


Trunk Lights and Box
Thread Starter
Copy & Paste Moderator


Joined: Apr 2002
Posts: 9,764
Likes: 208
From: Eastern MA
Since others have posted their trunk mods, I thought I'd post mine too.
I added 2 CCFL tubes to the trunk for lighting. I mounted them to the angled part of the side panels right under where the mat/cover rests and made some reflectors out of aluminum with vinyl on the back-side to blend in better. I tapped into the dome light for power, but still have a switch to turn them on/off because normal fluorescent ballasts don't like to be dimmed (they will be damaged). That way I only turn them on when I need them (but of course the dome light has to be on), but if I forget, the car's power saver feature will turn them off....unfortunately in that case, the "theater dimming" feature may damage the ballast. At least they were cheap.
I bought two CCFL kits from MicroCenter for $15. The switch was $2 or $3 at RadioShack. I needed two kits for the two ballasts. I tried to extend the bulb wiring to only have one ballast (each has two outputs), but there was too much voltage drop in the long run of wire that the bulb only partially lit. So each of the two bulbs has its own ballast mounted with the supplied velcro to the back of the panel to which the bulb is attached.
The bulbs are mounted to the reflectors with the supplied velcro and the reflectors are mounted to the panels with rivets.
The vinyl is attached to the reflectors with carpet tape and rivets (for appearance and extra hold). I used a black marker to black-out the edge of the vinyl.
I already had the aluminum, rivets, vinyl, carpet tape, etc. If you had to buy all that it would easily add $20+ to the cost of the project, but you'd have plenty left over for other projects.
Full shot of the trunk with the camera's flash turned on:

500 x 375
1280 x 960
2592 x 1944
No Lights and the camera's flash is off:
500 x 375
1280 x 960
2592 x 1944
Lights on and the camera's flash is off:
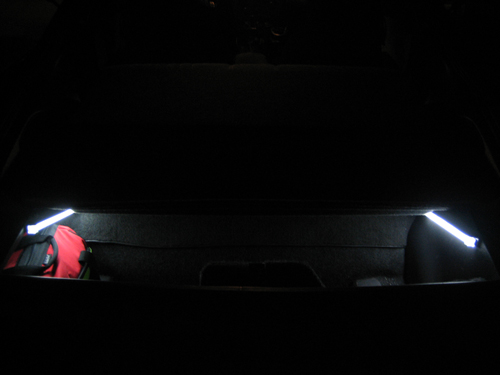
500 x 375
1280 x 960
2592 x 1944
500 x 375
1280 x 960
2592 x 1944
Close-up of the light and switch (flash on):
500 x 375
1280 x 960
2592 x 1944
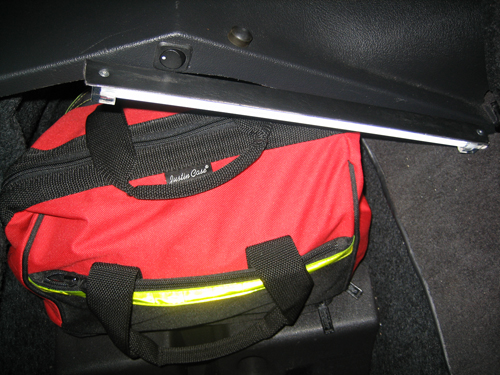
I also made a box that is mounted on the hump behind the rear seat. Inside is the normal stuff I carry around that filled the trunk and made it useless (ex: tools and jump pack). The box is made of pine and MDF screwed together and covered in black carpet that I got in a roll from PepBoys. The lock is a standard lock cylinder from HomeDepot with its lever notched to strike against a bolt to lock. It has too much play though and I'm looking for a better option. The box is bolted to the threaded holes that were used by the child anchor points.
I didn't keep tabs on how much I spent making this box, but I'd say easily $50+.
Trunk Box Closed:
500 x 375
1280 x 960
2592 x 1944
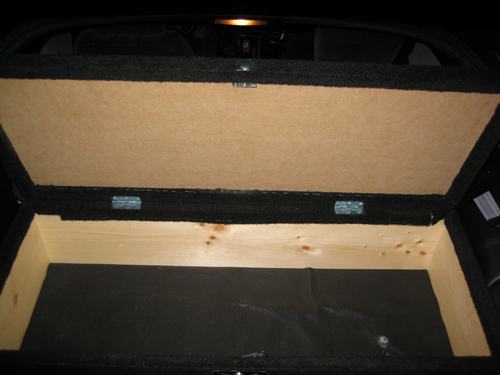
Trunk Box Open:

500 x 375
1280 x 960
2592 x 1944
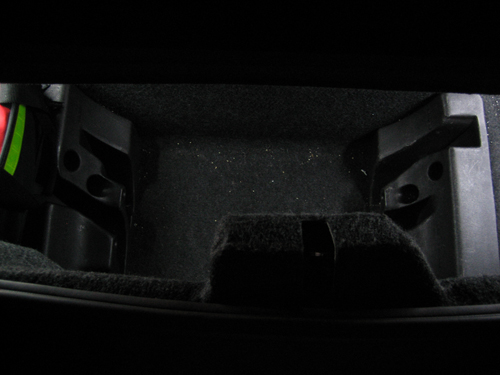
Trunk Box Empty (the black mat at the bottom is a rubber anti-skid drawer liner):
500 x 375
1280 x 960
2592 x 1944
This pic shows how the box is bolted to the threaded holes that were used by the child anchor points:
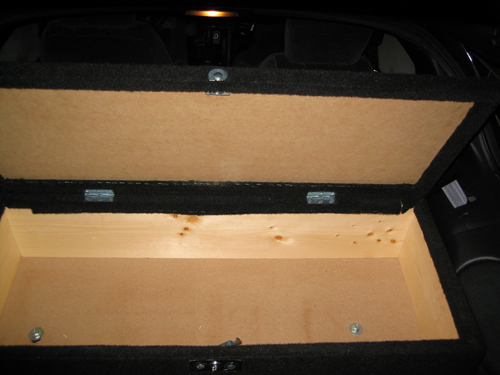
500 x 375
1280 x 960
2592 x 1944
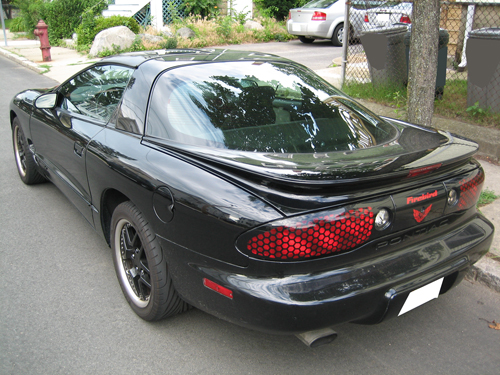
Trunk Box seen from outside the car:
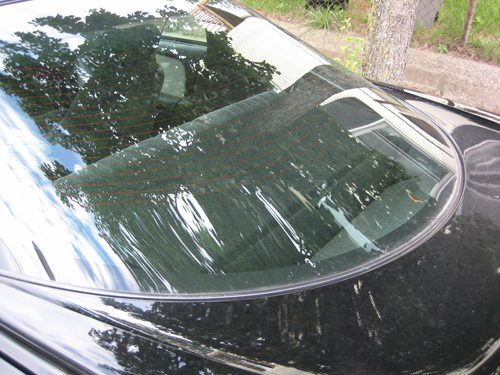
500 x 375
1280 x 960
2592 x 1944
500 x 375
1280 x 960
2592 x 1944
I added 2 CCFL tubes to the trunk for lighting. I mounted them to the angled part of the side panels right under where the mat/cover rests and made some reflectors out of aluminum with vinyl on the back-side to blend in better. I tapped into the dome light for power, but still have a switch to turn them on/off because normal fluorescent ballasts don't like to be dimmed (they will be damaged). That way I only turn them on when I need them (but of course the dome light has to be on), but if I forget, the car's power saver feature will turn them off....unfortunately in that case, the "theater dimming" feature may damage the ballast. At least they were cheap.
I bought two CCFL kits from MicroCenter for $15. The switch was $2 or $3 at RadioShack. I needed two kits for the two ballasts. I tried to extend the bulb wiring to only have one ballast (each has two outputs), but there was too much voltage drop in the long run of wire that the bulb only partially lit. So each of the two bulbs has its own ballast mounted with the supplied velcro to the back of the panel to which the bulb is attached.
The bulbs are mounted to the reflectors with the supplied velcro and the reflectors are mounted to the panels with rivets.
The vinyl is attached to the reflectors with carpet tape and rivets (for appearance and extra hold). I used a black marker to black-out the edge of the vinyl.
I already had the aluminum, rivets, vinyl, carpet tape, etc. If you had to buy all that it would easily add $20+ to the cost of the project, but you'd have plenty left over for other projects.
Full shot of the trunk with the camera's flash turned on:
500 x 375
1280 x 960
2592 x 1944
No Lights and the camera's flash is off:
500 x 375
1280 x 960
2592 x 1944
Lights on and the camera's flash is off:
500 x 375
1280 x 960
2592 x 1944
500 x 375
1280 x 960
2592 x 1944
Close-up of the light and switch (flash on):
500 x 375
1280 x 960
2592 x 1944
I also made a box that is mounted on the hump behind the rear seat. Inside is the normal stuff I carry around that filled the trunk and made it useless (ex: tools and jump pack). The box is made of pine and MDF screwed together and covered in black carpet that I got in a roll from PepBoys. The lock is a standard lock cylinder from HomeDepot with its lever notched to strike against a bolt to lock. It has too much play though and I'm looking for a better option. The box is bolted to the threaded holes that were used by the child anchor points.
I didn't keep tabs on how much I spent making this box, but I'd say easily $50+.
Trunk Box Closed:
500 x 375
1280 x 960
2592 x 1944
Trunk Box Open:
500 x 375
1280 x 960
2592 x 1944
Trunk Box Empty (the black mat at the bottom is a rubber anti-skid drawer liner):
500 x 375
1280 x 960
2592 x 1944
This pic shows how the box is bolted to the threaded holes that were used by the child anchor points:
500 x 375
1280 x 960
2592 x 1944
Trunk Box seen from outside the car:
500 x 375
1280 x 960
2592 x 1944
500 x 375
1280 x 960
2592 x 1944
Last edited by VIP1; Jul 11, 2008 at 05:26 PM.
Cool.
I got a little sneaky trunk light idea I'm working on right now too. Might be about a month before I get it all done & be able to post pics of it. But likes yours, I have not seen another set-up like it ever.
I got a little sneaky trunk light idea I'm working on right now too. Might be about a month before I get it all done & be able to post pics of it. But likes yours, I have not seen another set-up like it ever.
Trending Topics
LS1 Tech Stories
The Best V8 Stories One Small Block at Time

Topdon ONE vs. Artidiag 800 BT2: Which is the Diagnostic Tablet For You?
Pouria Savadkouei
Gas Monkey Built a 6-Wheel Ferrari Testarossa With a Corvette LT4 Engine
Verdad Gallardo
7 Most Reliable High-Performance Engines GM Has Ever Built
Verdad Gallardo
Amazing '71 Camaro Restomod Is Modern Muscle Car Under the Skin
Verdad Gallardo
6 Common C5 Corvette Failures and What's Involved In Repairing Them
Pouria Savadkouei
Retro Modern Bandit Pontiac Trans AM Comes With Burt Reynolds' Autograph
Verdad Gallardo
Top 10 Greatest Cadillac V Series Performance Models Ever, Ranked
Pouria Savadkouei
Top 10 Most Powerful Chevy Trucks Ever Made!
