Transmission area wrapped w/RattleTrap 80mil - pics!
 09-03-2013, 11:04 PM
#21

If your tranny tunnel gets 750+ degrees, you'll have much much larger problems than the rattle trap's condition lol.
Transmissions run <200 degrees typically, and that's internal temperature. On the outside you've got air movement and it's not directly contacting that surface anyway.
I highly doubt you'll have a problem with it
Transmissions run <200 degrees typically, and that's internal temperature. On the outside you've got air movement and it's not directly contacting that surface anyway.
I highly doubt you'll have a problem with it
 09-18-2013, 02:03 PM
#22
I overlayed the RattleTrap Extreme with DEI tunnel shield. This stuff is very sticky on contact.

I taped up the RattleTrap seams with DEI cool tape. The tunnel shield lays over it and is single piece and bolted in with factory fasteners. I used a 48"x42" piece. I had to hammer it in with a rubber mallet in most of the areas. This shielding is very rigid and has a fiberglass layer.
There are sound barriers and sound dampening...this is a combo of both. Just to compare, interior car floor panels usually get the following sandwich treatment:
1. sound deadening material to eliminate resonance (dynamat, Fatmat, etc)
2. isolation layer (decoupler) to separate the sheet metal from the sound barrier (foam)
3. sound barrier to block the sound (mass loaded vinyl or MLV)
I still haven't road tested it because I'm doing a lot of mods. I think the FatMat Rattle Trap extreme and DEI tunnel shield are a decent combo. You get the heatshielding, fiberglass isolation layer, and then resonance barrier.
For the paranoid untrusting types with the FatMat RattleTrap Extreme or any other resonance barrier product, you can always just use the DEI tunnel shield (solo) to replace the OEM piece.
Last edited by philistine; 09-18-2013 at 09:19 PM.
09-18-2013, 04:14 PM
#24
09-18-2013, 08:18 PM
#25
Here's a few pics:
First I taped up the RattleTrap Extreme seams with DEI cool tape.

Now starts the DEI tunnel shield. Here is a single piece of 48"x42". Notice the 48" level next to it.

Here is the sketch for the cuts after taking measurements. I left out the length because you might want to take it the entire length. I personally trimmed to a total length of 44" (front to back).

After cutting according to the sketch it looks like this.

From that single piece of 48"x42" you should only have these scraps left over from those cuts.

Installing it can be time consuming. I drew a centerline but as you can see, I got off the mark - that is ok because extra material was included in the measurements to compensate for the offset. This is looking towards the rear.

You have to cut the holes for the different ports. I used a hammer and center punch to find the bolt holes.


As you work it with your hands and rubber mallet to form it you will have to trim a small corner piece on each side.

This is all the left-over pieces from the the DEI single sheet 48"x42" tunnel shield.

I imagine different methods to install it would be used based on skill and experience. Basically, I peeled off the tape and started pressing it in on the centerline without touching the sides - it's not easy but not too hard either. You work that centerline perfect before touching the sides - get them air bubbles out. Then you press the sides...centerline working outwards.
I hope that helps.
Last edited by philistine; 10-01-2014 at 09:18 PM.
09-18-2013, 09:56 PM
#26
How's the adhesive on that stuff? I've used a couple of DEI heatshield products before, and found that once you stick the adhesive onto anything, it's not coming off again without destroying the material.
09-18-2013, 10:23 PM
#27
I would practice a couple times before removing the tape on the back - dry fitting.
******************************
Edit: Here is a closer look at the DEI tunnel shield thickness.

Last edited by philistine; 09-19-2013 at 12:15 AM.
09-19-2013, 01:16 PM
#28

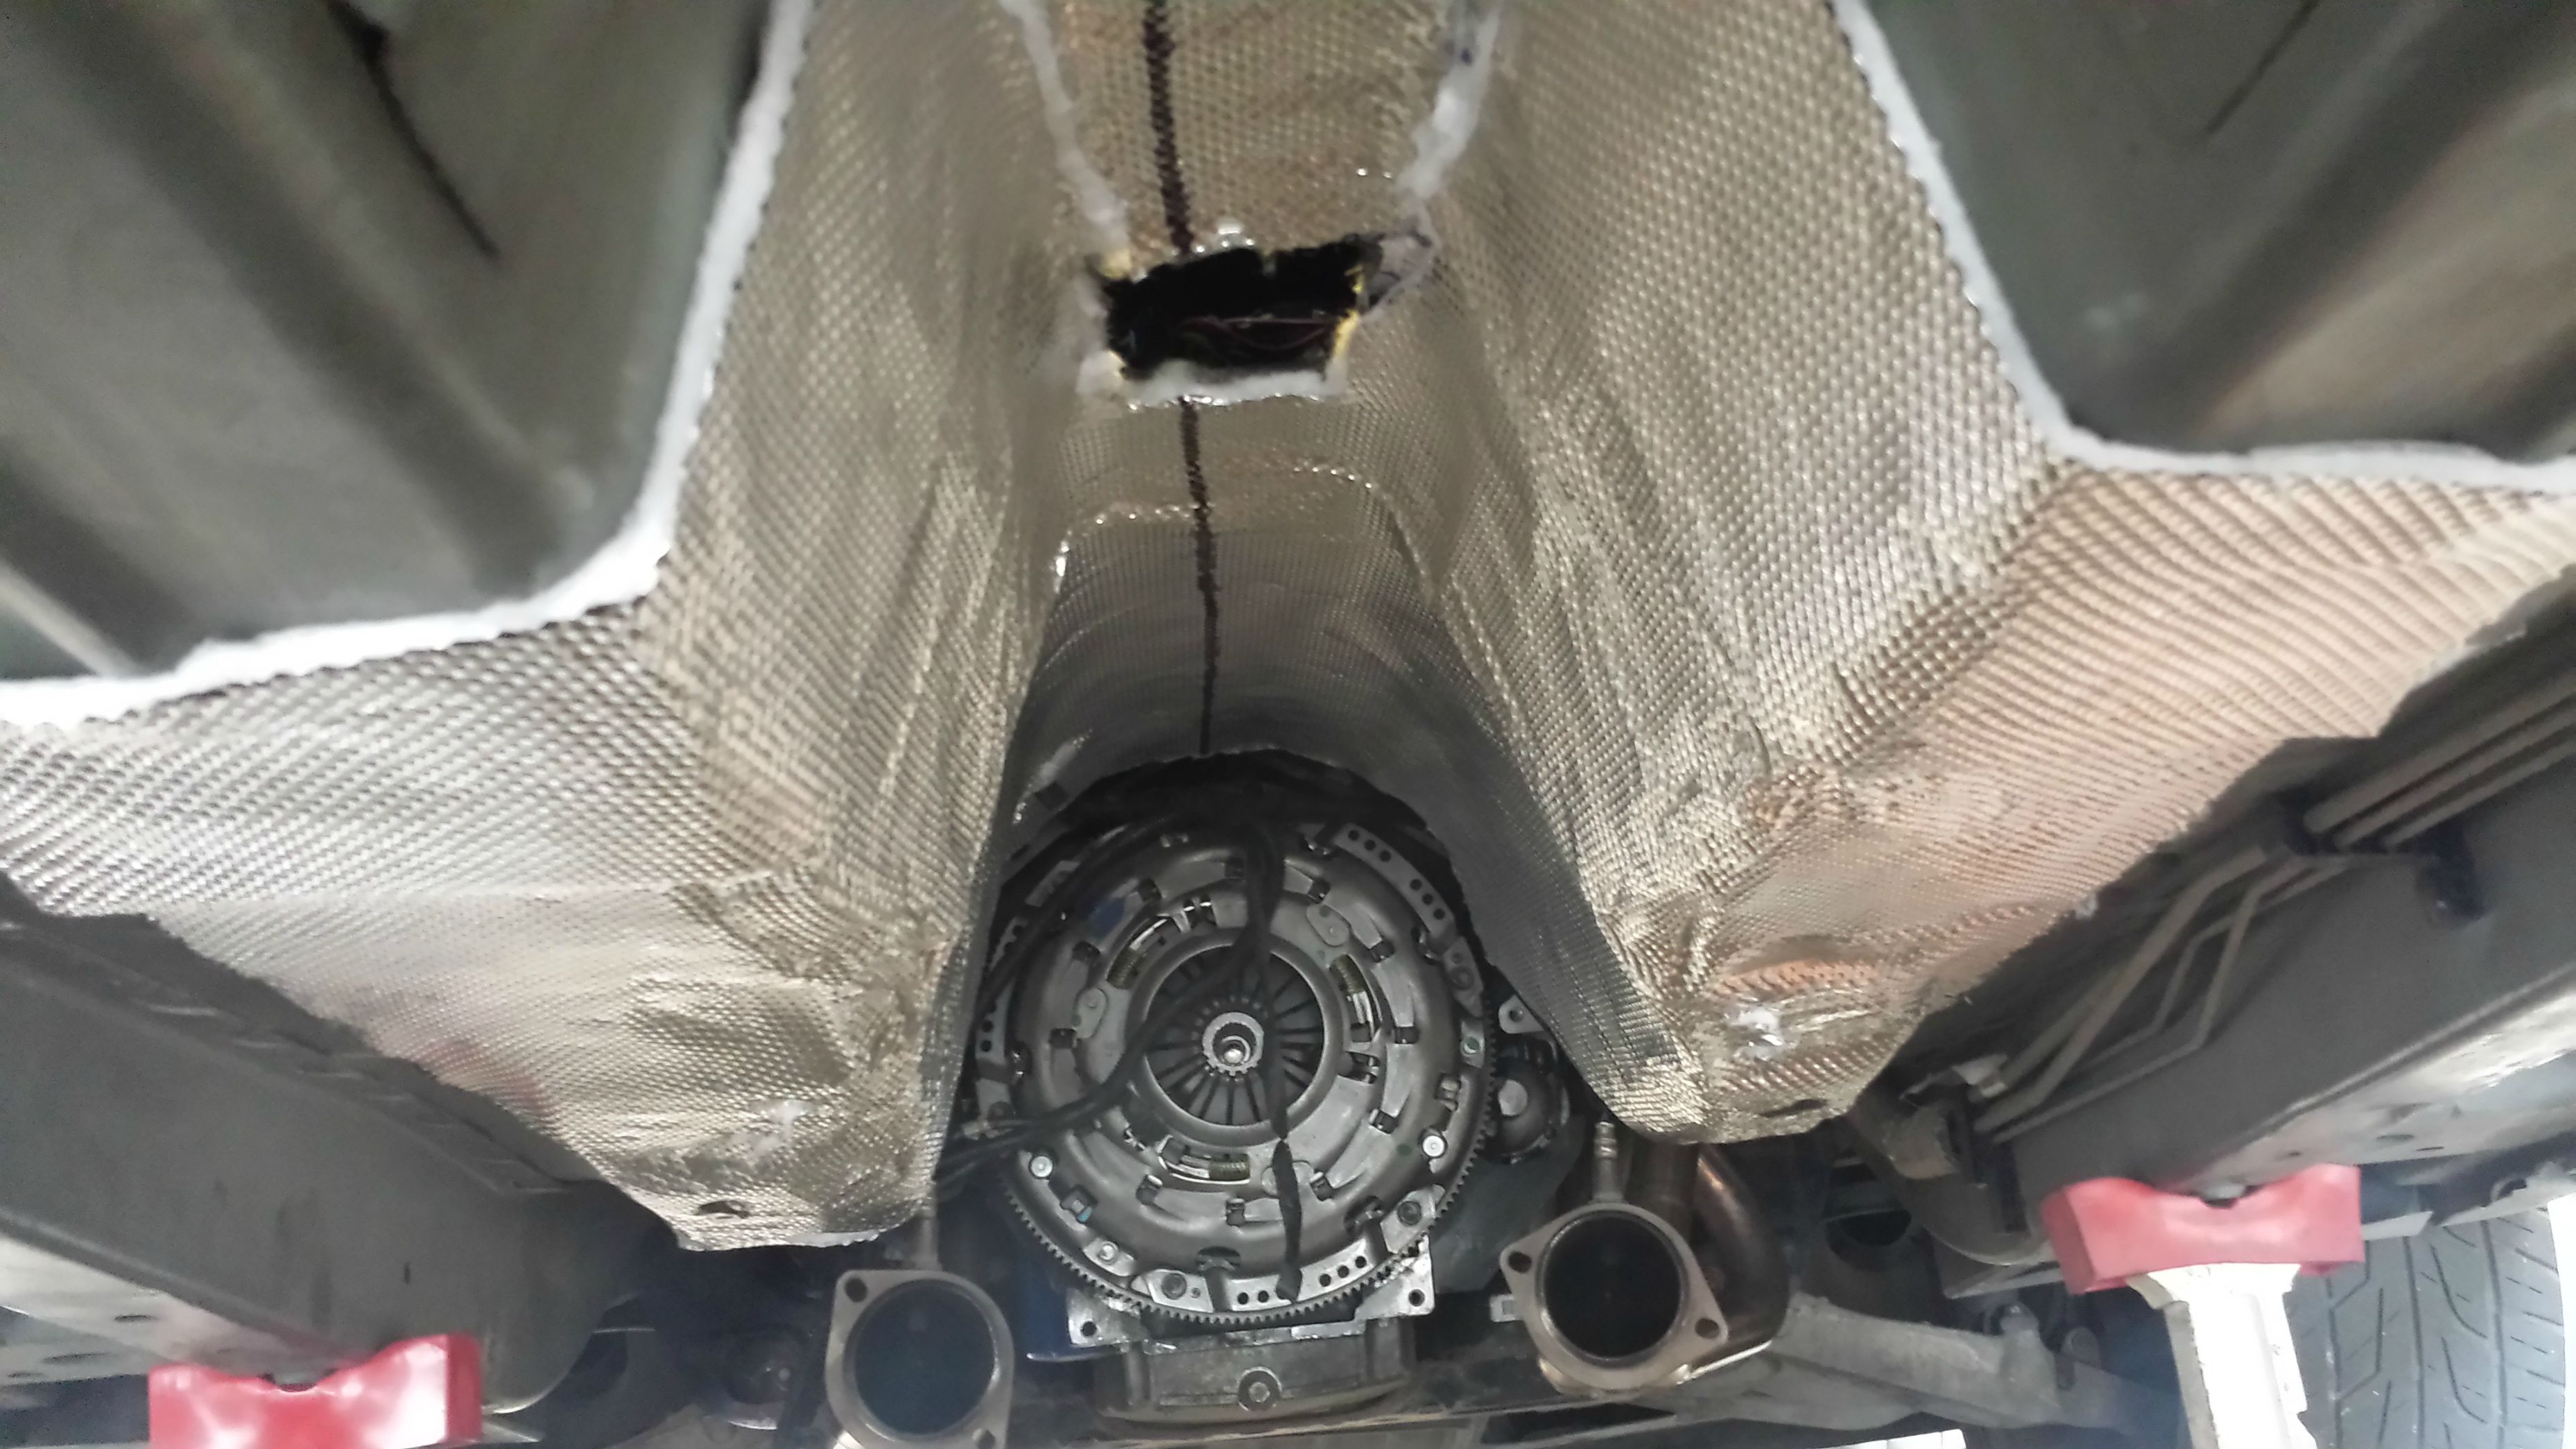
I also used the DEI tunnel shield when I did my clutch. Does not look half as nice as your install, but I was in a pretty big hurry with my helpers standing by. The stuff sticks like no other and forms really, really well if you can maneuver it without it sticking to everything. I'm glad I trashed my torn heat shield and replaced it with the DEI shield.
 10-01-2014, 09:24 PM
#31
Guess this is a good time as any to give an update, lol. Everything is held in place just as I installed it - the adhesive is very strong! The RattleTrap material is held in place under the DEI tunnel shield and quiets things down considerably.
So absolutely no issues with the installation and it's a great replacement for the factory tunnel shield - it's legit!
So absolutely no issues with the installation and it's a great replacement for the factory tunnel shield - it's legit!
03-07-2015, 08:08 PM
#32
I'll add my own rendition to this thread . They say imitation is the highest form of flattery and I copied everything he did, including the center line. Talked to Jaysen about copying his setup or perhaps doing a cheaper alternative, but finally decided might as well do it right. It definitely took a while to do this, but I'm sure I'll thank myself later. Car isn't back together yet (finishing tomorrow), but I'm expecting the cabin to be nice and quiet.
. They say imitation is the highest form of flattery and I copied everything he did, including the center line. Talked to Jaysen about copying his setup or perhaps doing a cheaper alternative, but finally decided might as well do it right. It definitely took a while to do this, but I'm sure I'll thank myself later. Car isn't back together yet (finishing tomorrow), but I'm expecting the cabin to be nice and quiet.