

1964 Chevelle - 5.3 LQ4/4L60E
 05-05-2009 | 01:28 PM
#1

Thread Starter
Staging Lane

Joined: Feb 2009
Posts: 69
Likes: 0
Patient - 1964 Chevelle (previously 350/350 with 295HP)
Donor - 2000 Tahoe 5.3L LQ4 with a 4L60E 102K miles- I was able to get a trans cooler, wiring harness, computer, fuse block, fuel pump, over flow tank, Mass Air Flow sensor, drive by wire pedal and controler, and some intake tubing. I was not able to get the exhaust connectors/o2 sensors. Ill have to Make my own thats all. I then sent my harness and computer to LT1350.com to have the wire set up as a stand alone harness and have the computer flashed. My plan is to make this as OEM of GM as much as possible, and no after market parts, so that it can be done as cheeply as possible and easy for others to follow if they wish to do this conversion.
Parts purchased so far:
Engine- $1000
Trans- $500
99 B-Body Gas tank- $50
Nylong Fuel line from B-body- $10
(with connectors)
New B&M Mega shifter- $200
S&P style adapter brackets Free.99
Wiring Harness/computer $300
electric fan $30
Idler Pulley $10
Last edited by twotone64; 05-10-2009 at 12:30 AM. Reason: misinformation
05-05-2009 | 01:33 PM
#2
Thread Starter
Staging Lane
Joined: Feb 2009
Posts: 69
Likes: 0
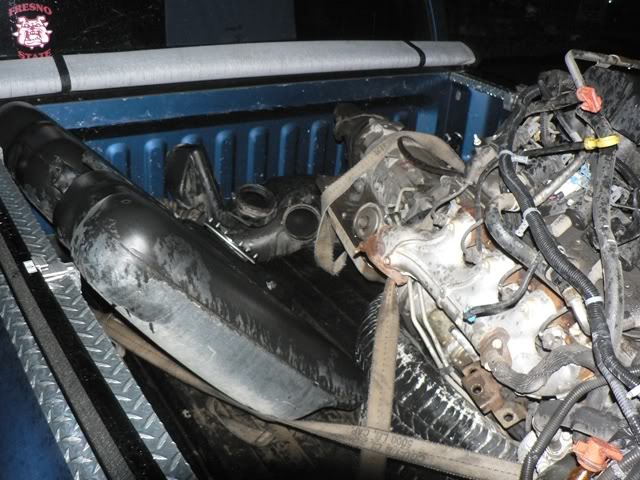
I sat the engine in and found that the truck oil pan interfered with the drag link and hung down pretty low, so I placed the bolts throught the engine brackets and set those along with the engine down on the frame mounts (cantelever style). This gave me plenty of clearance for the drag link and I was able to put my fingers over the top of the alternator so good room for that.
I then went to the hardware store and purchased some 3/8" galvanized pipe and cut those to fit inside the engine brackets and placed the bolts throught those. I then sat the engine back down where I wanted it on the frame mounts and tack welded them in. We pulled the motor and finshed welding them in. Reinstalling the motor proved a great improvement of the oil pan hanging down, but then proved another problem... the intake manifold.
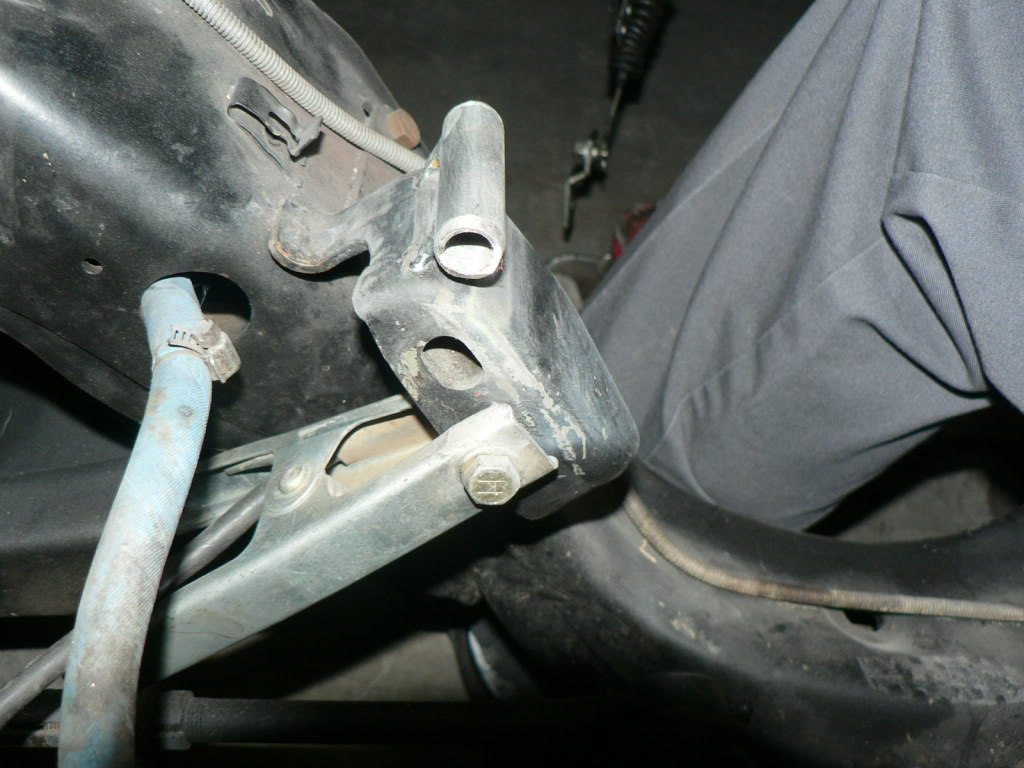
I then went to the hardware store and purchased some 3/8" galvanized pipe and cut those to fit inside the engine brackets and placed the bolts throught those. I then sat the engine back down where I wanted it on the frame mounts and tack welded them in. We pulled the motor and finshed welding them in. Reinstalling the motor proved a great improvement of the oil pan hanging down, but then proved another problem... the intake manifold.
Last edited by twotone64; 05-05-2009 at 10:52 PM.
05-05-2009 | 01:34 PM
#3
Thread Starter
Staging Lane
Joined: Feb 2009
Posts: 69
Likes: 0
While contemplating the intake manifold, I pulled the car over to my buddies house and placed it on a 4 post hoist and used the plasma cutter to remove some of the lower portion of the rear frame. I cut 28" of the lower portion, about 3/4" wide off of each side. I had to cut into the boxed portion as well. This made plenty of room for the gas tank.
05-05-2009 | 11:03 PM
#4
Thread Starter
Staging Lane
Joined: Feb 2009
Posts: 69
Likes: 0
To budget this I wanted to make it so that no money came out of my regular bank account or savings. I sold my SBC/th350 (complete-air claner to headers) to a co worker for $950, and some performance parts that I had planned on installing on that motor to a Team Chevelle member for $1,200. I also sold some other stuff on ebay for @$400, for a grand total of @$2,500. I have since done some side work and made a few hundered more. I have yet to dip into any other money cept that which I have swapped out for existing parts.
Always a plus with the wife when no money can be seen going for such a project.
Always a plus with the wife
when no money can be seen going for such a project.
05-06-2009 | 11:31 PM
#7


Looks like you have a nice swap going so far. I like how you are keeping a strict tally of everything so far. I should have done that on mine but then again it might have made me sick...haha
Trending Topics
05-06-2009 | 11:54 PM
#9
Thread Starter
Staging Lane
Joined: Feb 2009
Posts: 69
Likes: 0
Tonight I did a little tinkering. After putting the hood back on the car, I went about checking my hood to intake clearance. The intake manifold has the bosses that hold the Vortec cover on, they were too tall, so I cut those just below the brass inserts, and trimmed two three of the rails that the wiring harness runs next too. I then removed another stud from the front driver side of the intake near the purge solenoid.This was the next big hurdle for fitment. The next is the drivers exhaust manifold vs. brake proportioning valve... more to come on it this weekend.
To check clearance I dabbed some red bearing grease on the tops of all the points of the intake, and slowly closed the hood, then opened it to see which ones had touched the hood and trimmed those respectively, untill I had the hood closing easily. After I get the harness back I will be checking to see which castings I still need, and which I don't, and trim them all off.
My next step is to put the transmission into the the car and bolt it up to the engine and correct my cross member. Once all that is in, I will double check all my clearances. When all that is done I plan to move on to my fuel system.
05-07-2009 | 12:43 PM
#11
Curious about trans tunnel clearance. My son and I are doing a 64 wagon with ls1/auto - so far planning on using the H3 pan for better clearance - subscribing to this thread-
keep us informed
keep us informed
05-07-2009 | 12:54 PM
#13

Thanks for the update! I want to see pics of that car please  . Everything looks good man. I am hoping you are able to get the 3-5 degrees of angle on the engine without having to modify the tunnel where she is sitting now. Keep slammin' man. You're movin along good.
Rob
. Everything looks good man. I am hoping you are able to get the 3-5 degrees of angle on the engine without having to modify the tunnel where she is sitting now. Keep slammin' man. You're movin along good.Rob
 05-07-2009 | 11:17 PM
#17
Thread Starter
Staging Lane
Joined: Feb 2009
Posts: 69
Likes: 0
Thank you for the clarification. I will see if I can change the title. I changed the title, but it wont change it in the forum lists, only when you get here will it be different.
Last edited by twotone64; 05-08-2009 at 09:43 AM.
05-07-2009 | 11:24 PM
#18
Thread Starter
Staging Lane
Joined: Feb 2009
Posts: 69
Likes: 0
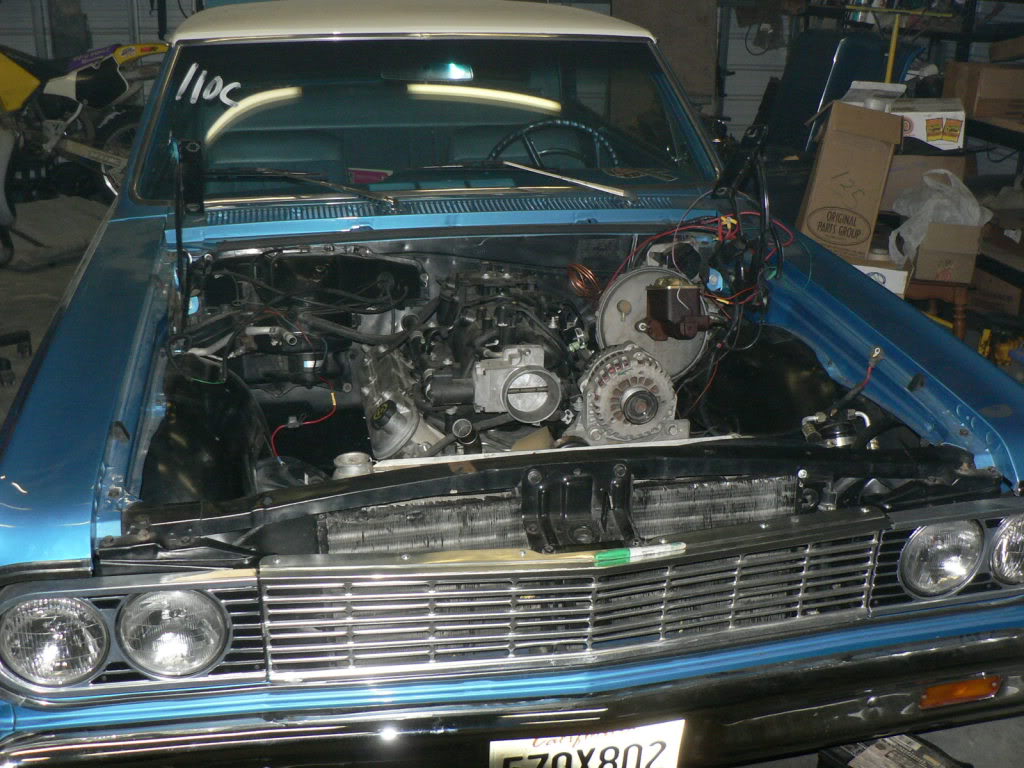
Here are some pictures of the car itself, sitting near School House Beach on the west coast of California just north of Bodega Bay. They were taken a year ago.
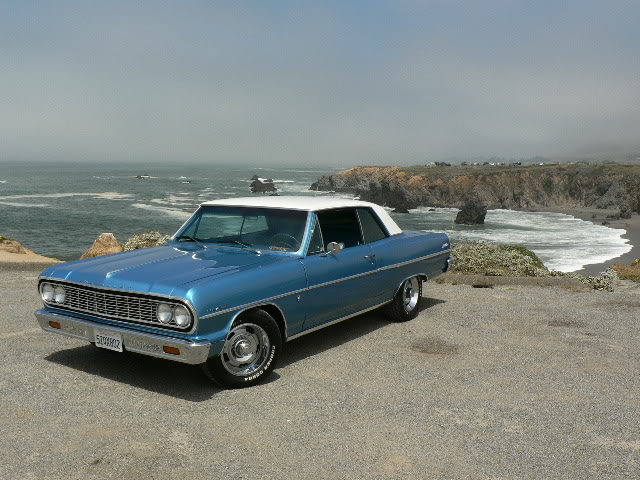
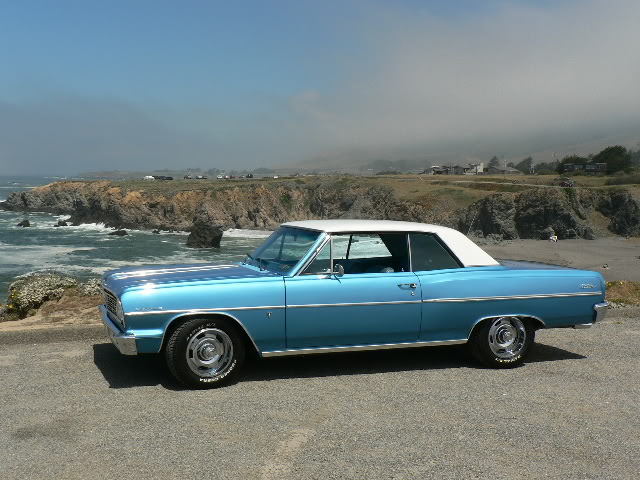
and here is a before picture: January of 2001
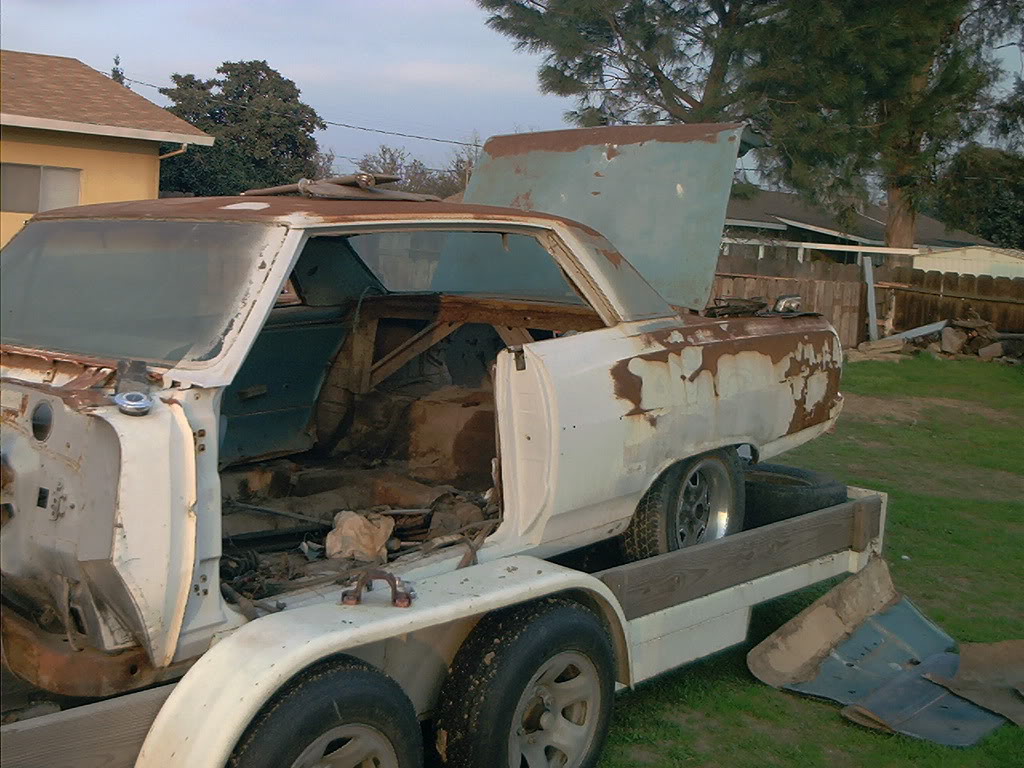
and here is a before picture: January of 2001
05-07-2009 | 11:26 PM
#19
Thread Starter
Staging Lane
Joined: Feb 2009
Posts: 69
Likes: 0
I plan to make a steel skid plate from 1/4" plate to divert debris in the road way.
05-10-2009 | 12:28 AM
#20
Thread Starter
Staging Lane
Joined: Feb 2009
Posts: 69
Likes: 0
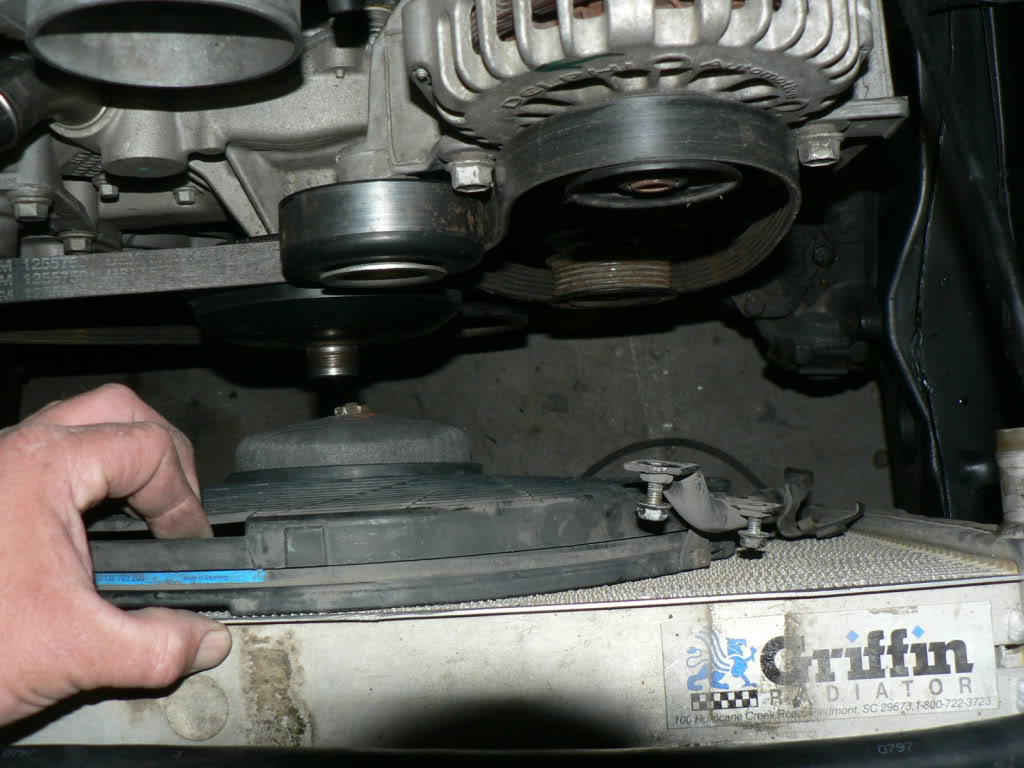
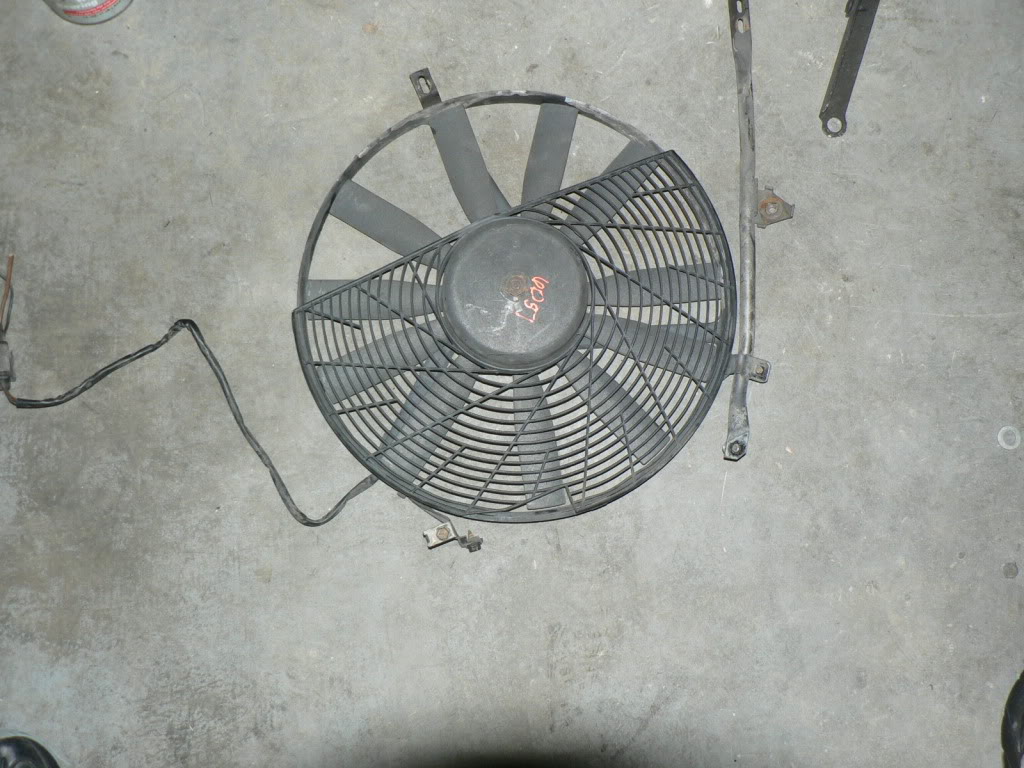
I went to the local pick n pull and picked up a few things for the conversion. I found an idler pulley off of a late model GM not sure what it was off of. I for got to look like an idiot. I placed the pulley where the upper left bolt of the power steering pump was. This put the belt in the same routing as if the power steering was in. I also picked up an electric fan that was on the front of a German Car. Of course I pulled the same krap and forgot to get the info off of it. I will try to get back to the yard and get the info so as to keep up with what parts are form what. After a measurement, I figure I will need an 87" belt.
the pulley on my engine:
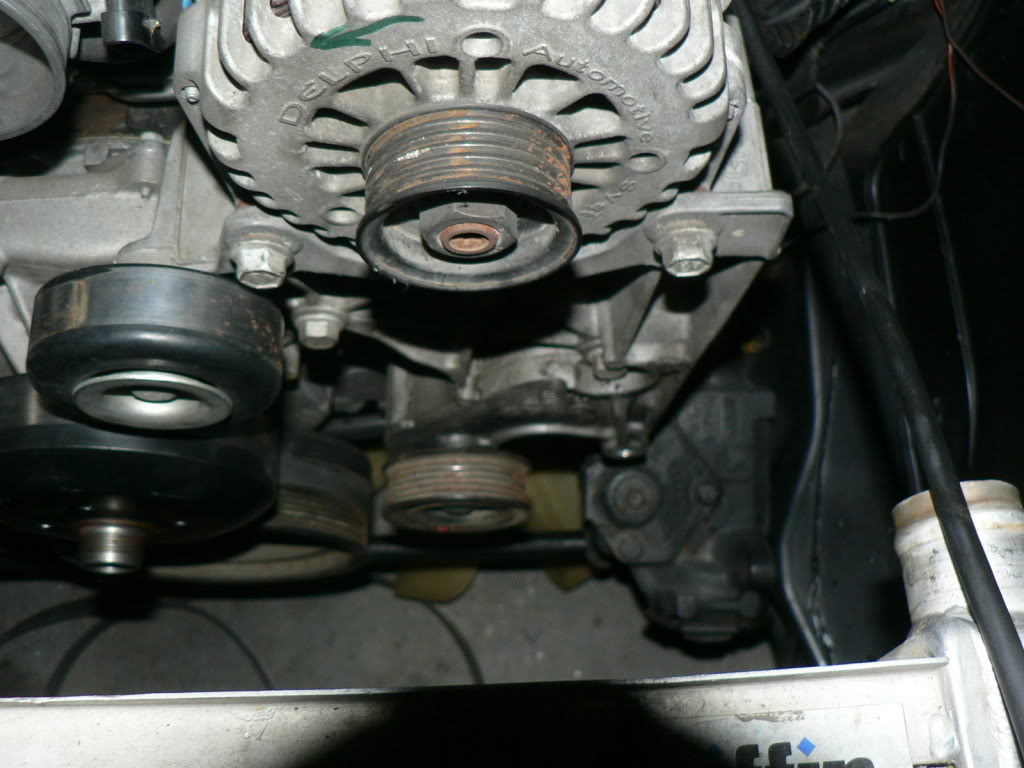
The belt on the pulley:

The fan clearance:
the 15.75" fan:
the pulley on my engine:
The belt on the pulley:
The fan clearance:
the 15.75" fan: