When you click on links to various merchants on this site and make a purchase, this can result in this site earning a commission. Affiliate programs and affiliations include, but are not limited to, the eBay Partner Network.
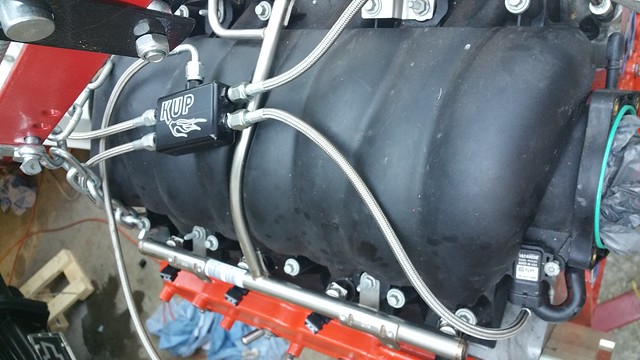
I just today bypassed a brand new Standard remote starter relay and wired it up to the starter instead. It was dropping voltage under load and causing hard start issues...
I'm going to try that next if the heat shield doesn't work. So far so good though even without it, I think my driveability issues are tune-related at this point. Time will tell.
After doing some painting and making a trip to Lowe's to buy some bolts (Fastenal was closed) I came home and took a look at my brake situation. I have no clue where the bolts went but only one was still bolted in (though it was coming loose) and another was somehow bent and eroded into the backing plate. One of many WTH moments so far in this build.
I replaced them all with new bolts, lock washers and plenty of red lock tite. While I was under the car I checked every other bolt and nut I saw and none the slightest bit loose. The driver's side rear was rock solid so I don't know what happened to the passenger. Maybe it's a side effect of letting some mouth breather look at them, might be the same ape that broke off one of the lugs. Whatever it was it's fixed now.
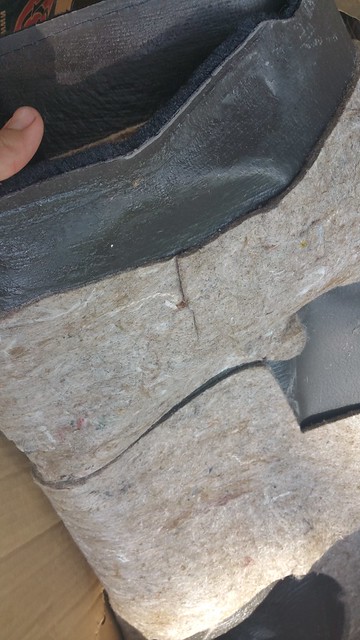
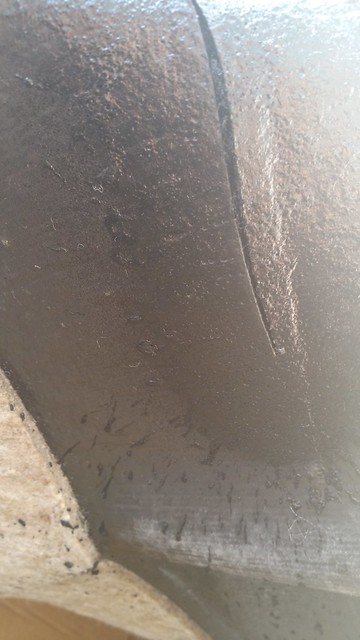
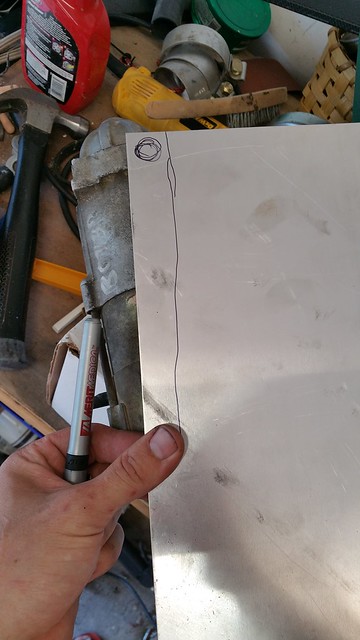
Last night while bored I also looked more into this heat shield situation and decided to try and make my own. R&D time was about 10 minutes and materials are somewhere in the $5-8 range, $25 if you count the adhesive and fabric that I already had on hand. I actually turned up an old head shield that came with a starter long, long ago. Since it was too big I made a smaller version of it.
This might fall apart, I don't know, but if so I'll just go with a heavier gauge sheet for version 2.0. Fortunately I happened to have a spare starter on the shelf.
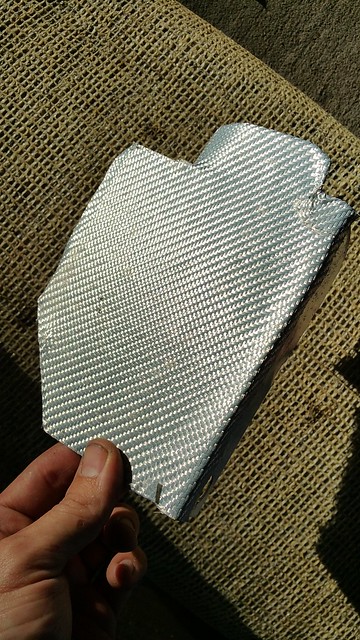
Threw some of that cobra cloth on it using 3M spray adhesive. It says it's heat resistant, but it didn't say how heat resistant. I used the industrial strength version of what headshield products recommends so maybe it'll hold.
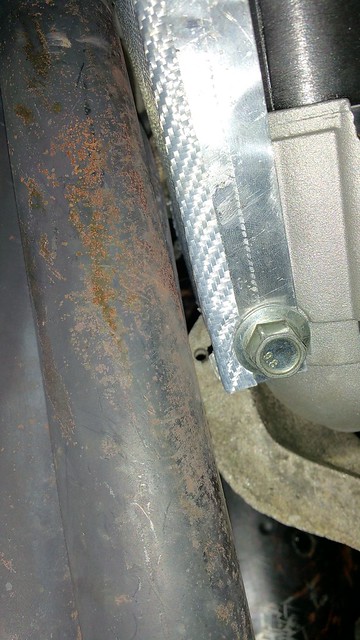
It's tight but I think this is better than the way it was before. Part of the rear curves around and I pressed the top back a bit so there is slightly more clearance than shown here.
Something else will undoubtedly pop up but for now I think the car might be something resembling safe and driveable. All that's left is to get a manual trans and I should be done for a while (except for body mounts, swapping water pumps and the frame braces). Actually tried to buy a trans today but banks were closed and the guy selling it didn't want to take part of it via paypal or transfer. I can understand his point of view but it sucks for me.
Car is on hold until the end of the month but while packing up parts I thought I'd go ahead and get the maplight mirror installed. It cleaned up well and is super useful.
I also picked up a T56 today along with everything else I'll need except the pilot bearing and a shifter, now all I need is some free time and somebody to weld the tunnel in. Hopefully I'll get a couple weeks around Christmas to knock it out. For now though I'm just going to keep my eyes peeled for an MGW or similar and buy all the random things like fluids and etc.
I'll make a proper sales thread for them but if anyone wants any black Fesler Chevelle hood hinges let me know.
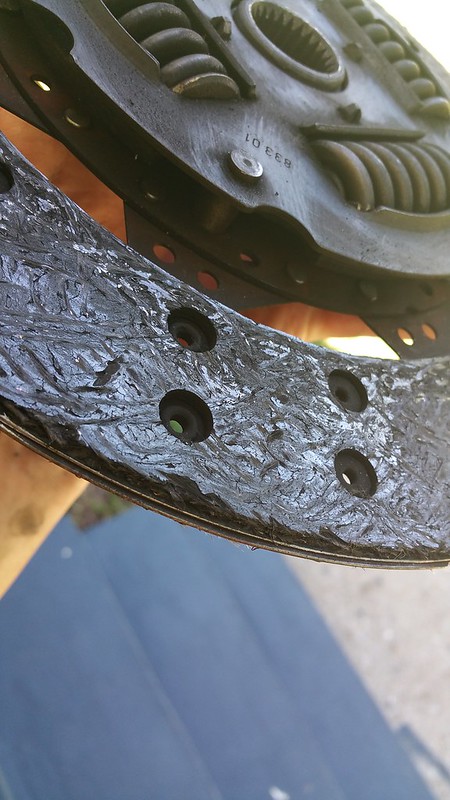
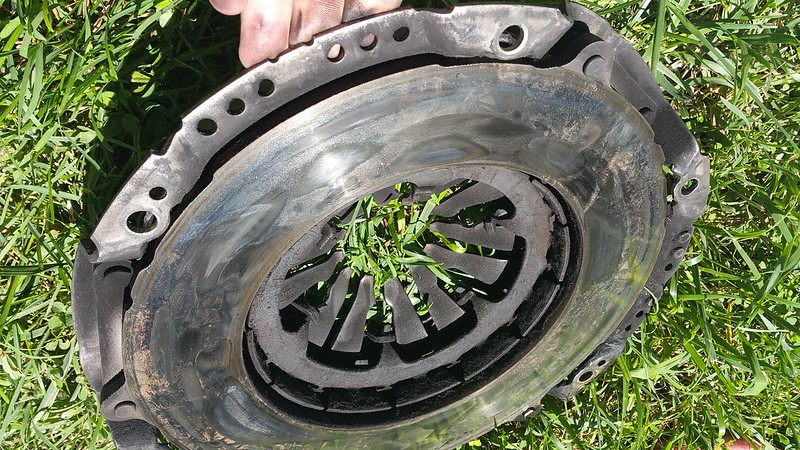
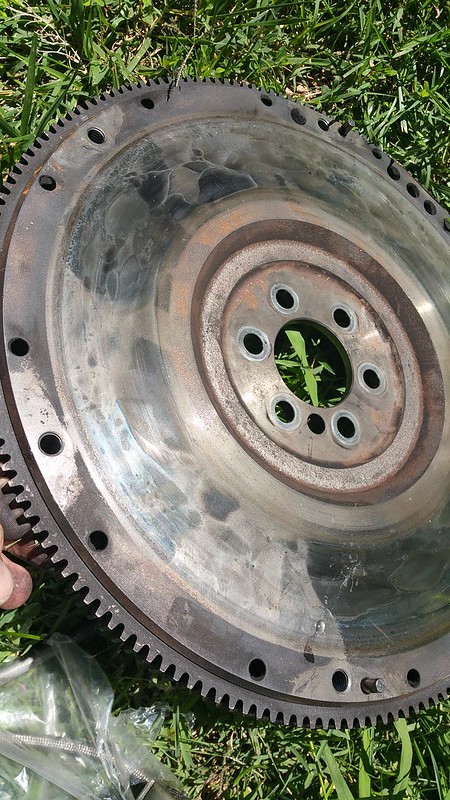
Found time to make a quick run to Nashville (about 36 hours worth) and got to clean up and take a better look at what I bought. I'm not an expert on clutches but I have a receipt from the shop saying this is a "Level 2" clutch, whatever that means, it looks like a regular Luk clutch to me. I'm thinking the metal surfaces might need to be resurfaced or replaced? The middle part (not sure what it's called) looks okay I think.
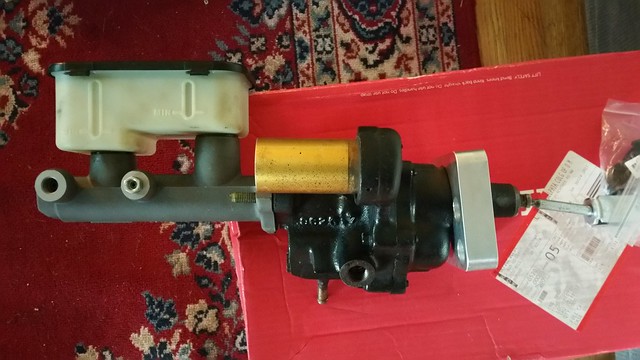
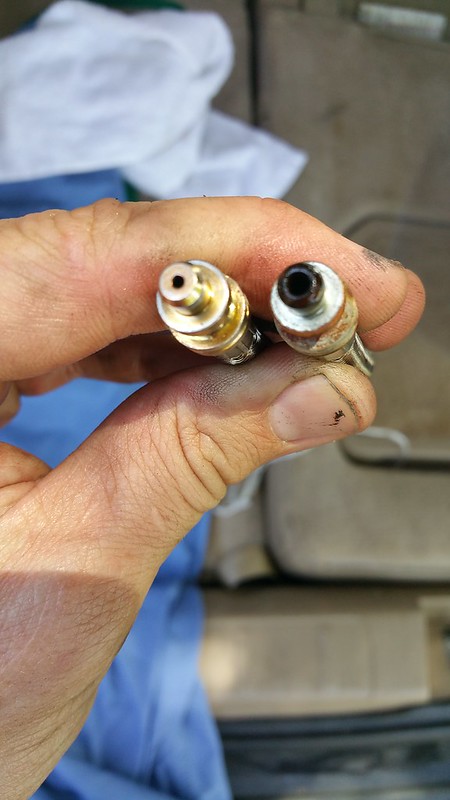
The master it came with was old but did have a new line on it, which I reused, drill modded and put on a better master I bought from undertow here on the forums. The new one is on the left and the older stock one is on the right. The new one doesn't look like it would flow anything at all.
And after drilling.
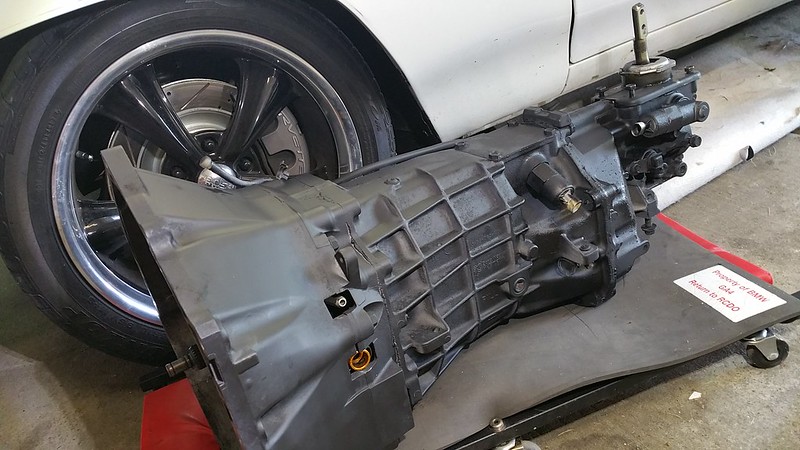
I degreased and painted the trans for no real reason other than boredom then tucked it away in the corner. Looking at all the tunnel patch options I'm considering buying a 2010 era console and getting them to cut the tunnel out with it. Might or might not be a waste of time but I'm going to look into it.
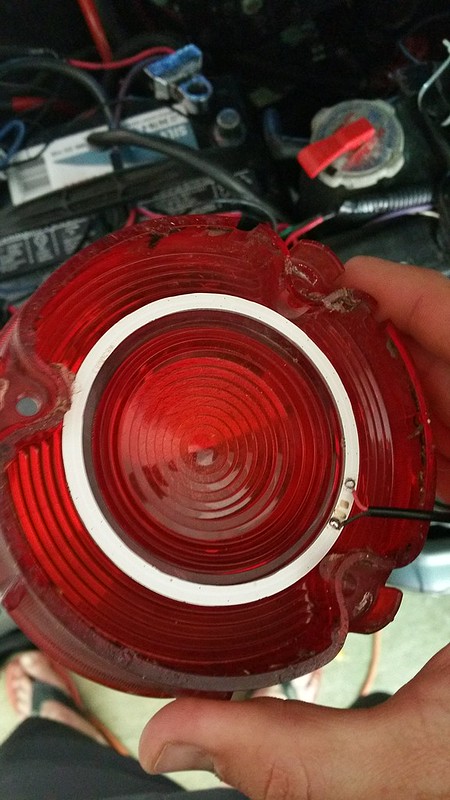
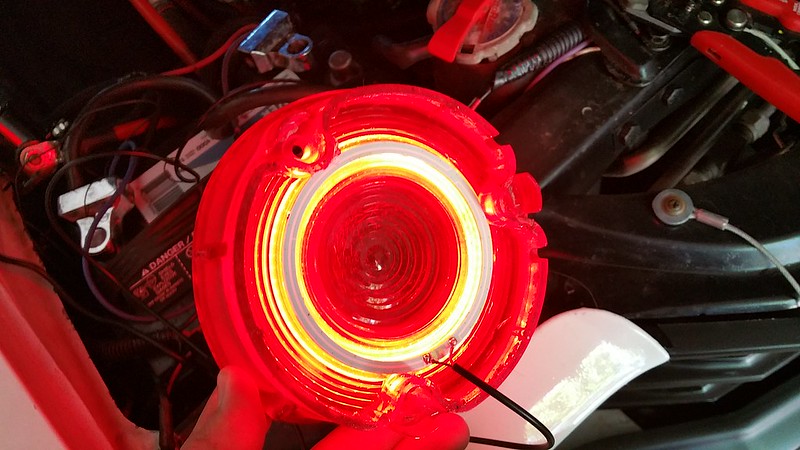
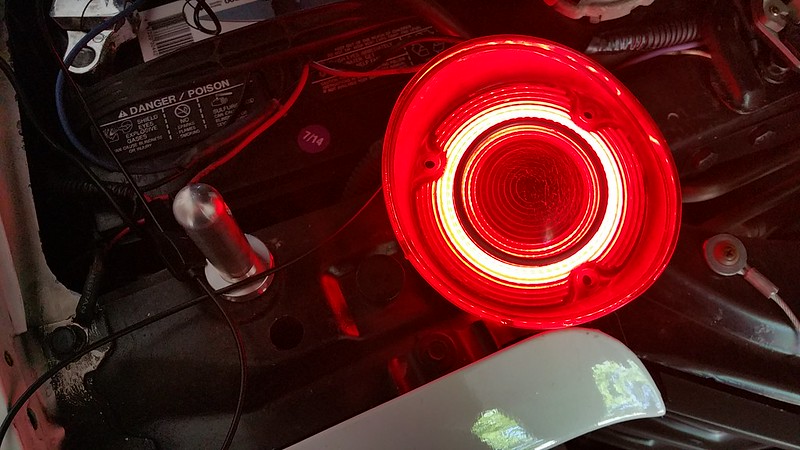
Another project on deck is making all 4 of the rear tail lights light up at night, and I found that 80mm cob led rings will fit perfectly inside lenses; I didn't even secure them but they fit with just enough friction to keep them in place. These will be placed into each of the lenses and tied into to running lights, smaller rings will be used to fill in the middle and come on when the brakes are applied. Way simpler and cheaper than those Led circuit boards using tons of those crappy little bulbs.
Also got a Pro 5.0 to replace the crappy stock shifter and various other little trinkets. Next trip home my old trans is getting shipped to some guy in Maine and I'll be breaking out the angle grinder to put a giant hole in the floor. Once that is done a guy from work has said he'll drop off his 66 Corvette for as long as I want to have me put an LS motor in it. Haven't seen too many (any actually) of these done so if anyone knows anything about them feel free to chime in. I'm hoping that is a pre-torque tube year.
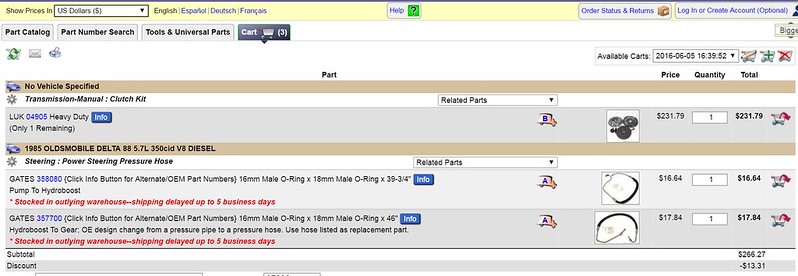
Just putting this here since it has some good hydroboost info I'll need in a couple weeks. Pretty sure my desktop is dying, will be surprised if it survives moving it back home. http://www.expeditionportal.com/foru...26#post1762126
The lines at least one person has used to connect things (clutch in the cart is the LUK LS7 kit, I don't know why forum people charge and pay hundreds more for these things).
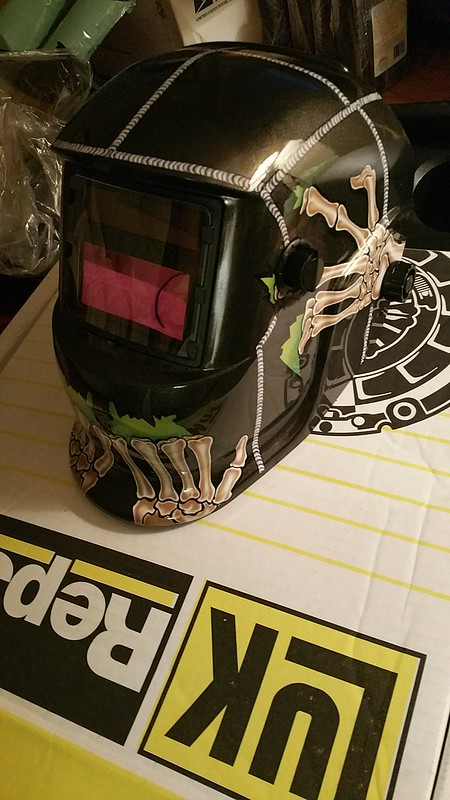
The parts room is once again full of boxes and whatnot; I ordered a Lincoln MIG and some various things to go with it like a fiberglass blanket, some clothes, the cliche mask with cartoon graphics on it and should be picking up an 80cf tank of 75/25 argon/ co2 later in the week. I don't know anything about welding so I just bought things with good reviews on amazon.
Tomorrow I'm going to pick up the console and transmission tunnel out of a 2011 Camaro, I had mentioned it before as an idea and happened to come across one at a reasonable price so will give it a shot. This might be a disaster, but if it works it'll make mounting the console and e brake painless. Speaking of the ebrake, I picked up one of these, as it looks like it will work for the Fbody brakes I have in back and also get rid of the stock cable that sort of just hung below the car. https://www.summitracing.com/parts/lok-ec-81fu
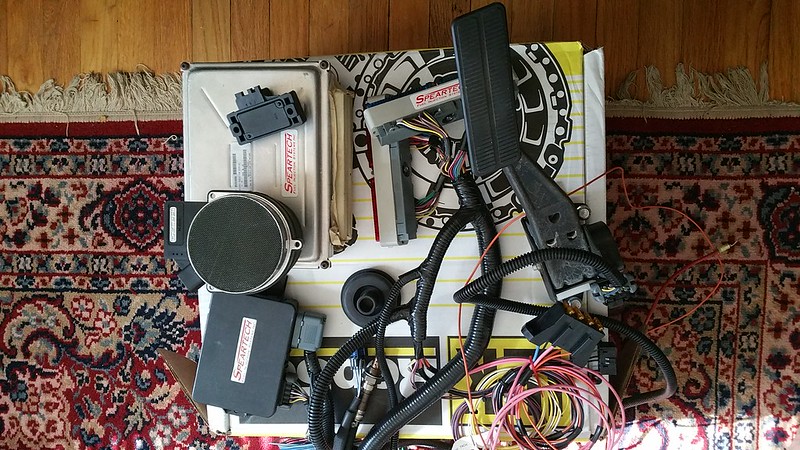
I also pulled off an sold the Holley HP EFI a couple days ago. There wasn't anything wrong with it, or any particular thing about it I didn't like, I was simply wanting to go DBW and get cruise control, which of course the Holley doesn't do.
To replace HP I picked up this Speartech harness, pedal, tac etc etc from a member here. Originally I was thinking I'd have to have a harness custom made, but it turns he already had one made for the same general setup, with the front cam, side knock sensors, 24x L92 and all that jazz, so I'm fairly confident this will work perfectly. It looks brand new and even has all the tags on the wires, there isn't even any grease or dirt on it anywhere. The only thing it didn't come with was the TB, but I found one here on tech and it'll be here Friday.
Overall I haven't gotten much done lately, but I do have a lot to do once July 15th rolls around. At that point I get to go home and have a partial day or two to mess with it. I'm hoping to get the motor and trans pulled, and if I do I'll have a CTS-V pan to sell if anyone wants one, just sort of throwing that out there. If anyone near Nashville gets bored and wants to help cut up and then reweld a car feel free to swing on by.
While I was out running errands I stopped by to pick up that trans tunnel (and the extra console I don't need) expecting to find slivers of metal and the smallest chunk possible. What I got was quite the opposite -
I asked for whatever they could reasonably get to and I guess they could get to a lot of it, looks like there is even some frame in there? Plenty of extra to cut off and use to practice welding and I might even use what heat shield remains. They also threw in a chunk of shifter with the ends cut or broken off, but the stick and mounting plate might be of use to someone.
Now I just need a handful of cut off wheels and some patience.
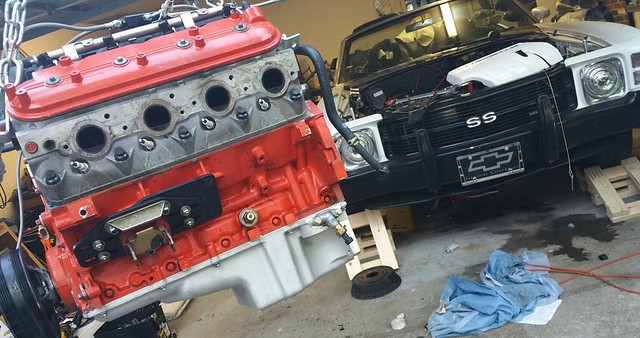
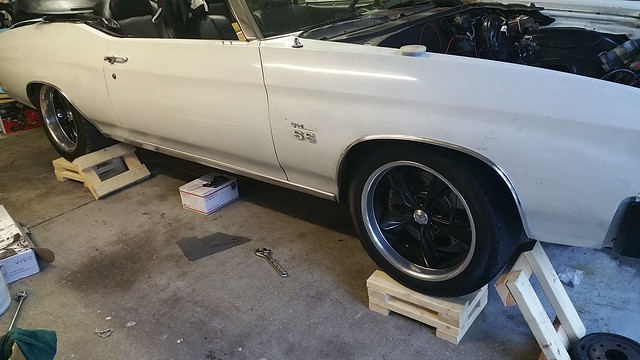
Here we are again, motor is back out of the car. Transmission is coming out tomorrow but today I managed to get the Holley oil pan and new steam vents on. Also made some wooden stands to get the car up high enough to work under.
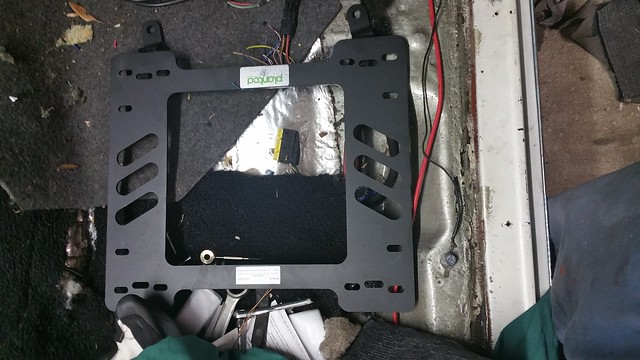
Picked up some Planted seat brackets and it looks like with a little bit of modification they should work out okay, letting me move the seats out far enough to get the Camaro console in and the seat recentered behind the steering wheel. The driver's side bracket I bought is for a Chevelle, but this passenger one is for a Civic; the only difference is in the feet, so if you can weld you might as well save some cash and pick them up dirt cheap used on ebay.
Rough fitting the console pre-seat removal, I'm thinking I'll be able to take the CD player out from in under the dash and make a mount for it in the front end of the
console. [/url]
The power window switches will go in as well, going to buy a Dremel and see how that goes. After looking into things more it turns out I'm going to need a way to activate the reverse lockout, as well a neutral safety switch; fortunately my car being an automatic means the wiring for both of these are already under the console. For the neutral switch I'm going to use a latching push button switch, for reverse I think I'm going to use one of these and the traction control button in the console - http://www.ebay.com/itm/272014020192?_trksid=p2055119.m1438.l2649&ssPageName=STRK%3AMEBIDX%3AIT
I'm always open to help, not sure there are too many people around Nashville though.
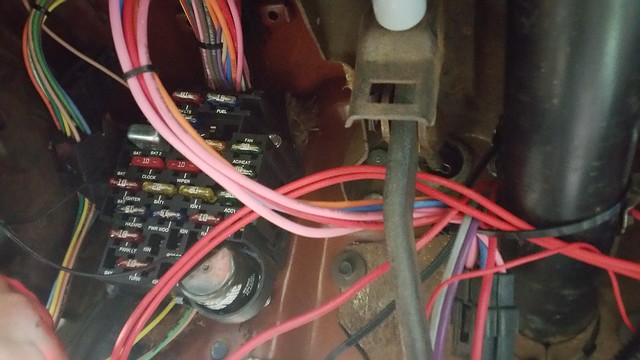
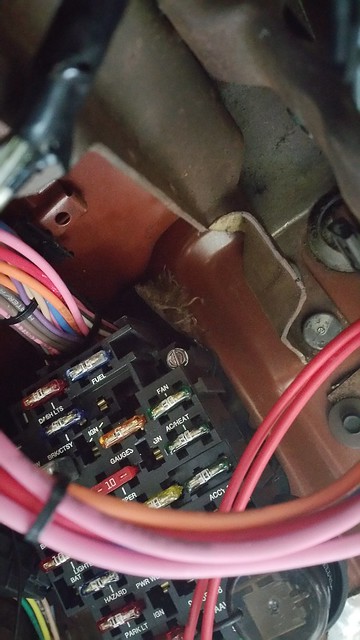
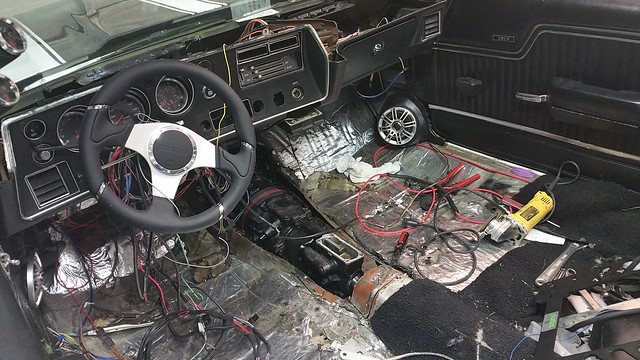
I was pulling the rest of the interior out and noticed that there is no hole in the firewall for a clutch; does everyone with an auto have to drill one out? The AAW fuse box looks like it would be in the way and I'm not sure it's something I could easily move.
After getting the old trans out of the way I slid the new one under to see how much I might need to cut. At this point it's kind of hard to know if I've cut too much or too little, but I'll figure it out tomorrow. For now I'm out of cutting discs and don't feel like going to buy any more.
I remember buying the car and thinking it would be nice to have something simple to work on, something without a lot of electric parts everywhere. Maybe the next project will work out that way...
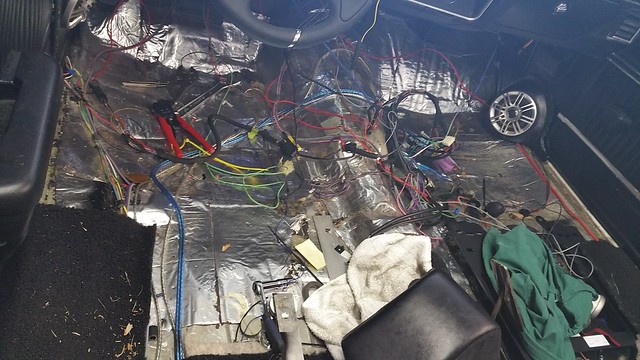
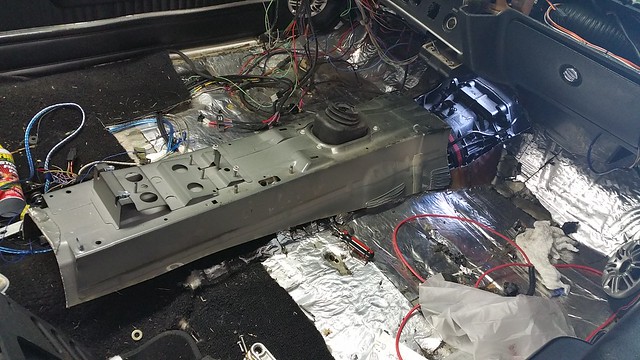
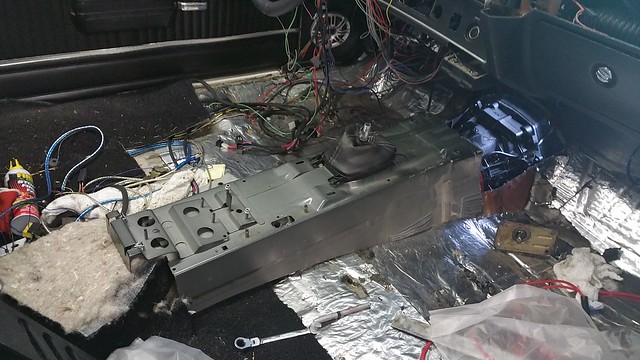
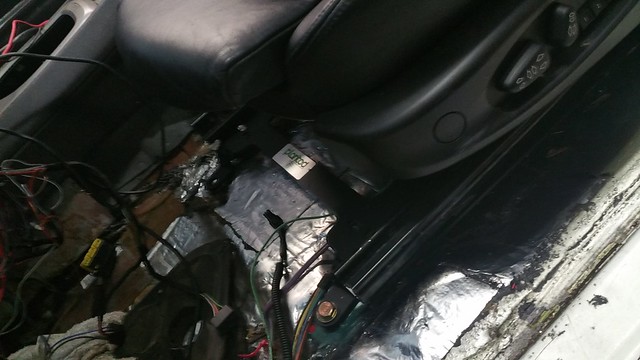
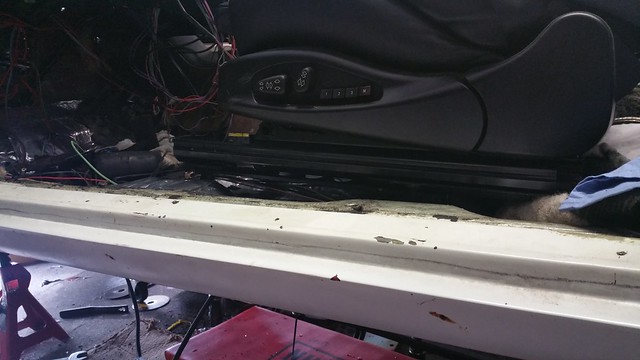
The interior is mostly gutted and excess wires have been thinned out a bit, still some rerouting to do but at least I've made sense out of the mess.
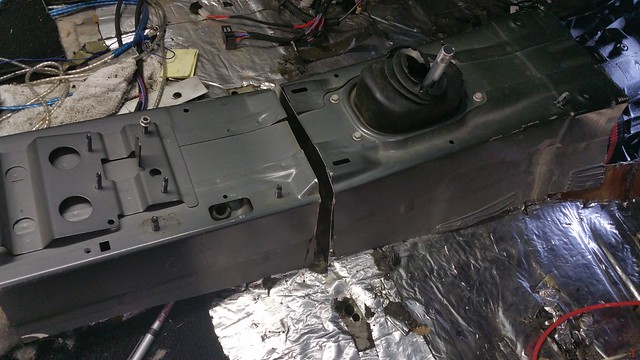
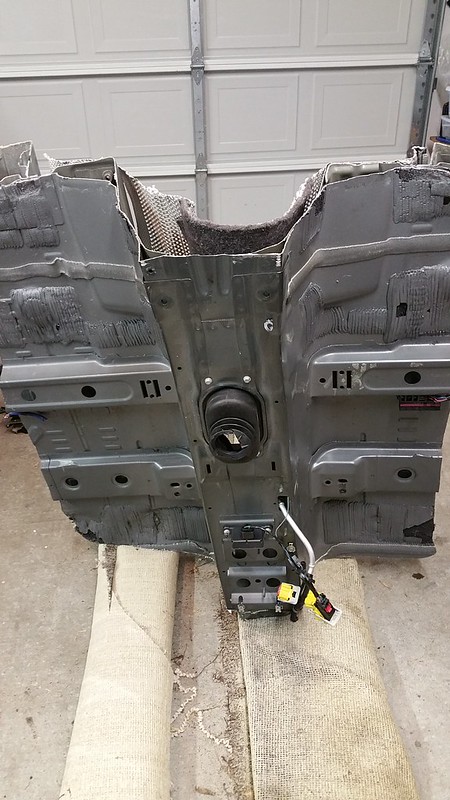
Took a chunk out of the floor, I stopped just in front of the floor brace. Rather than cut all that out I'll just sit the camaro floor section over it.
This is what came out, I'm pretty sure it's going to be enough. I pulled the crossmember to blast and paint it but will have it back in place by lunch. After that it'll be time to learn how to weld.
And this is where we are now. Will have to add new carpet to my shopping list. Progress is slow, but finishing by Friday still seems feasible at this point.
I think I'm going to have a ton of room when I'm finished and I still have new body bushings to put in. Planning to drop the motor back in tomorrow to see for sure before I solidify anything though.
Started by cutting the Camaro floor piece down a bit, the width looks good but sadly they didn't cut as far forward as I would've like. Judging from the size of the piece they gave me I hesitate to say they cut it short, so maybe that's about as far forward as it goes, I don't know.
From there I cut the back down a bit, and decided that I either needed to cut out even more of my trans or opt to cut down the new piece. After some thought I decided to split the difference, meaning I will leave the floor and split the console into two pieces. I'll build the front section as normal then just tack the rear part in place on top of the original floor. There is already plenty of driveshaft clearance I just need the rear section to hold up the console and make it high enough for the arm rest to be somewhat useable (I hope).
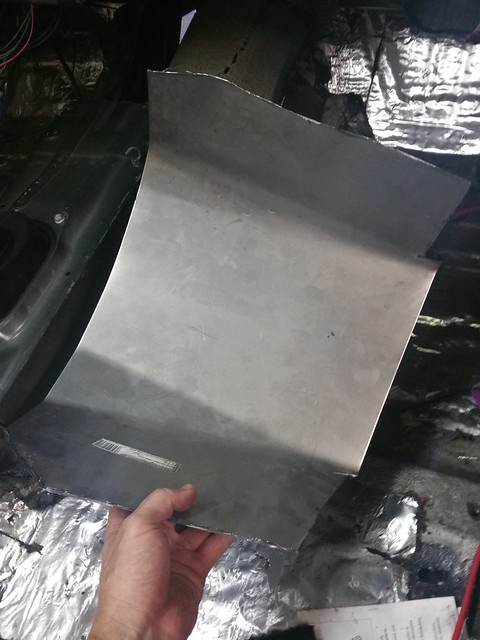
From here I started working with some sheet steel to finish up the front. I picked up some 16 gauge and holy **** is this stuff hard to work with. The next thinner size Lowe's had was 22 which felt too thin, especially considering how flimsy the car floor feels now.
Some trimming and fitting left to do plus a bit more bending to round out the firewall side, but for the most part things are generally together. If I had any idea what I was doing I'm sure this would be done already, but hopefully the hard stuff is out of the way. It seems unlikely I'd have to go up any higher and coming down at this point should be easy.
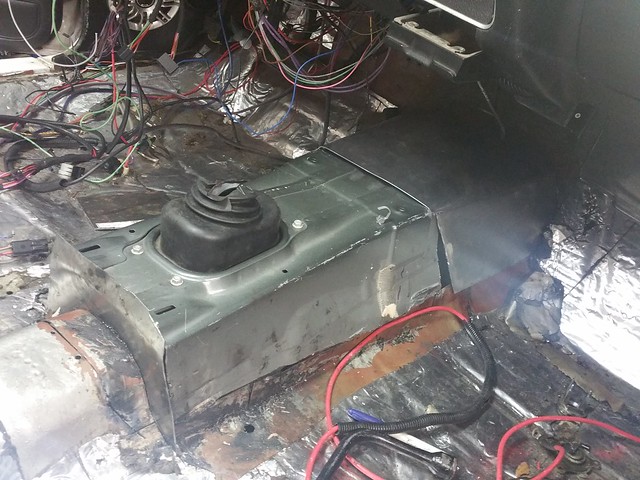
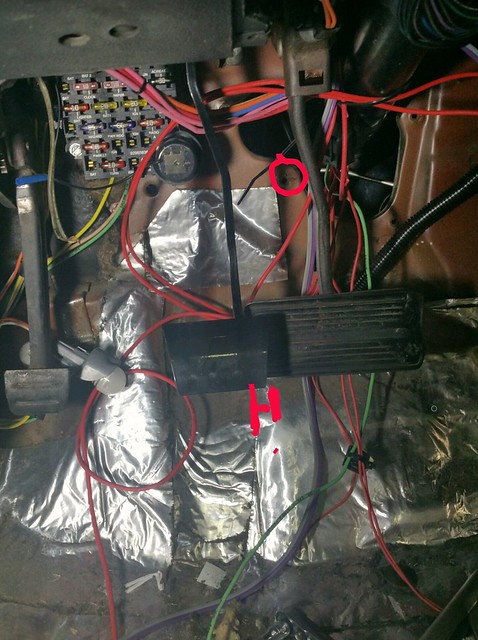
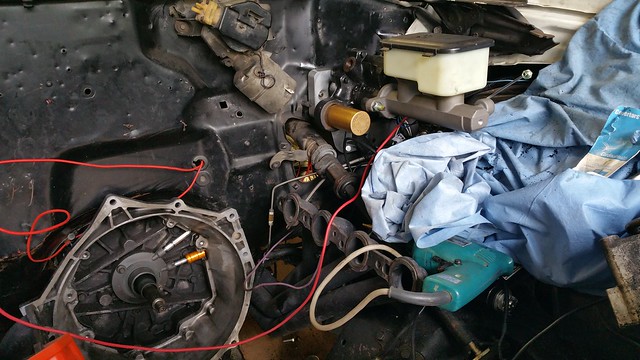
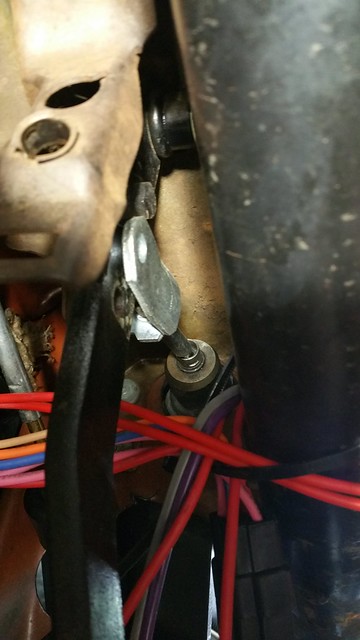
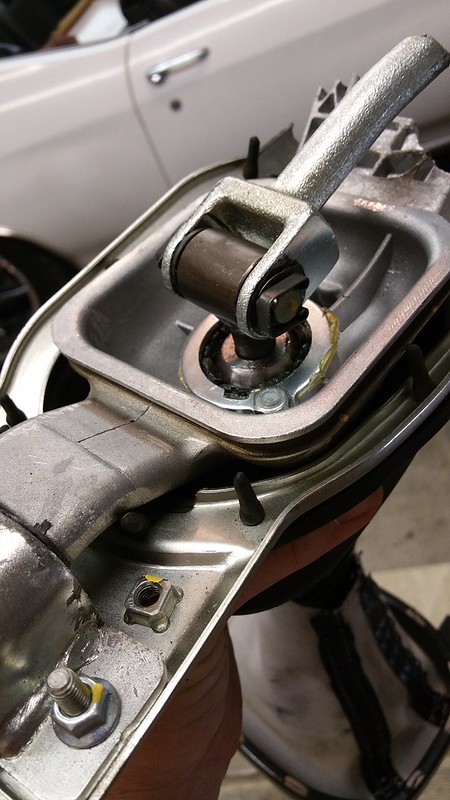
As I mentioned before, my car is an auto, originally with the shifter on the column. In looking at how to mount the master it seems like it's going to come partly through this thing and partly through the metal next to it. Not sure if every car would have this or not.
The next pic is bad but it shows (in the circle) where the clutch rod will come in and how the McLeod clutch pedal overlaps the stock brake pedal. The pedal comes with a spacer and you just slip it in where the dowel holding the brake is, pretty straightforward.
Tomorrow I'll break out the Greenlee and see how well things line up. My hydroboost stuff should be here Thursday so that should make things easier than working around this giant ugly vacuum booster.
This is a shot from in the engine bay, you can see the clutch master bracket in relation to the steering column.
That's all the swap-related progress for the day, spent the rest of my car time trying to get the body mount bolts out. Fortunately none of them broke and I was able to get all of them but the front two with the square nuts. Looks like I'll need to drop the fenders to get at them; not a huge deal but a big time waster for sure.
Progress looks good, did you check drive line angle so you'll know if the trans is high enough? Andrew can give you the scoop on how to do it if you never did it before. I downloaded the TREMEC app to turn your phone into an angle finder.
The motor isn't in yet so I'll have to check the angles tomorrow, but there is a lot of room left under the tunnel with the trans on the crossmember and at engine height. I'm heading to Dayton in a couple days so spent most of the day getting new wheels and tires for my daily, selling some console parts then cleaning up the garage so I can throw the motor back in the car first thing in the AM. I do have that Tremec app and have played around with it a bit.
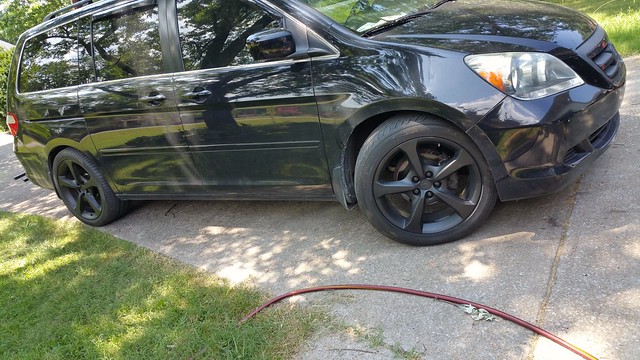
Not swap related, but I picked up some take off Camaro 20s with good tires last night and put them on this afternoon.
New carpet came today, it's the Essex with mass backing and insulation, ACC I think. Took about 2 days to get it from RockAuto. It's marketed as being the thick stuff like in luxury cars, and while it's nice enough and certainly better looking than the loop or whatever, it's not as nice or plush as what was in my Q45 or is in my old roommate's Mercedes wagon. I have no clue what the non-mass backed/ insulated stuff looks like, but this has a thin layer of rubber and some fairly dense (at least as compared to what I pulled out of the car) jute or jute-ish material.
Not sure what brand the old carpet in the car was but it was absolutely trashed at this point. I wish I had a piece of the cheap ACC carpet to compare the Essex to, but since I don't I can't say for sure if it's worth paying extra for. In hindsight it might be better to get cheap carpet and then some good floormats.
Also, if anyone comes across an HP Tuners Pro on Amazon warehouse in a couple days don't buy it; I just sent one back because they shipped me the wrong thing. Instead of a pro with GM credits they sent me a standard with Dodge credits. They've been pretty bad about that stuff lately, just throwing that out there in case you're looking for one. If you absolutely need one ASAP I'd suggest buying elsewhere.
As I mentioned before, my car is an auto, originally with the shifter on the column. In looking at how to mount the master it seems like it's going to come partly through this thing and partly through the metal next to it. Not sure if every car would have this or not.
The next pic is bad but it shows (in the circle) where the clutch rod will come in and how the McLeod clutch pedal overlaps the stock brake pedal. The pedal comes with a spacer and you just slip it in where the dowel holding the brake is, pretty straightforward.
Tomorrow I'll break out the Greenlee and see how well things line up. My hydroboost stuff should be here Thursday so that should make things easier than working around this giant ugly vacuum booster.
This is a shot from in the engine bay, you can see the clutch master bracket in relation to the steering column.
That's all the swap-related progress for the day, spent the rest of my car time trying to get the body mount bolts out. Fortunately none of them broke and I was able to get all of them but the front two with the square nuts. Looks like I'll need to drop the fenders to get at them; not a huge deal but a big time waster for sure.
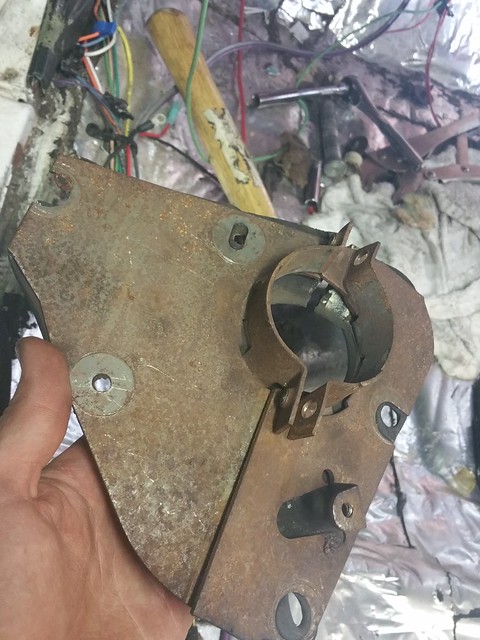
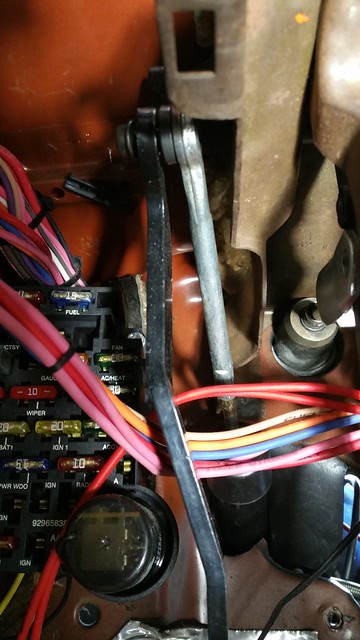
You need a column support with the clutch rod hole in it.
Then you need to source a MC mounting kit. I advise against kits that use the stock f-body MC. Instead look for a kit that uses the Wilwood long throw (gelling style) MC. These MCs have 1.4" of travel compared to the f-body 1". This will help a lot. I am using a kit from Keisler (now Silver Sport) and have had zero issues with it. There are other kits out there as well. On the Cougar I used a kit from Modern Driveline and am very happy with it, but I do not have first hand experience with their GM products.
Making holes in the support brace shouldn't take more than a few minutes but it's good to see that one for reference, I don't recall ever seeing one before.
I have a mounting bracket for the master, similar to what most kits seem to offer in various shapes or materials. The Keisler one was what I had wanted, but I could never find a place to buy one, and this sort of situation is why I opted to use a stock MC instead of a proprietary piece. McCleod has even moved to stock ones for some of their kits, and I like the idea of being able to get parts quickly should I need them (plus the McLeod pedal is designed to work with a stock one). Some MCs also hit the inner fender, so I wanted to avoid that as well. There are certainly some nice looking kits out there but for my purposes I'm not sure there is much benefit over buying the parts separately, at least not an advantage that justifies the prices ($650 for Silver Sport's or $300 for McLeod's for what can be duplicated at rock auto for under $200).
I'm using what this guy did https://ls1tech.com/forums/conversio...ly6-t56-4.html
Once I finish school next year I might give that American Powertrain or Bowler piece a shot, but for now I wanted a cheap bracket in case I run into issues with the hydroboost (which should be here tomorrow).
As a side note, I just realized that the brake pedals are different between autos and manuals, which explains the overlap of my pedals. I'll check tomorrow to see if the one I have can just be cut and welded. Fortunately I think pedal and firewall related concerns are the only things really standing in the way of being finished.
My hydroboost just came in and I'm going to give it a test fit here in a minute. Will post pics later but wanted to have this link somewhere.
This is what I picked up from csouth over on pro-touring. The box it came in was torn up by the shippers and some nuts were lost but csouth offered to order me some new ones from the bracket maker, stand up move on his part.
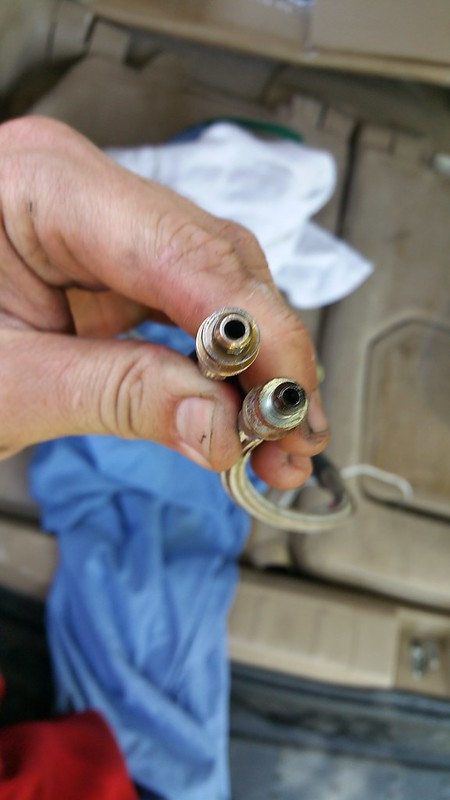
I think I'm going to clock it 180 the other way to make it similar to the way the chevelles.com guy did it, that way I can use the same hoses (which were ~$30 at rockauto). All credit for these part numbers goes to JB SS 396 but here is what he found (for the lazy) - "I'm using new lines from Oreilly Auto Parts for an 85 Chev C-20 PU 350 engine to go with the 86 Blazer HB unit and 96 JGC gear box. Test fit them for length today and looks perfect. Part #71093 Cost $16.99 and #91466 $19.99."
Not sure if I had mentioned this before or not but a while back I contacted chevelletiger to see if he could build a frame brace and it looks like he was able to whip something up - http://www.pro-touring.com/threads/1...64#post1196364
I figure I'll put mine on whenever I come home for Christmas break.
The last of the little bit I did today was to trial the Planted seat bracket. Overall it does what I wanted it to, in that it allows me to center the seat behind the steering wheel, but in so doing it also raises the seat height a bit. It feels rather high, but for now it's also slid all the way back so it's hard to say for sure until I hook the power back up.
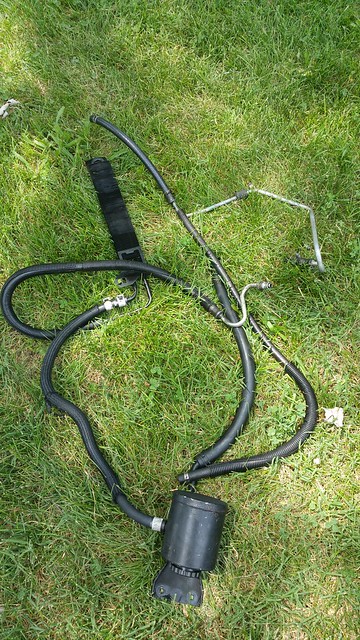
After taking a break to stain my mom's deack I ran over to the local salvage yard and grabbed a power steering cooler, a reservoir and a variety of lines and clamps. The cost for all of this was around $20.
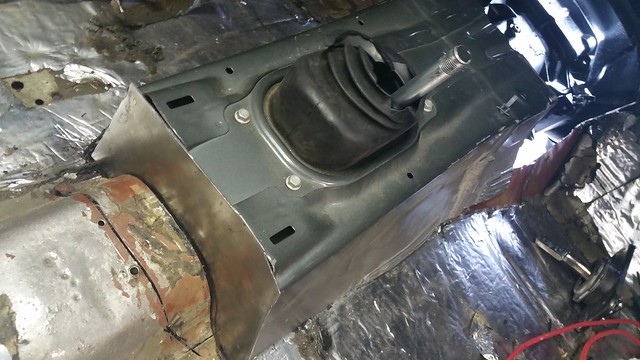
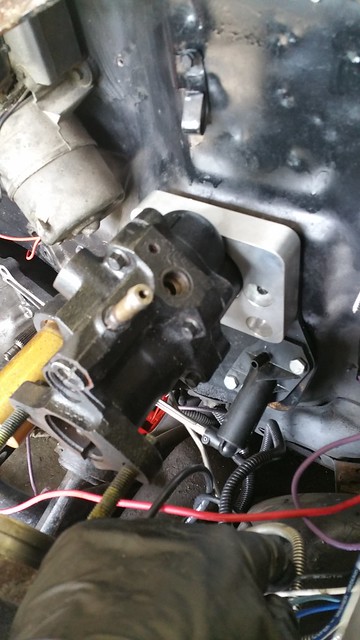
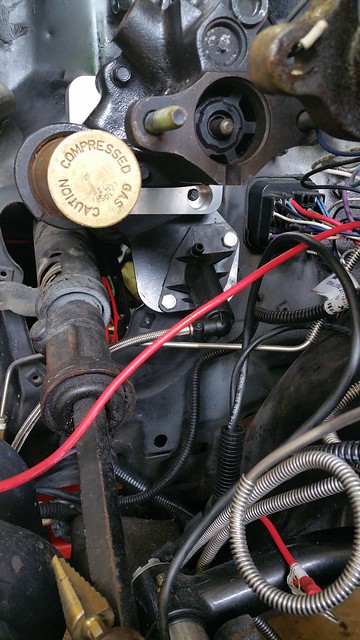
After some slight modification to the brackets involved and a quick punch with the greenlee I got both the hydroboost and the clutch master mounted up. I don't have the right flange bolts yet but I found some that worked well enough for a test fit.
Now I need to find a way to replace that wiper motor with something smaller.
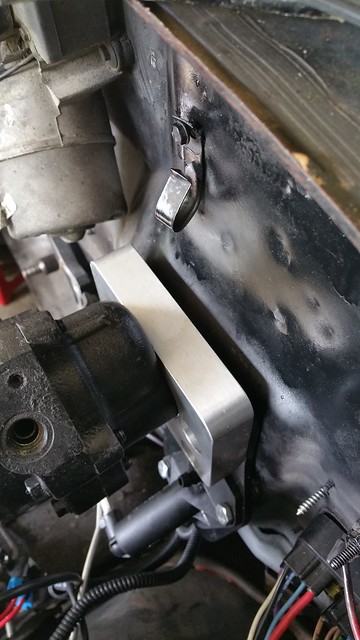
The pedal overlap makes it hard to get everything in place but that is an easy fix. Clutch lines up pretty well, though I think I'll weld in a piece and lower it about 3/4 inch.
It looks like the brake clevis is meant to bolt in where the brake light switch attaches. I'm using a Tallon hydraulics bracket so will email them to see what they say.


 05-30-2016, 07:33 PM


 [/url]