
1971 Nova Swap - 02 LS1/A4
 04-09-2013, 01:14 PM
#201
The Project was put on the back burner for the winter.. as I had to replace the trans on my Tahoe for Ski season and replace the oil pan on my Chevelle. There goes some project funds ! 
I am starting up on it now. So, here are some updates and short term plans..
1) I got some more wiring completed and 1/2 of the Ign wires routed and connectors on.
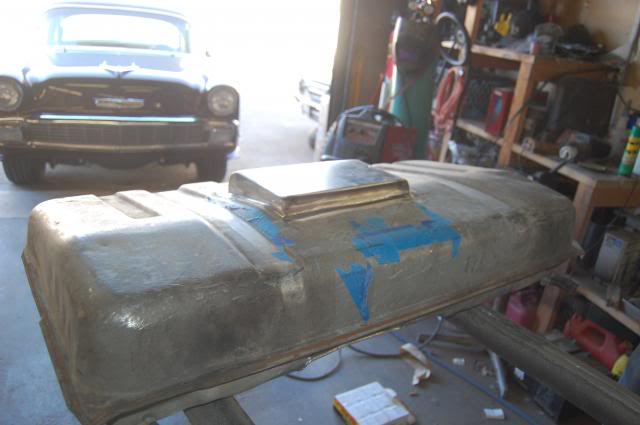
2) Have started to work on my design for the Fuel Tank with my Fab guy. Using a TanksINC PA4. Going to mod it as it has to be shorten. I also will be adding another bucket in the tank for the assembly and tray to sit in to add more capicity as a sump. Mod'ing the PA4 assembly some to move the tray over a bit due to fuel level sender and fill tube.
3) I ordered from POL a shock relocation kit to move the shock inboard and be able to clear the LS1 brakes in the rear.
4) Still need to complete the Trans lines and order a trans cooler and Drive shaft.
5) Also going to replace the LS1/F-Body brake Master as it is just going to complicate the tubing.. but it can work.. just going a different route on that.
a few picture of the progress on the tank..

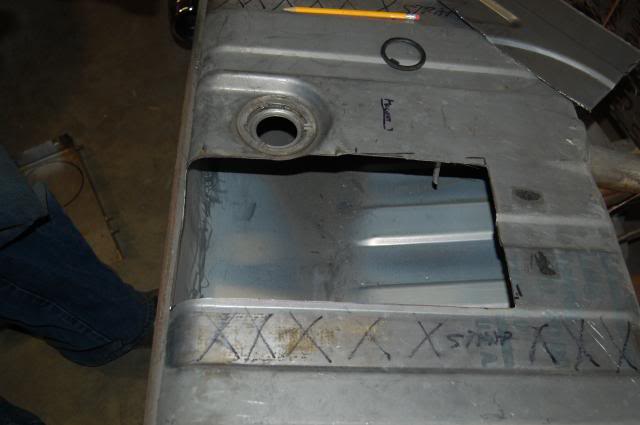
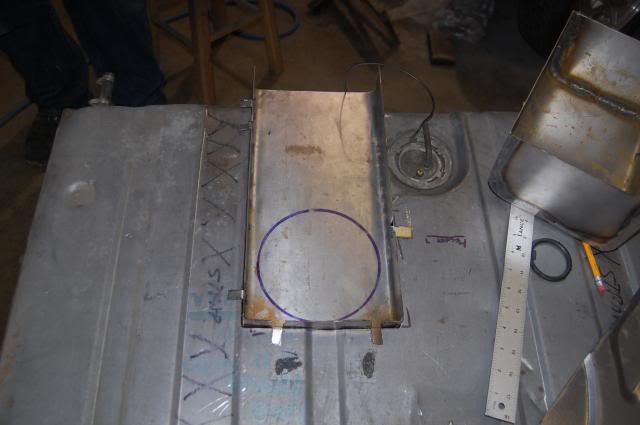
I am thinking I will cut the bottom out for the bucket to come through and that will will add another inch and be the lowest point in the tank.
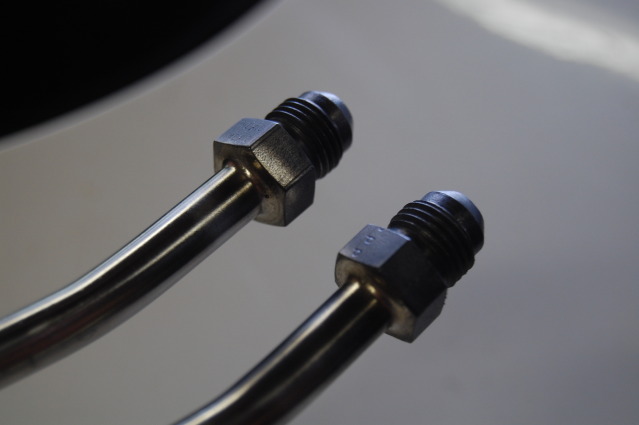
Here is some pictues of the Trans SS Hardlines that will be used with SS Teflon Lined Braided hose and AN Fittings
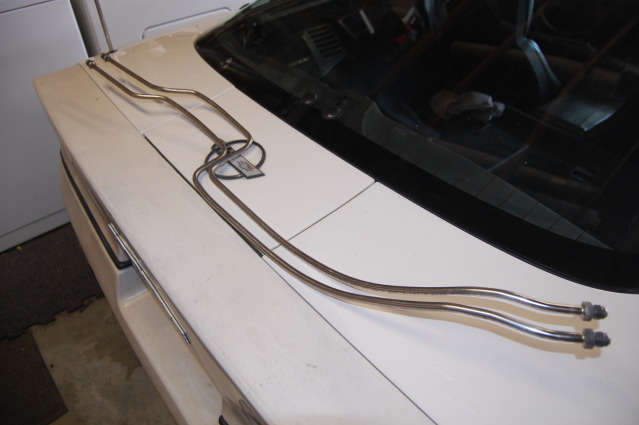
Brazed AN Bungs on
Routing
So, standby.. It will keep going as long as Funds are there and nothing else breaks ! LOL...
BC
I am starting up on it now. So, here are some updates and short term plans..
1) I got some more wiring completed and 1/2 of the Ign wires routed and connectors on.
2) Have started to work on my design for the Fuel Tank with my Fab guy. Using a TanksINC PA4. Going to mod it as it has to be shorten. I also will be adding another bucket in the tank for the assembly and tray to sit in to add more capicity as a sump. Mod'ing the PA4 assembly some to move the tray over a bit due to fuel level sender and fill tube.
3) I ordered from POL a shock relocation kit to move the shock inboard and be able to clear the LS1 brakes in the rear.
4) Still need to complete the Trans lines and order a trans cooler and Drive shaft.
5) Also going to replace the LS1/F-Body brake Master as it is just going to complicate the tubing.. but it can work.. just going a different route on that.
a few picture of the progress on the tank..
I am thinking I will cut the bottom out for the bucket to come through and that will will add another inch and be the lowest point in the tank.
Here is some pictues of the Trans SS Hardlines that will be used with SS Teflon Lined Braided hose and AN Fittings
Brazed AN Bungs on
Routing
So, standby.. It will keep going as long as Funds are there and nothing else breaks ! LOL...
BC
 04-09-2013, 05:28 PM
#203
That's a lot of progress - nice work! Are you completely ditching the PA-4 tray and just using the sump you've made? i was able to get mine to line up so the float sits down in the tray. I will try to get some photos up. Too bad I have to scrap/remake my recess.
I like how you routed the trans lines on top of the frame. That is not a half bad idea. I was planning to run mine alongside the oil pan rail, but I will rethink it now if I have room with my AC compressor.
Are your running soft lines at both ends between those hardlines and the tranny and the tranny cooler? Are you running into a radiator cooler and if so, are you adapting to 5/16 inverted flare?
04-09-2013, 10:33 PM
#204
Clint, will be leaving the the PA4 tray on.
The Hard line has the Brazed AN Bung on them so I will use Russell Teflon line SS Braided hose and AN ends on both the Trans and to the Cooler. Got one more line to make and waiting to order a cooler and then finish mounting and finishing the lines.
I am going to try using both the Radiator cooler and a external cooler. I know there are people that say to not do this. but my thinking is to let the Radiator cool the fluid down and then into the external cooler before going back to the trans. I can always bypass it if it doesn't workout.
Yes. using the Inverted Flare to AN -6 adapters on the Radiator ports.
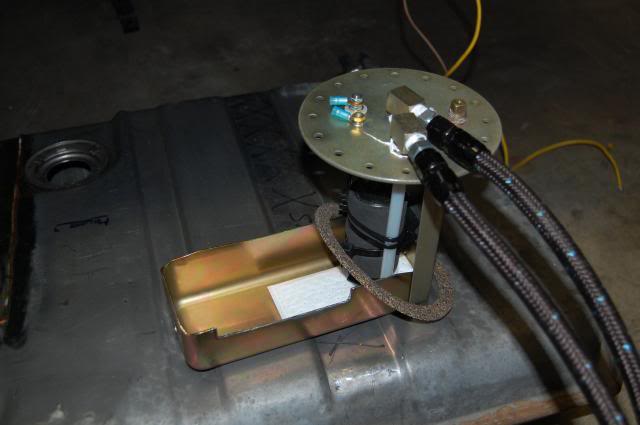
Well my Fab guy got some more work done. Wish I could say I am the one doing this, but it is my Design and idea, He is doing the Fab and Welding.. and we are working together on getting it all to work !
Got a few pin holes we are trying to seal up.. but got most of them and will get test over the night and finish up tomorrow.. ordering an new Sender, figure may as well.. better to have a new one than the old flaky one failing down the road. Worse case, I use some Eastwood or POR15 tank sealer.
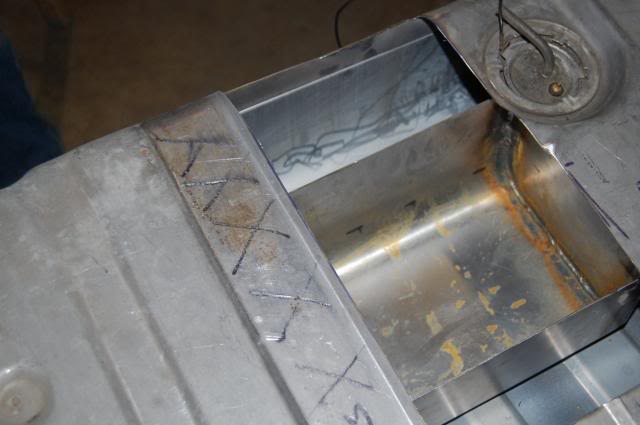
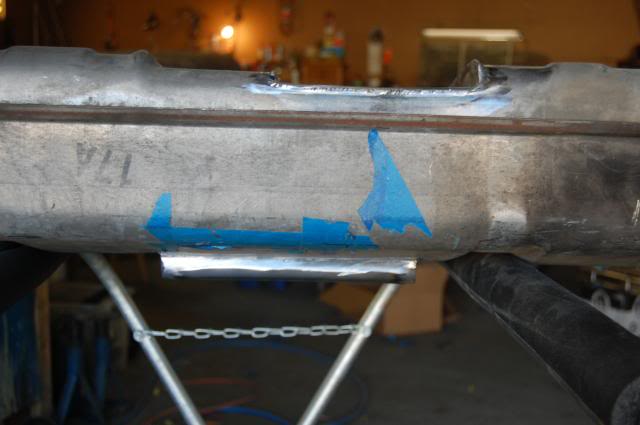
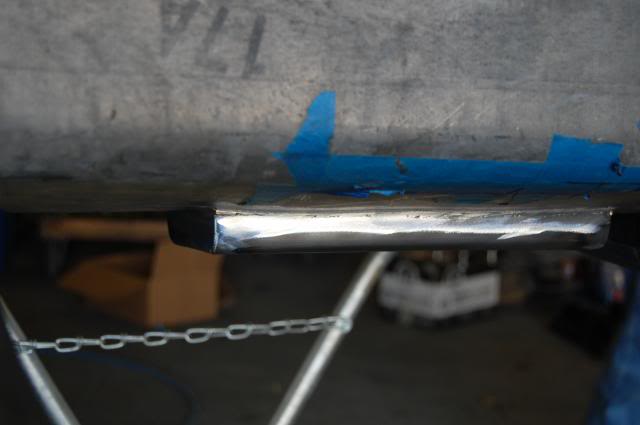
Rear view of the Bottom sump, It should be well within the angle of departure (rear bummer and Tires). Once it is painted, it will be a little harder to notice.

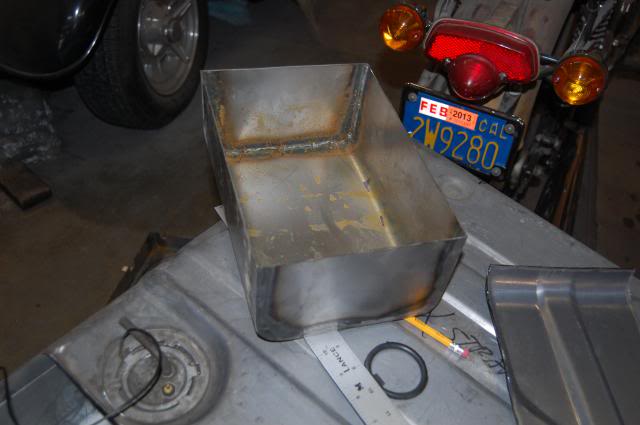
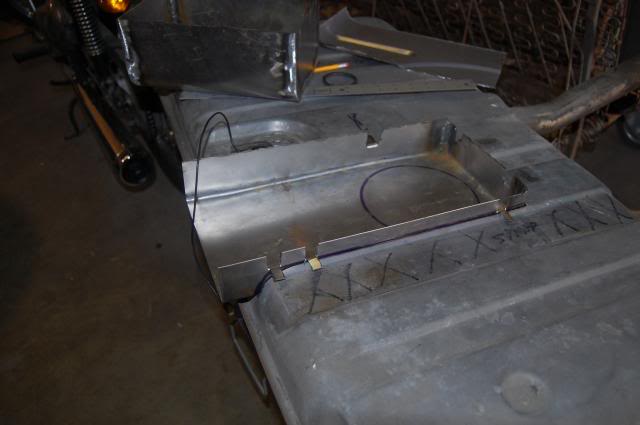
Here is the Upper tray welded in place and and Inner Bucket.
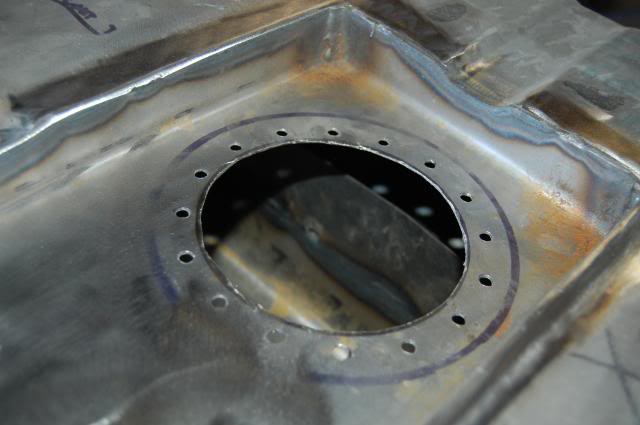
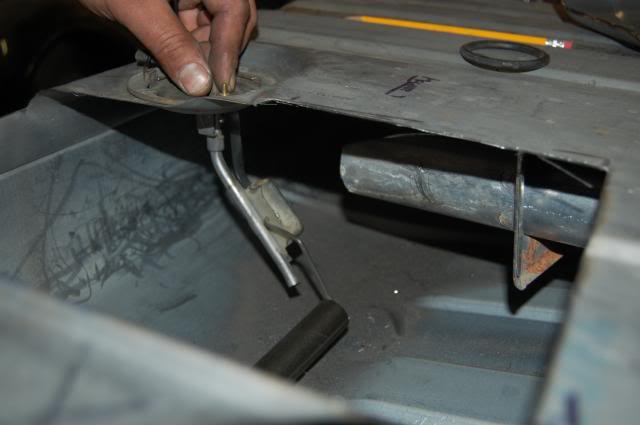
With Sender / Float in place, it clears the PA4 tray, and has a notch in the side of the Bucket.
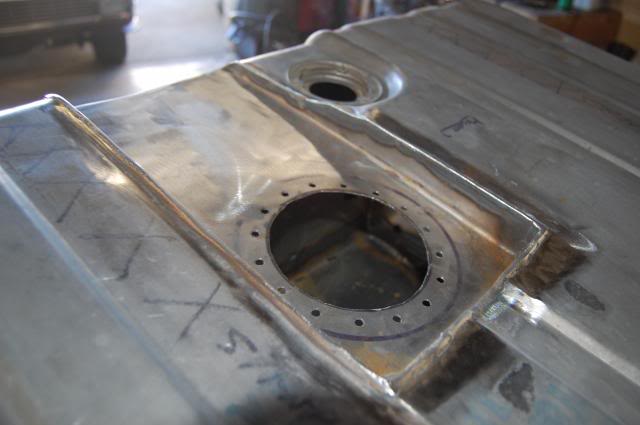
With the PA4 tray sitting where it will be.

Will post more up once we get done.
BC
The Hard line has the Brazed AN Bung on them so I will use Russell Teflon line SS Braided hose and AN ends on both the Trans and to the Cooler. Got one more line to make and waiting to order a cooler and then finish mounting and finishing the lines.
I am going to try using both the Radiator cooler and a external cooler. I know there are people that say to not do this. but my thinking is to let the Radiator cool the fluid down and then into the external cooler before going back to the trans. I can always bypass it if it doesn't workout.
Yes. using the Inverted Flare to AN -6 adapters on the Radiator ports.
Well my Fab guy got some more work done. Wish I could say I am the one doing this, but it is my Design and idea, He is doing the Fab and Welding.. and we are working together on getting it all to work !
Got a few pin holes we are trying to seal up.. but got most of them and will get test over the night and finish up tomorrow.. ordering an new Sender, figure may as well.. better to have a new one than the old flaky one failing down the road. Worse case, I use some Eastwood or POR15 tank sealer.
Rear view of the Bottom sump, It should be well within the angle of departure (rear bummer and Tires). Once it is painted, it will be a little harder to notice.
Here is the Upper tray welded in place and and Inner Bucket.
With Sender / Float in place, it clears the PA4 tray, and has a notch in the side of the Bucket.
With the PA4 tray sitting where it will be.
Will post more up once we get done.
BC
04-09-2013, 10:36 PM
#205
Thats some very nice fab work! 
__________________

Standalone LS Swap Harnesses IN STOCK!
LSX, LTX Stand alone swap harnesses. S10 LSX conversion PLUG AND PLAY harnesses, 24x conversion PLUG AND PLAY harnesses. LT1 to LSX PLUG AND PLAY Harnesses.
sales@bp-automotive.com
www.bp-automotive.com
1-888-467-4491
Standalone LS Swap Harnesses IN STOCK!
LSX, LTX Stand alone swap harnesses. S10 LSX conversion PLUG AND PLAY harnesses, 24x conversion PLUG AND PLAY harnesses. LT1 to LSX PLUG AND PLAY Harnesses.
sales@bp-automotive.com
www.bp-automotive.com
1-888-467-4491
04-10-2013, 11:47 PM
#206
Teching In

Join Date: Nov 2009
Location: Southern California
Posts: 16
Likes: 0
Received 0 Likes
on
0 Posts

Bc, are you going to use a universal disc/disc prop valve and a adjustable to the rear in addition? I followed/copied your 4th gen booster mod, I was going to use hydro boost, but this is alot easier/cheaper route! I just bought a booster/master combo for 65.00 shipped of ebay. After some research it seems the 98-02 3.8 and 5.7 combos are the same just for reference to others! I have the metric bubble flair tool as well as the quick disconect fuel line/trans line swaging tool if you need them. the swaging tool takes steel tubing and puts the collar in it like the fuel fiters/rails have. P.m me if interested
04-11-2013, 12:04 AM
#207
Bc, are you going to use a universal disc/disc prop valve and a adjustable to the rear in addition? I followed/copied your 4th gen booster mod, I was going to use hydro boost, but this is alot easier/cheaper route! I just bought a booster/master combo for 65.00 shipped of ebay. After some research it seems the 98-02 3.8 and 5.7 combos are the same just for reference to others! I have the metric bubble flair tool as well as the quick disconect fuel line/trans line swaging tool if you need them. the swaging tool takes steel tubing and puts the collar in it like the fuel fiters/rails have. P.m me if interested
I was going to use the 4th Gen Master. But with the ports on the Right side. It would have caused a lot of extra routing of tubes. So I am planning on picking up a standard master for Disk/Disk with the ports on the left. I would have had to do bubble flairs, then route from the right side of the master to the left side where my P-Vavle is, would have been messy.
Not that the 4th Gen wouldn't have worked..
Thanks for the offer.. but with a standard type of master, I should be good. Glad my trail and work is going to good use by others.
Got the tank back today.. will finish mocking up the tank and lines. Then will clean it out and use some Eastwood tank sealer.. well get some pictures up soon.
BC
 04-11-2013, 12:46 PM
#211
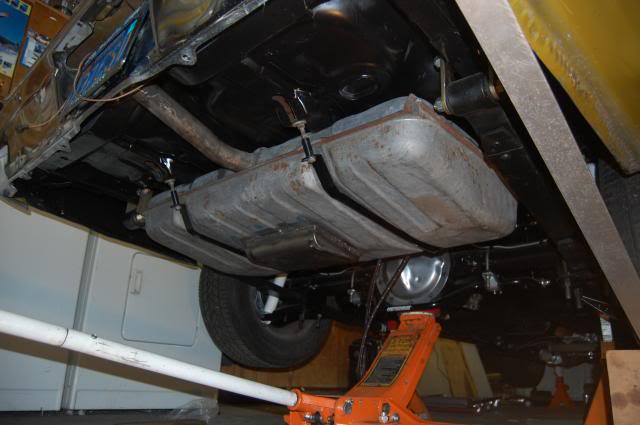
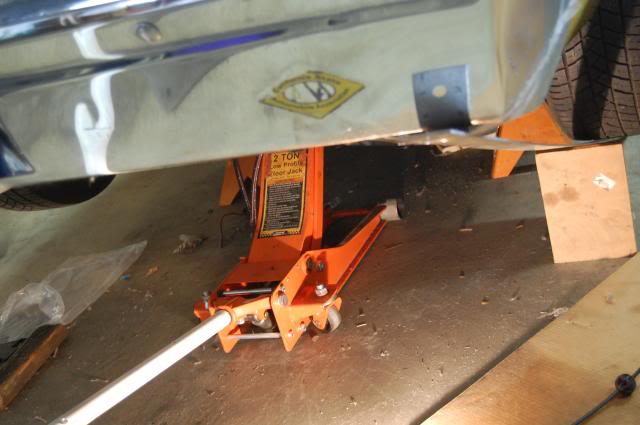
I put the tank in place to mock up anything I find that might be an issue. Will cut the final hoses and complete the AN fittings.
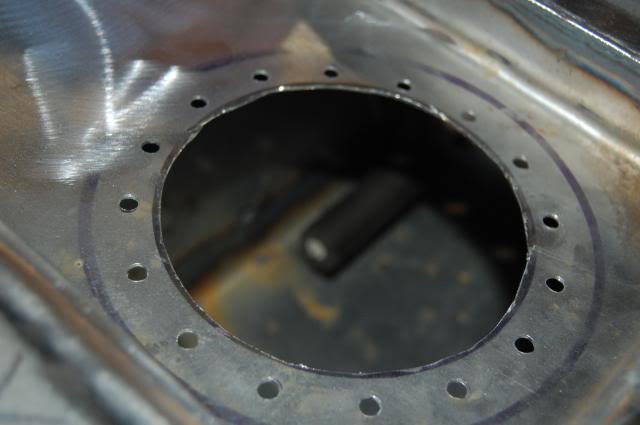
The bucket and tray are starting to surface rust.. So I better get around to cleaning up and sealing the inside. For now WD40 was sprayed. Orders some Eastwood Gas Tank Sealer.
The Bottom Bucket was put in and was looking real Pretty.. but as we tested it, we found about 6 leaks.. and the more we tried to seal them. .it started to get ugly. .I'll have to use some JB or Metal-to-Metal to clean up before I paint the tank. Most likely due to the age and the contaminates of the OEM Coating on the metal. We tried to get a clean surface to weld with. .but I guess a new tank would have been a good idea. .(but I�m on a cheap budget at this point).
Here are some more pictures of the tank in place.
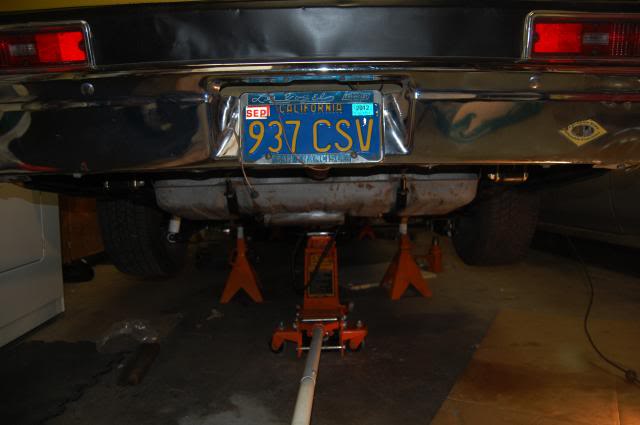

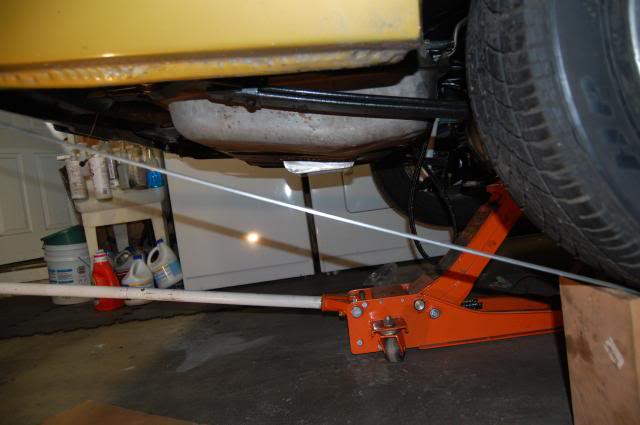
Checking Departure angle clearance.
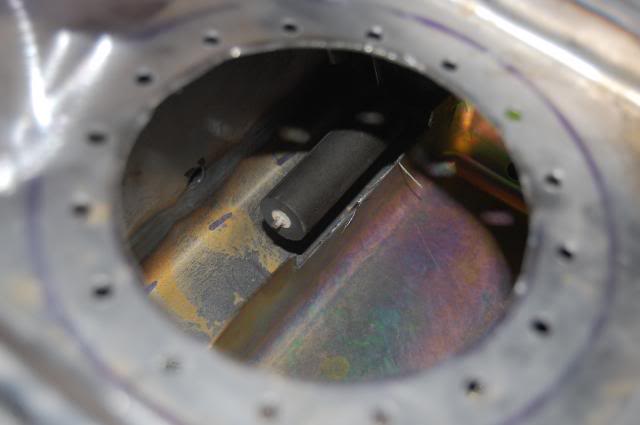
Viewing from the front into the tray for the fuel ports clearance.

The bucket and tray are starting to surface rust.. So I better get around to cleaning up and sealing the inside. For now WD40 was sprayed. Orders some Eastwood Gas Tank Sealer.
The Bottom Bucket was put in and was looking real Pretty.. but as we tested it, we found about 6 leaks.. and the more we tried to seal them. .it started to get ugly. .I'll have to use some JB or Metal-to-Metal to clean up before I paint the tank. Most likely due to the age and the contaminates of the OEM Coating on the metal. We tried to get a clean surface to weld with. .but I guess a new tank would have been a good idea. .(but I�m on a cheap budget at this point).
Here are some more pictures of the tank in place.
Checking Departure angle clearance.
Viewing from the front into the tray for the fuel ports clearance.
04-17-2013, 12:07 AM
#212
Put together the Tanksinc PA4 unit.. had to shorten it up as short as it could go to get clearance between the tray and the pump (with sock/filter in place). 6 3/8" from bottom of tray to the under side of the PA4 Flange.
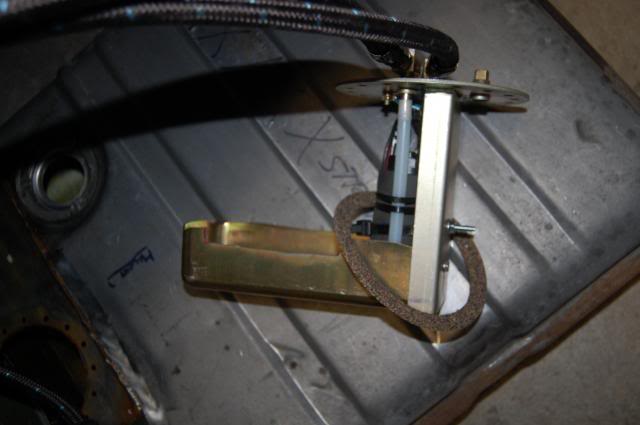
put the AN -6 Fitting and hose on the unit. But waiting for the Shock relocation kit to be in place, I think I might have to move the FPR as they might come into contact ?? waiting to see..
Waiting for some parts to clean and seal the inside of the tank.
BC


put the AN -6 Fitting and hose on the unit. But waiting for the Shock relocation kit to be in place, I think I might have to move the FPR as they might come into contact ?? waiting to see..
Waiting for some parts to clean and seal the inside of the tank.
BC
Last edited by bczee; 04-17-2013 at 12:16 AM.
04-17-2013, 12:21 AM
#213
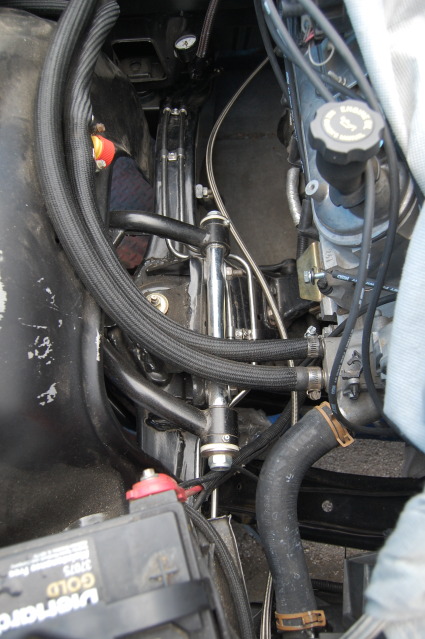
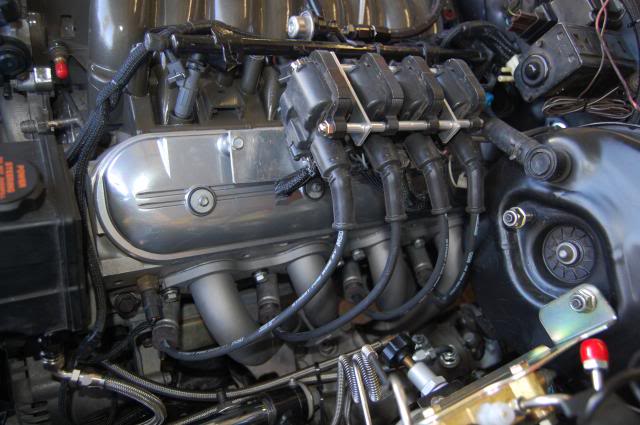
I am also trying to finish up my Ign wiring. I have a few options that I would like some comments on..
1) wire running back and down under the Headers. But I am having a problem with trying to run them as they are not able to run safely without getting very close to a tube or two. I have spend a few hours make wire holder and brackets.. but the headers just run very close to the back of the block and bell housing.


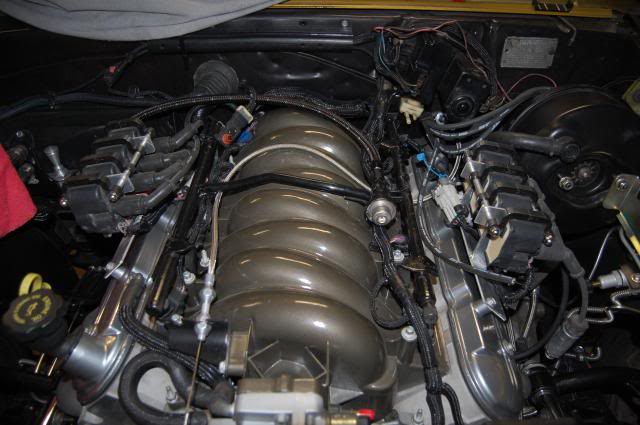
2) I flipped the coil bracket and coils..

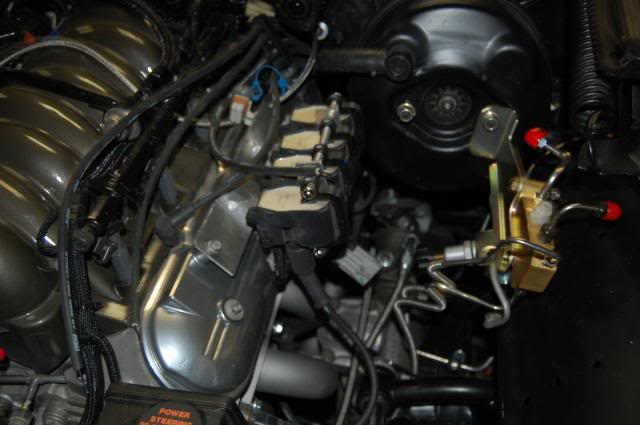
The Right side is back and below, the left side of the engine is down and direct to the plugs.
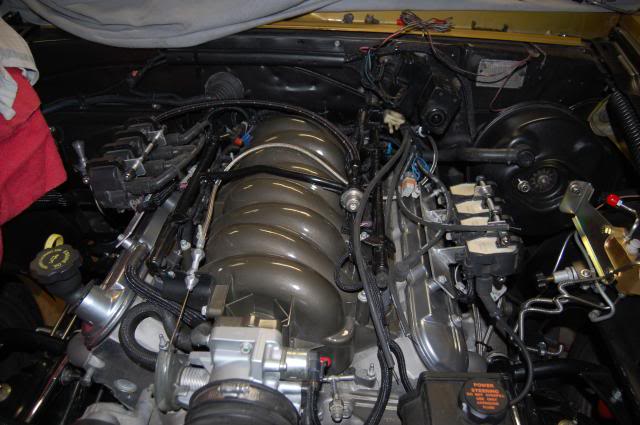
Looking for comments...I am trying to avoid burned wires..and so far the back and below is not working out so far.
BC
1) wire running back and down under the Headers. But I am having a problem with trying to run them as they are not able to run safely without getting very close to a tube or two. I have spend a few hours make wire holder and brackets.. but the headers just run very close to the back of the block and bell housing.


2) I flipped the coil bracket and coils..


The Right side is back and below, the left side of the engine is down and direct to the plugs.

Looking for comments...I am trying to avoid burned wires..and so far the back and below is not working out so far.
BC
04-17-2013, 11:16 AM
#215
Clint
Yes, I would be able to just flip the Coil and re-sequence to the correct order.
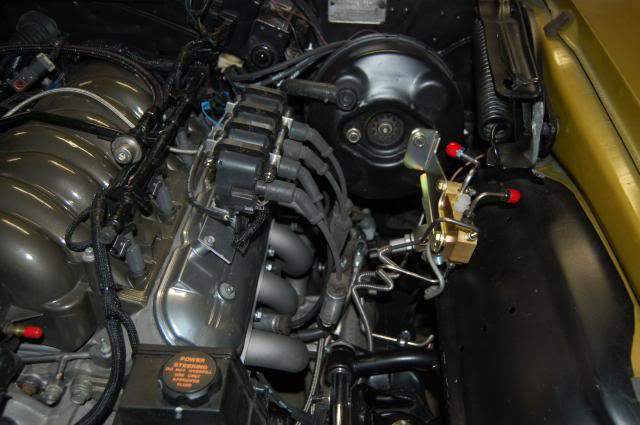
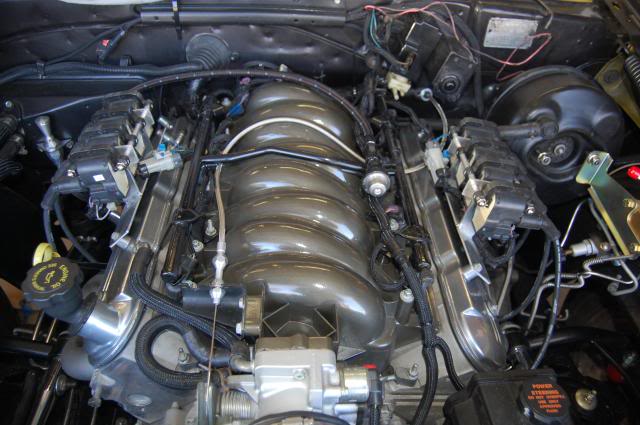
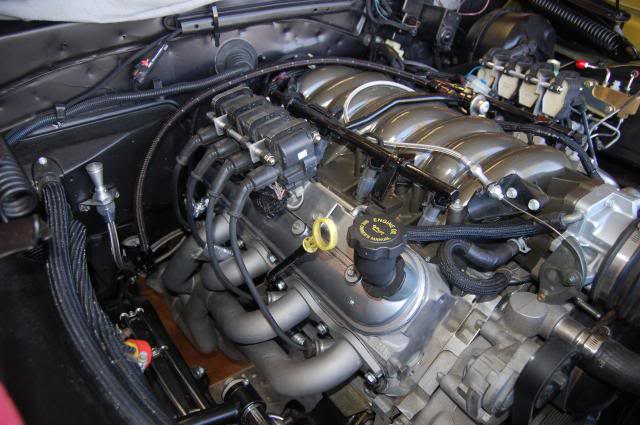
I have a choice to Flip or not Flip the Bracket. That would either put the coils in a higher location or a lower locatoin.. as seen in the last picture.
Just flipping the coil might give it a cleaner look, but the lower position would make for shorter Ign Wires.
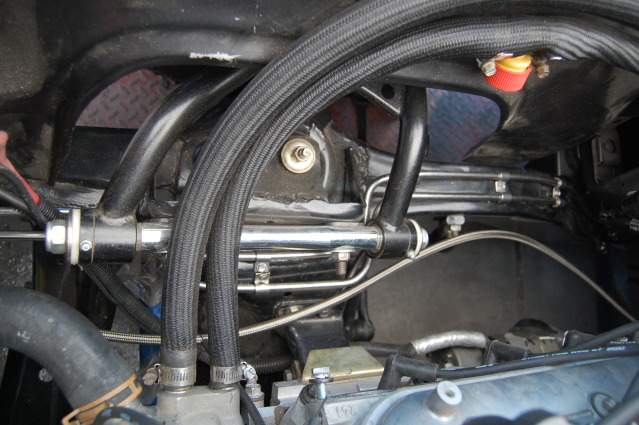
With the coils flipped:
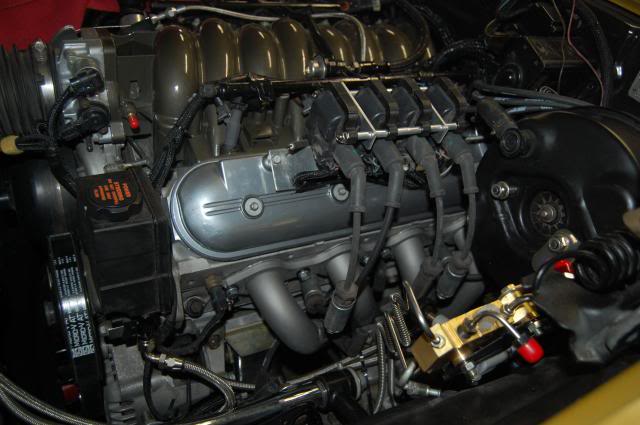
Comparing the Inboard vs outboarding the Ign Wires.:
High mounted
Low mounted

I think I will go with just flipping the coil and leaving the Bracket in the High position. Will now have to take about a set of wire to get the connectors to use on some 8mm wires and cut some of the one I have already made up(right side).
BC
Yes, I would be able to just flip the Coil and re-sequence to the correct order.
I have a choice to Flip or not Flip the Bracket. That would either put the coils in a higher location or a lower locatoin.. as seen in the last picture.
Just flipping the coil might give it a cleaner look, but the lower position would make for shorter Ign Wires.
With the coils flipped:


Comparing the Inboard vs outboarding the Ign Wires.:
High mounted

Low mounted
I think I will go with just flipping the coil and leaving the Bracket in the High position. Will now have to take about a set of wire to get the connectors to use on some 8mm wires and cut some of the one I have already made up(right side).
BC
Last edited by bczee; 04-18-2013 at 01:48 PM.
04-17-2013, 11:48 PM
#216
Ok.. Final Ign Wiring routing.. In the long run, I wanted to avoid burning wires. And the Header just ran to cose to the Block/Bell Housing (both higher and lower parts)


Also the POL Shock Relocation Kit came in.. I mocked it up, will have to mod two holes (in the instructions). It will clear the Sway bar mounts. Well gets some installed pictures later.

BC


Also the POL Shock Relocation Kit came in.. I mocked it up, will have to mod two holes (in the instructions). It will clear the Sway bar mounts. Well gets some installed pictures later.

BC
Last edited by bczee; 04-17-2013 at 11:55 PM.
 04-18-2013, 12:12 PM
#218
No, it is just to relocate the shock.. right now.. Mini-Tub is too far down the road if I decide to go that route.
So far the mock up looks good, everything cleared, that being the fuel, Brake and vapor lines. Sway bar mount and links. The Caliper will no longer be running into one of the stagered shock. I will be flipping sides of the bracket and Caliper so that the E-Brake Cable will be going forward and I will make a bracket for the cable and mod the cable to fit into the Nova mounting bracket like stock. Hopefully that will workout, else it will be plan B...
I know this might not be the best performing location for the shock, but it was a quick and easy remeidation.
Last edited by bczee; 02-08-2014 at 11:12 PM.

