
1971 Nova Swap - 02 LS1/A4


 06-14-2013, 11:09 AM
#242
If BCzee's start up had that effect you better just bite the bullet and get a whole pack for when you get your Nova out on the road

When is that happening BTW? All the cool kids are doing it!
 06-14-2013, 05:25 PM
#243
I don't want to distract from bczee's awesome news, but with all the recent startups, I am very anxious to make progress on mine. I'll update my thread when things move forward. There's just something about that open header rumble that makes my skin crawl with anticipation.
06-14-2013, 08:25 PM
#244
Bczee, glad the PNP/NSS diagram worked for you. A coworker and I came up with it for my Truckster build, and it's been on the road for the last 5 years and works perfect.
Now get some brakes and wheels on there and take her for a spin!! We need burn out videos
  .
.
Now get some brakes and wheels on there and take her for a spin!!
We need burn out videos .
06-14-2013, 11:09 PM
#245
Clint.. yeah. with reading all of the updates you and the rest of the Nova guys are doing and Taylor getting his on the track. I was just dying to start mine up. And I knew I was ready, but wanted to finish a few more thing. .but got to the point and said, Fu#@ it and I just turned the key.. LOL.. Glad I did..
Ls1nova71... I guess one way to look at it.. who needs brakes !.. I hope I don't say Fu#@ it and slam it in gear ! LOL..
thanks for the good words guys.. going to try and finish the eBrake cable soon. Well get pictures posted once I complete it..
BC
Ls1nova71... I guess one way to look at it.. who needs brakes !.. I hope I don't say Fu#@ it and slam it in gear ! LOL..
thanks for the good words guys.. going to try and finish the eBrake cable soon. Well get pictures posted once I complete it..
BC
06-17-2013, 05:52 PM
#247
Ok guys, You may have read the earlier post on the eBrake Cable bracket that I made out of 1 1/2" x 1 1/2" x 1/8" angle iron or steel.. and here is the rest of the steps to shorten the cable..
The late 4th Gen F-body cable is a very good cable to use and is easy to shorten. I am sure you can use these step to create other forms of eBrakes using other parts and levers. I could have put the 4th gen brake handle and mid cable bracket on if I was going with a hand eBrake setup.
Step 1, Cut off the barrel end of the inner cable .. (not the end that attaches to the backing plate eBrake lever.)
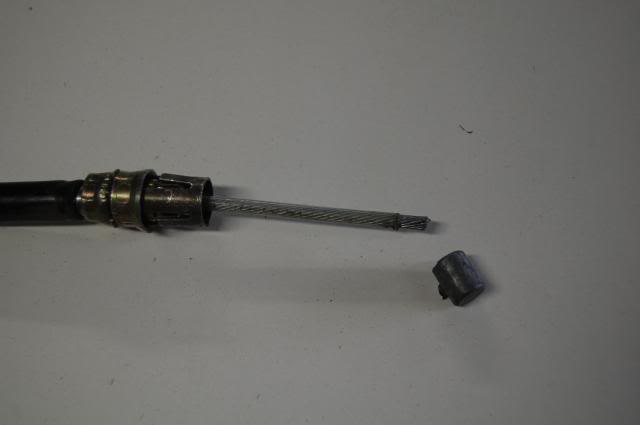
Step 2, Remove one of the metal ferrule ends from the cable housing. The ferrule threads onto the housing via Left hand threads. Clamp the housing in a bench vise just below the ferrule and use a vise grips and turn it clockwise to remove it.
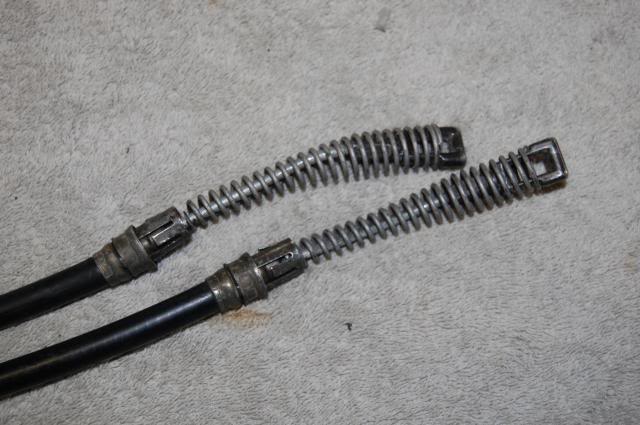
You may now remove the inner cable..as you will have to shorten the spring about 1".
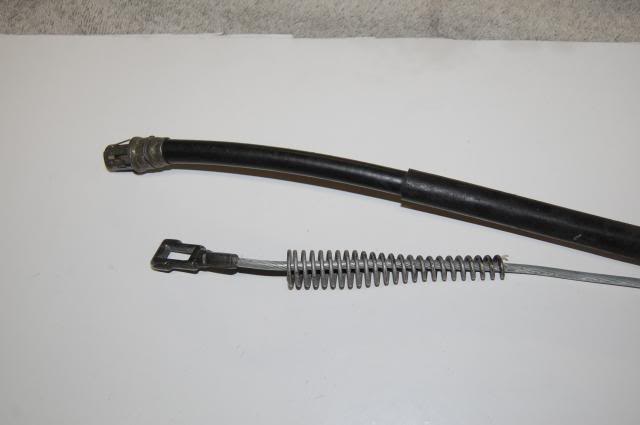
Step 3, Shorten the Spring 1" with a Saw or cutting wheel.

Step 4, Shorten the outter cable casing, in my case it was 22 1/2" from the end of the barrel where it meets the new bracket to where I cut the cable. I used a Cut off wheel, but you can use a Hack saw.
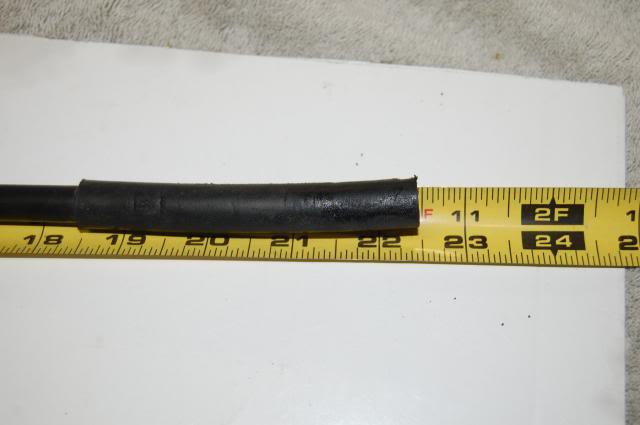
Make sure the inner cable hole is a clean cut, use something pointed to enlarge or clean it.
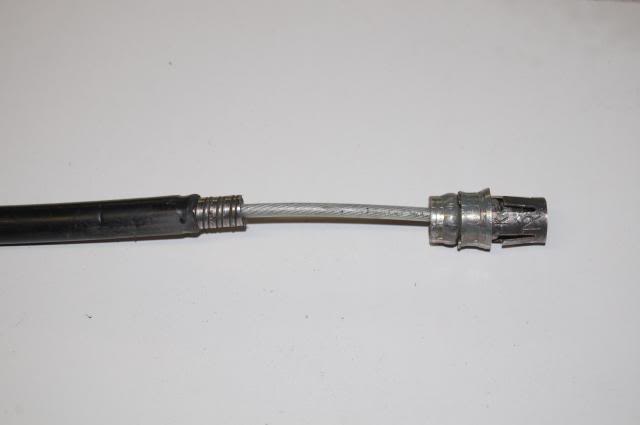
Step 5, The strip the rubber/plastic casing off about 1/2". Then reattach the Barrel by turning it clock wise.
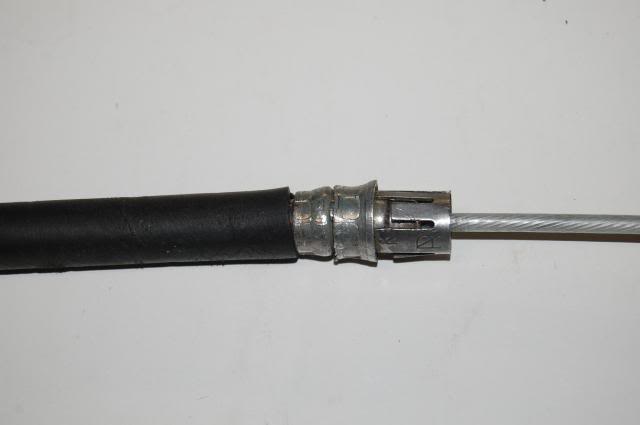
Slide the Inner Cable back in, I used some Spray Silicon to lub it so it would slide a bit easier.
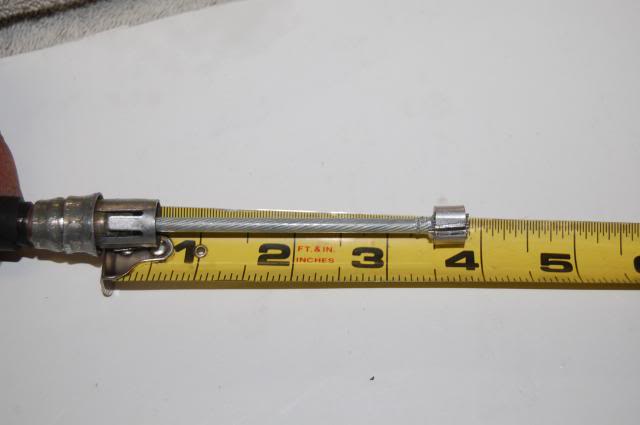
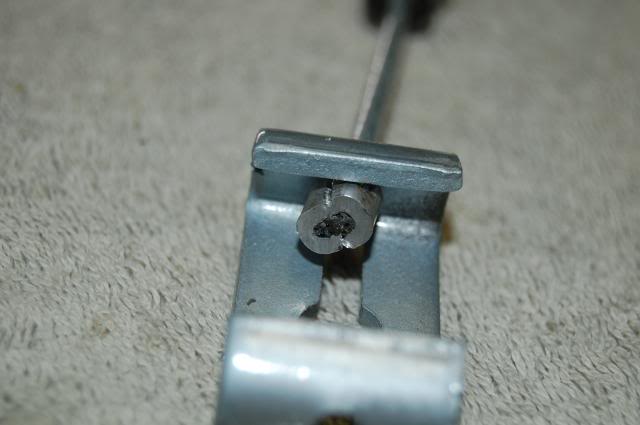
Step 6, I then shorten the inner cable to just about 4" from the end of the outer casing and barrel end. (as it was on the drum cable).
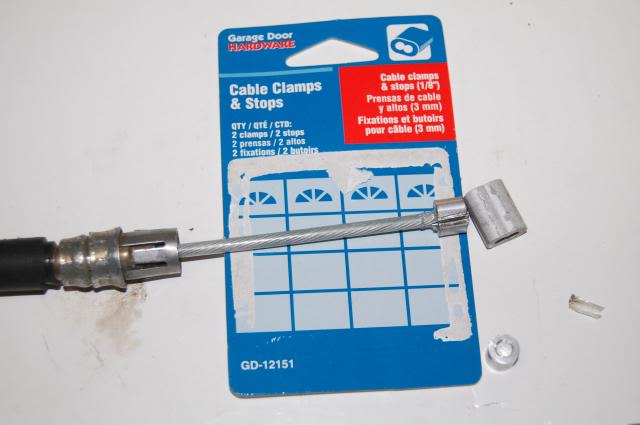
I used these cable end that I got from the local hardware store and just beat it down to secure it. You could also solder or braze it to fully secure it better. I will do that if I find that the beat down method is not strong enough. Strip about 3/8" of the plastic covering off for the new end to slide on.
And that is about it, you just need to reinstall it to the eBrake and the bracket on the frame.


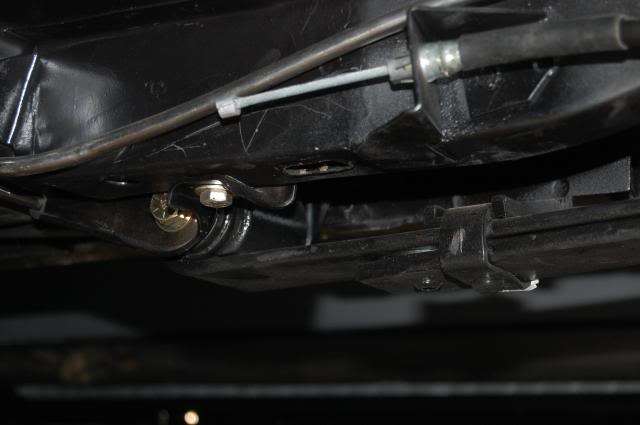
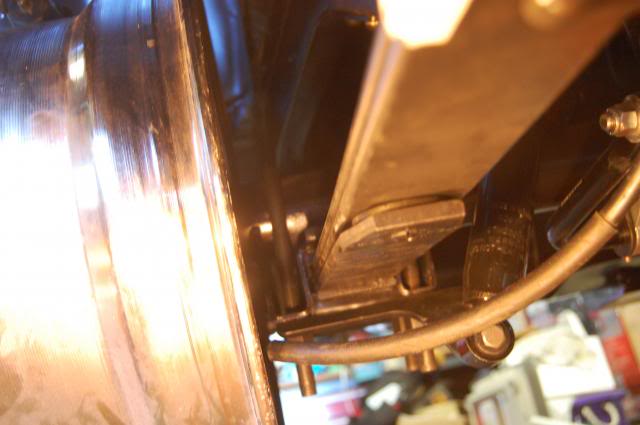
This is how it looks when I will be fitted to the bracket for the mid cable.
And attached to the front/frame bracket.
It took me about 30-40 min to do this.
BC
The late 4th Gen F-body cable is a very good cable to use and is easy to shorten. I am sure you can use these step to create other forms of eBrakes using other parts and levers. I could have put the 4th gen brake handle and mid cable bracket on if I was going with a hand eBrake setup.
Step 1, Cut off the barrel end of the inner cable .. (not the end that attaches to the backing plate eBrake lever.)
Step 2, Remove one of the metal ferrule ends from the cable housing. The ferrule threads onto the housing via Left hand threads. Clamp the housing in a bench vise just below the ferrule and use a vise grips and turn it clockwise to remove it.
You may now remove the inner cable..as you will have to shorten the spring about 1".
Step 3, Shorten the Spring 1" with a Saw or cutting wheel.
Step 4, Shorten the outter cable casing, in my case it was 22 1/2" from the end of the barrel where it meets the new bracket to where I cut the cable. I used a Cut off wheel, but you can use a Hack saw.
Make sure the inner cable hole is a clean cut, use something pointed to enlarge or clean it.
Step 5, The strip the rubber/plastic casing off about 1/2". Then reattach the Barrel by turning it clock wise.
Slide the Inner Cable back in, I used some Spray Silicon to lub it so it would slide a bit easier.
Step 6, I then shorten the inner cable to just about 4" from the end of the outer casing and barrel end. (as it was on the drum cable).
I used these cable end that I got from the local hardware store and just beat it down to secure it. You could also solder or braze it to fully secure it better. I will do that if I find that the beat down method is not strong enough. Strip about 3/8" of the plastic covering off for the new end to slide on.
And that is about it, you just need to reinstall it to the eBrake and the bracket on the frame.
This is how it looks when I will be fitted to the bracket for the mid cable.
And attached to the front/frame bracket.

It took me about 30-40 min to do this.
BC

 06-24-2013, 02:55 PM
#252
Update on the eBrake Cable. The aluminum cable ends that I got from the local hardware store was not doing the job.. it just couldn't hold the pulling force when I stepped on the pedal hard.
I now have brazed on steel ends. I just used some 1/4" steel round stock. I cut a section of 3/8". Then drill a 1/8" hole down the center of the bar and brazed it on to the cable. Should hold now. !
I can't take all of the credit. I found a few different method of doing the Brakes and Cable, and just used what I thought would work for me. Hope it works well for you guys...
BC
Last edited by bczee; 11-13-2013 at 02:43 PM.
 06-25-2013, 01:42 PM
#254
TECH Resident
Join Date: Nov 2007
Location: Texas
Posts: 816
Likes: 0
Received 0 Likes
on
0 Posts
Don't do it !!! When I I got my ls running car had zero brakes thats why it got parked to begin with some 7 years prior. The evil bay engine & trans only had a 90 days warranty so when I got mine fired I decided to just ease up my 1/4 mile long gravel drive way and turn around give it a little gas and make it shift into second to ensure the trans was in working order. It was alright but I quickly realized that the 1/4 mile drive was not near long enough being slightly down hill I was headed straight towards my shop I had to turn the car sliding sideways out into my muddy pasture and almost ended up in my pond doing mutli donuts until I came to a stop. The entire undercarriage that I had spent most of a day power washing and cleaning prior to the swap was covered in black mud and cow poop.
06-25-2013, 02:01 PM
#255
Rocky.. Haha,....... Yeah... I am going to act my age on that one.. but it might be a while before I get enough funds for a Exhaust system, wheels and tires.. Oh well. .I'll just drive the Chevelle ! Might head to Sonoma Tomorrow with the Chevelle. Nascar is done so.. Wed night it back on !
I knew it was safe to start up the engine.. but since I live in a area with a lot of homes .. I know it would be way to stupid to try and drive it without brakes. ..LOL
BC
I knew it was safe to start up the engine.. but since I live in a area with a lot of homes .. I know it would be way to stupid to try and drive it without brakes. ..LOL
BC
Last edited by bczee; 06-26-2013 at 09:31 AM.
06-25-2013, 06:13 PM
#256

Hookemdevils,
Can you have that chick jumpn while clapping her hands
LOL
Can you have that chick jumpn while clapping her hands
LOL
06-26-2013, 04:07 AM
#257
Launching!
 06-27-2013, 09:14 PM
#259
Ok.. I can hear you guys thinking now.. So.. lets hear them !
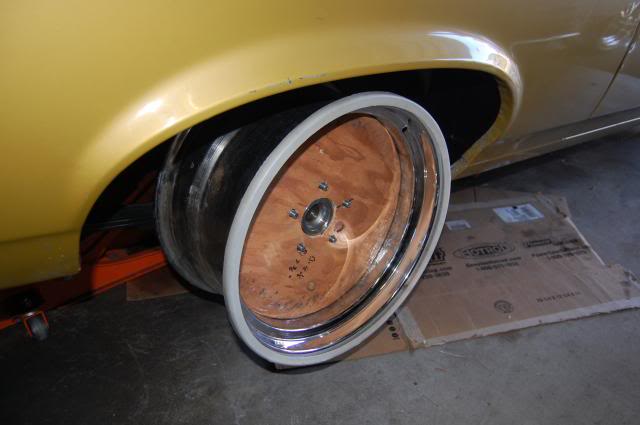
Some of you may remember I broke a wheel at the Good Guys Autocross on my Chevelle a while ago. Well I needed to get a good Idea of what I could fit on the Nova so I make a wooden center section and pressed it into the rim and bolted it up to the Nova..
This is a 9.5" Rim (only), with the shocks out of the way in board of the Springs.. it would fit in, but not sure of the Tire profile for now. This is at about 5.5" back spacing.
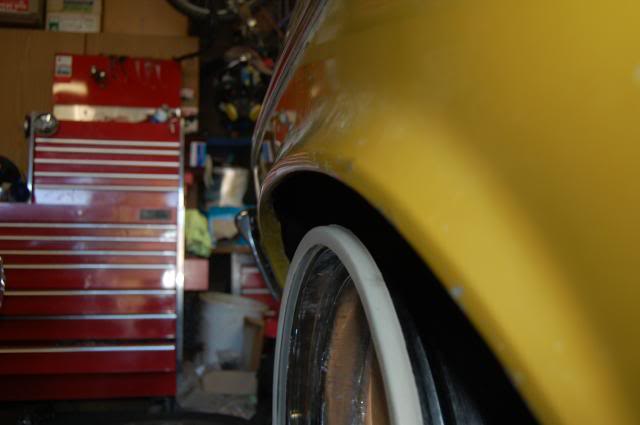
Seem to have a good 1" spacing all around.
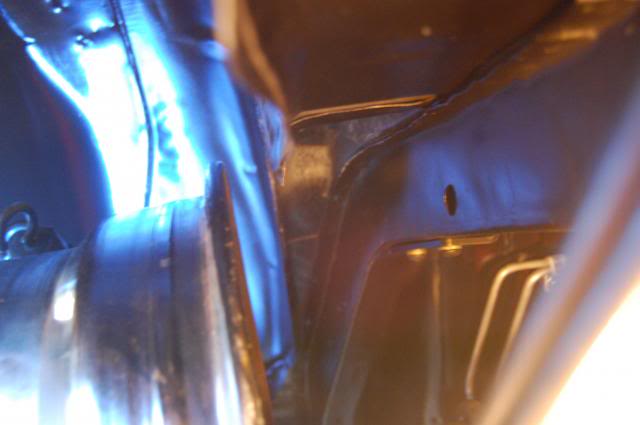
This is where knowing the profile of the tire would be good.
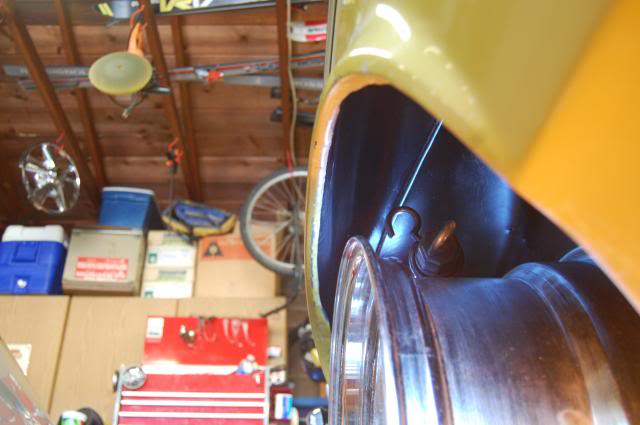
So... a 9.5" with 5.5" bs might work. but depending on the tire profile.. it might or might not work.. and 8" rim would work for sure.
See what happens with idle mind's ! Wonder if a 9.5" will fit on the front !??
BC
Some of you may remember I broke a wheel at the Good Guys Autocross on my Chevelle a while ago. Well I needed to get a good Idea of what I could fit on the Nova so I make a wooden center section and pressed it into the rim and bolted it up to the Nova..
This is a 9.5" Rim (only), with the shocks out of the way in board of the Springs.. it would fit in, but not sure of the Tire profile for now. This is at about 5.5" back spacing.
Seem to have a good 1" spacing all around.
This is where knowing the profile of the tire would be good.
So... a 9.5" with 5.5" bs might work. but depending on the tire profile.. it might or might not work.. and 8" rim would work for sure.
See what happens with idle mind's !
Wonder if a 9.5" will fit on the front !??BC
