


Converting an 86 K10 to an 04 Silverado
Thread Starter
Staging Lane
Joined: Jun 2011
Posts: 64
Likes: 0
From: Sioux Lookout, Ontario
Greetings from the new Guy.
Been an active follower of the LSX stuff now for quite some time. Always a lurker, however I've taken the next step and have finally begun the process of an LSX conversion.
Have been looking at an LSX swap into a second gen camaro now for quite some time. However, there is a lot of swapping of parts required to make these fit in the low hooded cars. (special low intake, different accessories, etc). I plan on swapping the car over eventually, but since I don't have any actual experience doing any of these conversions, I thought I'd make my first one extremely easy, and convert my daily driver truck to LSX technology.
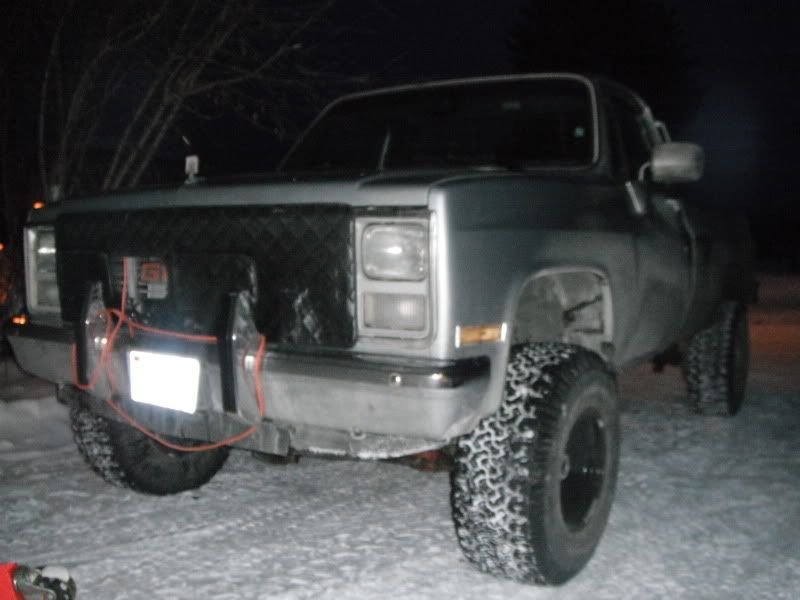
1986 GMC K10 (pictures to follow). Originally equipped with your standard 350, 4 speed setup (SM465). Rides like a brick sh*t house, but its a real work truck, and has several thousand kilo's. Its what I want, its what I like, and is still in good shape, so I'd much rather convert, than just buy new.
What I bought - A wrecked 2004 silverado with a 5.3 (VIN T). I removed everything from it in my driveway, tank, engine, wiring, etc.
I plan on mating the 5.3 to my current 4 speed trans in the truck (since gear ratio is perfect, no OD required). I know of the .400 thicker flywheel I must purchase. I know the bellhousing bolts up less one bolt. Is Mcleod the only aftermarket .400 thick flywheel?
I have a tbi tank in the truck with the low pressure (15psi) pump that I plan on taking out, to put in place a walbro pump. The truck was also a single fuel line, so I plan on the vette regular. Still mistified on the plumbing though;really don't want to run rubber hose if I can avoid it.
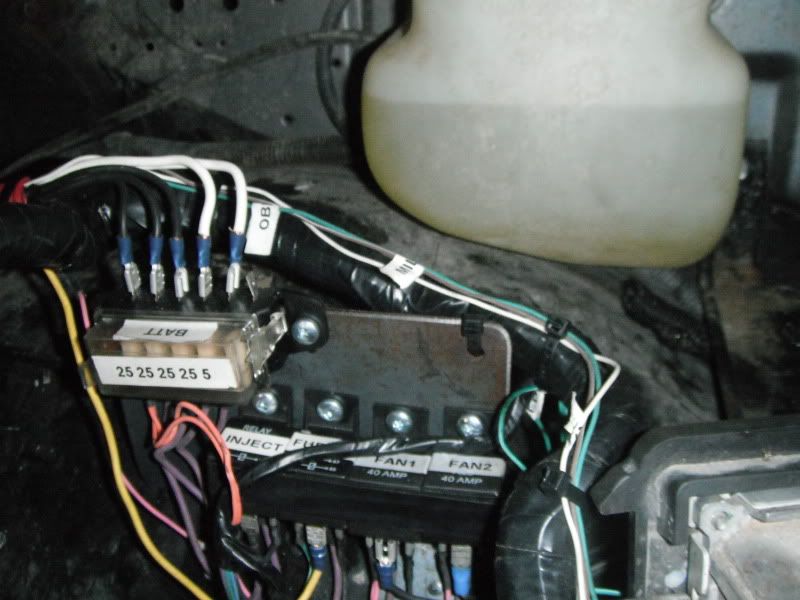
Wiring will be outsourced to mod the original wiring harness. Already running electric fans, expense spared.
Plan on using holley mounts to keep the trans located in the stock location. This is important so the driveshafts will not need to be modified.
My one hurdle, which I can't find a sticky on, is the exhaust. When I removed the engine from the 04 silverado, I kept the manifolds, y pipe, and full exhaust. While I don't want to use the muffler/tailpipe, I would like to use the manifolds and Y pipe (with converter on both sides intergrated). From what I can tell, to do so would be a very tight fit. I'm a little wary if even the manifolds will fit. (UPDATED) Informed by a a couple guys on LStruck.com that the manifolds do fit with minor clearencing;still unsure with y pipe.
Anyone with experience in the early 4by's trucks done this? Does the frame require clearancing? I really don't want headers (just another added expense). Using the stock exhaust would save a lot of fitting and cost, plus it'll keep me emissions legal. I've got no crossmembers to worry about since the engine x-member is at the front of the engine, and tranny x-member is behind the trans, under the x-fer case. Any info would be great.
Construction to begin late august/early september. Wiring being sent out mid july, and I'll be buying mounts, flywheel, and fuel pump in august.
PS EMISSIONS
From what I can tell, all new drive by wire engines do not (including mine) have an egr valve of any sort. Therefore, the only emissions equipment I can find really, is the converters on the y-pipe, and the canister attaching itself to the fuel tank. No egr, no smog pumps, not heat risers. Is that it?
Been an active follower of the LSX stuff now for quite some time. Always a lurker, however I've taken the next step and have finally begun the process of an LSX conversion.
Have been looking at an LSX swap into a second gen camaro now for quite some time. However, there is a lot of swapping of parts required to make these fit in the low hooded cars. (special low intake, different accessories, etc). I plan on swapping the car over eventually, but since I don't have any actual experience doing any of these conversions, I thought I'd make my first one extremely easy, and convert my daily driver truck to LSX technology.
1986 GMC K10 (pictures to follow). Originally equipped with your standard 350, 4 speed setup (SM465). Rides like a brick sh*t house, but its a real work truck, and has several thousand kilo's. Its what I want, its what I like, and is still in good shape, so I'd much rather convert, than just buy new.
What I bought - A wrecked 2004 silverado with a 5.3 (VIN T). I removed everything from it in my driveway, tank, engine, wiring, etc.
I plan on mating the 5.3 to my current 4 speed trans in the truck (since gear ratio is perfect, no OD required). I know of the .400 thicker flywheel I must purchase. I know the bellhousing bolts up less one bolt. Is Mcleod the only aftermarket .400 thick flywheel?
I have a tbi tank in the truck with the low pressure (15psi) pump that I plan on taking out, to put in place a walbro pump. The truck was also a single fuel line, so I plan on the vette regular. Still mistified on the plumbing though;really don't want to run rubber hose if I can avoid it.
Wiring will be outsourced to mod the original wiring harness. Already running electric fans, expense spared.
Plan on using holley mounts to keep the trans located in the stock location. This is important so the driveshafts will not need to be modified.
My one hurdle, which I can't find a sticky on, is the exhaust. When I removed the engine from the 04 silverado, I kept the manifolds, y pipe, and full exhaust. While I don't want to use the muffler/tailpipe, I would like to use the manifolds and Y pipe (with converter on both sides intergrated). From what I can tell, to do so would be a very tight fit. I'm a little wary if even the manifolds will fit. (UPDATED) Informed by a a couple guys on LStruck.com that the manifolds do fit with minor clearencing;still unsure with y pipe.
Anyone with experience in the early 4by's trucks done this? Does the frame require clearancing? I really don't want headers (just another added expense). Using the stock exhaust would save a lot of fitting and cost, plus it'll keep me emissions legal. I've got no crossmembers to worry about since the engine x-member is at the front of the engine, and tranny x-member is behind the trans, under the x-fer case. Any info would be great.
Construction to begin late august/early september. Wiring being sent out mid july, and I'll be buying mounts, flywheel, and fuel pump in august.
PS EMISSIONS
From what I can tell, all new drive by wire engines do not (including mine) have an egr valve of any sort. Therefore, the only emissions equipment I can find really, is the converters on the y-pipe, and the canister attaching itself to the fuel tank. No egr, no smog pumps, not heat risers. Is that it?
car shop inc, 1" setback mounts are what you want, not the holley ones  I'm using trailblazer SS manifolds, they fit tighter to the block so I shouldn't have any issues. Although the stock truck ones will require slight grinding on the passenger side from what I read. I used the AC delco EP-381 pump, but the walbro would work as well.
I'm doing it in my 88 suburban, if your truck is like mine, there is both a send and return fuel line on the throttle body, maybe you just missed it?
I'm using trailblazer SS manifolds, they fit tighter to the block so I shouldn't have any issues. Although the stock truck ones will require slight grinding on the passenger side from what I read. I used the AC delco EP-381 pump, but the walbro would work as well.I'm doing it in my 88 suburban, if your truck is like mine, there is both a send and return fuel line on the throttle body, maybe you just missed it?
Thread Starter
Staging Lane
Joined: Jun 2011
Posts: 64
Likes: 0
From: Sioux Lookout, Ontario
Why not the holley mounts? I need the trans and whatnot to stay where it is, setting back the engine 1" would screw that up, no?
I read good things about the 381 pump. If I can get a good price, I'll use that. Now I haven't really looked to hard at newer sending units; is it as simple as unbolting the tbi pump and bolting (with hose clamps?) to the sending unit? Then I assume a short peice of rubber hose connects the pump to the steel line of the sending unit?
No return line, only a pressure line. The second line is the evap canister line.
No the 1" setbacks put them in a similar location as the gen 1 motors sat. The car shop ones work for that chassis, that's what you need to run Do you have a picture of the throttle body with only 1 line? I know mine has two as did every other tbi truck I've ever seen. They both run along the passenger frame rail and along the exhaust manifold on up, you can see it clearly under the truck as a pair of lines.
Do you have a picture of the throttle body with only 1 line? I know mine has two as did every other tbi truck I've ever seen. They both run along the passenger frame rail and along the exhaust manifold on up, you can see it clearly under the truck as a pair of lines. Thread Starter
Staging Lane
Joined: Jun 2011
Posts: 64
Likes: 0
From: Sioux Lookout, Ontario
Didn't quite get what you meant. Throttle body from the tbi or throttle body from the 5.3? I'm assuming since you mentioned tbi, you meant the tbi body. The truck is/ and has always been carbed. I did run a homemade tbi system that I fabbed up over the winter for a couple months, but have gone back to carb for the time being. The truck does have a feed line, return line and a vapor line already running, as the mechanical fuel pump had a return built into it.
In case you're wondering, I decided to ditch tbi due to cost. The system setup was less than 200, but to buy a programmer/chip burner, etc would have run another 3-400, and I would still have an antique system with limited potential. This was approaching (what I figured) the cost of an LS swap. While more money for LS, the benefits would be greater, with a better engine response, more power, better fuel economy, etc. I figured why dump almost a grand into a well rounded tbi system when I could get the LS engine and setup for slightly more.
In case you're wondering, I decided to ditch tbi due to cost. The system setup was less than 200, but to buy a programmer/chip burner, etc would have run another 3-400, and I would still have an antique system with limited potential. This was approaching (what I figured) the cost of an LS swap. While more money for LS, the benefits would be greater, with a better engine response, more power, better fuel economy, etc. I figured why dump almost a grand into a well rounded tbi system when I could get the LS engine and setup for slightly more.
Thread Starter
Staging Lane
Joined: Jun 2011
Posts: 64
Likes: 0
From: Sioux Lookout, Ontario
Been quite a while since I've posted last, but I've come a long way in short order. Pictures to follow in following posts.
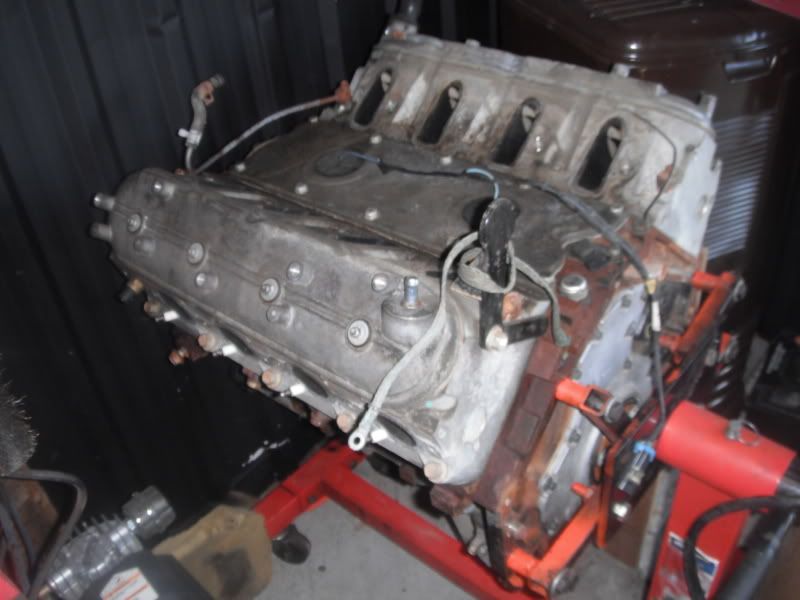
I got the 5.3 removed from a wrecked silverado sold to me from a local dealership. Everything was stripped that was able, and a lot was sold off to help off-set the cost of the build. Cost of the entire truck was $900, and I've pretty well made all that back selling off little tidbit parts, like exhaust, electrical peices, etc.
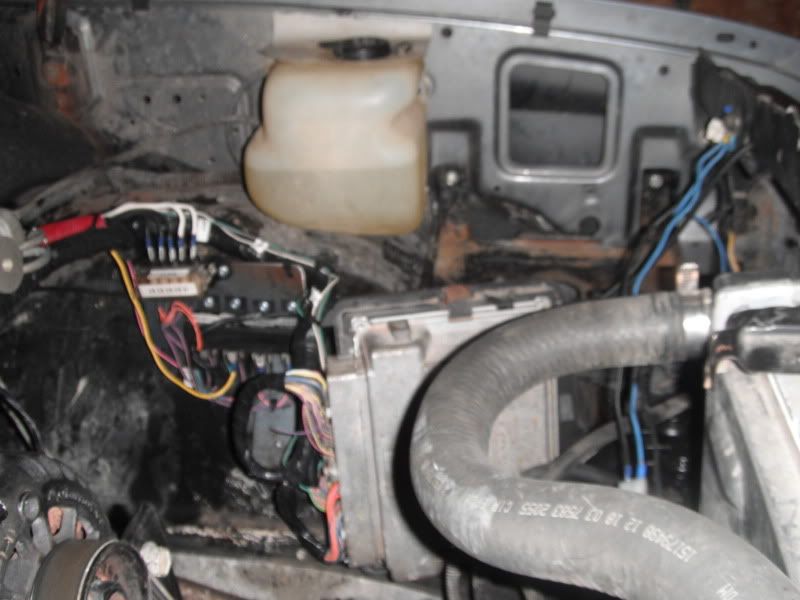
I took the complete wiring harness out of the truck, unhooking and labelling as I went through it. I did not cut anything unless I knew for sure it would not affect the engine running (ie airbags. power windows, lights, wipers, etc). I made sure to grab the gas pedal and tach module with associated wiring as well, since this is a Drive by Wire engine. The complete wiring harness was sent to Blake at http://www.lsx-harness.com/
He went through it cut everything down to a 3 wire hookup, labeled everything and altered the ECM for me. It was sent back in very short order. Only issue I had was a mixup in the communication; wiring and ECM was set up for an automatic, and I'm running a manual, so it threw codes left right and center. I contacted Blake, and he was more than happy to make it right for me at no cost. Very happy customer you could say.
Next major item was the flywheel. I found a Sachs NFW1050 online shipped to my door for $100. It's a generic replacement for a 2005 2500HD with a 6.0, and is almost the .400 thick required to work. Had to purchase new flywheel and clutch bolts from GM. Both are metric, however the flywheel bolts are not reusable (see torque to yeild). I understand ARP also makes a set for cheaper than GM and are reusable.
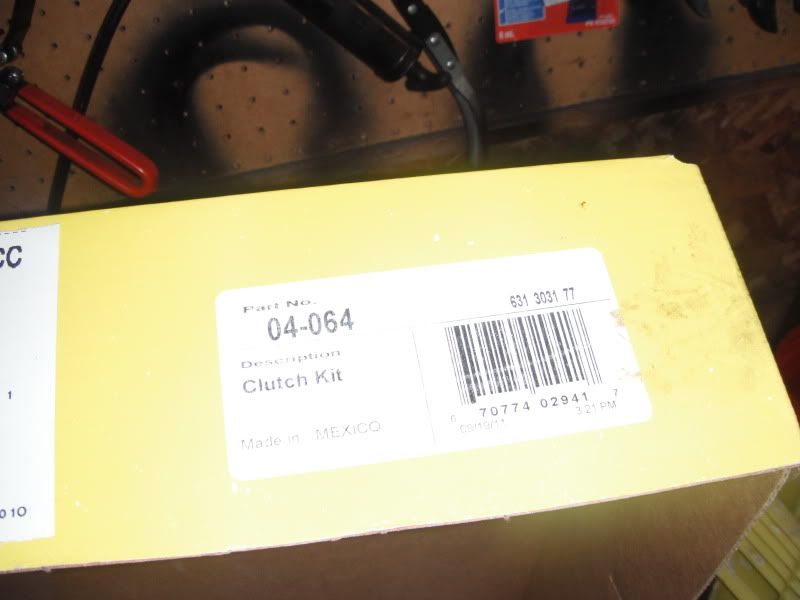
Clutch used was a Luk replacement for an 86 1 ton truck. Its a 12" clutch (disk measured 11 13/16th). Made to fit 10 spline 1 1/8 inch shift, complete with new throwout bearing and pilot bearing (pilot could not be used). Fitting the clutch on the flywheel revealed that the center portion of the flywheel is cut out more than a standard small block chevy, so less of the inner portion of the disk made contact with the flywheel.
However, after receiving this, I discoverd that the 2005HD chevy also had a transmission with the same 1 1/8 inch clutch, made to work on this flywheel (also 12" clutch). Had I known this, I would have went with this option instead, since its made to work this way from GM. To date, I haven't had any slip issues whatsoever with the Luk clutch. Conversations with Gary68, who has used the same flywheel with smaller clutches, claims to have no issues with a small clutch disk (less surface area making contact again), so I don't expect any. Side note; 2005 clutch is almost twice the price as the 86 Luk clutch
Pilot bearing had to be used from the same 2005HD truck, which sits on the outside of the crank so to properly support the input shaft of the transmission.
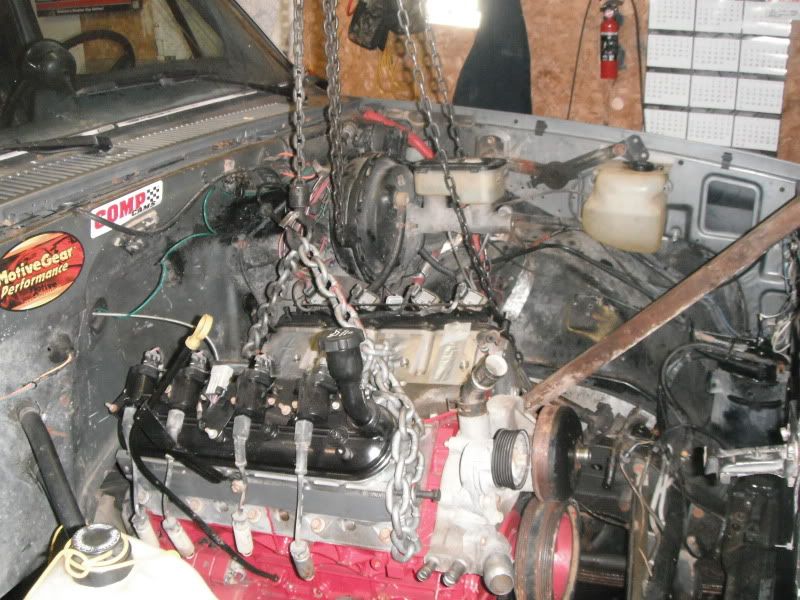
Motor mounts were from dirty dingo, and were specific for my truck. They fit absolutely perfect. Adjustibility is nice. Never had to move my trans or x-fer at all.
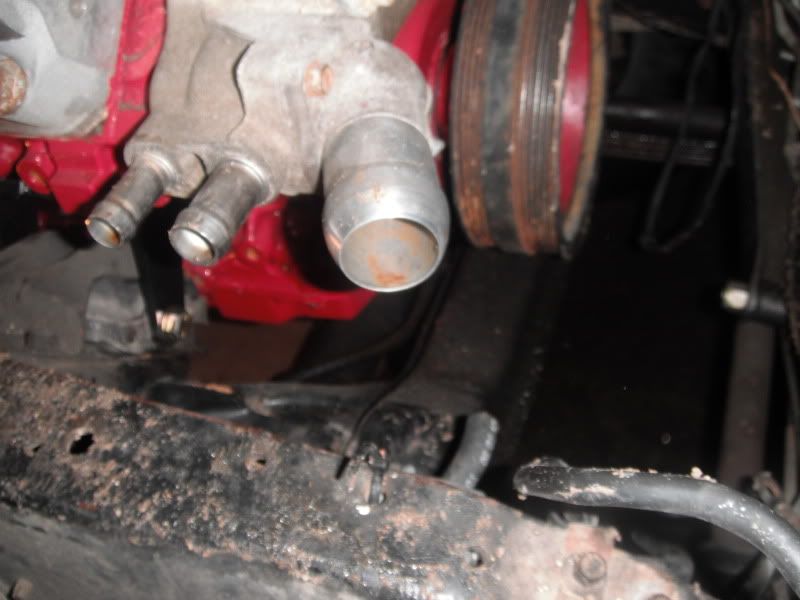
Cooling and front accessories were stock for the engine. Used my 86 Radiator, which has an inlet for a heater hose from the heater core. I used a 4" peice of heater hose with a 3/8th to 1/4" barb to connect the steam vent hose to. The 2004 silverado has a crossover upper coolant hose which allows usage of a old fashion radiator with a drivers side outlet.
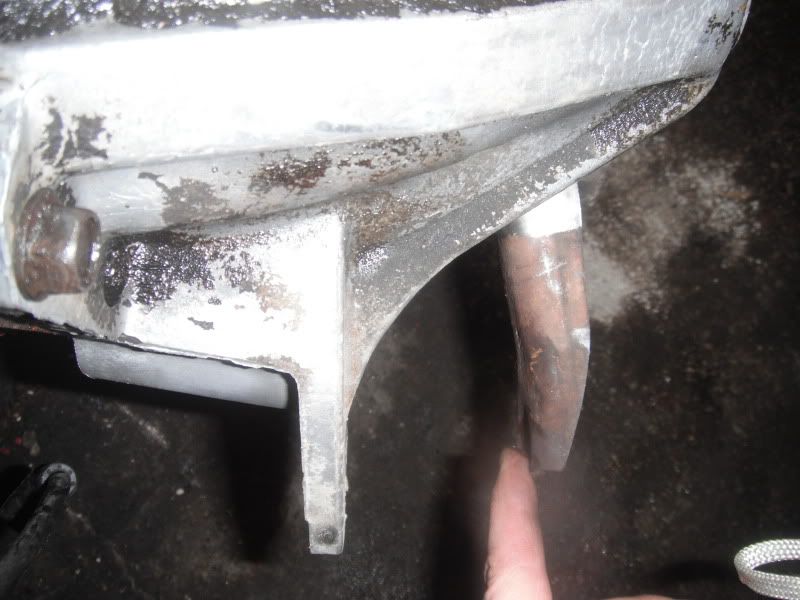
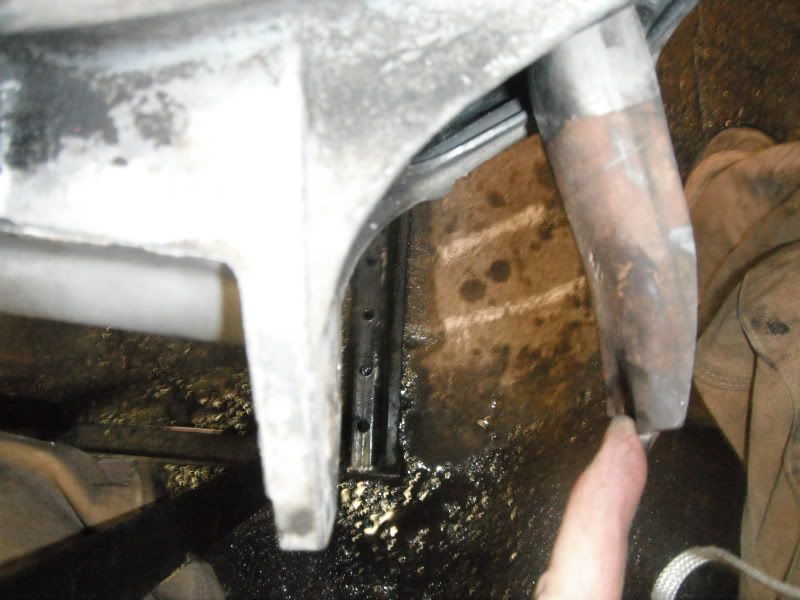
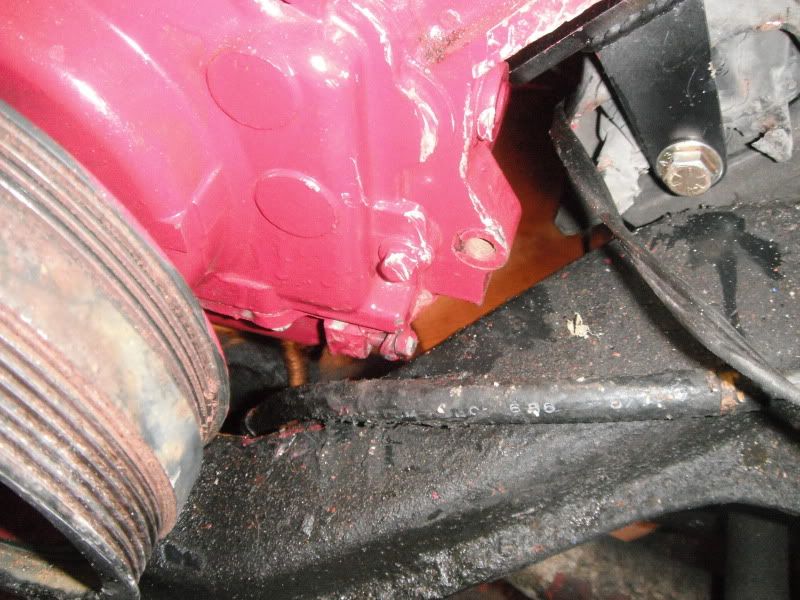
Exhaust. I wanted originally to use stock truck manifolds with the Y-pipe. However, there is no way in a 4x4 truck the Y pipe would fit due to the front drivershaft existing on the passenger side in the K trucks. I was able to use the manifolds. They fit tight, and only had to make a small clearence cut on the bottom of the drivers rail that would allow the exhaust to turn away slightly (towards trans). By little, I mean about 1/4" deep, 4" in length. I used a scrap Y-pipe to connect to the manifolds. I cut about 3 inches below the O2 bung on the Y-pipe and built off of them when installed in the truck.
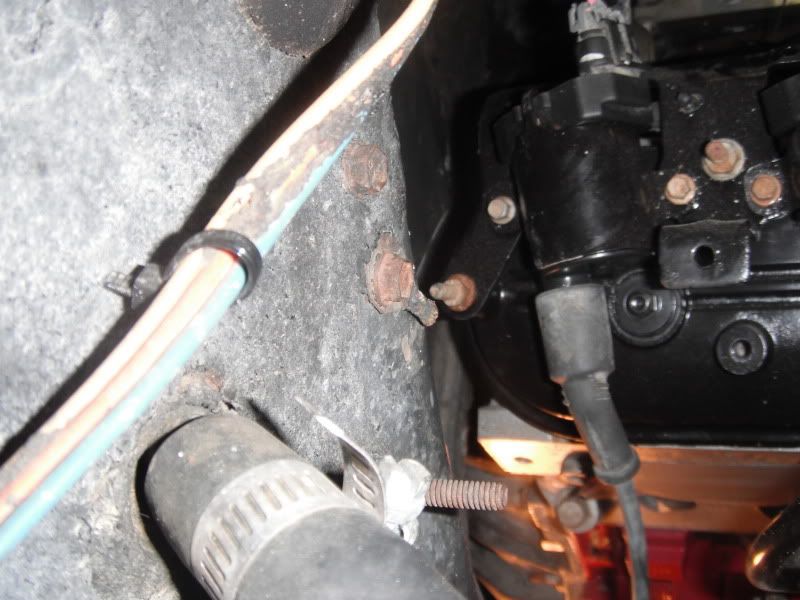
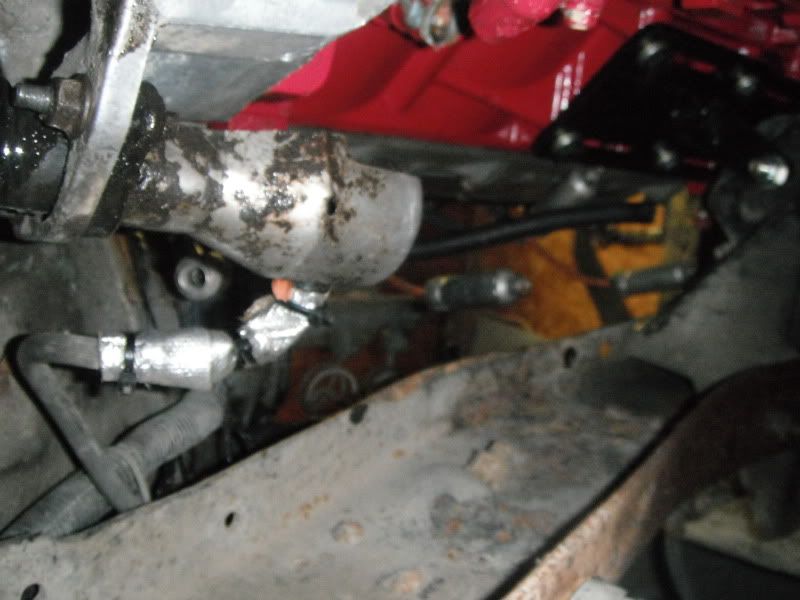
The only major issue I had was with the hydraulic clutch. The drivers exhaust pointed directly at the slave cylinder. The clutch line was directly in line with the exhaust. I allievate this, I turned the slave cylinder upside down so the bleed nipple pointed down. I took off the heat shield and moved it to the opposite side so it would provide so protection from exhaust heat. This caused the hydraulic line to become way to short. I spliced into the metal portion of the line with 2 unions, and made the steel portion another 10" longer. This allowed me more room to manouver and bend the line for ample clearance. For overkill, I wrapped the exhaust in header wrap, even though there is at least 1" of clearance all around.
Can't think of anything else right now. Time for pictures.
I got the 5.3 removed from a wrecked silverado sold to me from a local dealership. Everything was stripped that was able, and a lot was sold off to help off-set the cost of the build. Cost of the entire truck was $900, and I've pretty well made all that back selling off little tidbit parts, like exhaust, electrical peices, etc.
I took the complete wiring harness out of the truck, unhooking and labelling as I went through it. I did not cut anything unless I knew for sure it would not affect the engine running (ie airbags. power windows, lights, wipers, etc). I made sure to grab the gas pedal and tach module with associated wiring as well, since this is a Drive by Wire engine. The complete wiring harness was sent to Blake at http://www.lsx-harness.com/
He went through it cut everything down to a 3 wire hookup, labeled everything and altered the ECM for me. It was sent back in very short order. Only issue I had was a mixup in the communication; wiring and ECM was set up for an automatic, and I'm running a manual, so it threw codes left right and center. I contacted Blake, and he was more than happy to make it right for me at no cost. Very happy customer you could say.
Next major item was the flywheel. I found a Sachs NFW1050 online shipped to my door for $100. It's a generic replacement for a 2005 2500HD with a 6.0, and is almost the .400 thick required to work. Had to purchase new flywheel and clutch bolts from GM. Both are metric, however the flywheel bolts are not reusable (see torque to yeild). I understand ARP also makes a set for cheaper than GM and are reusable.
Clutch used was a Luk replacement for an 86 1 ton truck. Its a 12" clutch (disk measured 11 13/16th). Made to fit 10 spline 1 1/8 inch shift, complete with new throwout bearing and pilot bearing (pilot could not be used). Fitting the clutch on the flywheel revealed that the center portion of the flywheel is cut out more than a standard small block chevy, so less of the inner portion of the disk made contact with the flywheel.
However, after receiving this, I discoverd that the 2005HD chevy also had a transmission with the same 1 1/8 inch clutch, made to work on this flywheel (also 12" clutch). Had I known this, I would have went with this option instead, since its made to work this way from GM. To date, I haven't had any slip issues whatsoever with the Luk clutch. Conversations with Gary68, who has used the same flywheel with smaller clutches, claims to have no issues with a small clutch disk (less surface area making contact again), so I don't expect any. Side note; 2005 clutch is almost twice the price as the 86 Luk clutch
Pilot bearing had to be used from the same 2005HD truck, which sits on the outside of the crank so to properly support the input shaft of the transmission.
Motor mounts were from dirty dingo, and were specific for my truck. They fit absolutely perfect. Adjustibility is nice. Never had to move my trans or x-fer at all.
Cooling and front accessories were stock for the engine. Used my 86 Radiator, which has an inlet for a heater hose from the heater core. I used a 4" peice of heater hose with a 3/8th to 1/4" barb to connect the steam vent hose to. The 2004 silverado has a crossover upper coolant hose which allows usage of a old fashion radiator with a drivers side outlet.
Exhaust. I wanted originally to use stock truck manifolds with the Y-pipe. However, there is no way in a 4x4 truck the Y pipe would fit due to the front drivershaft existing on the passenger side in the K trucks. I was able to use the manifolds. They fit tight, and only had to make a small clearence cut on the bottom of the drivers rail that would allow the exhaust to turn away slightly (towards trans). By little, I mean about 1/4" deep, 4" in length. I used a scrap Y-pipe to connect to the manifolds. I cut about 3 inches below the O2 bung on the Y-pipe and built off of them when installed in the truck.
The only major issue I had was with the hydraulic clutch. The drivers exhaust pointed directly at the slave cylinder. The clutch line was directly in line with the exhaust. I allievate this, I turned the slave cylinder upside down so the bleed nipple pointed down. I took off the heat shield and moved it to the opposite side so it would provide so protection from exhaust heat. This caused the hydraulic line to become way to short. I spliced into the metal portion of the line with 2 unions, and made the steel portion another 10" longer. This allowed me more room to manouver and bend the line for ample clearance. For overkill, I wrapped the exhaust in header wrap, even though there is at least 1" of clearance all around.
Can't think of anything else right now. Time for pictures.
Trending Topics
Thread Starter
Staging Lane
Joined: Jun 2011
Posts: 64
Likes: 0
From: Sioux Lookout, Ontario
This is what I started with
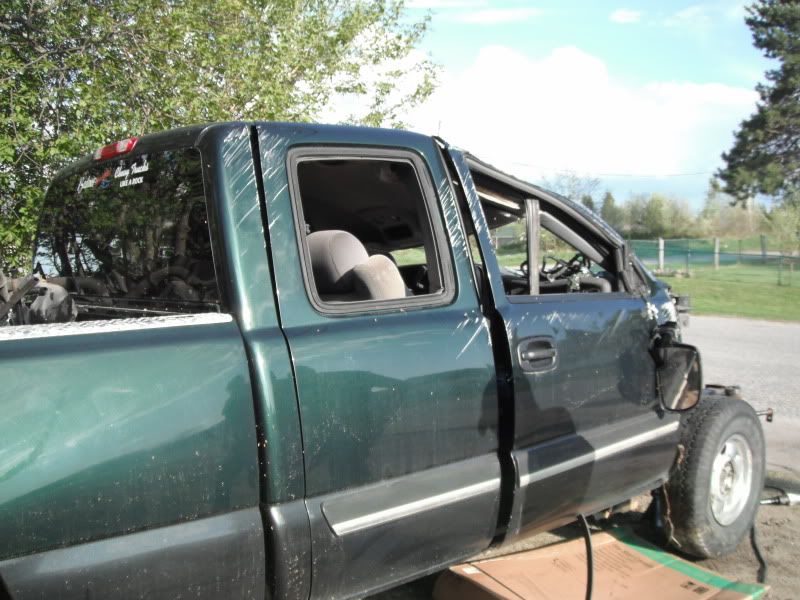
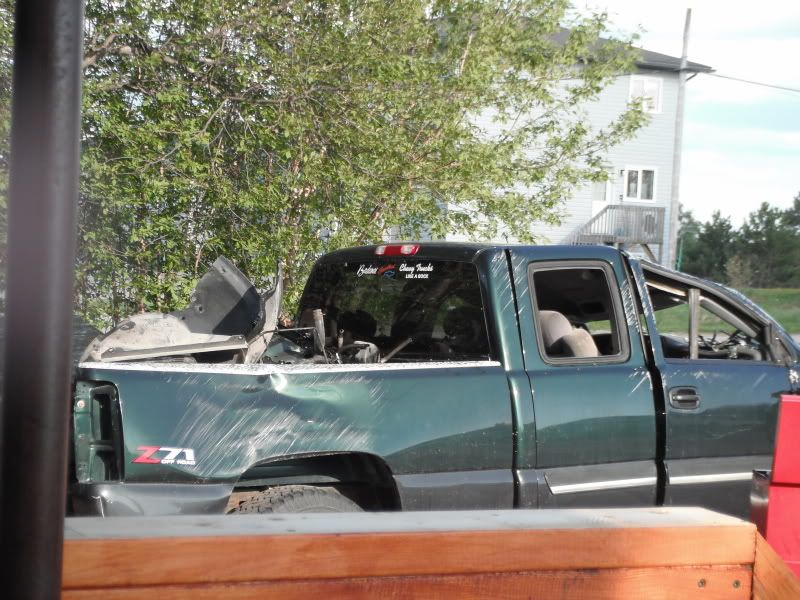
Its actually harder to disassemble a wrecked/damaged vehicle than you'd think.
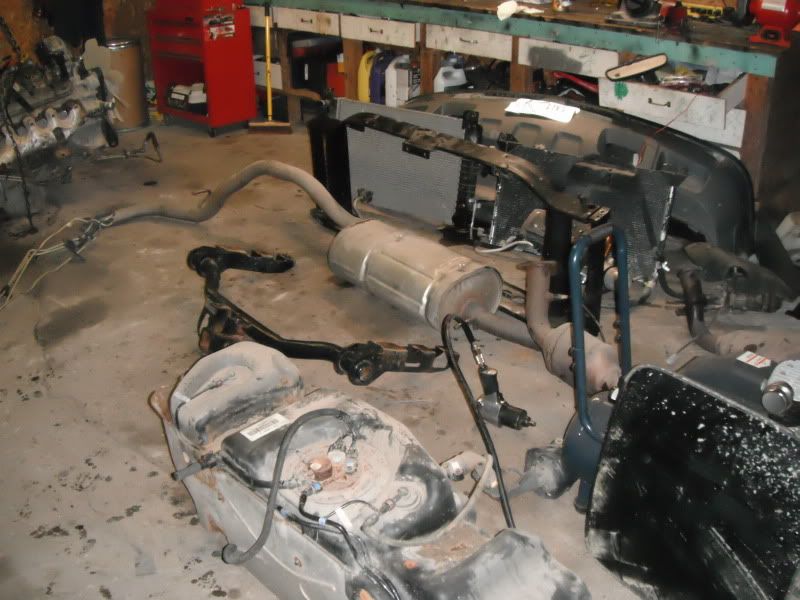
Parts sold to help offset cost.

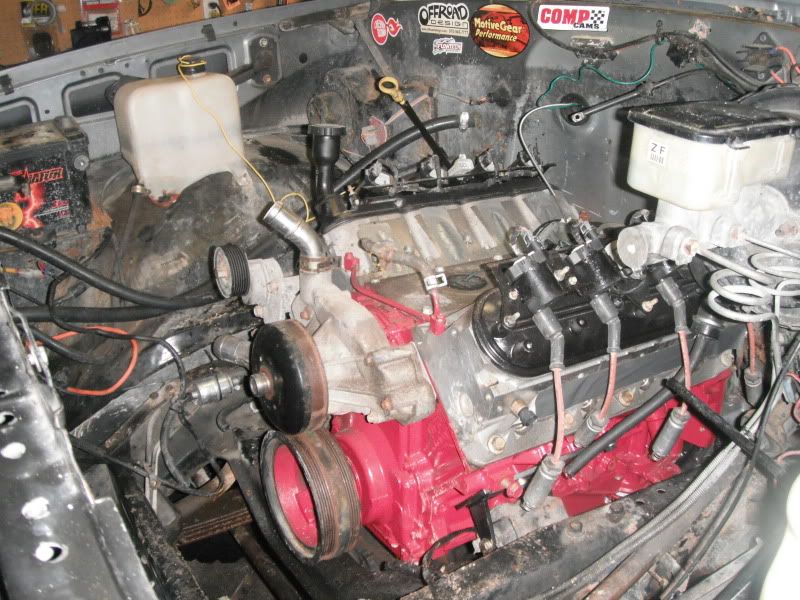
This is where it will end up.

Loyal and faithful, the rebuilt 350 has years of use and abuse, ready now for retirement.
Its actually harder to disassemble a wrecked/damaged vehicle than you'd think.
Parts sold to help offset cost.
This is where it will end up.
Loyal and faithful, the rebuilt 350 has years of use and abuse, ready now for retirement.
LS1 Tech Stories
The Best V8 Stories One Small Block at Time

6 Common C5 Corvette Failures and What's Involved In Repairing Them
Pouria Savadkouei
Retro Modern Bandit Pontiac Trans AM Comes With Burt Reynolds' Autograph
Verdad Gallardo
Top 10 Greatest Cadillac V Series Performance Models Ever, Ranked
Pouria Savadkouei
Top 10 Most Powerful Chevy Trucks Ever Made!

Hennessey's New Supercharged Silverado ZR2 Has 700 HP
Verdad Gallardo
Coachbuilt N2A Anteros Is an LS2-Powered C6 Corvette In Italian Clothes
Verdad Gallardo
Awesome K5 Blazer Restomod Comes With C7 Corvette Power
Verdad Gallardo
10 Camaros You Should Never Buy

10 LS Engine Myths That Refuse to Die
Verdad Gallardo Thread Starter
Staging Lane
Joined: Jun 2011
Posts: 64
Likes: 0
From: Sioux Lookout, Ontario
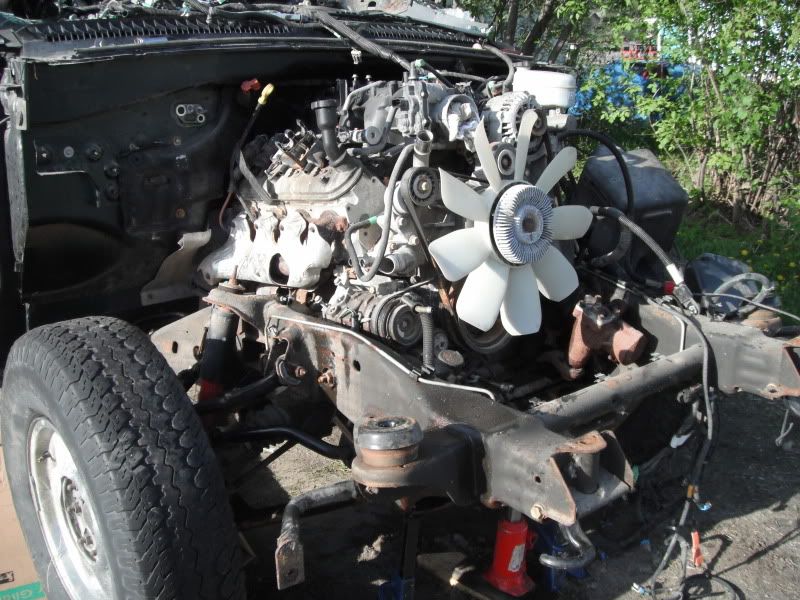
Out and stripped down
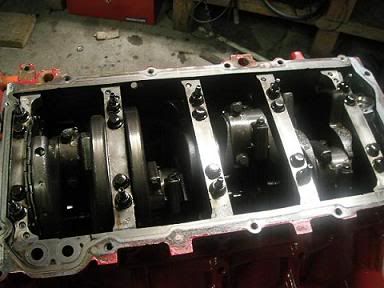
Because the truck was involved in a rollover, I couldn't really press on unless I knew there was no damage. What bothered me was the truck behind upside down, hence no oil pressure. While I would think a modern vehicle would have some sort of rollover protection that would shut down the vehicle (I believe they do?), I checked bearings just to make sure.
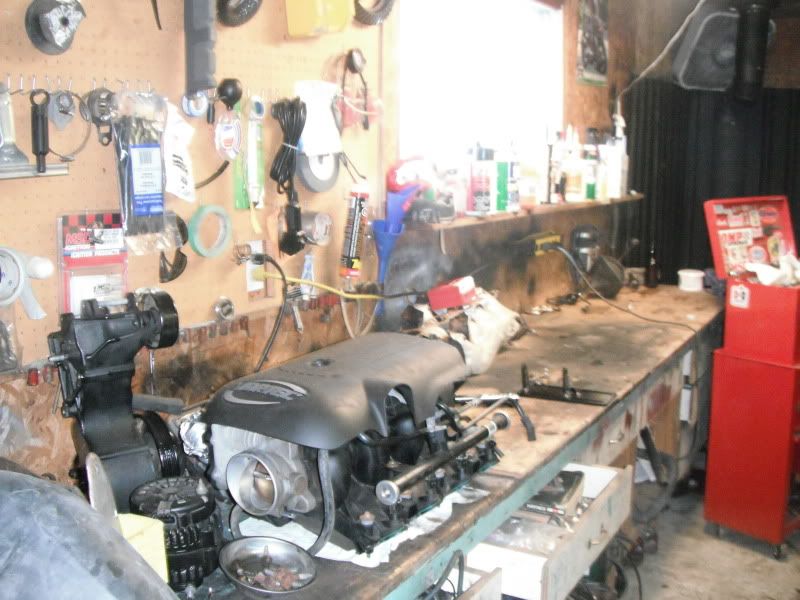
Very little wear. Not the damage I was expecting to see (better than expected). Reinstalled as is. Was told by the local dealer there was somewhere between 60 and 75000 kms on the engine, although I couldn't verify that. Just to be sure I built a test stand and ran the engine for several hours and various settings just to be sure.
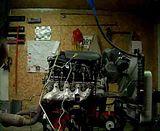
Click to watch
Because the truck was involved in a rollover, I couldn't really press on unless I knew there was no damage. What bothered me was the truck behind upside down, hence no oil pressure. While I would think a modern vehicle would have some sort of rollover protection that would shut down the vehicle (I believe they do?), I checked bearings just to make sure.
Very little wear. Not the damage I was expecting to see (better than expected). Reinstalled as is. Was told by the local dealer there was somewhere between 60 and 75000 kms on the engine, although I couldn't verify that. Just to be sure I built a test stand and ran the engine for several hours and various settings just to be sure.
Click to watch
Thread Starter
Staging Lane
Joined: Jun 2011
Posts: 64
Likes: 0
From: Sioux Lookout, Ontario
So, middle of January, -30C, decided this was a good time to undertake this project. Small, cozy garage, and the process began.
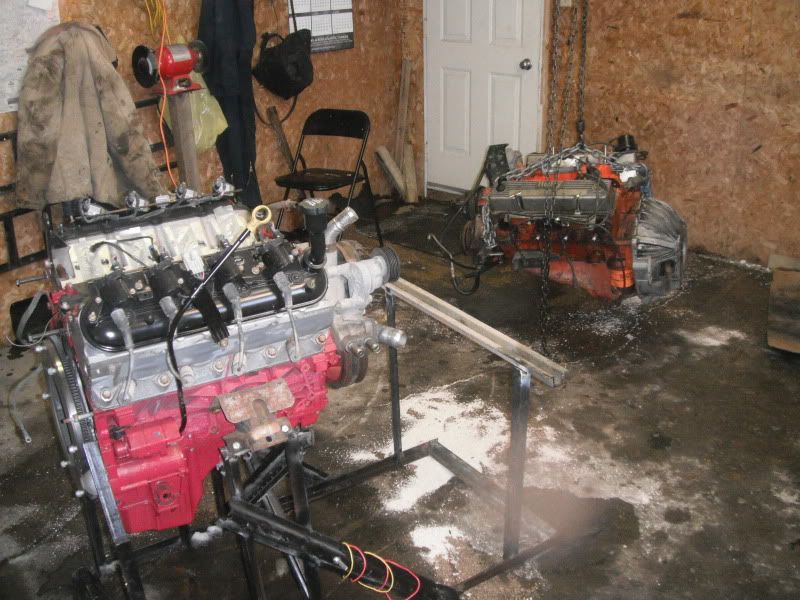
Here they are out and together.

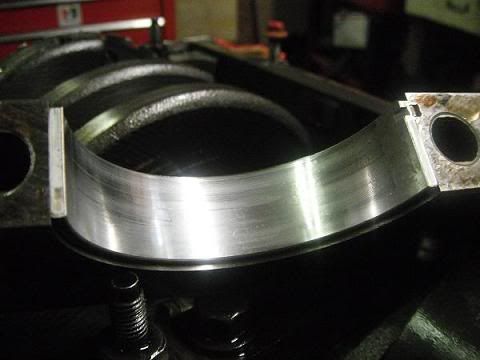
This was my concern about the new flywheel with the old style clutch. The center of this style flywheel is cut out more in the center. Didn't measure, but I'd say about an inch more so than you're standard sbc flywheel.
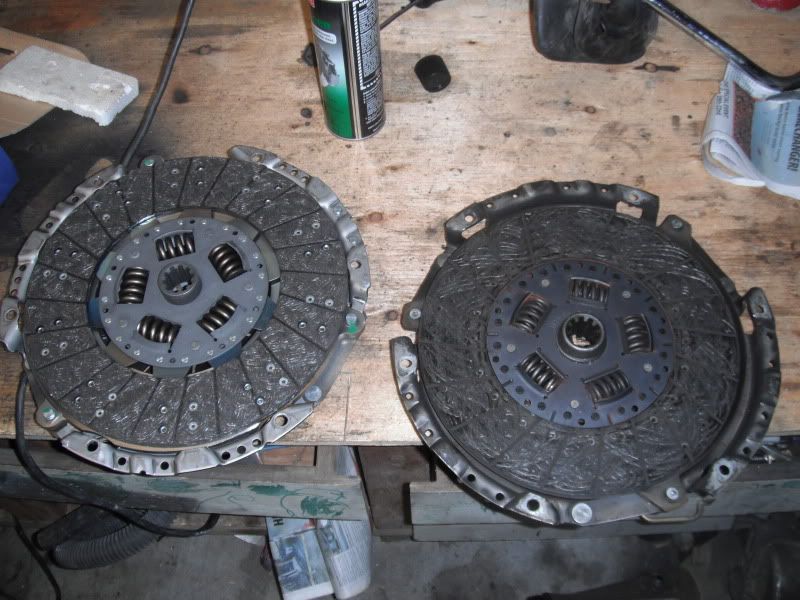
Old clutch vs new. Old was actually only 11" and always held good. Almost no sign of wear, other than dirt/grime.
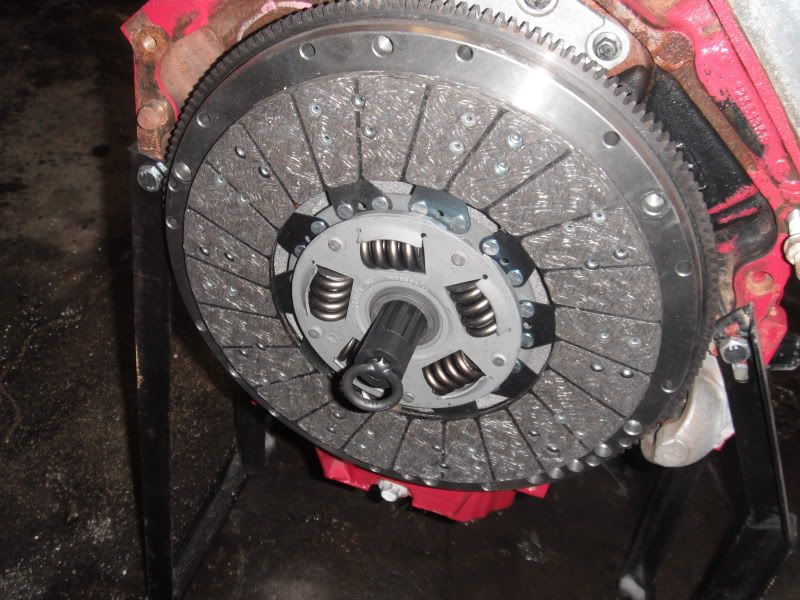
New old style Luk clutch on flywheel
Here they are out and together.
This was my concern about the new flywheel with the old style clutch. The center of this style flywheel is cut out more in the center. Didn't measure, but I'd say about an inch more so than you're standard sbc flywheel.
Old clutch vs new. Old was actually only 11" and always held good. Almost no sign of wear, other than dirt/grime.
New old style Luk clutch on flywheel
Thread Starter
Staging Lane
Joined: Jun 2011
Posts: 64
Likes: 0
From: Sioux Lookout, Ontario
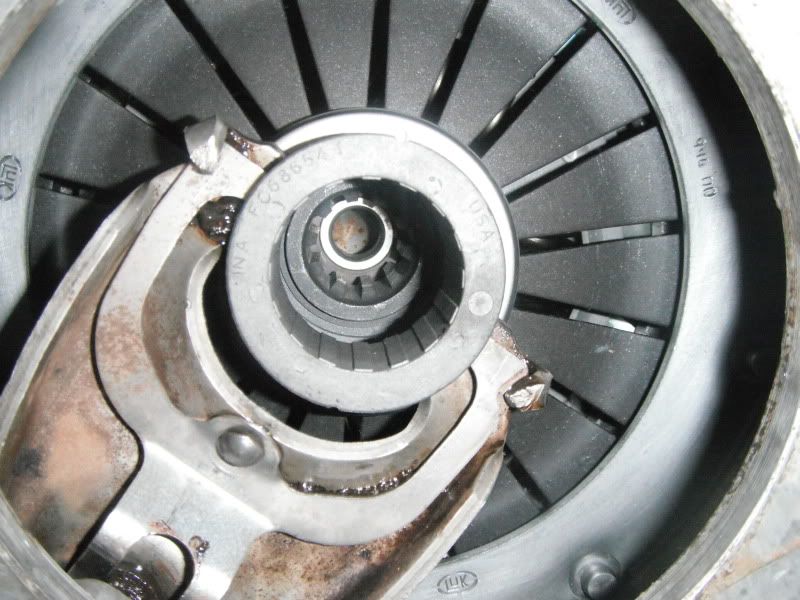
On disassembly of the sbc clutch assembly, I noticed the sbc was much thicker than what I have ever seen. It was even thicker than the NFW1050 flywheel I had purchased for the 5.3. Combined with the flange on the sbc sticking out further, and the thick flywheel, I was concerned the new flywheel on the LS would not let the clutch fork operate properly. This first picture is installed on the Small block, as it came of. I'm only appling enough pressure to keep the throwout bearing on the fingers of the pressure plate.
Now installed on the 5.3 with the flywheel and new clutch installed.
There is a good 3/4 inch or more of deflection right off the bat. I was concerned there wouldn't be enough leverage left to actuate the clutch before the fork hit the bellhousing. Aftermarket parts are 2 weeks away at minimum, or I would have ordered an aftermarket, adjustable pivot ball. This would help to reset the fork and correct the geometry. However, this is my daily driver, and I pushed through and tried it was it was. The stock slave cylinder does not have enough stroke to release the clutch completely. I fabbed a small extention to fit over the slave cylinder rod to give it an extra 1/2" length. Its working for the time being, but its right on the edge of working and failing.


Thread Starter
Staging Lane
Joined: Jun 2011
Posts: 64
Likes: 0
From: Sioux Lookout, Ontario

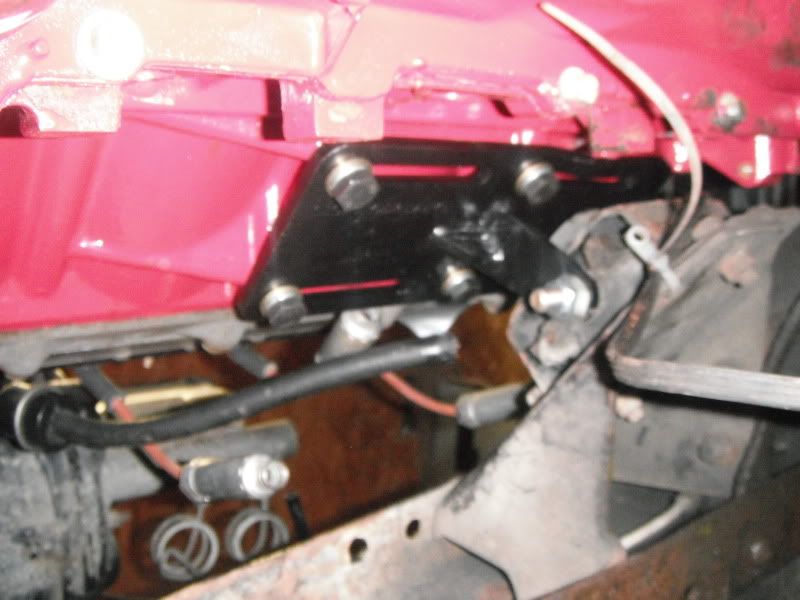
Did not have to cut or alter the front crossmember whatsoever. Was close, but there is at least 1/2" clearence or more all the way around. Engine was set back on the mounts as far as the dingo mounts would allow.
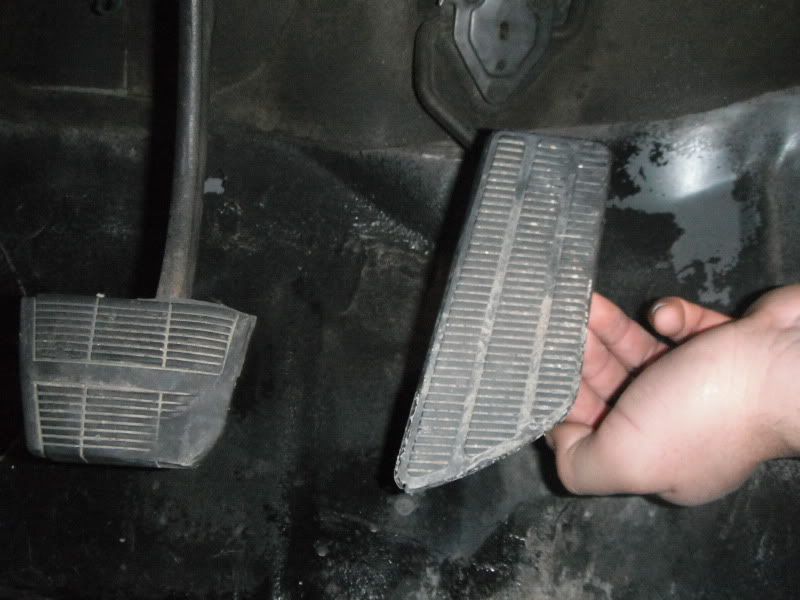
Old pedal
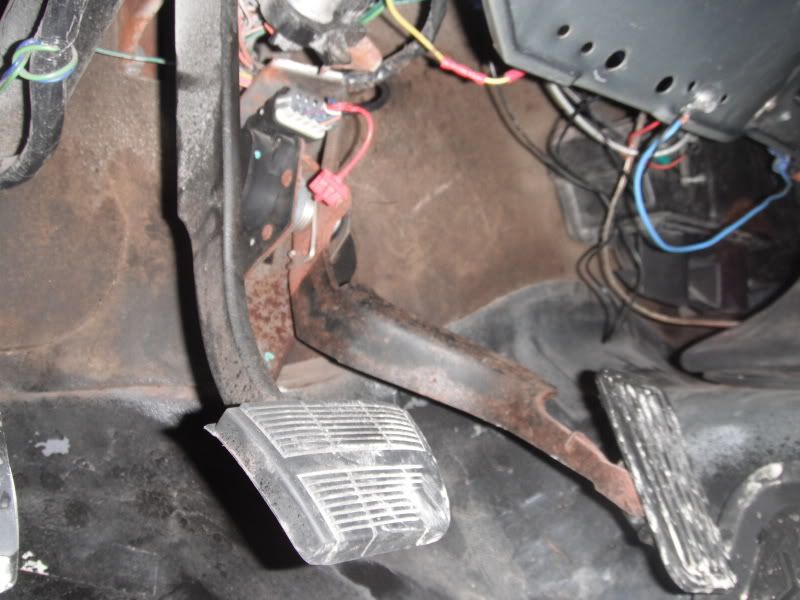
New pedal. Sits a little to far out for my liking. May alter this later.
Thread Starter
Staging Lane
Joined: Jun 2011
Posts: 64
Likes: 0
From: Sioux Lookout, Ontario
Completion
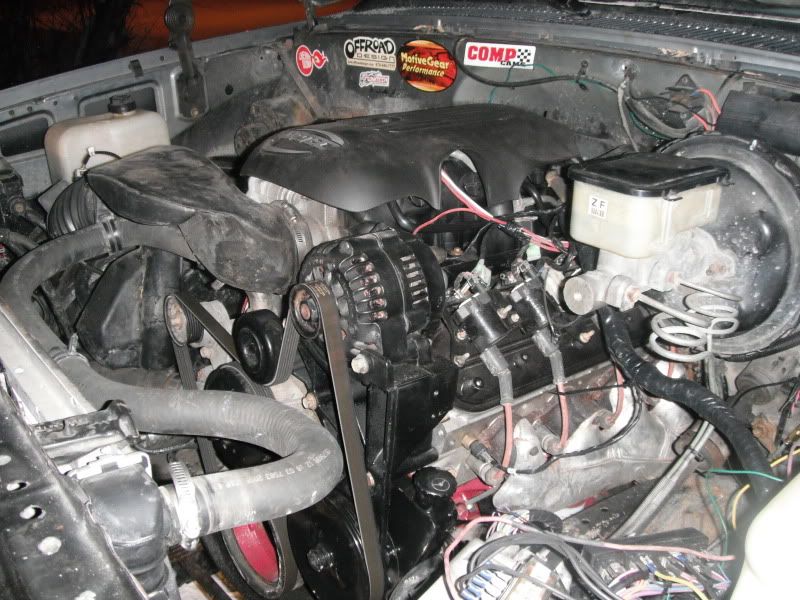

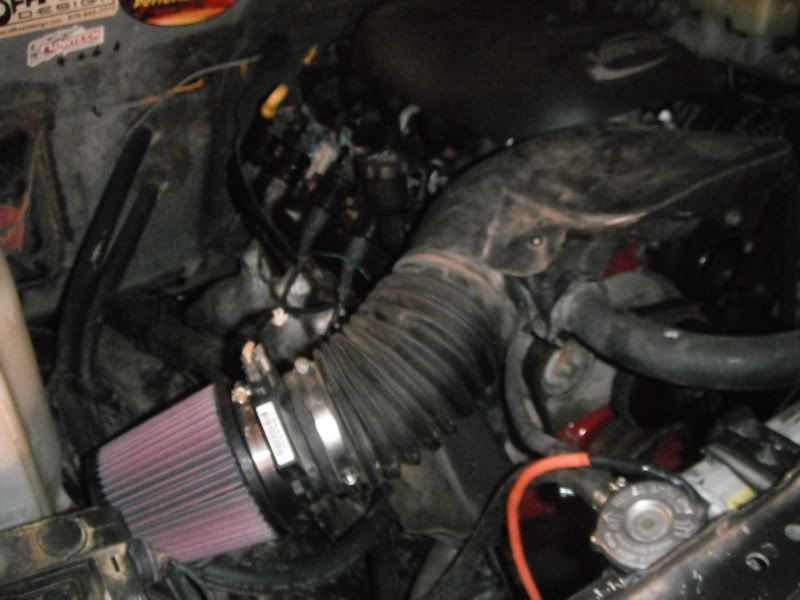
Done and done. Driven now for 3 days. Extremely happy with the results. More power than any small block I have ever driven. IMMEDIATE throttle response. Quiet, easy starting, super smooth. Love it.
Done and done. Driven now for 3 days. Extremely happy with the results. More power than any small block I have ever driven. IMMEDIATE throttle response. Quiet, easy starting, super smooth. Love it.

Registered User
Joined: Jan 2012
Posts: 2
Likes: 0
From: san juan tx
Hi, Dothedew ur set up looks good. I have a '86 k5 blazer that im going to do after i finish the cam swap on my ls motor. i have a ? for u where did u get the motor mounts for ur swap? Those mounts r cool looking..
Thread Starter
Staging Lane
Joined: Jun 2011
Posts: 64
Likes: 0
From: Sioux Lookout, Ontario
The mounts are specific to those year trucks, different again for 4x4's. Made it very easy to install and adjust.
Thread Starter
Staging Lane
Joined: Jun 2011
Posts: 64
Likes: 0
From: Sioux Lookout, Ontario
Couple of points I forget to add.
-Fuel system. I used the stock saddle tanks. Only one is functioning right now, I have to replace the other leaking one. I used the tbi sending unit (from 87 newer trucks), and bolted in place a walbro 255lph pump. Used high pressure hose to connect the pump to the sending unit with 4 clamps (see overkill). Again, high pressure rubber hose used to connect the sending unit to the frame rails, where I mounted the corvette regulator. I wanted to use nylon line, but due to time contraints I couldn't be bothered. I will swap over to nylon in the spring. For protection, I encased the rubber lines in corogated plastic wire loom. I bypassed the tank switching valve for the time being, since I don't have a high pressure valve yet. This will be added later, and lines connected as needed.
I mounted the regulator on the crossmember just behind the cab crossing side to side. There is a 2 or 3" recess in the rail, which I tucked it up into. I then built a small shield to prevent anything from damaging it. There was room on the frame rails, but it would have been quite tight to fit, espically with the switching valve right there in the way. I like this setup better. I used quick connect repair peices from dorman to connect feed and return to the regulator. This engine is a single line unit, so I used the fuel rail from the 04 silverado and made it snug up along the drivers side rail (inside c channel) with isolation clamps. There is a pivot rubber peice about 2/3's of the way down that made an easy 90 degree bend, that follows the bellhousing up to the back of the intake manifold. Very happy with it.
Also, for mounting the bellhousing to the new LS block. I took measurements, and found the input center of the shaft to be out of tolerance. I expected this, since the bellhousing is from 1986, and engine from 2004, chances are everything won't line up. Input center was 14 out of round (7 when divided by 2). Pretty close to the 5 that is suppose to be required. Some say 10 is allowed, but I prefer not to do this again, so I used mcleod adjustable dowel pins to dial in within the 5 required.


Thread Starter
Staging Lane
Joined: Jun 2011
Posts: 64
Likes: 0
From: Sioux Lookout, Ontario
Update to date
Been driving the truck daily since the swap. Fuel mileage has been a huge gain. Keep in mind I drive primarily in town, less than 5-10 minutes everywhere I go. With the carb'ed SBC, the choke was always pulled (manual), since the engine was only getting warm when I got to where I was going. I used to go through 20 gallons of fuel about every two weeks. I've made that same 20 gallons last a full 3 weeks now, with a lot more driving than I would normally do.
Cold start is incredible. At least in comparison to the carburated counterpart, maybe less so for someone who has had fuel injection for the last 20 years Instant, everytime, predicable.
Torque is just nuts. From off idle, all the way to redline, espically in the 2000rpm and up region. I had a previous carb leaned out so bad, that if I dropped the clutch early, it would buck and shutter unless the foot feed was properly fed to match load. Now, I can pop the clutch without even touching the foot feed, and it'll just lug along (within reason).
Noise. Engine noise. Way less. The old engine exhaust consisted of headers, about 3 feet of straight pipe and mufflers that exited beneath the bed (no tailpipes, fell off long ago), holes every 18" or so. With the new engine (change in firing order?), the same setup is much, much quieter. Get on it and it will make all the racket you want, but in comparison to a SBC, noise is dramatically less. Now that I have a proper exhaust, its almost as silent going down the road as a newer vehicle....almost. I can hear tire noise now; something I haven't heard since I owned the truck.
DTC lights. Only one that I've gotten a couple times is for MAF malfunctions. I find I set it off if I get on the gas hard just after a cold start. Once the engine is up to temp, it doesn't set it off. A few key cycles, the ecm deletes the code and light extinguishes. Go figure.
Still haven't hooked up a temp sensor for coolant to the old 86 truck guage. I don't want to wreck a cylinder head to fit the old style sensor, so I'm trying to find someone who can cut down an old sensor to the 12mmx1.5, so it would fit the cylinder head as is.
Still don't have VSS either, seems to drive ok without it for now. I do notice on deceleration that the exhaust pops lean; guessing this is from lack of vss input. Looking at the dakota digital plug in speedo drive. I will have to have the ecm changed from 40 pulse to 80 pulse to match the dakota vss, then it should work properly. Hoping cruise control will work with this, still unsure of that though.
Will wait until summer time when I can drive my bike while I send out the ecm to have it changed. May check with local gm dealer, see if their diagnostic equipment can make the same type of changes, or if its only aftermarket programmers that can do it.
Been driving the truck daily since the swap. Fuel mileage has been a huge gain. Keep in mind I drive primarily in town, less than 5-10 minutes everywhere I go. With the carb'ed SBC, the choke was always pulled (manual), since the engine was only getting warm when I got to where I was going. I used to go through 20 gallons of fuel about every two weeks. I've made that same 20 gallons last a full 3 weeks now, with a lot more driving than I would normally do.
Cold start is incredible. At least in comparison to the carburated counterpart, maybe less so for someone who has had fuel injection for the last 20 years
Instant, everytime, predicable.Torque is just nuts. From off idle, all the way to redline, espically in the 2000rpm and up region. I had a previous carb leaned out so bad, that if I dropped the clutch early, it would buck and shutter unless the foot feed was properly fed to match load. Now, I can pop the clutch without even touching the foot feed, and it'll just lug along (within reason).
Noise. Engine noise. Way less. The old engine exhaust consisted of headers, about 3 feet of straight pipe and mufflers that exited beneath the bed (no tailpipes, fell off long ago), holes every 18" or so. With the new engine (change in firing order?), the same setup is much, much quieter. Get on it and it will make all the racket you want, but in comparison to a SBC, noise is dramatically less. Now that I have a proper exhaust, its almost as silent going down the road as a newer vehicle....almost. I can hear tire noise now; something I haven't heard since I owned the truck.
DTC lights. Only one that I've gotten a couple times is for MAF malfunctions. I find I set it off if I get on the gas hard just after a cold start. Once the engine is up to temp, it doesn't set it off. A few key cycles, the ecm deletes the code and light extinguishes. Go figure.
Still haven't hooked up a temp sensor for coolant to the old 86 truck guage. I don't want to wreck a cylinder head to fit the old style sensor, so I'm trying to find someone who can cut down an old sensor to the 12mmx1.5, so it would fit the cylinder head as is.
Still don't have VSS either, seems to drive ok without it for now. I do notice on deceleration that the exhaust pops lean; guessing this is from lack of vss input. Looking at the dakota digital plug in speedo drive. I will have to have the ecm changed from 40 pulse to 80 pulse to match the dakota vss, then it should work properly. Hoping cruise control will work with this, still unsure of that though.
Will wait until summer time when I can drive my bike while I send out the ecm to have it changed. May check with local gm dealer, see if their diagnostic equipment can make the same type of changes, or if its only aftermarket programmers that can do it.