

LQ4 into a 79' Malibu
 07-20-2011 | 10:16 PM
#1
Hello all I've been on the forum for a couple years and decided to finally post up my build thread. I am an apprentice technician at a local Chevrolet dealership, so trying to find motivation, and time to put the car together has come in spurts. So progress may not happen for a couple days to a month at times.
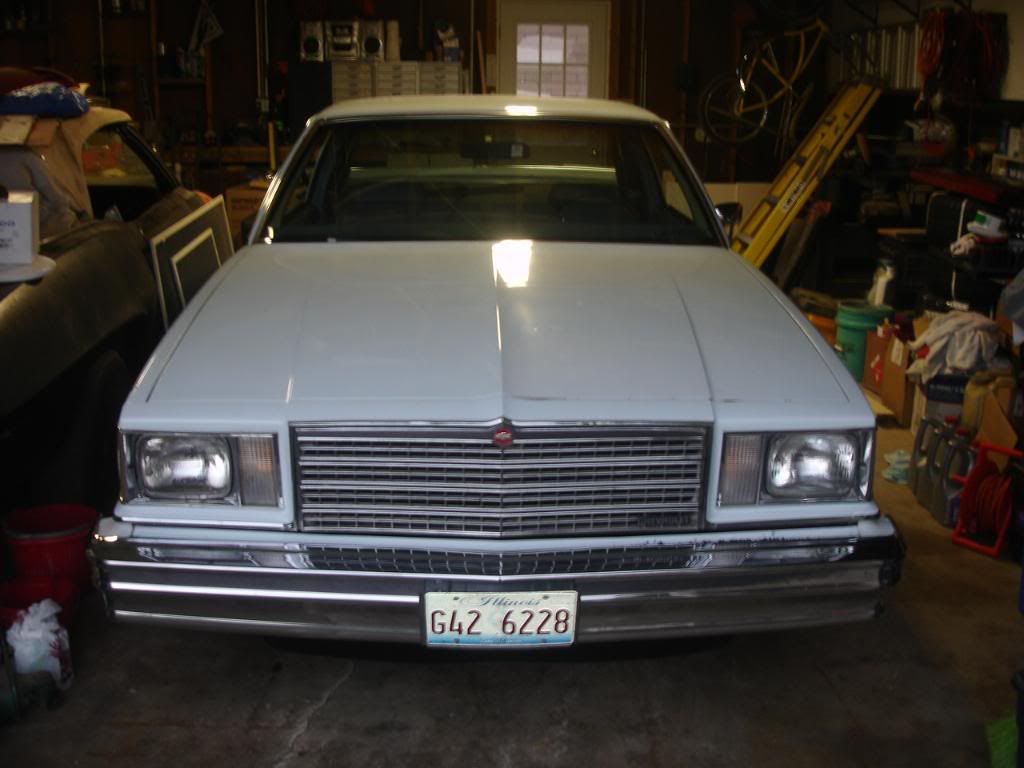
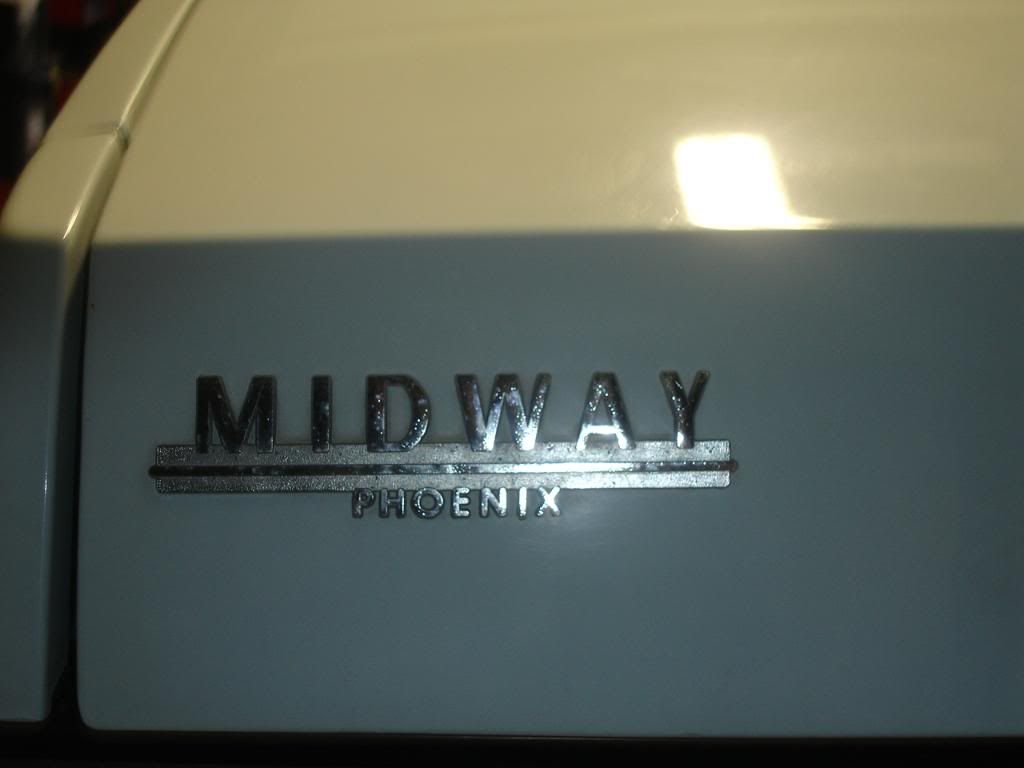
The car was purchased off of eBay in 2009. We bought it for $3400 running and drove it off the trailer about 30 miles home. We bought the car in Wisconsin and brought it home to IL. The car was originally sold at Midway Chevrolet in Phoenix, AZ. The interior was trashed due to all the sun it got, but the exterior was rust free, as the frame was.
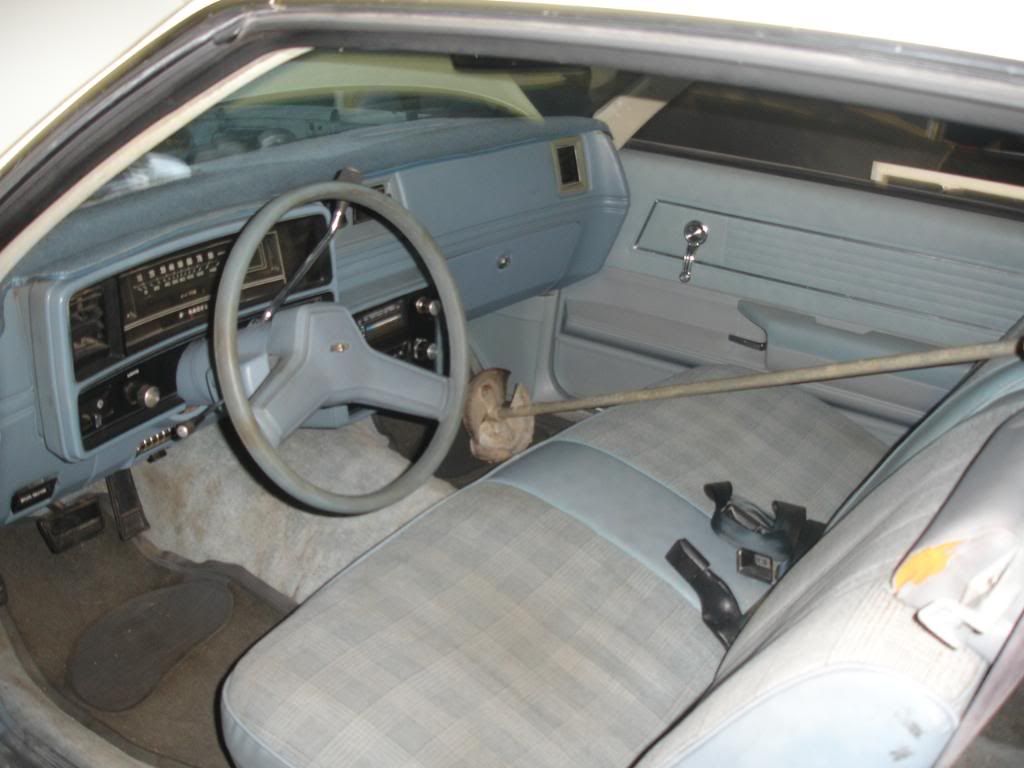
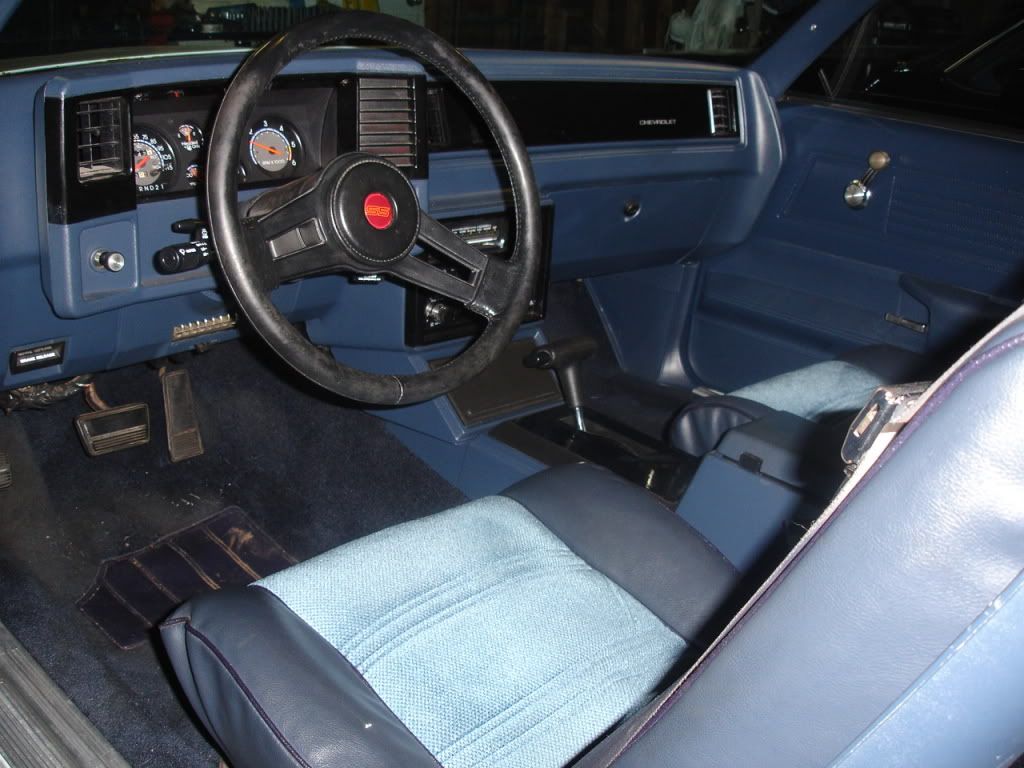
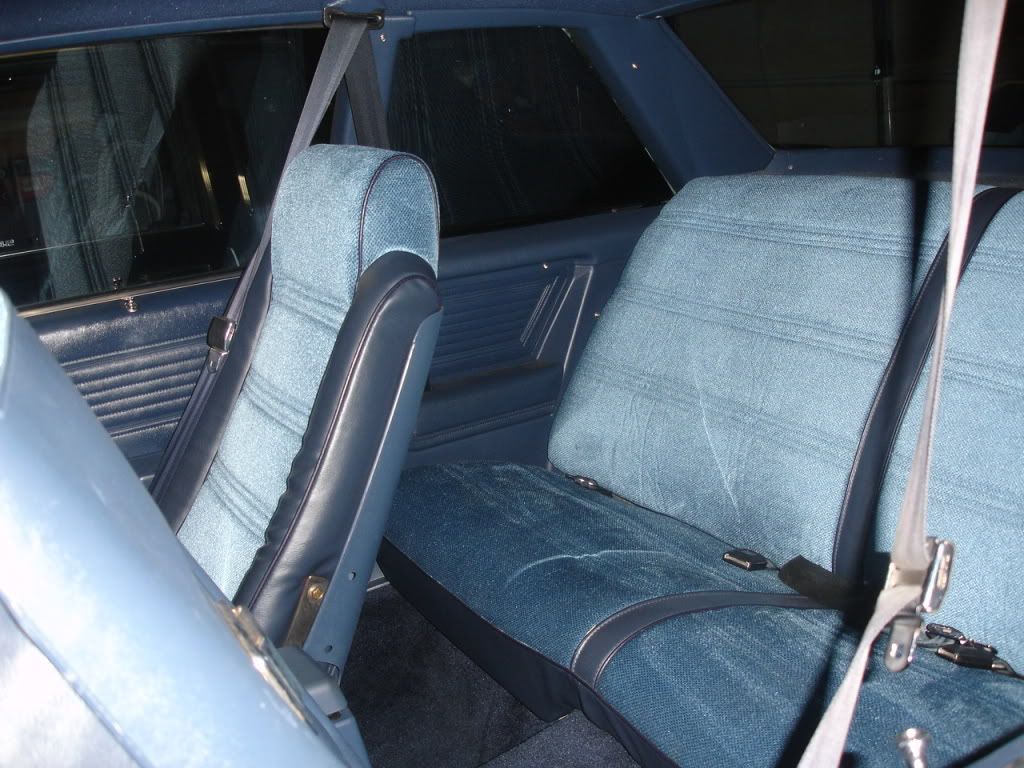
We dropped in a 355 Gen I that was included in the sale of my dad's 69' Convertible Camaro. A couple weeks after that, it ended up spinning 3 rod bearings. I put the Goodwrench 350 that the car came with, back in and drove it for the rest of the year. That winter, I decided to start re-doing the interior. I ended up using Cutlass bucket seats, Cutlass tilt column, Monte Carlo center console, and Monte Carlo dash. I recovered the stock bench seat and the new bucket seats, re-dyed every interior piece, minus the reproduction rear sail panels (which fit like crap IMO, and will find originals sooner than later), Shadow Blue with SEM interior spray.
I then started doing the rear end, replacing the 2.23 7.5" with a 3.73 8.5" from a 442. I then removed the 3.73's and went with 3.23's so I could drive it on the highway. Also went ahead and installed a Detroit Truetrac differential and a TA performance girdle. The rear suspension is a set of C3fab tubular uppers and boxed lowers.
A bunch of things changed under the hood, serpentine system and an electric fan, but nothing else. I went with a Pypes full exhaust with an x-pipe and their mufflers.
Suspension is still sitting on the stock springs, with Hotchkis sway bars, Bilstein shocks, and a Spohn front steering rebuild kit. I replaced the stock bushings (which were relatively good from what I could tell) with some Energy Suspension ones. All bolts came out no problems, except I managed to bust a cage nut loose which was fixed pretty decently.
On to the exciting stuff.
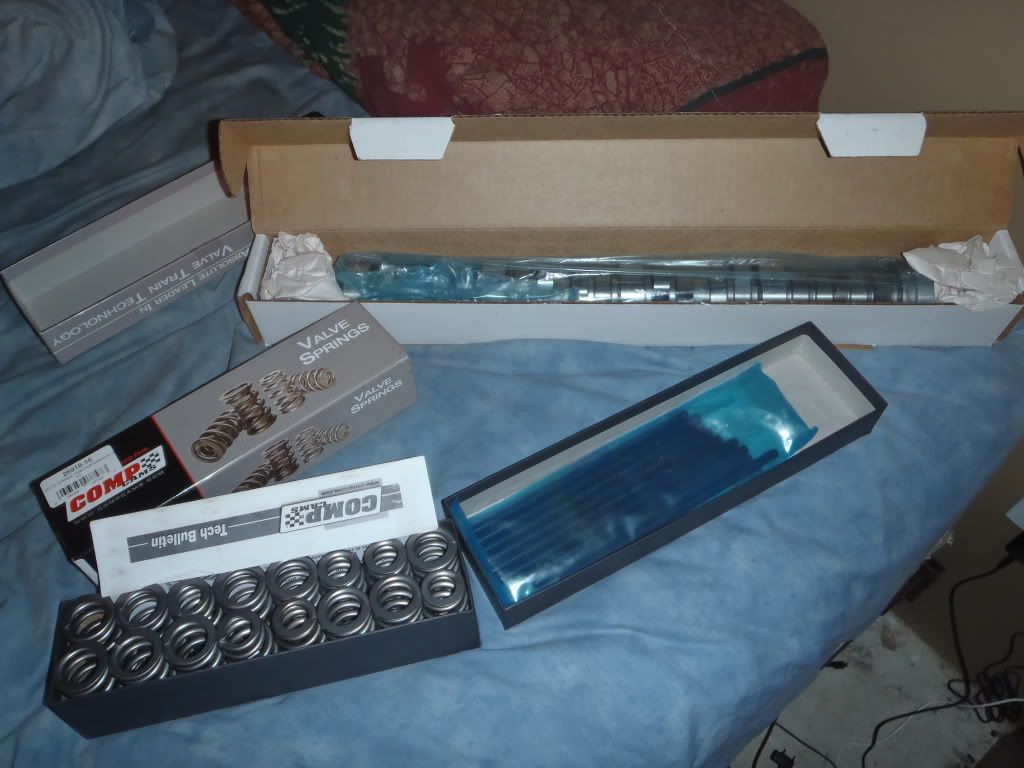
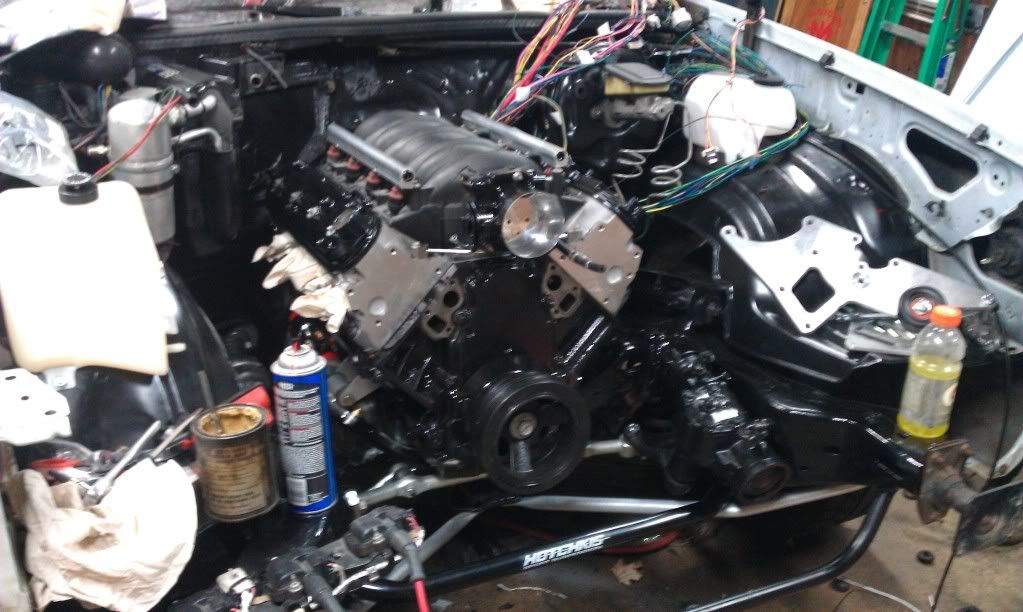
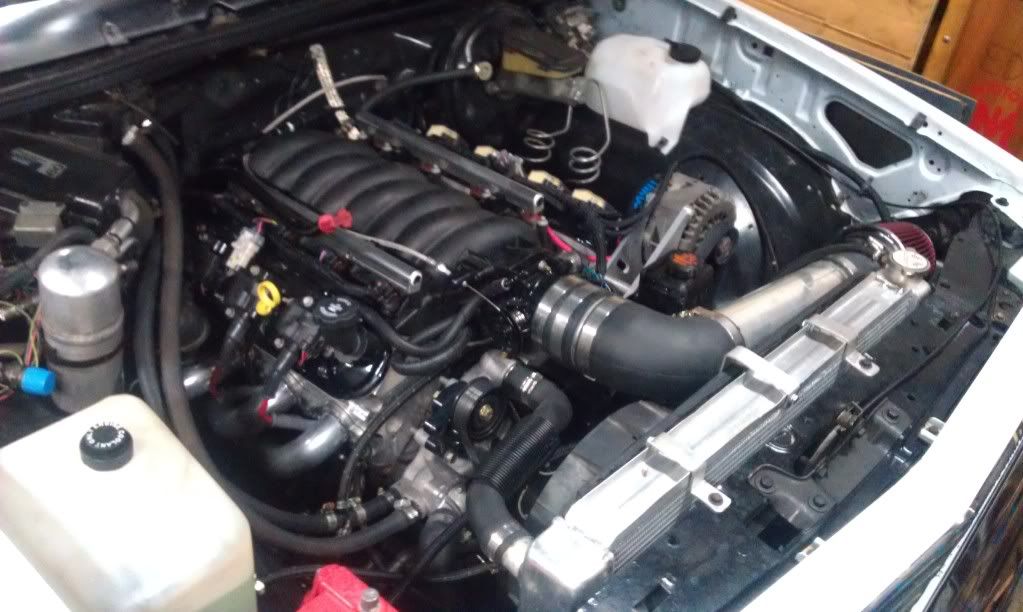
The donor engine is a LQ4 from an 03' Express van. I purchased it from a fellow member on here, as well as www.maliburacing.com. He now has an LS7 Malibu with a 6 speed. I also purchased the LS6 intake from him. Starting with that, I ended up getting a P&P throttle body and MAF. I then went ahead and got Katech rod bolts, and a TR224 cam. I found a set of used 243 Z06 heads, and sent them to TSP to get CNC ported, valve job, and PRC double springs installed.
I also went ahead and bought a TSP ported LS6 oil pump, along with a pickup tube girdle and CTS-V pan kit.
For the trans, I ended up using a 4L60E in the F-body configuration. It was built to Level 4 specs by Andy Rizzo and the gang over at FLT. It will backed by a Yank 3600SS stall.
Side note, if you ever get the chance to visit the shop, please do. It's a small shop but its definately worth the stop. They are a nice group of people and I spoke on the phone with Andy multiple times about the trans.
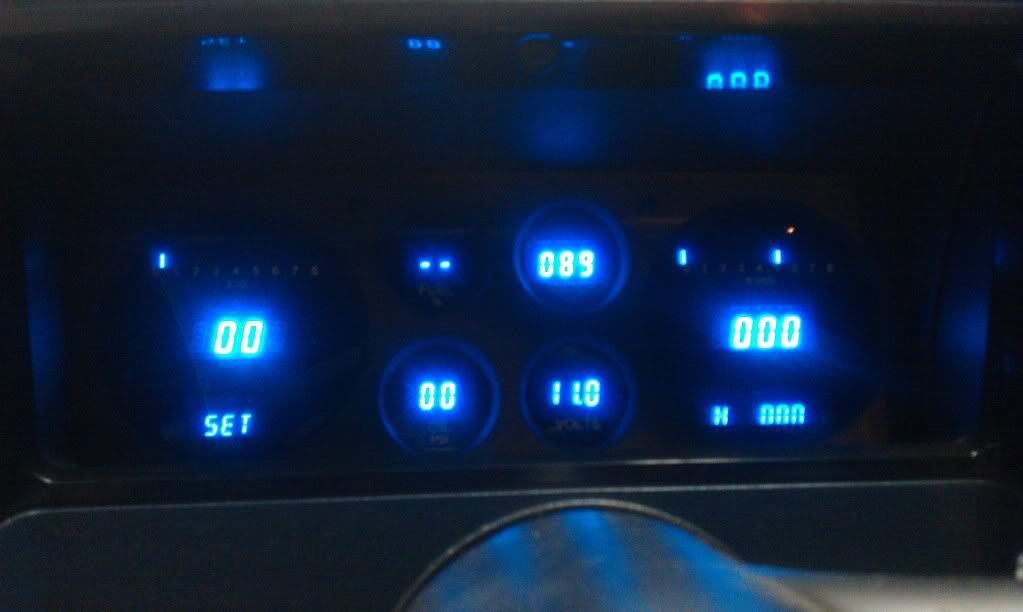
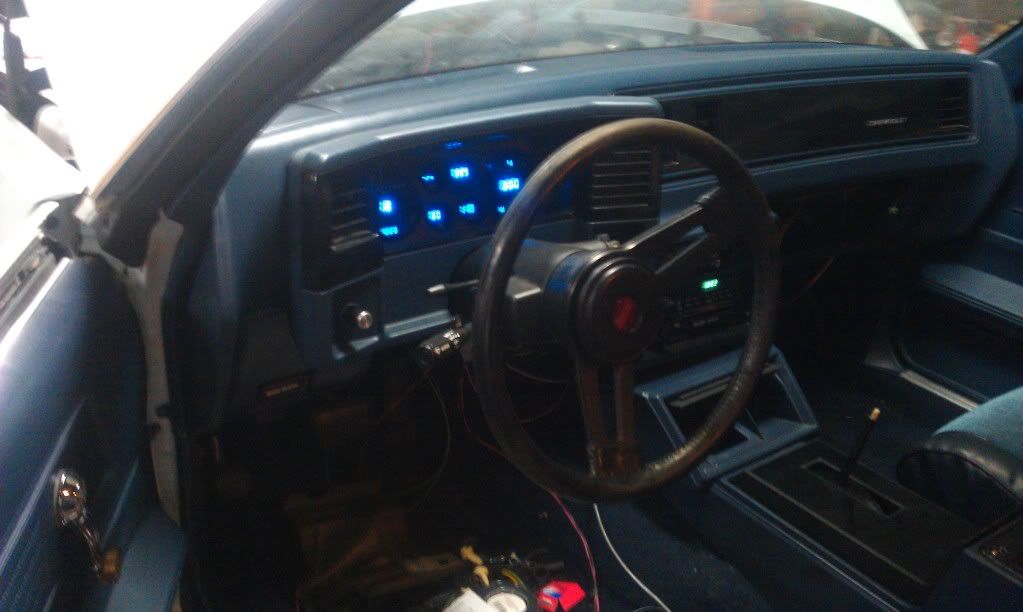
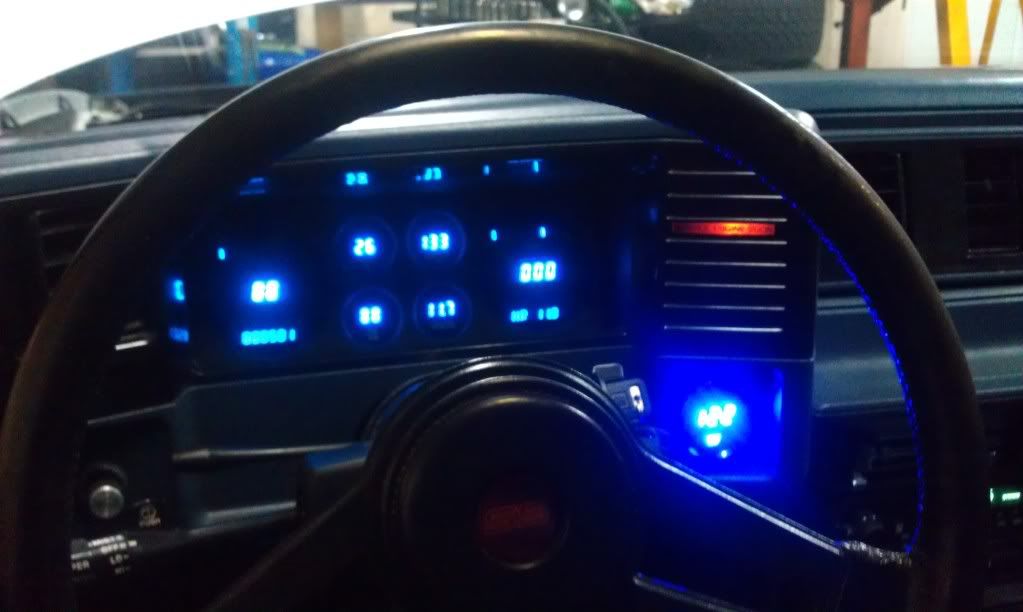
For the electronics, I ended up using a PCM from an 02' Camaro. I went with the Painless Performance 60608 harness. It's really a nice piece, but it can definately be confusing to someone who has never had any experience with wiring diagrams. It's much harder with older cars than newer, as there is very little in terms of wiring diagrams. I will also be using the 4th gen f-body shifter modified to fit in the stock console. I will be using the Dakota Digital cluster set up for a Monte Carlo.
Alright enough reading here come the pictures
The car before the LS swap

Nasty interior

Couple of outside pictures when we brought it home
NO RUST!!
Interior finished for now
And now onto the fun stuff
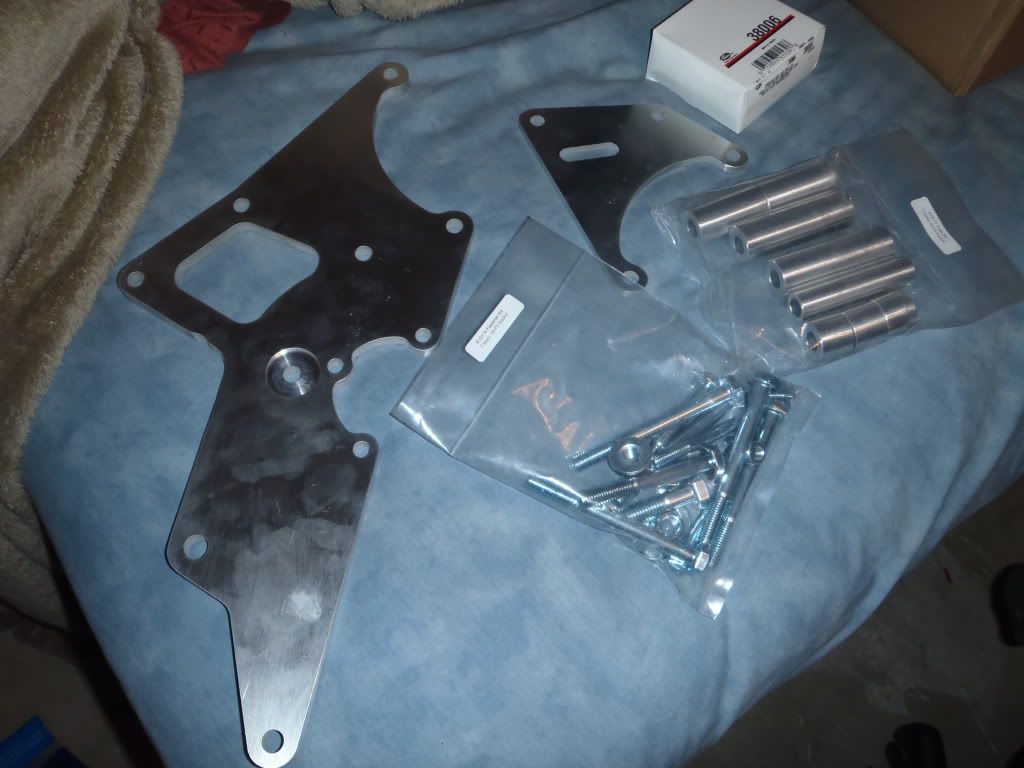
Kwirk perf accessory bracket
Cam and components
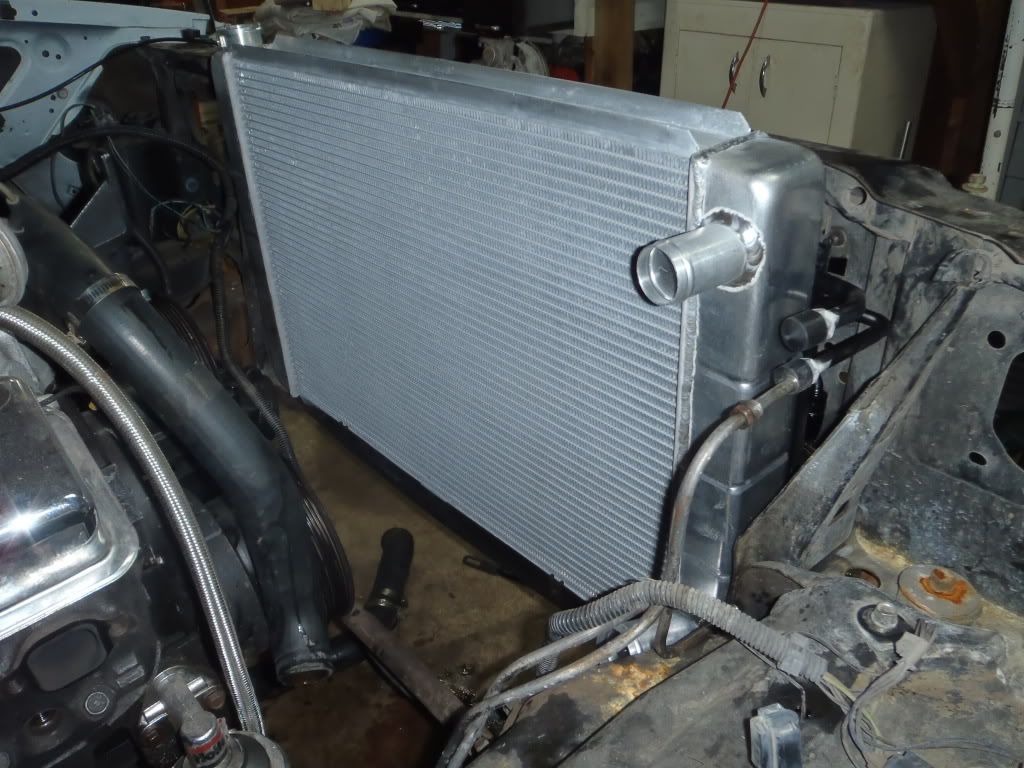
Dual pass radiator
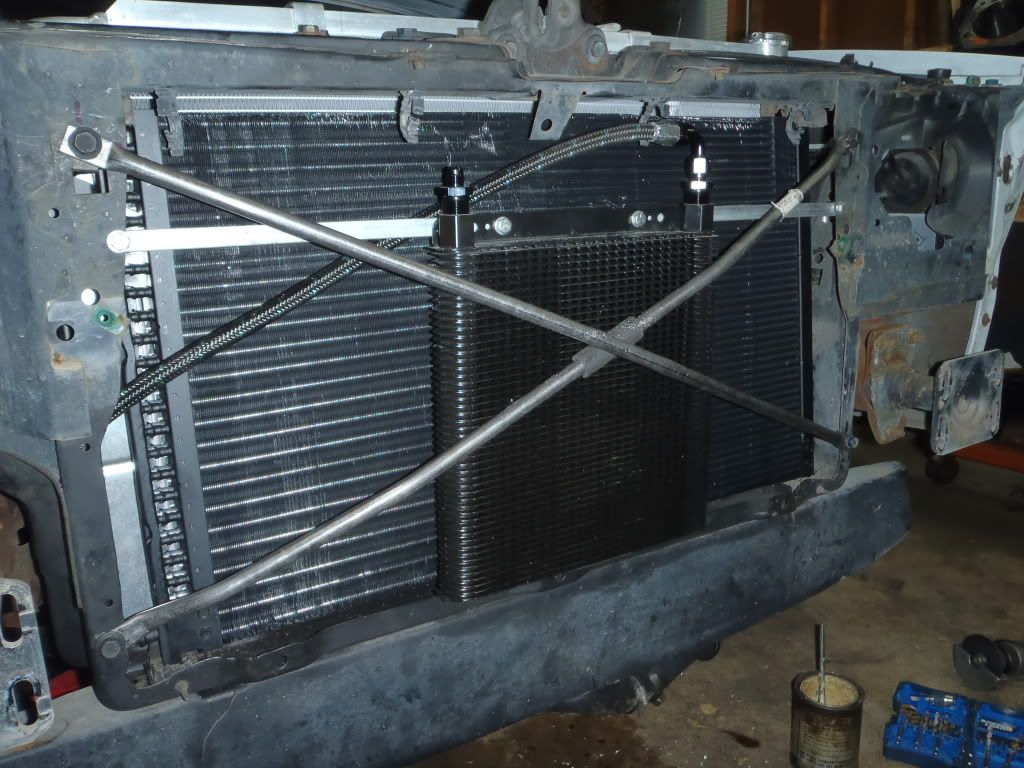
Custom x-braces with B&M supercooler AND AC condensor
First fit
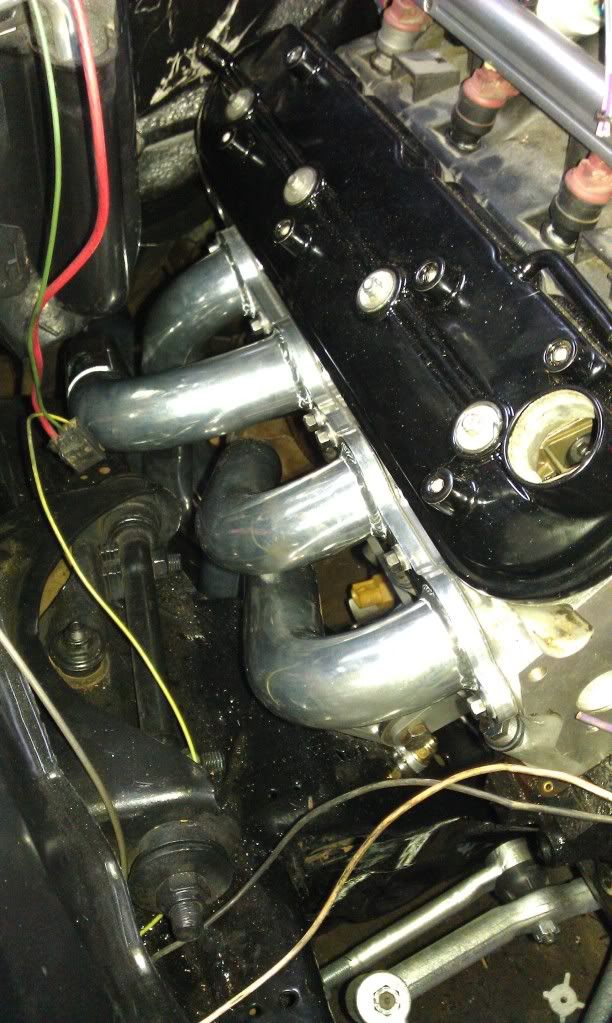
F-body headers fit like garbage with BRP mounts

Coil clearance with BRP mounts and f-body coils
Frame all painted up
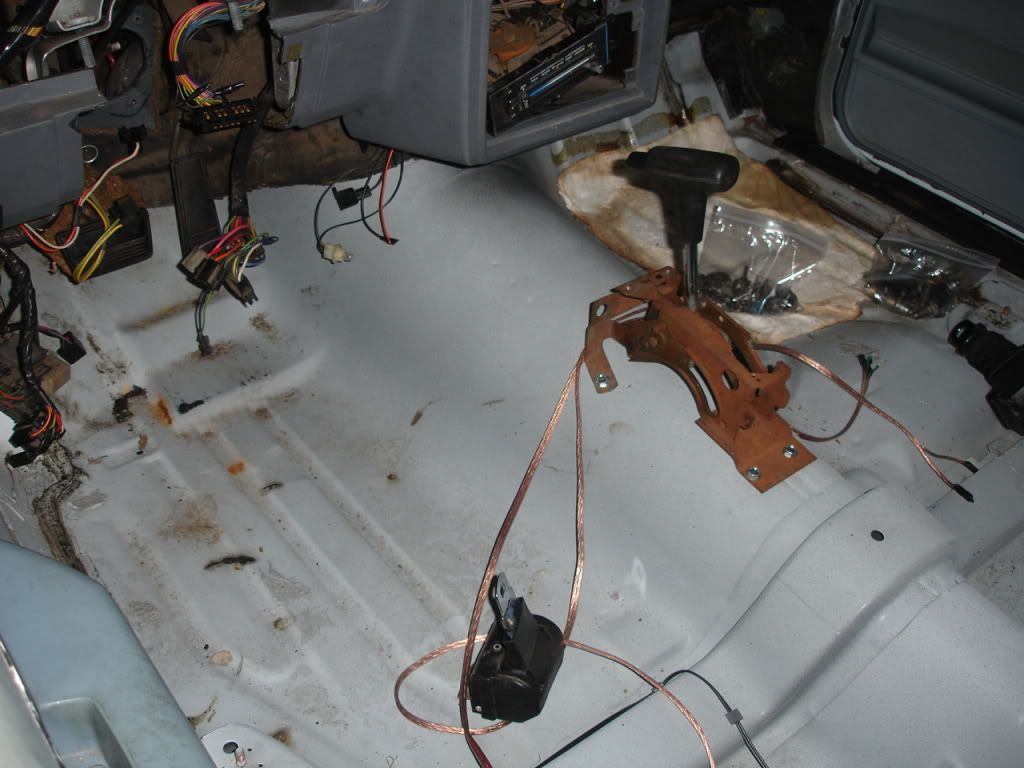
Fuse block mounted in factory position

Harness going out to the engine
Digital cluster
In for good!
BRP header fitment

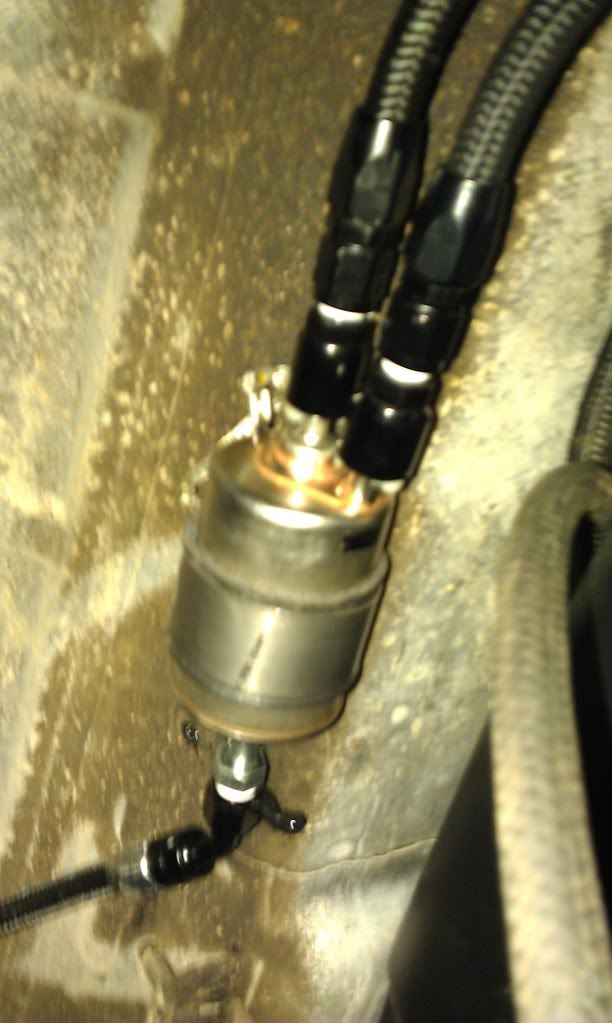
C5 fuel filter
New trans cooler lines

Trans before unloading Thanks again FLT

Doing a little fiberglass patching after I poked a hole in it being impatient

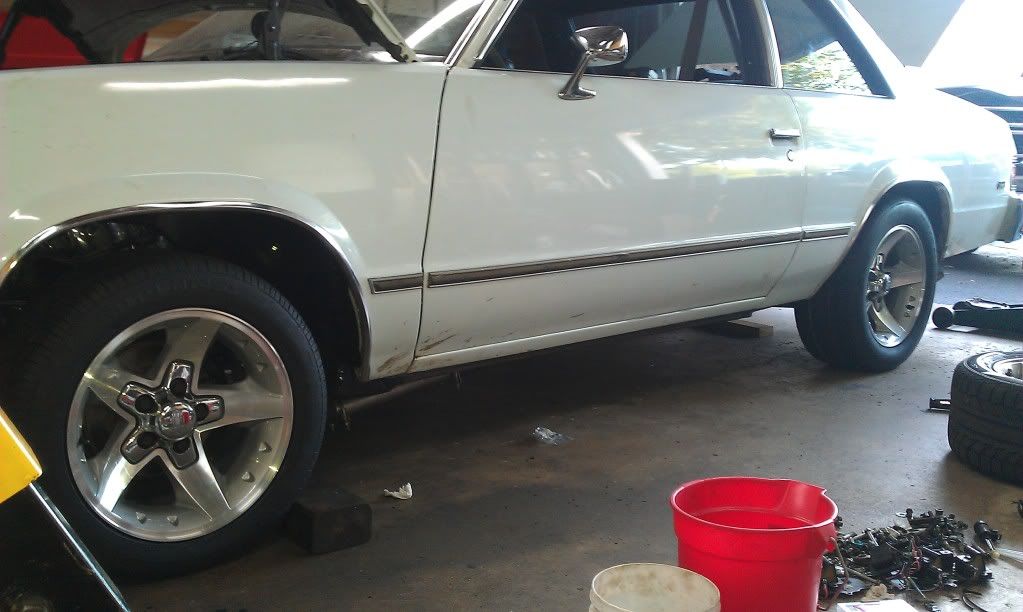
Where the project is now
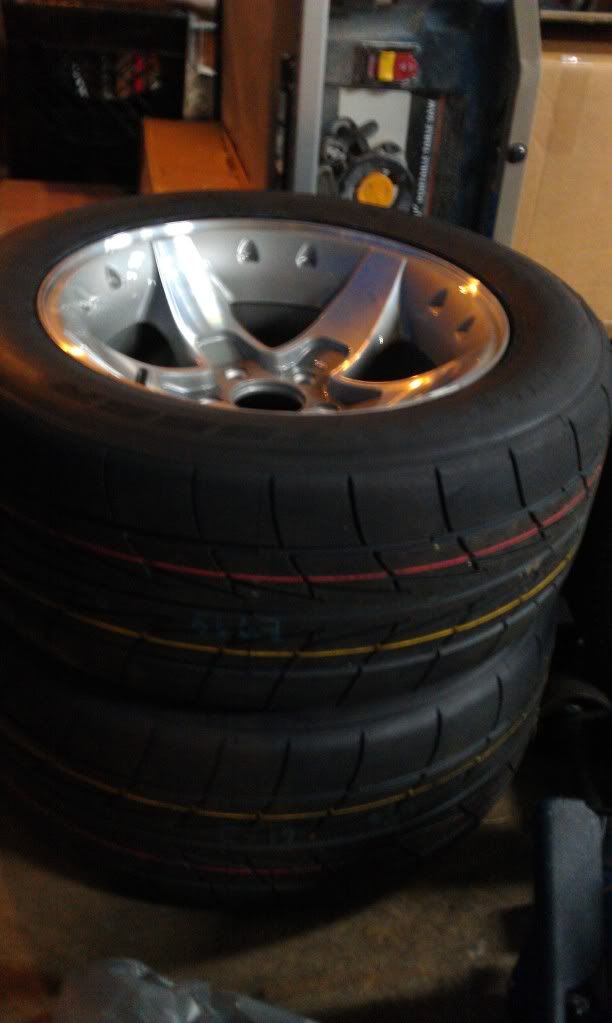
Nitto NT555R's mounted on a new set of ZQ8 wheels
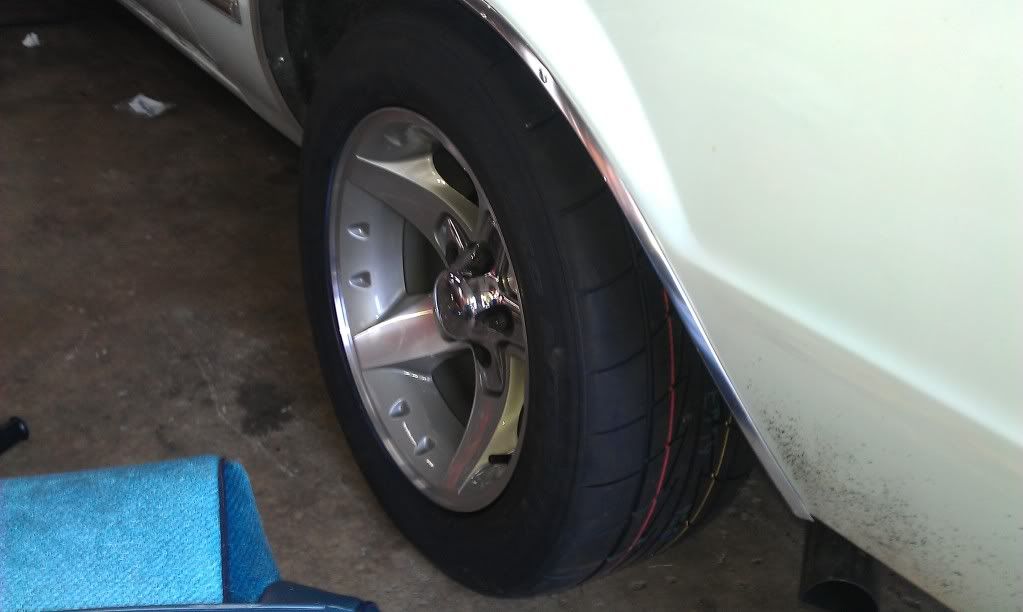
How the car sits
Digital cluster
That's all I've got for now. I need to send my PCM back to Frost to recalibrate because I changed from the 3 wire MAF to an 85MM 5 wire MAF to clean things up as well as simplify my intake. Also need to get my driveshaft shortened, finish the shifter mount and cable routing, take care of the throttle cable, finish the battery cable to starter, and alternator cable to fuse block. I hooked the alt cable to the battery so the fuse block would have 12V, it looks like I'll have to bring the Fluke home and start diagnosing what I did wrong.
My first hope was to get it running before spring, and then it was to get it done before the end of July. Now I just want the car driveable haha.
If anyone has any questions or wants any pictures of something let me know, I've been through two different headers, two different oil pans, and basically anything else that could of been mixed up has been.
Last but not least thanks to Andy at FLT, TSP, Speed Inc., Frost, and my dad for letting me put his 87' 442 outside for so long while I procrasterbate on the couch.
Appreciate you checking out the thread!
The car was purchased off of eBay in 2009. We bought it for $3400 running and drove it off the trailer about 30 miles home. We bought the car in Wisconsin and brought it home to IL. The car was originally sold at Midway Chevrolet in Phoenix, AZ. The interior was trashed due to all the sun it got, but the exterior was rust free, as the frame was.
We dropped in a 355 Gen I that was included in the sale of my dad's 69' Convertible Camaro. A couple weeks after that, it ended up spinning 3 rod bearings. I put the Goodwrench 350 that the car came with, back in and drove it for the rest of the year. That winter, I decided to start re-doing the interior. I ended up using Cutlass bucket seats, Cutlass tilt column, Monte Carlo center console, and Monte Carlo dash. I recovered the stock bench seat and the new bucket seats, re-dyed every interior piece, minus the reproduction rear sail panels (which fit like crap IMO, and will find originals sooner than later), Shadow Blue with SEM interior spray.
I then started doing the rear end, replacing the 2.23 7.5" with a 3.73 8.5" from a 442. I then removed the 3.73's and went with 3.23's so I could drive it on the highway. Also went ahead and installed a Detroit Truetrac differential and a TA performance girdle. The rear suspension is a set of C3fab tubular uppers and boxed lowers.
A bunch of things changed under the hood, serpentine system and an electric fan, but nothing else. I went with a Pypes full exhaust with an x-pipe and their mufflers.
Suspension is still sitting on the stock springs, with Hotchkis sway bars, Bilstein shocks, and a Spohn front steering rebuild kit. I replaced the stock bushings (which were relatively good from what I could tell) with some Energy Suspension ones. All bolts came out no problems, except I managed to bust a cage nut loose which was fixed pretty decently.
On to the exciting stuff.
The donor engine is a LQ4 from an 03' Express van. I purchased it from a fellow member on here, as well as www.maliburacing.com. He now has an LS7 Malibu with a 6 speed. I also purchased the LS6 intake from him. Starting with that, I ended up getting a P&P throttle body and MAF. I then went ahead and got Katech rod bolts, and a TR224 cam. I found a set of used 243 Z06 heads, and sent them to TSP to get CNC ported, valve job, and PRC double springs installed.
I also went ahead and bought a TSP ported LS6 oil pump, along with a pickup tube girdle and CTS-V pan kit.
For the trans, I ended up using a 4L60E in the F-body configuration. It was built to Level 4 specs by Andy Rizzo and the gang over at FLT. It will backed by a Yank 3600SS stall.
Side note, if you ever get the chance to visit the shop, please do. It's a small shop but its definately worth the stop. They are a nice group of people and I spoke on the phone with Andy multiple times about the trans.
For the electronics, I ended up using a PCM from an 02' Camaro. I went with the Painless Performance 60608 harness. It's really a nice piece, but it can definately be confusing to someone who has never had any experience with wiring diagrams. It's much harder with older cars than newer, as there is very little in terms of wiring diagrams. I will also be using the 4th gen f-body shifter modified to fit in the stock console. I will be using the Dakota Digital cluster set up for a Monte Carlo.
Alright enough reading here come the pictures
The car before the LS swap
Nasty interior
Couple of outside pictures when we brought it home
NO RUST!!
Interior finished for now
And now onto the fun stuff
Kwirk perf accessory bracket
Cam and components
Dual pass radiator
Custom x-braces with B&M supercooler AND AC condensor
First fit
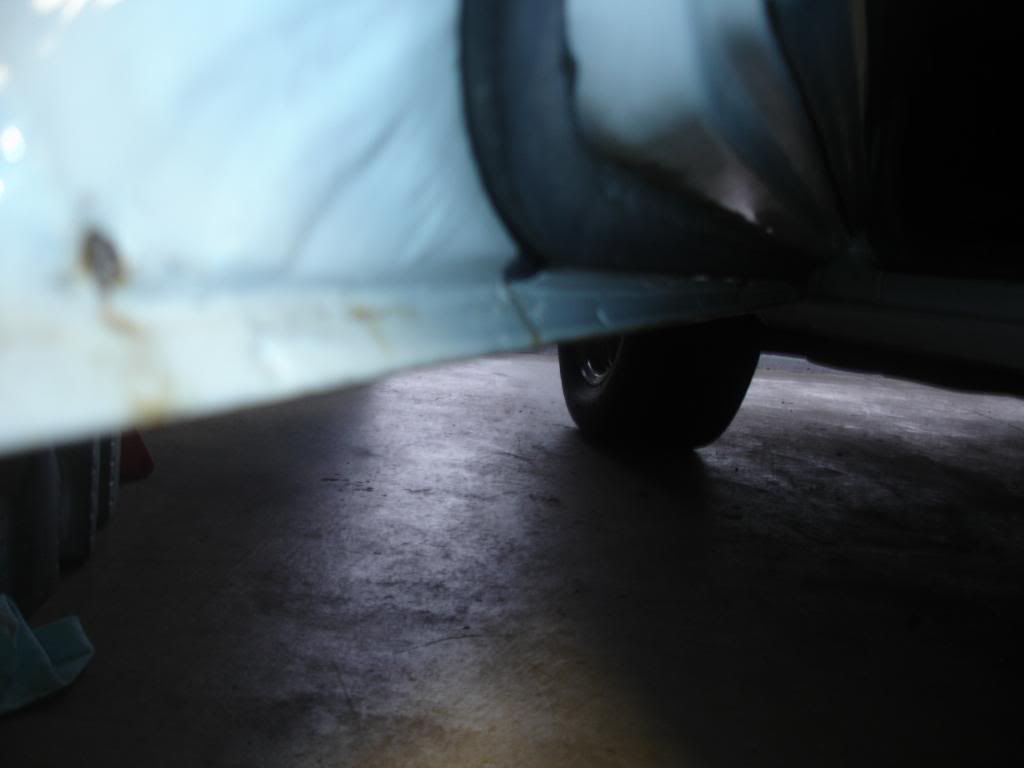
F-body headers fit like garbage with BRP mounts
Coil clearance with BRP mounts and f-body coils
Frame all painted up
Fuse block mounted in factory position
Harness going out to the engine
Digital cluster
In for good!
BRP header fitment
C5 fuel filter
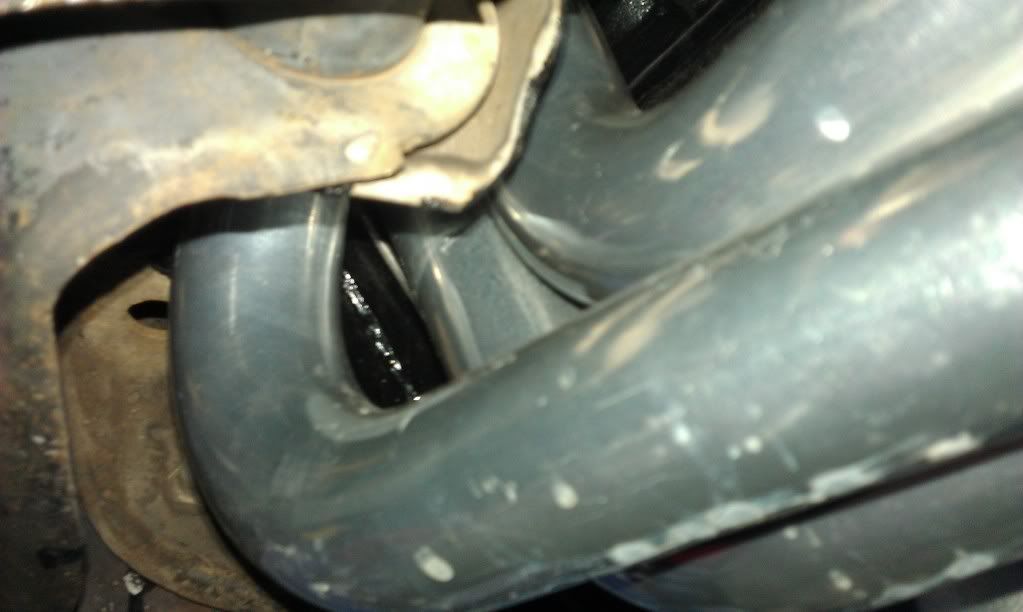
New trans cooler lines
Trans before unloading Thanks again FLT
Doing a little fiberglass patching after I poked a hole in it being impatient
Where the project is now
Nitto NT555R's mounted on a new set of ZQ8 wheels
How the car sits
Digital cluster
That's all I've got for now. I need to send my PCM back to Frost to recalibrate because I changed from the 3 wire MAF to an 85MM 5 wire MAF to clean things up as well as simplify my intake. Also need to get my driveshaft shortened, finish the shifter mount and cable routing, take care of the throttle cable, finish the battery cable to starter, and alternator cable to fuse block. I hooked the alt cable to the battery so the fuse block would have 12V, it looks like I'll have to bring the Fluke home and start diagnosing what I did wrong.
My first hope was to get it running before spring, and then it was to get it done before the end of July. Now I just want the car driveable haha.
If anyone has any questions or wants any pictures of something let me know, I've been through two different headers, two different oil pans, and basically anything else that could of been mixed up has been.
Last but not least thanks to Andy at FLT, TSP, Speed Inc., Frost, and my dad for letting me put his 87' 442 outside for so long while I procrasterbate on the couch.
Appreciate you checking out the thread!


Trending Topics
 07-23-2011 | 08:17 PM
#9
It was taken in Lemont under an old bridge. Not sure where Yates is.
Got the car to crank then 20 minutes later start. I don't have heater hoses, coolant crossover isn't hooked up, PCV isn't, and the fans have no mount so I shut it down right away. I'm confused on the F body shifter if anyone knows how to wire it to my truck harness any help would be appreciated
It also has open headers so it was pretty obnoxious. Can't wait till I can back it out of the garage under its own power.
Last edited by 01cherryreds10; 07-23-2011 at 08:49 PM.
08-21-2011 | 09:28 PM
#10

Ok I need a update man! Im goin to try and follow as much as your stuff as possible. Me and my brother have talked and we want to do a lsx (I told him we shoudl do the lq4 or like the lm7) and convert it to a car intake top end instead of spending the money for a ls1/2 and getting vette acessories.
I read you said the fbody headers fit like junk, did you end up gettin different ones or just used them? I am also sold on getting that oil pan too. Seems to be a pretty good price for the best fitment.
Our plan is to drop the motor in stock form besides converting to car intake for now. Than take it to northern DE, which I am lucked out having Race Proven Motorsports up there and get a cam and tune done. All in all we are looking for 400+ hp with just a cam and tune. Id like to make it as fast if not faster than the s10, so Id say with the additional few hundred pounds on the s10, I need atleast 50 whp/tq for the monte. So My goal for wheel hp/tq is 365rwhp/390rwtq.
Now I just need to sell my damn explorer in my driveway to have enough to pick up a motor and trans that is still possibly available (lq4/4l80)
08-21-2011 | 10:51 PM
#11
Yup actually good thing you bumped this. Took a bunch of pictures while I had it up in the air at work this weekend. I'll post them all up tomorrow. Shows header clearance, motor mounts, oil pan, trans crossmember, exhaust etc.
Got the car driving now. Its pretty fun!!! Launched it for the first time today. Such a great feeling. I put probably 200 miles on the car since I got it driveable last Saturday. I picked up a light ticking noise getting a shake from McDonalds an hour ago, so hopefully that damn clown didn't put a hex on my car.
Taking it to a buddy's shop this week to get my 3.73's put back in along with a set of Moser axles for the 8.5". My driveshaft loop will hopefully get here with the axles tomorrow. Trying to get the car out to Route 66 this weekend for Friday night test and tune.
08-22-2011 | 03:19 PM
#12
Yup actually good thing you bumped this. Took a bunch of pictures while I had it up in the air at work this weekend. I'll post them all up tomorrow. Shows header clearance, motor mounts, oil pan, trans crossmember, exhaust etc.
Got the car driving now. Its pretty fun!!! Launched it for the first time today. Such a great feeling. I put probably 200 miles on the car since I got it driveable last Saturday. I picked up a light ticking noise getting a shake from McDonalds an hour ago, so hopefully that damn clown didn't put a hex on my car.
Taking it to a buddy's shop this week to get my 3.73's put back in along with a set of Moser axles for the 8.5". My driveshaft loop will hopefully get here with the axles tomorrow. Trying to get the car out to Route 66 this weekend for Friday night test and tune.
Got the car driving now. Its pretty fun!!! Launched it for the first time today. Such a great feeling. I put probably 200 miles on the car since I got it driveable last Saturday. I picked up a light ticking noise getting a shake from McDonalds an hour ago, so hopefully that damn clown didn't put a hex on my car.
Taking it to a buddy's shop this week to get my 3.73's put back in along with a set of Moser axles for the 8.5". My driveshaft loop will hopefully get here with the axles tomorrow. Trying to get the car out to Route 66 this weekend for Friday night test and tune.
08-22-2011 | 10:40 PM
#14
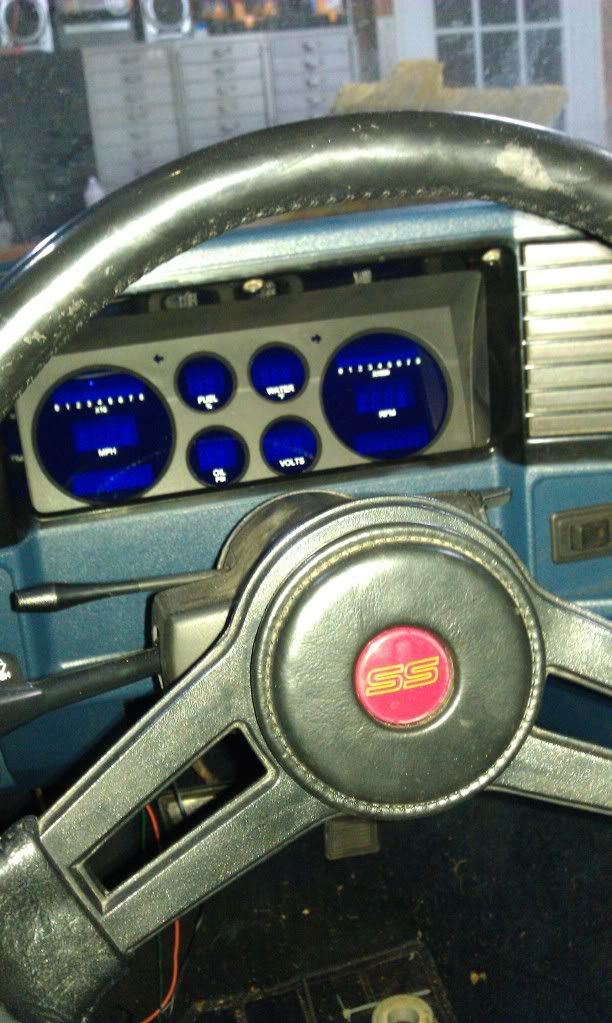
The cluster is the Dakota Digital cluster for our Chevy G-bodies. Absolutely love the cluster too, just got the thing's speedometer calibrated correctly. It has lots of cool options, 0-60, 1/4 mile time and speed etc.
Alright here's some pictures. Don't mind the trans line leak, I think I just fixed it outside when I was trying to find my "engine noise". I thing listening for pesky problems at work is just making me paranoid about my car at home. A guy I work with says you'll hear some ticking/tapping from the pushrods because of the length being too short/too long, but won't see any performance loss. Just the noise and I can live with that. Oil pressure is great going from 50-60 on the street. Converter bolts tight, all header bolts tight, and I even pulled the passenger side valve cover off to verify the modified rocker arms were torqued correctly. I think it's just me haha. No performance issues like a misfire or bad idle either.
Alright picture time wooo!
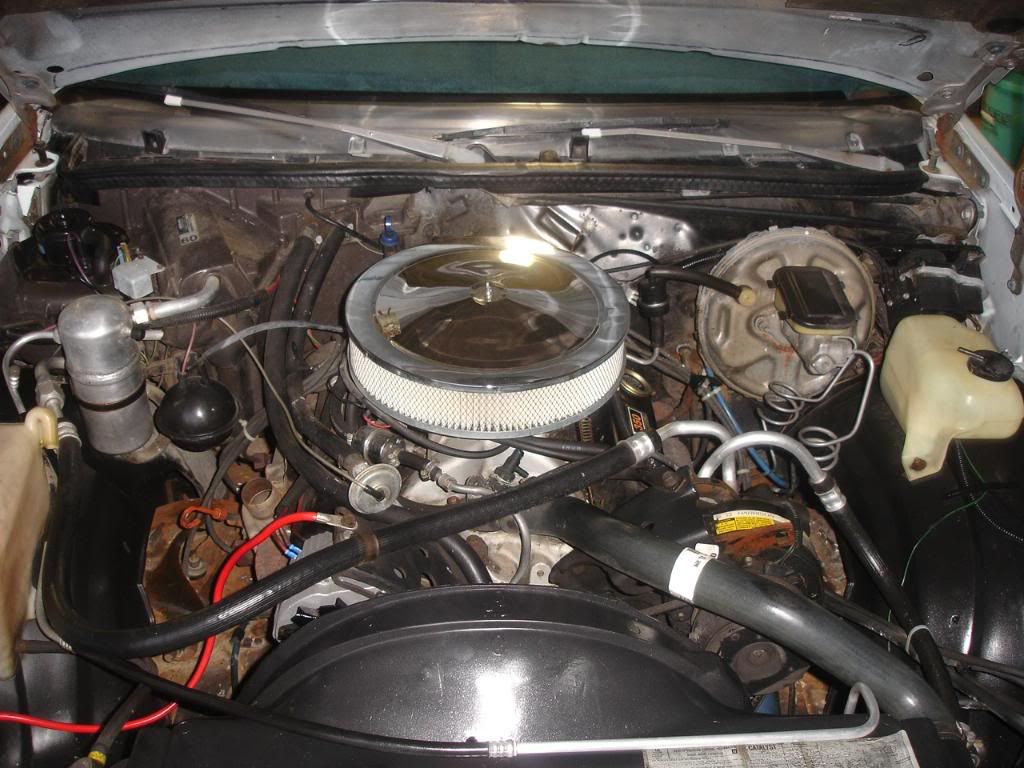
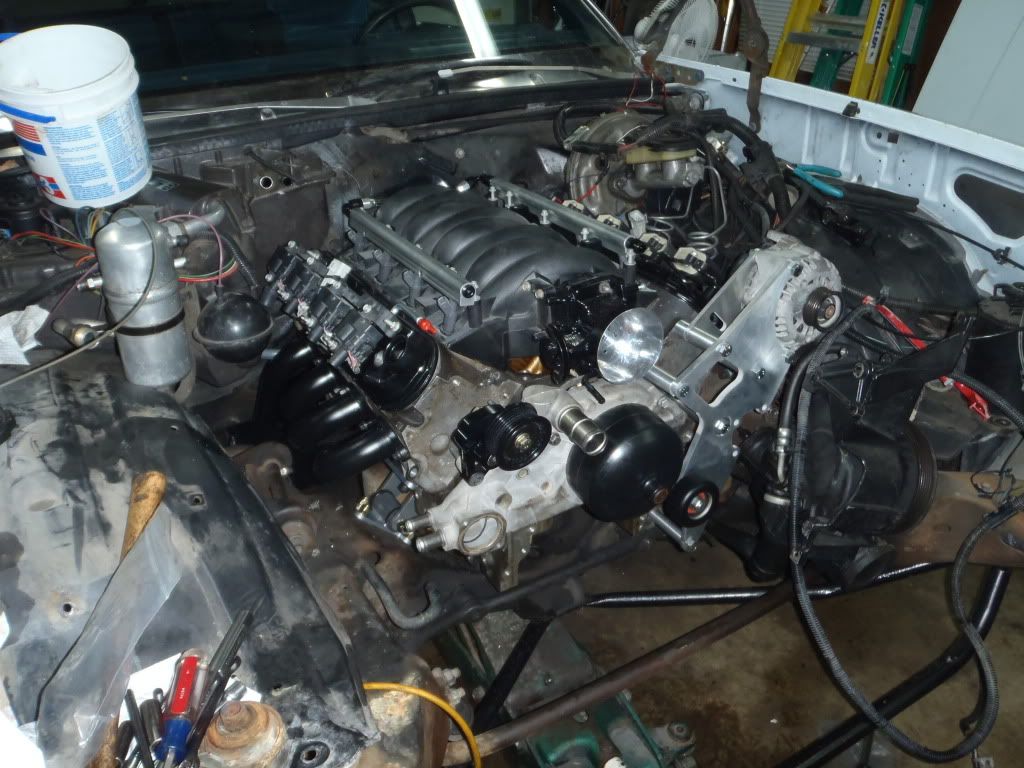
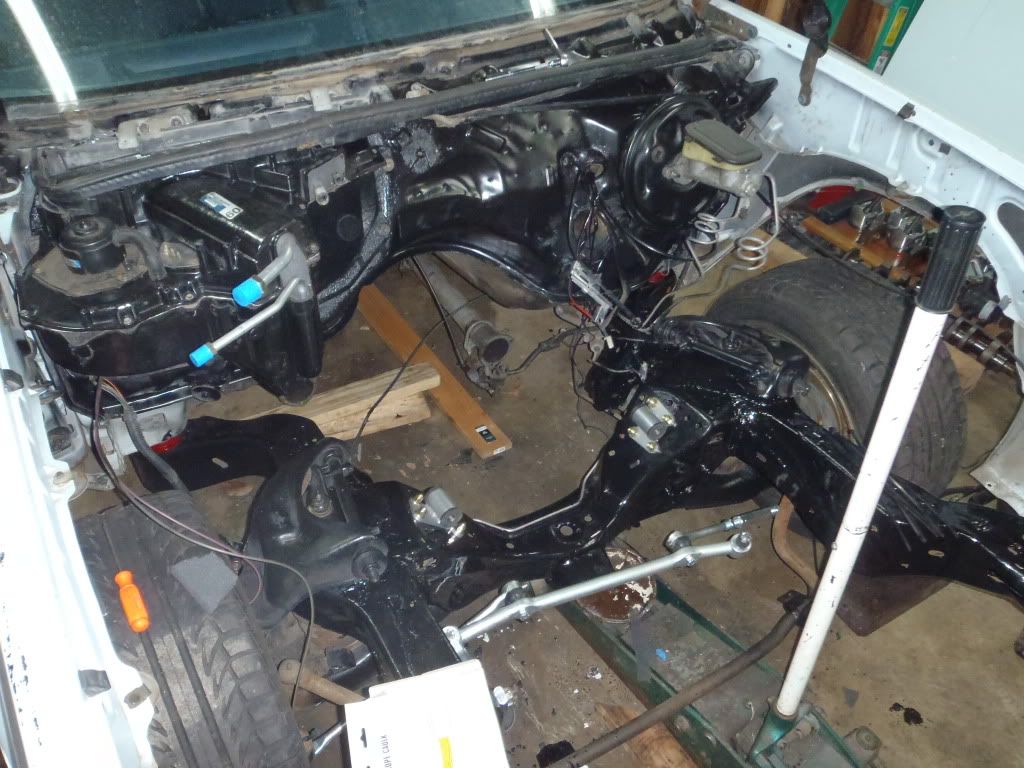
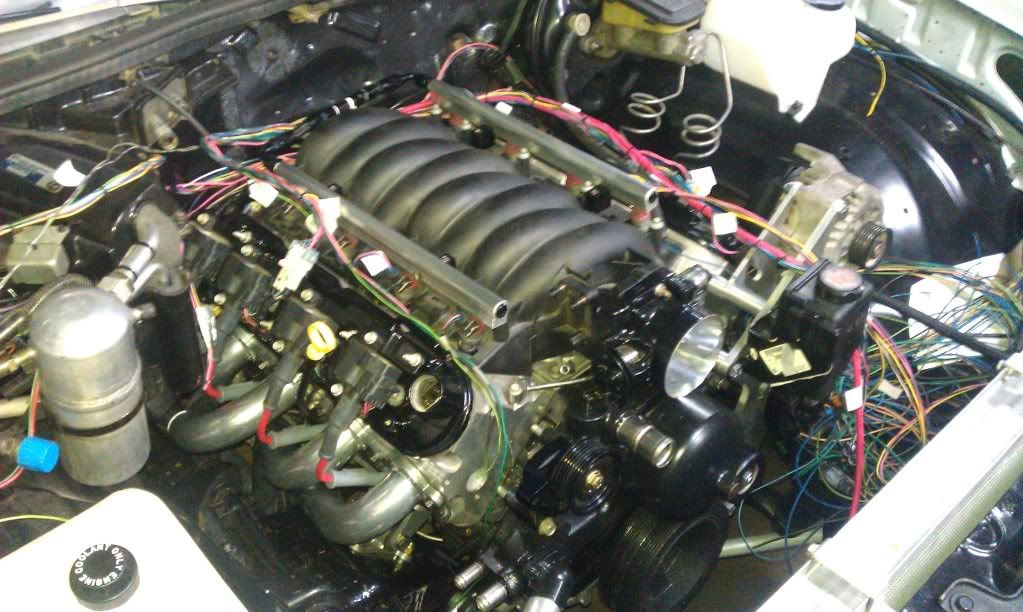
Engine bay as of right now
Cluster with new trans gauge and engine light placed in stock location
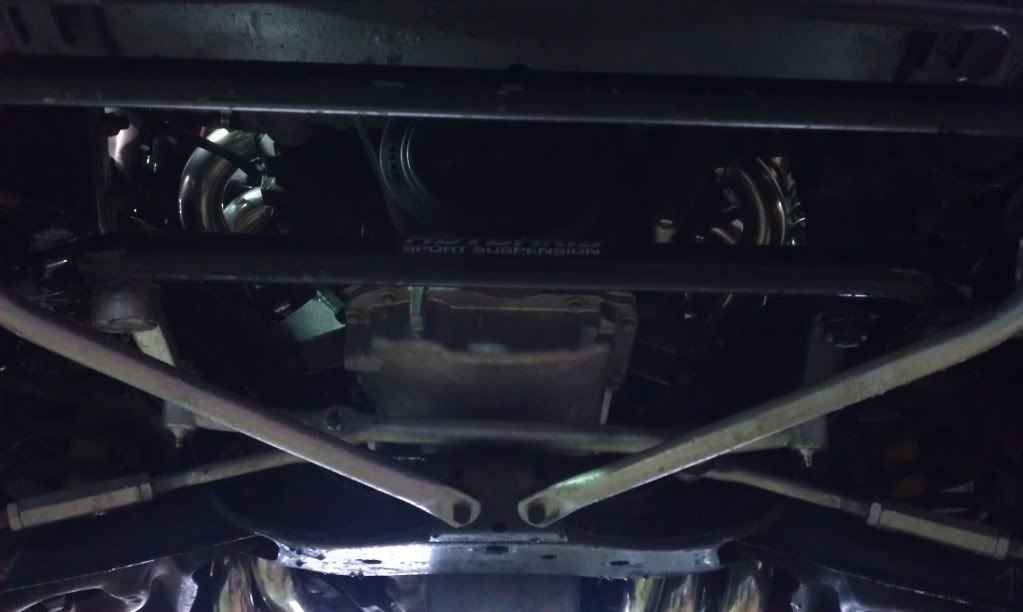
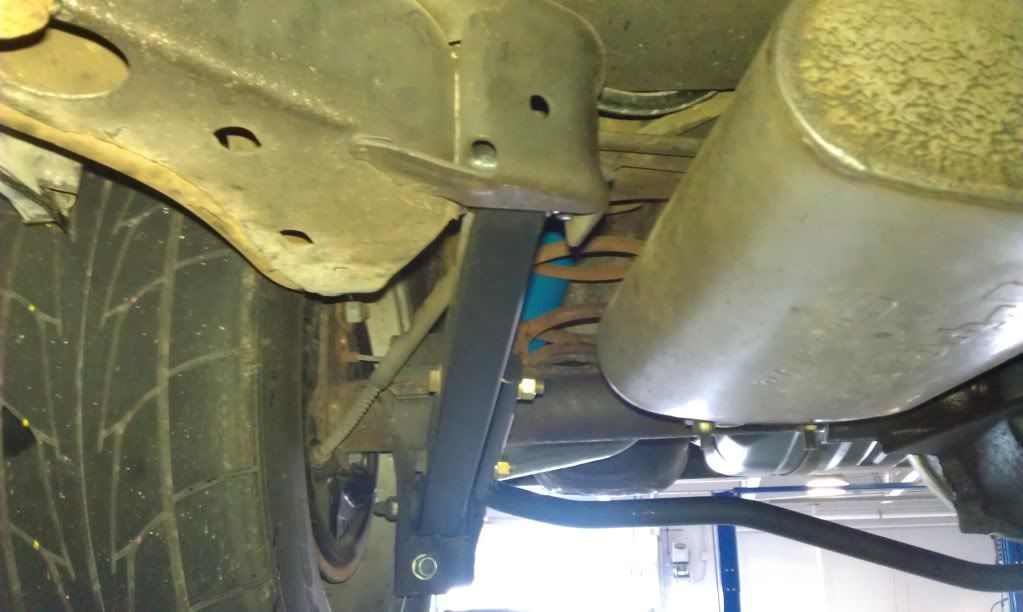
Picture of the Kirban GP brace tied to the jounce bars
Mod needed to use the GP bar with the replacement air dam for G-bodies
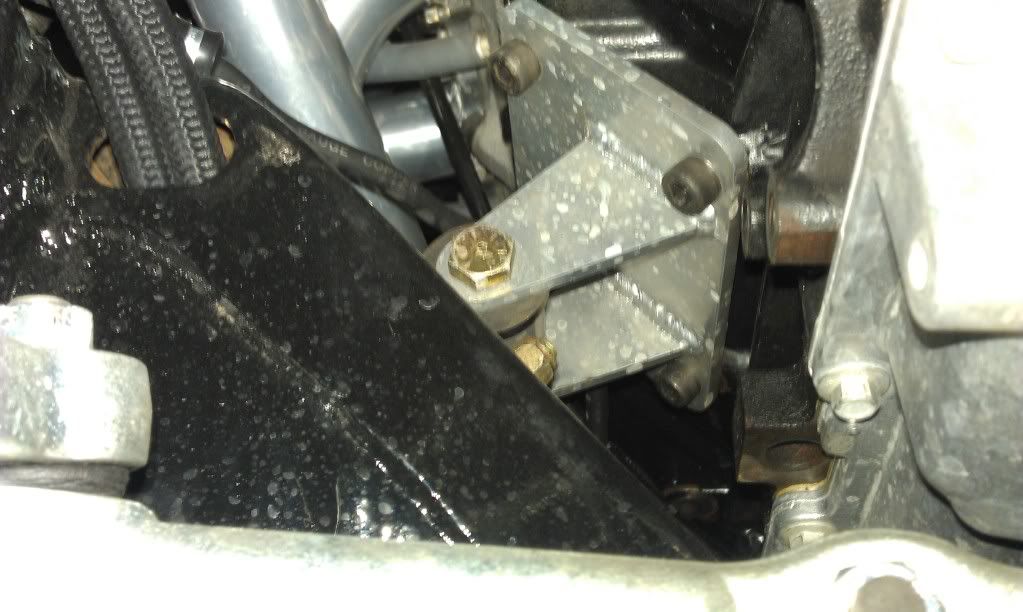
Mounts
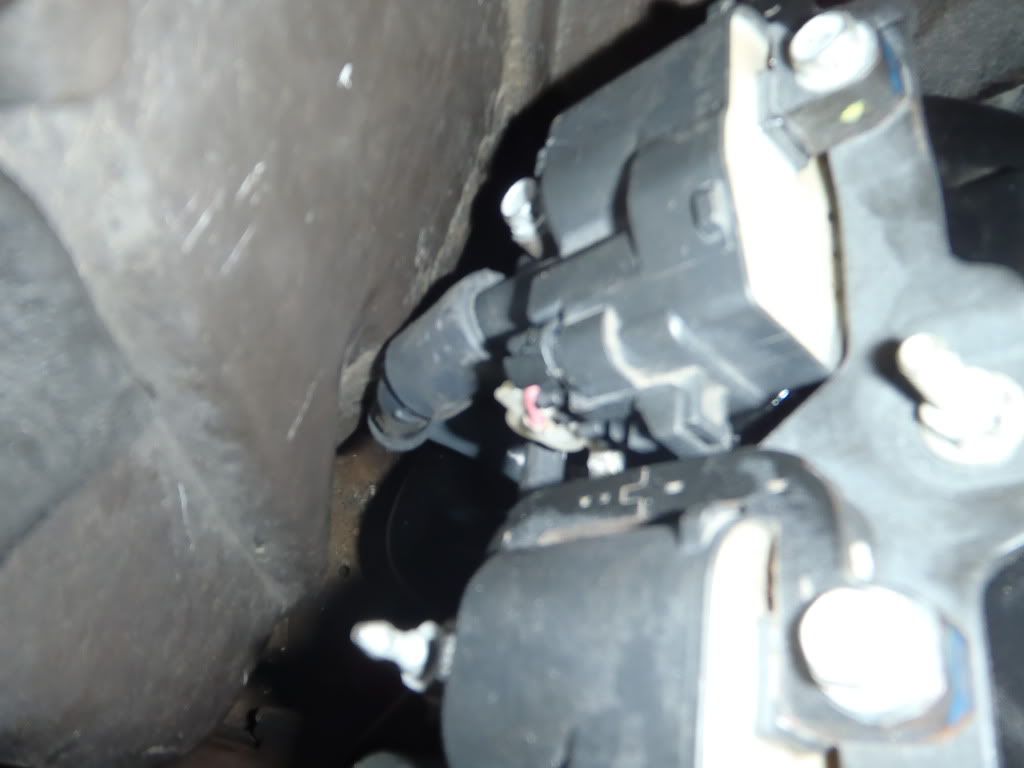
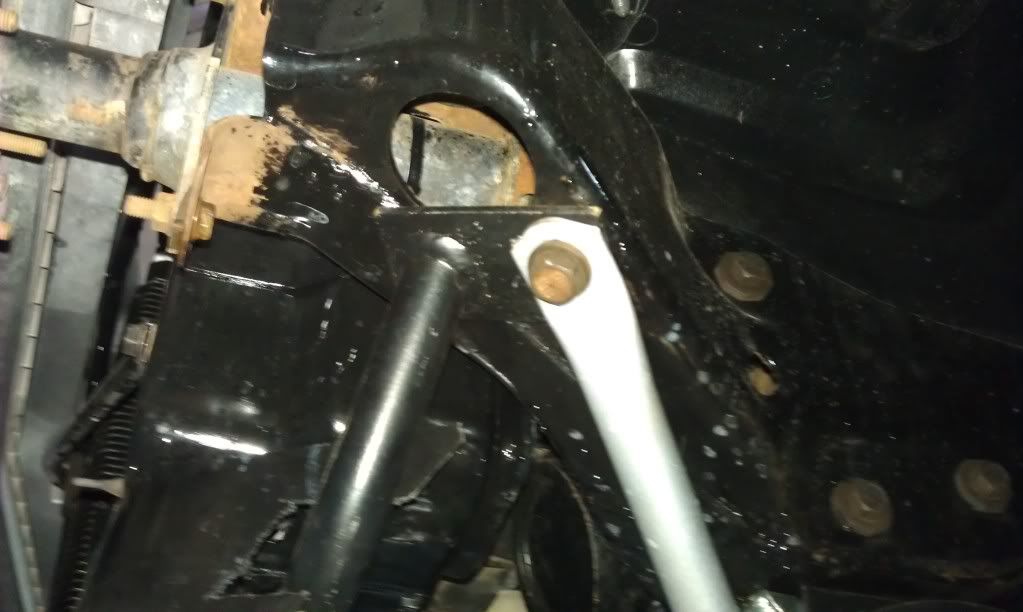
Passenger side header clearance, about 1/4" from the control arm ear
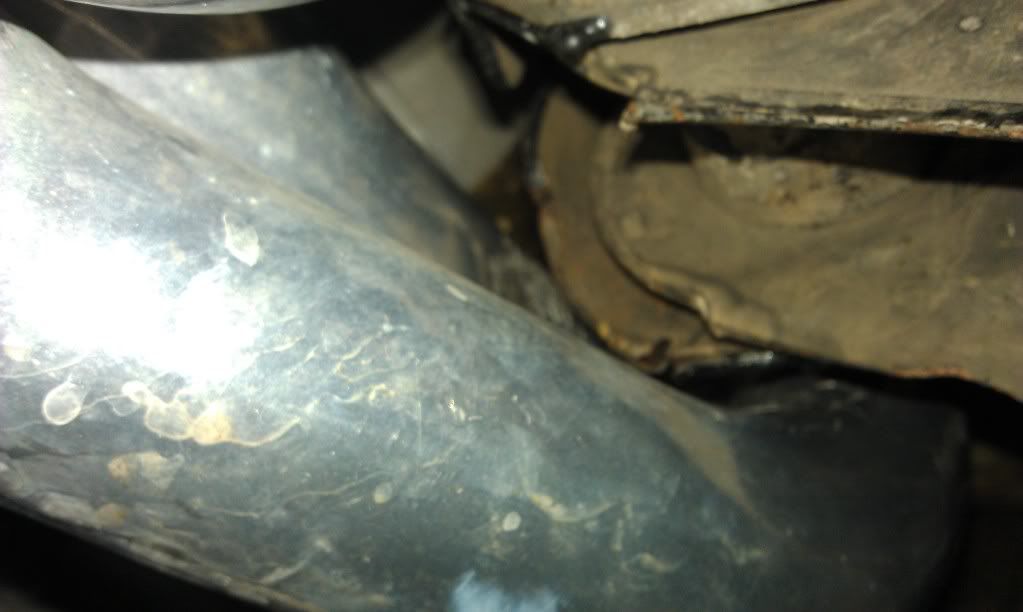
Driver side, fits better than I could of imagined
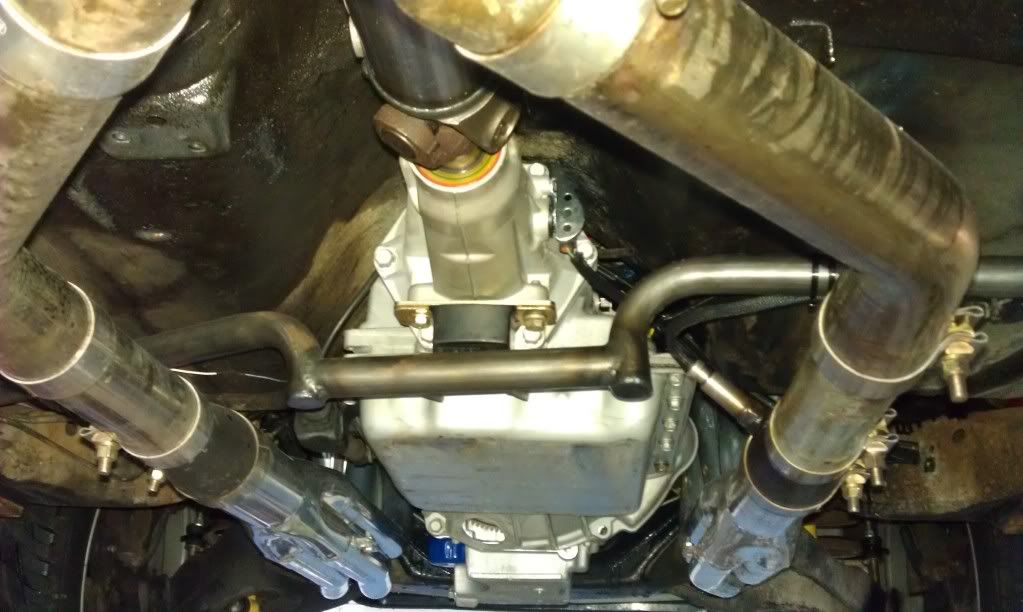
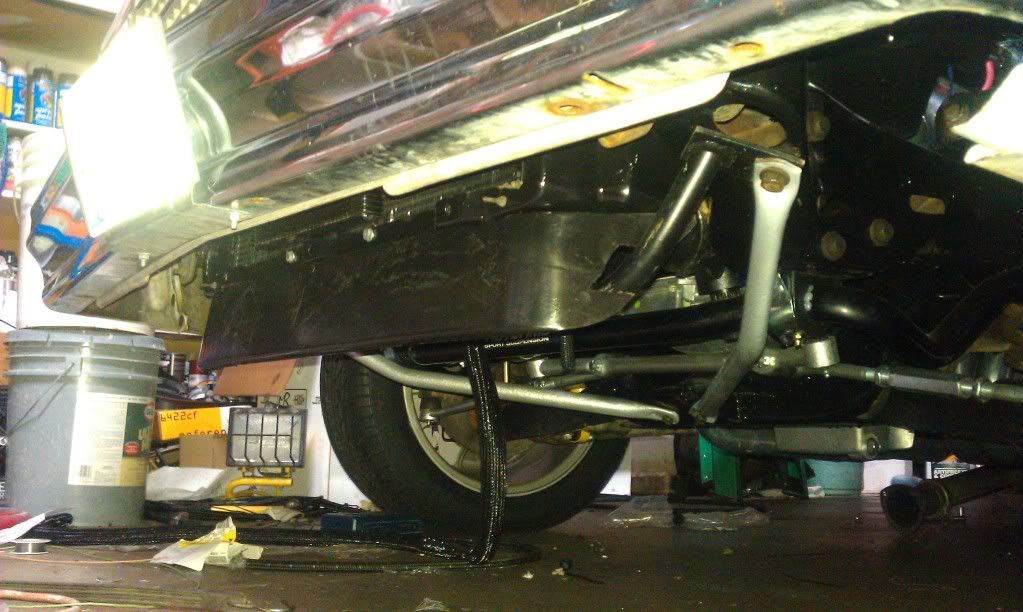
Pan shot
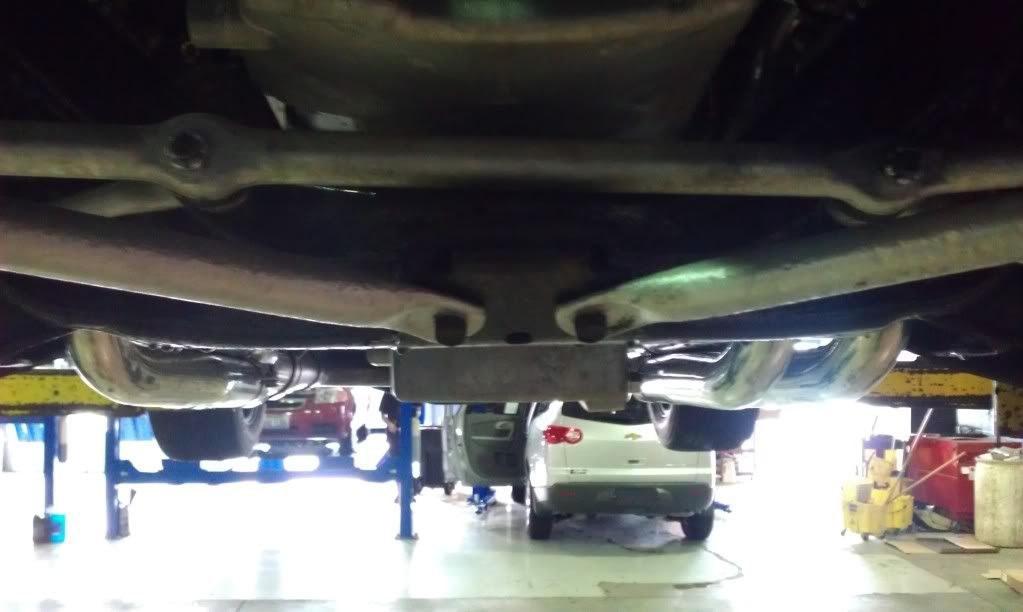
Iceman crossmember
Exhaust
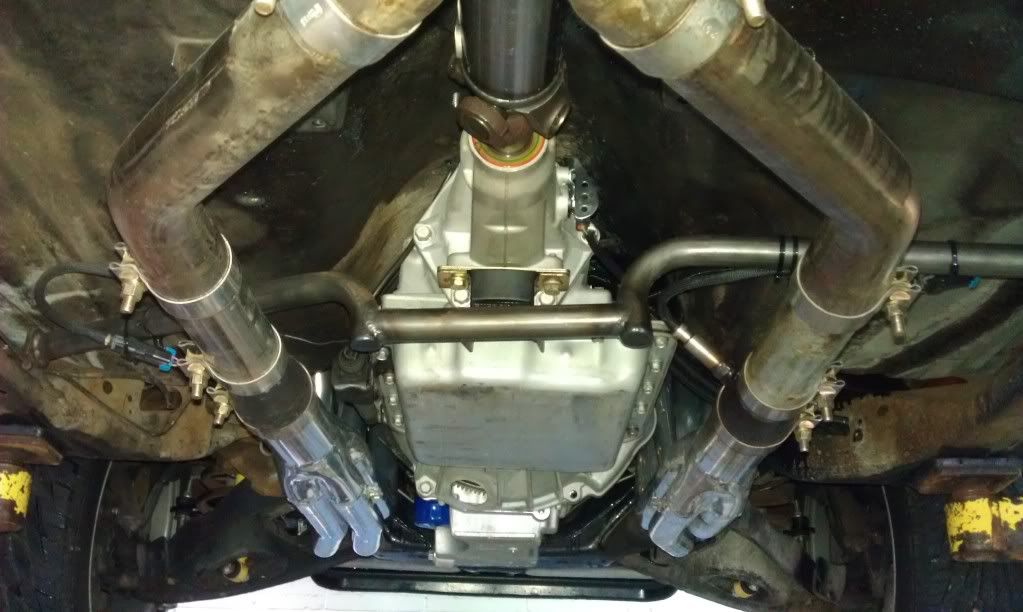
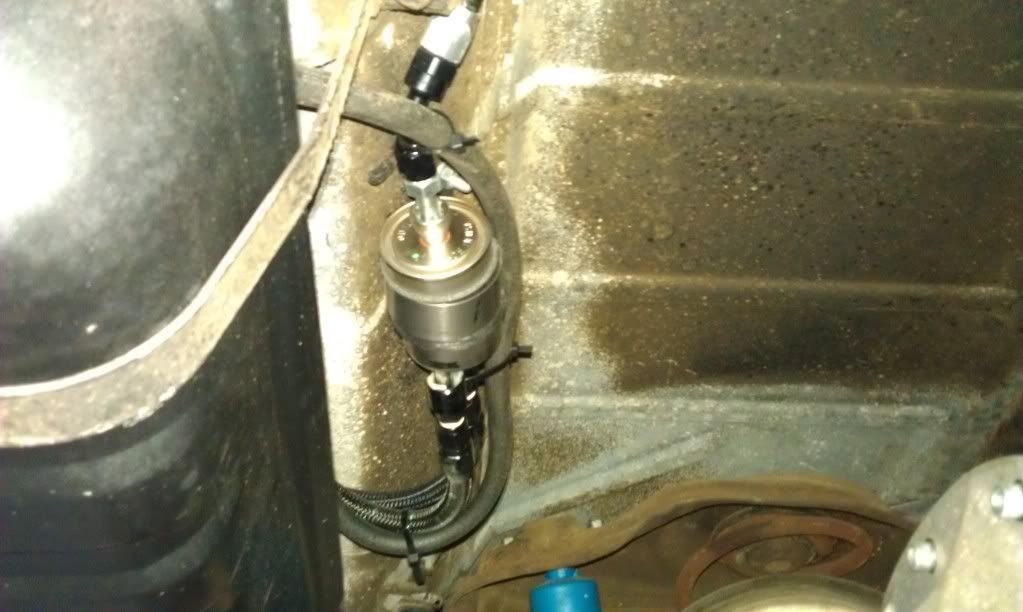
Fuel regulator
Rear end
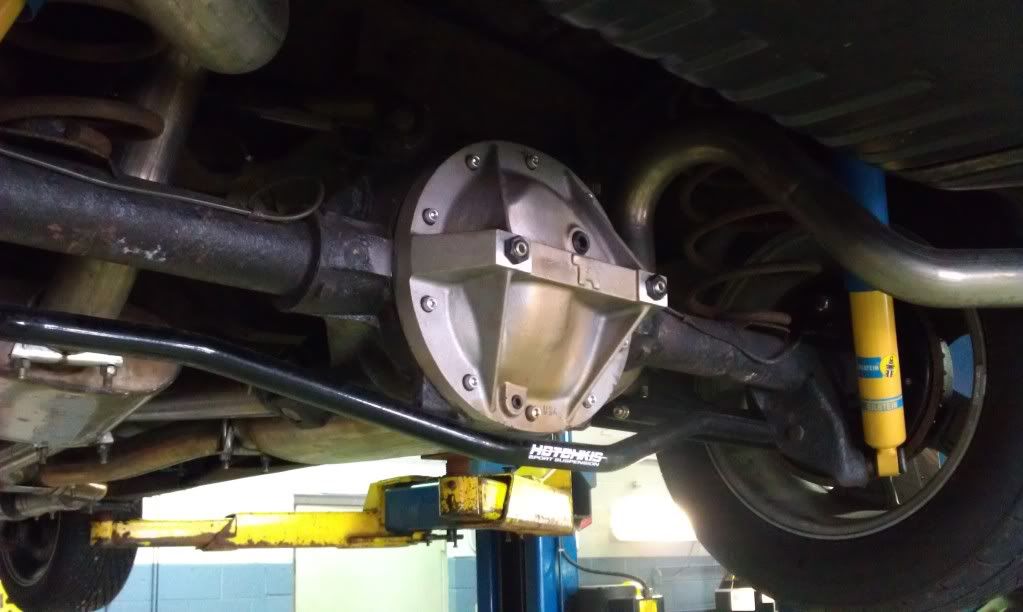
C3 Fab control arms
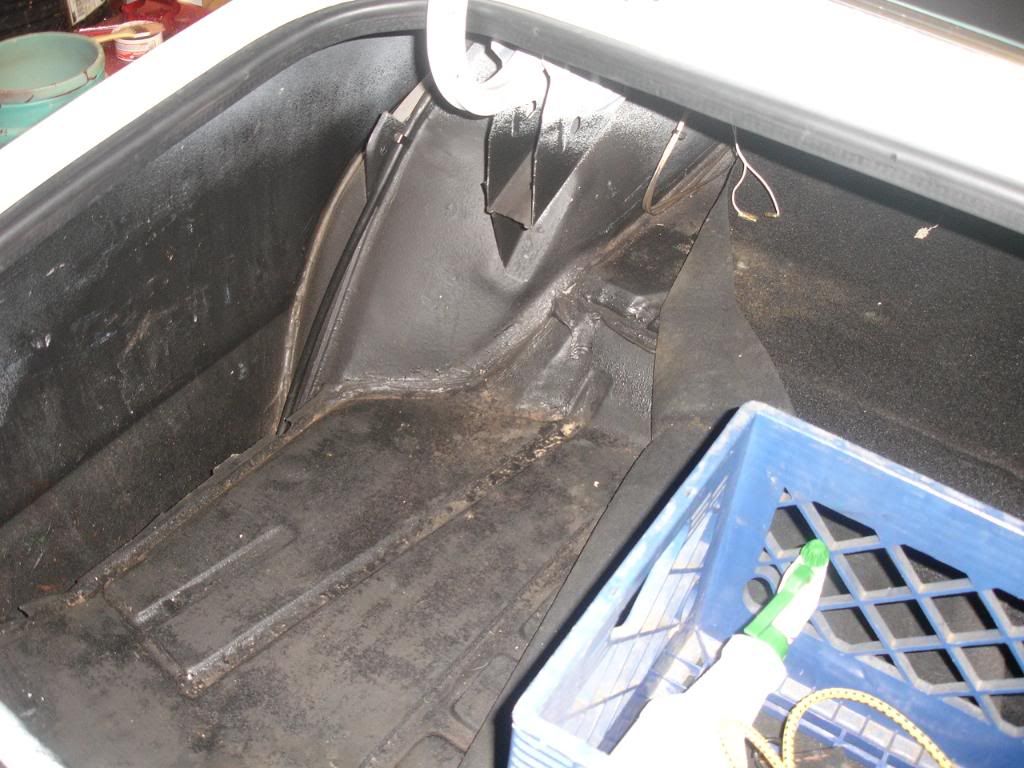
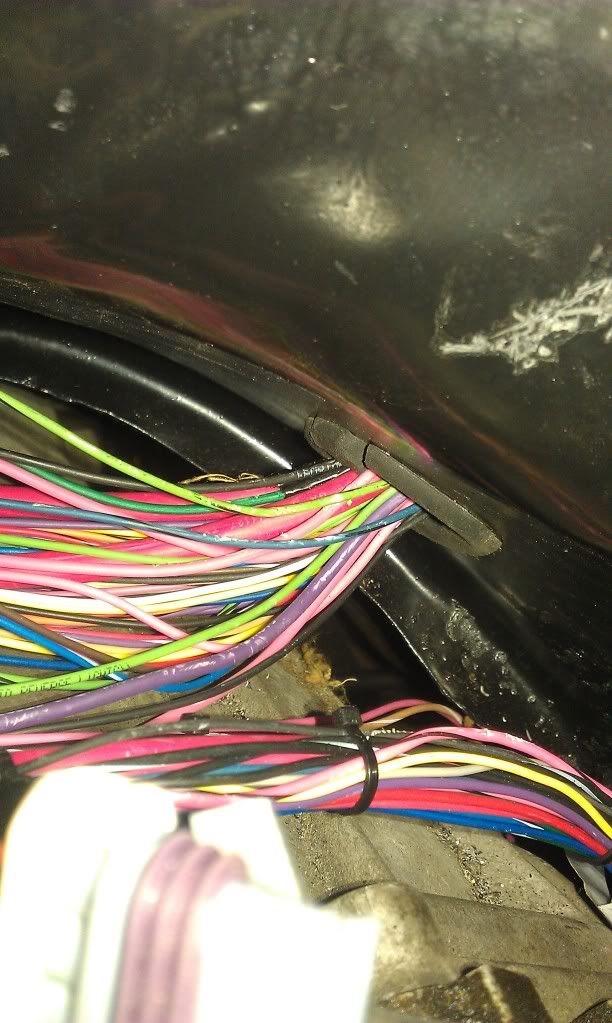
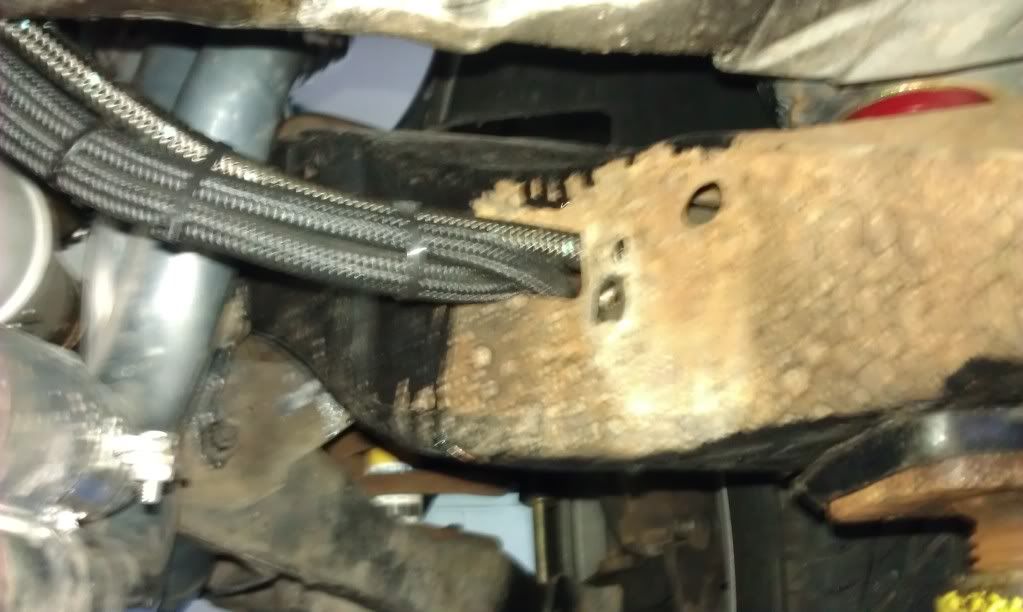
Crappy picture of where my fuel line and trans lines go into the frame
Another picture, you can kind of see the ground clearance for the Musclecar pan
That's all I have for now. Let me know if you have any other questions. My PCM is laying on my passenger floor right now. I'll get around to mounting it. I don't think I'll be able to pass tech at the race track with it there so I'll have to mount it soon.
Love the way the car drives. The cam is a nice choice for my build IMO. Great driveability, smooth idle, gets kind of choppy when backing into a parking space (which sounds bad *** at cruise nights haha).
Getting my 3.73's that I originally replaced with 3.23's put back in tomorrow. Also going to go ahead and put a set of Moser axles while I have the rear end apart.
That's all I have for now, let me know if you have any questions about anything I did.
Alright here's some pictures. Don't mind the trans line leak, I think I just fixed it outside when I was trying to find my "engine noise". I thing listening for pesky problems at work is just making me paranoid about my car at home. A guy I work with says you'll hear some ticking/tapping from the pushrods because of the length being too short/too long, but won't see any performance loss. Just the noise and I can live with that. Oil pressure is great going from 50-60 on the street. Converter bolts tight, all header bolts tight, and I even pulled the passenger side valve cover off to verify the modified rocker arms were torqued correctly. I think it's just me haha. No performance issues like a misfire or bad idle either.
Alright picture time wooo!
Engine bay as of right now
Cluster with new trans gauge and engine light placed in stock location
Picture of the Kirban GP brace tied to the jounce bars
Mod needed to use the GP bar with the replacement air dam for G-bodies
Mounts
Passenger side header clearance, about 1/4" from the control arm ear
Driver side, fits better than I could of imagined
Pan shot
Iceman crossmember
Exhaust
Fuel regulator
Rear end
C3 Fab control arms
Crappy picture of where my fuel line and trans lines go into the frame
Another picture, you can kind of see the ground clearance for the Musclecar pan
That's all I have for now. Let me know if you have any other questions. My PCM is laying on my passenger floor right now. I'll get around to mounting it. I don't think I'll be able to pass tech at the race track with it there so I'll have to mount it soon.
Love the way the car drives. The cam is a nice choice for my build IMO. Great driveability, smooth idle, gets kind of choppy when backing into a parking space (which sounds bad *** at cruise nights haha).
Getting my 3.73's that I originally replaced with 3.23's put back in tomorrow. Also going to go ahead and put a set of Moser axles while I have the rear end apart.
That's all I have for now, let me know if you have any questions about anything I did.
08-22-2011 | 11:05 PM
#15

01 cherryreds 10, very nice 79 Malibu. Nice and clean with a straight body. I enjoyed all the pics that you did. Keep them comming as I am sure there are a lot of viewers on this forum enjoying them too. Did you install the engine with the headers attached to the engine or did you put the headers on after the engine was in place. Your choice of tranny builders was very good as I had FLT build me 2 Level Vll but I have only used 1 so far and that shifts beautiful. Keep the pics comming and keep us posted as to track times etc. Good luck at the track. Rich
08-22-2011 | 11:24 PM
#17
I also have the 1-7/8". Those headers were a pain in the *** to put in. I wish I knew these fit so nicely before I wasted money on the Pacesetters only to not use them.
Intake is from www.intakehoses.com , but in the intake thread someone got a DIY kit from Air Raid and I think I may try that during the winter. I'm a big fan of the one piece look.
The headers are kind of a complicated thing. I didn't see any way to put them in on the engine out of the car, so that idea was out the window immediately. The driver side was fairly easy, you have to remove the collectors and then put the two separate primary sets on by themselves, and then get the collector back on once they are bolted to the engine. The starter was a pan in the *** but after a while it just comes natural to you once you've pulled them out so many times.
All in all, I'd get the BRP's again even if I could have used the Pacesetters. Build quality is top notch Hedman makes a great product.
08-22-2011 | 11:40 PM
#18
Why did it take so long with the Headers..what were they hitting?
With mine we slid them up from underneath the car after the Engine went in and bolted them in..literally was 3 min per side..if that. I took the Starter off and that was it..they both just slid right up. Then we installed the T56.
What you doin for the Radiator Shroud?
With mine we slid them up from underneath the car after the Engine went in and bolted them in..literally was 3 min per side..if that. I took the Starter off and that was it..they both just slid right up. Then we installed the T56.
What you doin for the Radiator Shroud?
