
1981 Second Gen Camaro Berlinetta BUDGET build (Updated FiTech injection/Boost!)
 12-11-2011, 06:38 PM
#41
Staging Lane

Join Date: Oct 2010
Posts: 54
Likes: 0
Received 0 Likes
on
0 Posts
Hey man well done on low budget. I swapped a ls2 t56 in my 79 berlinetta back in may. also restored the whole thing as well. I'm on nastyz28 as well under banaro79 pretty well documented as well so hopefully I can help in some way. Now that it's done it's crazy to drive! The mpg's are a bonus too. The rear tail pans are easy to do the inner is not available so u will have to make ur own. Good job so far makes me want to do it again


 12-14-2011, 04:04 AM
#43
I'm glad I found this! I'm doing a similar build in my '81 and I too am on a very similar budget. Luckily I already own a few things for the swap just sitting around. I too am going with the 5.3 but I'm gonna use the iron block because I plan on boosting it. I haven't taken the time to read through all 3 pages of this yet but I definitely will.
12-16-2011, 12:36 AM
#45
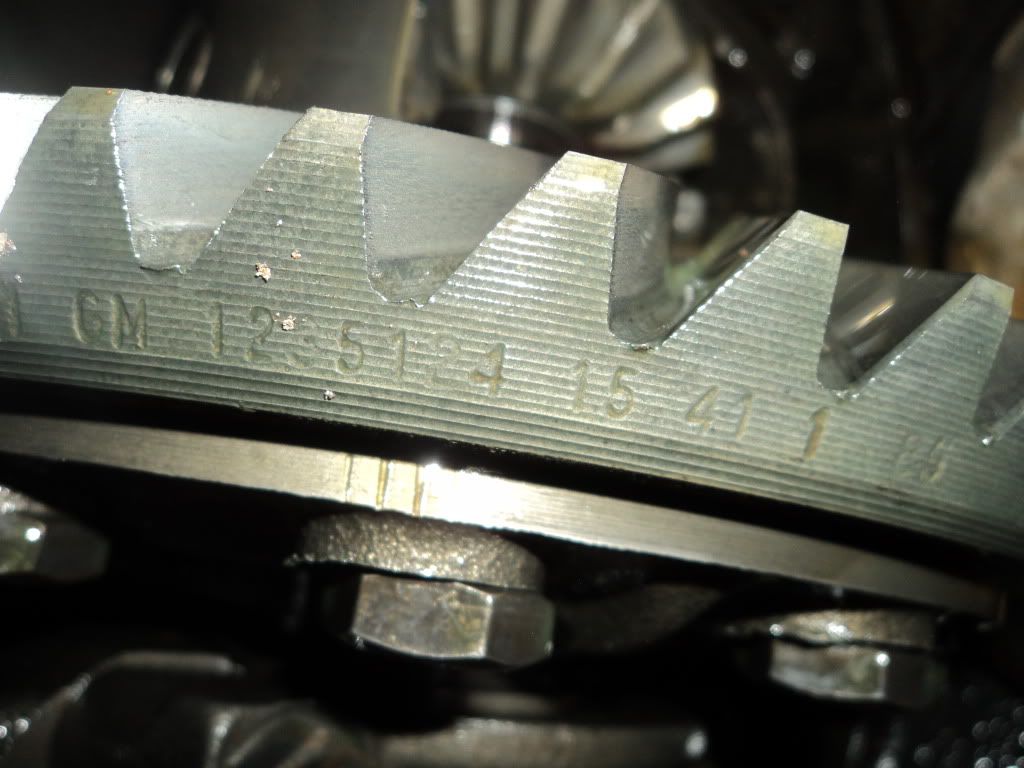
Alright the last few days have been dedicated to wire brushing, degreasing, scraping, and in general cleaning the rear section of the underbody while I am STILL waiting for my clutch pedals and linkage (Damn Bowtie Performance). Anyway nothing exciting I got a pic of the ring and pinion where you can see how to identify what gear ratio you have. Mine had 15 41 as you can see in the picture. So ring gear 41 divided by pinion 15 gives me the unfortunate rear gear ratio of 2.73, I was hoping those wild hillbillies swapped gears. I guess gears werent a problem with the big 454 in it lol. On top of that it is a NON Posi rear...looks like budget build means gas friendly for now!
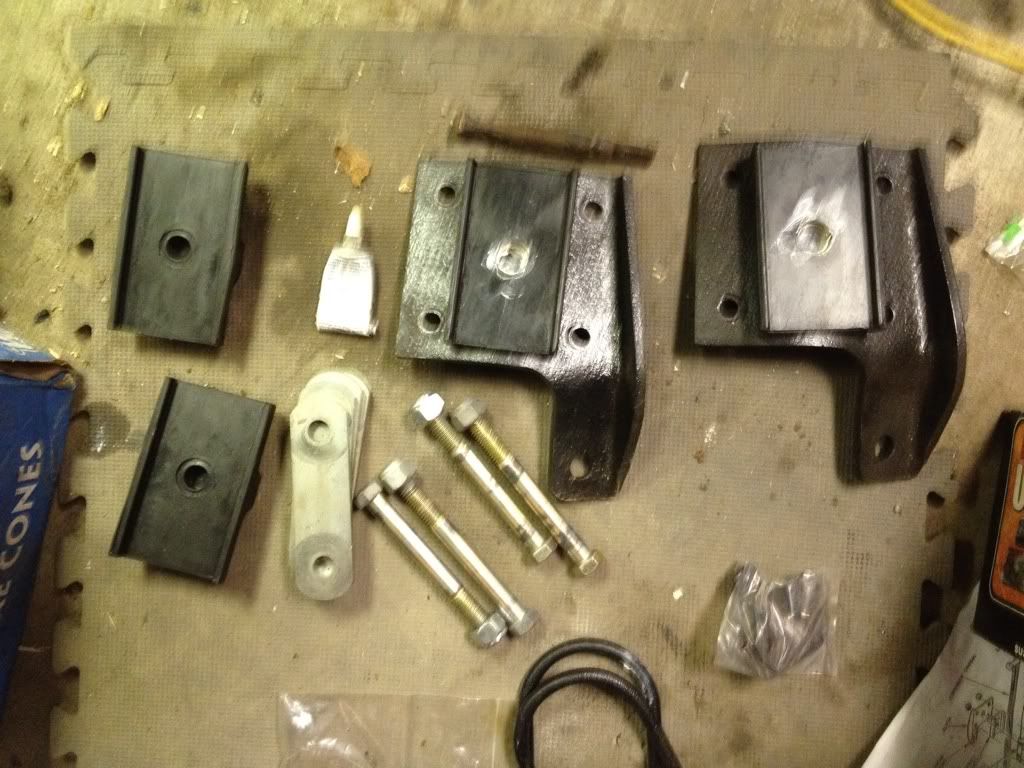
I also bought some new rear shocks from my place AZ, got them for $28 for the pair...they are Gabriels standard line, I figured that these would probably be better than the 30 year old ones i took off that couldnt rebound under no load lol. Anyway they were this nasty looking blood red, which i couldnt stand so I painted them a deep cast iron color similar to the stock non-Z28 color. (Z28s were black)
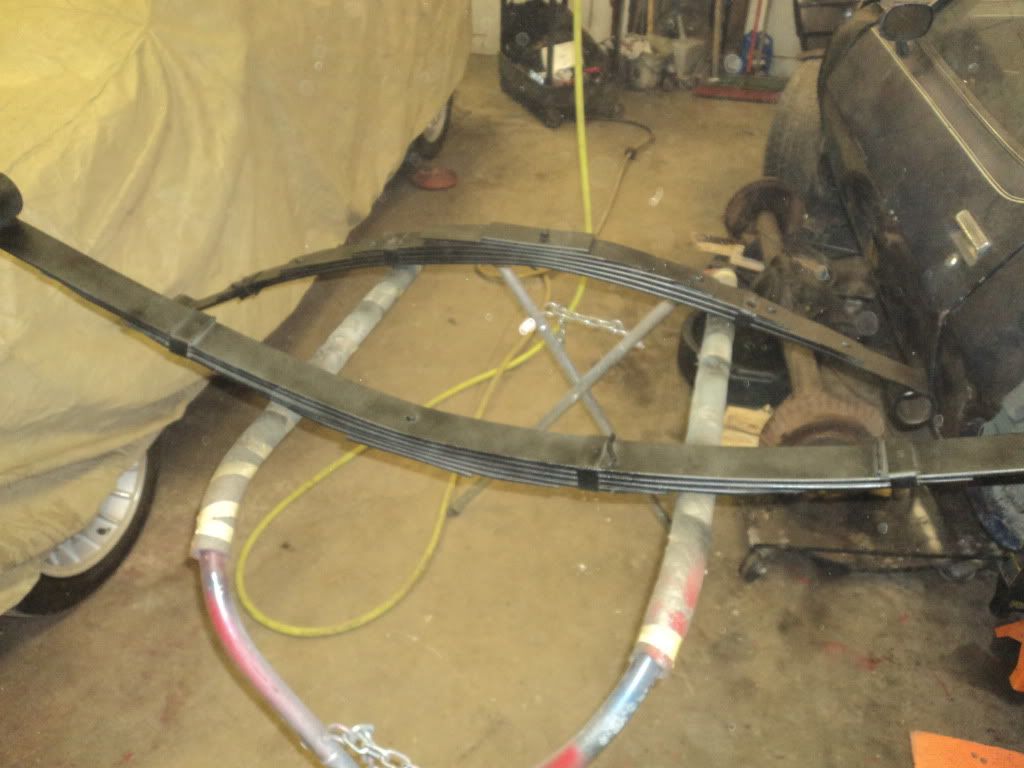
The leaf spring bushings on these cars arent hard to remove, OTHER than the metal sleeved ones in the front leaf eyes. I didnt want to torch them out due to the possibility of the heat messing up 30 year old spring steel. So instead i did an old school trick of drilling out the bushing until i got a large chunk out of the center to relieve the pressure on the sleeve, then it was PB blaster, hammer, PB, hammer, PB, hammer. I everntually got them both out without messing up the spring eyes, I wish i had a press! Also got the leafs springs finally cleaned up and replaced the rubbers that are in between the leaf spring and strap (not bushing). I wire brushed and carb clean the life out of them! Anyway I think I'm finally ready to install all the bushings and put the rearend/springs back in the car. I think this is the pic before the last coat of satin, they still have a hint of gray prime in them in the pic lol.
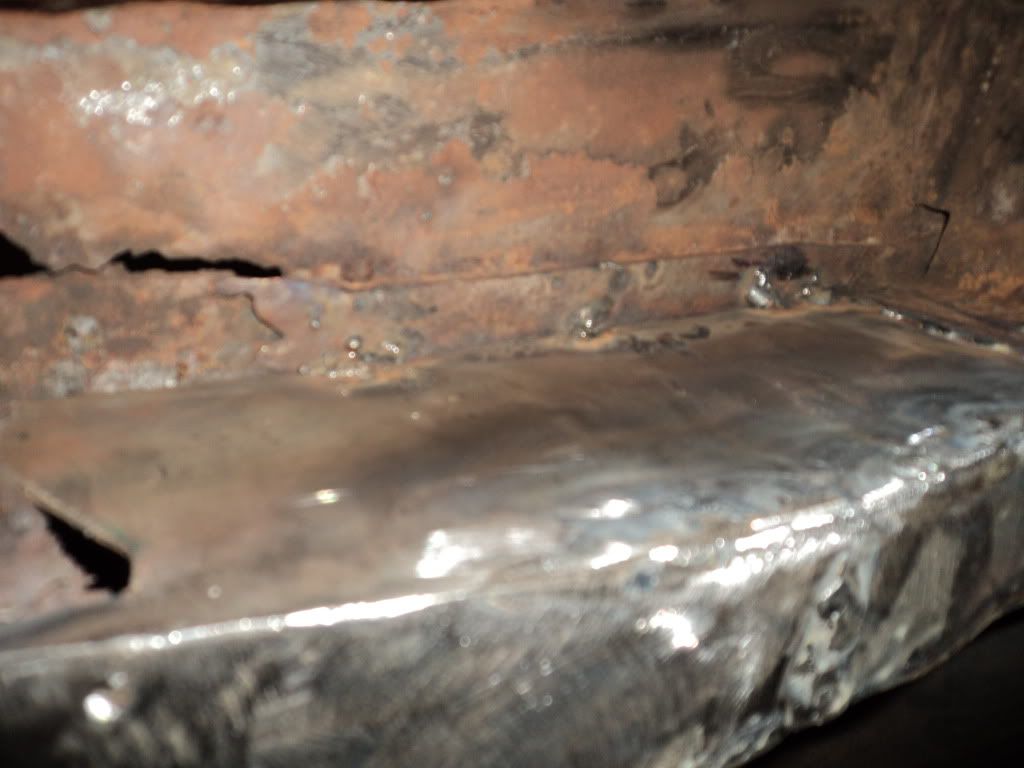
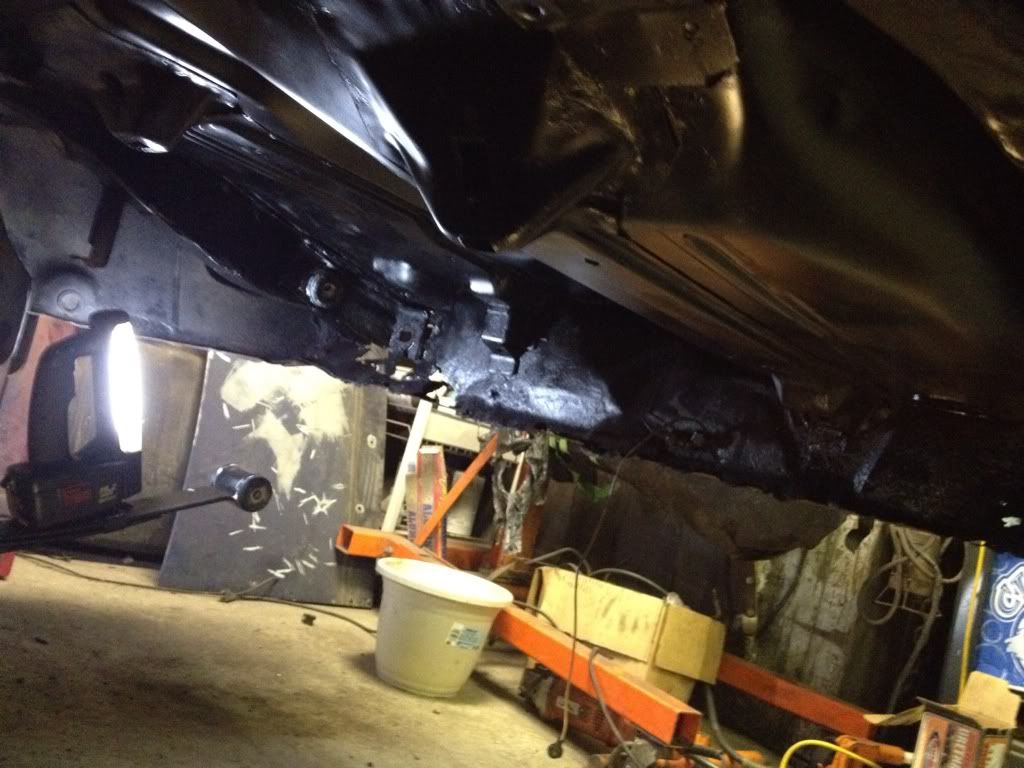
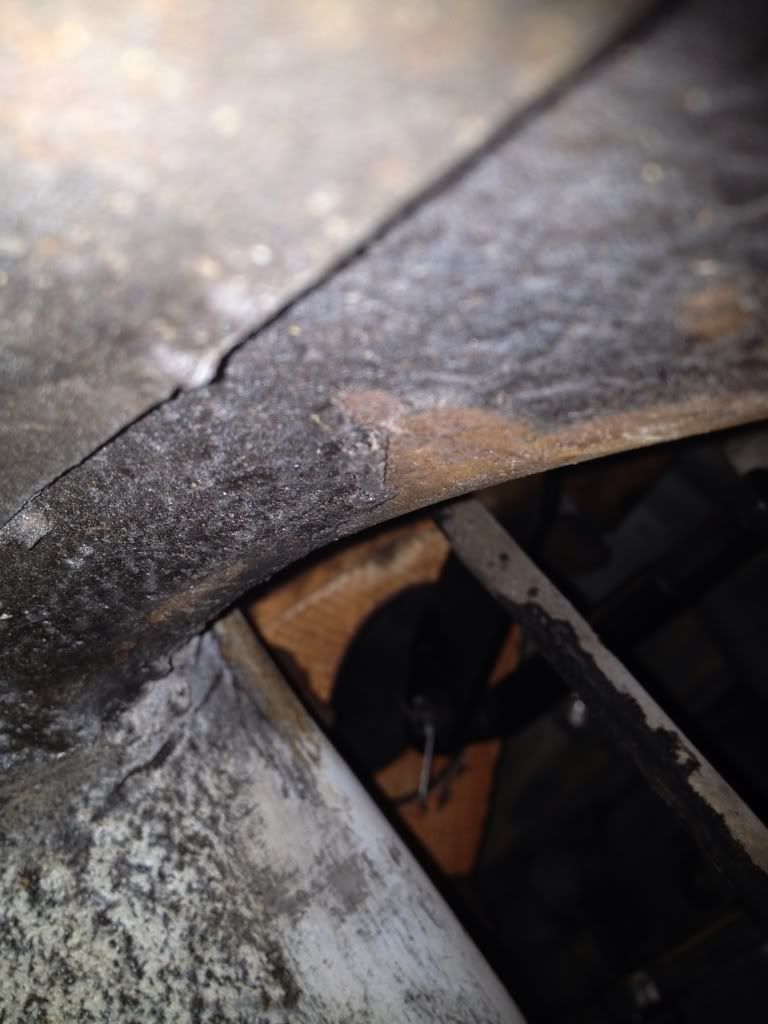
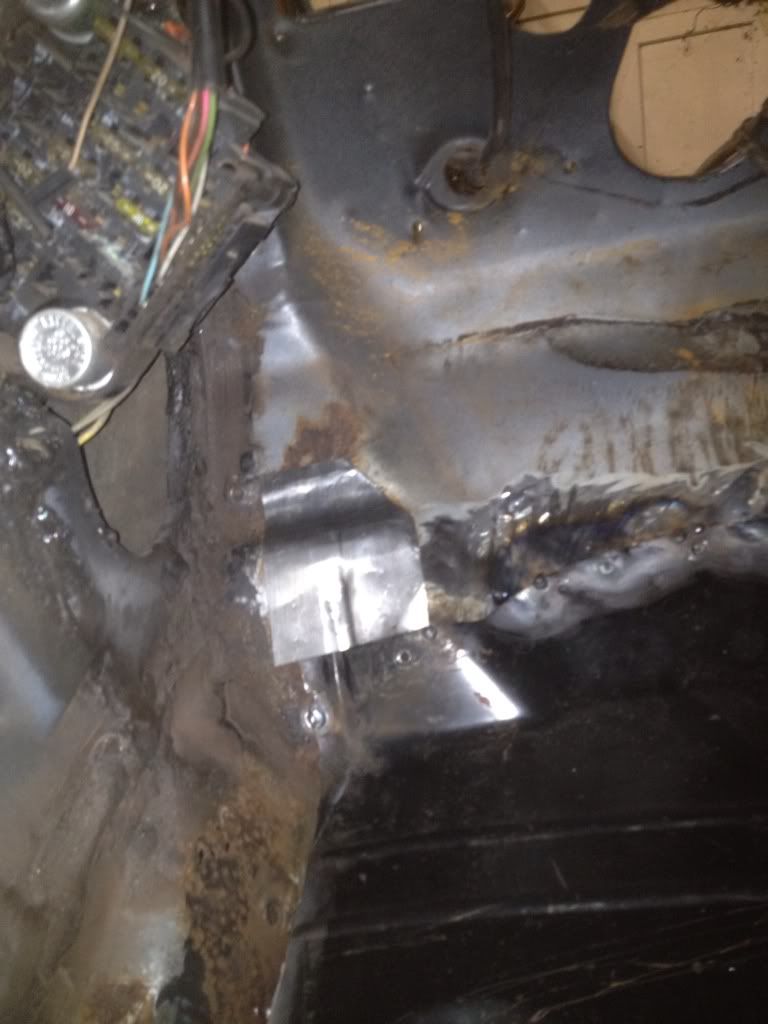
The reason I havent already put the bushings in is because i had to torch off the top shackle bolt on the rear framerail. I popped the driver side bushing out afterward with no problem. I didnt quite want to remove the passenger side shackle bushing yet...this is because there is some rust damage on the frame rail right before the section where the leaf spring upper shackle bushing presses into the framerail itself. I figured i didnt want to remove anymore material (even if it was only the steel sleeved bushing) UNTIL I addressed the rust issue by welding in some 16 gauge plate. There is also damage on the other side of the same framerail too. So I am going to leave bushing in for structural integrity until at least one of the sides has its patch tacked it. I couldnt find any replacement framerails for an 81 camaro, but unless they were cheap i prob wouldnt have bought them anyway. I figure once i overlap some plate and box in the rear part of the framerail i will be ok. I spent a while cleaning the section where plate was going to be welded, then i just primed it lightly to seal it until tommorrow. Looks nasty now but we will get her fixed up right!
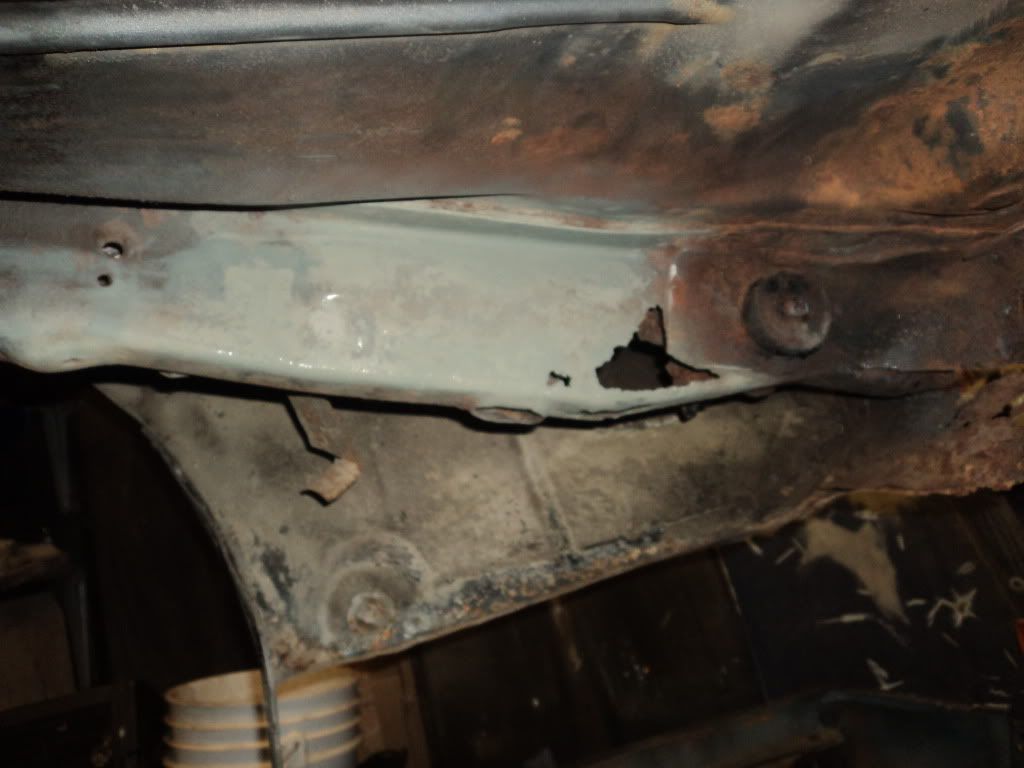
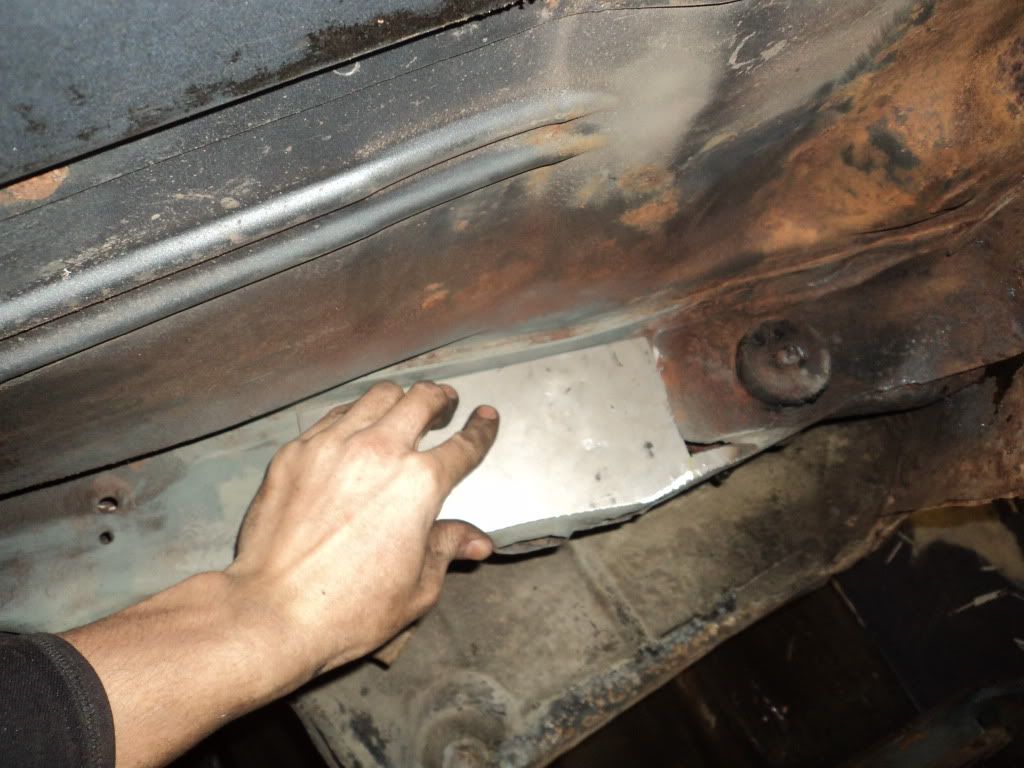
You might be wondering why i left a gap between the small tab of the patch and the frame rail...i plan on running a horzontal piece through the framerail in order to tie it in will the patch on the other side...I gotta try to not overheat this damn framerail!
Hopefully i can get the clutch stuff tommorrow, although im goin to pull the engine back out since i dont feel like installing flywheel/clutch on my back!
I also bought some new rear shocks from my place AZ, got them for $28 for the pair...they are Gabriels standard line, I figured that these would probably be better than the 30 year old ones i took off that couldnt rebound under no load lol. Anyway they were this nasty looking blood red, which i couldnt stand so I painted them a deep cast iron color similar to the stock non-Z28 color. (Z28s were black)
The leaf spring bushings on these cars arent hard to remove, OTHER than the metal sleeved ones in the front leaf eyes. I didnt want to torch them out due to the possibility of the heat messing up 30 year old spring steel. So instead i did an old school trick of drilling out the bushing until i got a large chunk out of the center to relieve the pressure on the sleeve, then it was PB blaster, hammer, PB, hammer, PB, hammer. I everntually got them both out without messing up the spring eyes, I wish i had a press! Also got the leafs springs finally cleaned up and replaced the rubbers that are in between the leaf spring and strap (not bushing). I wire brushed and carb clean the life out of them! Anyway I think I'm finally ready to install all the bushings and put the rearend/springs back in the car. I think this is the pic before the last coat of satin, they still have a hint of gray prime in them in the pic lol.
The reason I havent already put the bushings in is because i had to torch off the top shackle bolt on the rear framerail. I popped the driver side bushing out afterward with no problem. I didnt quite want to remove the passenger side shackle bushing yet...this is because there is some rust damage on the frame rail right before the section where the leaf spring upper shackle bushing presses into the framerail itself. I figured i didnt want to remove anymore material (even if it was only the steel sleeved bushing) UNTIL I addressed the rust issue by welding in some 16 gauge plate. There is also damage on the other side of the same framerail too. So I am going to leave bushing in for structural integrity until at least one of the sides has its patch tacked it. I couldnt find any replacement framerails for an 81 camaro, but unless they were cheap i prob wouldnt have bought them anyway. I figure once i overlap some plate and box in the rear part of the framerail i will be ok. I spent a while cleaning the section where plate was going to be welded, then i just primed it lightly to seal it until tommorrow. Looks nasty now but we will get her fixed up right!
You might be wondering why i left a gap between the small tab of the patch and the frame rail...i plan on running a horzontal piece through the framerail in order to tie it in will the patch on the other side...I gotta try to not overheat this damn framerail!
Hopefully i can get the clutch stuff tommorrow, although im goin to pull the engine back out since i dont feel like installing flywheel/clutch on my back!
12-16-2011, 06:35 AM
#46
Looking good! I am in the same sad spot as you with the rear end, 2.73 open diff is really going to kill our fun factor until we can get some better gear and a LSD. DAMN ECONOMY CARS! I also understand your frustration on the lack of a press. I just took apart my front suspension and pounded out the ball joints with a sledge on the floor! Keep up the good work, hope you get your clutch parts soon!
12-16-2011, 09:41 AM
#47
Launching!
iTrader: (1)
Join Date: Apr 2011
Location: Adamsville Tennessee
Posts: 231
Likes: 0
Received 0 Likes
on
0 Posts
Are you going to swap to urethane bushings? I have a couple of old t/a's around me, I think a couple have posi's or lsd's. When I get home I'll check and see. I may be able to get the gears pretty cheap for you, but I don't get home until 25 of Januarary. I would sell you the one out of my t/a when I get my 9" but I promised it to my father for his 36 chevy coupe. I need to post some pics of that on here, I believe its a beauty although it's running a TPI lol. But its a stout TPI.
This is a great project, I love these body-styled year cars. Suscribed!
This is a great project, I love these body-styled year cars. Suscribed!
12-25-2011, 12:42 PM
#49
Well I have had to spend a lot longer time on this mechanical clutch linkage then I thought! The lack of provision for the engine block side pivot ball made it challenging, I made like 3 different iterations before I was happy with the zbar angle. The bad part is the manifold I was planning on using has the collector right on top of the zbar return tab. I think I am going to see if I can find some cheap c6 corvette manifolds which should work and flow a lot better as well, but some people are asking 150 bucks for them! I can get headers for like 225! Ill see whats out there I guess. Pics to come....
01-23-2012, 12:18 PM
#50
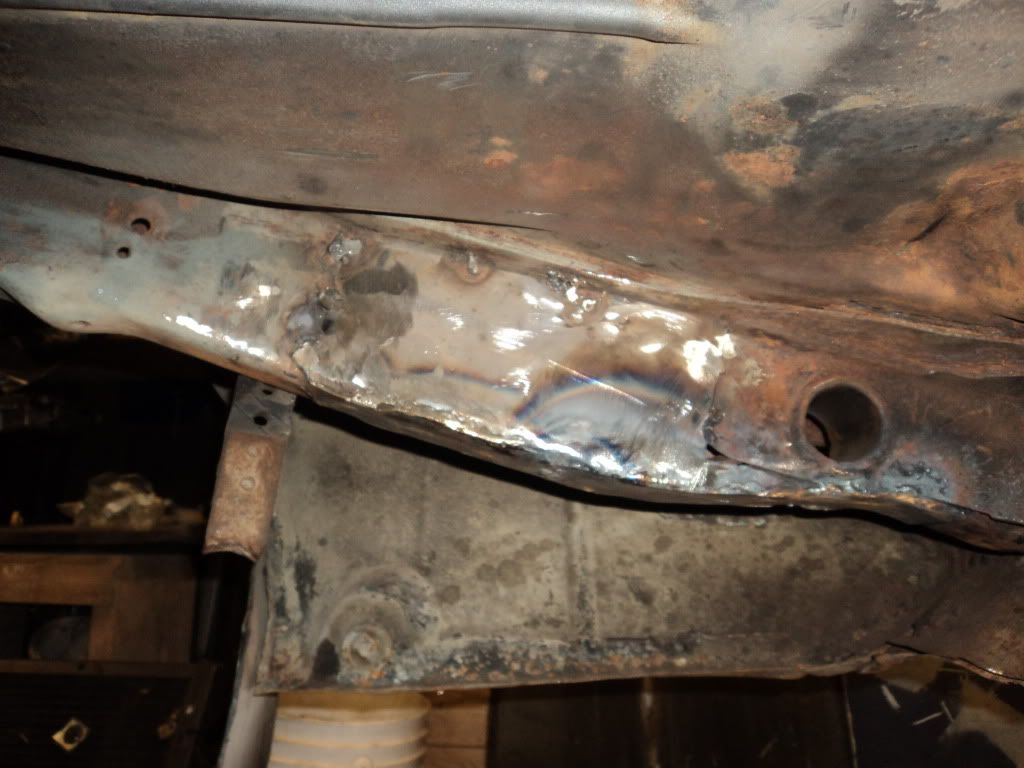
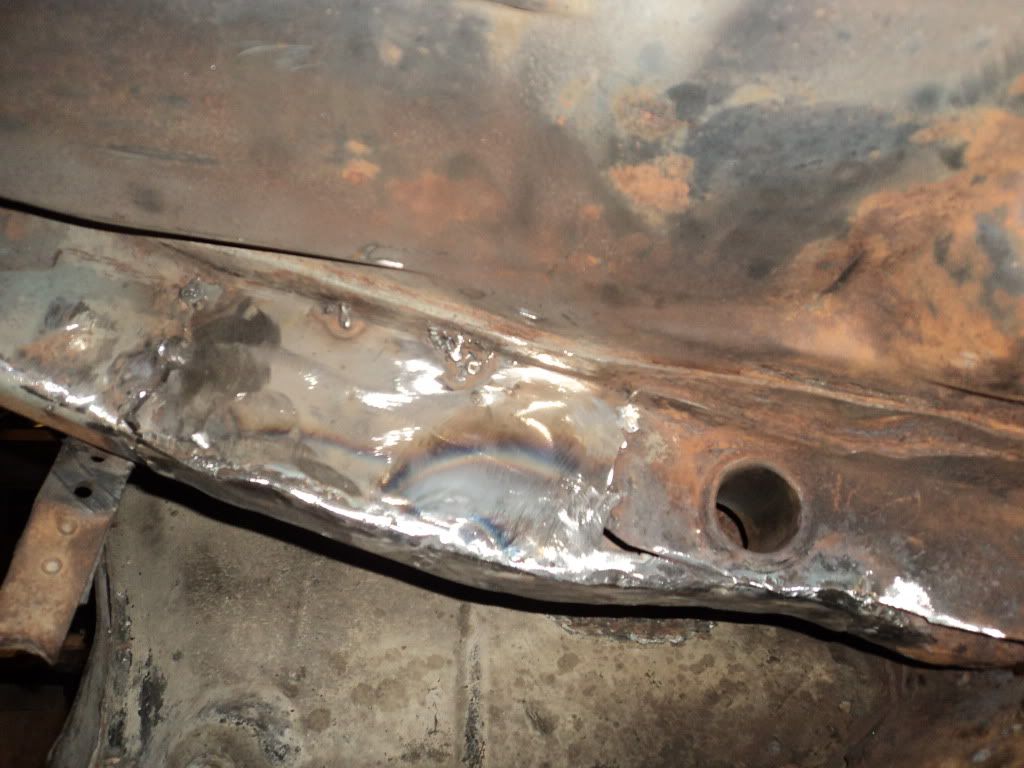
OK so i have got a little lazy on the posting, but i have been working still...I have completed the rear suspension part of my project by painting the underbody from the rear wheels back and repairing the hole i could see through on the framerail a few posts back...i got that handled..it isnt the best ilooking repair in the world, but i know damn sure it will get the job done!
Also replaced all bushings on the rear suspension assembly with the cheap prothane kit i got off of ebay...
some people say that these suck and you should just stick with rubber, well we will see, but i hope they are wrong..at least i know they are better than the 30 year old ones lol! they are a pain in the *** to put in especially if you are an idiot like me an take everything apart with no measurements! It took forever to double, triple check an make sure everything was square..but im pleased...any way here is some pics


I just painted the inner cross rail for not, but i got a new tailight panel coming in the mail so i will just do all that at once...
Im not sure if i posted this but i am making this a floor shifter car because i like the bare bones idea...so this is the picture i am using as the look im after its also from a second gen camaro..
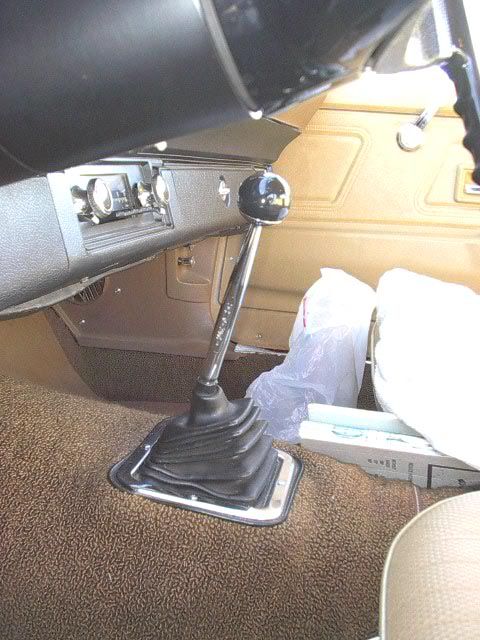
Here is what mine looked like with the correct hurst comp plus shifter and a hurst shifter made for who knows what..my buddy said it looked like a ratrod but i said "never have a leverage problem while power shifting either"...its too big though so i threw in the stock one for now


Now all I'm going to pull the motor and trans and pull the front subframe...i got bushing kit along with the tail panel from rick's camaro on a sweet email deal and should be here by end of the week..budget, budget, budget
Also replaced all bushings on the rear suspension assembly with the cheap prothane kit i got off of ebay...
some people say that these suck and you should just stick with rubber, well we will see, but i hope they are wrong..at least i know they are better than the 30 year old ones lol! they are a pain in the *** to put in especially if you are an idiot like me an take everything apart with no measurements! It took forever to double, triple check an make sure everything was square..but im pleased...any way here is some pics
I just painted the inner cross rail for not, but i got a new tailight panel coming in the mail so i will just do all that at once...
Im not sure if i posted this but i am making this a floor shifter car because i like the bare bones idea...so this is the picture i am using as the look im after its also from a second gen camaro..
Here is what mine looked like with the correct hurst comp plus shifter and a hurst shifter made for who knows what..my buddy said it looked like a ratrod but i said "never have a leverage problem while power shifting either"...its too big though so i threw in the stock one for now
Now all I'm going to pull the motor and trans and pull the front subframe...i got bushing kit along with the tail panel from rick's camaro on a sweet email deal and should be here by end of the week..budget, budget, budget
01-25-2012, 09:27 AM
#51
Teching In

Join Date: Feb 2011
Location: East TN
Posts: 6
Likes: 0
Received 0 Likes
on
0 Posts
Keep up the work man! And keep them pictures coming. I am itching to get get started on my 72 camaro ls swap, but got some house project that need to be finished first. I like you style of thinking with budget minded but quailty work.
01-25-2012, 09:36 AM
#52
Teching In
Join Date: Feb 2011
Location: East TN
Posts: 6
Likes: 0
Received 0 Likes
on
0 Posts
Check out this thread on LQ4 motors and Accessories. griffsbombelco and quagmeyer have some excellent pictures of truck accessories in second generation camaros. Also shows you how the truck oil pans hang down.
http://www.nastyz28.com/forum/showthread.php?t=219098
http://www.nastyz28.com/forum/showthread.php?t=219098
01-25-2012, 10:12 AM
#53
Staging Lane
Join Date: Jun 2011
Location: Sioux Lookout, Ontario
Posts: 64
Likes: 0
Received 0 Likes
on
0 Posts
Looks good so far. I'm sure you know there are lots of these done on nastyz28. Not just LS swaps, but auto to 4 speeds, etc.
I did the four speed swap a couple years ago, and it was the best thing to date I've ever done to it. You actually 'drive' the car now. The linkage is a bit of a pain, but take the extra time to get it right. Lack of a bullstud is a bit of a pain. I did see somewhere a new bracket that someone made, that was a small peice of 1/4's plate steel bent 90 degrees. It mounted in a bellhousing mounting bolt hole, and then swung the 90 around to the side of the block (facing foward), with a ball stud welded where the old one would be in a sbc. Didn't seem difficult to make, espically since you're obviously handy with a welder. There is room there to fit the linkage; its tight, but it works. PS Also like the floor shifter/bare bones like.
Not sure on the trans, but if its an 81, you likely have a 3.42 first gear. Should have 6 splines on the input. Think they were all the same for 81 (don't quote me), but mine is the same. I to have 2.73 gears. I actually downgraded from 3.73 to 2.73 on purpose, since I travel with mine on a regular basis. With 3.73 and a direction driver trans (which the st-10 is, 1 to 1 fourth gear), I was turning almost 3000 rpm at 100km/h (60mph). That got old fast. When I had the automatic it was slouchy off the line, however when the ST-10 came into play, that extra low first gear made starting out effortless. Second gear is placed just right to back into from first quickly and keep the engine in its power band. 3 is a little farther out, drops rpms quite a bit, and fourth not far from that. Sort of a large split between 1-2 and 3-4. But for a street car I love it. Wouldn't go with a higher gear set unless I had an OD trans.
I'd stick with what you got and try it first. If you decided it's not good enough, you can change later. Save you're pennies for the intake and install.
01-30-2012, 04:04 PM
#54
I had to go back on the rearend in order to correct a couple issues...the first being the fact that the leaf spring plates that secure the leaf spring to the axle on either were bent upwards because the new poly leaf spring pads are WAY thicker than the old rubber ones, and when i ran the nut onto the U-bolt and 2 T-bolts it started to bend the 1/8+" plate! I saw on nastyz28 a few others with this problem so I just did what they did and stacked a couple washers between the plate and the nuts, i just loctited them but they were run up enough that you could see the bolt coming through letting me know i had all the threads covered....Now i gotta remove the front subframe but i'm not sure if i wanna disassemble the control arms before or after i take off the subframe...any ideas?
I finally took some pics of the infamous mechanical clutch linkage that I couldnt find any pictures to go off of on the net. The Fbody manifolds i had fit great on both sides until i installed the linkage! The driver side collector end directly over top of the Zbar with the clutch pushrod adjusted to the right freeplay..


Here is a picture of the Zbar up close showing the plate i made up to hold the engine block side pivot ball...
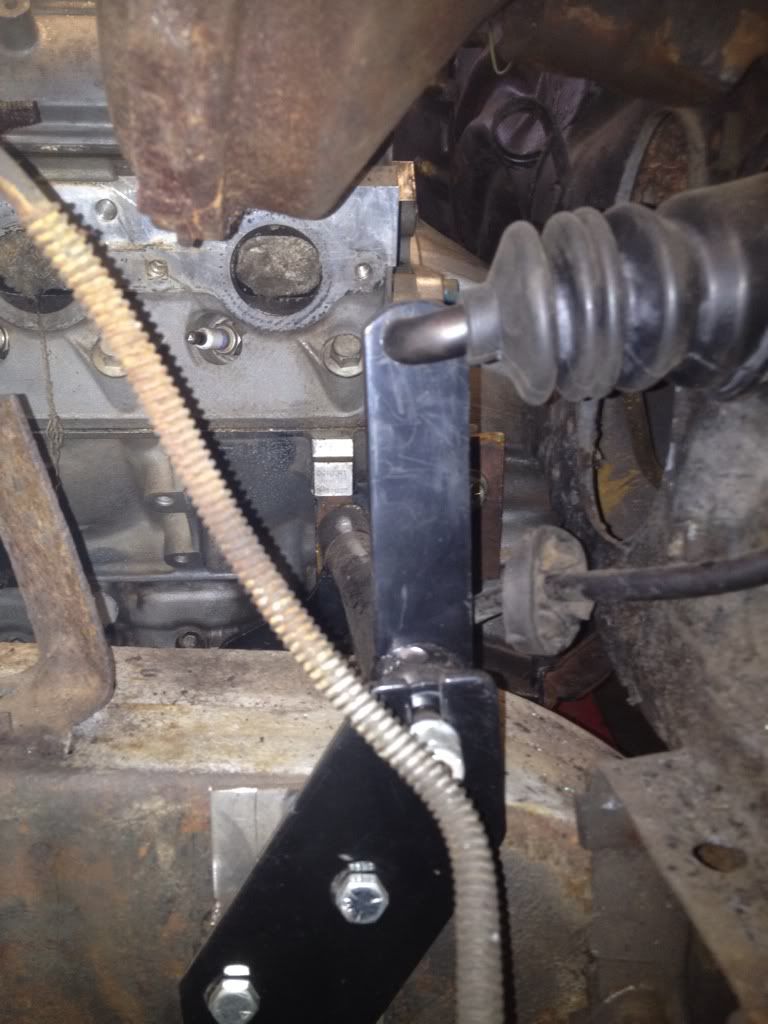
i used some quarter inch plate just bc it was laying around, but its prob overkill so im going to make something that looks nicer but still has the correct strength...i threaded the plate so the ball stud would thread in, as well as have a nut that secures it behind the plate...


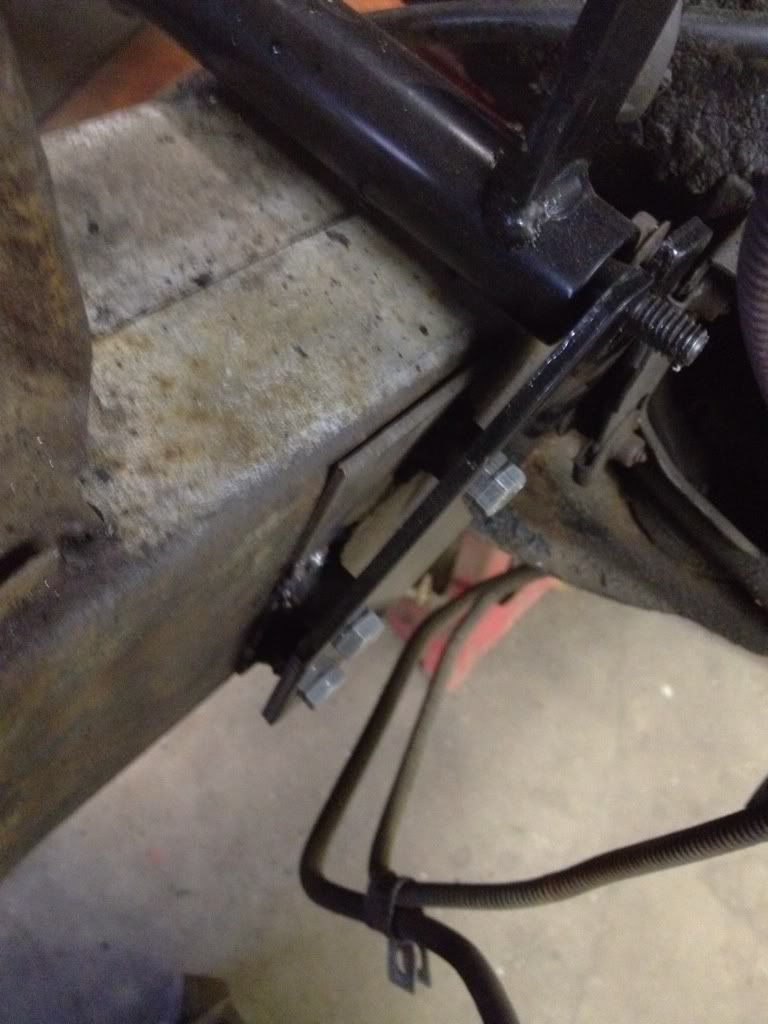
Also the bracket that the Zbar slides into on the outside of the driver side framerail was too close...I would have had to grind the aluminum engine block in order to move the ball stud closer to the block...so instead i made a plate with some round stock spacers to push the frame bracket 1/2" further outside the frame rail (again def got to redesign this, it just good to have dimensions)...since the original frame bracket fasteners were just some cheap GM self tappers i used some linger bolts and i threaded the frame rail. I figure if i loctite it i should be good, but im still trying to think of a better setup...

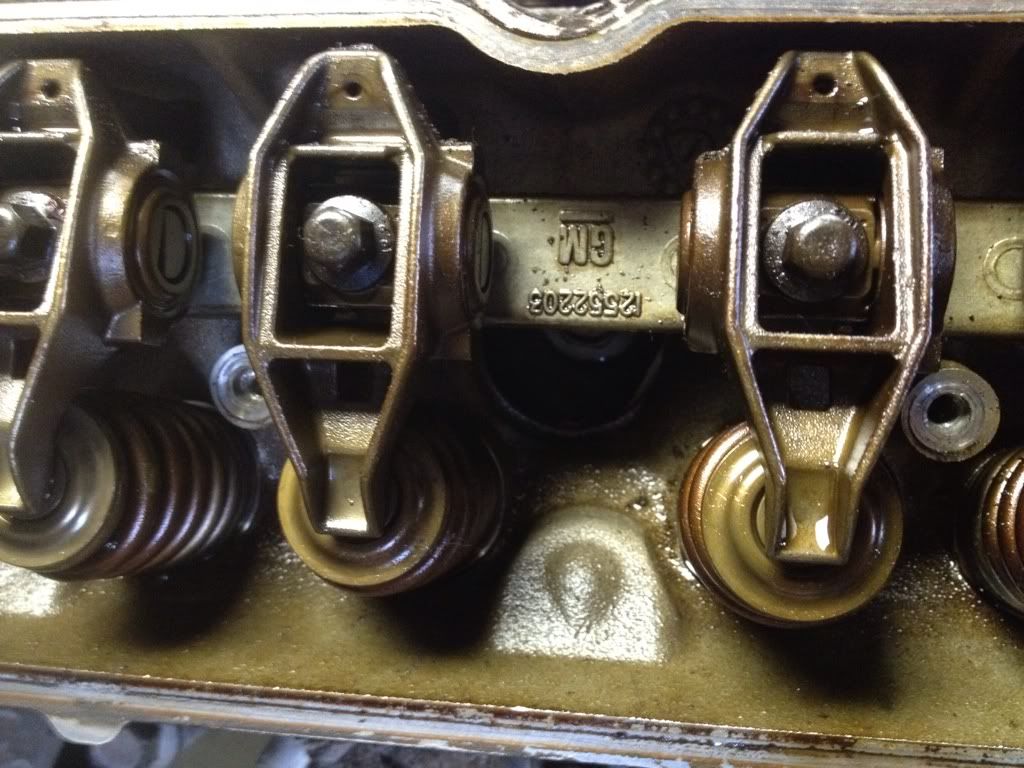
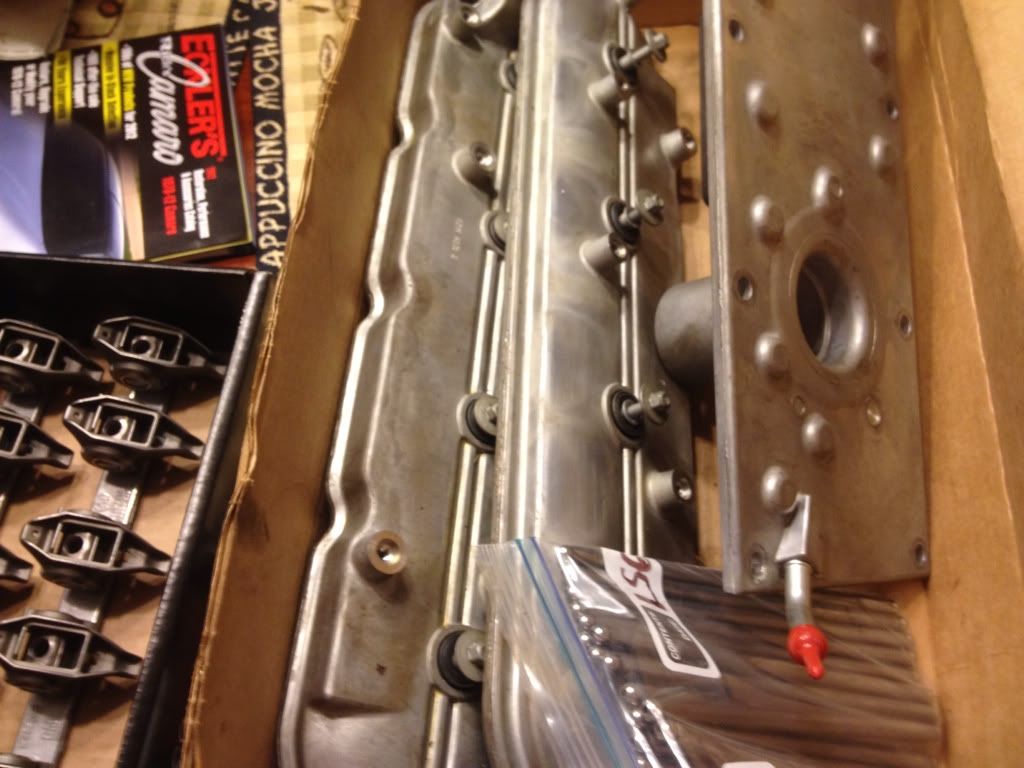
On a side note i pulled the valve covers just for the hell of it since im itching bad to rebuild it!!! I cant believe how much cleaner it is under there than the other 40k mile lm7 5.3 i had before, it was all creamy looking..not good....anyway check out how clean for almost 1/4 million miles!
I finally took some pics of the infamous mechanical clutch linkage that I couldnt find any pictures to go off of on the net. The Fbody manifolds i had fit great on both sides until i installed the linkage! The driver side collector end directly over top of the Zbar with the clutch pushrod adjusted to the right freeplay..
Here is a picture of the Zbar up close showing the plate i made up to hold the engine block side pivot ball...
i used some quarter inch plate just bc it was laying around, but its prob overkill so im going to make something that looks nicer but still has the correct strength...i threaded the plate so the ball stud would thread in, as well as have a nut that secures it behind the plate...
Also the bracket that the Zbar slides into on the outside of the driver side framerail was too close...I would have had to grind the aluminum engine block in order to move the ball stud closer to the block...so instead i made a plate with some round stock spacers to push the frame bracket 1/2" further outside the frame rail (again def got to redesign this, it just good to have dimensions)...since the original frame bracket fasteners were just some cheap GM self tappers i used some linger bolts and i threaded the frame rail. I figure if i loctite it i should be good, but im still trying to think of a better setup...
On a side note i pulled the valve covers just for the hell of it since im itching bad to rebuild it!!! I cant believe how much cleaner it is under there than the other 40k mile lm7 5.3 i had before, it was all creamy looking..not good....anyway check out how clean for almost 1/4 million miles!
02-02-2012, 04:51 PM
#55
Hey man, looks like you are making some good progress. I too am working on chassis improvments to supplment my LS transplant. After I pulled the engine and tranny I pulled the subframe out with all the front suspension still rolling THEN I tried to pull all the steering and control arms off and I will tell you: it is a BI#CH dismantling without the mass of the vehicle to ahelp you out! Every bolt I turned the subframe would slide along the floor. I had to stand on the frame (all 260LB of me). Plus, using the weight of the vehicle to aid in removing the coil springs would have been a major ++. So my 2 cents is to remove the steering and control arms with the subframe and engine in place! good luck!
 04-10-2012, 10:28 AM
#58
Ok i havent updated in a while but i have still been working...
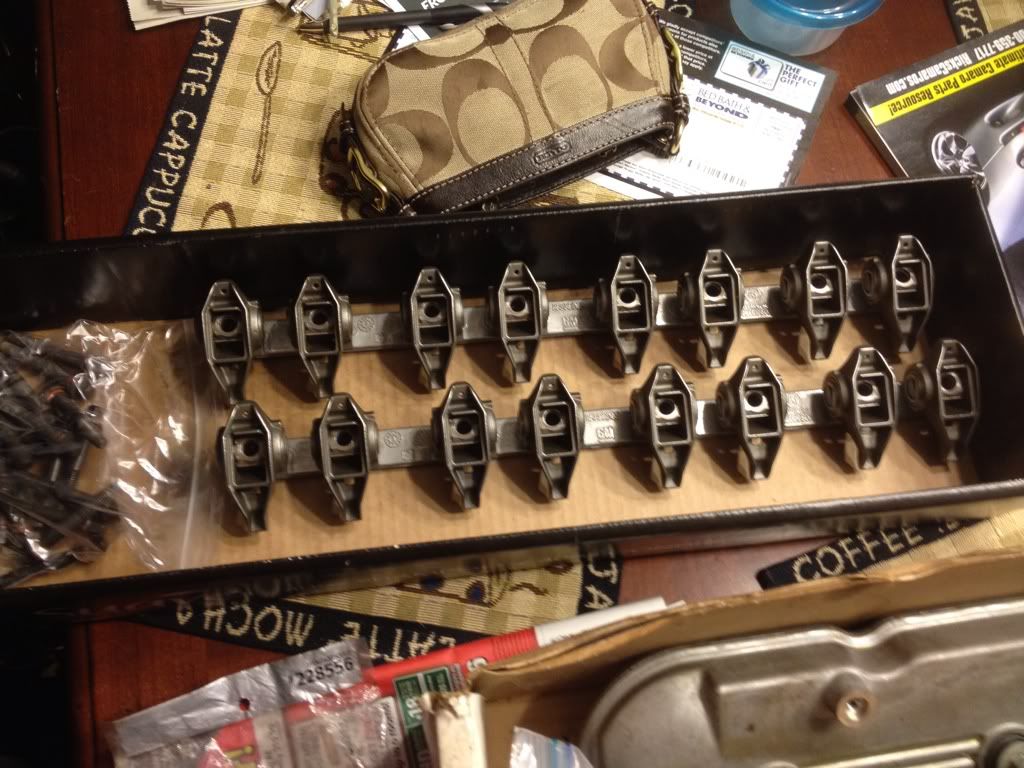
Scored a bunch of brand new stuff for $550- a set sodium/hollow zo6 heads, ls6 valley cover, rockers/stands, pushrods, head gaskets, ac irdium plugs, and a bunch of other engine bolts....I already have 799 heads on my L33 so i sold the heads and ls6 valley cover for $630...so i got pai $80 to get all the other new stuff...the deals are out there you just gotta look!

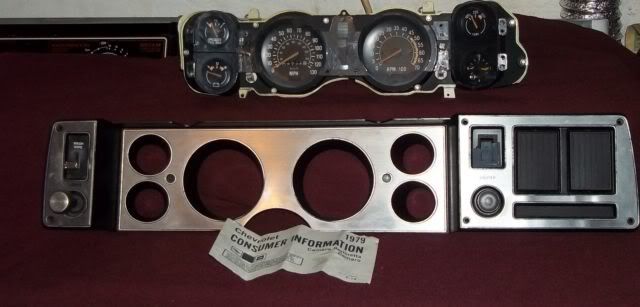
Also tore out my 85 mph speedo, idiot light having gauge cluster because it had no tach and belonged in a V6 car...
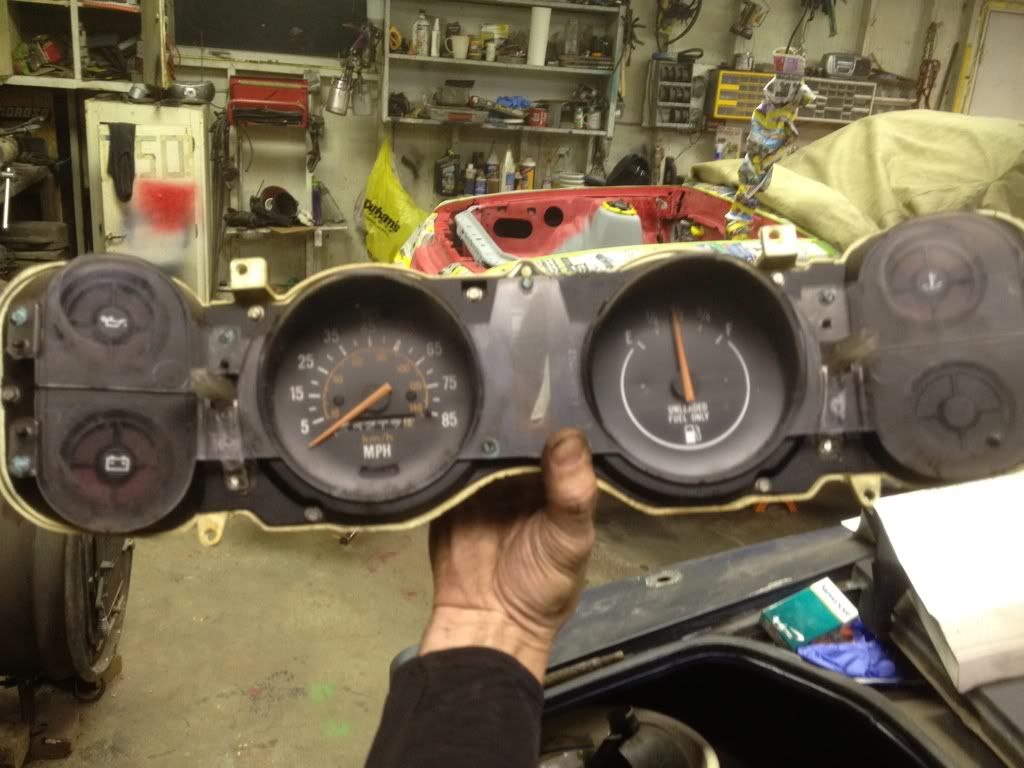
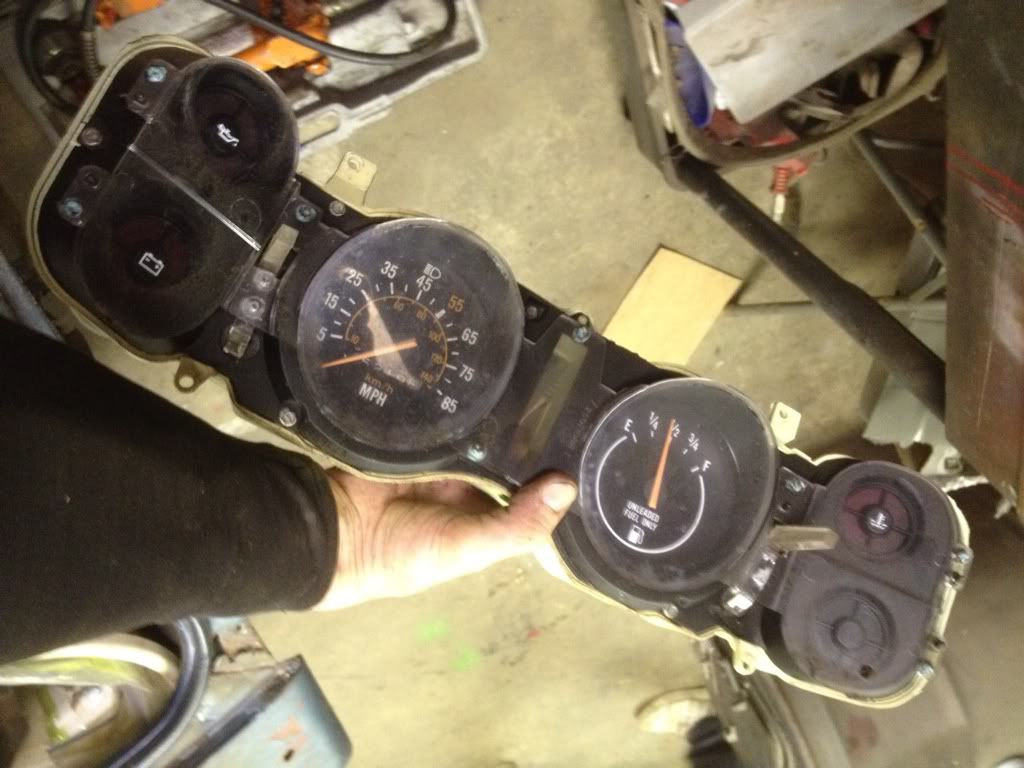


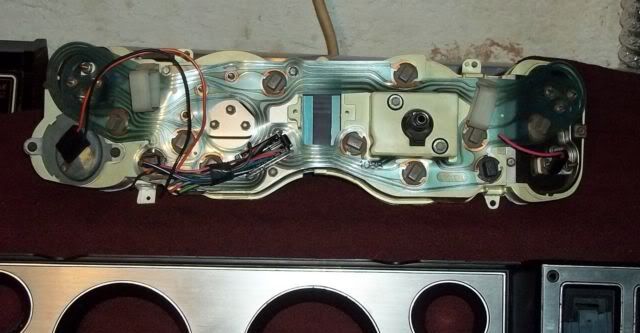
I scored this gauge cluster with (130 mph speedo, 7000rpm tach, water temp, fuel level, voltmeter, and small clock (better than my tach sized one on the old cluster!) I got it for $90 shipped, and it even came with a silver gauge bezel (not sure if i will use yet), printed circuit, and even the pigtail for the gauges so I dont have to try de-pin the 30 year old connector on mine!
Scored a bunch of brand new stuff for $550- a set sodium/hollow zo6 heads, ls6 valley cover, rockers/stands, pushrods, head gaskets, ac irdium plugs, and a bunch of other engine bolts....I already have 799 heads on my L33 so i sold the heads and ls6 valley cover for $630...so i got pai $80 to get all the other new stuff...the deals are out there you just gotta look!
Also tore out my 85 mph speedo, idiot light having gauge cluster because it had no tach and belonged in a V6 car...
I scored this gauge cluster with (130 mph speedo, 7000rpm tach, water temp, fuel level, voltmeter, and small clock (better than my tach sized one on the old cluster!) I got it for $90 shipped, and it even came with a silver gauge bezel (not sure if i will use yet), printed circuit, and even the pigtail for the gauges so I dont have to try de-pin the 30 year old connector on mine!
04-10-2012, 10:37 AM
#59
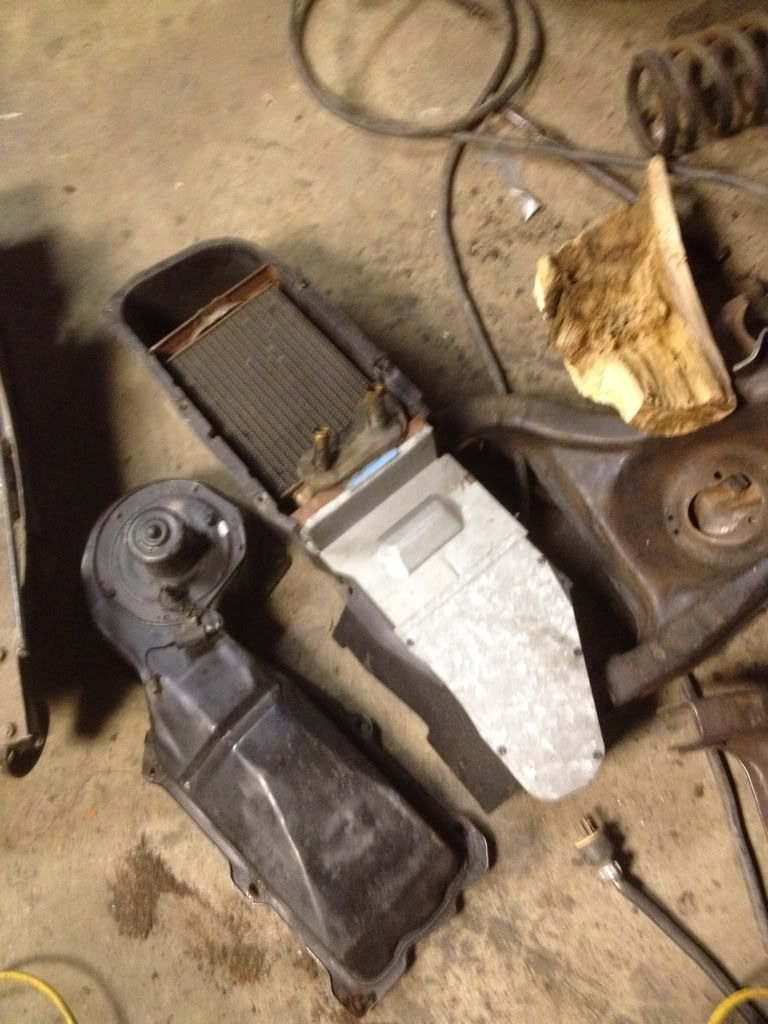
I also disassembled the heater core so i could get a better shot at cleaning the firewall...this is one of those parts that are cheap and simple...
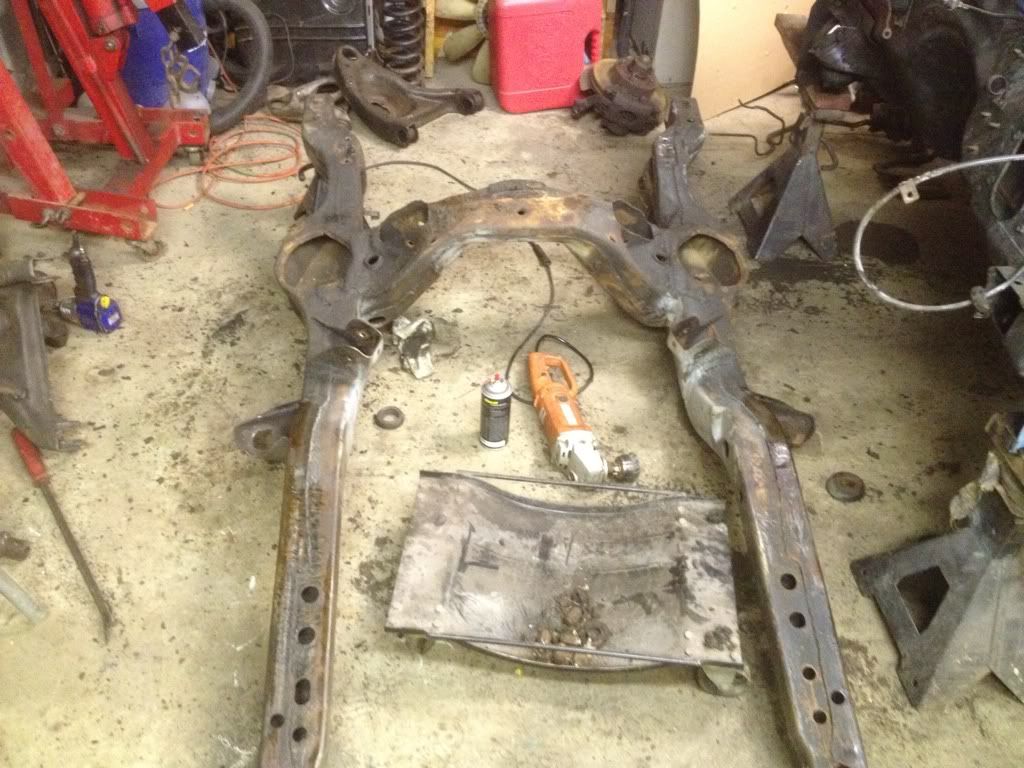
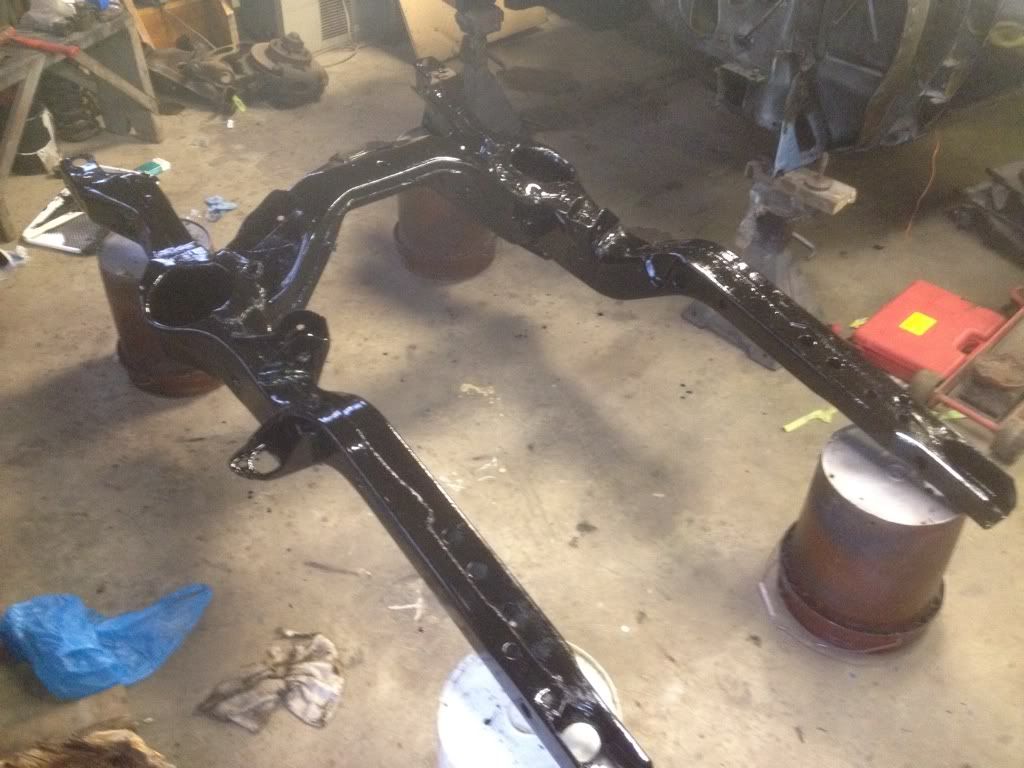
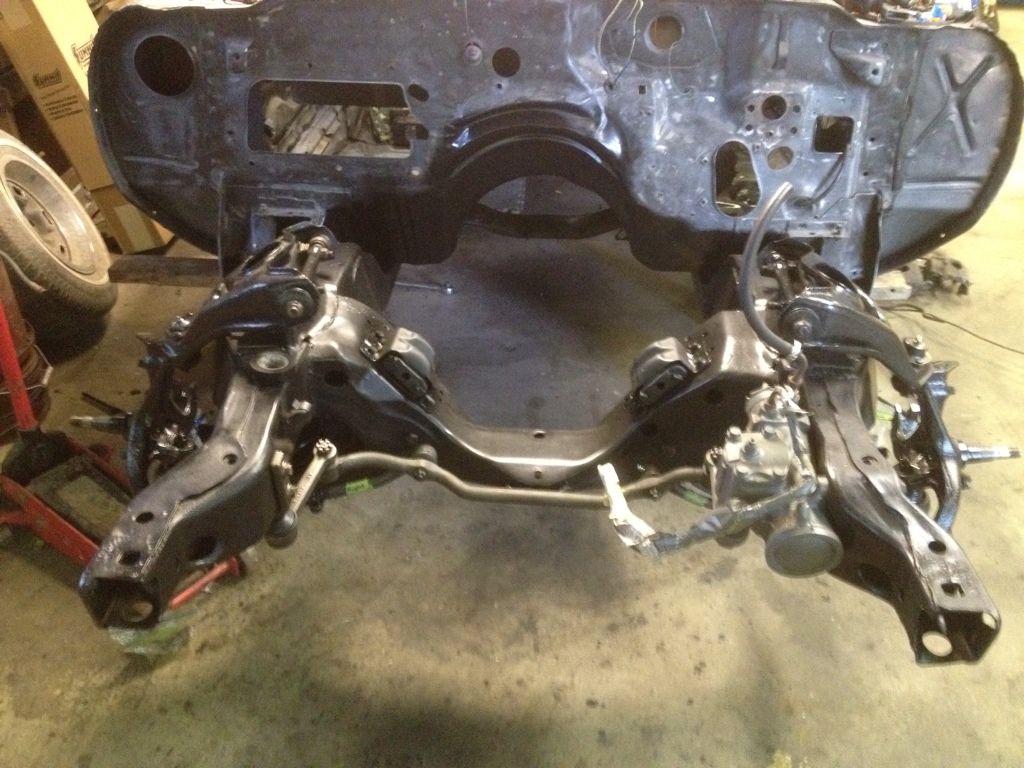
I also go the subframe prepped up and painted....I am now finishing up the control arms to match with new ball joints and energy suspension bushings...
Before:
Cleaned:

POR15ed:
I also knocked out the driver side complete floor pan (well 75% done)....
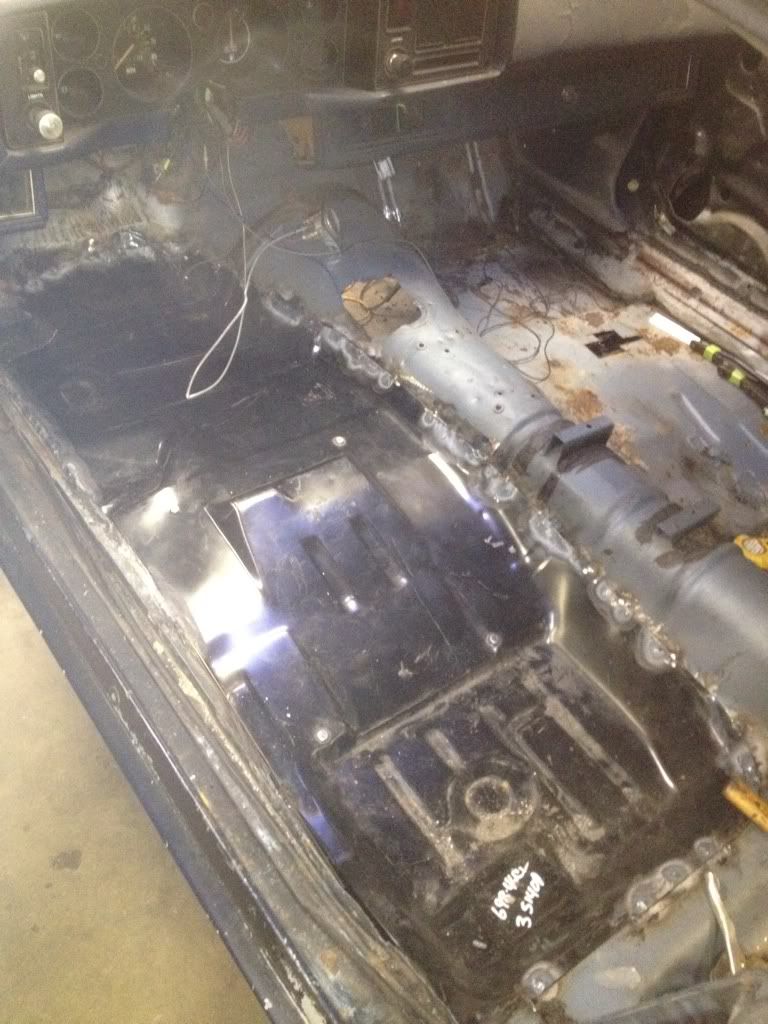
also made a small patch for the passenger side floor...

...and a small patch for the driver toe board which the floorpan didnt include..
I also finally defeated one of the control arms after alot of fighting....i found the easiest way to install the bushings is to use a threaded rod with a combo of 3/4" deep sockets, washers, and nuts...Ill post a picture of my rig when i get home...I will finish POR15ing the underbody of the car and firewall....then after i get the subframe and front suspension thrown back in it will be time for the motor...........FINALLY!!!!!!!
I also go the subframe prepped up and painted....I am now finishing up the control arms to match with new ball joints and energy suspension bushings...
Before:
Cleaned:
POR15ed:
I also knocked out the driver side complete floor pan (well 75% done)....
also made a small patch for the passenger side floor...
...and a small patch for the driver toe board which the floorpan didnt include..
I also finally defeated one of the control arms after alot of fighting....i found the easiest way to install the bushings is to use a threaded rod with a combo of 3/4" deep sockets, washers, and nuts...Ill post a picture of my rig when i get home...I will finish POR15ing the underbody of the car and firewall....then after i get the subframe and front suspension thrown back in it will be time for the motor...........FINALLY!!!!!!!
06-10-2012, 09:41 AM
#60
It feels like I haven't posted in ages but I have been working my *** of to get this car not only running but looking sexy too. I got the whole subframe and firewall finished (not painted in pic)
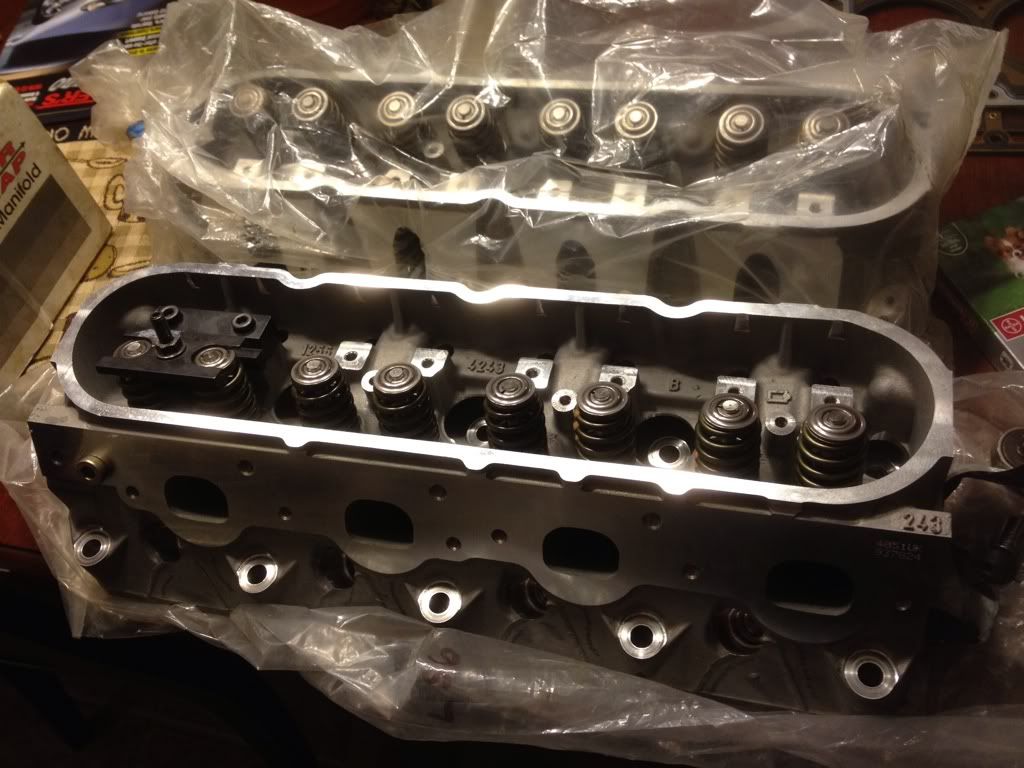
I finally got to tear into the motor as I waited bc I hate motors that get torn apart and then just sit there so I rebuilt the heads and valvetrain in a 3 day period...I changed all the valve seals which were the trick one piece seals...Also swapped out the 200k mile valvesprings for some low mile (under 20k) ones, same with lifters, also used a plastic rolox disc to make the ends of the heads looked freshly machined and the clear coated them....
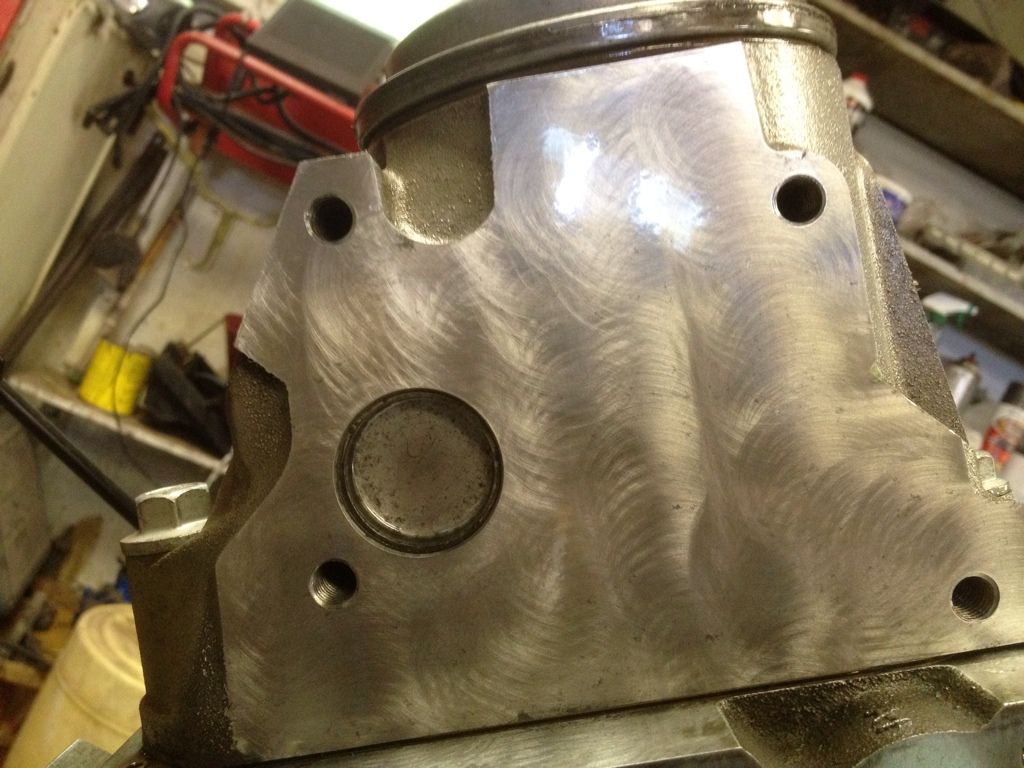
Now the shortblock looked to be in excellent condition for almost quarter million miles...I mic'd everything and the cylinder walls, valve guides, lifter bores, etc all checked to be within service limit...check out the factory cross hatch!
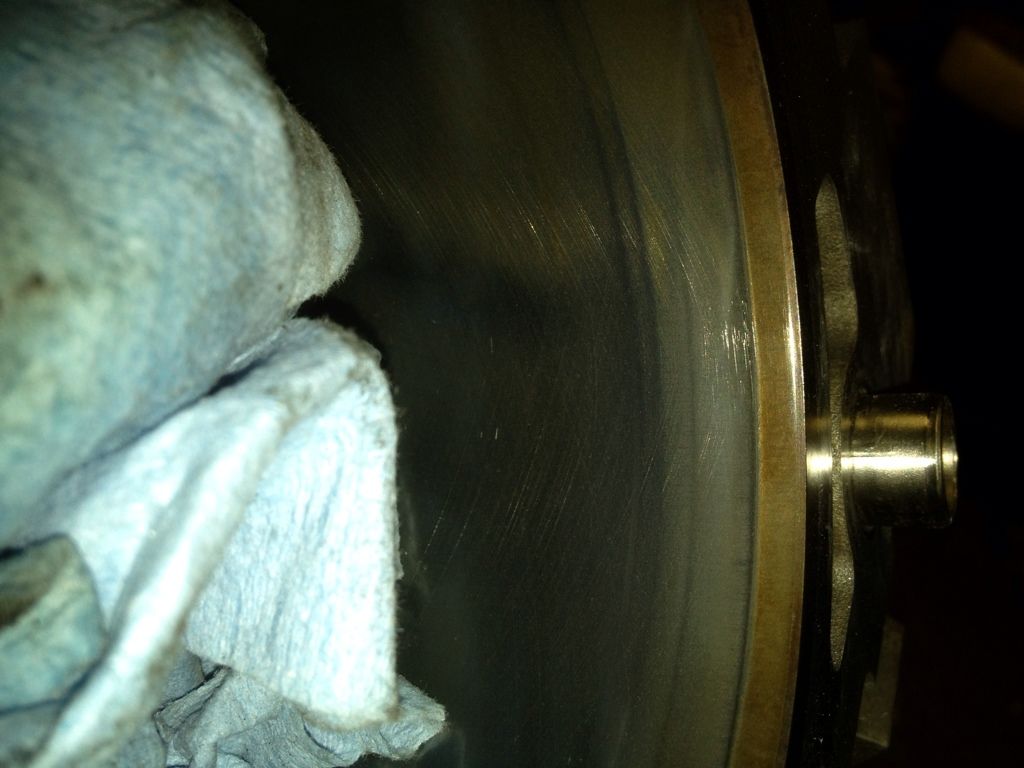

the truck this engine came out of had low oil pressure which is why the owner yanked it...I was hoping to find a bad oil pump rather than bearings and I was relieved to find the inside of the oil pump wiped out under the gearotor..
Here is a pic of it...
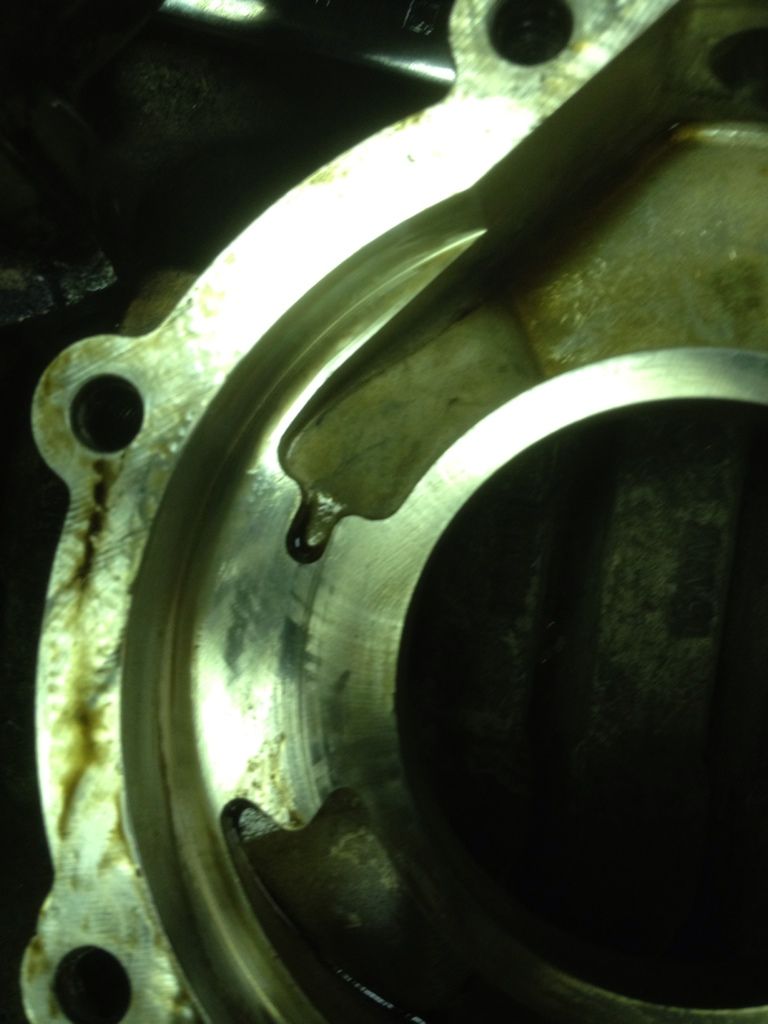
Now here is a pic of a good used oil pump look at the difference of machine work...

I was happy to replace it with a new melling unit along with new pickup o ring and pan
I finally got to tear into the motor as I waited bc I hate motors that get torn apart and then just sit there so I rebuilt the heads and valvetrain in a 3 day period...I changed all the valve seals which were the trick one piece seals...Also swapped out the 200k mile valvesprings for some low mile (under 20k) ones, same with lifters, also used a plastic rolox disc to make the ends of the heads looked freshly machined and the clear coated them....
Now the shortblock looked to be in excellent condition for almost quarter million miles...I mic'd everything and the cylinder walls, valve guides, lifter bores, etc all checked to be within service limit...check out the factory cross hatch!
the truck this engine came out of had low oil pressure which is why the owner yanked it...I was hoping to find a bad oil pump rather than bearings and I was relieved to find the inside of the oil pump wiped out under the gearotor..
Here is a pic of it...
Now here is a pic of a good used oil pump look at the difference of machine work...
I was happy to replace it with a new melling unit along with new pickup o ring and pan