

5.3 4l60e swap into my RUSTY '71 C-10


 10-13-2012, 03:23 PM
#62

I hadn't thought of the groove thing. I like that. I will have to give it a try. Cause right now my cable is like a foot too long. Got it off a 97 Chevy suburban with a 5.7 and put it in my 90 suburban with a 5.3. The ends work out perfect, it just has too much length. Thanks for clearing that up for me, and I'll quit cluttering up your thread with meaningless throttle cable banter...
10-13-2012, 11:29 PM
#63

Just read the whole thread Eric,,, Nice job on the DD...You sure know how to make look good...That orange one sure was NICE to see in Ottawa, sorry the guys backed out....any luck on the title thing?
I hope to have my 66 running in a couple weeks, wish I could be as dedicated to taking pics and posting them as you...see ya at the next one...
Rick
I hope to have my 66 running in a couple weeks, wish I could be as dedicated to taking pics and posting them as you...see ya at the next one...
Rick
10-14-2012, 08:51 AM
#64

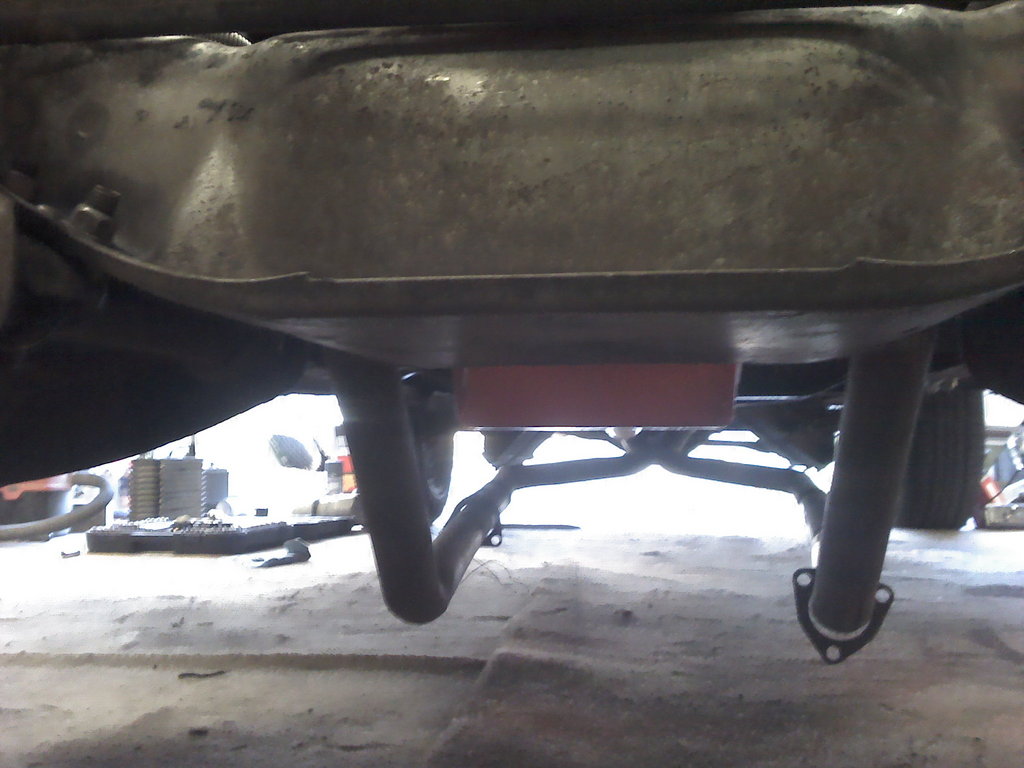
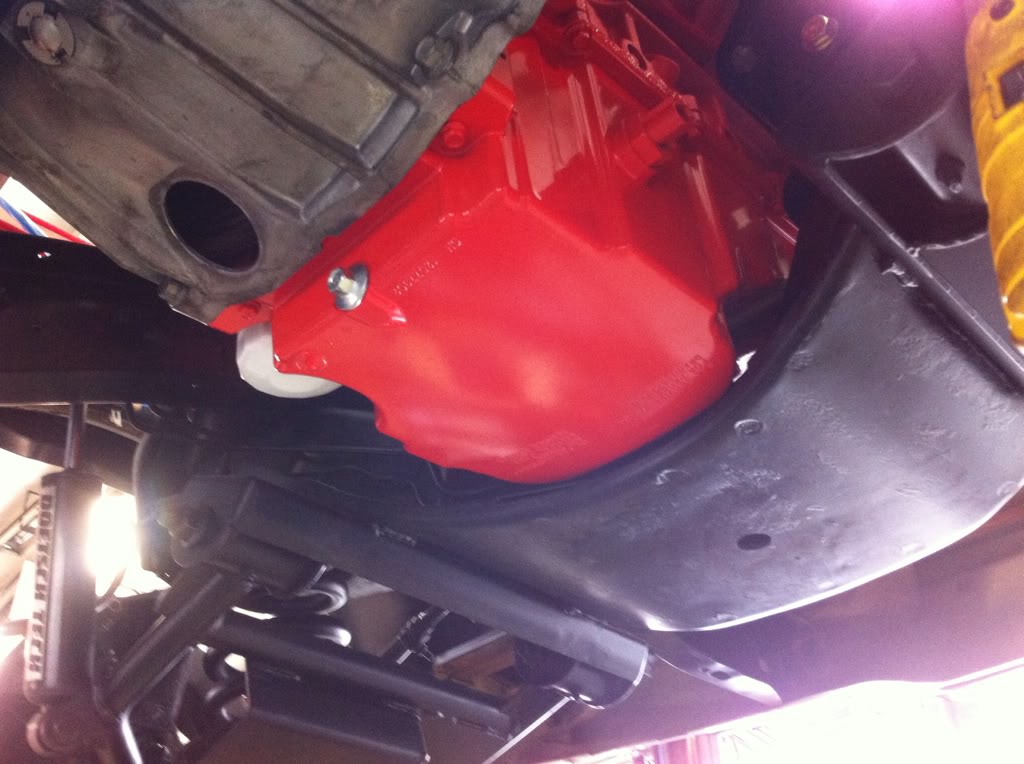
Nice build just recently completed a conversion on my69 c/10 myself. Love all your cost effective ideas especially the motor mounts. Did the engine stands just unbolt off the donor vehicle and what year vehicle? Also in using those engine mounts does the oil pan sit below the cross member if so how much can you post picture? I ended up using Ctsv pan on mine cause the truck is lowered. Thanks
10-17-2012, 09:56 PM
#65
Nice build just recently completed a conversion on my69 c/10 myself. Love all your cost effective ideas especially the motor mounts. Did the engine stands just unbolt off the donor vehicle and what year vehicle? Also in using those engine mounts does the oil pan sit below the cross member if so how much can you post picture? I ended up using Ctsv pan on mine cause the truck is lowered. Thanks
 10-18-2012, 10:48 PM
#66
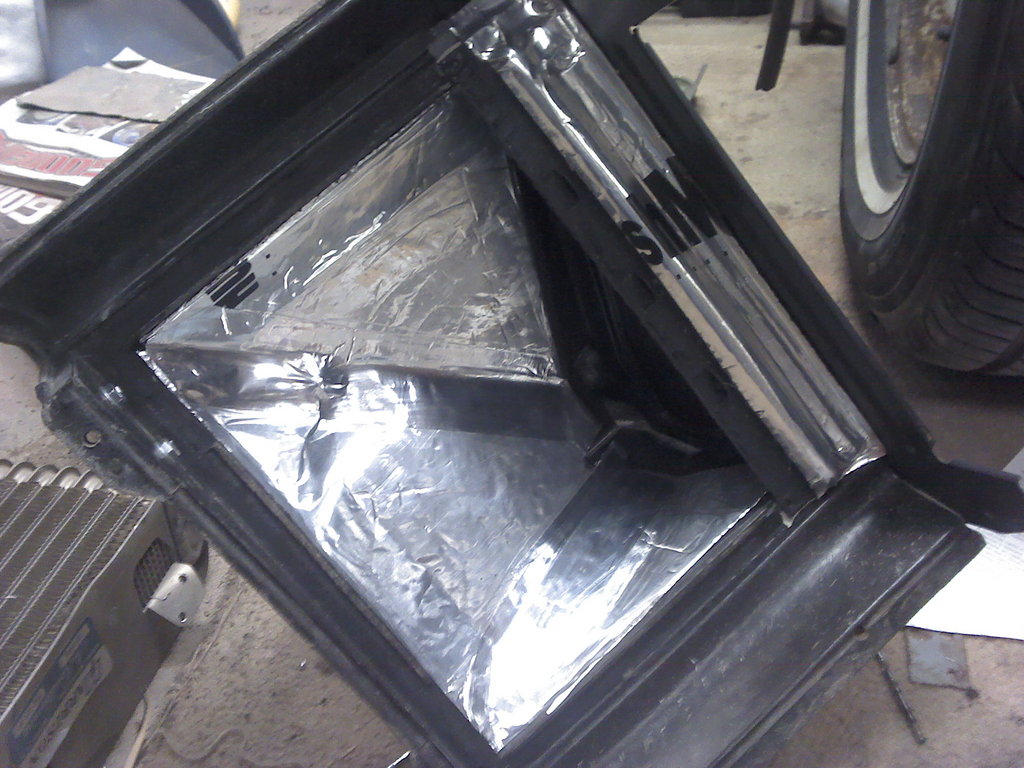
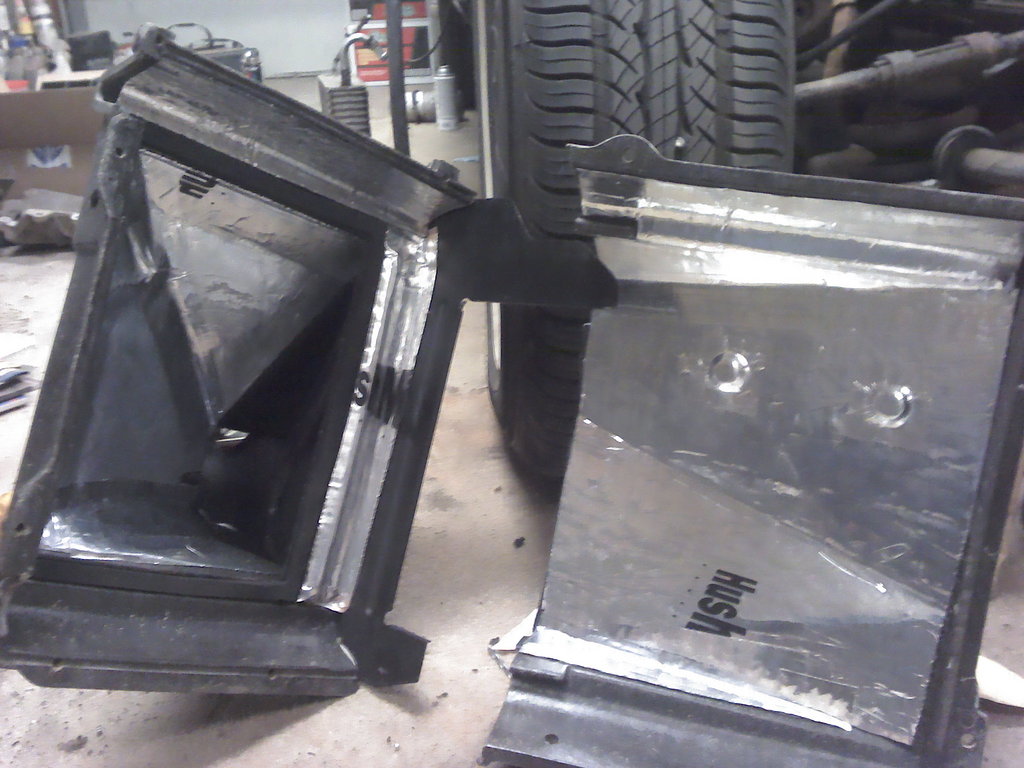
Haven't really got alot done on the engine swap part of my build, been concentrating on getting the A/C back in working order. I had high hopes that the back of the box wasn't going to be rusted out, but in a truck as rusty as this one, I pretty much figured it was going to be.

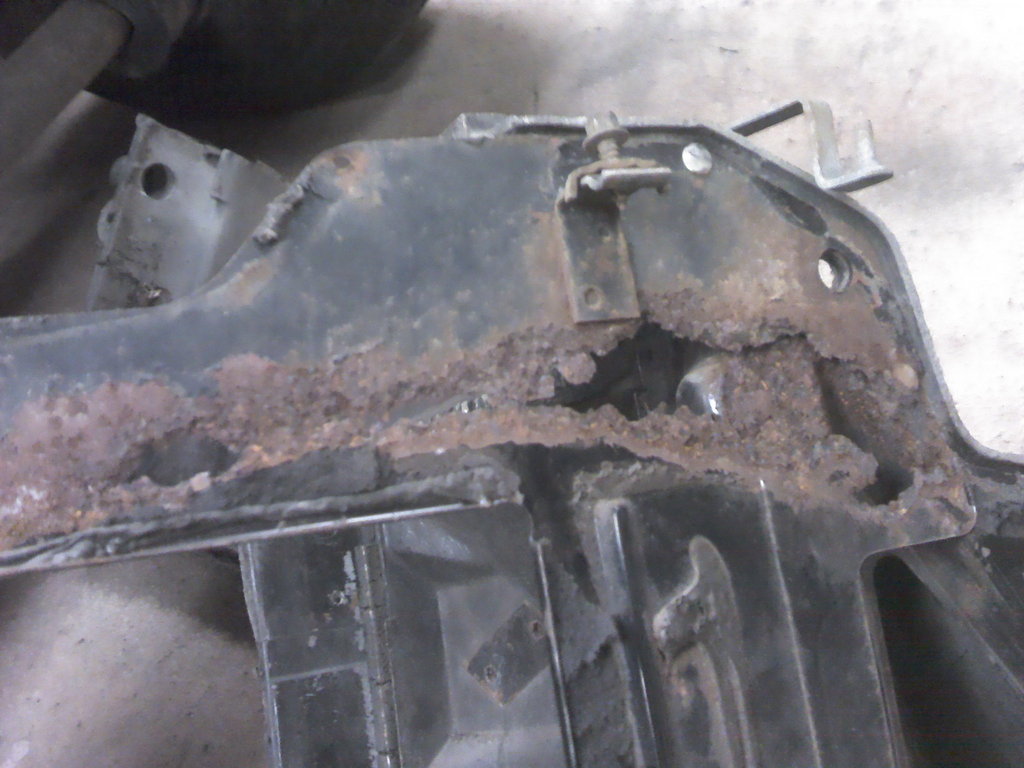
I got another A/C box that had a bad blend door, but the back wasn't rusted out, for free, so I took the back off and cleaned it up, and put it on mine.
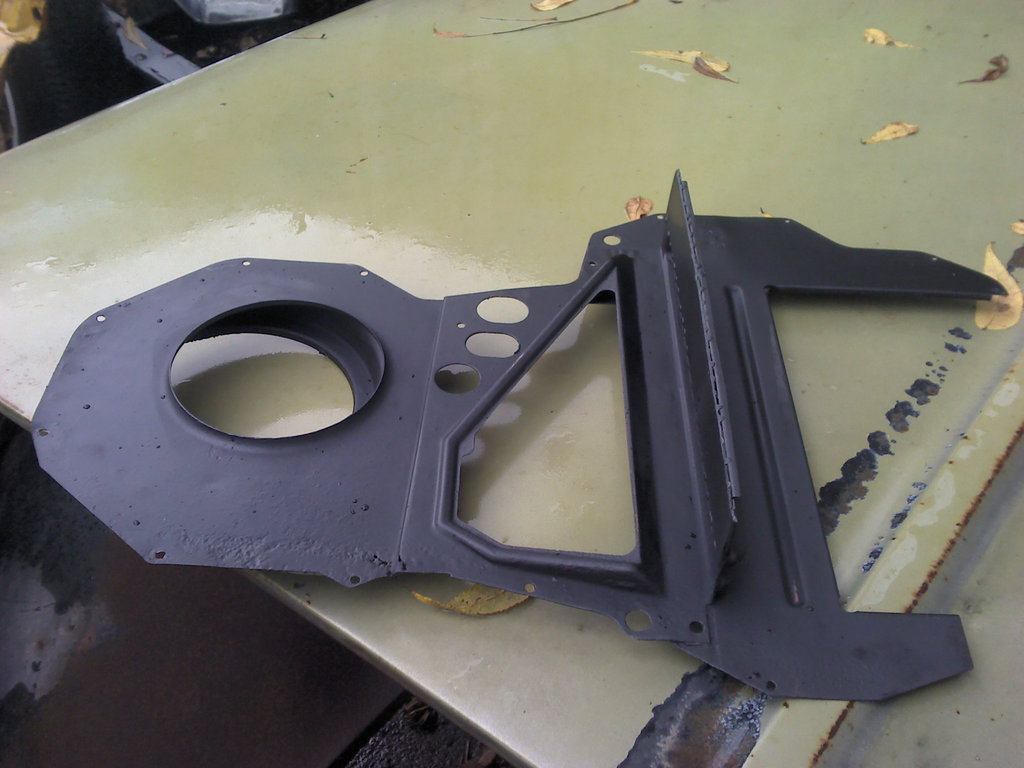
The evaporator out of the '87 is about a half inch narrower than the original '71, so I cut part of the old back off of the rusted one and welded it to the good one.
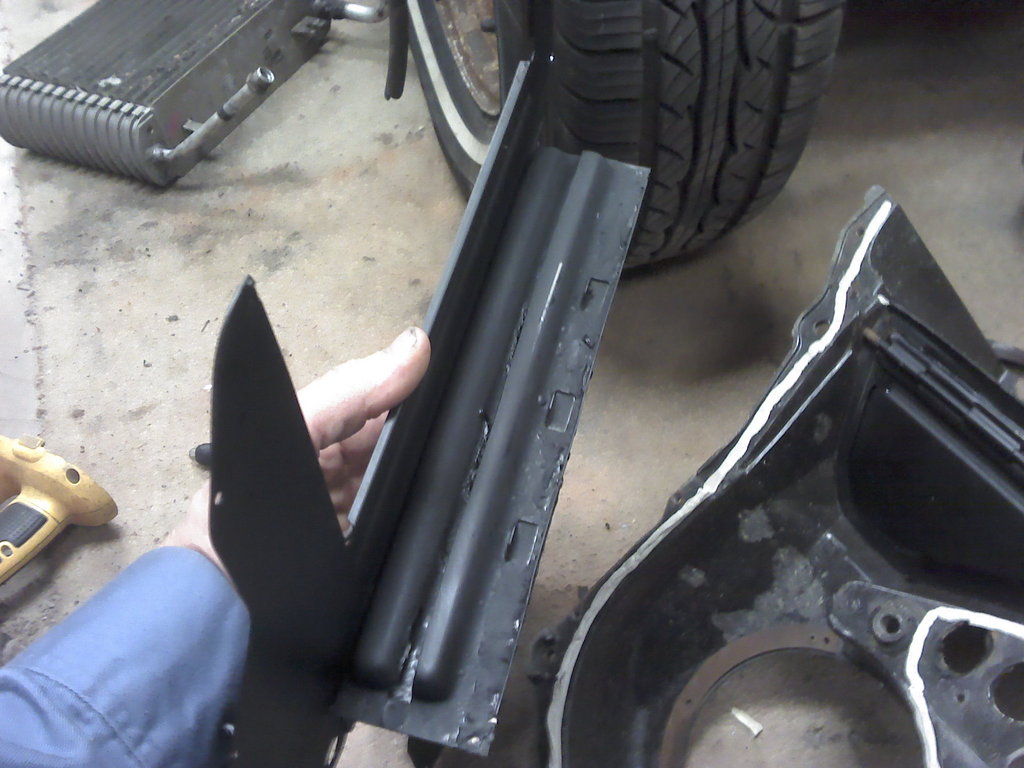
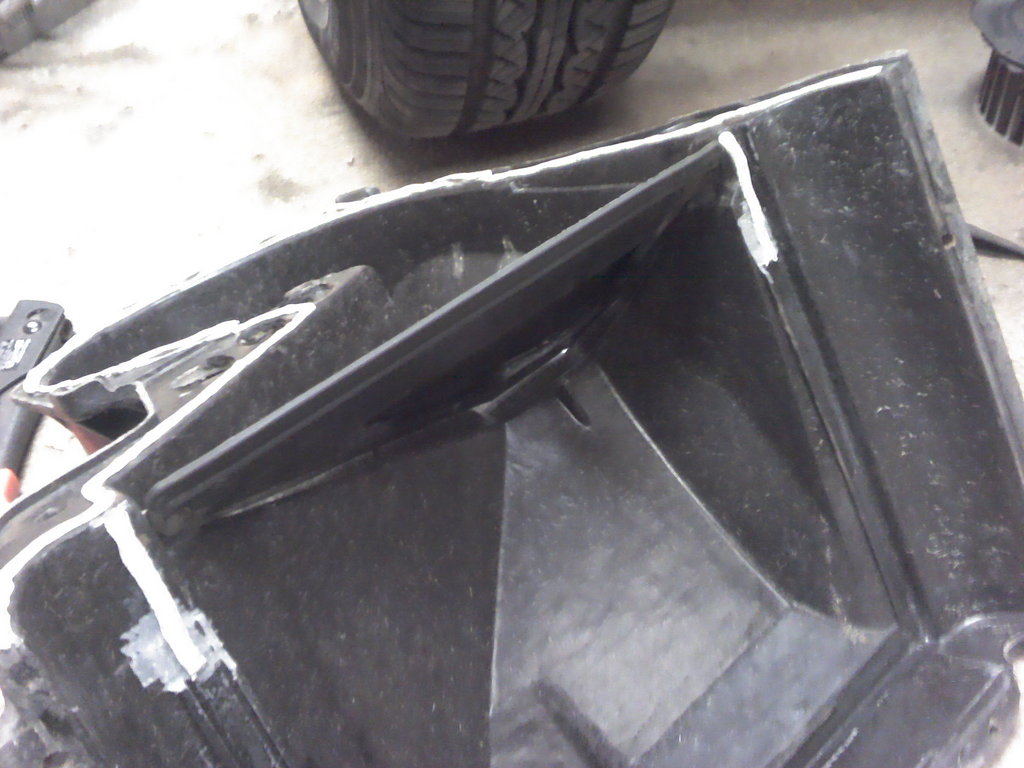
Then got some strip caulk and some rivits and put the two together.
Good as new!
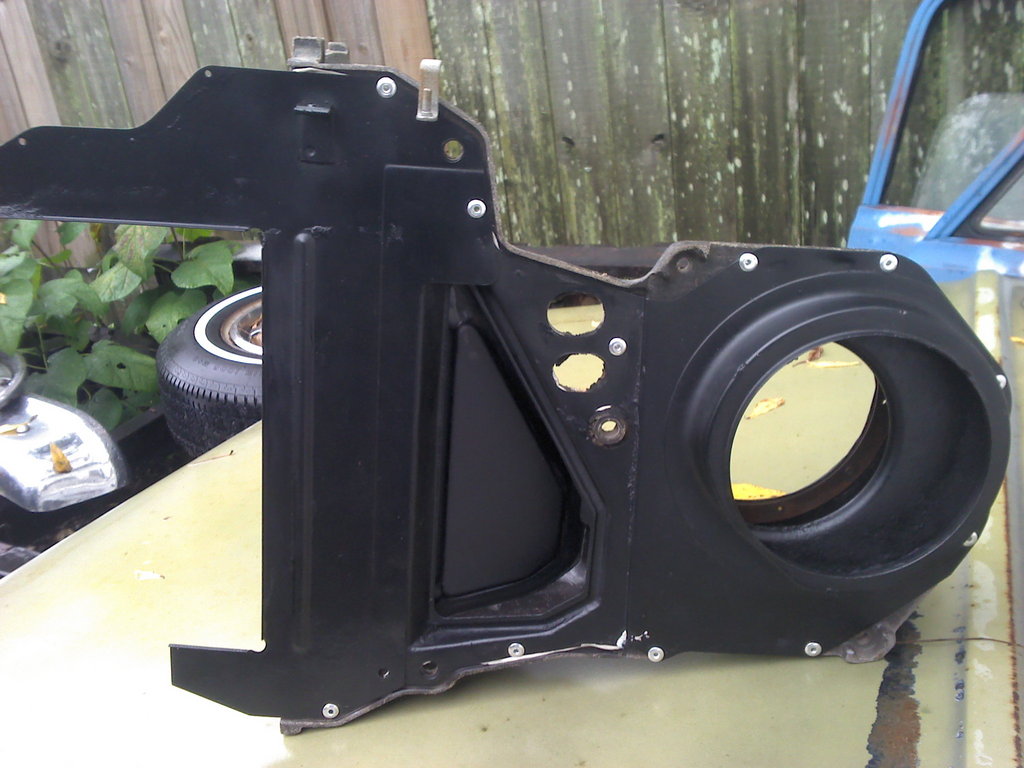
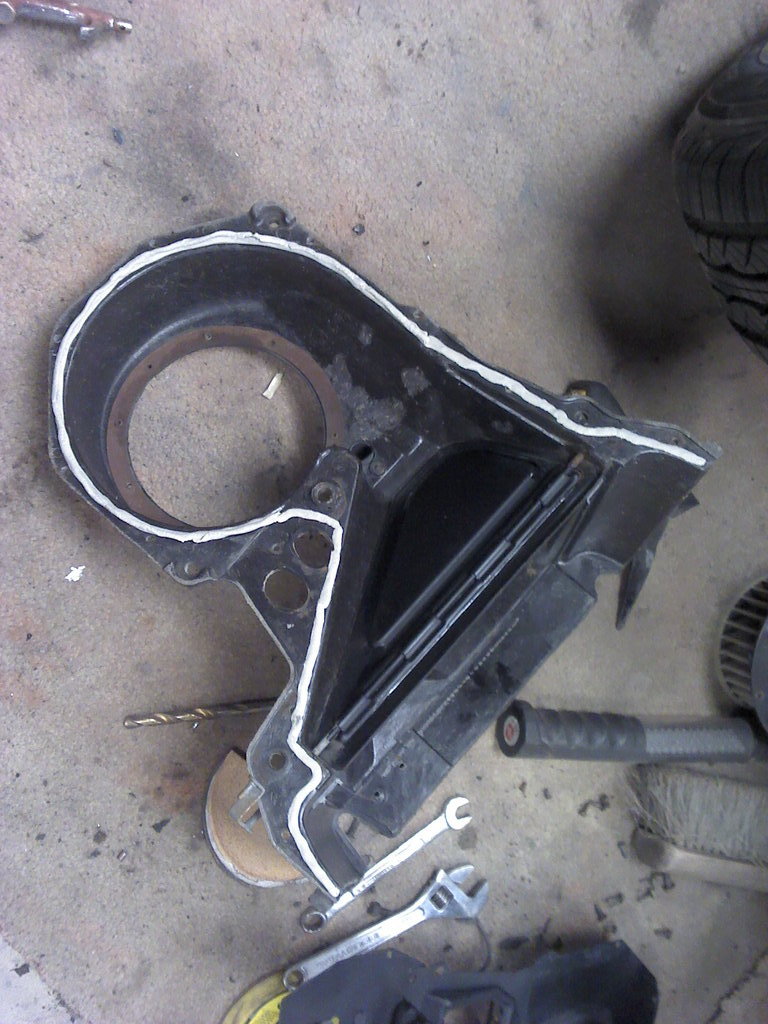
Next came an experiment. Since no new cars have the A/C evaporator in the hot engine compartment, and they seem to work better than the older ones, I decided to take some left over Hush Mat and lined the inside of the box. Not sure if it will help much or not, but I figure it couldn't hurt. Time will tell, but I guess not until next summer.
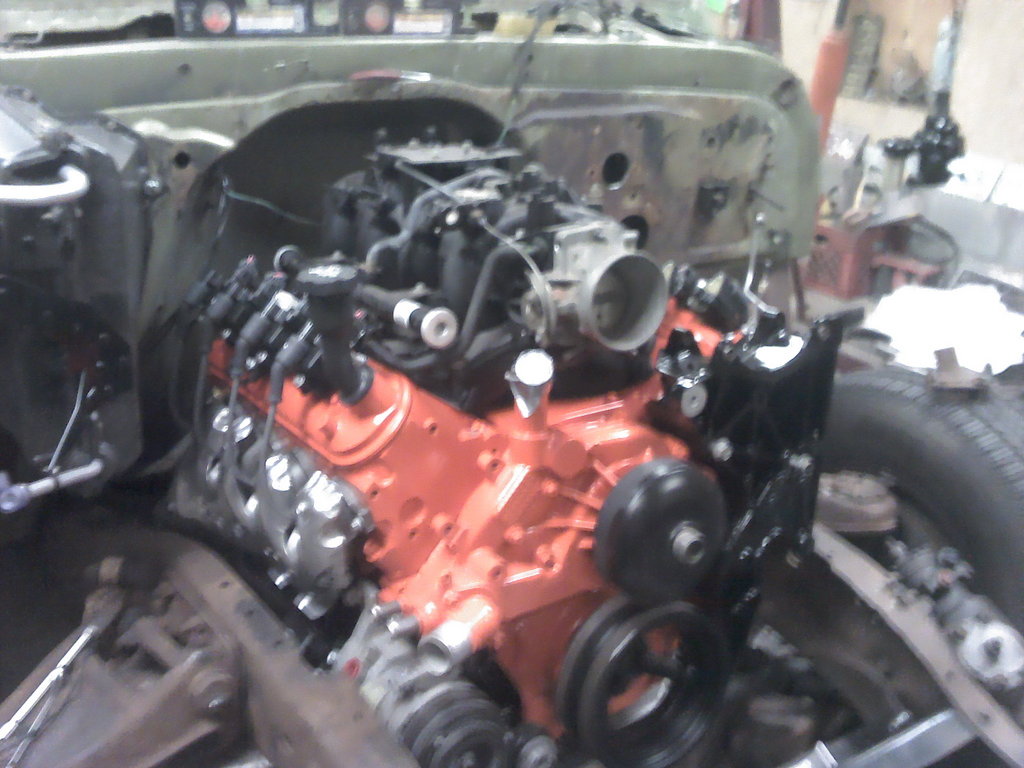
Got it put back on. Also got the accessory brackets painted, and the coils cleaned up and put back on.
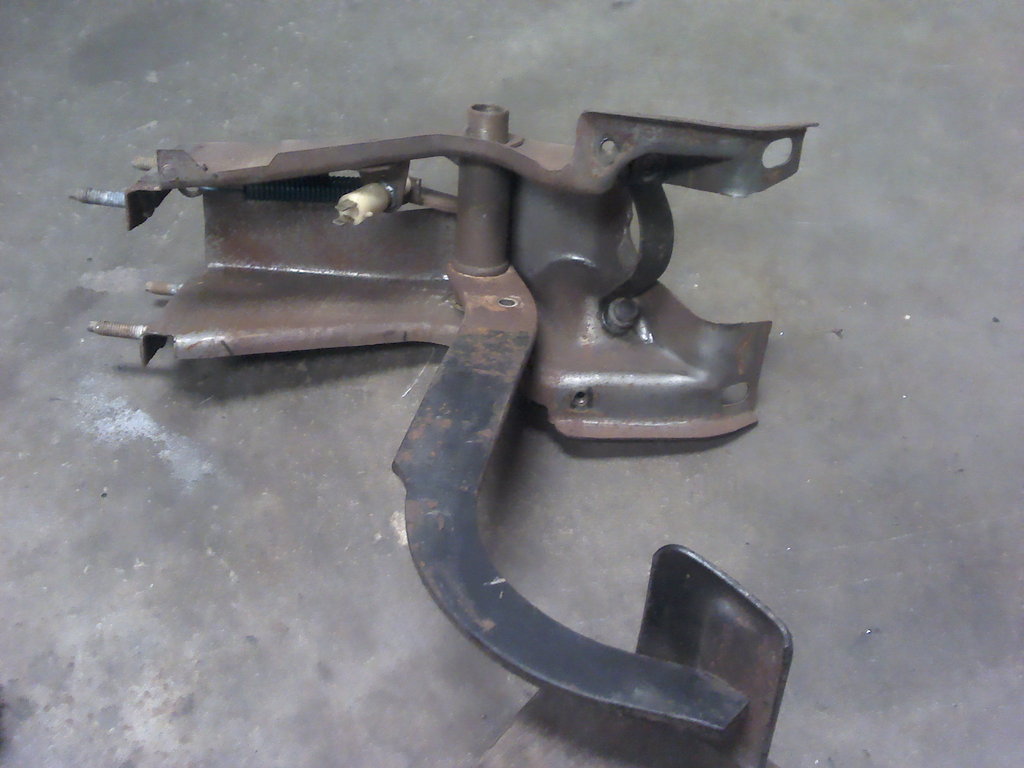
Moving along, I pulled the steering column out. You are supposed to remove the column when swapping engines, right? And also took the brake pedal and mount out.
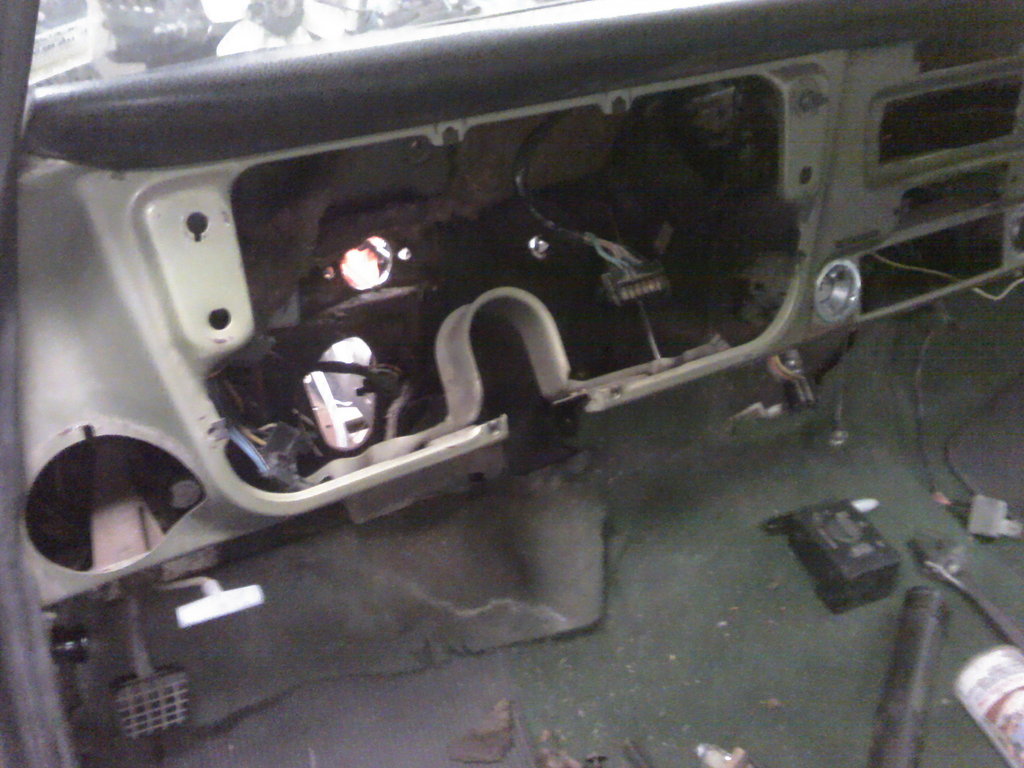
The hard way to replace a brake light switch!
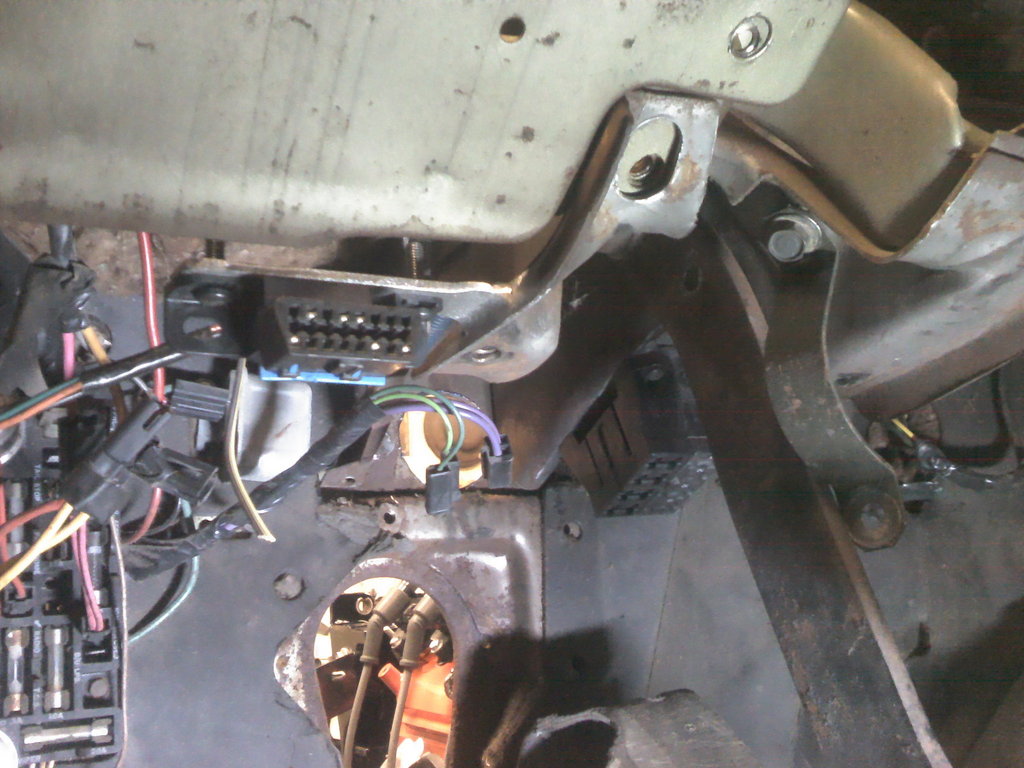
The real reason I pulled it is so I could add a bracket for the two small fuse boxes to mount to, and also one for the ALDL connector, so it's accessible, but not readily seen.
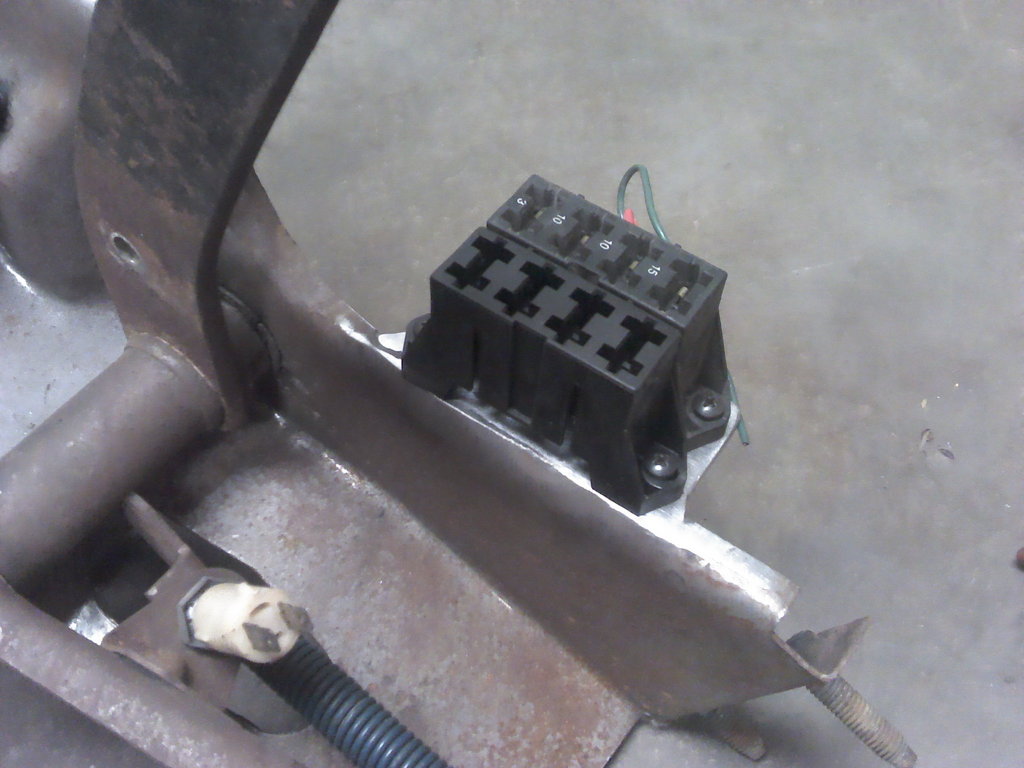
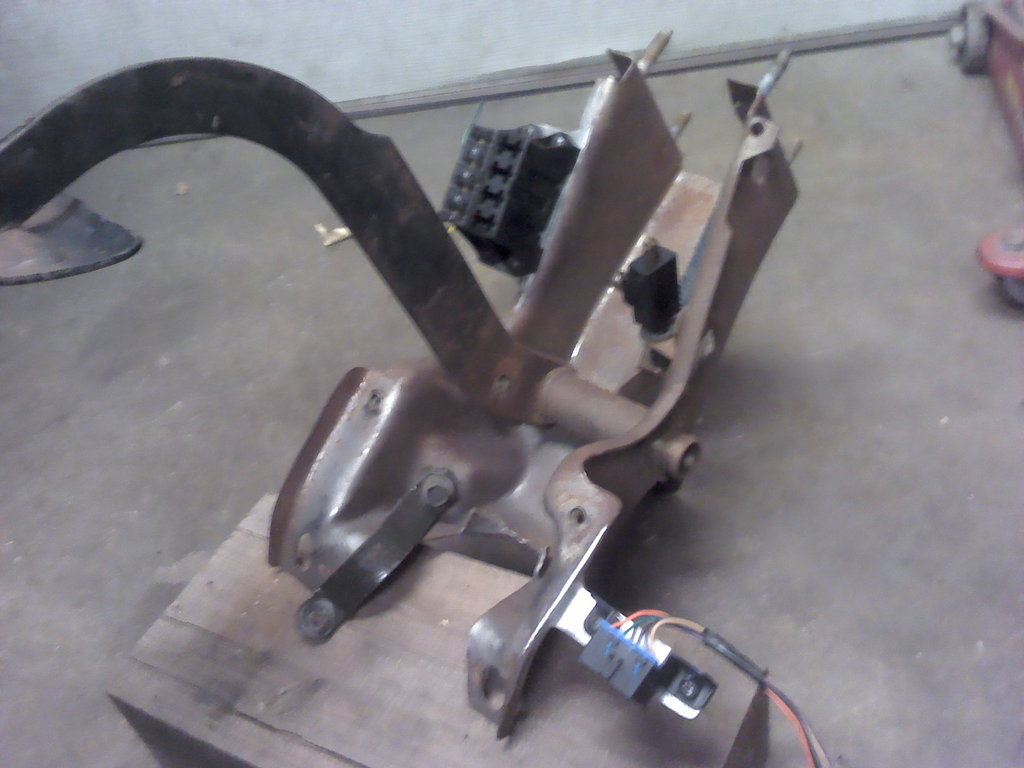
This is what it looks like installed.
Today's total.
Four Seasons A/C evaporator.... $90
Accumulator.... $25
Orifice tube.... $2
Strip caulk, rivits and miscellaneous bolts from hardware store.... $20
I got another A/C box that had a bad blend door, but the back wasn't rusted out, for free, so I took the back off and cleaned it up, and put it on mine.
The evaporator out of the '87 is about a half inch narrower than the original '71, so I cut part of the old back off of the rusted one and welded it to the good one.
Then got some strip caulk and some rivits and put the two together.
Good as new!
Next came an experiment. Since no new cars have the A/C evaporator in the hot engine compartment, and they seem to work better than the older ones, I decided to take some left over Hush Mat and lined the inside of the box. Not sure if it will help much or not, but I figure it couldn't hurt. Time will tell, but I guess not until next summer.
Got it put back on. Also got the accessory brackets painted, and the coils cleaned up and put back on.
Moving along, I pulled the steering column out. You are supposed to remove the column when swapping engines, right?
And also took the brake pedal and mount out.The hard way to replace a brake light switch!
The real reason I pulled it is so I could add a bracket for the two small fuse boxes to mount to, and also one for the ALDL connector, so it's accessible, but not readily seen.
This is what it looks like installed.
Today's total.
Four Seasons A/C evaporator.... $90
Accumulator.... $25
Orifice tube.... $2
Strip caulk, rivits and miscellaneous bolts from hardware store.... $20
10-19-2012, 12:18 AM
#67

Cool build! Subscribed
Man you got lucky, I had one come apart and hit me in the stomach. Even through a shirt it made me bleed and left a deep blue and yellow bruise for 2 weeks. I dont do anything without glasses on now.
Today's lesson in shop safety, you can't be too careful! The other day while using my cut off wheel, the wheel came apart, and when I say 'came apart' I really mean 'exploded'! It was a fairly new wheel, but must have been cracked or something, because it did it just out of the blue, I wasn't forcing it or anything. When it came apart it went through one of the flourescent lights in my garage and took out two bulbs. It could have been real ugly, just glad I didn't get hurt. If I'd been leaning over it, it wouldn't have been good. I keep my distance from it now, and check the wheel before using it to make sure it's not damaged.
10-19-2012, 02:31 PM
#70

Shhhh.I'm about to let a secret slip,wink wink.Please don't tell anyone else.It will be between us.You can ditch the black box under the hood.Go with a unit from a front wheel drive car and put it under the dash.I have used one from a mid 90's Escort/Tracer wagon and a late 90's Cavalier.This would really work to smooth out the firewall.I know you're not going for the custom route but just in case you do in the future.I'm planning a Cavalier/Sunfire unit in my 71 Skylark and another Escort/Tracer unit in my 90 Cougar.
10-20-2012, 12:08 PM
#71
Shhhh.I'm about to let a secret slip,wink wink.Please don't tell anyone else.It will be between us.You can ditch the black box under the hood.Go with a unit from a front wheel drive car and put it under the dash.I have used one from a mid 90's Escort/Tracer wagon and a late 90's Cavalier.This would really work to smooth out the firewall.I know you're not going for the custom route but just in case you do in the future.I'm planning a Cavalier/Sunfire unit in my 71 Skylark and another Escort/Tracer unit in my 90 Cougar.
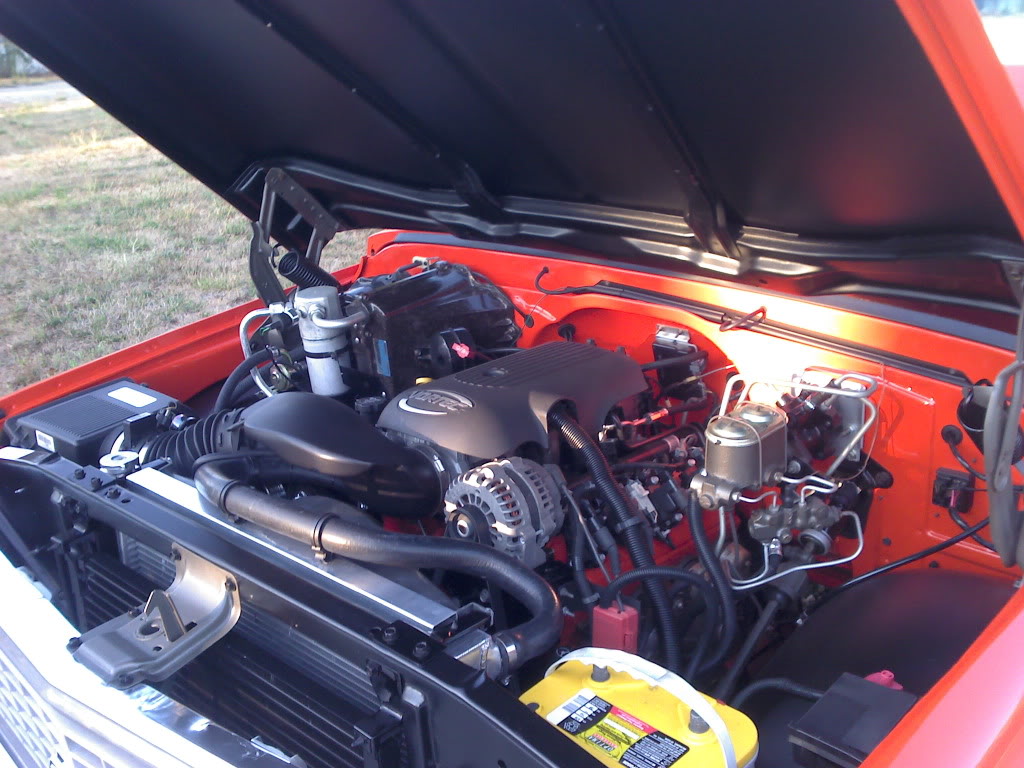
This is my orange truck I just finished, you can see the fuse box in the lower left corner, I think it was actually out of an Impala, but GM used the same box on alot of different models.
 10-25-2012, 10:27 PM
#73
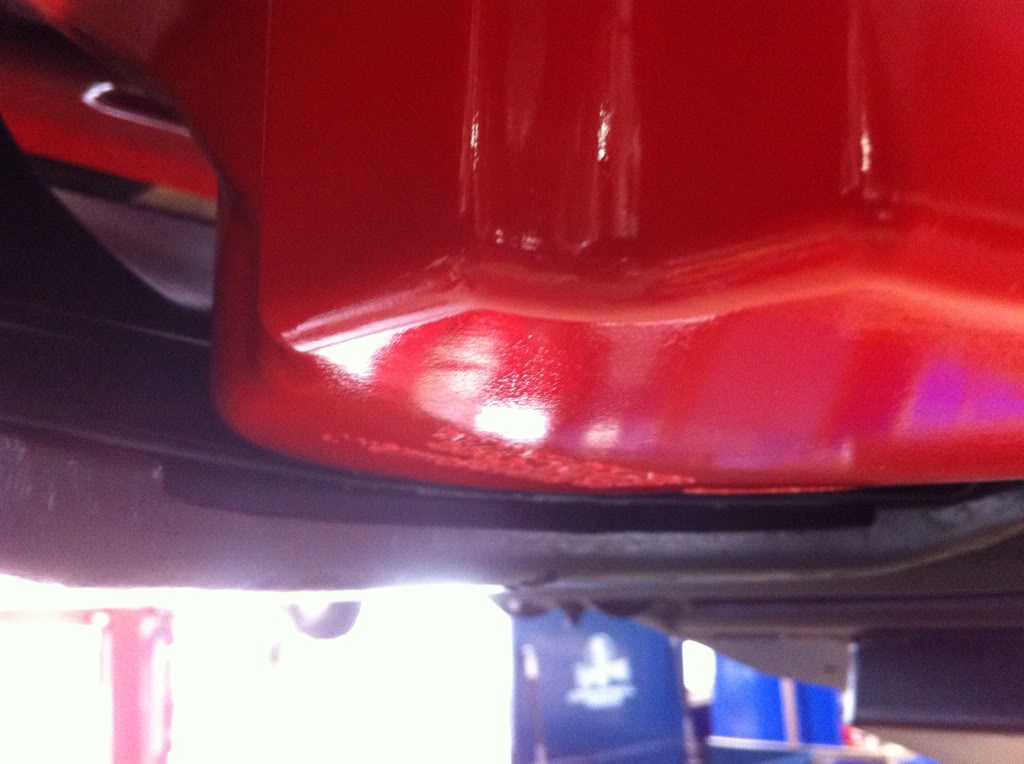
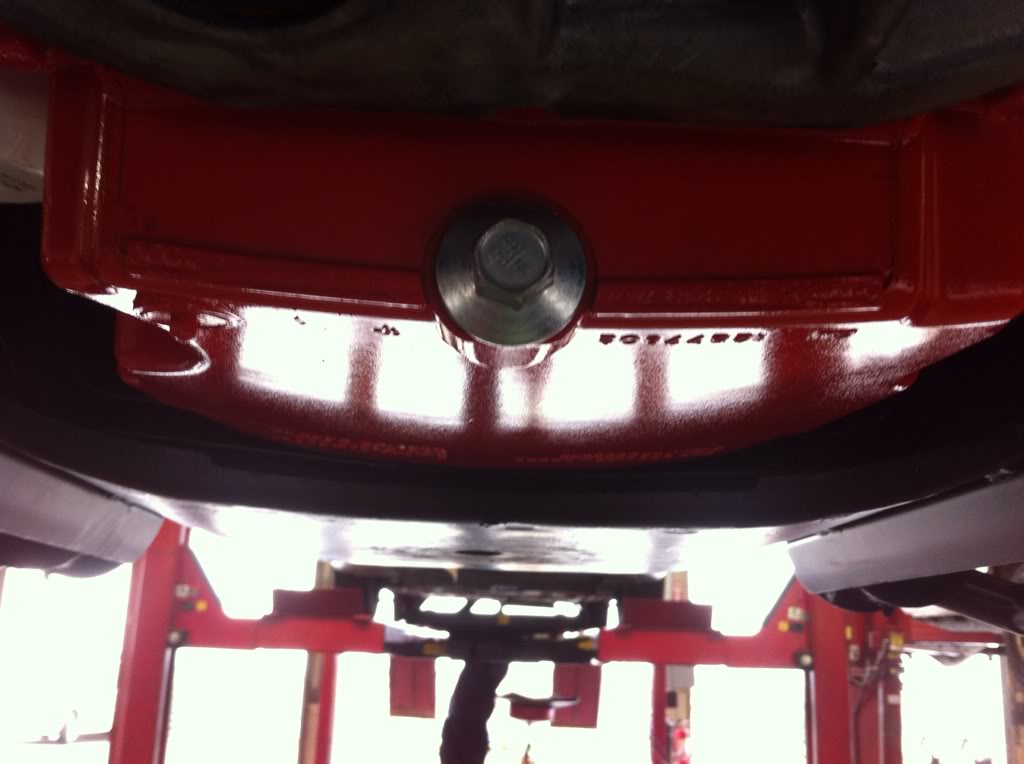
Does it not hang down below the crossmember any at all, or is it just less? I don't mind you posting anything, I do this for fun, and to maybe help others out who are interested in doing a similar swap, so other options are always good.
10-25-2012, 10:49 PM
#74
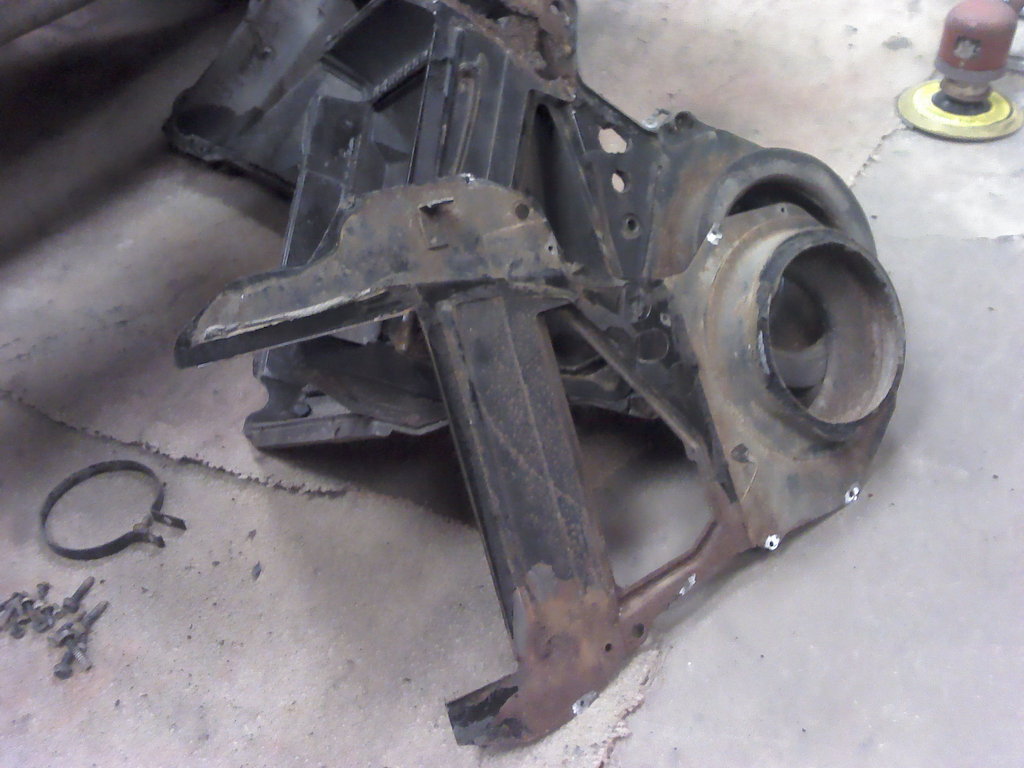
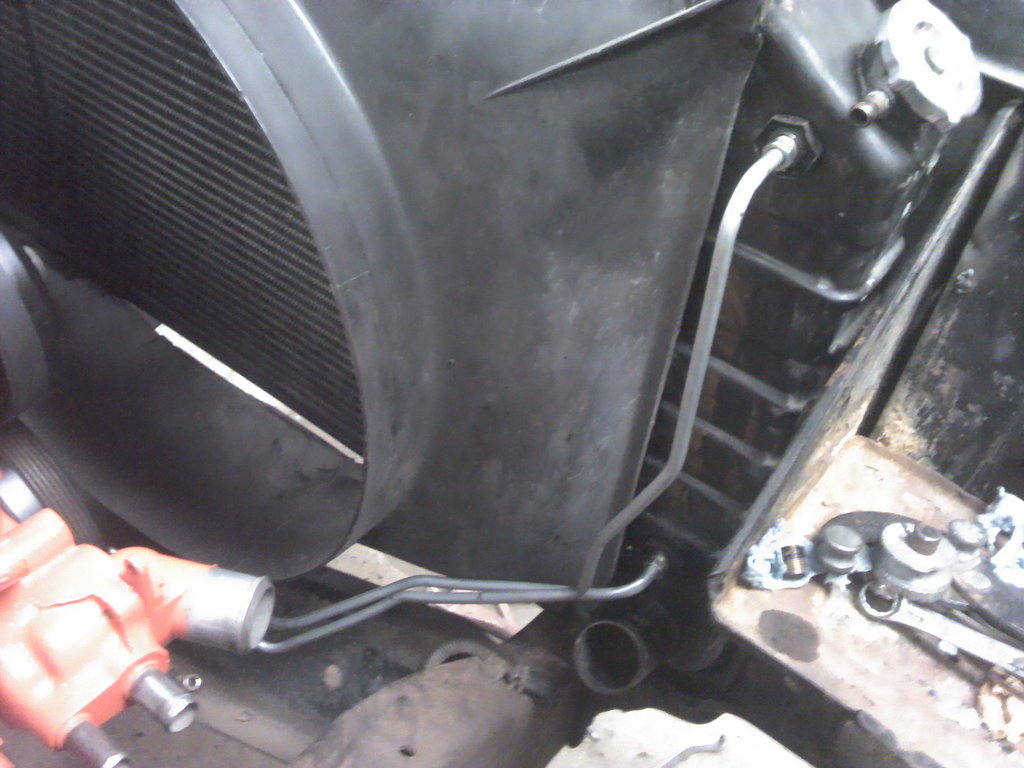
I dug out a spare core support and a couple of rusty fenders and put them on so I could get some transmission lines bent up. Way easier than putting the whole front clip back on!
I bought a roll of metal line from the auto parts store for $25, cheaper than the long sticks that they sell that are flared on both ends, and also able to make them in one piece that way. On a side note, when I to buy the flare nuts, they're like $2 a piece, and I needed 4, but naturally they only had 3, so I priced the shortest piece of line that comes with the nuts and it was $3.50, so I bought 2 of them and cut the line abnd took the nuts off and saved a dollar!
Made a little bracket to be able to attach a clamp to, to hold the lines secure at the front of the engine.
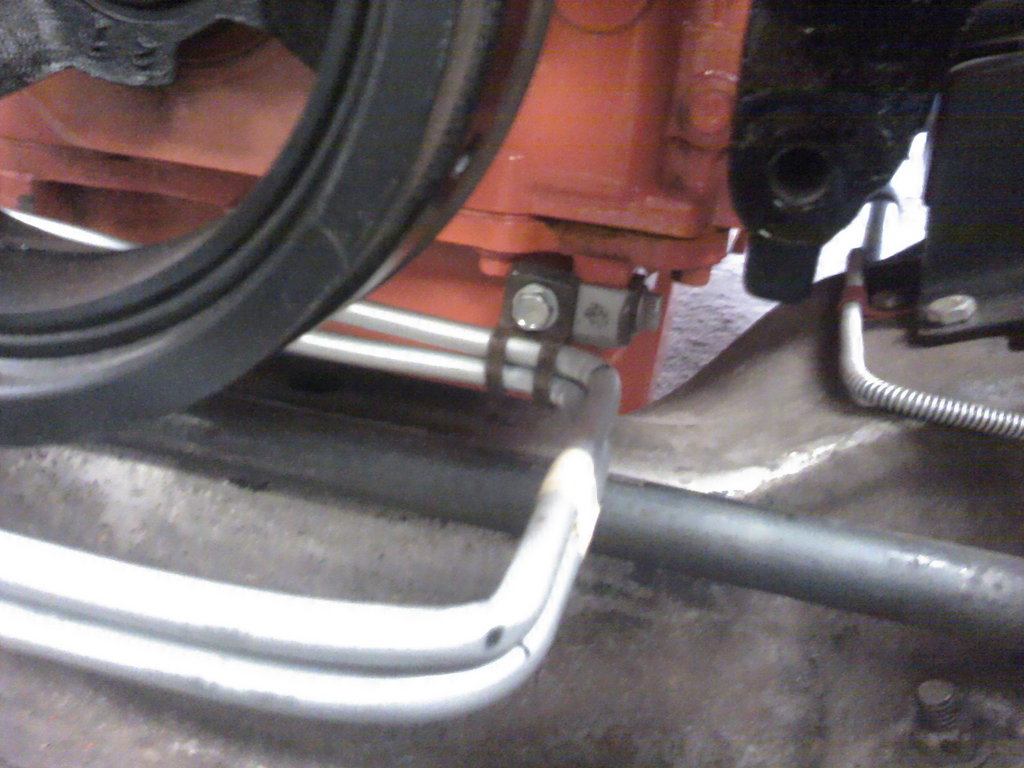
Bending metal lines suck! I probably am too critical, but I like them to both be the same, and not to be anywhere close to rubbing on anything. It took me several hours to bend them, but they turned out alright. Could have been neater in places, but at some point I have to stop and remind myself that this is just a beater/driver truck! Most of the initial bending was done on another engine/trans I have sitting in the corner of the garage, because I didn't do this before I put the engine in. If you don't have a spare to use, then definitley make the lines before putting the engine in, it's almost impossible to do them in the vehicle.

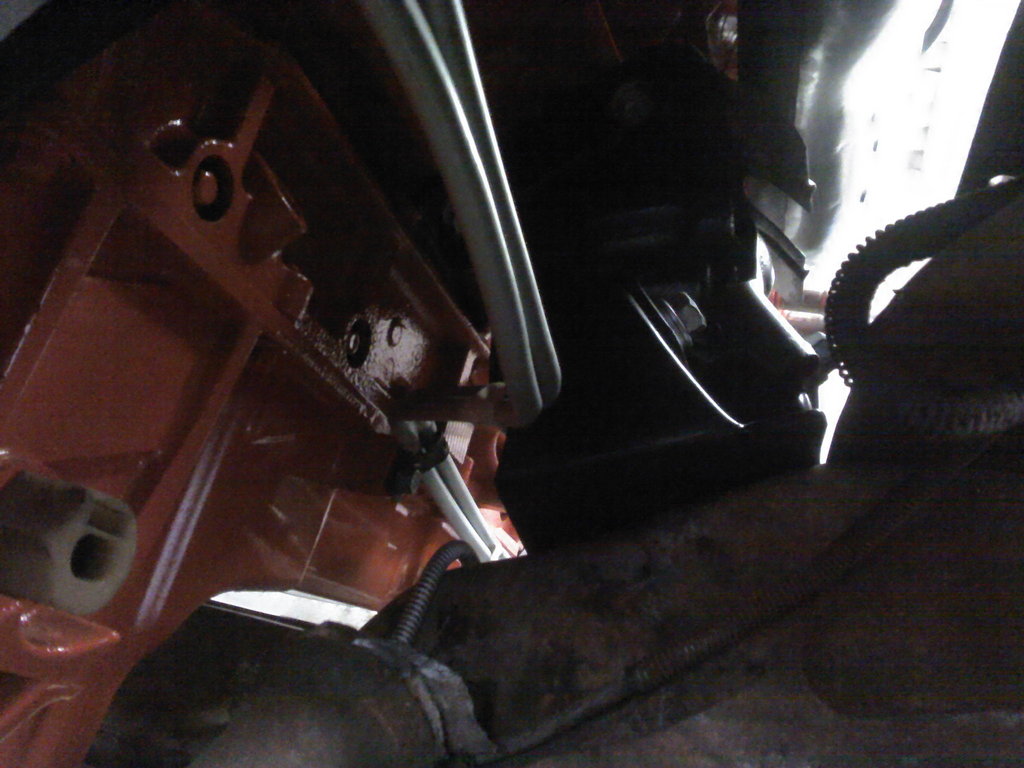
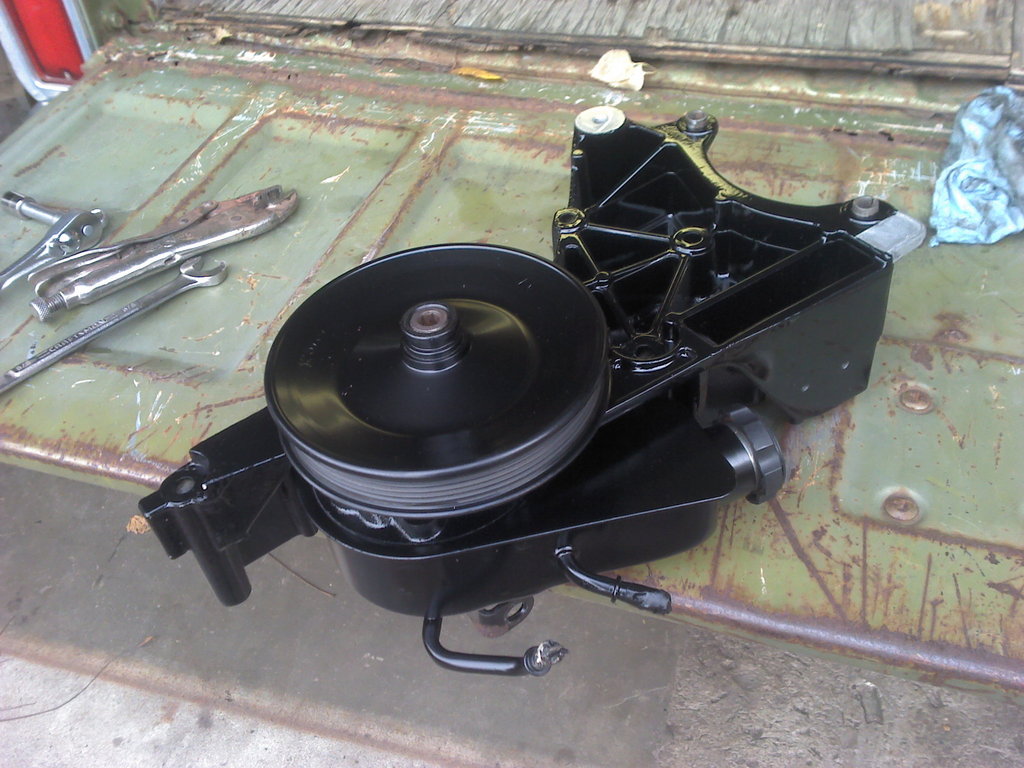
Also got a Hydroboost specific power steering pump at the junk yard off of a '96 Silverado diesel for $20, so I cleaned it up and mounted it to the bracket. Also got the lines with it, and if they work I'll probably get new ones for the model of truck they came off of.
Total for today's update.
Power steering pump and lines.... $20
Transmission line and fittings.... $35
I bought a roll of metal line from the auto parts store for $25, cheaper than the long sticks that they sell that are flared on both ends, and also able to make them in one piece that way. On a side note, when I to buy the flare nuts, they're like $2 a piece, and I needed 4, but naturally they only had 3, so I priced the shortest piece of line that comes with the nuts and it was $3.50, so I bought 2 of them and cut the line abnd took the nuts off and saved a dollar!
Made a little bracket to be able to attach a clamp to, to hold the lines secure at the front of the engine.
Bending metal lines suck! I probably am too critical, but I like them to both be the same, and not to be anywhere close to rubbing on anything. It took me several hours to bend them, but they turned out alright. Could have been neater in places, but at some point I have to stop and remind myself that this is just a beater/driver truck! Most of the initial bending was done on another engine/trans I have sitting in the corner of the garage, because I didn't do this before I put the engine in. If you don't have a spare to use, then definitley make the lines before putting the engine in, it's almost impossible to do them in the vehicle.
Also got a Hydroboost specific power steering pump at the junk yard off of a '96 Silverado diesel for $20, so I cleaned it up and mounted it to the bracket. Also got the lines with it, and if they work I'll probably get new ones for the model of truck they came off of.
Total for today's update.
Power steering pump and lines.... $20
Transmission line and fittings.... $35
10-26-2012, 09:56 AM
#75
hello to all on ls1tech. ls1nova71, im watching and reading this thread like a hawk. thanks for the insight/information on this build thread. i have (2) question, what r your plans for the stock fuse block? are you going to replace the 40 year old wiring/glass fuses? my mind wants to know. will you be removing the gas tank in the cab, to relocate it in the spare tire area, under the bed floor? thanks again for the information.dec010974.
 10-26-2012, 03:32 PM
#78
Teching In
Join Date: Aug 2011
Location: Weatherford, Tx.
Posts: 30
Likes: 0
Received 0 Likes
on
0 Posts
I am watching this build and learning. Just wanted to say Thanks for posting with pictures allowing so much insight to what you have learned.
Props too you SIR.
This is just Awsome!
Props too you SIR.
This is just Awsome!
10-27-2012, 12:32 AM
#79
Cad Ctsv kind of expensive but I would have been stuck with this on my swap. The truck is lowered. First picture is truck Stuck down one and a half inch. Second picture Ctsv pan un painted
11-01-2012, 10:42 PM
#80
hello to all on ls1tech. ls1nova71, im watching and reading this thread like a hawk. thanks for the insight/information on this build thread. i have (2) question, what r your plans for the stock fuse block? are you going to replace the 40 year old wiring/glass fuses? my mind wants to know. will you be removing the gas tank in the cab, to relocate it in the spare tire area, under the bed floor? thanks again for the information.dec010974.
As for the tank, I'm leaving the tank in the cab. My orange truck I put a Blazer tank in, but didn't want to cut a hole in the bedside for a fuel filler, and dragging a hose across the tailgate to reach an inside of the bed mounted filler didn't sound like a good idea, so I made a flip down taillight with the filler behind it. It's a neat idea in theory, but the fact is it doesn't fill real well, and on a truck that I will be driving alot, I didn't want the hassle.