
Isuzu Trooper 5.3 Swap
 07-10-2013, 09:15 AM
#1
Teching In
Thread Starter

After about a year of searching I have finally found myself a 5.3 and 4l60E combo for a good deal. Currently in my trooper I have a 3.4 gm v6 that I swapped in place of the 2.8 v6 it originally came with. I quickly got bored of that and wanted more power and better gas mileage, so hopefully the 5.3 will do just that.
So far I have made sure that the 91 suburban passenger drop transfer case I picked up a while ago fit. I also have started disassembling the 5.3. Plan for this next week is to get it torn down to the long block, make sure everything looks good, clean it up, replace all the gaskets, paint it, and put it back together. Here are a couple of picks, sorry if there bad they were taken at like 1 in the morning in my garage.
[IMG]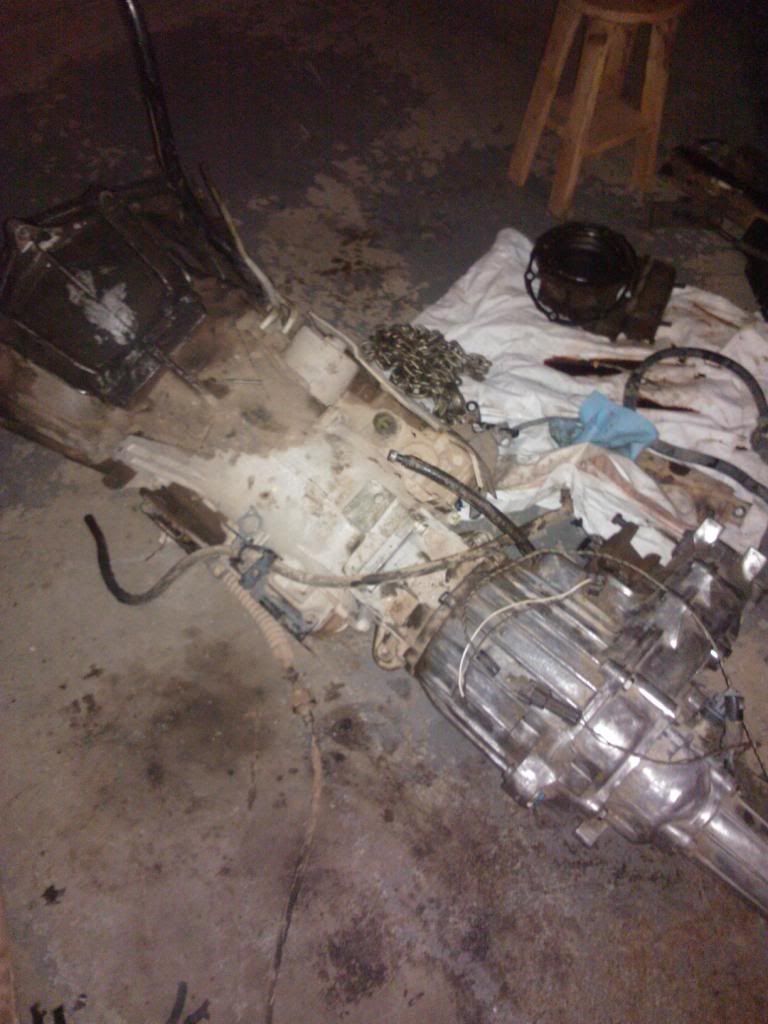 [/IMG]
91 t case bolted to 2000 tranny, worried a little about the clearance of the front driveshaft on the side of the tranny pan.
[IMG]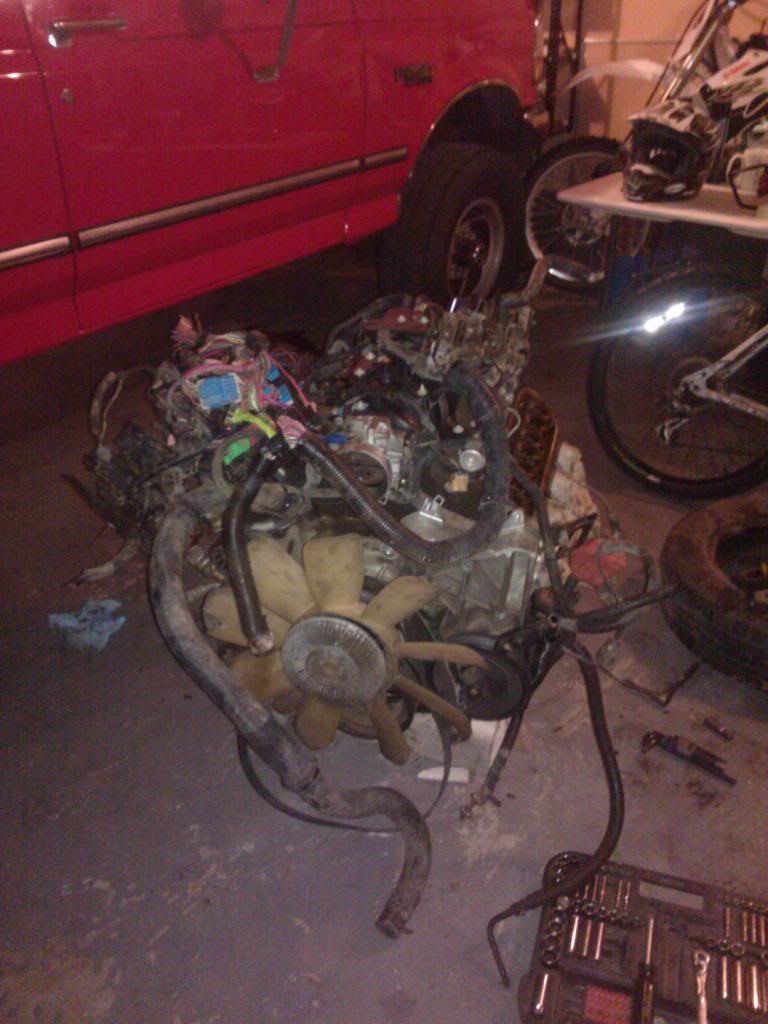 [/IMG]
they did a really crappy job tearing out the engine. They manage to break the starter, the alternator bracket, bunch of sensors, cut up the harness, and destroy the range mode sensor on the tranny. Just more money I have to spend now.
[IMG]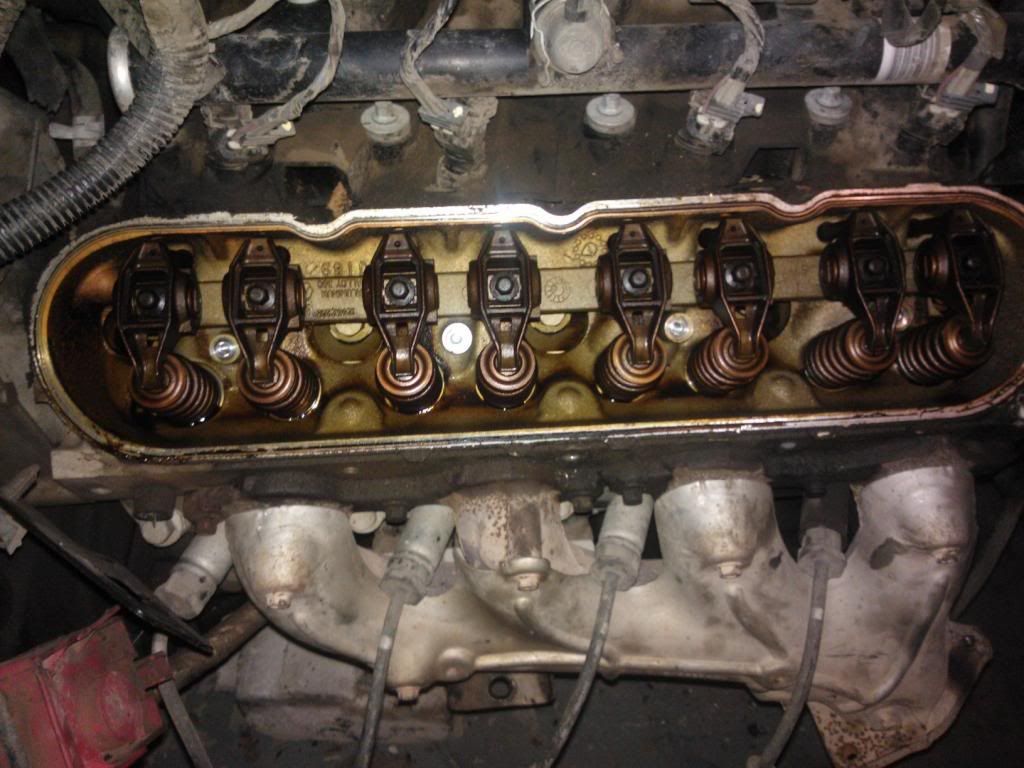 [/IMG]
Even with 180,000 miles the head shows no sign of sludge buildup. I have also already taken the heads off and the cross hatches are still good. Now I just want to check the bearings and make sure they look good. By the way I am a poor college kid so this project will be on a budget.
Now i have some questions if anyone could chime in. I plan on using a walbro 255 fuel pump and retrofit it in place of my existing one. So far I am just planning on using compression fitting to tie into my supply and return lines. Then have adapters on the end of those to go to AN 6 fittings. then from the AN 6 fitting I want to run hose like shown below. Is it just an AN 6 fitting with a barbed end and high pressure hose? I remember installing something similar on my dads diesel and it said it could hold up to 300 psi. Where is the best source for these fitting and hose, I already try to search and came up dry.
[IMG]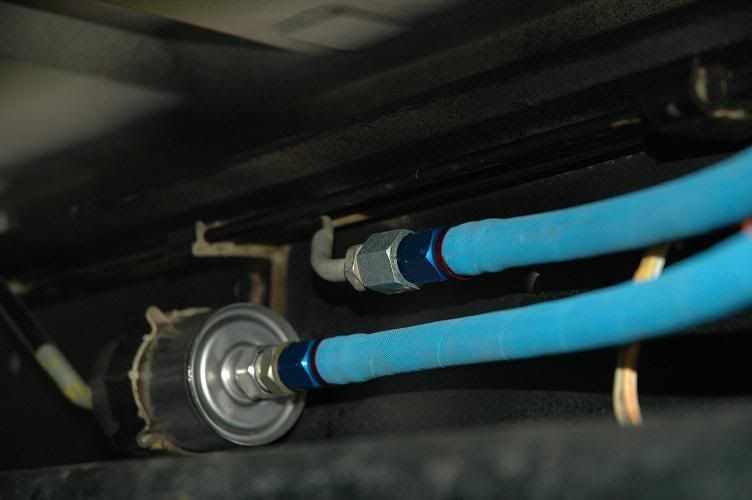 [/IMG]
[IMG]
 [/IMG]
And here is a picture of my 1990 Isuzu Trooper
[IMG]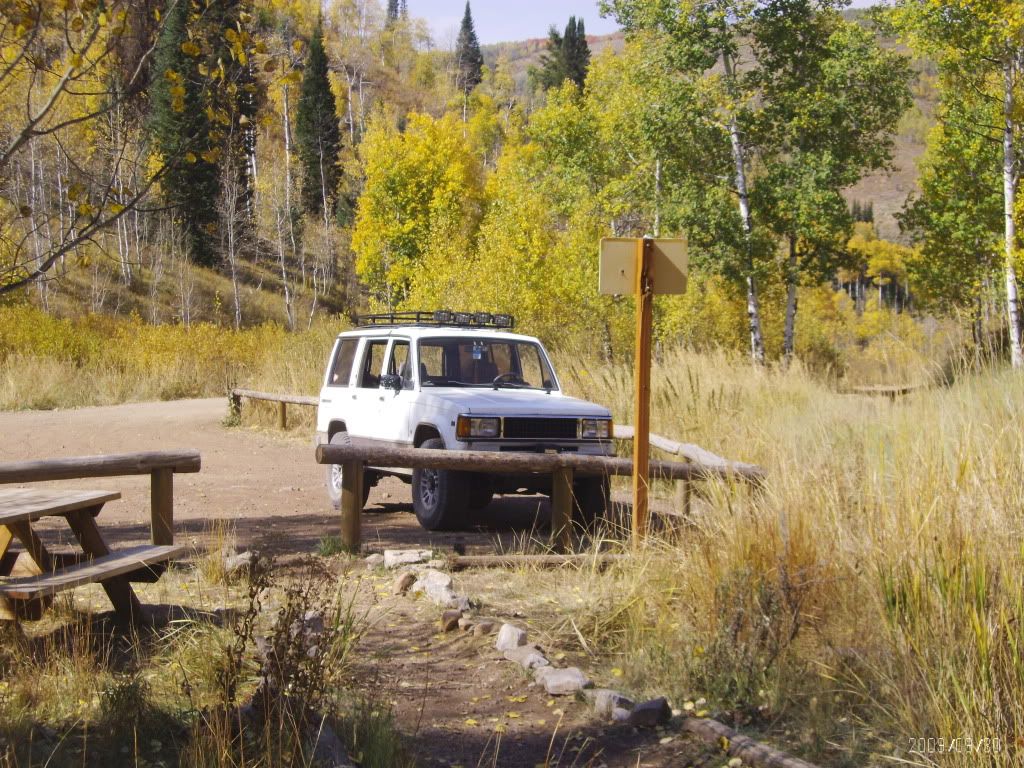 [/IMG]
It currently has a gm 3.4 and gm 4L30E tranny, also has the same TBI system that the gm 4.3 and 5.7's had. So it shouldn't be to hard of a swap I hope
So far I have made sure that the 91 suburban passenger drop transfer case I picked up a while ago fit. I also have started disassembling the 5.3. Plan for this next week is to get it torn down to the long block, make sure everything looks good, clean it up, replace all the gaskets, paint it, and put it back together. Here are a couple of picks, sorry if there bad they were taken at like 1 in the morning in my garage.
[IMG]
 [/IMG]
91 t case bolted to 2000 tranny, worried a little about the clearance of the front driveshaft on the side of the tranny pan.
[IMG]
 [/IMG]
they did a really crappy job tearing out the engine. They manage to break the starter, the alternator bracket, bunch of sensors, cut up the harness, and destroy the range mode sensor on the tranny. Just more money I have to spend now.
[IMG]
 [/IMG]
Even with 180,000 miles the head shows no sign of sludge buildup. I have also already taken the heads off and the cross hatches are still good. Now I just want to check the bearings and make sure they look good. By the way I am a poor college kid so this project will be on a budget.
Now i have some questions if anyone could chime in. I plan on using a walbro 255 fuel pump and retrofit it in place of my existing one. So far I am just planning on using compression fitting to tie into my supply and return lines. Then have adapters on the end of those to go to AN 6 fittings. then from the AN 6 fitting I want to run hose like shown below. Is it just an AN 6 fitting with a barbed end and high pressure hose? I remember installing something similar on my dads diesel and it said it could hold up to 300 psi. Where is the best source for these fitting and hose, I already try to search and came up dry.
[IMG]
 [/IMG]
[IMG]
 [/IMG]
And here is a picture of my 1990 Isuzu Trooper
[IMG]
 [/IMG]
It currently has a gm 3.4 and gm 4L30E tranny, also has the same TBI system that the gm 4.3 and 5.7's had. So it shouldn't be to hard of a swap I hope
 07-11-2013, 10:10 PM
#3
TECH Regular
iTrader: (5)

Join Date: Feb 2010
Location: Celina, Texas
Posts: 456
Likes: 0
Received 0 Likes
on
0 Posts

The hose you are looking for is called "push-loc" I used it on my build. Its oil, fuel, e85, safe. But, they cannot recommend it for fuel line. It does not have a mechanical retainment to prevent the hose from coming off. I used the heat shrink clamps from Gates. Looked great and permanent. The hose is rated for 300psi, burst is over 900 psi. Check my photobucket, you will get the idea.
07-11-2013, 11:43 PM
#4
Teching In
Thread Starter
Thanks for the reply, I will have to check them out. Is it also safe to just use high pressure fuel line with good clamps and a barbed fitting? And what fuel pump do you guys recommend for a stock motor? I am leaning towards the walbro 255 but know that there are other ones I have read about that people use. Here is the link on ebay of what I am planning on getting and just adapting the pump to my current in tank system
http://www.ebay.com/itm/290940721424...84.m1423.l2649
The last couple of days I have just been cleaning parts. The complete gasket set I ordered of ebay also came. It was a cheap one thought and I am a little worried about the head gaskets. I might just go buy some fel-pro ones and use the rest of the gaskets in the kit. Here is a link for the ones I bought, and negative feedback on this brand? I read mixed reviews
http://www.ebay.com/itm/151043120096...84.m1423.l2649
Today I also made a quick stop at a junkyard to get some of the wire harness conectors that the engine pullers either destroyed or didn't include. I managed to find the ecu and pcm connectors, along with the tranny harness. Almost got the nuetral safety switch that they managed to break when they pulled the engine, but I ended up breaking it too, lol. So I am not so mad about that anymore. the connectors just wouldn't budge.
will post more pics soon
08-24-2013, 08:44 PM
#6
Teching In
Thread Starter
Well I haven't updated in a long time, and sadly there hasn't been much progress made. Ended up breaking my foot on a dirt bike about a month ago. So what I can do is very limited. I cleaned the block up a bunch before the accident happened, tore it all apart, replaced the valve seals, and bought a complete gasket set. But today I was actually able to get out in the garage and get some work done, felt good to be able to touch a wrench again. I got the heads all torqued down, and a bunch of other stuff cleaned up. Here is what it currently looks like.
[IMG]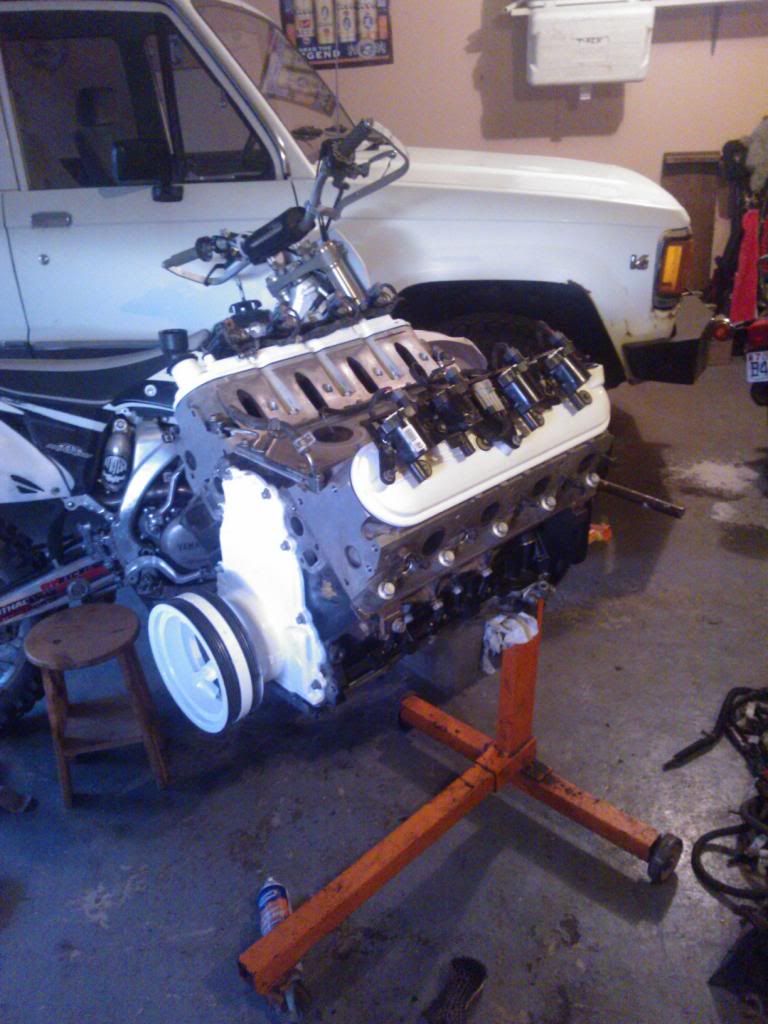 [/IMG]
My Trooper is white so I painted the valve covers and timing cover white. Was thinking of painting the block white too, but I think I will just keep it black. School starts on Monday, but hopefully I can get the old engine out soon and start to see if this one will fit.
[IMG]
 [/IMG]
My Trooper is white so I painted the valve covers and timing cover white. Was thinking of painting the block white too, but I think I will just keep it black. School starts on Monday, but hopefully I can get the old engine out soon and start to see if this one will fit.
Trending Topics
 09-01-2013, 08:42 PM
#10
Teching In
Thread Starter
Got a bunch of work done this weekend. Was able to take the old 3.4 and 4l30e out. Which is a big accomplishment when you only have one good foot. Also set the 5.3 in place to see how it will fit. It is definitely a tight fit but it looks like it should work. The truck pan will barely clears the front axle as far as I can tell, but I still might have to do some cutting on it. Good news is the truck intake will work, which will save a lot of money. However I am still not sure on all of the truck accessories fitting and still being able to fit electric fans and a radiator. Anyways here are some pictures.
[IMG]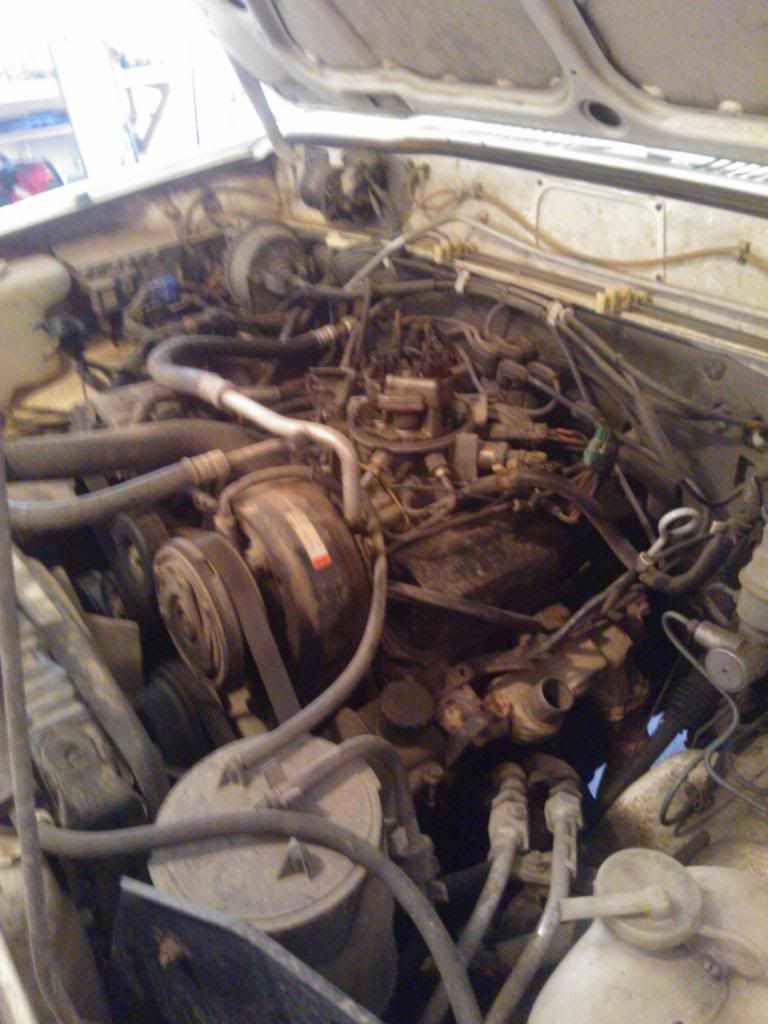 [/IMG]
Before disassembly started
[IMG]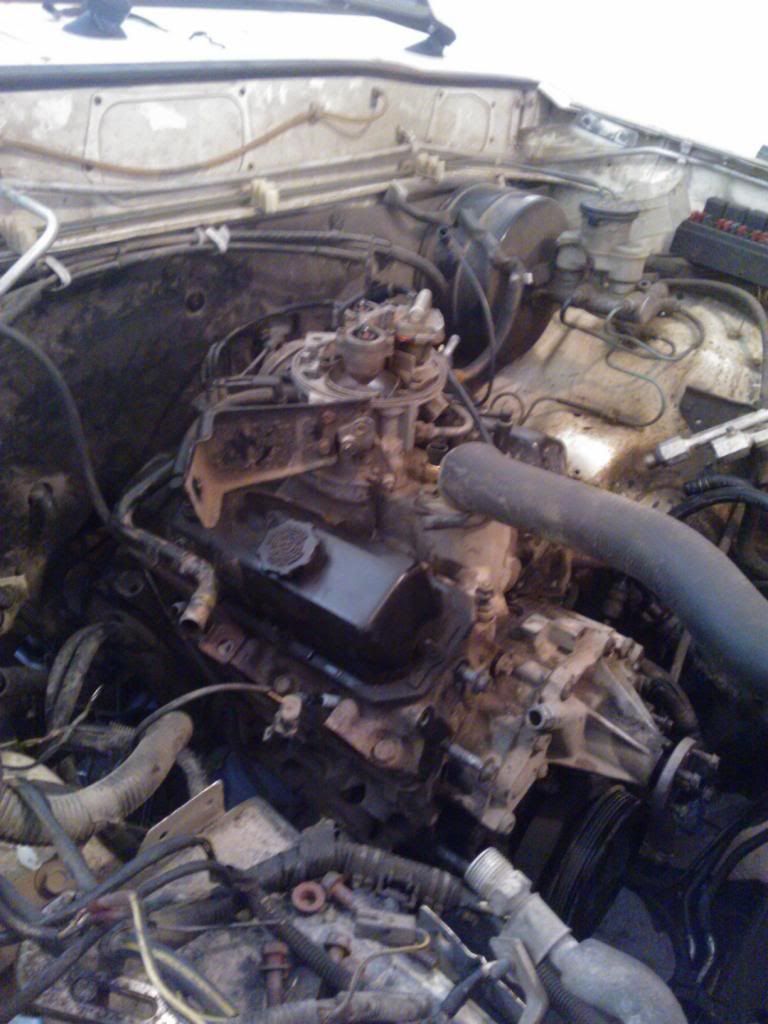 [/IMG]
Torn down to pull
[IMG]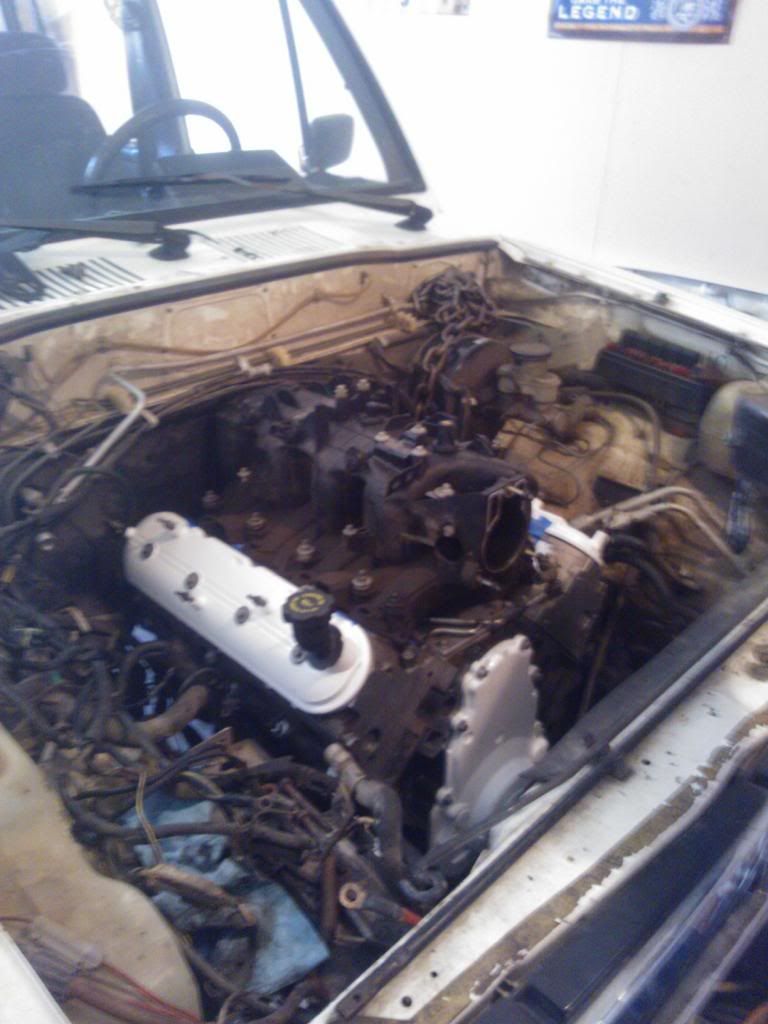 [/IMG]
5.3 laying in the engine bay, its resting on wood at the moment. I just wanted to get an idea of engine mounts and clearance issues.
[IMG]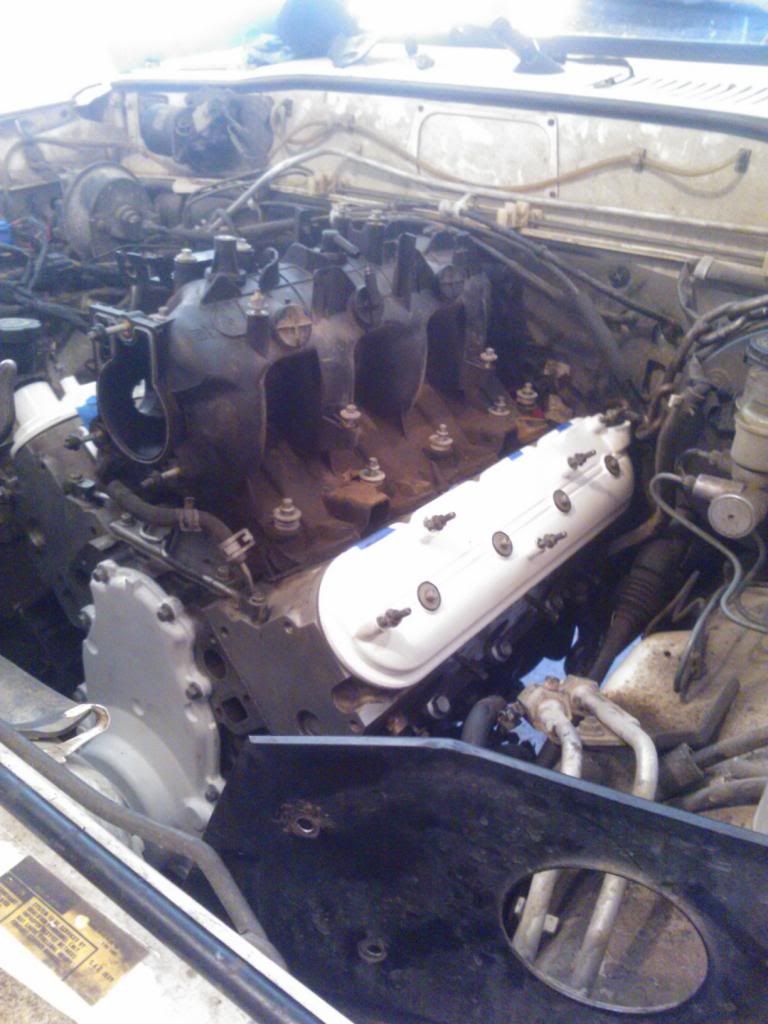 [/IMG]
[IMG]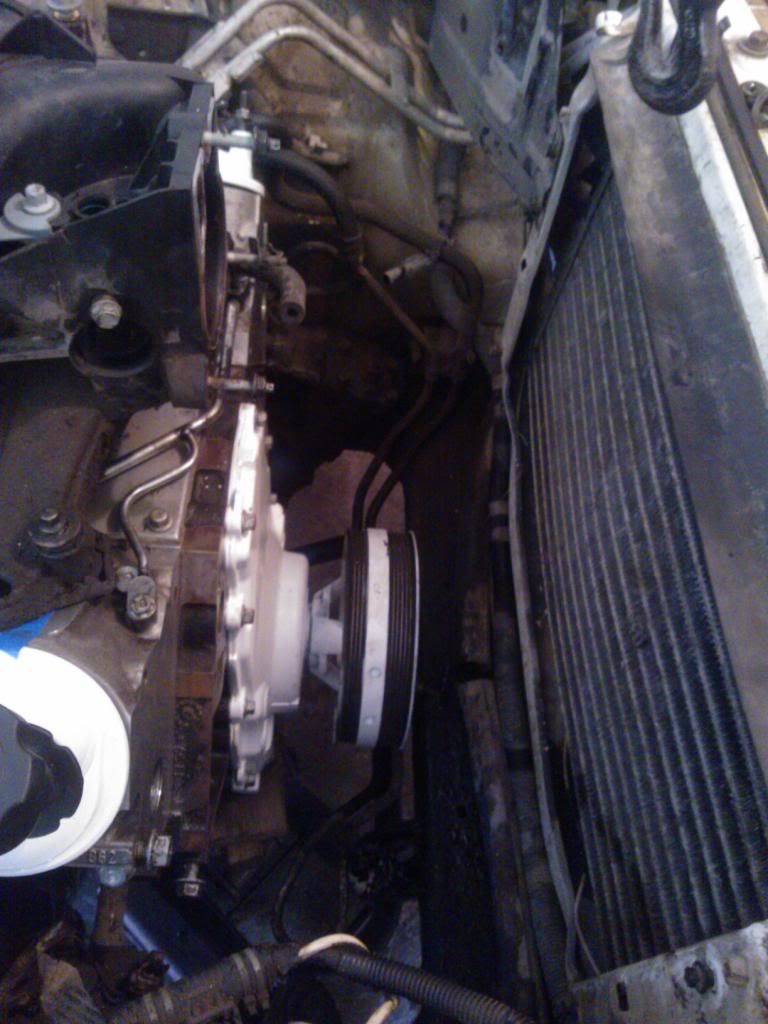 [/IMG]
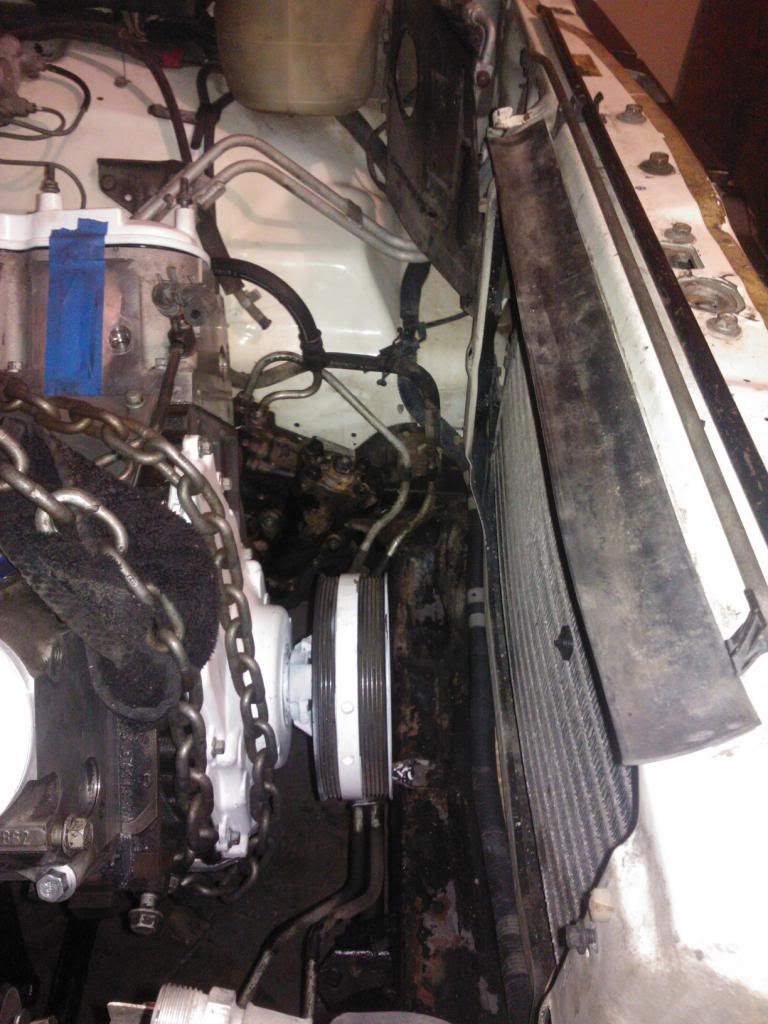
Might need ls1 accessories, would make fitting the electric fans and radiator a lot easier
[IMG] [/IMG]
fits just under the pinch weld on the firewall
[IMG]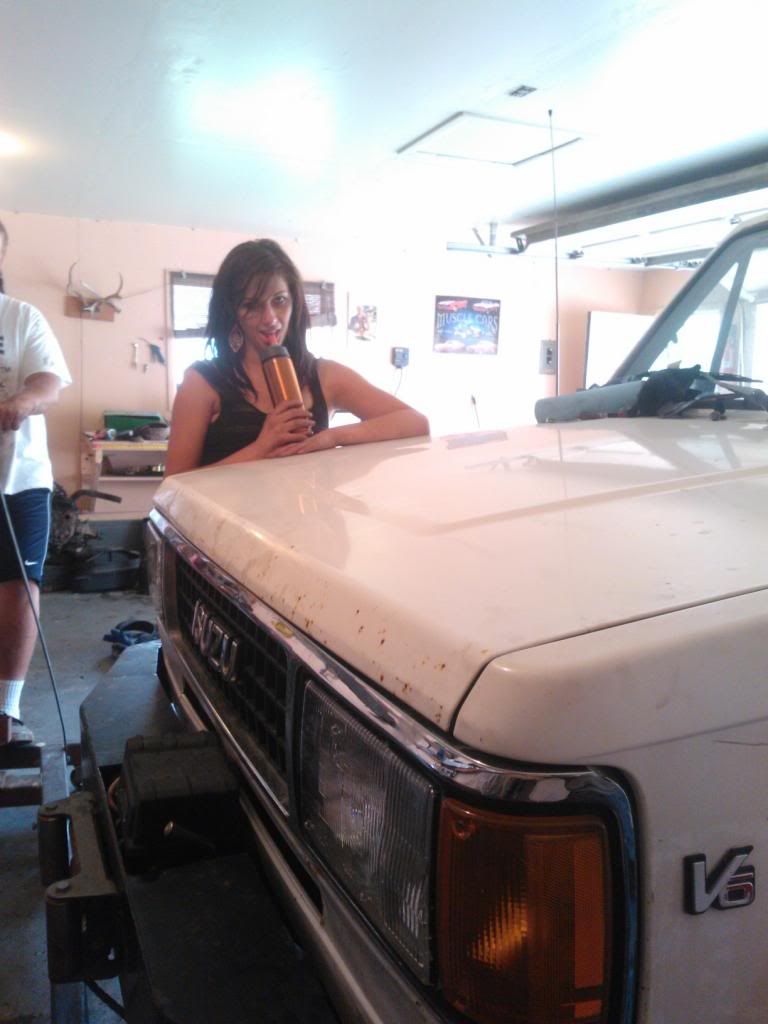 [/IMG]
hood clears the throttle body and intake
[IMG]
 [/IMG]
Before disassembly started
[IMG]
 [/IMG]
Torn down to pull
[IMG]
 [/IMG]
5.3 laying in the engine bay, its resting on wood at the moment. I just wanted to get an idea of engine mounts and clearance issues.
[IMG]
 [/IMG]
[IMG]
 [/IMG]
Might need ls1 accessories, would make fitting the electric fans and radiator a lot easier
[IMG]
 [/IMG]
fits just under the pinch weld on the firewall
[IMG]
 [/IMG]
hood clears the throttle body and intake
09-03-2013, 10:52 AM
#11
Teching In
Thread Starter
Was wondering if anyone has an opinion on where I should get my 1999 silverado computer I just bought off ebay done? The engine is from a 2000 suburban so I will need to get it flashed with the different program and will also need the theft, and emissions stuff removed. But I am wondering if it would benefit to get the TQ management stuff removed or changed? The engine is completely stock, but I would still like to squeeze as much power out of it as I can. Would love to be able to beat mustangs and rice cans off of the line with my 4.56 gears. I was looking at having the guy from lt1swap.com do the programming since he is only 75 dollars and sounds like he knows what he is doing and can account for tire and gear size. Is there anyone else around the same price that is good to go to and can maybe do some performance tuning?
thanks
thanks
09-18-2013, 10:44 PM
#12
Teching In
Thread Starter
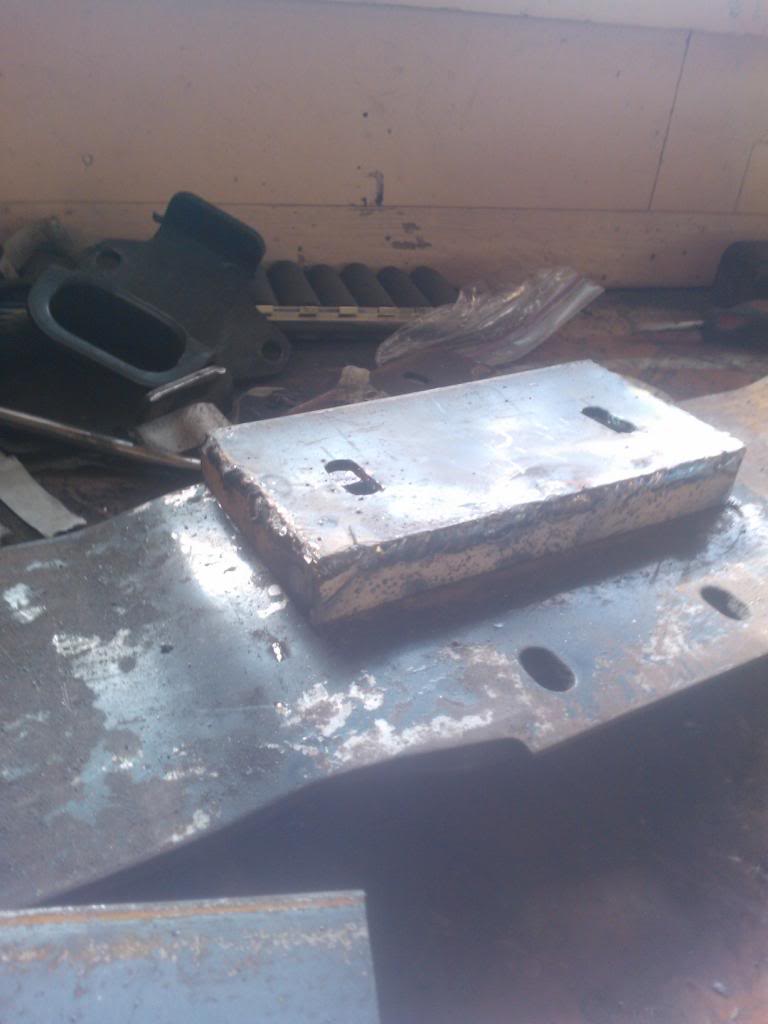
If anyone is still reading, sorry it is going so slow. Its hard to find time to work on projects when your a mechanical engineering student. Plus I am doing all of this on one foot, so I have a couple good excuses. In the last couple weeks I have managed to modify my transmission mount, cut up my oil pan so it will fit, partially weld up some engine mounts, and today for the first I bolted the engine and tranny together in the vehicle. So here are some more fancy cell phone pictures.
This is how I get around my garage, my sweet knee scooter.
[IMG] [/IMG]
Transmission mount cut up
[IMG]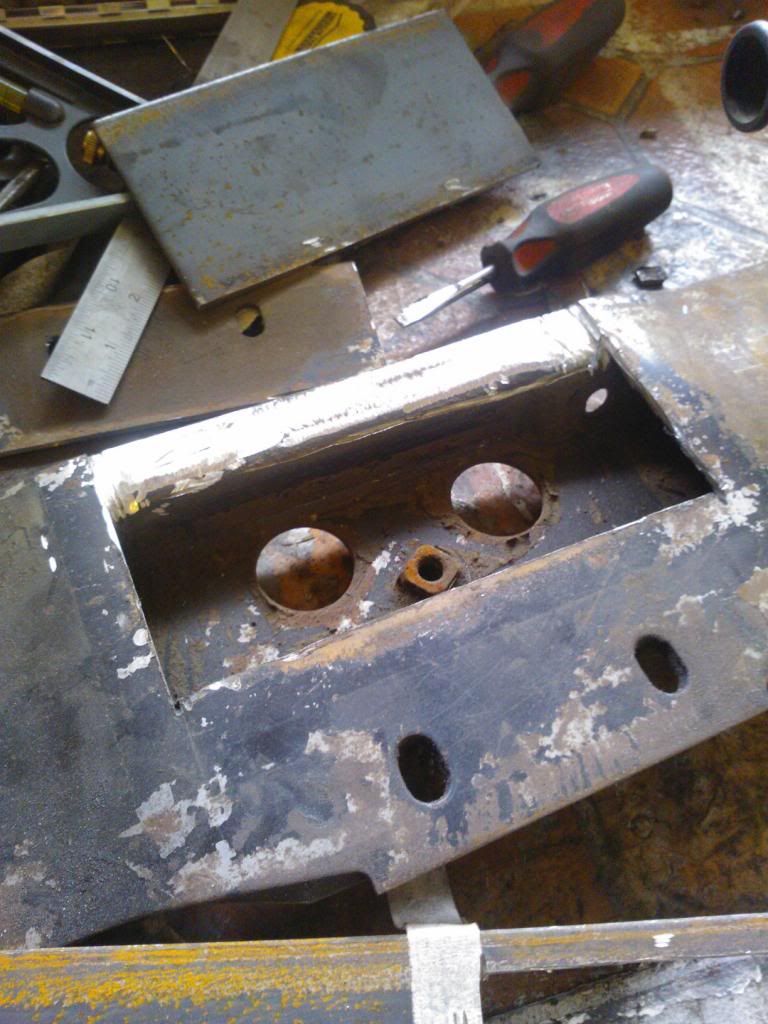 [/IMG]
Metal cut up
[IMG]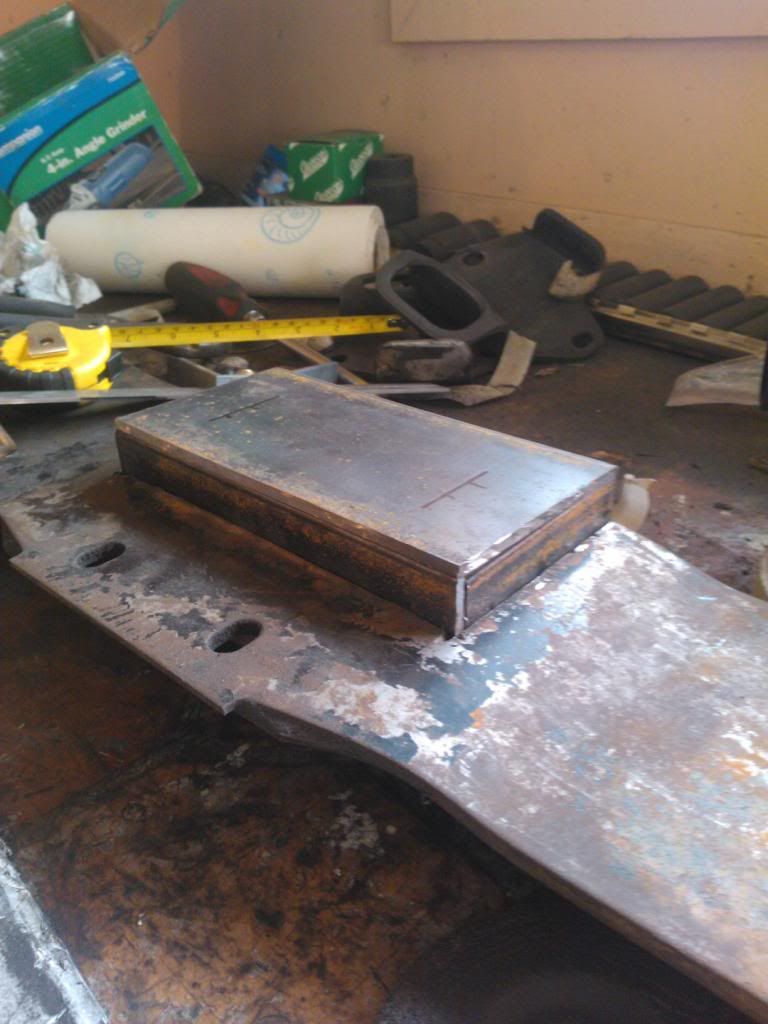 [/IMG]
Partially welded together with my crappy Lincoln flux core welder. Yes I beveled the edges, its good and strong just not pretty.
[IMG][/IMG]
Tranny in, figured if I got the tranny in first then it would be easier to center the engine in the bay
[IMG]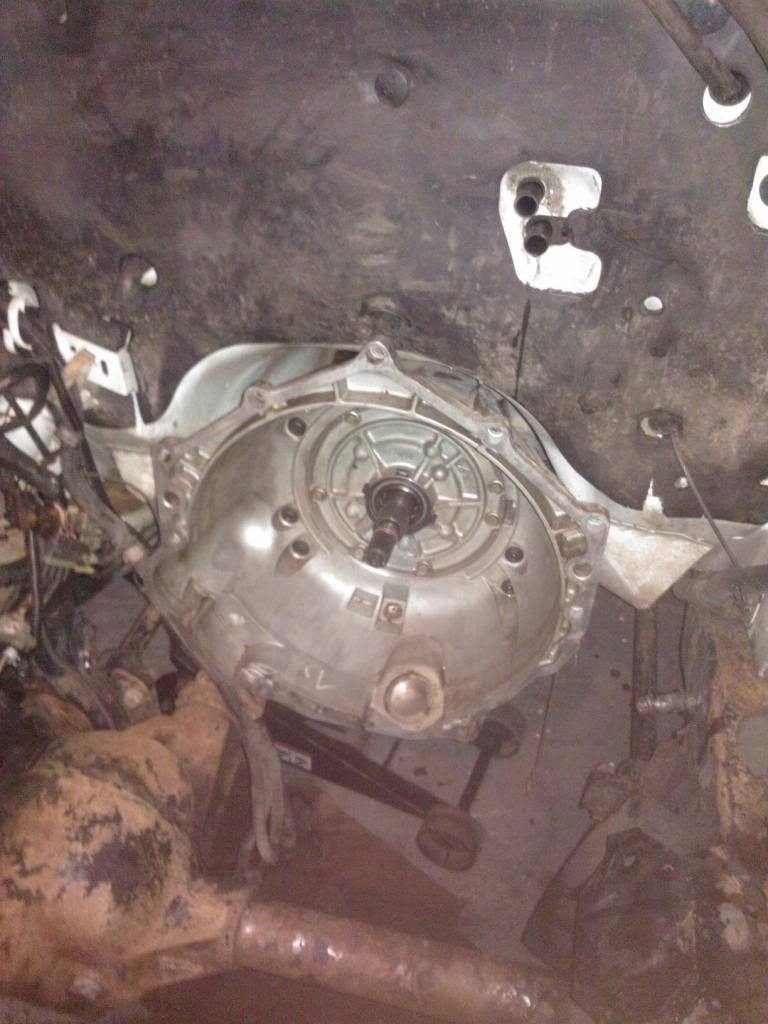 [/IMG]
Liquid industries engine mount kit, very good quality and good guys to deal with. This was welded with my boss's miller which wasn't working well. Has a kink in the line or something so the wire feed was a little sparatic.
[IMG]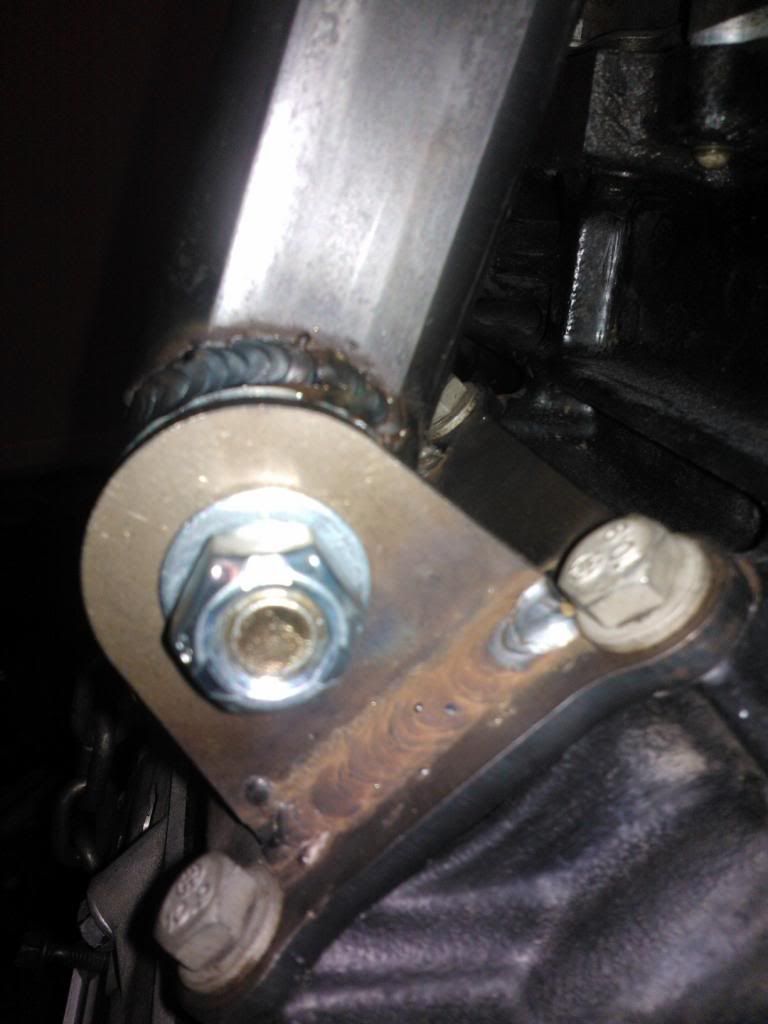 [/IMG]
Stock truck oil pan
[IMG]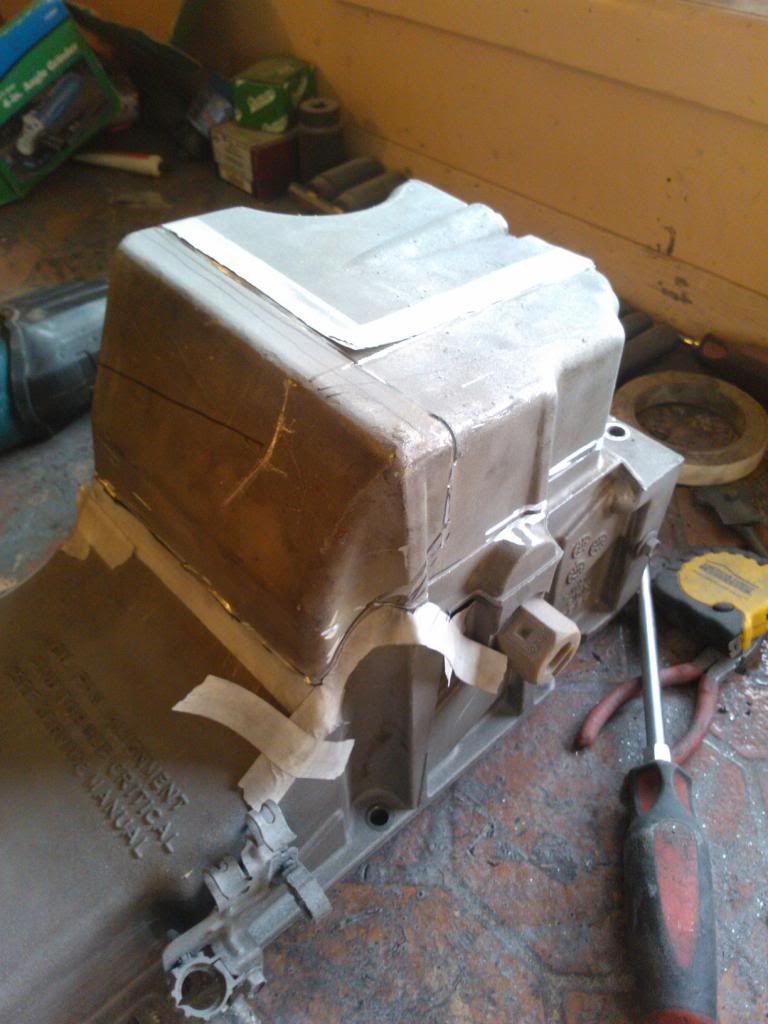 [/IMG]
Not so stock anymore, my mom is bringing me my nice millermatic 211 welder next week when I get the pins out of my foot. I have a spool gun attachment for it that I will try out by piecing the pan back together
[IMG] [/IMG]
Bolted together
[IMG]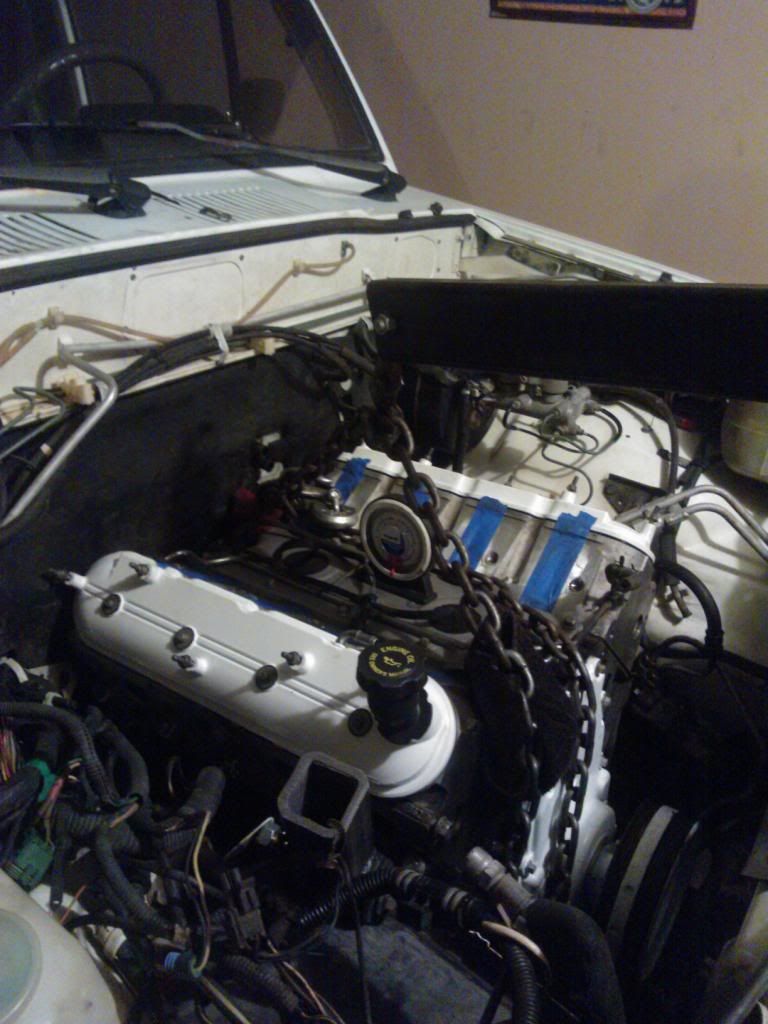 [/IMG]
almost clears, planning on cutting up the manifolds to fit and welding on some V-bands
[IMG]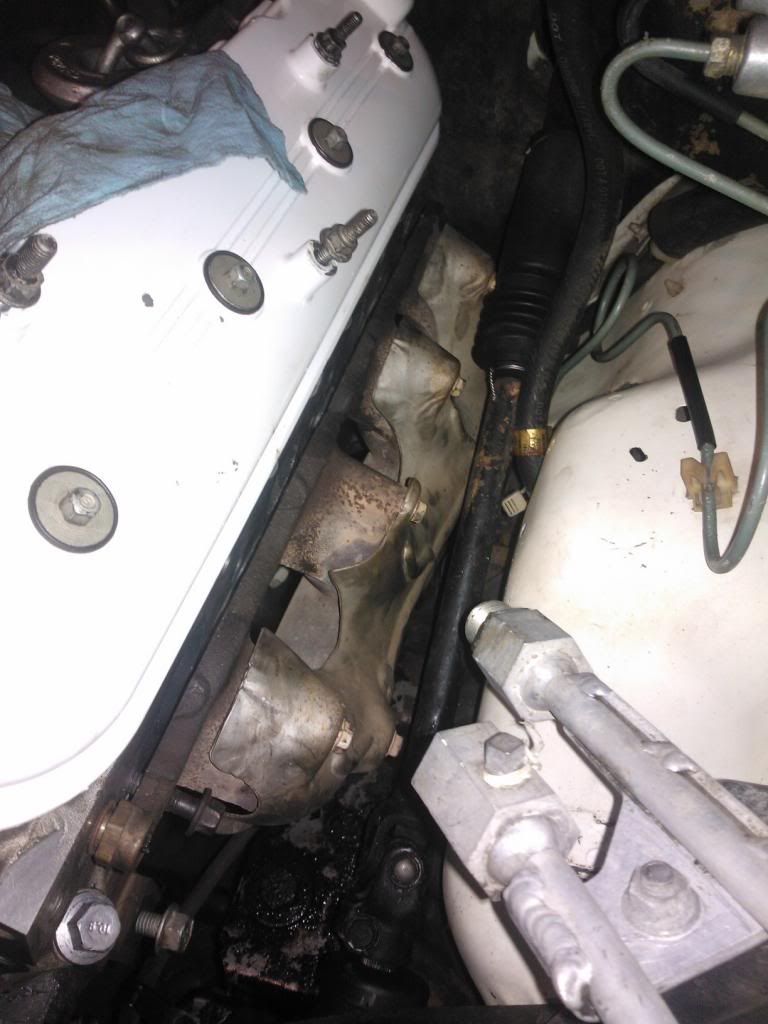 [/IMG]
Probably be ditched the condenser for now so I can fit the radiator and fans, wish i could afford some camaro ls1 accessories
[IMG]
 [/IMG]
Right now the engine is at 5 degrees leaning back, thinking that should be good? any opinions?
This is how I get around my garage, my sweet knee scooter.
[IMG]
 [/IMG]
Transmission mount cut up
[IMG]
 [/IMG]
Metal cut up
[IMG]
 [/IMG]
Partially welded together with my crappy Lincoln flux core welder. Yes I beveled the edges, its good and strong just not pretty.

[IMG]
[/IMG]Tranny in, figured if I got the tranny in first then it would be easier to center the engine in the bay
[IMG]
 [/IMG]
Liquid industries engine mount kit, very good quality and good guys to deal with. This was welded with my boss's miller which wasn't working well. Has a kink in the line or something so the wire feed was a little sparatic.
[IMG]
 [/IMG]
Stock truck oil pan
[IMG]
 [/IMG]
Not so stock anymore, my mom is bringing me my nice millermatic 211 welder next week when I get the pins out of my foot. I have a spool gun attachment for it that I will try out by piecing the pan back together
[IMG]
 [/IMG]
Bolted together
[IMG]
 [/IMG]
almost clears, planning on cutting up the manifolds to fit and welding on some V-bands
[IMG]
 [/IMG]
Probably be ditched the condenser for now so I can fit the radiator and fans, wish i could afford some camaro ls1 accessories
[IMG]
 [/IMG]
Right now the engine is at 5 degrees leaning back, thinking that should be good? any opinions?
Last edited by kmattinson67; 09-18-2013 at 10:51 PM.
09-19-2013, 12:10 PM
#13
http://s1008.photobucket.com/user/km...00347.jpg.html
Where did this mod come from?
Just kidding looks good
Where did this mod come from?
Just kidding looks good
09-19-2013, 12:46 PM
#14
TECH Enthusiast
iTrader: (14)
Join Date: Mar 2008
Location: Valley Lee, MD. Southern Maryland
Posts: 652
Likes: 0
Received 11 Likes
on
11 Posts
Good work so far!!! As far as a mail order tune goes, TunedbyFrost dot com might be a place for you to look at. Frost (Steve) has a good rep on these boards and has been doing the LS engine tuning thing for a while.
09-19-2013, 02:00 PM
#15
Teching In
Thread Starter
http://s1008.photobucket.com/user/km...00347.jpg.html
Where did this mod come from?
Just kidding looks good
Where did this mod come from?
Just kidding looks good
09-19-2013, 07:17 PM
#16
On The Tree

Join Date: Feb 2013
Location: Seattle, WA
Posts: 141
Likes: 0
Received 0 Likes
on
0 Posts
nicely done, but I would try and find a corvette LS2 accessory drive set up. I know you want to save money but keeping AC is pretty much important to me.
how much room do you have to the condenser? looks like around 4-5", the corvette drive is 1-9/16" shorter than the truck. the Camaro is around 7/8" shorter than the truck.
how much room do you have to the condenser? looks like around 4-5", the corvette drive is 1-9/16" shorter than the truck. the Camaro is around 7/8" shorter than the truck.
09-21-2013, 04:33 PM
#17
Teching In
Thread Starter
I would love to make the AC work right now, but it is not a high priority for me. Haven't had working AC in the last 7 years I have been driving it as my daily driver, so I can live another couple without it. Today I wanted to see if the AC compressor would even fit, and well it just barely doesn't. It is hitting my idler arm and a little bit of my front axle mount. So until I do the SAS, which might happen in the spring, I will just get everything else working for now. As for the radiator I am thinking of using one of these universal speedway ones if I can't find one in a junkyard that will fit. If I get rid of the condenser then there should be plenty of room for a tranny cooler, the radiator, and some junkyard electric fans.
http://www.speedwaymotors.com/Speedw...tors,3557.html
http://www.speedwaymotors.com/Speedw...tors,3557.html
11-26-2013, 12:18 AM
#18
Teching In
Thread Starter
Well I have been slacking on updates, busy with school and stuff. But I have been getting some progress done. Engine is mounted permanently, oil pan is cut hacked and welded back together, fuel lines are ran, pump is upgraded, and the wiring has been started. Here are the few pics I found on my phone, need to take some more soon though to show my wiring mess.
[IMG]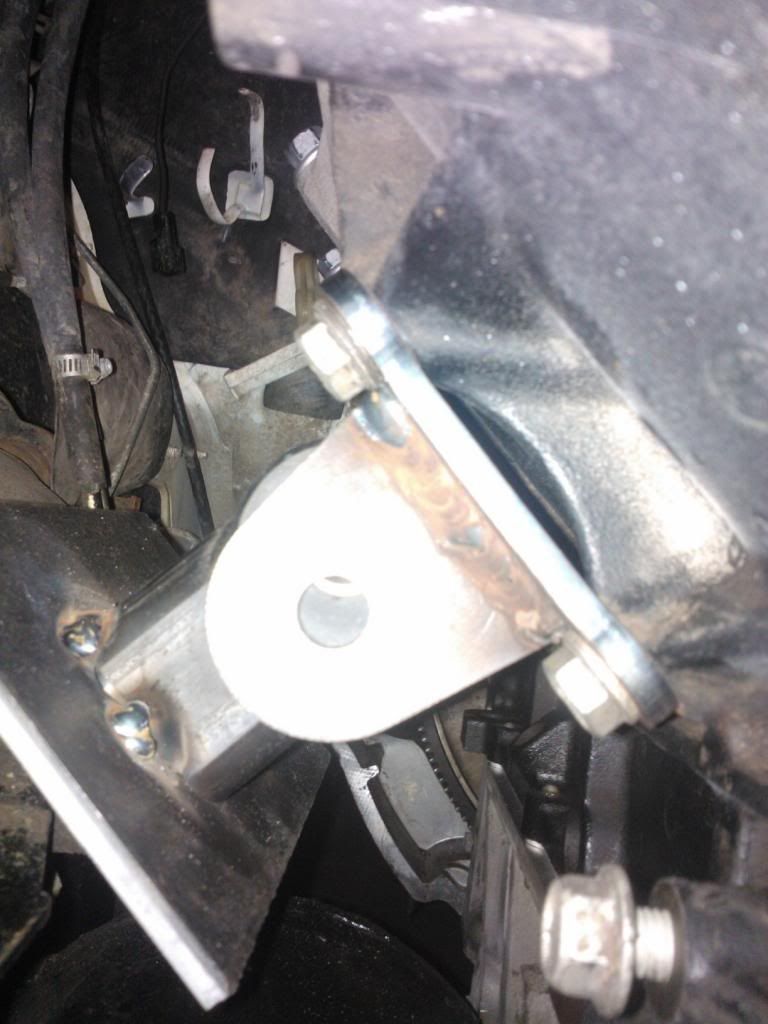 [/IMG]
This is the first test fit with the mounts, I ended up cutting them a little shorter to get a better angle on the engine.
[IMG]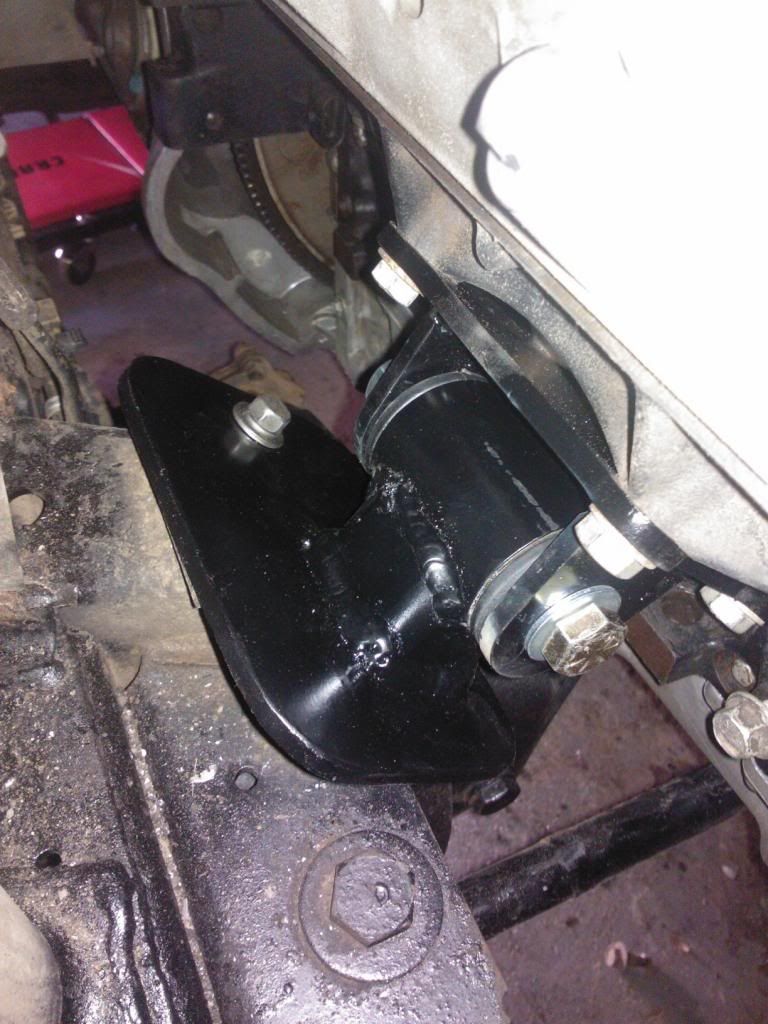 [/IMG]
Here is a pic of the finished mount, I ended up using 1/4" plate that I bolted to the original frame stands. Then I welded 2" square 1/4" wall tubing to that. Which I notched and welded to the bushing tube from liquid industries. Worked out pretty good I think.
[IMG]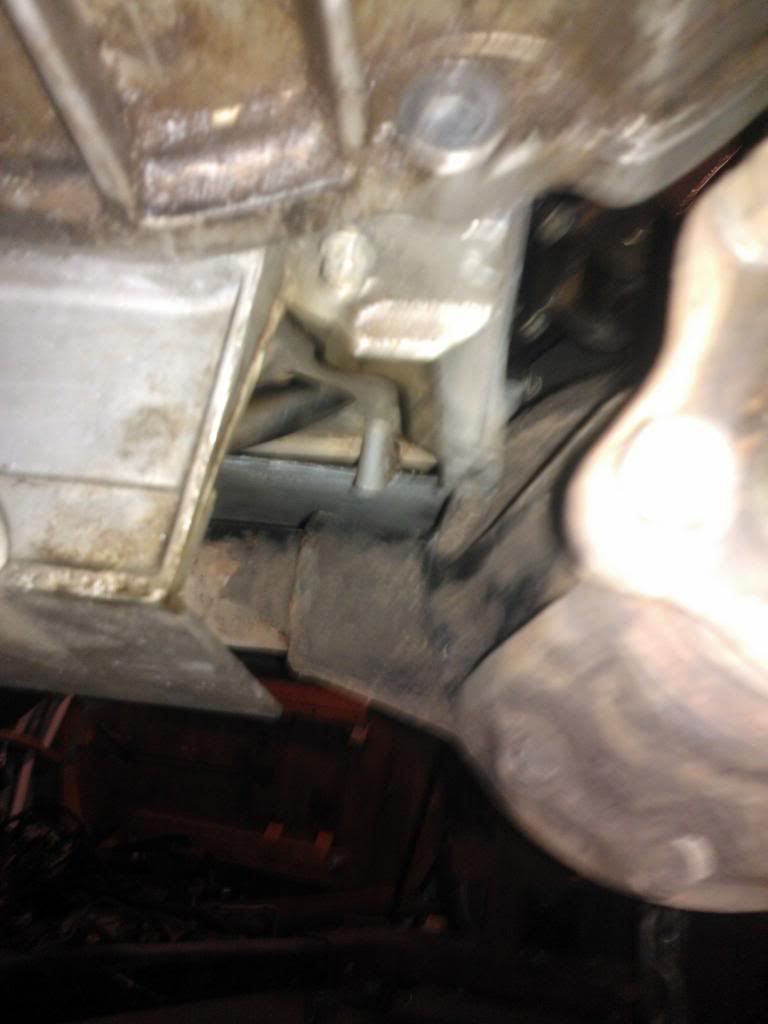 [/IMG]
Here is a pic of the oil pan all cut up, need to post one of the finished product. The welds weren't that great since it was my first time using my spool gun with my miller, but It passed a water leak test. So hopefully it will be good.
[IMG] [/IMG]
walbro 255 universal fuel pump i bought off ebay, pretty positive it is a legit one. Hopefully it is not a knockoff.
[IMG]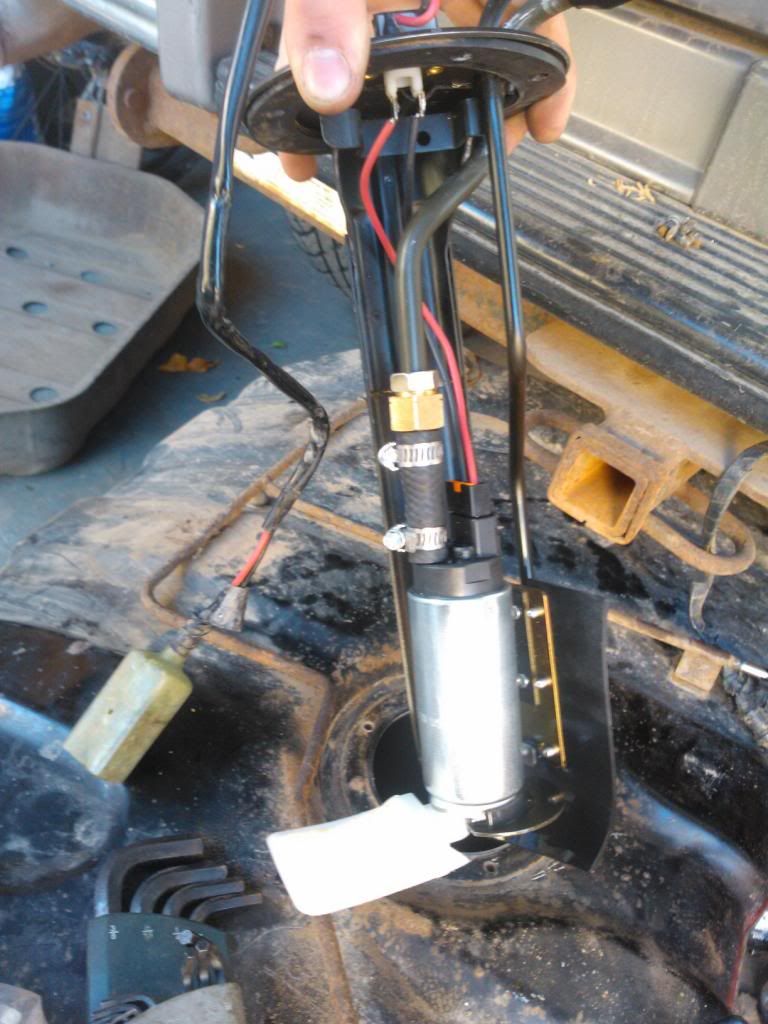 [/IMG]
Had to put a slightly bigger 3/8" tube in, rubber isolator fit perfect in the original mount.
[IMG] [/IMG]
Bolted down with push lock AN fittings and parker hose
[IMG]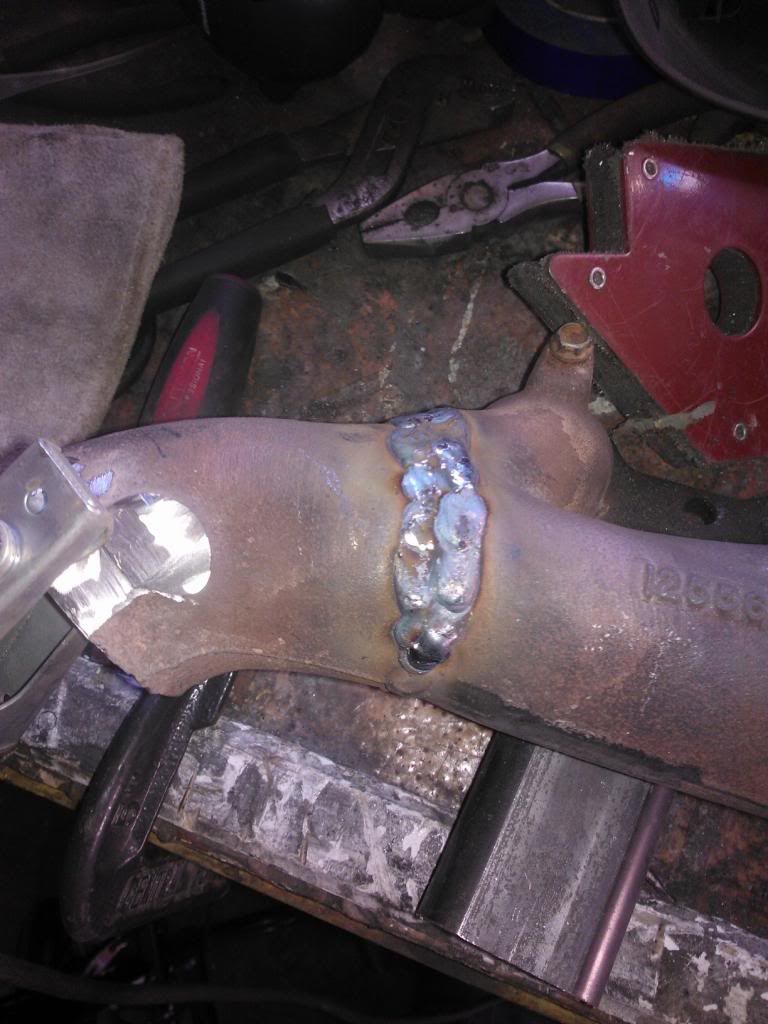 [/IMG]
Manifolds had to be angled a little different so they didn't hit the frame. Also have v-bands welded on them.
[IMG]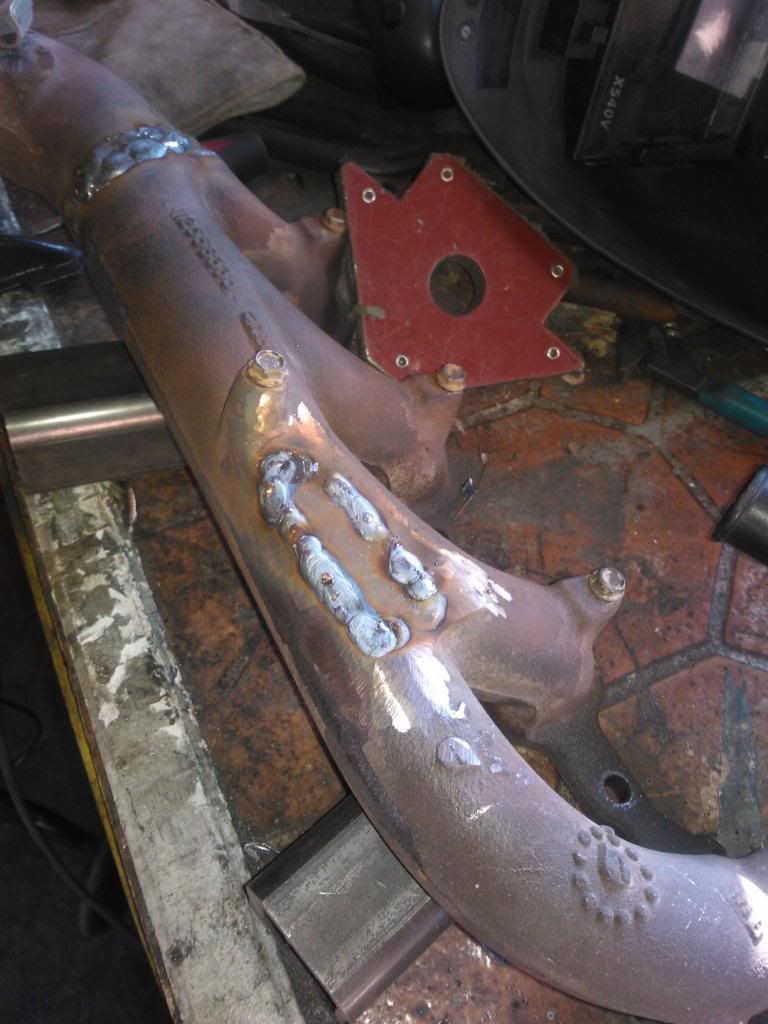 [/IMG]
EGR cut off and welded up. Hopefully the welds don't break from the cast iron. I also put the heat shields back on and reshaped them a little bit.
[IMG]
 [/IMG]
This is the first test fit with the mounts, I ended up cutting them a little shorter to get a better angle on the engine.
[IMG]
 [/IMG]
Here is a pic of the finished mount, I ended up using 1/4" plate that I bolted to the original frame stands. Then I welded 2" square 1/4" wall tubing to that. Which I notched and welded to the bushing tube from liquid industries. Worked out pretty good I think.
[IMG]
 [/IMG]
Here is a pic of the oil pan all cut up, need to post one of the finished product. The welds weren't that great since it was my first time using my spool gun with my miller, but It passed a water leak test. So hopefully it will be good.
[IMG]
 [/IMG]
walbro 255 universal fuel pump i bought off ebay, pretty positive it is a legit one. Hopefully it is not a knockoff.
[IMG]
 [/IMG]
Had to put a slightly bigger 3/8" tube in, rubber isolator fit perfect in the original mount.
[IMG]
 [/IMG]
Bolted down with push lock AN fittings and parker hose
[IMG]
 [/IMG]
Manifolds had to be angled a little different so they didn't hit the frame. Also have v-bands welded on them.
[IMG]
 [/IMG]
EGR cut off and welded up. Hopefully the welds don't break from the cast iron. I also put the heat shields back on and reshaped them a little bit.
Last edited by kmattinson67; 11-26-2013 at 12:24 AM.
07-01-2014, 11:10 PM
#19
Teching In
Thread Starter
Well I really need to update this thread, maybe I will post some pictures later. My trooper runs and I have driven it around the neighborhood a little bit but it still needs some work. First it idles a little rough, and when I try to hold it at a higher rpm it stumbles a little bit. Then when I drive it, it hesitates when I give it gas. I am guessing its just a bad sensor or wiring, but I have tried a couple things and no luck yet.
Here is what I have tested.
- The fuel pressure is around 50-53ish and 60 when I take the vacuum line off.
- compression is about 160 psi on all 8 cylinders
- all the cylinders seem to be sparking correctly (tested this by hooking up the timing light to each cylinder and revving it to see if it stumbled at all)
- replaced the map sensor and it didnt make a difference, it read 30 in with engine off and 8 or so with it on
- oxygen sensors seem to be varying from .1 to .9 volts, but I still need to verify the wiring on these. guessing these could be a problem.
- TPS goes from 0% to 100% when i press the pedal down all the way
- I tried testing for a vacuum leak with starter fluid but didn't notice any(probably going to try the cigar trick next)
Well that is it, please help. I need to get this thing running good so I can start on my solid axle swap soon. want to DD this thing again. Thinking it is either a oxygen sensor, vacuum leak, or maybe a crank sensor?
also the timing advance from #1 cylinder on my reader says it is varying around 30-50 degrees at idle, this seems way high to me. It also isn't pulling any DTC's.
The following users liked this post:
68Formula (07-04-2020)
07-01-2014, 11:48 PM
#20
Teching In
Thread Starter
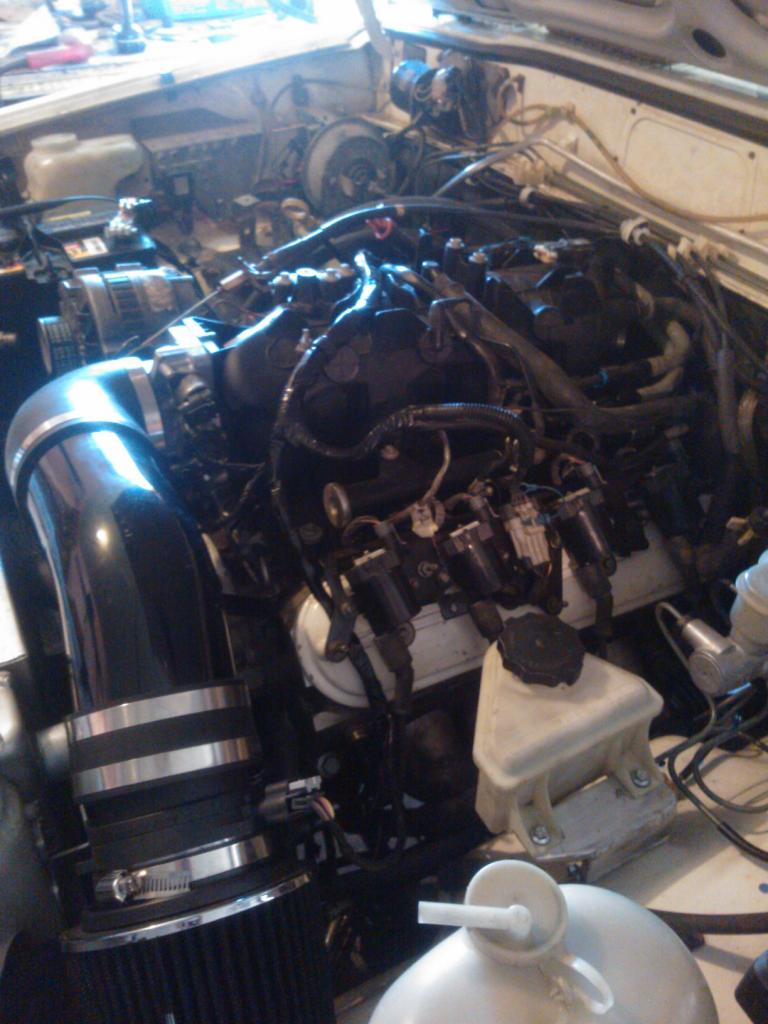
Here the engine is in its current state, I ended up using ls2 corvette accessories. Used my original alternator mounted on the passenger side with a mount that i built. Also built my own power steering pump mount and used a pump from a 2003 V6 Saturn L300. Will need to post more pictures of this later since it is pretty unique and I just used what I had and what I could find from the junkyard. I used a ls2 water pump and harmonic balancer though.
I also graduated from college and moved backed to Washington for the summer. So here is a pic of my trooper loaded up on my car trailer for the voyage.

I also graduated from college and moved backed to Washington for the summer. So here is a pic of my trooper loaded up on my car trailer for the voyage.