

69 Camaro G8/6L80e Swap *Build Thread*
 02-10-2014, 08:10 PM
#21
Staging Lane
Thread Starter
Join Date: Jan 2014
Location: Panama City, FL
Posts: 70
Likes: 0
Received 0 Likes
on
0 Posts
 02-14-2014, 03:46 AM
#22
Vintage Air also has kits for factory a/c cars. They basically eliminate the suitcase and provide a firewall plate so you have more room in the engine compartment.
As far as the 6L80 is concerned, it looks like it was just too big for the tranny tunnel, right? How big of a mod did it end up being? I'm looking at doing the exact same combo in my '69 Firebird, but I don't know if I want to go through the hassle of that modification for it. I know it is probably worth it. Do you have any more pics of the finished (if it's done yet) tranny tunnel?
As far as the 6L80 is concerned, it looks like it was just too big for the tranny tunnel, right? How big of a mod did it end up being? I'm looking at doing the exact same combo in my '69 Firebird, but I don't know if I want to go through the hassle of that modification for it. I know it is probably worth it. Do you have any more pics of the finished (if it's done yet) tranny tunnel?
02-14-2014, 06:01 AM
#23
Staging Lane
Thread Starter
Join Date: Jan 2014
Location: Panama City, FL
Posts: 70
Likes: 0
Received 0 Likes
on
0 Posts
Vintage Air also has kits for factory a/c cars. They basically eliminate the suitcase and provide a firewall plate so you have more room in the engine compartment.
As far as the 6L80 is concerned, it looks like it was just too big for the tranny tunnel, right? How big of a mod did it end up being? I'm looking at doing the exact same combo in my '69 Firebird, but I don't know if I want to go through the hassle of that modification for it. I know it is probably worth it. Do you have any more pics of the finished (if it's done yet) tranny tunnel?
As far as the 6L80 is concerned, it looks like it was just too big for the tranny tunnel, right? How big of a mod did it end up being? I'm looking at doing the exact same combo in my '69 Firebird, but I don't know if I want to go through the hassle of that modification for it. I know it is probably worth it. Do you have any more pics of the finished (if it's done yet) tranny tunnel?
Actually just got in town last night (I live 8 hours from my home town) I will be working on the car a good bit this weekend. We have a friend doing the swap for us, so I come in town to help when I can.
As far as the 6L80 the main rework is the tunnel as you can see. We didn't necessarily have to cut it all the way out, the metal was just easier to work with out of the car. The tunnel will for the most part need to be wider at the top and slightly taller. As far as I know he hasn't tackled rebuilding the tunnel yet. The plan is to reuse ask much of the stock sheet metal for the tunnel as possible. It will need to be reshaped to remove the taper at the top. It will have to be more boxy if that makes sense.
I will see what progress he has made today when I go over there. I will continue to update this thread as we move along with pics and info. Thanks for the comments and for looking

 02-14-2014, 10:45 PM
#25
Thanks for the response. We're nearing the end of the build and we're trying to save where we can. That's reason for trying to get the ac going for the least expense possible. I'll look into the vintage air kits but I'm sure they are pricey.
Actually just got in town last night (I live 8 hours from my home town) I will be working on the car a good bit this weekend. We have a friend doing the swap for us, so I come in town to help when I can.
As far as the 6L80 the main rework is the tunnel as you can see. We didn't necessarily have to cut it all the way out, the metal was just easier to work with out of the car. The tunnel will for the most part need to be wider at the top and slightly taller. As far as I know he hasn't tackled rebuilding the tunnel yet. The plan is to reuse ask much of the stock sheet metal for the tunnel as possible. It will need to be reshaped to remove the taper at the top. It will have to be more boxy if that makes sense.
I will see what progress he has made today when I go over there. I will continue to update this thread as we move along with pics and info. Thanks for the comments and for looking
I will be interested to see what you do with the tranny tunnel.
As far as the alternator relief, how much of a PITA is it going to be if you have to replace the alternator?
02-17-2014, 07:21 PM
#26
Staging Lane
Thread Starter
Join Date: Jan 2014
Location: Panama City, FL
Posts: 70
Likes: 0
Received 0 Likes
on
0 Posts
Looking at it the other day, the firewall back portion of the system for the Firebird was about $780.
I will be interested to see what you do with the tranny tunnel.
As far as the alternator relief, how much of a PITA is it going to be if you have to replace the alternator?
I will be interested to see what you do with the tranny tunnel.
As far as the alternator relief, how much of a PITA is it going to be if you have to replace the alternator?
 02-18-2014, 08:09 AM
#29
Staging Lane
Thread Starter
Join Date: Jan 2014
Location: Panama City, FL
Posts: 70
Likes: 0
Received 0 Likes
on
0 Posts
Pete! Whats up man!
I've heard about this issue, someone mentioned it above. Is it just the L76 motors that have these lifter issues or on all DOD engines? I havent had time to research it yet. Right now we are just trying to get the swap completed, I'll worry about lifters and such later I guess.
Kept the DOD for fuel efficiency, maybe I shouldnt have. Do you have any other info on this issue that you could pass on? Right now I'm too busy researching how to finish the swap successfully. The motor only has 25k miles on it so hopefully I'll be okay for a while...?
Kept the DOD for fuel efficiency, maybe I shouldnt have. Do you have any other info on this issue that you could pass on? Right now I'm too busy researching how to finish the swap successfully. The motor only has 25k miles on it so hopefully I'll be okay for a while...?
02-18-2014, 10:09 AM
#31
Staging Lane
Thread Starter
Join Date: Jan 2014
Location: Panama City, FL
Posts: 70
Likes: 0
Received 0 Likes
on
0 Posts
Yeah, we are keeping the motor stock for now, if we upgrade later we'll worry about the lifters and such. Still working through your thread Hart_Rod, its taking me a while, nice build for sure!
02-18-2014, 09:03 PM
#32
Pete! Whats up man!
I've heard about this issue, someone mentioned it above. Is it just the L76 motors that have these lifter issues or on all DOD engines? I havent had time to research it yet. Right now we are just trying to get the swap completed, I'll worry about lifters and such later I guess.
Kept the DOD for fuel efficiency, maybe I shouldnt have. Do you have any other info on this issue that you could pass on? Right now I'm too busy researching how to finish the swap successfully. The motor only has 25k miles on it so hopefully I'll be okay for a while...?
02-21-2014, 09:29 AM
#33
Staging Lane
Thread Starter
Join Date: Jan 2014
Location: Panama City, FL
Posts: 70
Likes: 0
Received 0 Likes
on
0 Posts
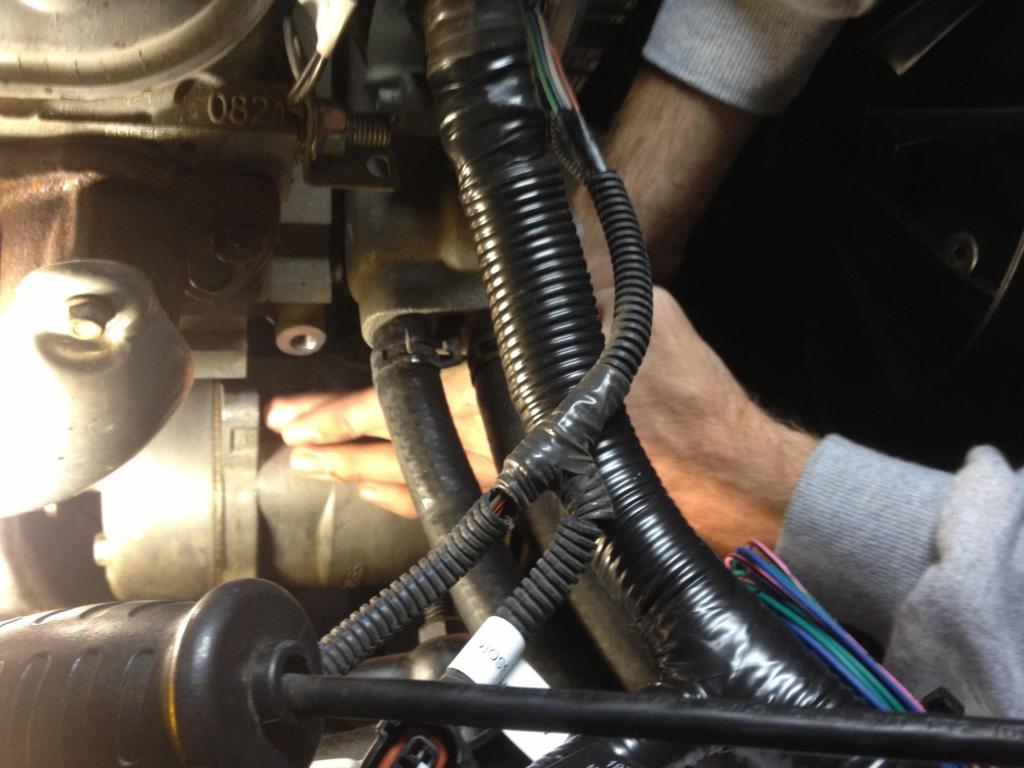
More progress last weekend, felt like I didn't get much done. Had to dissect the speartech harness a little before running the main trunk line inside the car. Pulled the wire loom and tape off to allow for the 4 wires for the fans to be used easier at the front of the car near the ECM. Also had to take the mini 4 fuse panel apart that came with the speartech rework so that I could get all it's connections through a 1" hole in the firewall. Also had to take OBD II plug apart. Ended up cutting the 5 wires for the gas pedal plug due to its size and the inability to take it apart with the electrical tools we had. We will solder these 5 wires back once inside the car.
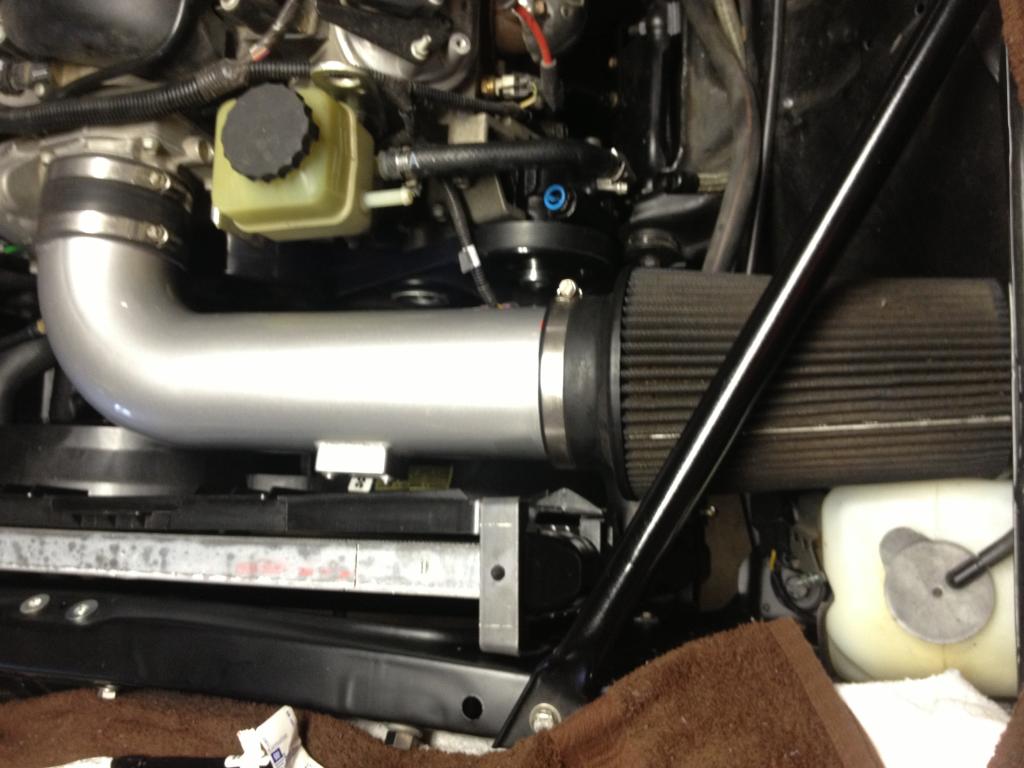
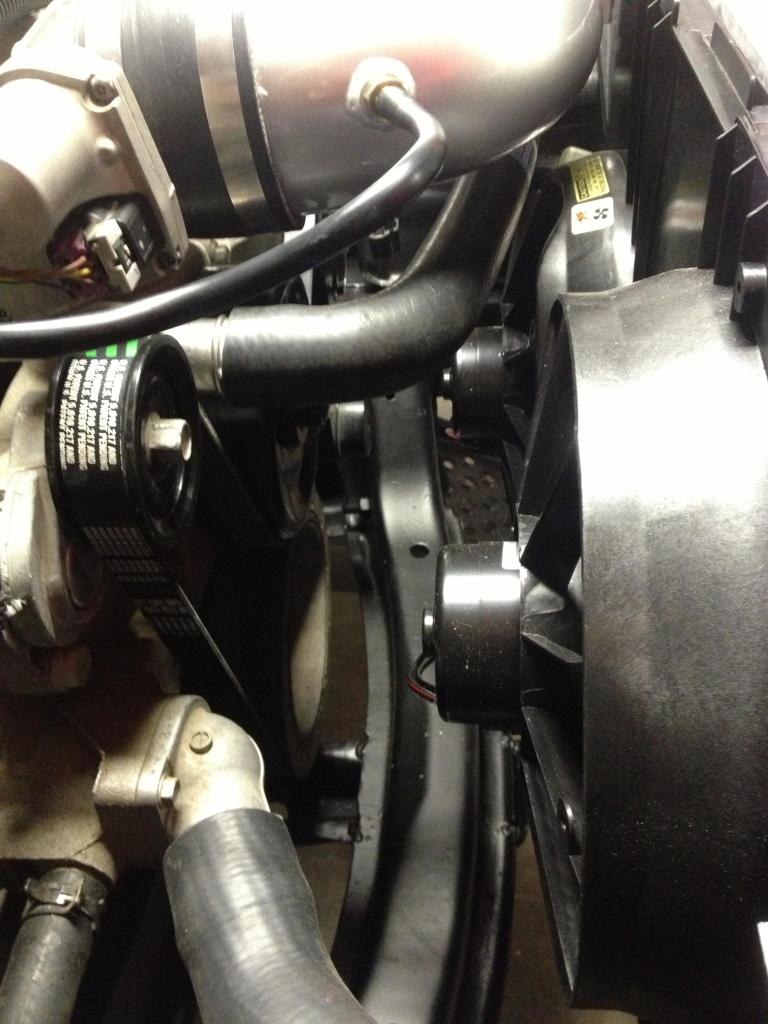
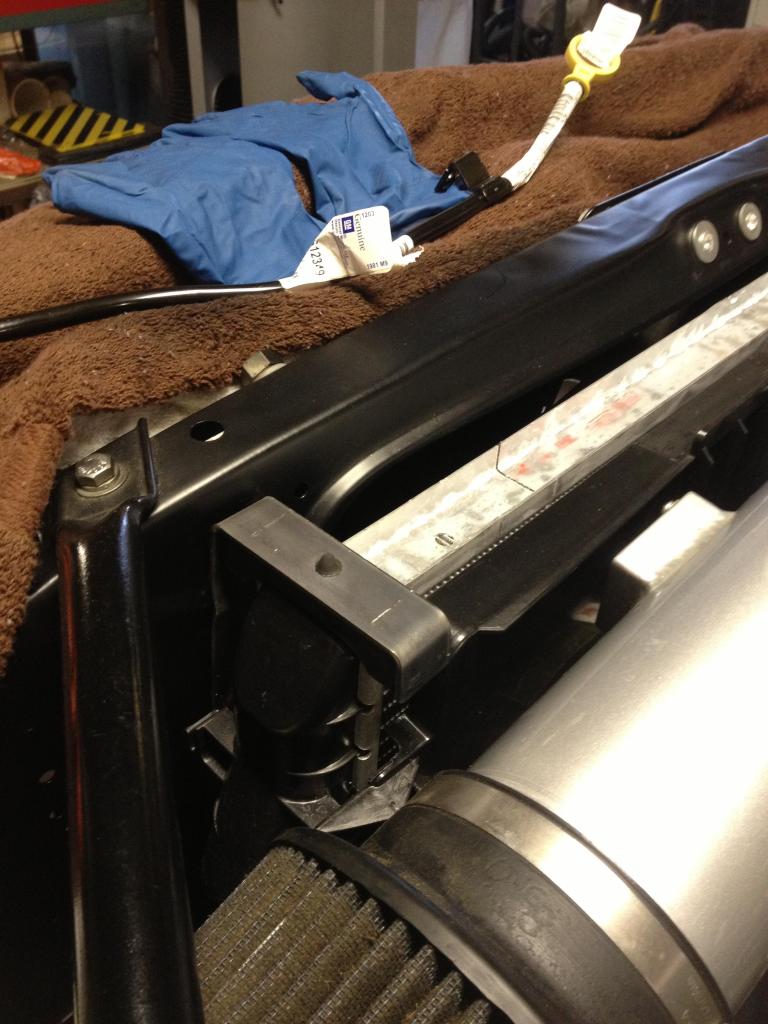
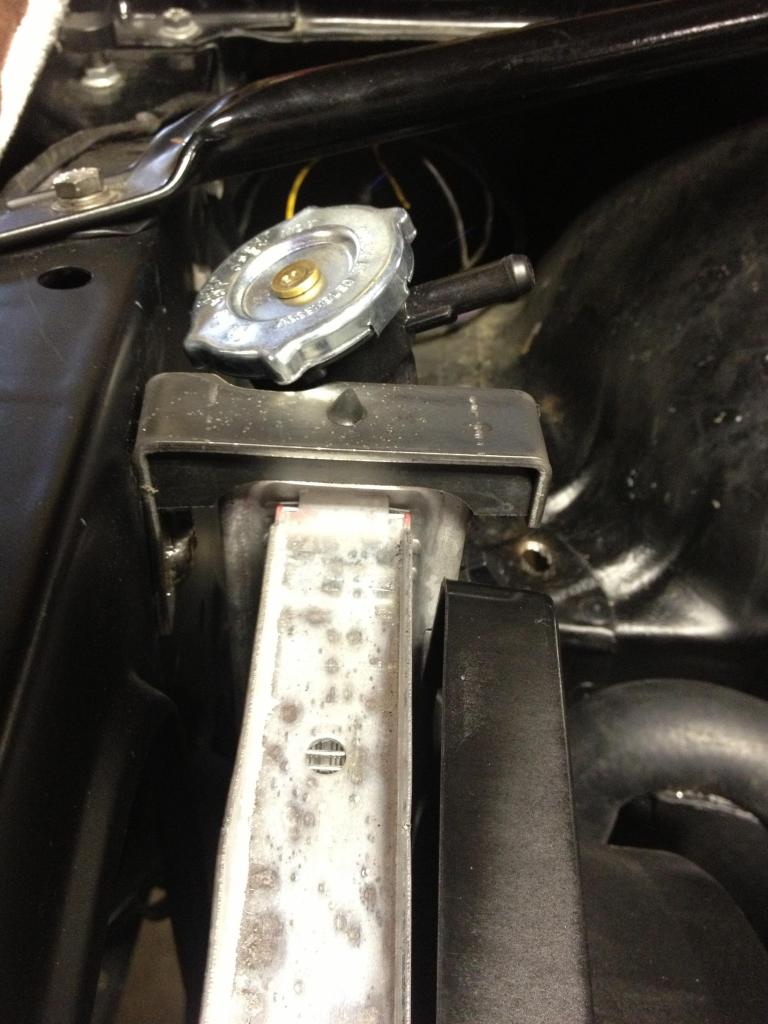
2000 camaro radiator, efans and hoses
2000 camaro ps pump clearance with a replacement pulley. The stock 6" O.D. Pulley was too close to the control arm
ECM mock up, probably going to mount it closer to the battery
2000 camaro radiator, efans and hoses
2000 camaro ps pump clearance with a replacement pulley. The stock 6" O.D. Pulley was too close to the control arm
ECM mock up, probably going to mount it closer to the battery
 02-21-2014, 05:20 PM
#36
Staging Lane
Thread Starter
Join Date: Jan 2014
Location: Panama City, FL
Posts: 70
Likes: 0
Received 0 Likes
on
0 Posts
I was leaning towards an aluminum set up with both the inlet/outlet on the passenger side but decided to go the stock 2000 camaro route. Also wanted a radiator with a tranny cooler built in for the purpose of getting the tranny fluid up to temp quicker. E fans came from rockauto for about $130, radiator for oriellly, they had it in stock for right at $100. One thing that was cool was since the radiator and fans were for the same make mad model they were made or work with each other. The fans slid right into the built in slots on the radiator. No fab necessary.
02-21-2014, 05:42 PM
#37
Staging Lane
Thread Starter
Join Date: Jan 2014
Location: Panama City, FL
Posts: 70
Likes: 0
Received 0 Likes
on
0 Posts

Going to have to modify hrs underside of the hood some right in front of the breather circle on the cowl hood. Haven't fit the hood yet but from measurements it should work with out the engine cover but in order to run it with the engine cover the hood will need to me modified some which we were hoping to not have to do. Oh we'll..
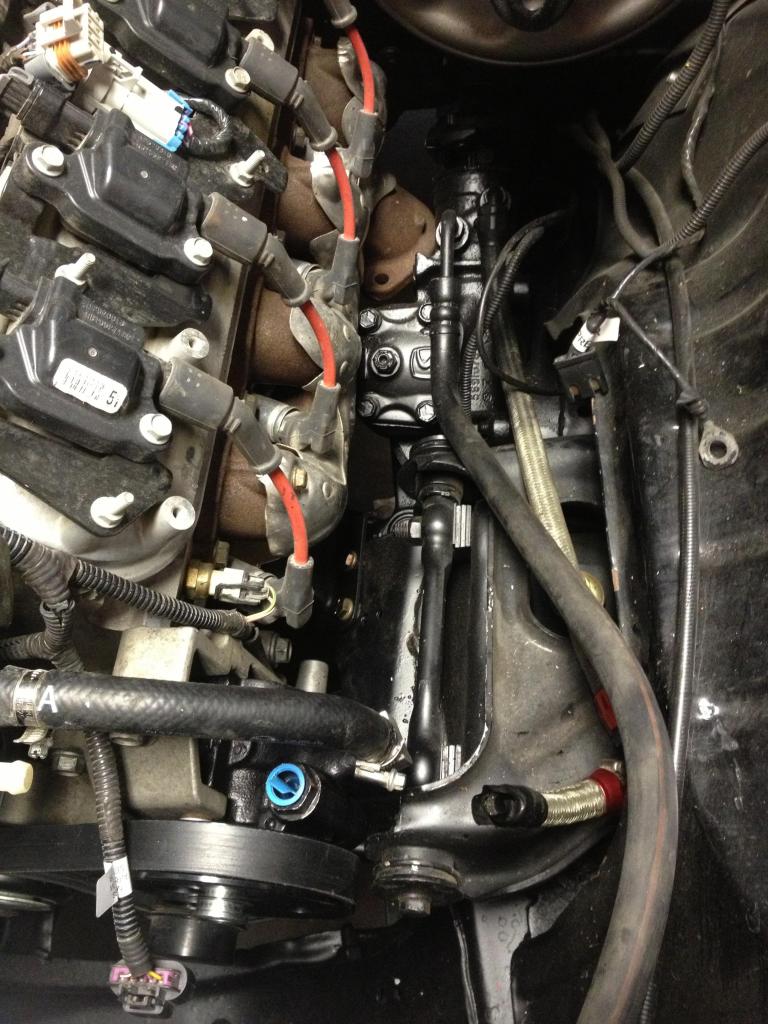
I looked into and was hoping that Alan grove components (AGC) low mount ac brackets were going to work but they set the compressor too far back and it would get into our motor mounts. From their measurements we did find out the the G8 motor came with a corvette style crank pulley.
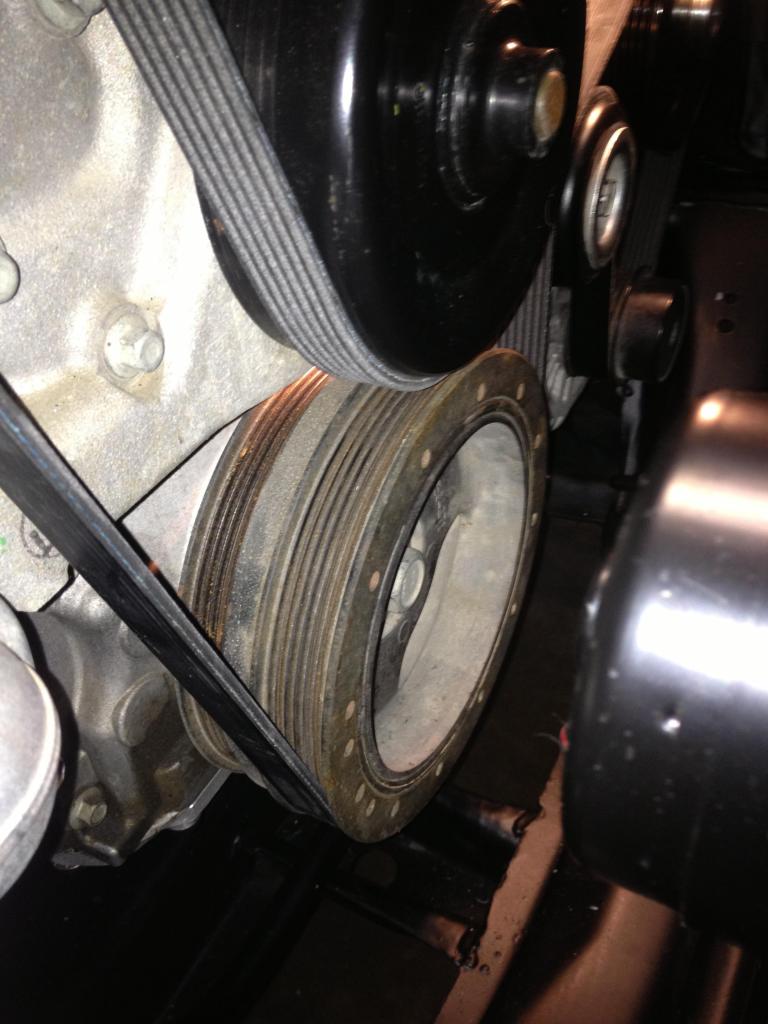
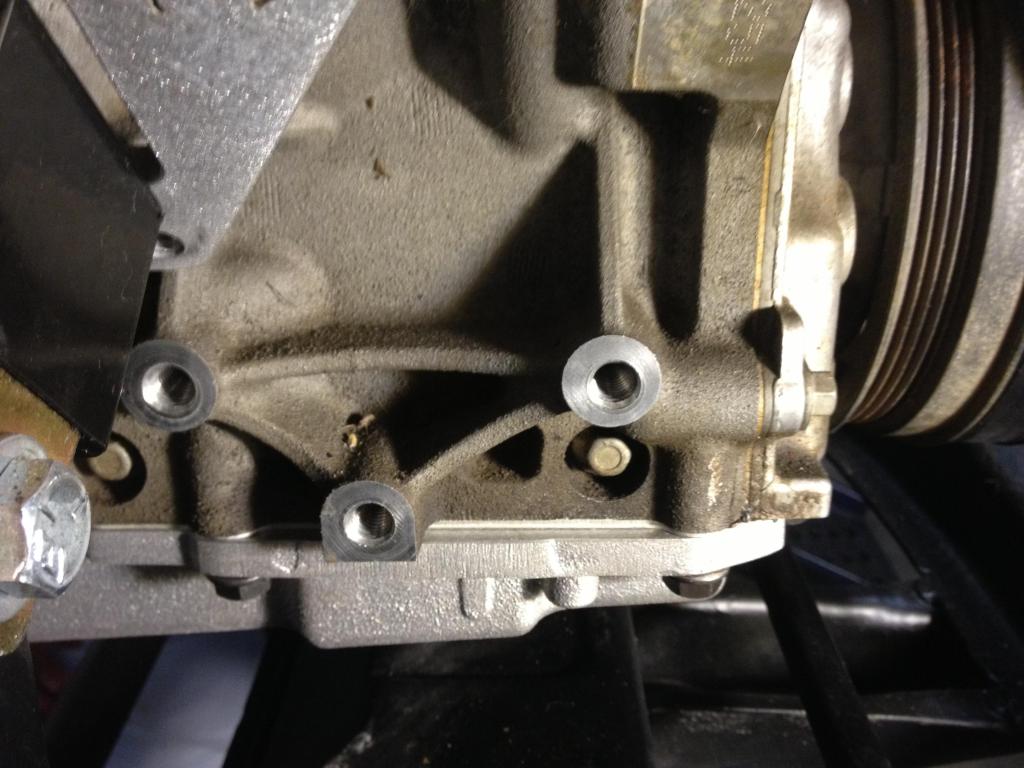
With the AGC kit the back of the compressor housing furthest back point is in line with the rear bolt hole of the triangular pattern on the LS blocks on the passenger side. Won't work with our set up as can be seen in the pics
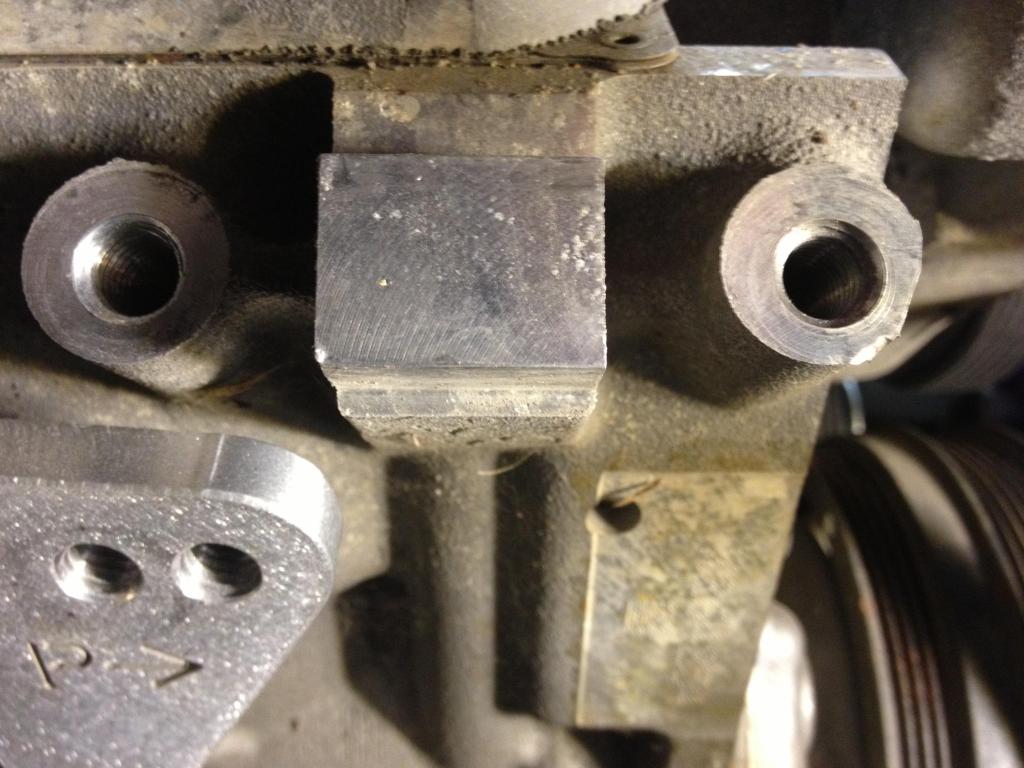
Probably will have to trim the front edge of the LS adapter plates in order to use the upper ac mounting point
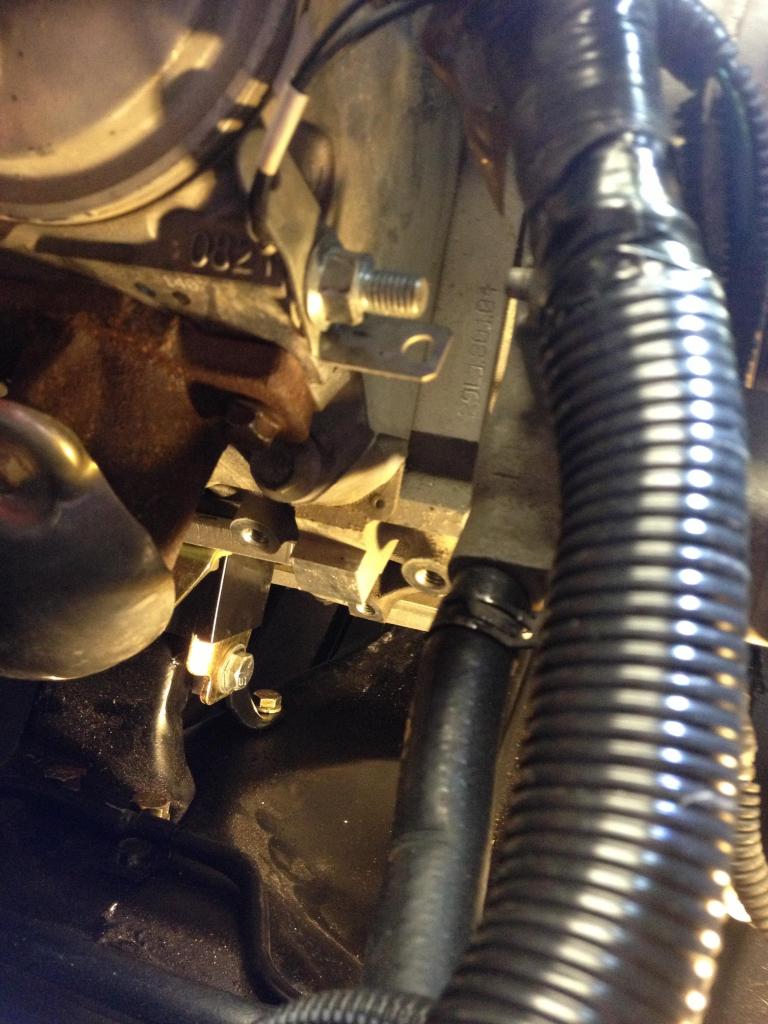
We have now decided the only way we are going to be able to run the ac compressor low on the passenger side is to move it forward and run it off the main belt wit ph everything else. Just not going to work with the back ac belt location on the cram pulley. Found john67's build on here and he made some homemade ac brackets that achieve the ac compressor mounting location like what we need, check them out
https://ls1tech.com/forums/conversio...ed-pics-6.html
The plan is to now make our own ac mounts, something similar to john67's. We got an old v belt driven sandon 508 compressor from a friend for mock up to see if this would work and it seems that it will, here's a few pics of the mock up by holding it in place to see how and if it will work

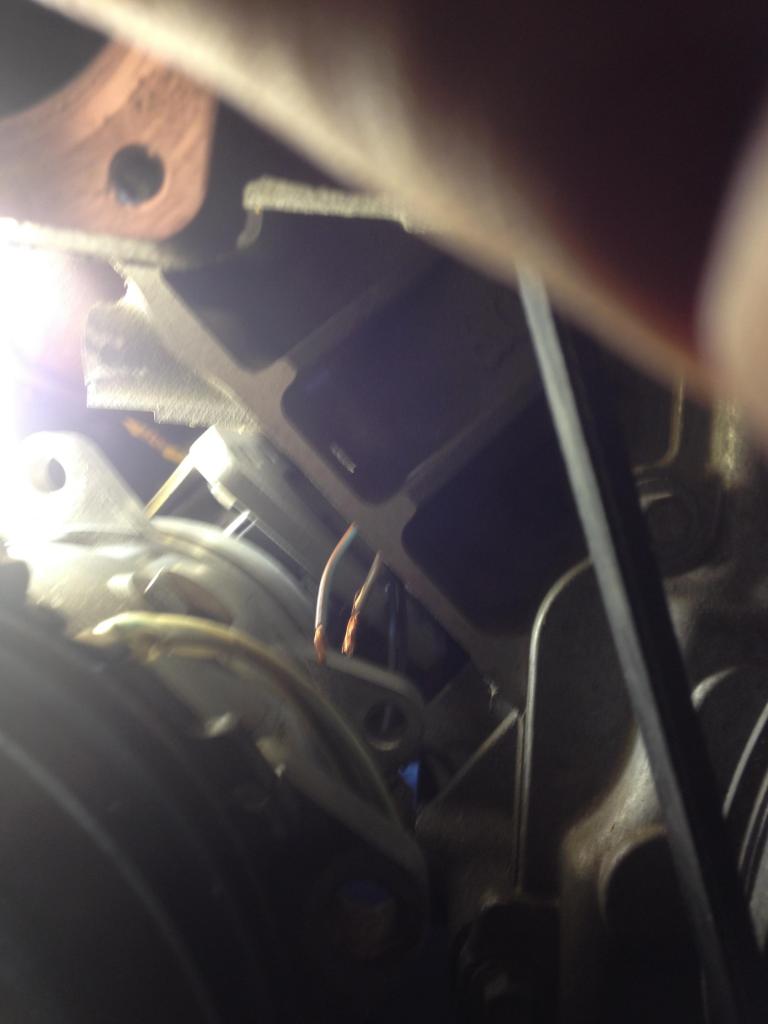
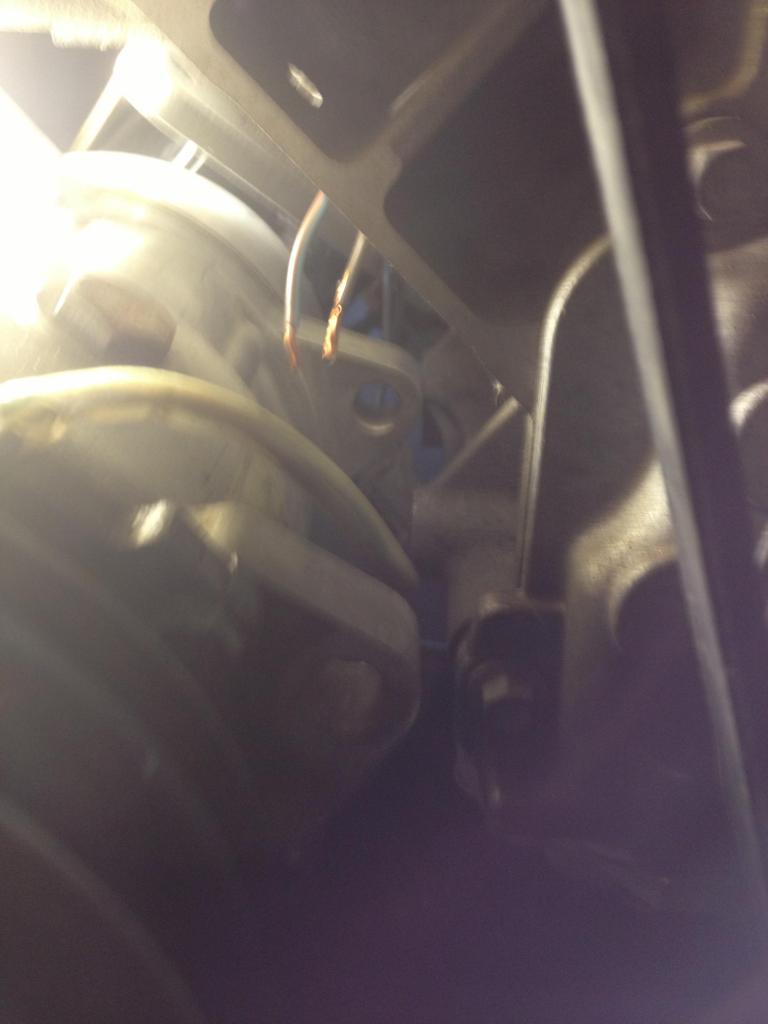
The 508 we had had for mock up had the rear exit hose set up, we will get one with the side entry so it will have the ability to go back a little further than the one in the pics. Gonna look for a cheap sanden now so we can make our brackets and get the ac set up behind us
Last edited by Hybrid 69; 02-21-2014 at 06:01 PM.
02-21-2014, 06:18 PM
#38
Staging Lane
Thread Starter
Join Date: Jan 2014
Location: Panama City, FL
Posts: 70
Likes: 0
Received 0 Likes
on
0 Posts
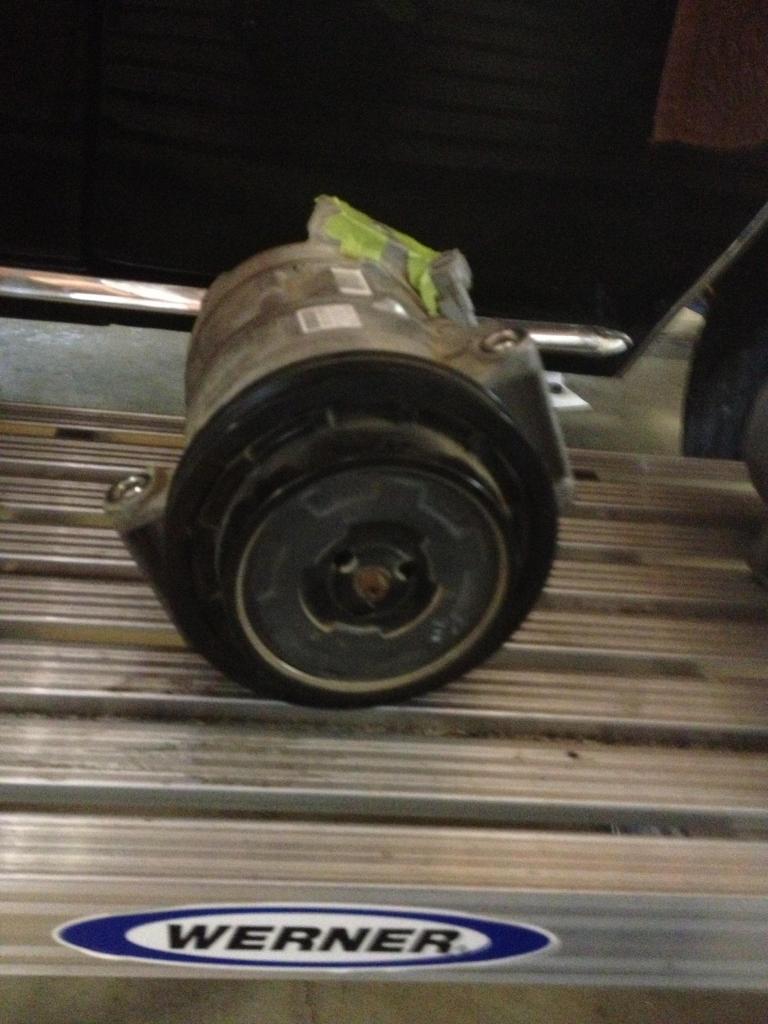

Factory G8 Denson ac compressor. From talking with buddyholly from the Chevelle Tech forum I found out that the stock L76 compressor is a variable displacement compressor and will not work correctly without the entire G8 system to control the compressor. So using the stock ac compressor is out... Buddyholly did a nice L76 swap into a Chevelle
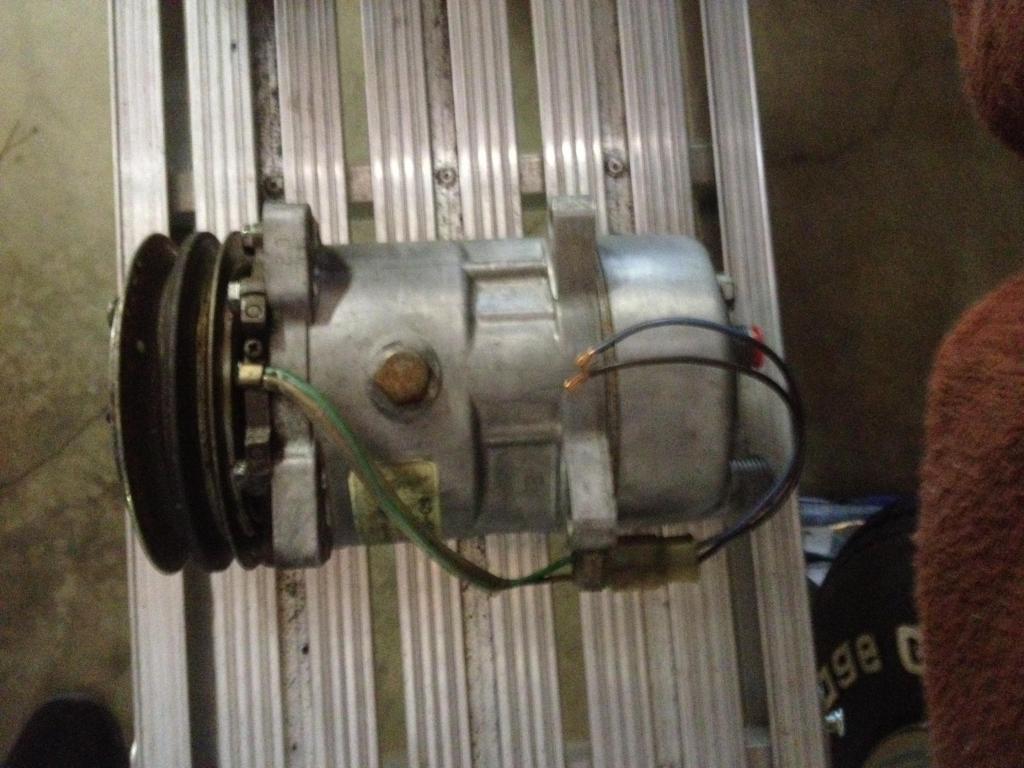
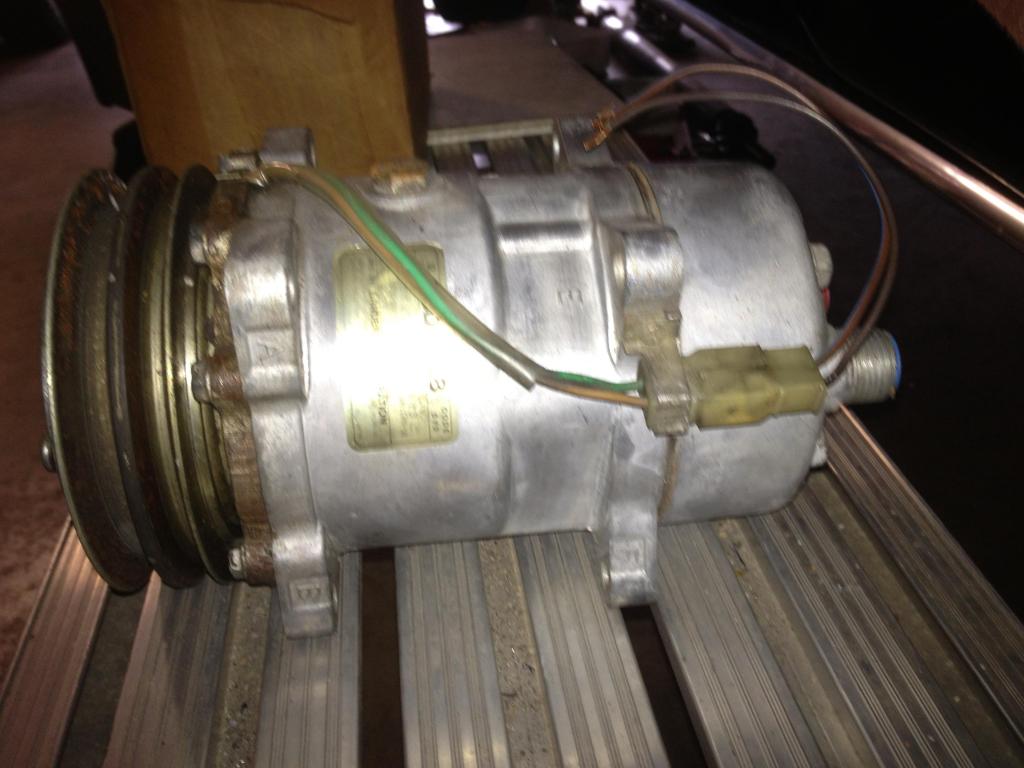
Mock up Sanden 508, much bigger but I think it will work with the right brackets and moving it forward
02-21-2014, 06:29 PM
#39
Staging Lane
Thread Starter
Join Date: Jan 2014
Location: Panama City, FL
Posts: 70
Likes: 0
Received 0 Likes
on
0 Posts
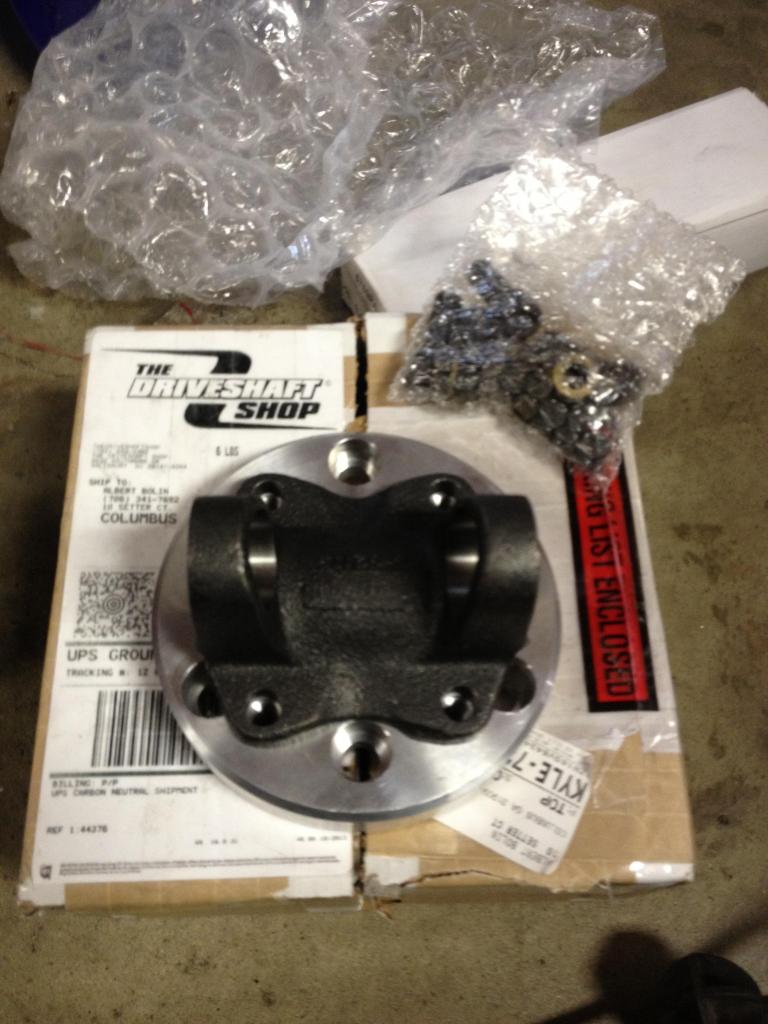
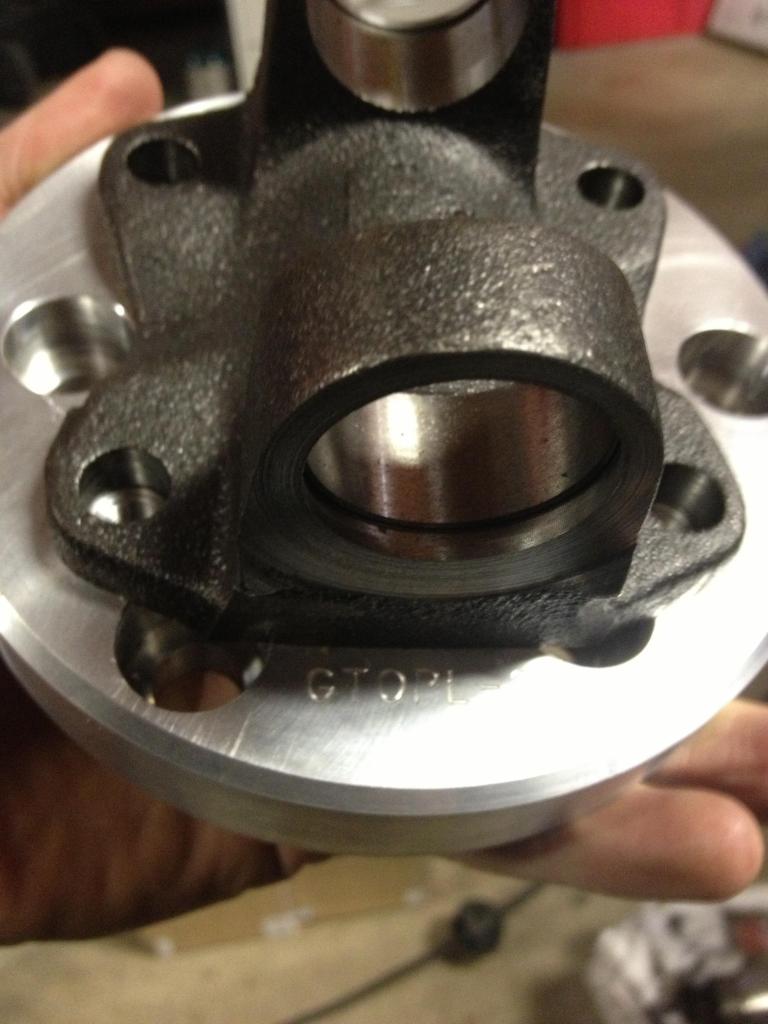
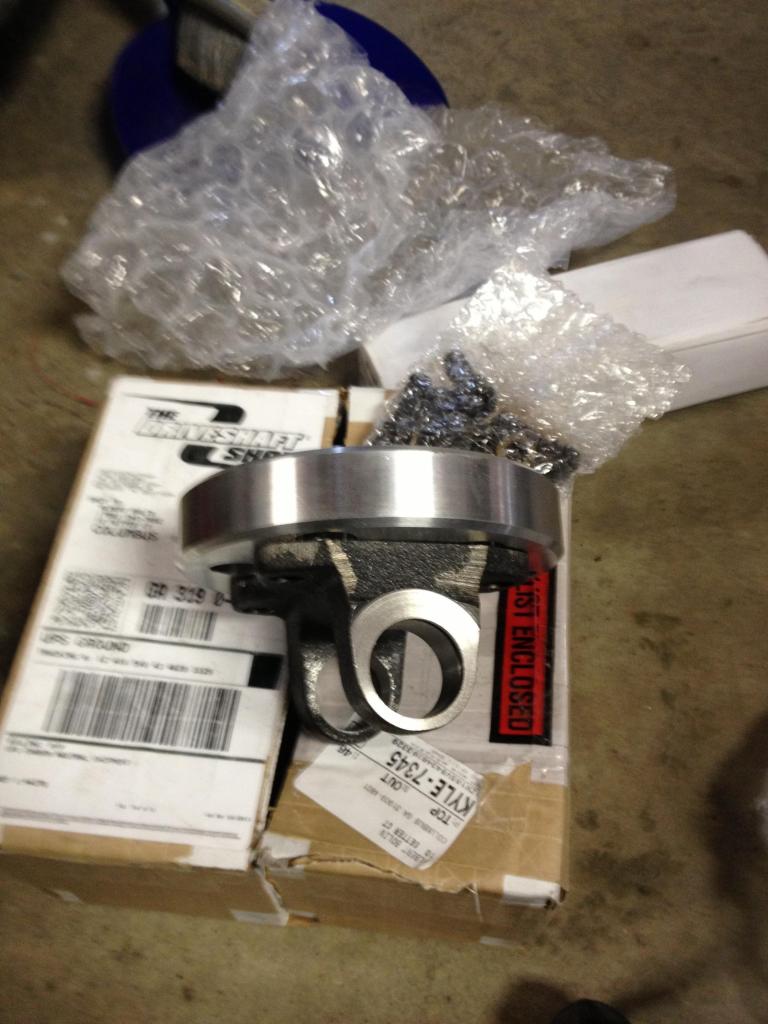
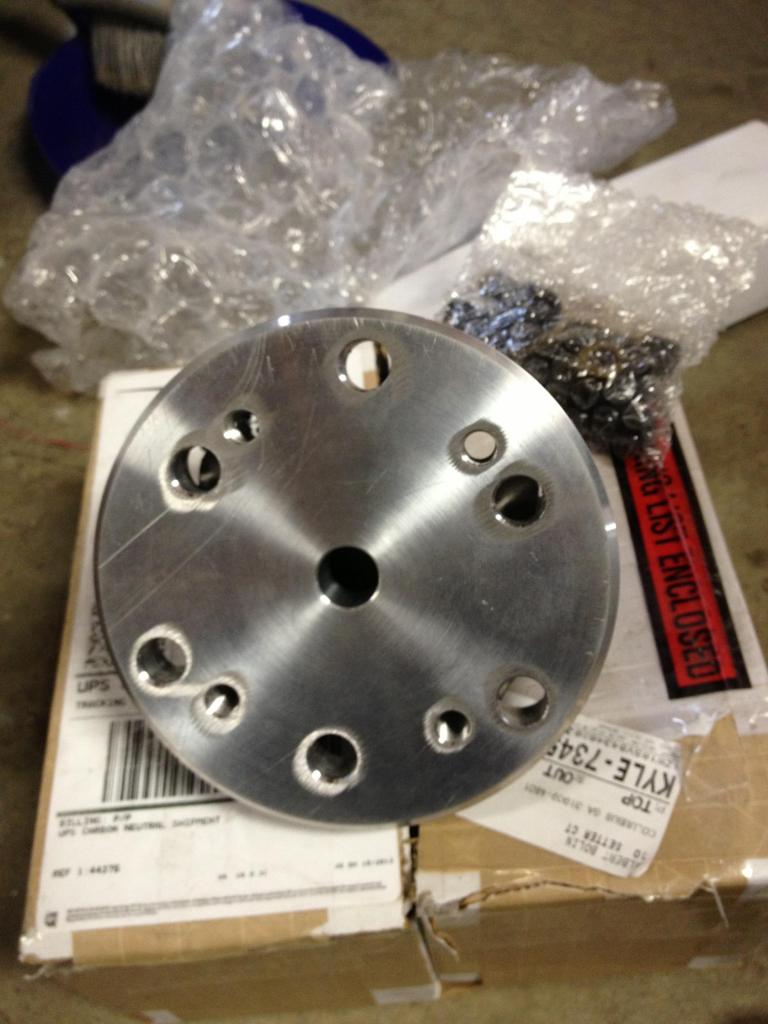
The driveshaft shops Part number: GTOPL-2. It will bolt in place of the hard rubber unit at the back of the 6L80. It uses a spicer 1350 universal joint. On the driveshaft side here is what we found from the driveshaft shop, see page 1 of the build for part numbers
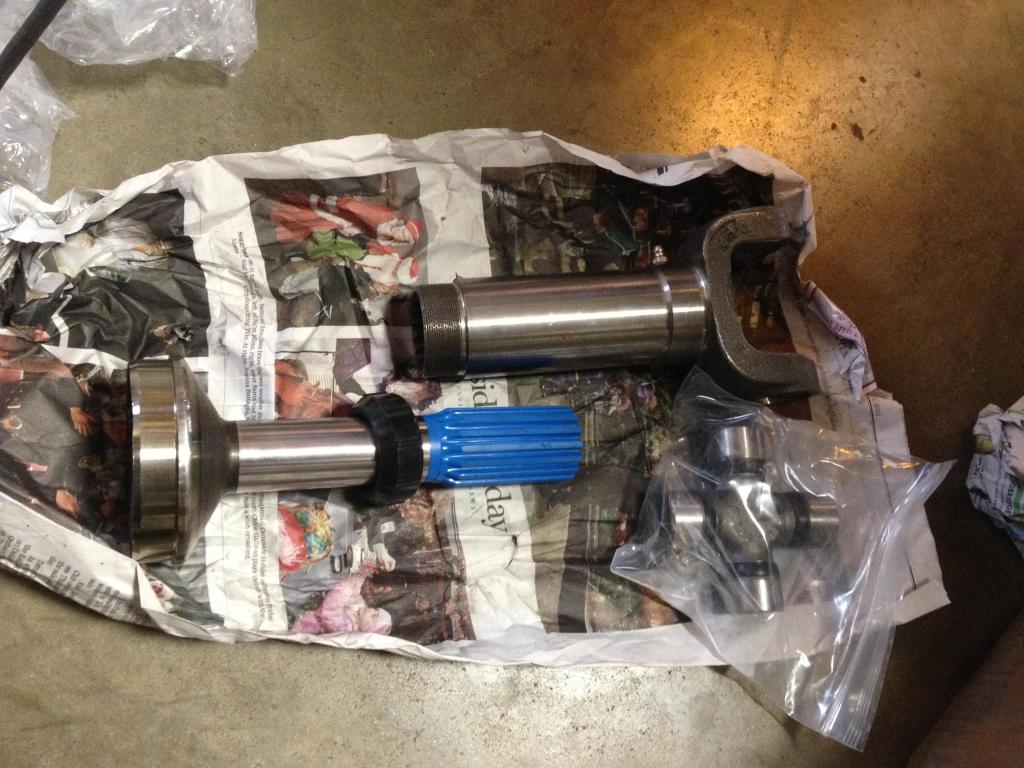
Spicer 1350 on one end and the other end will weld to a 3.5" driveshaft
02-21-2014, 07:03 PM
#40
Staging Lane
Thread Starter
Join Date: Jan 2014
Location: Panama City, FL
Posts: 70
Likes: 0
Received 0 Likes
on
0 Posts
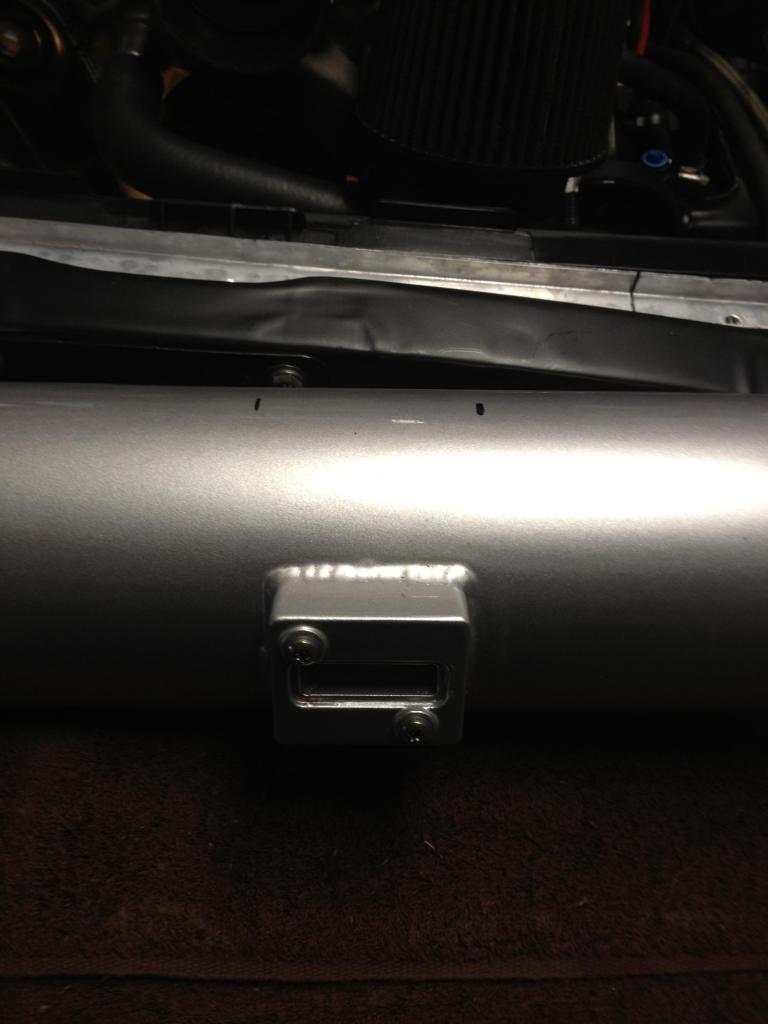
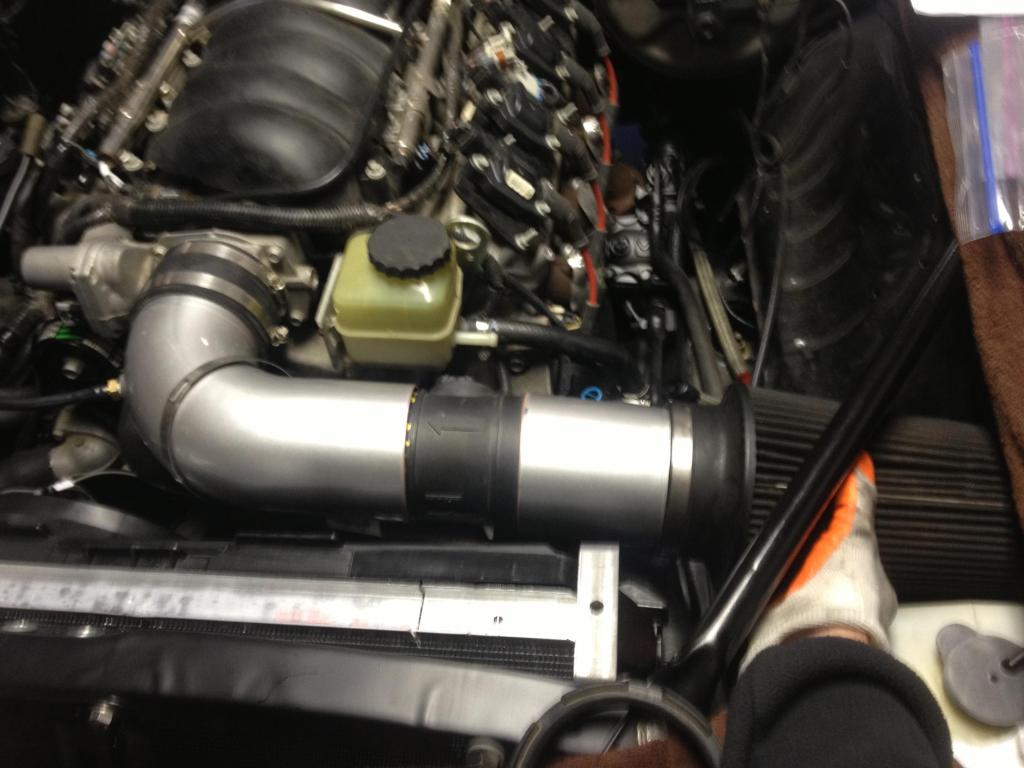
Cut the MAF bolt in section out of the 2010 camaro intake that I found on a camaro forum. Our in line style MAF will go in line with the addition of two 4" couplings. Still have to buy the couplings
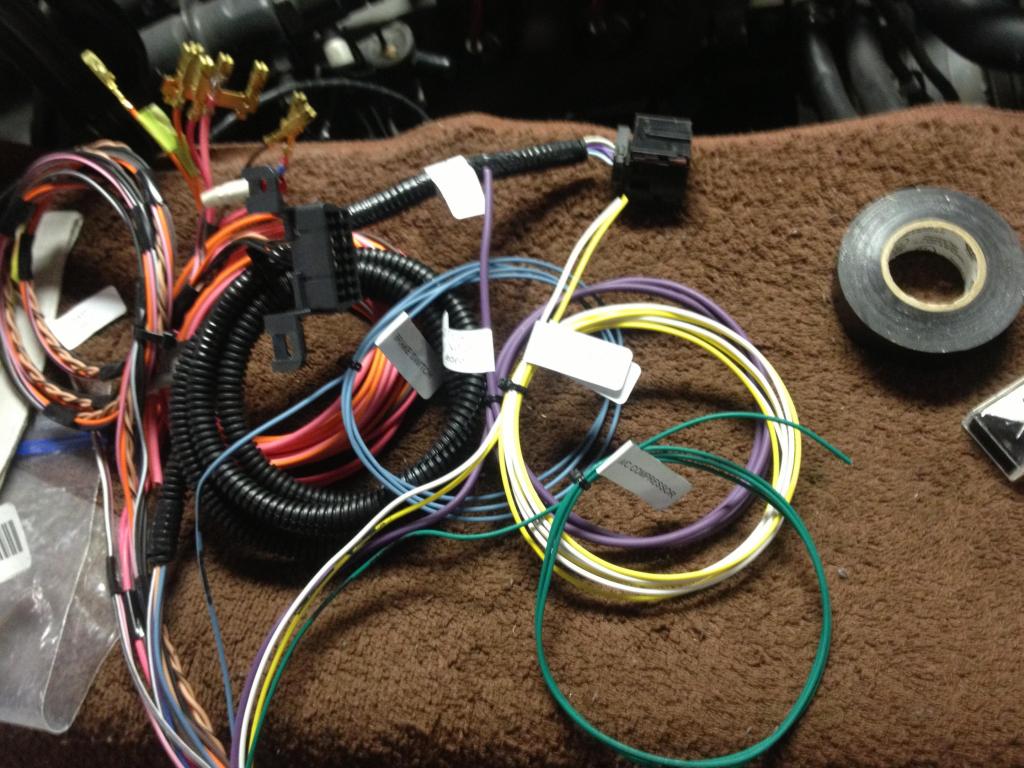
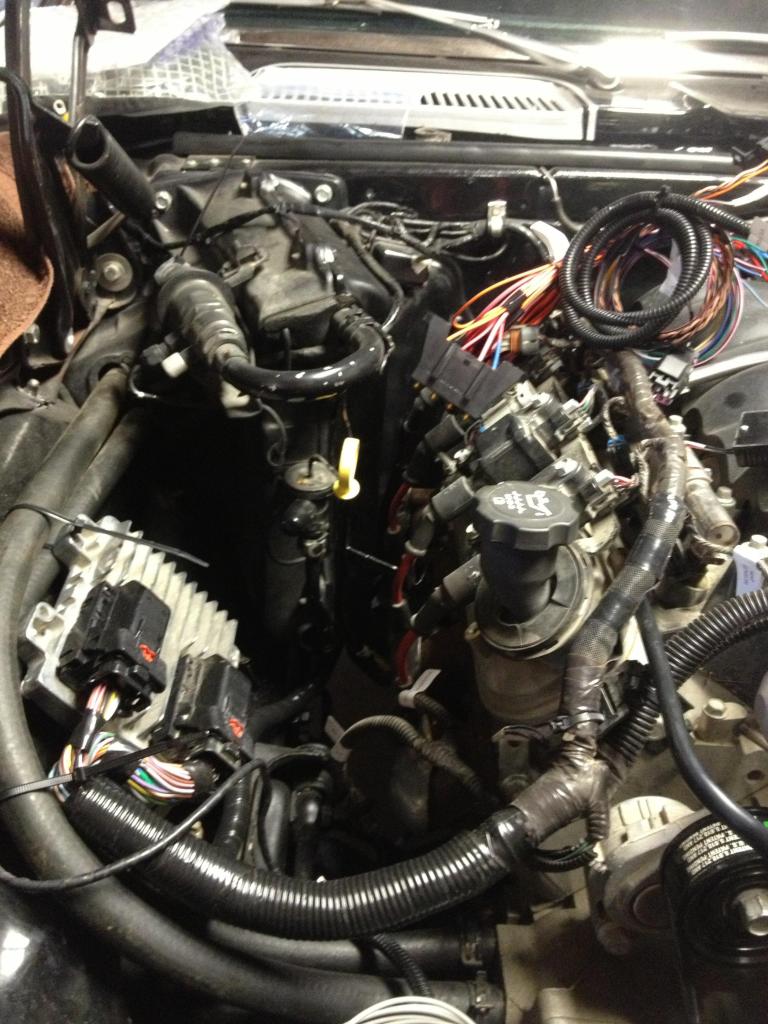
Speartech reworked harness
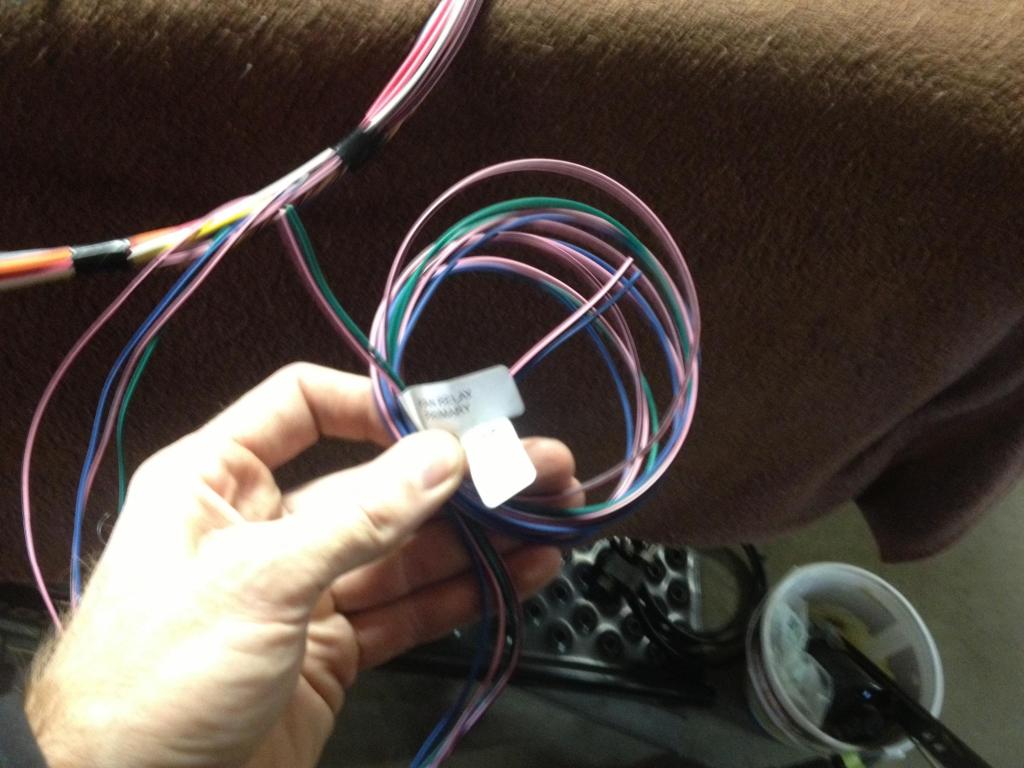
The fan relay wiring I mentioned above. Removed it from the main trunk line of wires and exited them near the computer up by the fans
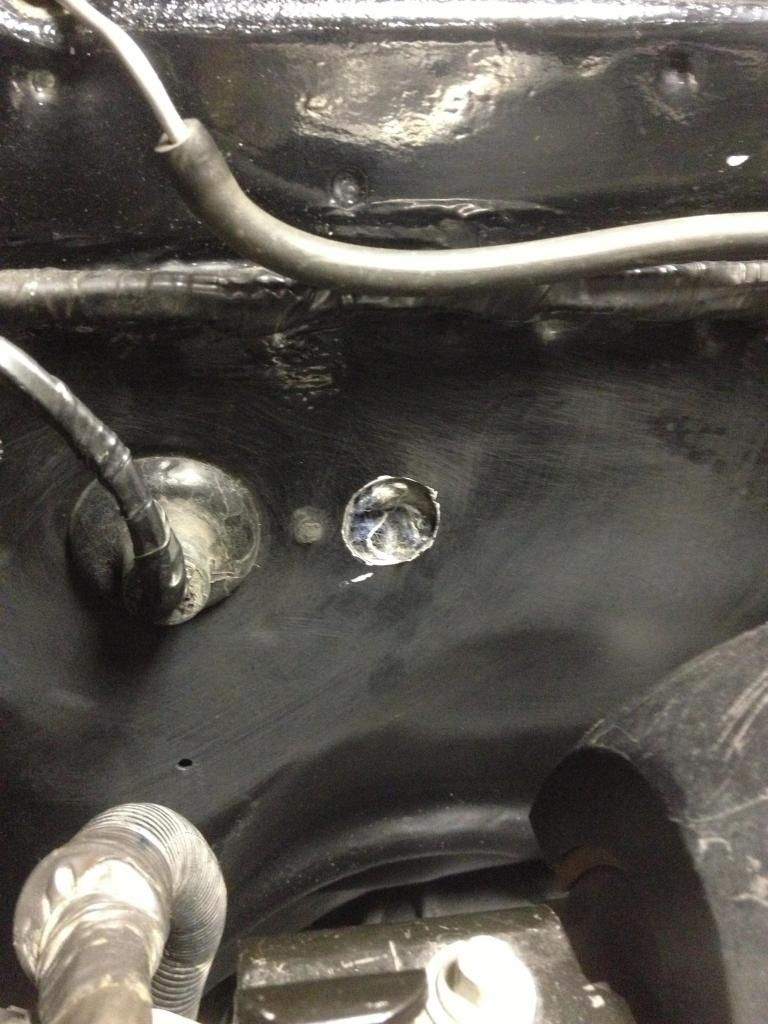
1" hole in the firewall for the main trunk line of tho speartech wiring to enter into the car. It is tight under the dash so we decided to use the plastic push plug hole that was already there (the one that holds the firewall pad on the 69 camaro)
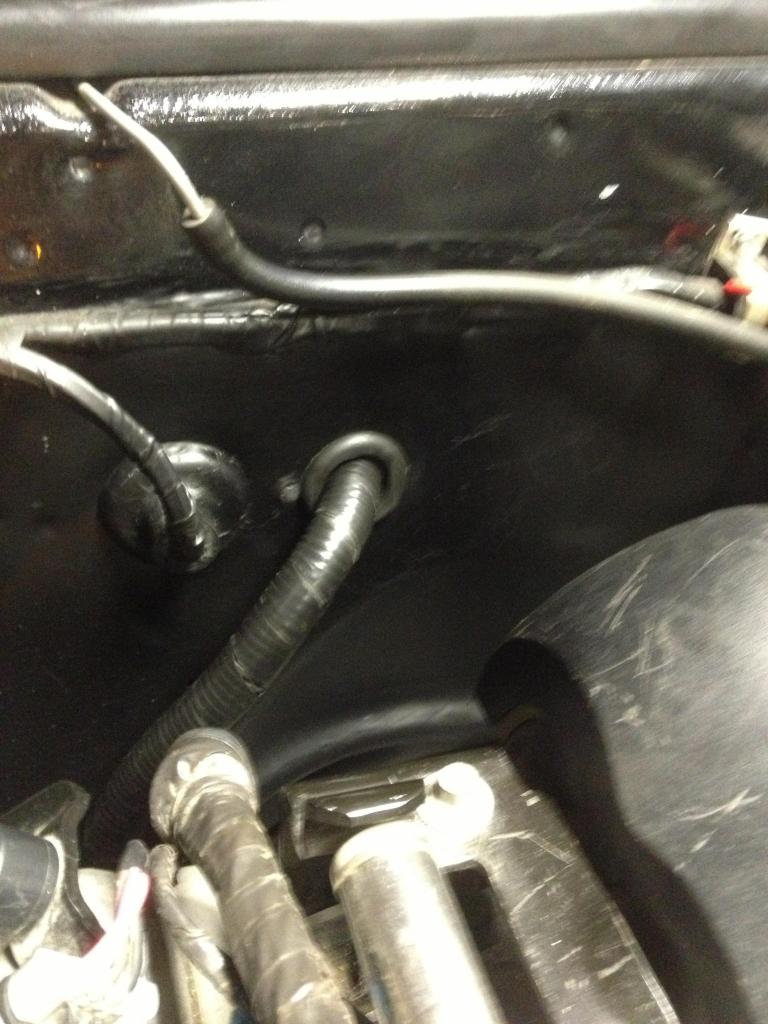
Installed with a 1" grommet