

69 Camaro G8/6L80e Swap *Build Thread*

Thread Starter
Staging Lane
Joined: Jan 2014
Posts: 70
Likes: 0
From: Panama City, FL
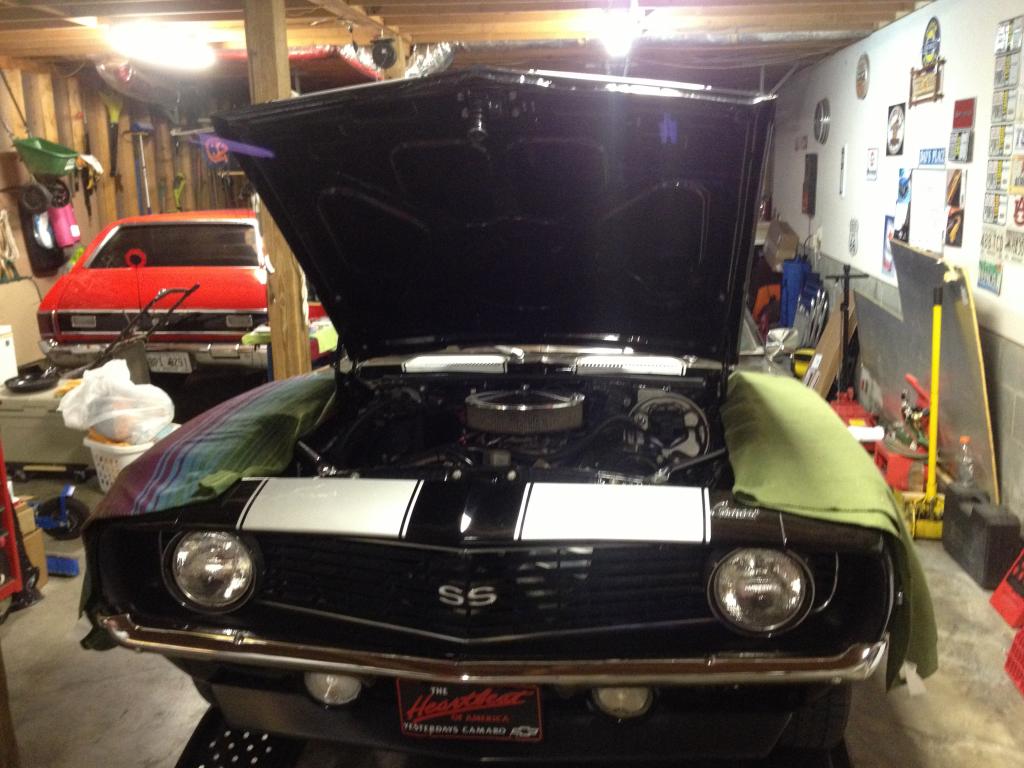
My Dad and I restored this car about 13 years ago. We decided it was time to step into the new age. The old set up was a 80's 350 bored .30 with the Edelbrock performer RPM aluminum heads and intake. Behind it was a 700r4 tranny with 3.73 gears.

Old power plant
We decided on a 2009 Pontiac G8 6.0L (L76 option) with a 6L80e tranny both with 25k miles on them. Purchased it from a salvage yard in North Dakota called Kens Auto. It came with a 6 month warranty from the time it is first started up.
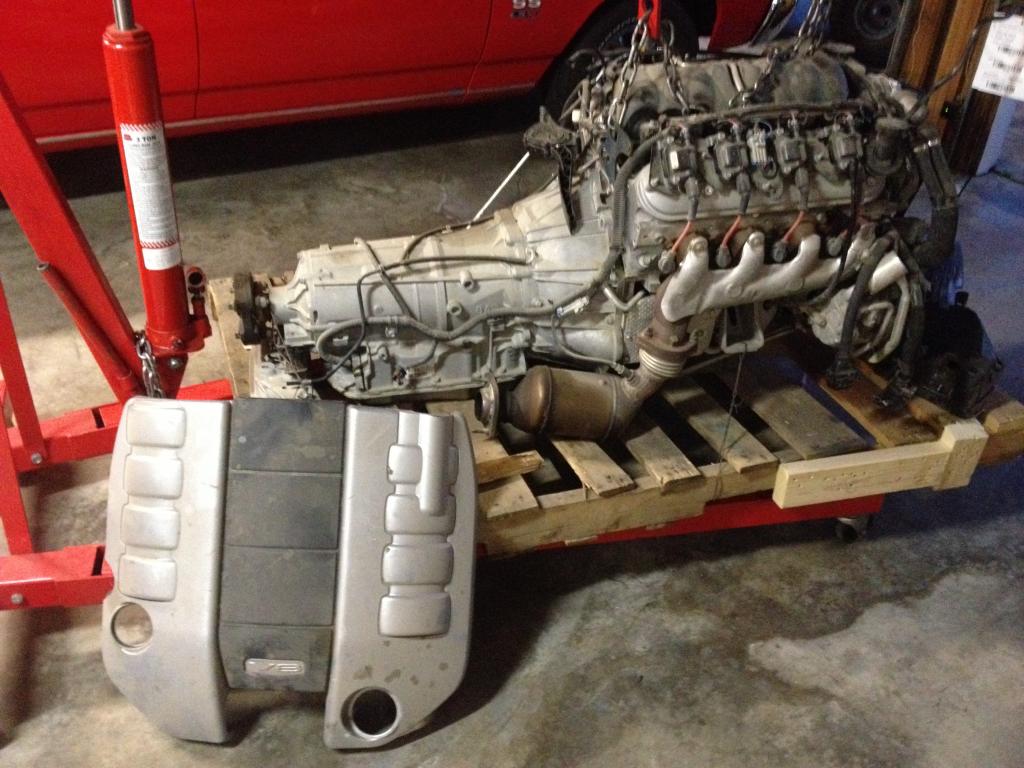
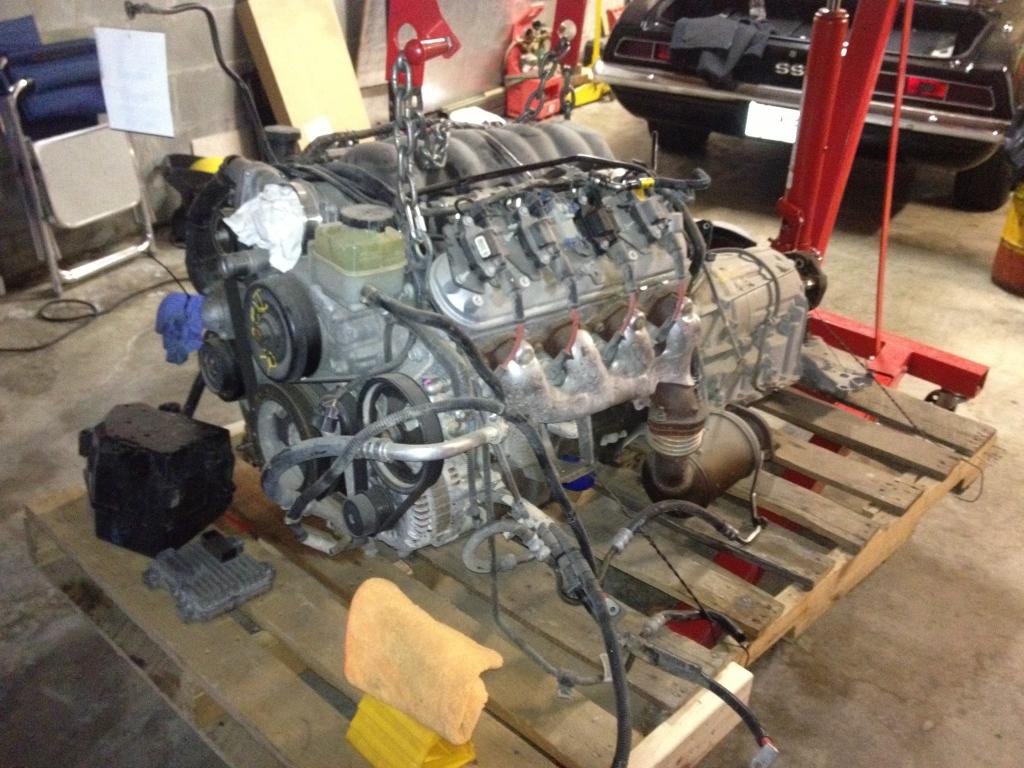
New power plant
We have a friend doing the swap for us, his user name on here is (moreengineering) he's done 3 LS swaps in his own cars (Chevelles). The G8/6L80 and the Camaro has thrown him some curve ***** along the way but that's expected I guess. We started the swap in March of 2013. I'd say were about 60% done.
The car is in Georgia with my Dad, I live in Florida now so it's 8 hours away from me. I've been able to make it back 4-5 times this year so I've helped moreengineering when I was there. I hate not being there for the entirety of the swap, but I stay in constant contact with him and I'm in charge of all the parts ordering.
The car was an base model V8 from the factory, didnt have the original motor in it and wasnt restored back to stock when we did it 13 years ago. We're not purest and the cars not original so we had no problem putting a newer LS motor in and doing what we have to in order to make it fit. So far so good, worked through several hurdles. This is the set up so far
Parts List:
-2009 pontiac G8 6.0L L76 option with the 6L80E tranny
-Mast motorsports ls swap oil pan
-Dirty dingo LS swap adapter plates
-Wiring harness rework by Speartech, kept the DOD, added a tap shift box
-We kept the factory K member mounts (short and wide I believe) but moved them up about 3/4" in an effort to keep the alternator and the a/c compressor in the low mounting position
-Used 2000 S-10 with a 4.3L motor mounts, Energy Suspension poly urethane PN: 3.1144
-Used a 69 V8 with a turbo 350 tranny mount,Energy Suspension poly urethane PN: 3.1108
-Had to notch the k member for the alternator to stay low
-Used a 2000 Camaro with a V8 radiator and upper and lower radiator hoses bought from O'rielly Auto
-2000 Camaro with a V8 efans ordered from Rock Auto PN: 620634, electric plug for the fans (2) PN: PT304
-Spectra factory replacement fuel tank PN: GM32BFI, set up for fuel injection, ordered an extra fuel pump (I've heard they are weak and tend to fail around a year or so..) PN: EP381, both from Rock Auto as well. Had to add a vent to the tank though, out the top at the center. See page 6 for details
-moreengineering made a custom tranny cross member, he used 1"x2" 3/16" wall tubing. 1/4" plate was welded on the ends to allow it to bolt in
-We plan to keep the aftermarket auto meter gauges we have from the original restoration. We will have to get an electronic speedo and temp gauge due to the ones we have being mechanical
-Keeping the factory G8 exhaust manifolds for now, no cats
-Using a 2010 Camaro 6.2L aftermarket intake CAI, we'll cut the bolt in style MAF area and replace it with the in line style MAF for the G8
-Using a 2010 Camaro 6.2L pick up tube PN: 12570787 and dip stick PN: 12570788. The G8 came with it in the oil pan, our aftermarket oil pan won't work with it entering through the side of the pan. Had to remove the dip stick plug from the passenger side of the block.
-In order to convert the non slip yoke output shaft of the 6L80 we bought the follwing: Adapter from The Driveshaft Shop PN: GTOPL-2 which includes PN 3-2-119. The first is an adapter that bolts to the output of the 6L80, this is threaded to allow the second PN to bolt to it. PN 3-2-119 is a spicer 1350 flange. For the slip yoke pieces we went to Denny's Driveshafts and got their PN: 3-40-1621, the male side of the slip yoke and PN: 3333586, the female side of the slip yoke. This set up will be welded to a 3.5" driveshaft. We also bought a 1350 style greasable U-joint as well
-2000 Camaro with a V8 power steering pump from O'reilly Auto. See "issues" below for why we ditched the stock G8 P/S pump
-Lokar 6L80 24" tranny dip stick from Summit
-Went with a Sanden 508 with 7 groove compressor PN:191-101 (summit racing I think) or SD5H14. Also went with the vintage air PN: VTA-04808-VMA condenser / dryer kit
Issues so far:
-Cut the tunnel out, see pic, we did an "I" cut originally but the tunnel metal was so hard to work with we decided to cut it all out. We will rework it off of the car (bending and what not) then reinstall back to the orginal cut lines (at the floor pans) hopefully with a filler piece added in the middle at the top. This has yet to be done/worked out but this is our plan. The tunnel needed to be wider for the most part but will prob need to be slightly taller as well.
-Notched the k member for the alternator, our choice to try and keep the low mounting position this way we can keep the factory engine cover
-At the final motor install and the reinstallation of the P/S pulley we realized it was too big. it was real close to the control arm with it's was a 6" o.d. pulley. He ended up swapping it out for a 2000 Camaro with a V8 P/S pump. aparently the G8 P/S pump had a weird output shaft size and smaller pulleys were hard to find to replace the 6" o.d. one. The 2000 Camaro P/S pump mounted in the stock location and has a more popular output shaft. He was able to find a smaller P/S pump pulley that would work from a 2000 chevy with a 3.1 V6 motor. It's worked out and we have the control arm clearance now...
-We are still deciding what to do with the A/C. One option is to relocate the A/C compressor to the upper mounting position using Holley LS swap brackets and a Sandan aftermarket compressor. The G8 compressor will not work with the factory mounting brackets or the old AC system I have found out after researching it a good bit. I will probably need to get a newer style condensor if we go this route.
-Figuring out how to convert the fixed yoke style tranny (the G8's and new camaros have independent rear suspensions) to a slip yoke style took a lot of research. Finally found the adapter option on a 67-72chevytruck forum. We have all the parts listed above but have not installed them yet. I also found the tail housing conversion option but we didnt want to go that deep into the tranny and the adapter option was right at the same price
Still To Figure Out:
-How to get the factory G8 A/C compressor to mount low without the orginal bracketry. If and how the G8 A/C compressor will work with our original Camaro evaporator box. What all else I would need to get everything plumbed and set up correctly.
-Shifter, thinking I'm going to go with a stock G8 shifter so we can take advantage of the manual mode. Still have to find one and mount to the tunnel once we make it
-I'm sure there is something I'm forgetting..
Here's some pics of the progress:
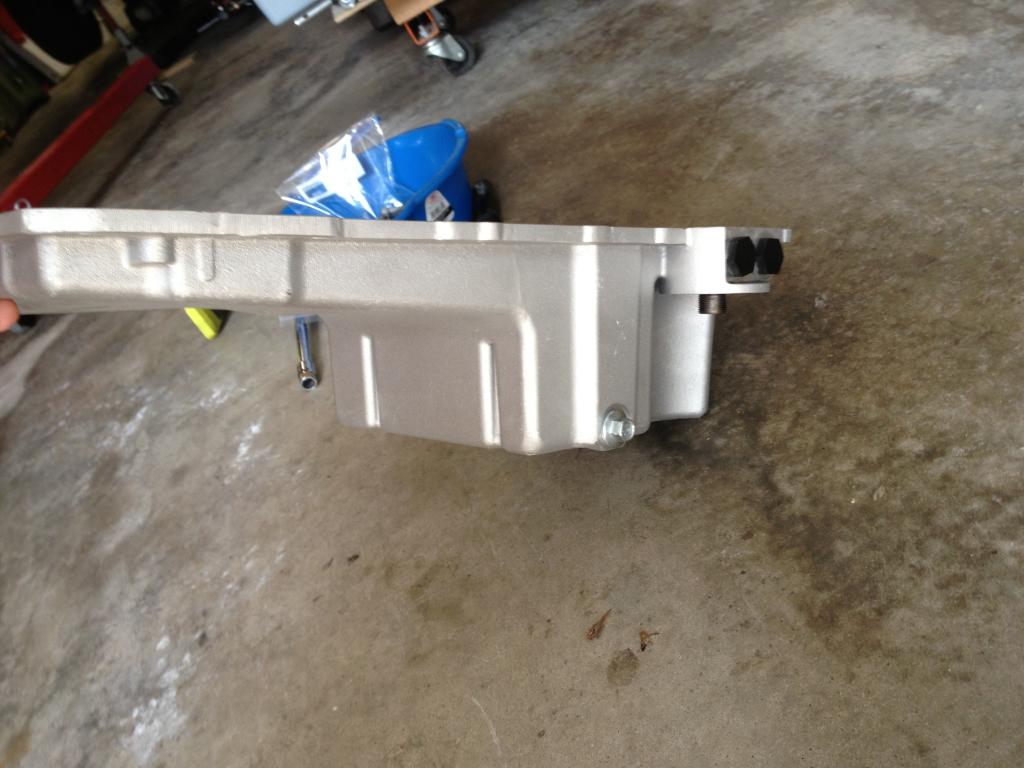
Mast motorsports oil pan, holds 5.5 Quarts
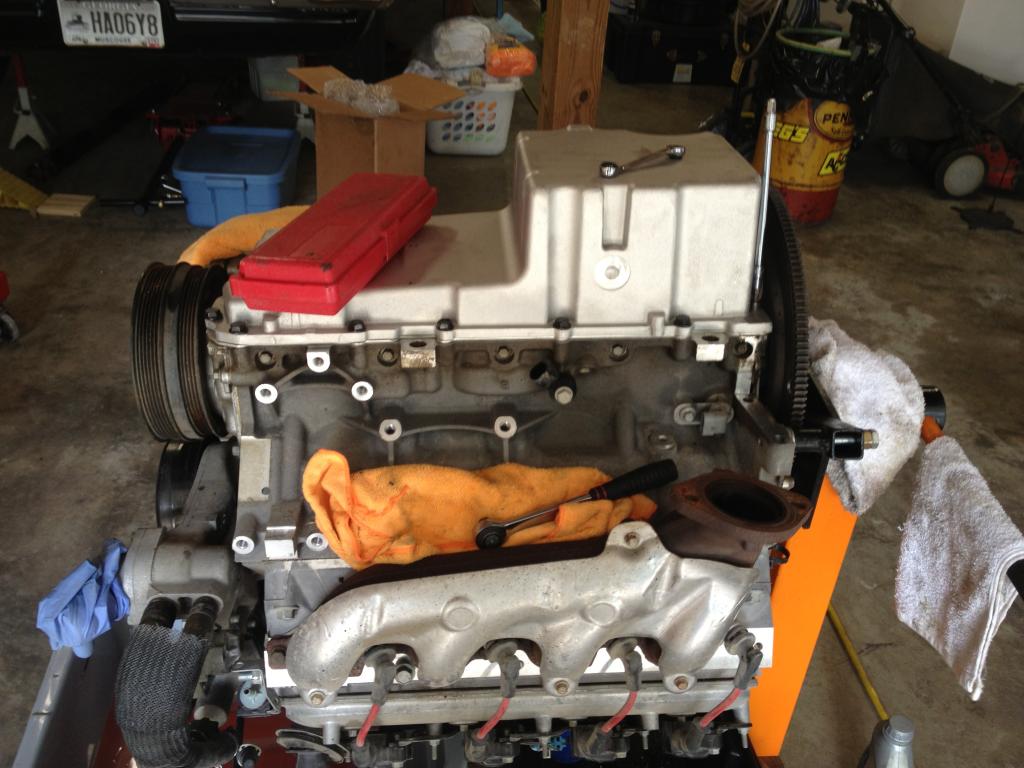
Mounted up
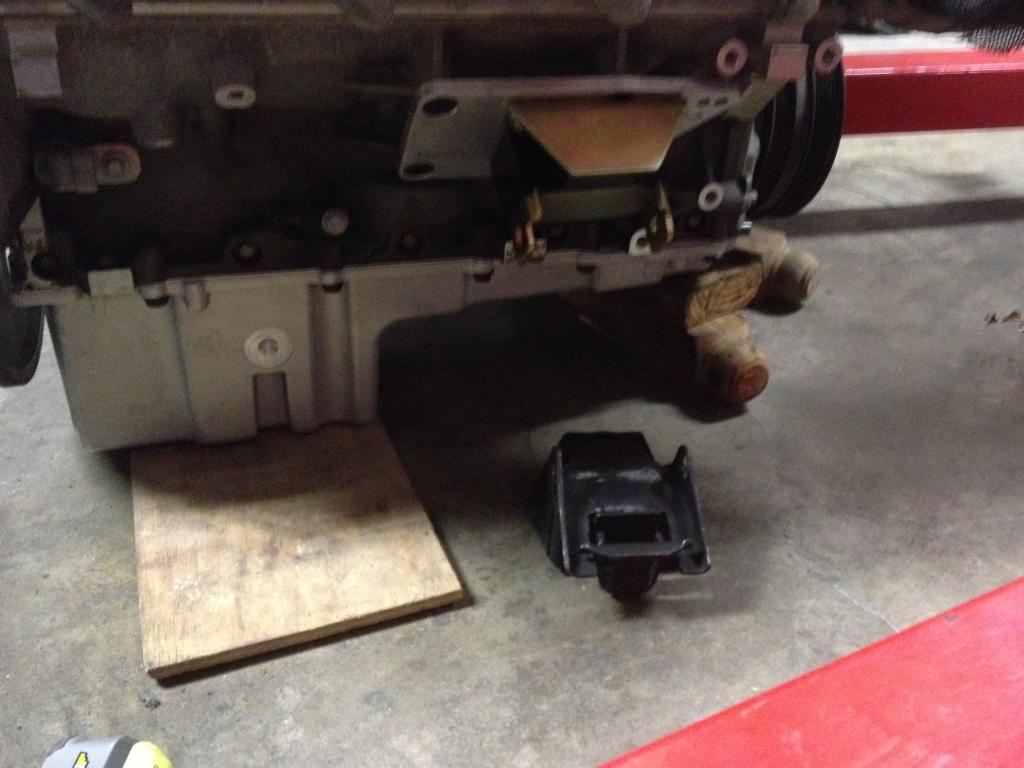
Dirty Dingo adapters and Energy Suspension 3.1144 poly mounts
First of many test fits
Like I mentioned ealier we've been working on the swap since March of 2013 and this is where we are now. Slowly but surely we'll get there. Thanks for looking, feel free to ask questions I'll help others anyway I can. I'll post more pics as progress is made or upon request. If anyone can help me with my A/C questions (see above) that would be great!
Thanks!
Old power plant
We decided on a 2009 Pontiac G8 6.0L (L76 option) with a 6L80e tranny both with 25k miles on them. Purchased it from a salvage yard in North Dakota called Kens Auto. It came with a 6 month warranty from the time it is first started up.
New power plant
We have a friend doing the swap for us, his user name on here is (moreengineering) he's done 3 LS swaps in his own cars (Chevelles). The G8/6L80 and the Camaro has thrown him some curve ***** along the way but that's expected I guess. We started the swap in March of 2013. I'd say were about 60% done.
The car is in Georgia with my Dad, I live in Florida now so it's 8 hours away from me. I've been able to make it back 4-5 times this year so I've helped moreengineering when I was there. I hate not being there for the entirety of the swap, but I stay in constant contact with him and I'm in charge of all the parts ordering.
The car was an base model V8 from the factory, didnt have the original motor in it and wasnt restored back to stock when we did it 13 years ago. We're not purest and the cars not original so we had no problem putting a newer LS motor in and doing what we have to in order to make it fit. So far so good, worked through several hurdles. This is the set up so far
Parts List:
-2009 pontiac G8 6.0L L76 option with the 6L80E tranny
-Mast motorsports ls swap oil pan
-Dirty dingo LS swap adapter plates
-Wiring harness rework by Speartech, kept the DOD, added a tap shift box
-We kept the factory K member mounts (short and wide I believe) but moved them up about 3/4" in an effort to keep the alternator and the a/c compressor in the low mounting position
-Used 2000 S-10 with a 4.3L motor mounts, Energy Suspension poly urethane PN: 3.1144
-Used a 69 V8 with a turbo 350 tranny mount,Energy Suspension poly urethane PN: 3.1108
-Had to notch the k member for the alternator to stay low
-Used a 2000 Camaro with a V8 radiator and upper and lower radiator hoses bought from O'rielly Auto
-2000 Camaro with a V8 efans ordered from Rock Auto PN: 620634, electric plug for the fans (2) PN: PT304
-Spectra factory replacement fuel tank PN: GM32BFI, set up for fuel injection, ordered an extra fuel pump (I've heard they are weak and tend to fail around a year or so..) PN: EP381, both from Rock Auto as well. Had to add a vent to the tank though, out the top at the center. See page 6 for details
-moreengineering made a custom tranny cross member, he used 1"x2" 3/16" wall tubing. 1/4" plate was welded on the ends to allow it to bolt in
-We plan to keep the aftermarket auto meter gauges we have from the original restoration. We will have to get an electronic speedo and temp gauge due to the ones we have being mechanical
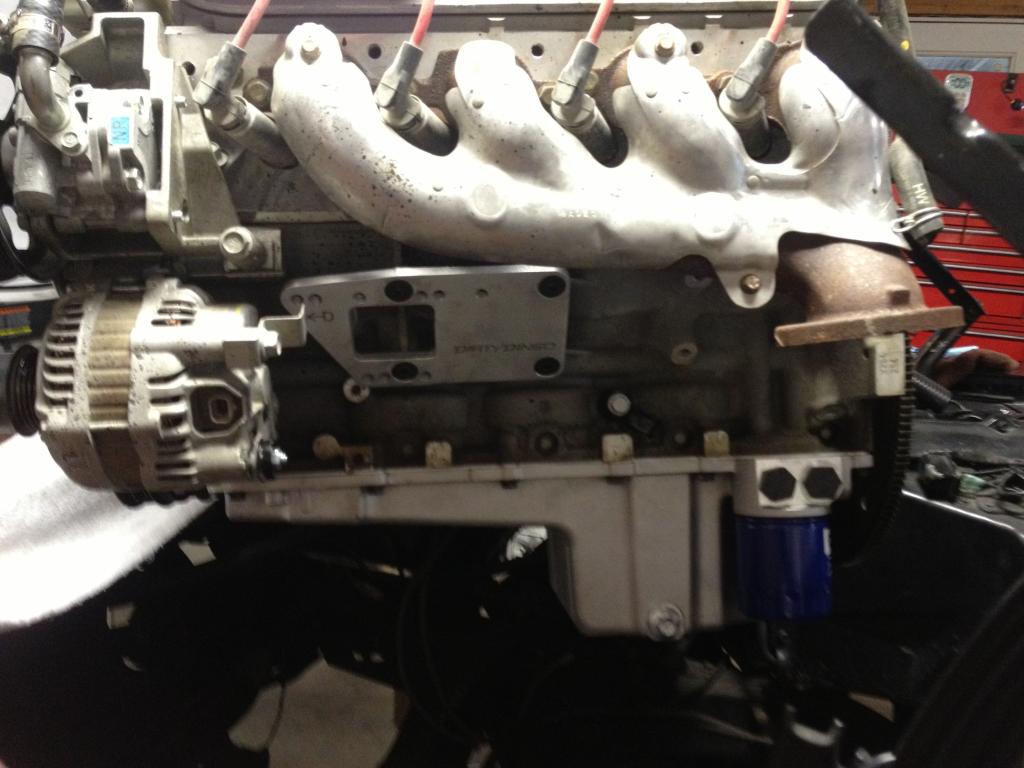
-Keeping the factory G8 exhaust manifolds for now, no cats
-Using a 2010 Camaro 6.2L aftermarket intake CAI, we'll cut the bolt in style MAF area and replace it with the in line style MAF for the G8
-Using a 2010 Camaro 6.2L pick up tube PN: 12570787 and dip stick PN: 12570788. The G8 came with it in the oil pan, our aftermarket oil pan won't work with it entering through the side of the pan. Had to remove the dip stick plug from the passenger side of the block.
-In order to convert the non slip yoke output shaft of the 6L80 we bought the follwing: Adapter from The Driveshaft Shop PN: GTOPL-2 which includes PN 3-2-119. The first is an adapter that bolts to the output of the 6L80, this is threaded to allow the second PN to bolt to it. PN 3-2-119 is a spicer 1350 flange. For the slip yoke pieces we went to Denny's Driveshafts and got their PN: 3-40-1621, the male side of the slip yoke and PN: 3333586, the female side of the slip yoke. This set up will be welded to a 3.5" driveshaft. We also bought a 1350 style greasable U-joint as well
-2000 Camaro with a V8 power steering pump from O'reilly Auto. See "issues" below for why we ditched the stock G8 P/S pump
-Lokar 6L80 24" tranny dip stick from Summit
-Went with a Sanden 508 with 7 groove compressor PN:191-101 (summit racing I think) or SD5H14. Also went with the vintage air PN: VTA-04808-VMA condenser / dryer kit
Issues so far:
-Cut the tunnel out, see pic, we did an "I" cut originally but the tunnel metal was so hard to work with we decided to cut it all out. We will rework it off of the car (bending and what not) then reinstall back to the orginal cut lines (at the floor pans) hopefully with a filler piece added in the middle at the top. This has yet to be done/worked out but this is our plan. The tunnel needed to be wider for the most part but will prob need to be slightly taller as well.
-Notched the k member for the alternator, our choice to try and keep the low mounting position this way we can keep the factory engine cover
-At the final motor install and the reinstallation of the P/S pulley we realized it was too big. it was real close to the control arm with it's was a 6" o.d. pulley. He ended up swapping it out for a 2000 Camaro with a V8 P/S pump. aparently the G8 P/S pump had a weird output shaft size and smaller pulleys were hard to find to replace the 6" o.d. one. The 2000 Camaro P/S pump mounted in the stock location and has a more popular output shaft. He was able to find a smaller P/S pump pulley that would work from a 2000 chevy with a 3.1 V6 motor. It's worked out and we have the control arm clearance now...
-We are still deciding what to do with the A/C. One option is to relocate the A/C compressor to the upper mounting position using Holley LS swap brackets and a Sandan aftermarket compressor. The G8 compressor will not work with the factory mounting brackets or the old AC system I have found out after researching it a good bit. I will probably need to get a newer style condensor if we go this route.
-Figuring out how to convert the fixed yoke style tranny (the G8's and new camaros have independent rear suspensions) to a slip yoke style took a lot of research. Finally found the adapter option on a 67-72chevytruck forum. We have all the parts listed above but have not installed them yet. I also found the tail housing conversion option but we didnt want to go that deep into the tranny and the adapter option was right at the same price
Still To Figure Out:
-How to get the factory G8 A/C compressor to mount low without the orginal bracketry. If and how the G8 A/C compressor will work with our original Camaro evaporator box. What all else I would need to get everything plumbed and set up correctly.
-Shifter, thinking I'm going to go with a stock G8 shifter so we can take advantage of the manual mode. Still have to find one and mount to the tunnel once we make it
-I'm sure there is something I'm forgetting..
Here's some pics of the progress:
Mast motorsports oil pan, holds 5.5 Quarts
Mounted up
Dirty Dingo adapters and Energy Suspension 3.1144 poly mounts
First of many test fits
Like I mentioned ealier we've been working on the swap since March of 2013 and this is where we are now. Slowly but surely we'll get there. Thanks for looking, feel free to ask questions I'll help others anyway I can. I'll post more pics as progress is made or upon request. If anyone can help me with my A/C questions (see above) that would be great!
Thanks!
Last edited by Hybrid 69; Aug 1, 2015 at 07:16 PM.
Thread Starter
Staging Lane
Joined: Jan 2014
Posts: 70
Likes: 0
From: Panama City, FL
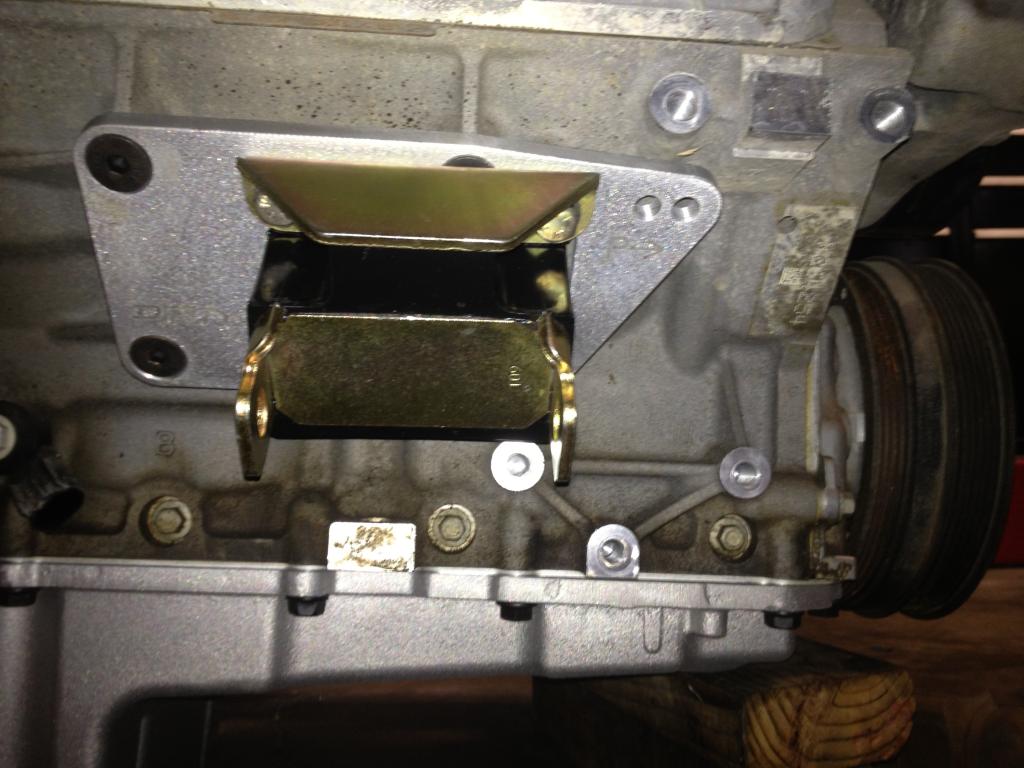
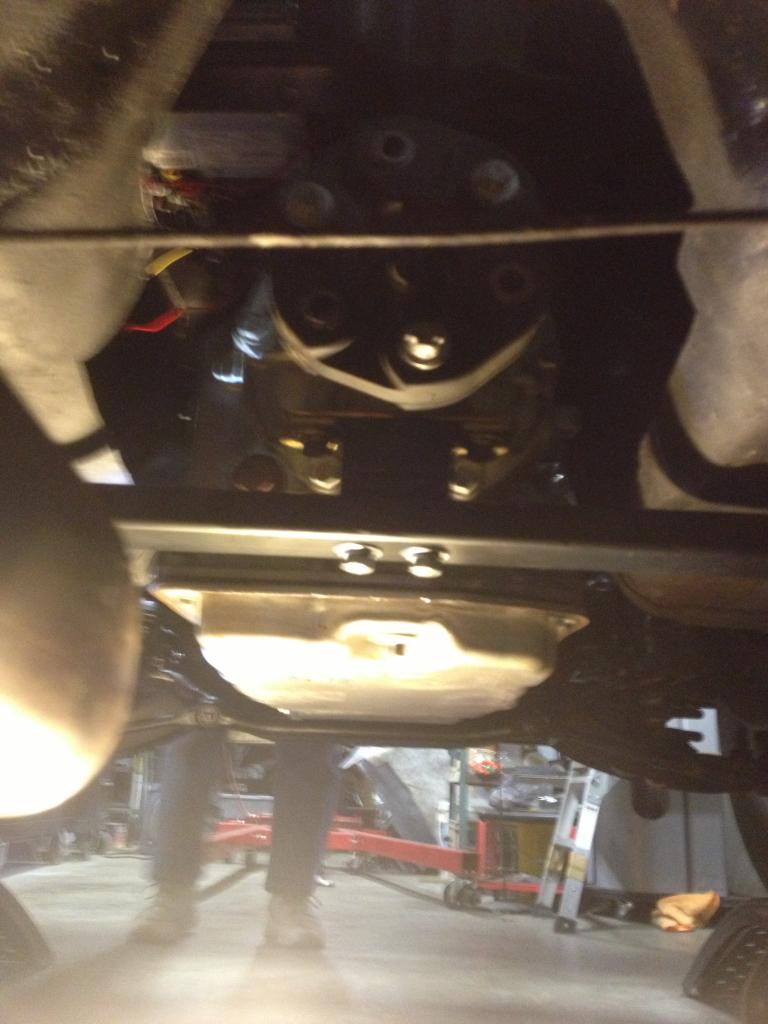
Good side shot of the new oil pan
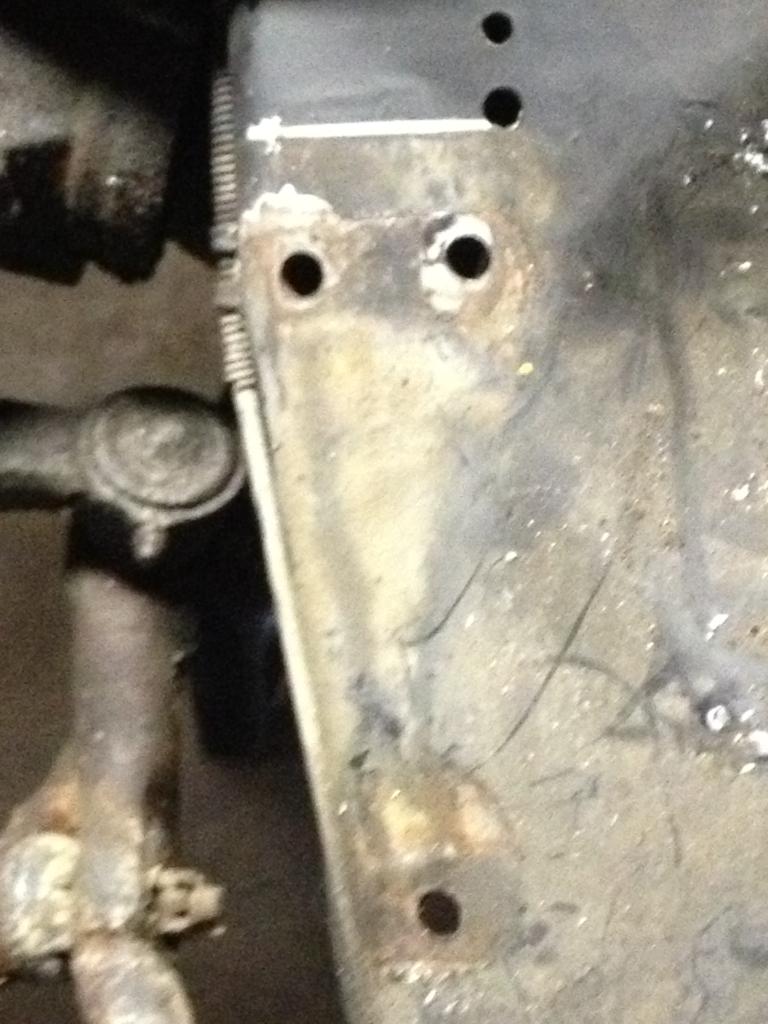
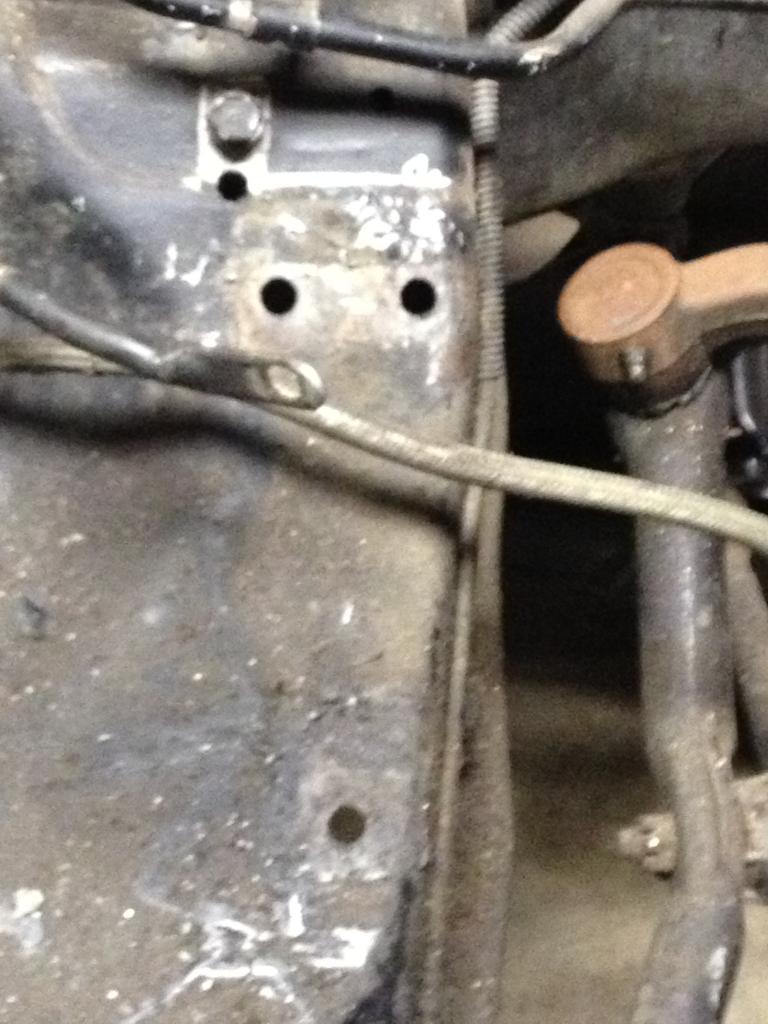
Marked lines for where to move the motor mounts up on the k member, moved them up about 3/4" on each side
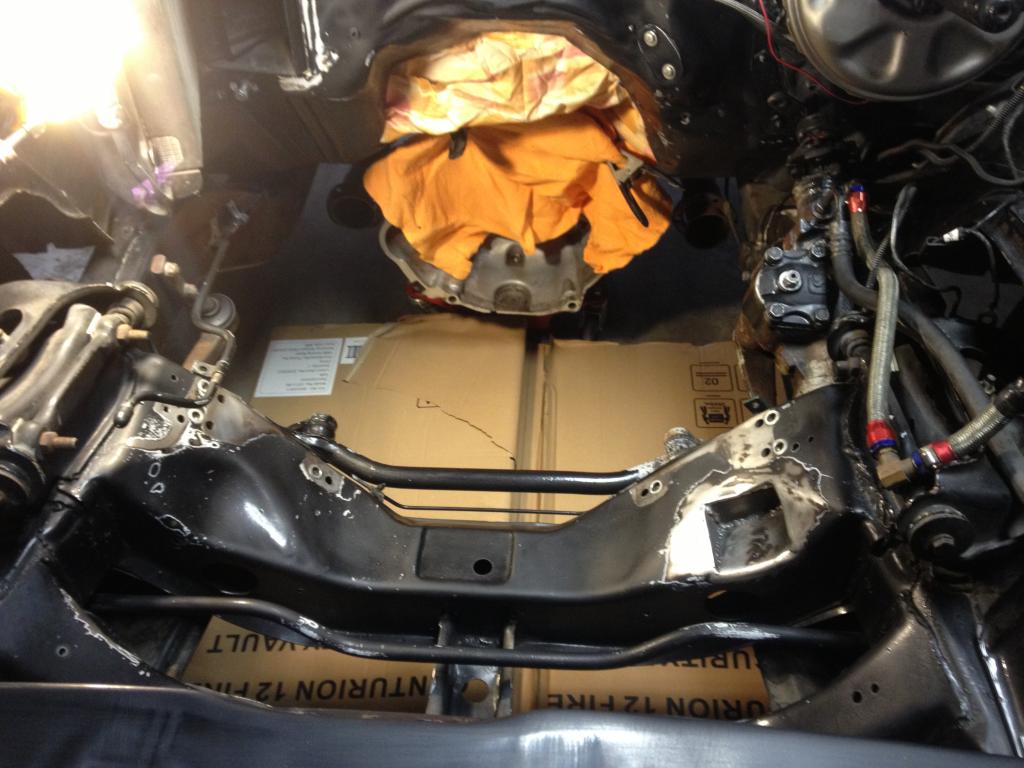
Cleaned up engine bay for paint. k member notched for Alternator
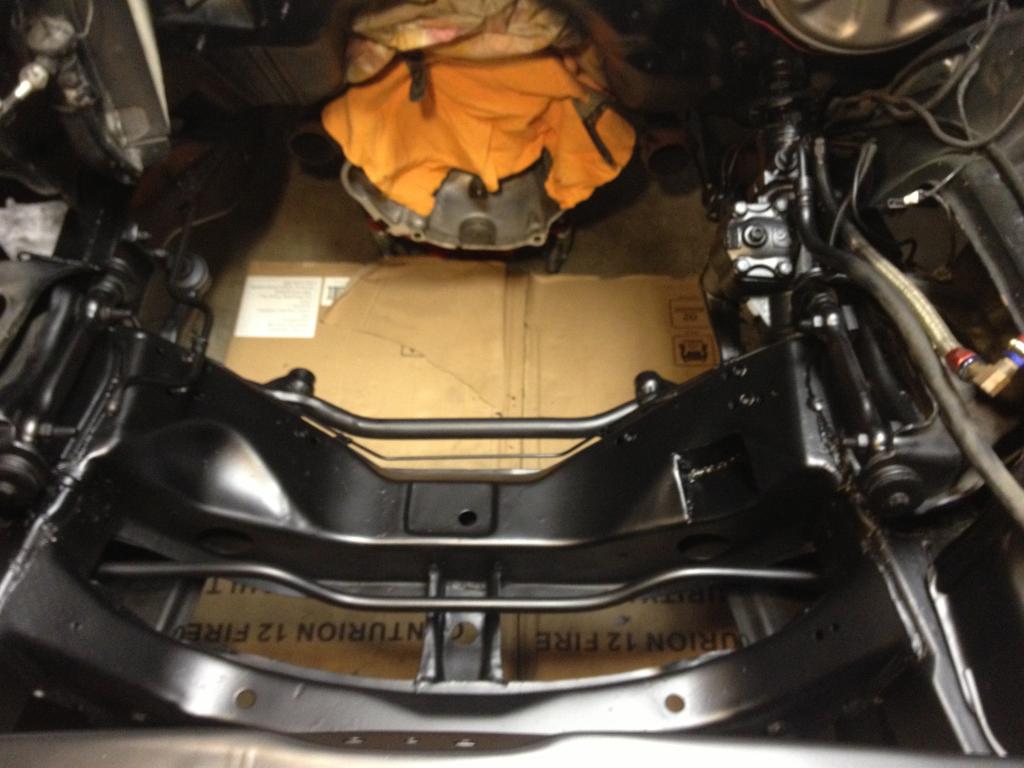
Repainted Engine bay
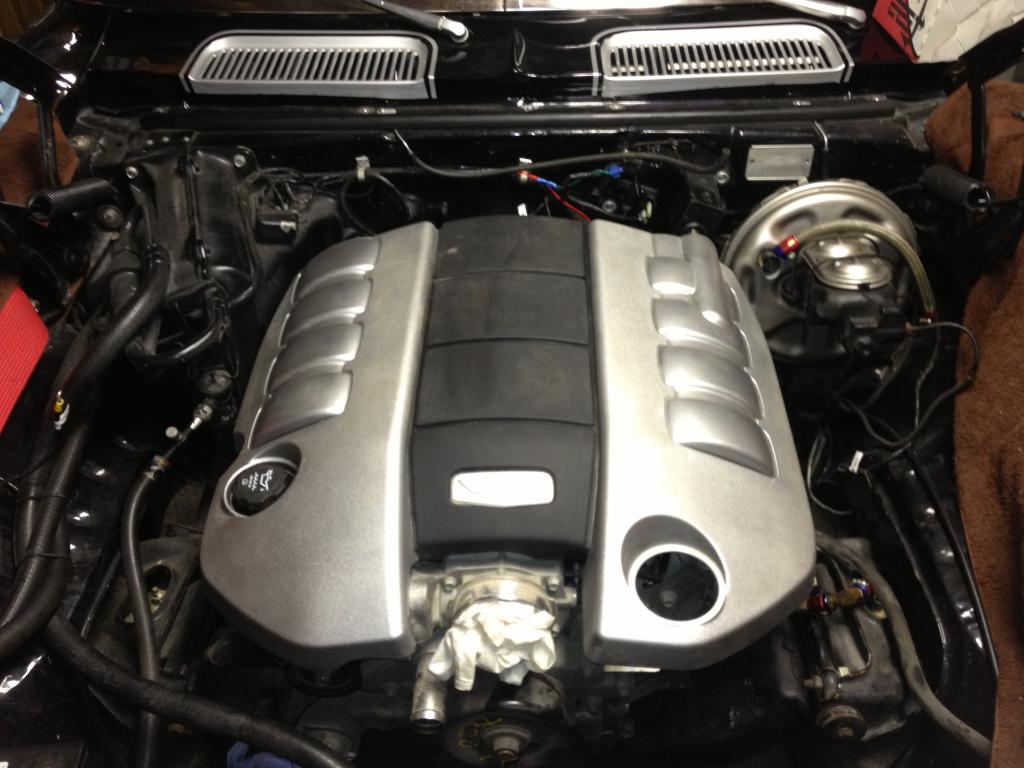
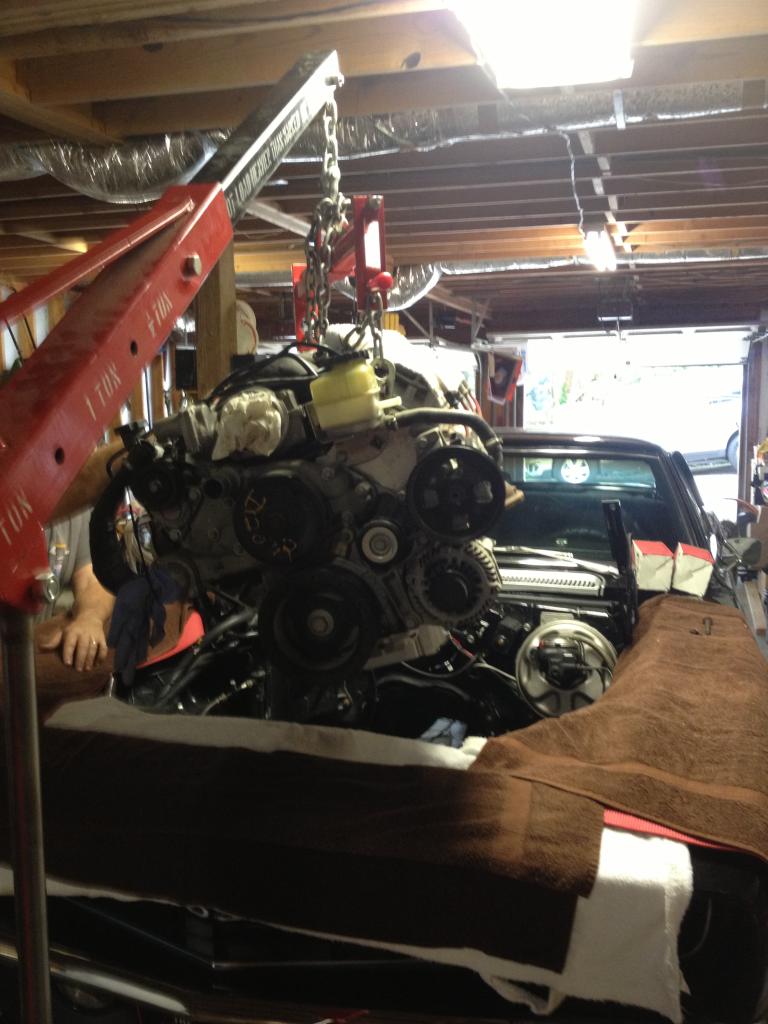
Motor in place for the final time hopefully..
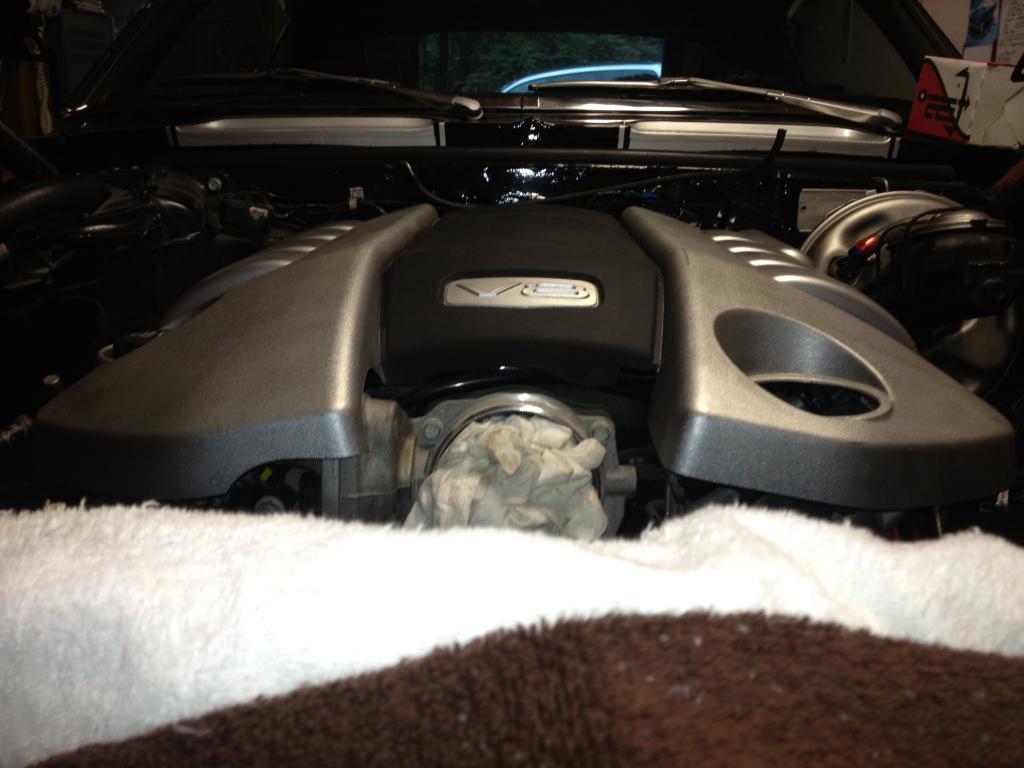
Thinking the hood should clear
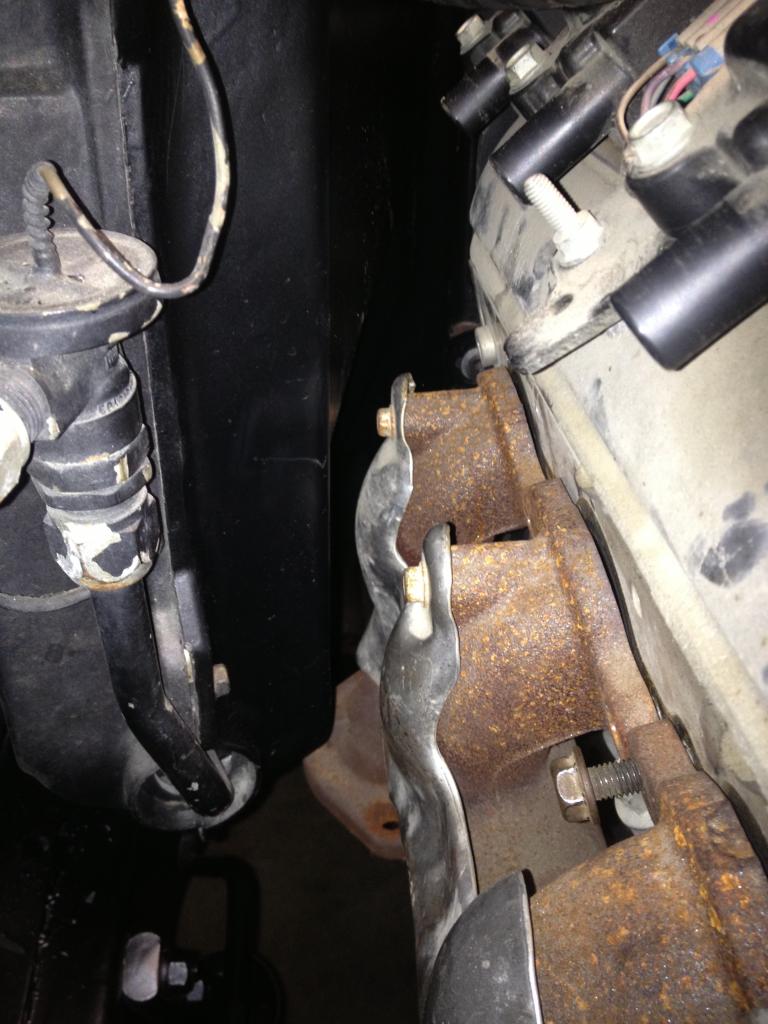
Evaporator box clearance
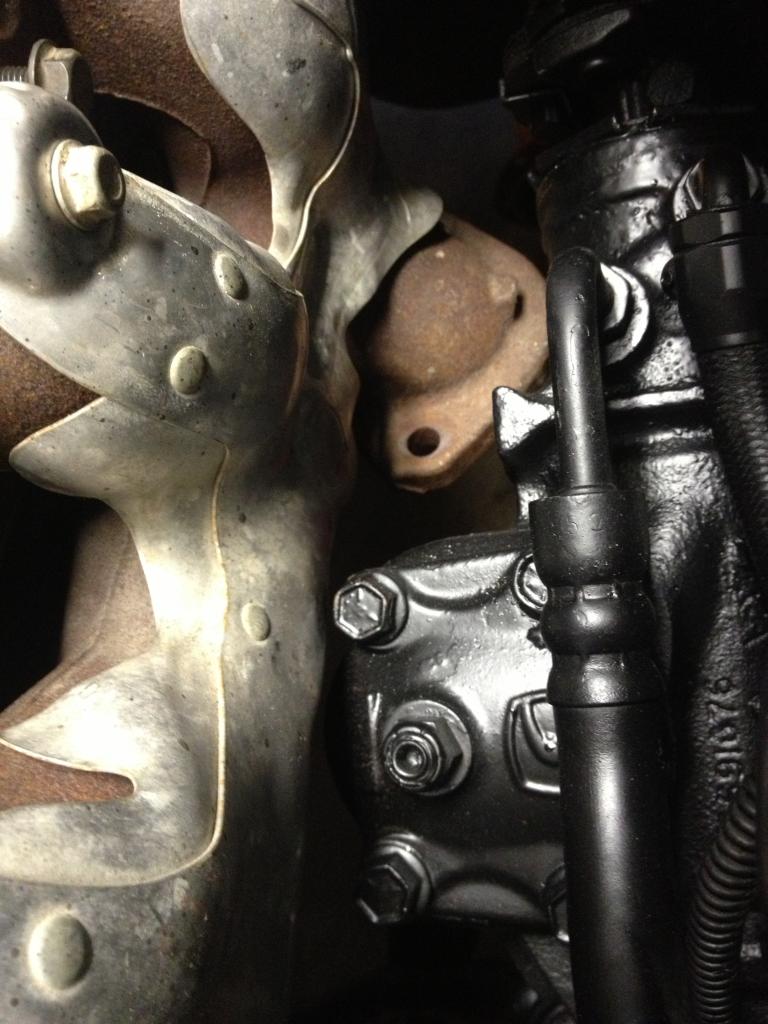
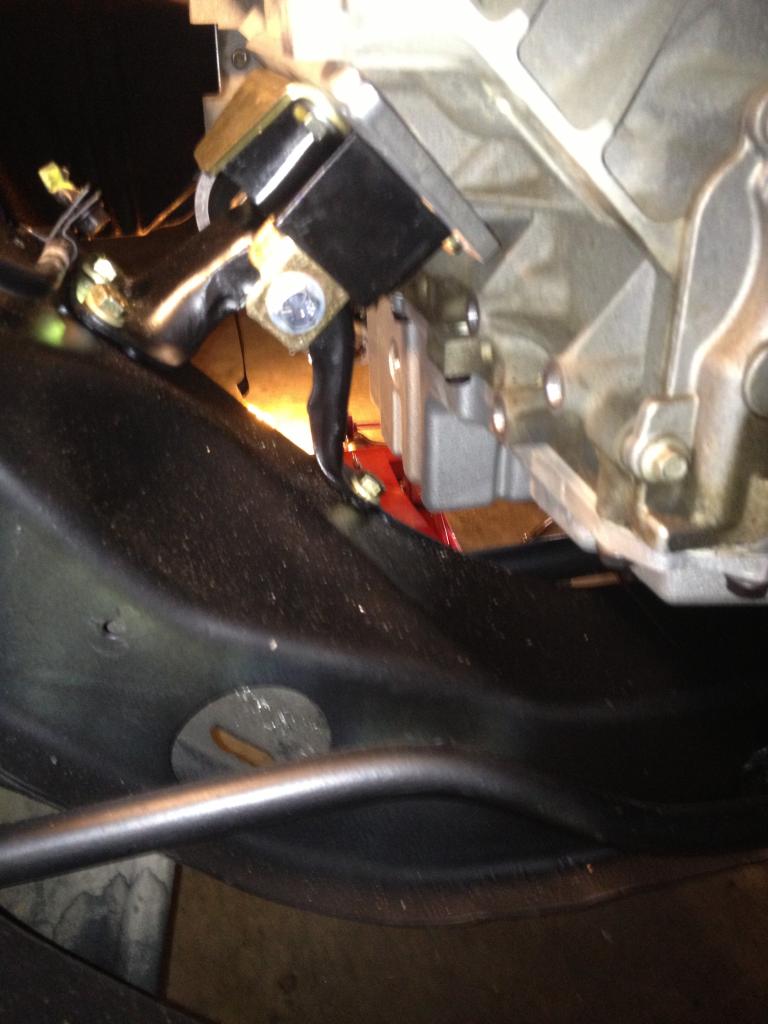
Gear box clearance


Alternator clearance at the k member after notching
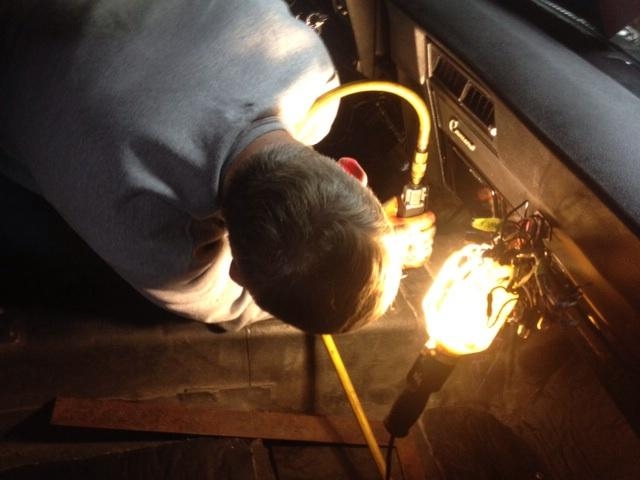
Cutting time
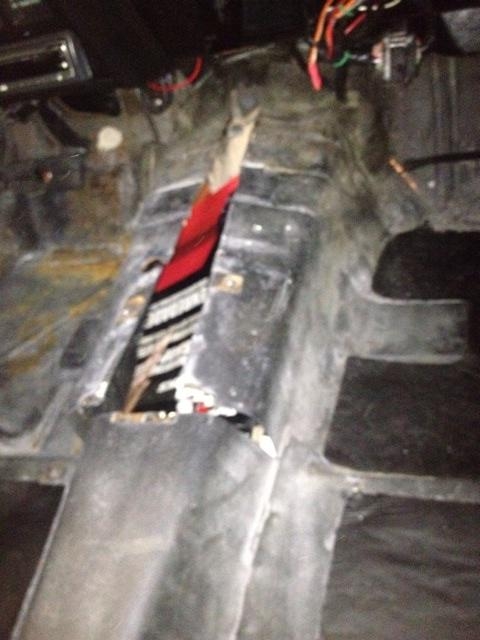
"I" cut
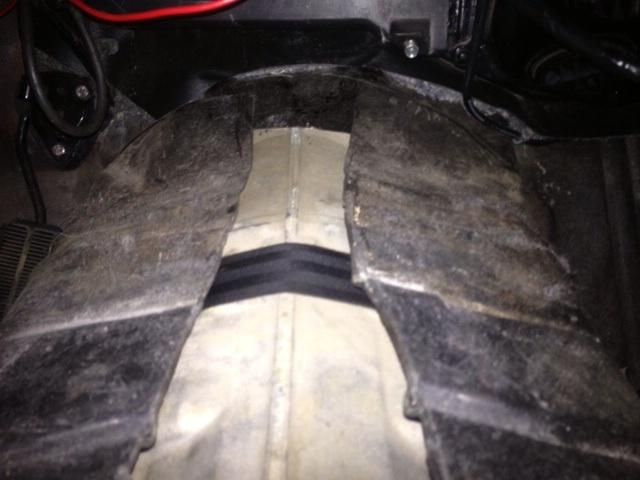
About where it need to be height wise
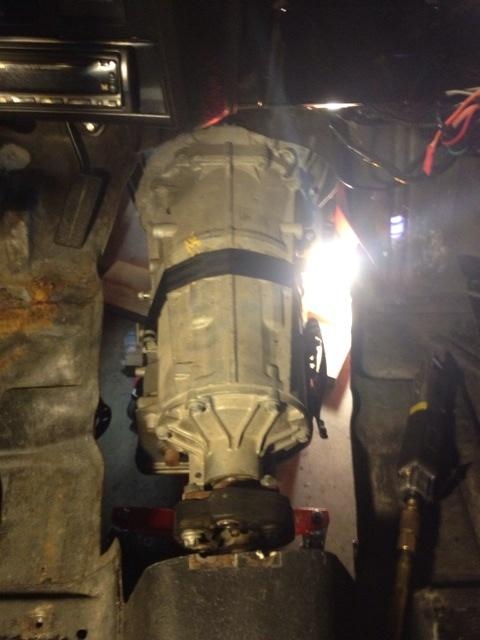
No turning back now..
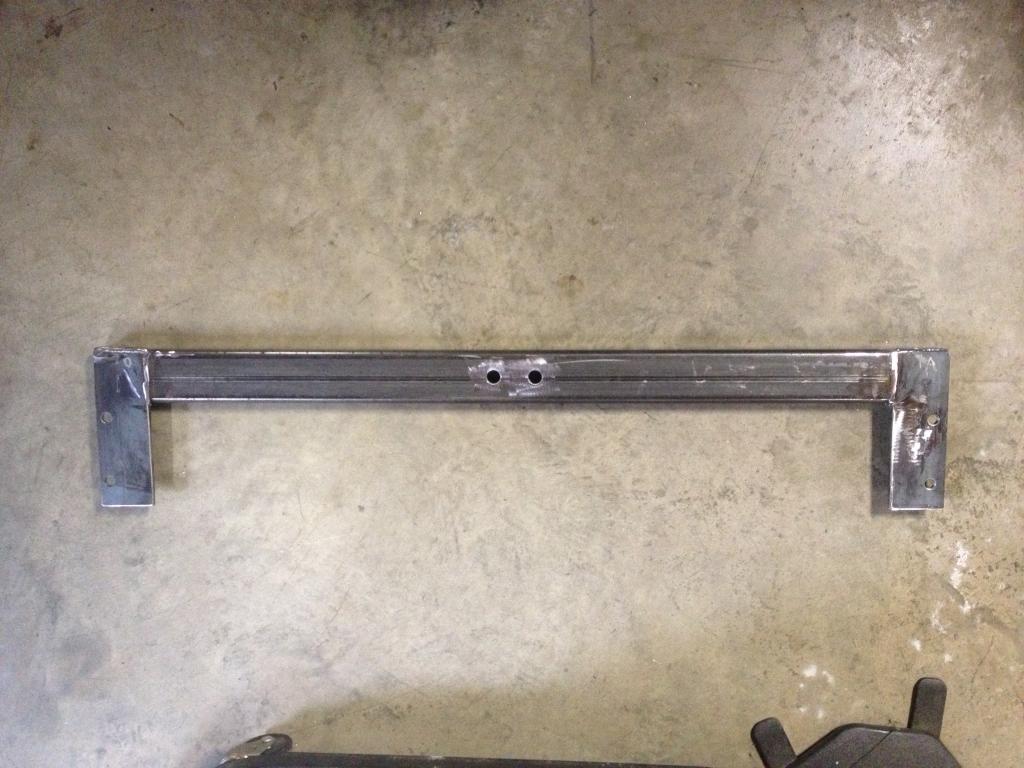

New tranny cross member
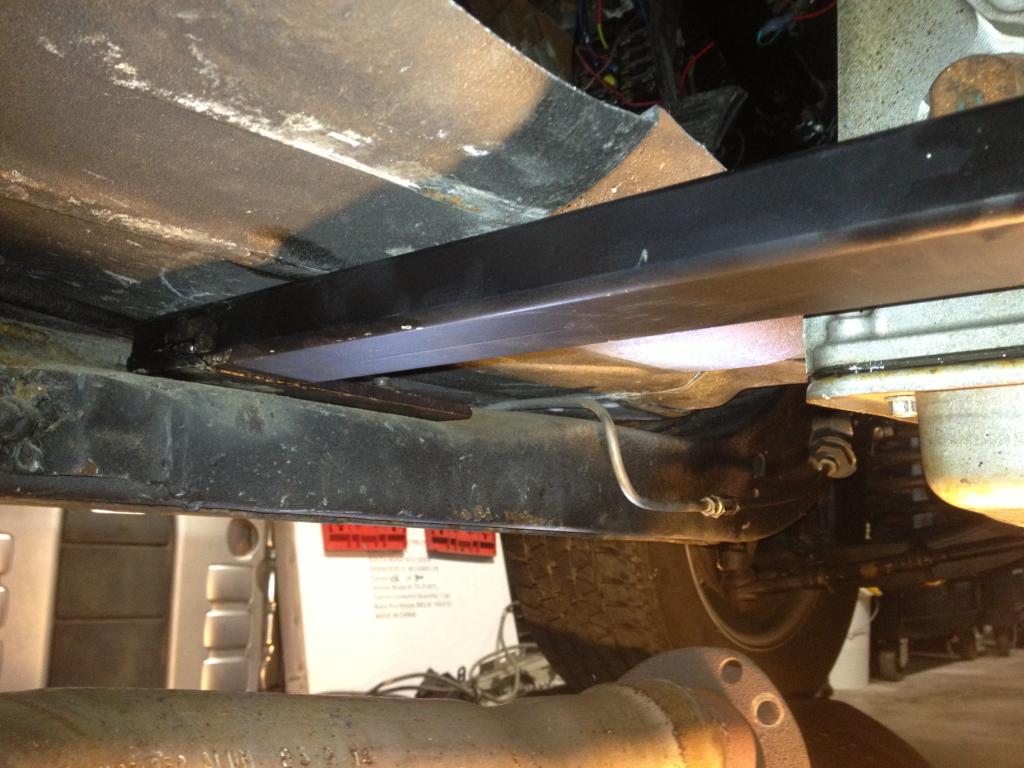
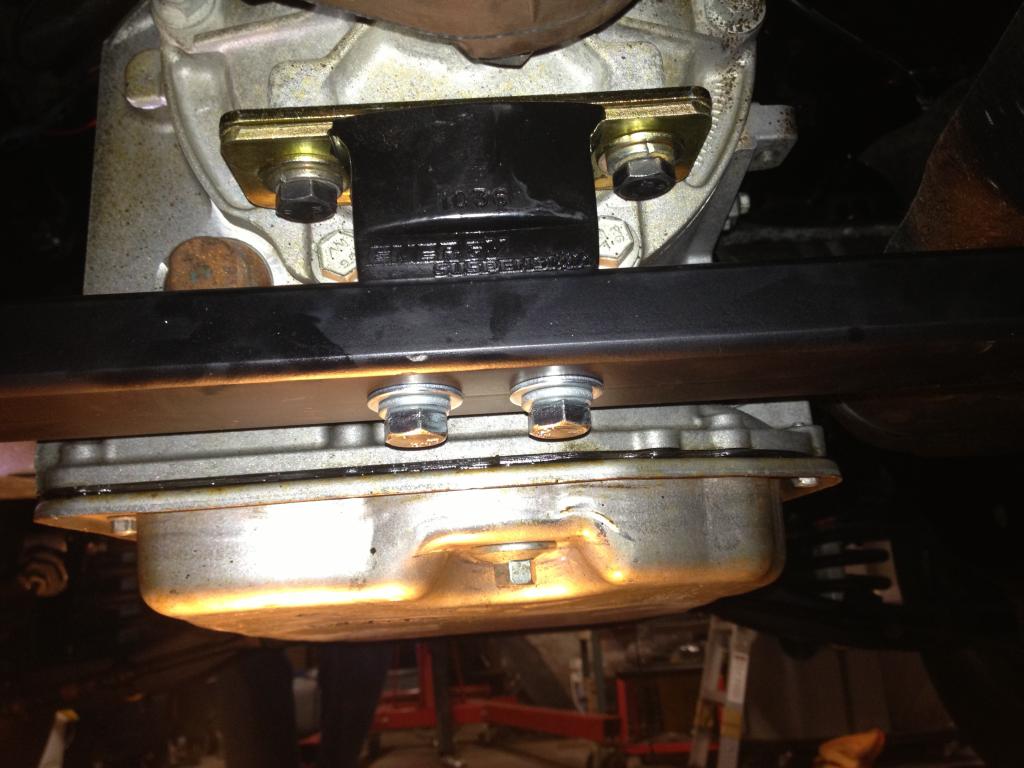
Mounted up
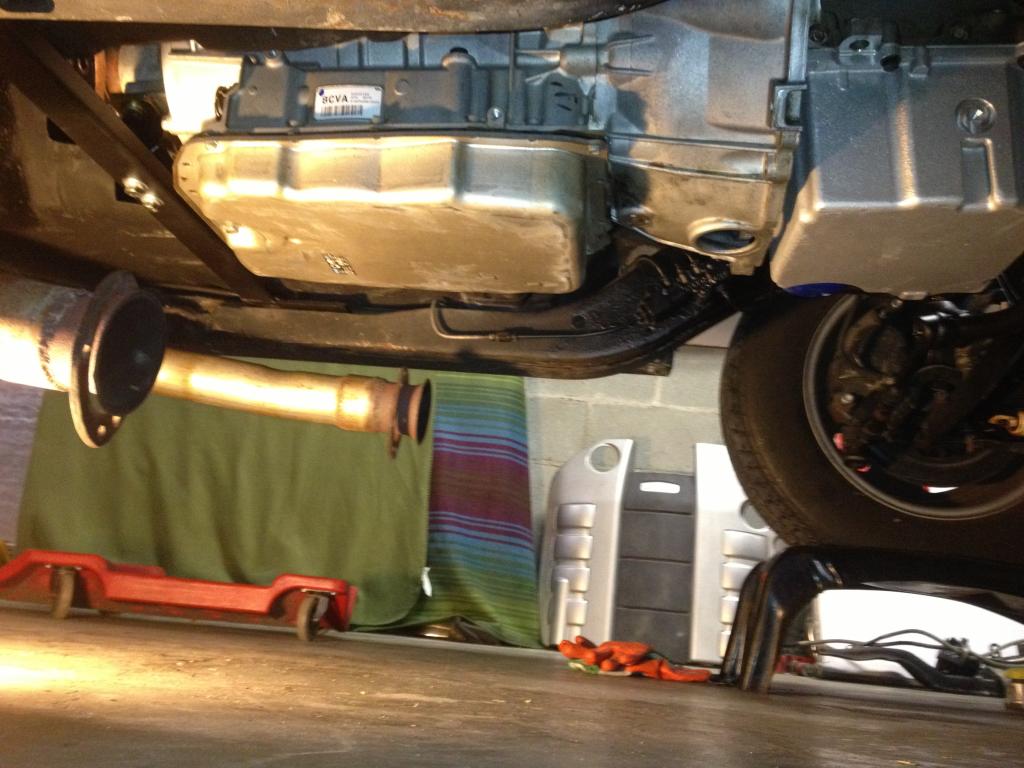
No low hanging pans here..
Motor mount shot

New E fans

Radiator and E fan mock up
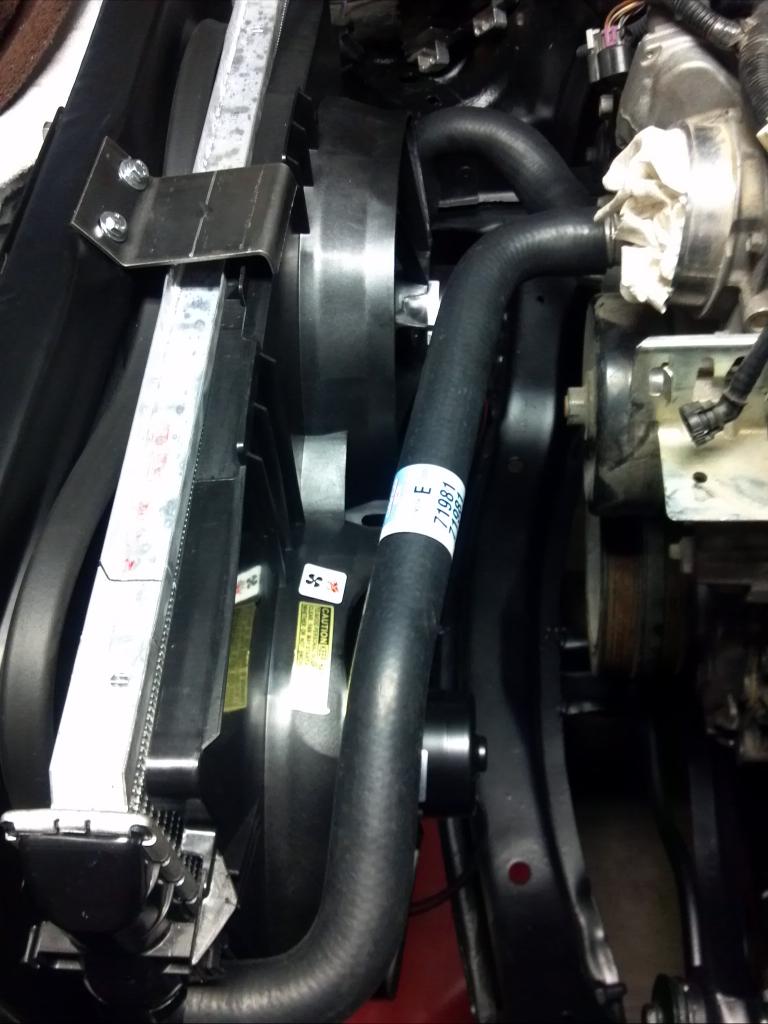
With 2000 Camaro hoses, went right in
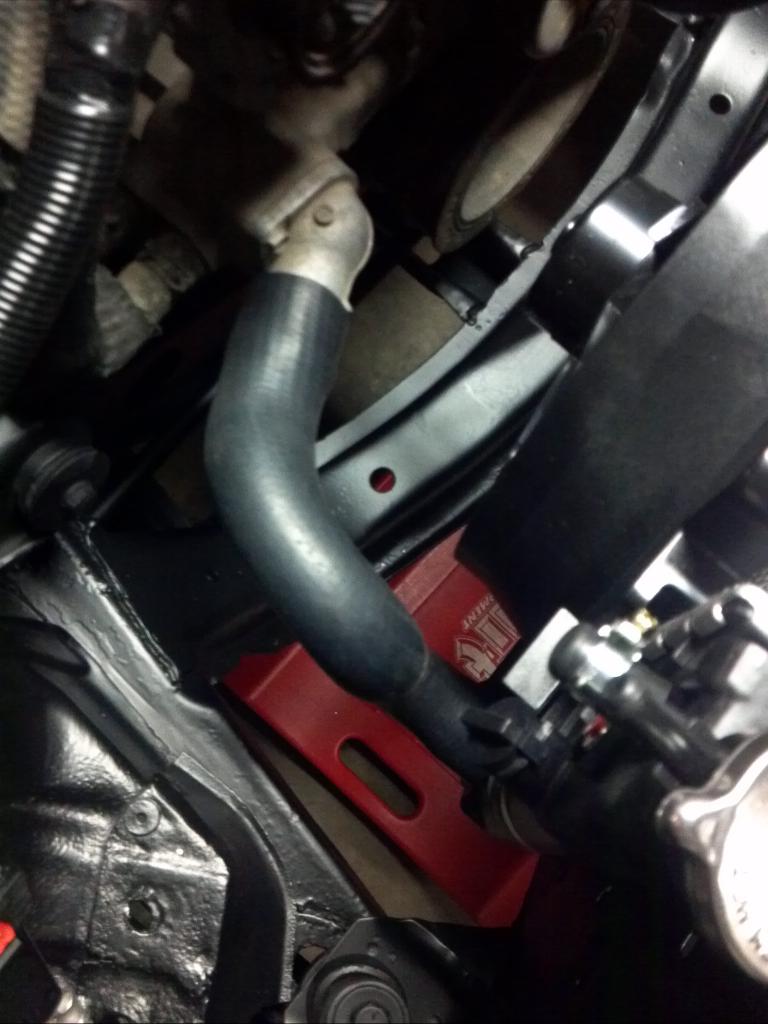
Lower Radiator hose
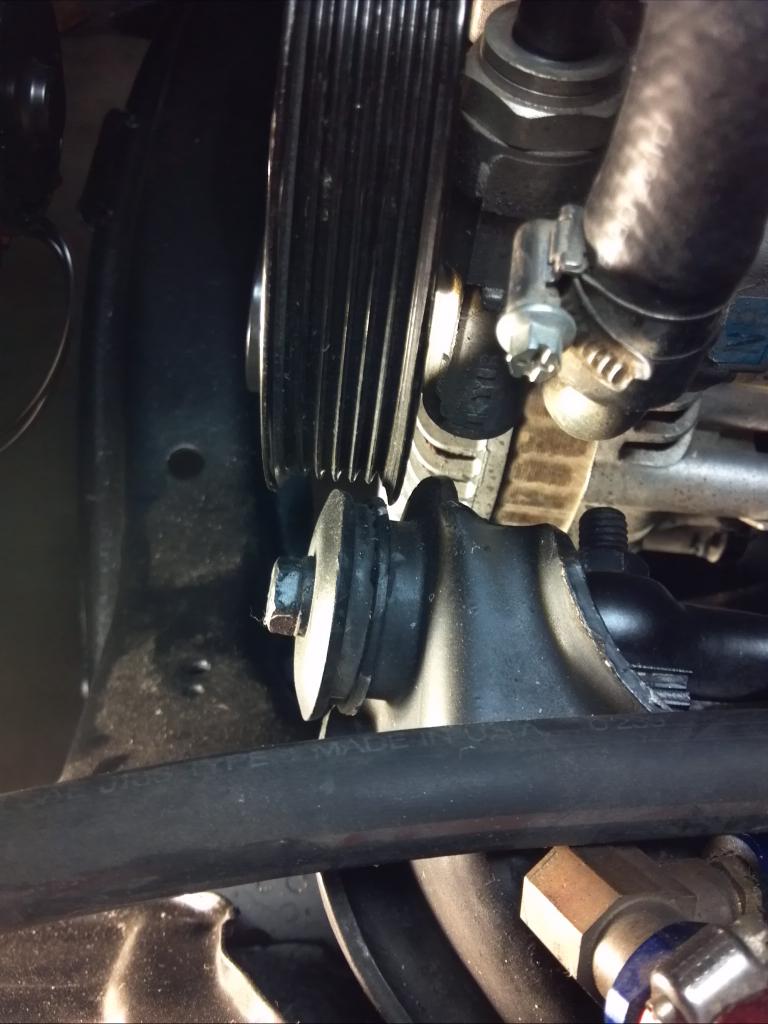
Stock G8 P/S pulley 6" o.d. before we swapped it out for a 2000 Camaro P/S pump with smaller pulley
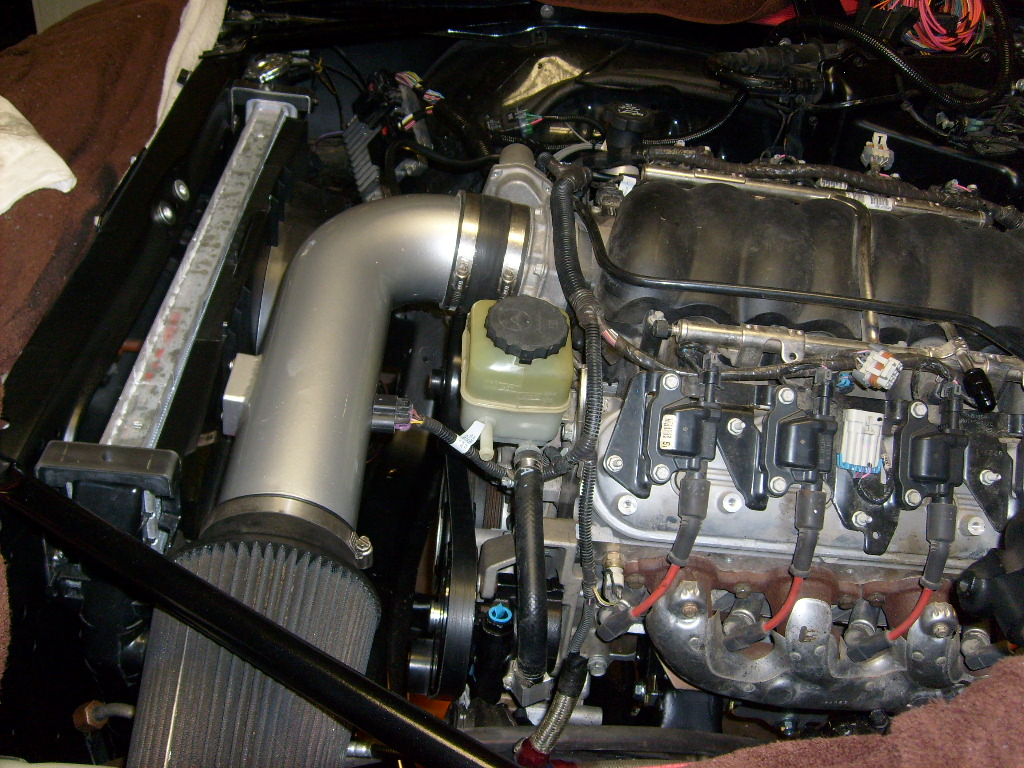
2010 Camaro K&N CAI

Nice build! I did a similar setup in my 68 C10 (13' LS3/6L80). Here's my build thread. It might help you with some of the issues you have or will have LOL!
http://67-72chevytrucks.com/vboard/s...358692&page=17
https://ls1tech.com/forums/conversio...e-tvs1900.html
Rob
http://67-72chevytrucks.com/vboard/s...358692&page=17
https://ls1tech.com/forums/conversio...e-tvs1900.html
Rob

TECH Senior Member


Joined: Jul 2009
Posts: 8,024
Likes: 659
Hybrid 69,
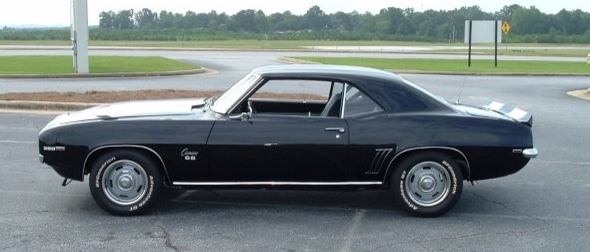
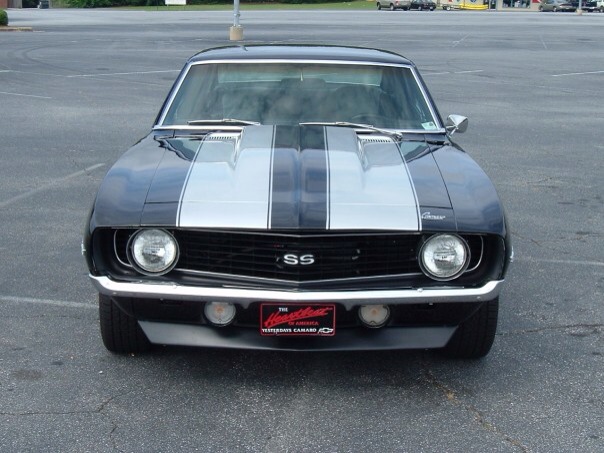
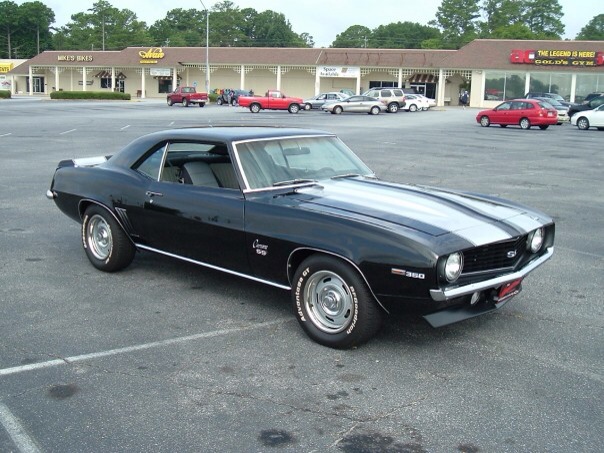
Great write up. Thanks for sharing. Thats a gorgeous car. Any chance of getting more pics of the car the next time you go back to work on it? I bet giving the 700R4 trans and 3.73s it was plenty quick. A gear change might be in your future with the 6L80's first gear and 3.73. 1st gear will be useless. LOL. Forget about WOT from a dead stop.
You might want to do a SEARCH on retaining the DOD. There has been many instances (several forums) of the DOD lifters failing on low milage (under 100K) stock cam/engines. You might want to consider AlenGroveComponents http://www.alangrovecomponents.com/LS.htm for a aftermarket Sanden compressor low mount setup. The "truck" setup (3rd down on link) will work for the VVT cammed motors. FWIW
Great write up. Thanks for sharing. Thats a gorgeous car. Any chance of getting more pics of the car the next time you go back to work on it? I bet giving the 700R4 trans and 3.73s it was plenty quick. A gear change might be in your future with the 6L80's first gear and 3.73. 1st gear will be useless. LOL. Forget about WOT from a dead stop.
You might want to do a SEARCH on retaining the DOD. There has been many instances (several forums) of the DOD lifters failing on low milage (under 100K) stock cam/engines.
You might want to consider AlenGroveComponents http://www.alangrovecomponents.com/LS.htm for a aftermarket Sanden compressor low mount setup. The "truck" setup (3rd down on link) will work for the VVT cammed motors. FWIW Trending Topics

Thread Starter
Staging Lane
Joined: Jan 2014
Posts: 70
Likes: 0
From: Panama City, FL
Nice build! I did a similar setup in my 68 C10 (13' LS3/6L80). Here's my build thread. It might help you with some of the issues you have or will have LOL!
http://67-72chevytrucks.com/vboard/s...358692&page=17
What was on this page, I didnt see anything relevant. You may have been referring me to the whole thread? I think that's the case, gonna take me a while to get through all 51 pages
https://ls1tech.com/forums/conversio...e-tvs1900.html
Rob
http://67-72chevytrucks.com/vboard/s...358692&page=17
What was on this page, I didnt see anything relevant. You may have been referring me to the whole thread? I think that's the case, gonna take me a while to get through all 51 pages
https://ls1tech.com/forums/conversio...e-tvs1900.html
Rob
Thread Starter
Staging Lane
Joined: Jan 2014
Posts: 70
Likes: 0
From: Panama City, FL
Hybrid 69,
Great write up. Thanks for sharing. Thats a gorgeous car. Any chance of getting more pics of the car the next time you go back to work on it? I bet giving the 700R4 trans and 3.73s it was plenty quick. A gear change might be in your future with the 6L80's first gear and 3.73. 1st gear will be useless. LOL. Forget about WOT from a dead stop.
You might want to do a SEARCH on retaining the DOD. There has been many instances (several forums) of the DOD lifters failing on low milage (under 100K) stock cam/engines. You might want to consider AlenGroveComponents http://www.alangrovecomponents.com/LS.htm for a aftermarket Sanden compressor low mount setup. The "truck" setup (3rd down on link) will work for the VVT cammed motors. FWIW
Great write up. Thanks for sharing. Thats a gorgeous car. Any chance of getting more pics of the car the next time you go back to work on it? I bet giving the 700R4 trans and 3.73s it was plenty quick. A gear change might be in your future with the 6L80's first gear and 3.73. 1st gear will be useless. LOL. Forget about WOT from a dead stop.
You might want to do a SEARCH on retaining the DOD. There has been many instances (several forums) of the DOD lifters failing on low milage (under 100K) stock cam/engines.
You might want to consider AlenGroveComponents http://www.alangrovecomponents.com/LS.htm for a aftermarket Sanden compressor low mount setup. The "truck" setup (3rd down on link) will work for the VVT cammed motors. FWIWI agree on the gear swap, were gonna see how it does. Shoulda planned a little better because we just put the 3.73's in when the 700r4 went in 6 or 7 years ago... It ought to do some nice burn outs though

Were keeping DOD at this point, I will reasearch it though. Maybe something to consider deleting down the road. Thanks for the heads up, I hadnt heard that..
Thanks for the AlenGroveComponents link, I'll check it out.
Thanks man, hope we can keep it as planned!
Thread Starter
Staging Lane
Joined: Jan 2014
Posts: 70
Likes: 0
From: Panama City, FL
Hybrid 69,
Great write up. Thanks for sharing. Thats a gorgeous car. Any chance of getting more pics of the car the next time you go back to work on it? I bet giving the 700R4 trans and 3.73s it was plenty quick. A gear change might be in your future with the 6L80's first gear and 3.73. 1st gear will be useless. LOL. Forget about WOT from a dead stop.
You might want to do a SEARCH on retaining the DOD. There has been many instances (several forums) of the DOD lifters failing on low milage (under 100K) stock cam/engines. You might want to consider AlenGroveComponents http://www.alangrovecomponents.com/LS.htm for a aftermarket Sanden compressor low mount setup. The "truck" setup (3rd down on link) will work for the VVT cammed motors. FWIW
Great write up. Thanks for sharing. Thats a gorgeous car. Any chance of getting more pics of the car the next time you go back to work on it? I bet giving the 700R4 trans and 3.73s it was plenty quick. A gear change might be in your future with the 6L80's first gear and 3.73. 1st gear will be useless. LOL. Forget about WOT from a dead stop.
You might want to do a SEARCH on retaining the DOD. There has been many instances (several forums) of the DOD lifters failing on low milage (under 100K) stock cam/engines.
You might want to consider AlenGroveComponents http://www.alangrovecomponents.com/LS.htm for a aftermarket Sanden compressor low mount setup. The "truck" setup (3rd down on link) will work for the VVT cammed motors. FWIW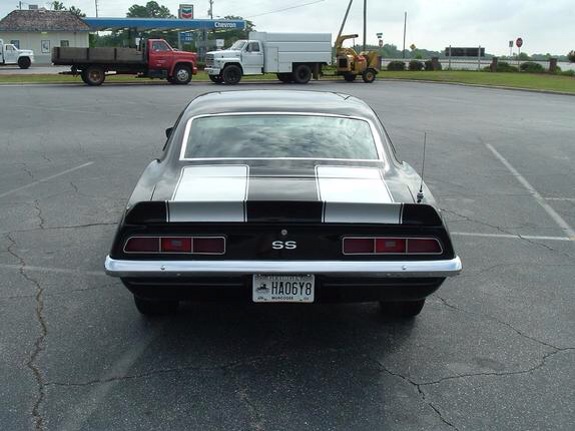
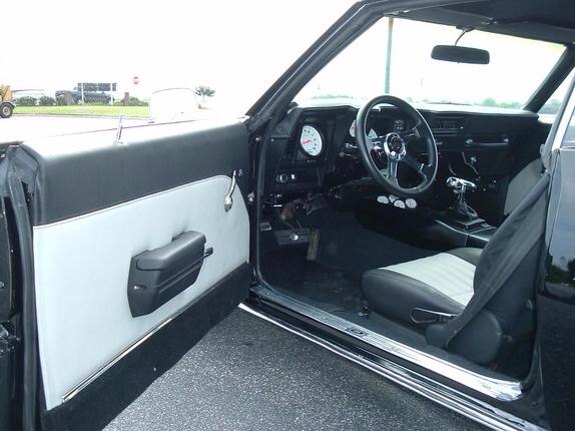
Door panel shot. We used 2000 a Camaro buckets when we did the original restoration. Marine grade vinyl was used for the door panels and seats. Recovered the stock back seat with the same material. Stock center console
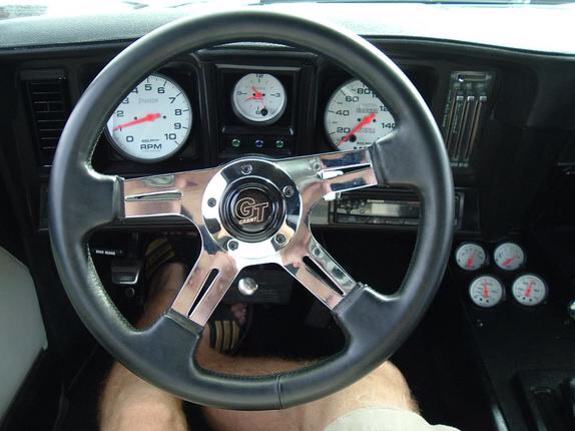
Auto meter 5" Tach and Speedo, 2 1/16" gauges in the center console
It's sad but these are all the digital photos of the exterior/interior that I can find right now..
Thread Starter
Staging Lane
Joined: Jan 2014
Posts: 70
Likes: 0
From: Panama City, FL
Not sure at the moment. Big brakes and wheels are in the cars future as well once the motor swap gets done. I'd like to do at least 17" rims all the way around maybe 18"s. Still have to research what I can fit on the car without too much modifications.
Thread Starter
Staging Lane
Joined: Jan 2014
Posts: 70
Likes: 0
From: Panama City, FL
Do any of you know of a build where a car or truck with factory ac was set up with a new style ac compressor? I have yet to find one with my research. Someone out there has to have done it. Need to know if it will work and what all I'll need to make it work. I can only find builds that used vintage air systems. Help please!!


Do any of you know of a build where a car or truck with factory ac was set up with a new style ac compressor? I have yet to find one with my research. Someone out there has to have done it. Need to know if it will work and what all I'll need to make it work. I can only find builds that used vintage air systems. Help please!!
Thread Starter
Staging Lane
Joined: Jan 2014
Posts: 70
Likes: 0
From: Panama City, FL
So you replaced the factory (old) evaporator with the LT1 unit in the factory box, then hooked it all up to the factory LT1 compressor. What all does it take to make this work? LT1 condesor, dryer...? Did it just not cool like you wanted or what, explain more if you dont mind? Once you smooth the firewall you'll be going with an aftermarket set up? Vintage air or what?
Yes I plan to go aftermarket...it just did not cool the car well. It has been well over 10 years, and several since it had the LT1, but seem like it took minimal work to get it to fit inside and seal it properly. I used all LT1 components except I used the factory 69 condenser. it never flowed enough air I think to work properly.
Thread Starter
Staging Lane
Joined: Jan 2014
Posts: 70
Likes: 0
From: Panama City, FL
Yes I plan to go aftermarket...it just did not cool the car well. It has been well over 10 years, and several since it had the LT1, but seem like it took minimal work to get it to fit inside and seal it properly. I used all LT1 components except I used the factory 69 condenser. it never flowed enough air I think to work properly.
