
1967 Cougar build (over 500 pictures and videos)
 01-06-2015, 04:15 PM
#161
TECH Resident

BTW - that is the SPAL fan. I think 14", but perhaps 16" ~ $140 from the fan man. It draws around 25 amps, so close to 400W. It kept my engine cool even in 95F weather that is with AC. And with enough air that it still cycles on and off via the PCM (though I only use one speed not PWM). I also trigger the fan with a trinary switch (AC pressure) and a parallel relay to that controlled by the PCM.
In short, it should provide plenty of cooling!
Doug
In short, it should provide plenty of cooling!
Doug
 01-06-2015, 04:29 PM
#162
TECH Senior Member
Thread Starter
iTrader: (7)

Thanks for the tips Doug.
The C6 fan mounts directly to the radiator. There are mounting tabs on the end tanks that it just bolts too. This is an aftermarket radiator, but you get the idea:

Andrew
The C6 fan mounts directly to the radiator. There are mounting tabs on the end tanks that it just bolts too. This is an aftermarket radiator, but you get the idea:
Andrew
 01-06-2015, 05:06 PM
#163
TECH Resident
Do you have an aluminum radiator? If so, perhaps you could just weld on short aluminum bungs to mount it (I plan to do this with my next gen shroud when I install my new aluminum radiator)?
Or you could use the same 1/8" aluminum sheet like it did, but just use the face (not the sides) and turn the perimeter in to an adaptor flange, where the center is open to air flow. You could weld bungs to the aluminum sheet. Just 1/4" or 3/8" deep on the bungs would be sufficient to hold it. I'd use a thread locker when you are ready to mount for the long term.
Plenty of ways to do it of course!
Doug
01-08-2015, 07:56 AM
#164


Andrew, I ran into the same issue (same setup you have) with with the #1 coil using the holley VC and Vette serpentine. I couldn't use the offset bracket either, I just mounted the coil with the upper bolt only and rotated the coil so it is straight instead of tilted like the others. Been working fine so far. One thing I did think of was cutting the coil offset bracket in half and only using it for the bottom mount of that particular coil.
Curious if you have thought about what radiator you are going to use for your swap?
Curious if you have thought about what radiator you are going to use for your swap?
01-08-2015, 05:23 PM
#165
TECH Senior Member
Thread Starter
iTrader: (7)
Andrew, I ran into the same issue (same setup you have) with with the #1 coil using the holley VC and Vette serpentine. I couldn't use the offset bracket either, I just mounted the coil with the upper bolt only and rotated the coil so it is straight instead of tilted like the others. Been working fine so far. One thing I did think of was cutting the coil offset bracket in half and only using it for the bottom mount of that particular coil.
Curious if you have thought about what radiator you are going to use for your swap?
Curious if you have thought about what radiator you are going to use for your swap?
Thanks for the tip on the coil mounting. I was thinking of using a C4 radiator, but I'm also considering using an inexpensive Champion direct fit aluminum radiator.
Andrew
01-08-2015, 09:46 PM
#166
TECH Senior Member
Thread Starter
iTrader: (7)
I've been looking at various radiators, and I think I am going to get this one:
http://www.speedwaymotors.com/Speedw...tors,3557.html
It is 26" wide overall, and 19" high. I like the aluminum construction because I will be able to weld some mounts for the radiator directly to the tanks. I measured the fan shroud and the spacing for the mounts is right at 25", so it should work pretty well.
Andrew
01-08-2015, 09:51 PM
#167
TECH Resident
I bought almost the same one but it is tall and narrow for my '51 ford f1 L92 swap. Been too busy to install - just using original brass unit.
It's a quality piece. I think you will be happy.
It's a quality piece. I think you will be happy.
01-09-2015, 01:19 AM
#168
Teching In

Join Date: May 2010
Posts: 21
Likes: 0
Received 0 Likes
on
0 Posts
As any custom in the 70s, the stock radio was replaced by a groovy AM/FM 8 track HiFi!

I am going to keep the head unit there, but will see about installing an iPod dock inside where the tapes used to go, and have that going to a small amp and with a couple of speakers. Nothing crazy.
Andrew
 01-09-2015, 01:28 AM
#169
Teching In
Join Date: May 2010
Posts: 21
Likes: 0
Received 0 Likes
on
0 Posts
01-09-2015, 04:39 PM
#170
yeah those things are definitely dangerous, I mean who in his right mind would cut a primary 12 volt wire in half and insert an ammeter and hope nothing ever shorted out, oh wait I did just that back in the early 60's, thank god for alternators and volt meters.
01-10-2015, 08:25 AM
#171

Your manifold will be on it's way back to you on Monday..........Didn't use the other seal because it would have almost cut thru the adapters coming from both sides.....
Ken
Ken
01-13-2015, 12:33 PM
#177
On The Tree
iTrader: (10)
Join Date: Jul 2008
Location: Lindale, TX
Posts: 151
Likes: 0
Received 0 Likes
on
0 Posts
Where do the Holley valve covers place the coils as far as plug wire length is concerned? I know the truck wires are longer than car wires. I want to do a set of these on mine to give a cleaner look.
01-13-2015, 04:42 PM
#178
 01-13-2015, 05:01 PM
#179
TECH Senior Member
Thread Starter
iTrader: (7)
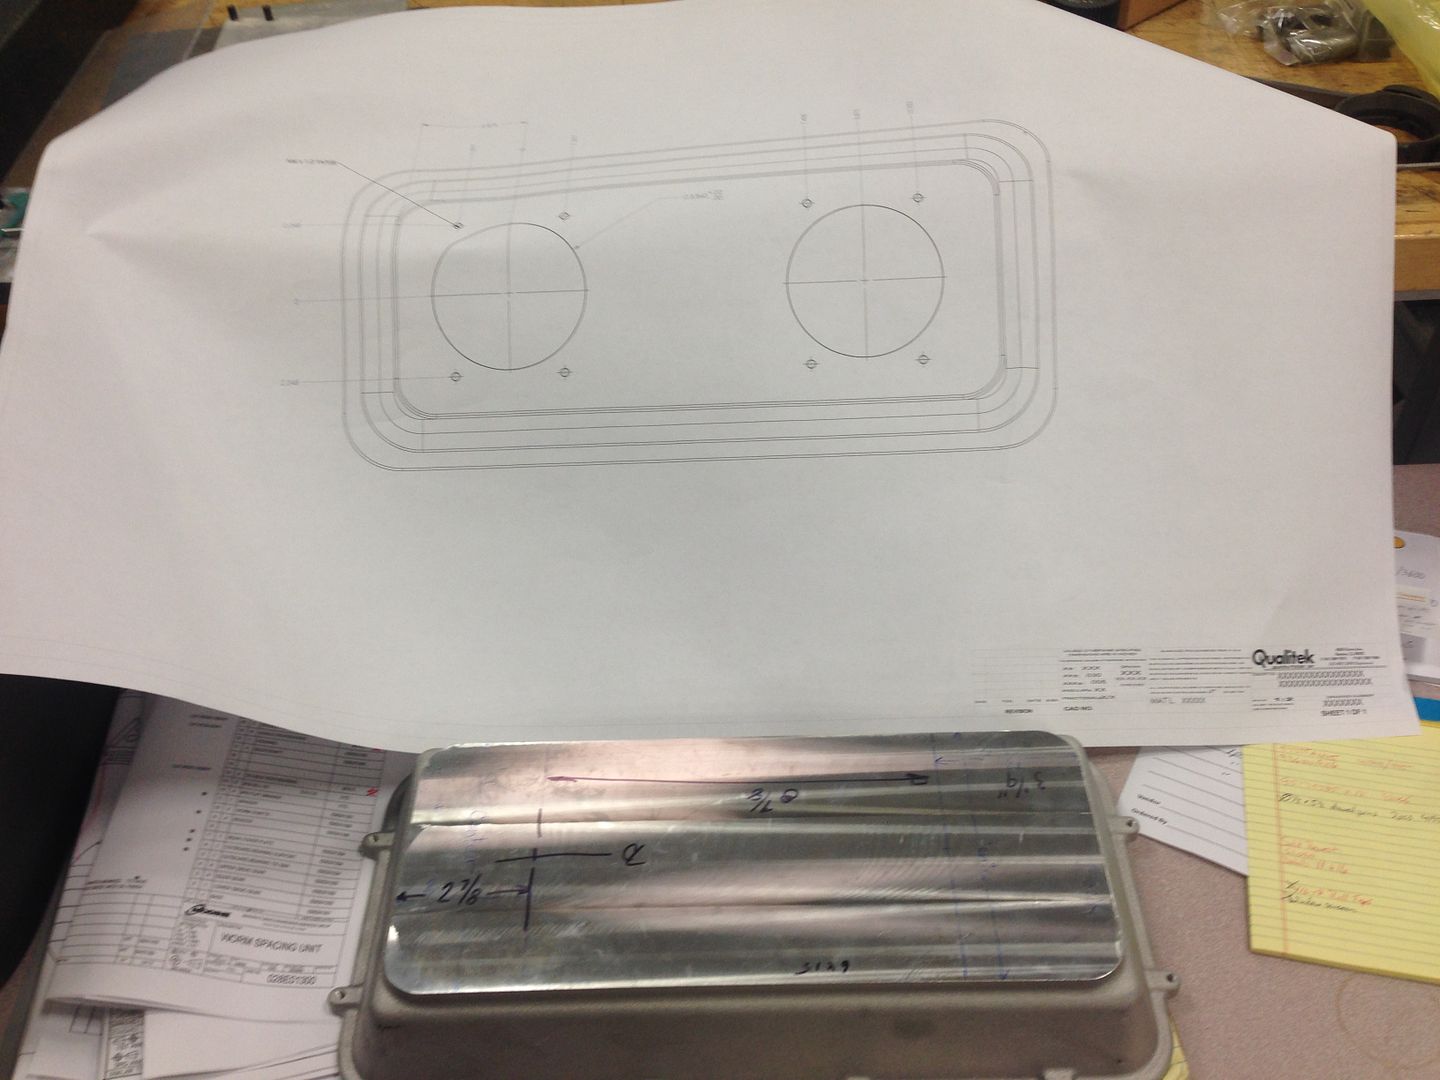
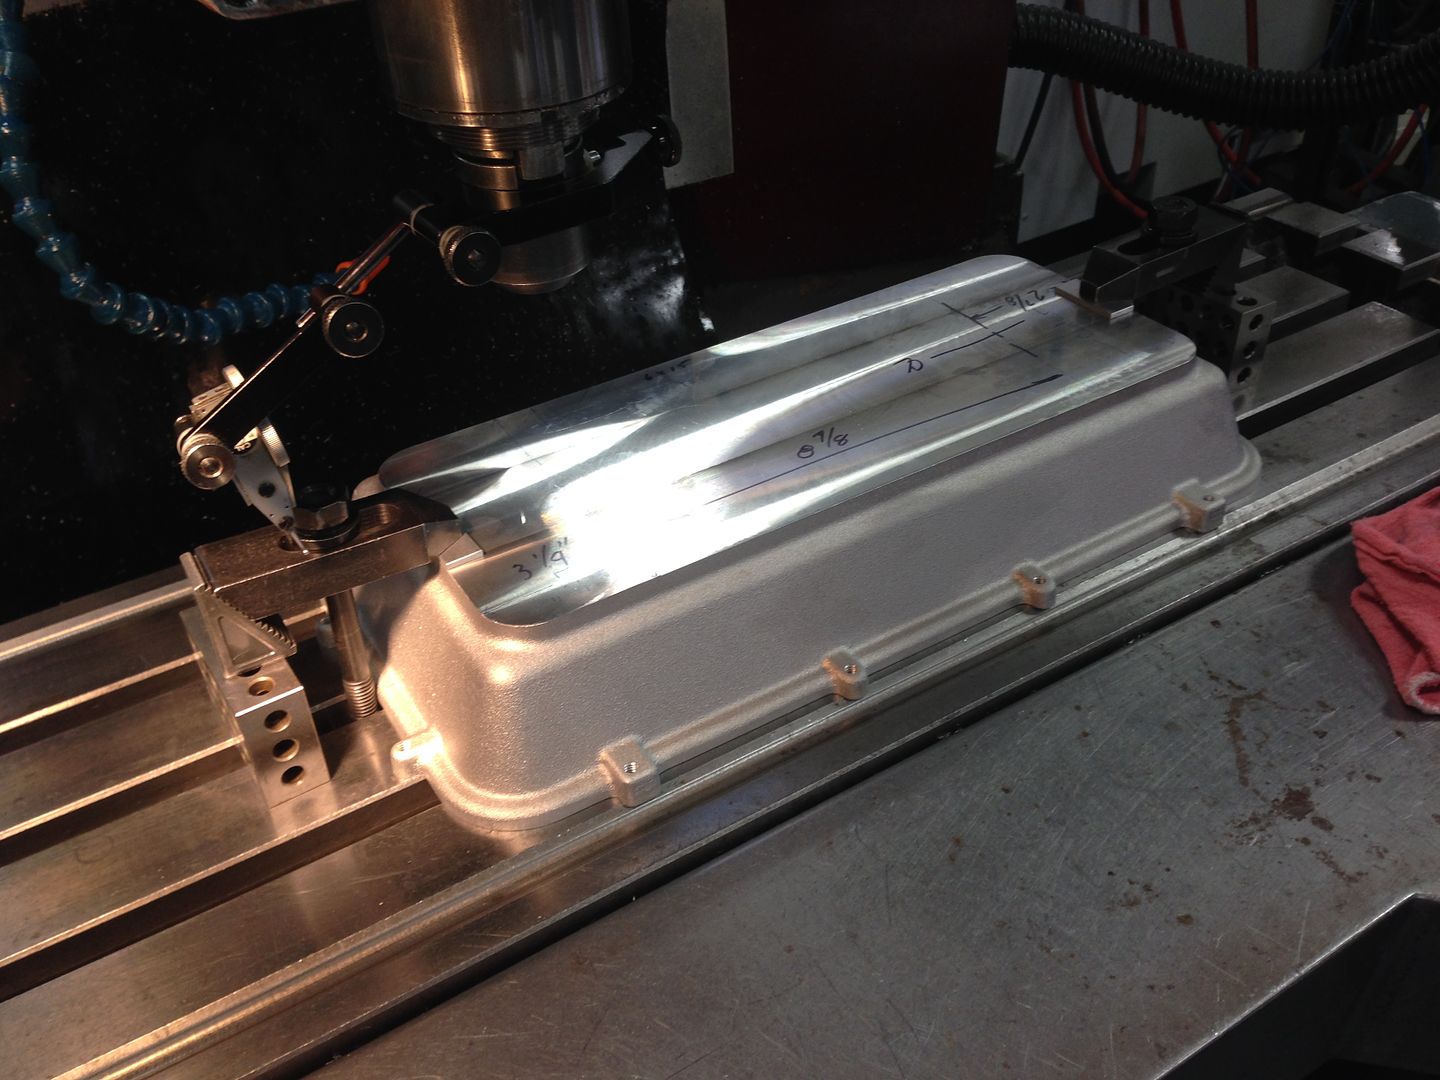
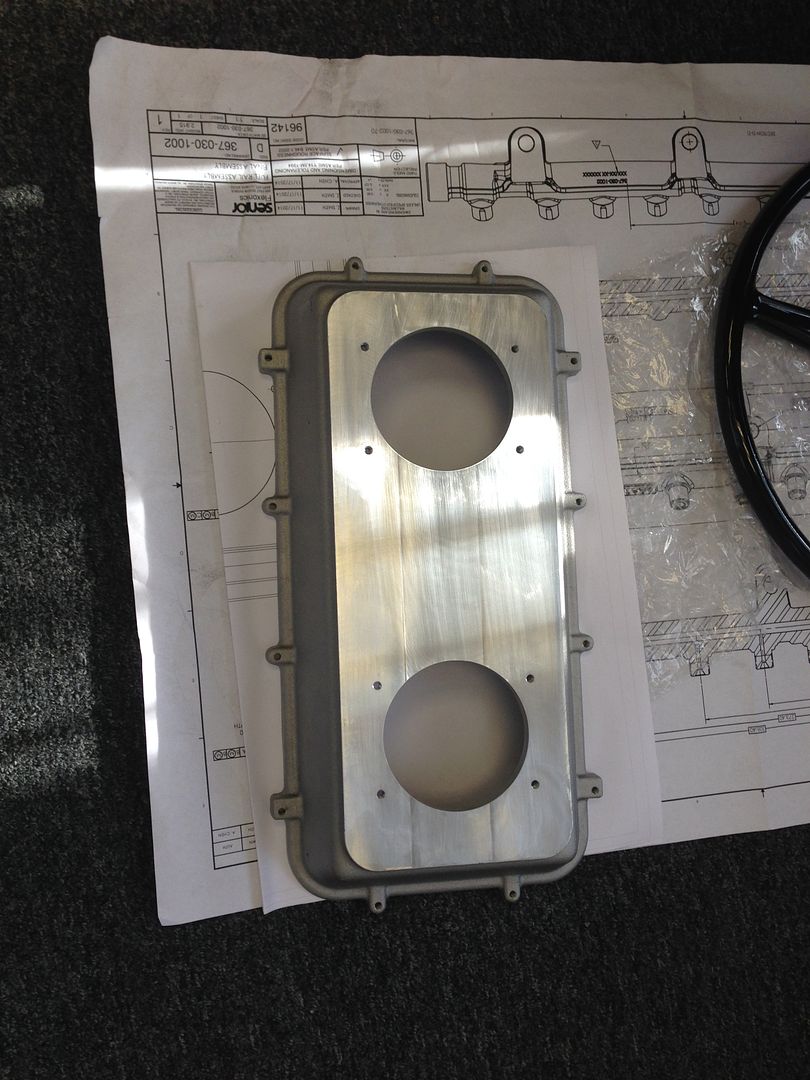
I received the package from Ken today and I couldn't be happier. If he didn't offer to machine the top for me, I probably would have lost a finger trying to do this with a drill press, and a giant hole saw...LOL

In case anyone is wondering why the spacer is needed, here is an angle that shows what's going on. The motor of the throttle body extends past the mounting surface, so it needs to be raised.

When I ordered the Hi-Ram, I thought that I also needed to order the stud kit that is recommended. However, when I received it, there was already a stud kit included. Well, lucky for me, I kept the extra stud kit, because they work perfectly to mount the throttle bodies to the intake. They are perhaps a hair long, but good enough.


Here is everything mocked up.

I am thinking that I need to take the top and the spacers and have them bead blasted to give them a cast appearance. Then either paint the intake or have it hard anodized.
Andrew
In case anyone is wondering why the spacer is needed, here is an angle that shows what's going on. The motor of the throttle body extends past the mounting surface, so it needs to be raised.
When I ordered the Hi-Ram, I thought that I also needed to order the stud kit that is recommended. However, when I received it, there was already a stud kit included. Well, lucky for me, I kept the extra stud kit, because they work perfectly to mount the throttle bodies to the intake. They are perhaps a hair long, but good enough.
Here is everything mocked up.
I am thinking that I need to take the top and the spacers and have them bead blasted to give them a cast appearance. Then either paint the intake or have it hard anodized.
Andrew
01-13-2015, 05:17 PM
#180

I received the package from Ken today and I couldn't be happier. If he didn't offer to machine the top for me, I probably would have lost a finger trying to do this with a drill press, and a giant hole saw...LOL
In case anyone is wondering why the spacer is needed, here is an angle that shows what's going on. The motor of the throttle body extends past the mounting surface, so it needs to be raised.
When I ordered the Hi-Ram, I thought that I also needed to order the stud kit that is recommended. However, when I received it, there was already a stud kit included. Well, lucky for me, I kept the extra stud kit, because they work perfectly to mount the throttle bodies to the intake. They are perhaps a hair long, but good enough.
Here is everything mocked up.
I am thinking that I need to take the top and the spacers and have them bead blasted to give them a cast appearance. Then either paint the intake or have it hard anodized.
Andrew