


Impulse-Buy '67 Camaro

Thread Starter
On The Tree
Joined: Dec 2004
Posts: 189
Likes: 1
From: Austin, TX
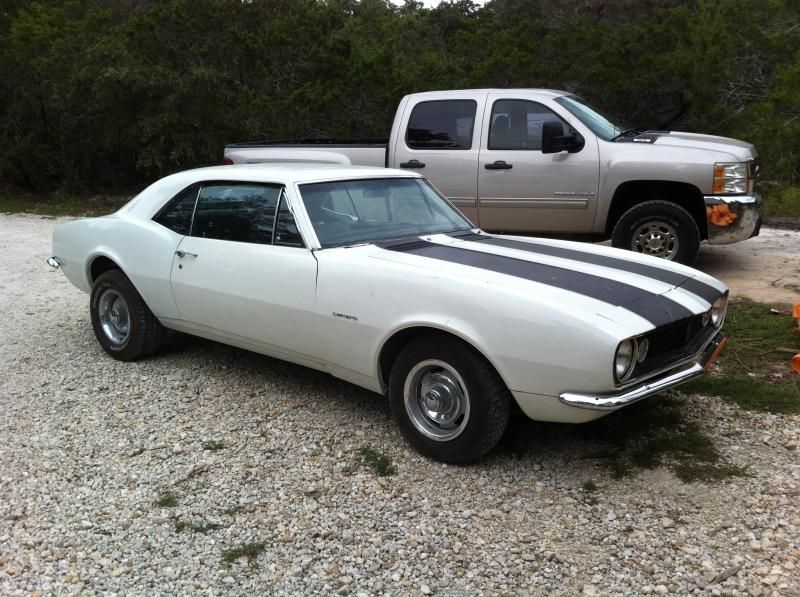
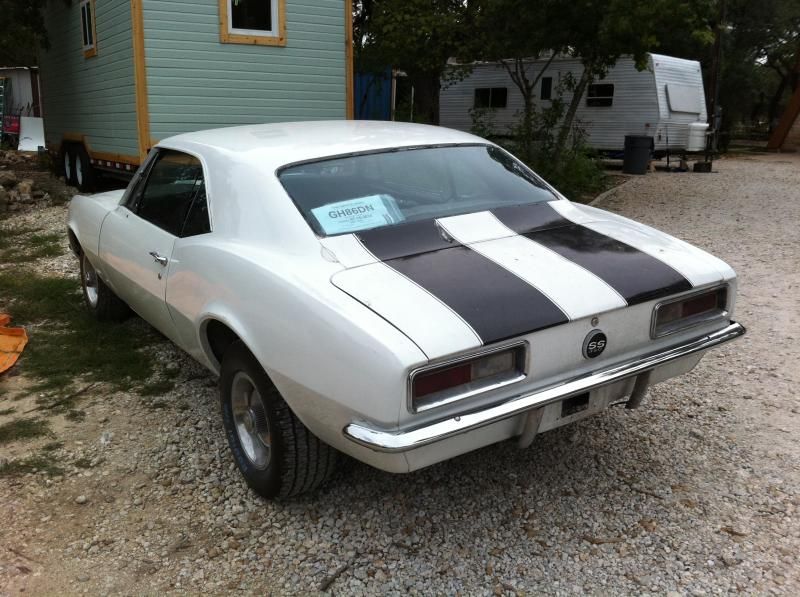
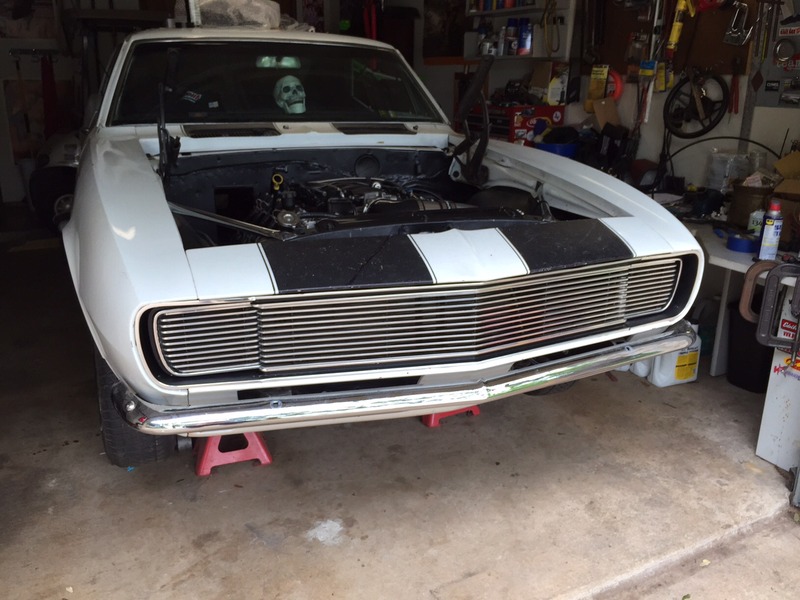
I came across a couple deals I couldn't pass up recently. A running and driving, clear title car popped up on Craigslist for a good price. I bought it back in early October just to jack around with for a few months (tinker with and joyride), and sell (break even or make a few hundred) when I got bored with it. I do this a lot with cars/bikes/boats.
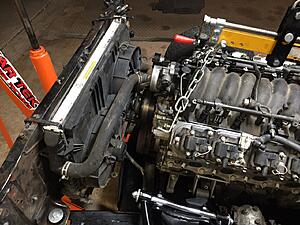
A few weeks later, someone posted an LS1/4L60E from a 2000 TA WS6 on CL, including a LH8 pan already installed, and BRP mount kit. Guy was gonna do a swap and ran out of money before he got very far. I've always envied these first gen LS swaps, so here I am.
The car was about 70% restored when I bought it. It needed some additional sheet metal work, which I'm almost finished with. I am about to start rehabbing the suspension, and installing the drivetrain.
I'll use this as a build thread of sorts, and start posting questions as they come up. Thanks for taking the time to read this thread, and especially thanks for any help.
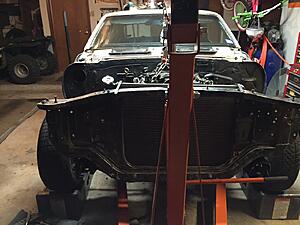
Here's the car when I picked it up.
A few weeks later, someone posted an LS1/4L60E from a 2000 TA WS6 on CL, including a LH8 pan already installed, and BRP mount kit. Guy was gonna do a swap and ran out of money before he got very far. I've always envied these first gen LS swaps, so here I am.
The car was about 70% restored when I bought it. It needed some additional sheet metal work, which I'm almost finished with. I am about to start rehabbing the suspension, and installing the drivetrain.
I'll use this as a build thread of sorts, and start posting questions as they come up. Thanks for taking the time to read this thread, and especially thanks for any help.
Here's the car when I picked it up.


Last edited by tracetrimble; Feb 11, 2015 at 02:30 PM.
Thread Starter
On The Tree
Joined: Dec 2004
Posts: 189
Likes: 1
From: Austin, TX
So, for my first questions...
I really want to keep this project on a tight budget, so I want to use the BRP stuff I already have, if I can. I want to build a super low budget, fun, reliable, daily driver. As a DD, I don't want the ground clearance problems I've read about with the LH8 pan. Otherwise I've read mostly good things about the BRP kit.
I was talking to an old guy at hotrodlane.cc about fuel tanks, and he asked about my project. When I told him I had the BRP kit, he mentioned driveshaft angle problems because the engine mounts place the block higher in the bay. Could be their line against a competitor's product, or could be the truth. I have my doubts about shaft angle really being a problem. There's no way you could get anywhere near as bad as the driveshaft angle in any stock 4x4 pickup, by moving the motor up a few inches in a first gen. My only concern is if the 4L60E will hit the floor.
Is the BRP kit good except for LH8 pan ground clearance? I'm thinking of getting rid of this pan, and buying a Holley swap pan. Does anyone know if the Holley 302-1 or 302-2 fits better with BRP mounts?
Last edited by tracetrimble; Feb 11, 2015 at 06:13 PM.

Teching In
Joined: Jul 2013
Posts: 48
Likes: 0
From: Dallas, Tx
I have a set of Brp mounts for my ls1/t56 and I haven't had any problems/issues with it on my 67 camaro. I like the mounts and the positioning of the motor. I have a griffin ls radiator and it's tight with my intake up front but I am pleased with it. I would use them again if I had to.
Last edited by jasony82; Feb 11, 2015 at 04:49 PM.
Thread Starter
On The Tree
Joined: Dec 2004
Posts: 189
Likes: 1
From: Austin, TX
Wow, thanks, that looks great. Do you have their oil pan, too? There is glare in the pics, but it looks like your pan sticks below the crossmember by about 1"?
Looks like manual brakes on your car. How much firewall clearance is there with the BRP kit? Will I need the "skinny" booster, or coil relocators? This is an a/c car, and I'm probably going back with Classic Air. I'm also curious about firewall clearance for that and the wiper motor.
I'm most likely going with ebay tubular control arms with stock height springs, which should lower the front about 1 1/2". I really want to keep the (aluminum - cracks instead of bends!) oil pan tucked up if I can. If it's only an inch or so and close to the crossmember, that's not bad and I guess I could build a little skid plate under it for a lot less than switching to a different pan.
As for cooling, I picked up a stock 4th gen radiator and electric fans. The coolant hoses and tranny lines match up perfectly, just need to make some brackets for it. This is about the thinnest radiator I've ever seen, but they say it works. Should be ideal for clearance.
Thanks y'all... I know I have lots of questions.
Last edited by tracetrimble; Feb 11, 2015 at 06:18 PM.
Staging Lane
Joined: Jan 2015
Posts: 87
Likes: 0
From: Massachusetts
So, for my first questions...
I really want to keep this project on a tight budget, so I want to use the BRP stuff I already have, if I can. I want to build a super low budget, fun, reliable, daily driver. As a DD, I don't want the ground clearance problems I've read about with the LH8 pan. Otherwise I've read mostly good things about the BRP kit.
I was talking to an old guy at hotrodlane.cc about fuel tanks, and he asked about my project. When I told him I had the BRP kit, he mentioned driveshaft angle problems because the engine mounts place the block higher in the bay. Could be their line against a competitor's product, or could be the truth. I have my doubts about shaft angle really being a problem. There's no way you could get anywhere near as bad as the driveshaft angle in any stock 4x4 pickup, by moving the motor up a few inches in a first gen. My only concern is if the 4L60E will hit the floor.
Is the BRP kit good except for LH8 pan ground clearance? I'm thinking of getting rid of this pan, and buying a Holley swap pan. Does anyone know if the Holley 302-1 or 302-2 fits better with BRP mounts?
I really want to keep this project on a tight budget, so I want to use the BRP stuff I already have, if I can. I want to build a super low budget, fun, reliable, daily driver. As a DD, I don't want the ground clearance problems I've read about with the LH8 pan. Otherwise I've read mostly good things about the BRP kit.
I was talking to an old guy at hotrodlane.cc about fuel tanks, and he asked about my project. When I told him I had the BRP kit, he mentioned driveshaft angle problems because the engine mounts place the block higher in the bay. Could be their line against a competitor's product, or could be the truth. I have my doubts about shaft angle really being a problem. There's no way you could get anywhere near as bad as the driveshaft angle in any stock 4x4 pickup, by moving the motor up a few inches in a first gen. My only concern is if the 4L60E will hit the floor.
Is the BRP kit good except for LH8 pan ground clearance? I'm thinking of getting rid of this pan, and buying a Holley swap pan. Does anyone know if the Holley 302-1 or 302-2 fits better with BRP mounts?
Can't speak from experience on the Camaro side of the BRP mounts but they only move the motor 1.25 inches up/forward(diagonally 1.25, not 1.25 forward and 1.25 up) on an 80s C10. I'm not an expert but I'm sure even if it did mess the angles up it wouldn't be unfixable with a few things. Oil pan-wise you may have a problem. I've heard the LH8 is almost the same as the GMPP Muscle car pan. I've heard people complain that they are a little low. The Holley should be better. Idk the price difference but the LS3 vette pan is supposed to be one of the best for clearance. I'm sure there are a few others, too. Check the stickied oil pan thread in the Conversions section.
Thread Starter
On The Tree
Joined: Dec 2004
Posts: 189
Likes: 1
From: Austin, TX
I'm planning on lowering the rear about the same as the front, so that should help with the driveline angles. Maybe the taller BRP mounts will also allow my low mount alternator and compressor to clear the crossmember?
Trending Topics
LS1 Tech Stories
The Best V8 Stories One Small Block at Time

Gas Monkey Built a 6-Wheel Ferrari Testarossa With a Corvette LT4 Engine
Verdad Gallardo
7 Most Reliable High-Performance Engines GM Has Ever Built
Verdad Gallardo
Amazing '71 Camaro Restomod Is Modern Muscle Car Under the Skin
Verdad Gallardo
6 Common C5 Corvette Failures and What's Involved In Repairing Them
Pouria Savadkouei
Retro Modern Bandit Pontiac Trans AM Comes With Burt Reynolds' Autograph
Verdad Gallardo
Top 10 Greatest Cadillac V Series Performance Models Ever, Ranked
Pouria Savadkouei
Top 10 Most Powerful Chevy Trucks Ever Made!

Hennessey's New Supercharged Silverado ZR2 Has 700 HP
Verdad Gallardo
Coachbuilt N2A Anteros Is an LS2-Powered C6 Corvette In Italian Clothes
Verdad Gallardo Thread Starter
On The Tree
Joined: Dec 2004
Posts: 189
Likes: 1
From: Austin, TX
I'm ordering frontend parts... I'm going with tubular control arms which lower the front by about 1 1/2", so I need stock height springs. What rate (lbs/in or Moog part number) coil springs should I order?
In a previous post you said ebay arms, I would reconsider and do some searching on global west, umi, bmr, ridetech, speedtech, chris alston chassisworks and Im sure theres others. Head on over to protouring.com and youll find plenty of info on first gen suspension and ls swaps as well.
Thread Starter
On The Tree
Joined: Dec 2004
Posts: 189
Likes: 1
From: Austin, TX
Pretty sure I'm going with the Moog 6320 springs after I found this helpful site: http://www.pozziracing.com/camaro_sp...fo.htm#SPRINGS
Thread Starter
On The Tree
Joined: Dec 2004
Posts: 189
Likes: 1
From: Austin, TX
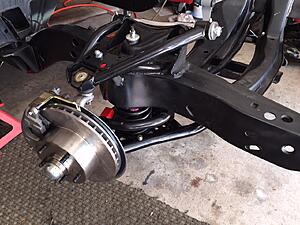
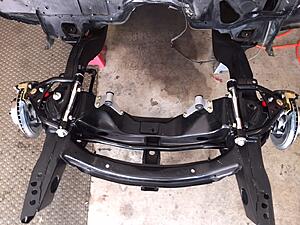
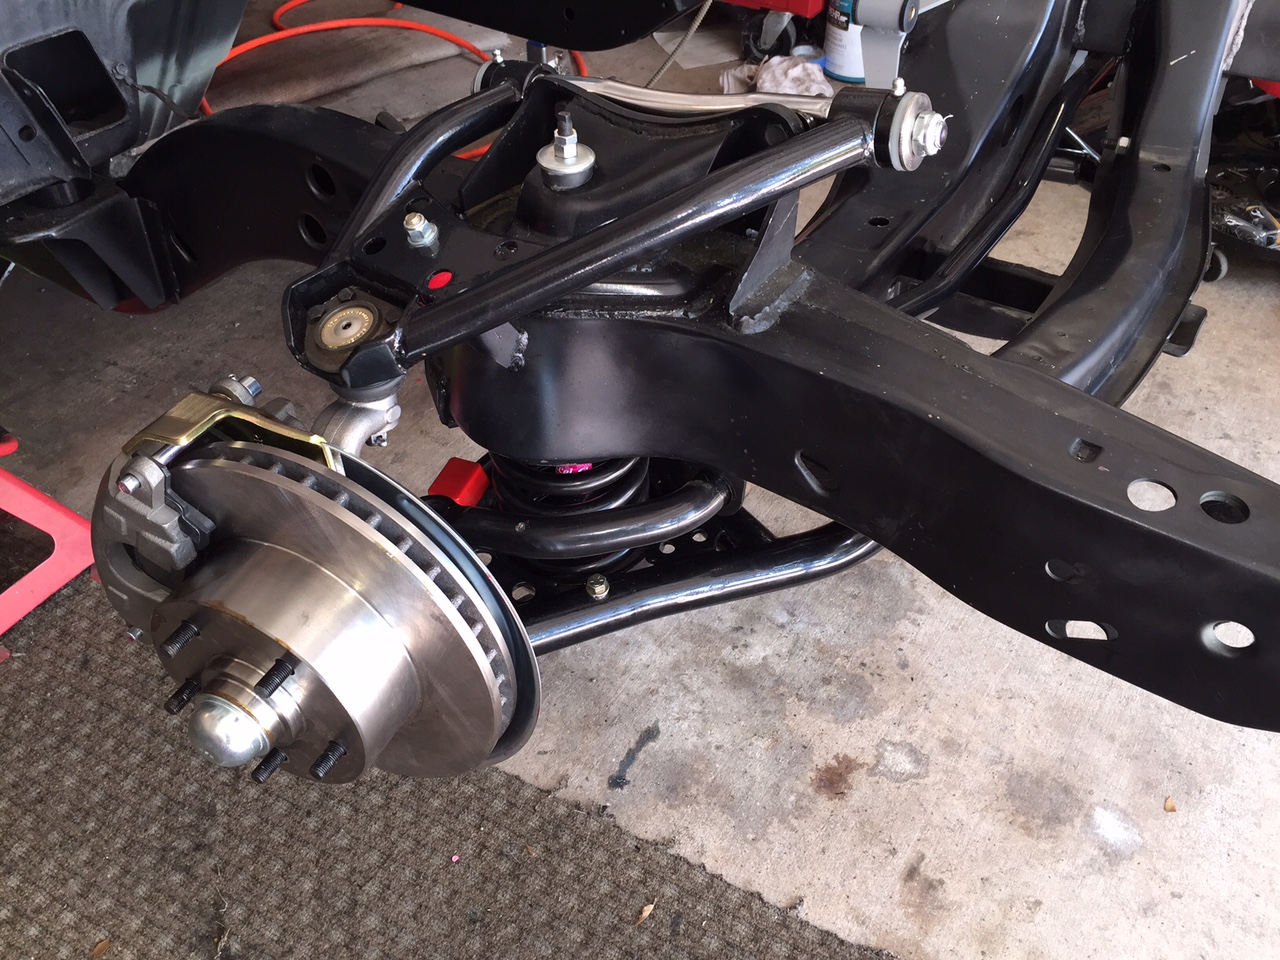
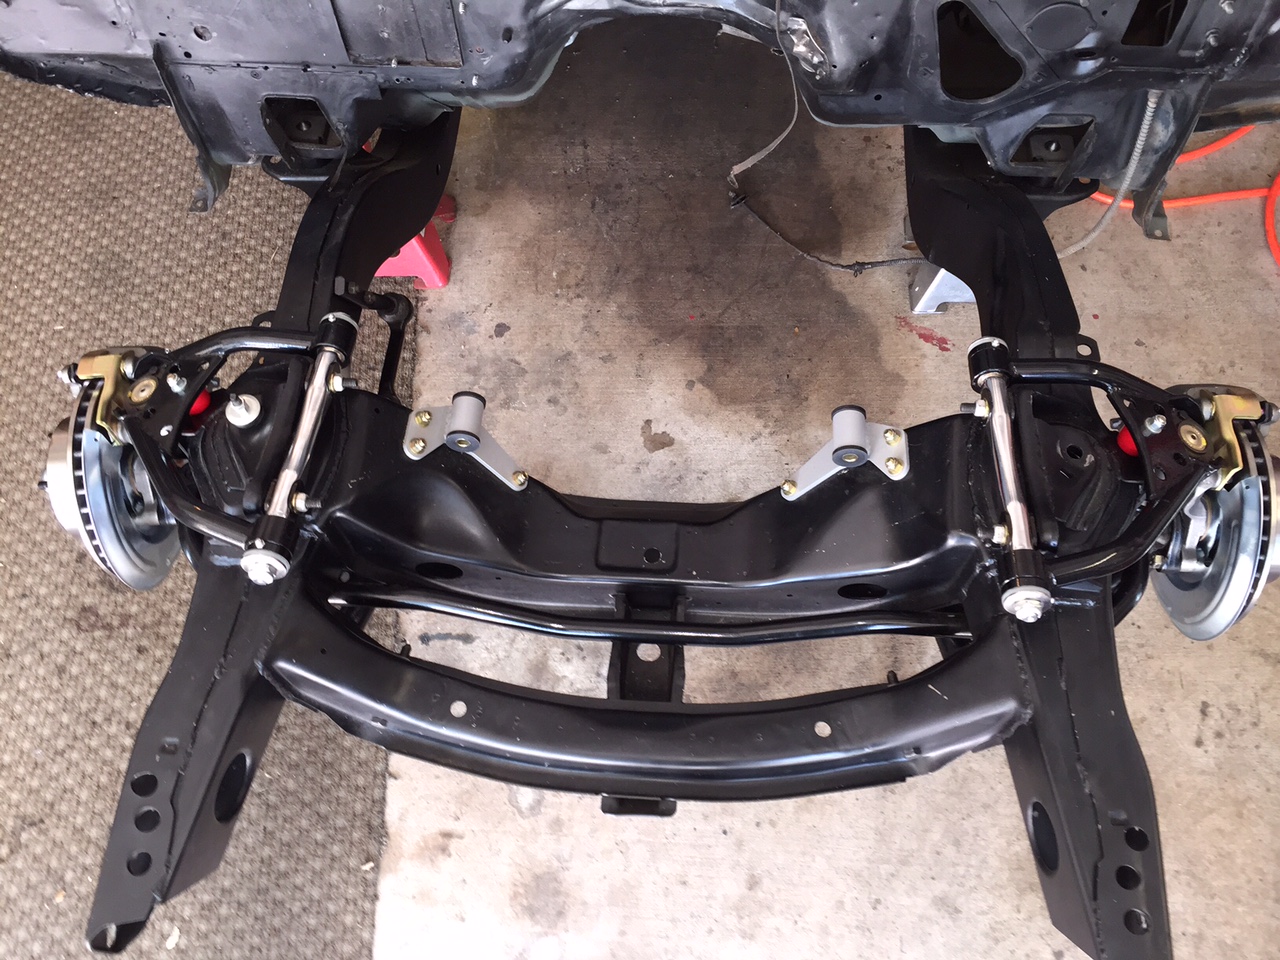
Finally making some progress... I ended up replacing the subframe with a repop from Eckler's. The old one was too tweaked to save... $1100 surprise.
I then got stuck (and busy with other things) for about 3 months due to a ghetto disc brake conversion that I couldn't figure out. Some previous owner had installed spindles & metric brakes from a 78-87 Malibu, and the lower ball joints wouldn't seat on them. Ended up buying a complete disc kit with spindles from Right Stuff Detailing... Another $400 surprise, but I'm really happy with the way everything is fitting up. Every part of the frontend is new now except for the center link in the steering.
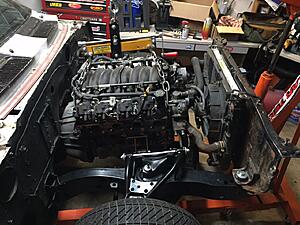
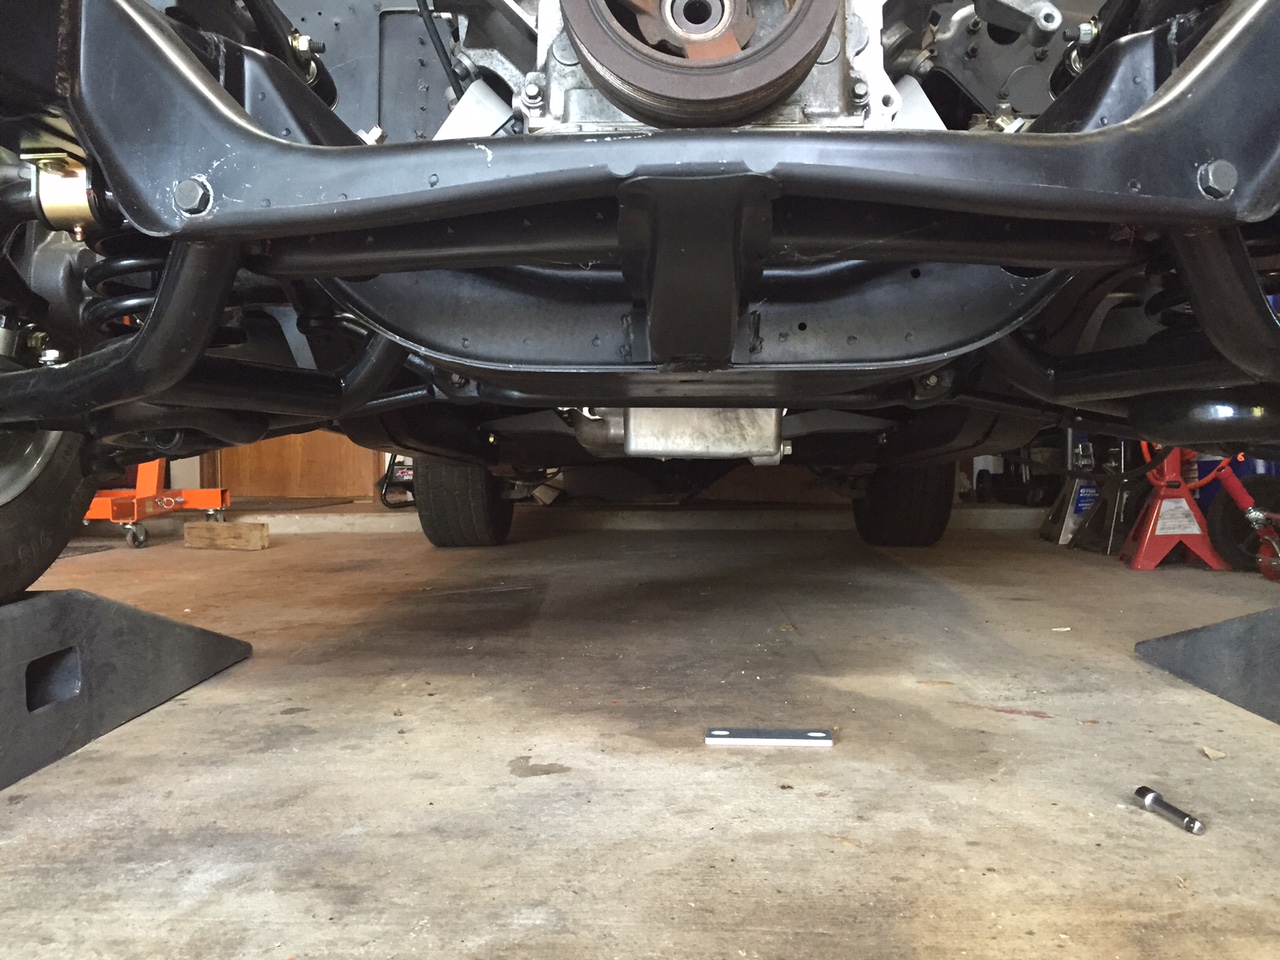
The LH8 oil pan does hang below the x-member by about an inch with the BRP kit. The Moog 6320 springs seem a little too stiff - upper control arms almost touch the bump stops with the motor & tranny dropped in. The 4th gen radiator & fans fit great except the cap - looks like it will hit the hood if I don't mount it low, and then the cap will kinda face the back of the radiator support due to the weird angle. I need to weld up something to actually mount the rad - it's just sitting on the old supports so I could get an idea of how it would fit.
Here are some recent pics. Next on the long list of crap to do is the fuel system and wiring.


I then got stuck (and busy with other things) for about 3 months due to a ghetto disc brake conversion that I couldn't figure out. Some previous owner had installed spindles & metric brakes from a 78-87 Malibu, and the lower ball joints wouldn't seat on them. Ended up buying a complete disc kit with spindles from Right Stuff Detailing... Another $400 surprise, but I'm really happy with the way everything is fitting up. Every part of the frontend is new now except for the center link in the steering.
The LH8 oil pan does hang below the x-member by about an inch with the BRP kit. The Moog 6320 springs seem a little too stiff - upper control arms almost touch the bump stops with the motor & tranny dropped in. The 4th gen radiator & fans fit great except the cap - looks like it will hit the hood if I don't mount it low, and then the cap will kinda face the back of the radiator support due to the weird angle. I need to weld up something to actually mount the rad - it's just sitting on the old supports so I could get an idea of how it would fit.
Here are some recent pics. Next on the long list of crap to do is the fuel system and wiring.


Thread Starter
On The Tree
Joined: Dec 2004
Posts: 189
Likes: 1
From: Austin, TX
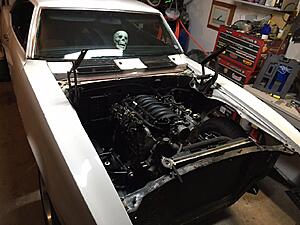
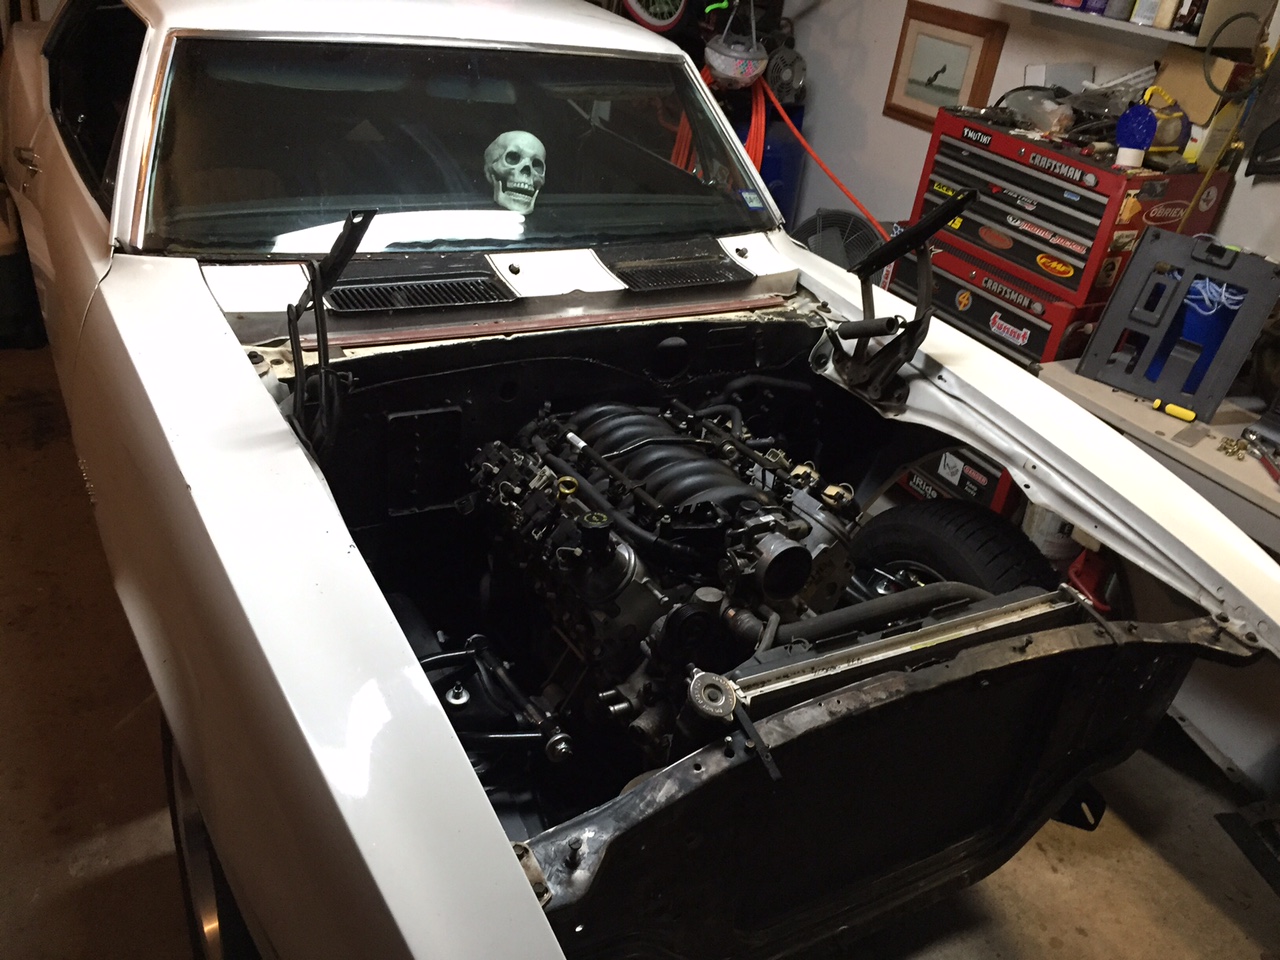
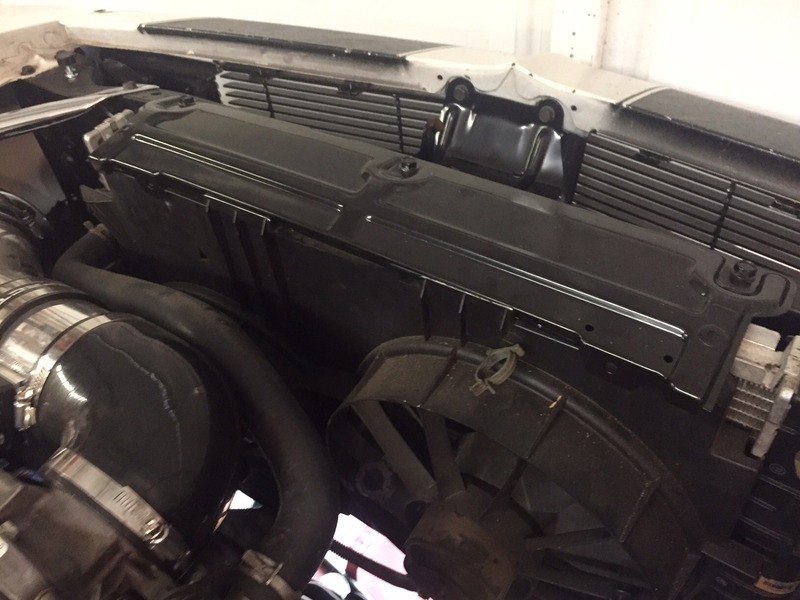
Time for an update... I'm pretty much done with the engine bay. New fuel tank is fully plumbed, serp drive, intake, cooling, etc. I'm pretty happy with the way everything is working out. I was able to reuse almost everything from the donor car. The stock 4th gen radiator, fans, trans cooler, and rad hoses worked out really well, almost like they were made for this swap. I used an upper support/cover from a second gen, which fit perfectly and really cleaned up the looks IMO. I also came across most of the parts for an RS conversion on CL for $250, and got that buttoned up recently.
I'm finishing up the wiring inside the cab now. The major stuff I have left is brakes, drive shaft, shifter, and exhaust. Hope to have it on the road by this coming fall.

I'm finishing up the wiring inside the cab now. The major stuff I have left is brakes, drive shaft, shifter, and exhaust. Hope to have it on the road by this coming fall.


Thread Starter
On The Tree
Joined: Dec 2004
Posts: 189
Likes: 1
From: Austin, TX
Thanks!
To mount the (LS) radiator, I bought some 1" square tubing, and cut a couple short sections in half lengthwise to make 4 "loops" for the clips on the rad to hook into. I located the rad where I wanted it, marked the loop locations, and welded them to the rad support. I also wrapped fat rubber bands around the bottom of the clips to give them some cushioning.
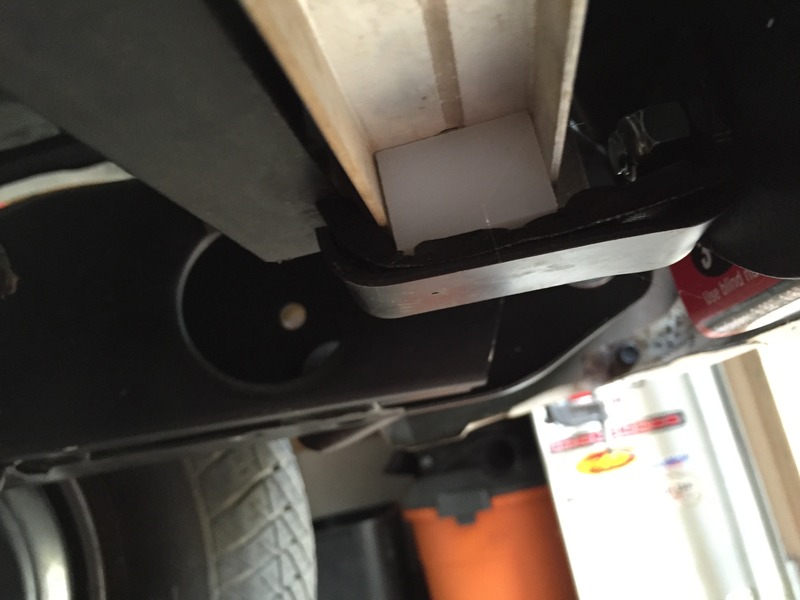
I made a couple U shaped brackets to hold it up from the bottom that bolt into the rad support. I put some adhesive back foam sheet inside the bottom brackets. I also cut some UHMW stock into blocks to fill in the groove where the brackets contact it, held in place with sheet metal screws. The 2nd gen rad cover holds the fan shroud down in its clips, and really finishes off the look nicely.
Here are a couple pics of the tabs and lower brackets.
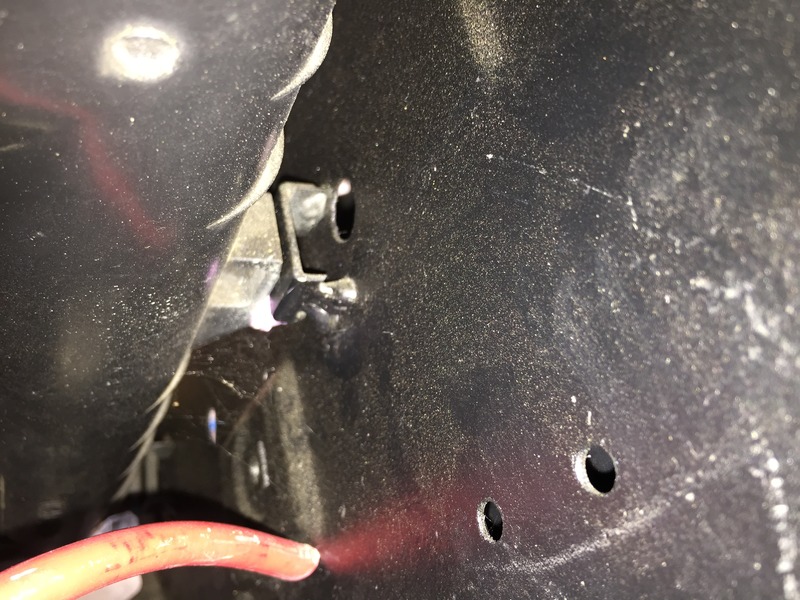
To mount the (LS) radiator, I bought some 1" square tubing, and cut a couple short sections in half lengthwise to make 4 "loops" for the clips on the rad to hook into. I located the rad where I wanted it, marked the loop locations, and welded them to the rad support. I also wrapped fat rubber bands around the bottom of the clips to give them some cushioning.
I made a couple U shaped brackets to hold it up from the bottom that bolt into the rad support. I put some adhesive back foam sheet inside the bottom brackets. I also cut some UHMW stock into blocks to fill in the groove where the brackets contact it, held in place with sheet metal screws. The 2nd gen rad cover holds the fan shroud down in its clips, and really finishes off the look nicely.
Here are a couple pics of the tabs and lower brackets.


Last edited by tracetrimble; Jun 8, 2016 at 03:20 PM.