

LS1 Xtreme
 03-10-2015, 01:12 AM
#1
Teching In
Thread Starter

Join Date: Jan 2013
Location: Dallas, TX
Posts: 27
Likes: 0
Received 0 Likes
on
0 Posts
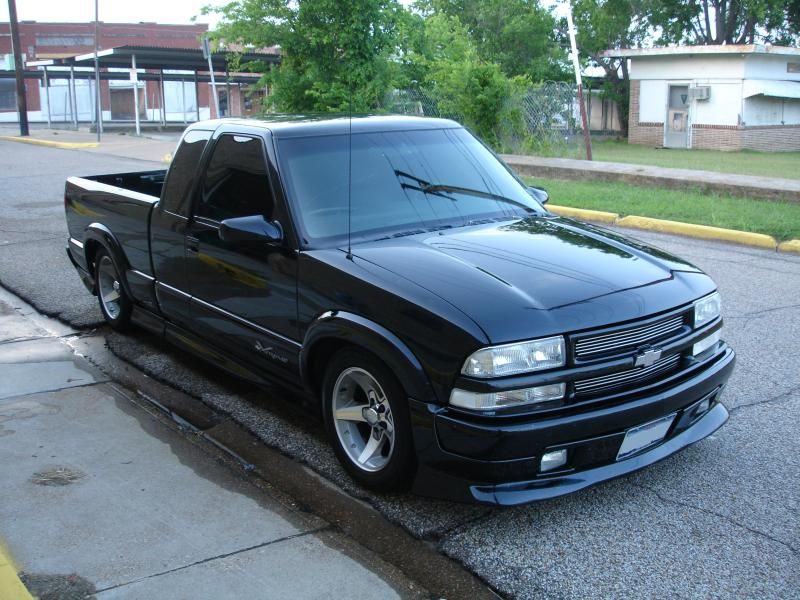
I know a ton of S10 LS swaps have been done but I figured I would share mine over here with you guys anyway.
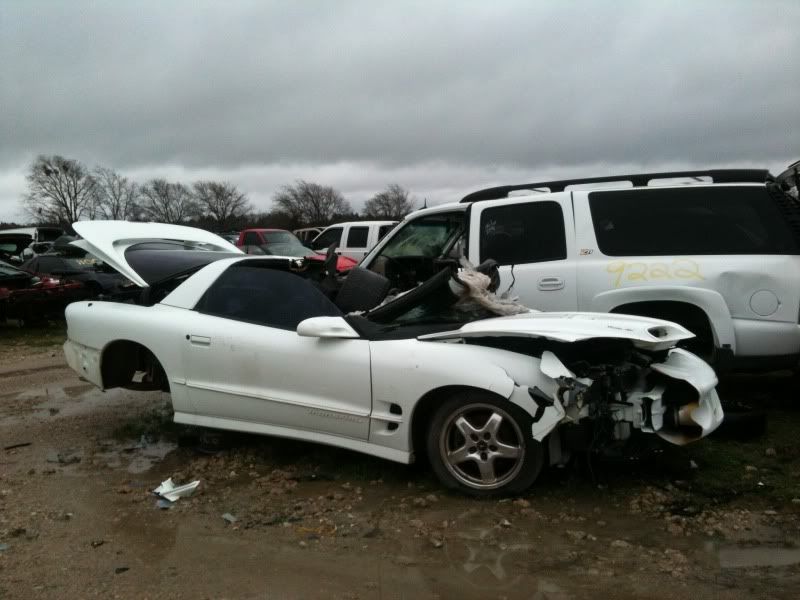
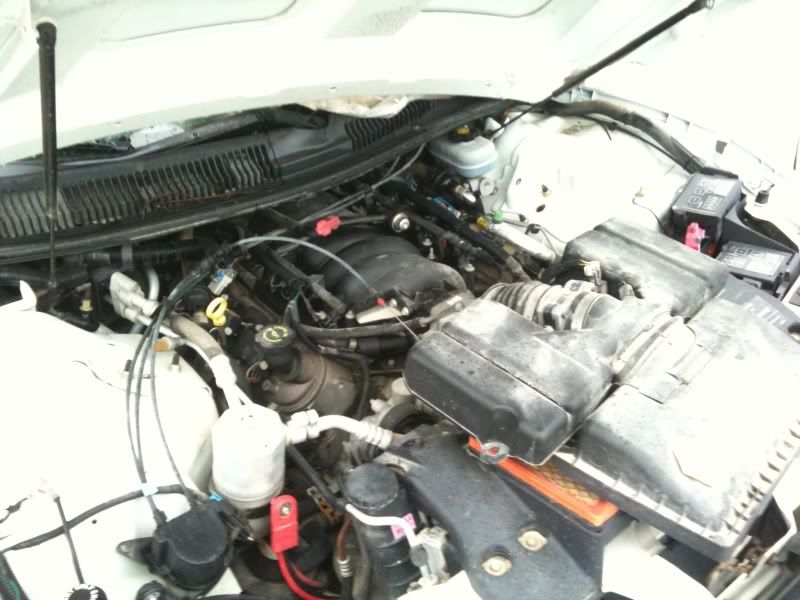
I bought this truck back in 2005 and up until May 2012 it was my daily driver. I had always wanted to do an LS-based swap but never really pursued it. I did several cosmetic and suspension modifications over the years but the stock 4.3 V6 stayed under the hood. Fast-forward to January 2012, I came across a wrecked 2002 Trans Am WS6 auto with 90k miles so I picked up that motor thinking I�d eventually do the swap after I researched more and gathered everything else I would need, assuming that would probably be a couple years down the road.
The truck had other plans. About 4 months after I bought the LS1, I was coming home from work one day and it blew a head gasket. It had 201k miles on it. So rather than spend time and money repairing the 4.3L I decided to just do the swap. Luckily I had another car I could drive in the meantime. Life got busy and the truck ended up sitting for a year and a half until November 2013. My goal was for the swap to look like it came from the factory and all accessories/functions worked just as they did before.
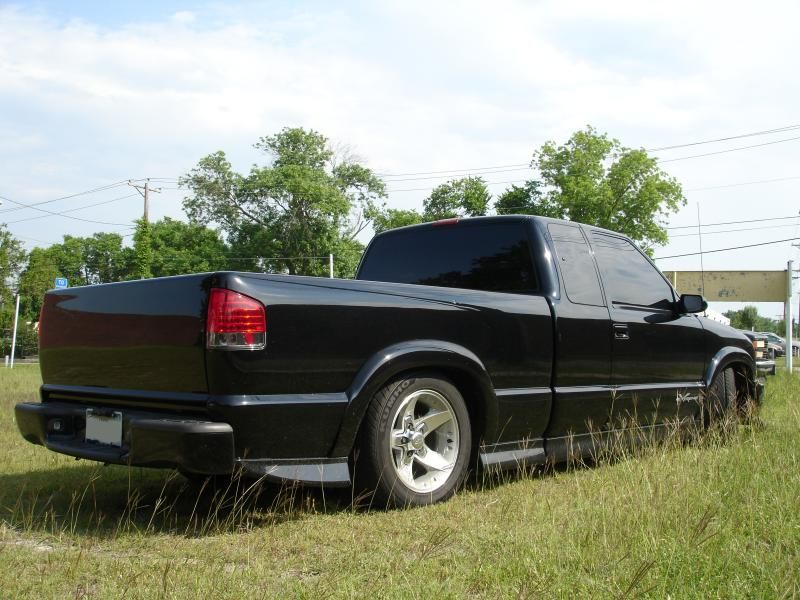
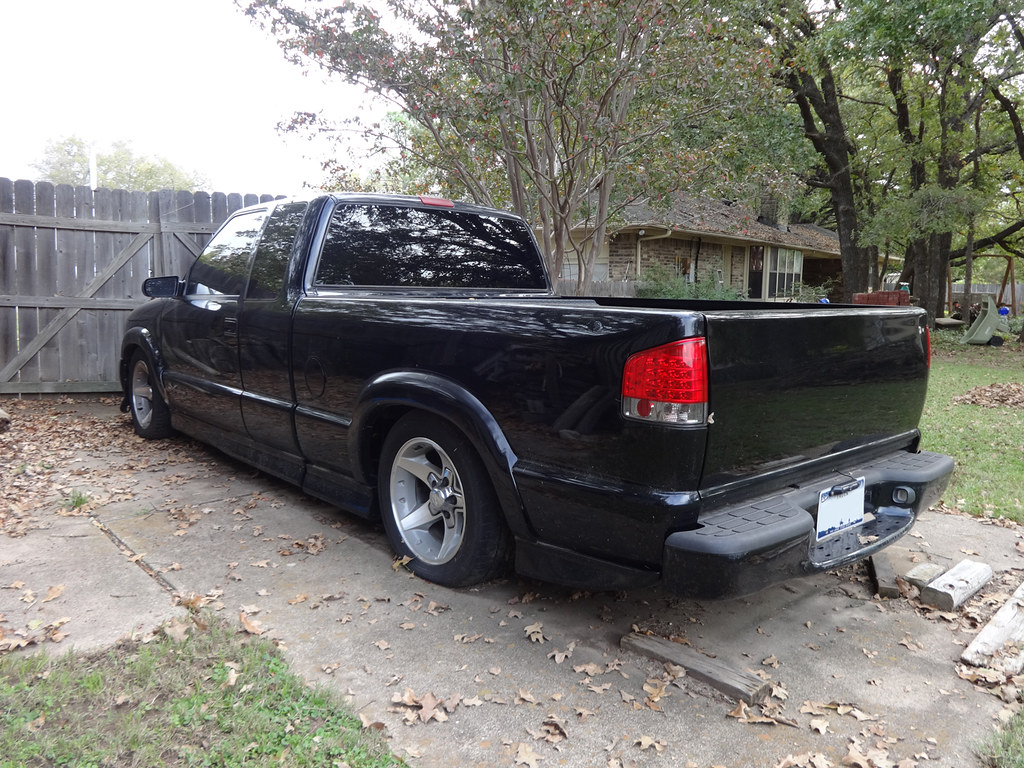
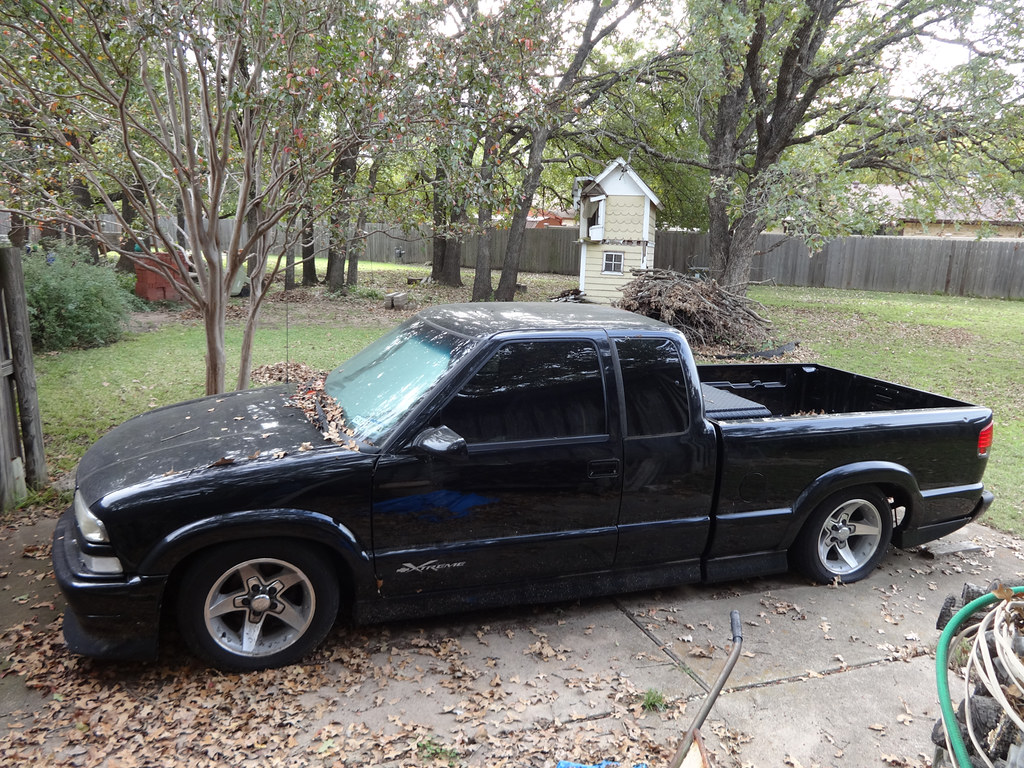
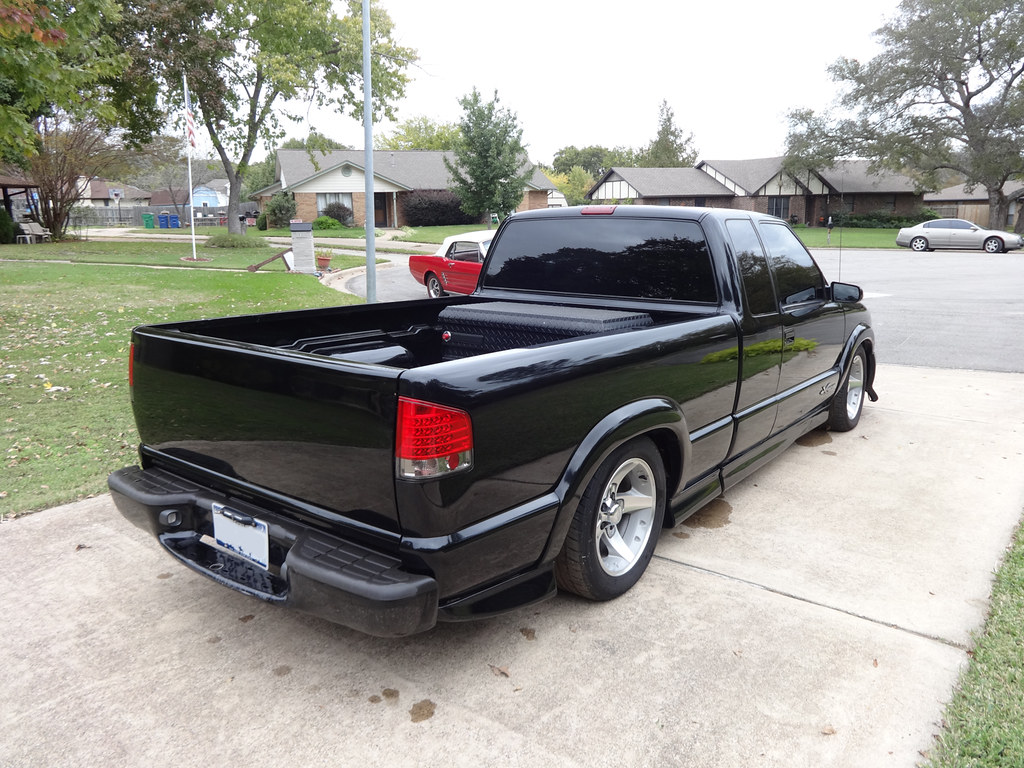
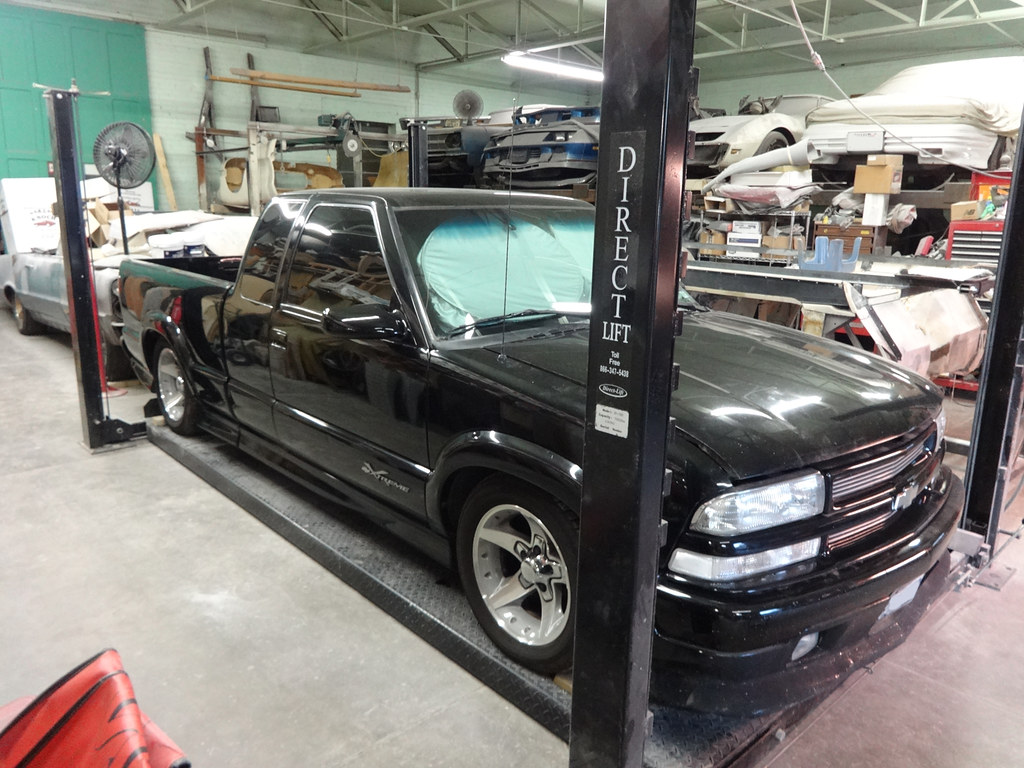
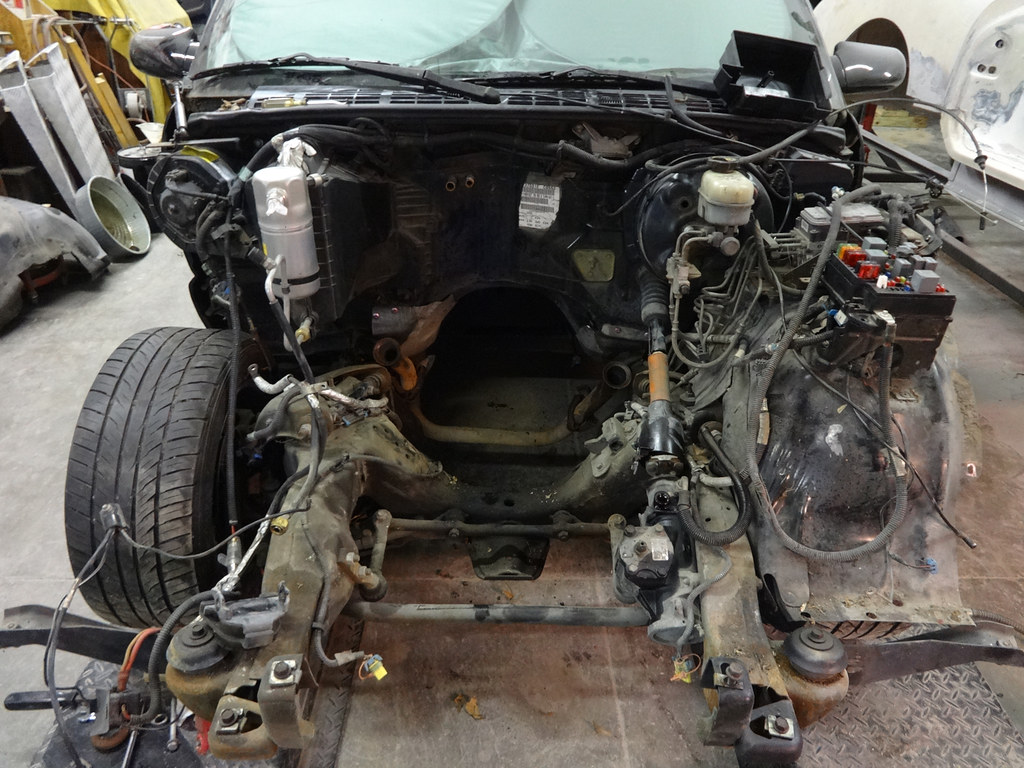
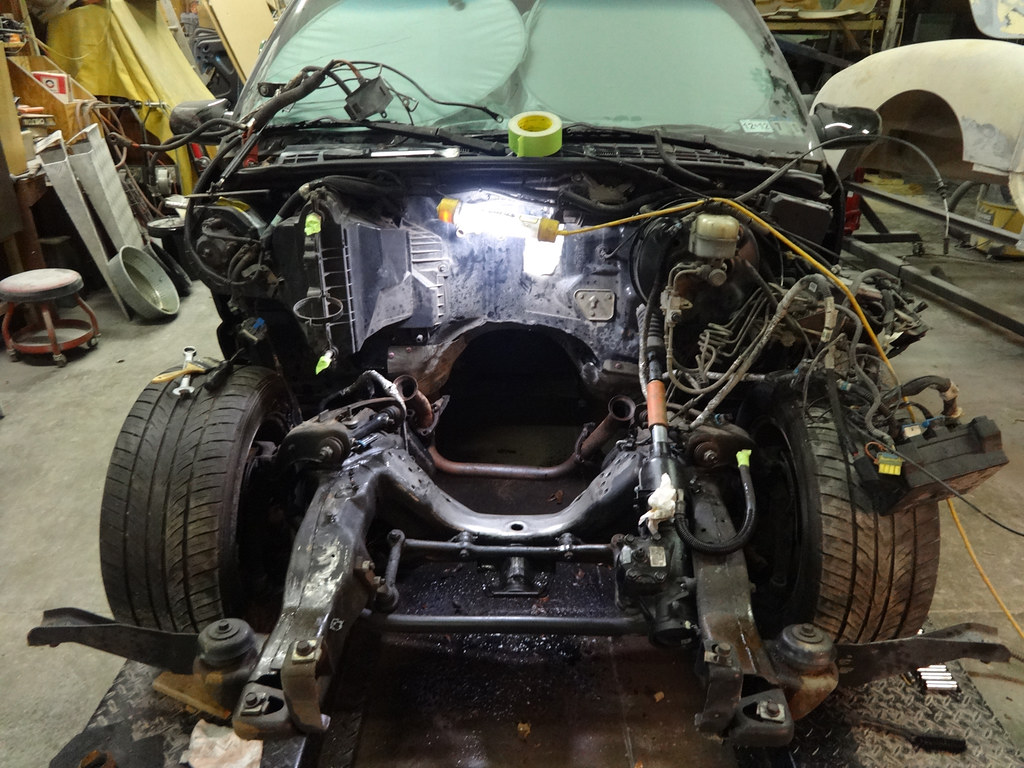
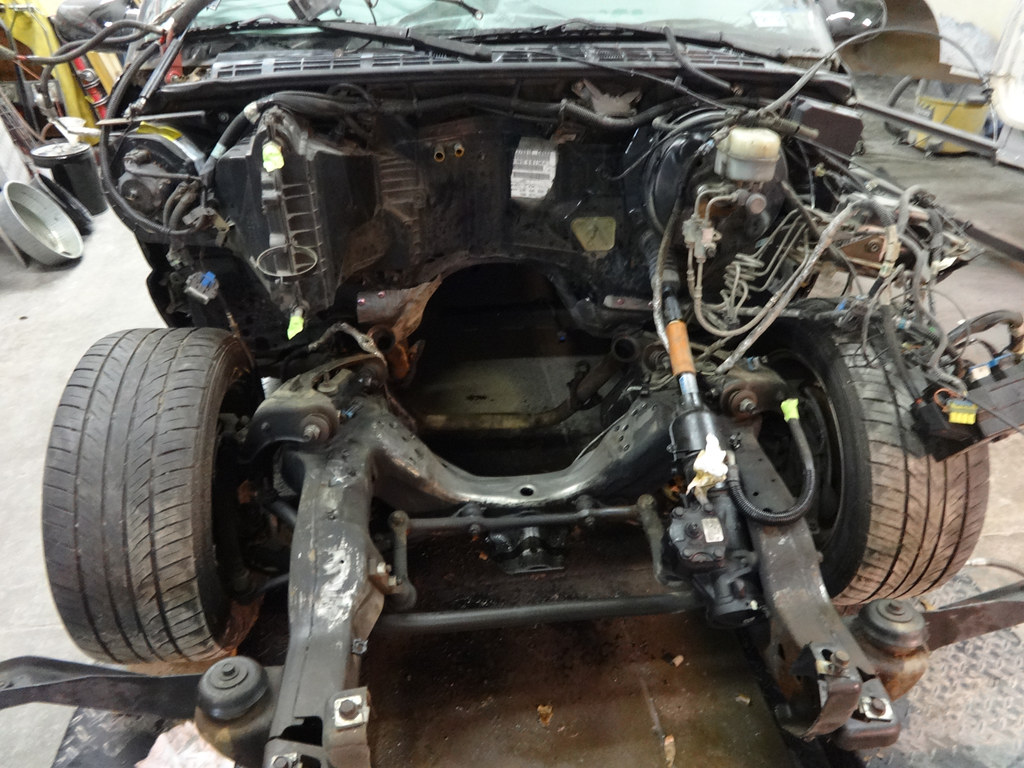
Here is the truck before the 4.3 came out:
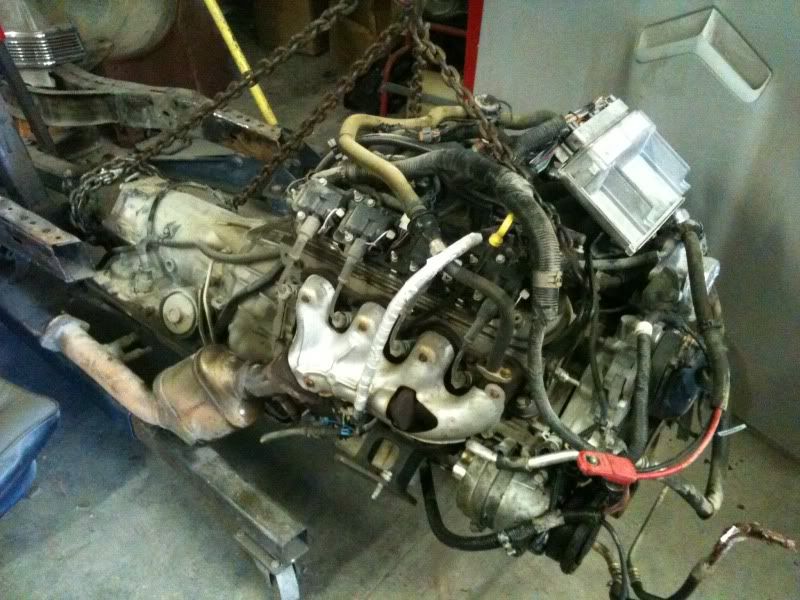
The donor car:
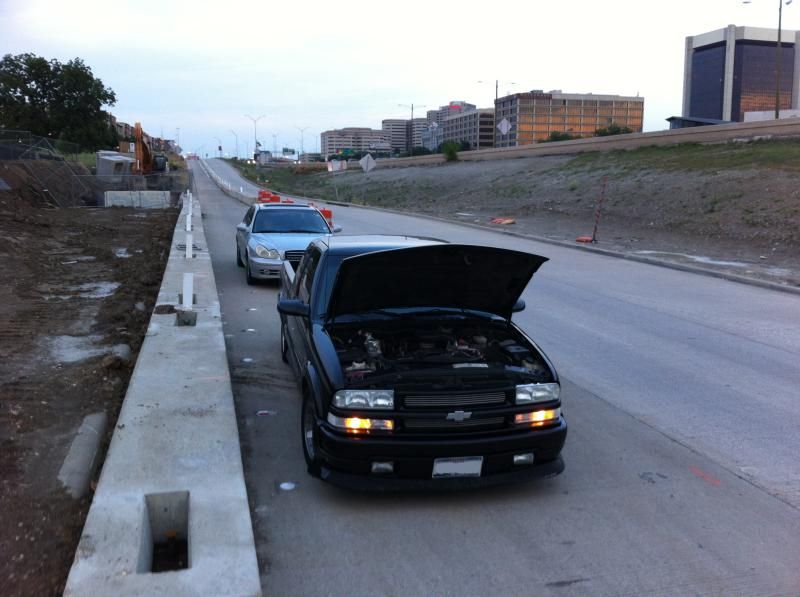
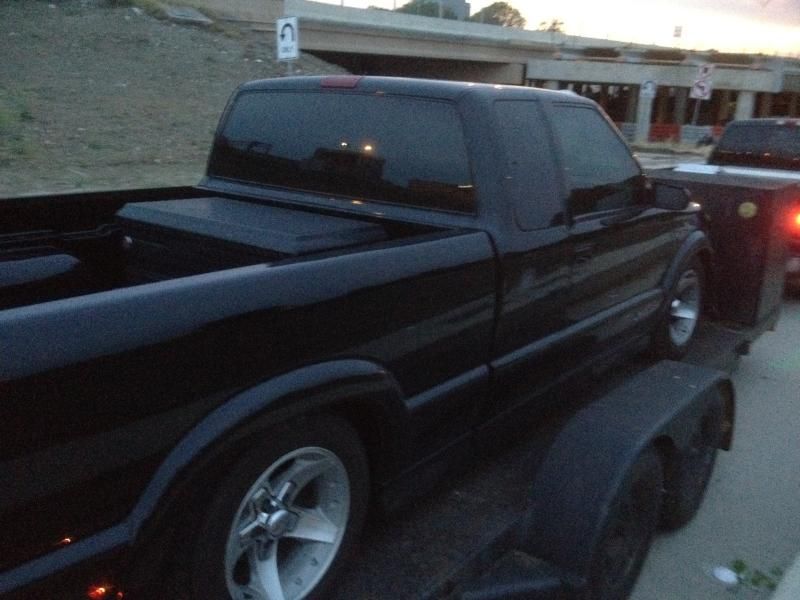
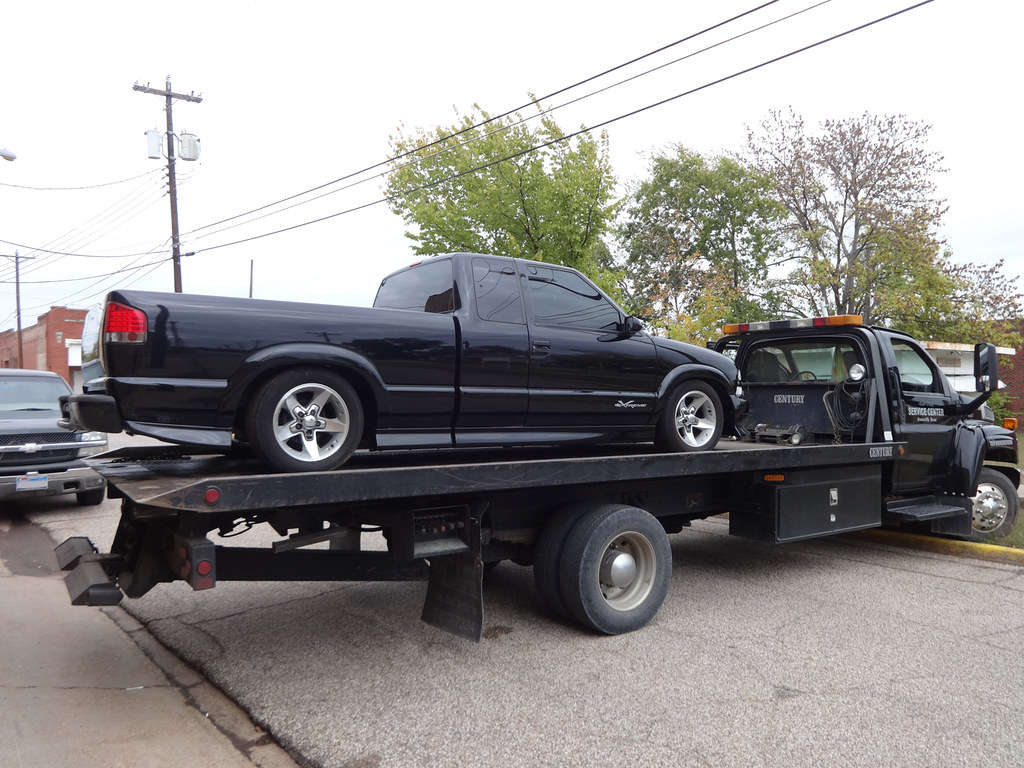
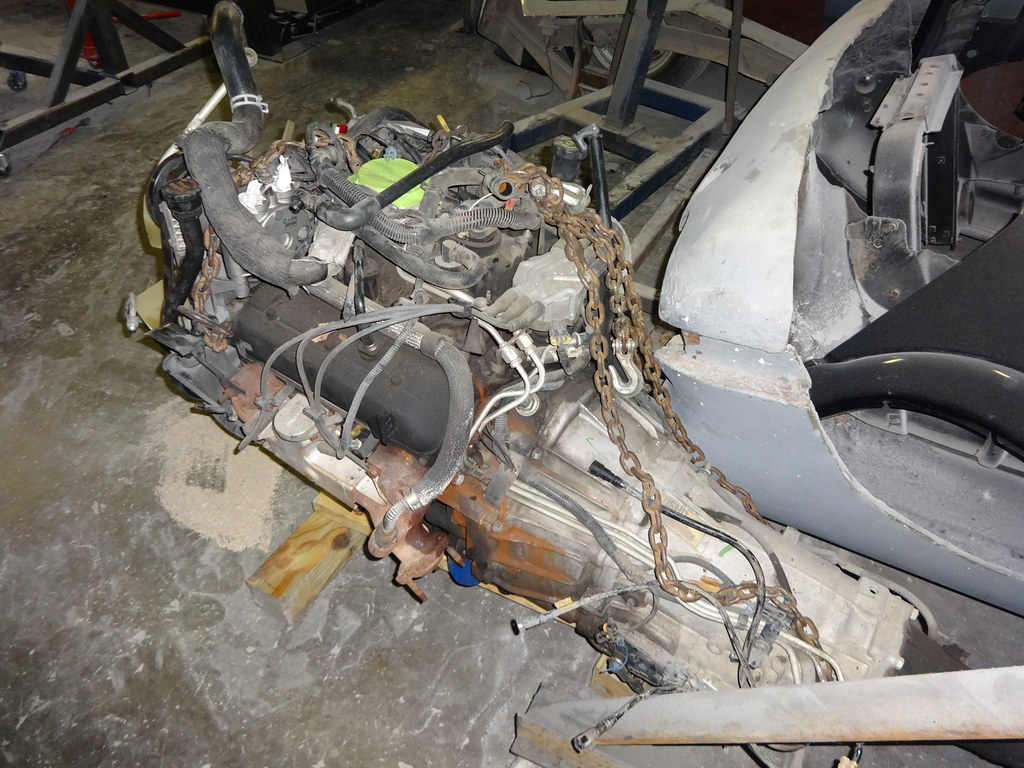
When it broke down and had to haul it home:
Where it sat for the year and a half:
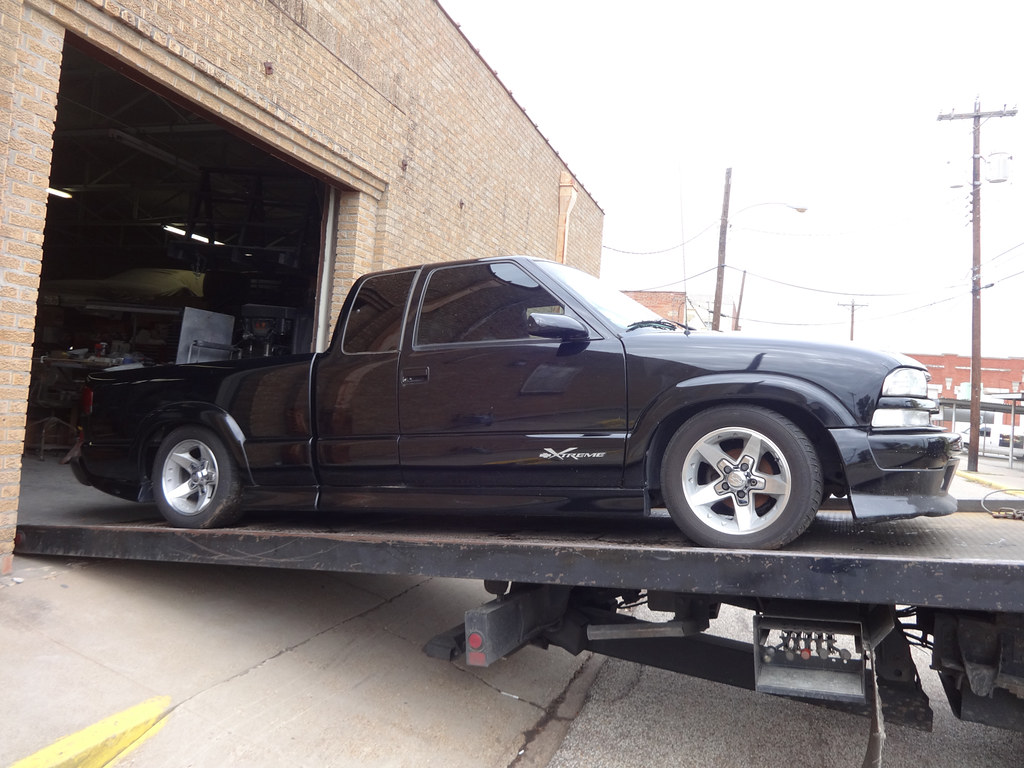
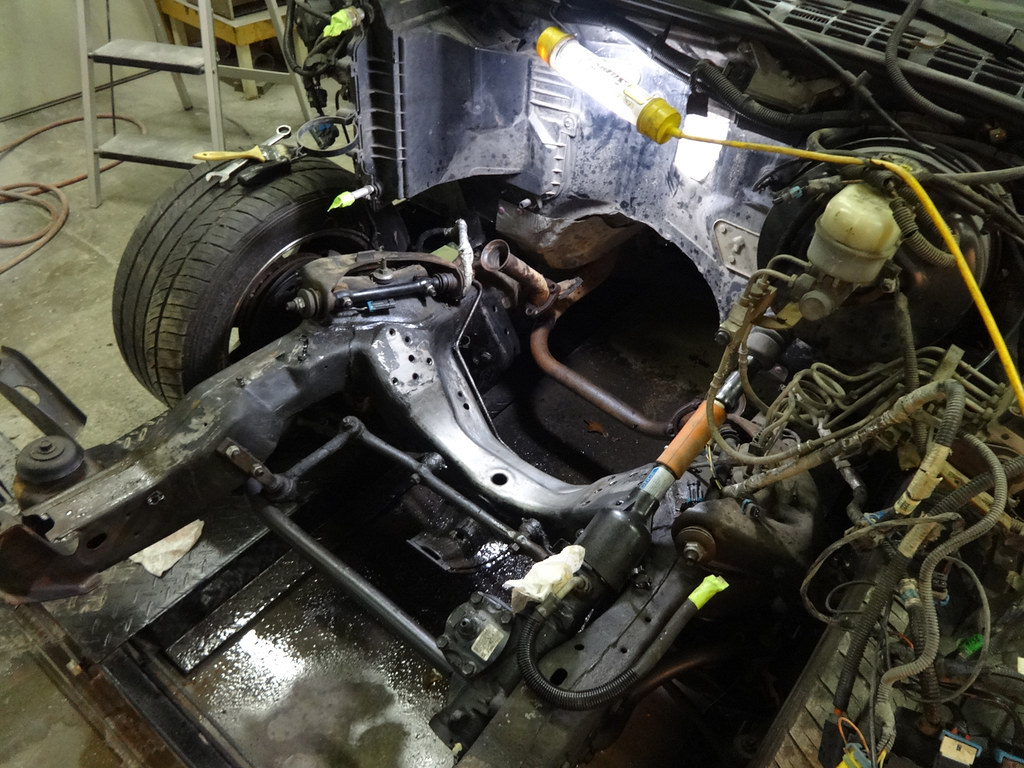
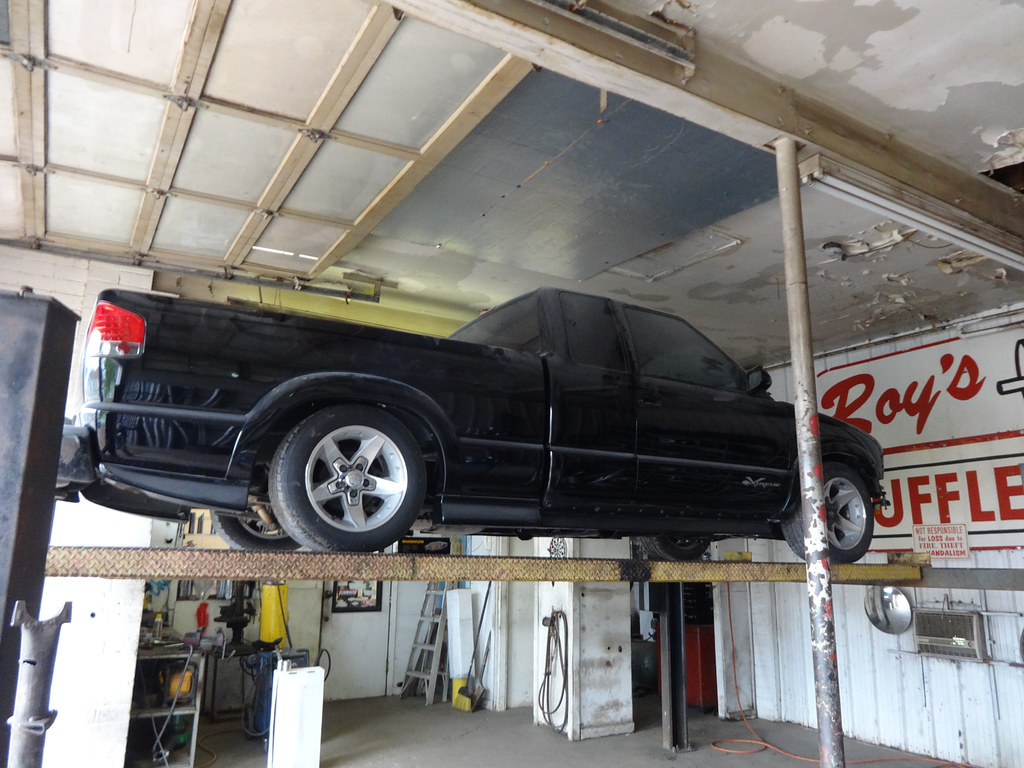
Gave it a quick wash before I took it to my dad�s shop to tear it down. Had to get a friend�s wrecker to put it up into the shop for me, as the ramp is too steep for the truck to make it.

I bought this truck back in 2005 and up until May 2012 it was my daily driver. I had always wanted to do an LS-based swap but never really pursued it. I did several cosmetic and suspension modifications over the years but the stock 4.3 V6 stayed under the hood. Fast-forward to January 2012, I came across a wrecked 2002 Trans Am WS6 auto with 90k miles so I picked up that motor thinking I�d eventually do the swap after I researched more and gathered everything else I would need, assuming that would probably be a couple years down the road.
The truck had other plans. About 4 months after I bought the LS1, I was coming home from work one day and it blew a head gasket. It had 201k miles on it. So rather than spend time and money repairing the 4.3L I decided to just do the swap. Luckily I had another car I could drive in the meantime. Life got busy and the truck ended up sitting for a year and a half until November 2013. My goal was for the swap to look like it came from the factory and all accessories/functions worked just as they did before.
Here is the truck before the 4.3 came out:
The donor car:
When it broke down and had to haul it home:
Where it sat for the year and a half:
Gave it a quick wash before I took it to my dad�s shop to tear it down. Had to get a friend�s wrecker to put it up into the shop for me, as the ramp is too steep for the truck to make it.
Last edited by cwd240z; 03-10-2015 at 02:42 AM.

 03-10-2015, 01:13 AM
#3
Teching In
Thread Starter
Join Date: Jan 2013
Location: Dallas, TX
Posts: 27
Likes: 0
Received 0 Likes
on
0 Posts
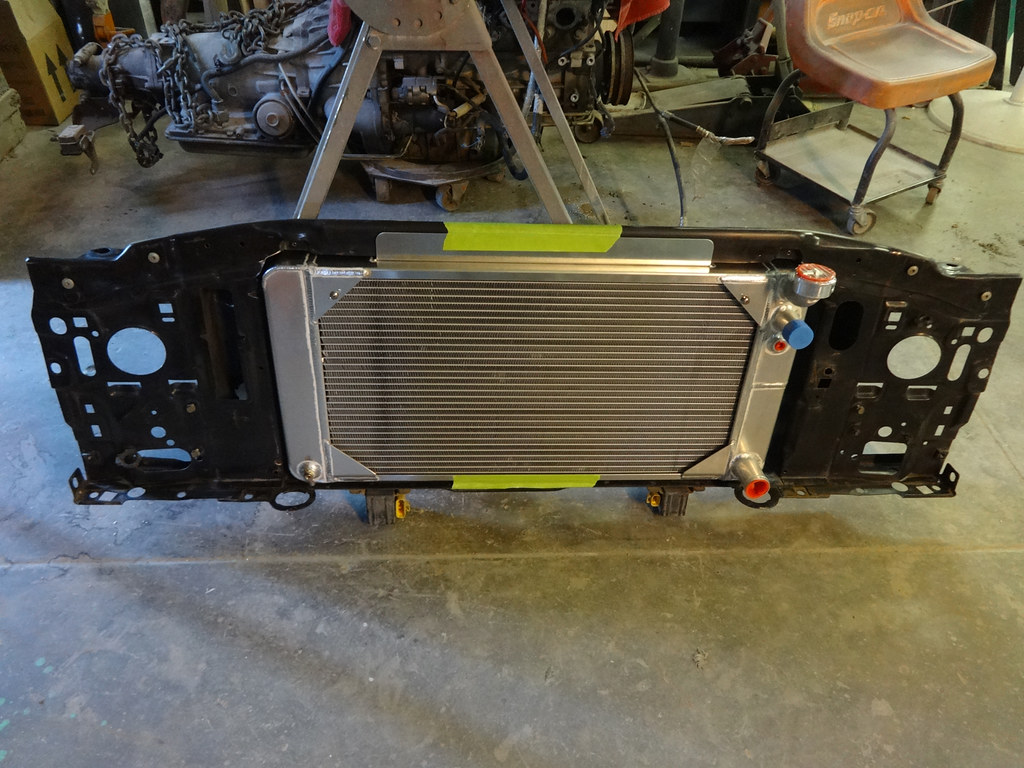
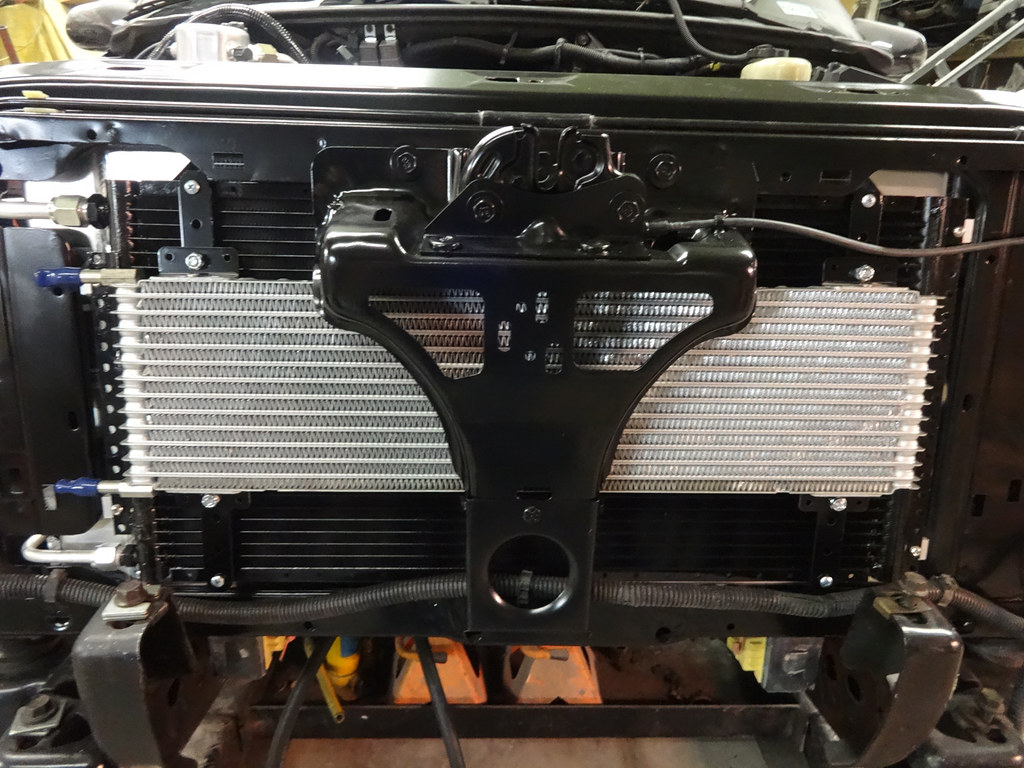
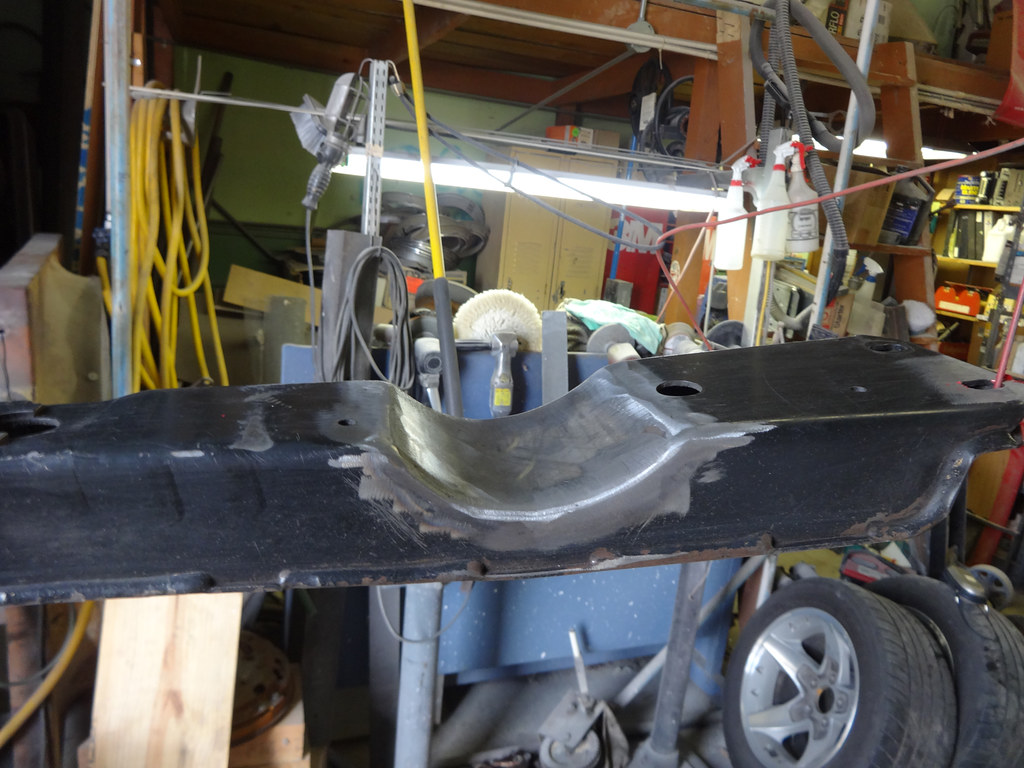
I got a lot of the swap parts from Current Performance Wiring...engine harness, radiator, condenser, a/c lines, engine mounts. Here is the radiator support after I modified it to allow the radiator to be recessed:
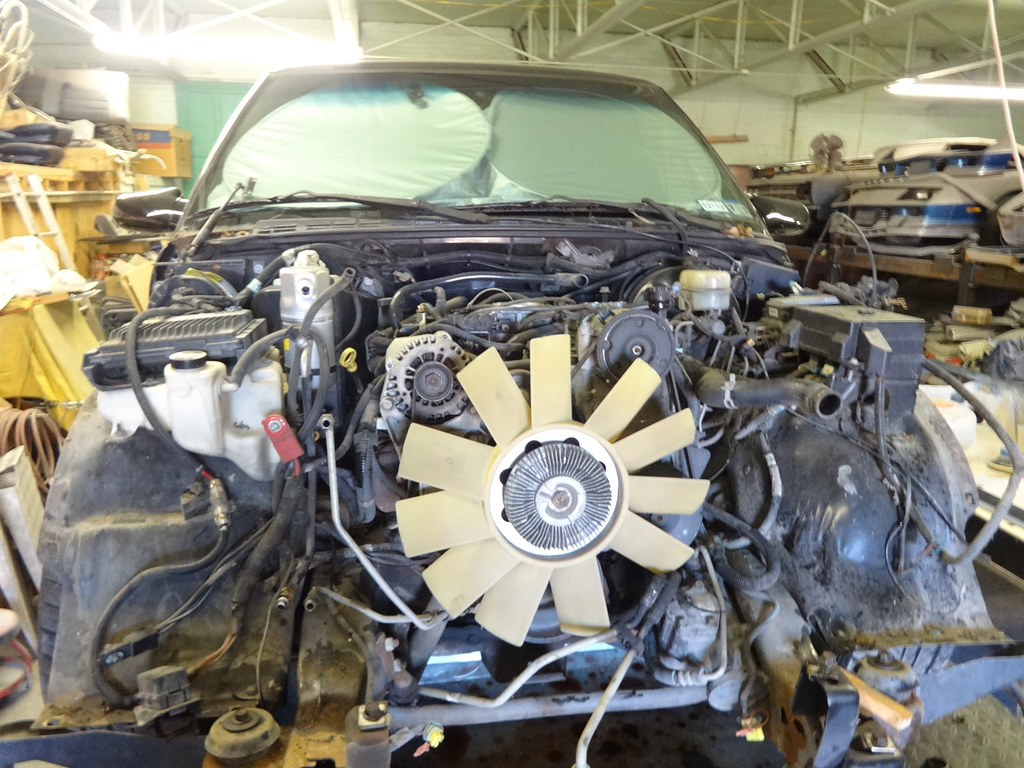
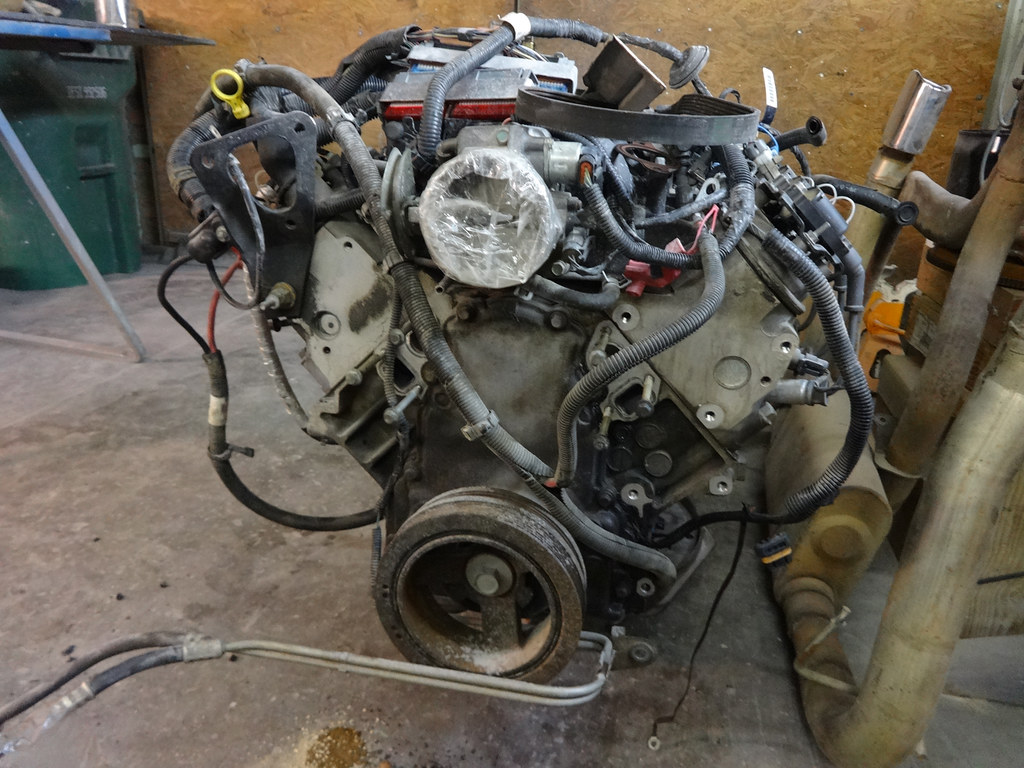
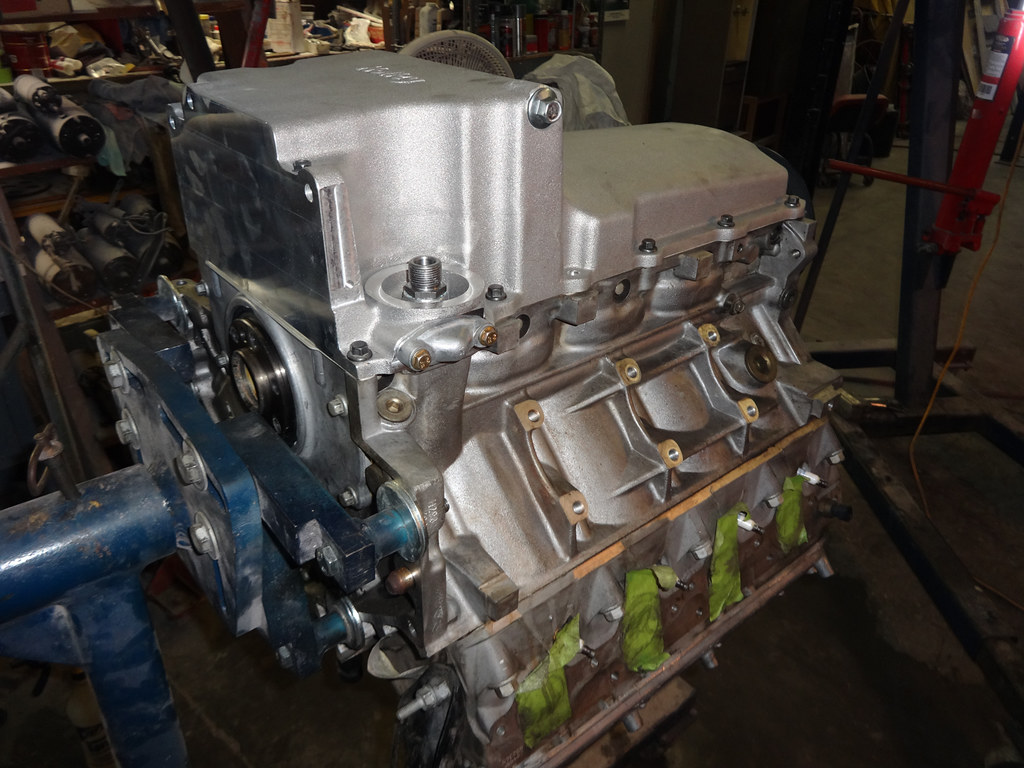
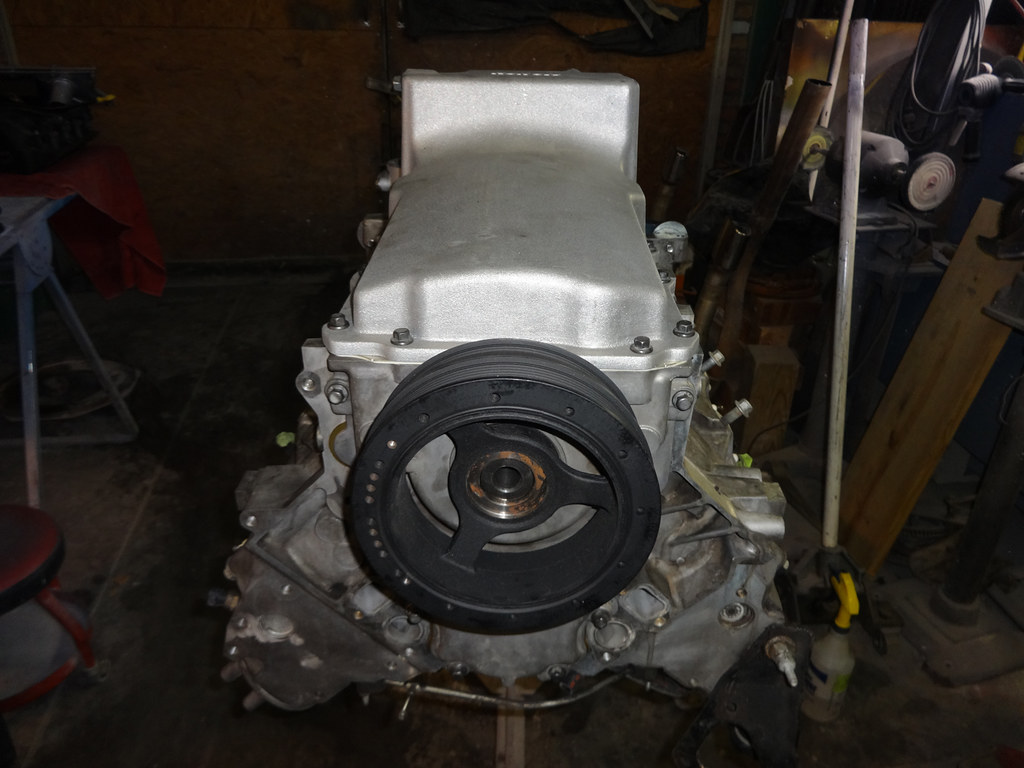
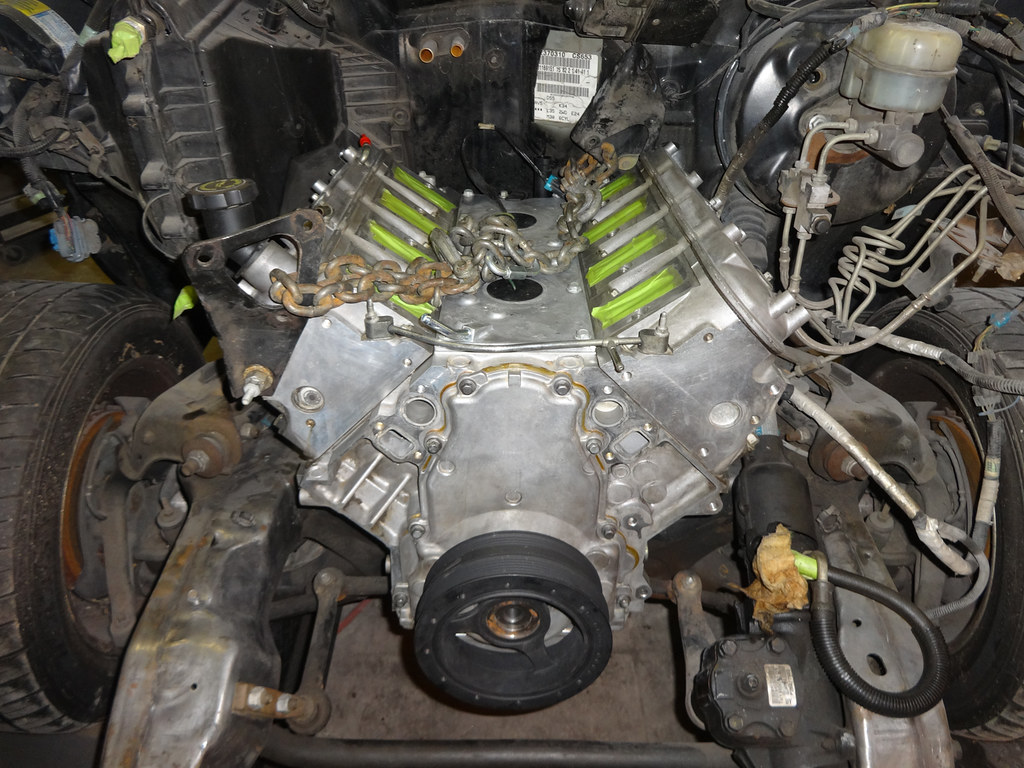
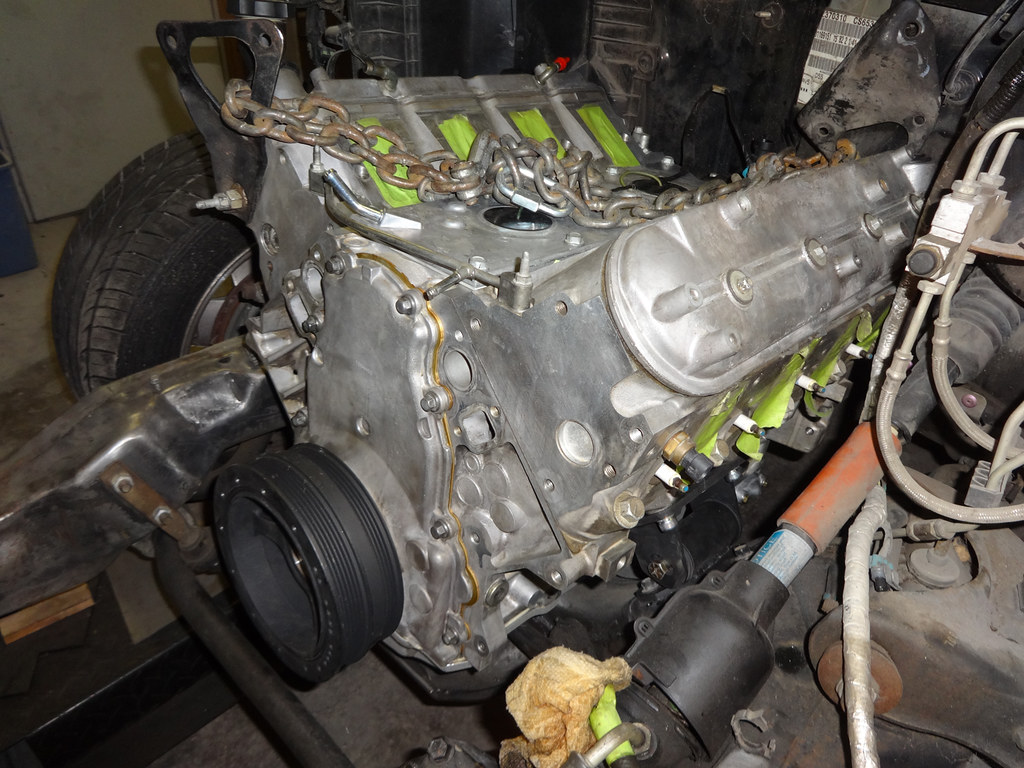
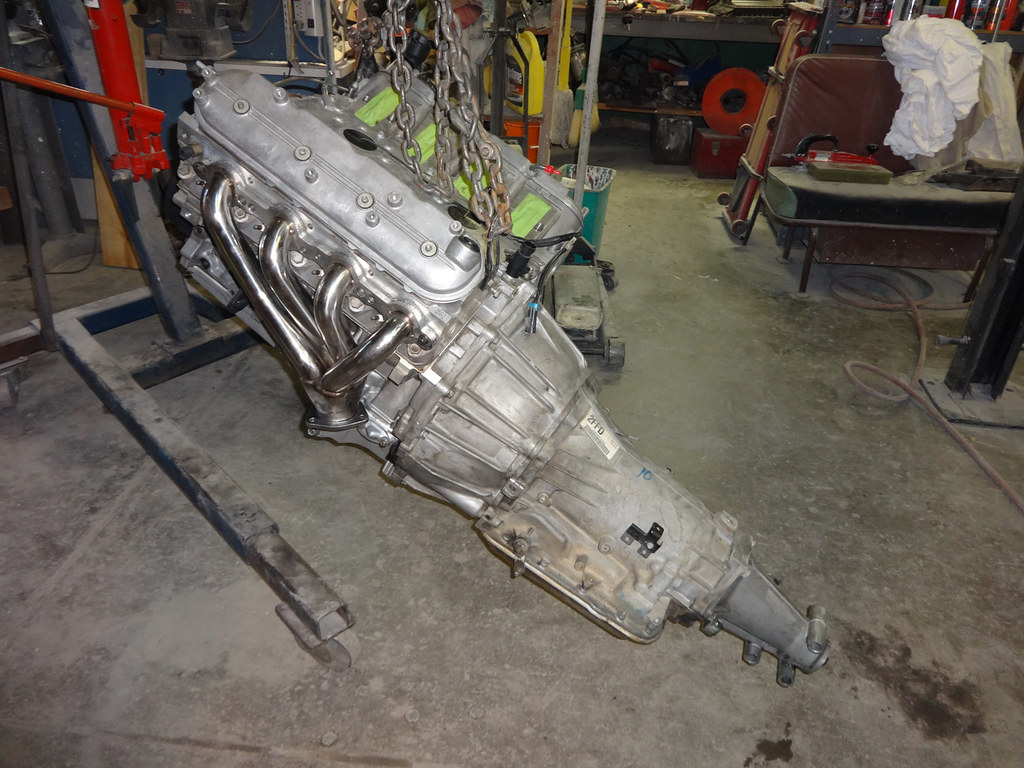
I took off all of the f body accessories since I am going with the Corvette style setup for clearance reasons. Spent some time cleaning the motor. I went ahead and replaced the rear seal and cover gasket. Also, since I was pulling the balancer off to replace with one from an LS3, I decided to replace the oil pump, front seal, and timing cover gasket as well.
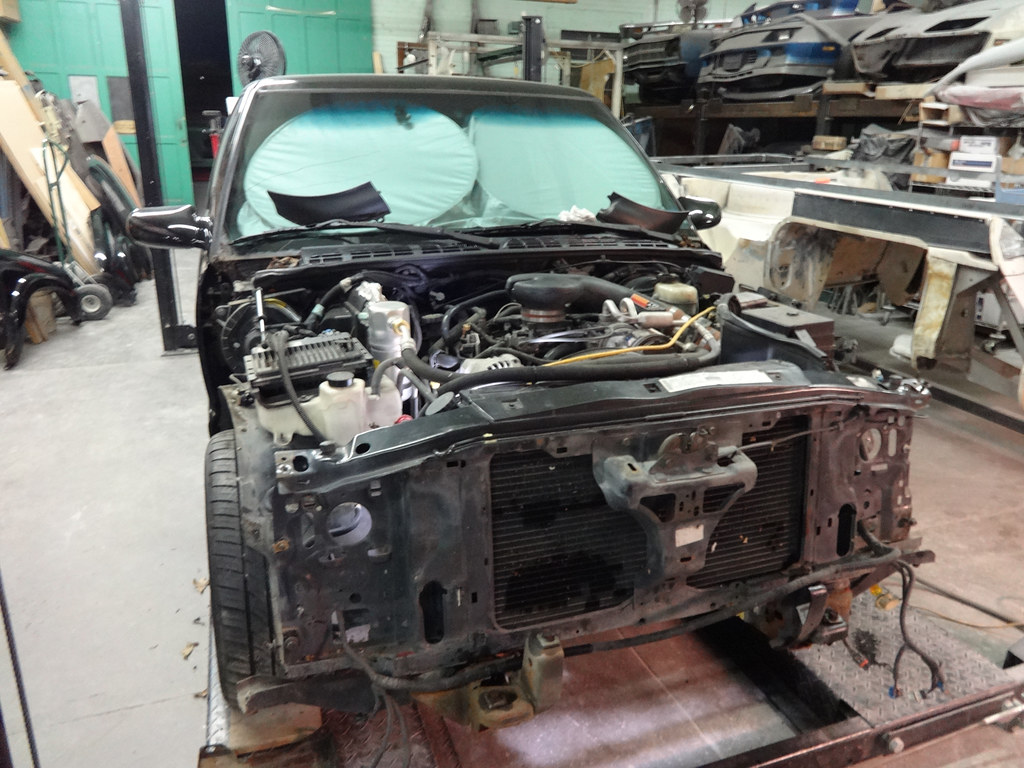
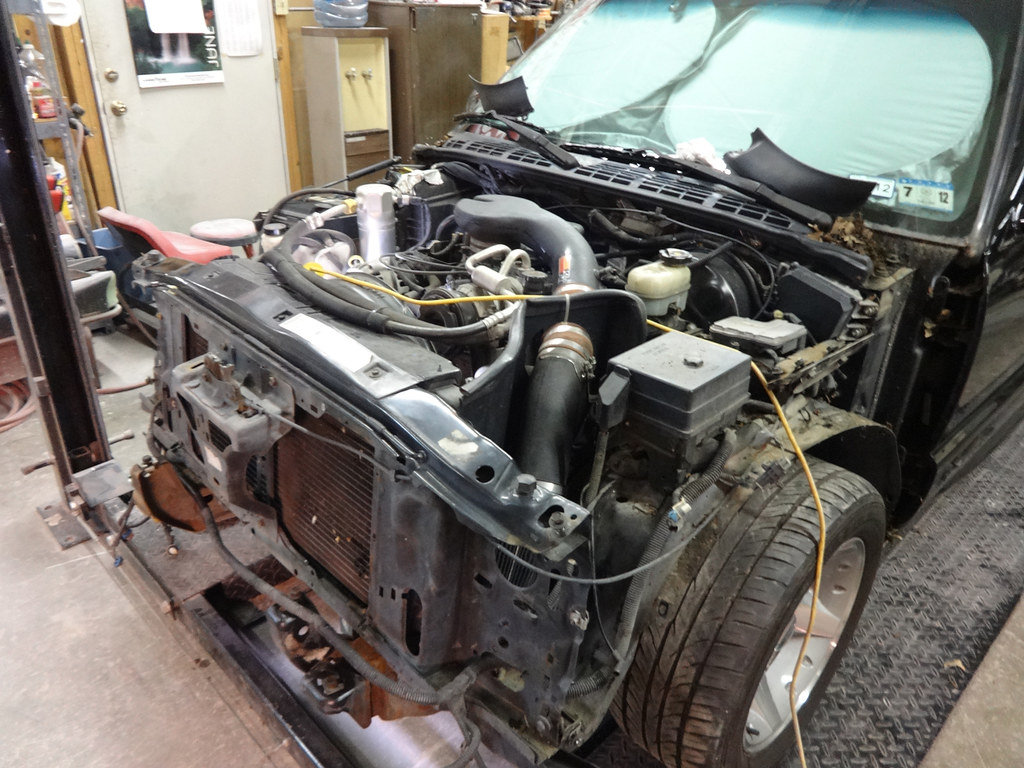
Before I wheeled it outside and degreased/washed it...
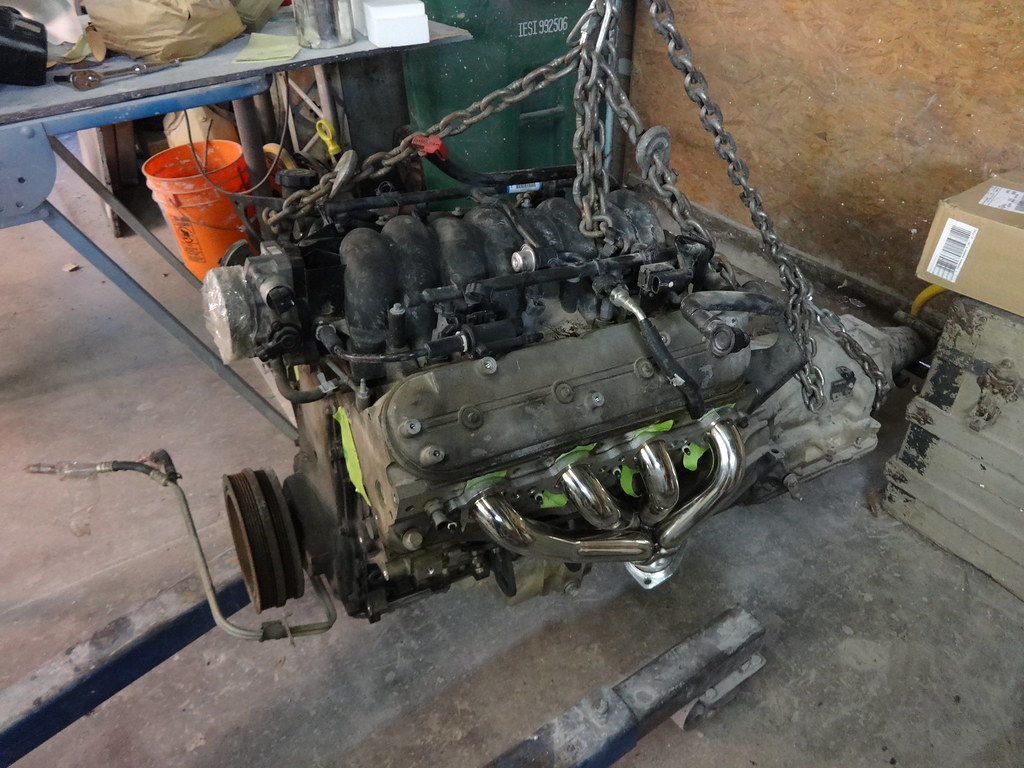
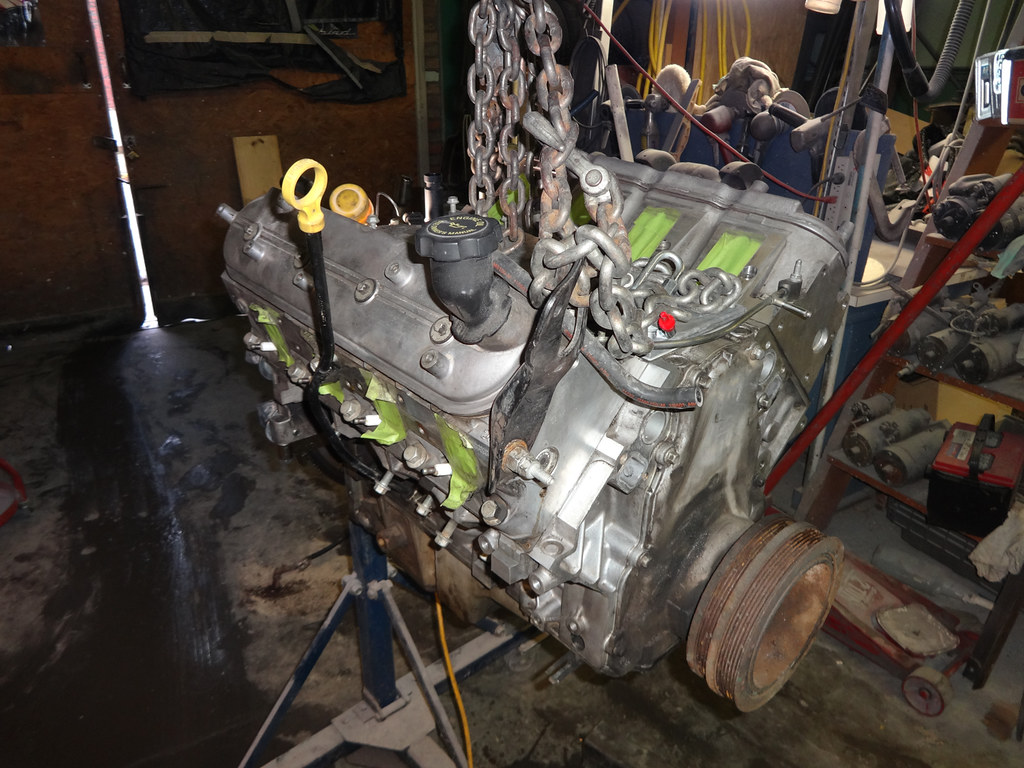
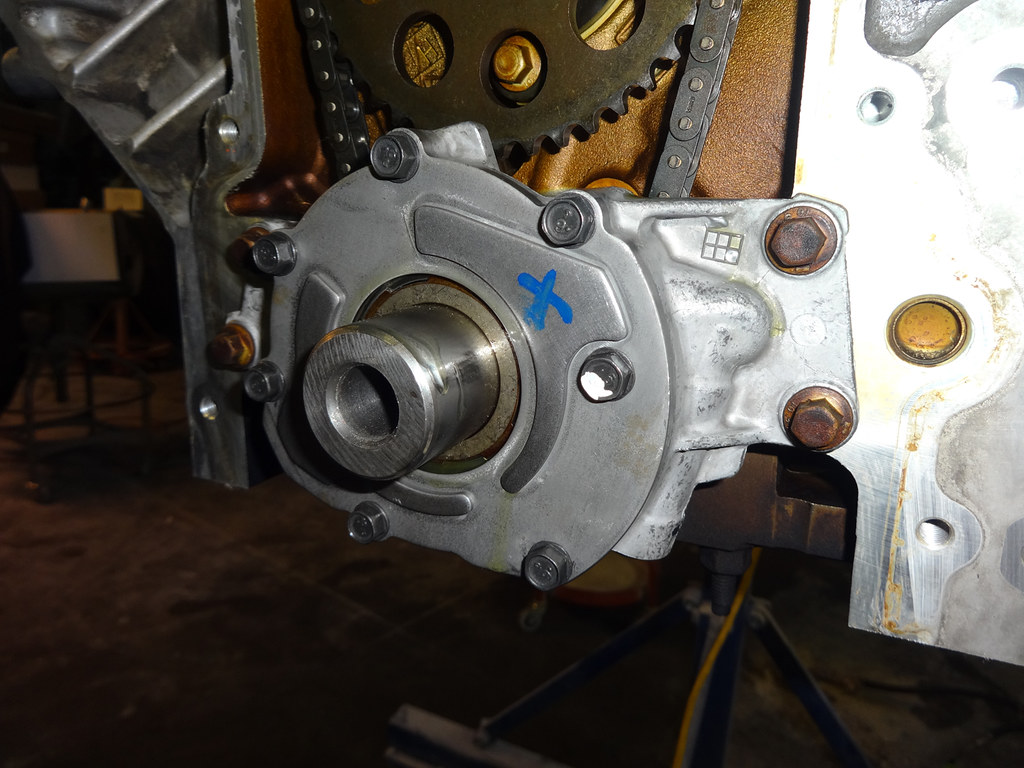
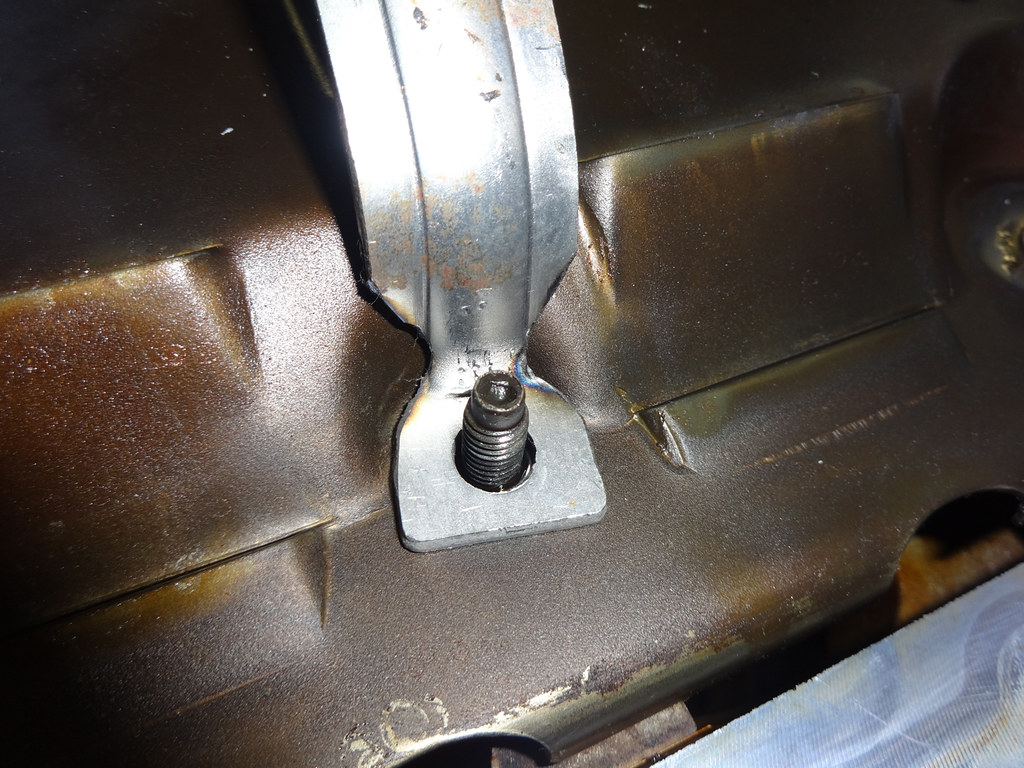
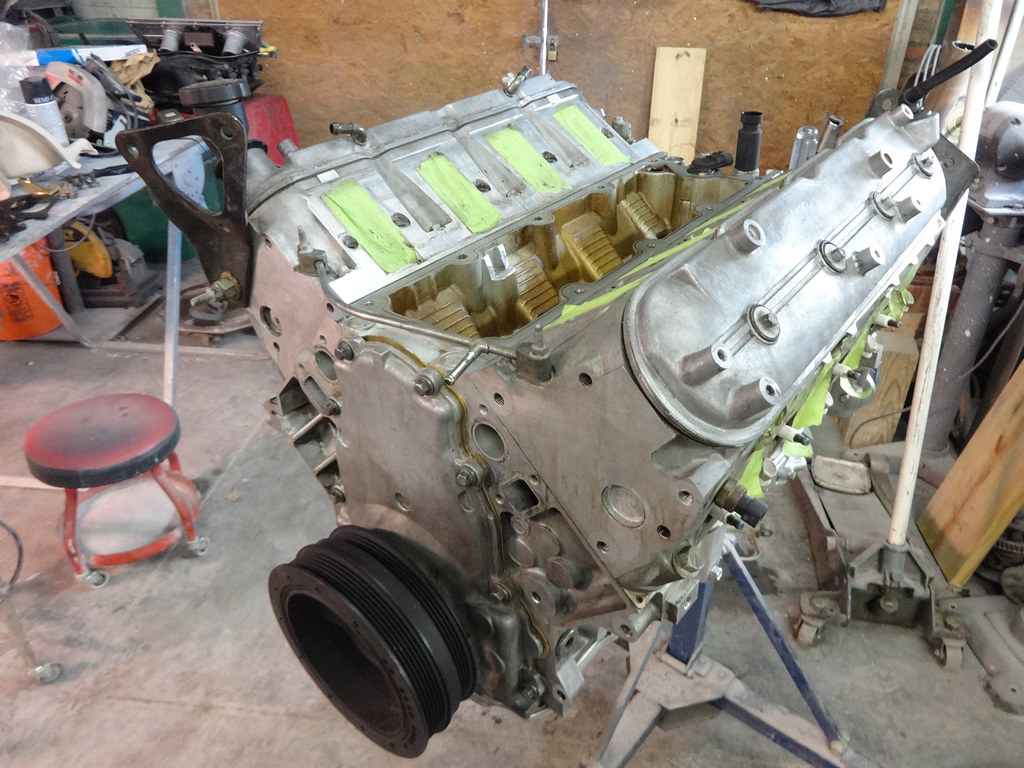
Once I got all the front and rear cover gaskets replaced, I rotated it over so I could swap oil pans. I went with the Holley 302-1 pan due to crossmember clearance issues and to give me the most ground clearance as the truck sits so low. Holley suggests cutting the windage tray to install their pickup tube, but I cut a little off of the mounting bracket instead.
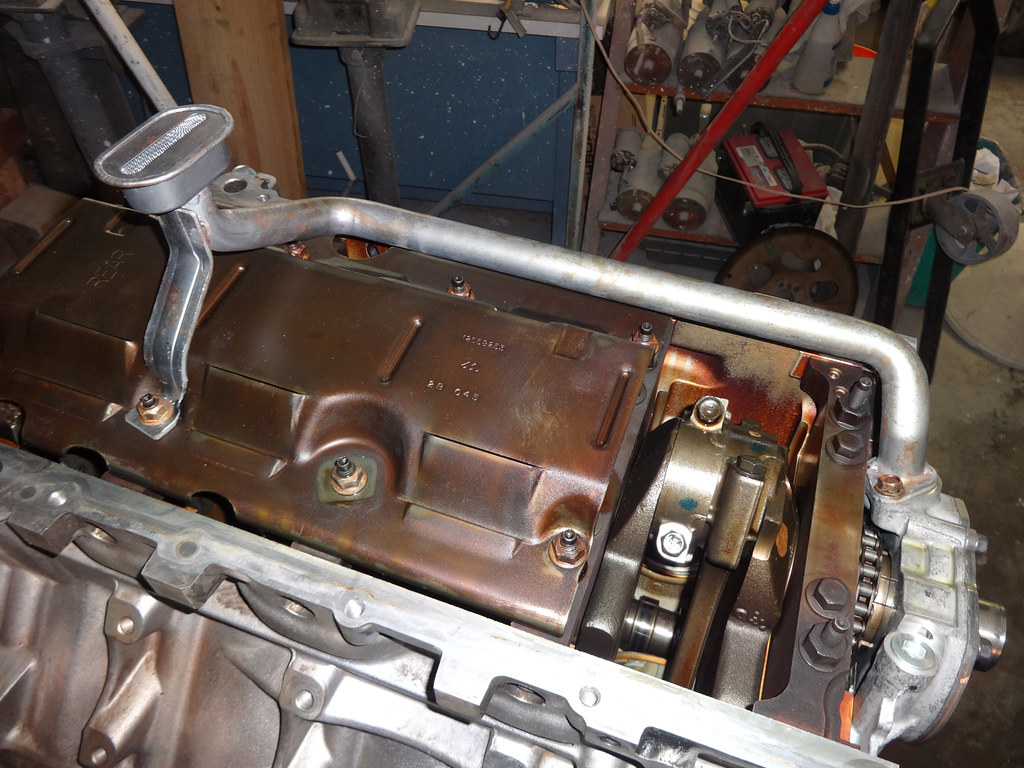
Also installed an LS6 valley cover:
I took off all of the f body accessories since I am going with the Corvette style setup for clearance reasons. Spent some time cleaning the motor. I went ahead and replaced the rear seal and cover gasket. Also, since I was pulling the balancer off to replace with one from an LS3, I decided to replace the oil pump, front seal, and timing cover gasket as well.
Before I wheeled it outside and degreased/washed it...
Once I got all the front and rear cover gaskets replaced, I rotated it over so I could swap oil pans. I went with the Holley 302-1 pan due to crossmember clearance issues and to give me the most ground clearance as the truck sits so low. Holley suggests cutting the windage tray to install their pickup tube, but I cut a little off of the mounting bracket instead.
Also installed an LS6 valley cover:
Last edited by cwd240z; 03-10-2015 at 01:28 AM.
03-10-2015, 01:14 AM
#4
Teching In
Thread Starter
Join Date: Jan 2013
Location: Dallas, TX
Posts: 27
Likes: 0
Received 0 Likes
on
0 Posts
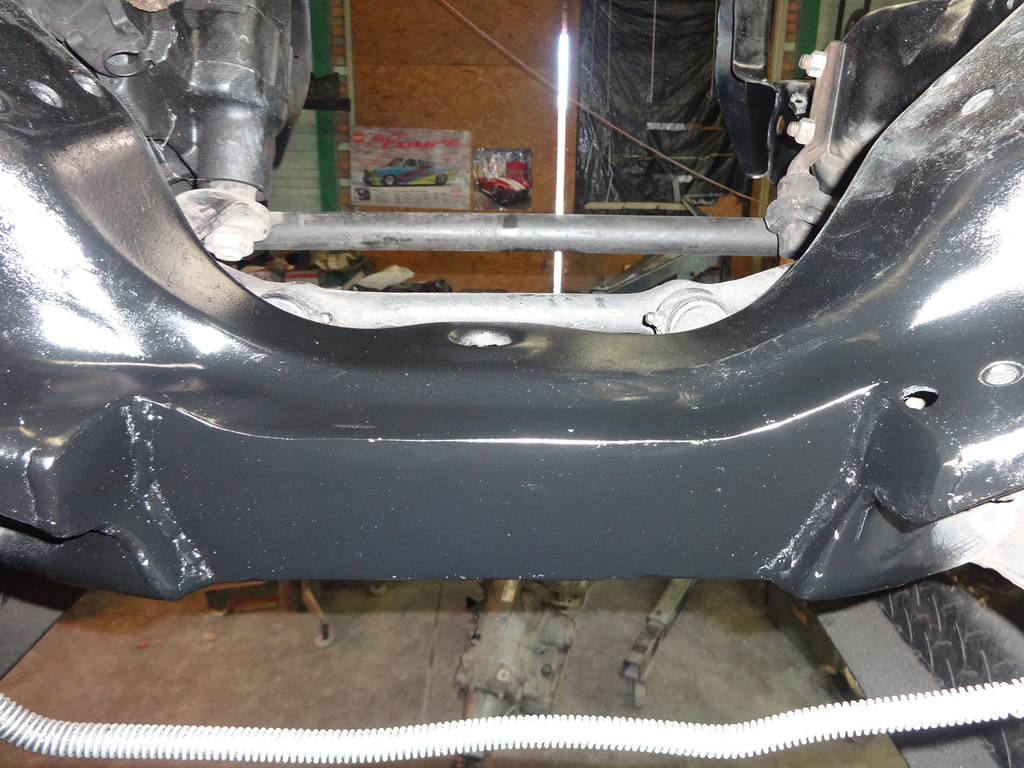
Time to notch the crossmember to clear the oil pan.
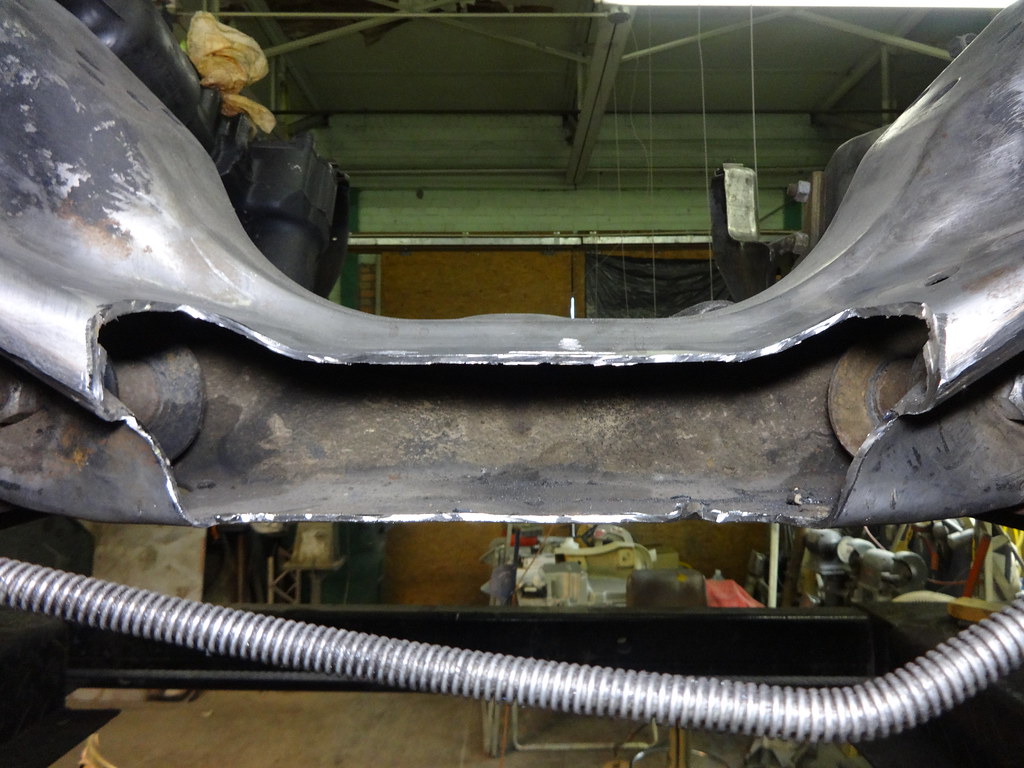
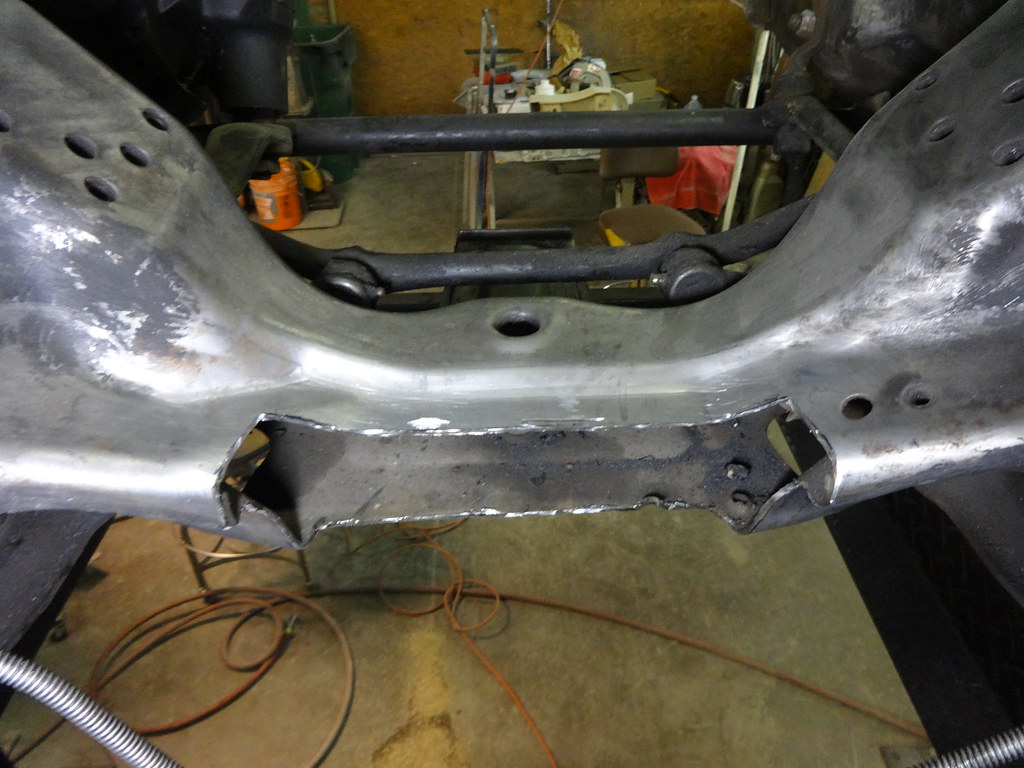
Drivers side clearance:
Passenger side was tight after the initial cut, so I gave it another �” or so:
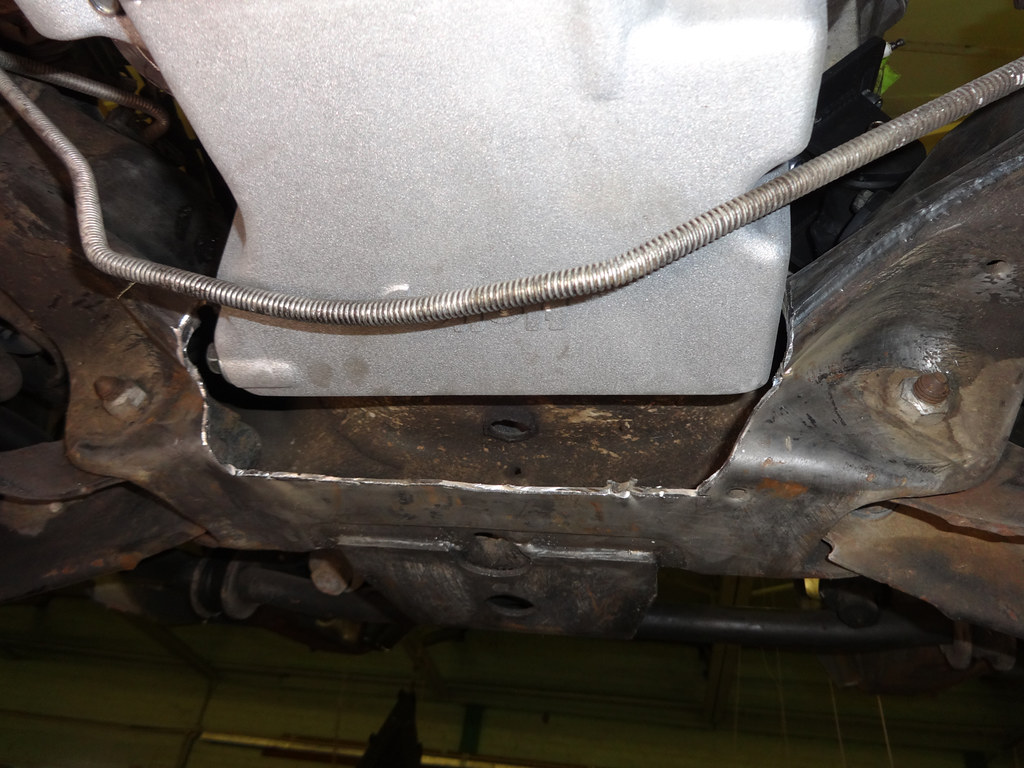
Crossmember notch welded up and some paint on the frame:
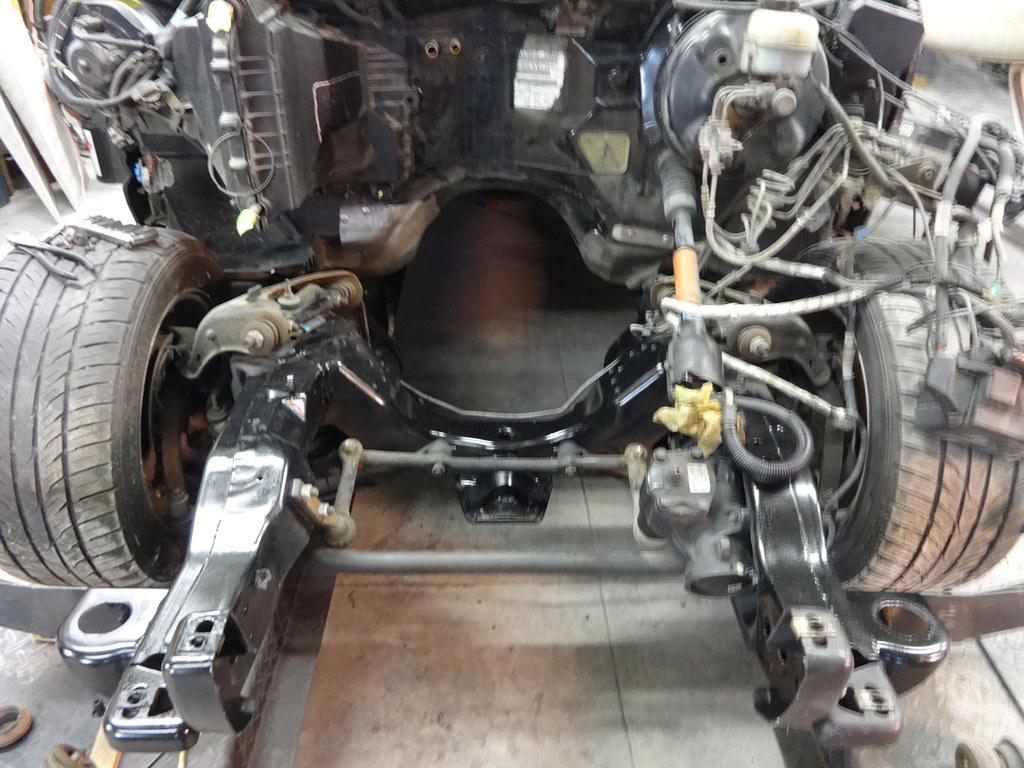
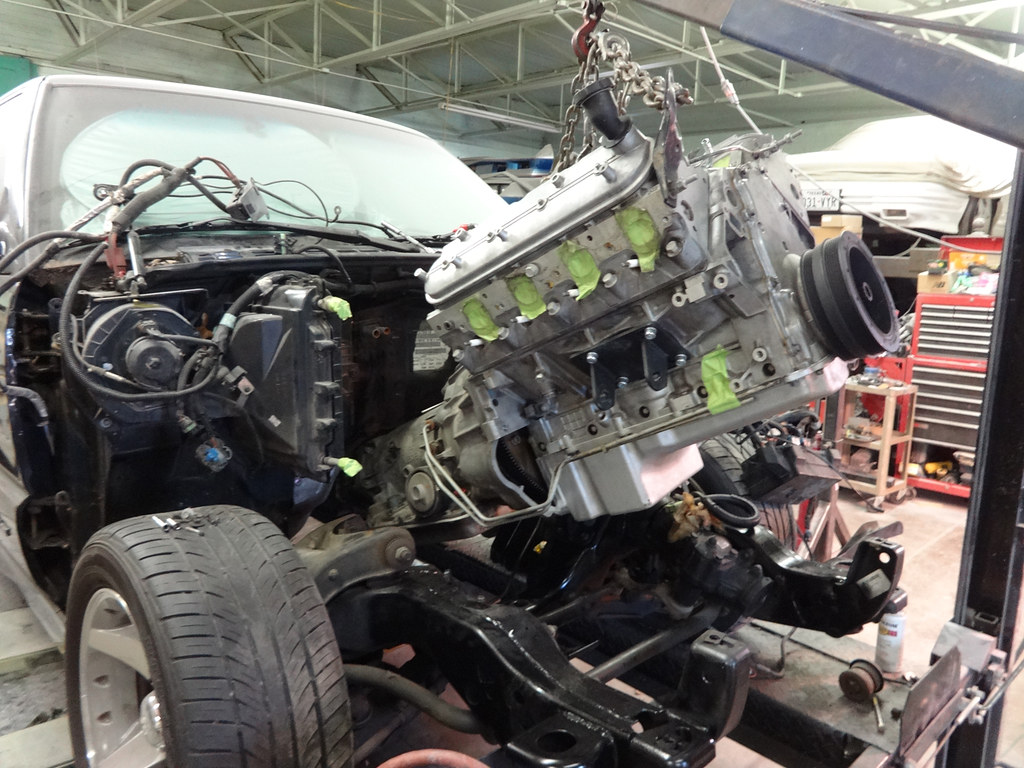
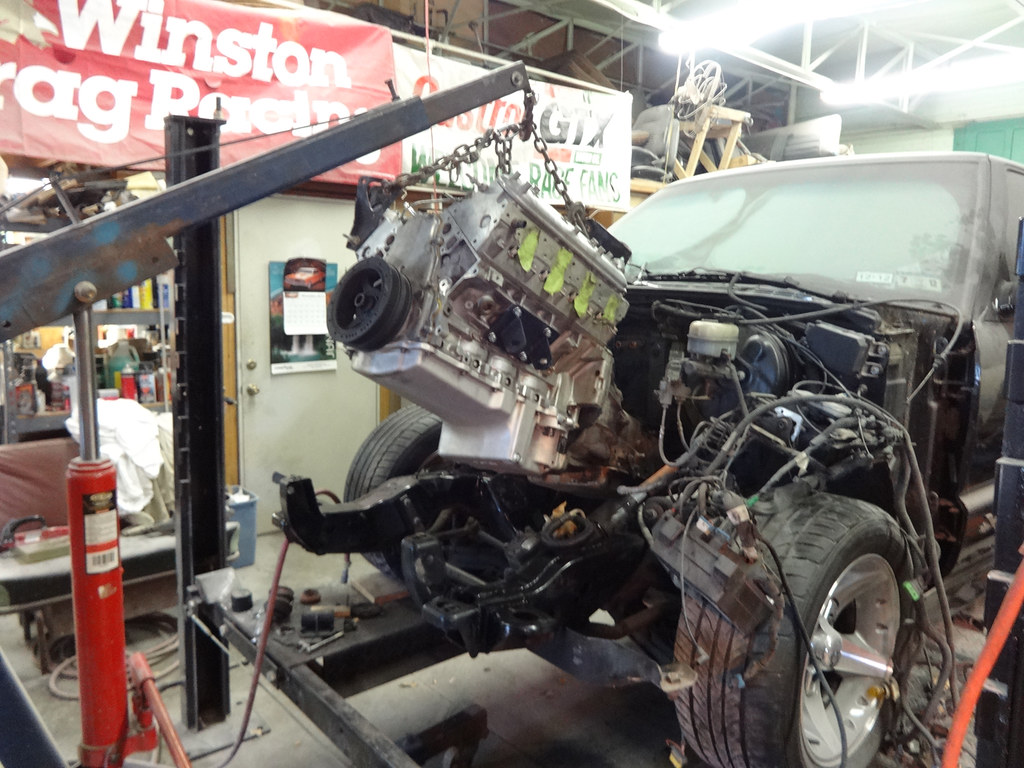
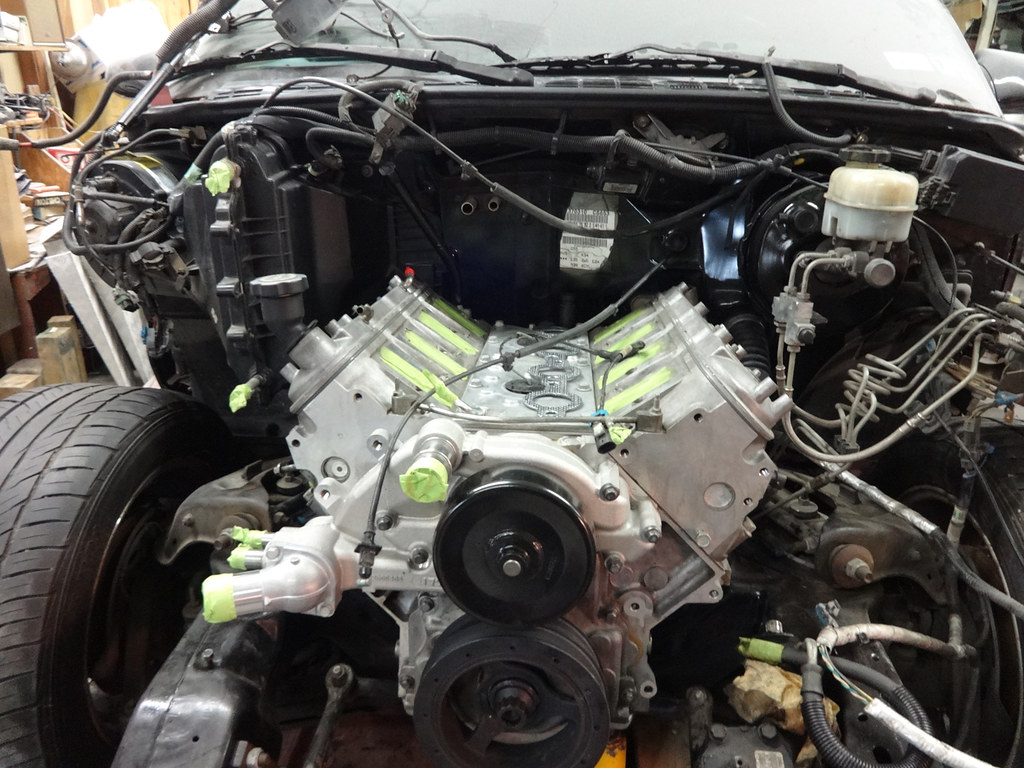
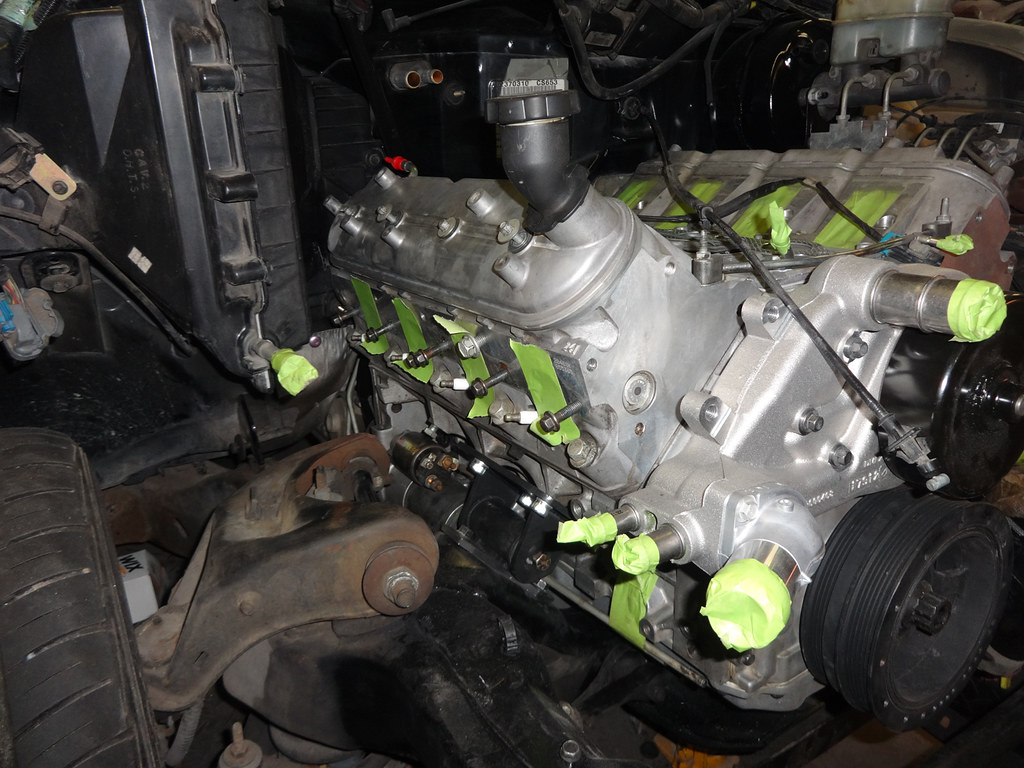
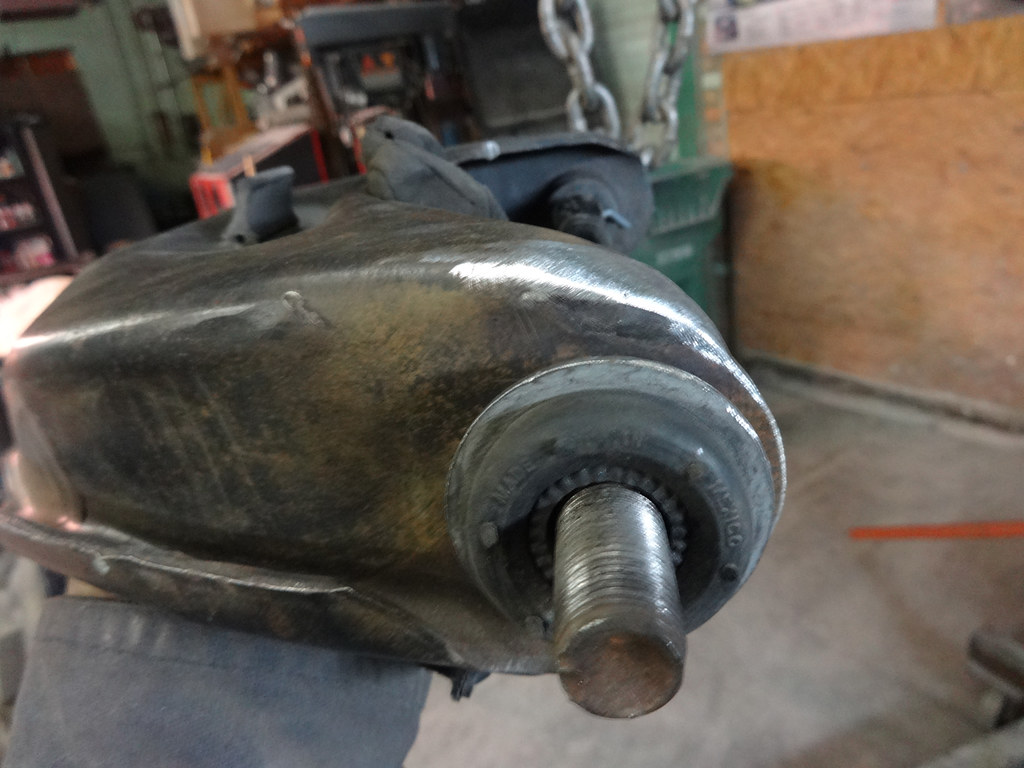
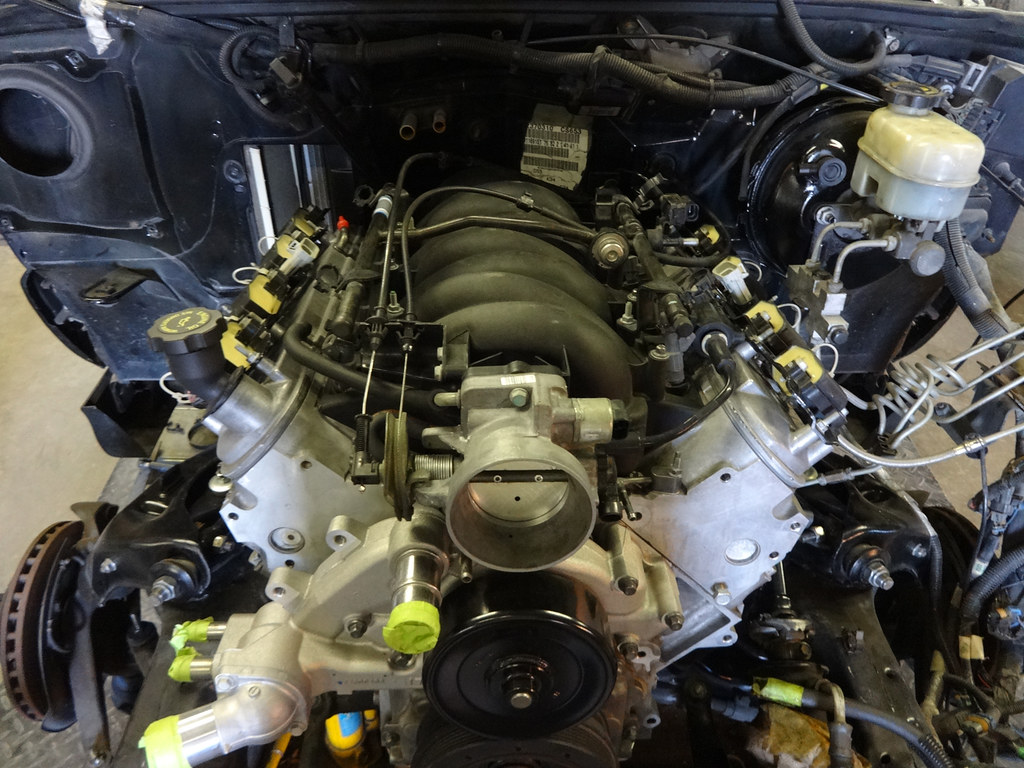
Setting the motor in to check for blower box clearance. It will need to be notched quite a bit to clear the coils. Also needed a smaller booster to clear the drivers side coils. Used one from a first gen S10 that bolts right up, all I had to do cut the shaft off the original and weld to the new one.
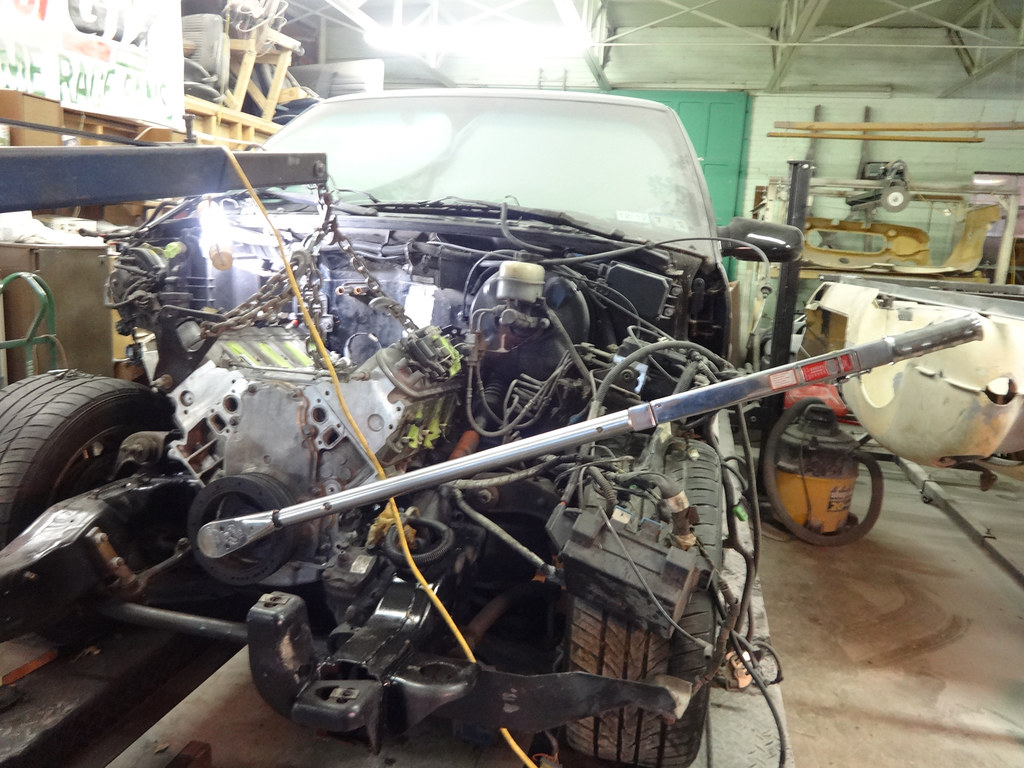
Torquing the balancer bolt to 235 ft lbs. Borrowed this massive Snap On torque wrench from guy who works on semi trucks. It went from 200 ft lbs to 600, I was barely using it.
New booster in:

Drivers side clearance:
Passenger side was tight after the initial cut, so I gave it another �” or so:
Crossmember notch welded up and some paint on the frame:
Setting the motor in to check for blower box clearance. It will need to be notched quite a bit to clear the coils. Also needed a smaller booster to clear the drivers side coils. Used one from a first gen S10 that bolts right up, all I had to do cut the shaft off the original and weld to the new one.
Torquing the balancer bolt to 235 ft lbs. Borrowed this massive Snap On torque wrench from guy who works on semi trucks. It went from 200 ft lbs to 600, I was barely using it.
New booster in:
Last edited by cwd240z; 03-10-2015 at 12:24 PM.
03-10-2015, 01:14 AM
#5
Teching In
Thread Starter
Join Date: Jan 2013
Location: Dallas, TX
Posts: 27
Likes: 0
Received 0 Likes
on
0 Posts
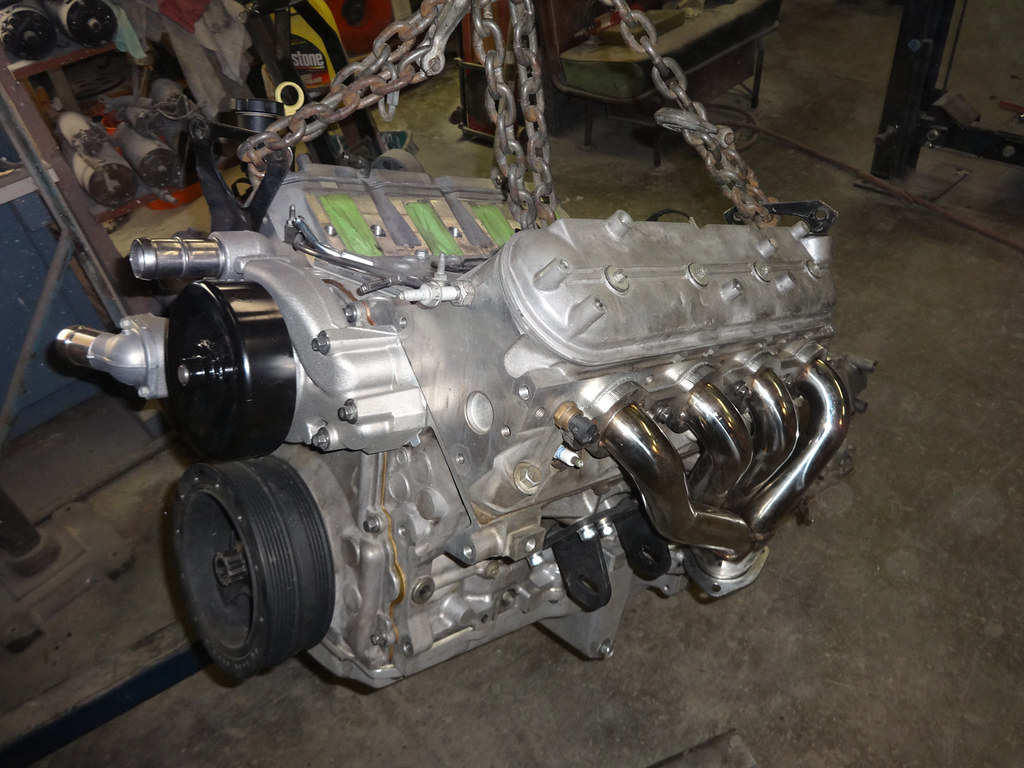
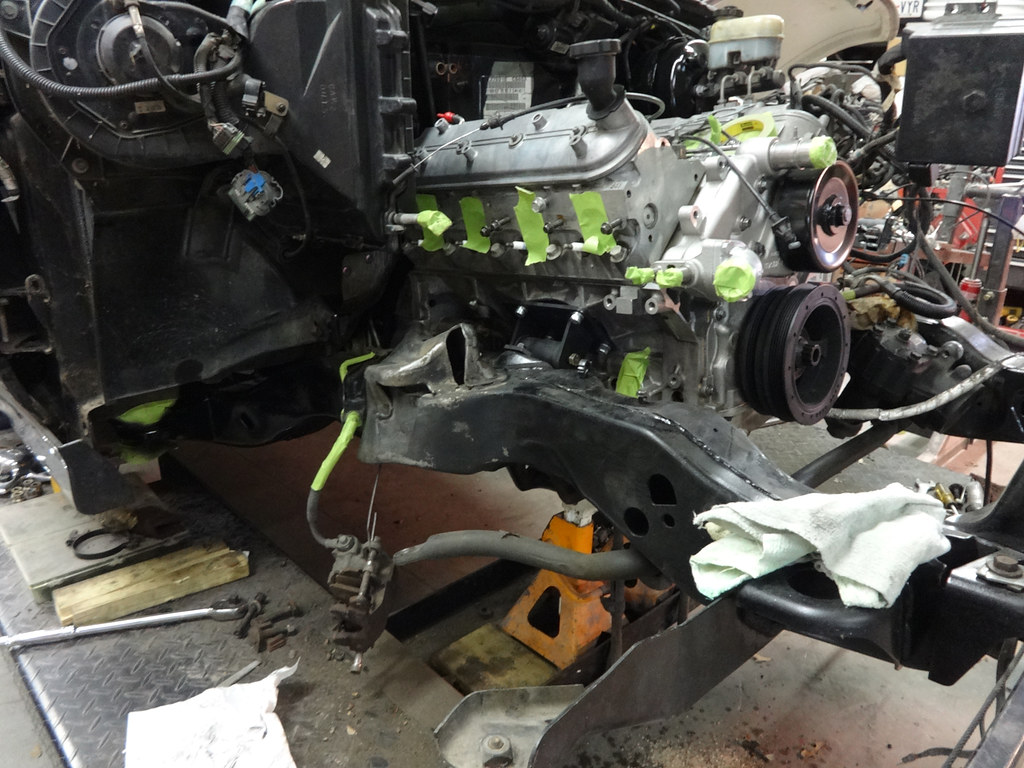
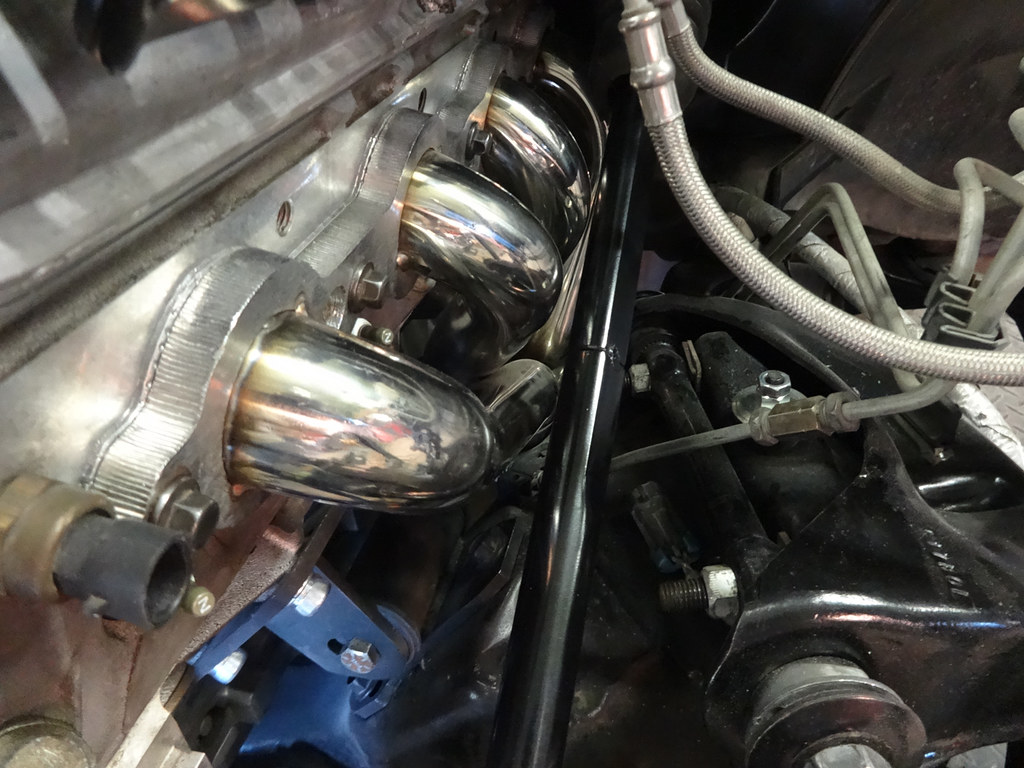
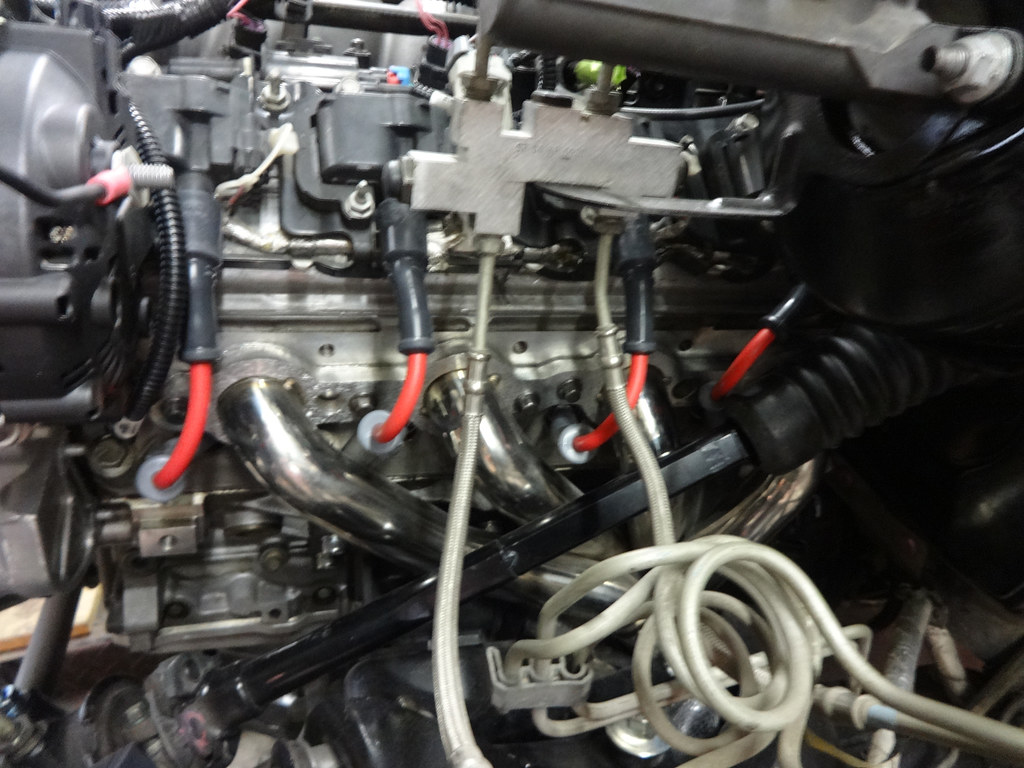
New water pump and stainless headers on:
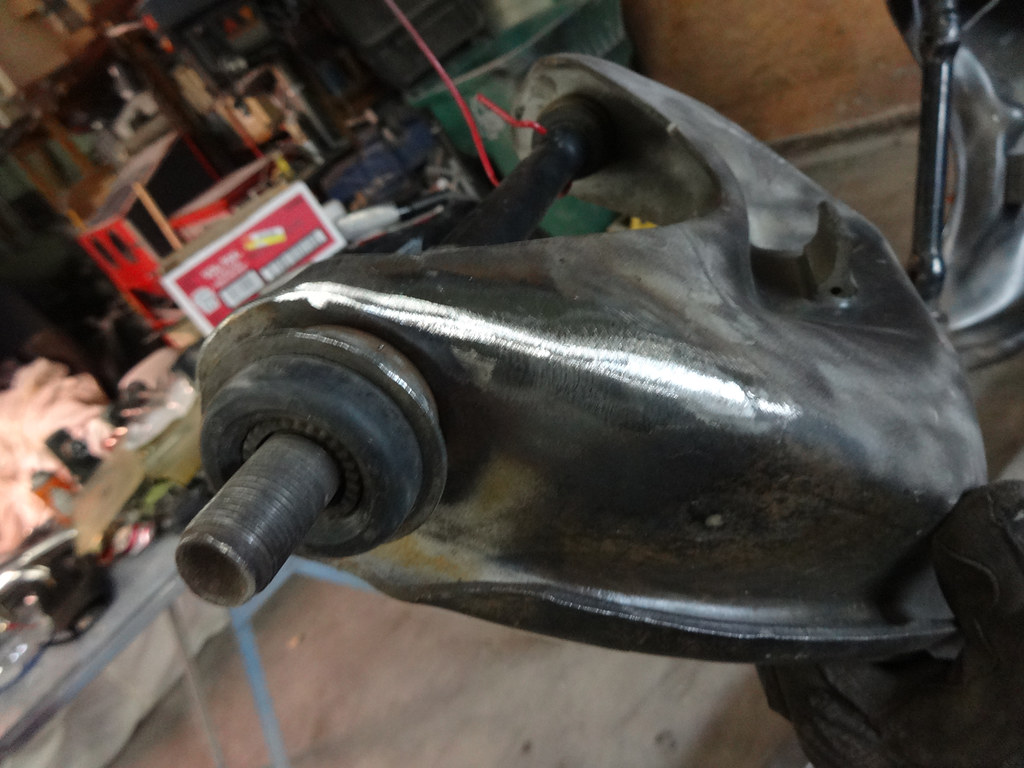
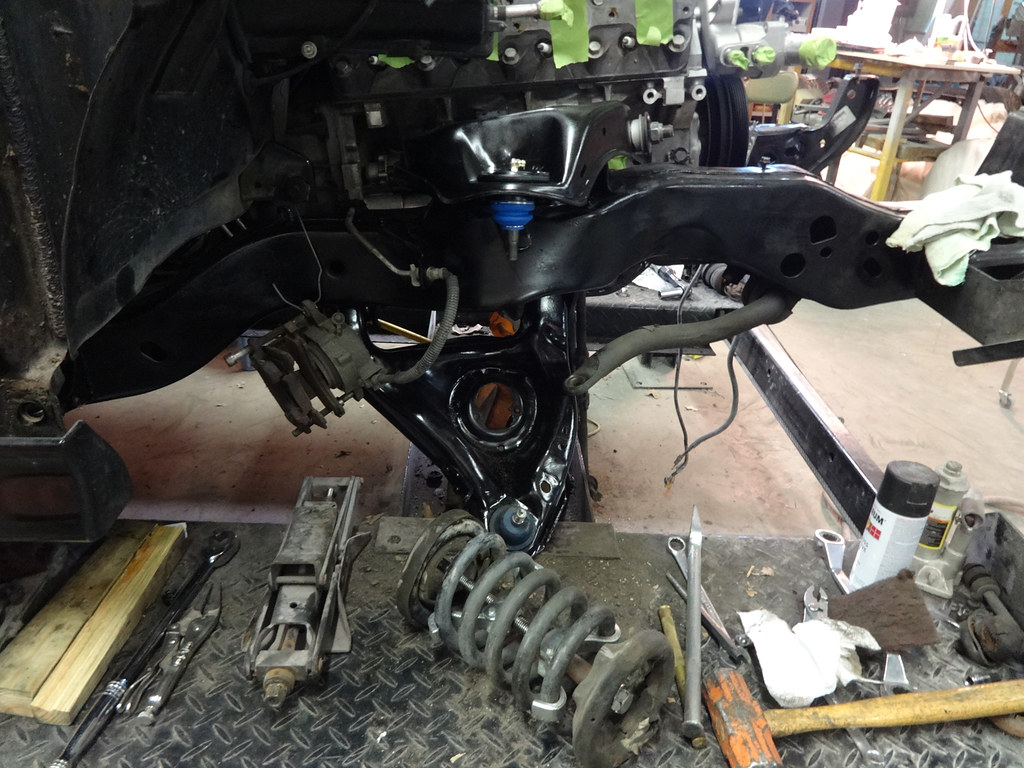
Clearance issues with the upper control arm. First thing is, I realized that my upper control arm bushings are shot which is allowing them to sit further in, which is hitting the drivers side header. So I will be replacing the bushings and also modifying the corner of the arm where it hits to give me more room. Also replacing ball joints while I'm at it.
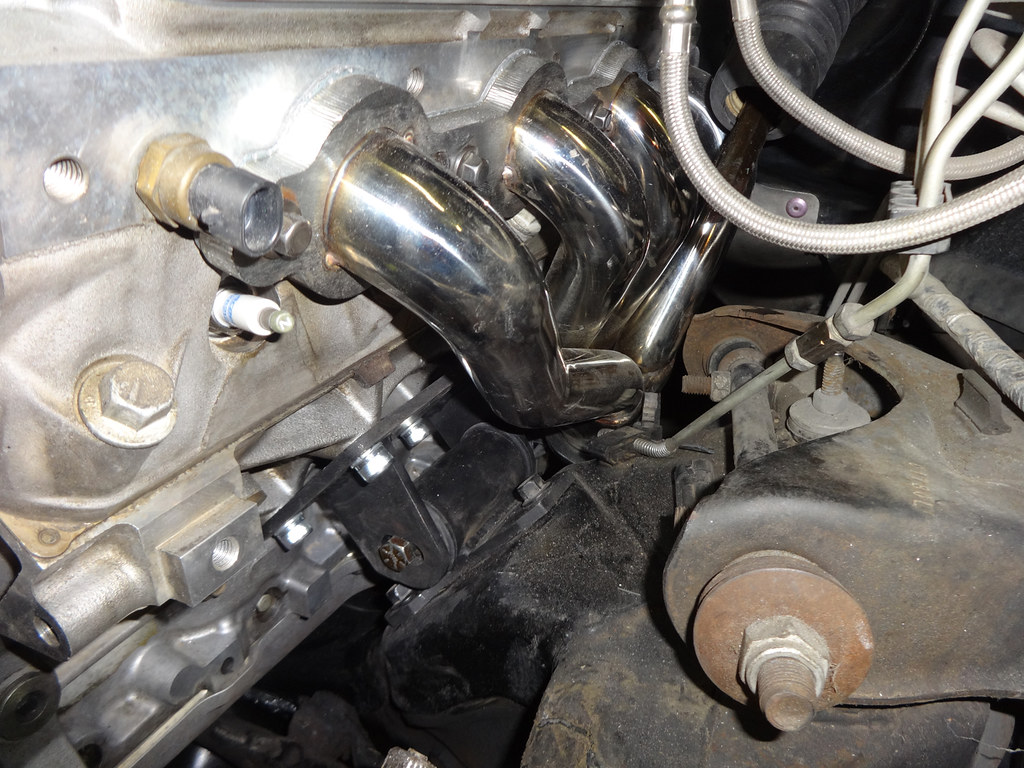
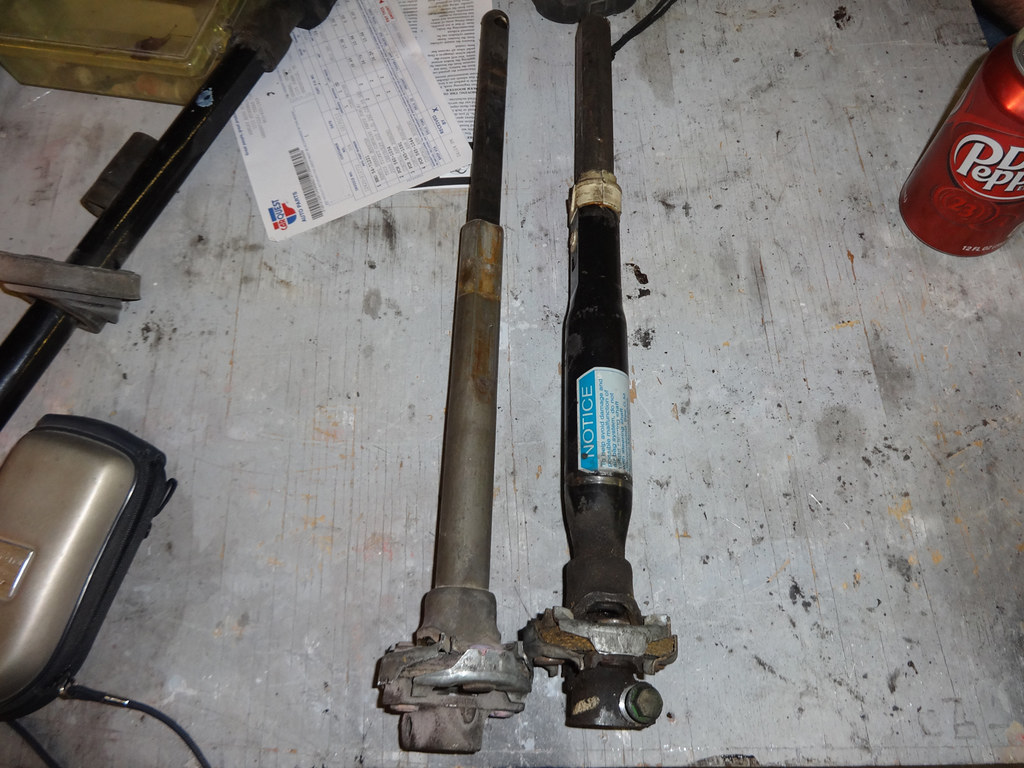
Also found a smaller diameter steering shaft laying around the shop I plan to use for more header clearance.
Front upper and lower bushings being replaced as well as all ball joints.
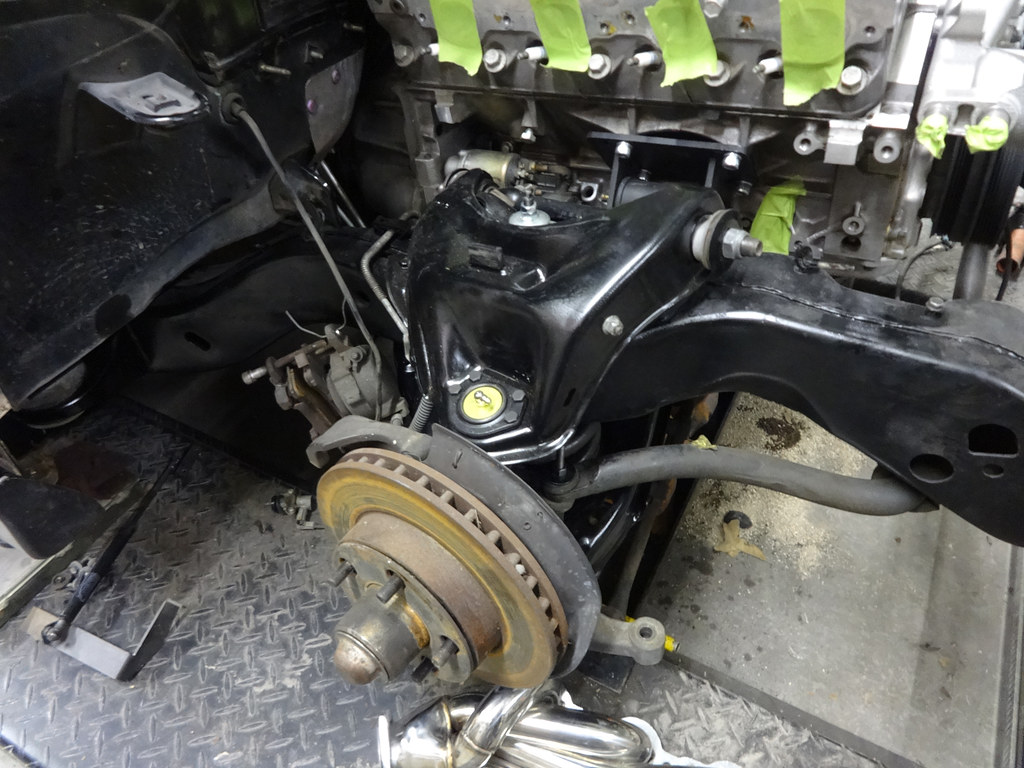
Checking new steering shaft clearance:
Clearance issues with the upper control arm. First thing is, I realized that my upper control arm bushings are shot which is allowing them to sit further in, which is hitting the drivers side header. So I will be replacing the bushings and also modifying the corner of the arm where it hits to give me more room. Also replacing ball joints while I'm at it.
Also found a smaller diameter steering shaft laying around the shop I plan to use for more header clearance.
Front upper and lower bushings being replaced as well as all ball joints.
Checking new steering shaft clearance:
03-10-2015, 01:15 AM
#6
Teching In
Thread Starter
Join Date: Jan 2013
Location: Dallas, TX
Posts: 27
Likes: 0
Received 0 Likes
on
0 Posts
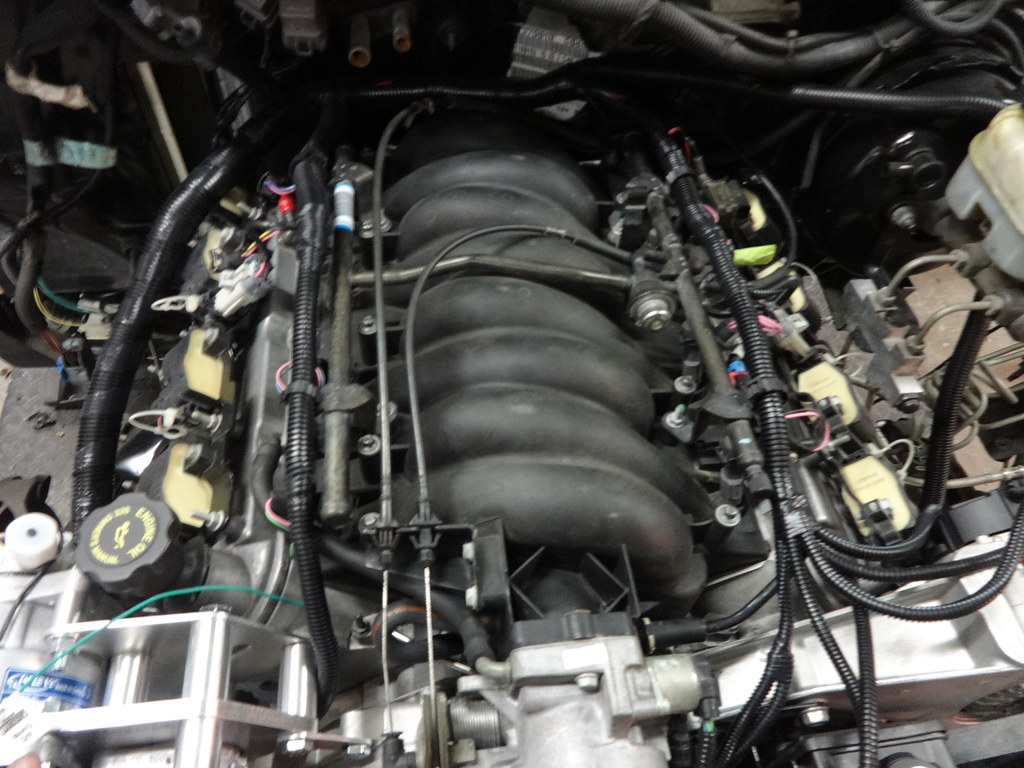
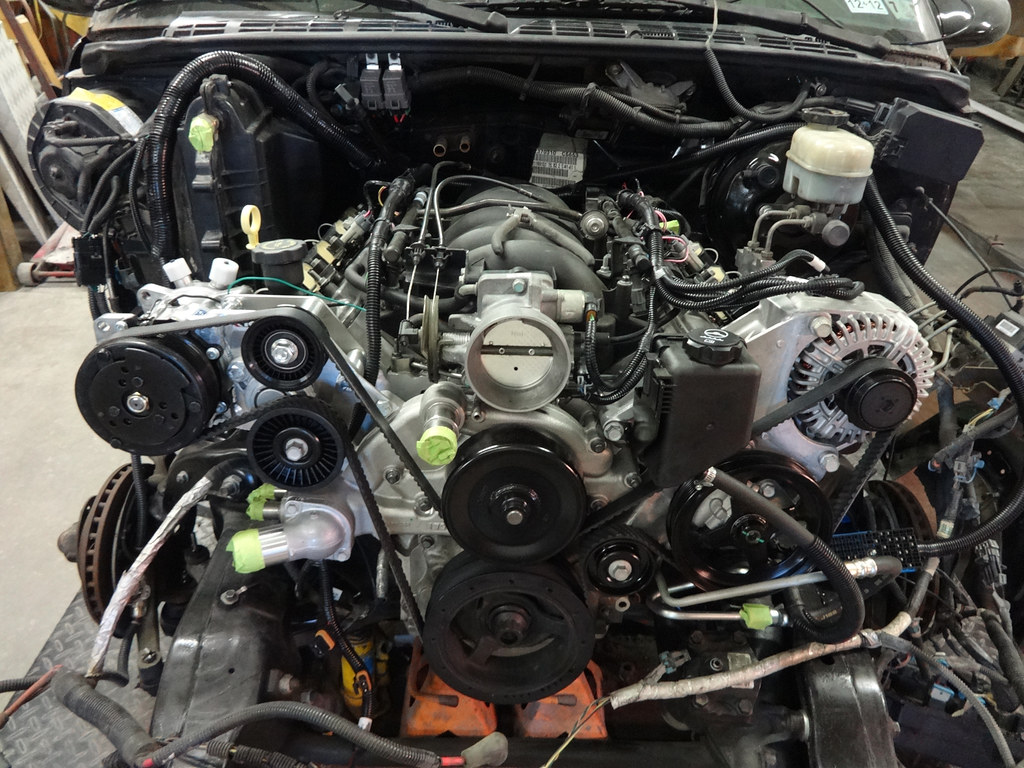
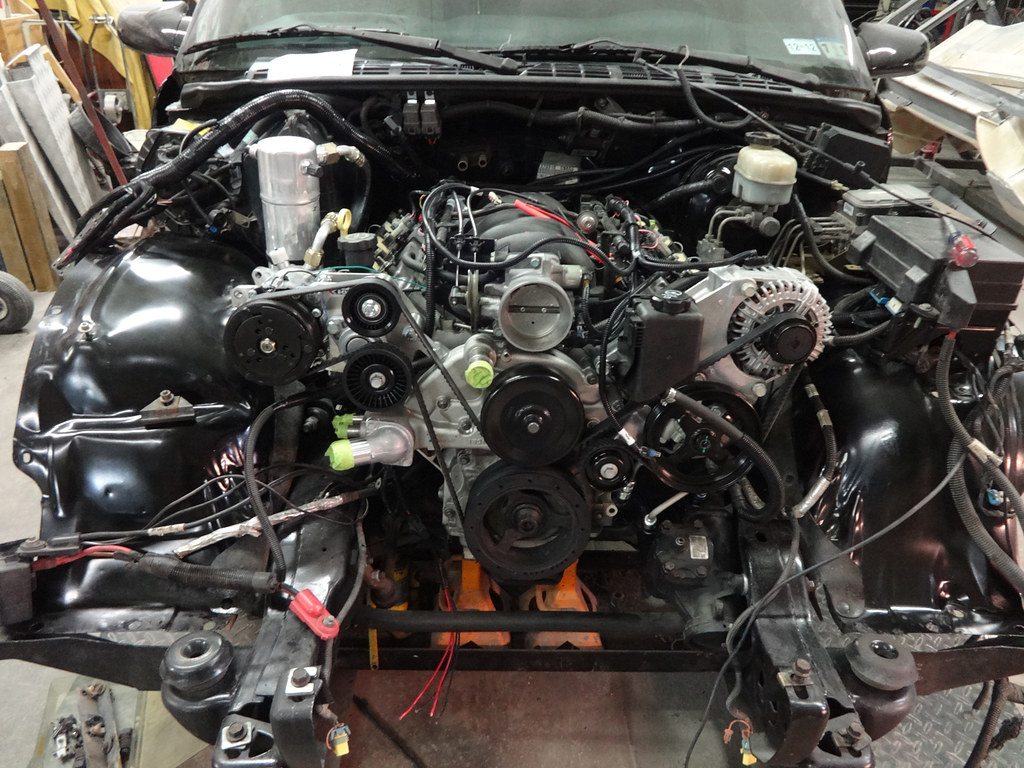
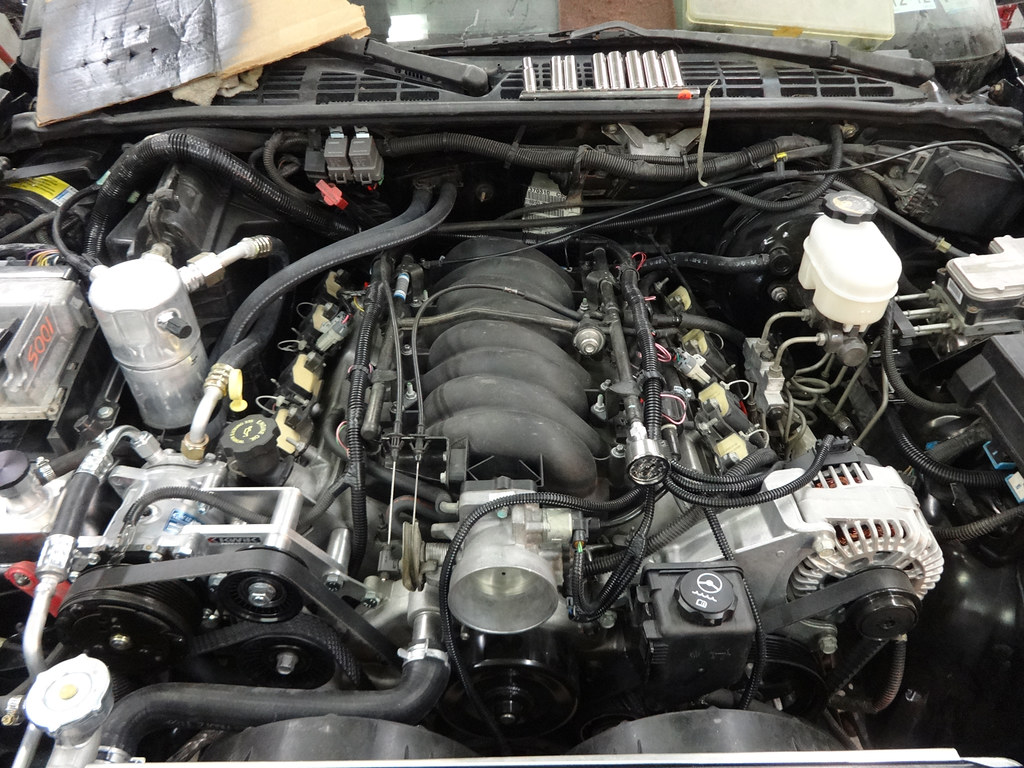
Cleaned up intake manifold and replaced gaskets, then installed it. S10 throttle and cruise cables hook right up. Mounted coils also.
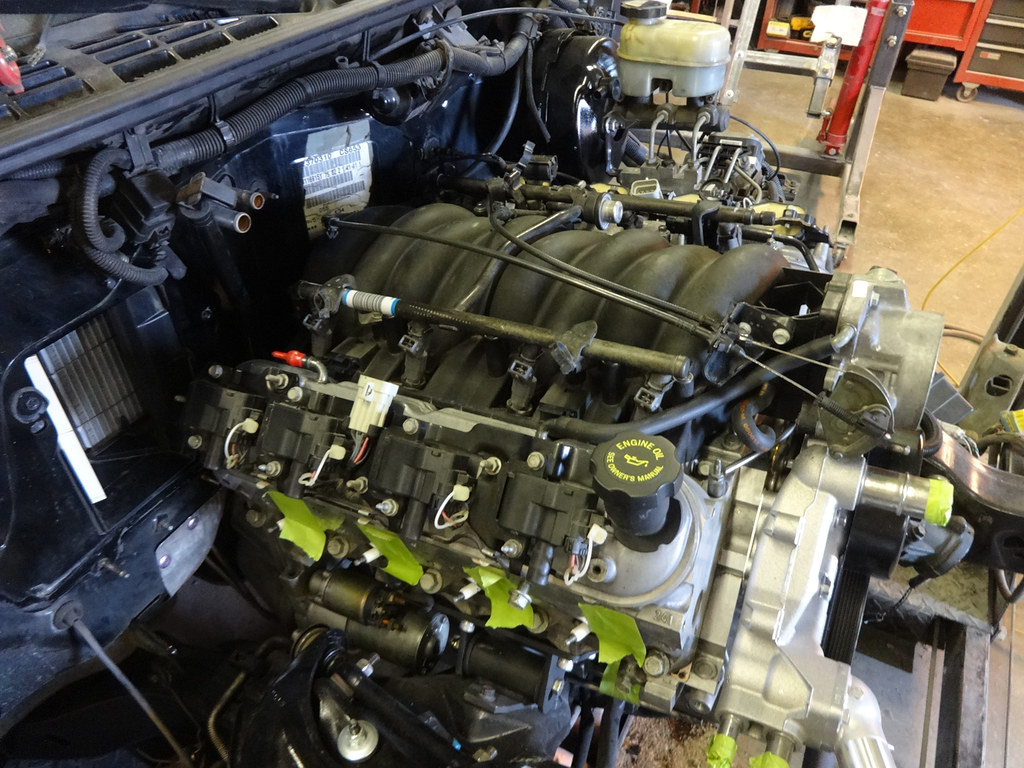
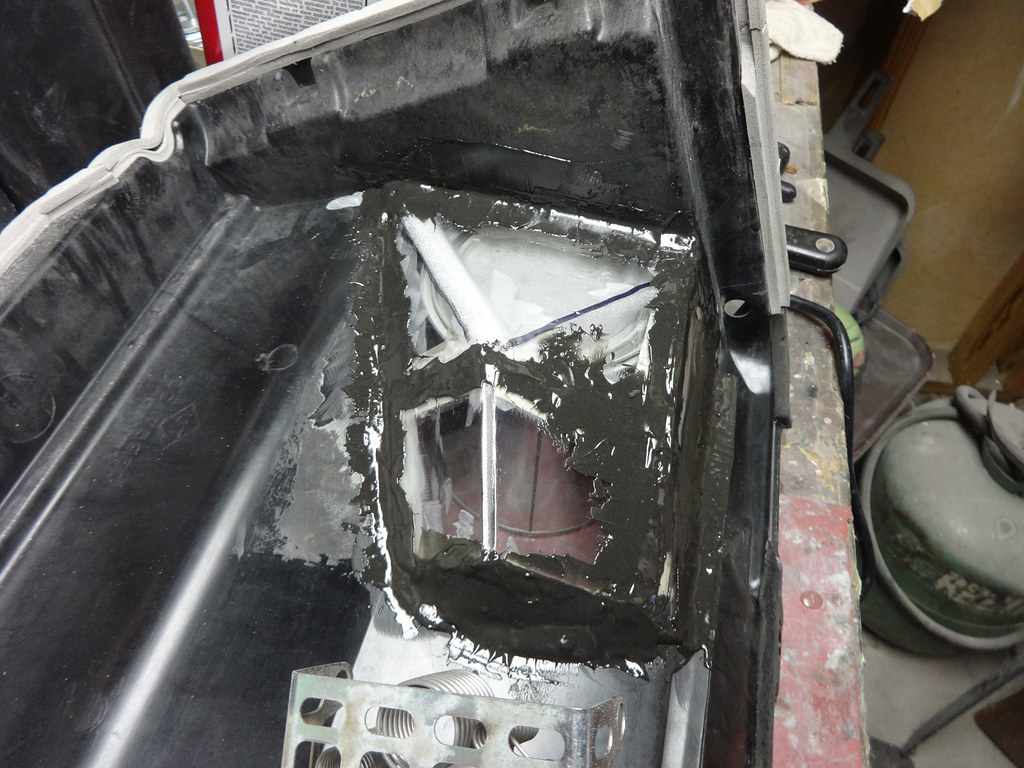
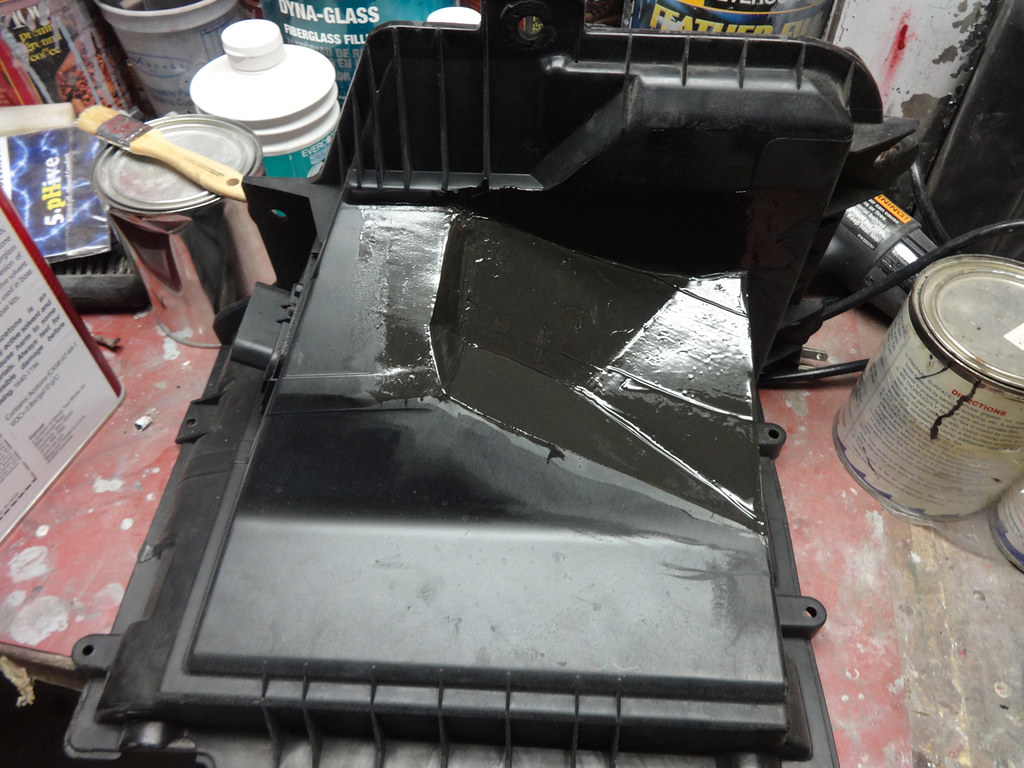
Notching the blower box for coils. Ended up using some scrap lexan. Heated it up to bend it how I wanted then used some epoxy and marine tex to hold it all together. Second pic was before being sanded and painted.
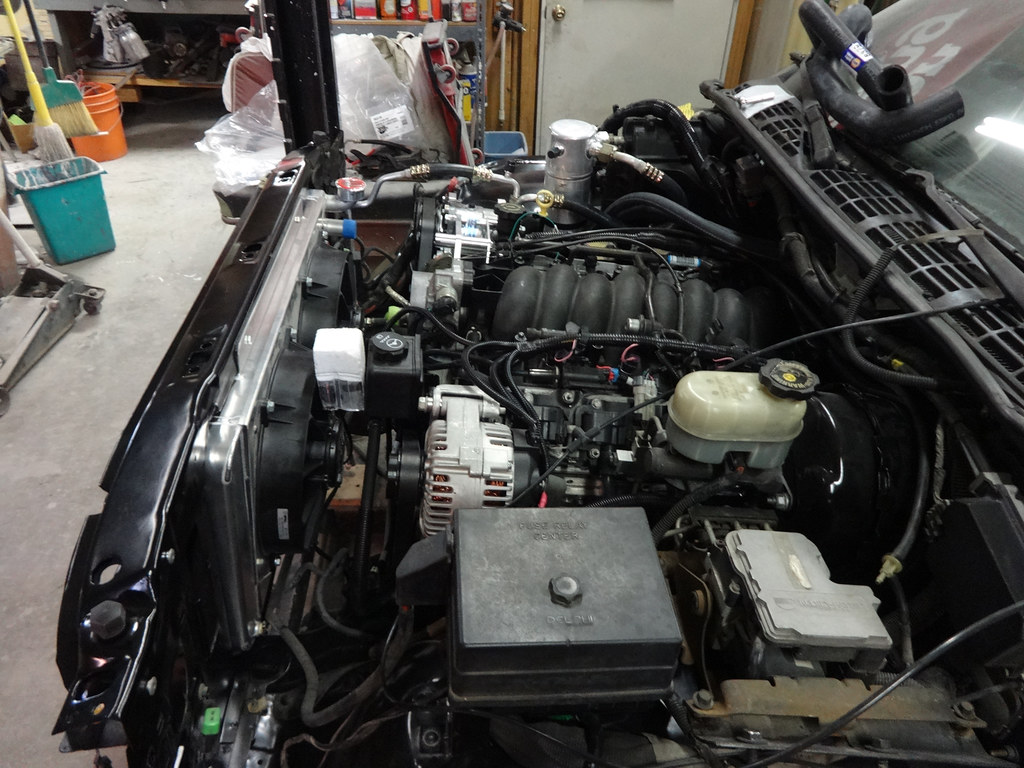
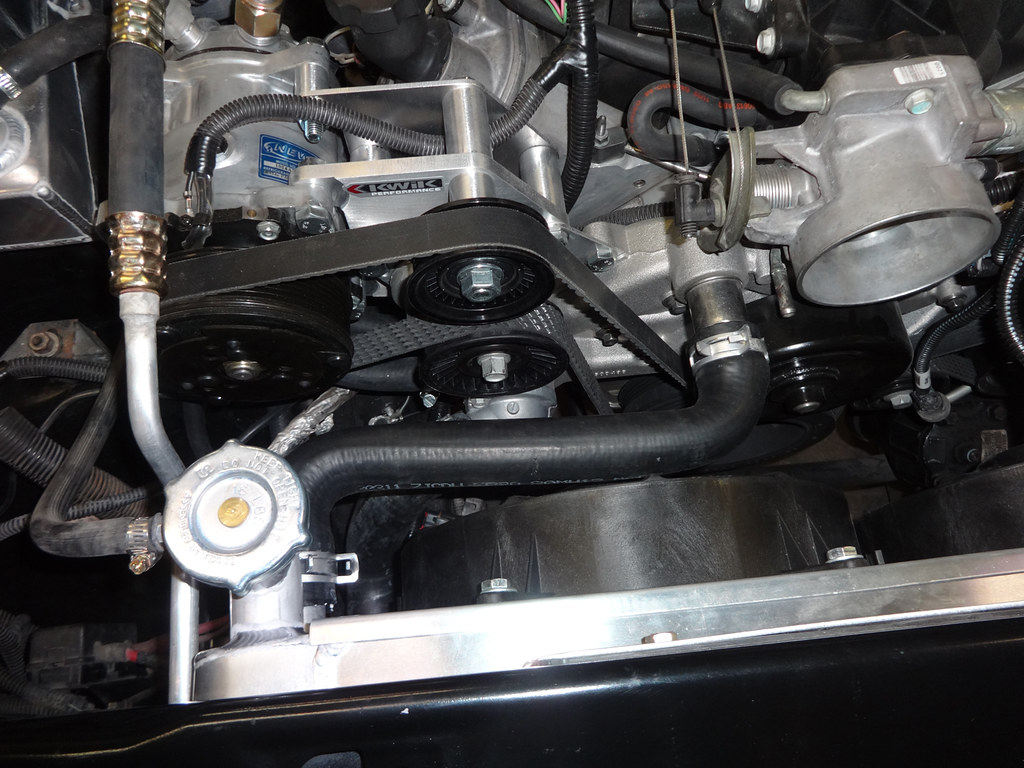
Installed the the alternator/power steering pump bracket and equipment, and also the Kwik high mount A/C and compressor.
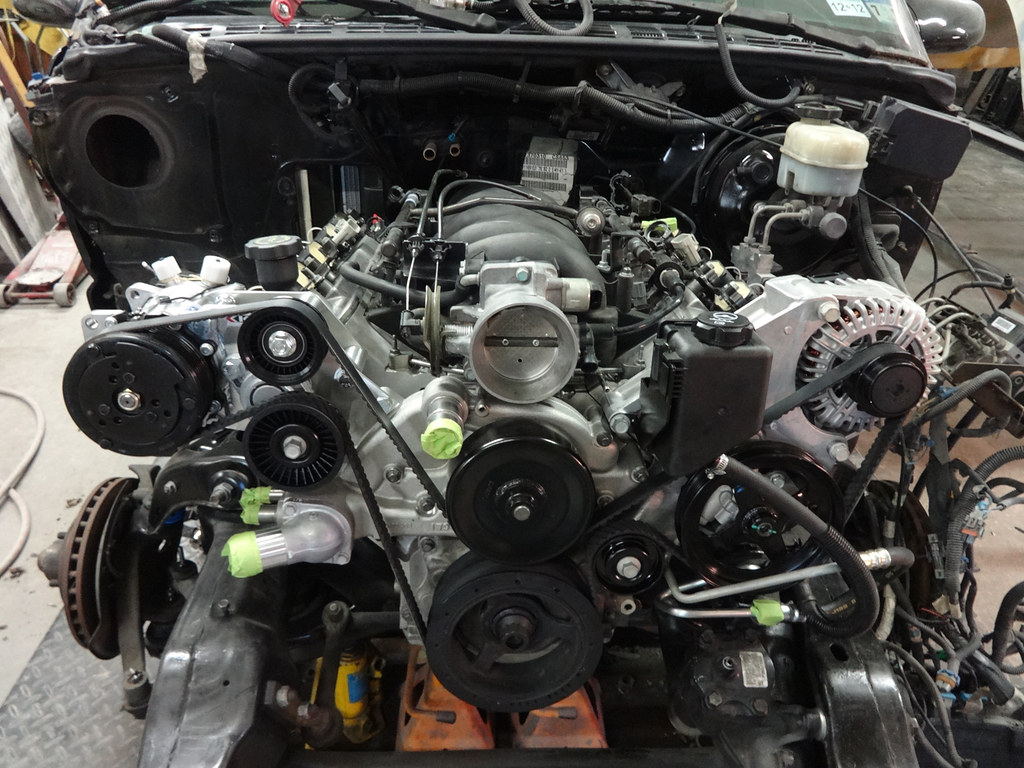
CPW wiring harness and MSD plug wires going on.
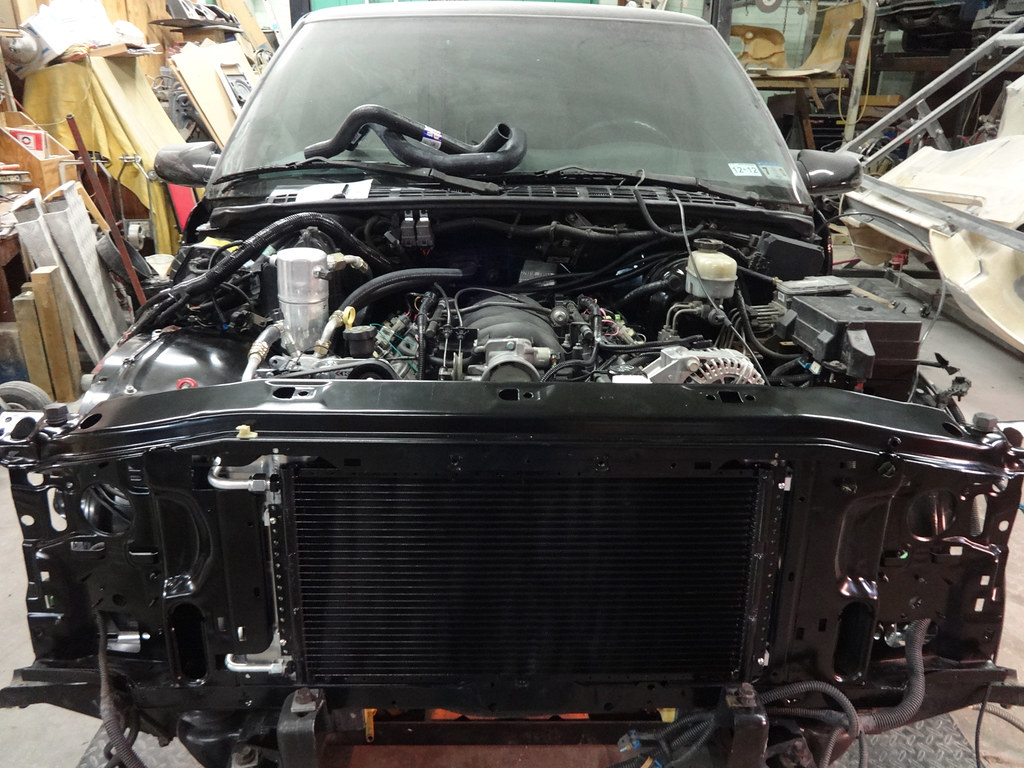
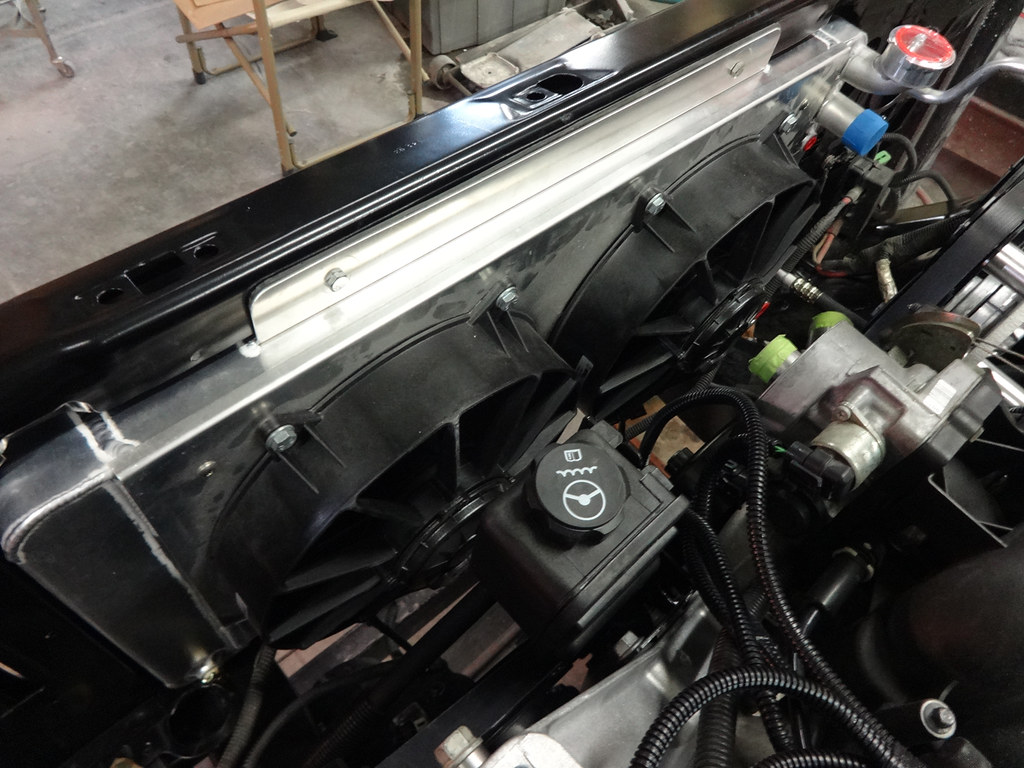
Inner fenders bolted in and all the associated stuff mounted on them. Radiator support installed along with radiator, condenser and electric fans. A/C lines connected and heater hoses put on.
Tru-cool transmission cooler mounted.
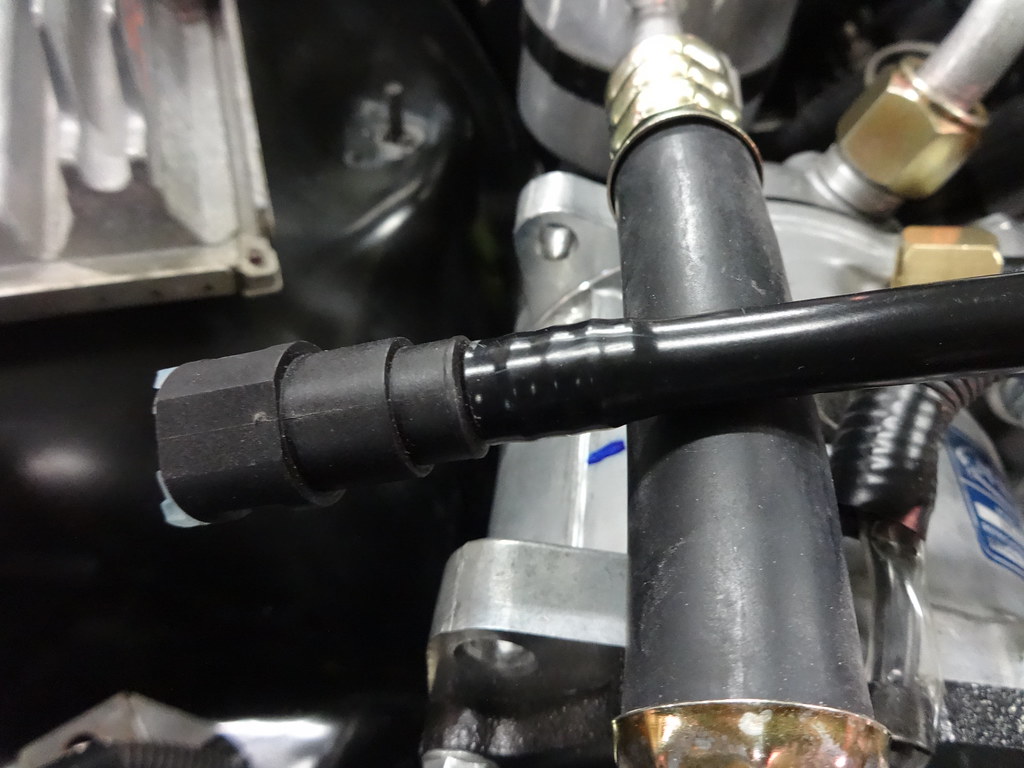
Made most of my fuel lines using nylon. Just need another fitting that I didn't have enough of to finish them, then I'll slip them all on and mount the filter on the frame. Will also use some regular rubber fuel line and slide over the nylon just for added protection against rubbing in some areas.
Notching the blower box for coils. Ended up using some scrap lexan. Heated it up to bend it how I wanted then used some epoxy and marine tex to hold it all together. Second pic was before being sanded and painted.
Installed the the alternator/power steering pump bracket and equipment, and also the Kwik high mount A/C and compressor.
CPW wiring harness and MSD plug wires going on.
Inner fenders bolted in and all the associated stuff mounted on them. Radiator support installed along with radiator, condenser and electric fans. A/C lines connected and heater hoses put on.
Tru-cool transmission cooler mounted.
Made most of my fuel lines using nylon. Just need another fitting that I didn't have enough of to finish them, then I'll slip them all on and mount the filter on the frame. Will also use some regular rubber fuel line and slide over the nylon just for added protection against rubbing in some areas.
03-10-2015, 01:15 AM
#7
Teching In
Thread Starter
Join Date: Jan 2013
Location: Dallas, TX
Posts: 27
Likes: 0
Received 0 Likes
on
0 Posts
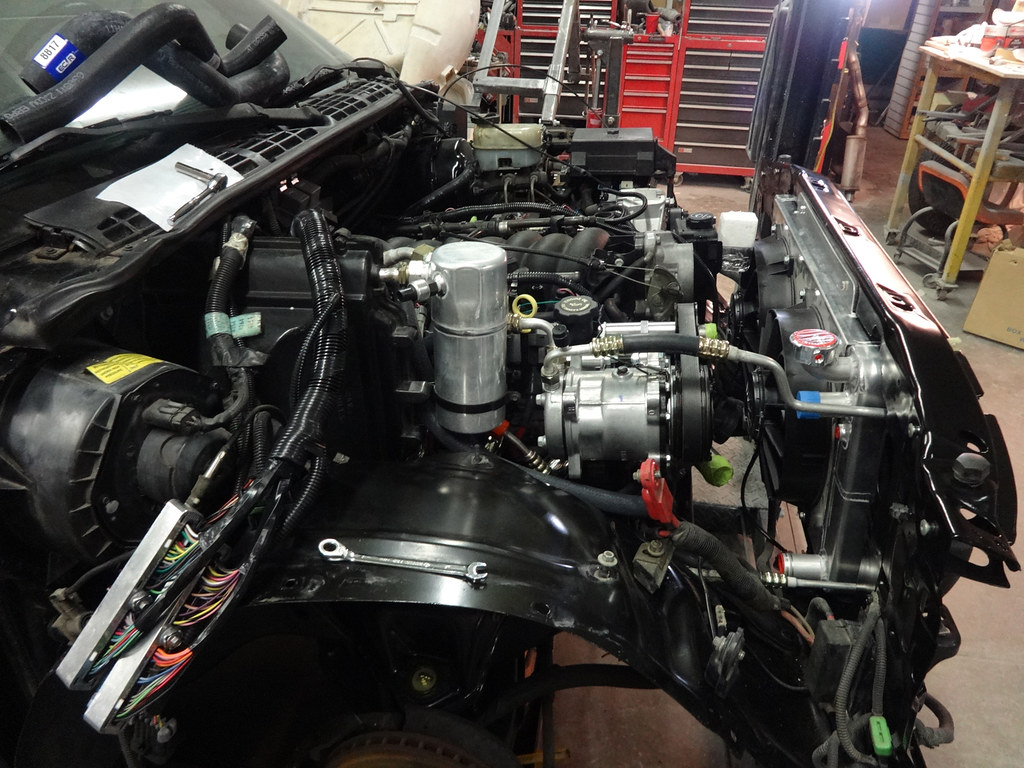
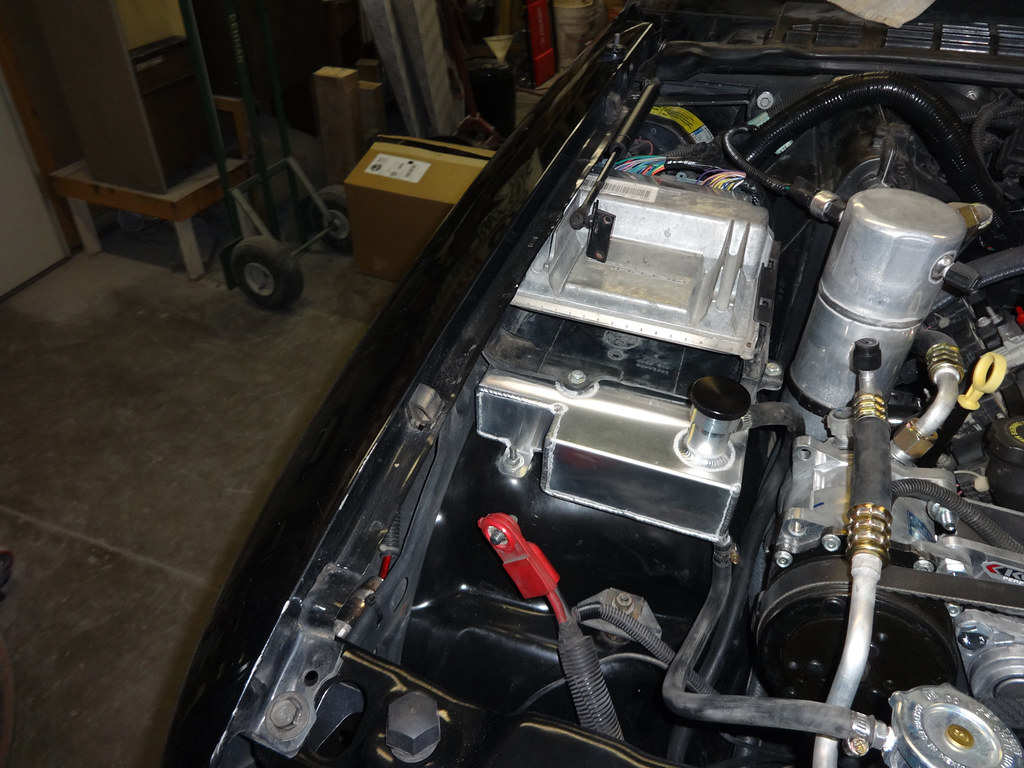
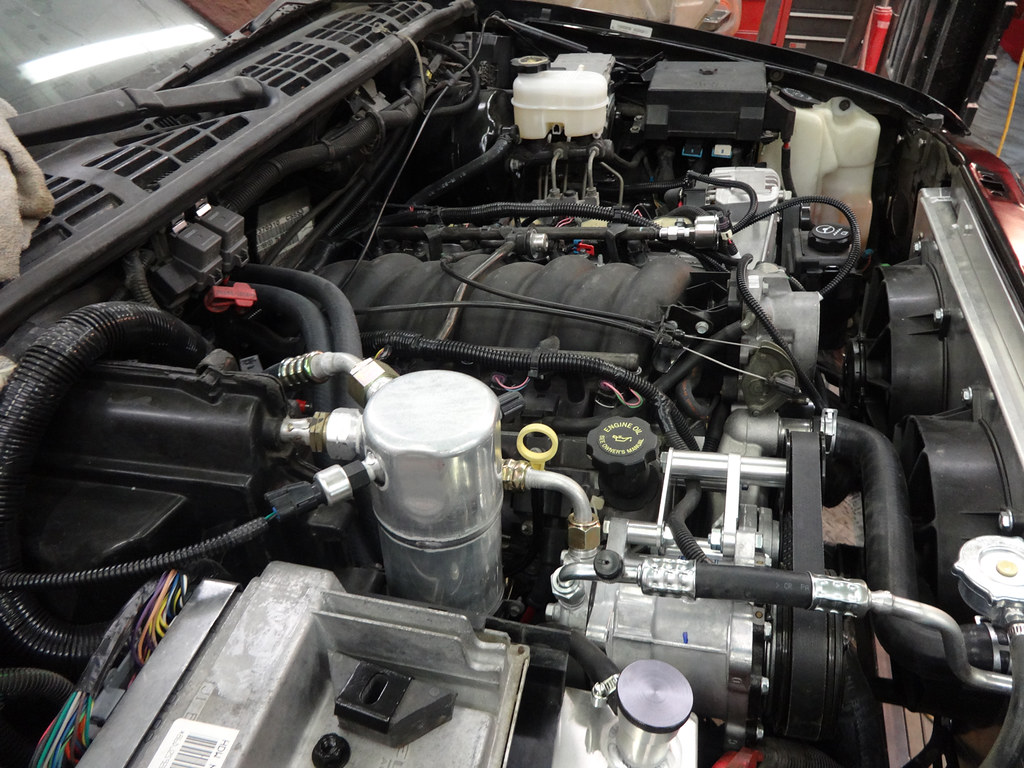
Was originally going to try and modify the stock plastic overflow tank to clear the a/c compressor, but decided to go with Jared's overflow tank as it would look much better.

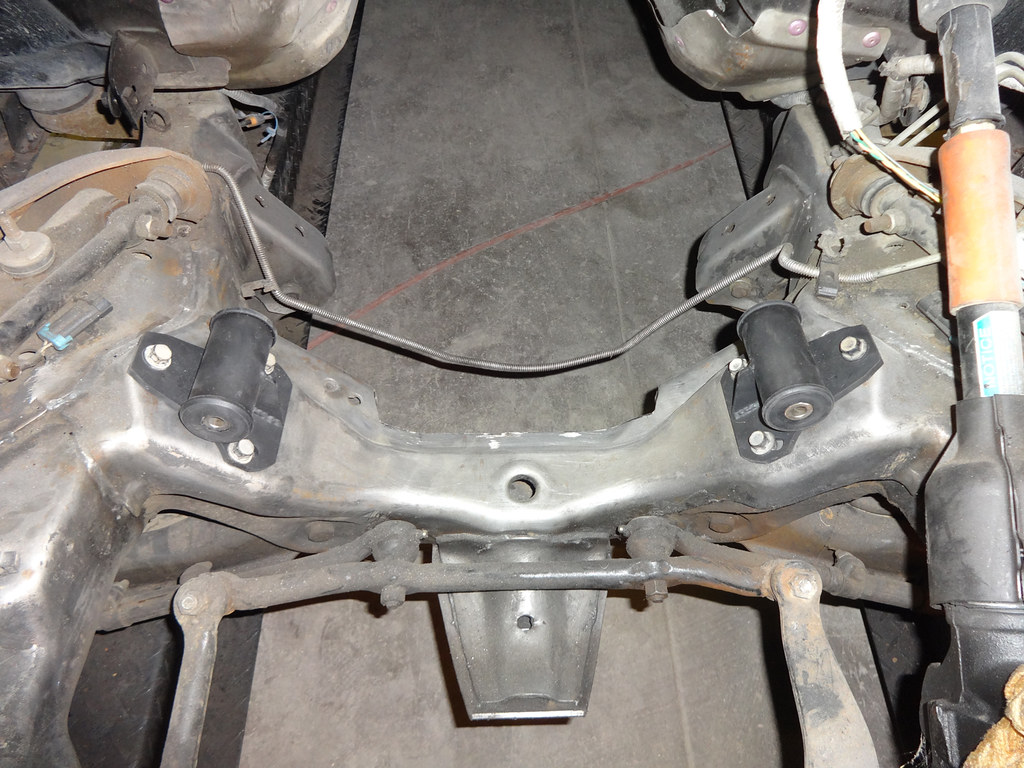
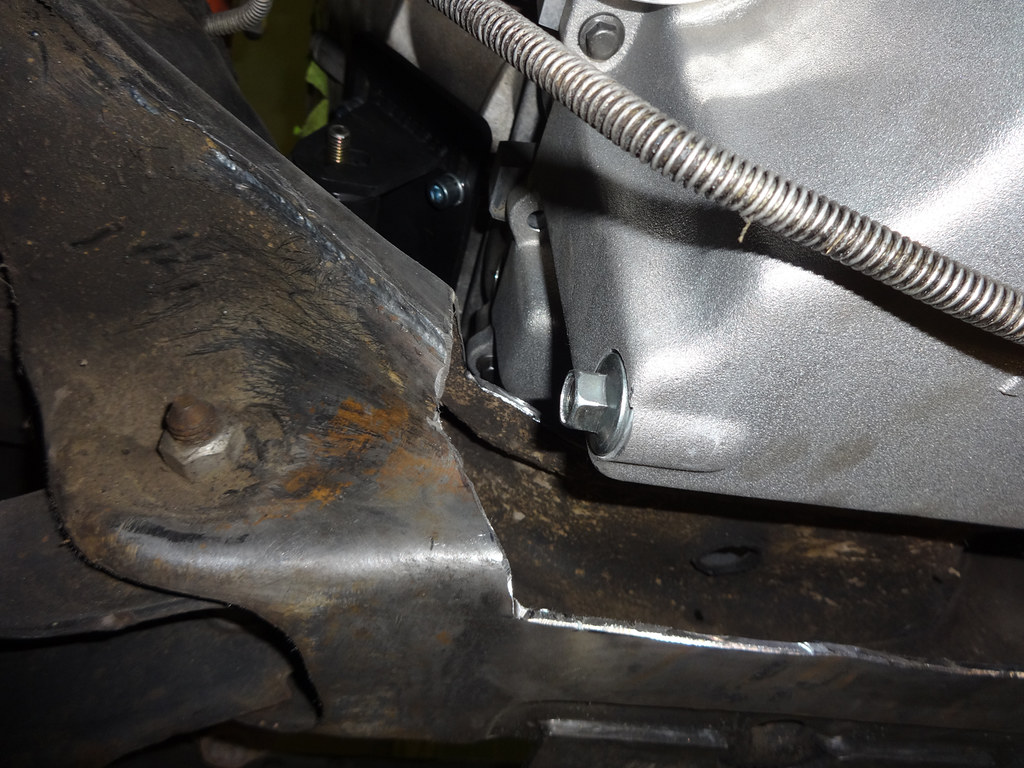
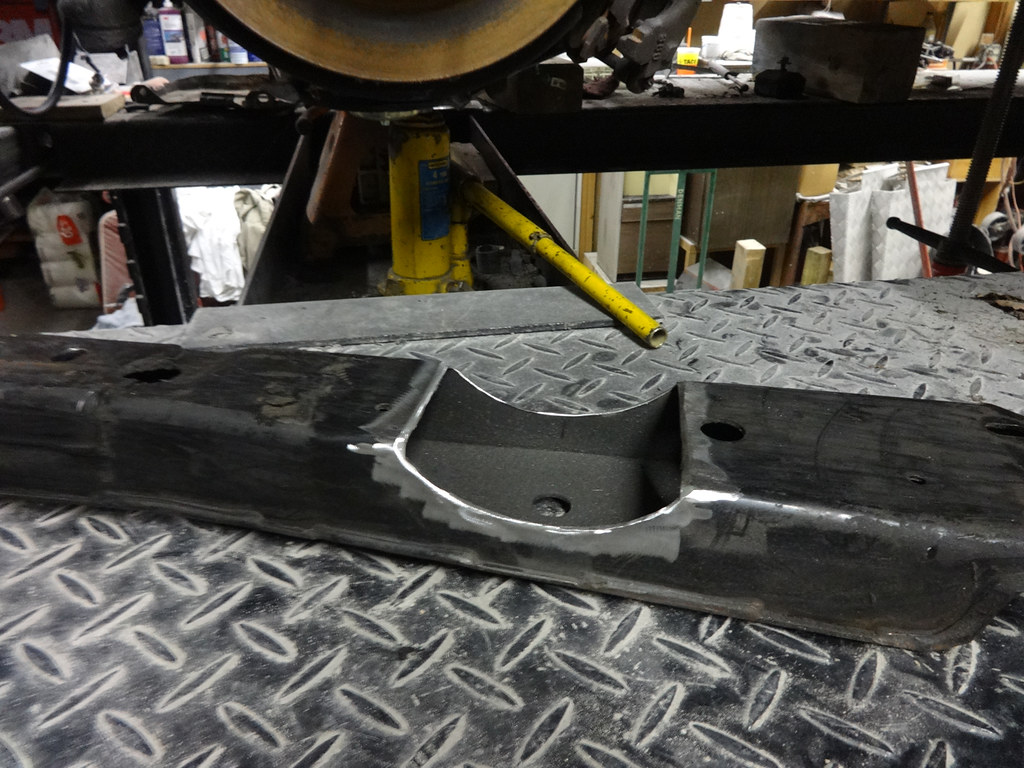
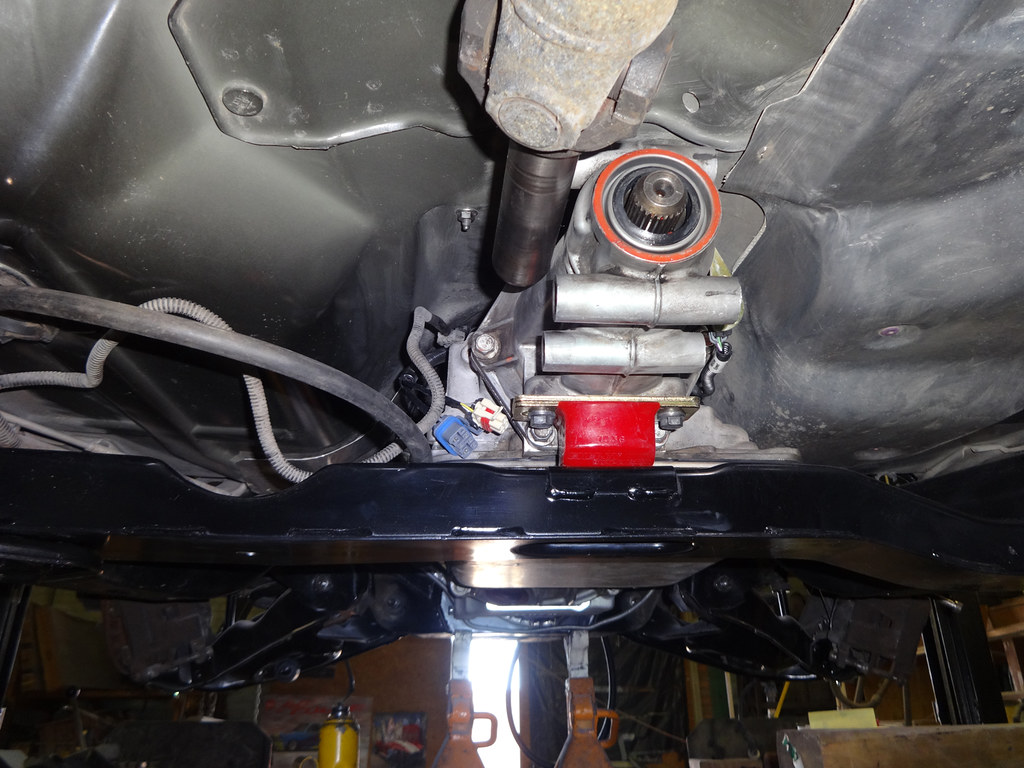
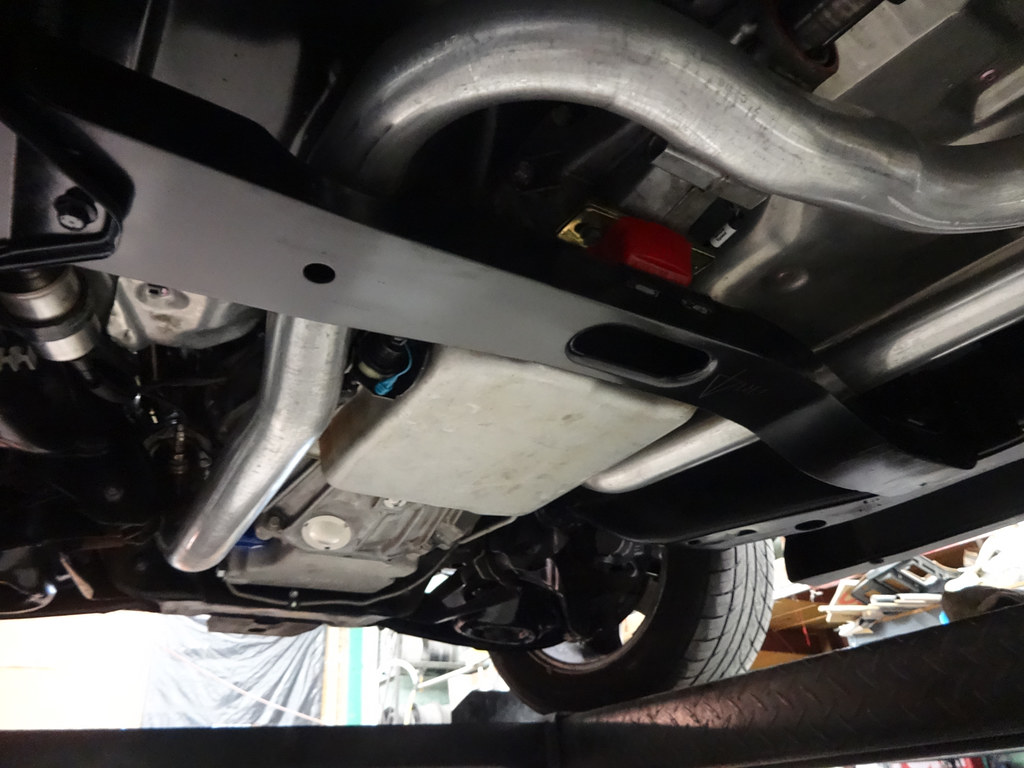
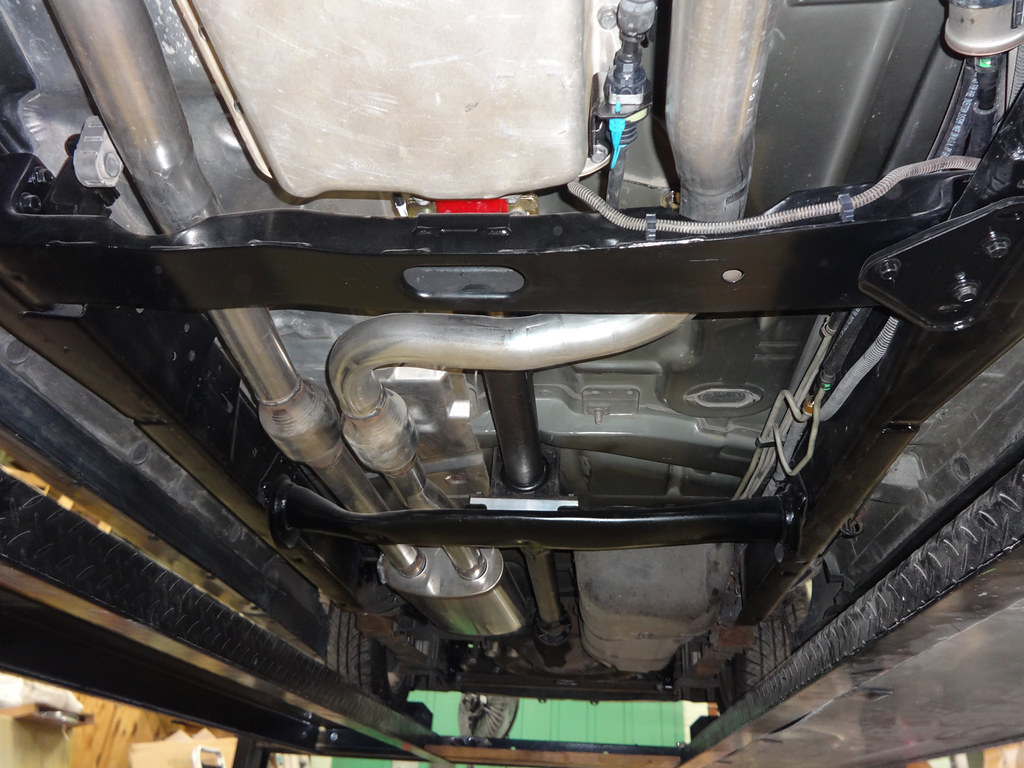
Notched the transmission crossmember for exhaust clearance on the driver side. The pipe could've cleared without the notch, but I wanted a little more clearance between it and the cab floor. Got a new urethane mount for it.

Radiator and heater hoses on.
The high side a/c line needed to be shortened about �� which is why the fittings are a different color.

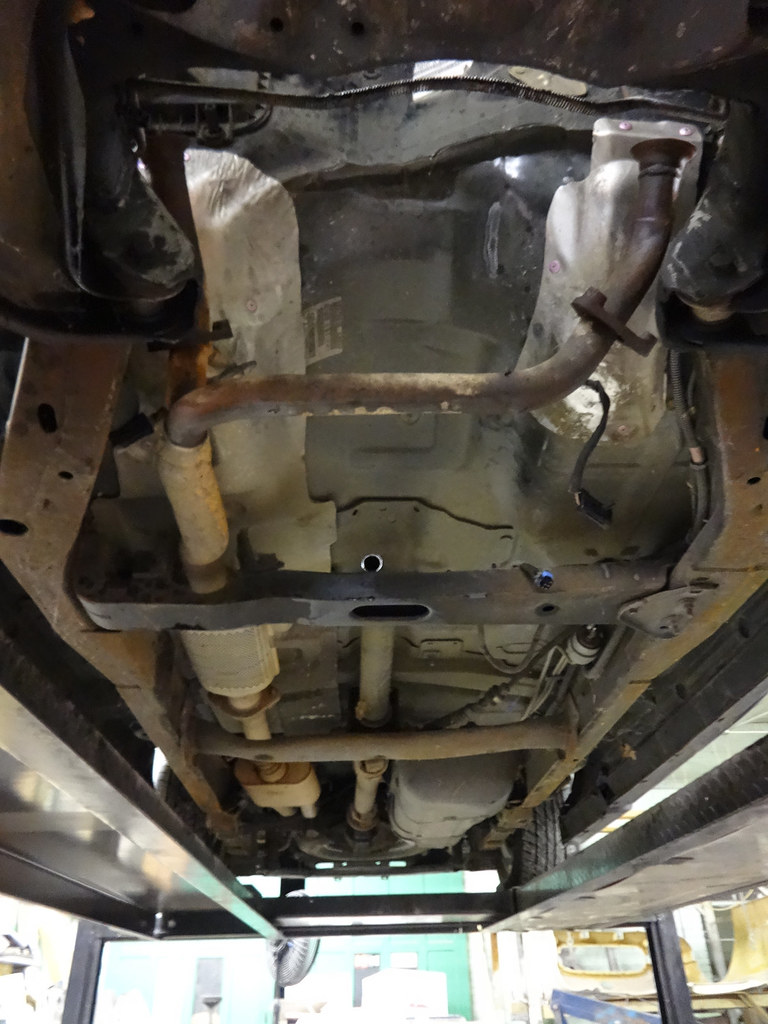
I've also cleaned the bottom of the cab and frame, then painted the frame. It's one of those things that's like "Where do I stop?" Now all I lack is cleaning under the bed, but I'll take the bed off for that later.
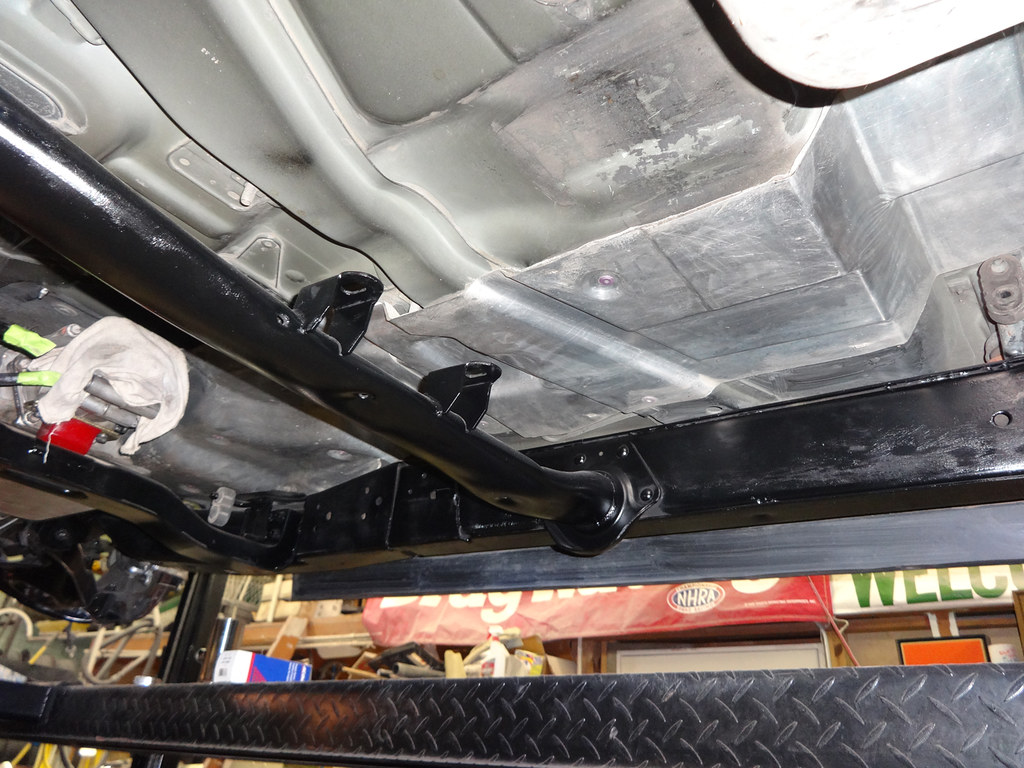
Notched the transmission crossmember for exhaust clearance on the driver side. The pipe could've cleared without the notch, but I wanted a little more clearance between it and the cab floor. Got a new urethane mount for it.
Radiator and heater hoses on.
The high side a/c line needed to be shortened about �� which is why the fittings are a different color.
I've also cleaned the bottom of the cab and frame, then painted the frame. It's one of those things that's like "Where do I stop?" Now all I lack is cleaning under the bed, but I'll take the bed off for that later.
Trending Topics
03-10-2015, 01:15 AM
#8
Teching In
Thread Starter
Join Date: Jan 2013
Location: Dallas, TX
Posts: 27
Likes: 0
Received 0 Likes
on
0 Posts
Built an air intake.

At this point I filled everything with fluid and was able to start the truck for the first time�with only headers.
https://www.flickr.com/photos/100782...8/13372322083/
At this point I filled everything with fluid and was able to start the truck for the first time�with only headers.
https://www.flickr.com/photos/100782...8/13372322083/
03-10-2015, 01:16 AM
#9
Teching In
Thread Starter
Join Date: Jan 2013
Location: Dallas, TX
Posts: 27
Likes: 0
Received 0 Likes
on
0 Posts
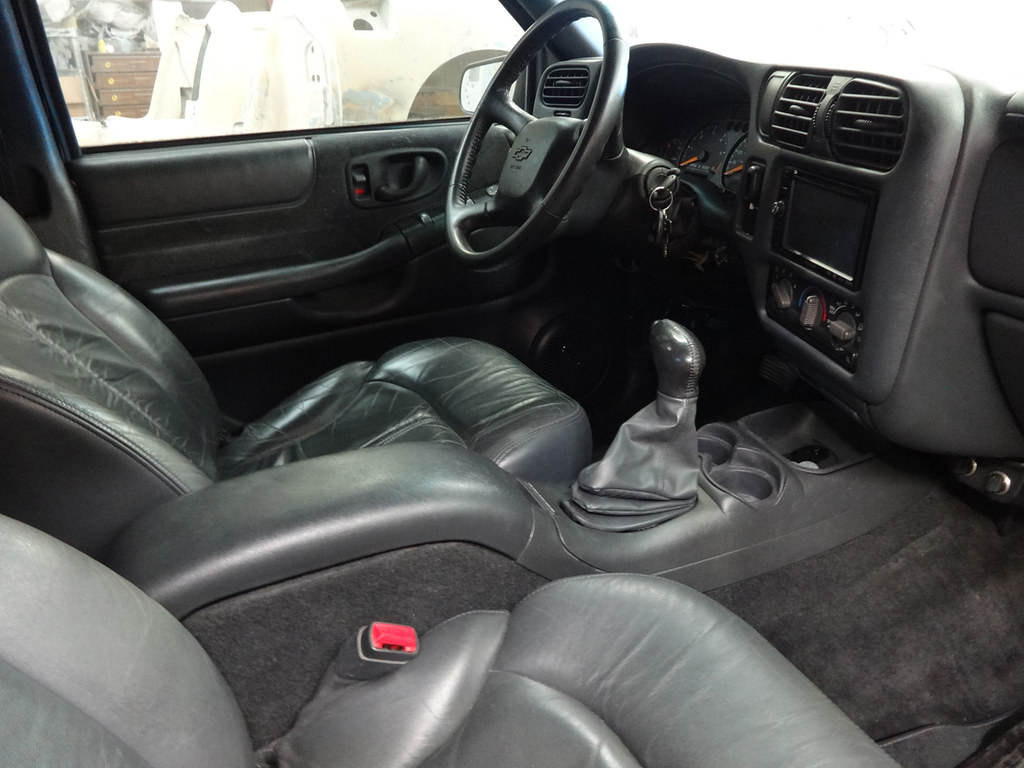
Finished wiring up the floor shifter I got from a Bravada.
Had to get the front half of the driveshaft shortened about an 1”. Once I got that back I took the truck down the street to the exhaust shop. I went with dual 2.5" into Maganflow cats into dual in dual out 22" Magnaflow with built in x-pipe. I wanted to run it out the passenger rear like factory exhaust, but dual 2.5" pipes snaking past the spare tire would've been difficult, so it just ends over the axle. I like the sound. It’s relatively quiet at idle and cruising down the highway but it wakes up when you get into it.
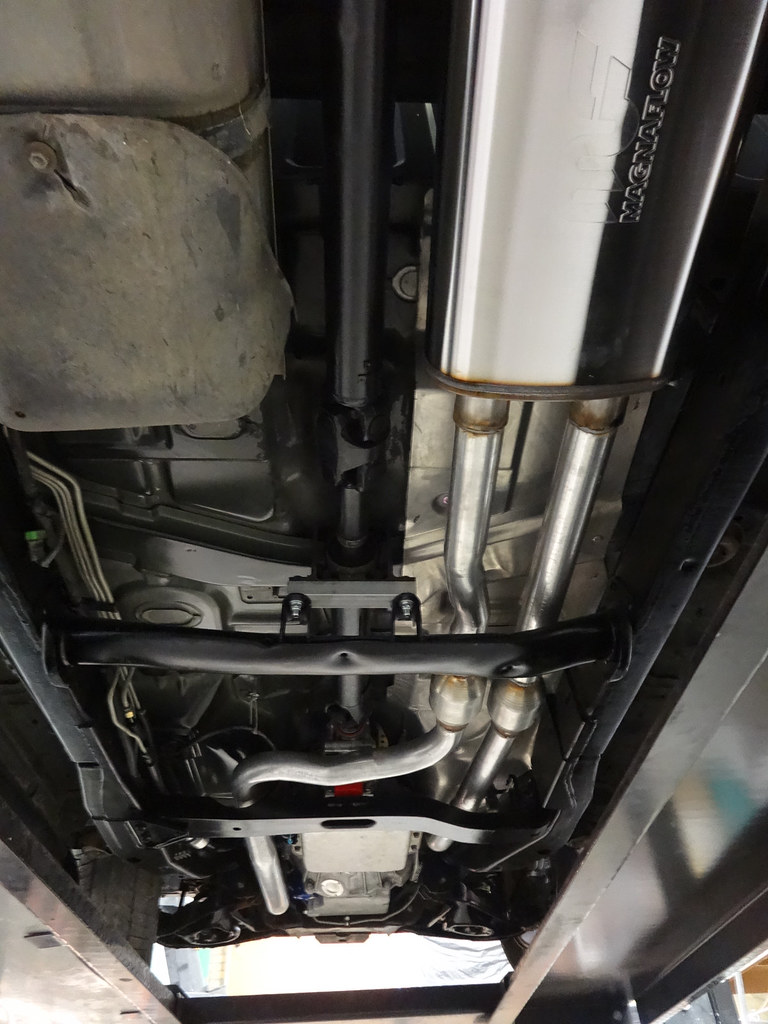
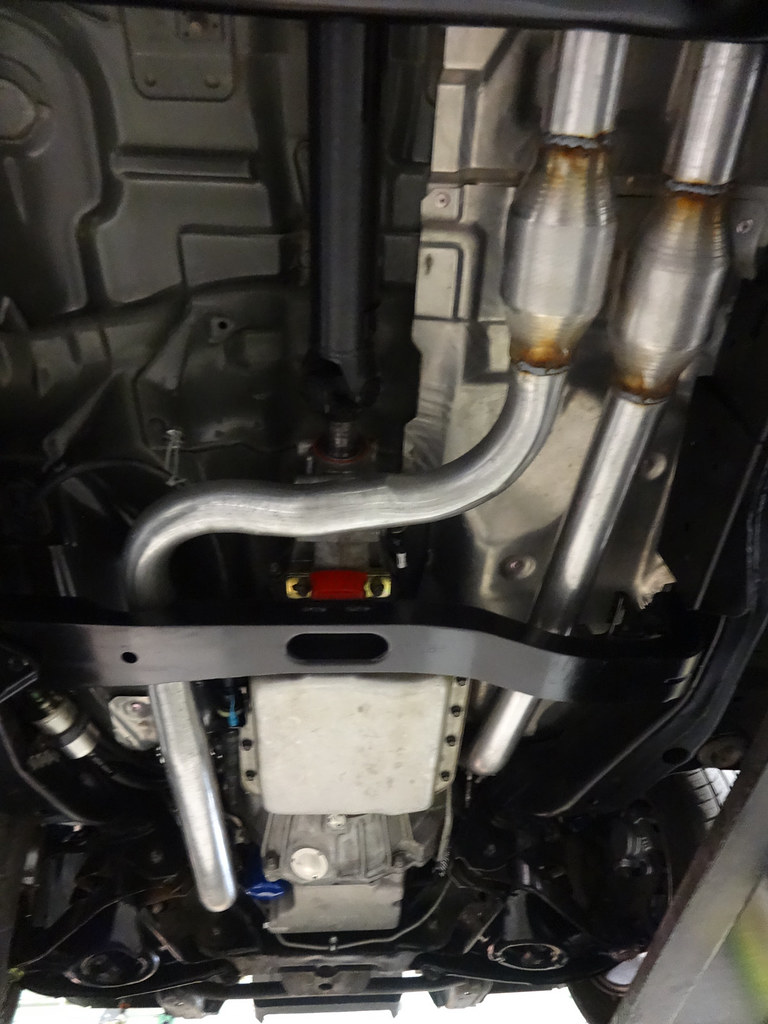
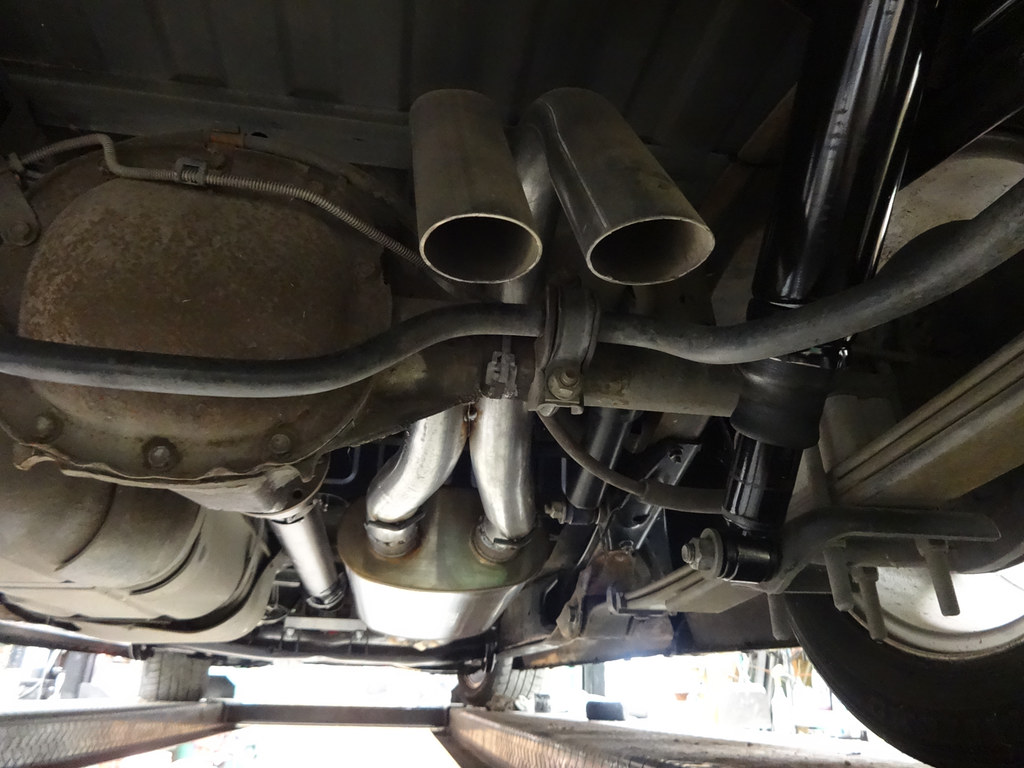
Had to get the front half of the driveshaft shortened about an 1”. Once I got that back I took the truck down the street to the exhaust shop. I went with dual 2.5" into Maganflow cats into dual in dual out 22" Magnaflow with built in x-pipe. I wanted to run it out the passenger rear like factory exhaust, but dual 2.5" pipes snaking past the spare tire would've been difficult, so it just ends over the axle. I like the sound. It’s relatively quiet at idle and cruising down the highway but it wakes up when you get into it.
Last edited by cwd240z; 03-10-2015 at 12:24 PM.
03-10-2015, 01:16 AM
#10
Teching In
Thread Starter
Join Date: Jan 2013
Location: Dallas, TX
Posts: 27
Likes: 0
Received 0 Likes
on
0 Posts
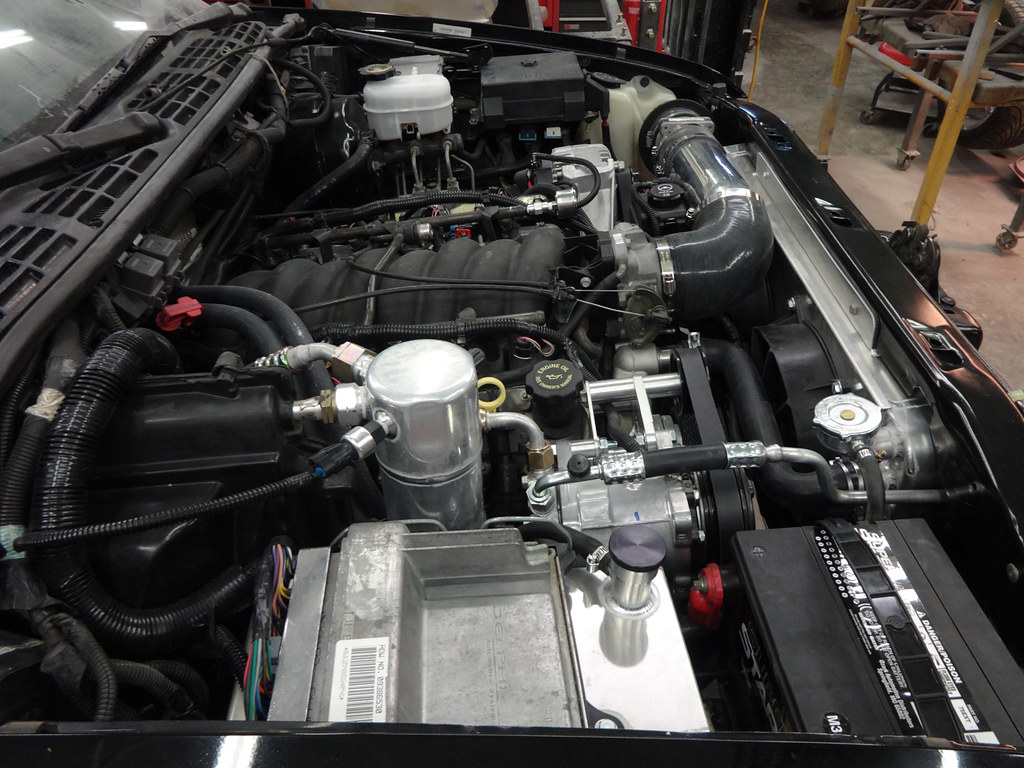
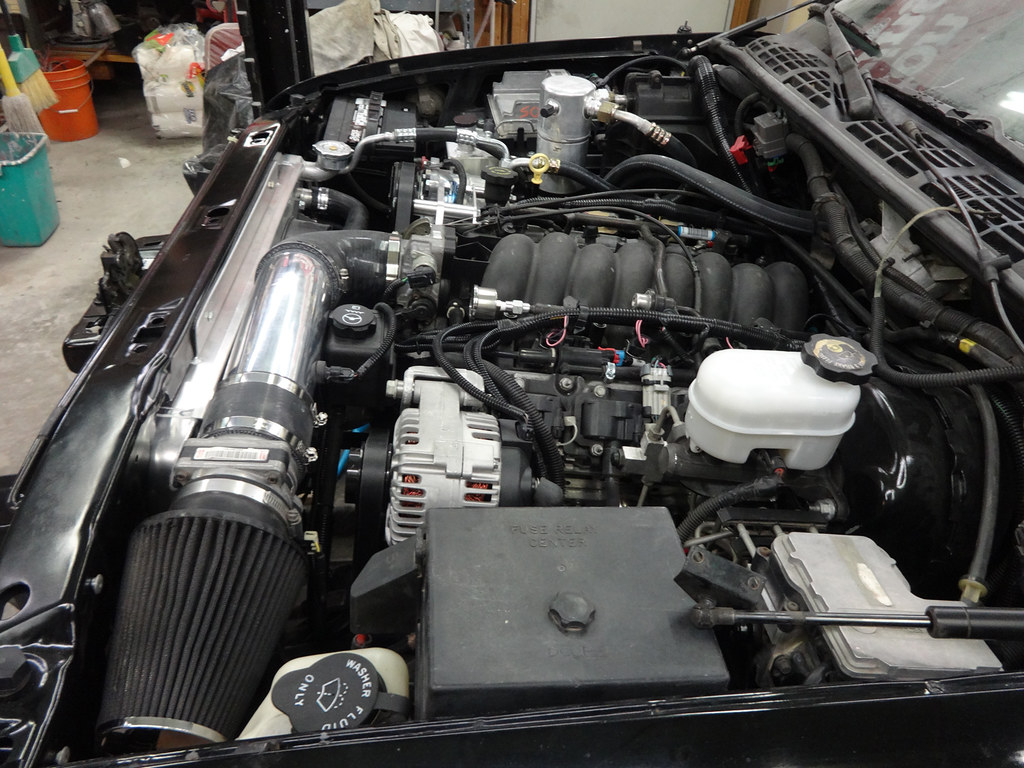
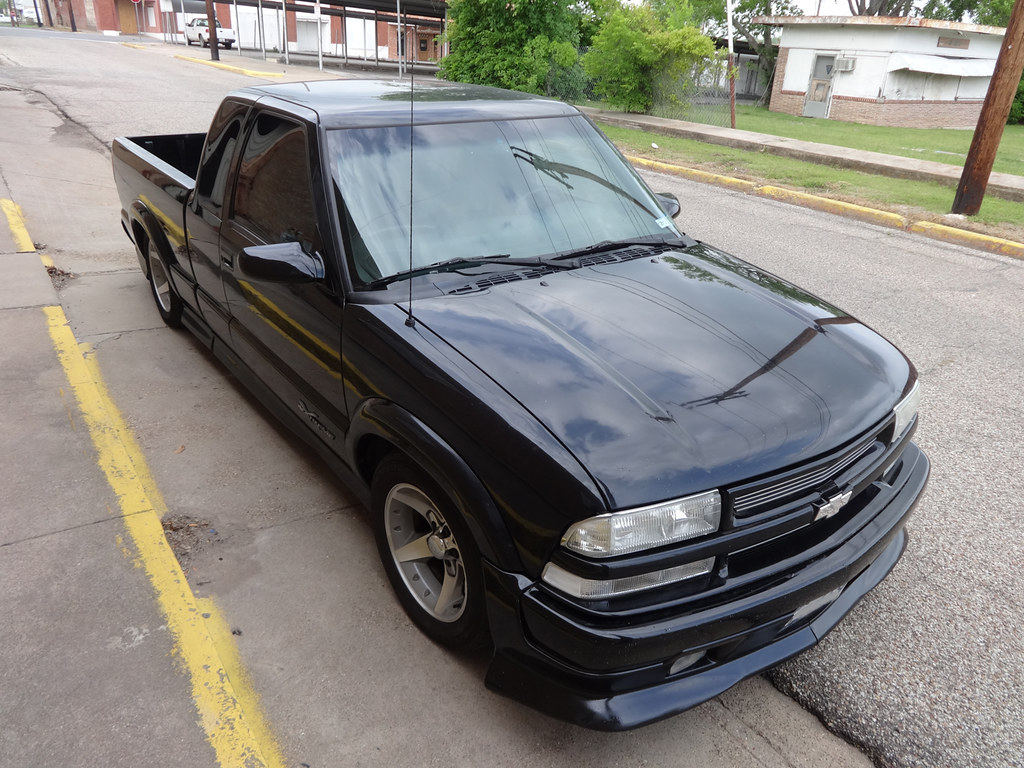
Everything put back together and truck is on the road again with a new, better heart:
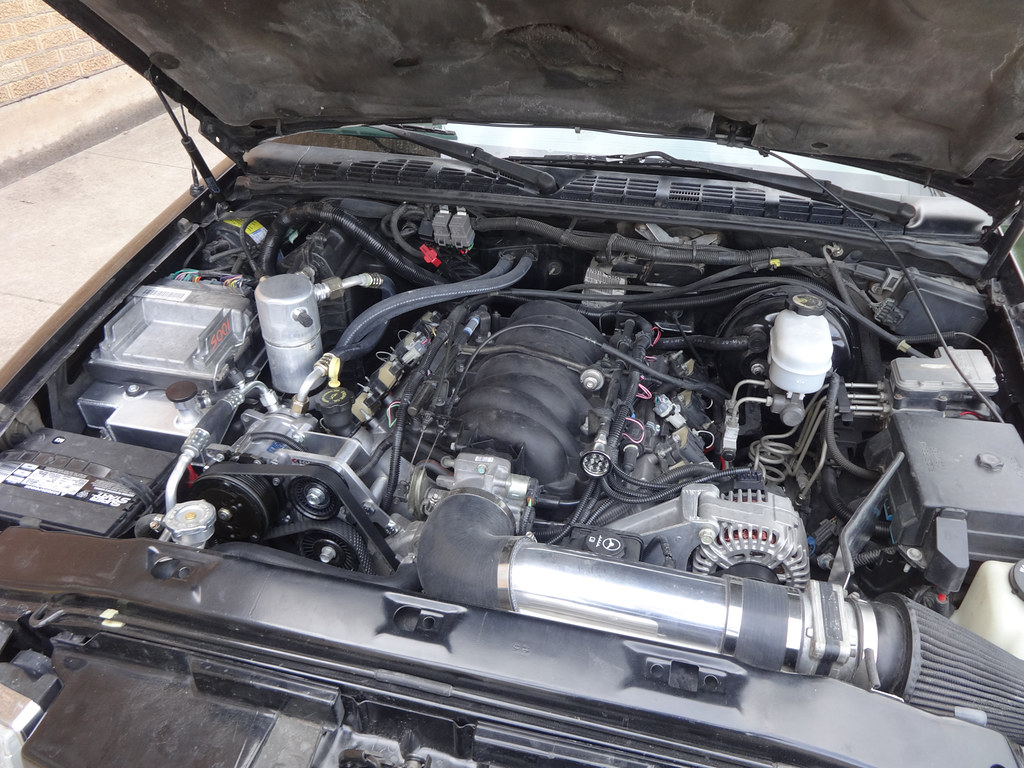
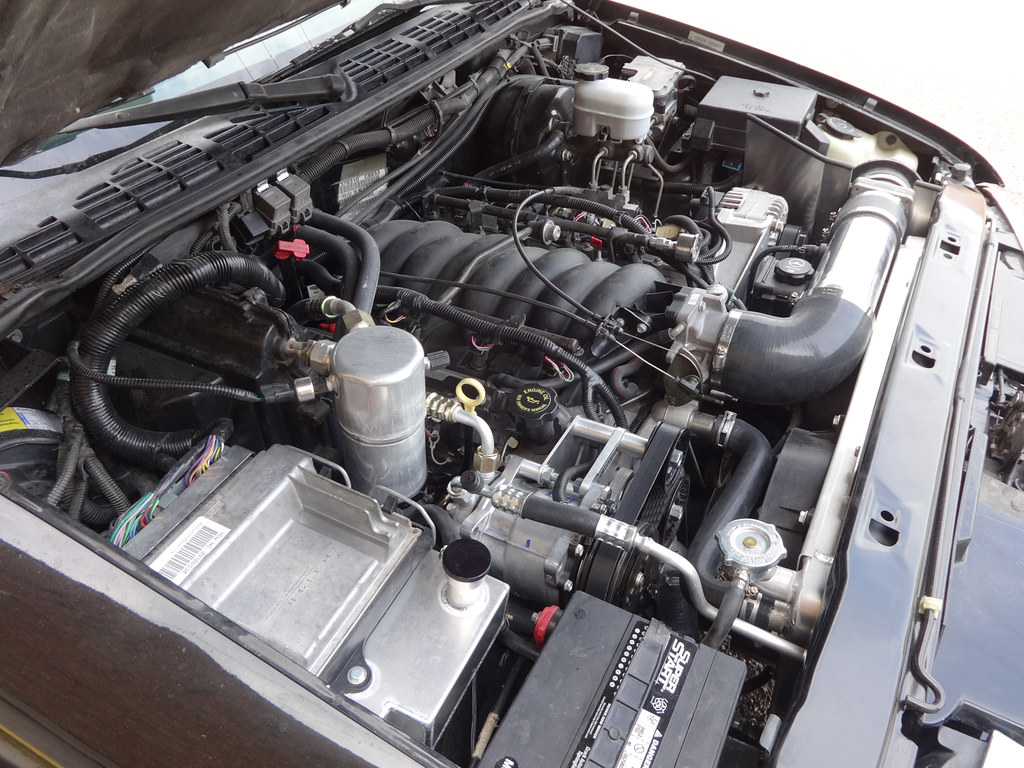
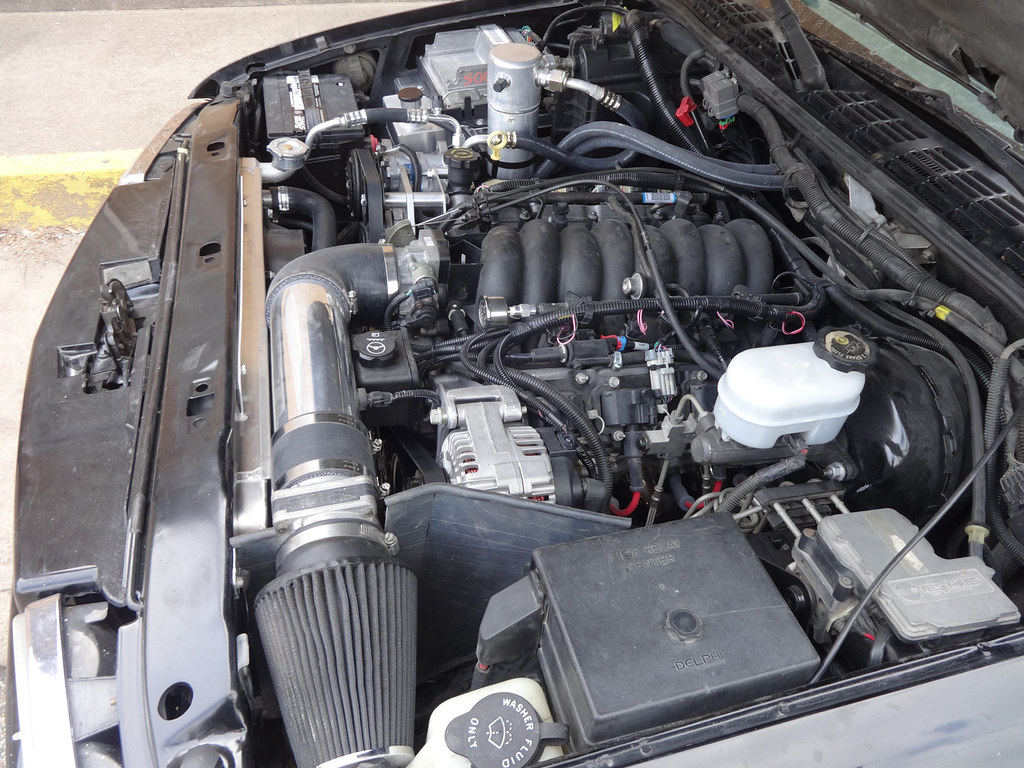

A/C blows a chilly 45 degrees going down the road. I'm happy with that.
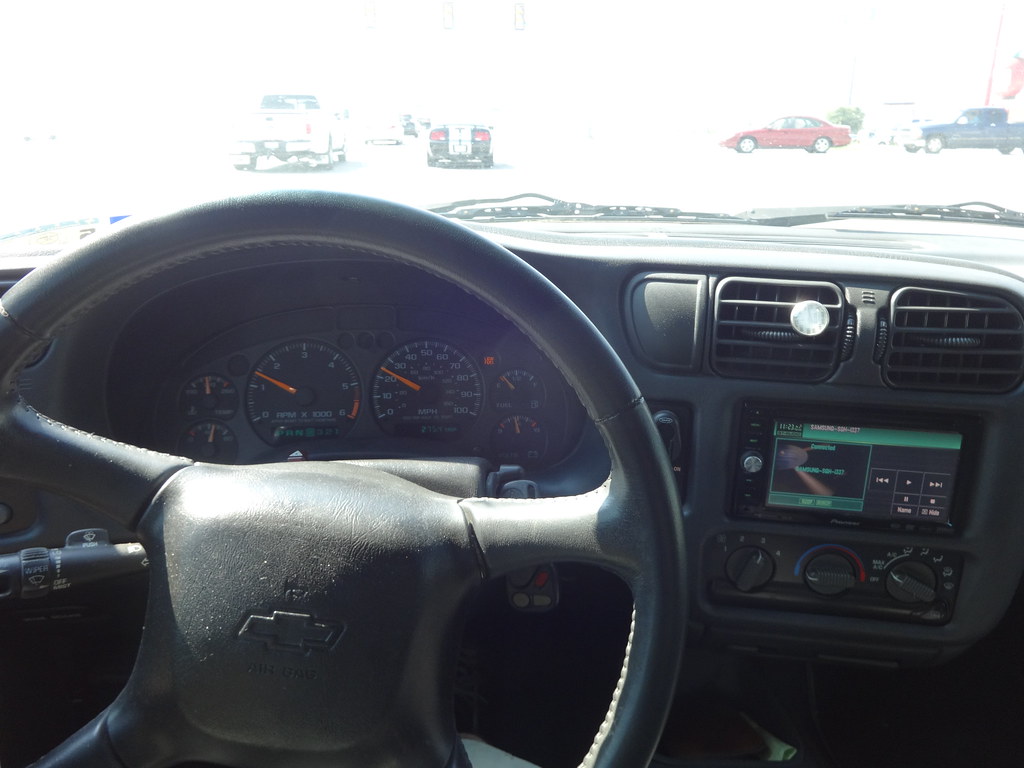
Finally got around to fitting the fuel rail covers on the truck...
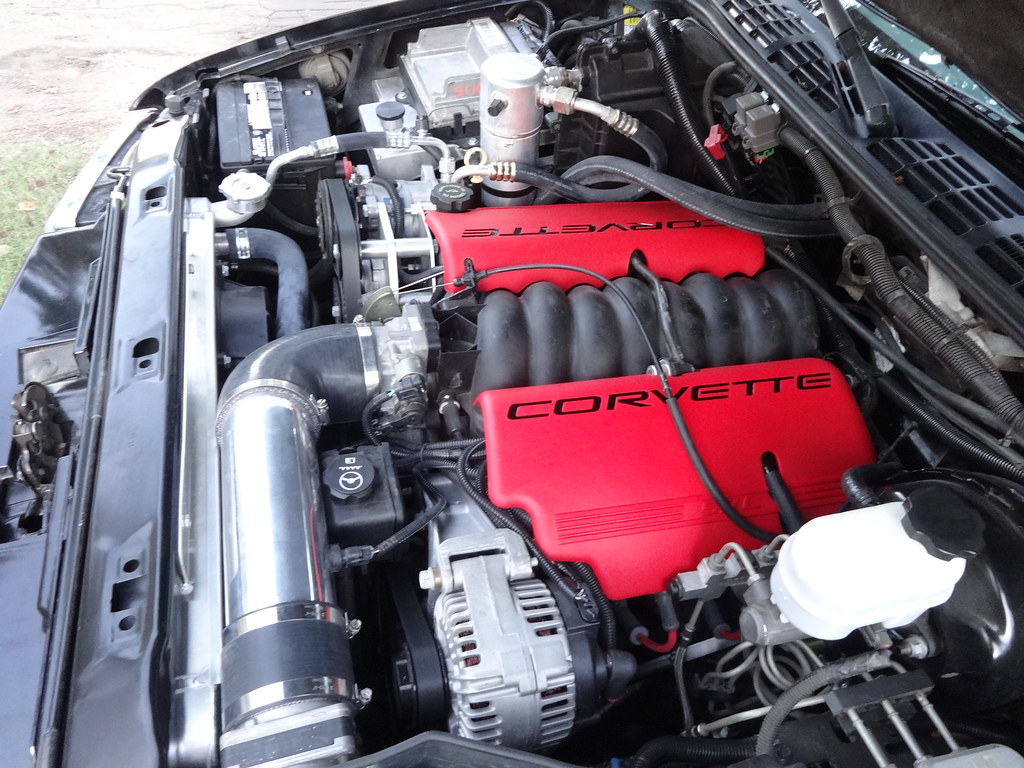
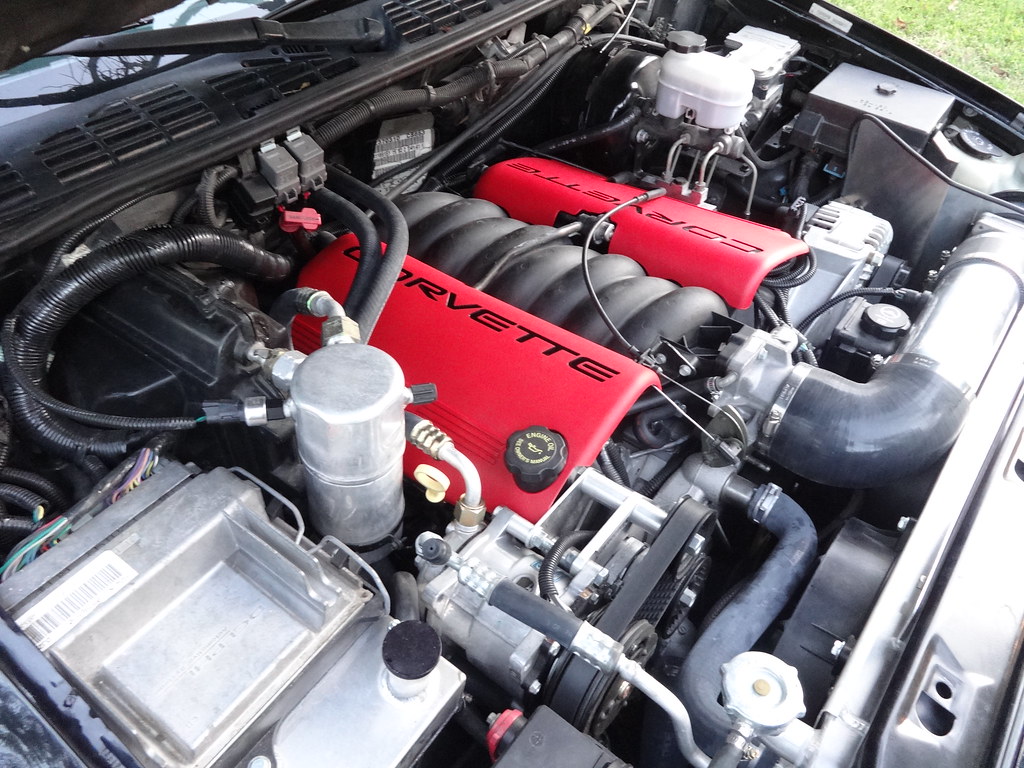
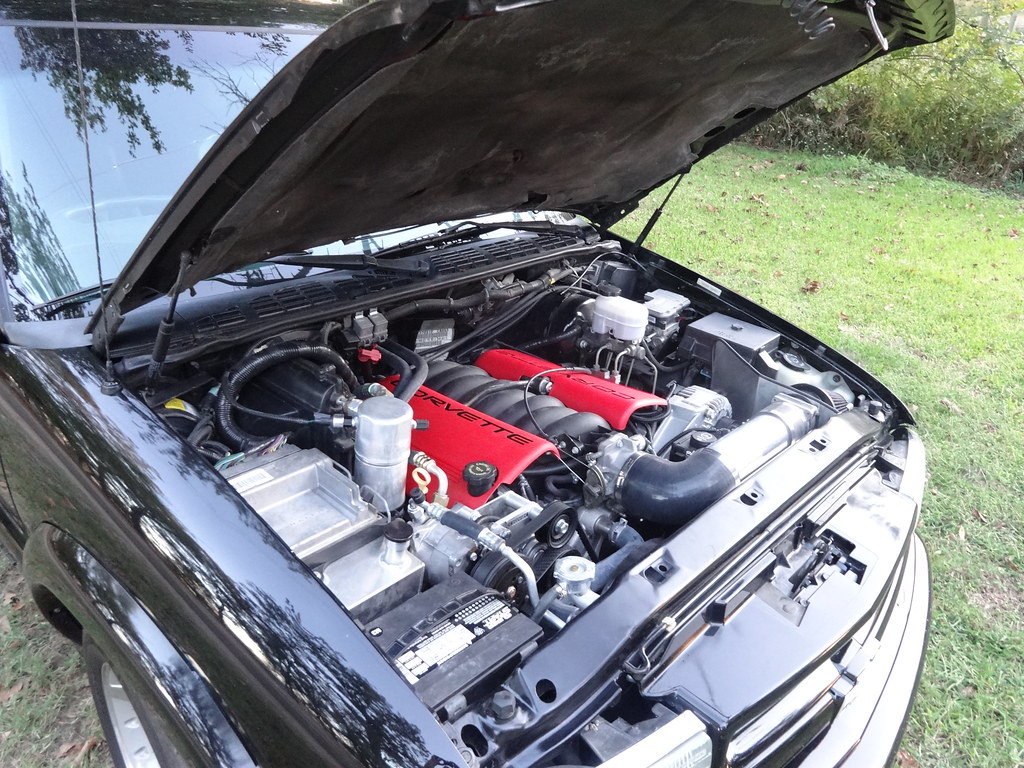
That’s pretty much how it sits right now. So far I have about 2,500 miles on the swap…almost time for an oil change.
A/C blows a chilly 45 degrees going down the road. I'm happy with that.
Finally got around to fitting the fuel rail covers on the truck...
That’s pretty much how it sits right now. So far I have about 2,500 miles on the swap…almost time for an oil change.
Last edited by cwd240z; 03-10-2015 at 01:27 AM.


 03-11-2015, 05:21 PM
#15
Teching In
Thread Starter
Join Date: Jan 2013
Location: Dallas, TX
Posts: 27
Likes: 0
Received 0 Likes
on
0 Posts
Thanks!
Thanks...no I haven't taken any after I got the exhaust done. I should though.

 12-07-2015, 10:14 PM
#18

Really nice clean swap, and you spent the $ where it needed to be spent! I always say, the best thing I bought was my CPW harness, and the other was my Holley Pan. I would recommend buying the stainless works headers if you turn it up.
What brake booster did you change to and why?
What brake booster did you change to and why?
