
1991 Formula Build. PIC HEAVY!
 03-10-2016, 03:27 PM
#1
Staging Lane
Thread Starter

Join Date: Feb 2015
Location: Minnesota
Posts: 92
Likes: 0
Received 0 Likes
on
0 Posts
If this isn't the right board plase advise.
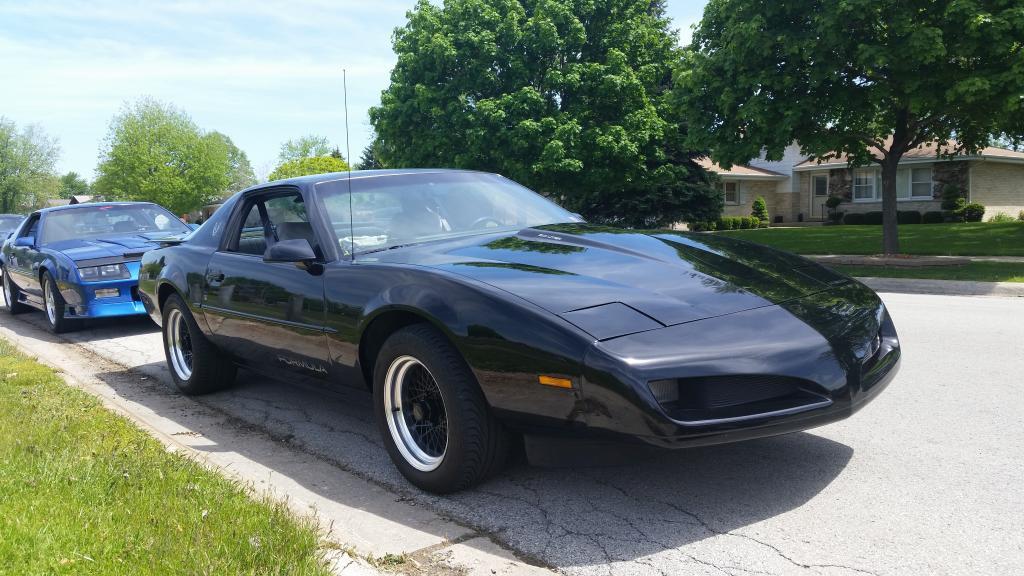
Well, it is time to finally start my build after purchasing the car in 2009 as a roller. I have a 1991 Pontiac Firebird Formula 5 spd. The end goal is to have a fun summer daily and weekend car that I can enjoy at AutoX events and make the occasional � mile run without breaking. My goal is for this to be picture heavy.
I will update the top post with the “List” as things get done as well as post updates. An * means I am in progress with that item.
Car is currently a 305 TBI completely stock. Then end goal is:
The "List"
Y-pipe
SLP exhaust
Adjustable TA
9 inch with 4.11 gear
4th gen washer and coolant reservoir
SFCs
Black 4th gen seats
Swap to black interior
New carpet
New door glass
New window in-door sweeps
Window tint
Upgrade sound system phase 2 (Sub and Amp)
Hushmat
*Empty wallet mod
Completed:
LS - solid mount
T56 - poly mount
Longtube headers
4th gen gas tank
Paint engine bay
Undercoat
New window motors
86-90 TA sequential taillights
Refinished cross lace wheels.
Outside door window sweeps
Caster/camber plates
Walter Racecraft big black shaft
Adjustable panhard bar
Panhard bar relocation kit (room for new exhaust)
Adjustable LCAs
Lower Control Arm Relocation Brackets
Del-a-lum control arm bushings
New Shocks/Struts on all 4 corners
All new poly graphite bushings front and rear (Sway bar, endlinks, etc)
New Steering rebuild from tie rod to tie rod and everything in between.
Wonderbar
LS1 front brake upgrade
Upgrade sound system phase 1 (Speakers and 4th gen CD deck, aux)

Last edited by joshy1410; 07-02-2018 at 08:56 AM.


 03-10-2016, 03:28 PM
#3
Staging Lane
Thread Starter
Join Date: Feb 2015
Location: Minnesota
Posts: 92
Likes: 0
Received 0 Likes
on
0 Posts
Wheels:
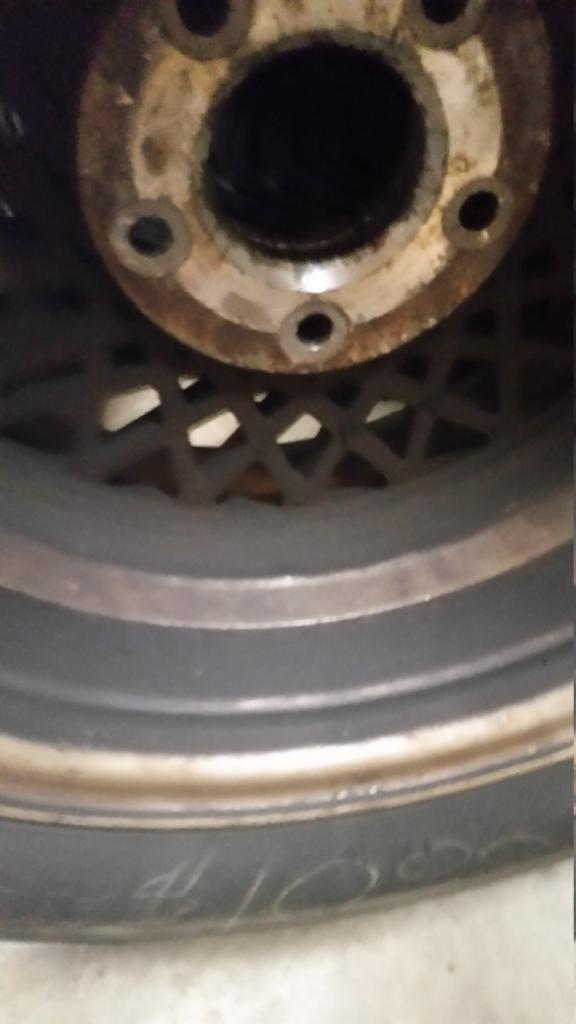
I really wanted crosslace wheel in black for my car. I found a member who had a set for sale 3 hours away. Picked them up and ran them they way they were for a couple years.
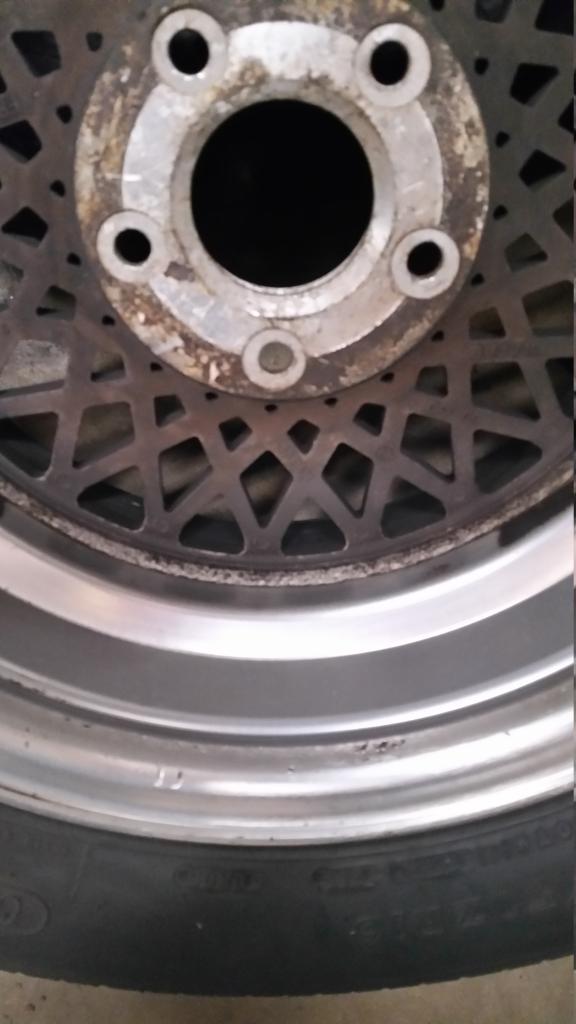
They were looking like they had seen better days. I decided to refinish them.
First thing was to clean them really well.
Before
After
Sanding took forever about 5 hours per wheel, but they were ready for paint.
I used VHT wheel paint. Self-etching primer, primer, Gloss black, and clear.
Self-etching primer 2 coats
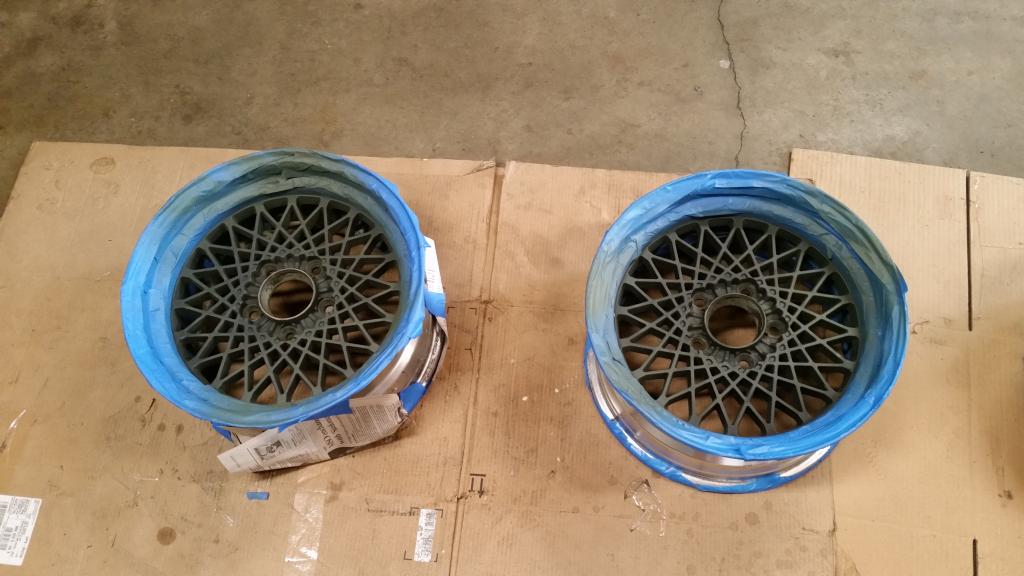
Primer 2 coats
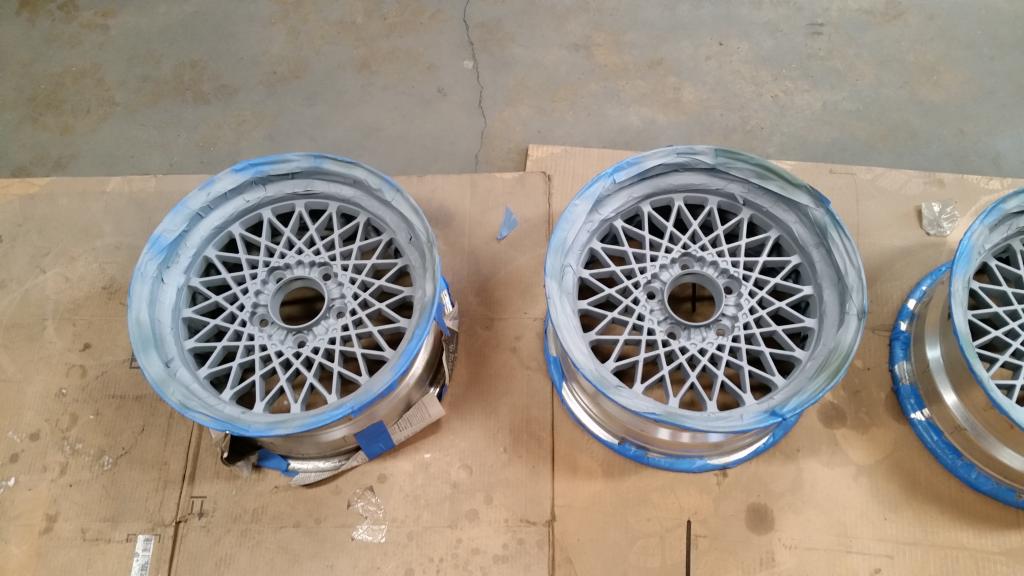
Gloss black 4 coats and 3 coats of clear
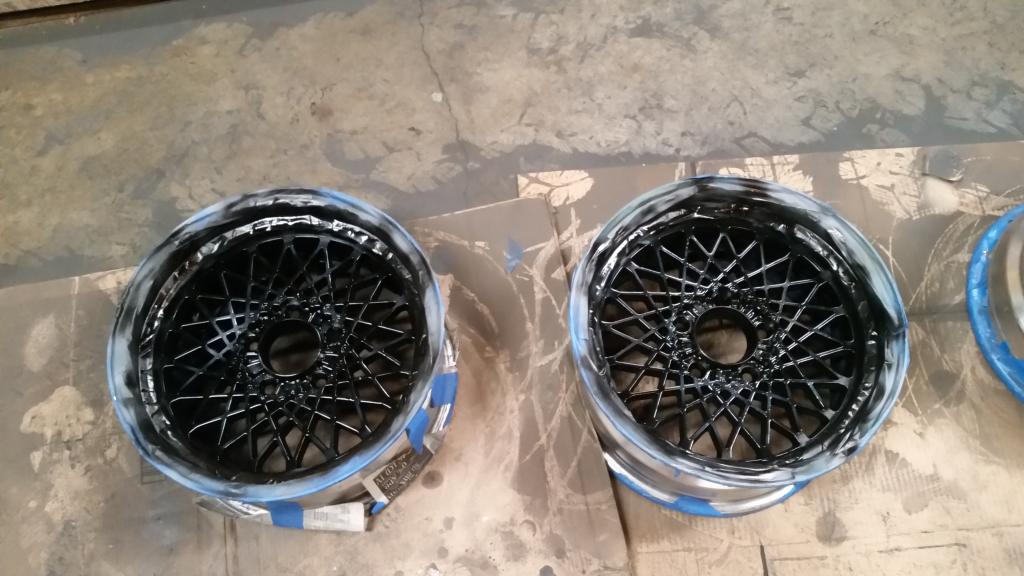
I polished the lips with Mothers Billet polish. If I had to do them again I would have them powder coated. Painting was a pain as there are so many angles and crevasses. Overall I think thy turned out really well.
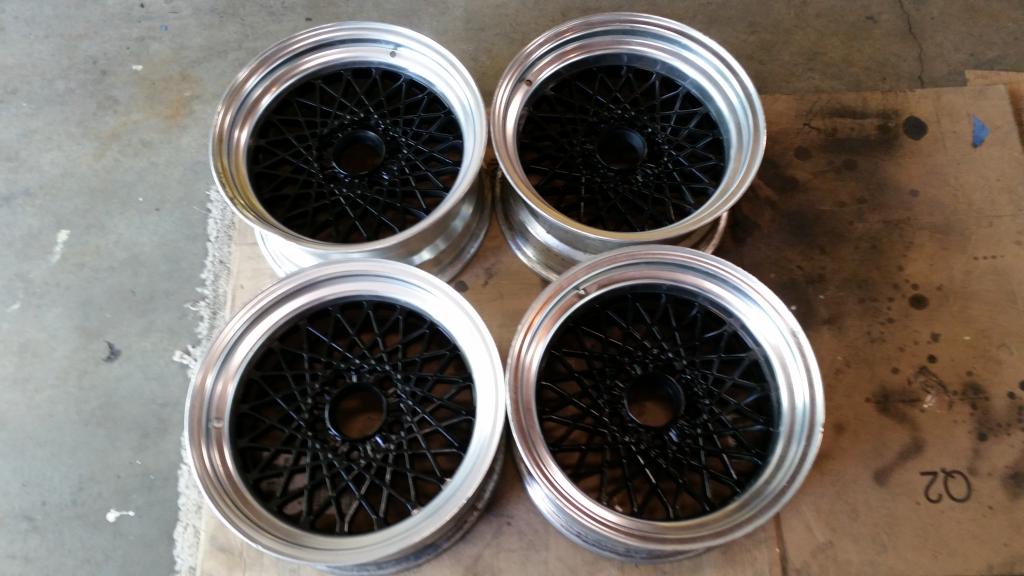
Here they are on the car.

I really wanted crosslace wheel in black for my car. I found a member who had a set for sale 3 hours away. Picked them up and ran them they way they were for a couple years.
They were looking like they had seen better days. I decided to refinish them.
First thing was to clean them really well.
Before

After

Sanding took forever about 5 hours per wheel, but they were ready for paint.
I used VHT wheel paint. Self-etching primer, primer, Gloss black, and clear.
Self-etching primer 2 coats

Primer 2 coats

Gloss black 4 coats and 3 coats of clear

I polished the lips with Mothers Billet polish. If I had to do them again I would have them powder coated. Painting was a pain as there are so many angles and crevasses. Overall I think thy turned out really well.

Here they are on the car.
 03-10-2016, 03:30 PM
#4
Staging Lane
Thread Starter
Join Date: Feb 2015
Location: Minnesota
Posts: 92
Likes: 0
Received 0 Likes
on
0 Posts
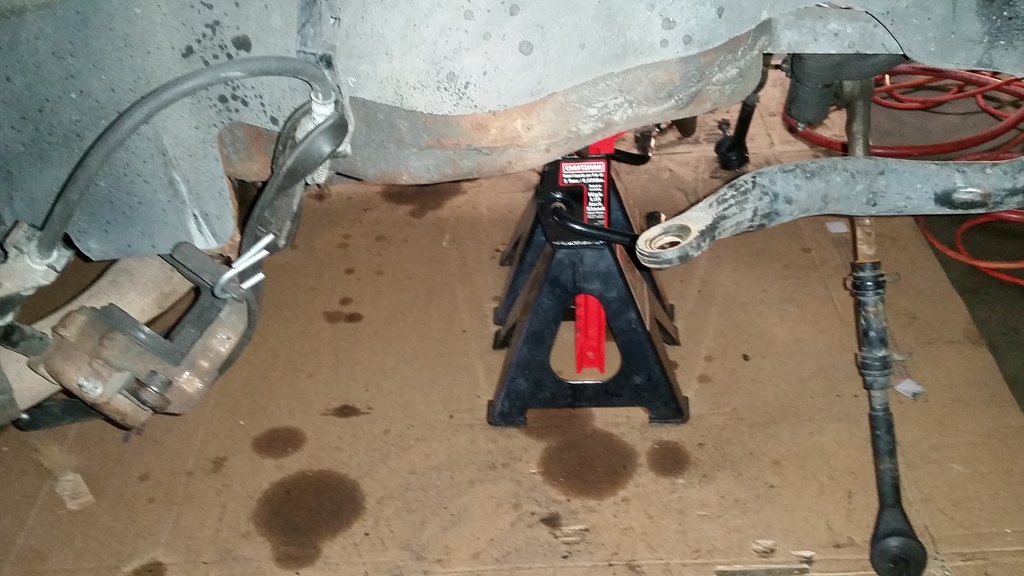
Well here is my weekly update. I feel like I made some decent progress in the last few days. Well anything is progress compared to just searching the internet and buying things without installing them.
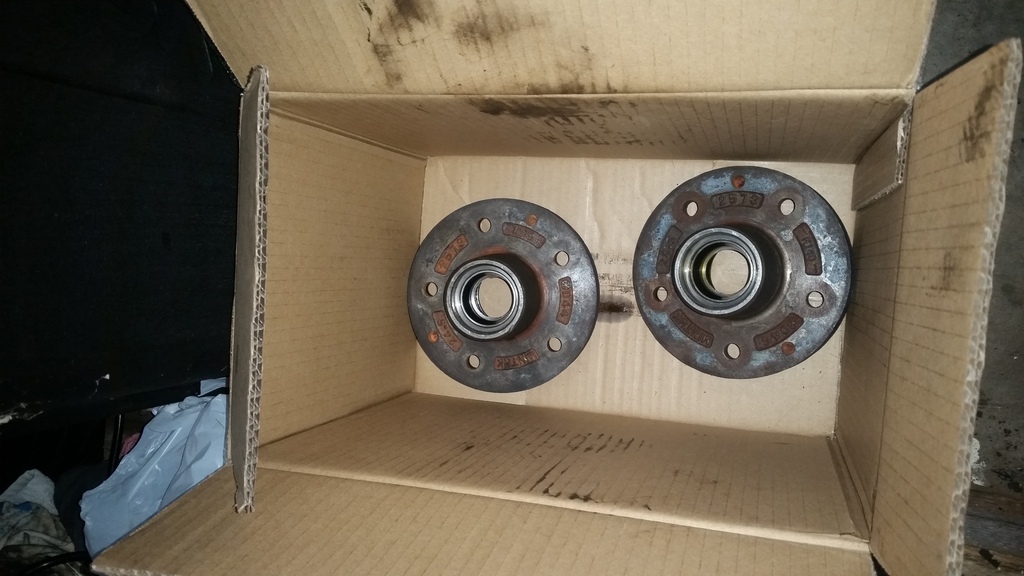
Rotors have been cut off and are ready for the machine shop to be turned to fit my LS1 brakes as well has have new longer ARP wheel studs pressed in. Once they come back they will be cleaned and painted.
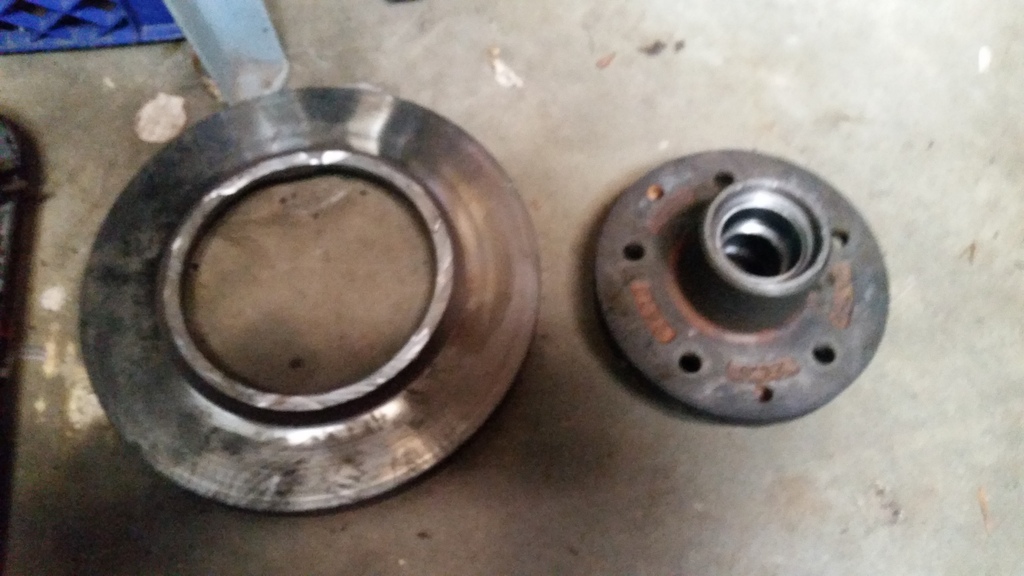
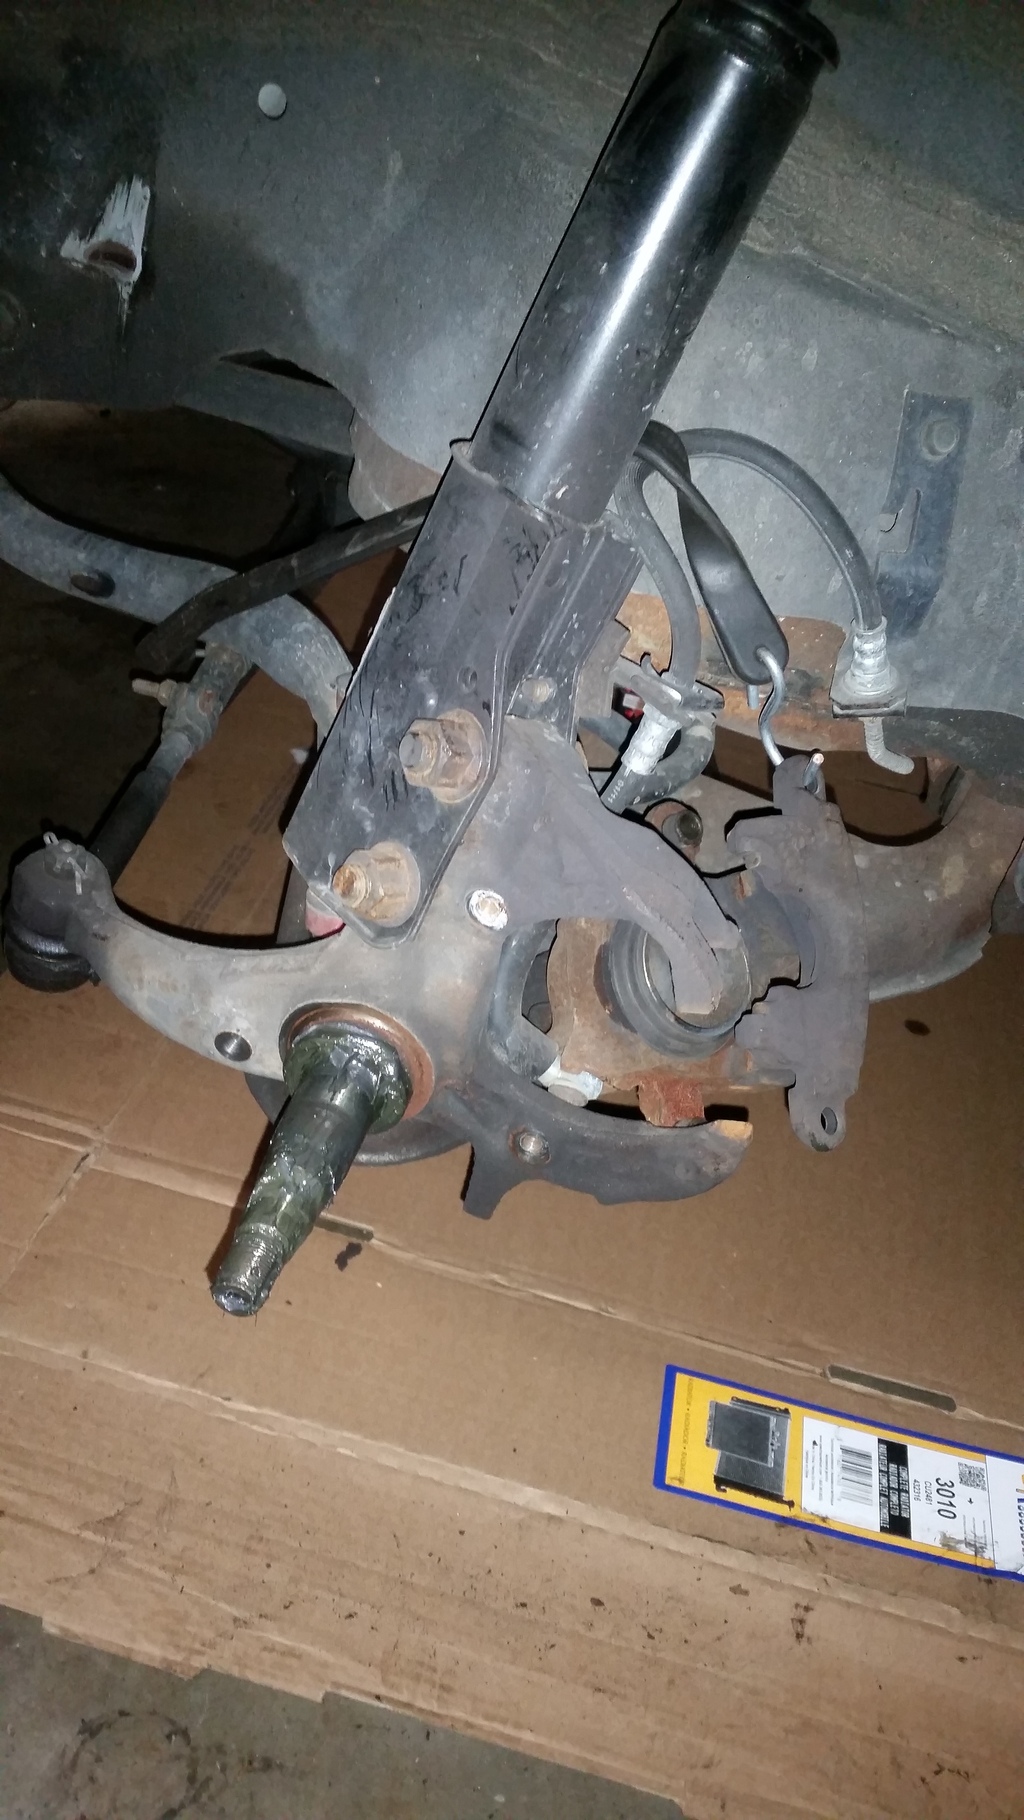
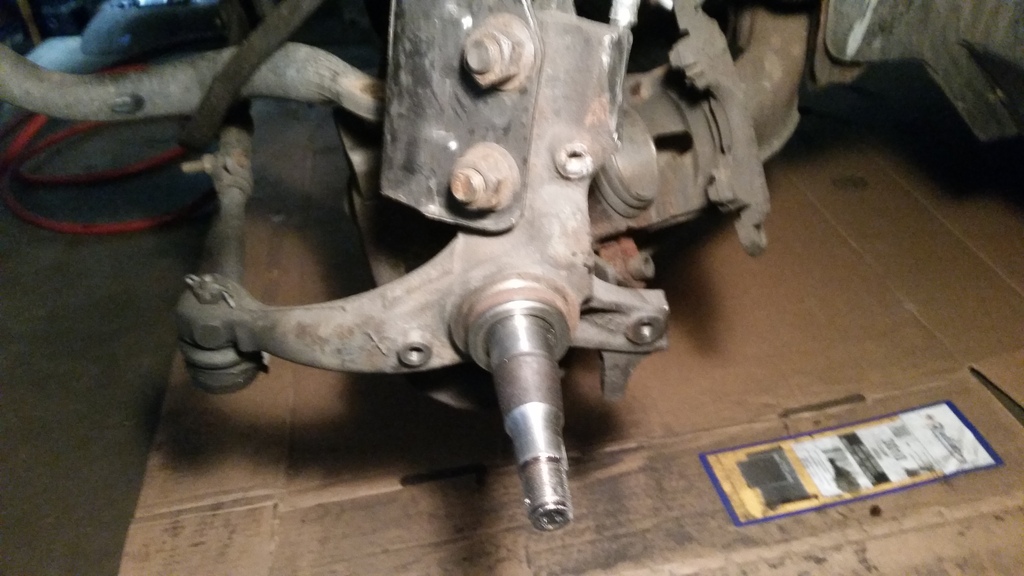
Spindles have been cut down, removed and are ready for the machine shop to drill and tap. (I was going to drill and tap, but then I realized I needed to get the bit and the tap, so this time around I will let the shop do it). Once they come back they will be cleaned and painted.
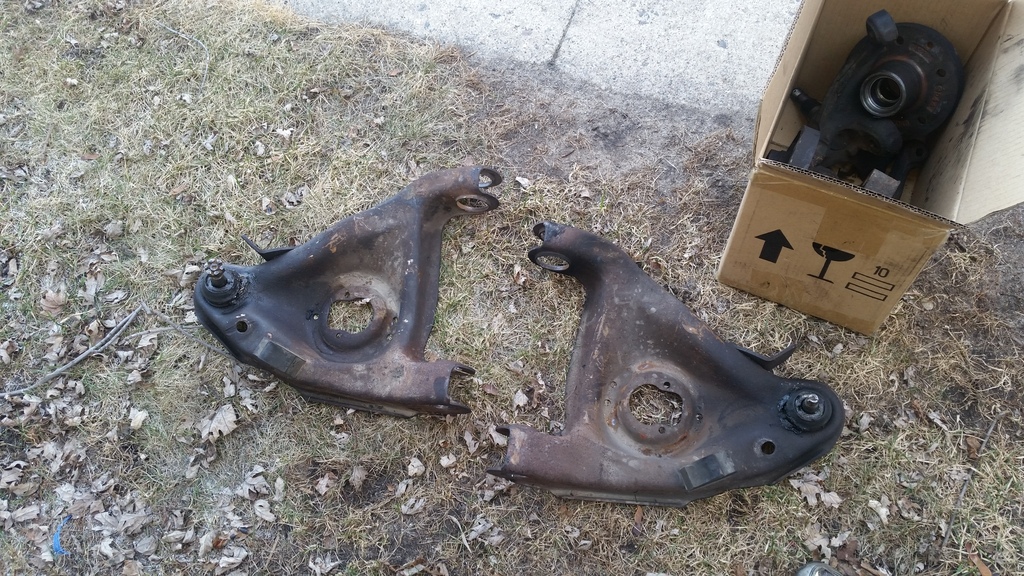
LCA arms have been removed, rubber bushings and metal sleeved have been removed. They are ready for the machine shop to get new ball joints and del-a-lum bushings. Once they come back they will be cleaned and painted.
Once everything is back, I can start the installation of everything. Including new shocks.

Hopefully I will be able to post more frequent updates. If you have any questions please ask!
-Josh
Rotors have been cut off and are ready for the machine shop to be turned to fit my LS1 brakes as well has have new longer ARP wheel studs pressed in. Once they come back they will be cleaned and painted.


Spindles have been cut down, removed and are ready for the machine shop to drill and tap. (I was going to drill and tap, but then I realized I needed to get the bit and the tap, so this time around I will let the shop do it). Once they come back they will be cleaned and painted.


LCA arms have been removed, rubber bushings and metal sleeved have been removed. They are ready for the machine shop to get new ball joints and del-a-lum bushings. Once they come back they will be cleaned and painted.

Once everything is back, I can start the installation of everything. Including new shocks.


Hopefully I will be able to post more frequent updates. If you have any questions please ask!
-Josh


 03-11-2016, 07:24 AM
#7
Staging Lane
Thread Starter
Join Date: Feb 2015
Location: Minnesota
Posts: 92
Likes: 0
Received 0 Likes
on
0 Posts
How did you like your brake upgrade?
Trending Topics
 03-11-2016, 09:36 AM
#9
Staging Lane
Thread Starter
Join Date: Feb 2015
Location: Minnesota
Posts: 92
Likes: 0
Received 0 Likes
on
0 Posts
In short:
I am either looking at finding another LS1 or a 6.0 iron. Ideally I would like to find a good running pull out and do a well matched H/C/I on it. If I could get 450rwhp on 91/93 octane though my T56 I will be happy. It needs to drive well in traffic as I drive this car almost daily in the summer.
The long story :
I picked up an ls1 from a member who is on here and I was told it had a bottom end knock and needed new bearings. When I opened it up I found this in the block
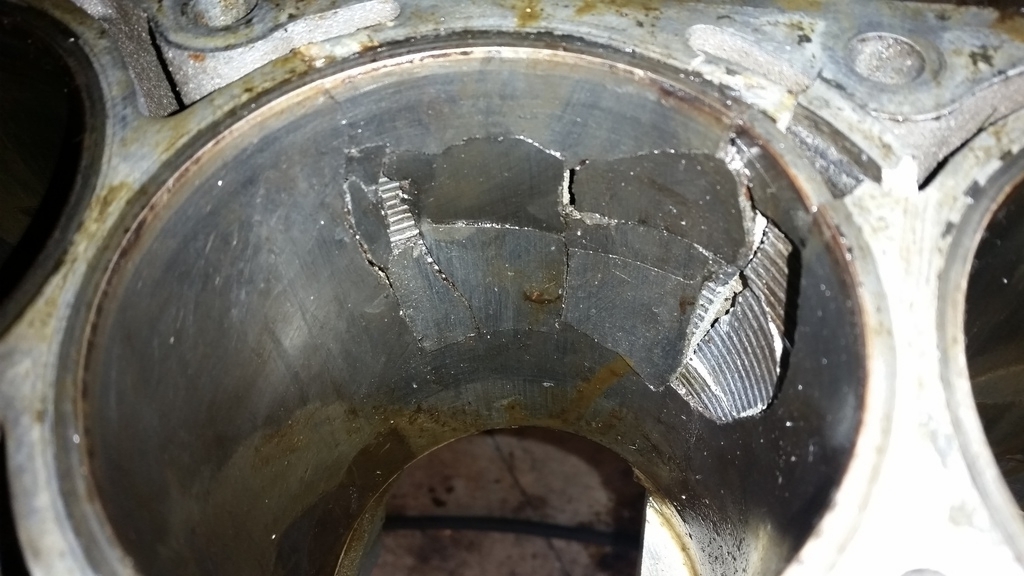
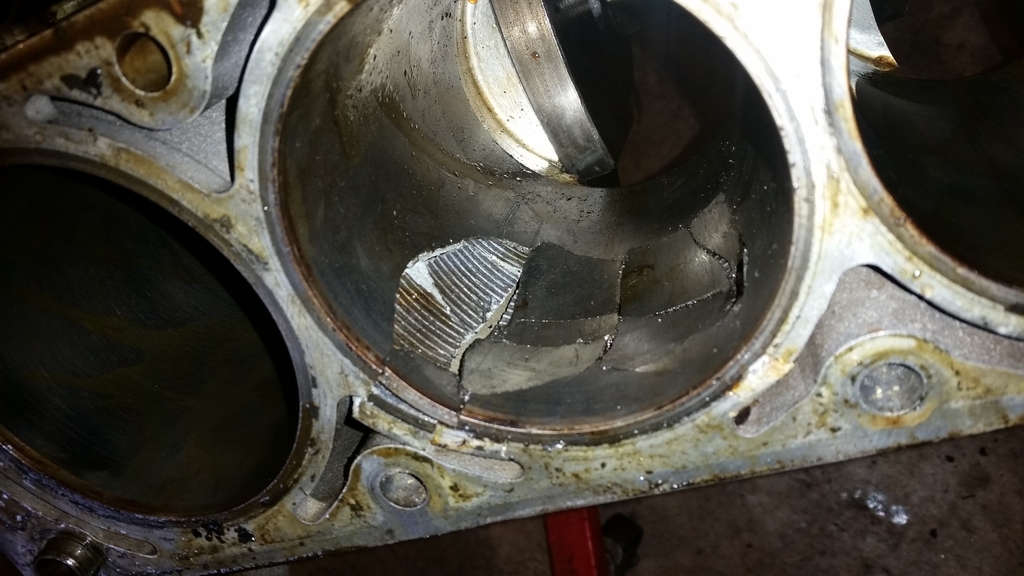

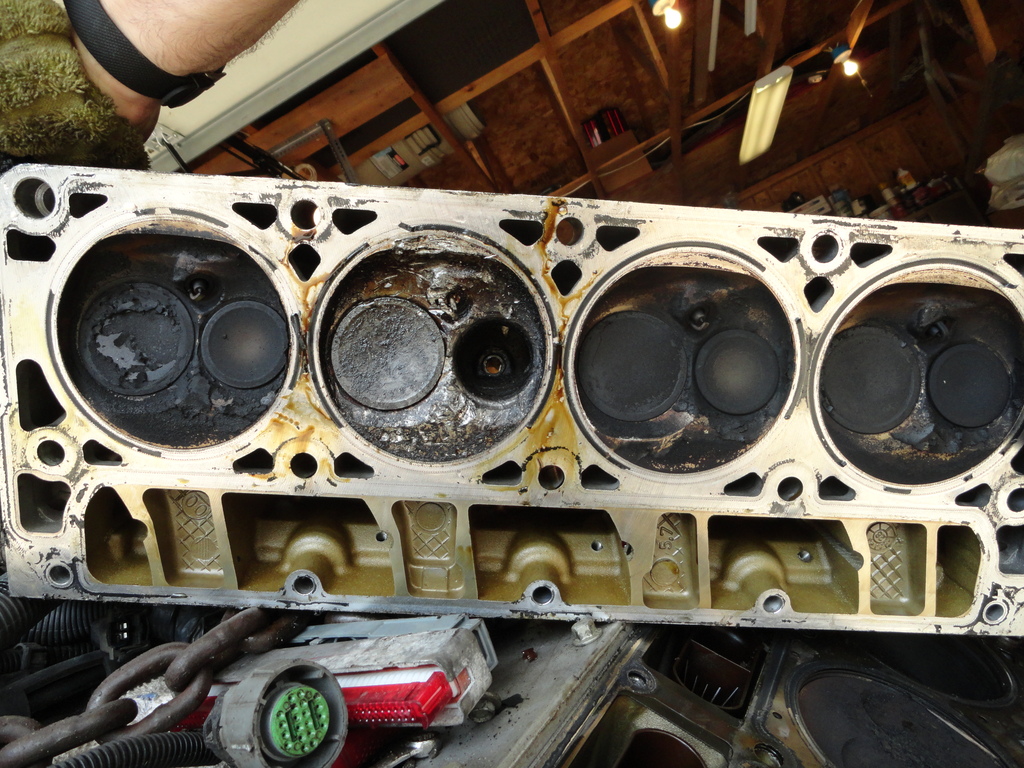
And this was the head.
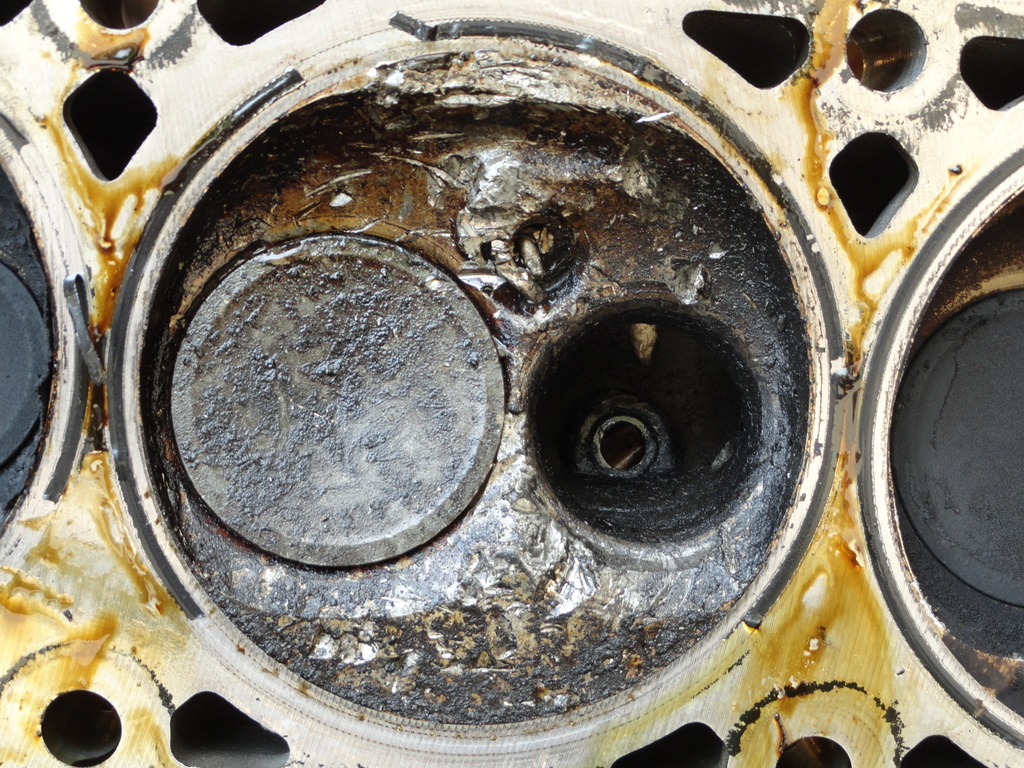
This was all that was left of the piston other than some chunks in the pan.
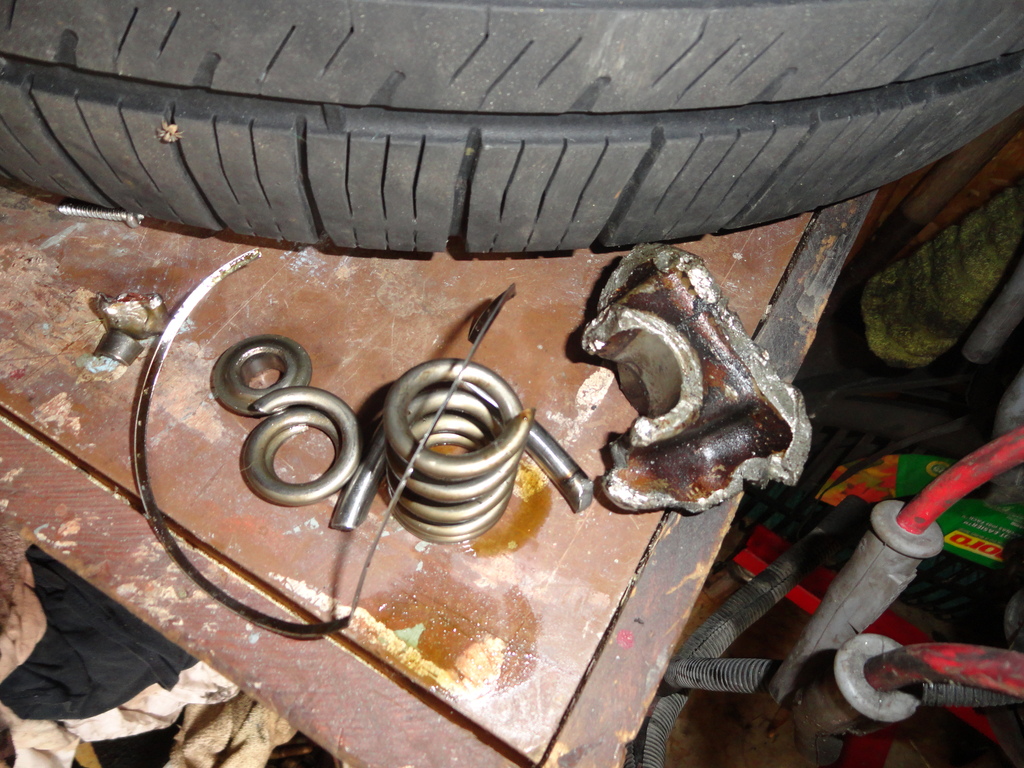
So this is why I would prefer a good running pull out. I know 450 rwhp may be lofty, but why not shoot for it.
I am either looking at finding another LS1 or a 6.0 iron. Ideally I would like to find a good running pull out and do a well matched H/C/I on it. If I could get 450rwhp on 91/93 octane though my T56 I will be happy. It needs to drive well in traffic as I drive this car almost daily in the summer.
The long story :
I picked up an ls1 from a member who is on here and I was told it had a bottom end knock and needed new bearings. When I opened it up I found this in the block


And this was the head.


This was all that was left of the piston other than some chunks in the pan.

So this is why I would prefer a good running pull out. I know 450 rwhp may be lofty, but why not shoot for it.
03-11-2016, 09:46 AM
#10
Launching!

Join Date: Feb 2003
Location: 08003
Posts: 205
Likes: 0
Received 0 Likes
on
0 Posts

that's messed up, but I had a similar experience with my LS1/t56 pullout I bought off ebay. Had water in 2 cylinders that rusted the piston in place. I was able to soak it and break it free, but I was worried about it not sealing properly, and if I was going to pull it apart to hone and rering it I may as well have it rebuilt and that defeats the purpose of spending good money for a supposedly running dropout. Took me 6 months of fighting with him/ebay/paypal and amex, but I finally got my money back.
Love this build. Partial to the 3rd gens since my first car was a Blue 89 Firebird. Still want to pick up another one day.
Love this build. Partial to the 3rd gens since my first car was a Blue 89 Firebird. Still want to pick up another one day.
03-11-2016, 10:05 AM
#11
Staging Lane
Thread Starter
Join Date: Feb 2015
Location: Minnesota
Posts: 92
Likes: 0
Received 0 Likes
on
0 Posts
Yeah, I was really pissed. By the time I was able to pull the engine and open it up, it was too late to do anything about it. I talked to him and he said he didn't know and that he felt bad.
I am glad you were able to get your money back.
I would rather get a good shortblock and go from there, but if I was going to spend the money on a rebuild that needed a block, I would go bigger cubes.
I hope this build goes well, my second car was a 91 V6 Firebird and I enjoyed that car. I am looking forward to building this one up.
03-11-2016, 11:20 AM
#12
Staging Lane
Thread Starter
Join Date: Feb 2015
Location: Minnesota
Posts: 92
Likes: 0
Received 0 Likes
on
0 Posts
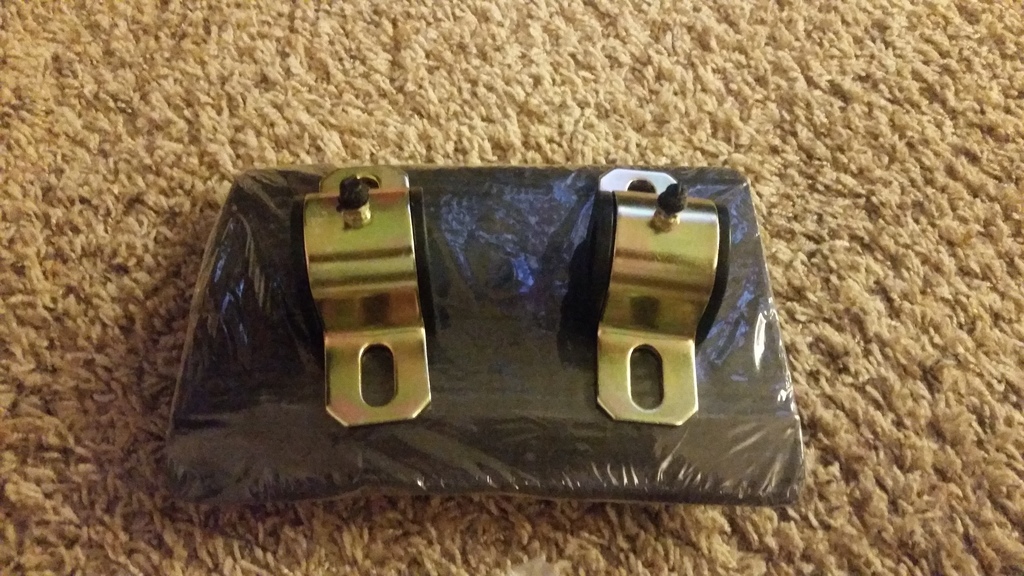
The last part of my TDS order came. Now I have polygraphite sway bar bushings for the front and rear with zerk fittings and zink plated brackets from TDS as well as their wonderbar. I can't wait to get this stuff on. A little more pricey than a generic set, but everything looks well built.
 03-12-2016, 07:09 AM
#14
Staging Lane
Thread Starter
Join Date: Feb 2015
Location: Minnesota
Posts: 92
Likes: 0
Received 0 Likes
on
0 Posts
I've never had the joy of experiencing the TPI firsthand, but from I can tell they were torque monsters down low. I am excited to go from the small tbi to the LS. Formula 350s are the best of both worlds in my book.
03-12-2016, 06:59 PM
#16
Staging Lane
Thread Starter
Join Date: Feb 2015
Location: Minnesota
Posts: 92
Likes: 0
Received 0 Likes
on
0 Posts
I have a set of LS1 brakes for the rear of mine as well. Just waiting until the new rear comes alone. 9" rears are expensive so that may be the last thing I do.

 03-13-2016, 10:08 PM
#19
Staging Lane
Thread Starter
Join Date: Feb 2015
Location: Minnesota
Posts: 92
Likes: 0
Received 0 Likes
on
0 Posts
03-13-2016, 10:08 PM
#20
Staging Lane
Thread Starter
Join Date: Feb 2015
Location: Minnesota
Posts: 92
Likes: 0
Received 0 Likes
on
0 Posts
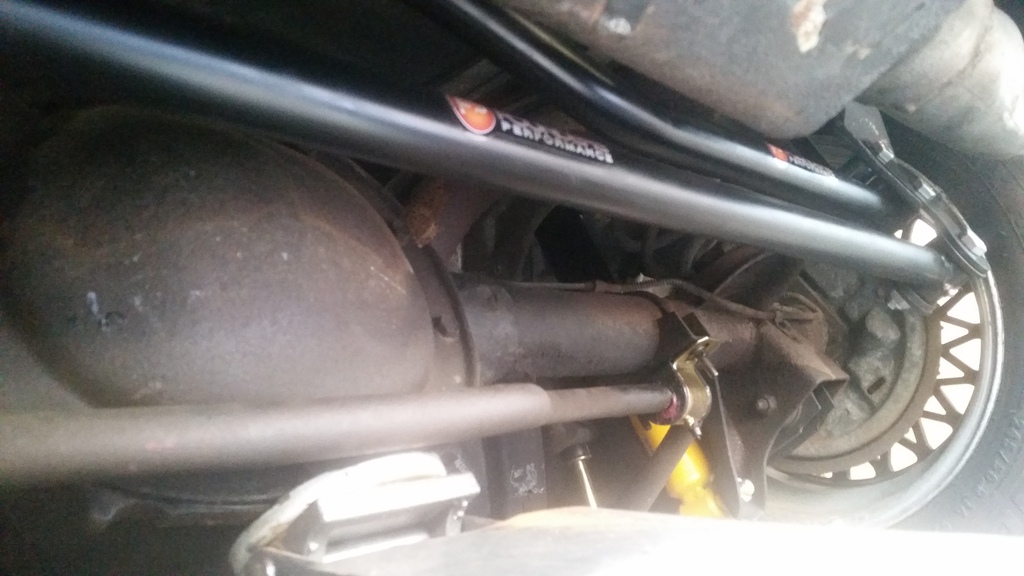
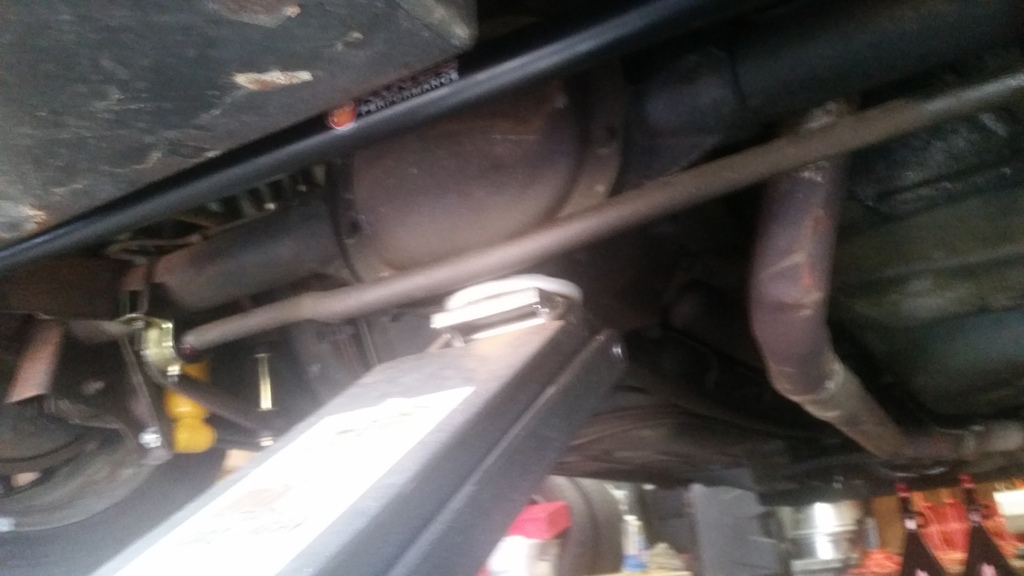
The weekend was very productive. My dad visited from out of town and we got some garage time in. We replaced the panhard bar and upper bar with on car adjustable from Founders. Once ride height is finalized I will be lowering the panhard bar on the axle side to correct it. It was really easy to center the rear in the car. It went quire smooth. We also Installed polygraphite end links and TDS polygraphite rear sway bar bushings. To top it off we installed rear Koni yellow shocks.
We removed the ball joints from the lower control arms and prepped them for paint. I used VHT Epoxy paint. It went on very well and turned out great.
Before

After

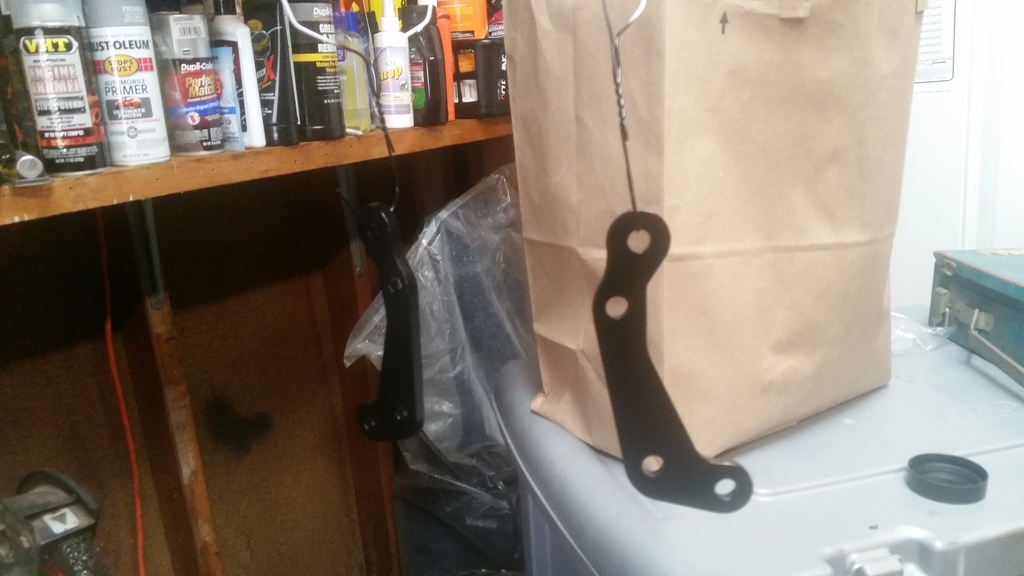
Painted my LS1 brake swap brackets as well.
Once my del-a-lum lower control arm bushings come in everything is going to the machine shop to get pressed in. Then the assembly can continue.


We removed the ball joints from the lower control arms and prepped them for paint. I used VHT Epoxy paint. It went on very well and turned out great.
Before
After

Painted my LS1 brake swap brackets as well.

Once my del-a-lum lower control arm bushings come in everything is going to the machine shop to get pressed in. Then the assembly can continue.