
Chevelle Mount Issues.
 06-17-2007, 10:10 PM
#41
11 Second Club
iTrader: (11)
Join Date: Aug 2004
Location: TULSA
Posts: 453
Likes: 0
Received 0 Likes
on
0 Posts

Originally Posted by pist0lpete
I am pretty satisfied with the steering linkage and overall oil pan clearance although now that I look at the pictures they are a bit deceiving but there is plenty of room. My newest issue has to do with the tranny linkage. Any of you guys that did the swap with an Automatic have any problems with your hooker LS1 swap headers hitting the shifting linkage?
Edit: I also ending up getting my alternator clearance where I needed it by grinding away a bit on the steering box. Not my first choice of action but it seems to work fine and I managed not to hit any of the internal fluid passages in the box.
Edit: I also ending up getting my alternator clearance where I needed it by grinding away a bit on the steering box. Not my first choice of action but it seems to work fine and I managed not to hit any of the internal fluid passages in the box.

 06-17-2007, 11:10 PM
#42
TECH Resident
Thread Starter
iTrader: (3)

Join Date: Sep 2005
Location: Edmond, Oklahoma
Posts: 796
Likes: 0
Received 0 Likes
on
0 Posts
I am running a 700r4 tranny for now. Are you using a column shift or a tunnel mounted shifter? I think if I switch to a tunnel shifter my problem will be solved.
06-17-2007, 11:44 PM
#44
TECH Resident
Thread Starter
iTrader: (3)
Join Date: Sep 2005
Location: Edmond, Oklahoma
Posts: 796
Likes: 0
Received 0 Likes
on
0 Posts
Ya I Didn't even see you are from tulsa. I have some friends/roommates from there. I go to school at O-state but I plan on coming up to tulsa and cruising once my car is finished. But really is a car ever "finished"? haha
10-11-2007, 01:25 AM
#45
TECH Resident
Thread Starter
iTrader: (3)
Join Date: Sep 2005
Location: Edmond, Oklahoma
Posts: 796
Likes: 0
Received 0 Likes
on
0 Posts
Well its about time for an update. The engine and tranny are installed for the final time. I have been working on finishing up the fueling and wiring and all the little details.
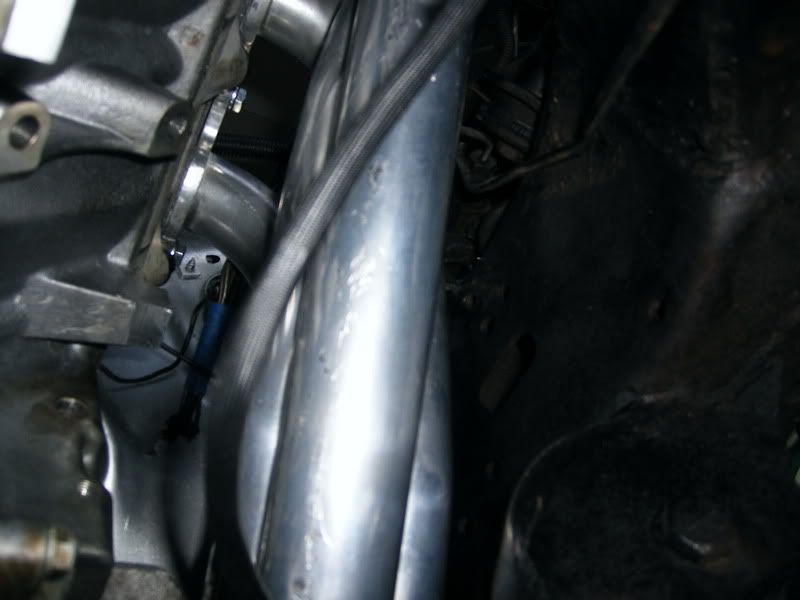
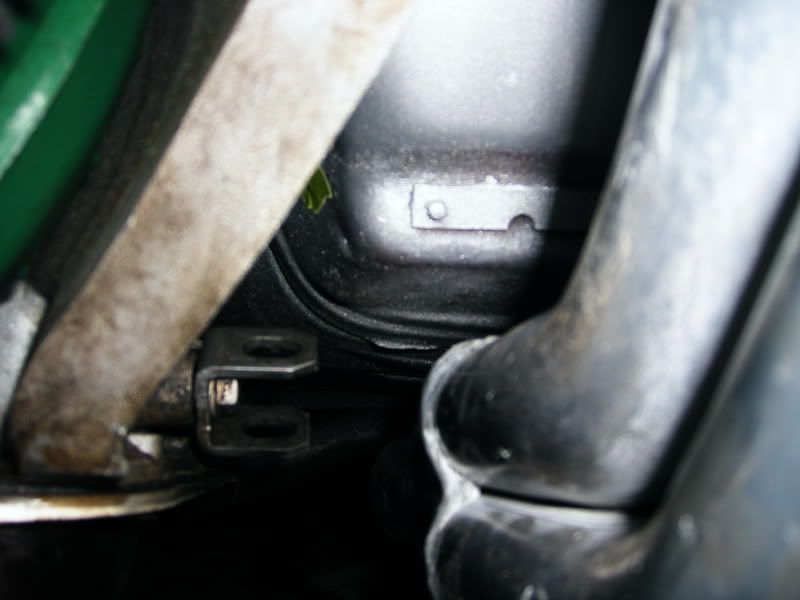
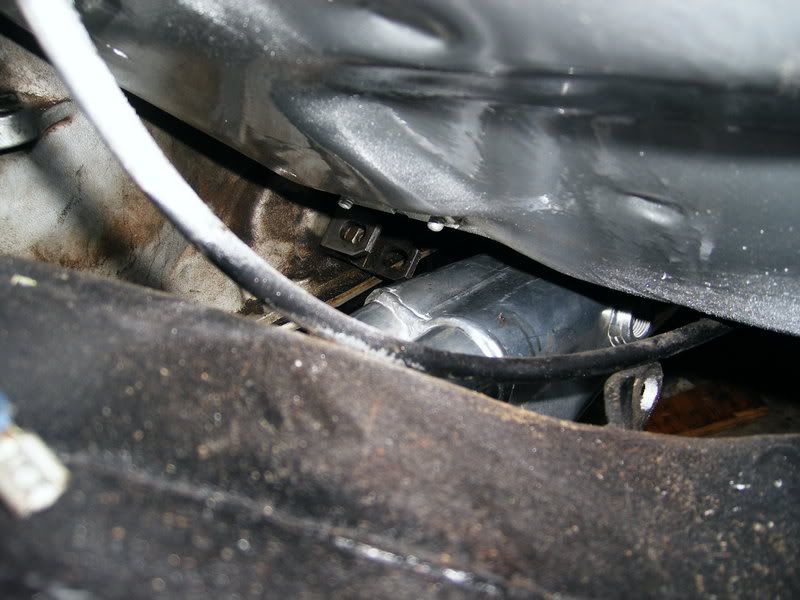
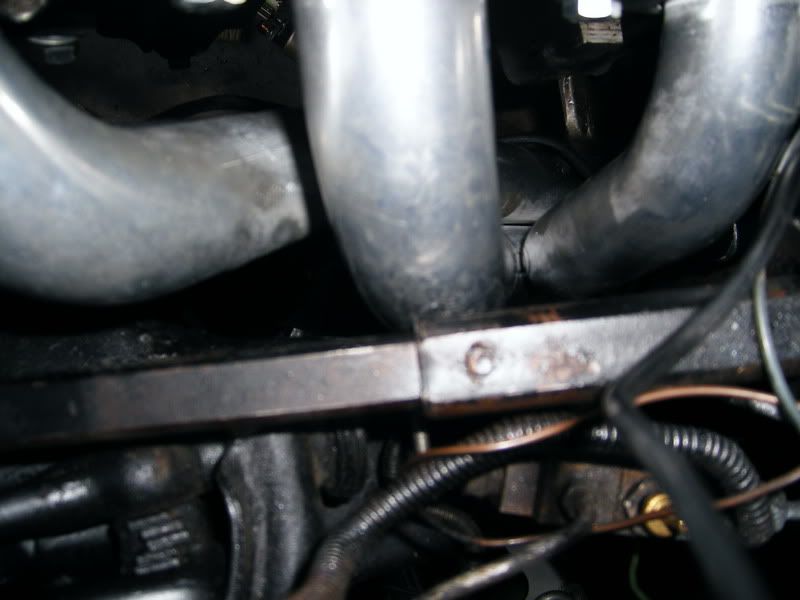
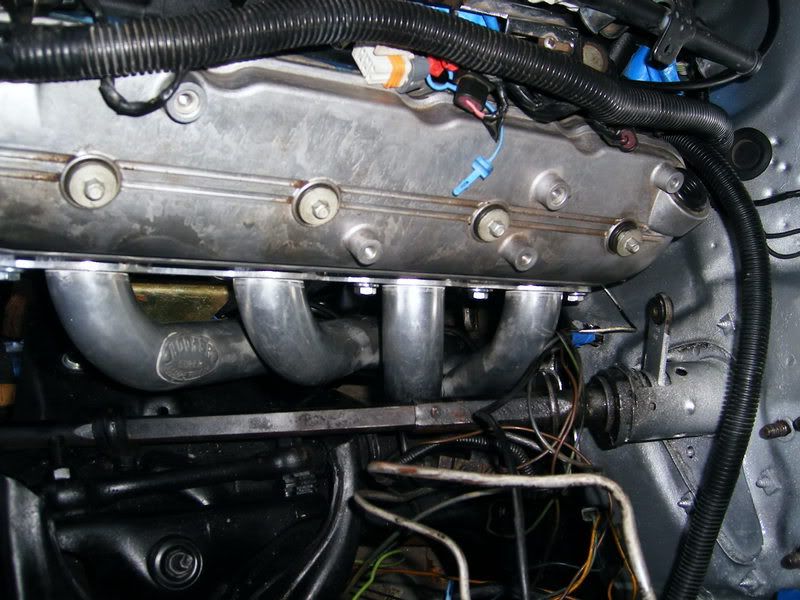
Somebody requested some pictures of the Hooker Swap header fitment so I snapped a few from some different angles. These are all from the driver side header as it is the tightest fit by far.
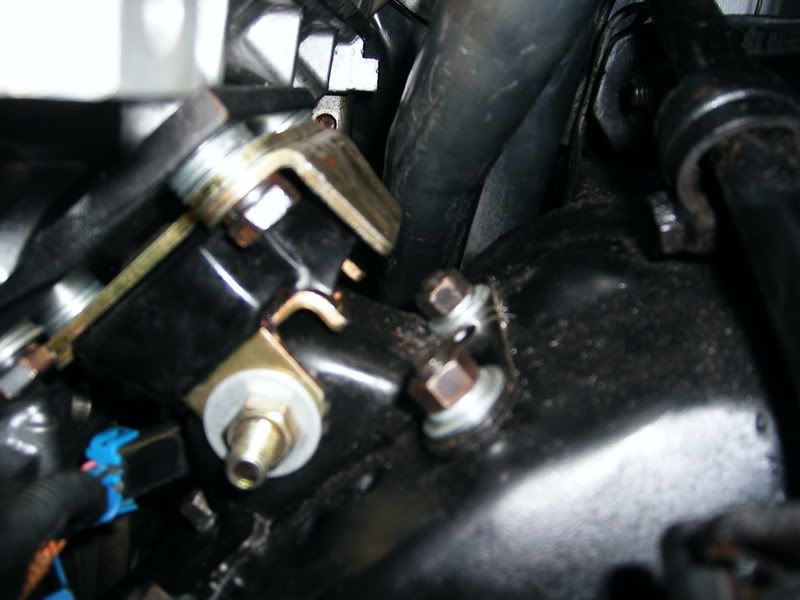
Here is a picture of the grommet I was able to get off a 96ish Ford LTD to route the harness through. Unfortunately I had not once but twice the pilot bit on the hole saw broke and caused the carnage to the freshly painted firewall...

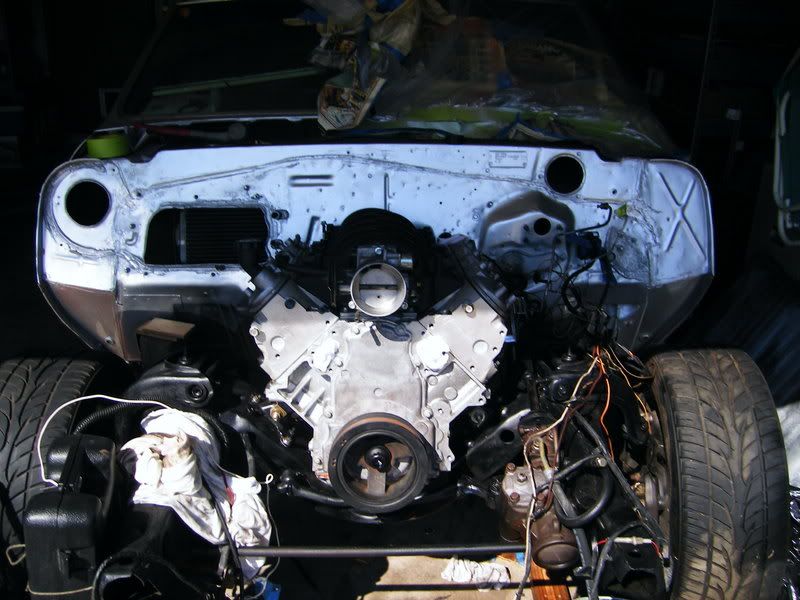
Finally, Here is a picture of the engine as it sits right now. I just wish I had more time and money to smooth the firewall but other than that I think it looks great so far.
Somebody requested some pictures of the Hooker Swap header fitment so I snapped a few from some different angles. These are all from the driver side header as it is the tightest fit by far.
Here is a picture of the grommet I was able to get off a 96ish Ford LTD to route the harness through. Unfortunately I had not once but twice the pilot bit on the hole saw broke and caused the carnage to the freshly painted firewall...
Finally, Here is a picture of the engine as it sits right now. I just wish I had more time and money to smooth the firewall but other than that I think it looks great so far.
10-11-2007, 11:14 AM
#47
TECH Resident
Thread Starter
iTrader: (3)
Join Date: Sep 2005
Location: Edmond, Oklahoma
Posts: 796
Likes: 0
Received 0 Likes
on
0 Posts
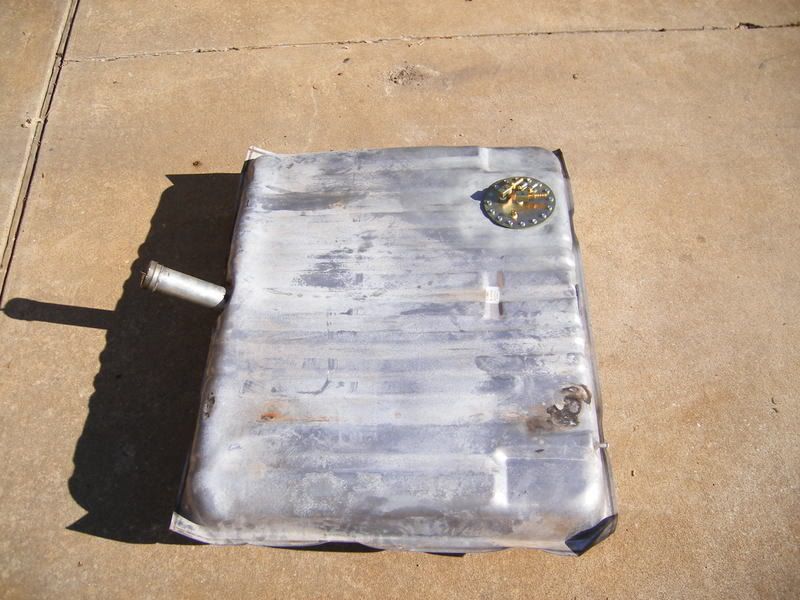
Nothing blatantly slowing me down right now other than waiting on parts. The bummer deal is I started with basicly a long block so there are alot of odds and ends I have to come up with as far as sensors and bolts but I think I still saved quite a bit in the long run. I have been trying to track down an Jeep GC steering box locally to no avail. I should have snapped some pics of my tank because I got the tanksinc setup installed. Basicly right now the two major steps left are getting power to the wiring harness and running the fuel lines. Also, I have been unable to find the little coolant passage blockoffs that go on the back of the heads. It seems that part number is nowhere to be found.
10-11-2007, 07:22 PM
#50
TECH Enthusiast

looking good . i just installed my s&p shortys they look great and fit nice, but i havent installed the steering column yet ,it looks real close ill get some pics soon. JOHN
10-18-2007, 02:00 PM
#51
TECH Resident
Thread Starter
iTrader: (3)
Join Date: Sep 2005
Location: Edmond, Oklahoma
Posts: 796
Likes: 0
Received 0 Likes
on
0 Posts
Just a little note for anybody wanting to know, the air bleed plugs part # has changed like three times so the number now is GM PT# 12602540. Just ordered a couple from my local dealership.
10-18-2007, 04:29 PM
#53
TECH Resident
Thread Starter
iTrader: (3)
Join Date: Sep 2005
Location: Edmond, Oklahoma
Posts: 796
Likes: 0
Received 0 Likes
on
0 Posts
Well if its anything like the front ones then the gasket is more of an o-ring that seems like it might be made onto the part you might be able to replace it though. I think the little blockoffs were like $4 each for the whole part though.
10-19-2007, 08:26 PM
#54
On The Tree
Join Date: Sep 2004
Location: ALBUQUERQUE, NM
Posts: 178
Likes: 0
Received 0 Likes
on
0 Posts
i am reading this post with interest trying to figure out what I am going to do on my cutlass LS swap and then came across this:
http://www.diecastmusclecars.com/grex5.htm
I am wondering if it is just easier to go this route and build my own lower mounts.
http://www.diecastmusclecars.com/grex5.htm
I am wondering if it is just easier to go this route and build my own lower mounts.
10-21-2007, 03:05 AM
#56
TECH Resident
Thread Starter
iTrader: (3)
Join Date: Sep 2005
Location: Edmond, Oklahoma
Posts: 796
Likes: 0
Received 0 Likes
on
0 Posts
Thats a pretty good setup but I like the bolt in factor of mine and it re-uses the stock parts. Also don't follow that guys' example and put you intake so that it pulls hot air from behind the radiator.
 12-24-2007, 03:21 PM
#58
TECH Resident
Thread Starter
iTrader: (3)
Join Date: Sep 2005
Location: Edmond, Oklahoma
Posts: 796
Likes: 0
Received 0 Likes
on
0 Posts
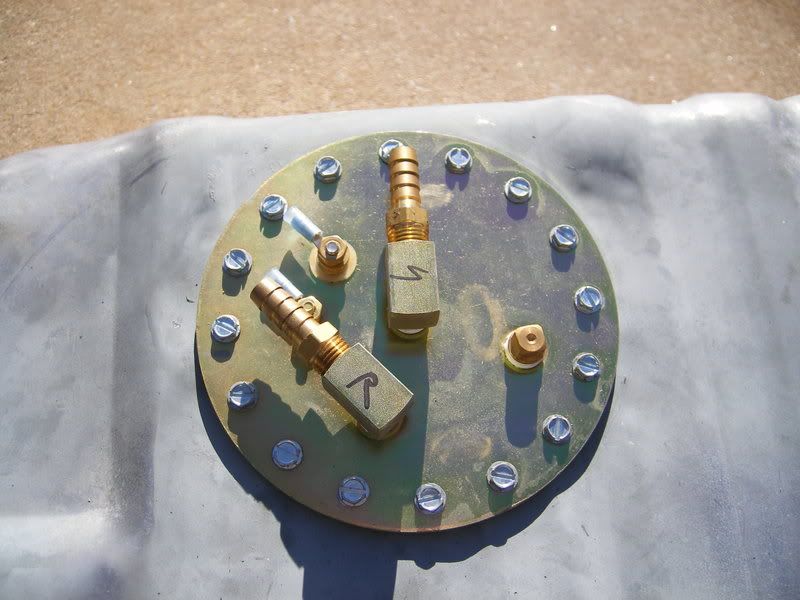
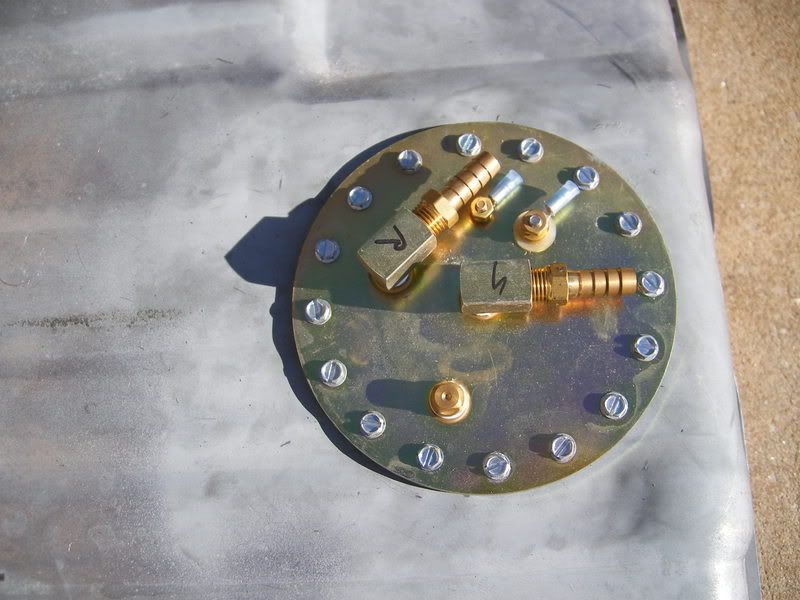
I know there were a few of you guys wanting to see some pictures of my modified tank. In retrospect I wish I would have taken some pics as I was doing the modifications but its really a pretty straightforward deal.
Also, sort of random but those of you using the hooker swap headers did the bolts that came with them seem a bit short to you?
Also, sort of random but those of you using the hooker swap headers did the bolts that came with them seem a bit short to you?
 08-14-2008, 09:45 PM
#60
TECH Resident
Thread Starter
iTrader: (3)
Join Date: Sep 2005
Location: Edmond, Oklahoma
Posts: 796
Likes: 0
Received 0 Likes
on
0 Posts
Well I have neglected this thread once again but I thought I should make an update nonetheless. I fired up the chevelle for the first time in over two years last night which was a nice accomplishment. Ran great oil pressure was good etc.
I have been busy finishing up the wiring and the little odds and ends etc. that would get it ready to run. The current performance fuse block really made it a pretty straightforward deal.
Today I installed the cable shift linkage conversion from ididit. It was really a pretty well engineered piece however the pictures in the instructions lacked a bit to be desired. All in all I think it is going to work well. I really need to get some pictures on here to document the progress.