

LS1 into a 1972 MGB GT
 12-21-2010, 05:24 PM
#141
Staging Lane

Join Date: Nov 2005
Location: Knoxville, TN
Posts: 52
Likes: 0
Received 0 Likes
on
0 Posts
You should just do what you do best and throw some Miata wiper mechanisms in there. Yeah, I'm familiar with your work Keith, I've read through your book a few times and followed a bunch of the builds (LS3 Miatas) over there at FM.
 12-21-2010, 10:52 PM
#142
On The Tree
Thread Starter
iTrader: (1)
Join Date: Aug 2008
Location: Colorado
Posts: 100
Likes: 0
Received 0 Likes
on
0 Posts
The problem with using Miata parts is that they're not well suited to adapting to different cars, like most modern wipers. The Lucas setup is actually nicely designed to be very flexible and really easy to adapt to just about anything. They take a bit more maintenance, but I'm okay with that.
The Lucas parts are also installed, which is a big plus! I've got it sorted out now, it just took a bit of doodling of circuit diagrams.
The Lucas parts are also installed, which is a big plus! I've got it sorted out now, it just took a bit of doodling of circuit diagrams.
12-26-2010, 08:38 PM
#143
On The Tree
Thread Starter
iTrader: (1)
Join Date: Aug 2008
Location: Colorado
Posts: 100
Likes: 0
Received 0 Likes
on
0 Posts
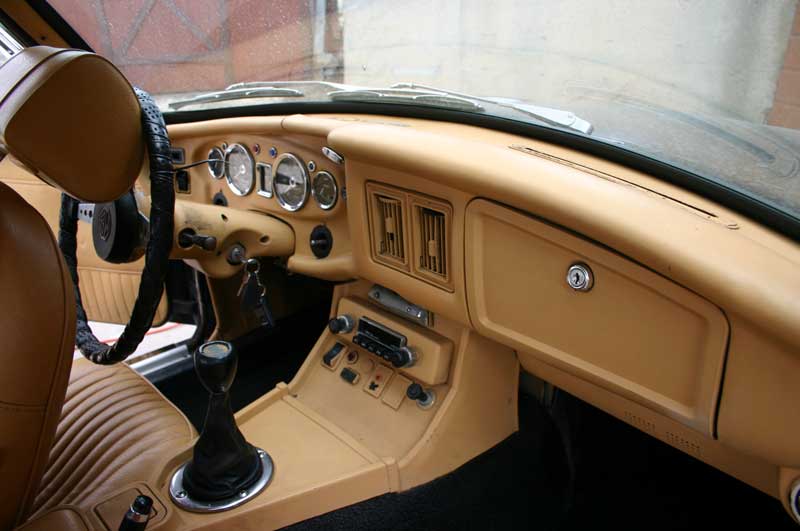
The interior of the car is basically assembled in the new look. It had been spray-painted tan in the past - MG never did a non-black dash in this car. The color was nice but the paint job wasn't up to scratch. So I returned it to black. It's also been modified with some interchange parts, replacing the big plastic center console with an older design.
Before.
Now.
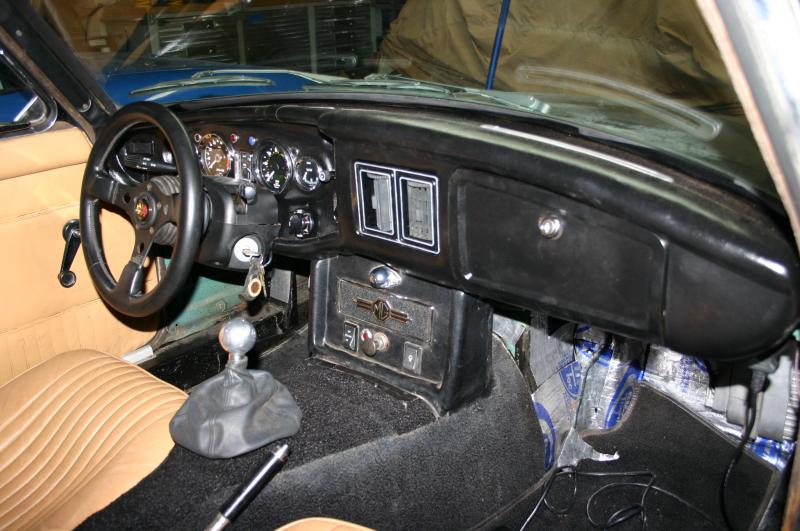
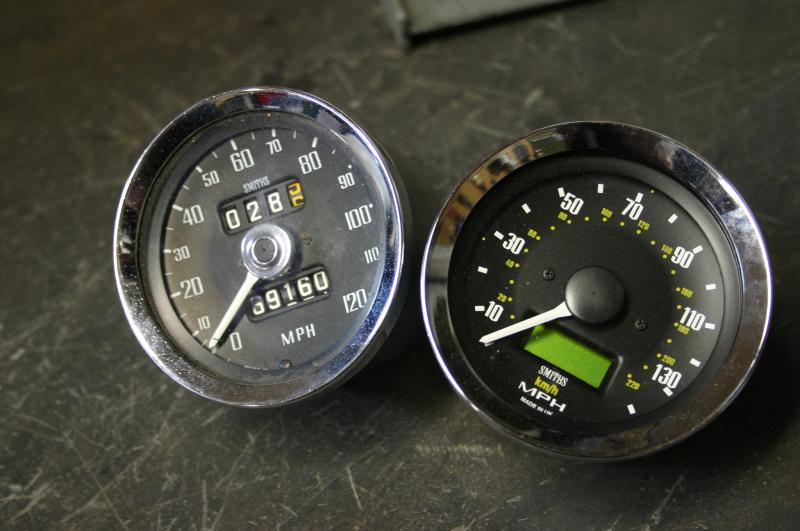
Here's a look at the new electronic speedo. It looks right at home in the dashboard, right down to the font.
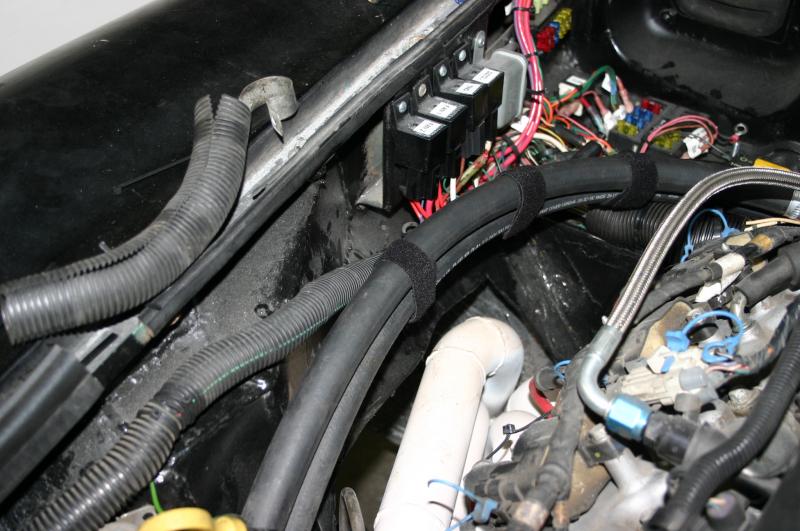
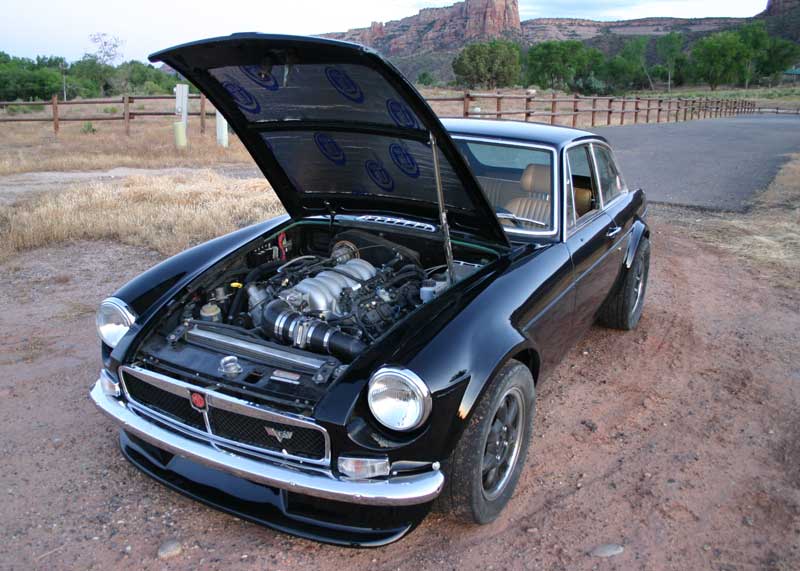
I've also cleaned up underhood a bit. The main wiring is still exposed in case I need to access it, and I'm seriously considering just putting a box over top of this to hide it instead of making a big python of electrical tape. The two heater hoses running past the relays are strapped together with vecro strap - it's got the hooks on one side and the loops on the other. You can buy it by the roll at Harbor Freight and it's great for tying things down in a fully removable fashion. Heck, I use it to hold my first aid kit in place in the rally car.
Obviously, I'm not done yet as I still have to install carpet/panels in the footwells, for example, although you don't notice that in person the way you do in pictures. Still, it's all been enough to make the little monster feel like a real car. We've been using it to go shopping and to drive to Christmas dinner. Everything seems to be working pretty well other than the fans - we got stuck in stop-and-go traffic in a grocery store parking lot and I saw the temps spike to 235 without hearing the fans run. Looks like they're blowing the 20A fuse on startup - they're rated for 13A continuous draw, but I know there's a startup surge. I'll bump that to 30A (the wiring will more than handle it) and see how it works. Otherwise, the wipers, defrost, heater, dash lights and all those other bits and pieces seem to be good.
I'm still working on sound control. More "cool-it" on the firewall behind the dash helped out quite a bit, now it's mostly rumble from the rear end. I'll lay down some more of the stuff under the carpet when I feel like taking part of the car apart again - it's so much fun having it together and working that I don't want to remove anything!
A retrospective: one year ago, the engine came out of the donor car and the MG hit the ground for the first time in mid-January. Two years ago, we were stripping the interior of the car. I'd call that good progress.
Before.
Now.
Here's a look at the new electronic speedo. It looks right at home in the dashboard, right down to the font.
I've also cleaned up underhood a bit. The main wiring is still exposed in case I need to access it, and I'm seriously considering just putting a box over top of this to hide it instead of making a big python of electrical tape. The two heater hoses running past the relays are strapped together with vecro strap - it's got the hooks on one side and the loops on the other. You can buy it by the roll at Harbor Freight and it's great for tying things down in a fully removable fashion. Heck, I use it to hold my first aid kit in place in the rally car.
Obviously, I'm not done yet as I still have to install carpet/panels in the footwells, for example, although you don't notice that in person the way you do in pictures. Still, it's all been enough to make the little monster feel like a real car. We've been using it to go shopping and to drive to Christmas dinner. Everything seems to be working pretty well other than the fans - we got stuck in stop-and-go traffic in a grocery store parking lot and I saw the temps spike to 235 without hearing the fans run. Looks like they're blowing the 20A fuse on startup - they're rated for 13A continuous draw, but I know there's a startup surge. I'll bump that to 30A (the wiring will more than handle it) and see how it works. Otherwise, the wipers, defrost, heater, dash lights and all those other bits and pieces seem to be good.
I'm still working on sound control. More "cool-it" on the firewall behind the dash helped out quite a bit, now it's mostly rumble from the rear end. I'll lay down some more of the stuff under the carpet when I feel like taking part of the car apart again - it's so much fun having it together and working that I don't want to remove anything!
A retrospective: one year ago, the engine came out of the donor car and the MG hit the ground for the first time in mid-January. Two years ago, we were stripping the interior of the car. I'd call that good progress.
Last edited by Keith Tanner; 12-26-2010 at 09:25 PM.
01-03-2011, 11:30 PM
#144
On The Tree
Thread Starter
iTrader: (1)
Join Date: Aug 2008
Location: Colorado
Posts: 100
Likes: 0
Received 0 Likes
on
0 Posts
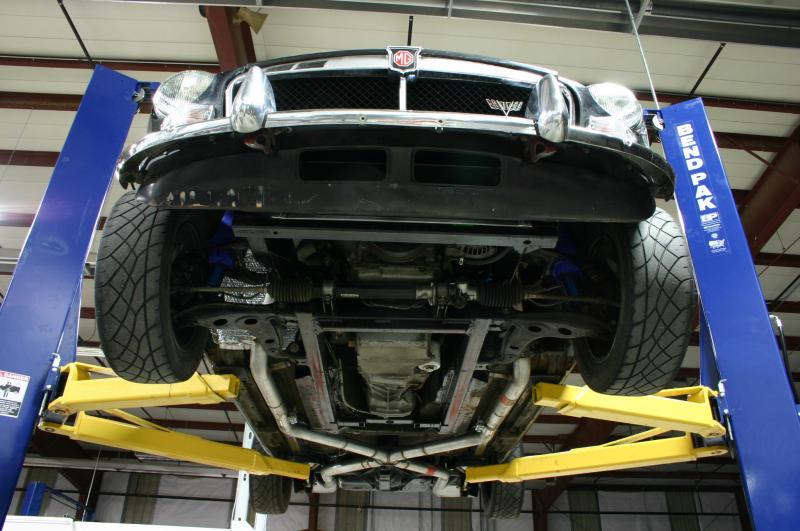
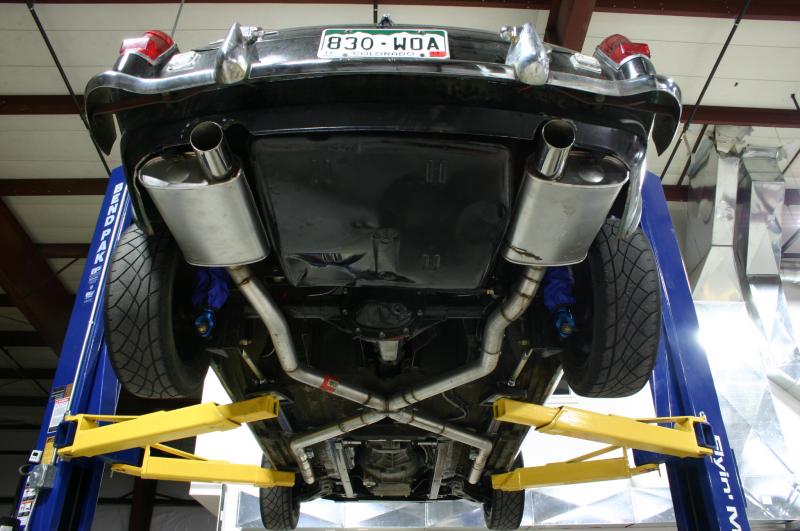
I brought the car to work and put it up on the lift. Looks pretty cool. Other than when it was aligned, this is the first time I've had the car on a lift - all the construction was done on jack stands. I found a few things that need attention, but nothing big.

 I love that car and the attention to detail.
  01-05-2011, 11:02 PM
#149
On The Tree
Thread Starter
iTrader: (1)
Join Date: Aug 2008
Location: Colorado
Posts: 100
Likes: 0
Received 0 Likes
on
0 Posts
Thanks for the kind words, guys. It's pretty close to done from a mechanical standpoint, but I still have to do the bodywork and sort out some handling. And yes, this would have been a lot easier with a bead-blasted shell on a rotisserie. But you work with what you have. The garage spot where it was built measures 16'6" x 8', and that includes tool storage and my welding bench!
While I had the car at work on a lift, I dropped it on the scales. The car's in full street trim, including an (almost) full tank of gas, interior and even a spare tire. Looks like my estimate a year ago for a 2400 lb weight wasn't far off. 51.9/48.1 front/rear distribution's pretty darn good and the cornerweights are bang-on.
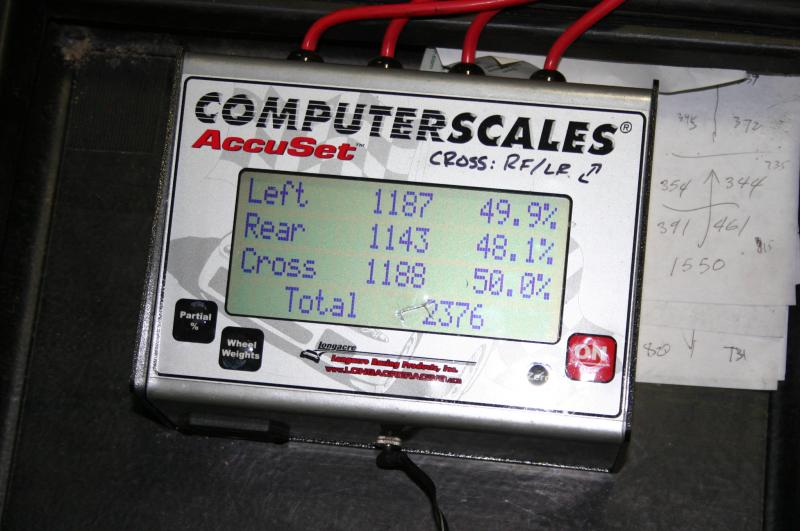
While I had the car at work on a lift, I dropped it on the scales. The car's in full street trim, including an (almost) full tank of gas, interior and even a spare tire. Looks like my estimate a year ago for a 2400 lb weight wasn't far off. 51.9/48.1 front/rear distribution's pretty darn good and the cornerweights are bang-on.
 06-21-2011, 07:16 PM
#152
On The Tree
Thread Starter
iTrader: (1)
Join Date: Aug 2008
Location: Colorado
Posts: 100
Likes: 0
Received 0 Likes
on
0 Posts
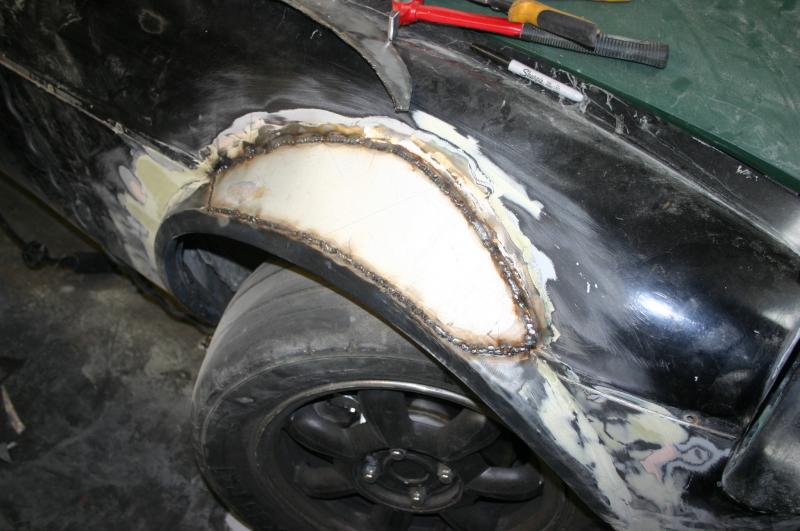
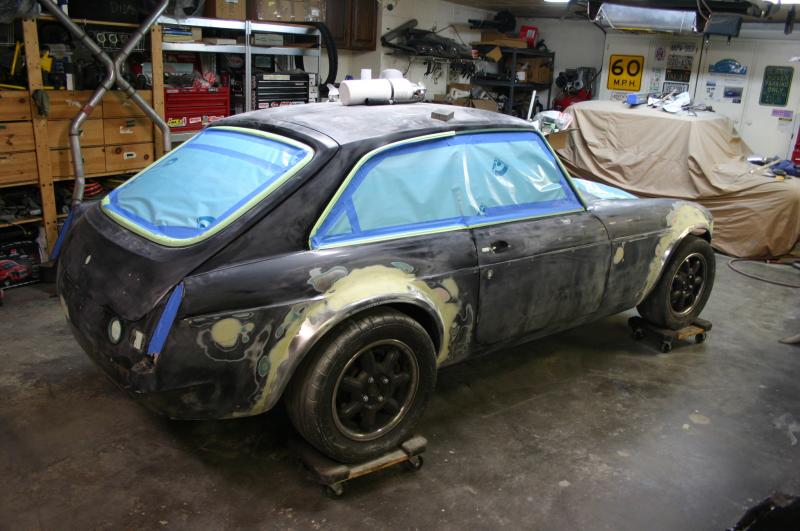
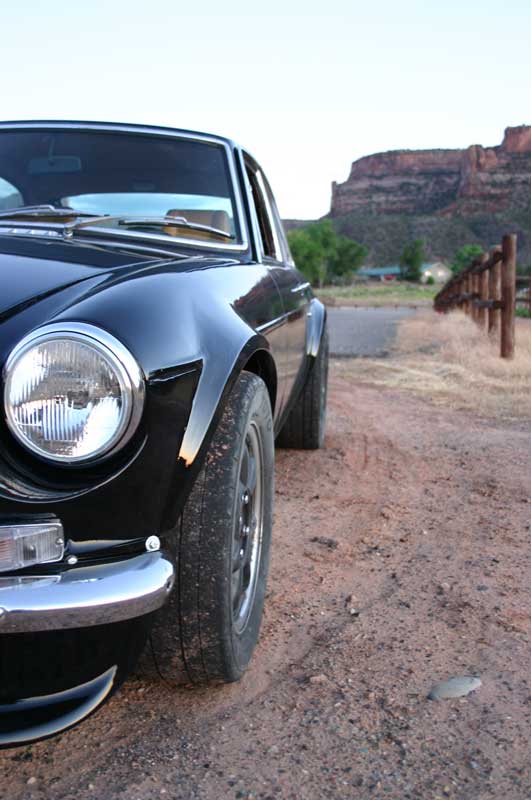
I've been working on a few other things - including my L33-powered Miata racer - but the MG finally took a big step. In mid-March, I started working on the bodywork. The shell's amazingly rust-free for a 39-year-old British car, but it has been painted at least twice over the years and also accumulated a lot of nicks and chips and a few dings. The black paint was badly sunburned. Plus the flares needed to be blended in to the body.
So I stripped the car down and started layering on filler, then sanding most of it off, then layering on a bit more. The whole car is compound curves which made things interesting. I've done almost no bodywork before, so there was a lot of learning going on. A D/A sander from Harbor Freight was the big breakthrough, allowing me to make much better shapes, faster, than I could by hand. I reworked the right front flare with steel first to fix the shape, it wasn't quite muscular enough. The car's also wearing an MG Special Tuning front air dam, which balances the look of the front end. Plus it looks totally badass.
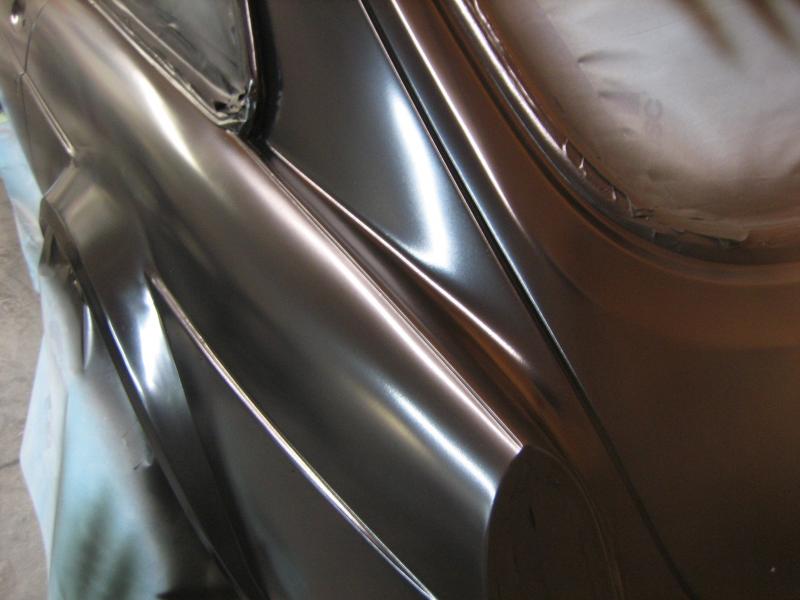
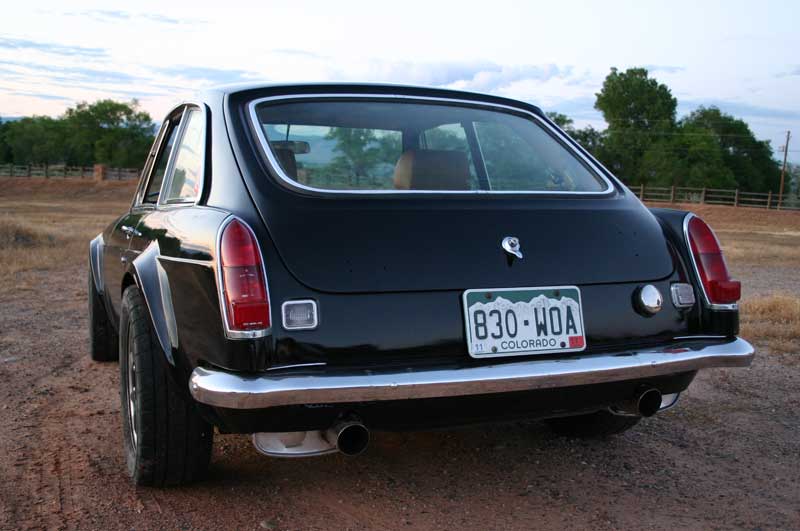
Finally, last week, I laid down a few coats of BMW Jet Black. It's not perfect, but it'll come to life nicely with some buffing and sanding. I'll put the mirrors, rear badges and chrome side strips on once that's done.
And now, the car.
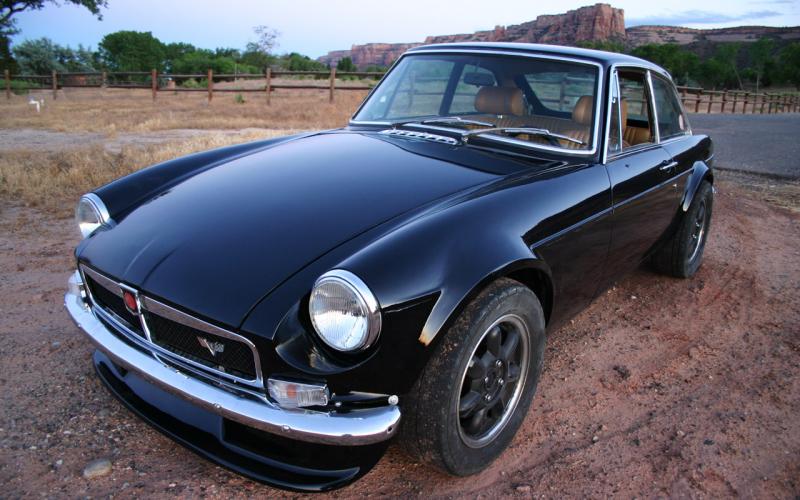

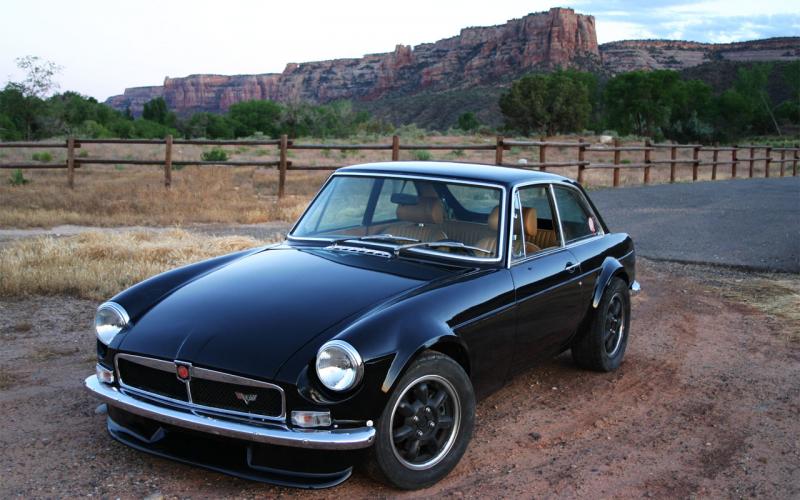
I've still got a way to go. I think it's going to get stiffer springs all the way around to see how that works out, and I still need to spend some time tuning the car on track. I have a Miata front sway bar adapted in the front so I have access to a wide variety of options. Nothing in the rear yet, but I'll fit the Camaro one if I need some more rear roll stiffness.
Video will come soon hopefully. But right now, I'm just enjoying the car. Holy cow, it moves.
So I stripped the car down and started layering on filler, then sanding most of it off, then layering on a bit more. The whole car is compound curves which made things interesting. I've done almost no bodywork before, so there was a lot of learning going on. A D/A sander from Harbor Freight was the big breakthrough, allowing me to make much better shapes, faster, than I could by hand. I reworked the right front flare with steel first to fix the shape, it wasn't quite muscular enough. The car's also wearing an MG Special Tuning front air dam, which balances the look of the front end. Plus it looks totally badass.
Finally, last week, I laid down a few coats of BMW Jet Black. It's not perfect, but it'll come to life nicely with some buffing and sanding. I'll put the mirrors, rear badges and chrome side strips on once that's done.
And now, the car.
I've still got a way to go. I think it's going to get stiffer springs all the way around to see how that works out, and I still need to spend some time tuning the car on track. I have a Miata front sway bar adapted in the front so I have access to a wide variety of options. Nothing in the rear yet, but I'll fit the Camaro one if I need some more rear roll stiffness.
Video will come soon hopefully. But right now, I'm just enjoying the car. Holy cow, it moves.

 06-22-2011, 07:35 AM
#156

Holy cow, you are talented! Great work! Bob
__________________
ATI ProCharger and Moser Sales 260 672-2076
PM's disabled, please e-mail me
E-mail: brutespeed@gmail.comob@brutespeed.com
https://brutespeed.com/ Link to website

ATI ProCharger and Moser Sales 260 672-2076
PM's disabled, please e-mail me
E-mail: brutespeed@gmail.comob@brutespeed.com
https://brutespeed.com/ Link to website

 06-29-2011, 09:57 AM
#158
On The Tree
Thread Starter
iTrader: (1)
Join Date: Aug 2008
Location: Colorado
Posts: 100
Likes: 0
Received 0 Likes
on
0 Posts
Video! Not a good one, I was playing with a couple of cameras and managed to get very little good footage of anything. Not even good engine noise! Still, it's something. I'll rope someone into shooting from outside the car when I have it on the track.
http://www.youtube.com/watch?v=F7D0gPZEMP0
http://www.youtube.com/watch?v=F7D0gPZEMP0
Last edited by Keith Tanner; 06-29-2011 at 10:53 AM.
 06-29-2011, 10:53 AM
#160
On The Tree
Thread Starter
iTrader: (1)
Join Date: Aug 2008
Location: Colorado
Posts: 100
Likes: 0
Received 0 Likes
on
0 Posts
Fast enough that a passenger would have asked me to slow down  I wasn't watching the speedo, and it's not the sort of road you can do 120 mph on. It's actually fairly rough in spots, I use it to do suspension testing.
I wasn't watching the speedo, and it's not the sort of road you can do 120 mph on. It's actually fairly rough in spots, I use it to do suspension testing.