
Miro's LS1 240 Drift Build
 12-16-2008, 11:17 PM
#41
On The Tree
Thread Starter
iTrader: (3)
Join Date: Aug 2008
Location: Lodi, NJ
Posts: 144
Likes: 0
Received 0 Likes
on
0 Posts
Nice build!
Good thats it's not just me who has rust problems...
Im building a Skyline R32 with LS3, but its mainly the same, so If you have any question, don't hesitate to contact me.
Skylines Australia
Subscribing...
Good thats it's not just me who has rust problems...
Im building a Skyline R32 with LS3, but its mainly the same, so If you have any question, don't hesitate to contact me.
Skylines Australia
Subscribing...
I was seriously just about to update.
I've been learning a new skill lately. No, it has nothing to do with drifting. It's called flood control.

The whole floor was eventually covered.
It rained nearly non-stop from last Wednesday to Friday, which has exposed a slight flaw in the drainage system around the garage. I can imagine the conversation when the garage was being built: "Hey, why don't we build this garage at the bottom of this sloped driveway so all the rain water goes right towards the garage? Oh yes, that's a great idea. And to keep water from getting in the garage, we'll put this tiny drain right in front of the garage door. So when the drain gets clogged with leaves and other crap, the garage and backyard will become a lake. Awesome. Let's build."
I managed to get some important things off the ground before the water got to it (welder), but pretty much everything else is wet. Also, the roof started leaking again (landlord fixed it in the summer, but started leaking again). So water dripped on the new battery tray patch I made, which caused it to rust again. Sweeeeeeet. I took the rust off with a wire wheel and covered the right front with a garbage bag.

I got some welding done before the rain started. I patched up the lower part of the frame rail and the hole in the floor by the frame rail. Pretty pathetic progress for a few days.
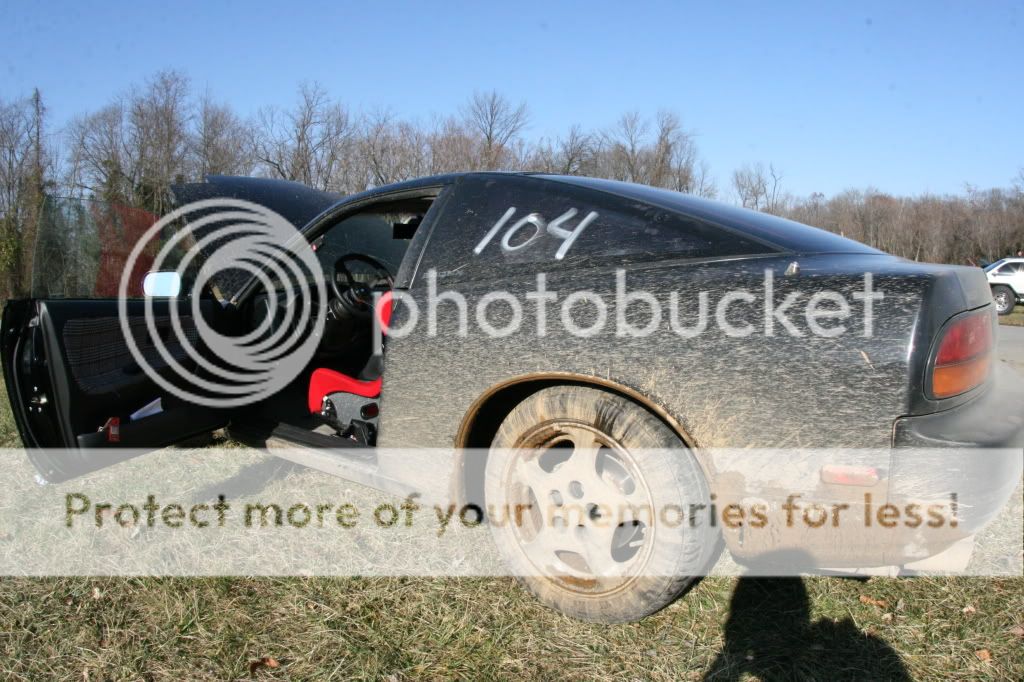
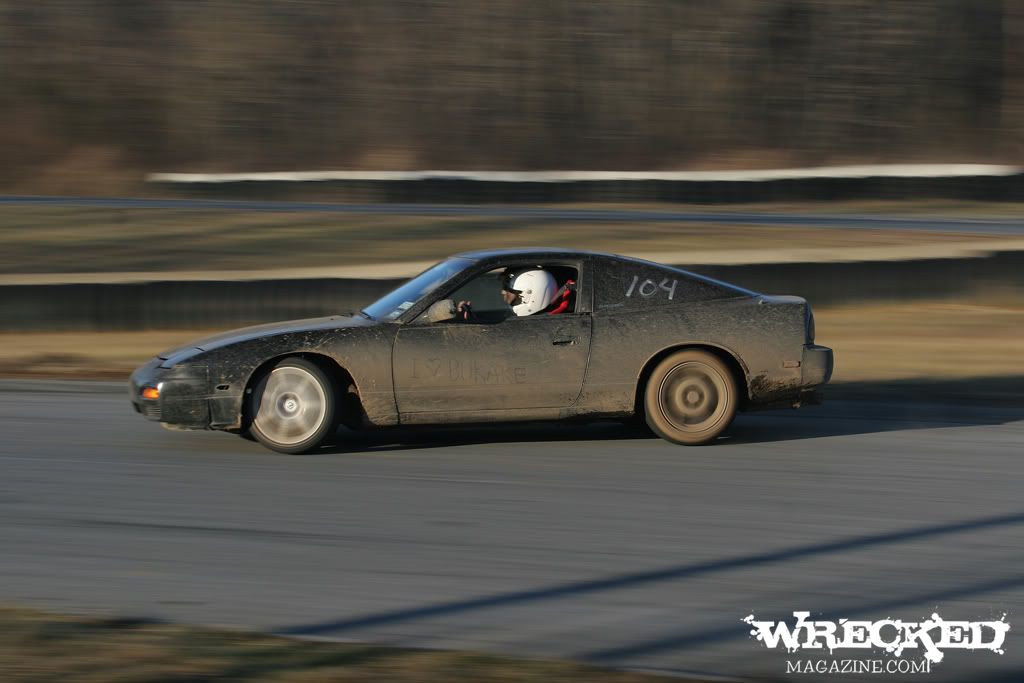
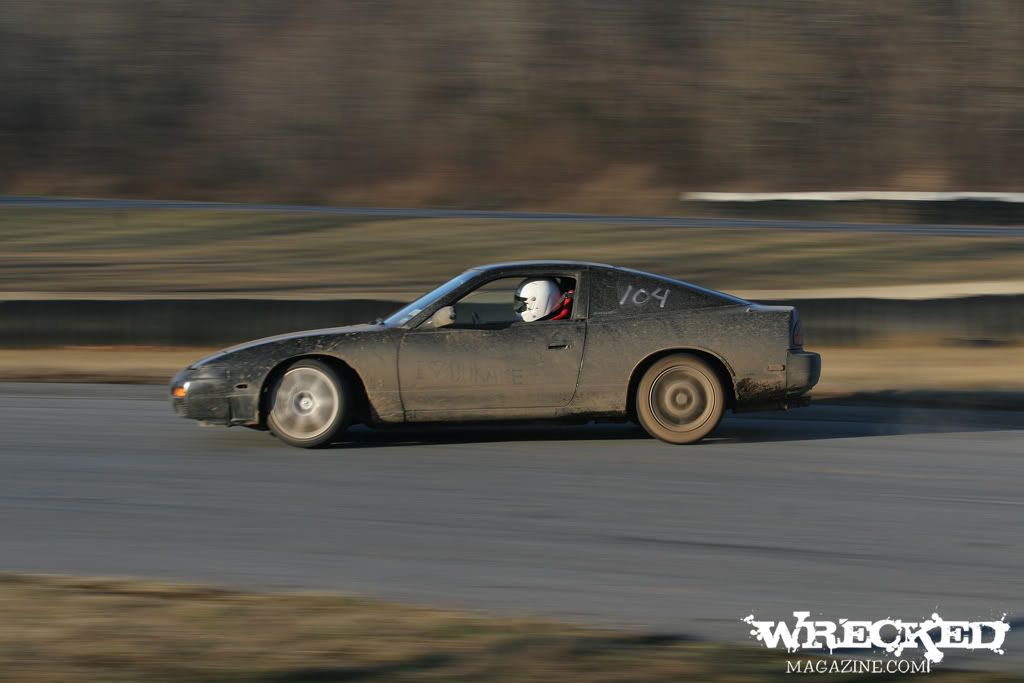
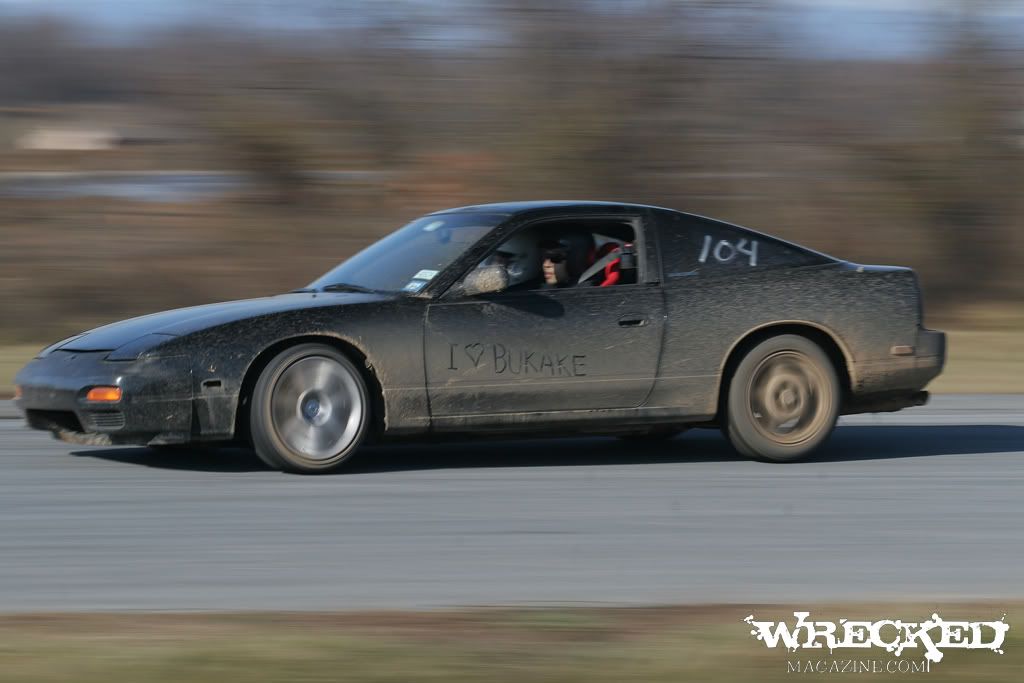
Then, I went to Drift Nirvana with Mel on Saturday. Here are some of his pics:
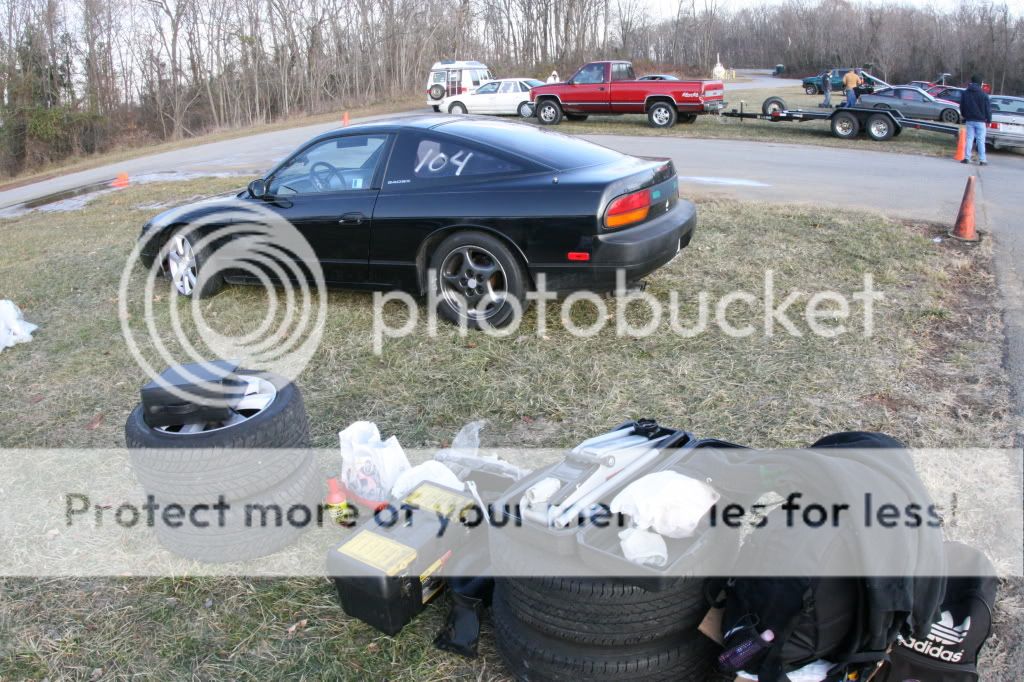
Before.
After.

No explanation needed.


Mel's first time off-roading.

Got back to work the next day and finished welding the frame rail.

And finally did the rest of the left front wheel well.

Wow, that sucked, but feels good to have it done.
Also got some GM parts (GTO pan, gaskets, seals, etc.) and the tube bender delivered. I'll post some pictures tomorrow.


 12-17-2008, 10:00 PM
#45
TECH Fanatic
iTrader: (9)
Join Date: Aug 2007
Location: Rocky Mtn thin air & snow...
Posts: 1,237
Likes: 0
Received 1 Like
on
1 Post

Originally Posted by miro
I've been learning a new skill lately. No, it has nothing to do with drifting. It's called flood control.
The whole floor was eventually covered.
It rained nearly non-stop from last Wednesday to Friday, which has exposed a slight flaw in the drainage system around the garage. I can imagine the conversation when the garage was being built: "Hey, why don't we build this garage at the bottom of this sloped driveway so all the rain water goes right towards the garage? Oh yes, that's a great idea. And to keep water from getting in the garage, we'll put this tiny drain right in front of the garage door. So when the drain gets clogged with leaves and other crap, the garage and backyard will become a lake. Awesome. Let's build."
I managed to get some important things off the ground before the water got to it (welder), but pretty much everything else is wet.

Originally Posted by miro
Wow, that sucked, but feels good to have it done.
Seriously though, nice job man. You're making some good progress, whether it feels like it or not.
I'll be watching this one...
 12-18-2008, 05:27 AM
#46
Teching In

Join Date: May 2007
Posts: 33
Likes: 0
Received 0 Likes
on
0 Posts
subscribed! wish i had the means to do this to my 240. stitch welding is supposed to really help out our inherent understeer problems. looks fantastic, though, and i'm looking forward to some more updates!!
01-04-2009, 12:26 AM
#47
On The Tree
Thread Starter
iTrader: (3)
Join Date: Aug 2008
Location: Lodi, NJ
Posts: 144
Likes: 0
Received 0 Likes
on
0 Posts
I've cut out every bit of rust from the car. Woohoo. This took what? Three weeks longer than I anticipated? New Year's resolution: Stop making stupid unrealistic schedules for yourself.
Anyway, here's the progress so far.


Stitch welded the engine bay.

Cut out rust behind passenger seat.

Holes behind passenger seat patched up.

Apparently, my car was rear ended so hard at some point in its life that the transmission tunnel buckled towards the rear of the car. This is what it looked like.

I knocked it back out from underneath.

Welded some sheet metal on top of where it buckled for extra support.

Found some rust on the lower part of the radiator support.

No more rust.

Cut rust out of driver floor.

Cut rust out of right rocker panel.


I'm cutting off the lower parts of the rear quarter panels because they are rusted. Also, I like the look of the car with the rear high and the tires exposed from the back. (Maybe more efficient smoke generation also? Haha.) I'm not going to have a rear bumper but will make a "bumper cover" from sheet metal that will be flush with the tail lights.

Stitch welding never hurt anybody.

Tube bender parts. So close to roll cage time.

Another rust patch on the inner frame rail and more stitch welding.


Stitch welding passenger floor.

Yay. I have a complete rocker panel again. But will need 5 pounds of body filler to make it look straight. I guess the side skirts will cover it anyway.
01-04-2009, 12:28 AM
#48
On The Tree
Thread Starter
iTrader: (3)
Join Date: Aug 2008
Location: Lodi, NJ
Posts: 144
Likes: 0
Received 0 Likes
on
0 Posts
And I have exceeded the max number of images for one post. So I will continue here...

Tuuuuuuuubing.

Hmm. This stuff seems heavy. Getting worried. Nope, that's 40ft of tubing on the scale. Comes out to 66 lbs. Will probably need 70ft for the super duper cage.

Driver floor patched and stitched.

I got some GM parts a few weeks ago.
GTO Oil Pan - P/N 12581209
GTO Windage Tray - P/N 12558189
GTO Pickup Tube - P/N 12572654
GTO Dipstick Tube - P/N 12561544
GTO Dipstick - P/N 12562468
Water Pump Gasket - P/N 12610311
Valve Cover Gaskets - P/N 12612045
Front Cover Gasket - P/N 12574294
Crankshaft Front Oil Seal - P/N 12585673
Dipstick Block Plug (for F-body dipstick location) - P/N 9421743
HUGE thanks to Slidewayz Motorsports for getting me the tubing (pretty difficult to pick it up when you leave for work at 7:30AM and get home at 7:30PM... ha). Awesome dudes. They'll be ordering all of the parts I need for my car, so if anyone's interested in doing the 240 LS1 conversion and is in the tristate area, they would be good people to contact.
Tuuuuuuuubing.
Hmm. This stuff seems heavy. Getting worried. Nope, that's 40ft of tubing on the scale. Comes out to 66 lbs. Will probably need 70ft for the super duper cage.
Driver floor patched and stitched.
I got some GM parts a few weeks ago.
GTO Oil Pan - P/N 12581209
GTO Windage Tray - P/N 12558189
GTO Pickup Tube - P/N 12572654
GTO Dipstick Tube - P/N 12561544
GTO Dipstick - P/N 12562468
Water Pump Gasket - P/N 12610311
Valve Cover Gaskets - P/N 12612045
Front Cover Gasket - P/N 12574294
Crankshaft Front Oil Seal - P/N 12585673
Dipstick Block Plug (for F-body dipstick location) - P/N 9421743
HUGE thanks to Slidewayz Motorsports for getting me the tubing (pretty difficult to pick it up when you leave for work at 7:30AM and get home at 7:30PM... ha). Awesome dudes. They'll be ordering all of the parts I need for my car, so if anyone's interested in doing the 240 LS1 conversion and is in the tristate area, they would be good people to contact.
Last edited by miro; 01-04-2009 at 12:35 AM.
01-04-2009, 08:31 AM
#50
On The Tree
Thread Starter
iTrader: (3)
Join Date: Aug 2008
Location: Lodi, NJ
Posts: 144
Likes: 0
Received 0 Likes
on
0 Posts
I'm going to build a basic 6-pt cage with X bars in the back and awesome NASCAR door bars (3 horizontal, 3 vertical). This will protect me from death when my fiberglass doors explode in a side impact.
 01-04-2009, 09:37 PM
#53
On The Tree
Thread Starter
iTrader: (3)
Join Date: Aug 2008
Location: Lodi, NJ
Posts: 144
Likes: 0
Received 0 Likes
on
0 Posts
EXACTLY. Exploding doors are fun too... can't wait.
I don't know, maybe fiberglass rear bumper? I was thinking I should chrome my gas tank or something since it will be visible with the high rear.
I don't know, maybe fiberglass rear bumper? I was thinking I should chrome my gas tank or something since it will be visible with the high rear.
01-08-2009, 06:48 AM
#54
On The Tree
Thread Starter
iTrader: (3)
Join Date: Aug 2008
Location: Lodi, NJ
Posts: 144
Likes: 0
Received 0 Likes
on
0 Posts
I cut out the reinforcement plates in the rear so that I can weld the rear down bars to the front of the rear shock towers.

Before

After
I'm finishing up stitch welding in the rear. I'm just waiting for the 12-gauge sheet metal to be delivered so I can start making the roll cage bases.
In the meantime...

Tube bender... check.

50k BTU kerosene heater... check.

Modified spindles and lower control arms from MA-Motorsports for unnecessarily large steering angle... check.
Before
After
I'm finishing up stitch welding in the rear. I'm just waiting for the 12-gauge sheet metal to be delivered so I can start making the roll cage bases.
In the meantime...
Tube bender... check.
50k BTU kerosene heater... check.
Modified spindles and lower control arms from MA-Motorsports for unnecessarily large steering angle... check.
Last edited by miro; 01-08-2009 at 06:57 AM.
01-08-2009, 08:47 AM
#55
Looks good, that a Version Select front bumper?
Just curious with all the fab work you're doing on the car why didn't you do the lowers yourself?
Just curious with all the fab work you're doing on the car why didn't you do the lowers yourself?
__________________
Glenn ***
Sales Tech
www.bmrsuspension.com
813.986.9302

Find a Quality alignment shop near you!
Glenn ***
Sales Tech
www.bmrsuspension.com
813.986.9302
Find a Quality alignment shop near you!
 01-08-2009, 10:34 AM
#57
On The Tree
Thread Starter
iTrader: (3)
Join Date: Aug 2008
Location: Lodi, NJ
Posts: 144
Likes: 0
Received 0 Likes
on
0 Posts
I probably could have done the control arms myself (except for the dimples), but bending the spindles myself would not be a good plan. MA-Motorsports has probably built a jig to get the steering arms in the right position every time they make these. (The arms where the tie rods attach are relocated so that the tie rods can pull the spindles further before it's maxed out.) It would take a lot of trial and error to get the steering arms in the right position and same on both sides.
01-08-2009, 02:12 PM
#58
The kit is some kind of knockoff, possibly a Version Select knockoff. I'm not exactly an expert in aero stuff; all I know is the car needs to be damn low.
I probably could have done the control arms myself (except for the dimples), but bending the spindles myself would not be a good plan. MA-Motorsports has probably built a jig to get the steering arms in the right position every time they make these. (The arms where the tie rods attach are relocated so that the tie rods can pull the spindles further before it's maxed out.) It would take a lot of trial and error to get the steering arms in the right position and same on both sides.
I probably could have done the control arms myself (except for the dimples), but bending the spindles myself would not be a good plan. MA-Motorsports has probably built a jig to get the steering arms in the right position every time they make these. (The arms where the tie rods attach are relocated so that the tie rods can pull the spindles further before it's maxed out.) It would take a lot of trial and error to get the steering arms in the right position and same on both sides.
__________________
Glenn ***
Sales Tech
www.bmrsuspension.com
813.986.9302
Find a Quality alignment shop near you!
Glenn ***
Sales Tech
www.bmrsuspension.com
813.986.9302
Find a Quality alignment shop near you!
01-08-2009, 04:56 PM
#59
On The Tree
Thread Starter
iTrader: (3)
Join Date: Aug 2008
Location: Lodi, NJ
Posts: 144
Likes: 0
Received 0 Likes
on
0 Posts
Yep. Have only heard good things about MA. Owner Brian Wilkerson seems like a cool guy. And it's reassuring that he uses this stuff on his own competition car.