
Pro-Touring 68 Acadian (Nova) with L92


 11-22-2009, 12:15 PM
#22
On The Tree
Thread Starter
iTrader: (4)

Join Date: Mar 2009
Location: British Columbia, Canada
Posts: 132
Likes: 0
Received 0 Likes
on
0 Posts

 11-22-2009, 04:51 PM
#23
 11-24-2009, 04:55 PM
#24
On The Tree
Thread Starter
iTrader: (4)
Join Date: Mar 2009
Location: British Columbia, Canada
Posts: 132
Likes: 0
Received 0 Likes
on
0 Posts
Thanks for the tip Andrew. I may have to look into that.
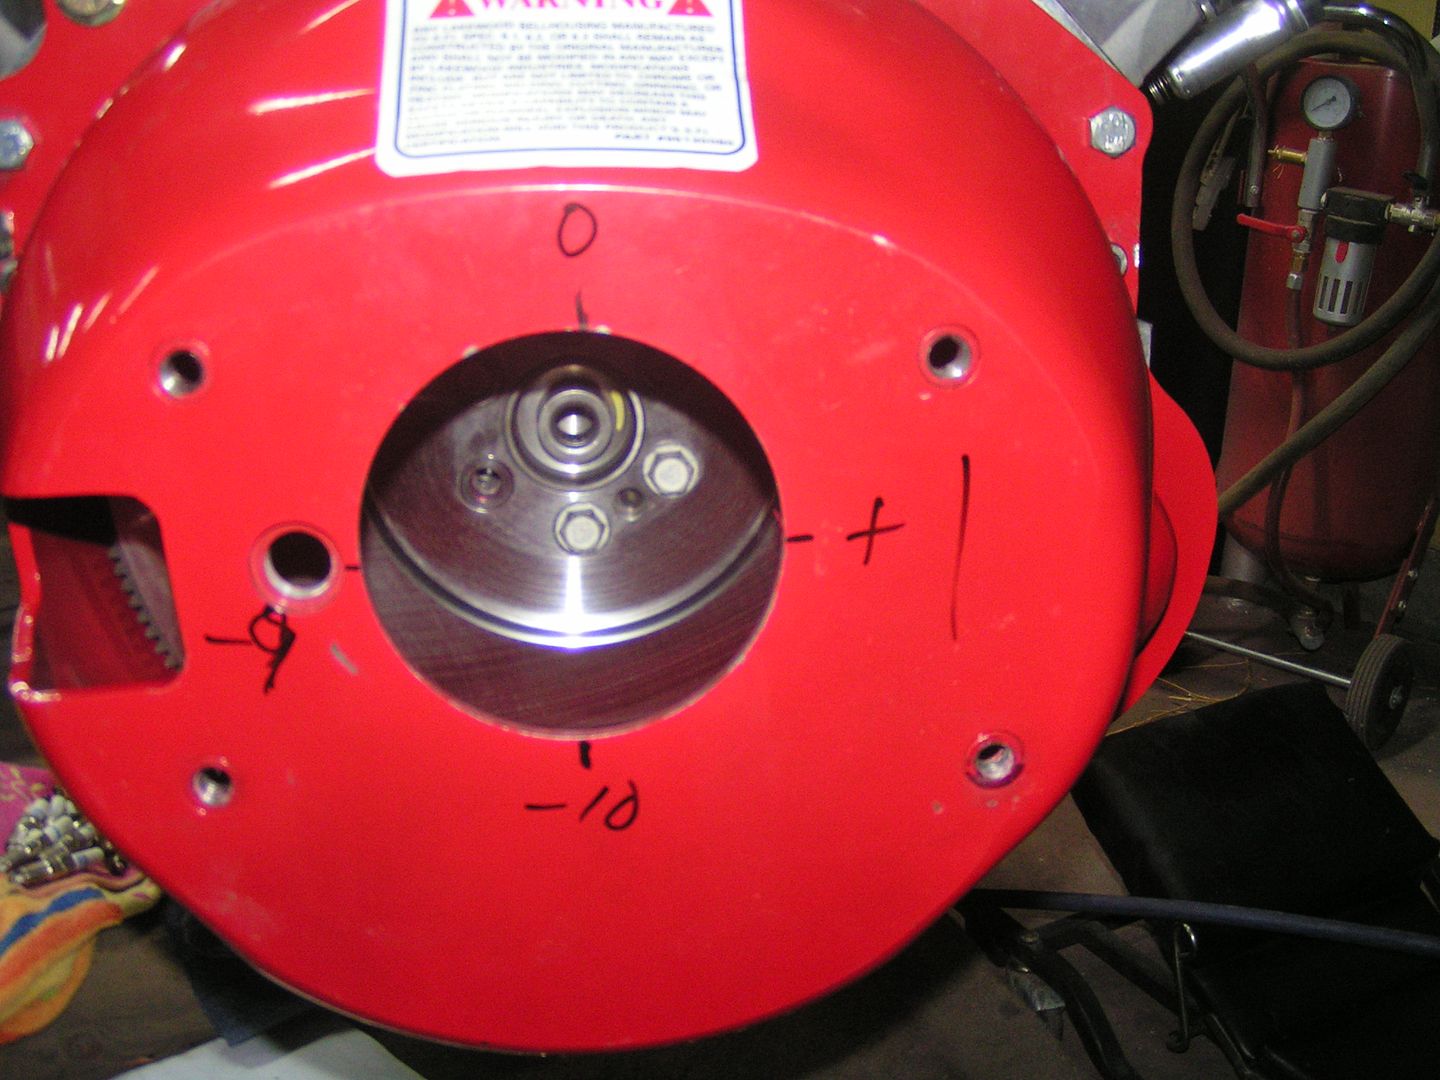
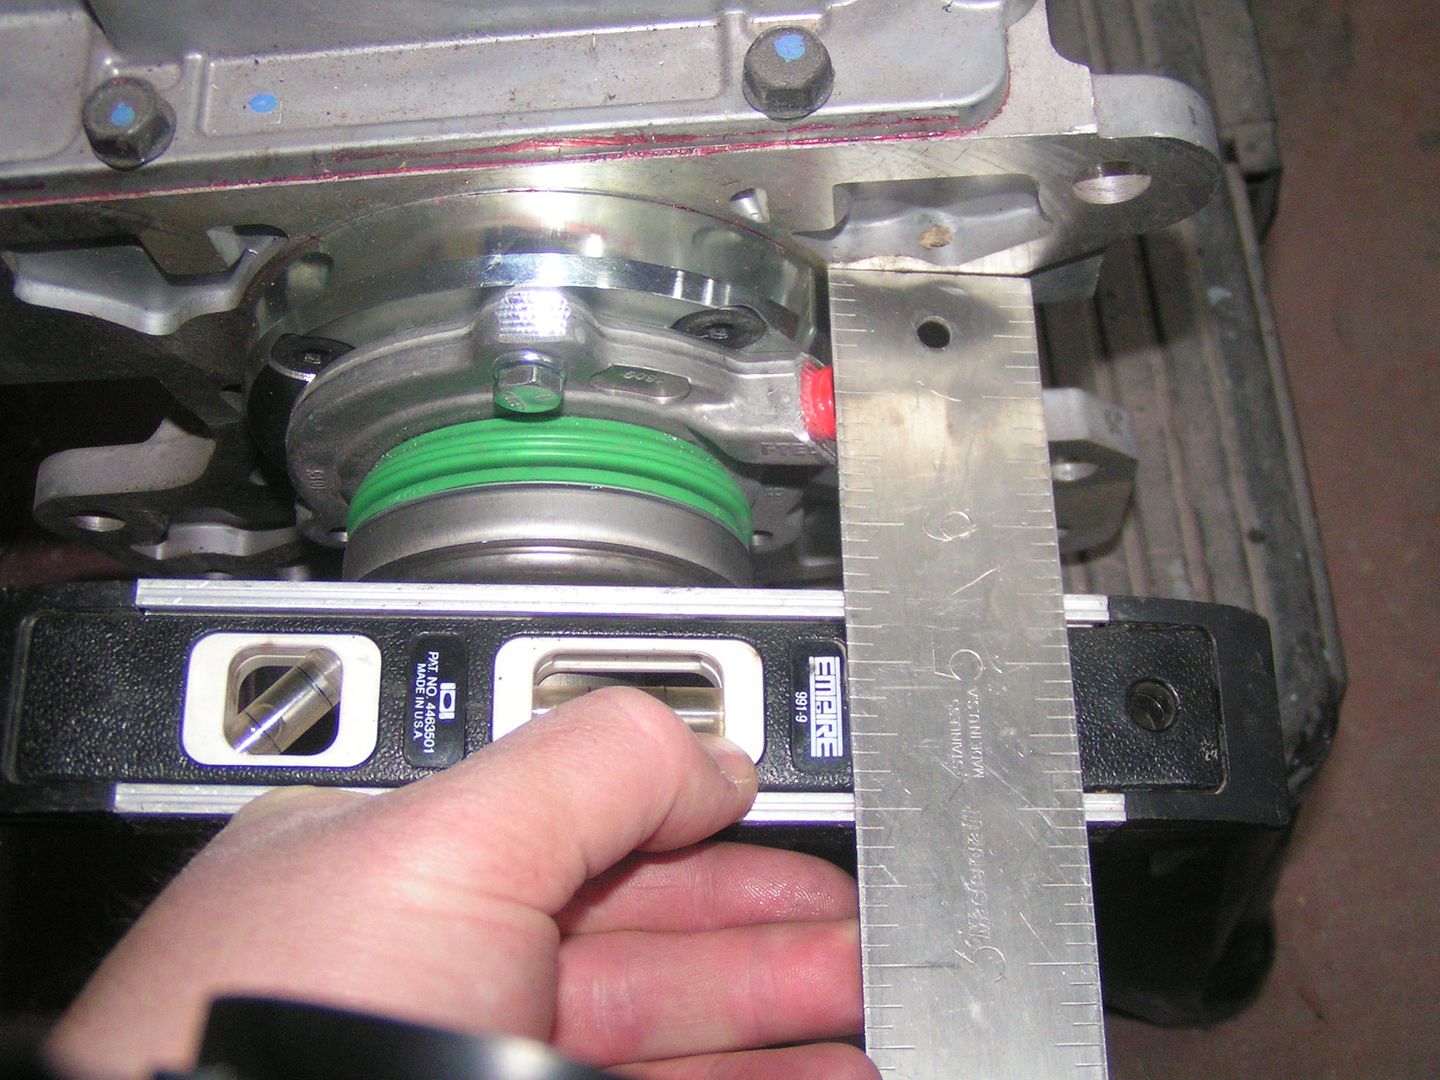
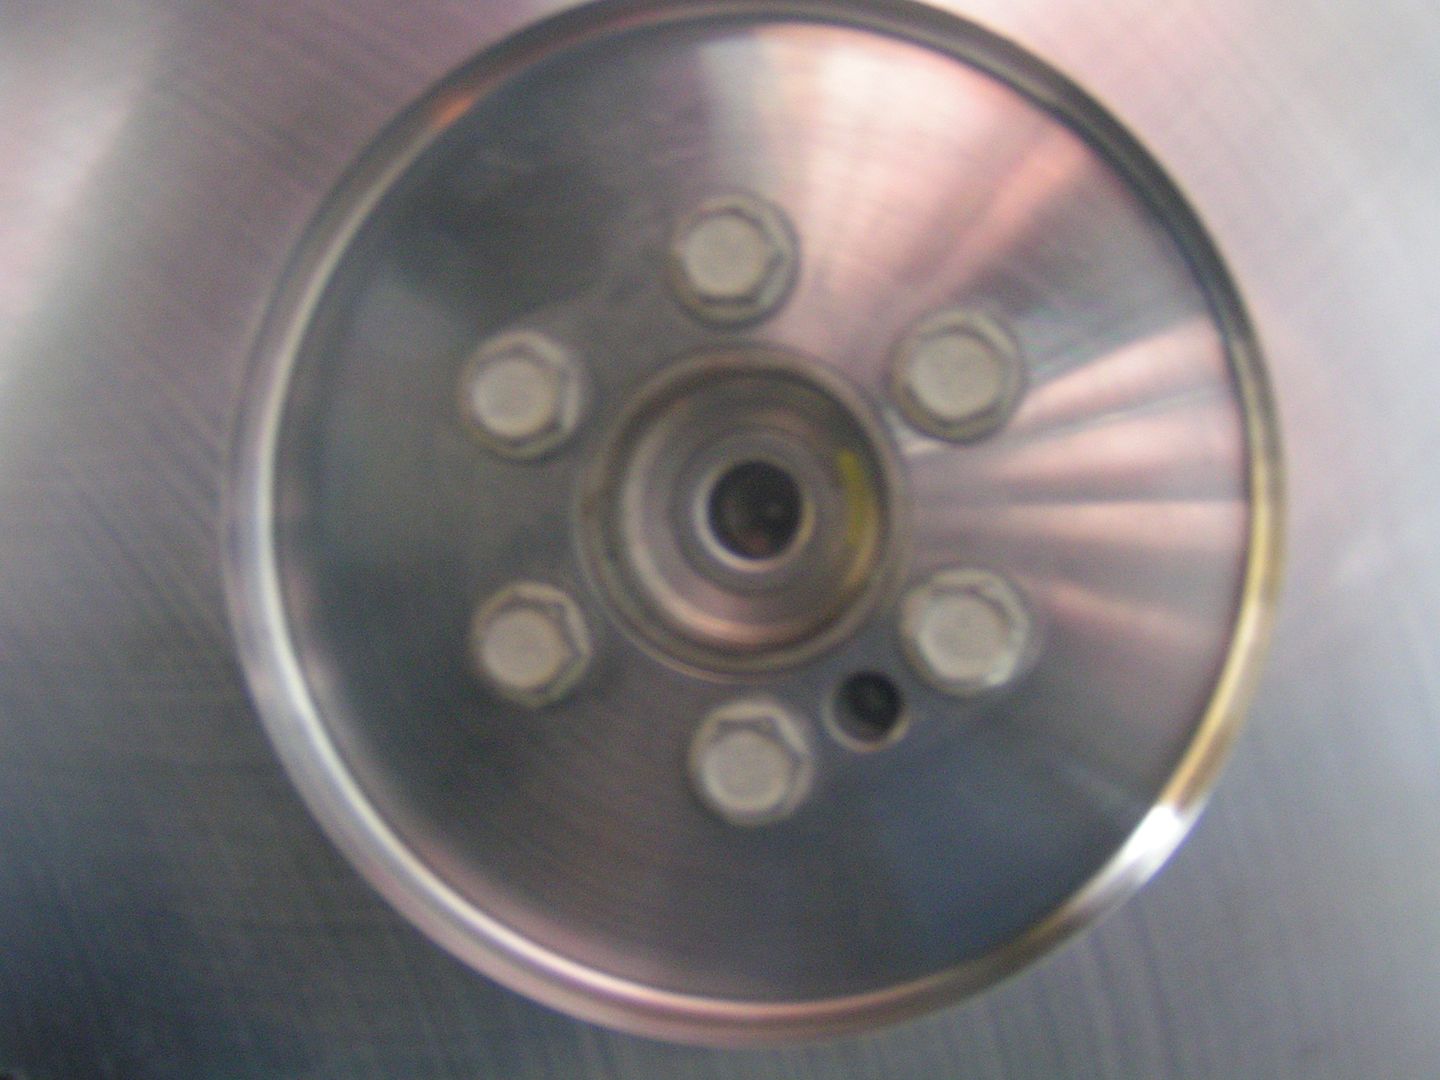
I spent a couple hours in the shop yesterday and today. I finally got the damn scatter shield dialed in to within specs. It's at 0.005" both ways so I am happy with that. Here's my readings for the final time.
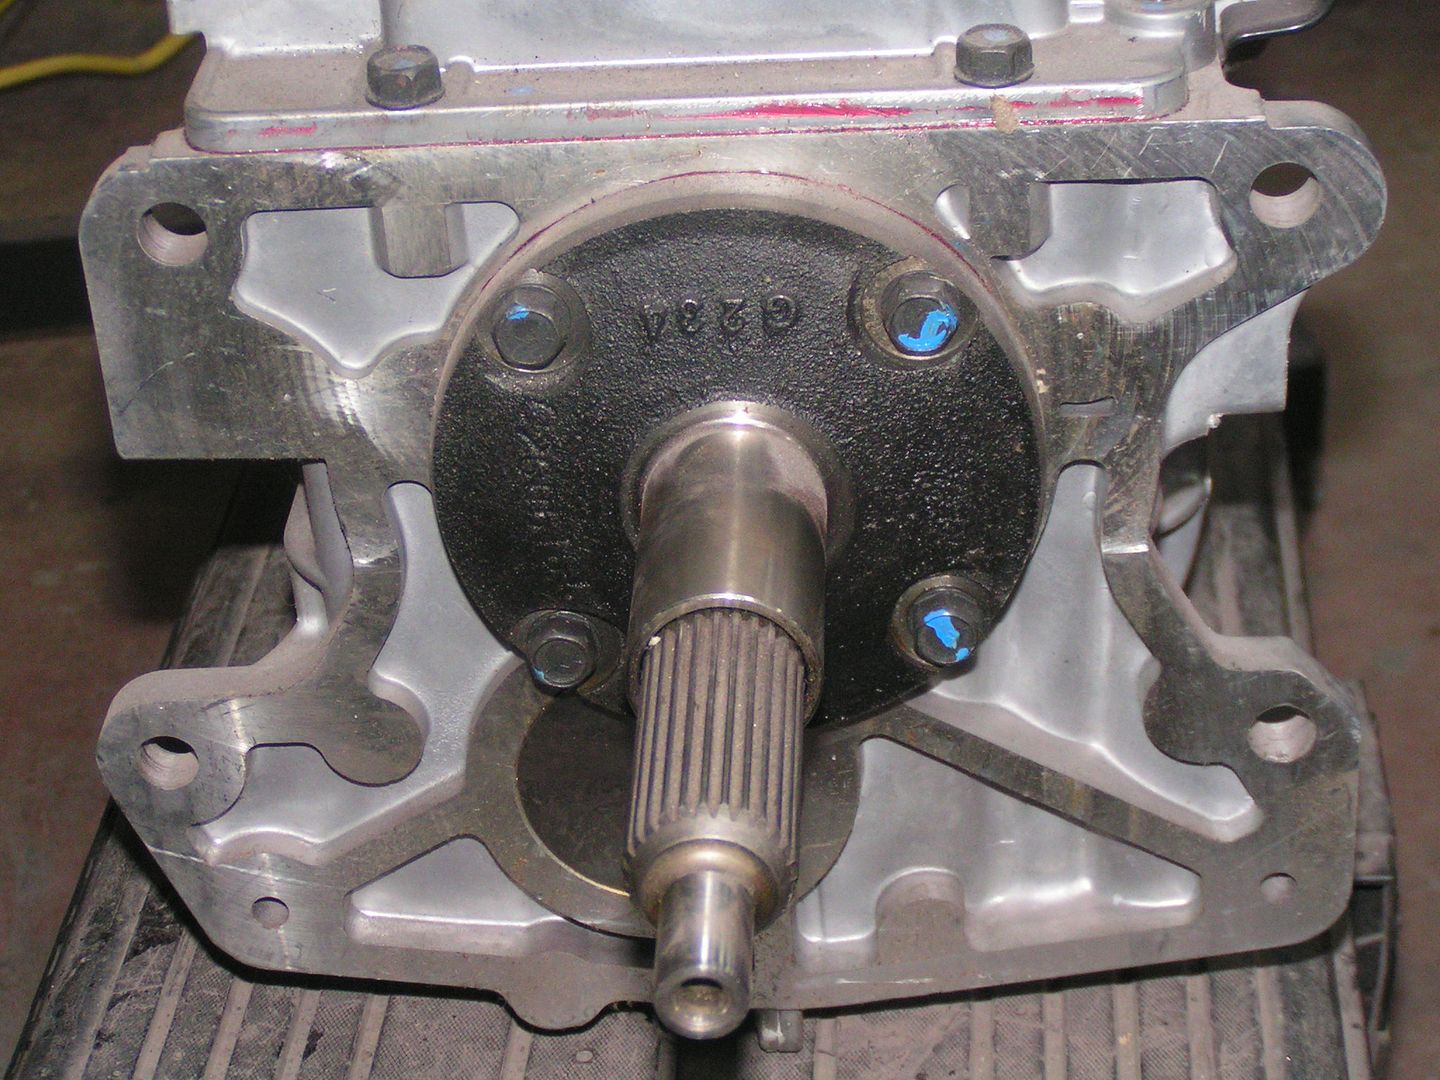
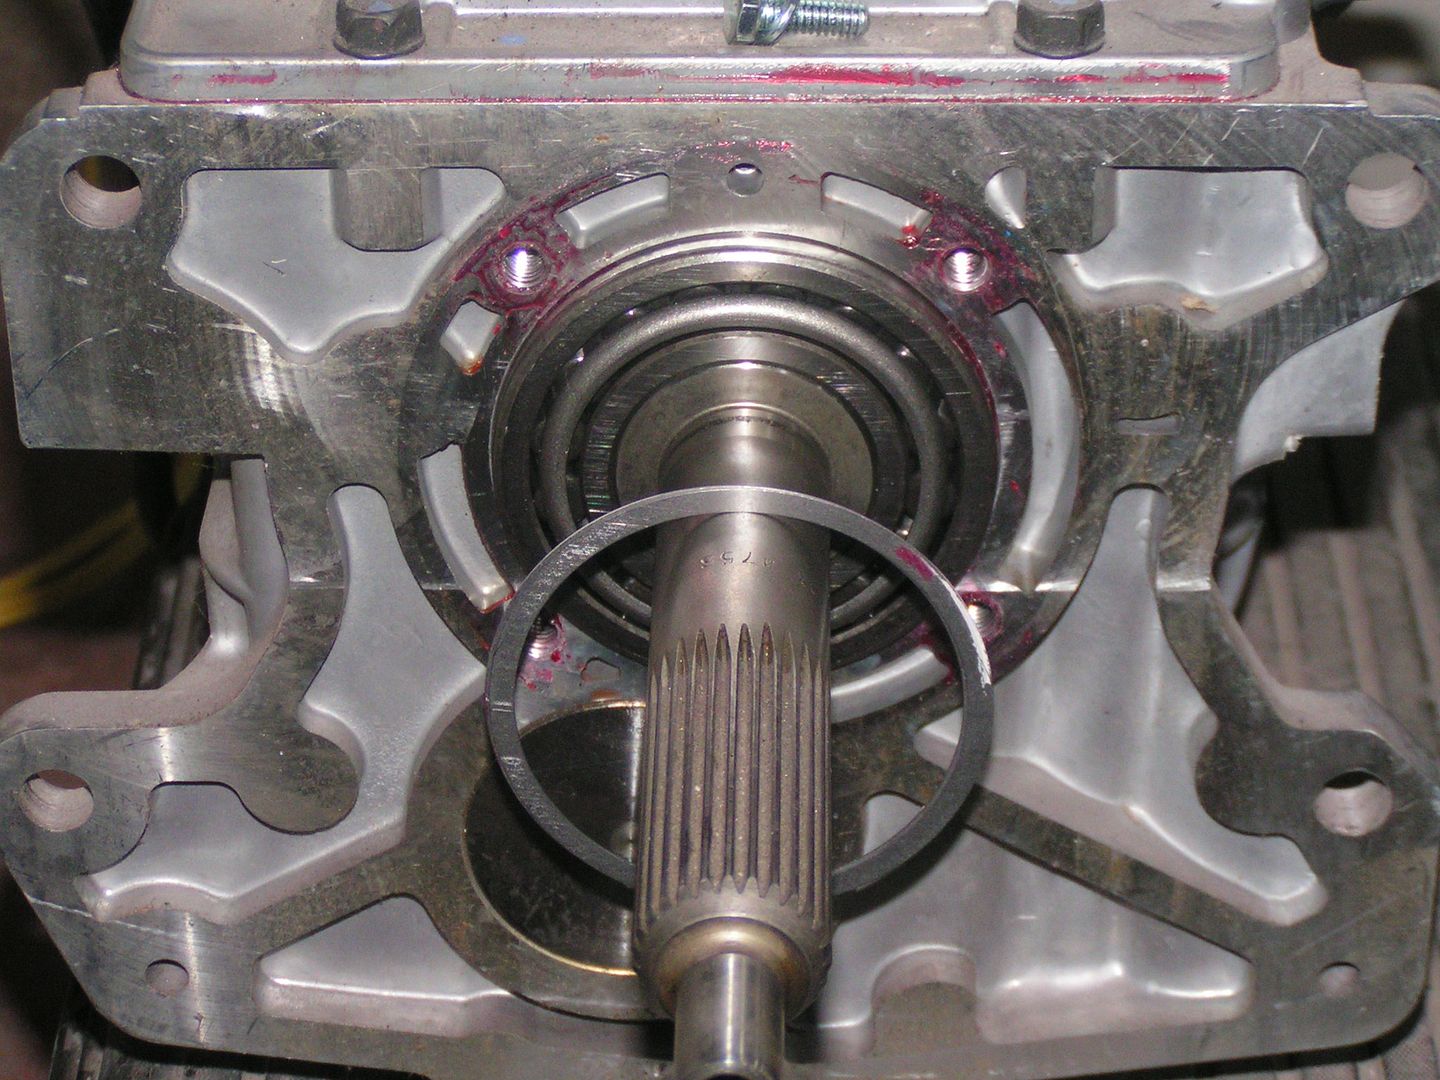
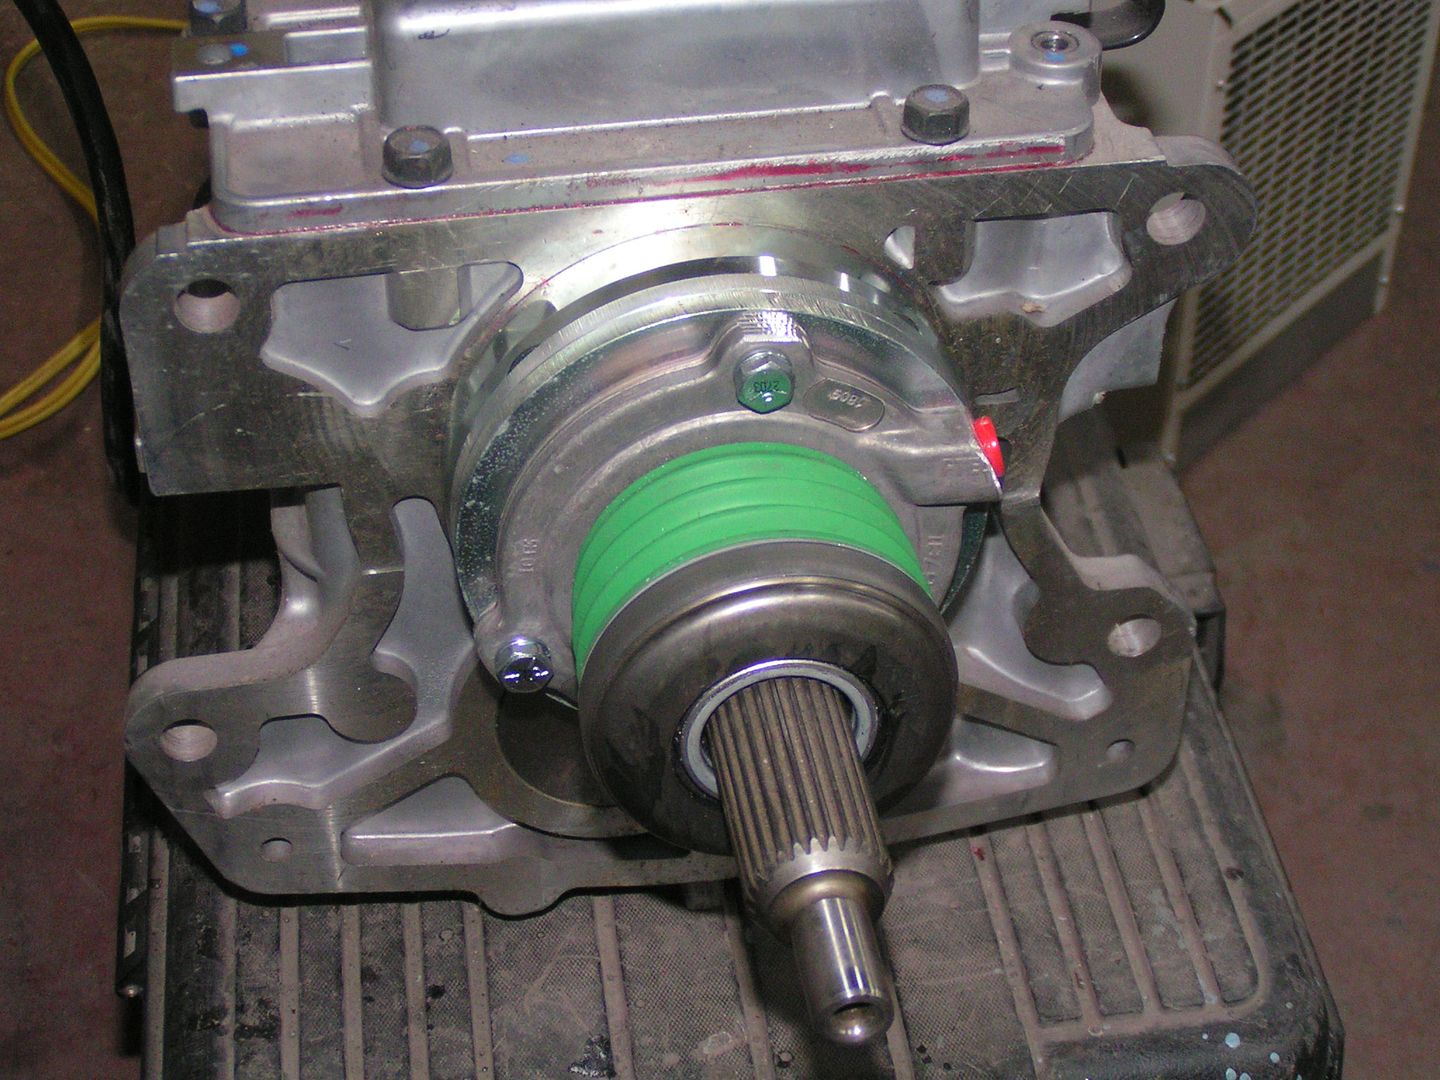
Once that was done, I had to swap the bearing plate or whatever it's called from the one that came with the tranny for a mechanical clutch set up for the new hydraulic set up.
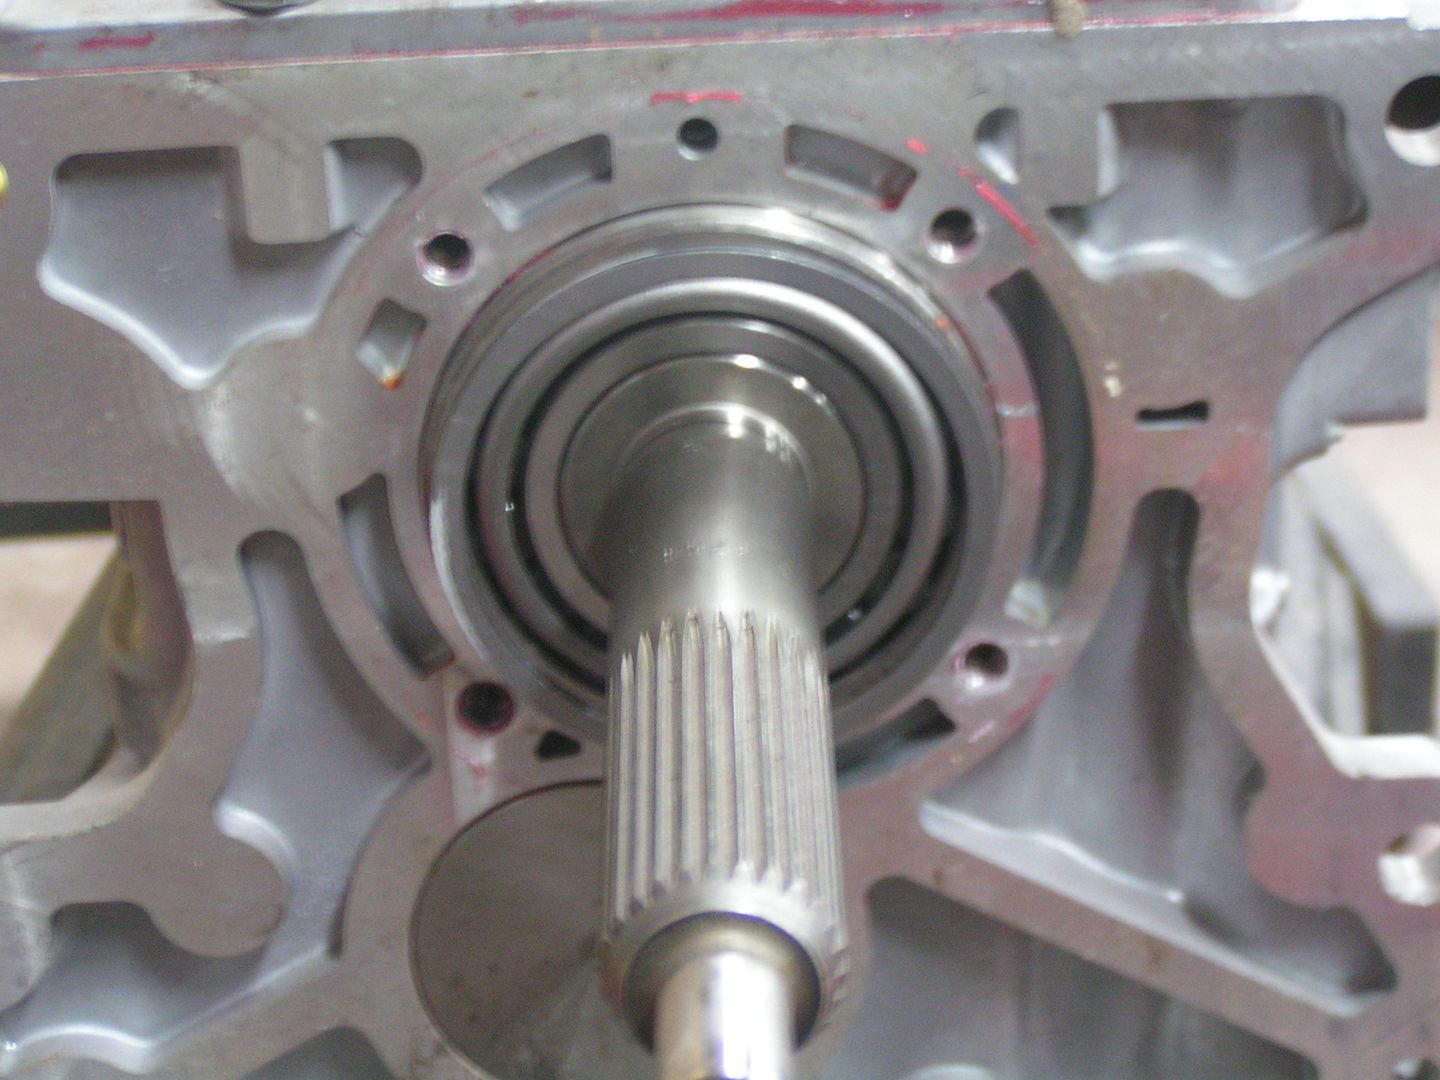
With it off
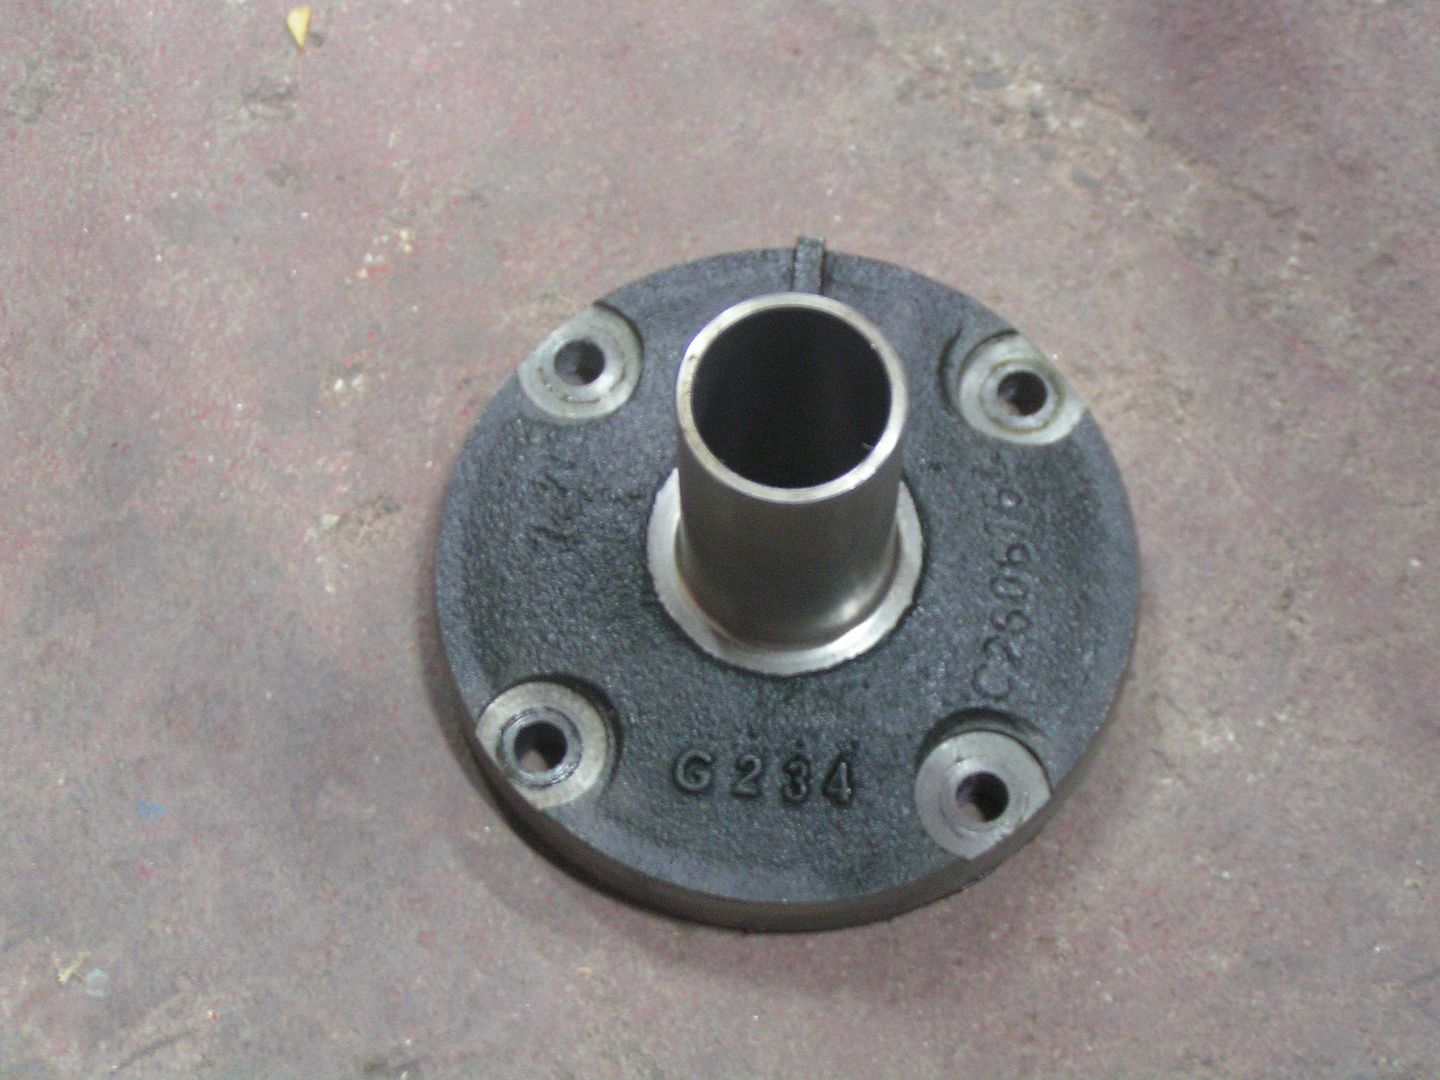
When you're putting the new one on, you have to be careful as there's a shim behind it that has to go back into place
New plate on

I had already done this step and knew I needed to use the two 1/4" shims, but I thought I'd post a pic of how you measure it. I've explained on the previous page what you need to measure.
Shims going on
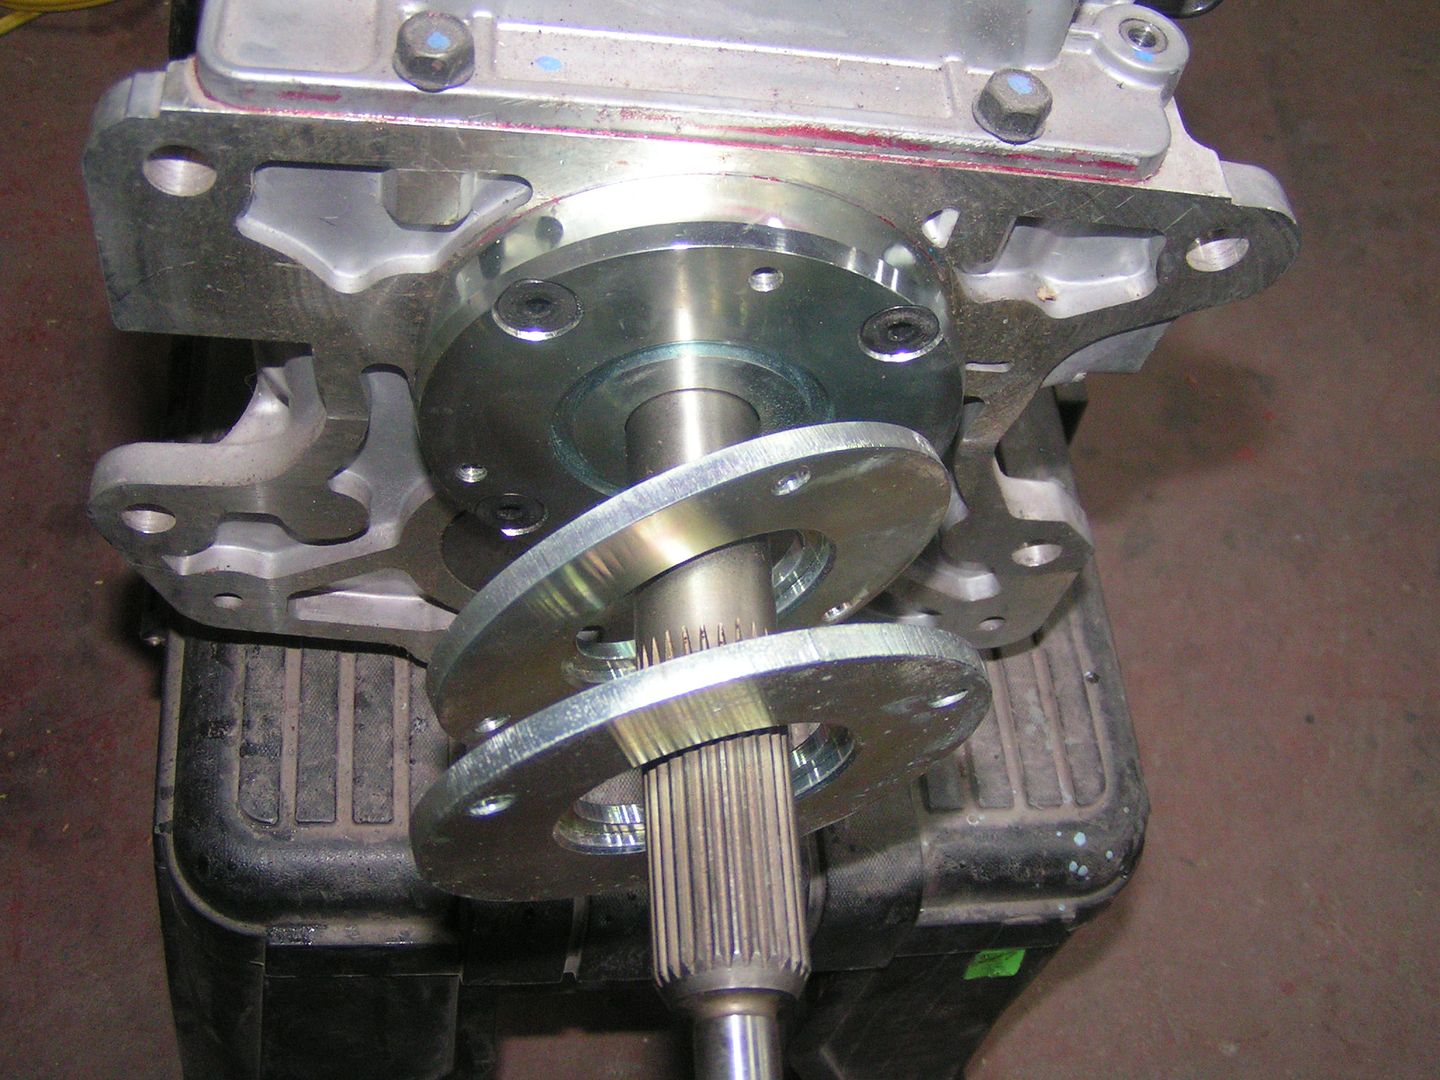
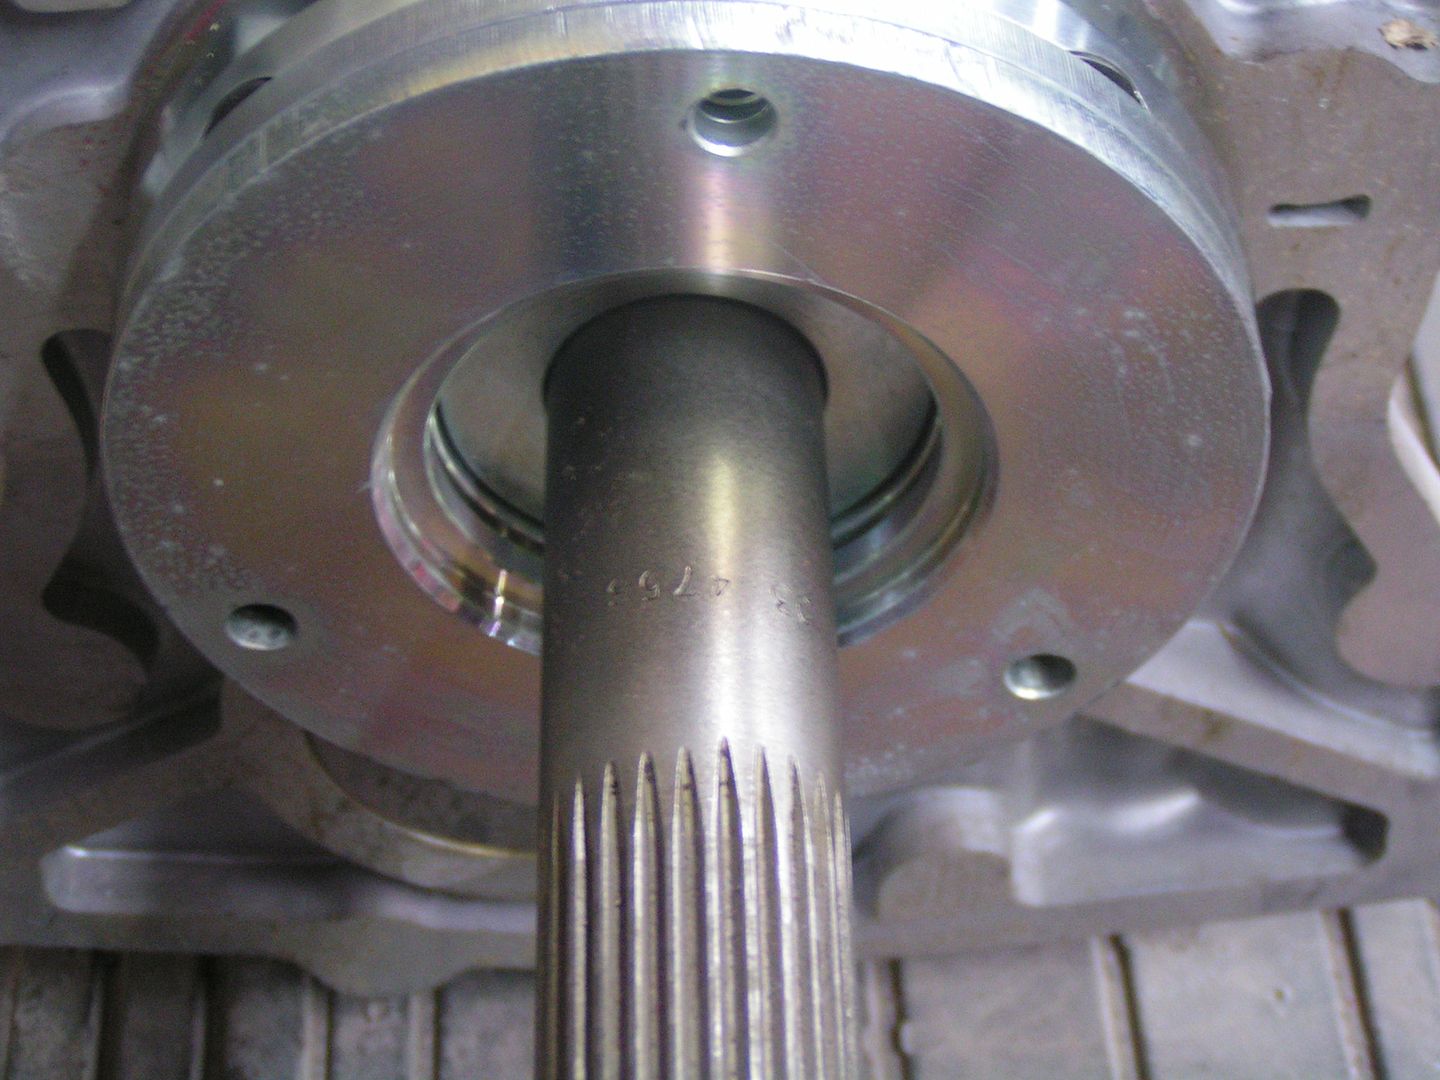
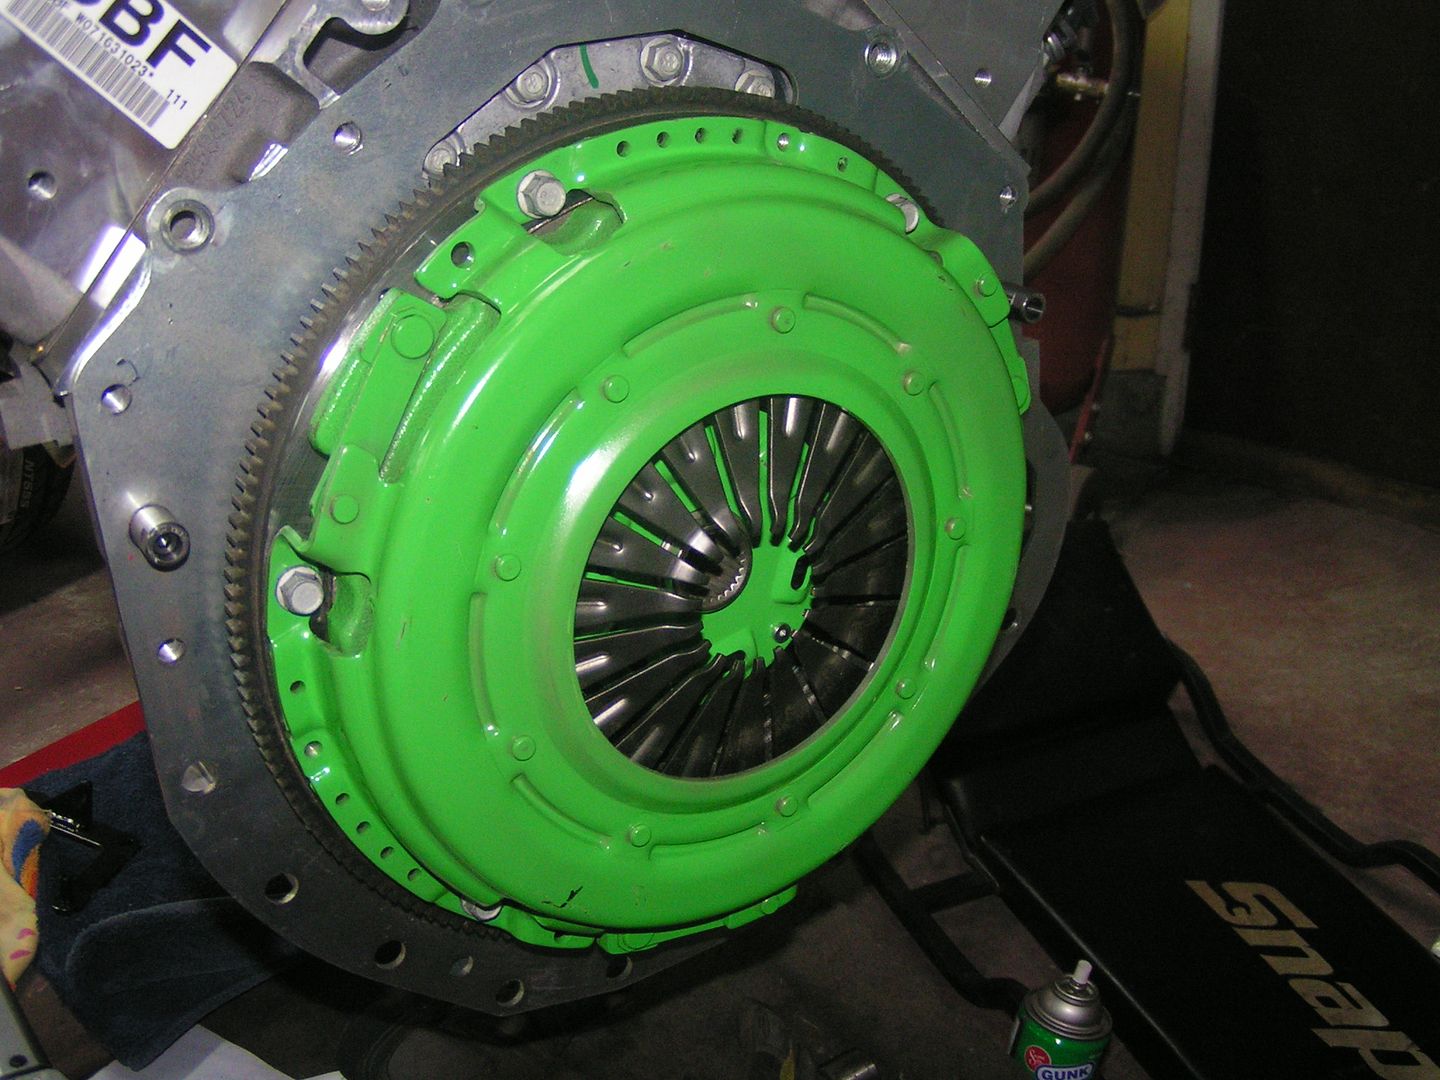
Once the shims were, bolted on the hydraulic throwout bearing
And then the scatter shield
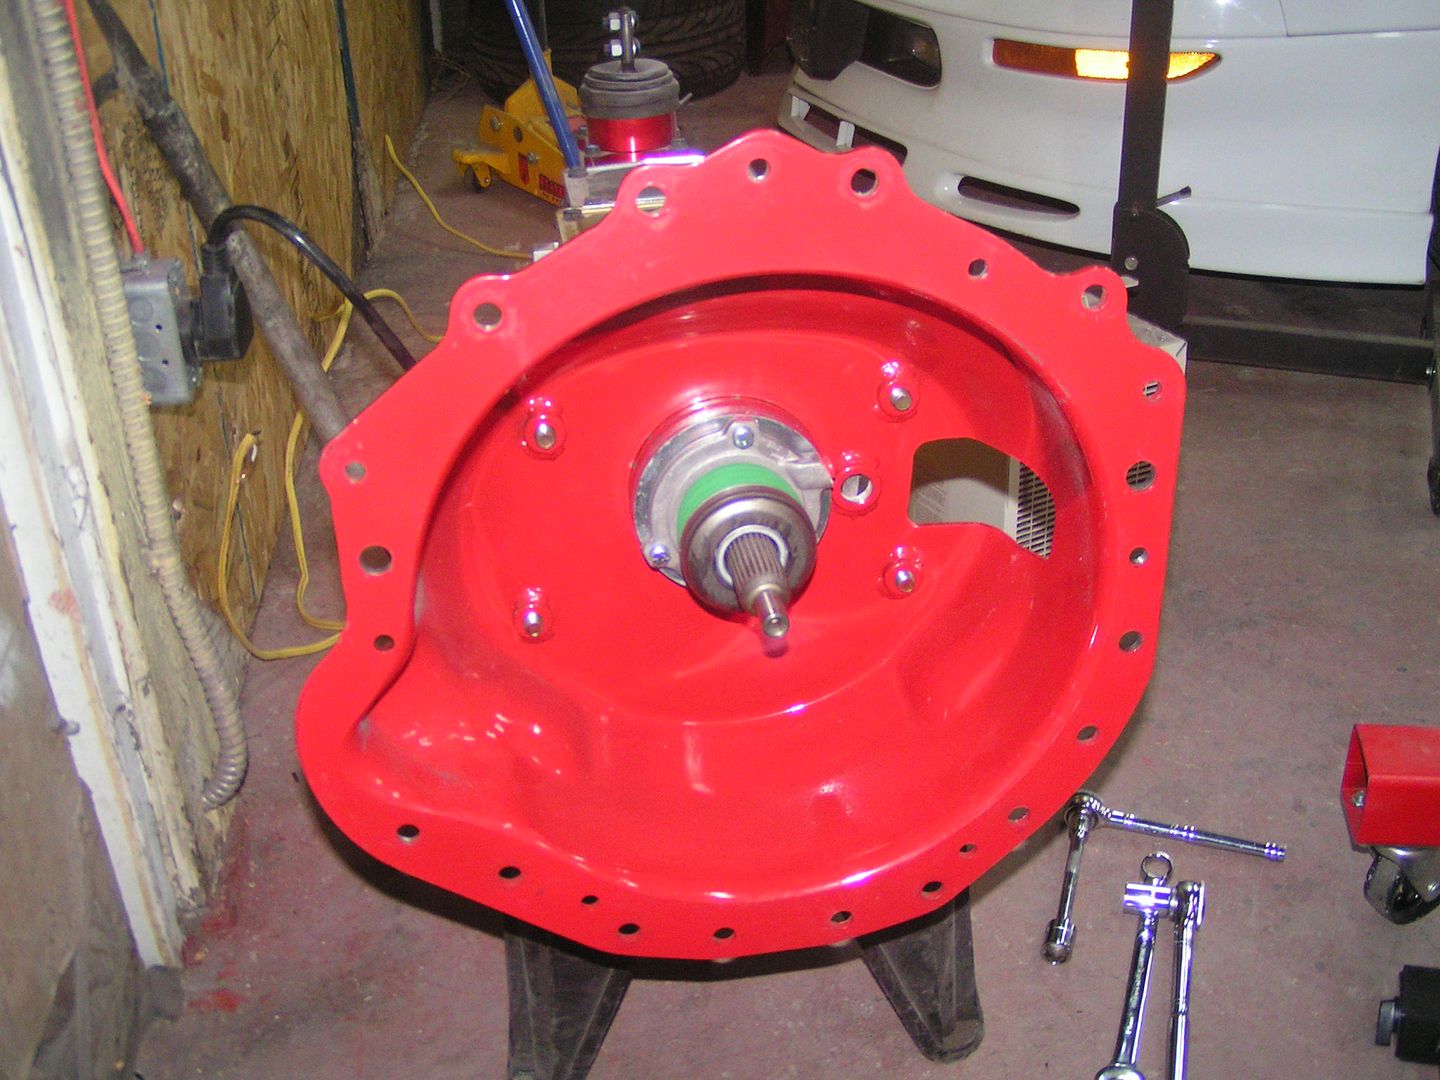
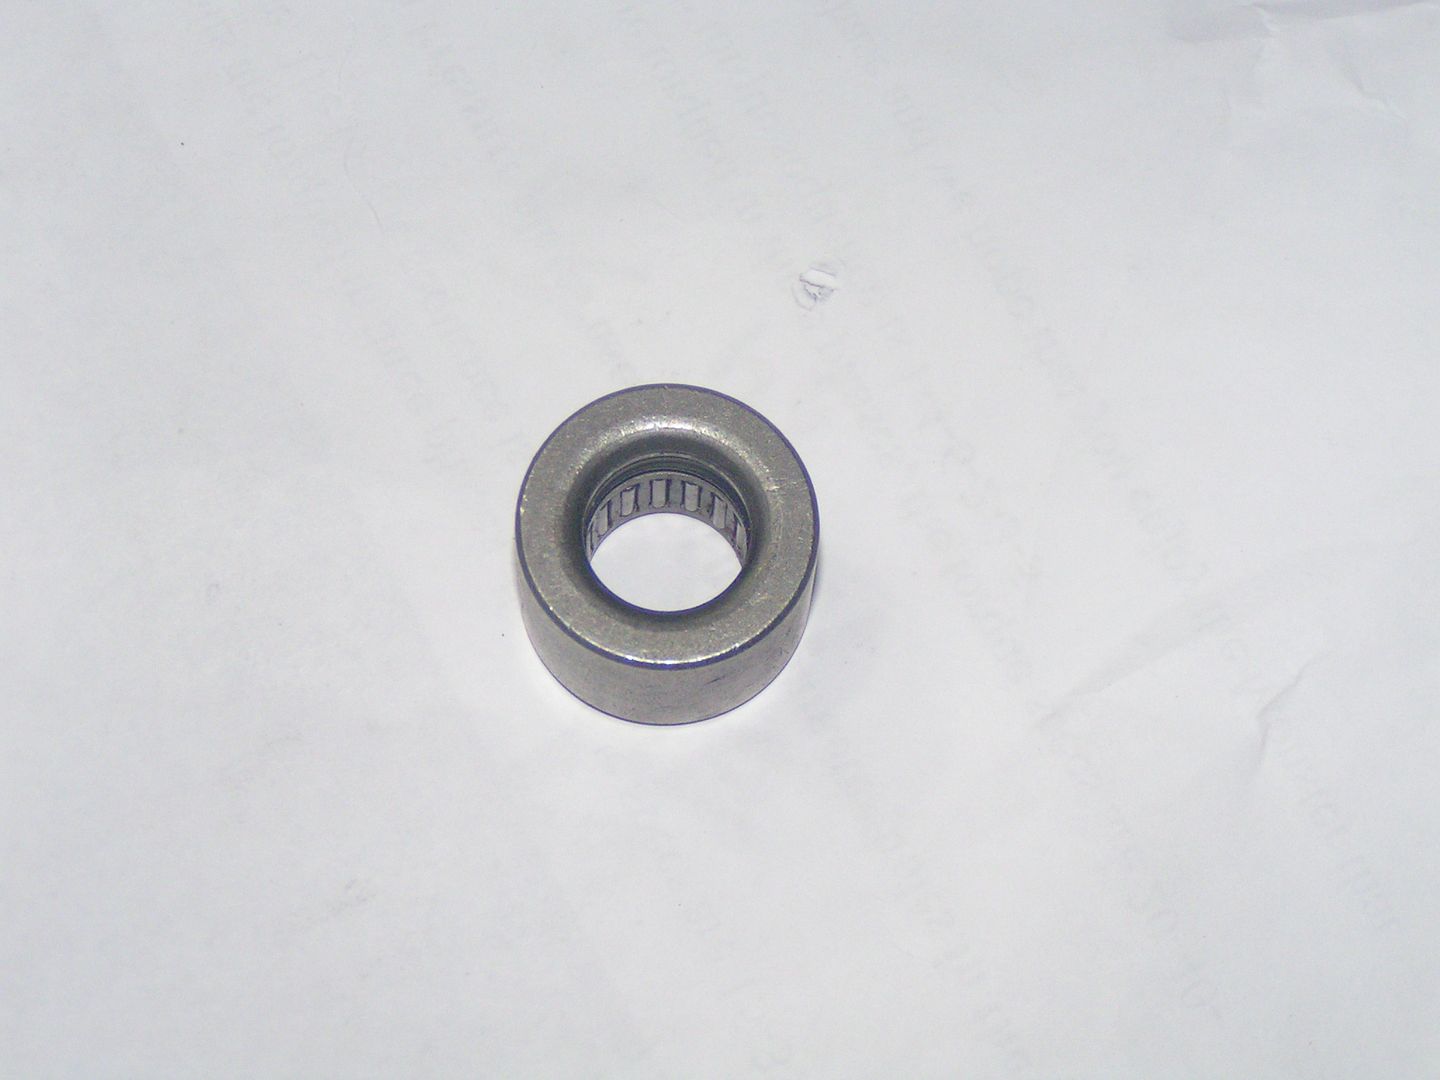
Then I had to install the pilot bearing. I read on one of the forums to freeze the bearing over night, so that's what I did. It went in pretty easy.
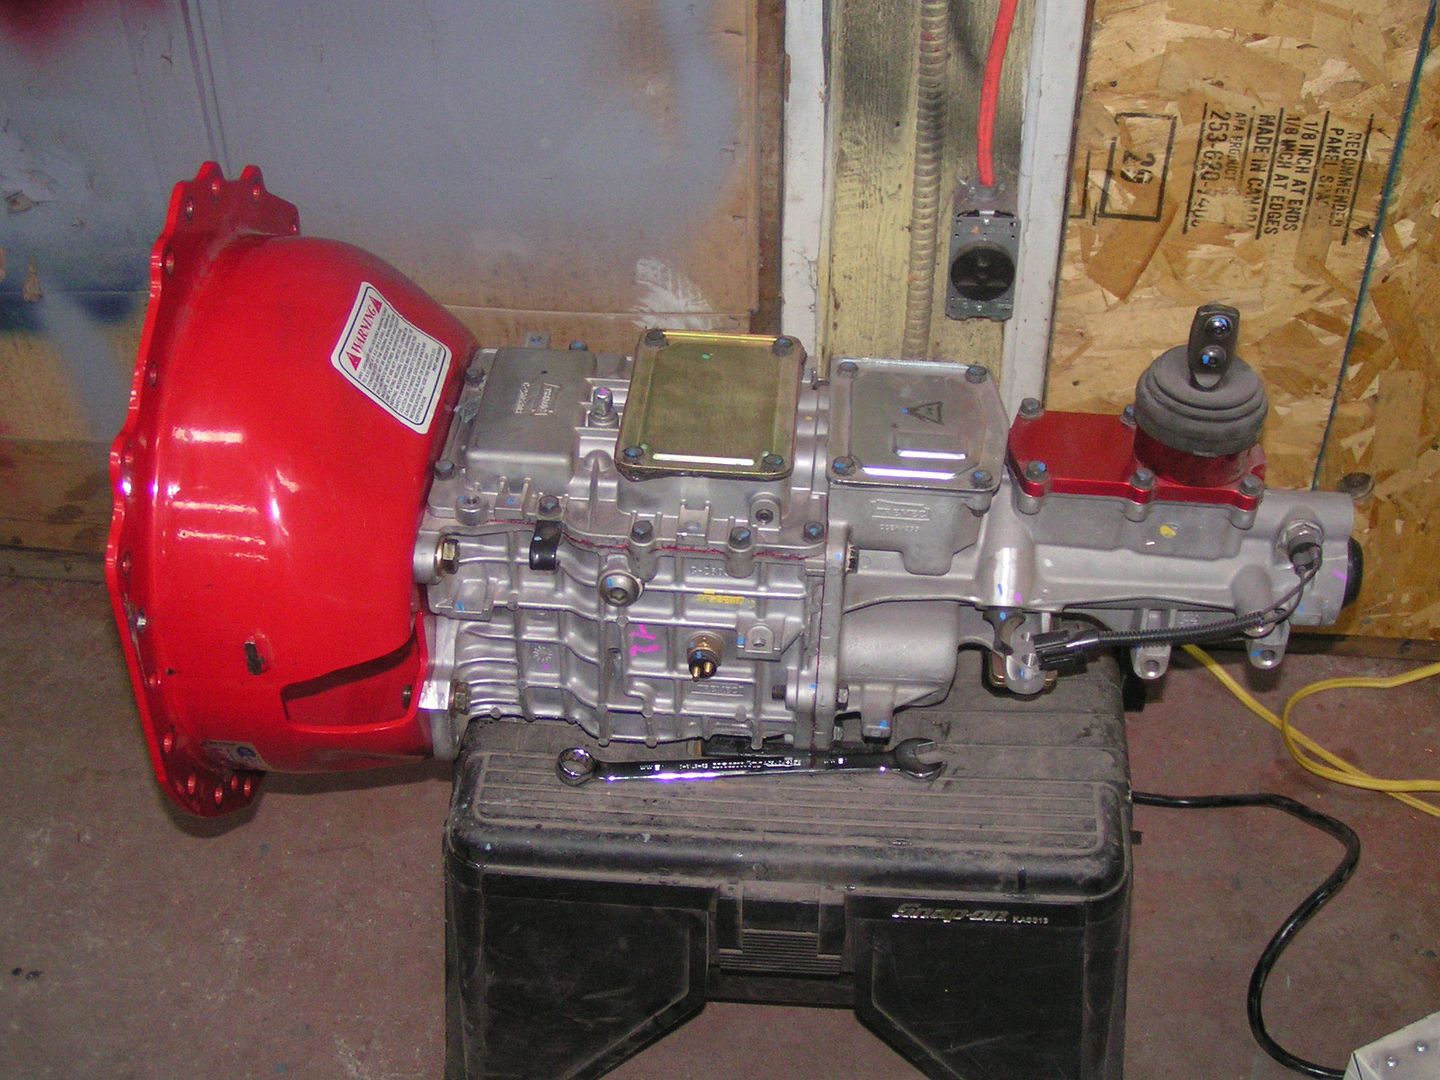
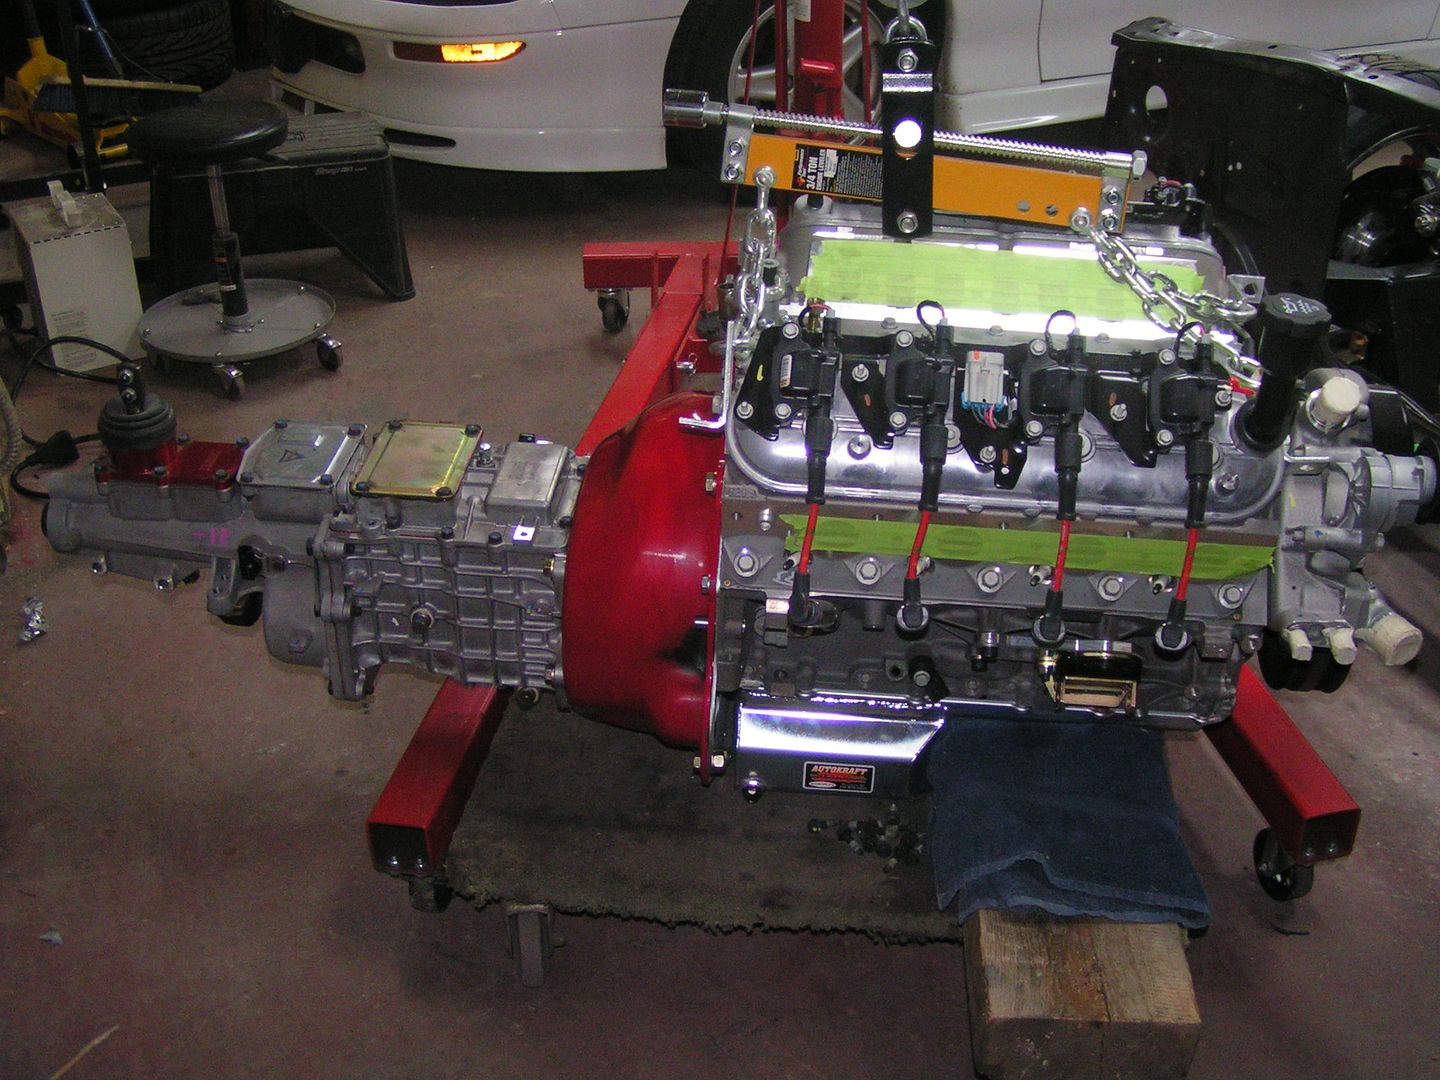
The Monster is back on...this time for good!!!
And finally....the two have mated
I debated about pulling the subframe and dropping it in today, but instead I thought I would run cable coax to the shop while the ground was still soft enough to do it. Next week I will drop the motor/trans in.
I spent a couple hours in the shop yesterday and today. I finally got the damn scatter shield dialed in to within specs. It's at 0.005" both ways so I am happy with that. Here's my readings for the final time.
Once that was done, I had to swap the bearing plate or whatever it's called from the one that came with the tranny for a mechanical clutch set up for the new hydraulic set up.
With it off
When you're putting the new one on, you have to be careful as there's a shim behind it that has to go back into place
New plate on
I had already done this step and knew I needed to use the two 1/4" shims, but I thought I'd post a pic of how you measure it. I've explained on the previous page what you need to measure.
Shims going on
Once the shims were, bolted on the hydraulic throwout bearing
And then the scatter shield
Then I had to install the pilot bearing. I read on one of the forums to freeze the bearing over night, so that's what I did. It went in pretty easy.
The Monster is back on...this time for good!!!
And finally....the two have mated
I debated about pulling the subframe and dropping it in today, but instead I thought I would run cable coax to the shop while the ground was still soft enough to do it. Next week I will drop the motor/trans in.
11-24-2009, 06:50 PM
#26
On The Tree
Thread Starter
iTrader: (4)
Join Date: Mar 2009
Location: British Columbia, Canada
Posts: 132
Likes: 0
Received 0 Likes
on
0 Posts
Thanks Andrew. I did measure between the fingers and the face of the scatter shield. The difference between the two was 3/4" so with the 1/2" shims, I'm left with 1/4" difference. From what I've read...that's exactly where I want it to be.
11-24-2009, 07:30 PM
#27
Staging Lane

Join Date: Apr 2009
Location: Long Beach Ca
Posts: 76
Likes: 0
Received 0 Likes
on
0 Posts
awesome build and write up on bellhousing alignment, I am using a muncie (TKO some day) on my 6.0 liter and I have seen numerous posts about using the larger pilot bearing that sites in the outer crank race to get good input shaft engagement when using tranys with the old style input shaft (muncie,T10,TKO...) . I dont know if the gen 4's are different though or if your trany has a special input shaft. I am just asking because it looks like you are using the small pilot bearing that fits into the inner race, have you checked the bearing engagement?
Last edited by jetback73nova; 11-24-2009 at 11:57 PM.
11-30-2009, 04:48 PM
#28
On The Tree
Thread Starter
iTrader: (4)
Join Date: Mar 2009
Location: British Columbia, Canada
Posts: 132
Likes: 0
Received 0 Likes
on
0 Posts
awesome build and write up on bellhousing alignment, I am using a muncie (TKO some day) on my 6.0 liter and I have seen numerous posts about using the larger pilot bearing that sites in the outer crank race to get good input shaft engagement when using tranys with the old style input shaft (muncie,T10,TKO...) . I dont know if the gen 4's are different though or if your trany has a special input shaft. I am just asking because it looks like you are using the small pilot bearing that fits into the inner race, have you checked the bearing engagement?
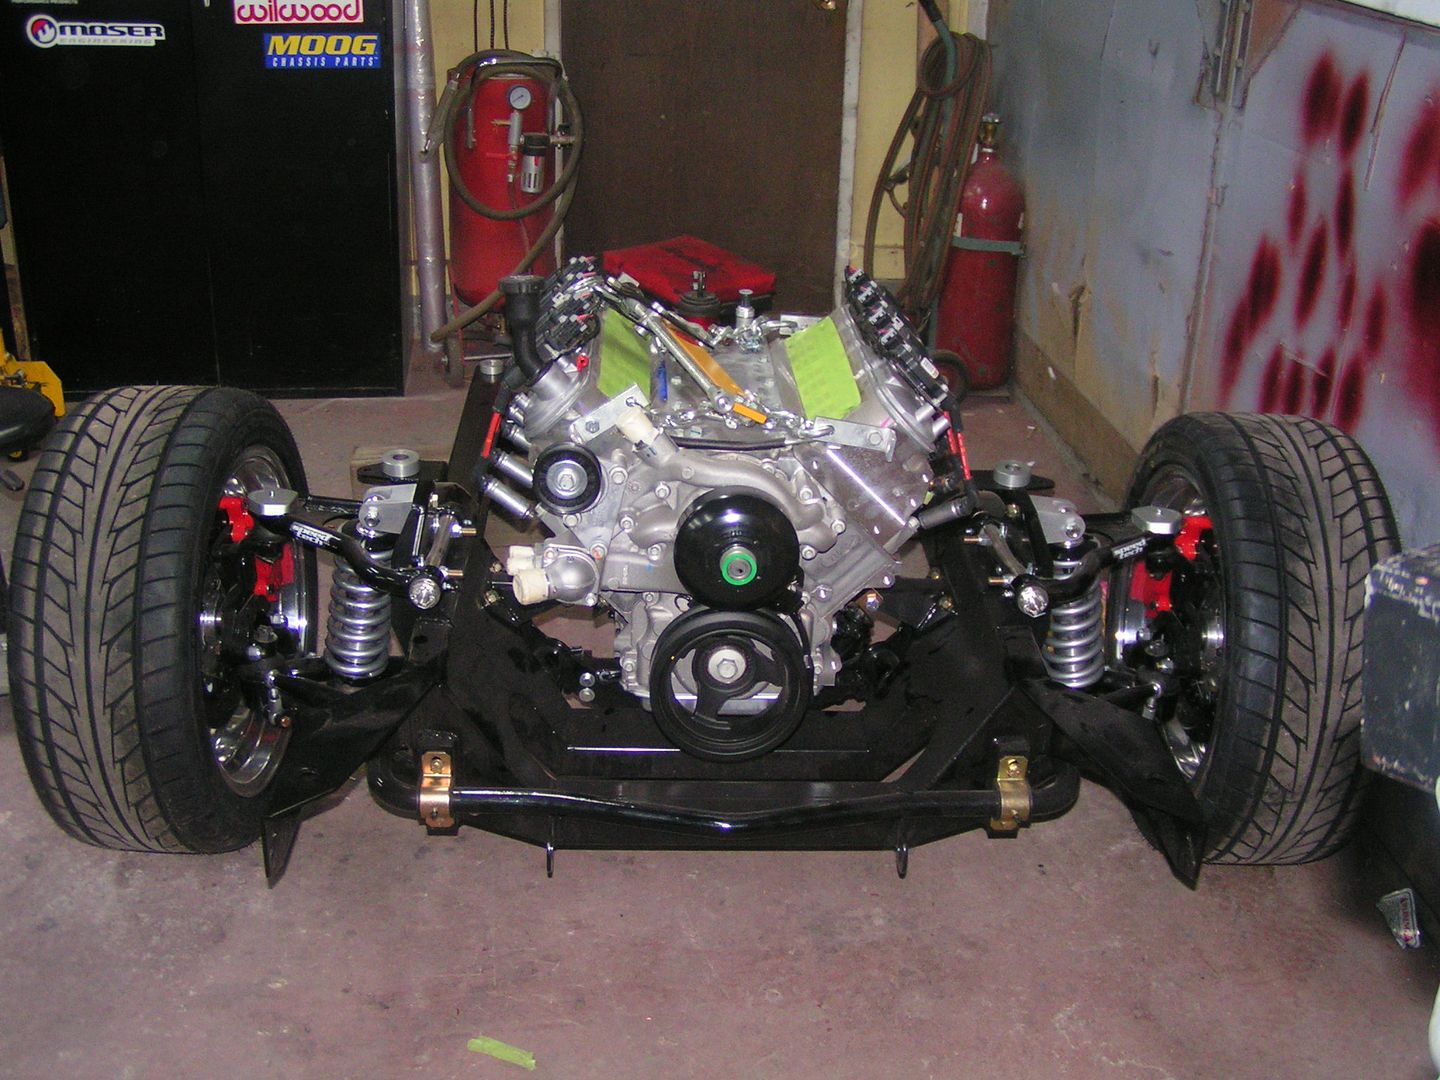
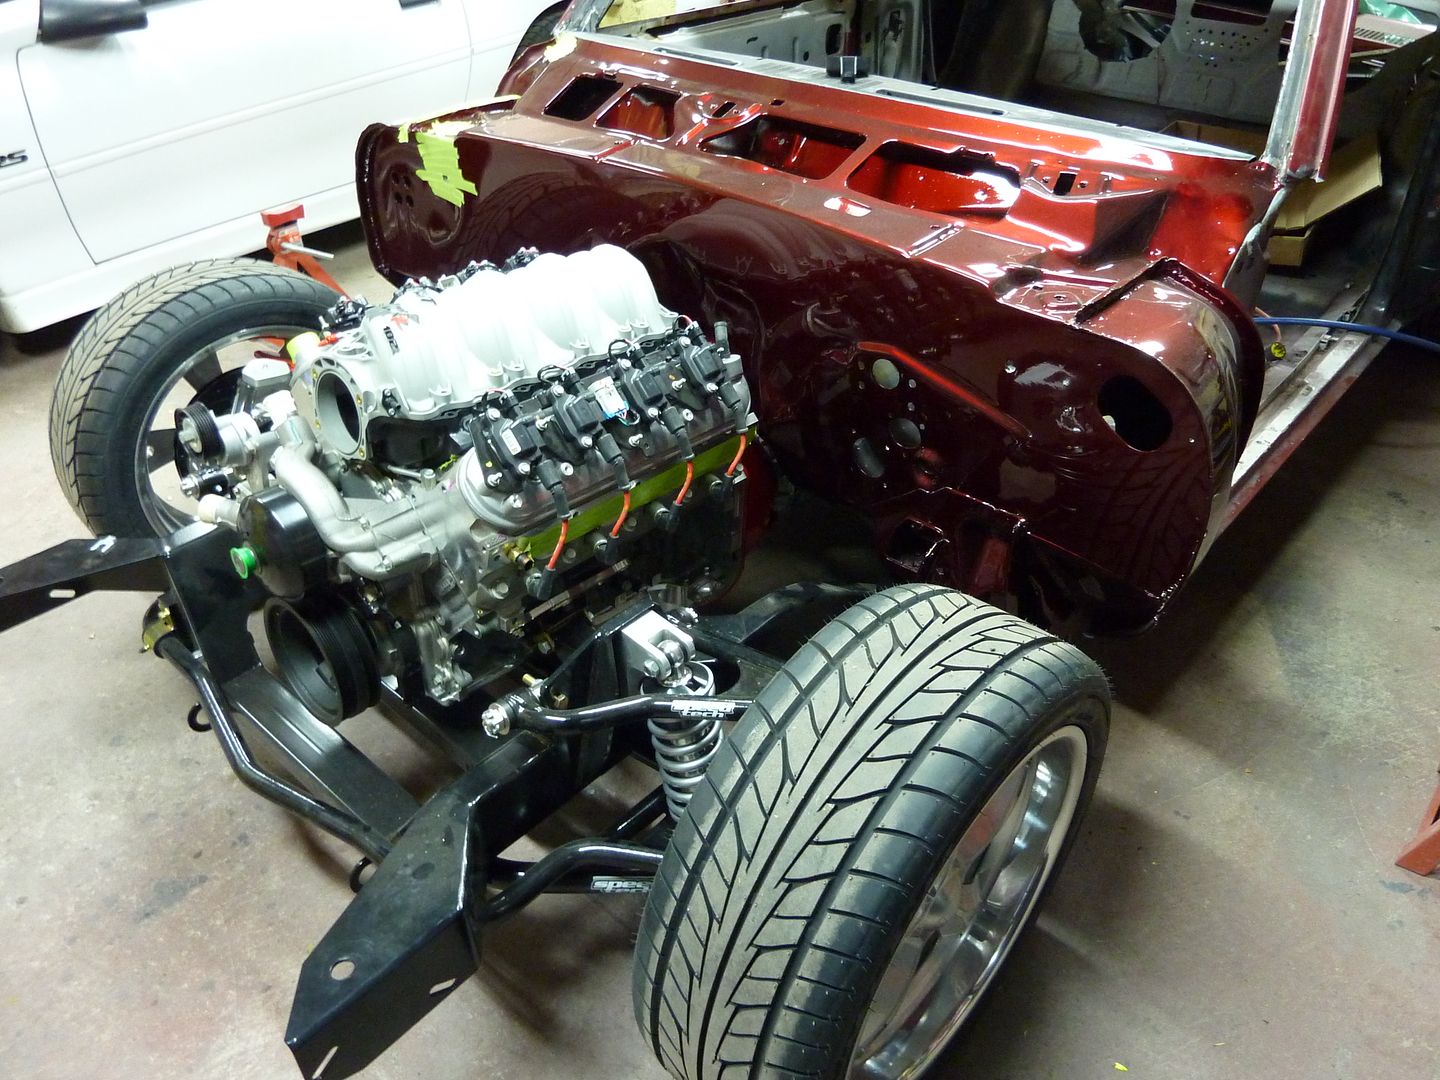
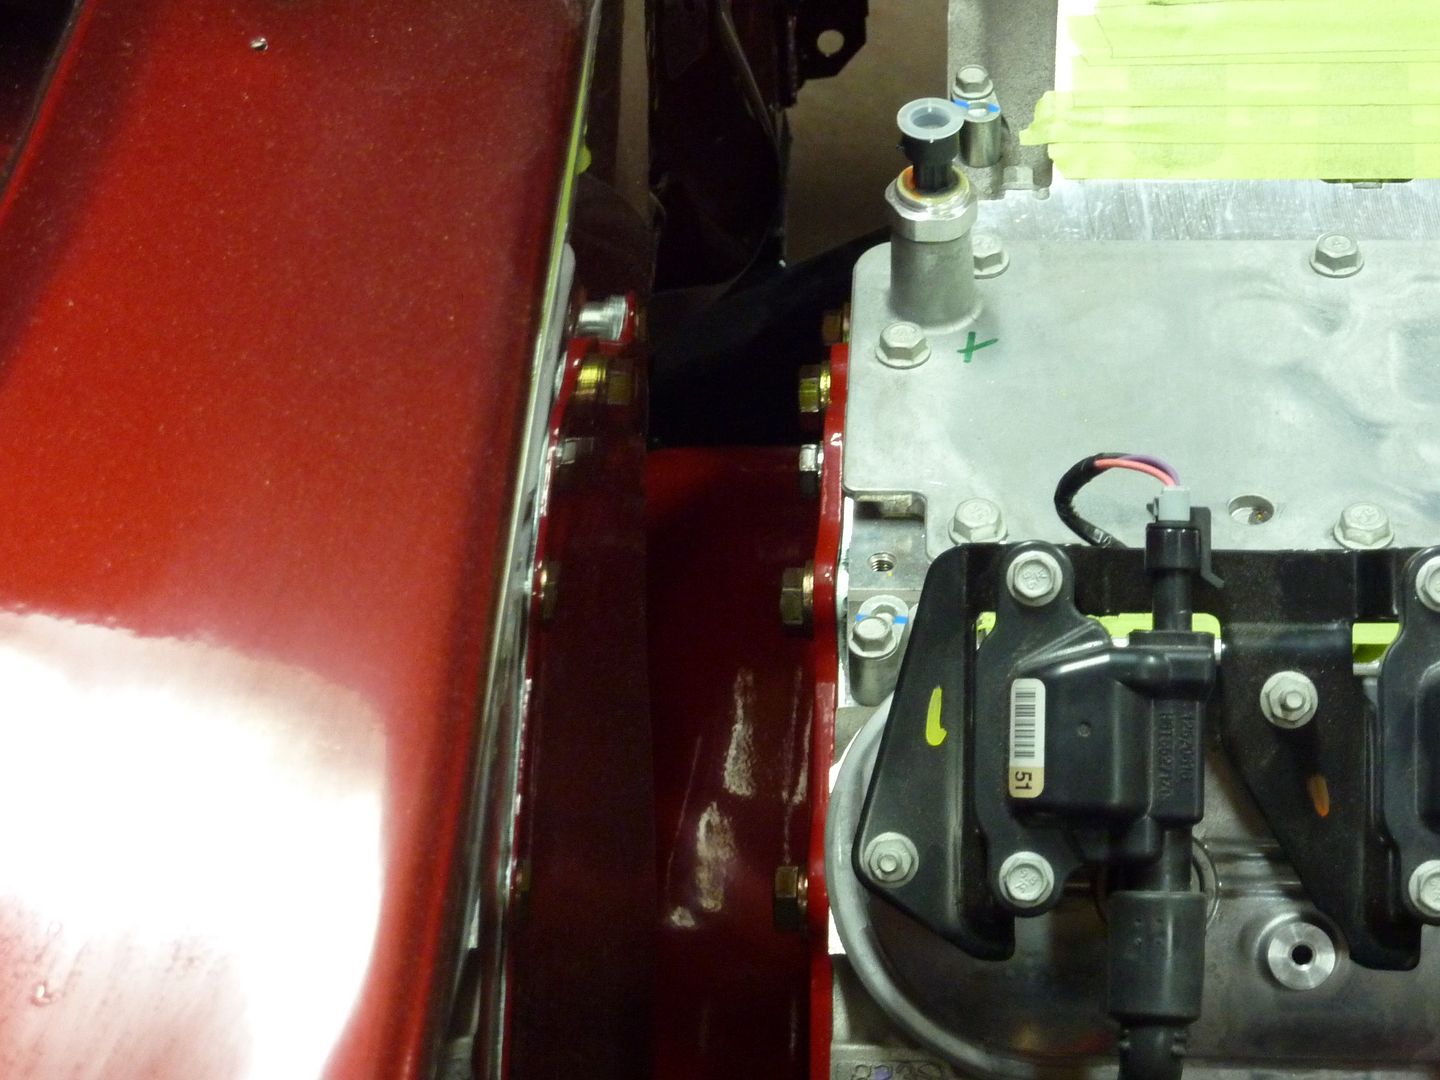
I got the motor and transmission onto the subframe today. I thought the subframe was back on the car for good, but it was so much easier to put the motor/trans in when it's out...especially when you're doing it by yourself. The one thing everyone should get to make the job easier..is an engine leveler, something like this one: http://www.jegs.com/i/JEGS/555/80048/10002/-1
I didn't get the subframe bolted back to the car yet as I need to get some touch up paint for the scattershield and I have a new shifter coming that I may need to modify the shifter hole for.
Onto the pics:
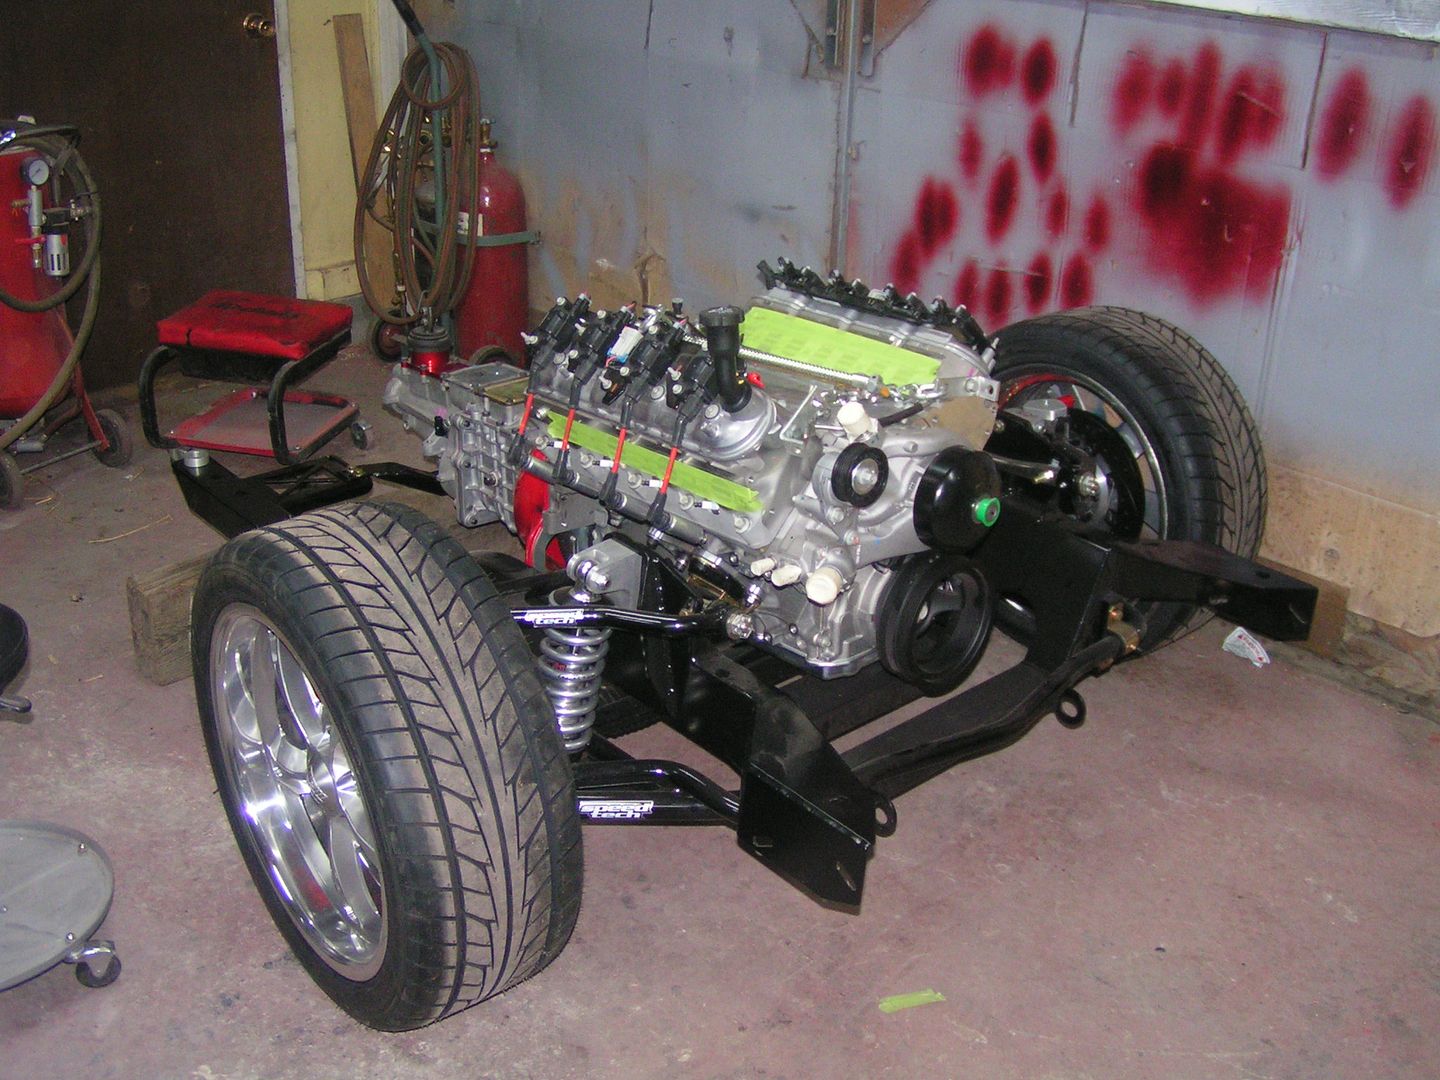
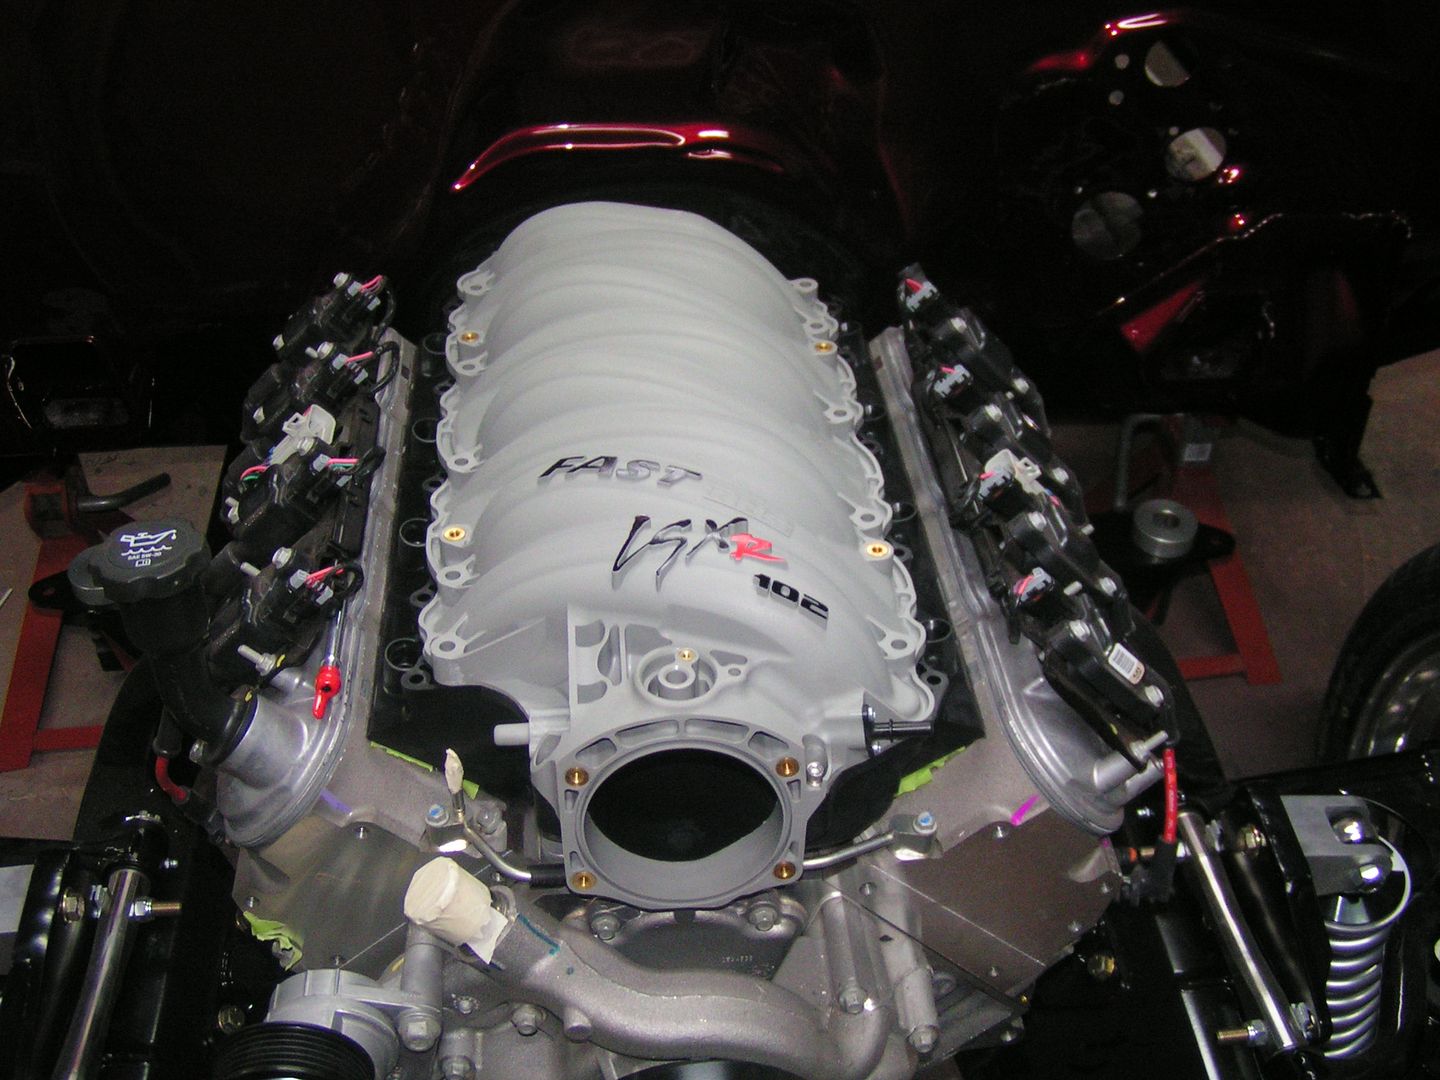
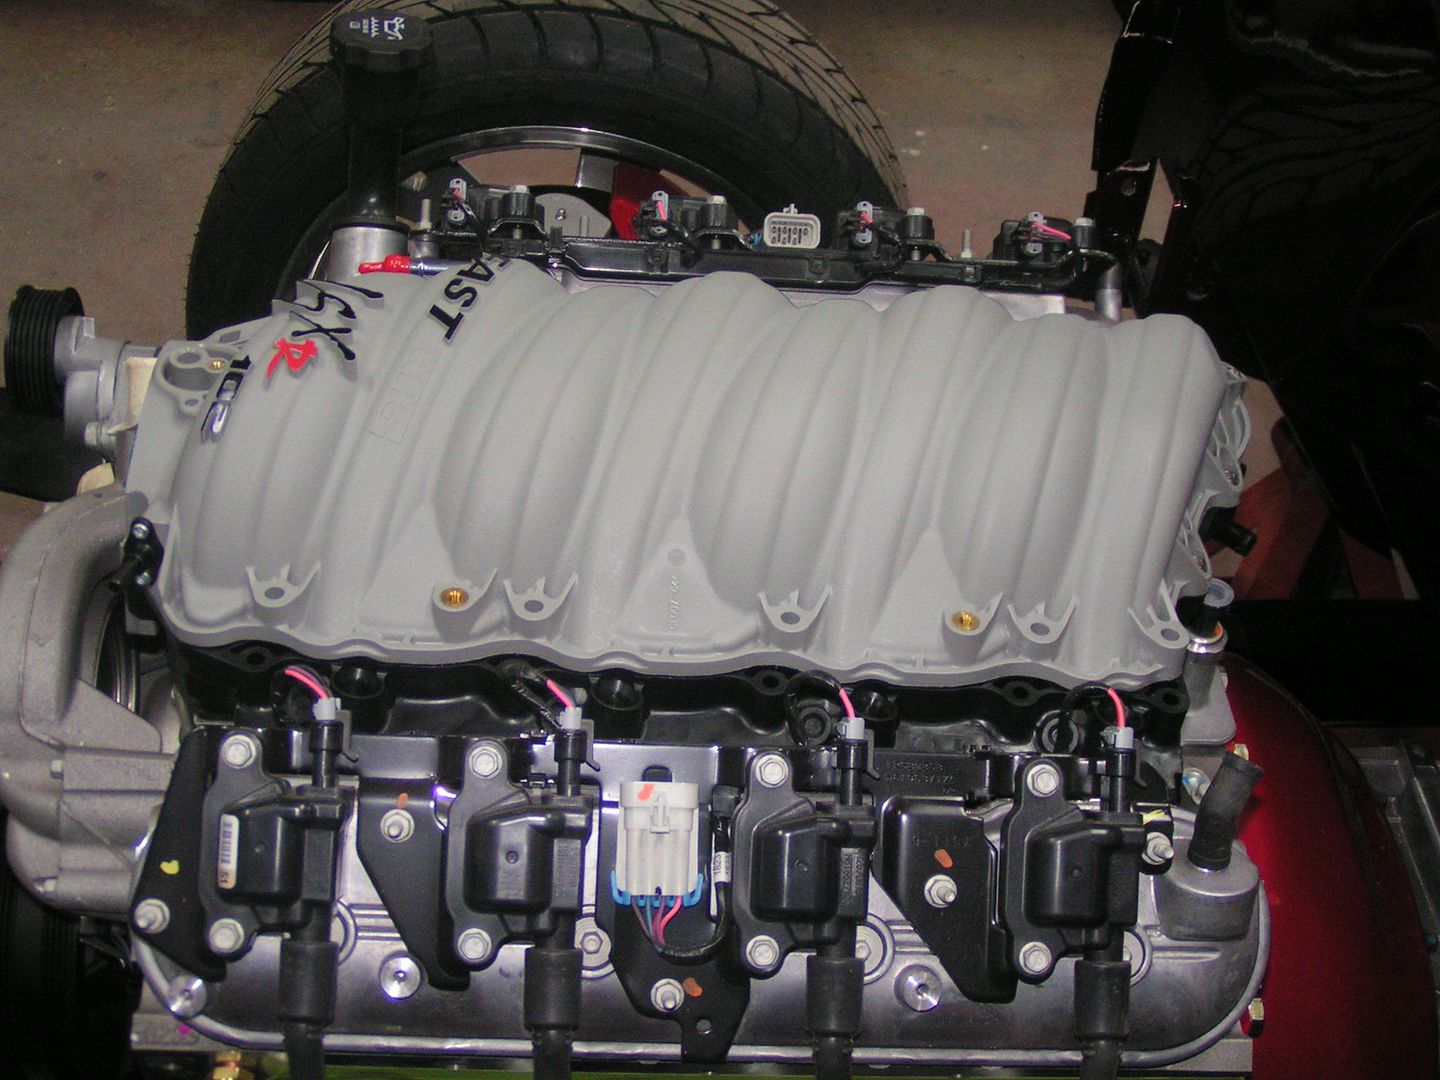
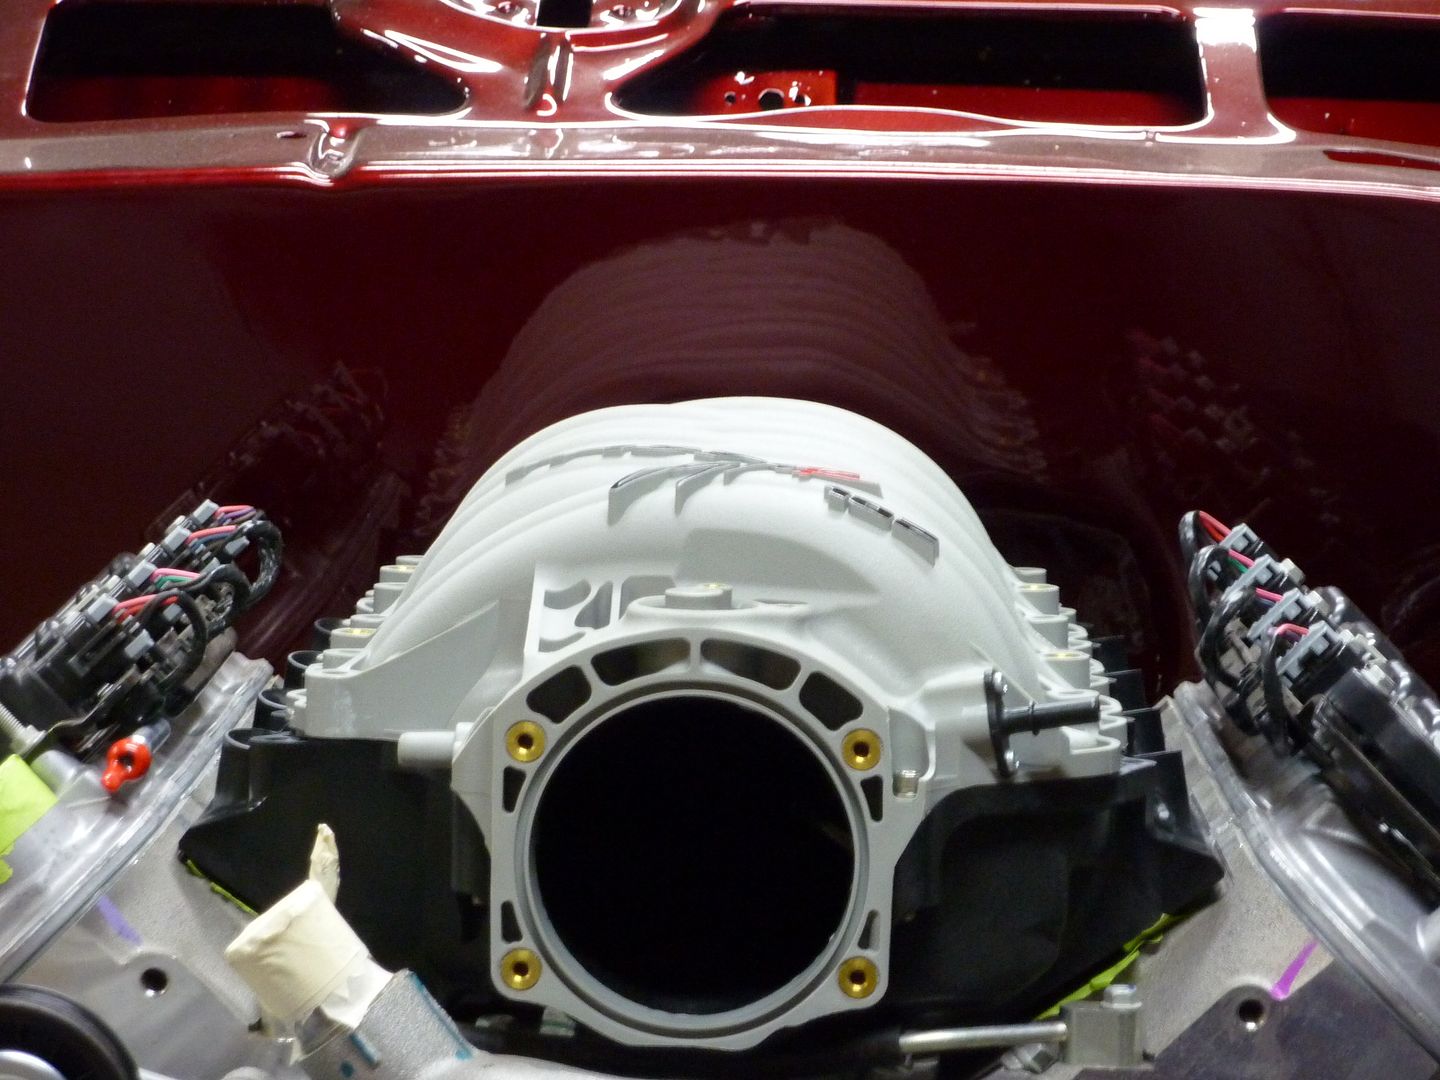
I really wanted to see how the FAST intake would look so I put it in place. It's going to look so sweet with that red.
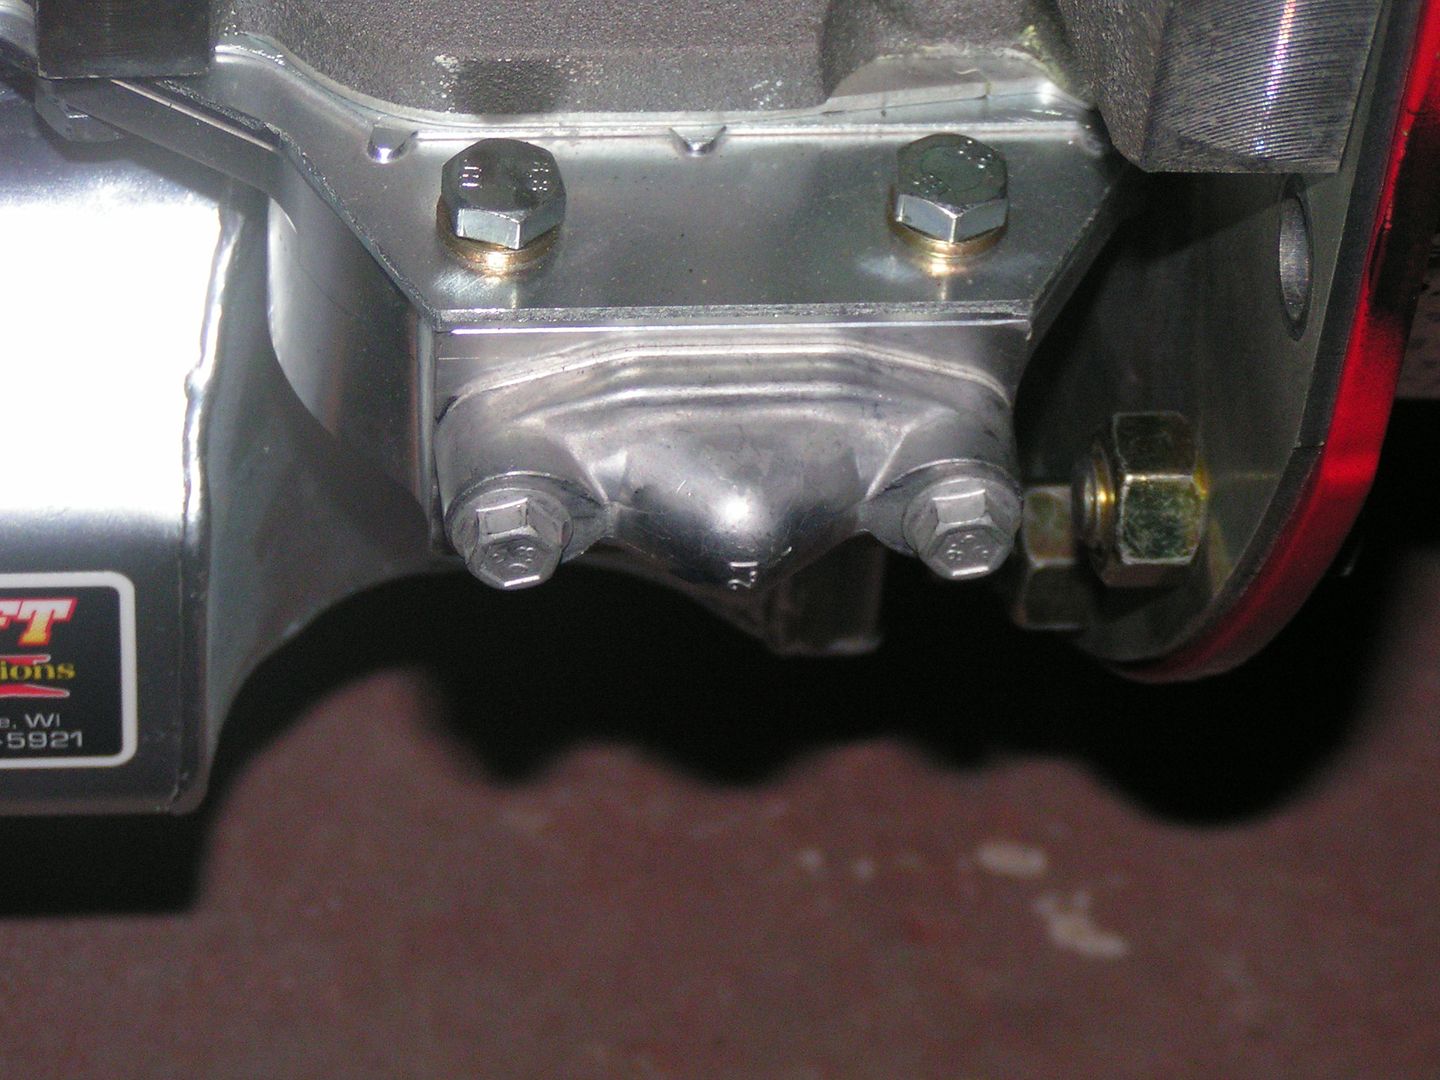
One question for you guys though who have the Autokraft oil pan, what do I need to get for here? I just put the stock one on for now to keep crap out.
 12-17-2009, 12:20 PM
#29
On The Tree
Thread Starter
iTrader: (4)
Join Date: Mar 2009
Location: British Columbia, Canada
Posts: 132
Likes: 0
Received 0 Likes
on
0 Posts
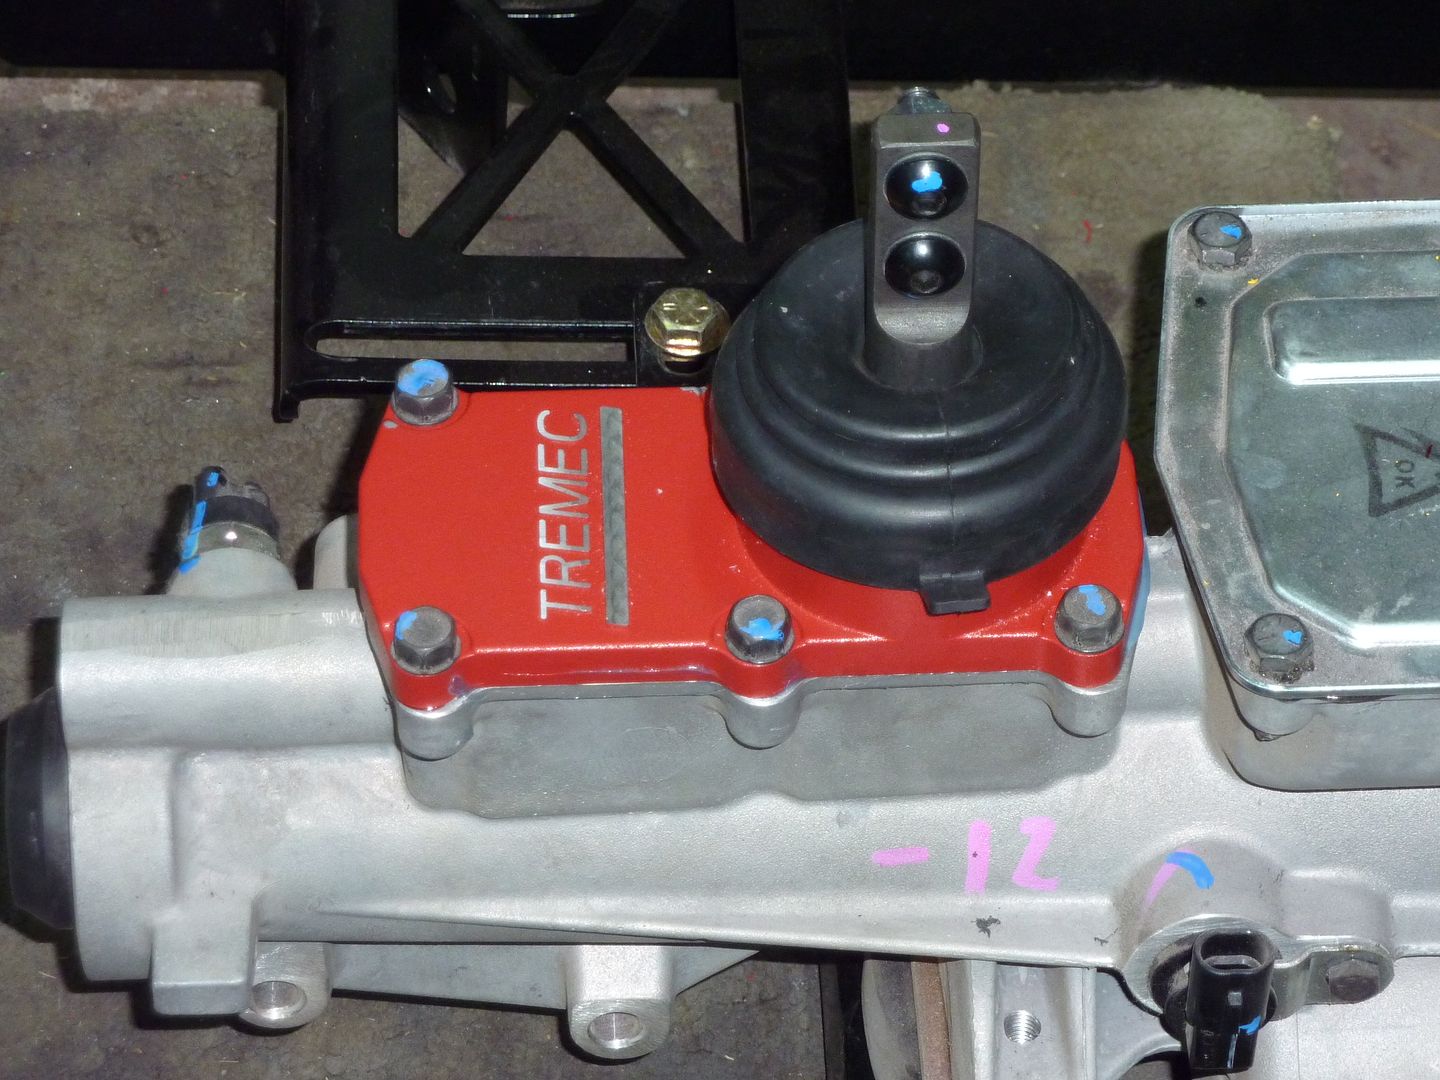
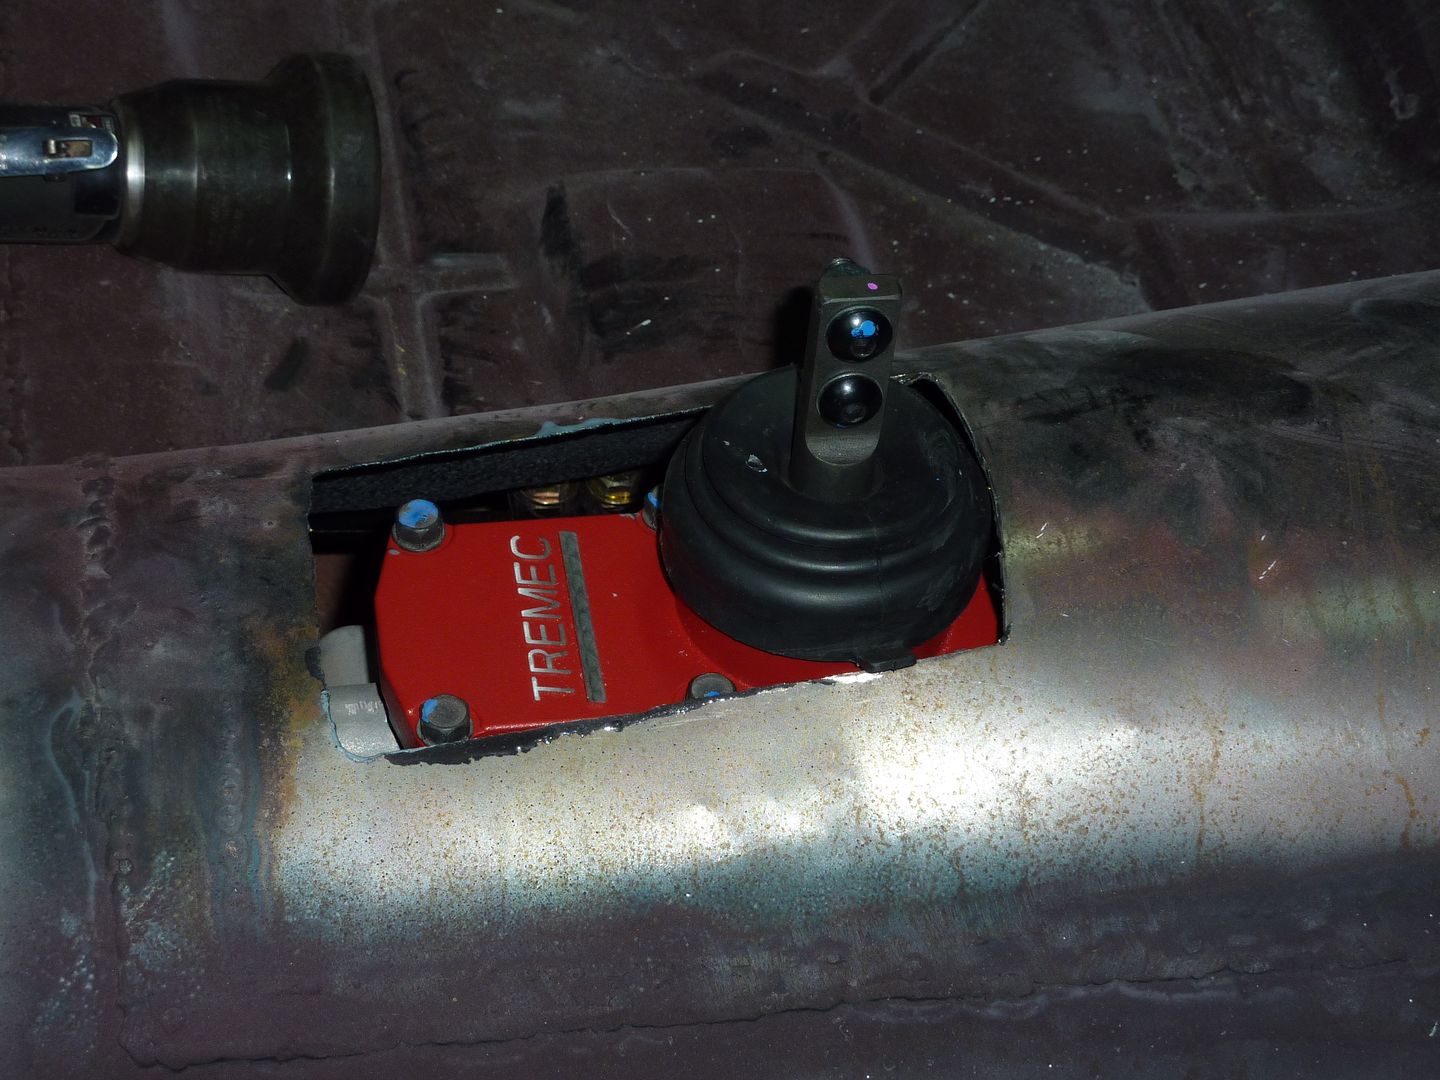
Not a bug update...but got some new parts.
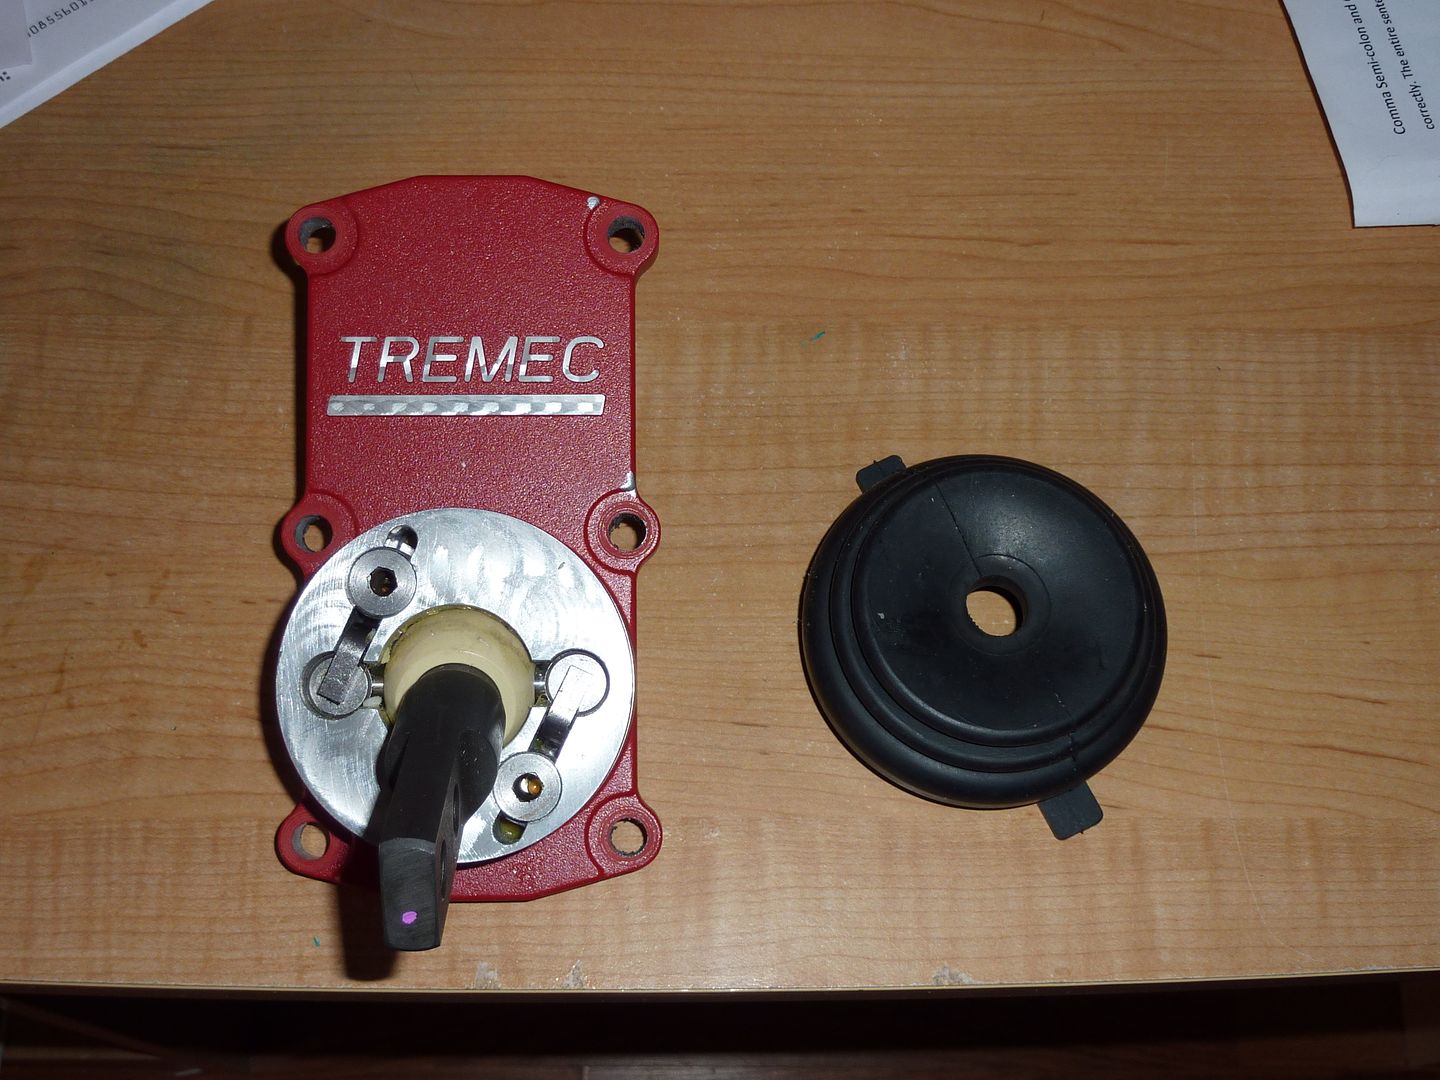
Tremec's new shifter. Thanks Gene!!! According to Gene: The new Tremec shifter is lower profile and has spring biasing adjustment. It also make provisions for the 2-3 shift. Like he also said...since I have never used my shifter yet, I won't know the difference, but I'm taking his word on it.
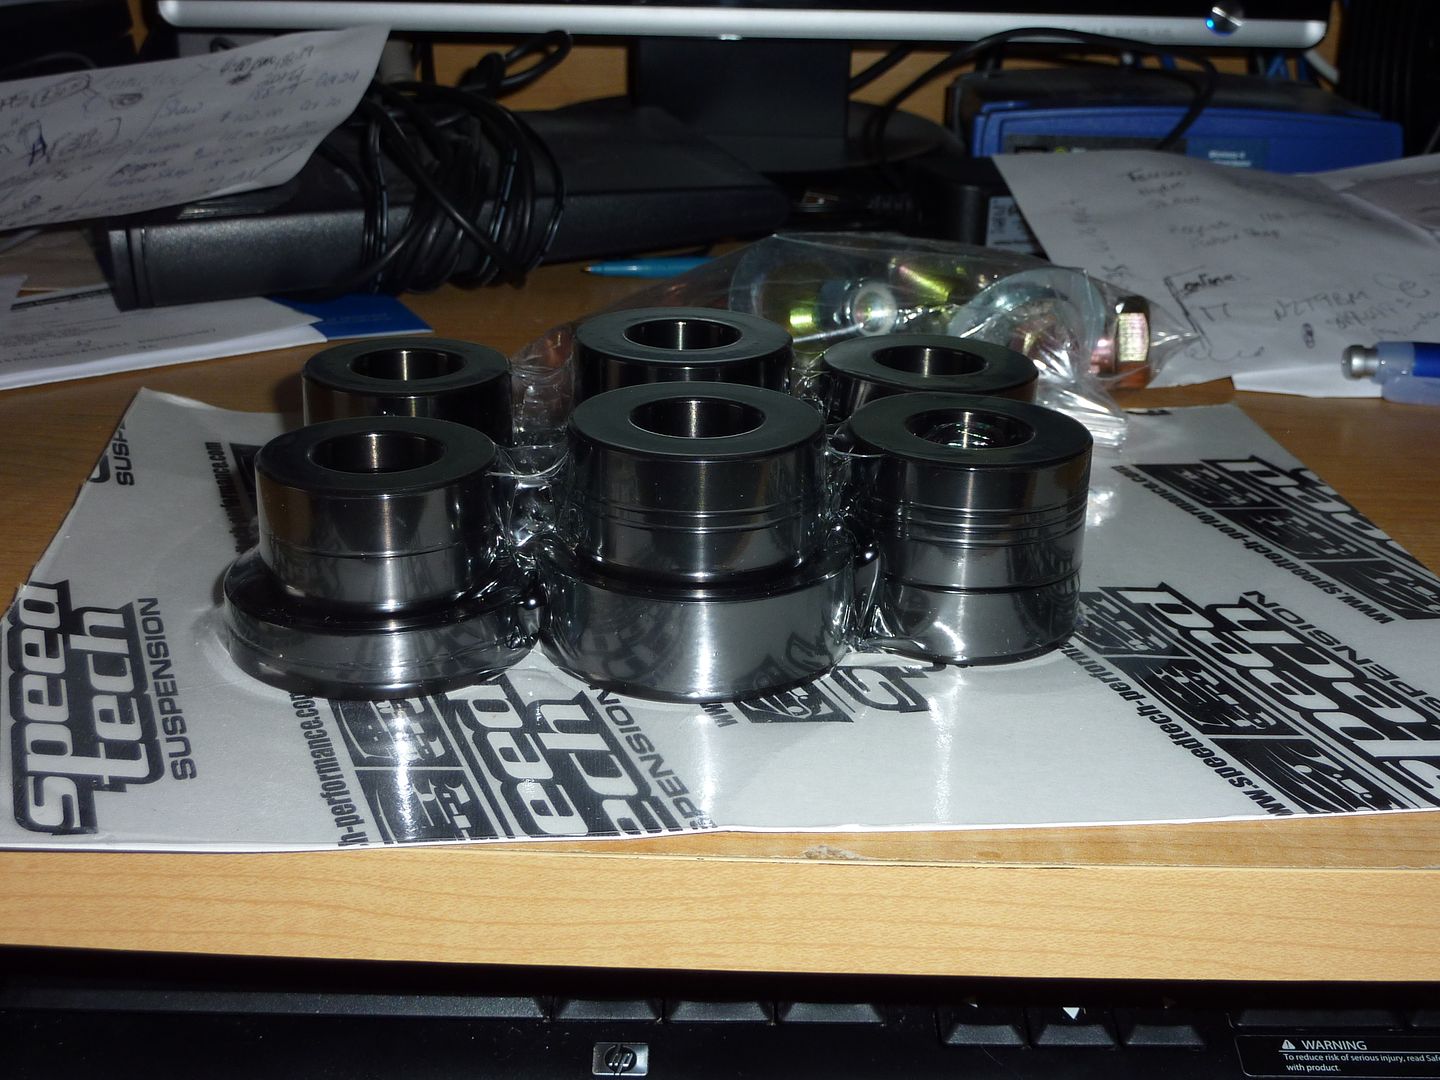
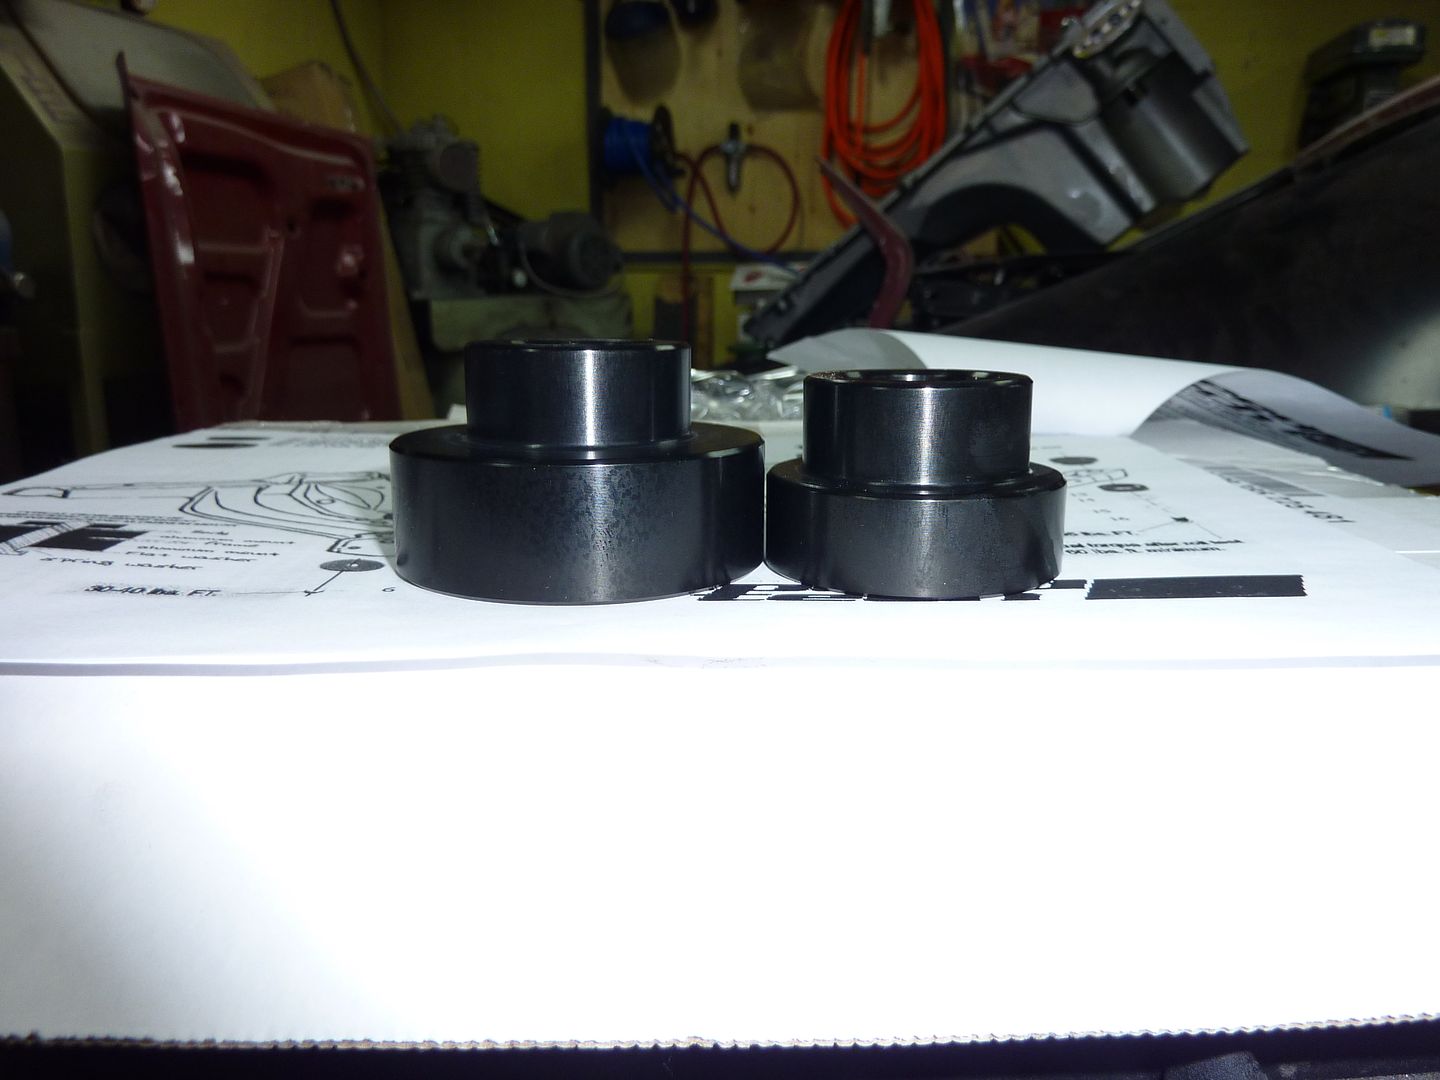
I also decided to get the new Speed Tech body mounts. I had the original silver ones and got them before Killer Customs bought the company. I thought I would go with the black anodized ones instead. Thanks Roger!!!
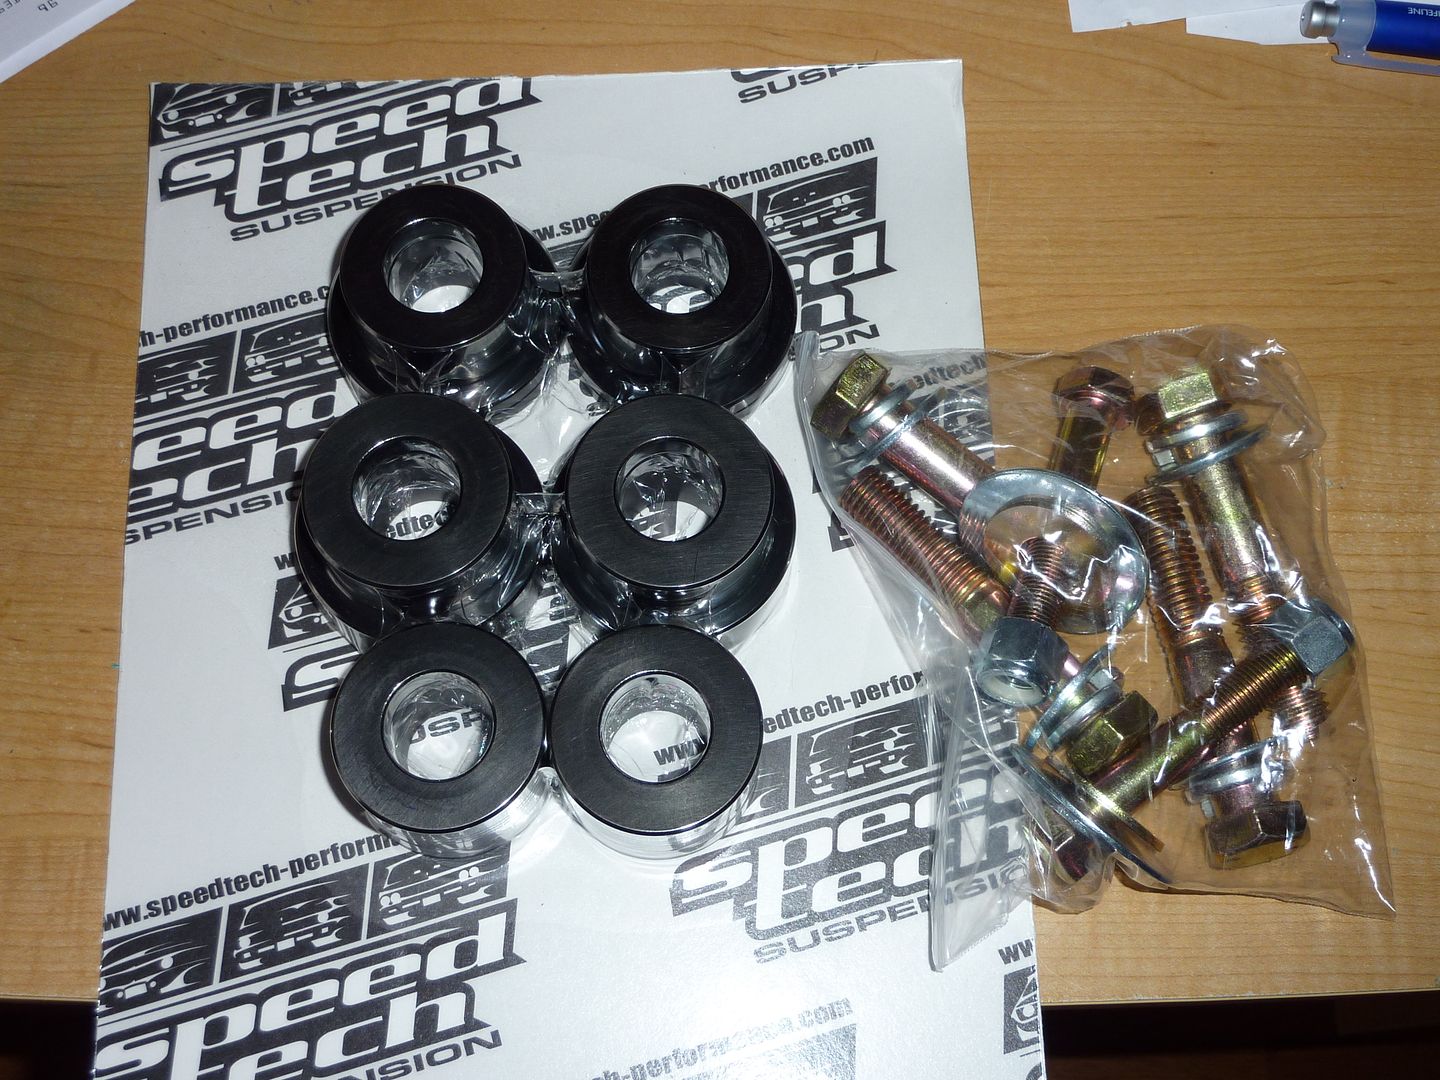
It's nice for dummies like me, they have put 1, 2 or 3 lines in them to tell where they go.
If I don't spend a couple hours in the shop tomorrow, likely won't be until the new year. That's okay as last week we were down to -20 Celsius so was getting a bit cold.
Tremec's new shifter. Thanks Gene!!! According to Gene: The new Tremec shifter is lower profile and has spring biasing adjustment. It also make provisions for the 2-3 shift. Like he also said...since I have never used my shifter yet, I won't know the difference, but I'm taking his word on it.
I also decided to get the new Speed Tech body mounts. I had the original silver ones and got them before Killer Customs bought the company. I thought I would go with the black anodized ones instead. Thanks Roger!!!
It's nice for dummies like me, they have put 1, 2 or 3 lines in them to tell where they go.
If I don't spend a couple hours in the shop tomorrow, likely won't be until the new year. That's okay as last week we were down to -20 Celsius so was getting a bit cold.
01-08-2010, 04:51 PM
#33
On The Tree
Thread Starter
iTrader: (4)
Join Date: Mar 2009
Location: British Columbia, Canada
Posts: 132
Likes: 0
Received 0 Likes
on
0 Posts
We've had a cold snap for the past few weeks and with Christmas and New Years I really haven't had a chance to get into the shop at all. With reading about all the guys that are having to sell their projects, I knew I had to get into the shop today even if it was for a couple hours. Fired up a couple 220 heaters and got the shop to about 10 or 12 C or about 50 F. Got to spend a couple hours out there, not a major update but an update none the less.
I started by changing the old Tremec shifter to the new improved one
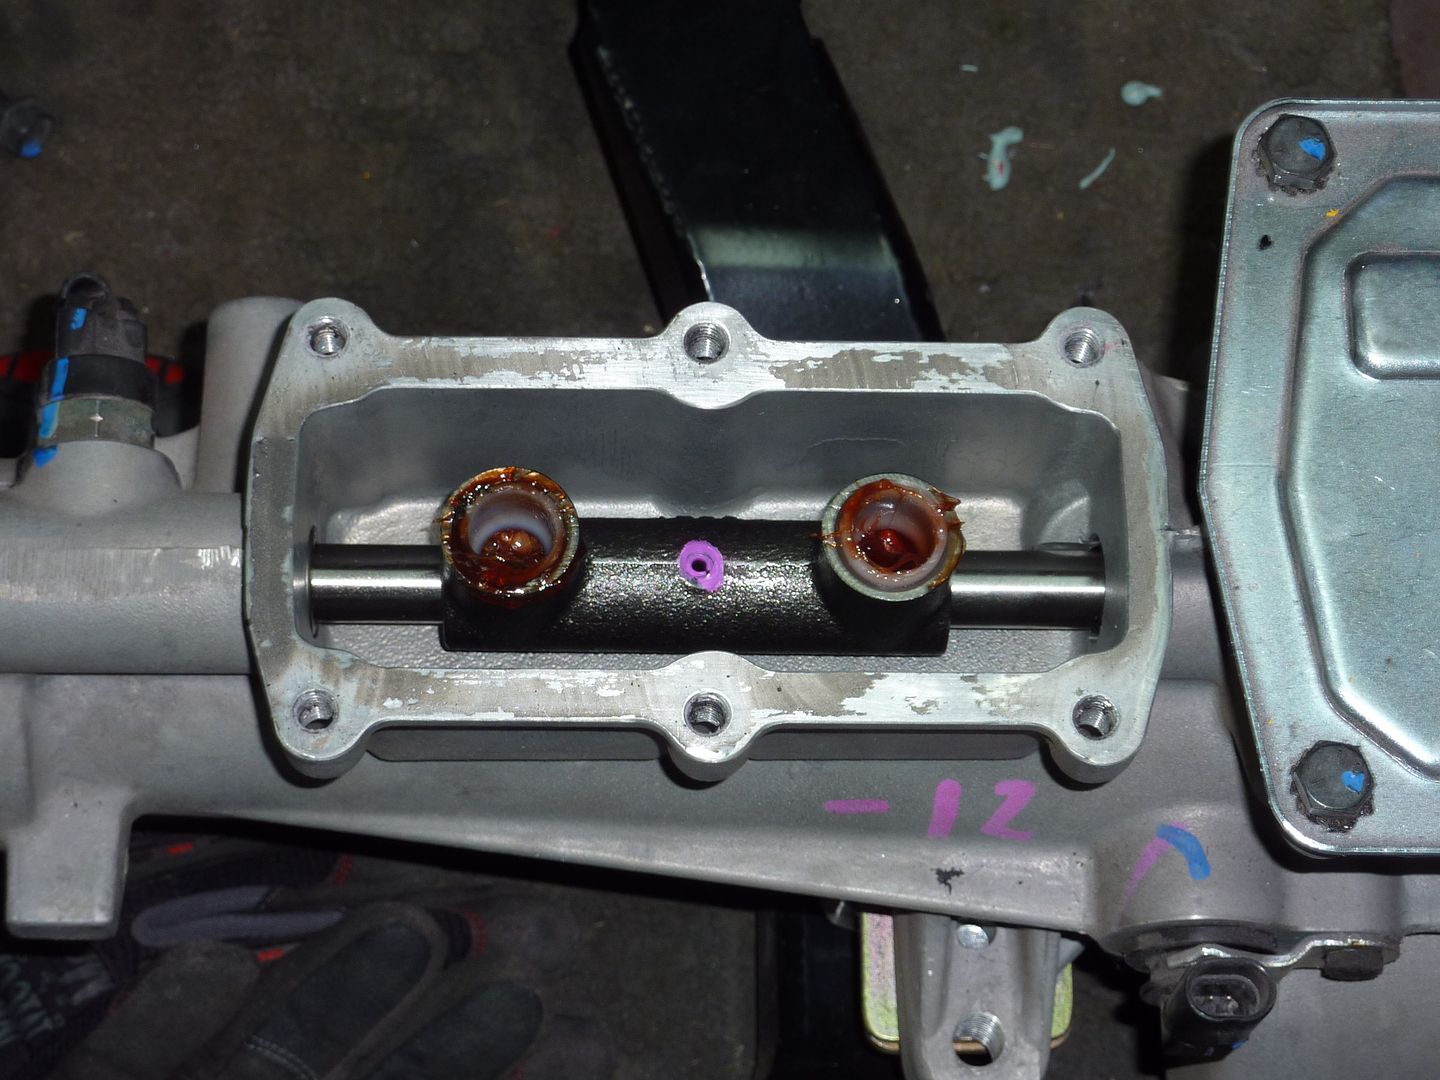
The old one
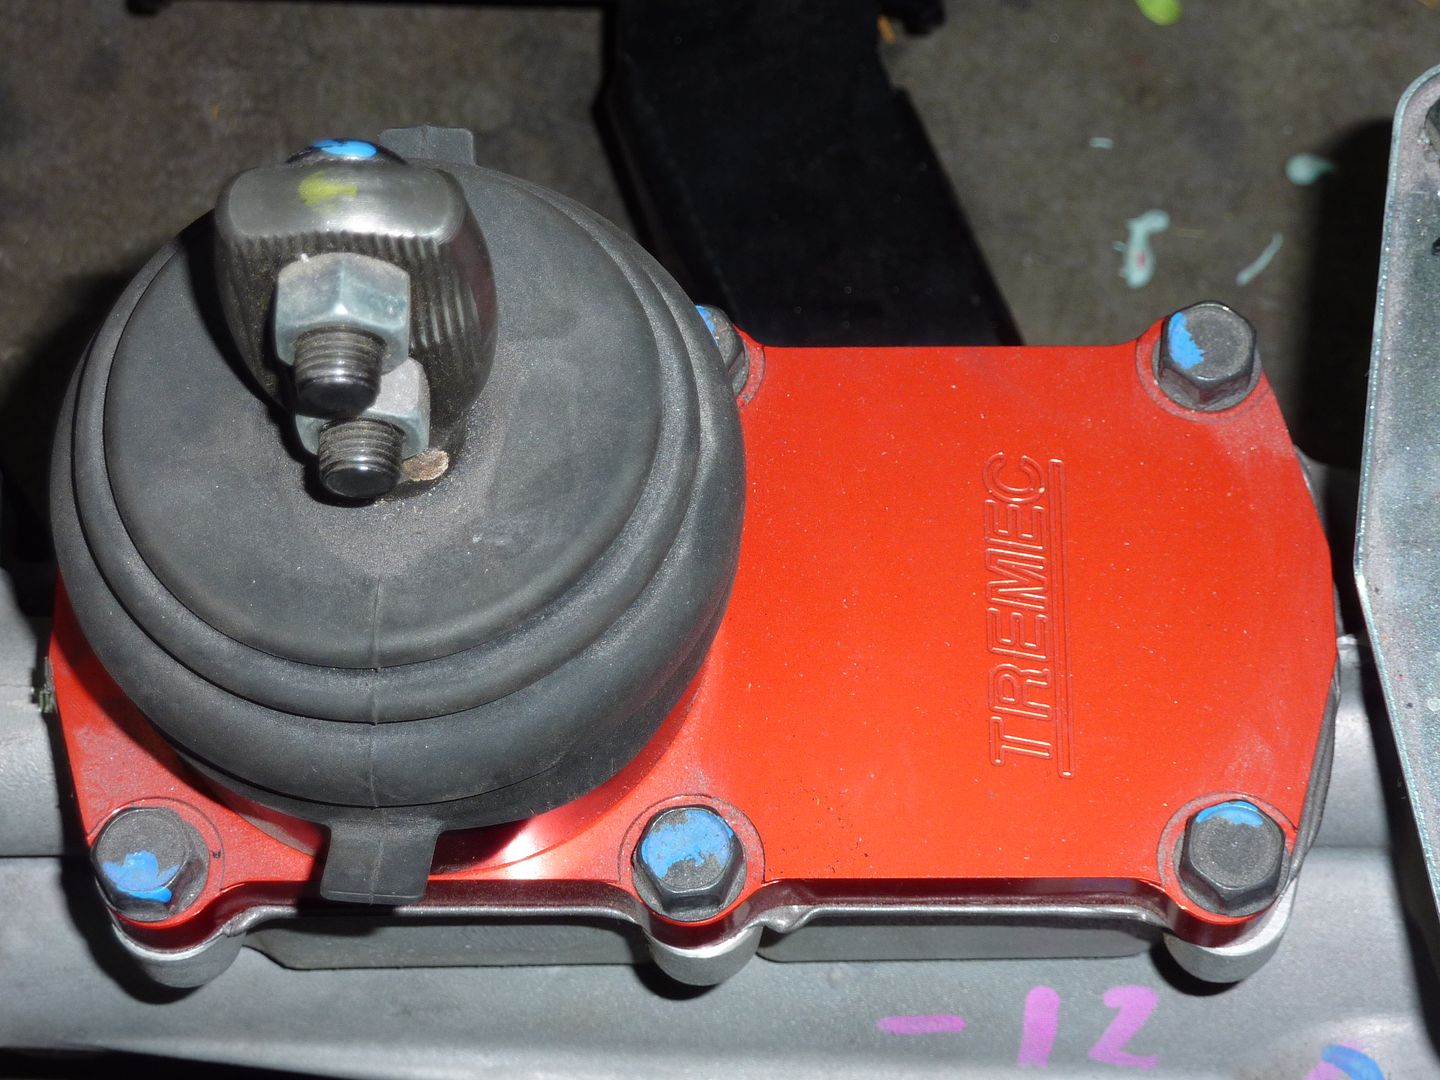
I'll admit I didn't know what to expect when I took the shifter off. I had no clue how it attached. Pretty simple set up, especially to swap the shifter from front to back.
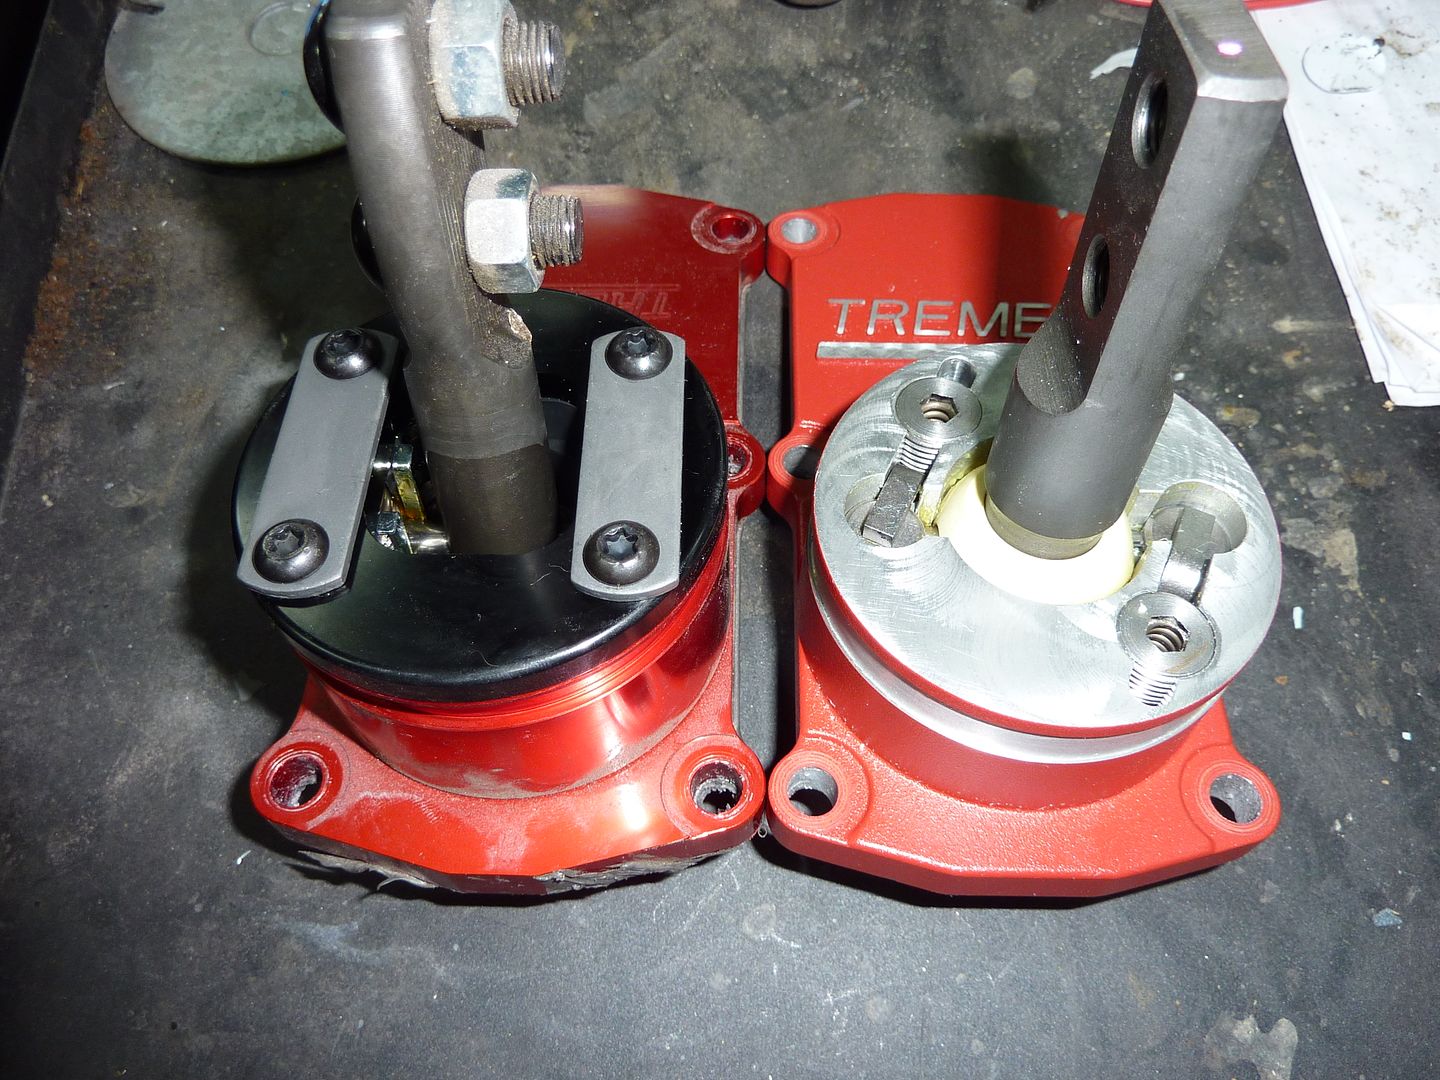
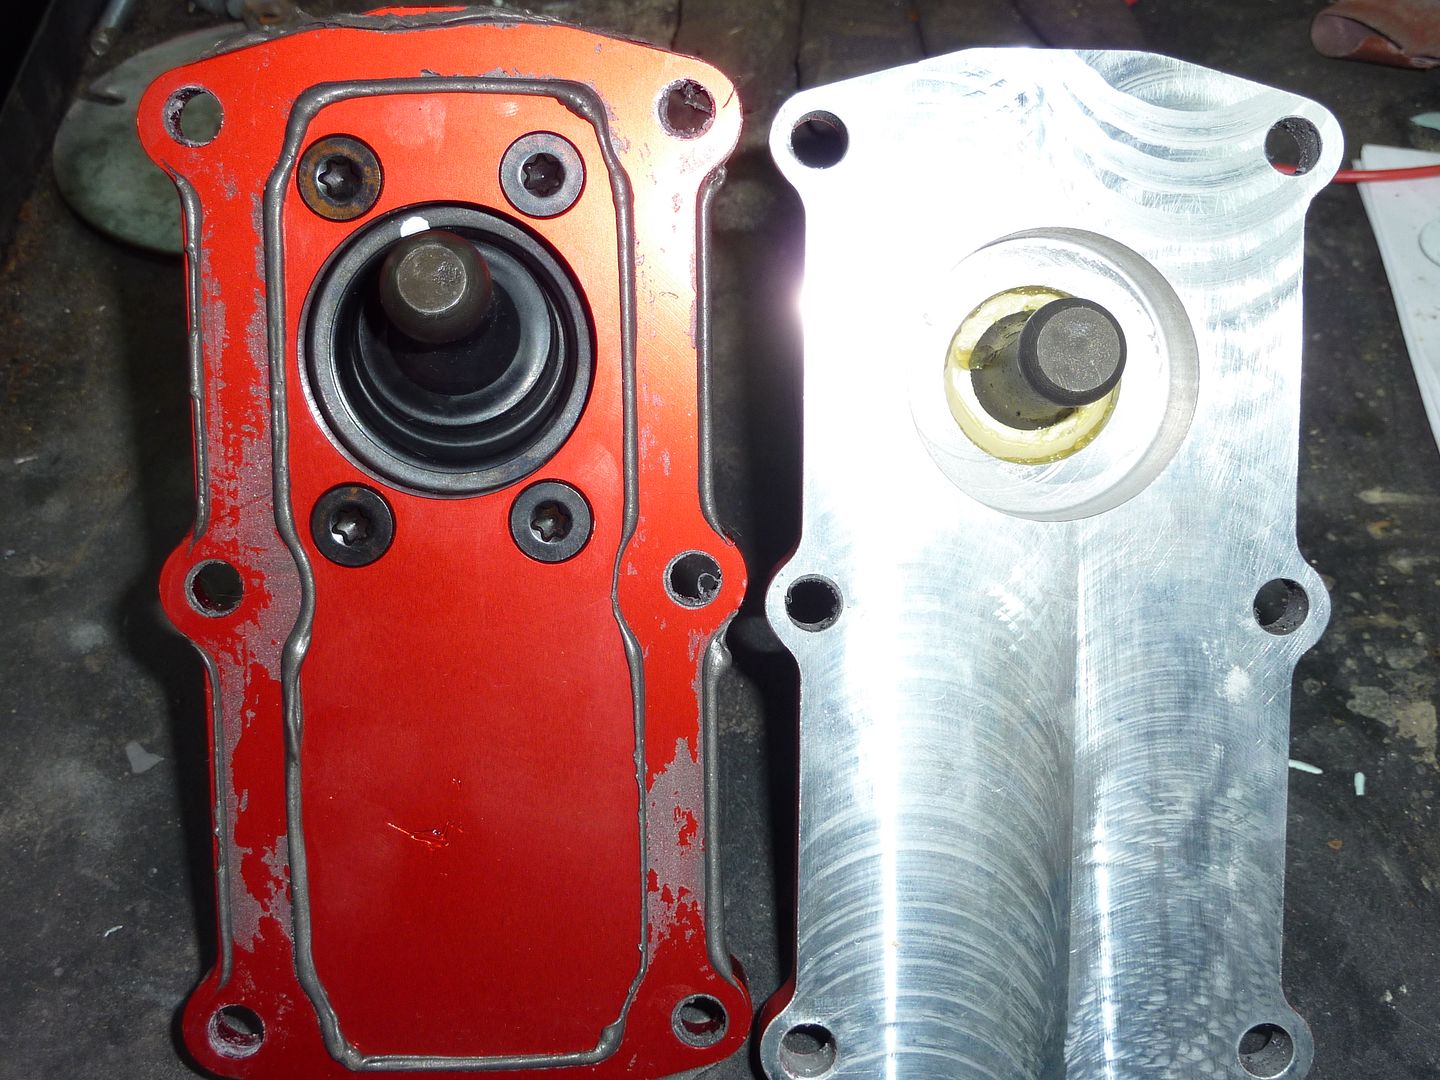
Before I put the new on one, I thought I would take some side by side shots to show the differences. The one on the right is the new improved one. You can the screws which allow you to make adjustments on the new shifter.

And the new shifter is on the tranny.
I know some guys were debating if after market aluminum mounts needed the factory shims when putting into a Nova. Speedtech has assured me they don't require the shims and here's why. The one on the left is the firewall mount and is higher than the back one to make up for the shims.
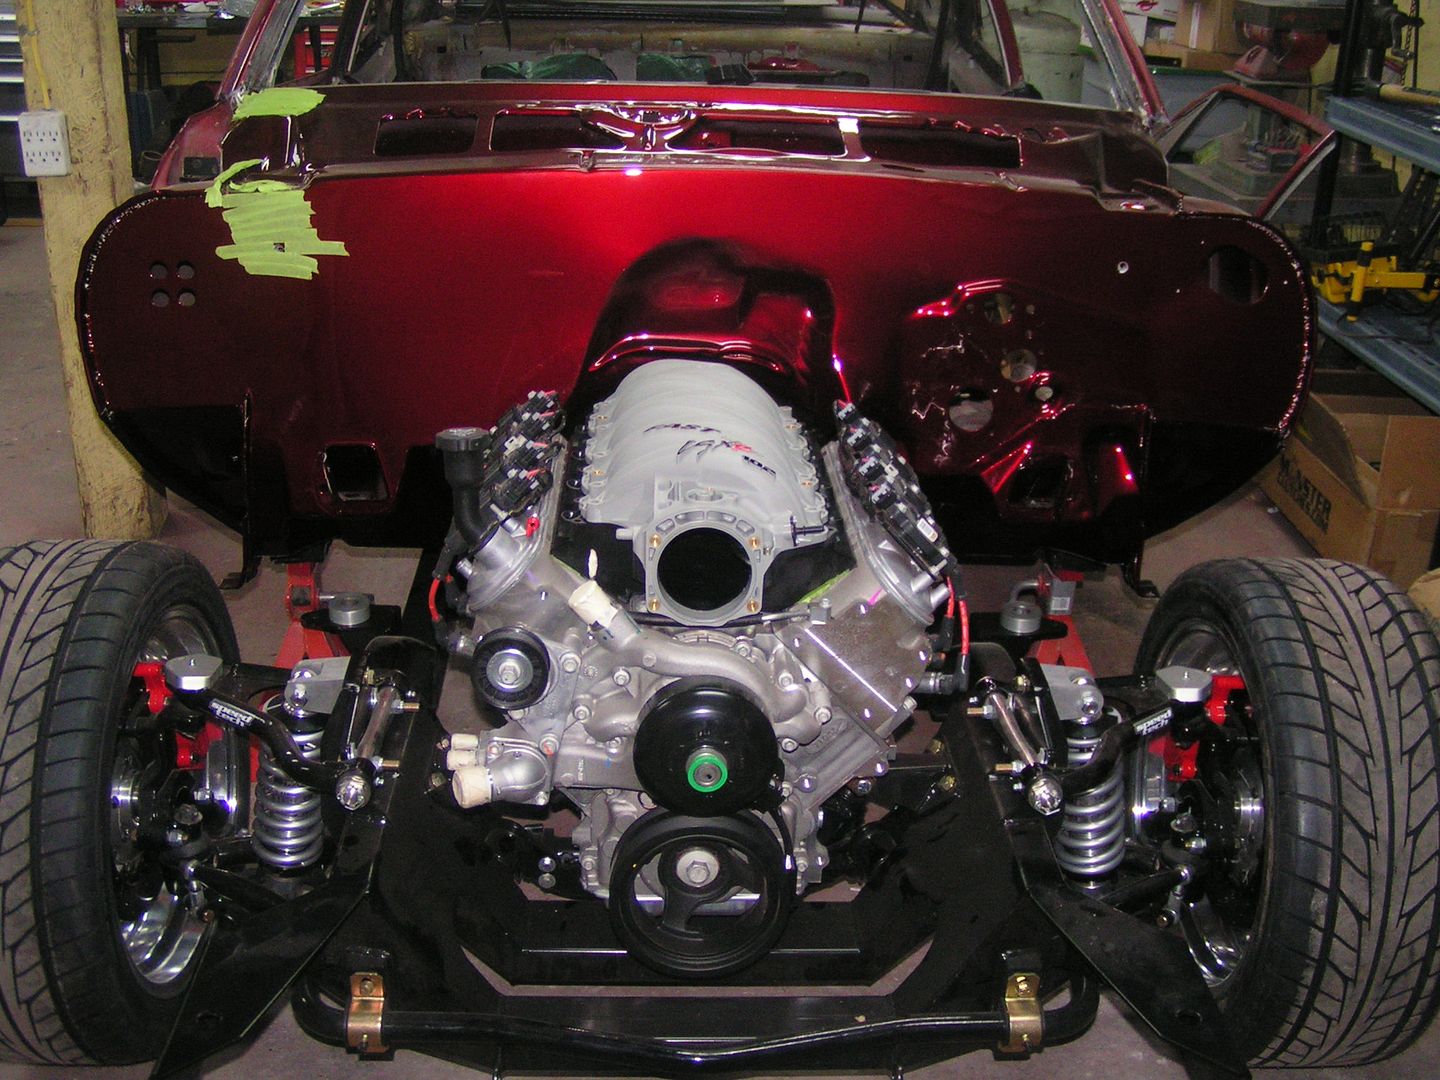
And finally the subframe is attached to the body for good It still needs to be aligned, but I had to put it on the ground to see how it looks. Aligning it by myself should be fun 
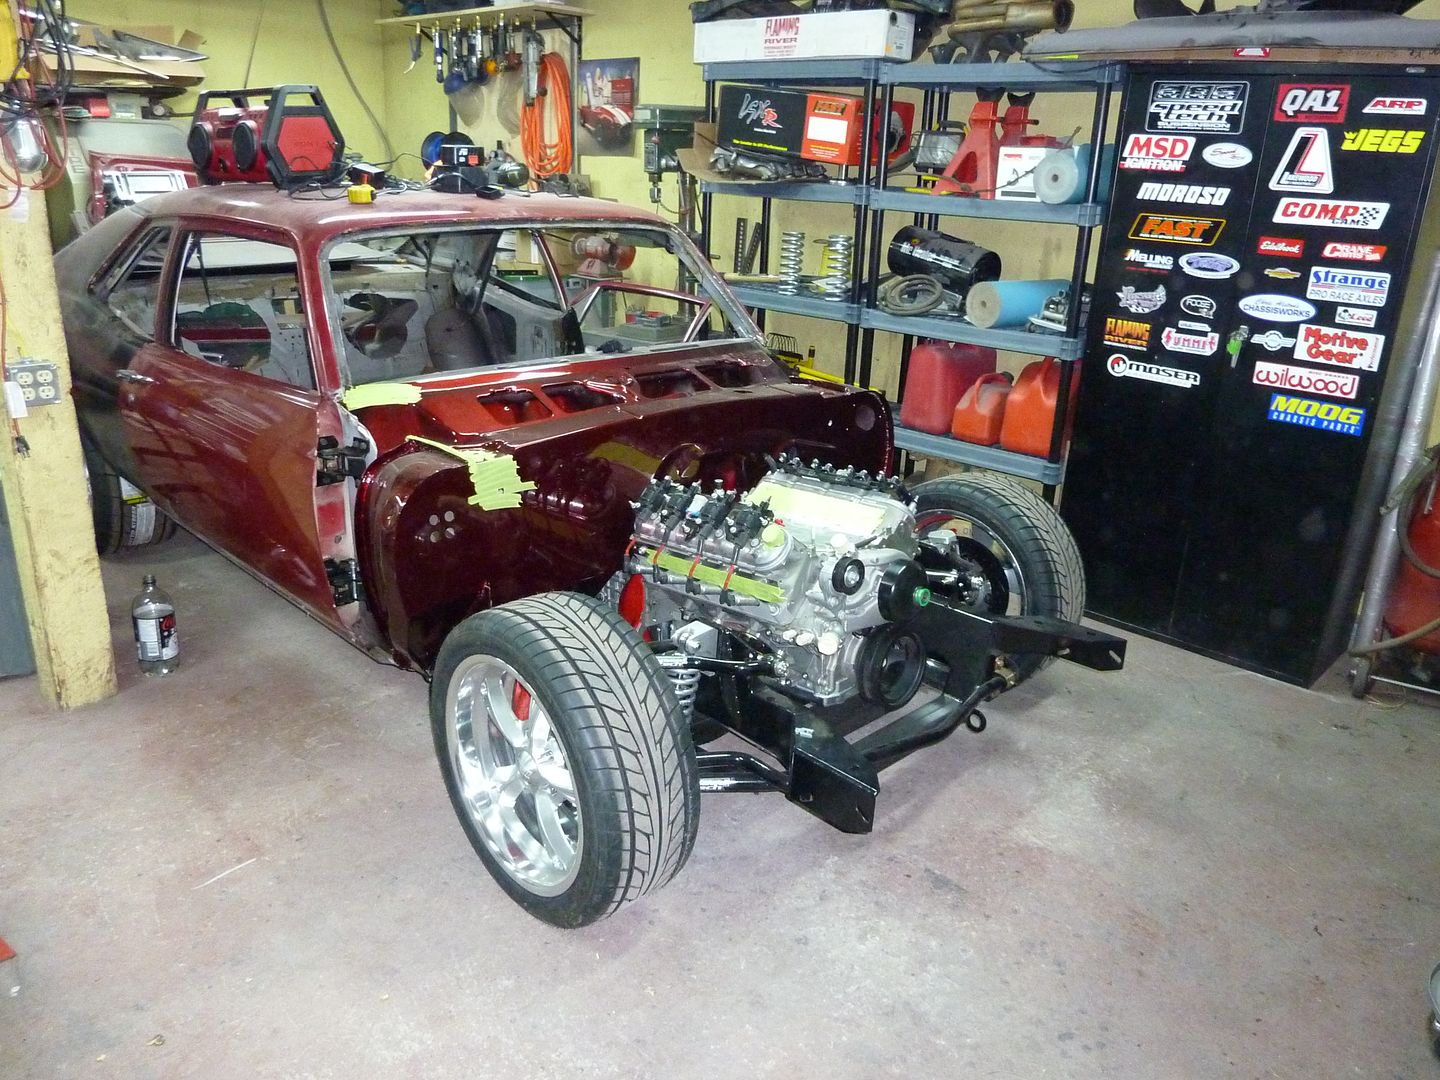
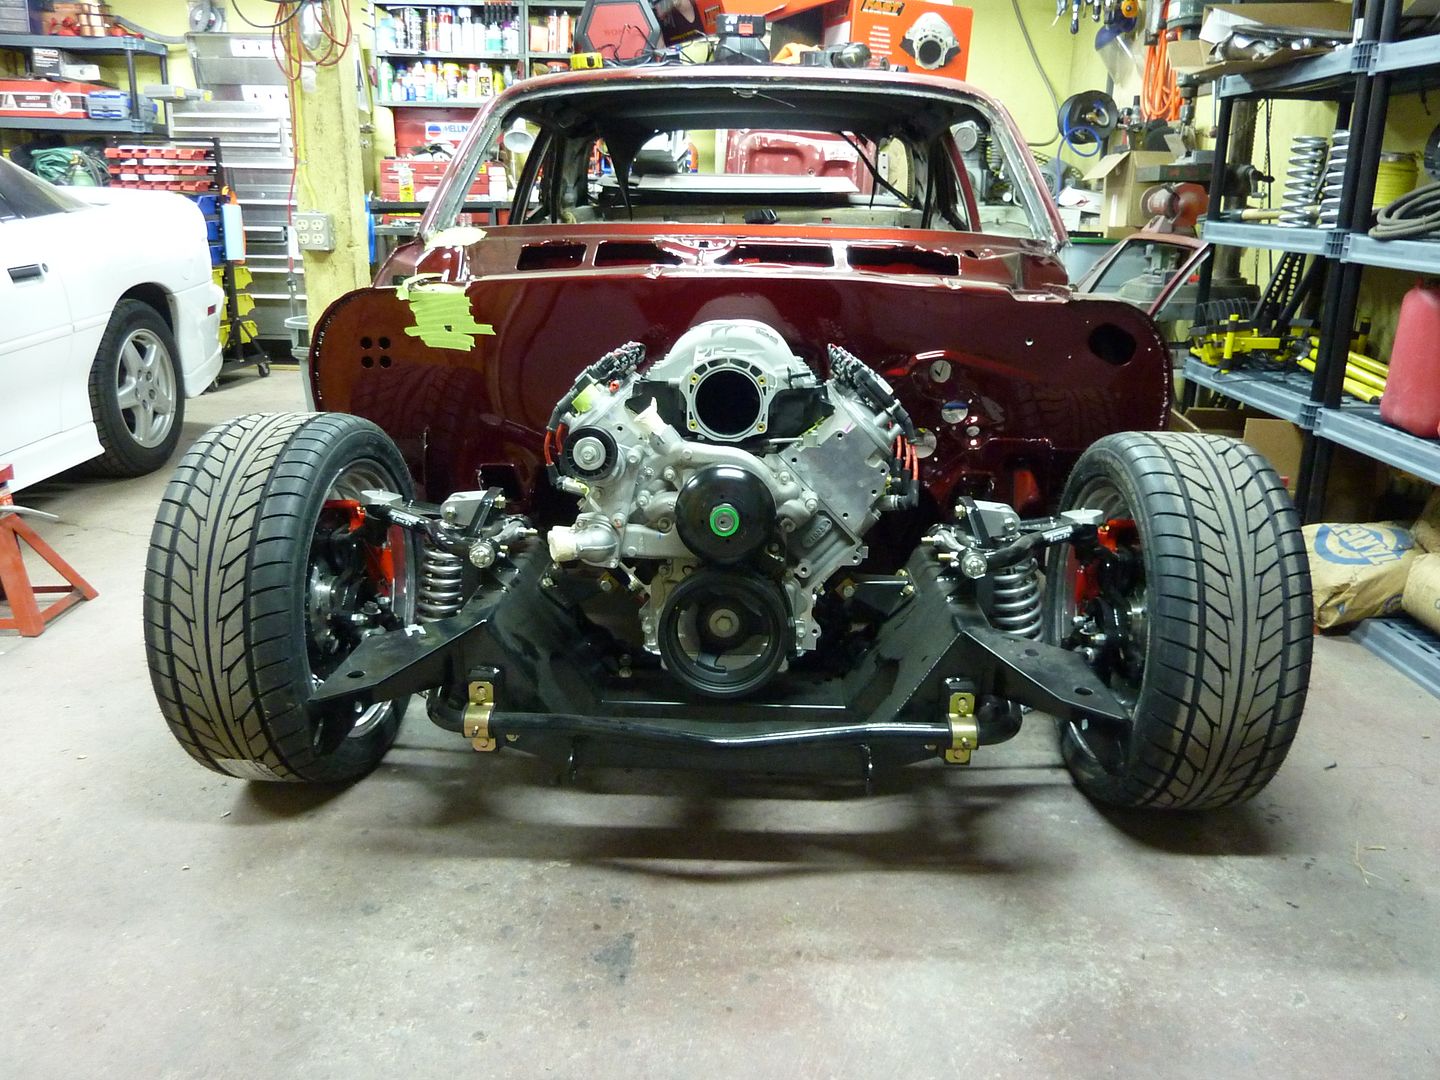
Lots of room to spare
And my secret weapon. Two L92's
I had to cut the shifter hole a bit to adjust for the changing it around. I still need to trim a bit more to make it more even all around. I plan on making a cover to fit over the hole. Do any of you think it would be an issue making a cover and putting some seam sealer underneath and using rivets to secure it down to the floor. I want to be able to just drill out the rivets if I ever need to access the shifter.
I started by changing the old Tremec shifter to the new improved one
The old one
I'll admit I didn't know what to expect when I took the shifter off. I had no clue how it attached. Pretty simple set up, especially to swap the shifter from front to back.
Before I put the new on one, I thought I would take some side by side shots to show the differences. The one on the right is the new improved one. You can the screws which allow you to make adjustments on the new shifter.
And the new shifter is on the tranny.
I know some guys were debating if after market aluminum mounts needed the factory shims when putting into a Nova. Speedtech has assured me they don't require the shims and here's why. The one on the left is the firewall mount and is higher than the back one to make up for the shims.
And finally the subframe is attached to the body for good
It still needs to be aligned, but I had to put it on the ground to see how it looks. Aligning it by myself should be fun Lots of room to spare
And my secret weapon. Two L92's
I had to cut the shifter hole a bit to adjust for the changing it around. I still need to trim a bit more to make it more even all around. I plan on making a cover to fit over the hole. Do any of you think it would be an issue making a cover and putting some seam sealer underneath and using rivets to secure it down to the floor. I want to be able to just drill out the rivets if I ever need to access the shifter.
Last edited by scherp69; 01-08-2010 at 05:01 PM.
 01-10-2010, 10:35 AM
#39
On The Tree
Thread Starter
iTrader: (4)
Join Date: Mar 2009
Location: British Columbia, Canada
Posts: 132
Likes: 0
Received 0 Likes
on
0 Posts
Can't believe I couldn't think of that. With the scattershield....I would have never know either until I started coming onto all the different websites. I've even asked local mechanics about it....they never do it.Chevelle....I haven't completely decided yet on the front set up. Right now I'm leaning towards using the Vintage Air Frontrunner kit as it includes a new water pump, balancer and all the pulleys etc. It uses a Stewart pump. I was also looking at the Billet Specialties, but isn't as complete of a kit.
02-10-2010, 02:07 PM
#40
On The Tree
Thread Starter
iTrader: (4)
Join Date: Mar 2009
Location: British Columbia, Canada
Posts: 132
Likes: 0
Received 0 Likes
on
0 Posts
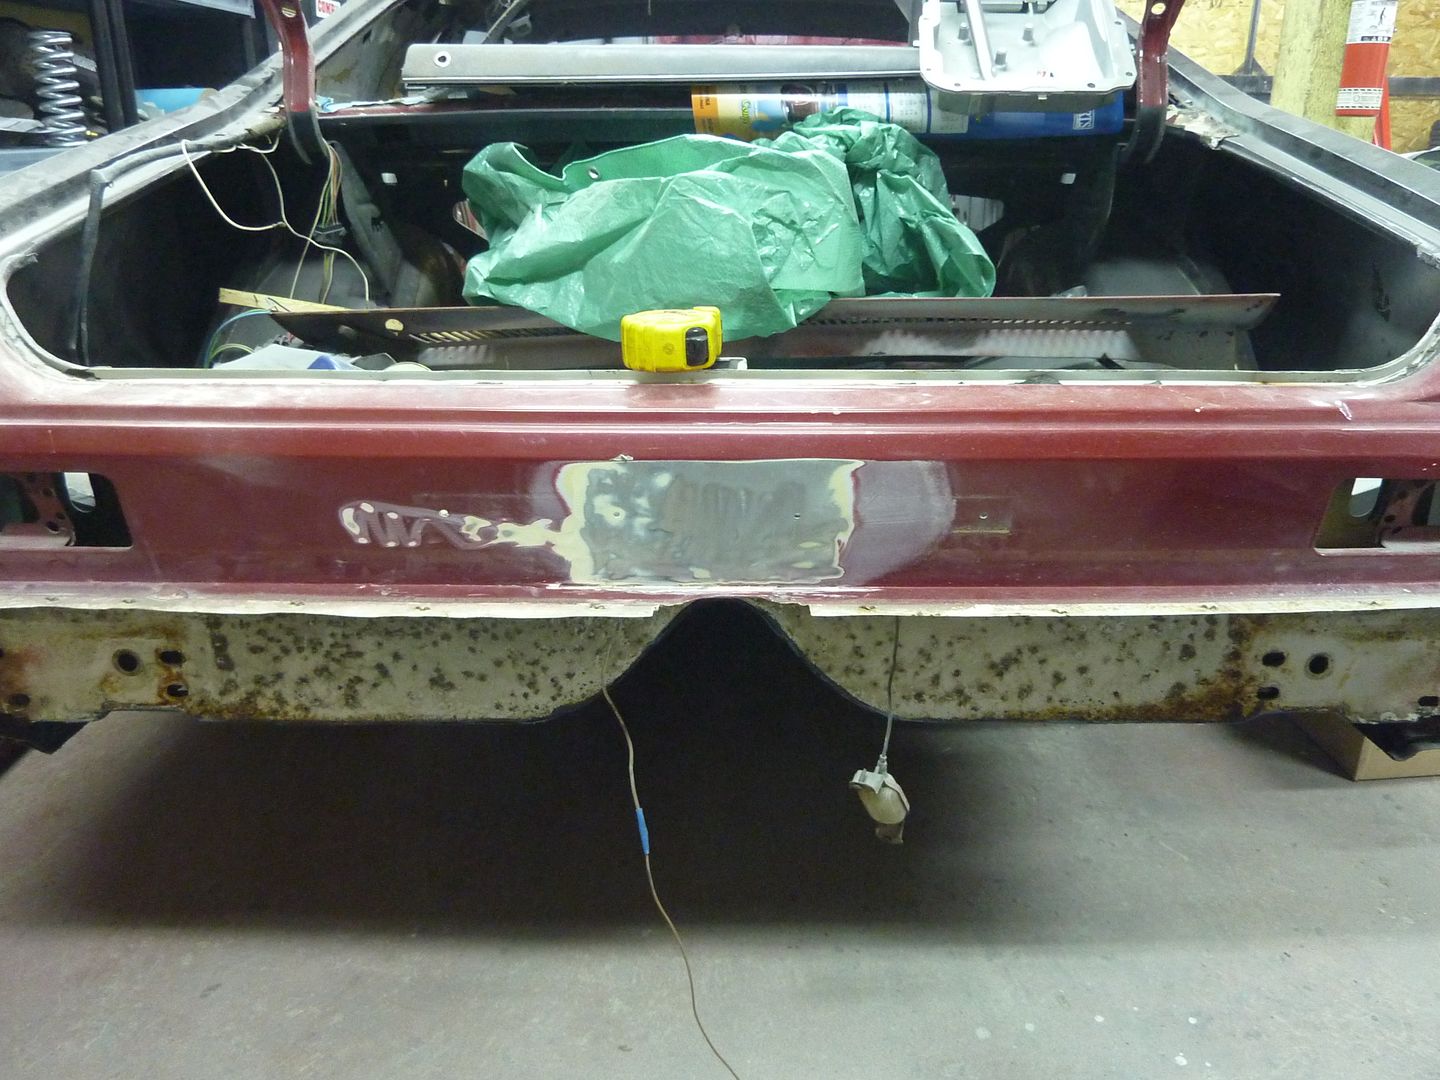
I finally had a couple hours this morning to go play in the shop. My step daughter started a new school this semester and hasn't made any new friends yet so I have been taking her out for lunch on my days off. It's amazing how that interferes with my shop time
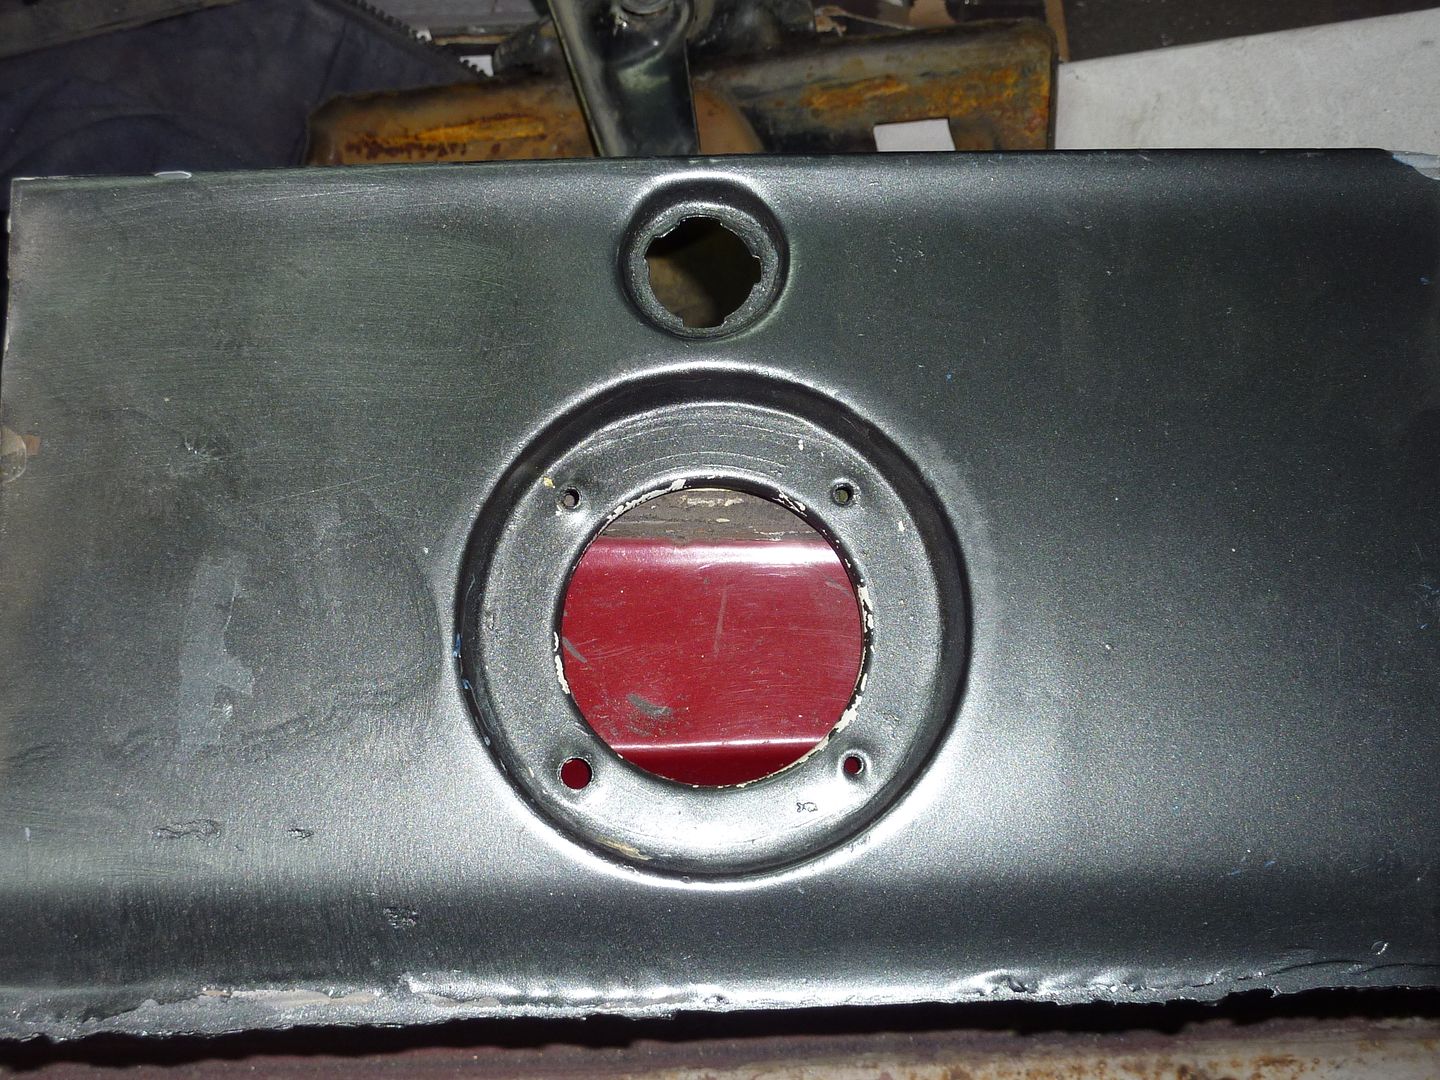
I borrowed this idea from Billy's (72novadriver) car. I love the way it look so thought I would do the same thing to mine. Billy made his insert, but I cheated. I found someone who was willing to cut out the filler cap portion of a tail panel from a 67 Camaro.
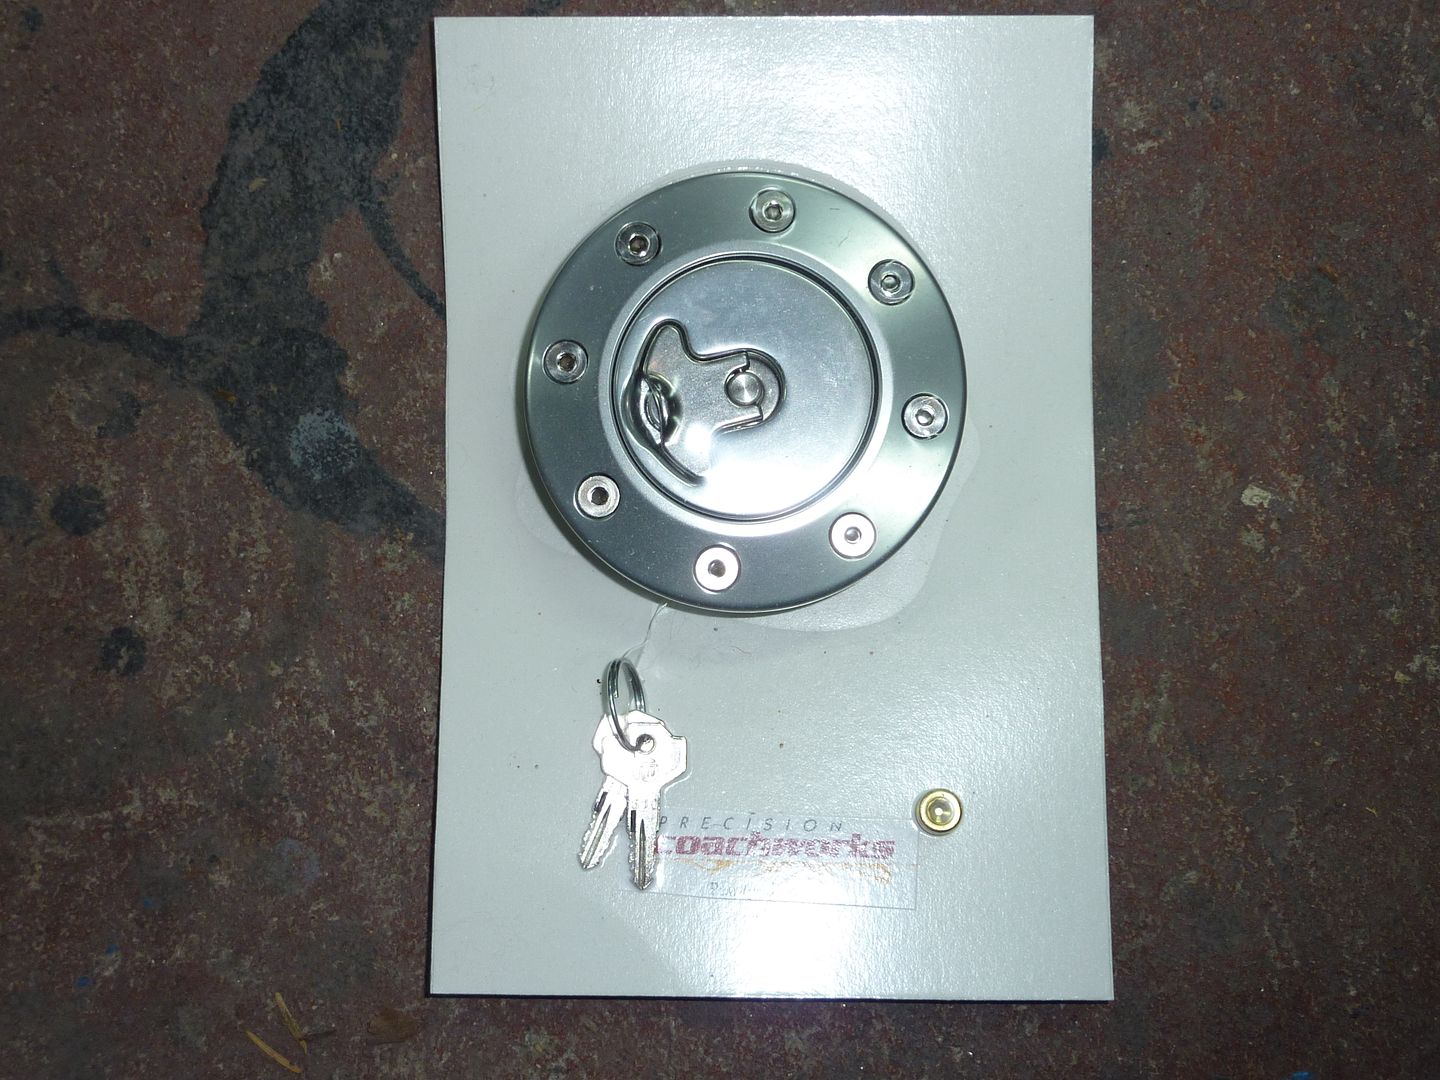
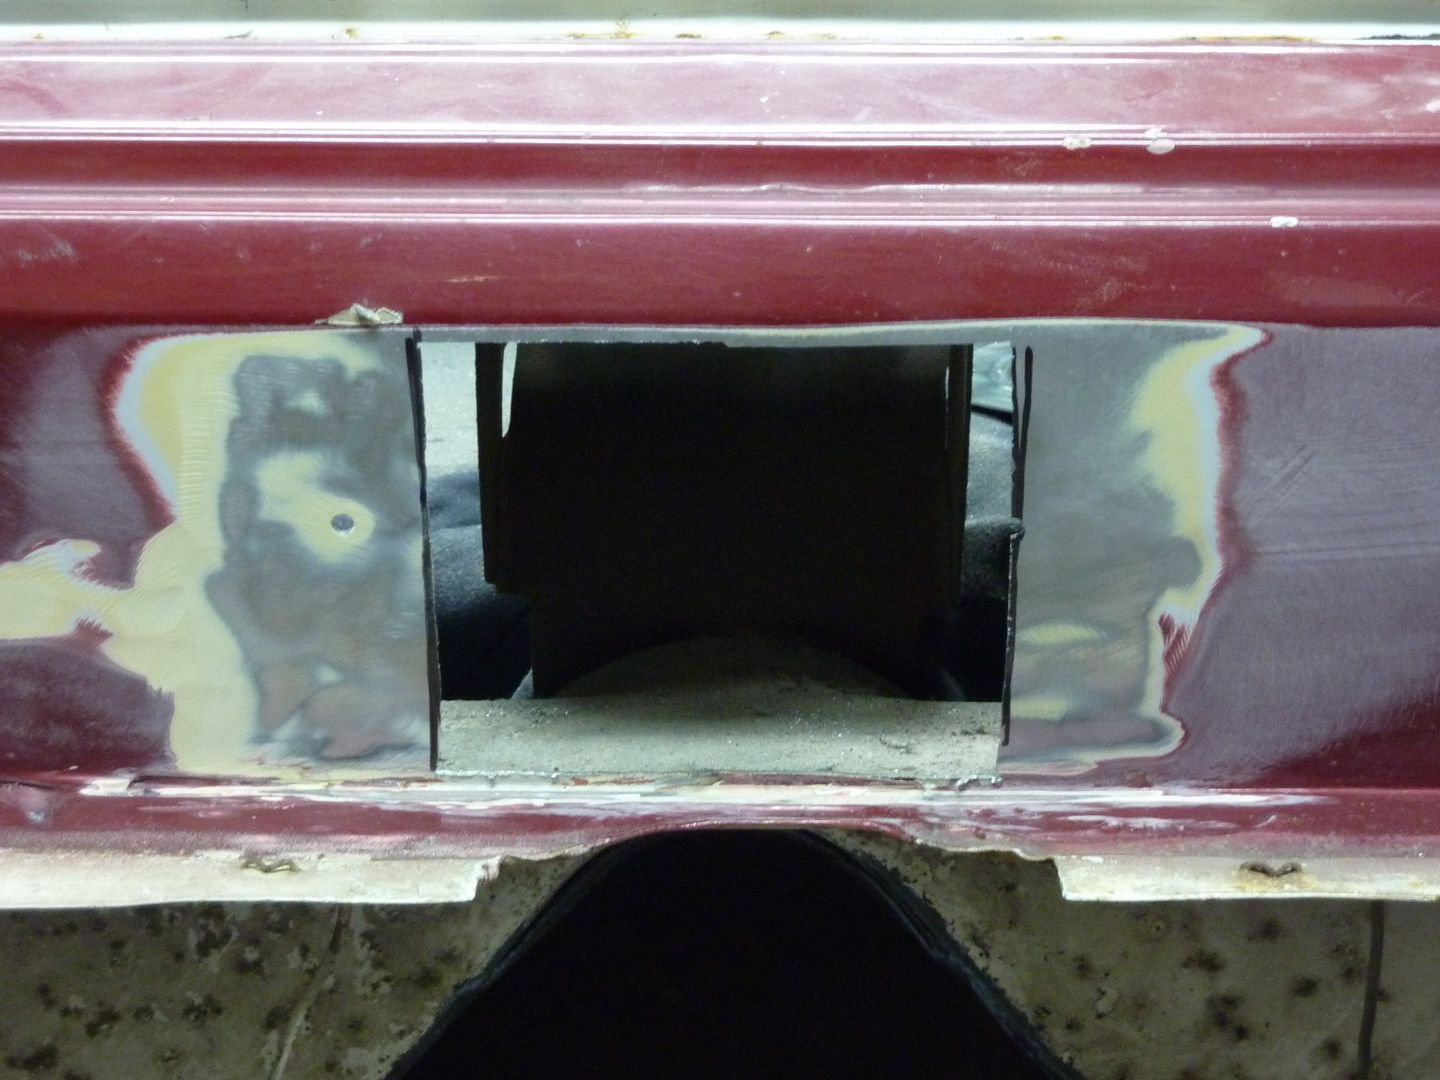
Bought a filler cap from Chassis Works. Beautiful piece. Not cheap though. I know there are cheaper ones out there, but I decided to go with this one.
Panel from the Camaro
Cut it down to a better size
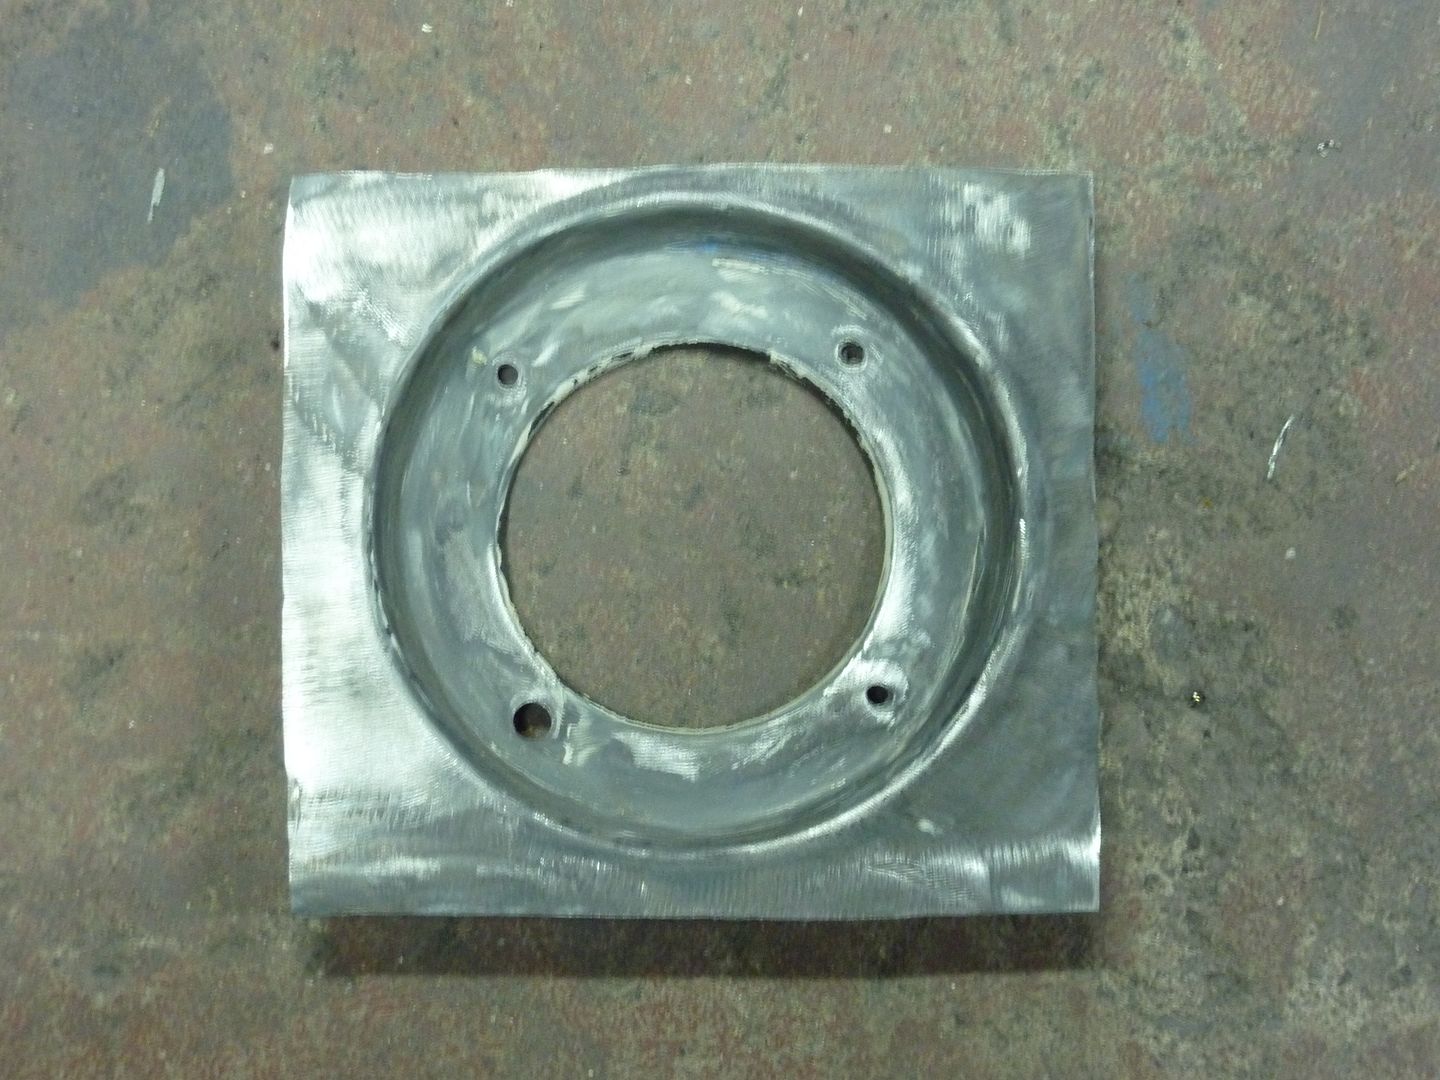
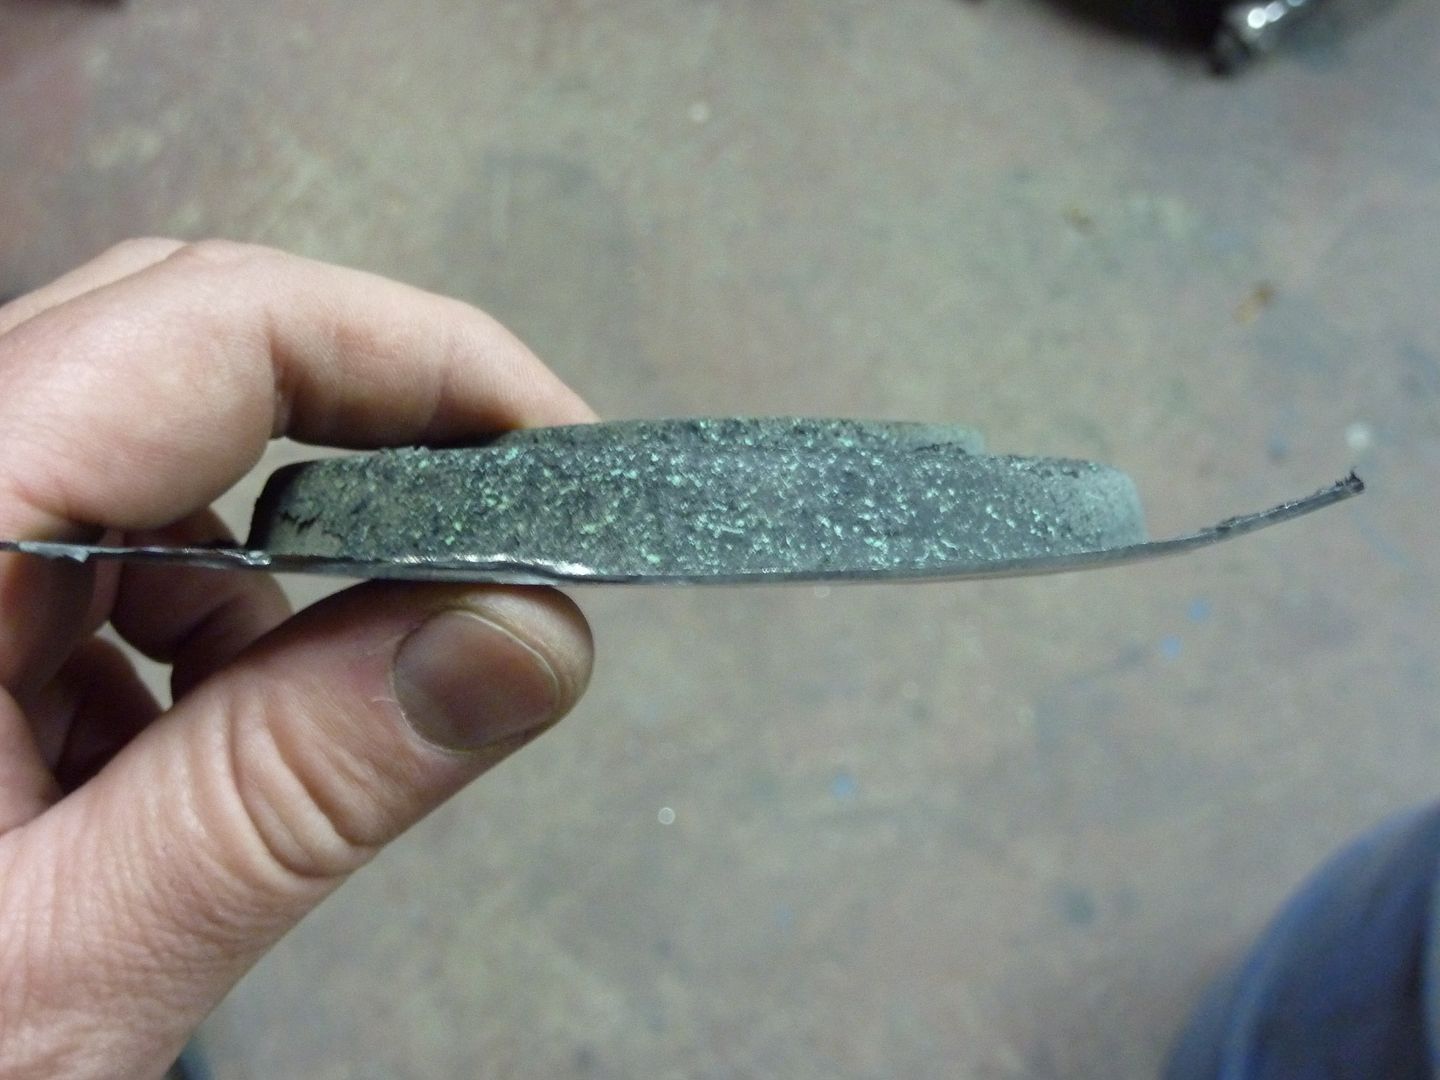
There's a bit of a contour to these, so I had to finesse it a bit
Had to clean up the area where I was going to weld it into place
I had to find centre and start cutting
Temporarily in place
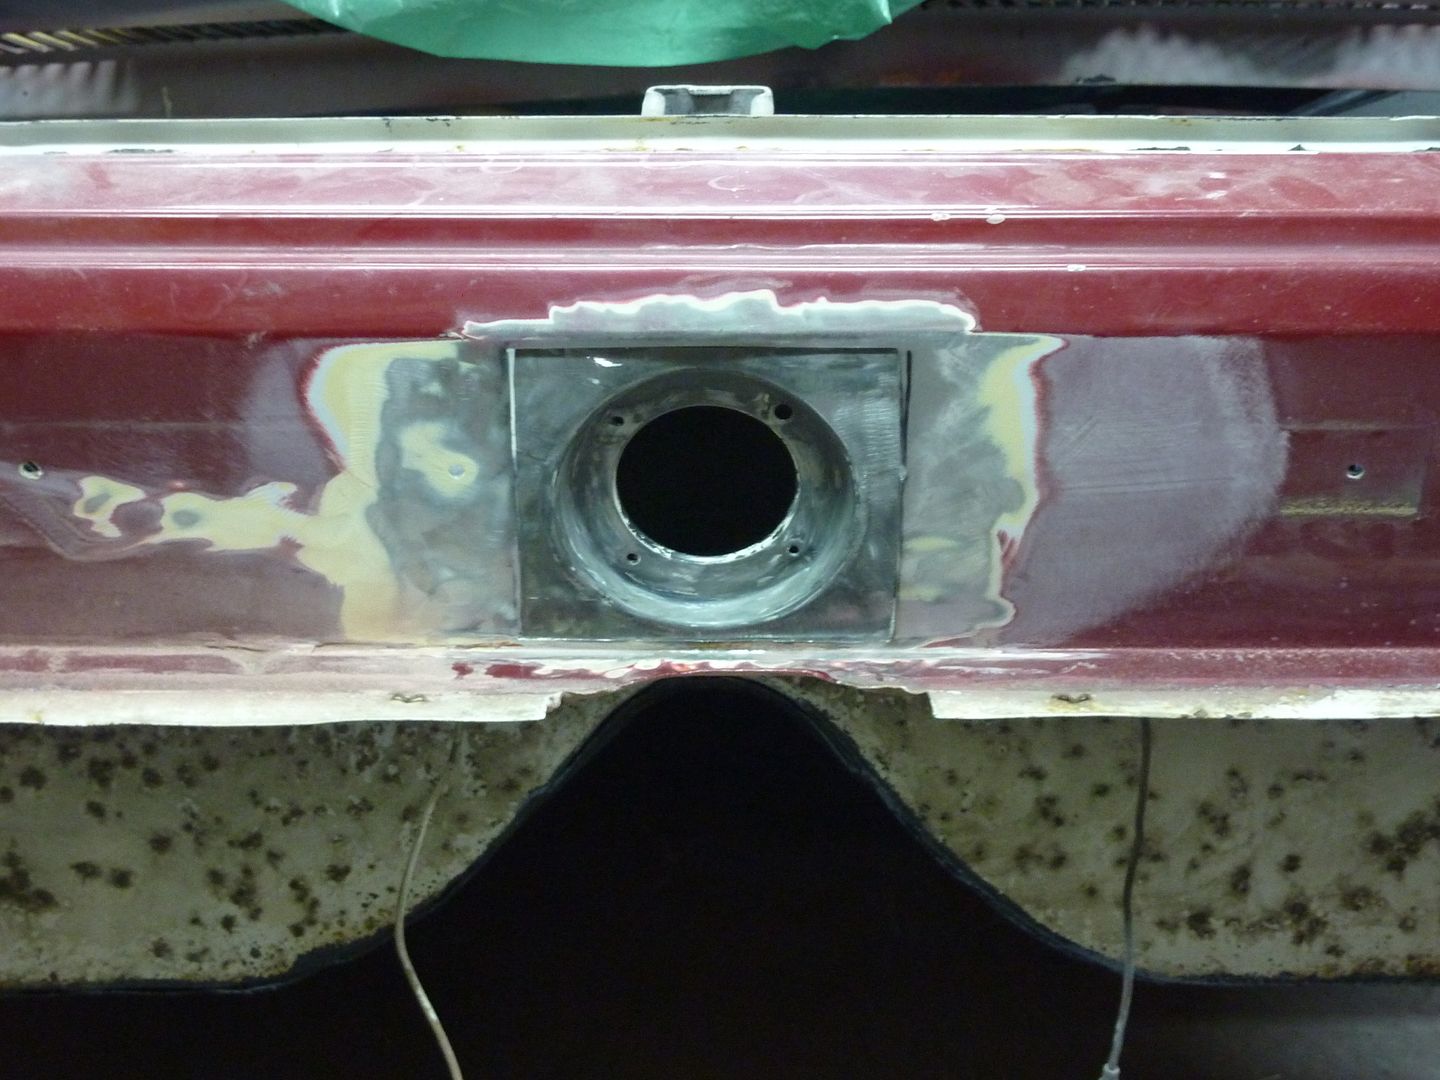
Welded into place and the filler cap is in place for a test fit. It's missing the gasket in behind so will stick out a little farther. I might make a thicker gasket so it is a little more flush with the tail panel.
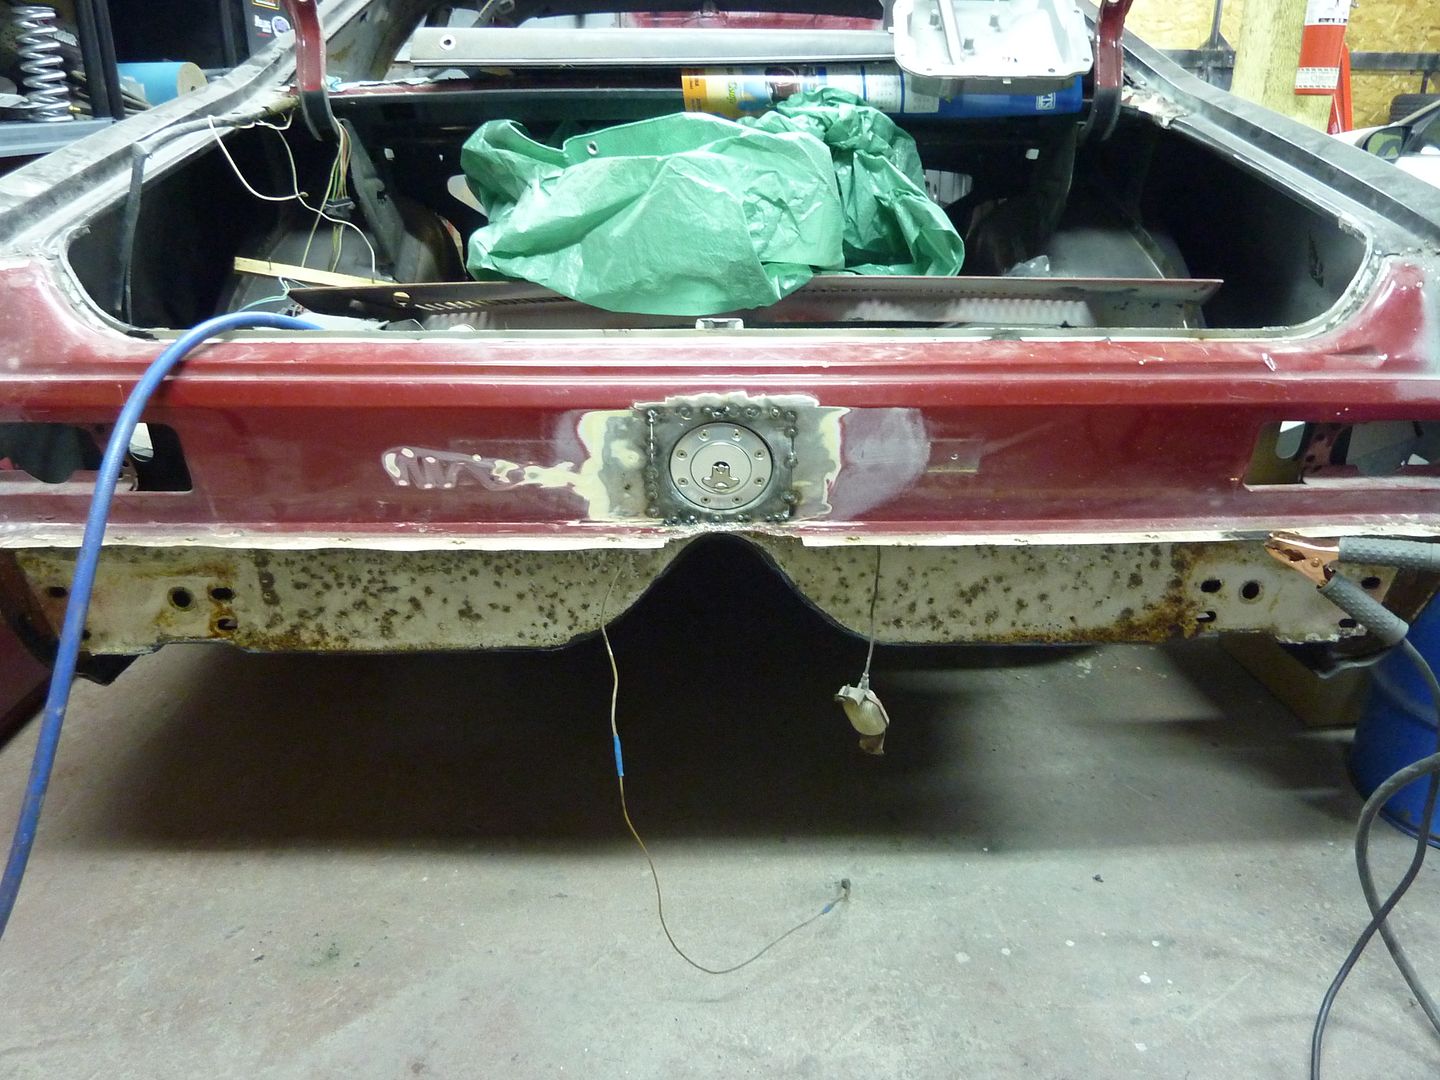
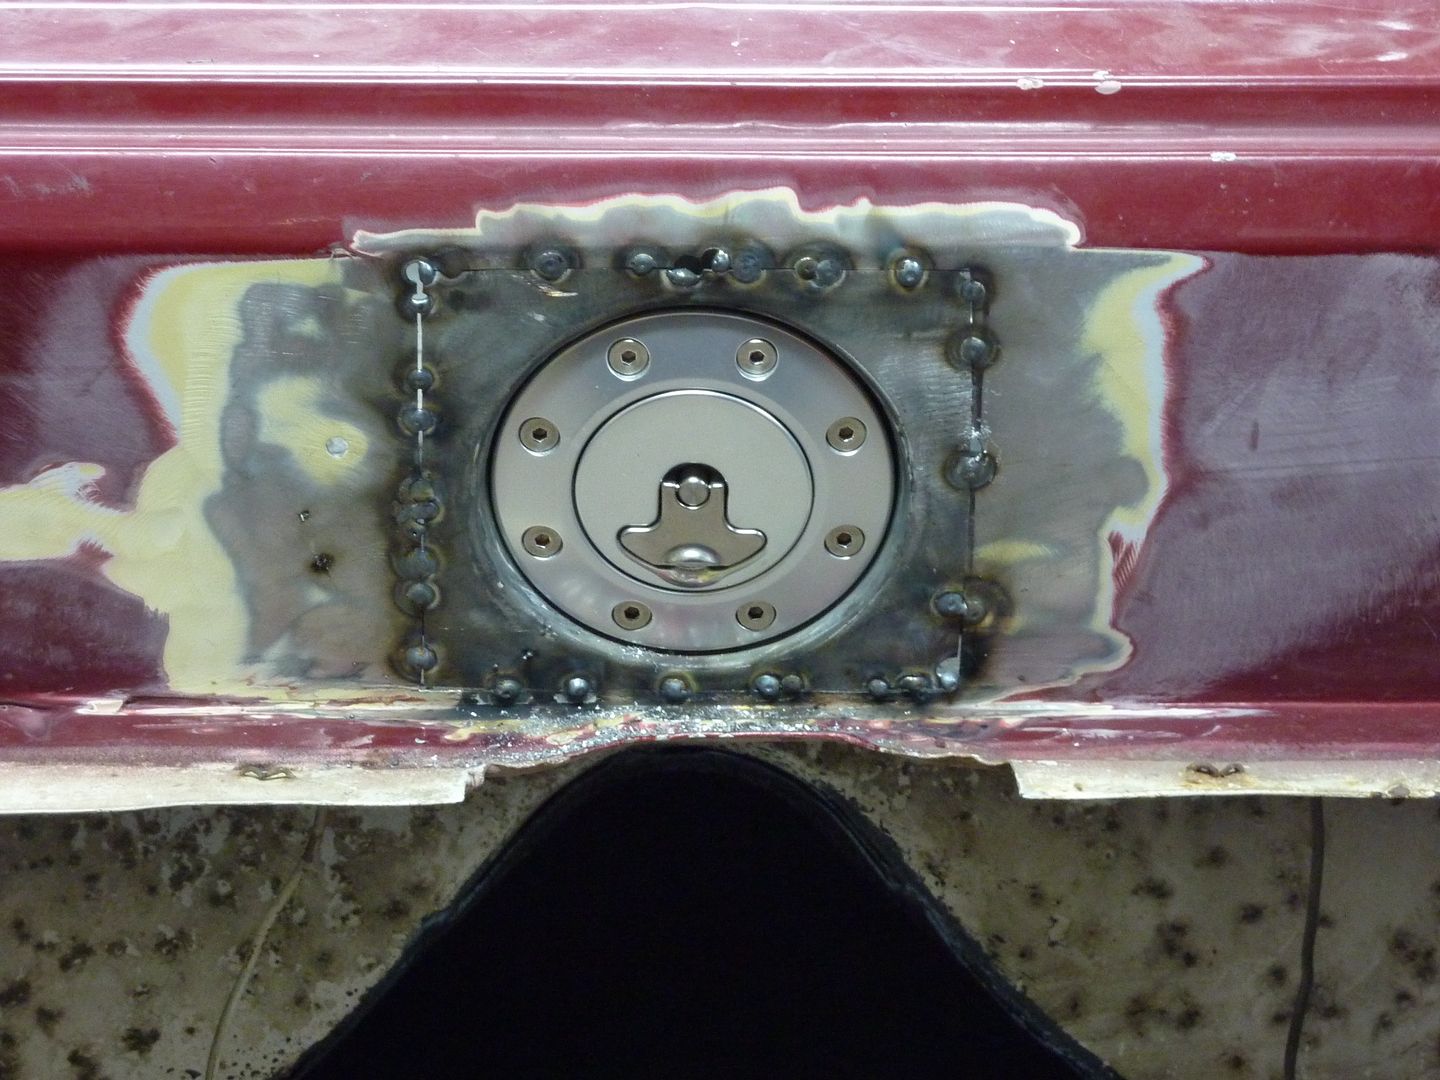
Now I have to modify the trunk to fit the filler neck.
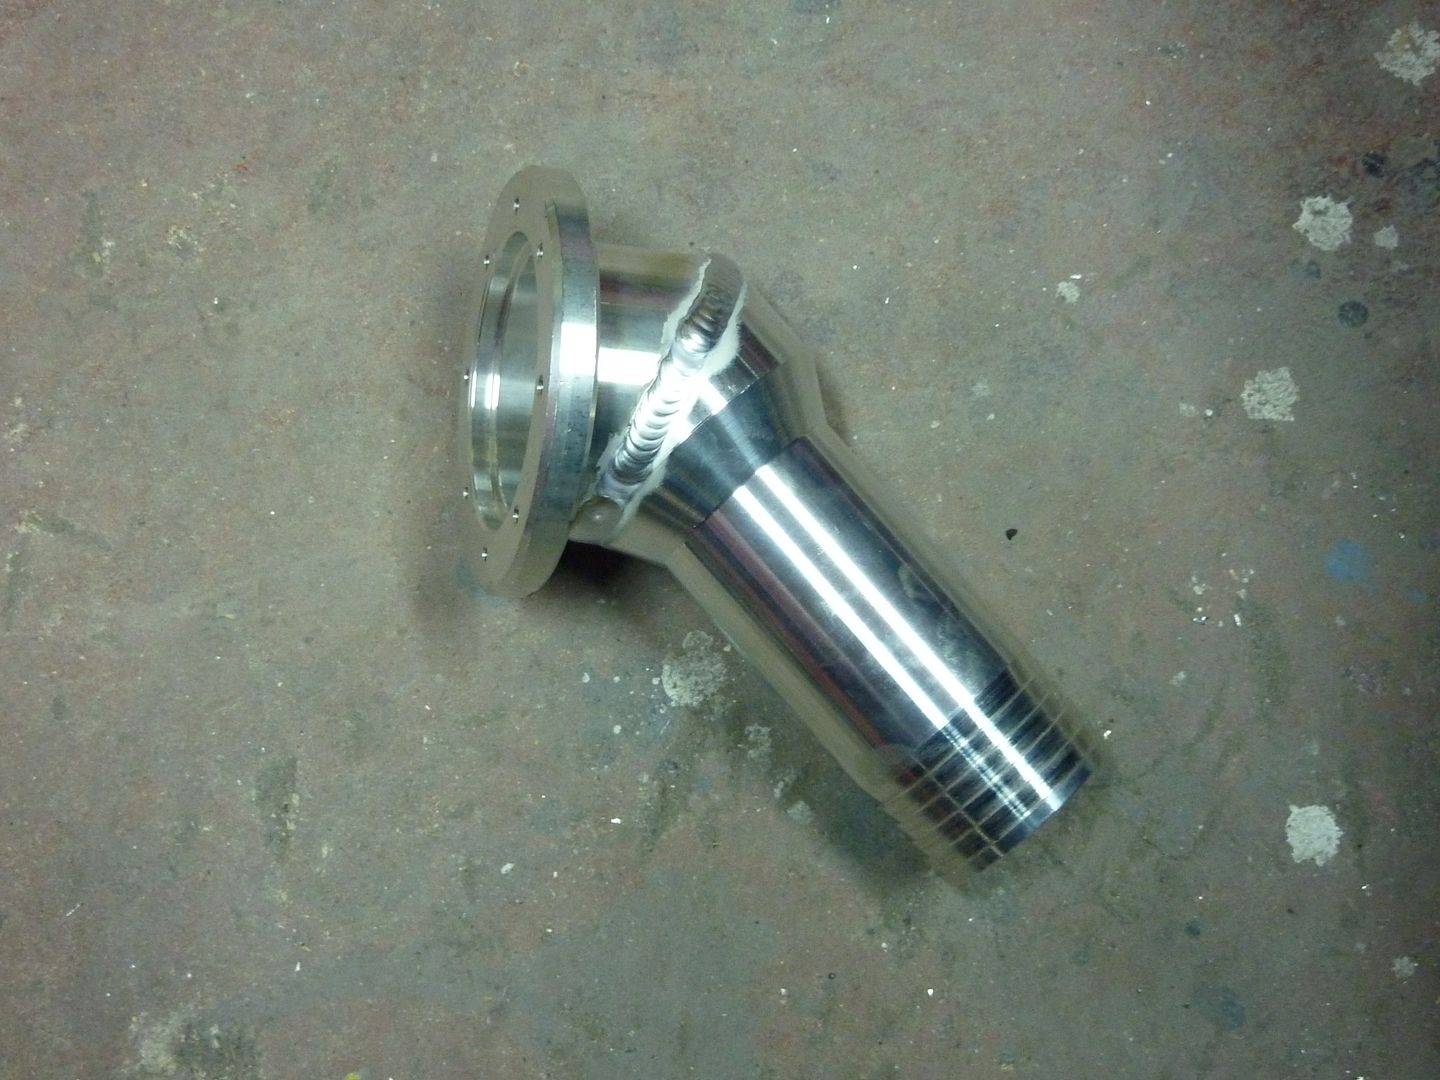
Hopefully I'll get out to the shop again in the morning and finish up the welding and start fitting the filler neck. What do you guys think??
I borrowed this idea from Billy's (72novadriver) car.
I love the way it look so thought I would do the same thing to mine. Billy made his insert, but I cheated. I found someone who was willing to cut out the filler cap portion of a tail panel from a 67 Camaro.Bought a filler cap from Chassis Works. Beautiful piece. Not cheap though. I know there are cheaper ones out there, but I decided to go with this one.
Panel from the Camaro
Cut it down to a better size
There's a bit of a contour to these, so I had to finesse it a bit
Had to clean up the area where I was going to weld it into place
I had to find centre and start cutting
Temporarily in place
Welded into place and the filler cap is in place for a test fit. It's missing the gasket in behind so will stick out a little farther. I might make a thicker gasket so it is a little more flush with the tail panel.
Now I have to modify the trunk to fit the filler neck.
Hopefully I'll get out to the shop again in the morning and finish up the welding and start fitting the filler neck. What do you guys think??