

Pro-Touring 68 Acadian (Nova) with L92
 09-26-2010 | 01:02 AM
#61

Thread Starter
On The Tree
iTrader: (4)
Joined: Mar 2009
Posts: 132
Likes: 0
From: British Columbia, Canada
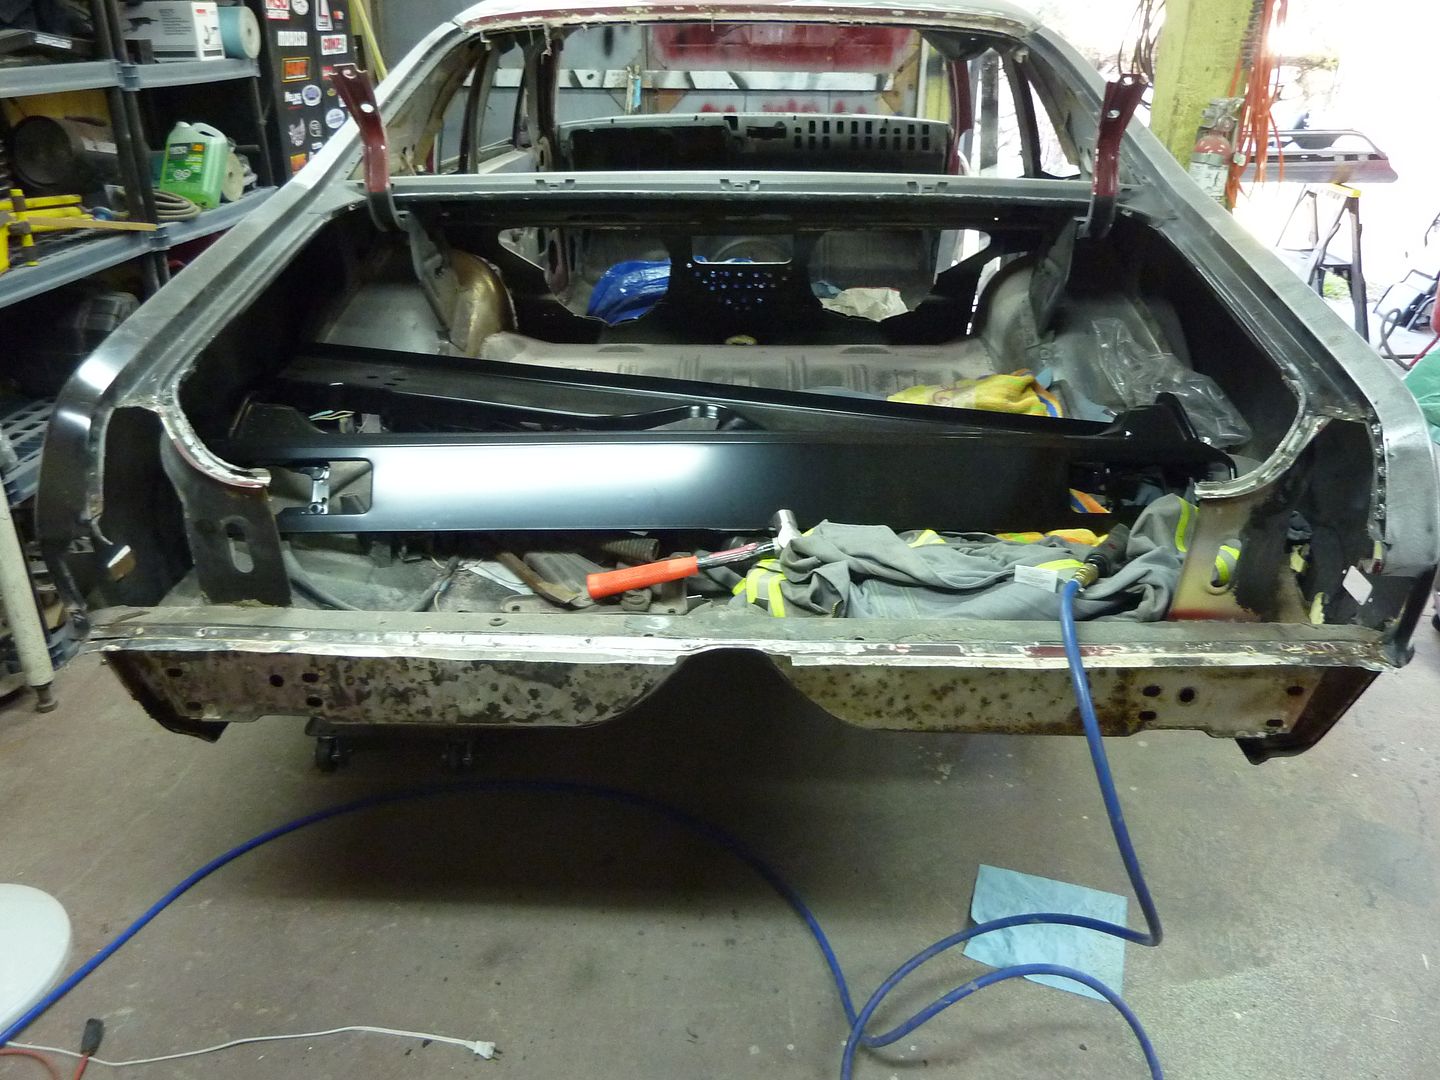
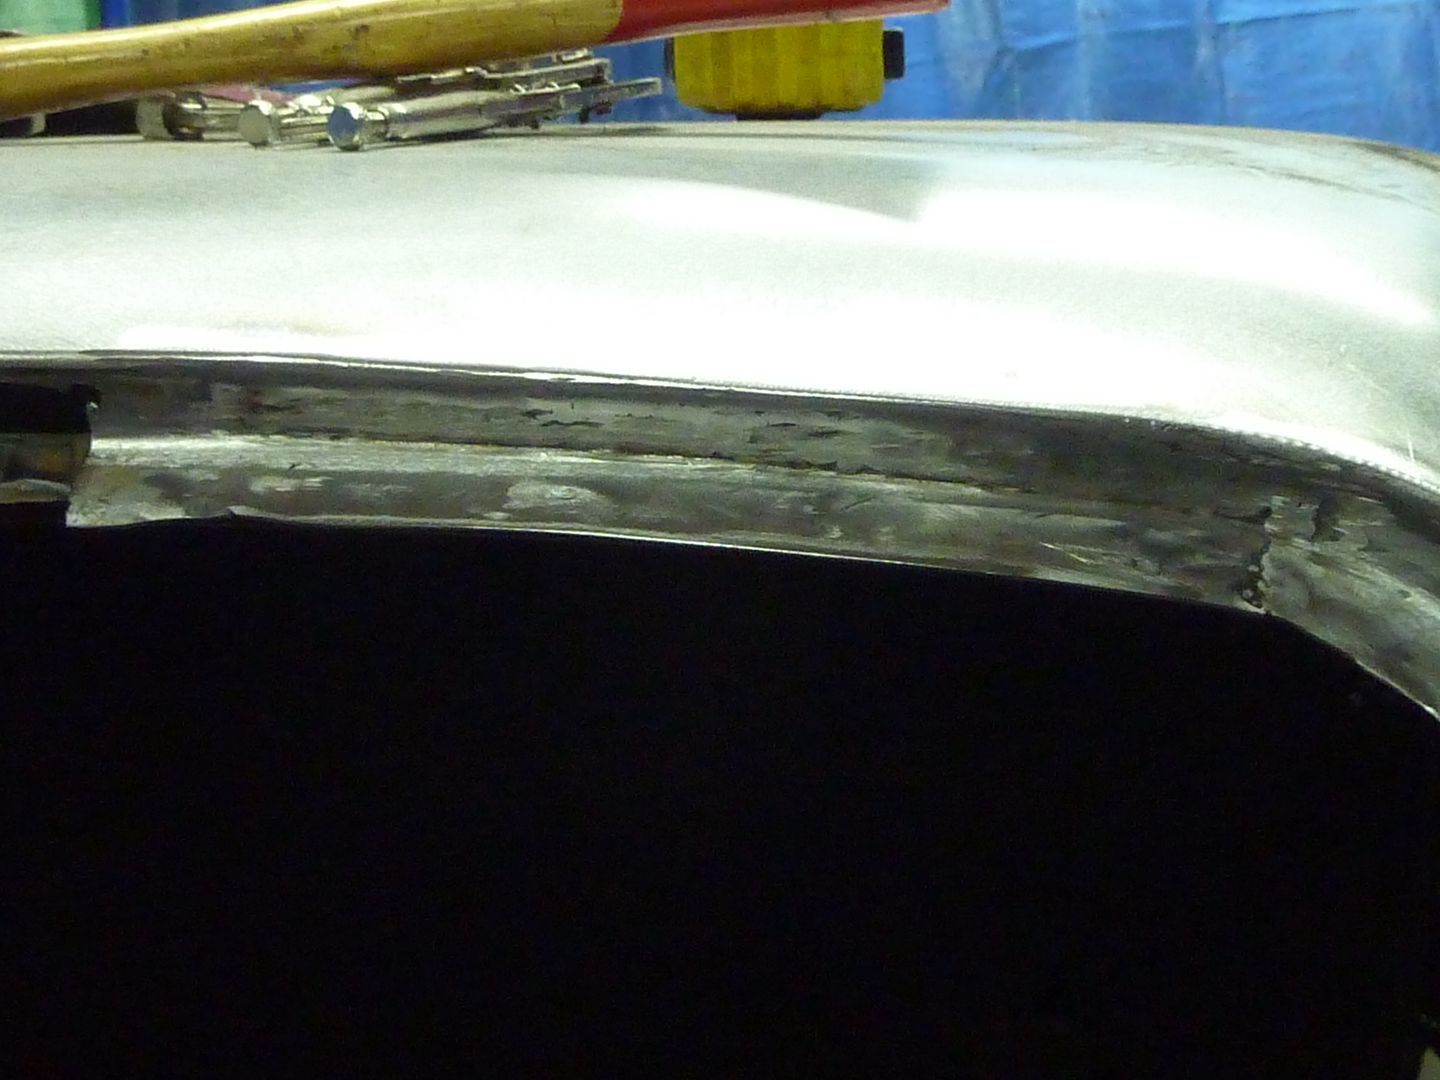
I made it out the shop and got some work done. I started cutting out the old tail panel and cross rail:
I will put some POR15 inside as well to stop the rust

If you're wondering how I went about removing the panels, here's how I cut out the tail panel. Need to cut out the fuel cap part and redo it in the new tail panel
As for the rear cross rail, you need to get rid of all the spot welds, which are quite big in size. I started to use my spot weld cutter, but broke it so need to get a new one. I ended up using my air cut off tool as a grinder and just ground down the area around the welds. Worked great. I then cut the panel into two parts to take off. Once I get another spot weld cutter, I will tackle the rest.
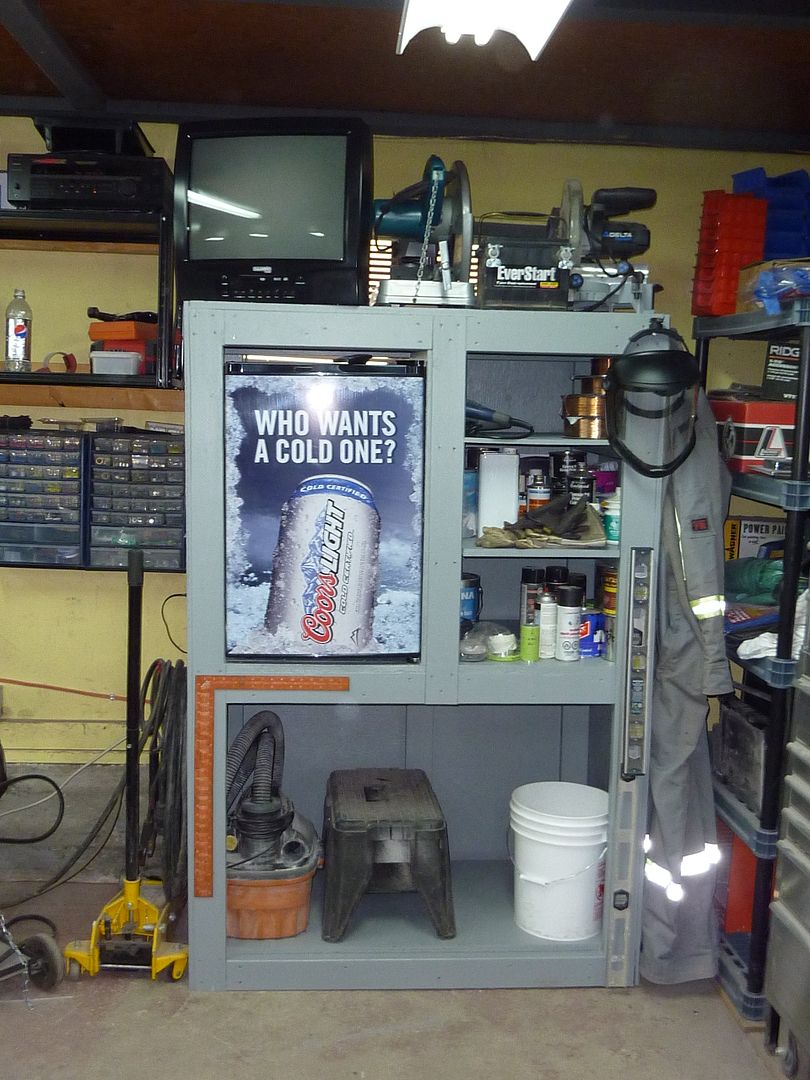
I also started to fill up the new storage compartment. Got the TV hooked up too.
I will put some POR15 inside as well to stop the rust
If you're wondering how I went about removing the panels, here's how I cut out the tail panel. Need to cut out the fuel cap part and redo it in the new tail panel
As for the rear cross rail, you need to get rid of all the spot welds, which are quite big in size. I started to use my spot weld cutter, but broke it so need to get a new one. I ended up using my air cut off tool as a grinder and just ground down the area around the welds. Worked great. I then cut the panel into two parts to take off. Once I get another spot weld cutter, I will tackle the rest.
I also started to fill up the new storage compartment. Got the TV hooked up too.
09-26-2010 | 01:03 AM
#62
Thread Starter
On The Tree
iTrader: (4)
Joined: Mar 2009
Posts: 132
Likes: 0
From: British Columbia, Canada
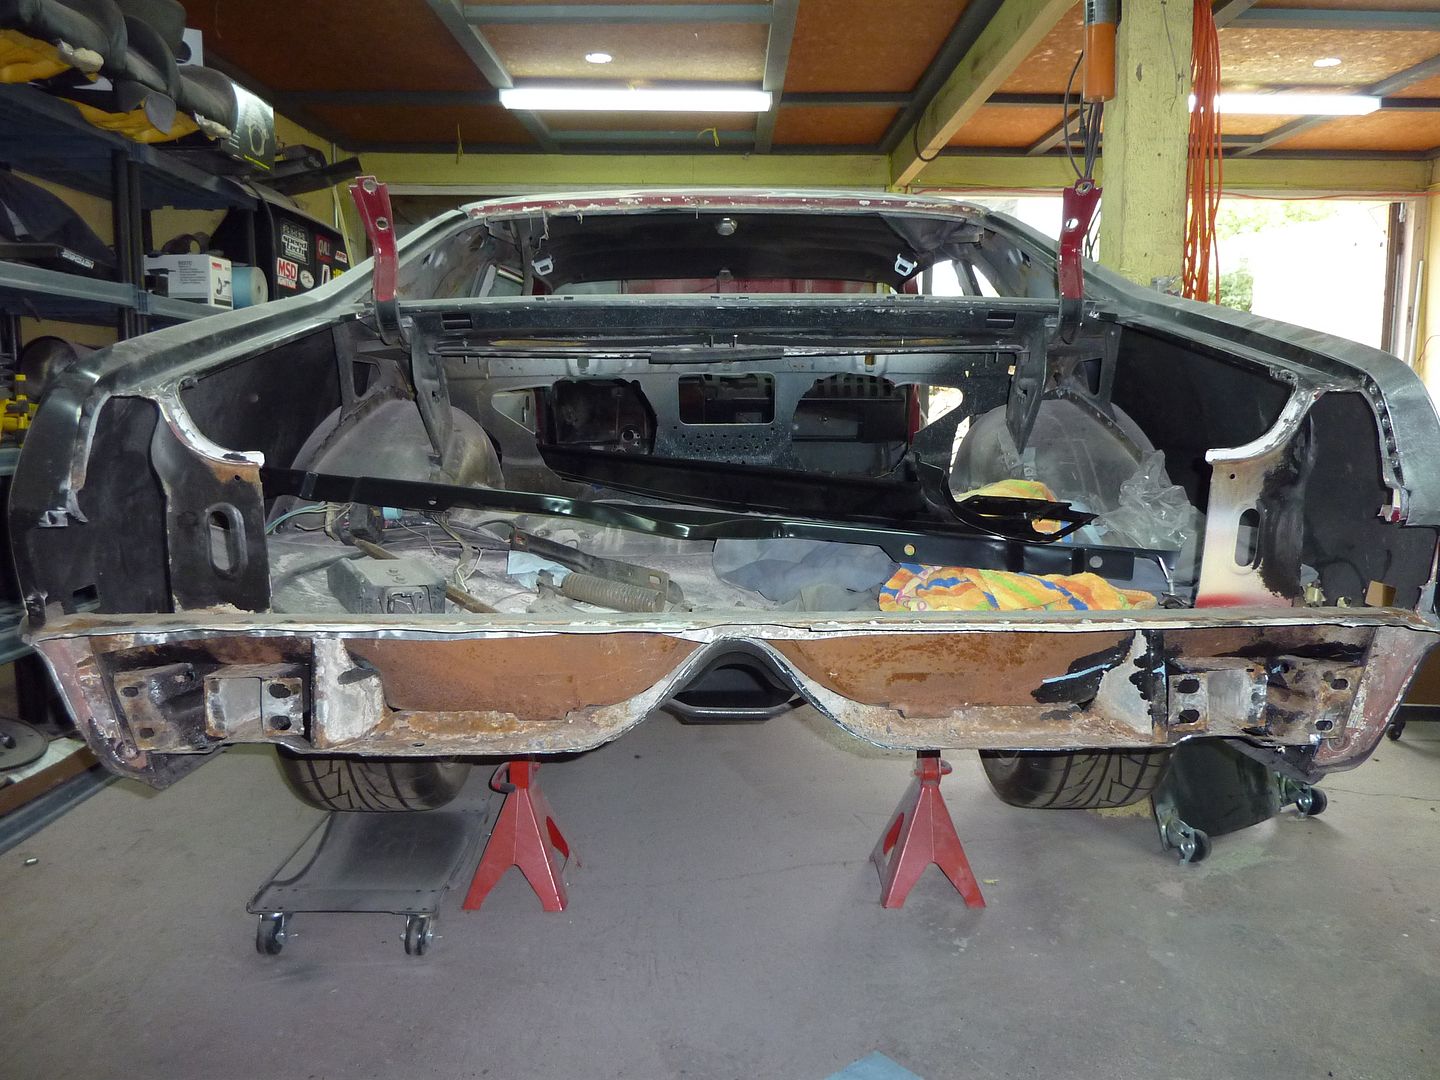
And finally....the most recent update. I also updated the plans for the build on page 1.
I spent every day this week in the shop and I still didn't get as much done as I wanted to. It's amazing how that always happens.
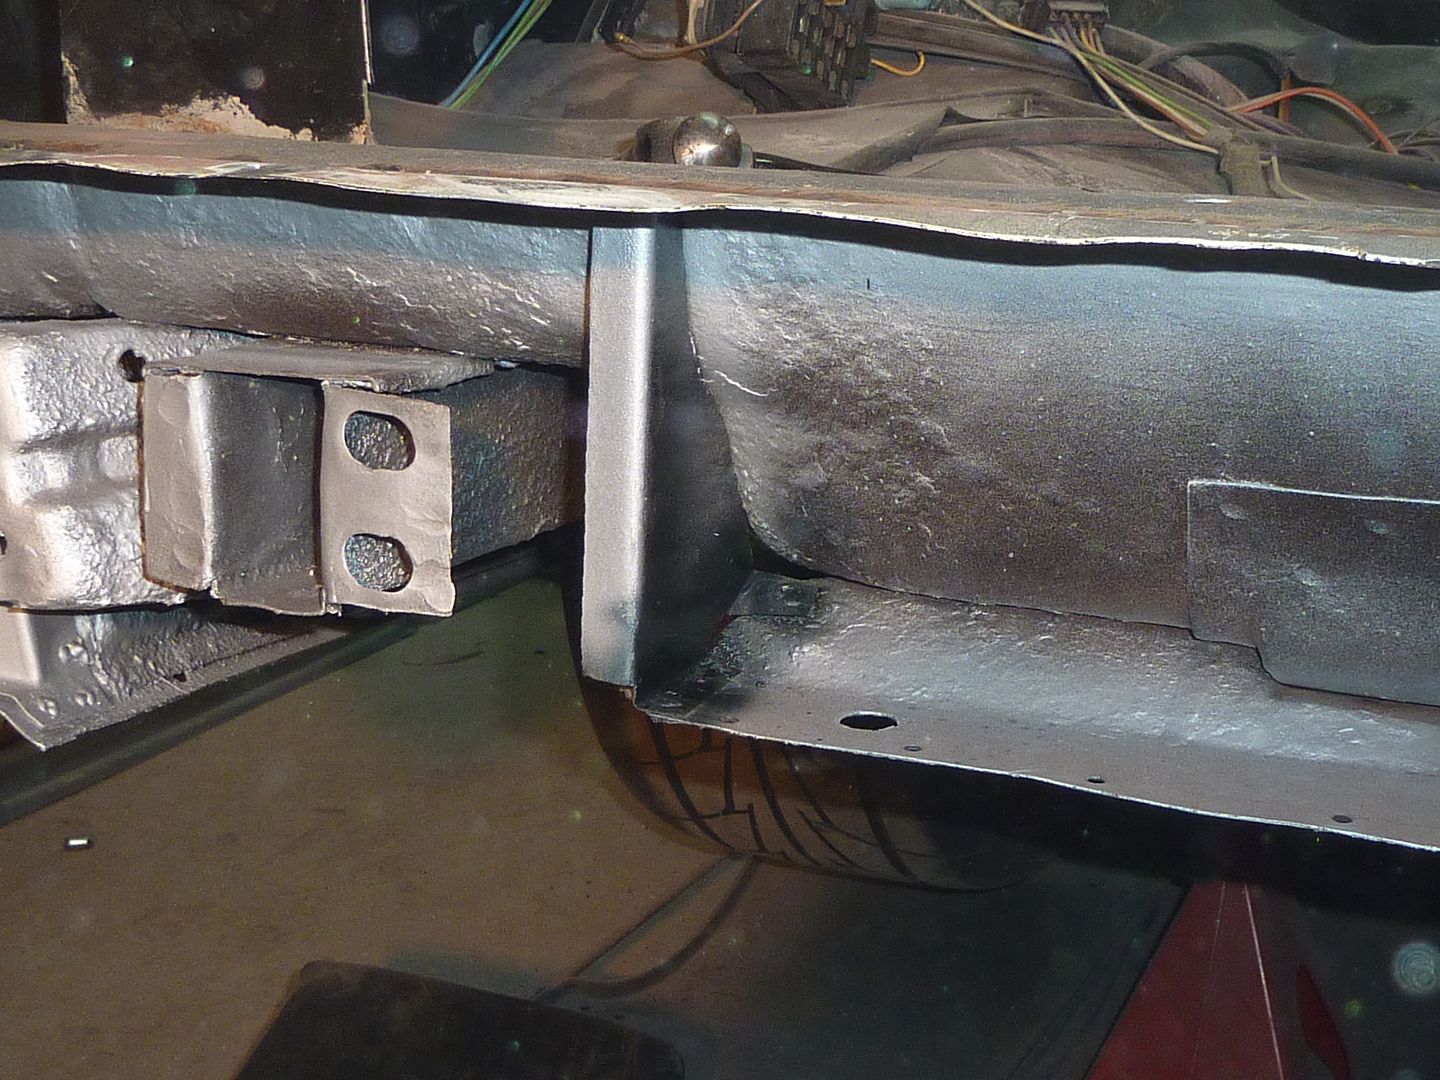
Got back to work on the rear cross rail. That alone took me a couple days by the time I patched some metal, cleaned things up, etc. One suggestion for anyone planning on doing this.....make sure to get a new rear cross brace: http://autometaldirect.com/ListItems...ossmember.aspx and cross rail extensions: http://autometaldirect.com/ListItems...Extension.aspx They will make the job so much easier. That's why it took me so long to do mine.
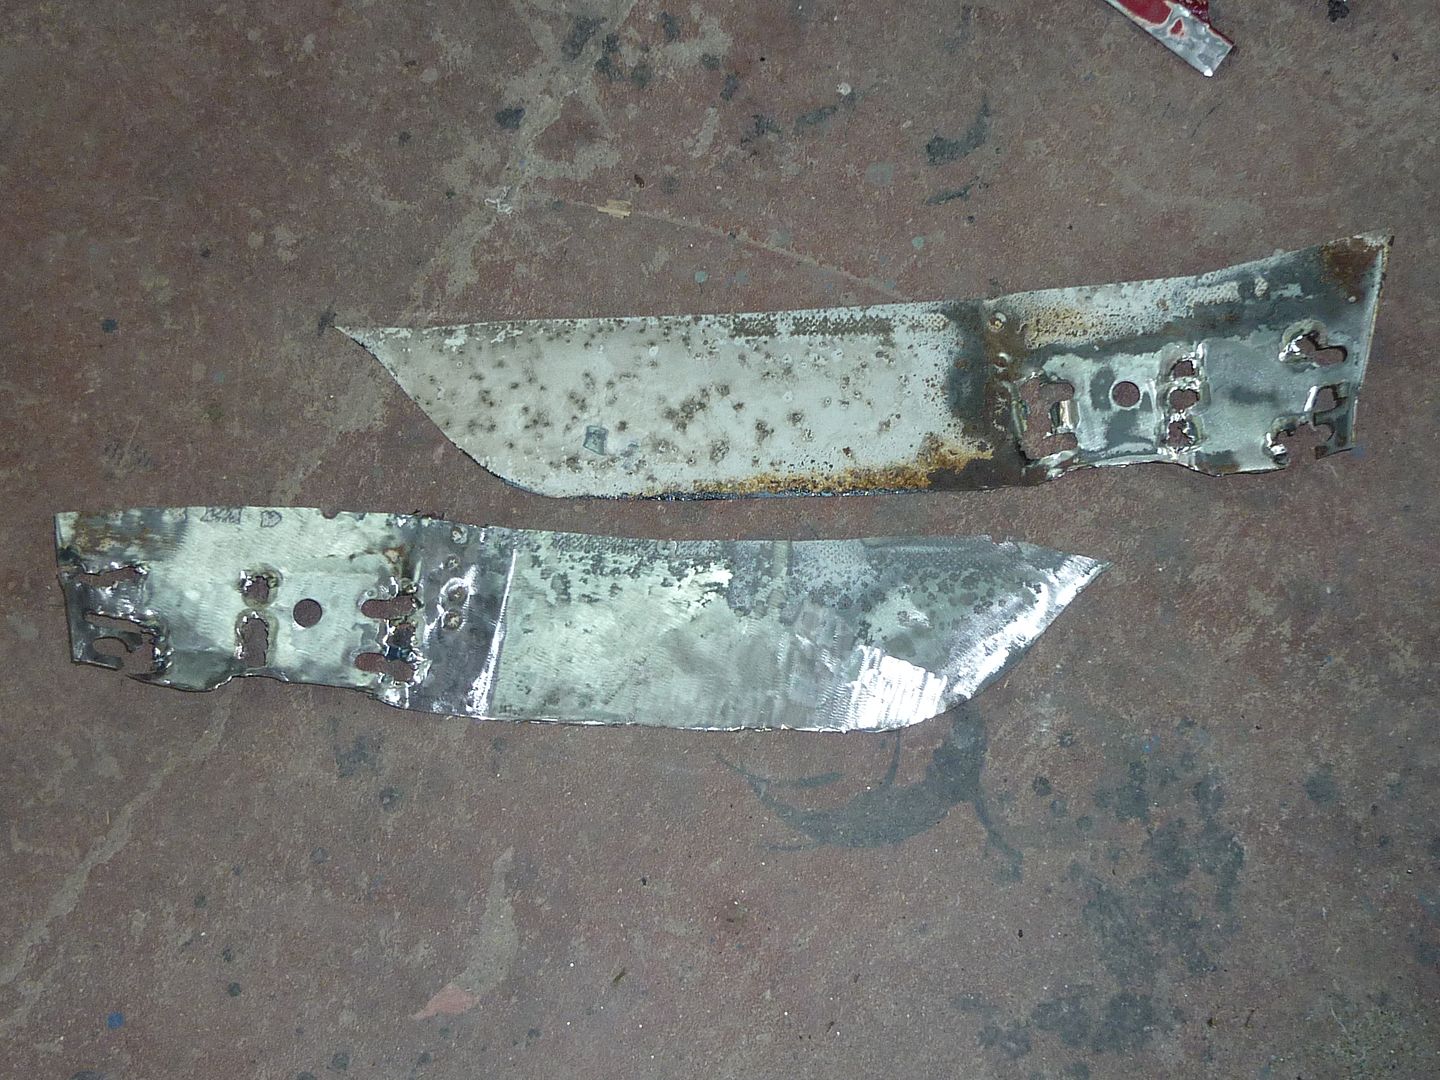
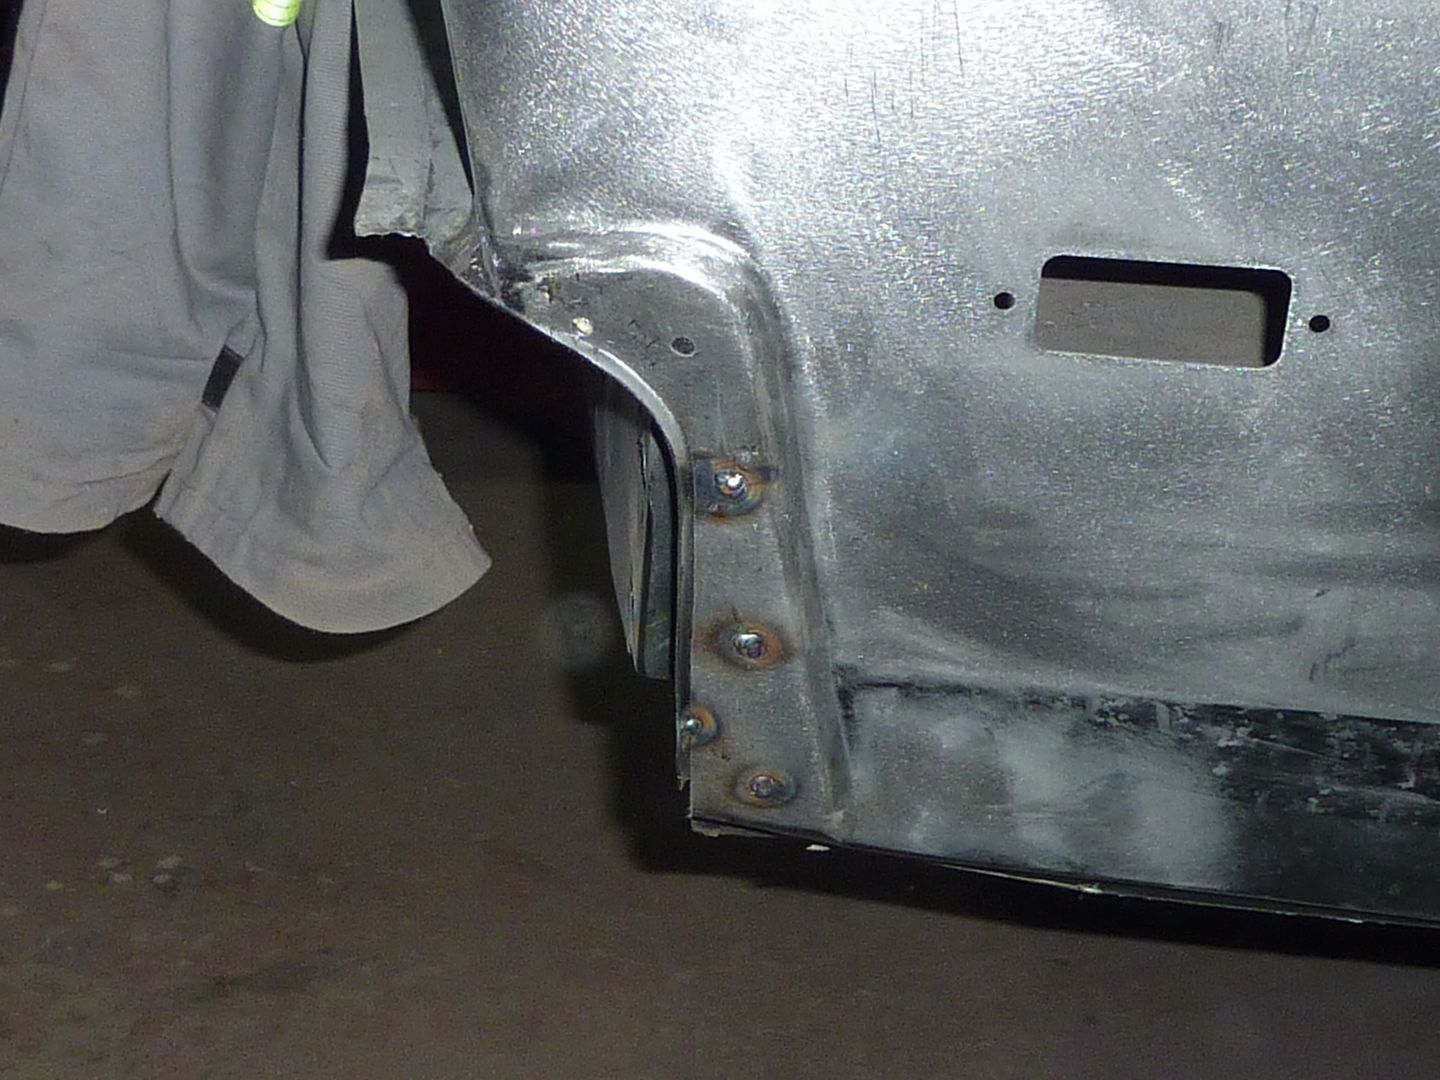
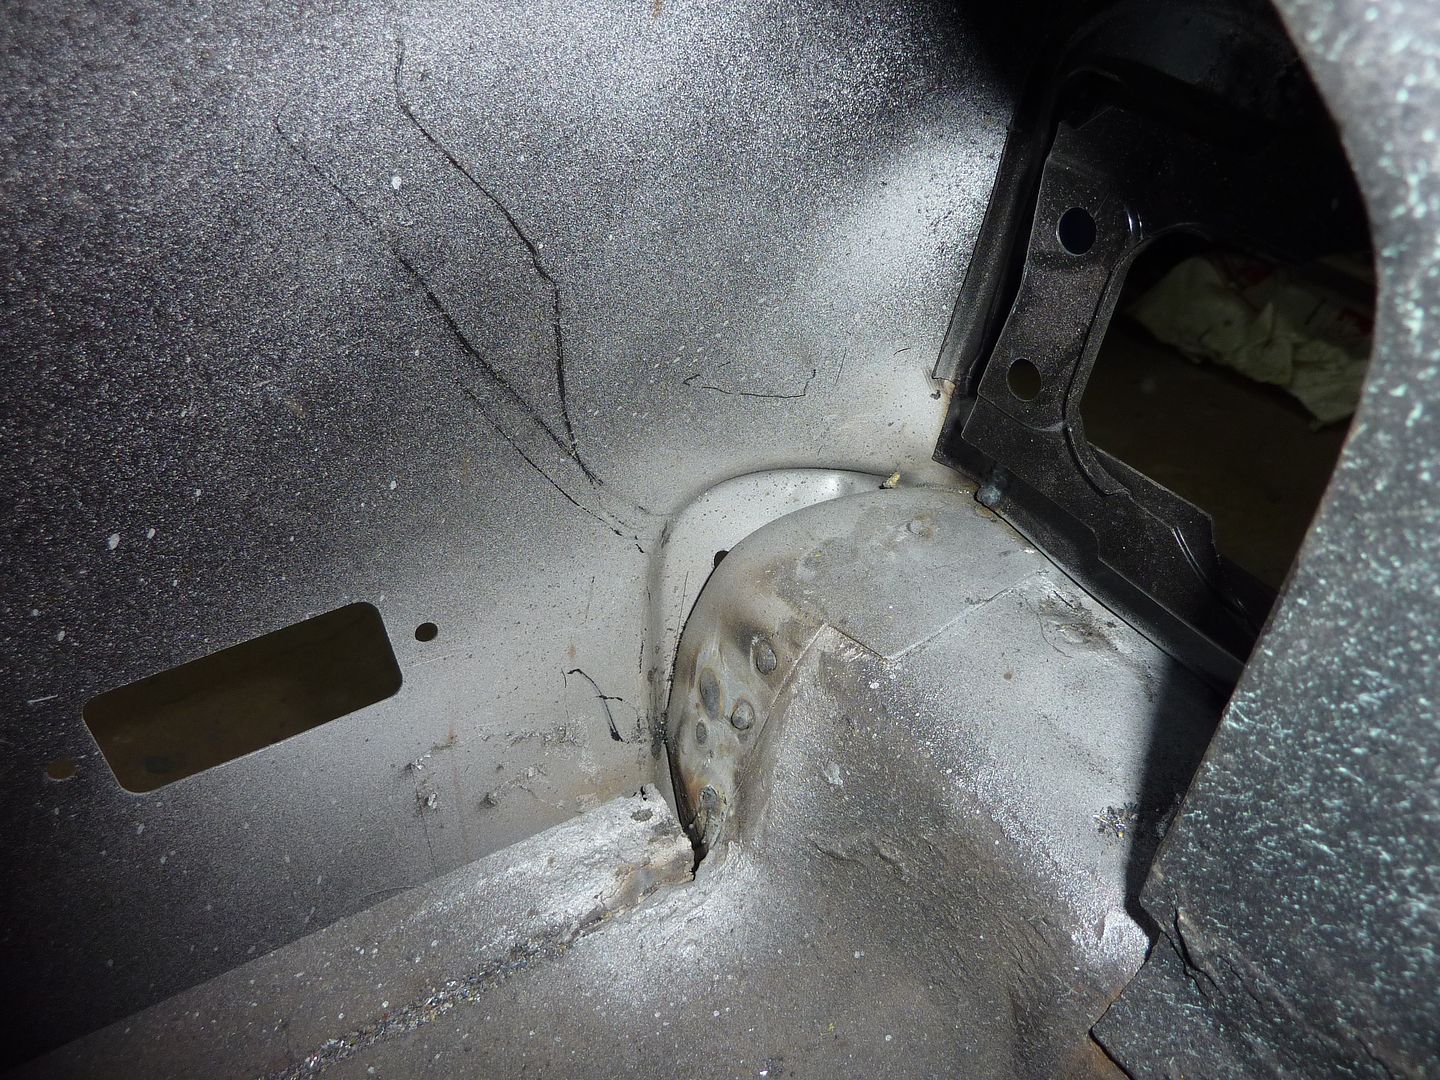
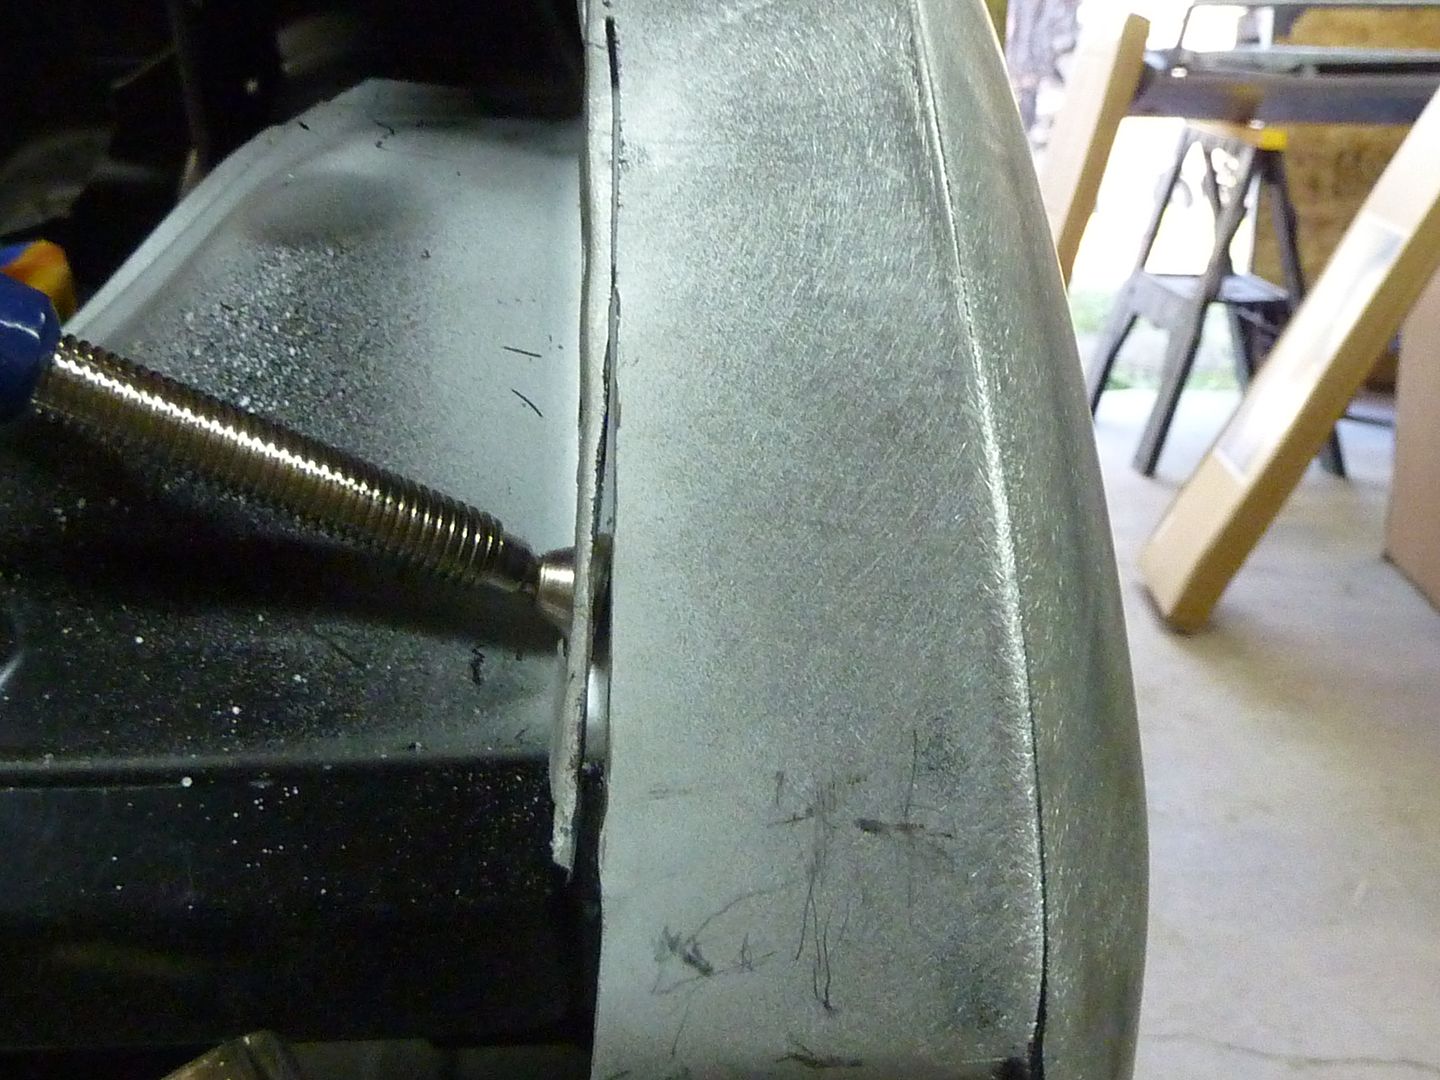
First thing I tackled were getting rid of the old trunk extension end caps. There were a pain, but can be done with the quarters on. I didn't have the quarters welded were they connect to the end caps so it made it way easier. Here's where the end caps connect to on the quarter panel
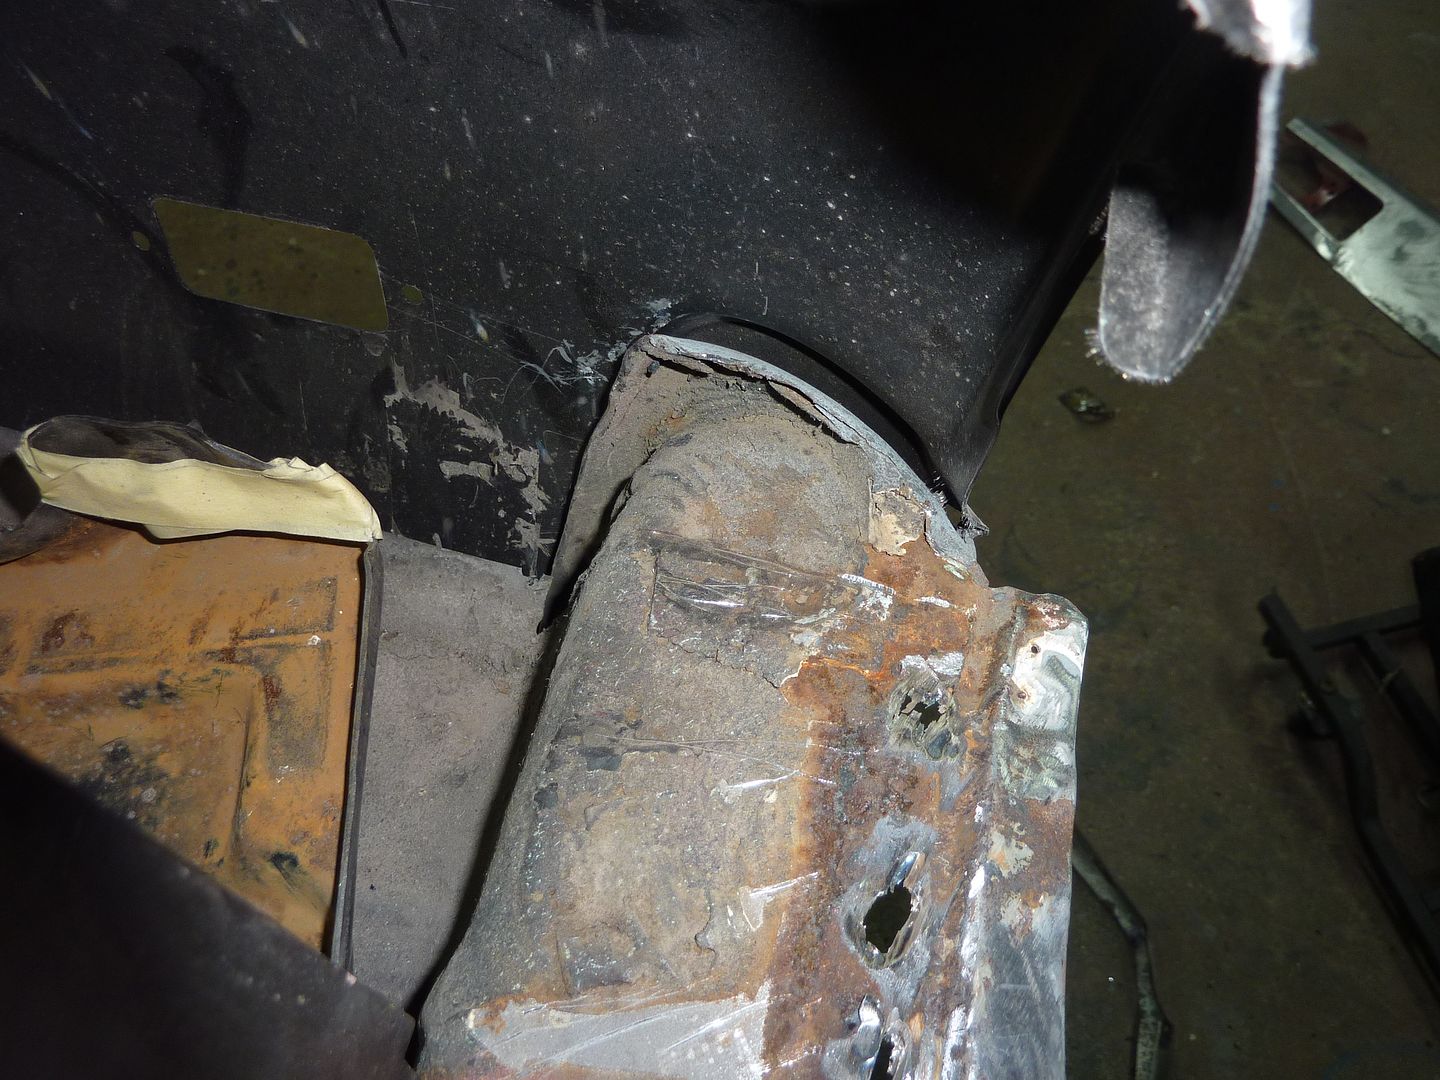
Looked like crap from the inside with the old ones in place
It's gone
New one in place. It's been sprayed with weld through primer that's why it's grey
Looks much better from inside too
Next was patching some of the cross brace
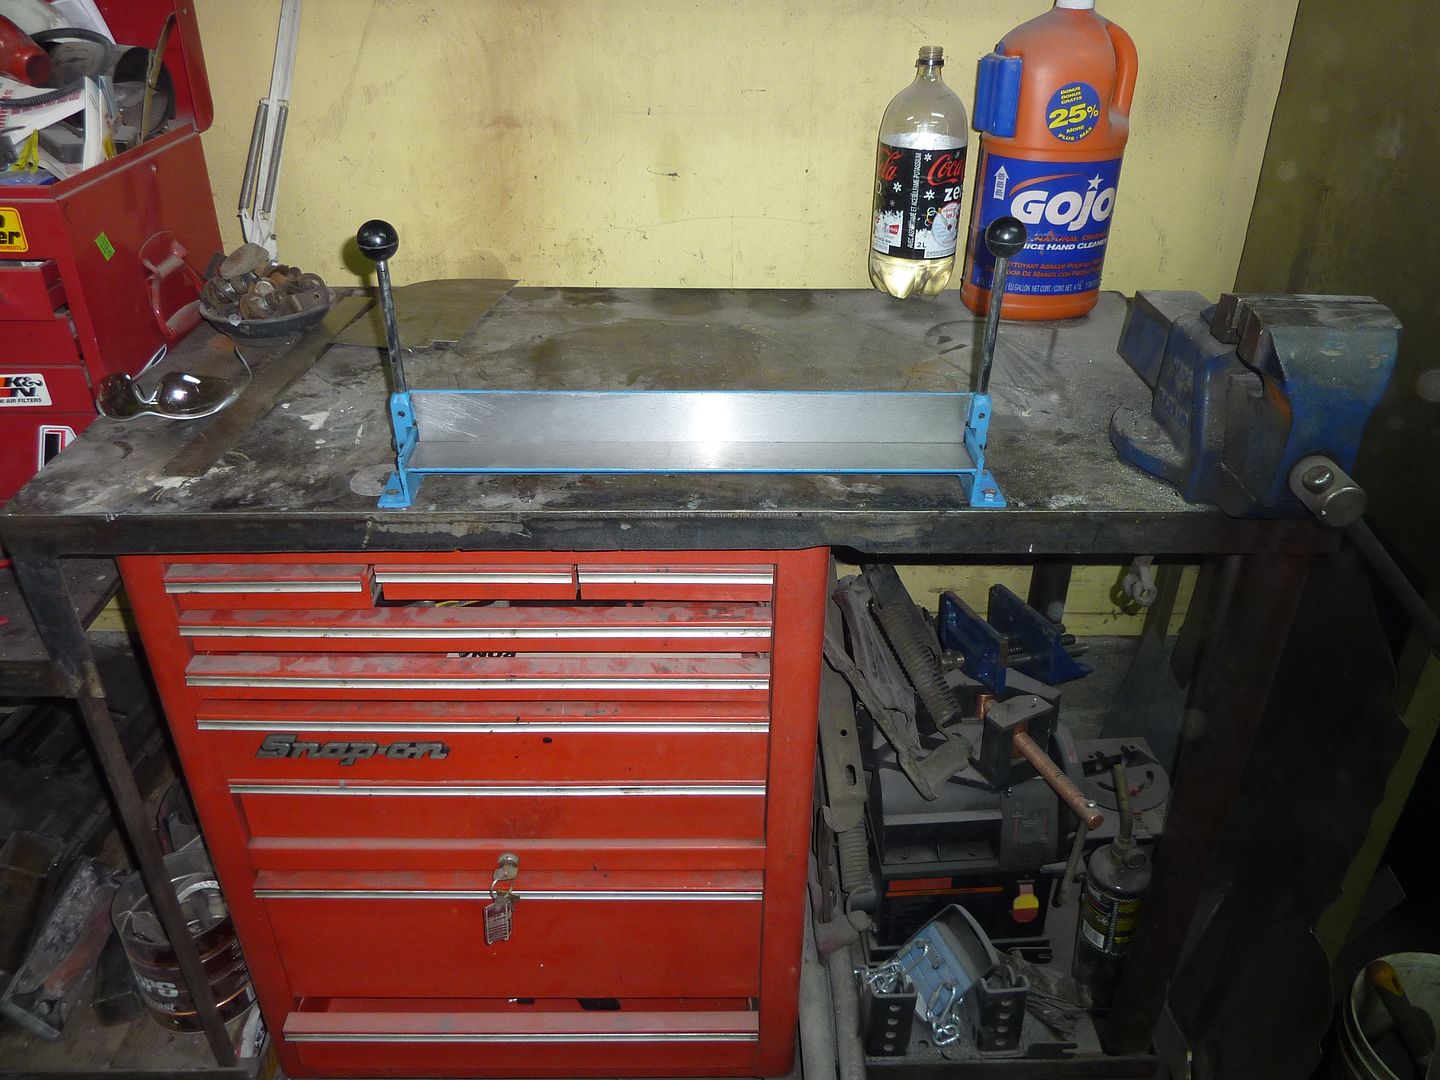
I bought myself a cheap metal brake a while back. Glad I did. Drilled some holes in my work bench and bolted it in place.
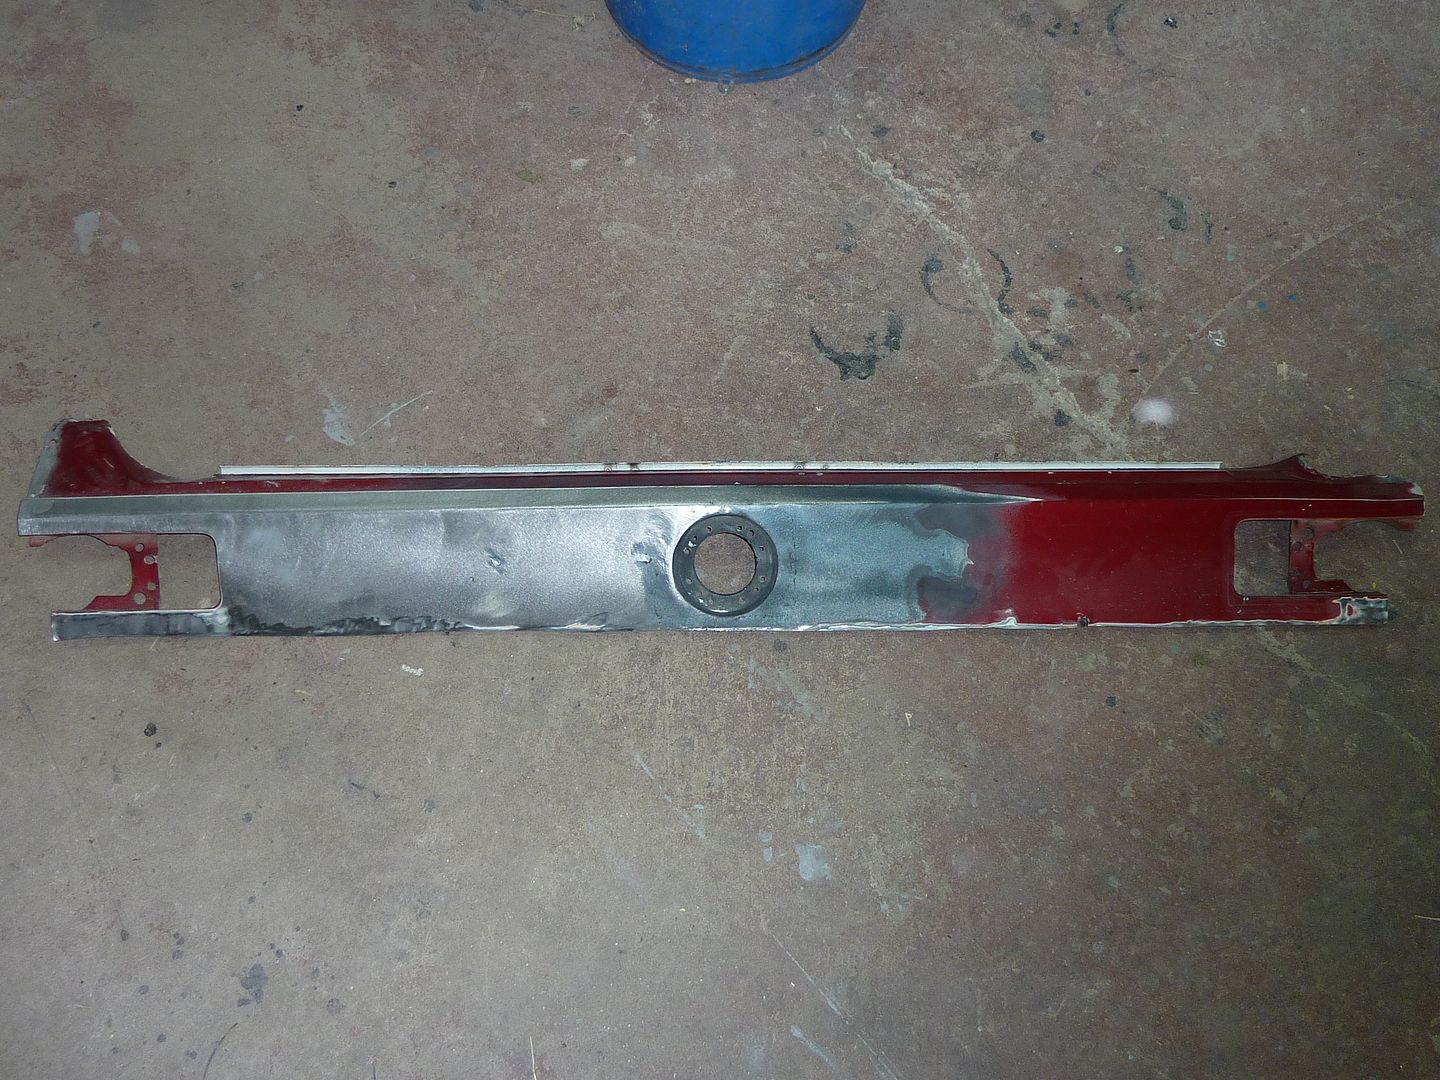
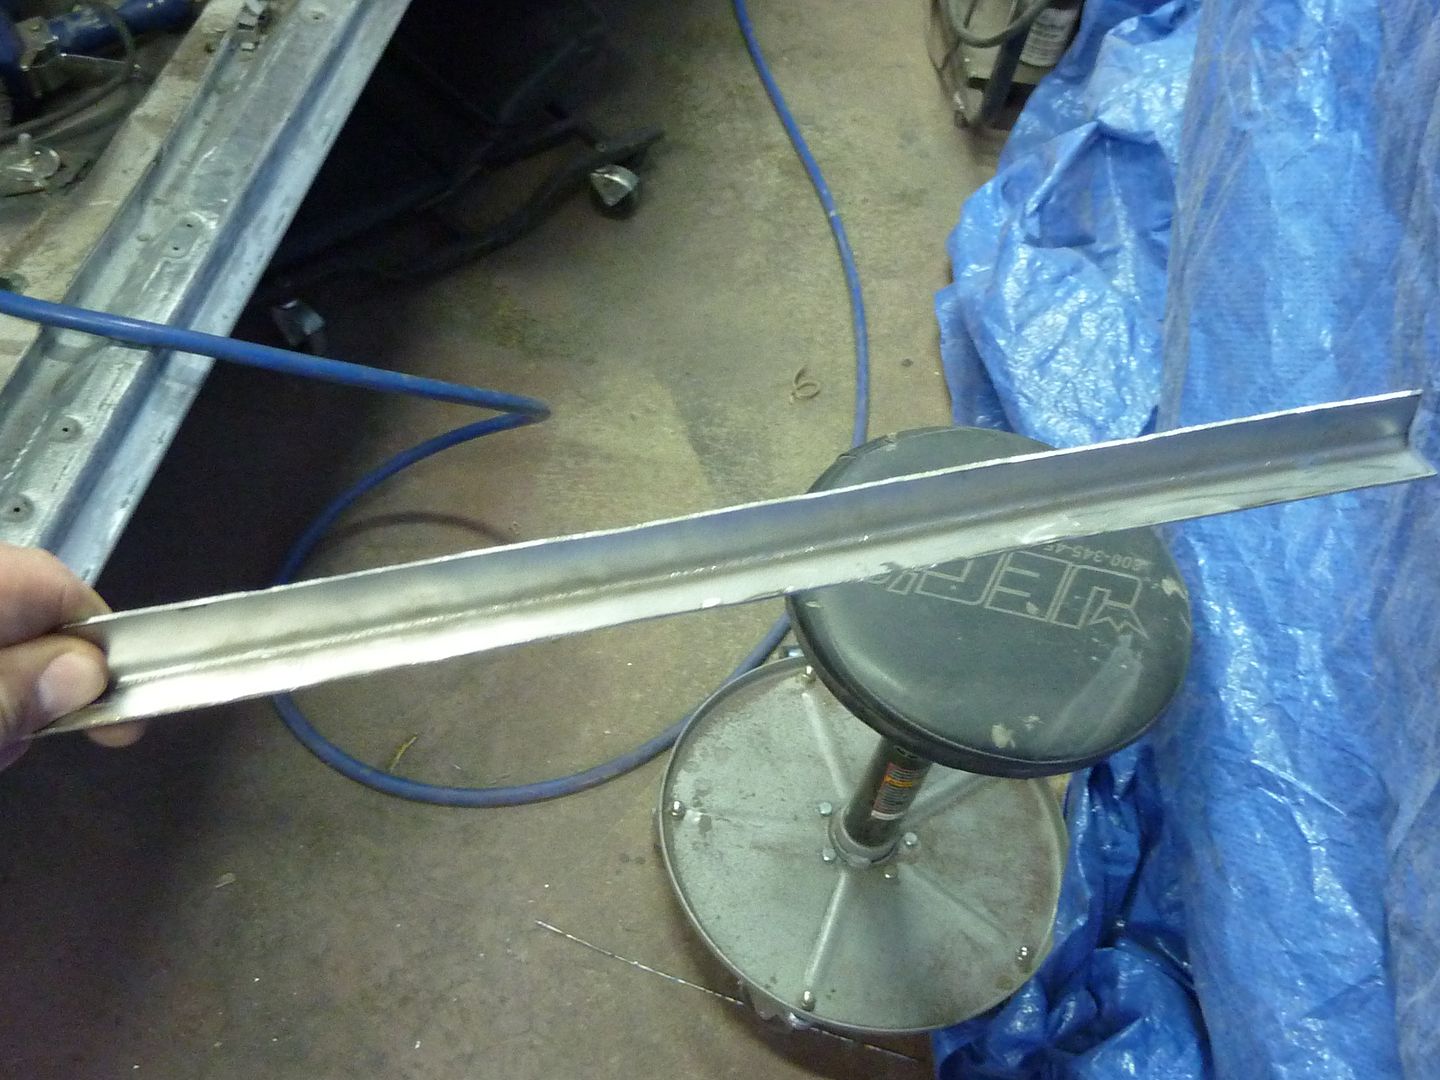
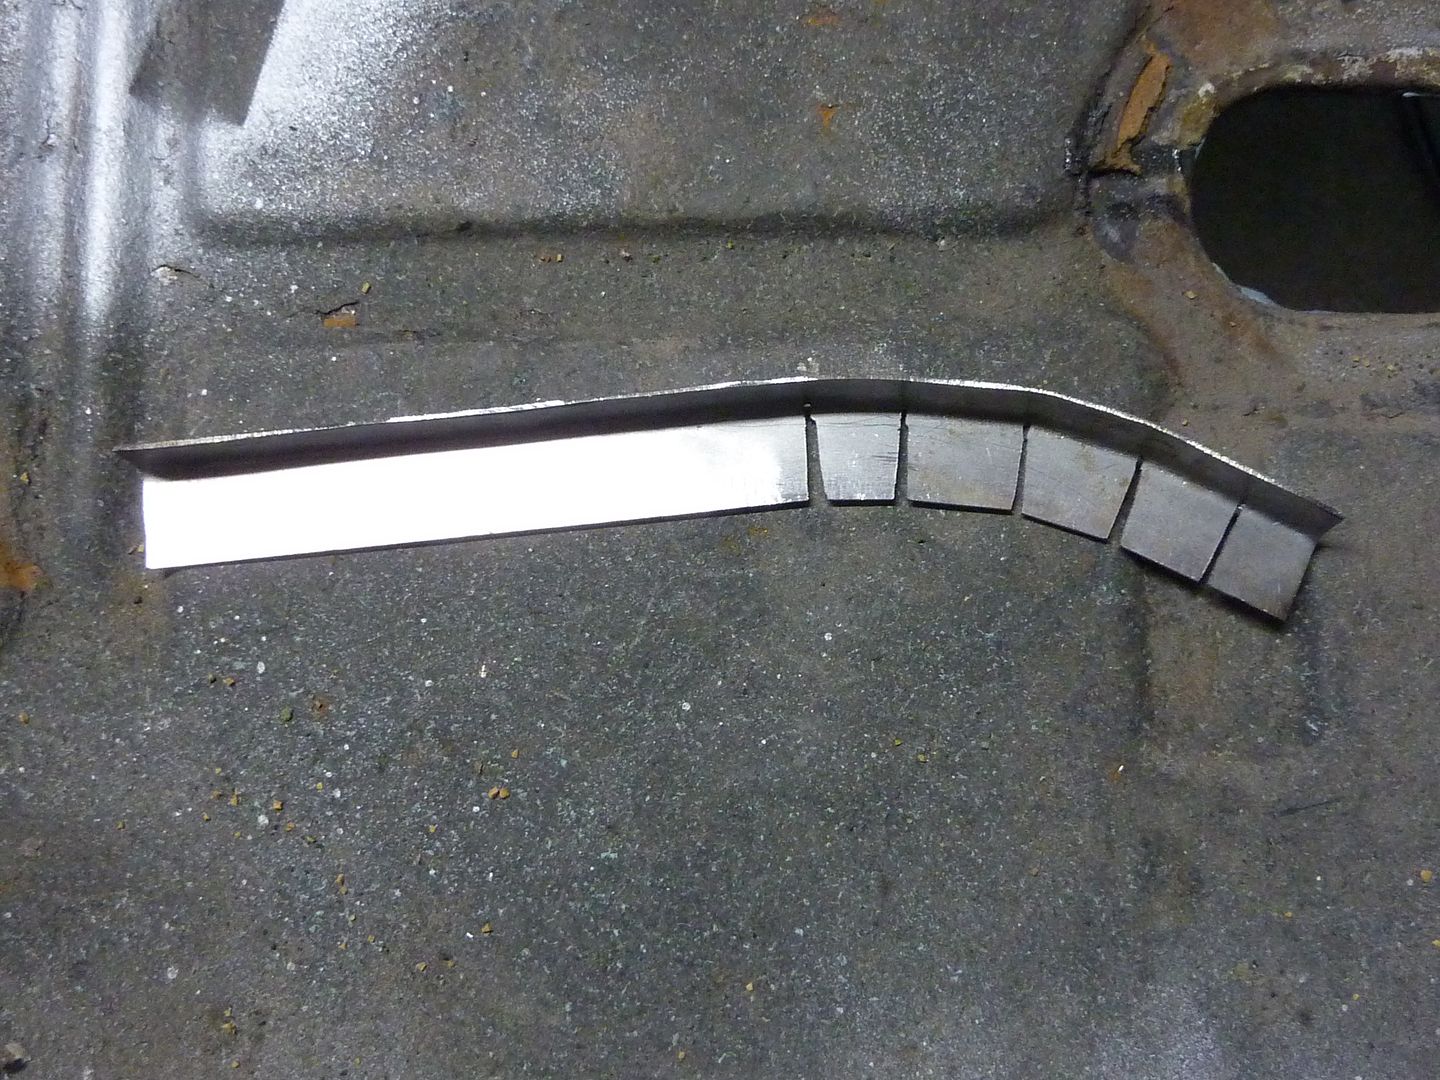
Next were the cross rail extensions. Since I didn't buy new ones, I just made some.
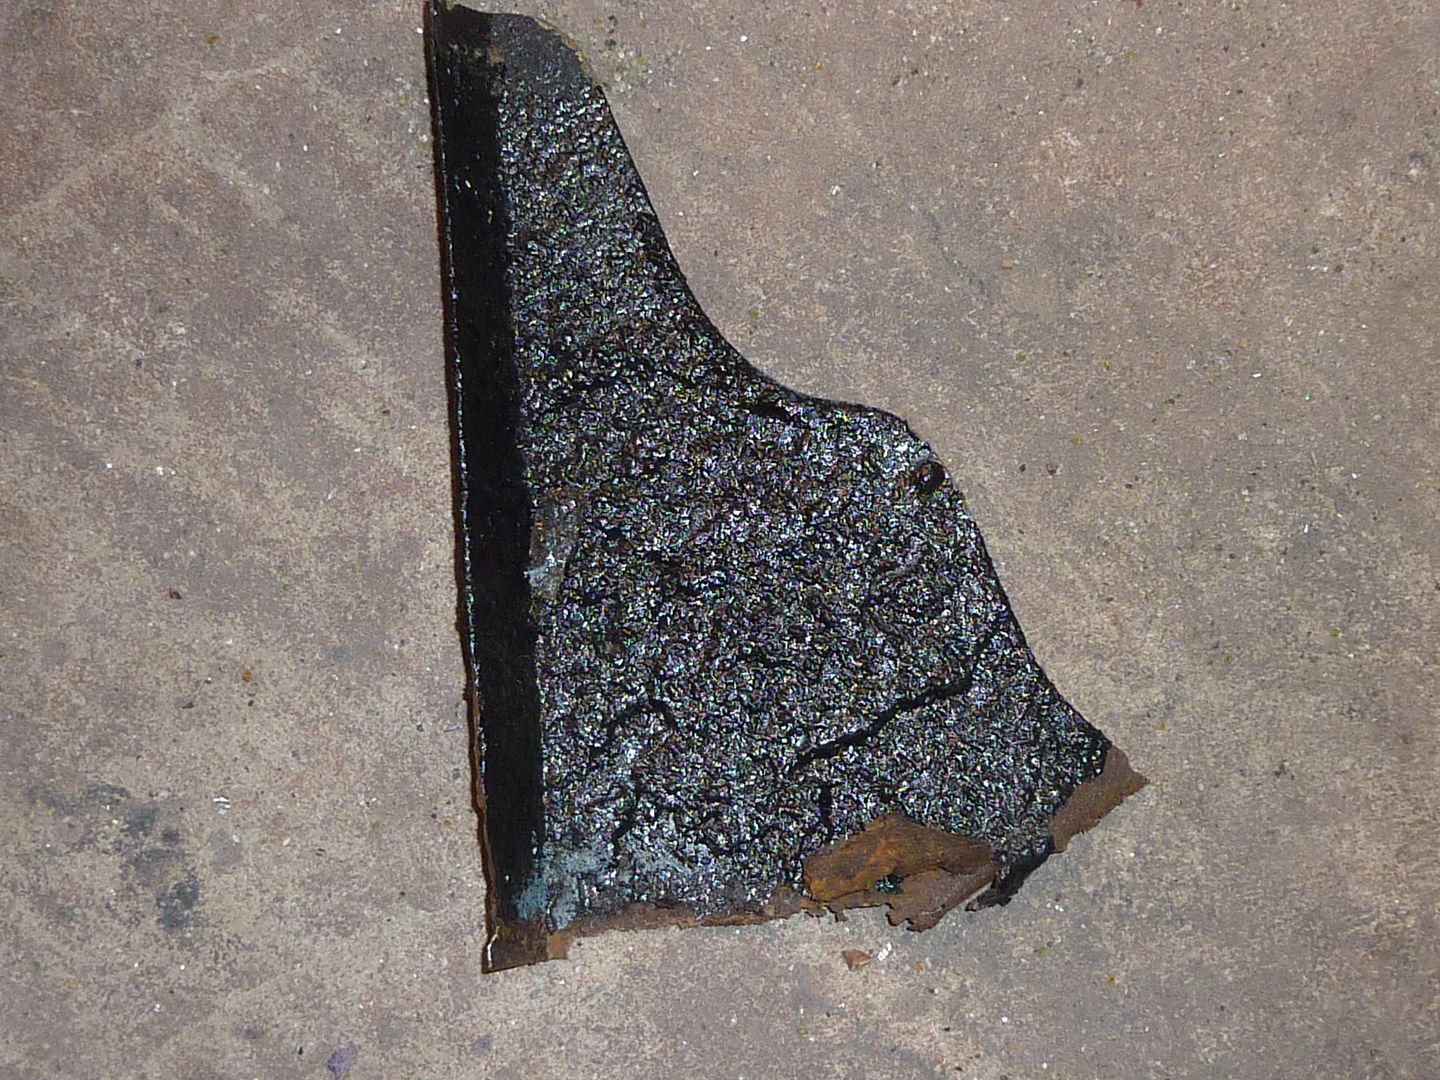
Old one
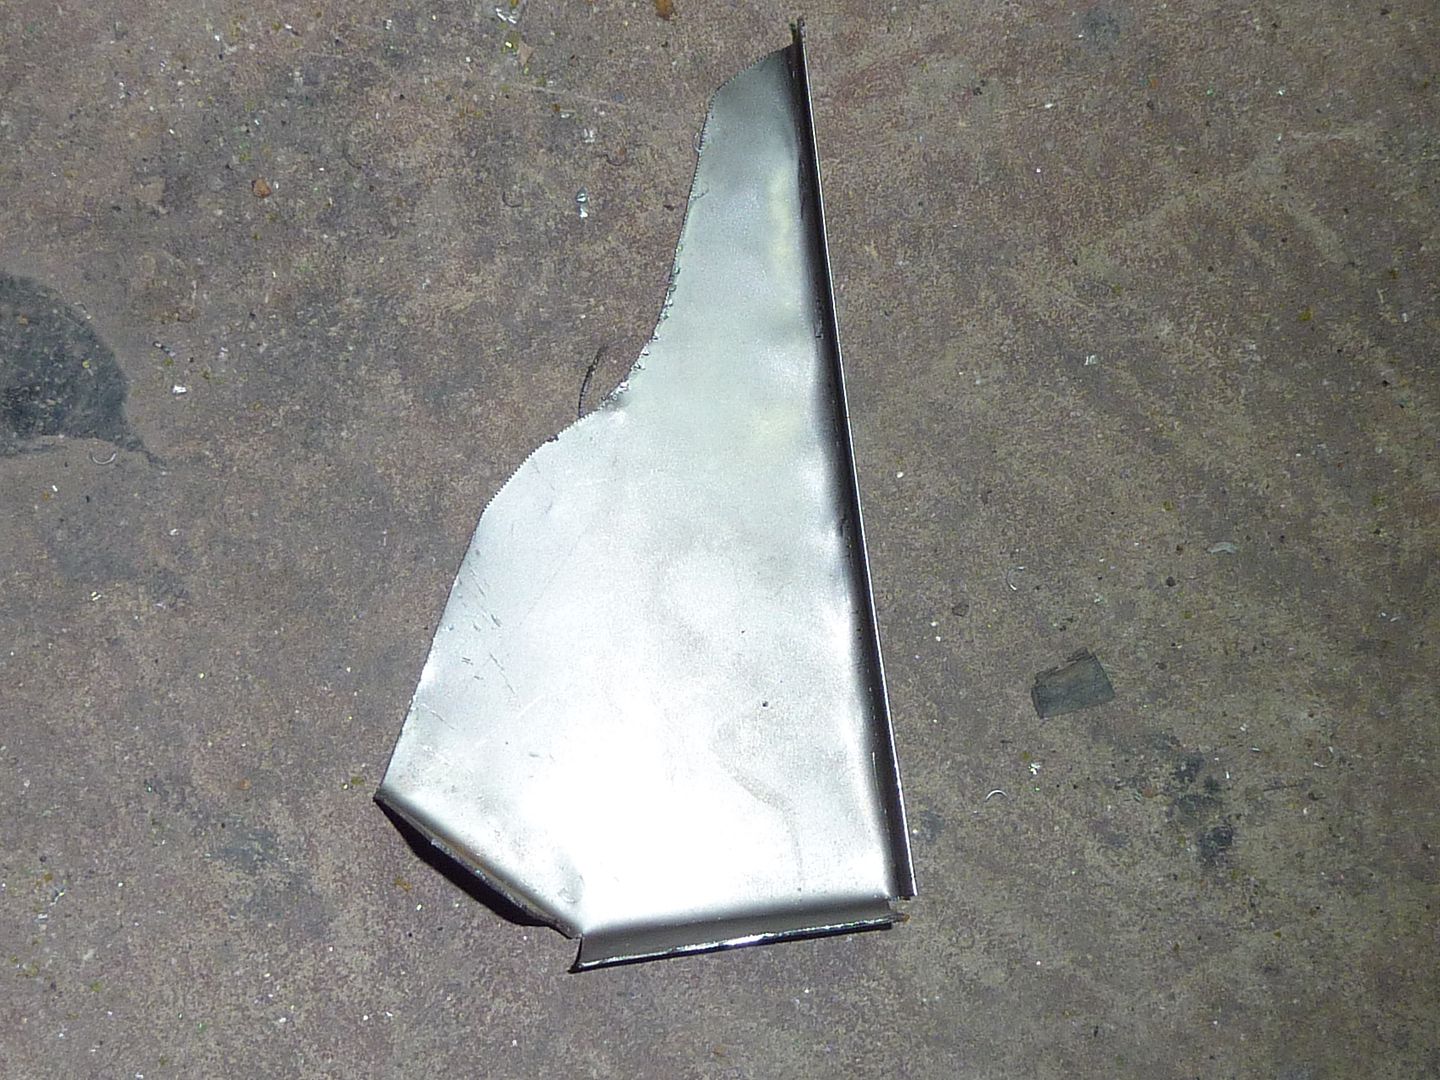
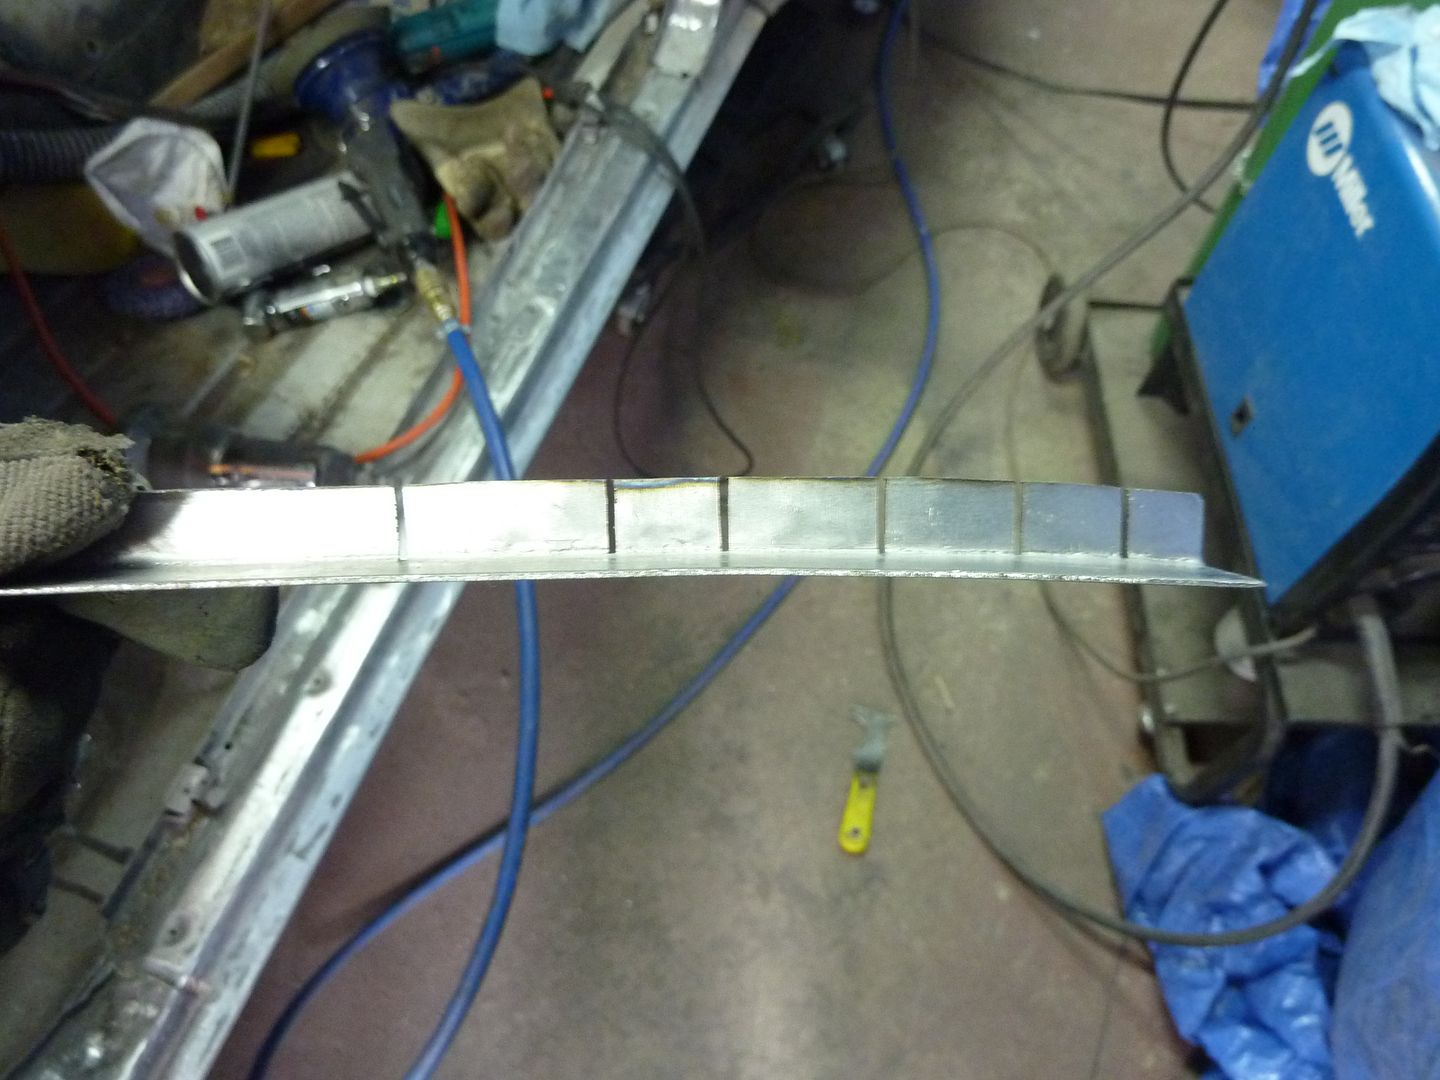
New one. Was actually quite easy to make
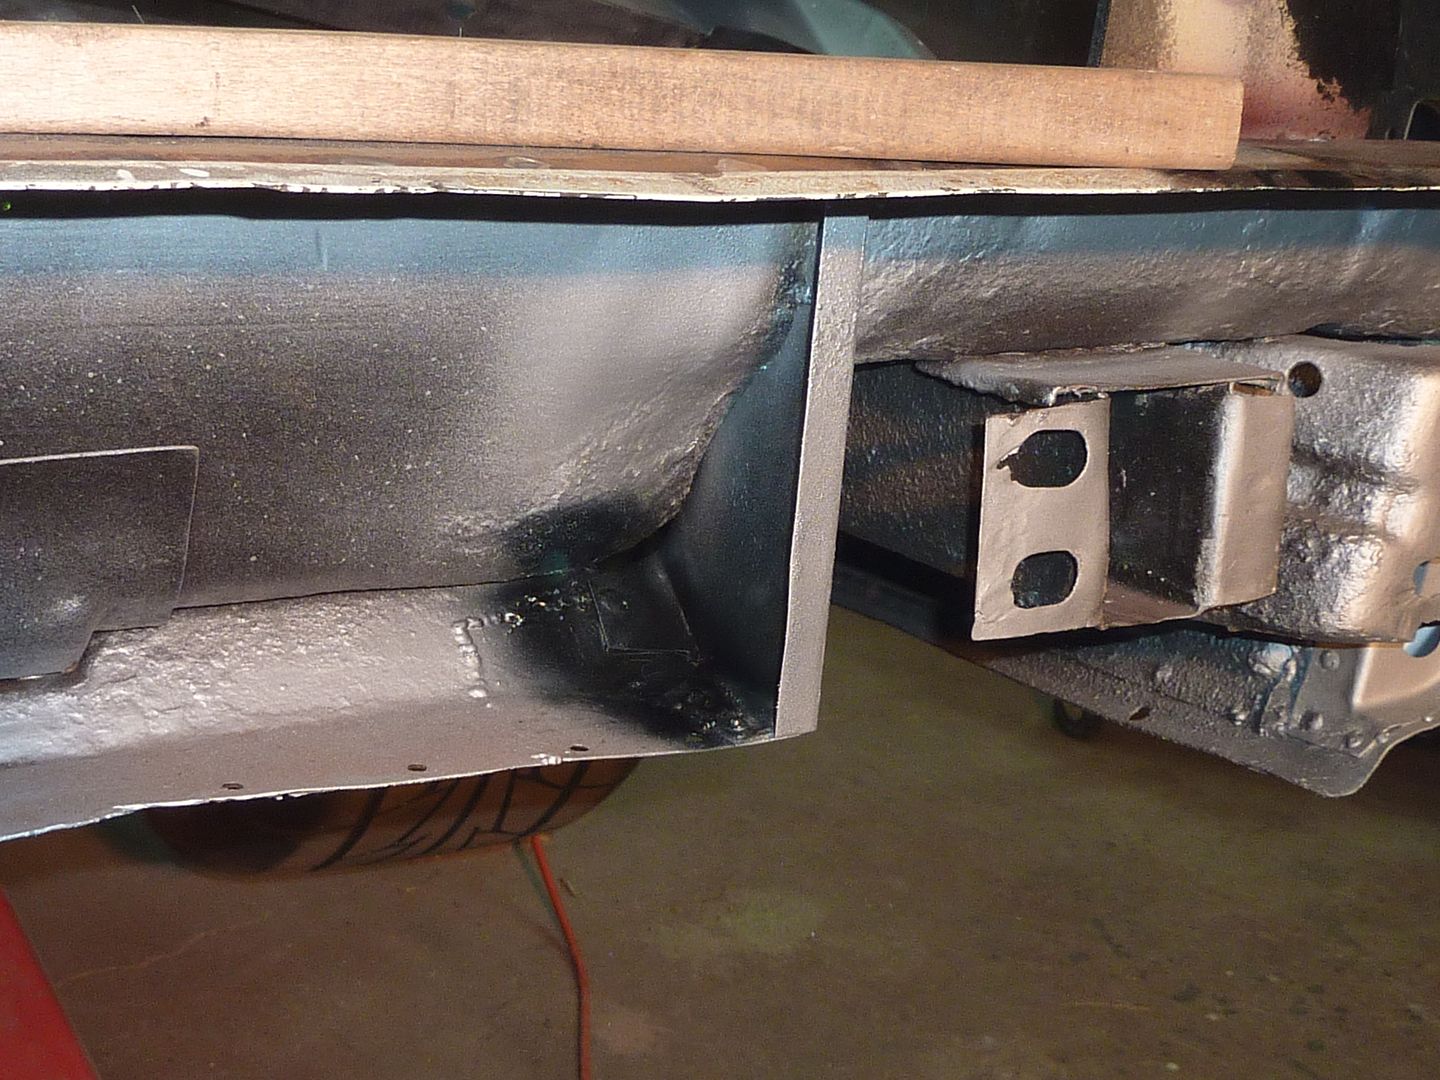
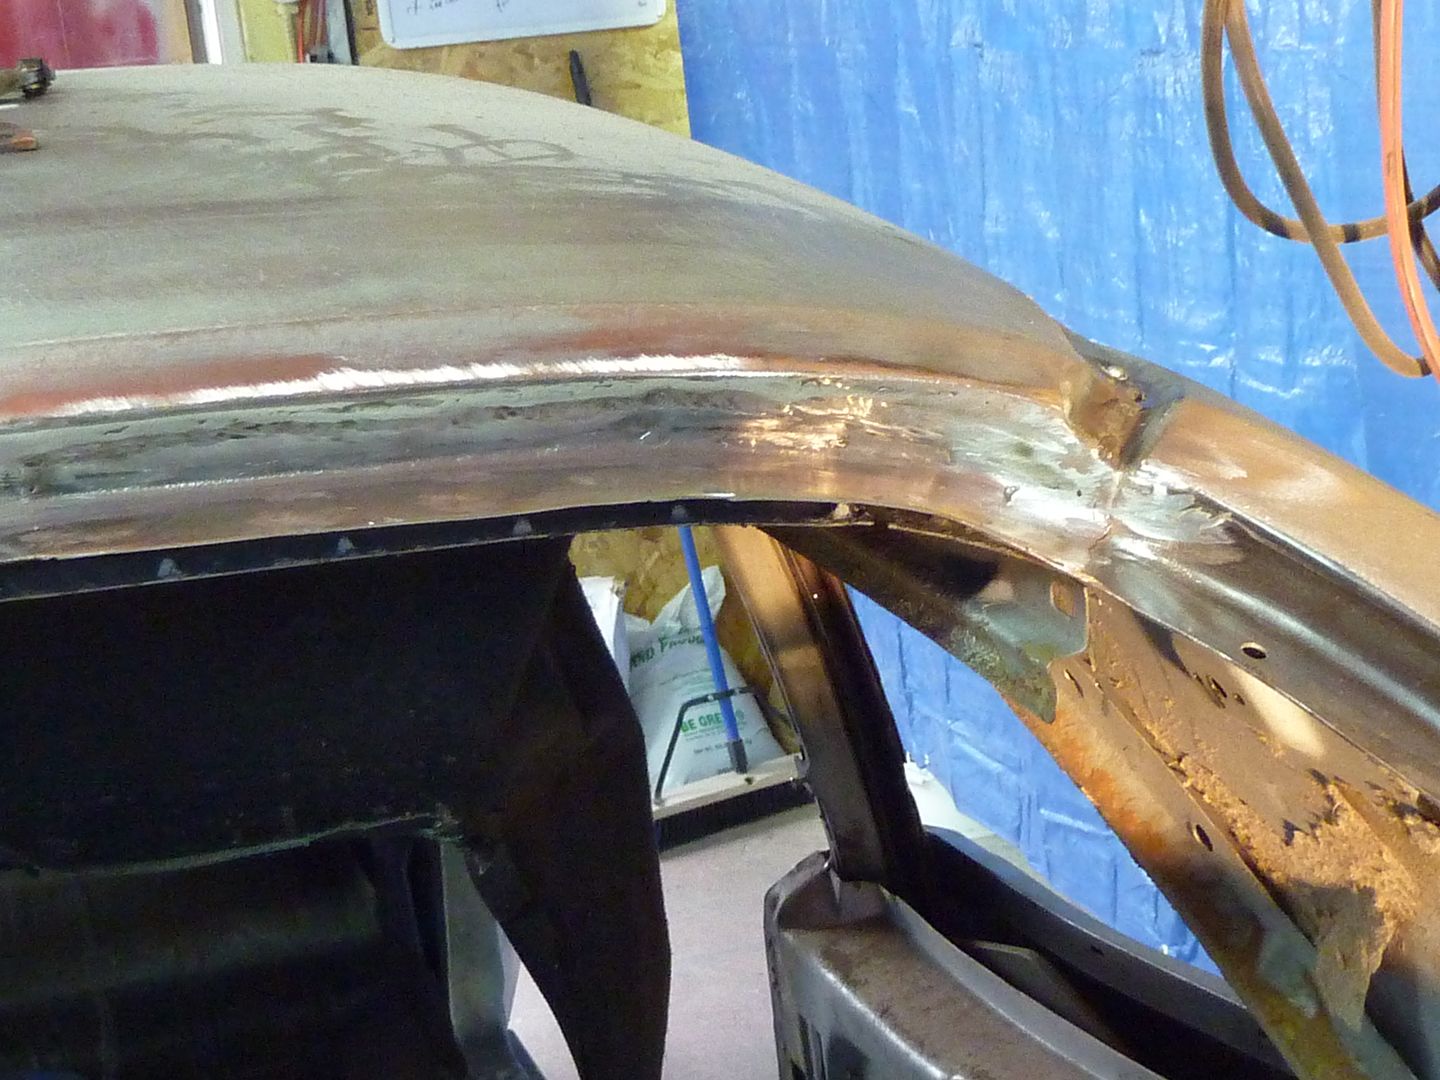
New ones welded into place. I know...the second one is bent the wrong way. But it still does the job. When I put these in, I realized that I made the bottom tabs too long. When the cross rail sits in place, it slides under the extension caps. I just cut along the bottom so the rail would slide under. Hopefully that made sense.
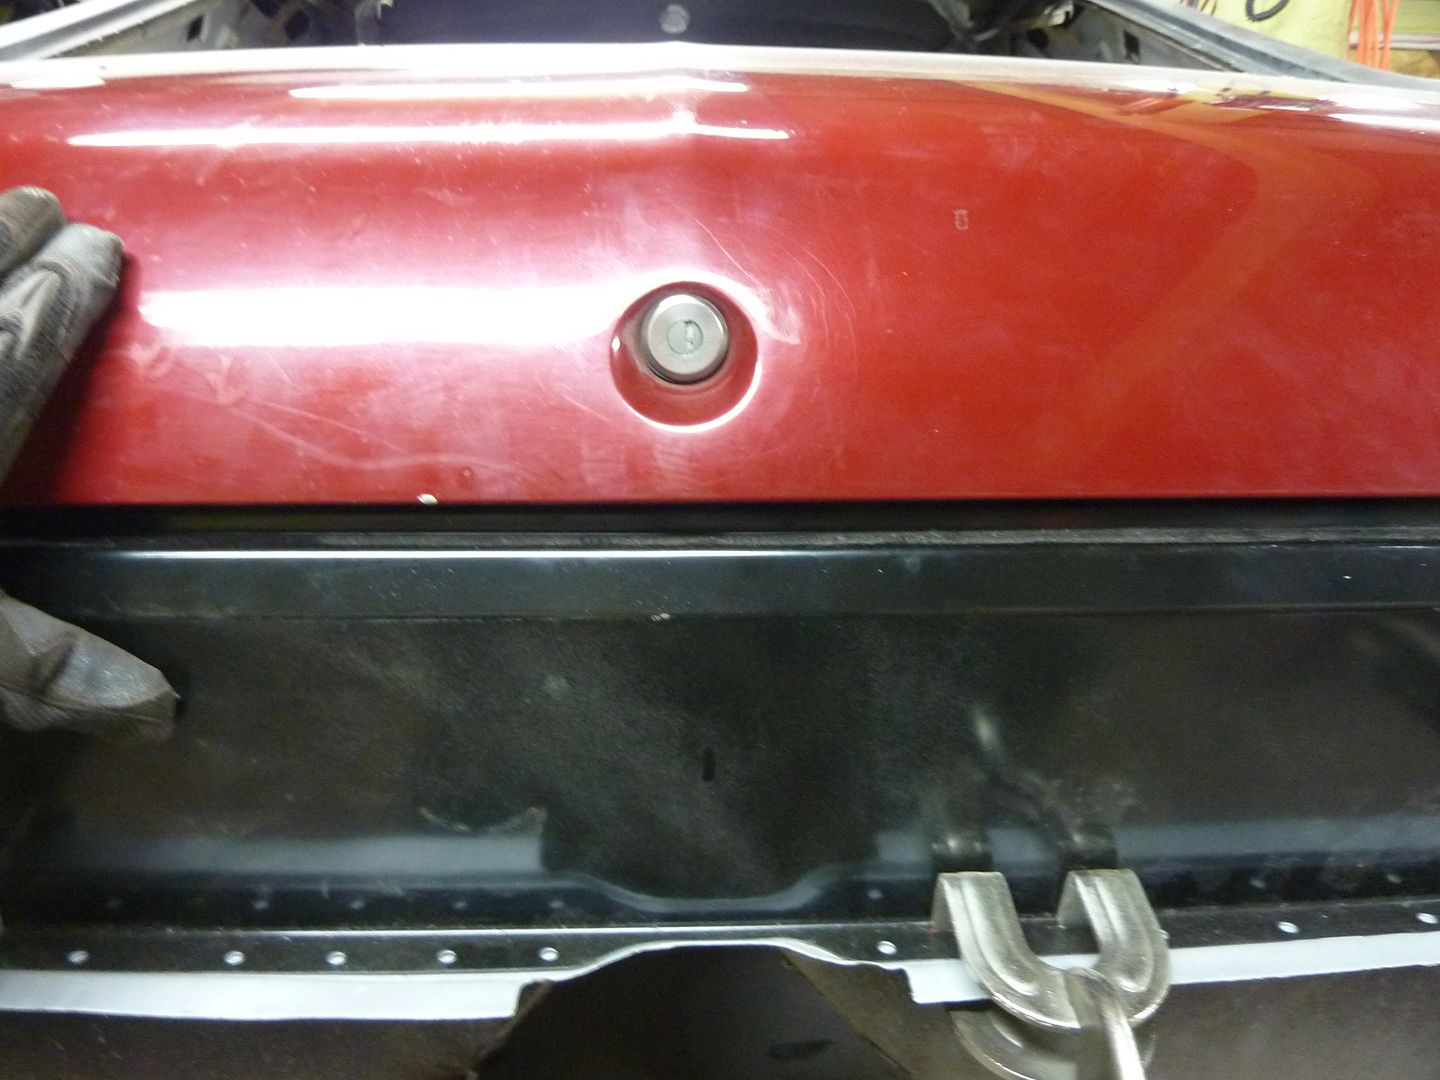
And finally...it was in
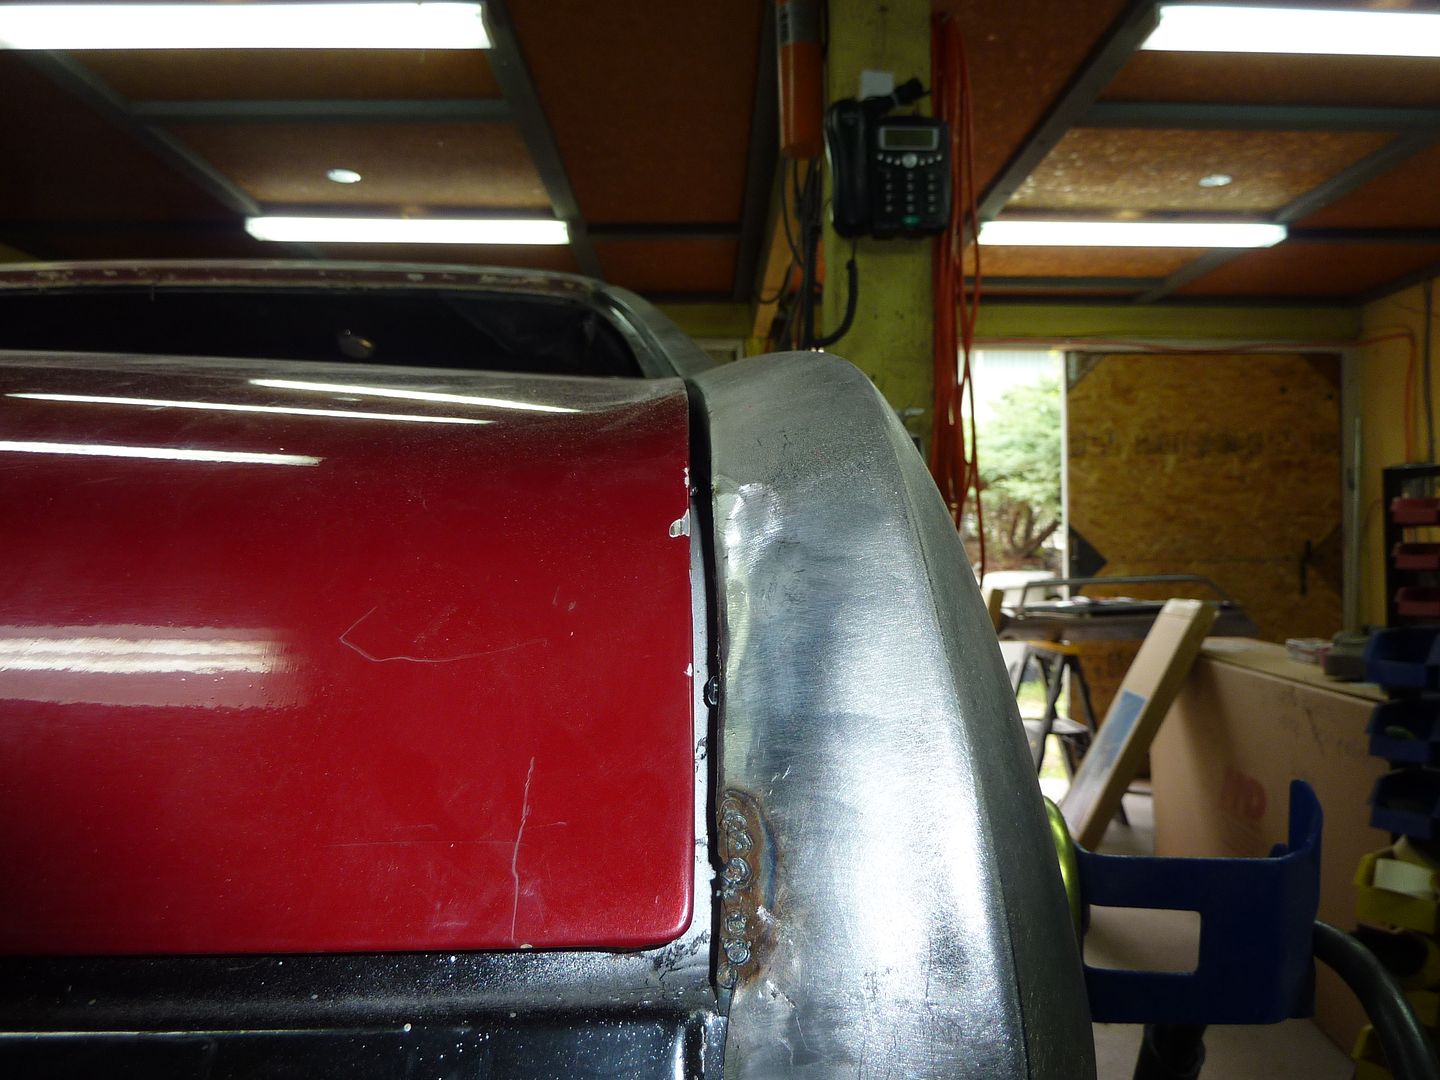
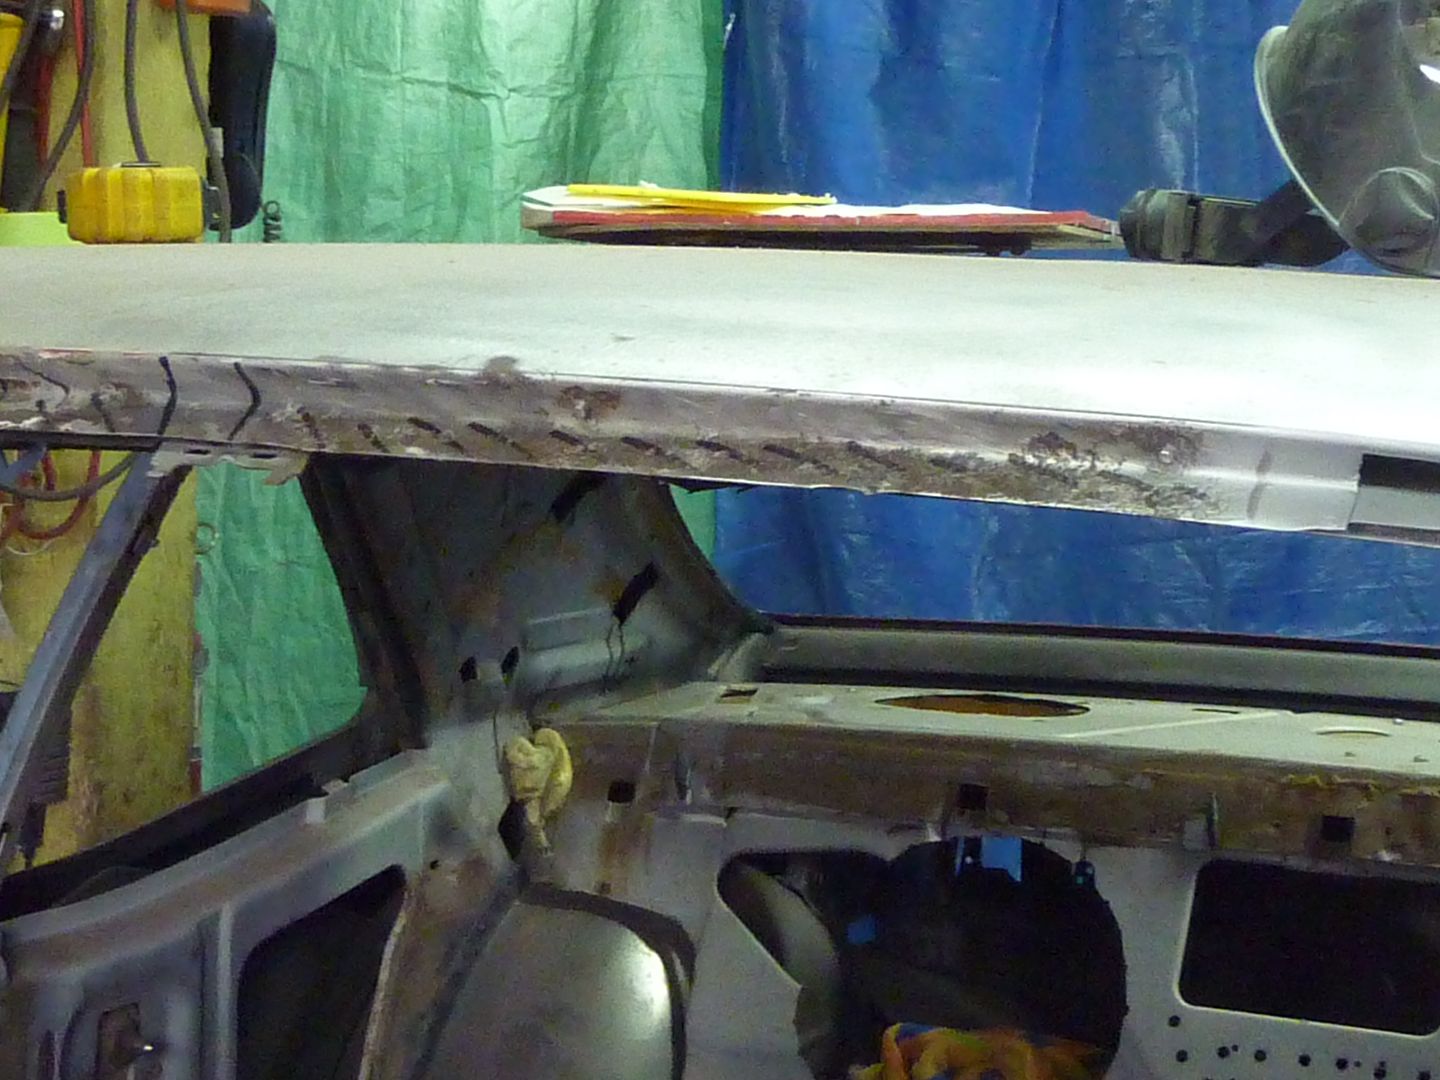
Next up was getting things ready for the tail light panel
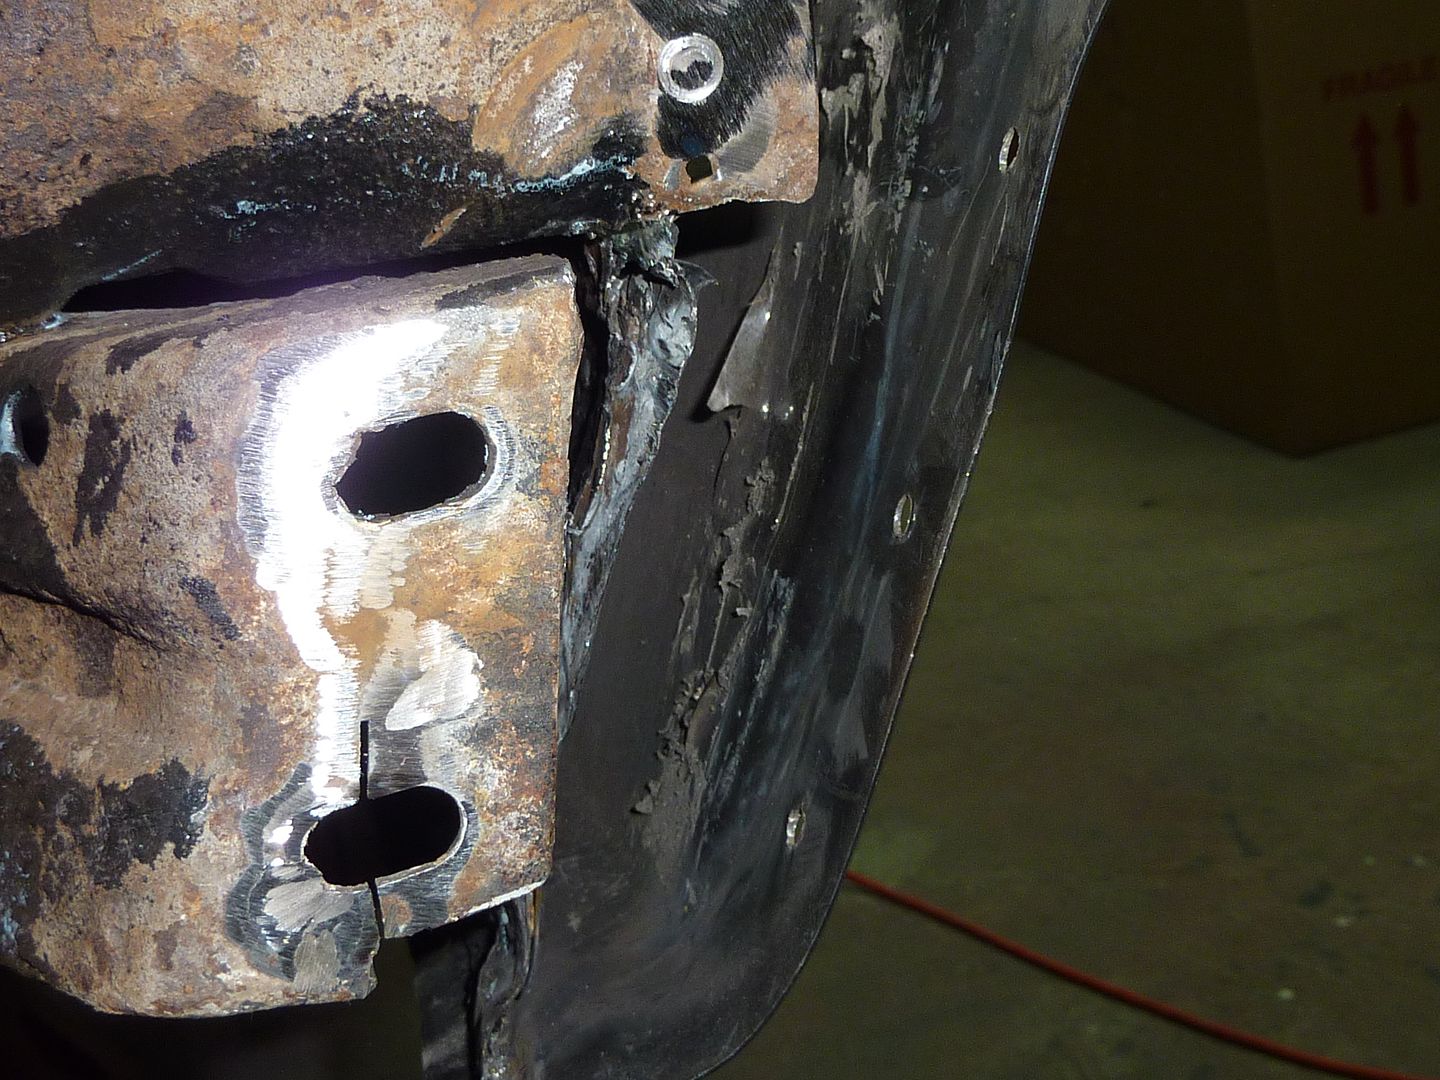
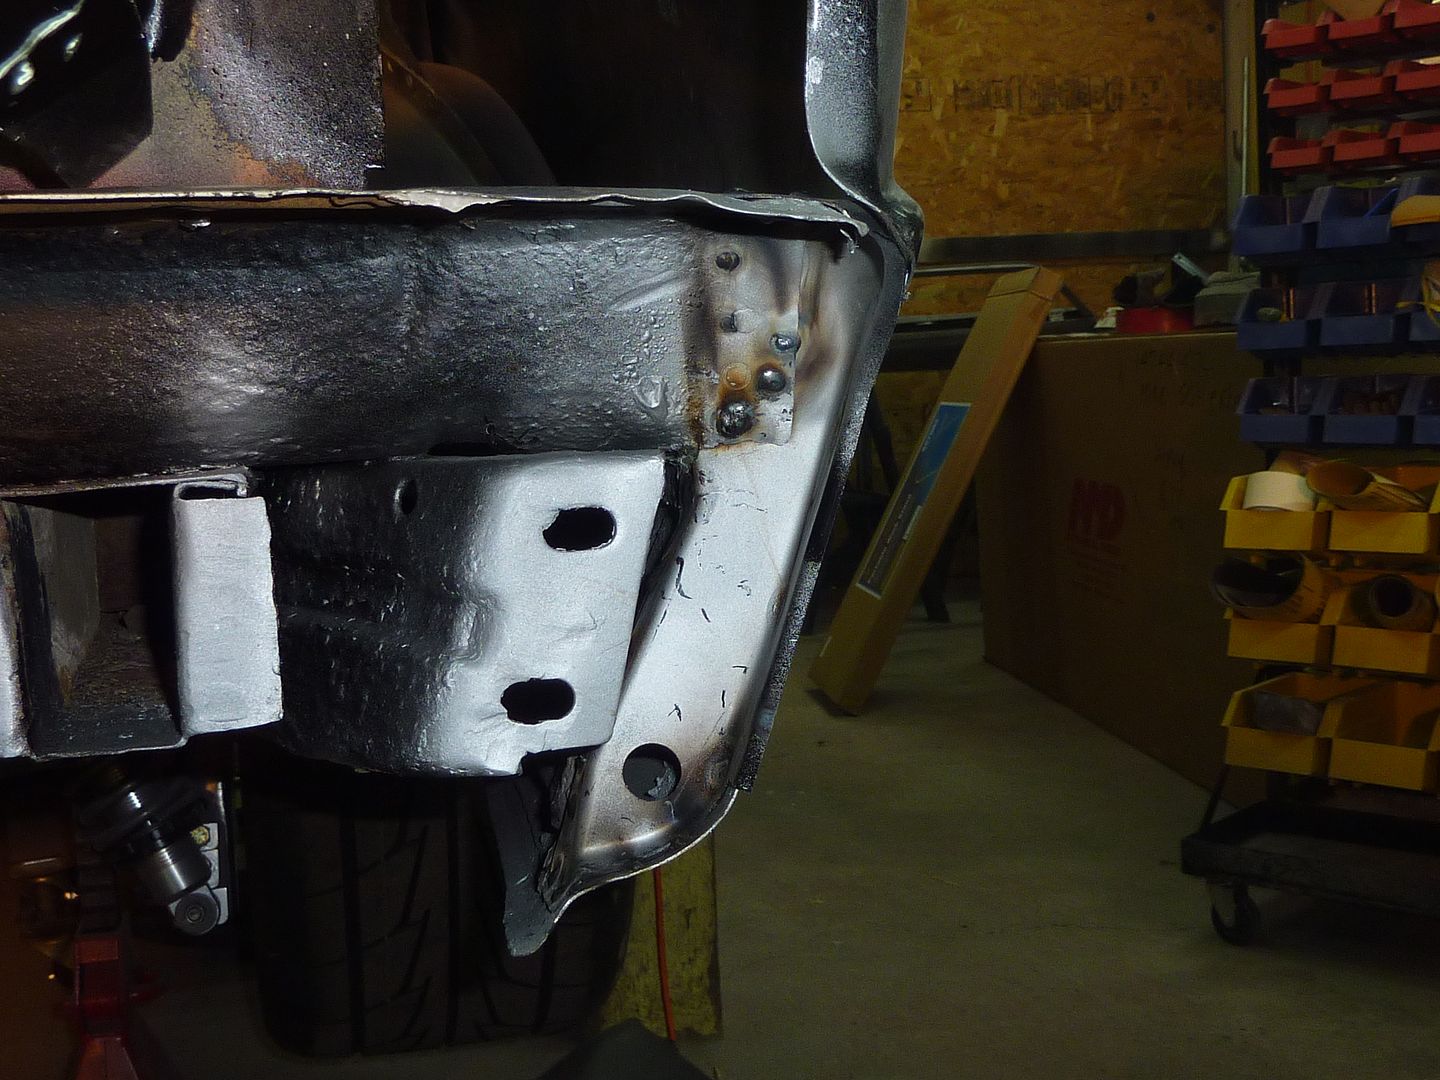
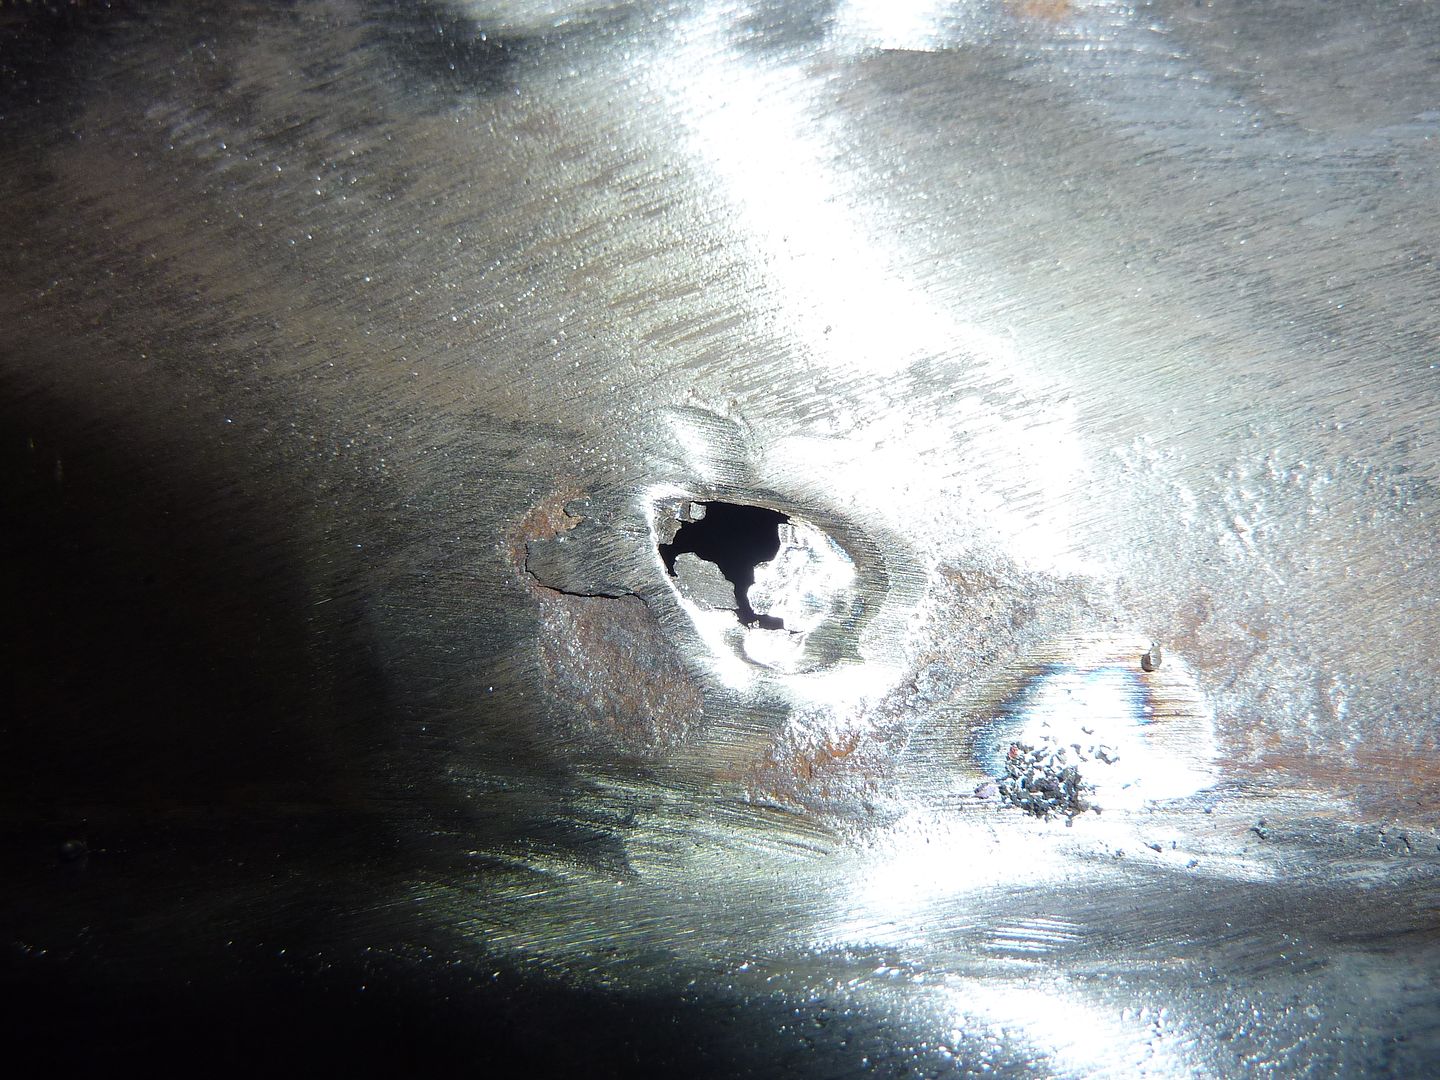
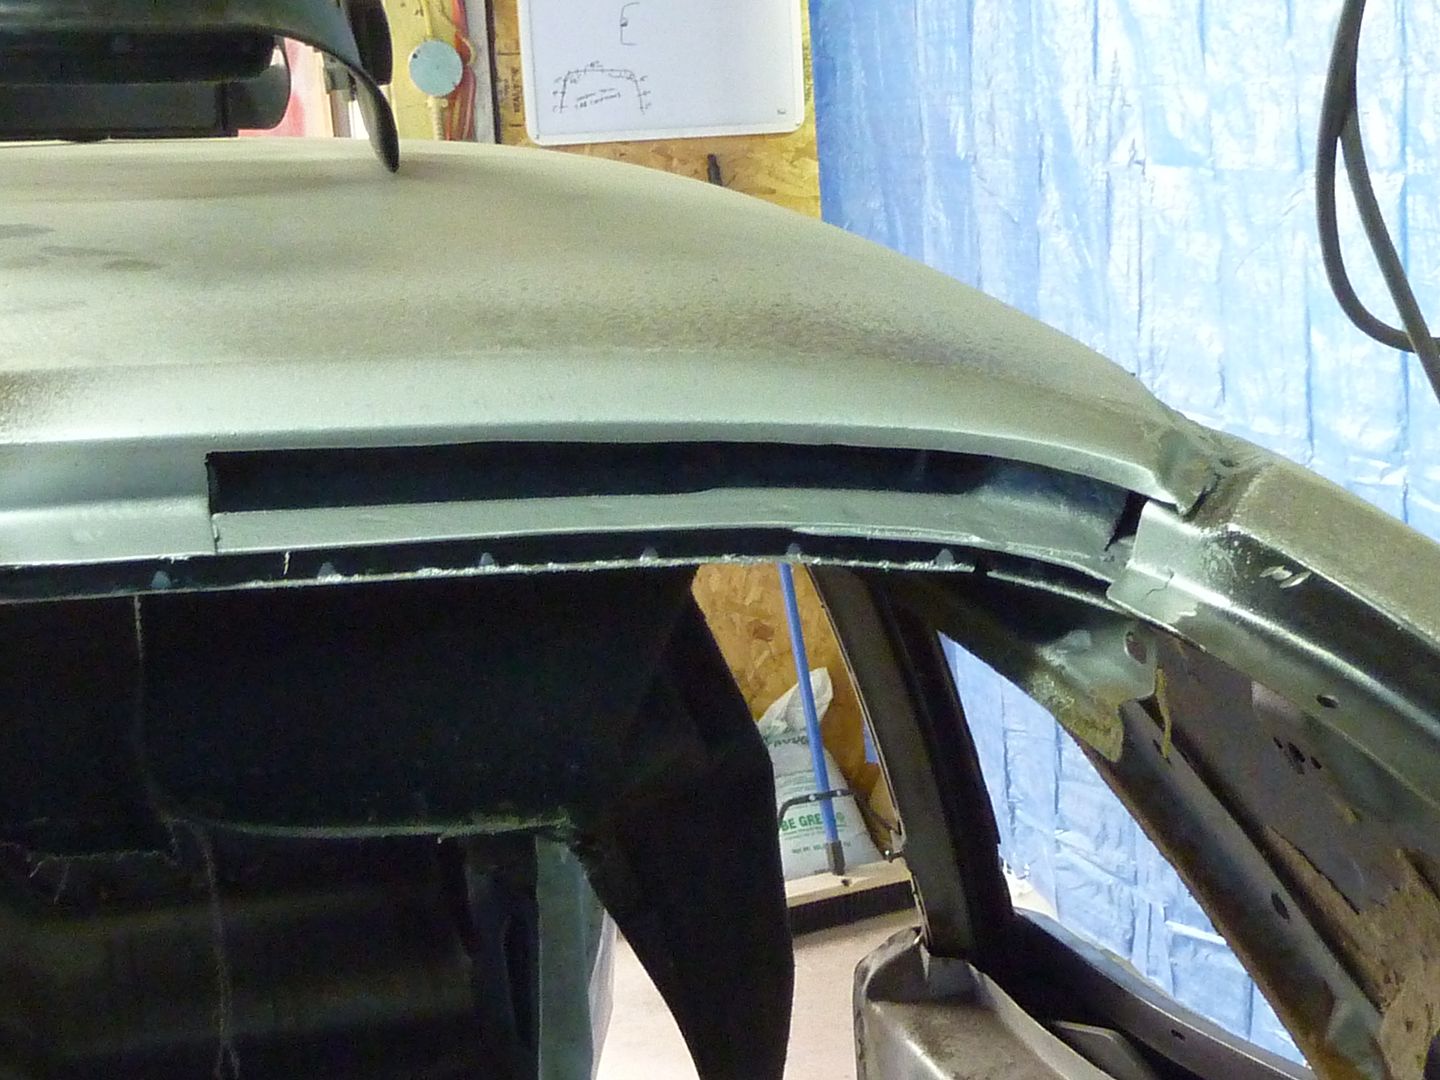
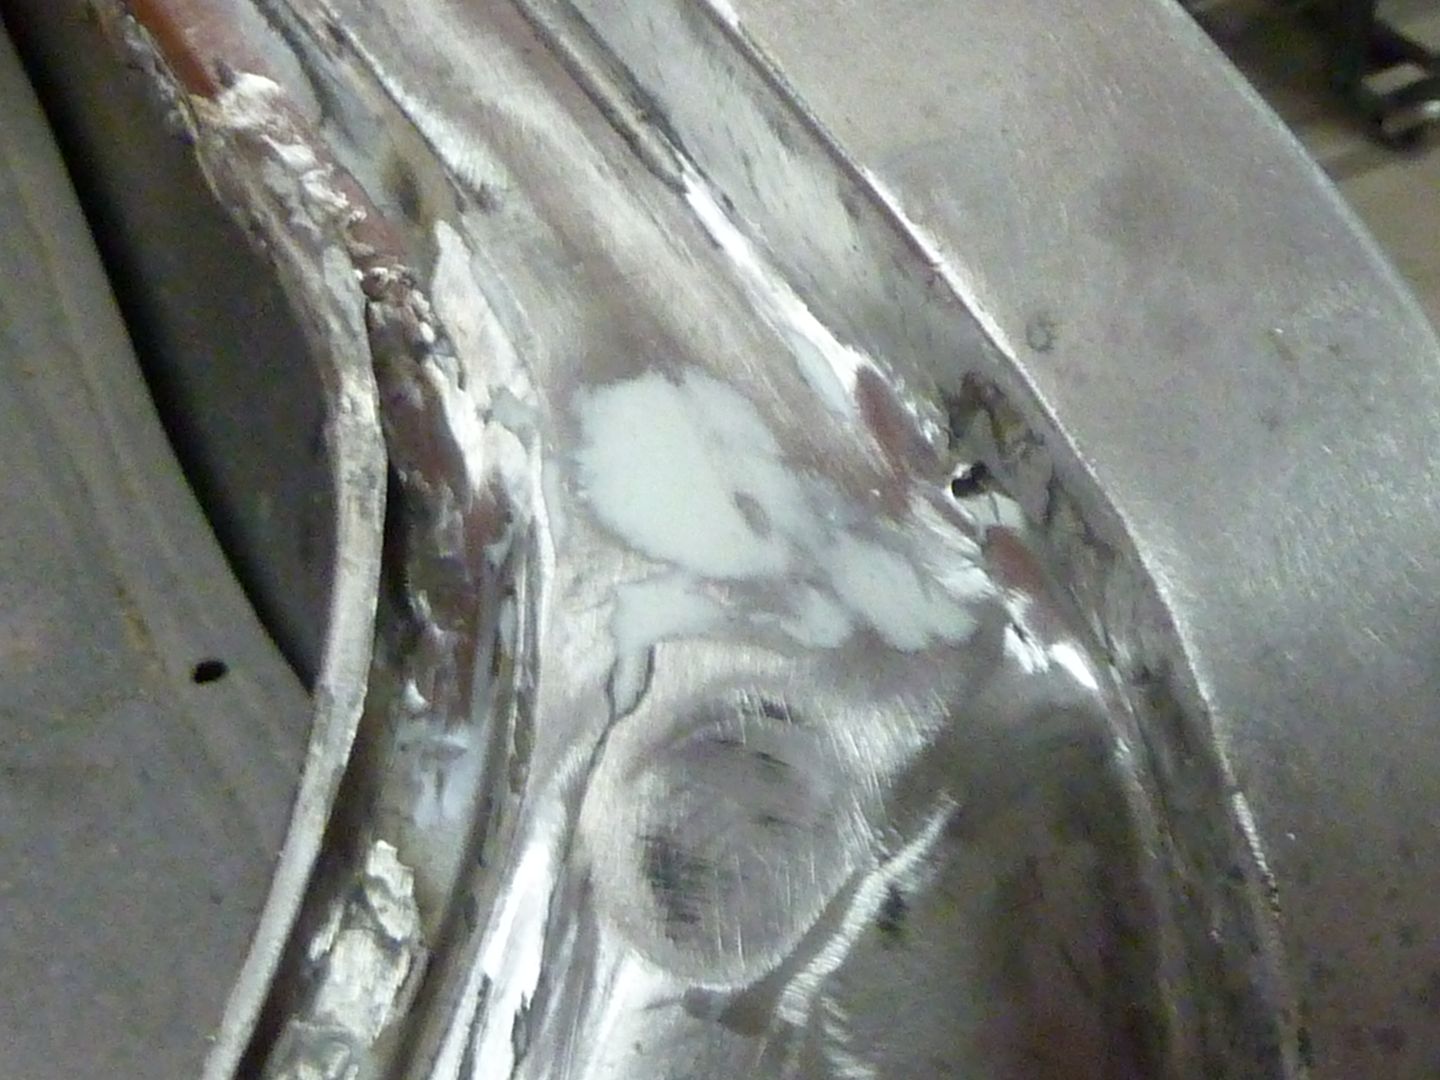
First I spent time cleaning up the rear flange. When I took the old one off and the cross rail, I ended up with a few weak spots like this
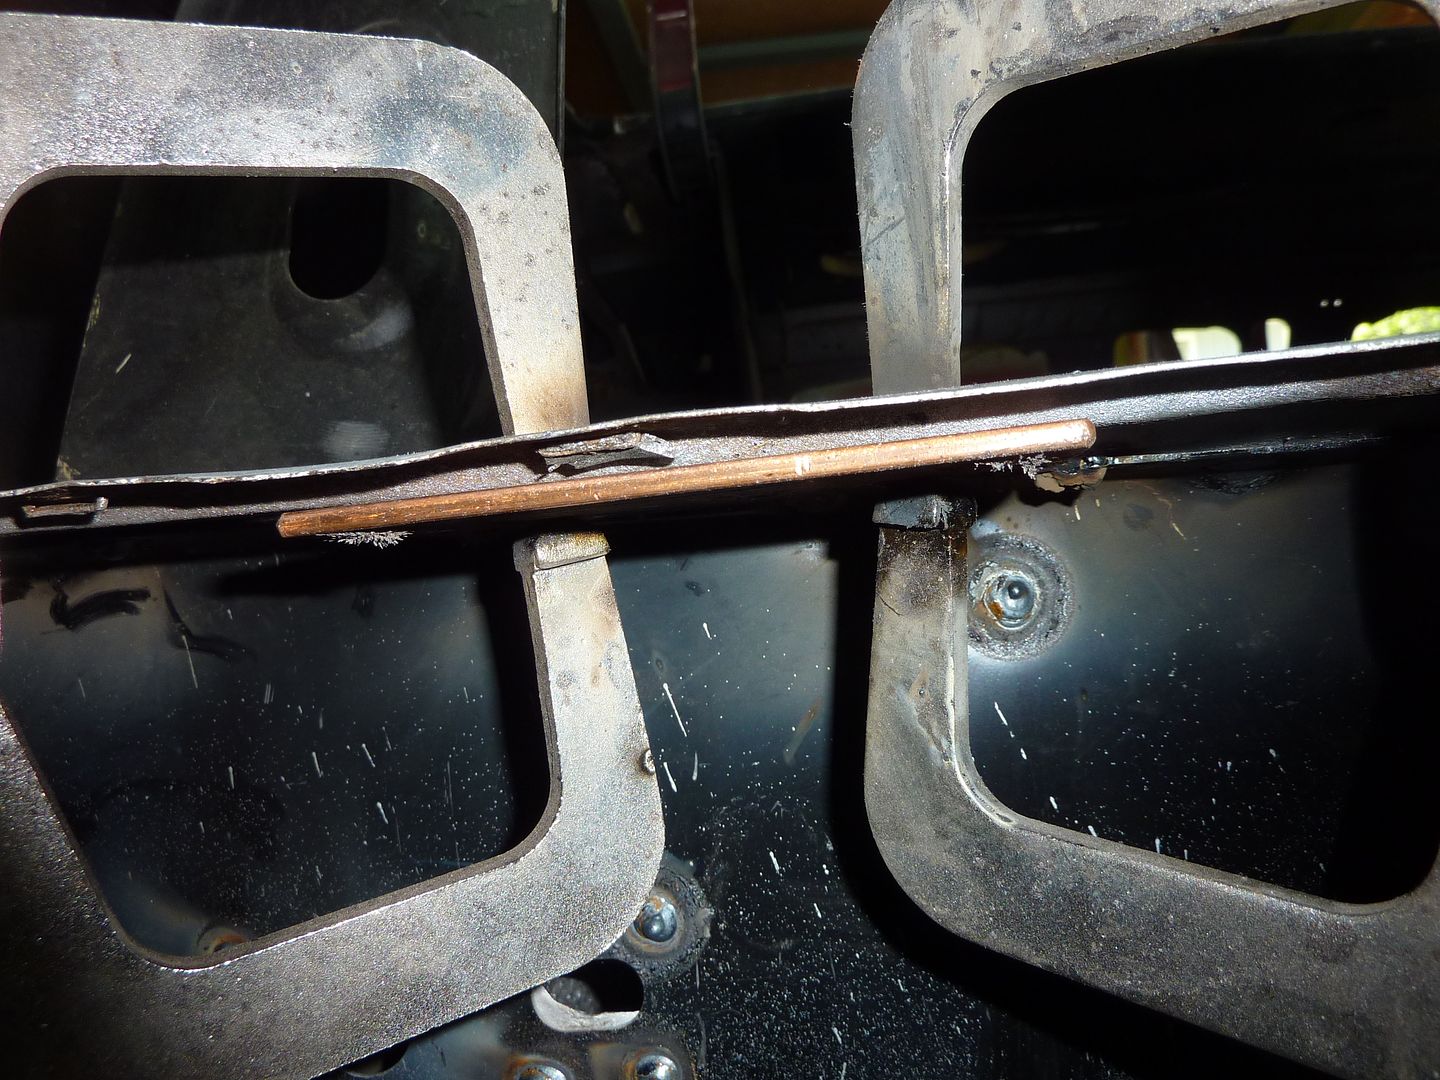
Here's where a piece of copper comes in really handy. Mine has magnets on it but it doesn't hold very good at all so I clamped it to the bottom and filled in the holes
Got it all filled and in weld through primer

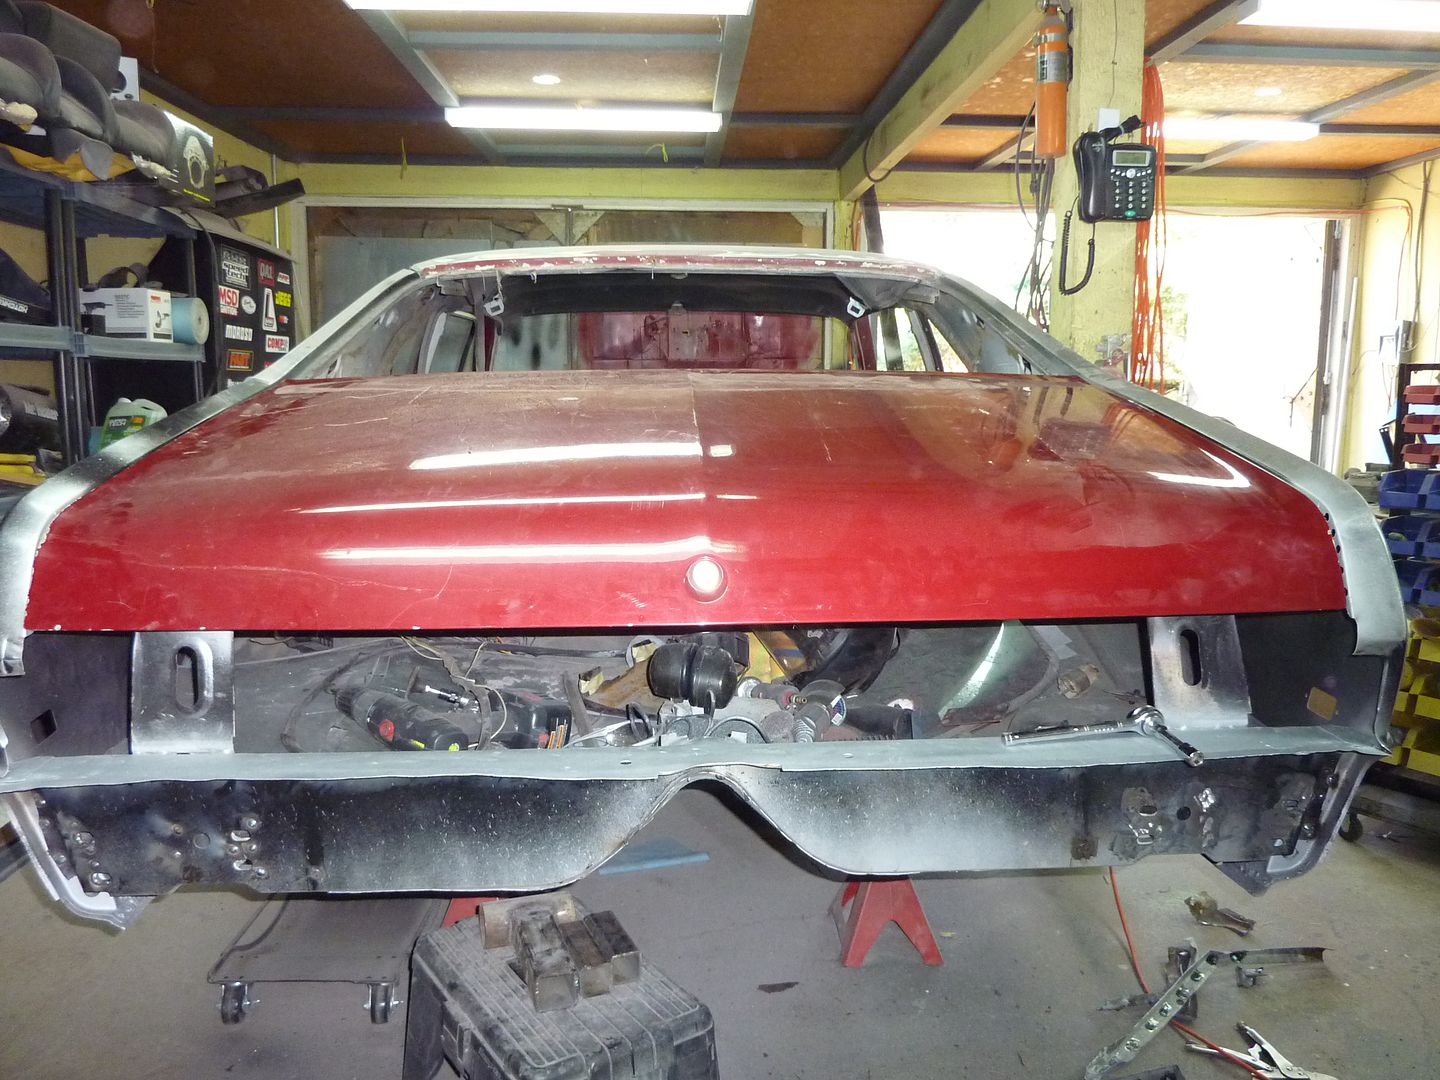
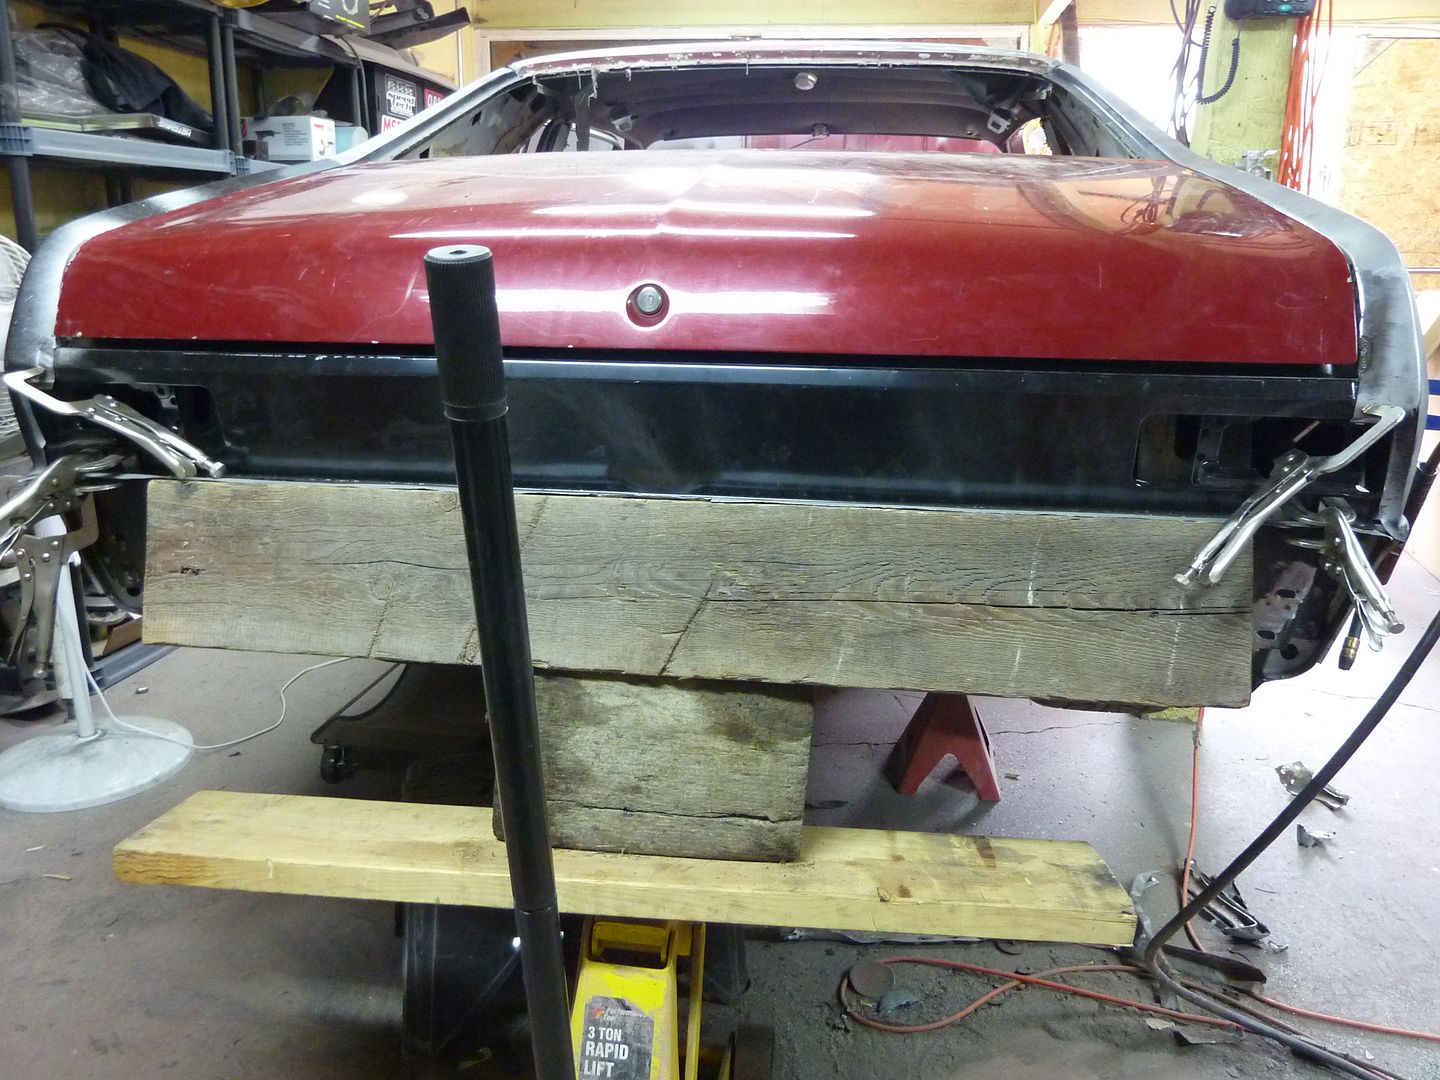
Put the trunk lid back on to get proper alignment
Putting the tail light panel in turned out to be a pain also. I had to tweak the quarters to make them fit better.
I mocked it into place, but the gap between it and the trunk was quite big
One thing I never even thought of until it was brought to my attention was the possibility of the trunk sagging. So I had to persuade the floor a bit
Once I got things lined up to where I was happy, I used some screws and clamps to hold things into place.
The rear gap was better. I might still weld in a piece of rod to get it a bit closer
Side gaps..I can live with. Again, I might weld in some rod if I get picky
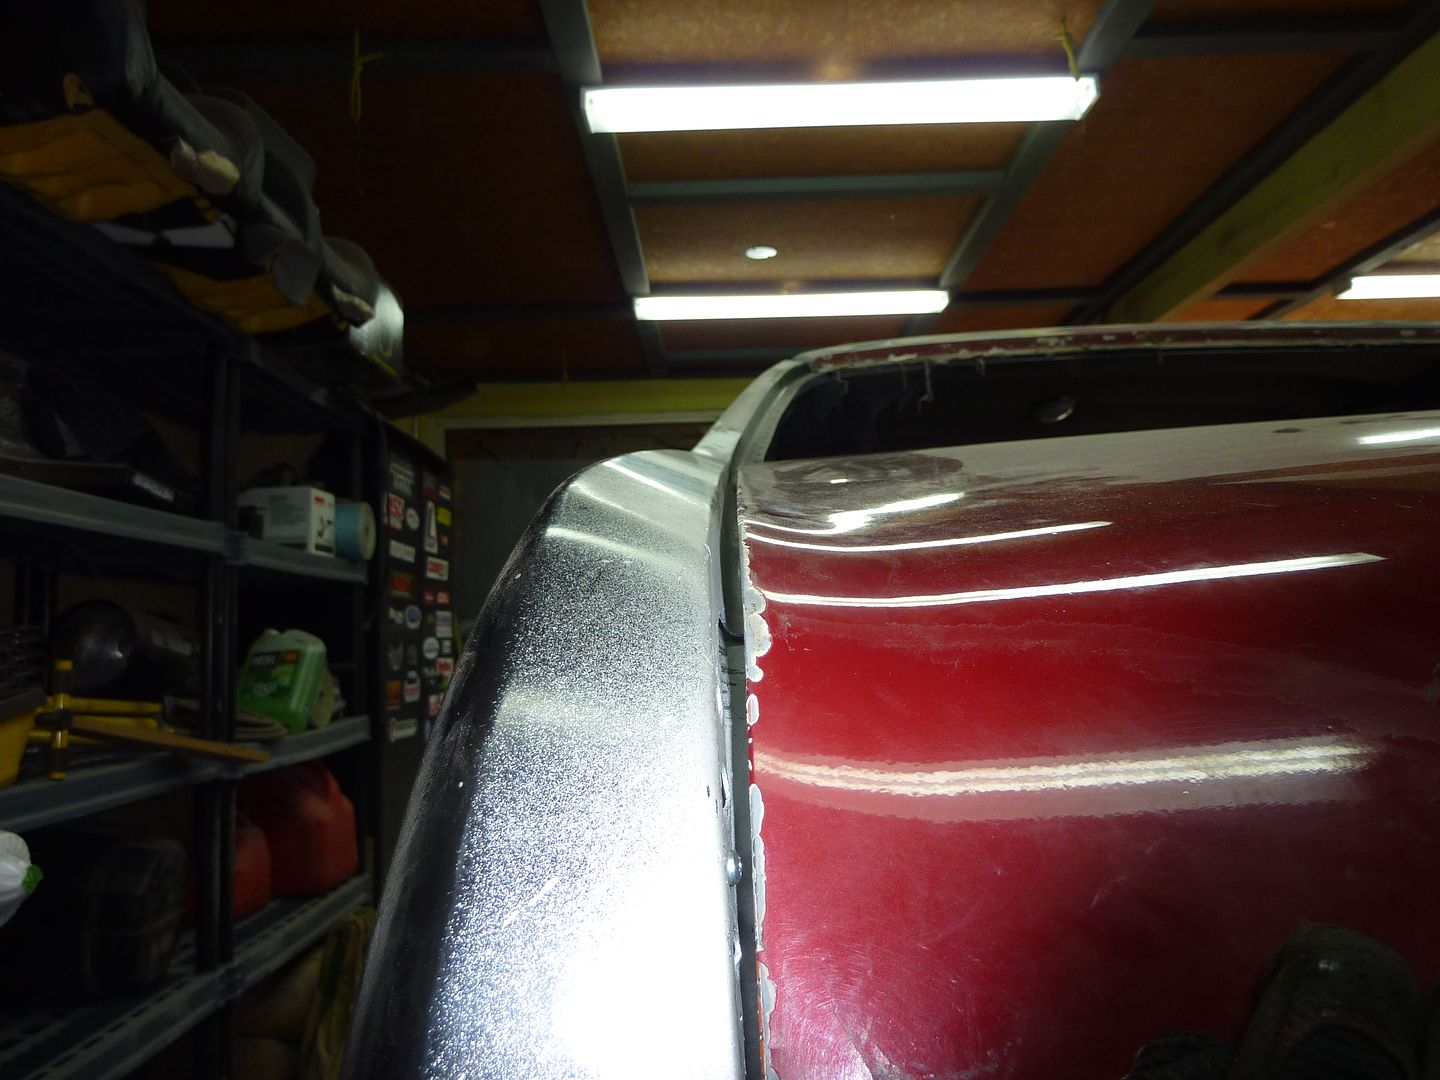
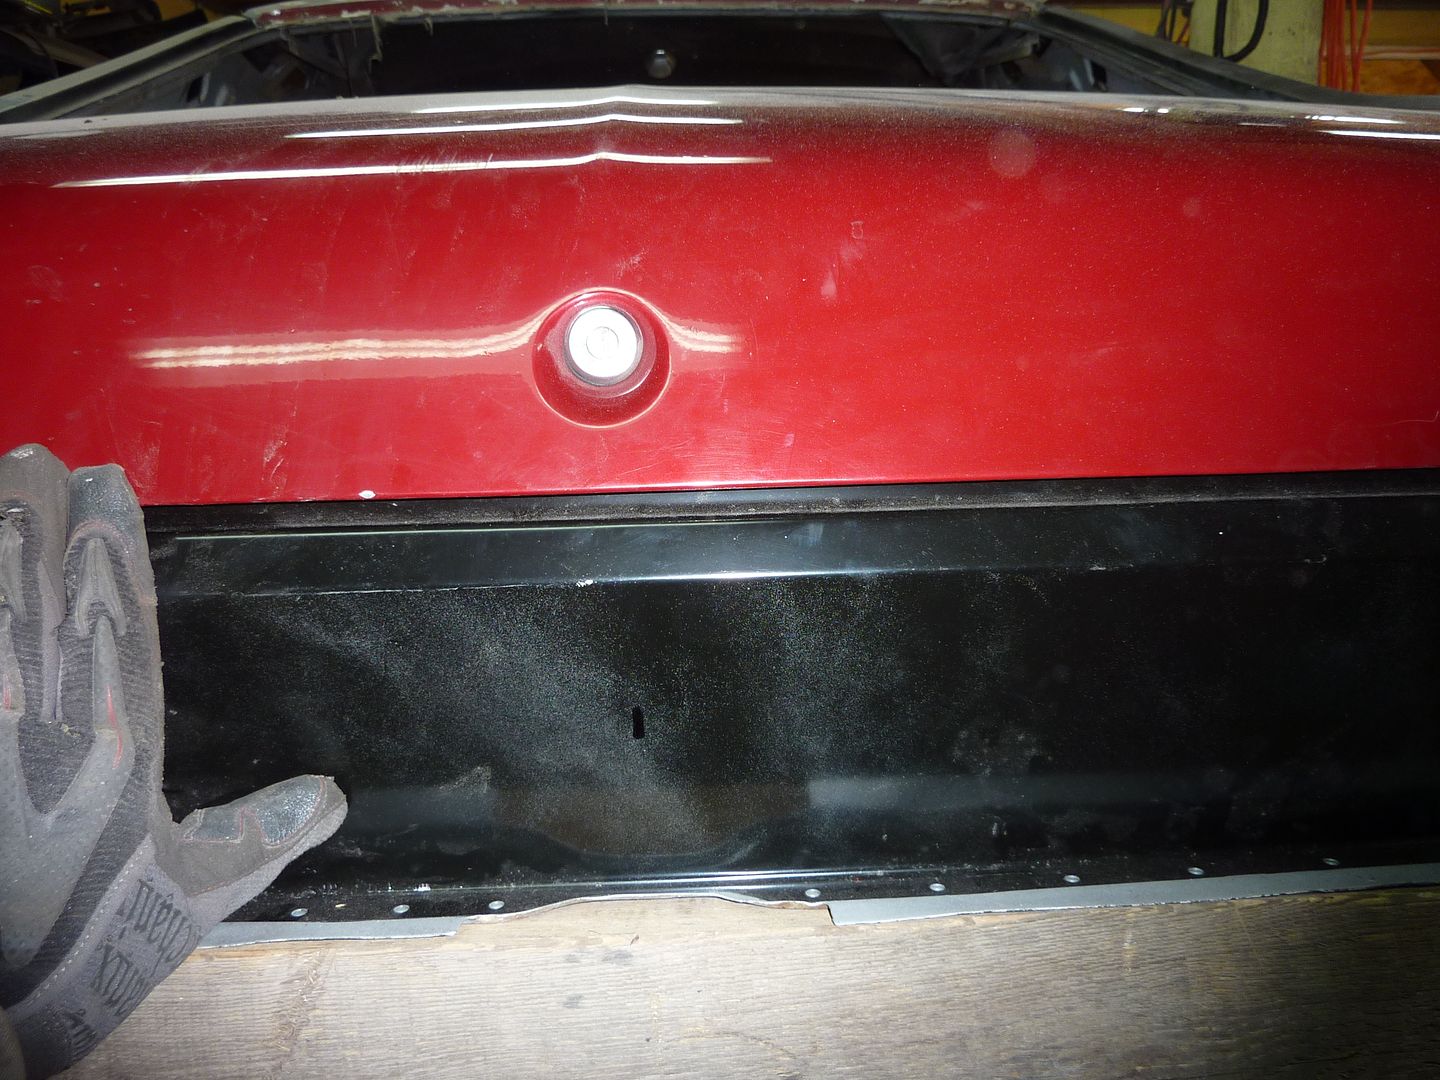
Along the back. It could go in a bit with some trunk adjustment

I welded everything into place and cleaned it up.

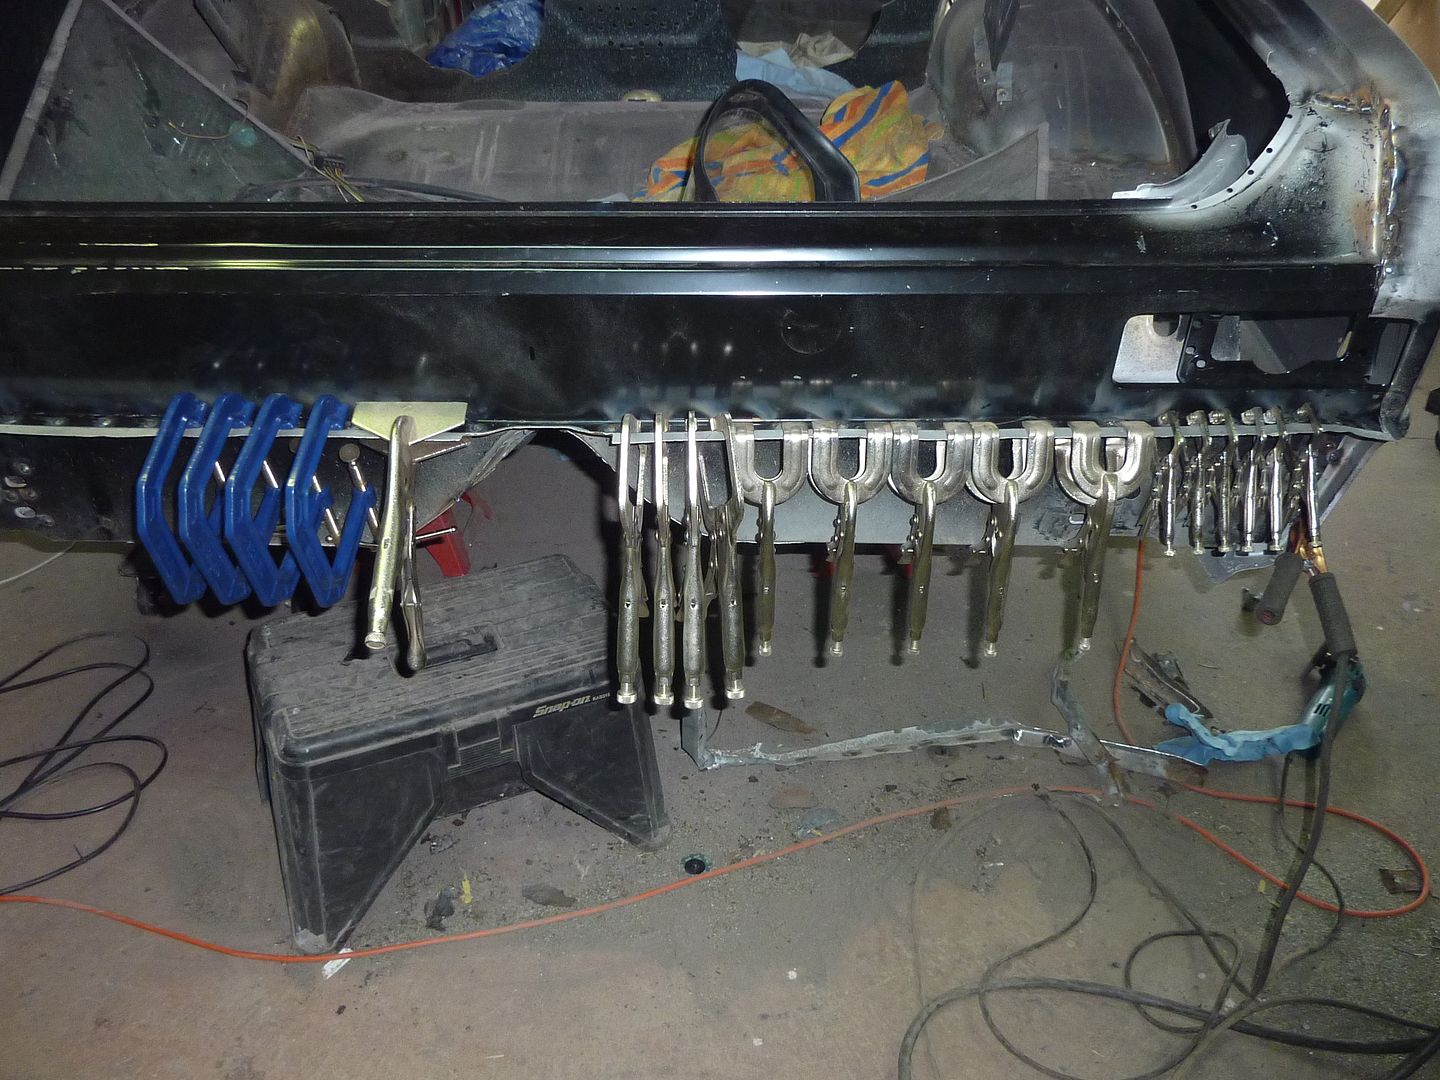
One thing I found after putting in so much new sheetmetal...I've ended up with a decent collection of clamps. And I can imagine this is small compared to some guys.
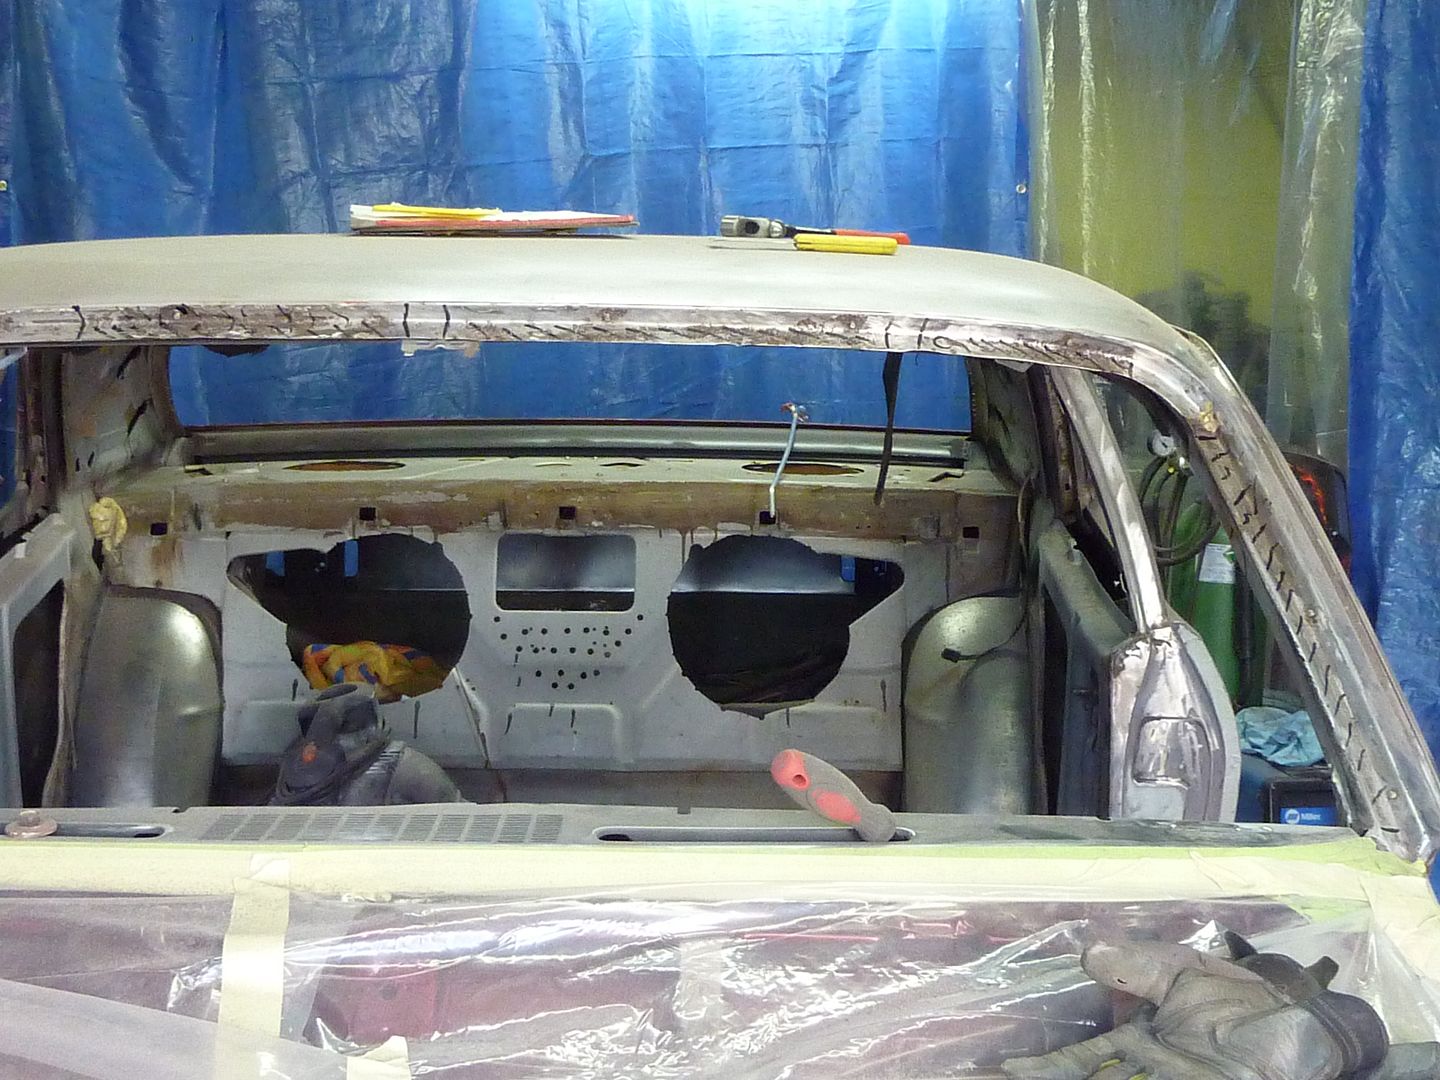
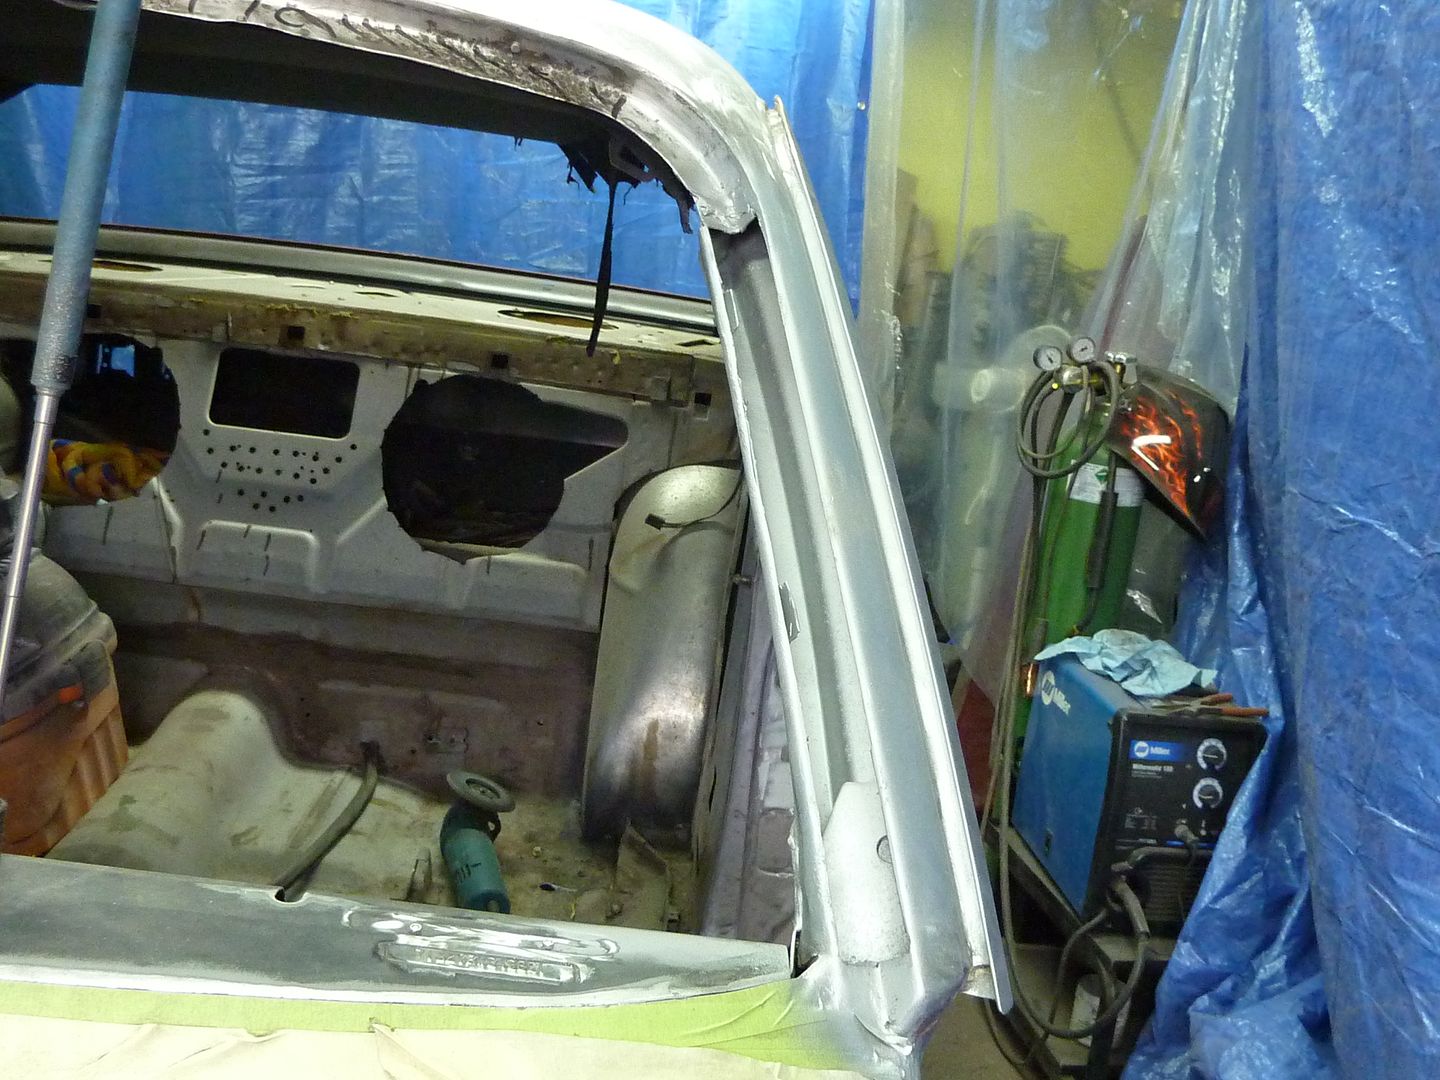
After I got that done, I started finishing up some of the little things I never got around to getting done. I finished welding the sail panel around the rear window. Then I got the passenger side wheel well opening all finished. I had a few tacks in there, but it wasn't all done. I also cut 1/4 - 1/2" off to give some more room for the tires. Still have to finish the driver's side.
Then I wanted to do a 'just sit there' job so I worked on getting the passenger side door jamb stripped. I was going to blast it, but I found it went really quick with the scotch brite pads so I just kept doing it.

Not sure if I'll get anything done on the weekend as the wife is back from her courses and I'm back to work on Monday. Hopefully next weekend I'll get a bunch more done as my wife and step daughter take off for most of my days off.
I spent every day this week in the shop and I still didn't get as much done as I wanted to. It's amazing how that always happens.
Got back to work on the rear cross rail. That alone took me a couple days by the time I patched some metal, cleaned things up, etc. One suggestion for anyone planning on doing this.....make sure to get a new rear cross brace: http://autometaldirect.com/ListItems...ossmember.aspx and cross rail extensions: http://autometaldirect.com/ListItems...Extension.aspx They will make the job so much easier. That's why it took me so long to do mine.
First thing I tackled were getting rid of the old trunk extension end caps. There were a pain, but can be done with the quarters on. I didn't have the quarters welded were they connect to the end caps so it made it way easier. Here's where the end caps connect to on the quarter panel
Looked like crap from the inside with the old ones in place
It's gone
New one in place. It's been sprayed with weld through primer that's why it's grey
Looks much better from inside too
Next was patching some of the cross brace
I bought myself a cheap metal brake a while back. Glad I did. Drilled some holes in my work bench and bolted it in place.
Next were the cross rail extensions. Since I didn't buy new ones, I just made some.
Old one
New one. Was actually quite easy to make
New ones welded into place. I know...the second one is bent the wrong way. But it still does the job. When I put these in, I realized that I made the bottom tabs too long. When the cross rail sits in place, it slides under the extension caps. I just cut along the bottom so the rail would slide under. Hopefully that made sense.
And finally...it was in
Next up was getting things ready for the tail light panel
First I spent time cleaning up the rear flange. When I took the old one off and the cross rail, I ended up with a few weak spots like this
Here's where a piece of copper comes in really handy. Mine has magnets on it but it doesn't hold very good at all so I clamped it to the bottom and filled in the holes
Got it all filled and in weld through primer
Put the trunk lid back on to get proper alignment
Putting the tail light panel in turned out to be a pain also. I had to tweak the quarters to make them fit better.
I mocked it into place, but the gap between it and the trunk was quite big
One thing I never even thought of until it was brought to my attention was the possibility of the trunk sagging. So I had to persuade the floor a bit
Once I got things lined up to where I was happy, I used some screws and clamps to hold things into place.
The rear gap was better. I might still weld in a piece of rod to get it a bit closer
Side gaps..I can live with. Again, I might weld in some rod if I get picky
Along the back. It could go in a bit with some trunk adjustment
I welded everything into place and cleaned it up.
One thing I found after putting in so much new sheetmetal...I've ended up with a decent collection of clamps. And I can imagine this is small compared to some guys.
After I got that done, I started finishing up some of the little things I never got around to getting done. I finished welding the sail panel around the rear window. Then I got the passenger side wheel well opening all finished. I had a few tacks in there, but it wasn't all done. I also cut 1/4 - 1/2" off to give some more room for the tires. Still have to finish the driver's side.
Then I wanted to do a 'just sit there' job so I worked on getting the passenger side door jamb stripped. I was going to blast it, but I found it went really quick with the scotch brite pads so I just kept doing it.
Not sure if I'll get anything done on the weekend as the wife is back from her courses and I'm back to work on Monday. Hopefully next weekend I'll get a bunch more done as my wife and step daughter take off for most of my days off.
Last edited by scherp69; 09-26-2010 at 01:09 AM.
10-01-2010 | 03:57 PM
#63
Looking great Mike. That is a LOT of work to get done and I appreciate the detail you're sharing. Sometimes it's surprising when you start cutting sheetmetal how much everything will move around on you. Looks like you got it coached back into alignment. Nice work!
Who wants a cold one? I DO!
Who wants a cold one? I DO!
10-23-2010 | 04:53 PM
#64
Thread Starter
On The Tree
iTrader: (4)
Joined: Mar 2009
Posts: 132
Likes: 0
From: British Columbia, Canada
Looking great Mike. That is a LOT of work to get done and I appreciate the detail you're sharing. Sometimes it's surprising when you start cutting sheetmetal how much everything will move around on you. Looks like you got it coached back into alignment. Nice work!
Who wants a cold one? I DO!
Who wants a cold one? I DO!

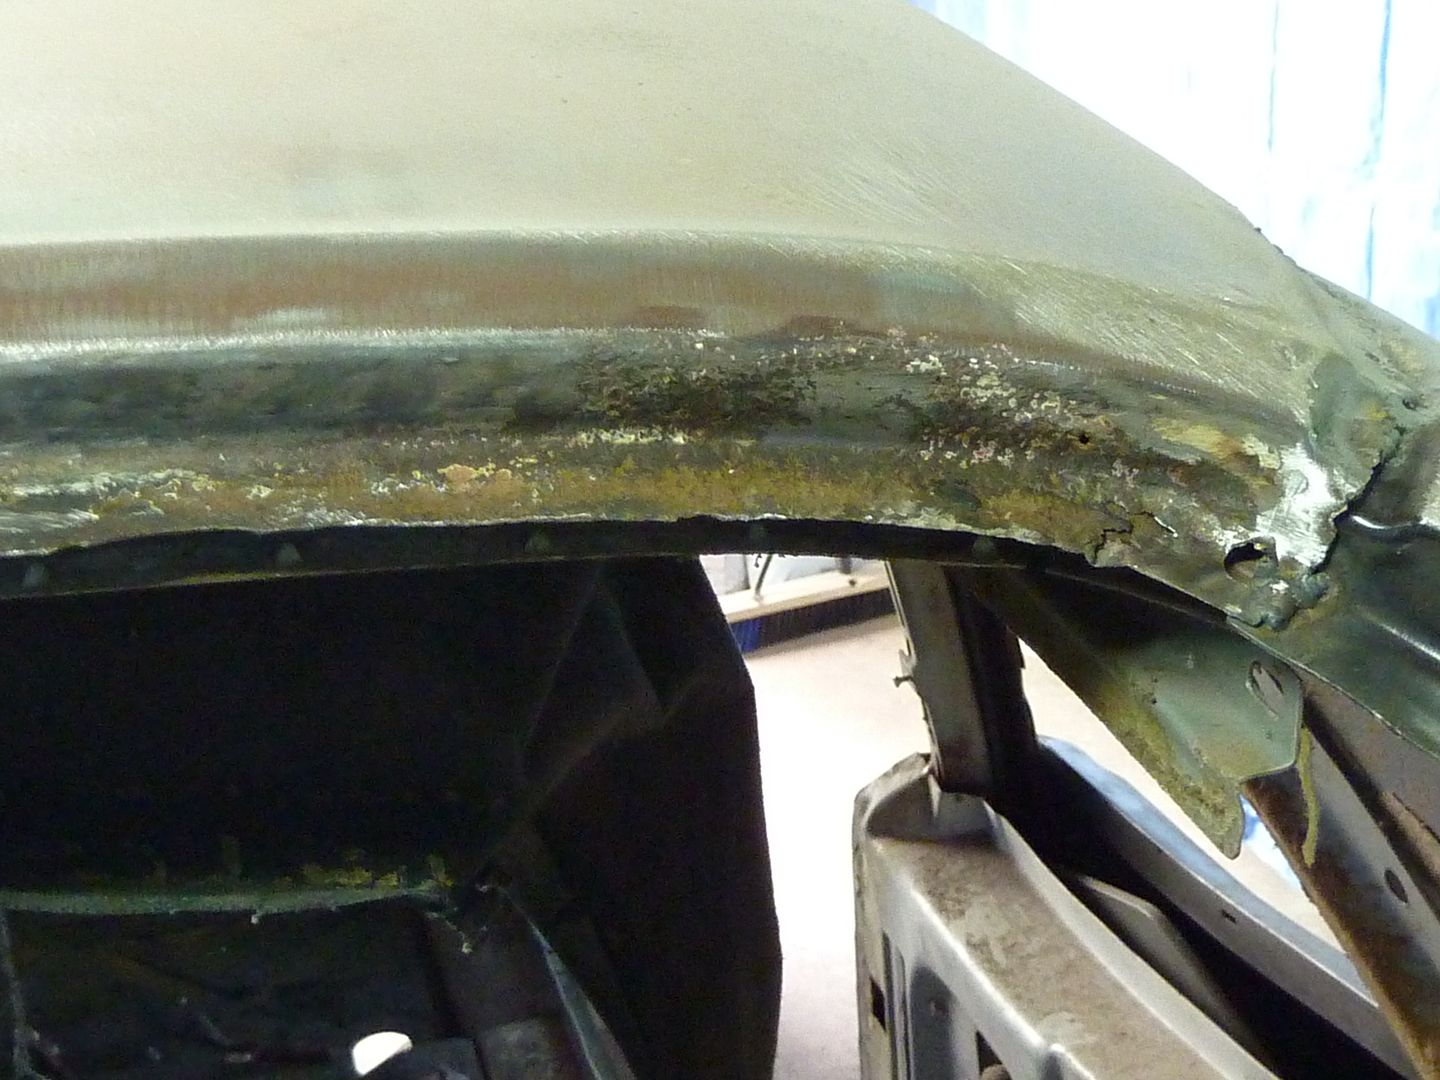
Well I'm not as far along as I was hoping to be, but thought I'd post an update anyways. So I started stripping the window channels and found some ugly areas. For anyone that has never replaced sections of a window channel...what a pain in the *****. Each section probably took me about 2 hours if not longer.
All the areas with black on it I decided to cut out
Cut the first part out
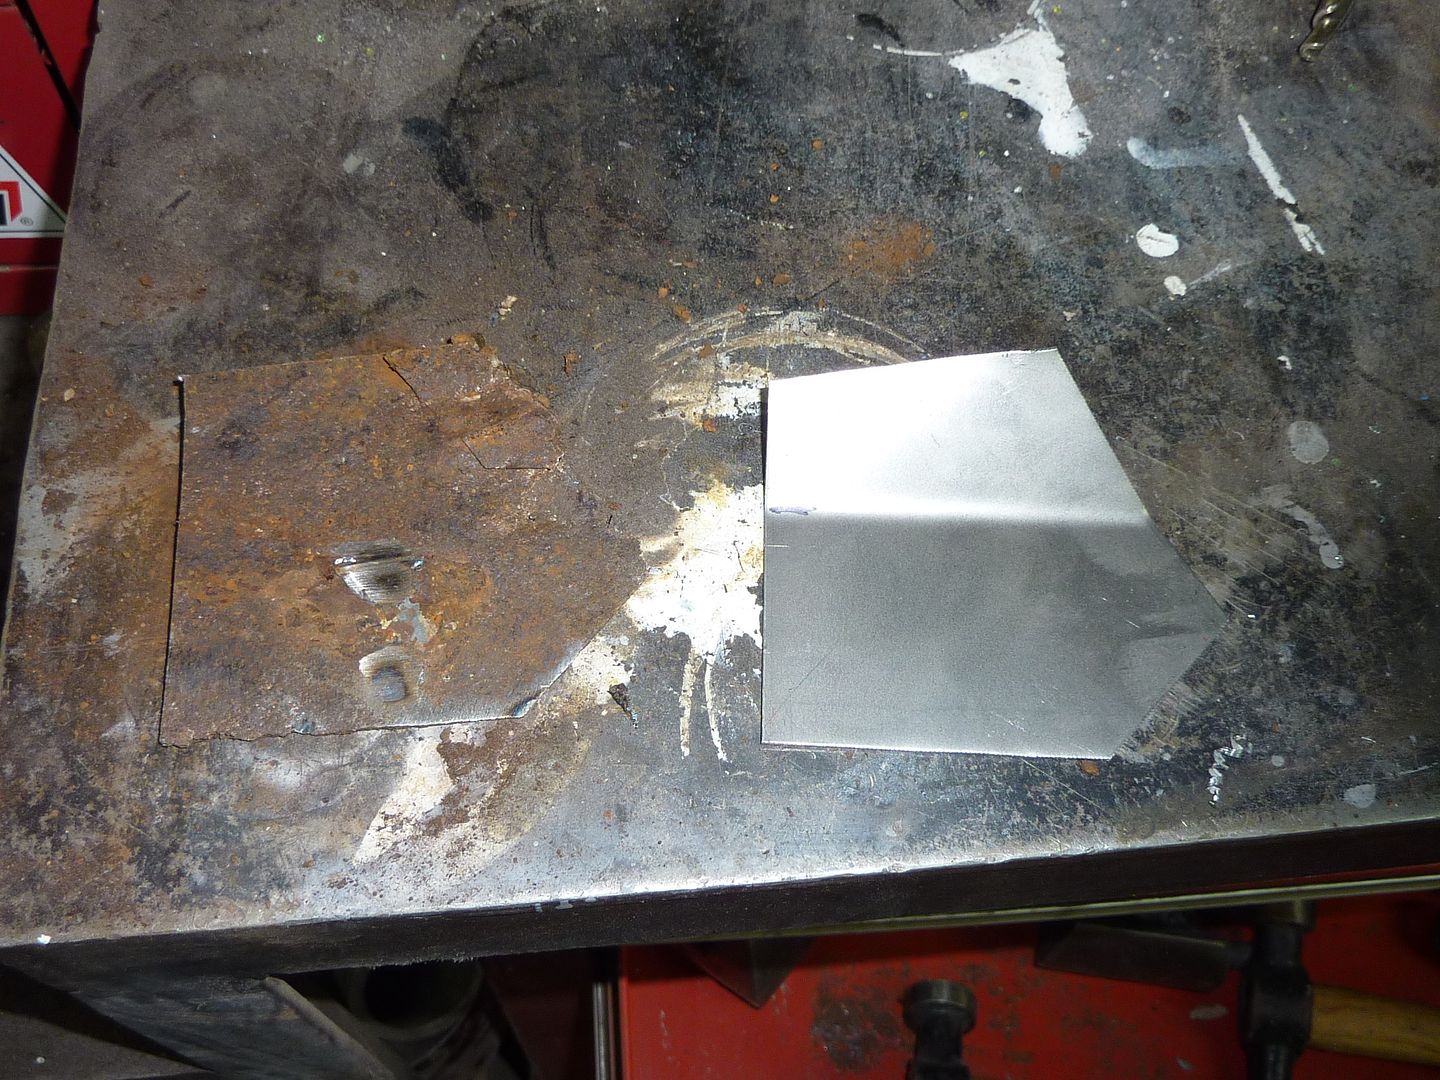
I used 18 gauge sheet metal and found out that the cheap metal brake was exactly that...cheap. Didn't work at all with 18 gauge. So I had to use my vice and a hammer.

The first part was pretty straight forward. You can see in this pic part of the new piece that was put in. The second part had a curve to it so I had to make some relief cuts in the new metal

New stuff in place
Here's a close up of the rest of the areas I got rid of
I'm not going to show each section as you get the hint. The windshield channel took quite a while as there were 4 or 5 sections to replace.
Onto the rear window....more rust.
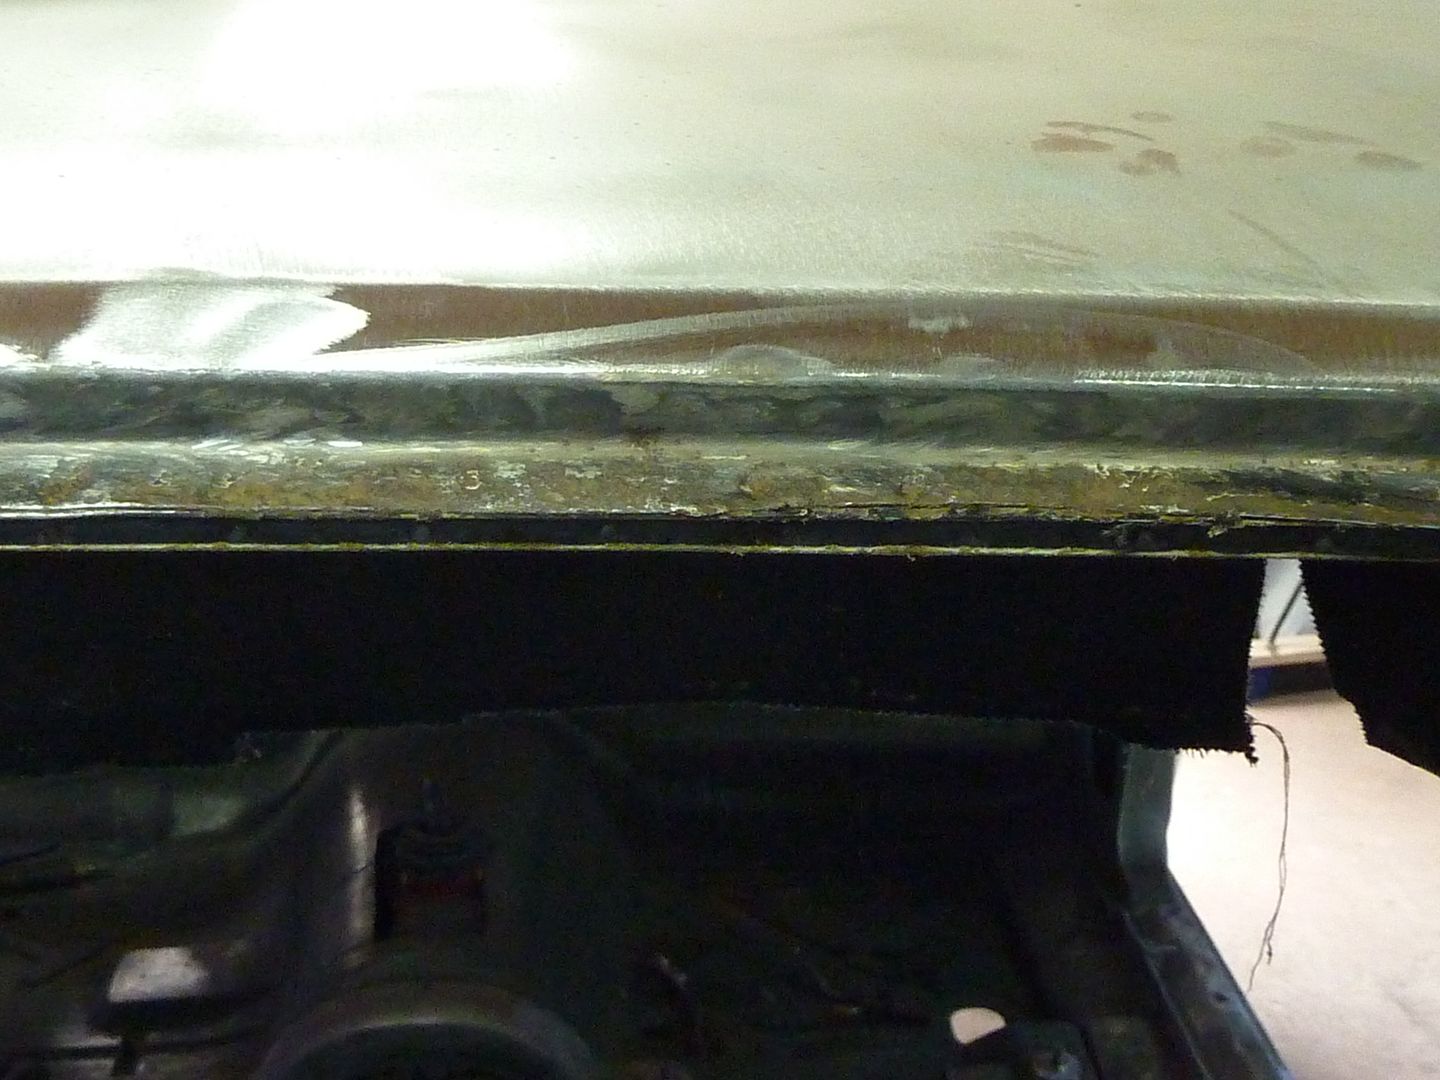
Out with the old
New piece fabbed up
And in place
Once I had the rear window done I started doing a long list of other things that I have neglected or forgot about
Did the sail panel gap
I wanted the trunk/quarter welds to be cleaner, so I added some filler
Other things I got done:
Finished welding the quarter panel at the door jambs. Most of the welds were there, but had to finish a few more and clean them up.
Had to weld the quarter panel to the rocker panel. This was done where the rear window sits in the back seat area. What a pain that was.
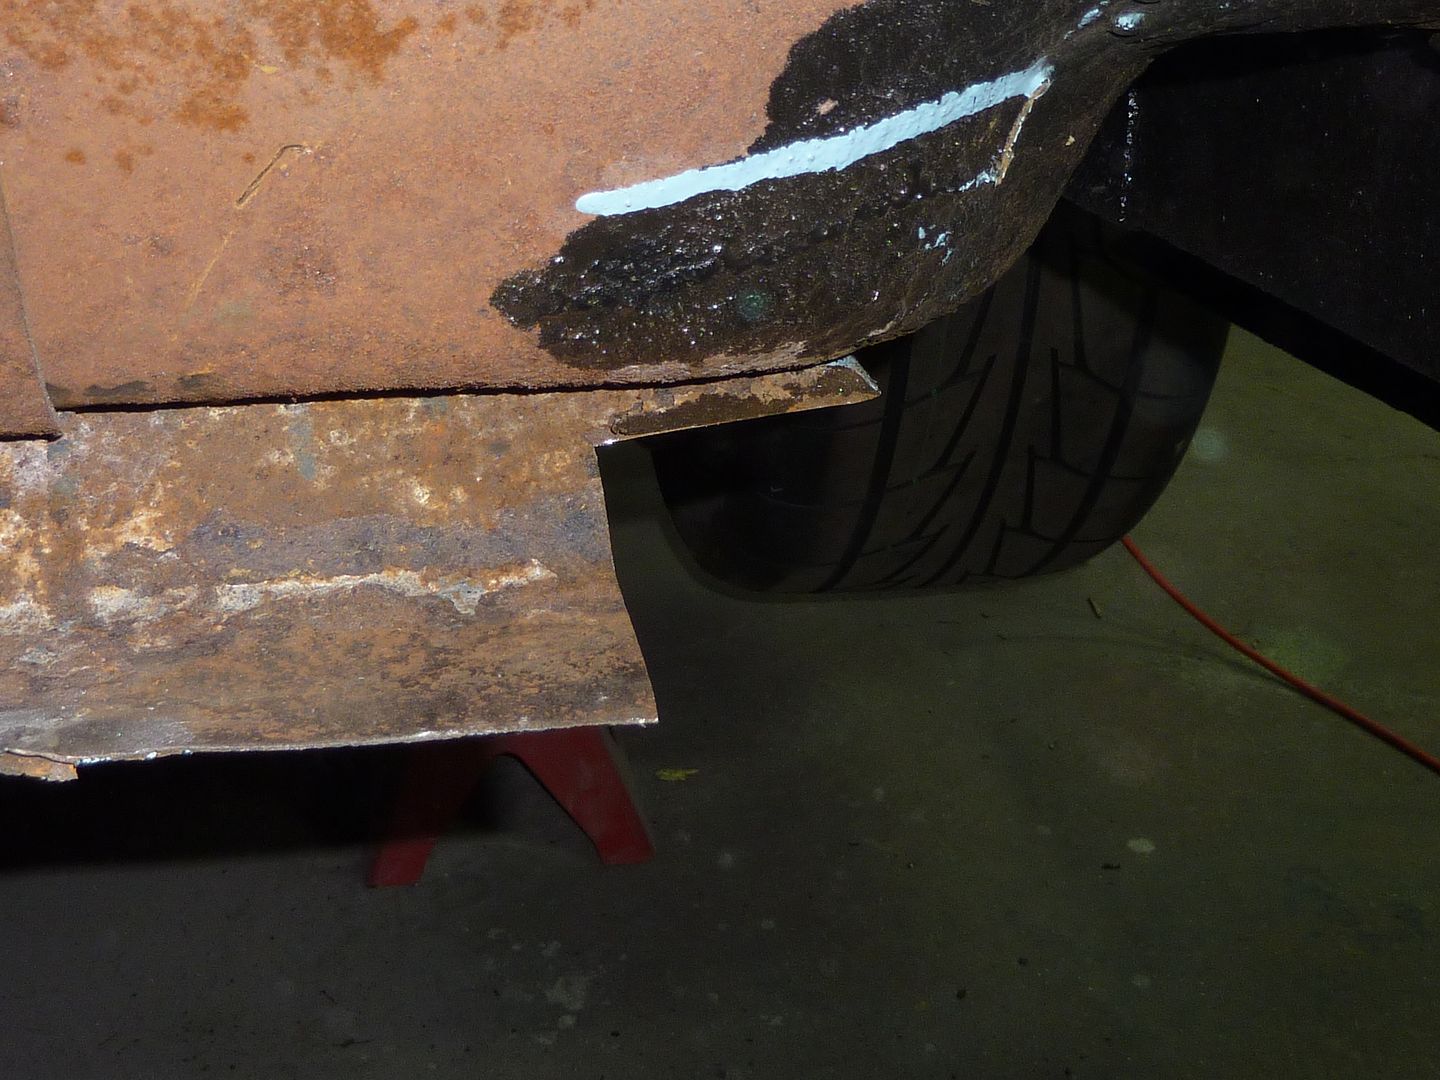
Finished welding all the plug welds on the driver's side wheel housing and trimmed about 1/2" off the fender lip, just like the passenger side. Gave me some extra clearance for the tires. I think I have enough room now that that when I burn the 305's up, I'll be sending my rims in to be widened and get some 315's or 325's.
Finished stripping the rocker panels. Thankfully didn't find any rusted areas.
It seemed like everytime I got doing one area I haven't gotten around to, I would realize there was something else I didn't do.
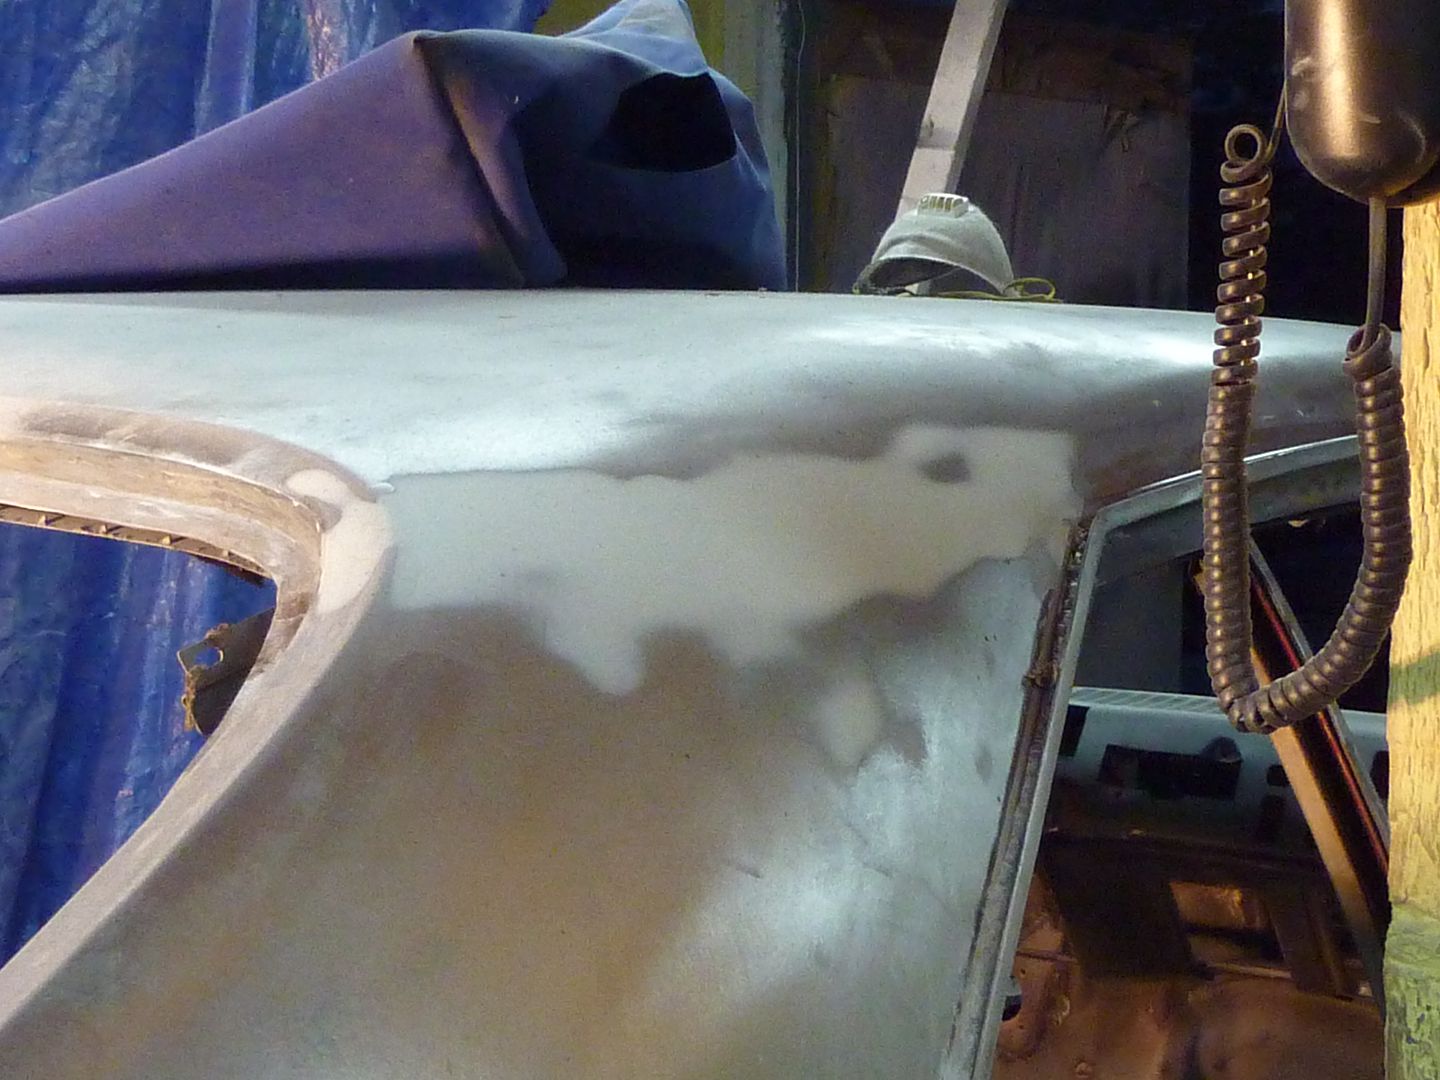
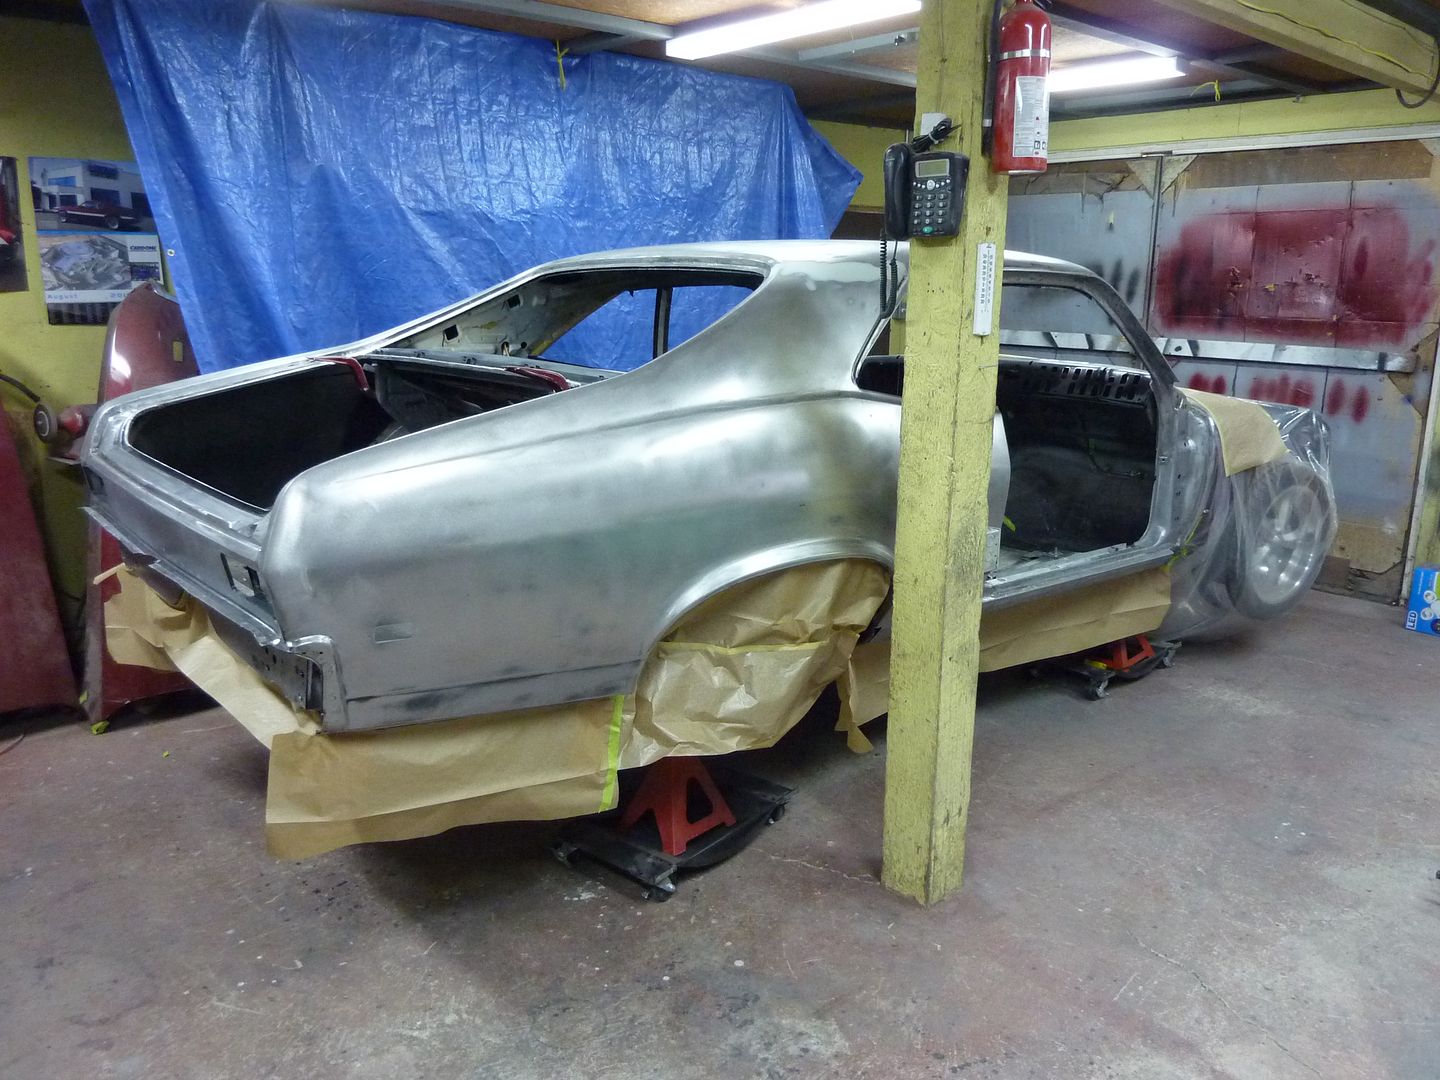
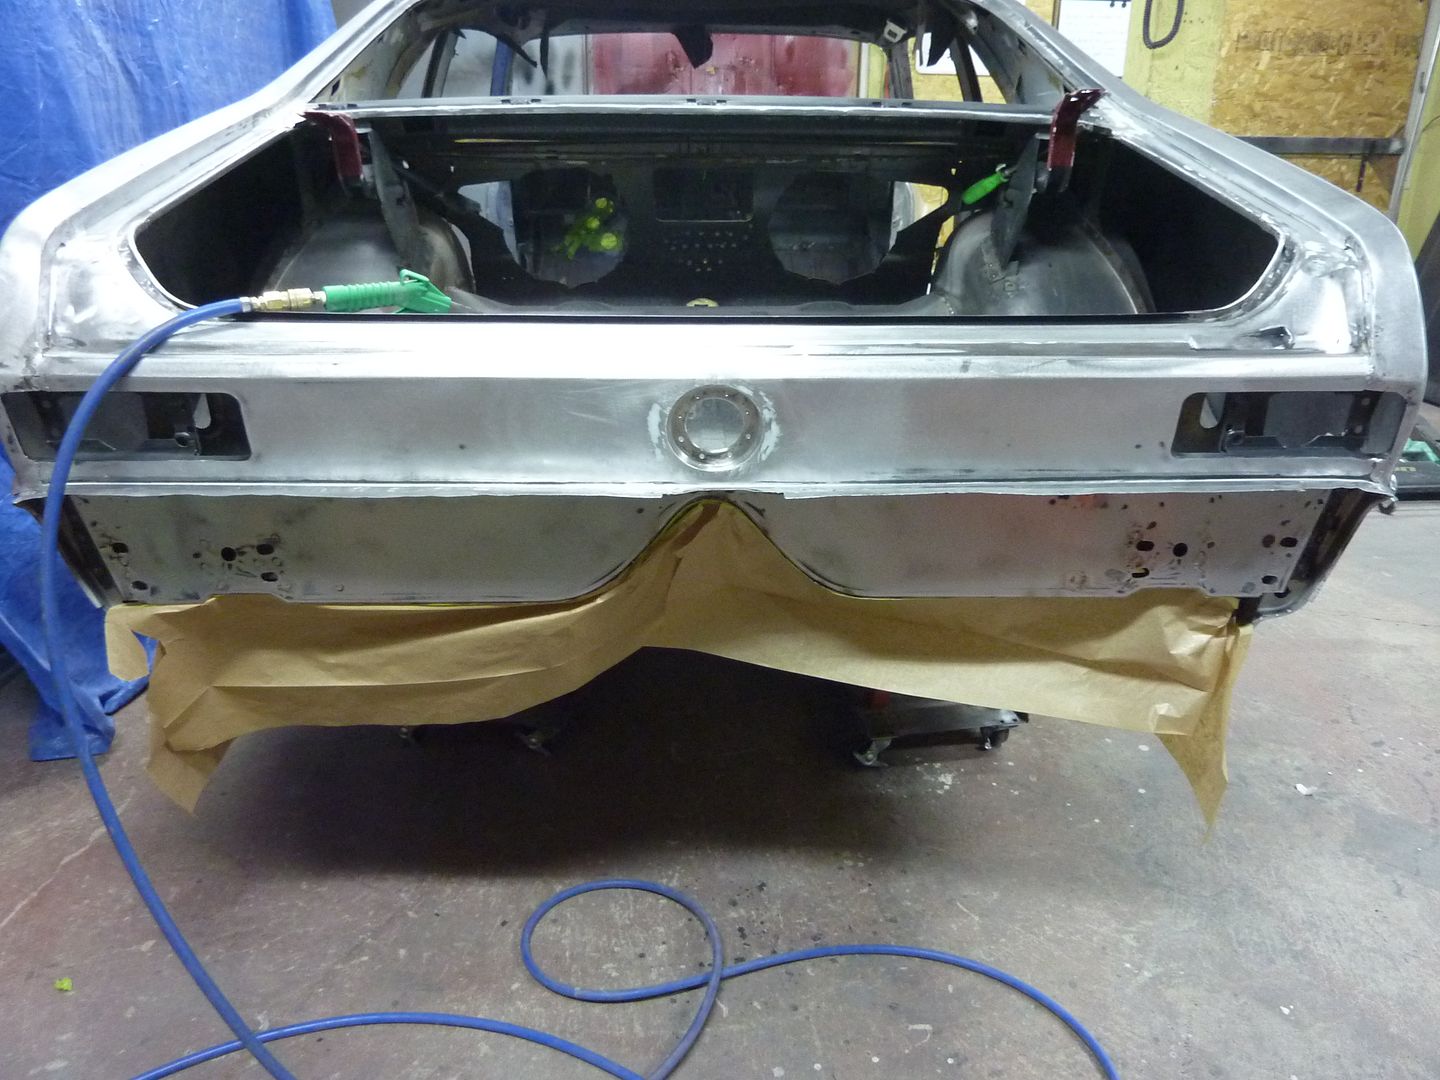
I was planning on getting the car into primer so I cleaned it all with PPG wax and grease remover.
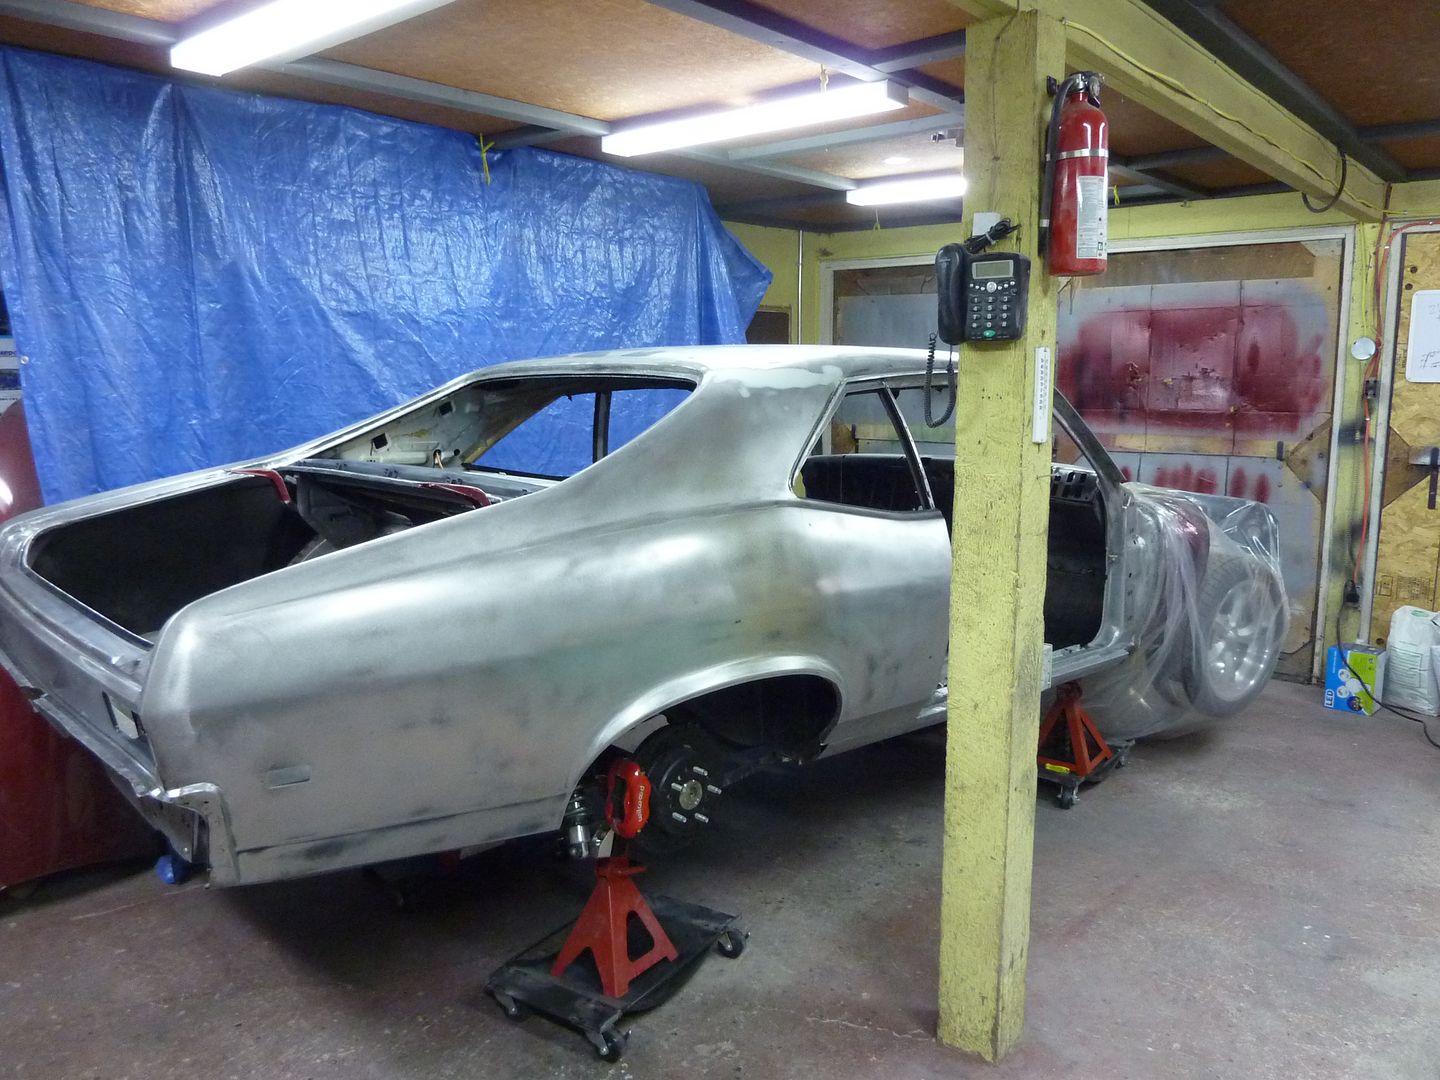
Started masking the car. I wasn't too concerned about masking the inside as I will cleaning it up and putting in some POR or Zero Rust.
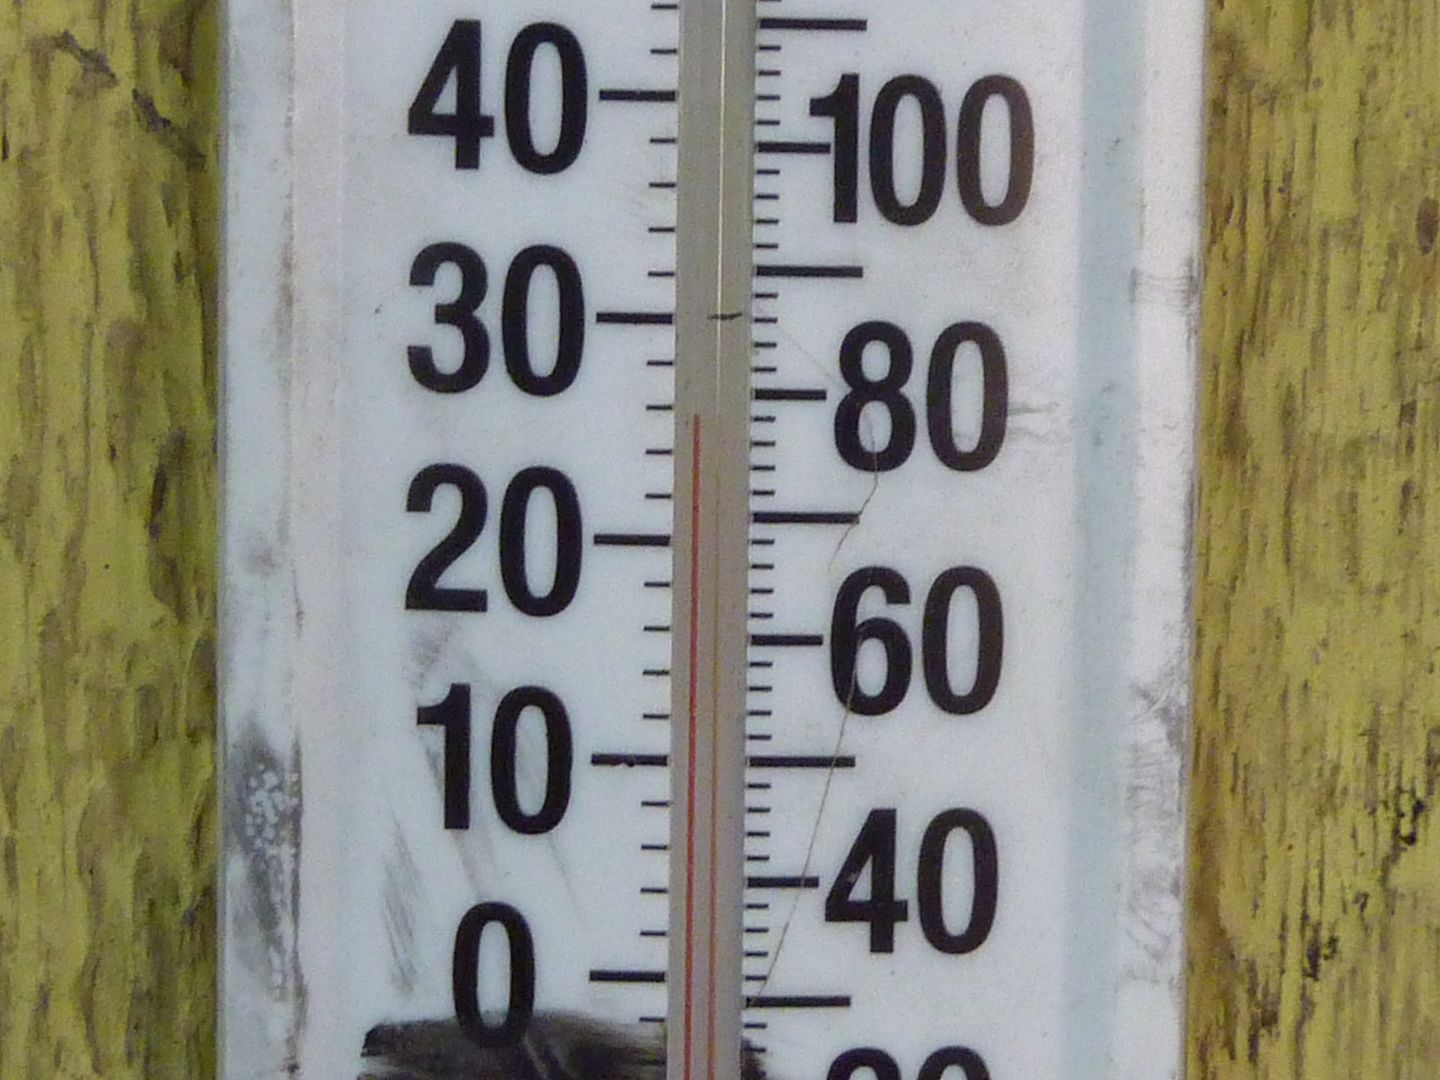
I got my spray gun out and was going to lay down the first coat of primer but I could not find my gun regulator anywhere. It was getting late in the day so I thought I would wait till later this week to get it done. Good thing I have two 220v heaters to get my shop nice and toasty as it's starting to get pretty close to zero Celcius over night.
I also thought I was going to have to get new primer as mine sat in the shop since last winter and it got down to -20 degrees Celcius if not closer to -30 a few times. I called the supplier who said it should be fine. He said if it was water based primer, it would likely be no good. I'm using BASF RM line EP569 and EP769 (one's gray the other is black). So the next update the car will be in primer.
10-24-2010 | 10:28 AM
#66

TECH Senior Member

Joined: Jul 2009
Posts: 7,930
Likes: 609
Scherp69,
When I first stumbled upon your build thread, I skimmed throught it and I thought the candyapple red paint was a fresh paint job. I was horrifiied when I seen you install the camaro fuel filler panel. I guess it was a old color. Not much left. Great progress. So which MillerMatic welder do you have? What are your thoughts on it? Any regrets or wiching you went with a cheaper unit, say Hobart or Lincoln I keep eyeballing the 210
Keep up the good work
Jjim.
10-29-2010 | 06:12 PM
#67
Thread Starter
On The Tree
iTrader: (4)
Joined: Mar 2009
Posts: 132
Likes: 0
From: British Columbia, Canada
Scherp69,
When I first stumbled upon your build thread, I skimmed throught it and I thought the candyapple red paint was a fresh paint job. I was horrifiied when I seen you install the camaro fuel filler panel. I guess it was a old color. Not much left. Great progress. So which MillerMatic welder do you have? What are your thoughts on it? Any regrets or wiching you went with a cheaper unit, say Hobart or Lincoln I keep eyeballing the 210
Keep up the good work
Jjim.
When I first stumbled upon your build thread, I skimmed throught it and I thought the candyapple red paint was a fresh paint job. I was horrifiied when I seen you install the camaro fuel filler panel. I guess it was a old color. Not much left. Great progress. So which MillerMatic welder do you have? What are your thoughts on it? Any regrets or wiching you went with a cheaper unit, say Hobart or Lincoln I keep eyeballing the 210
Keep up the good work
Jjim.
Onto the updates......
Got the filler cap panel back into place. Didn't bother posting pics of the process as I did that earlier, and really it's just welding a piece of sheet metal into place. After I got that done, I finished up a few last things I wanted to get done before spraying it.
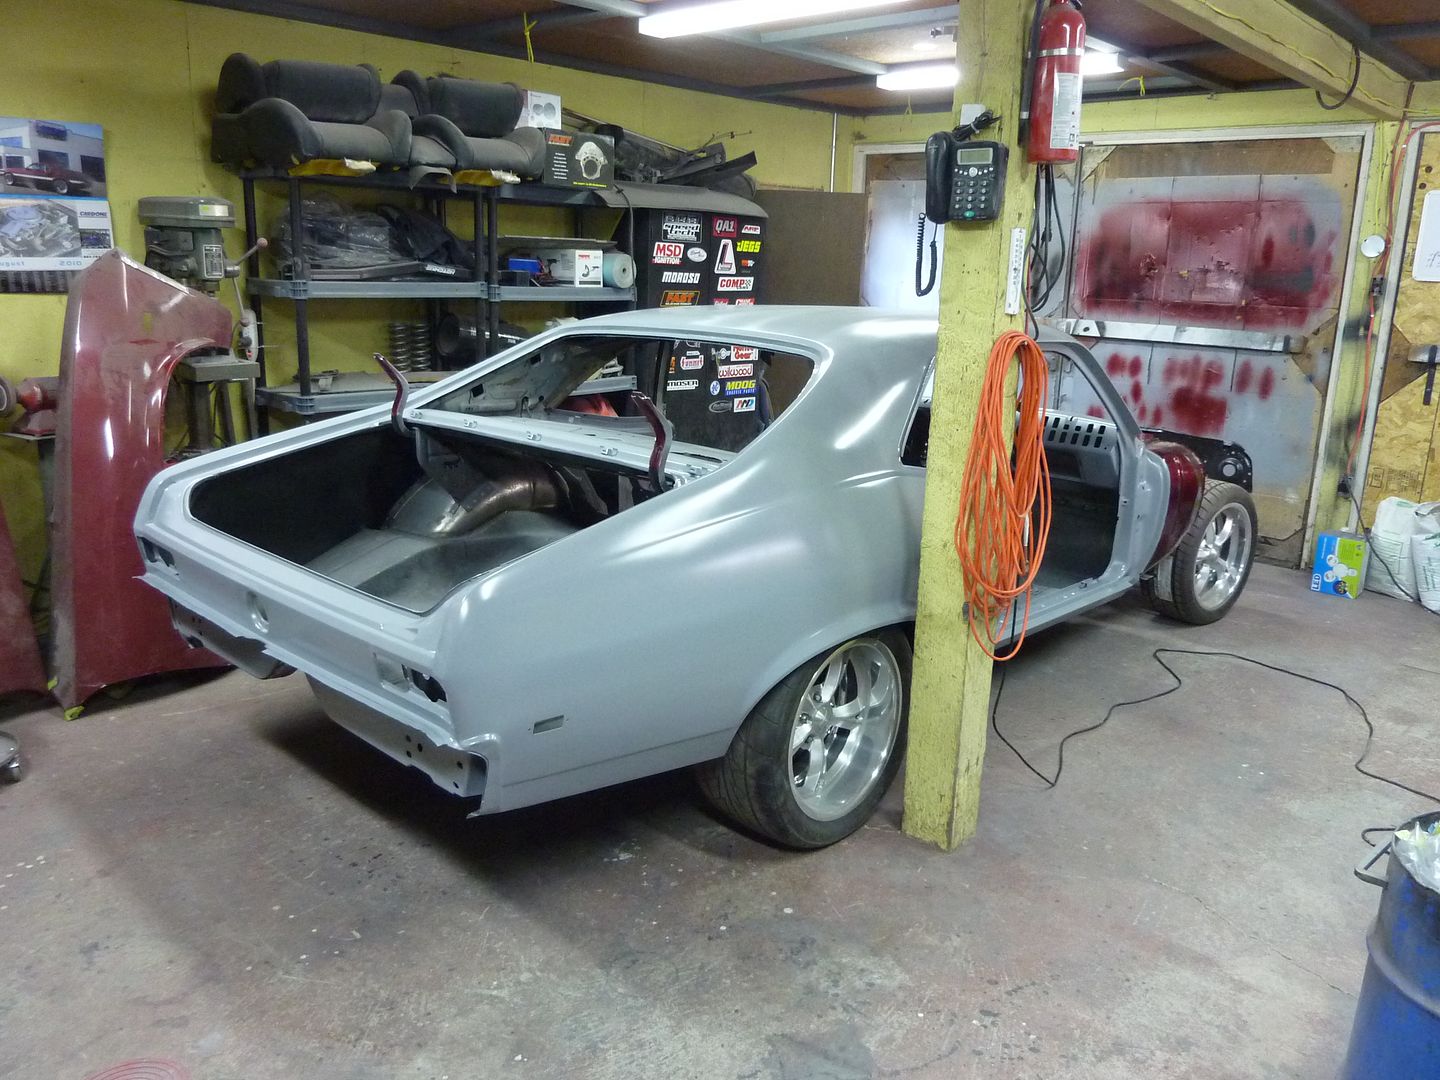
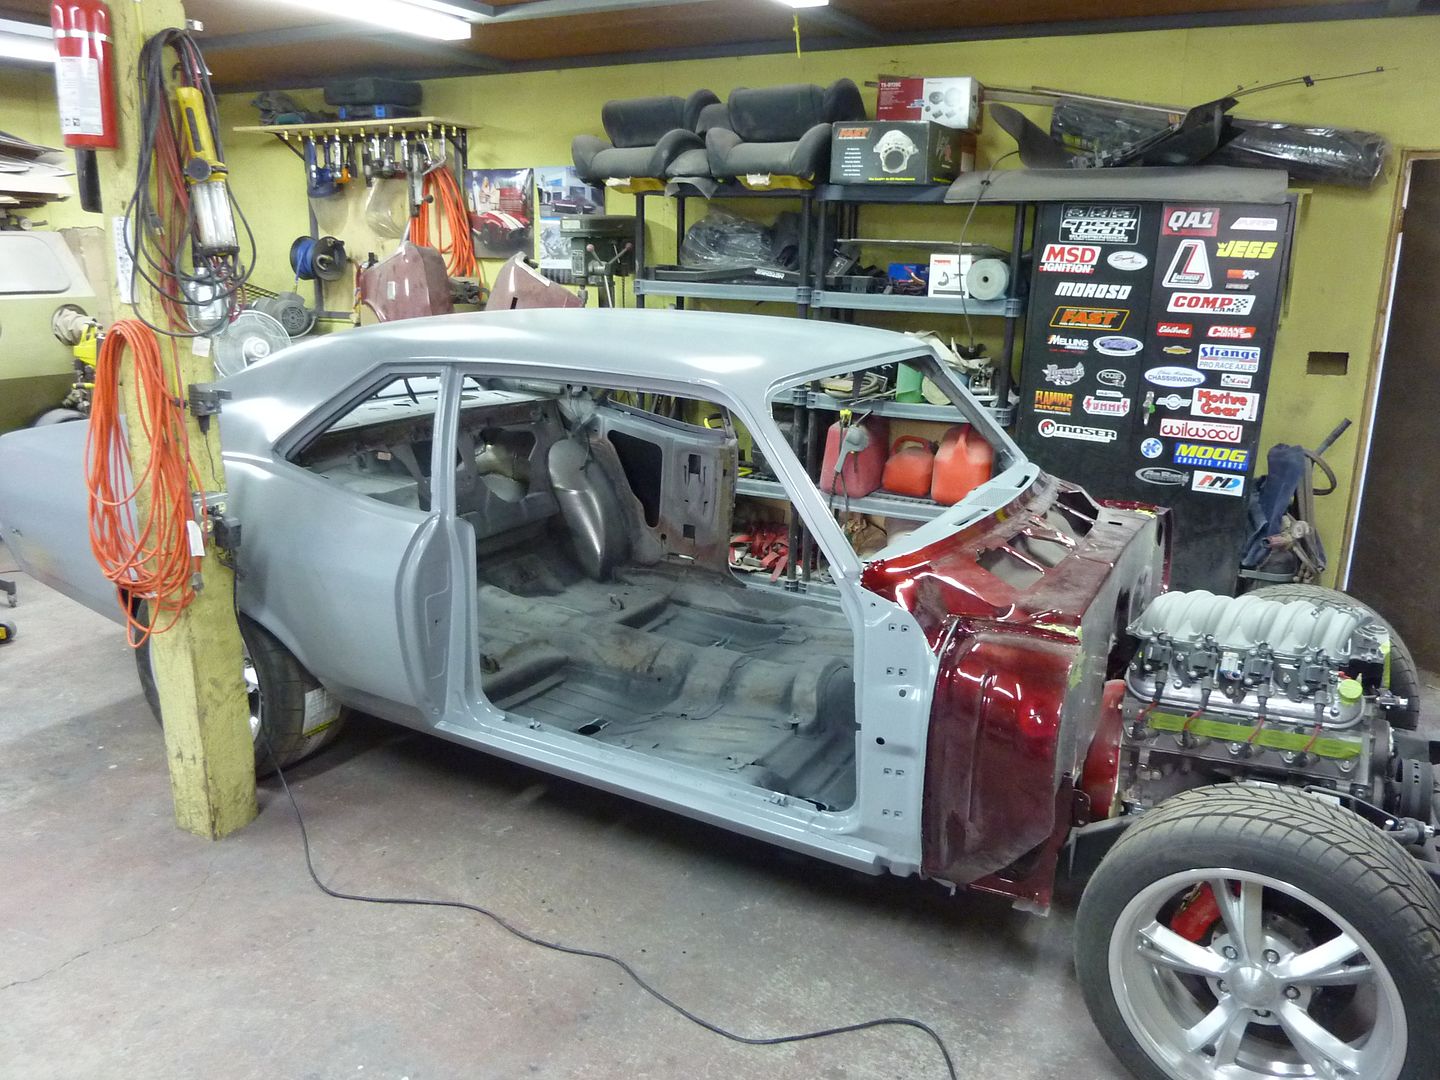
I finally got around to laying the primer. I decided to put 2 coats of black down first so I know when I'm getting close to the metal when sanding.
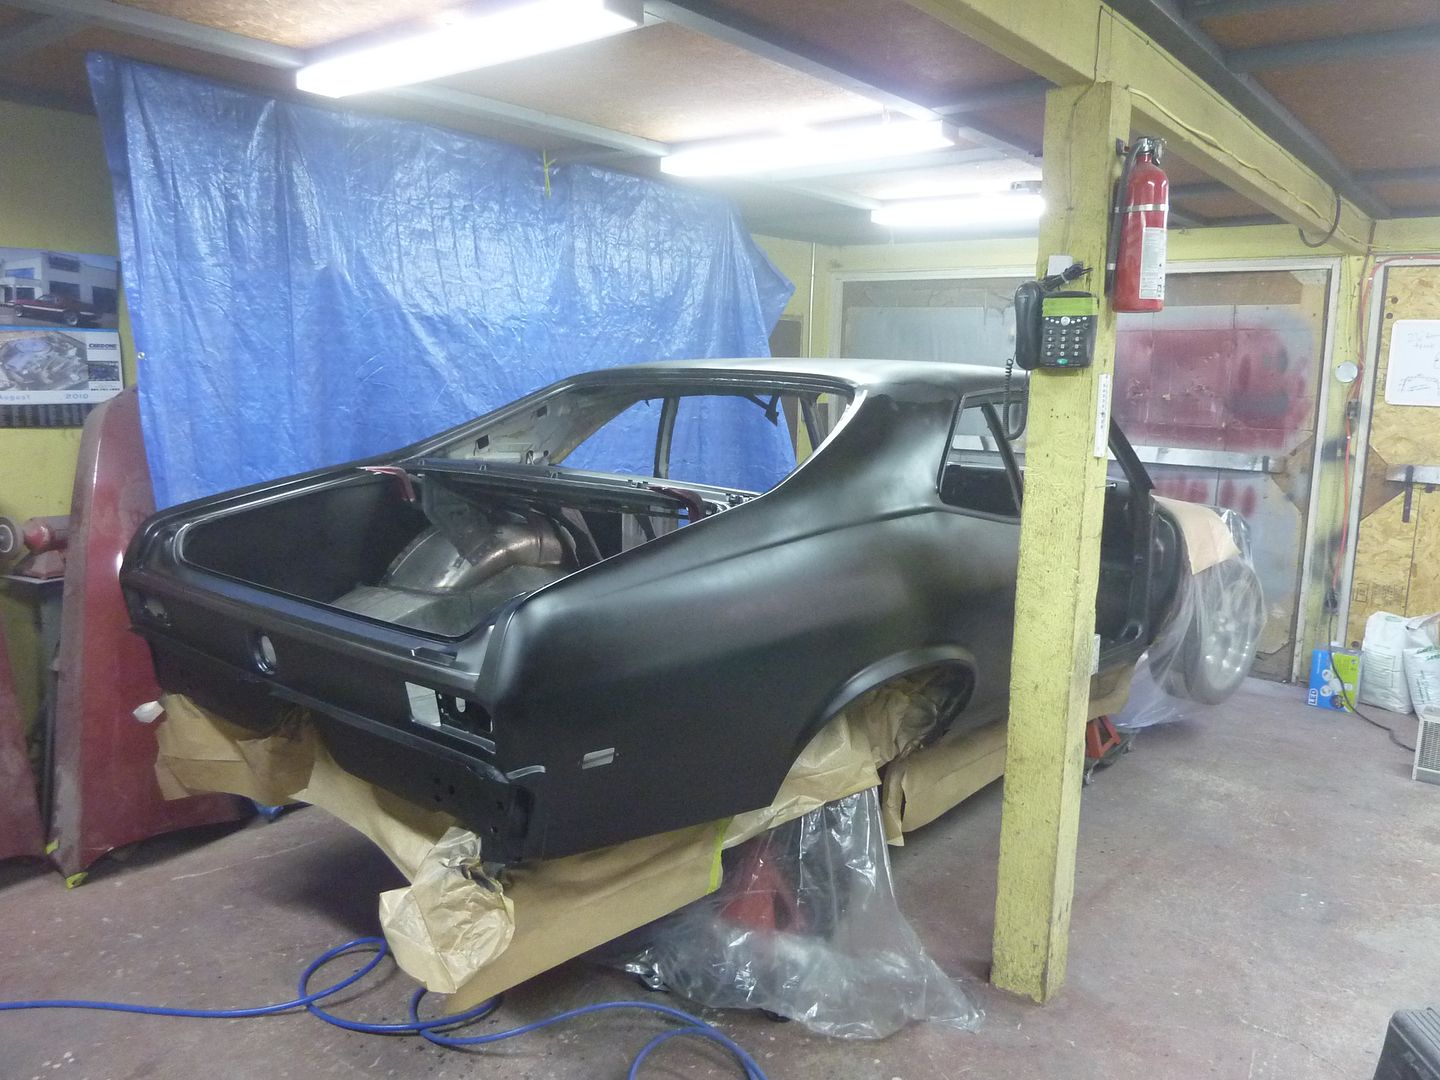
And then it was grey.....
The weather today wasn't too bad outside (8 degree Celcius) but I still needed to have one of the 220 heaters going. Got it pretty nice in the shop. Don't think I'll have to worry about it being too cold in there. I had it running all day yesterday, today and will turn it off tomorrow after the cars had a good 24 hours in that temp.
I was asked about what primer I was using in another thread. I know I posted it earlier in this thread, but thought I'd post it again. It's a fairly new product that BASF brought out and is a one product for everything primer. I'm using it on the bare metal, as a high build and it will be my sealer also. Here's a quote from one of their pamphlets:
Primer-surfacer? Wet-on-wet sealer? Precoat? Polyuroxy? Now one product lets you clear some shelf space by meeting all those needs. R-M�s new chromate-free epoxy primers � available in four colors � let shops replace a variety of products with just one easy-to-use solution. With outstanding adhesion over steel, aluminum, zinc coated and galvanized metals, the new primers are free of chromates yet deliver proven epoxy performance. The primers are offered in gray (EP569), white (EP669), black (EP769) and red (EP869) to blend smoothly with any basecoat, while eliminating excess
inventory and guesswork.
Here's the link to where I found that: http://www.leadingedge-az.com/winnin...ing2008%20.pdf It talks about the primer on page 7 of the pamphlet.
This stuff was brought to my attention by 2blackragtops who owns a body shop and spoke to the BASF rep about using a product that would do everything for me since I'm doing it all in my shop. The only thing is....it's not cheap. I bought a gallon of black and a quart of grey to start with. A quart runs about $60-70. The nice thing though.....one product for each step. I did the firewall with it so far and I found that it sprays nice and sanded easy. I haven't done much sanding on other primers so not sure how it is in comparison, but I was happy with it. I'm really happy with how the firewall turned out.
So now that the car is in primer, I'm going to take a break from the car for a couple weeks. I'm re-organizing my shop and need to get some stuff done around the yard. Not sure what I'll tackle next but as always....will post pics.
 01-21-2011 | 01:12 PM
#71
Thread Starter
On The Tree
iTrader: (4)
Joined: Mar 2009
Posts: 132
Likes: 0
From: British Columbia, Canada
No sorry, I sold it.
Thanks for the comments guys.
Just a quick update. I haven't done anything new to the car since October. It hasn't worked out with winter, xmas, work, etc. I plan on heading out on Monday though as the wife and daughter are gone until Thursday. What timing...I'm off Monday to Wednesday so I hope to get some stuff done.
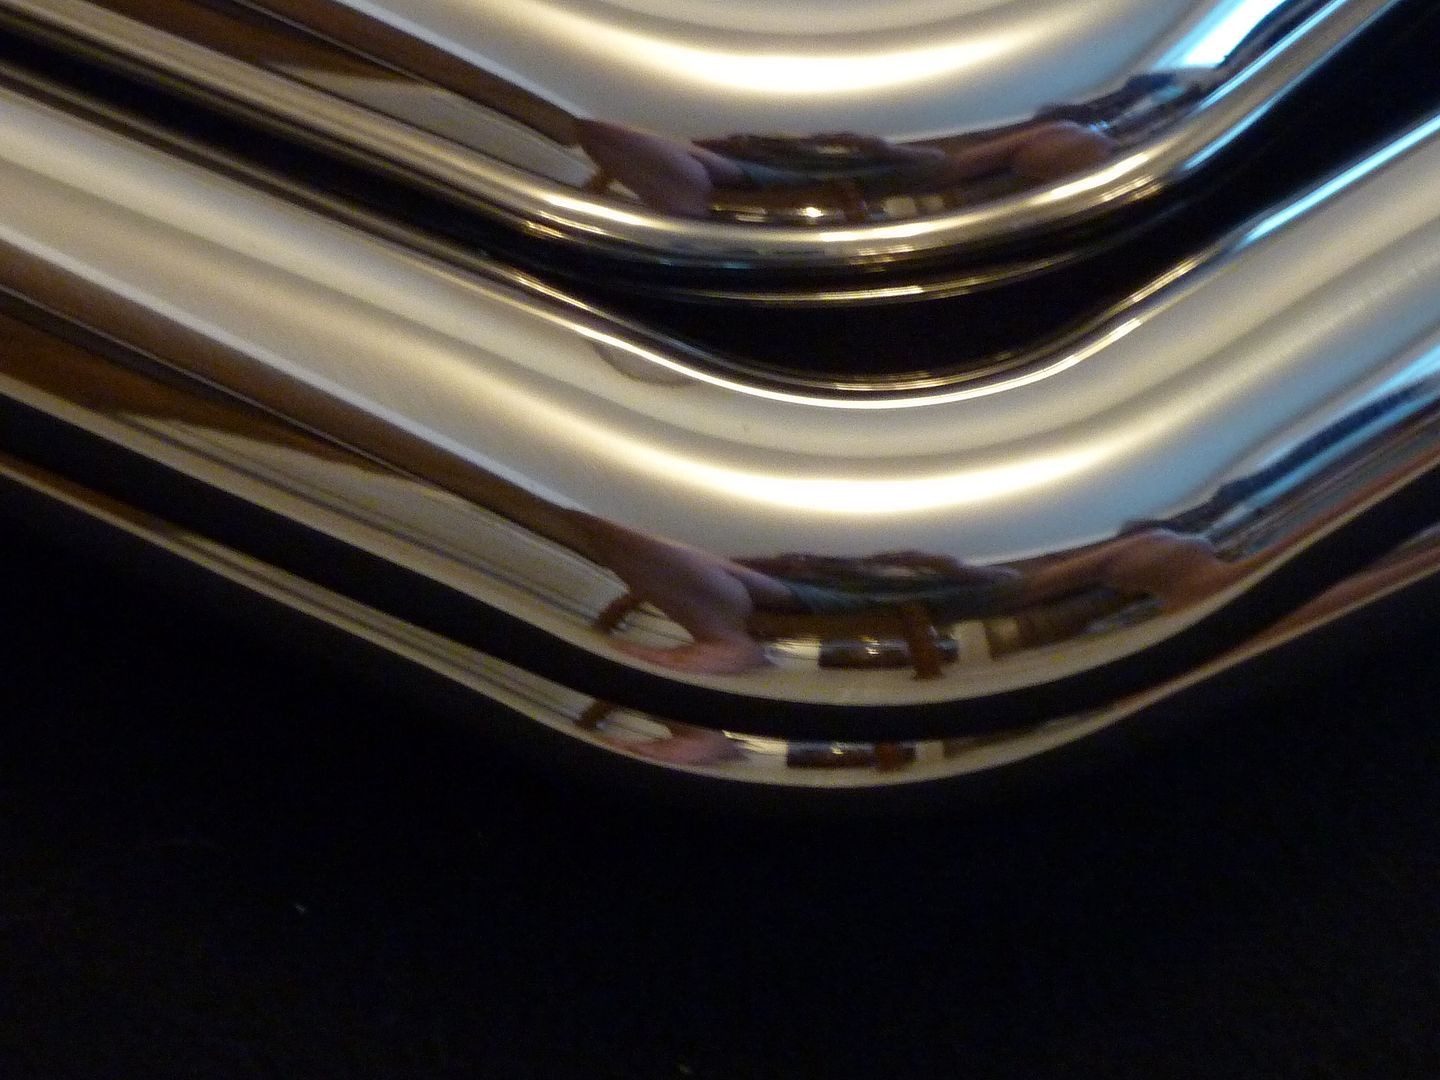
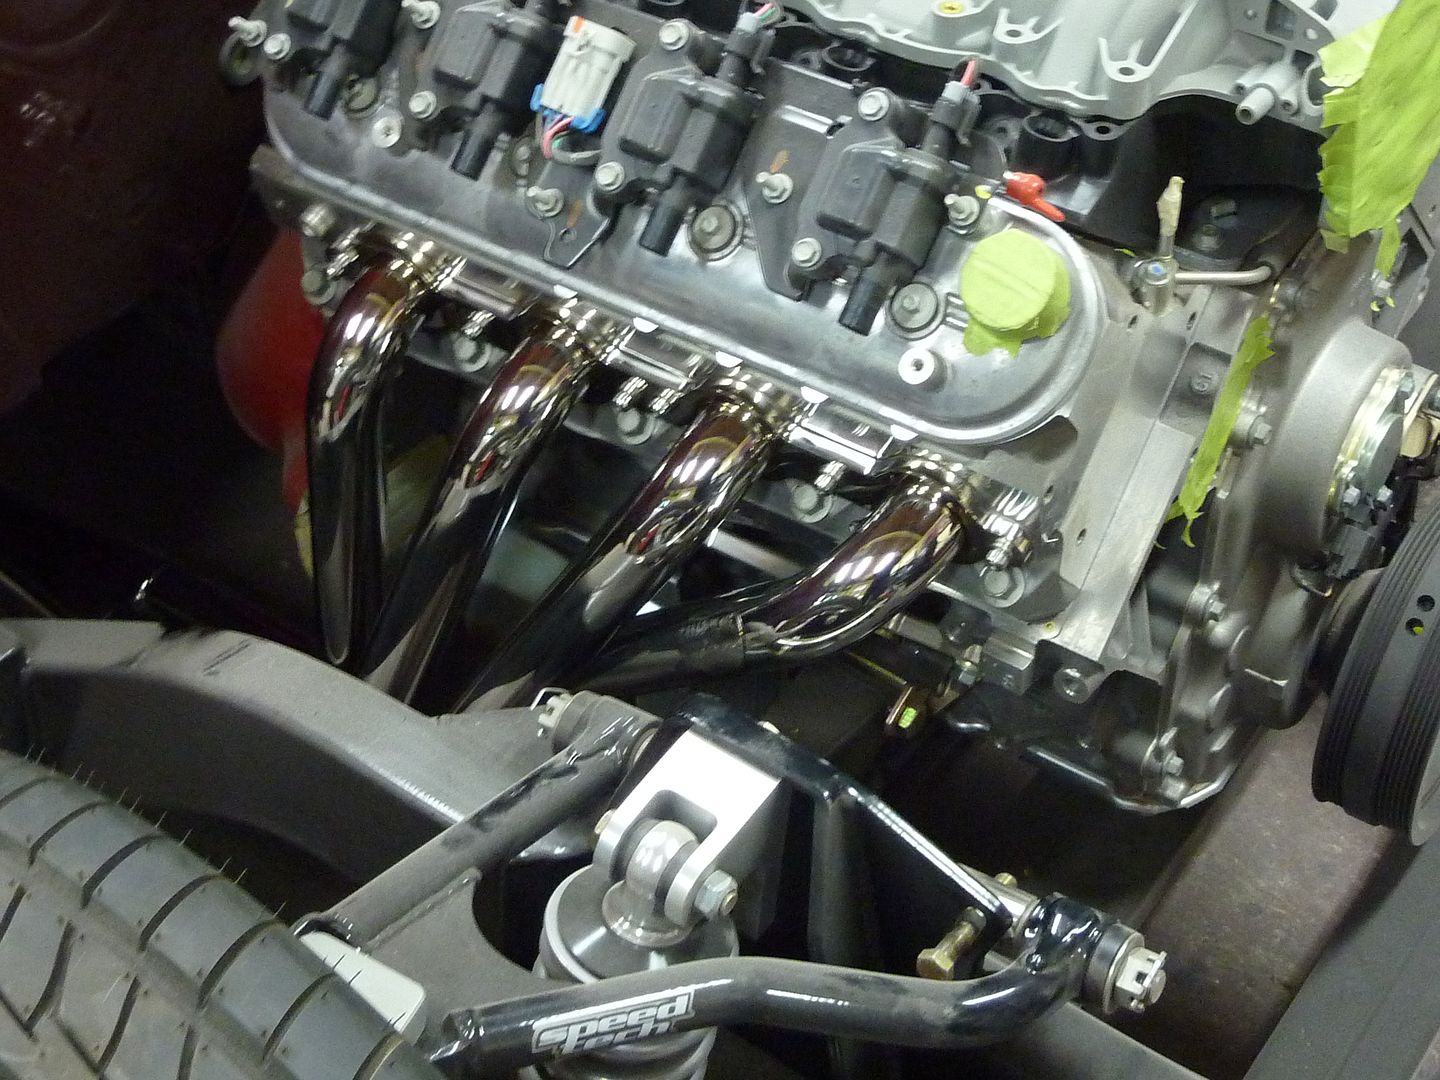
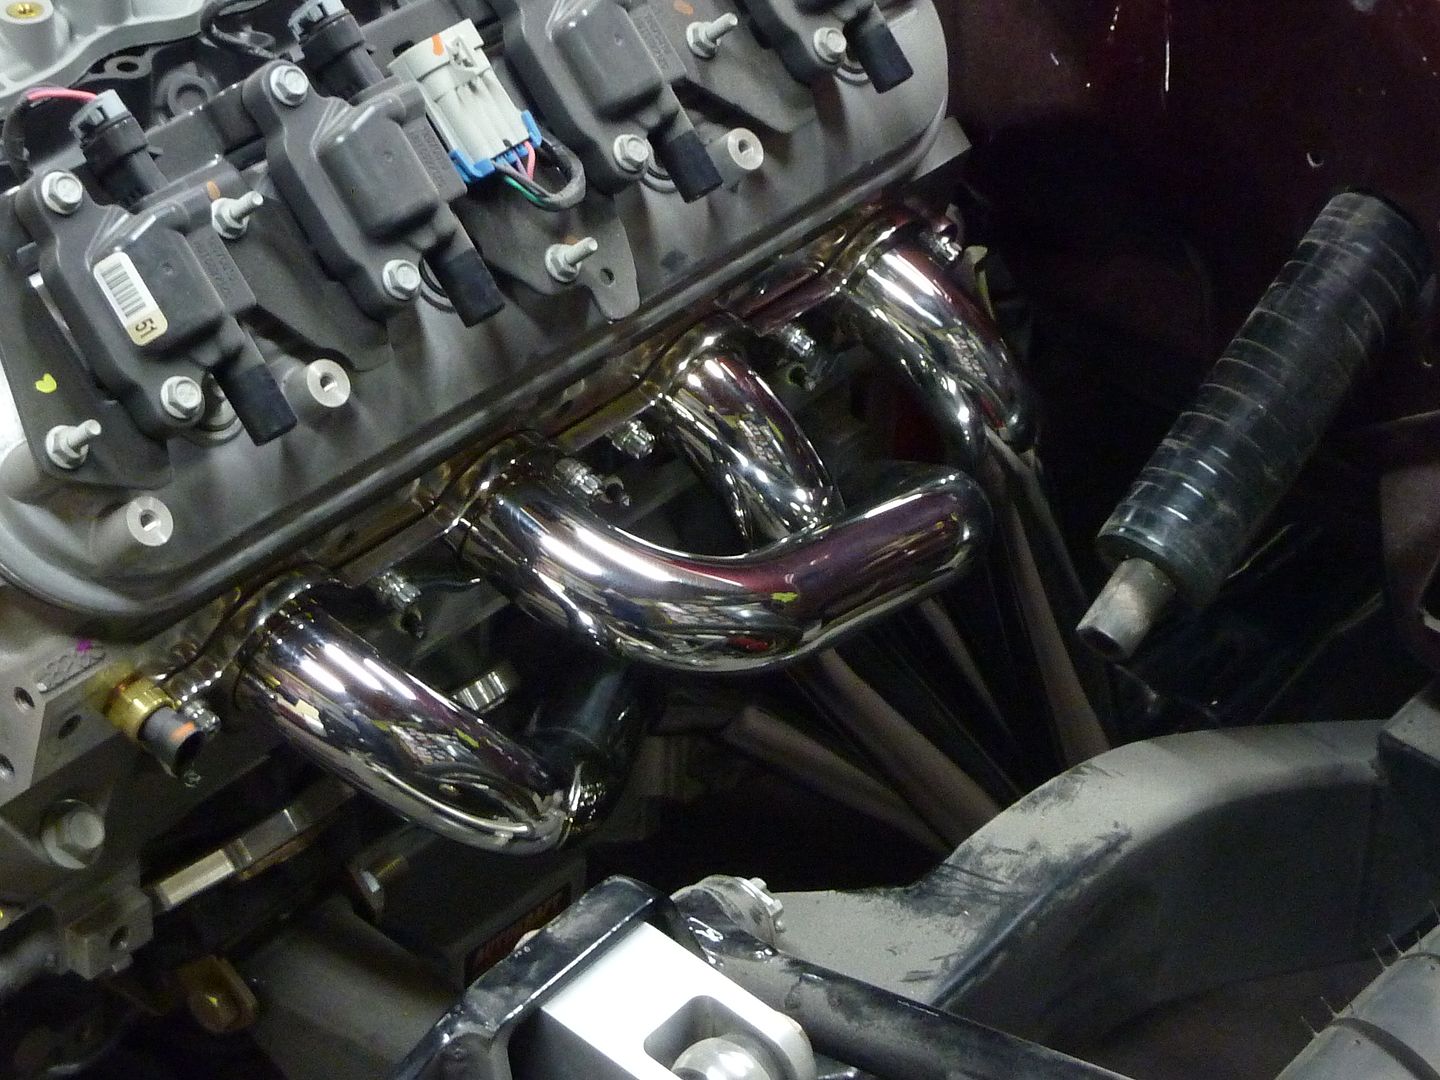
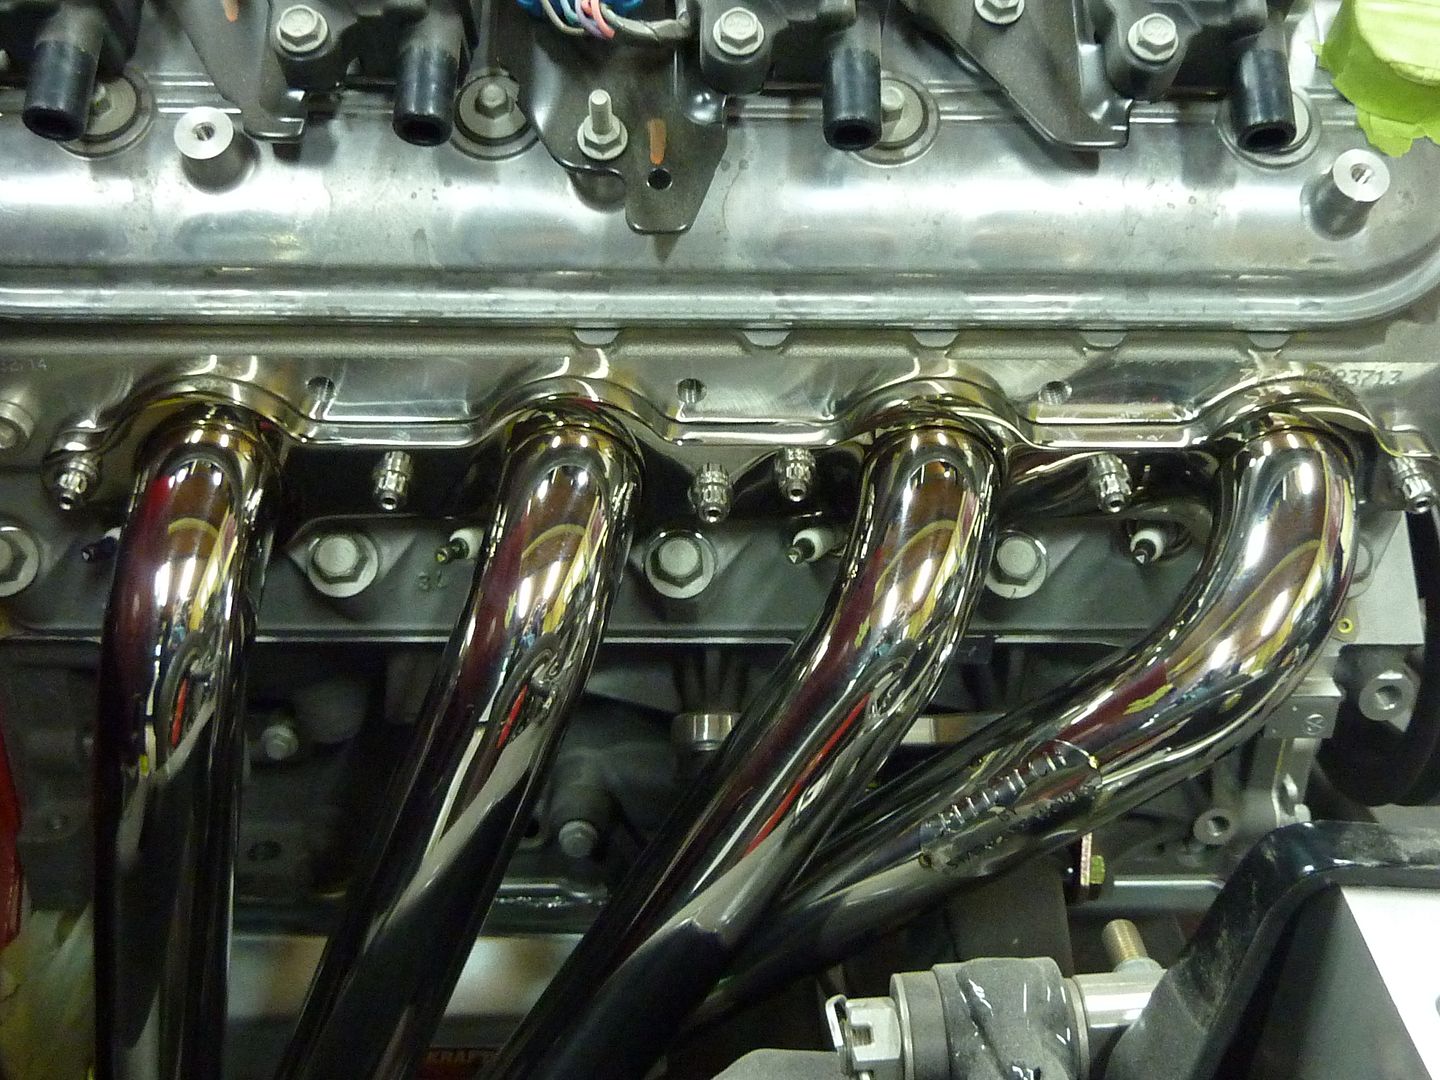
These showed up this morning though. They are Speed Tech LSx headers that are built by Stainless Works. They are amazing quality. I know the polished isn't for everyone, but I'm glad I decided to get them. They will look awesome. Here's a few pics:

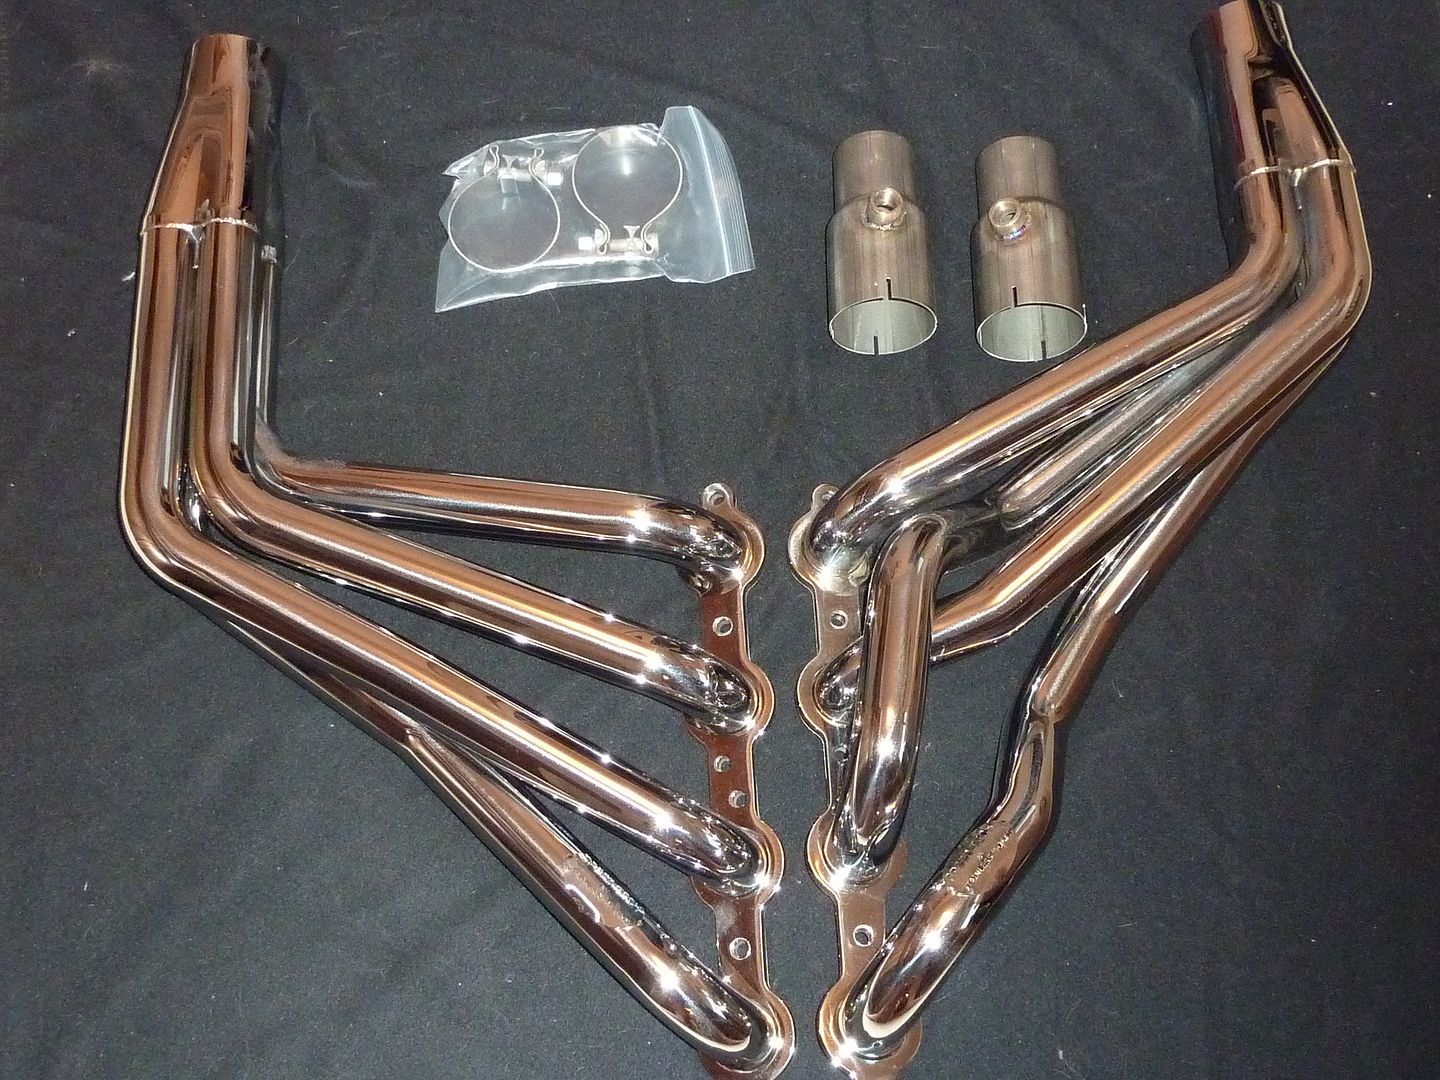
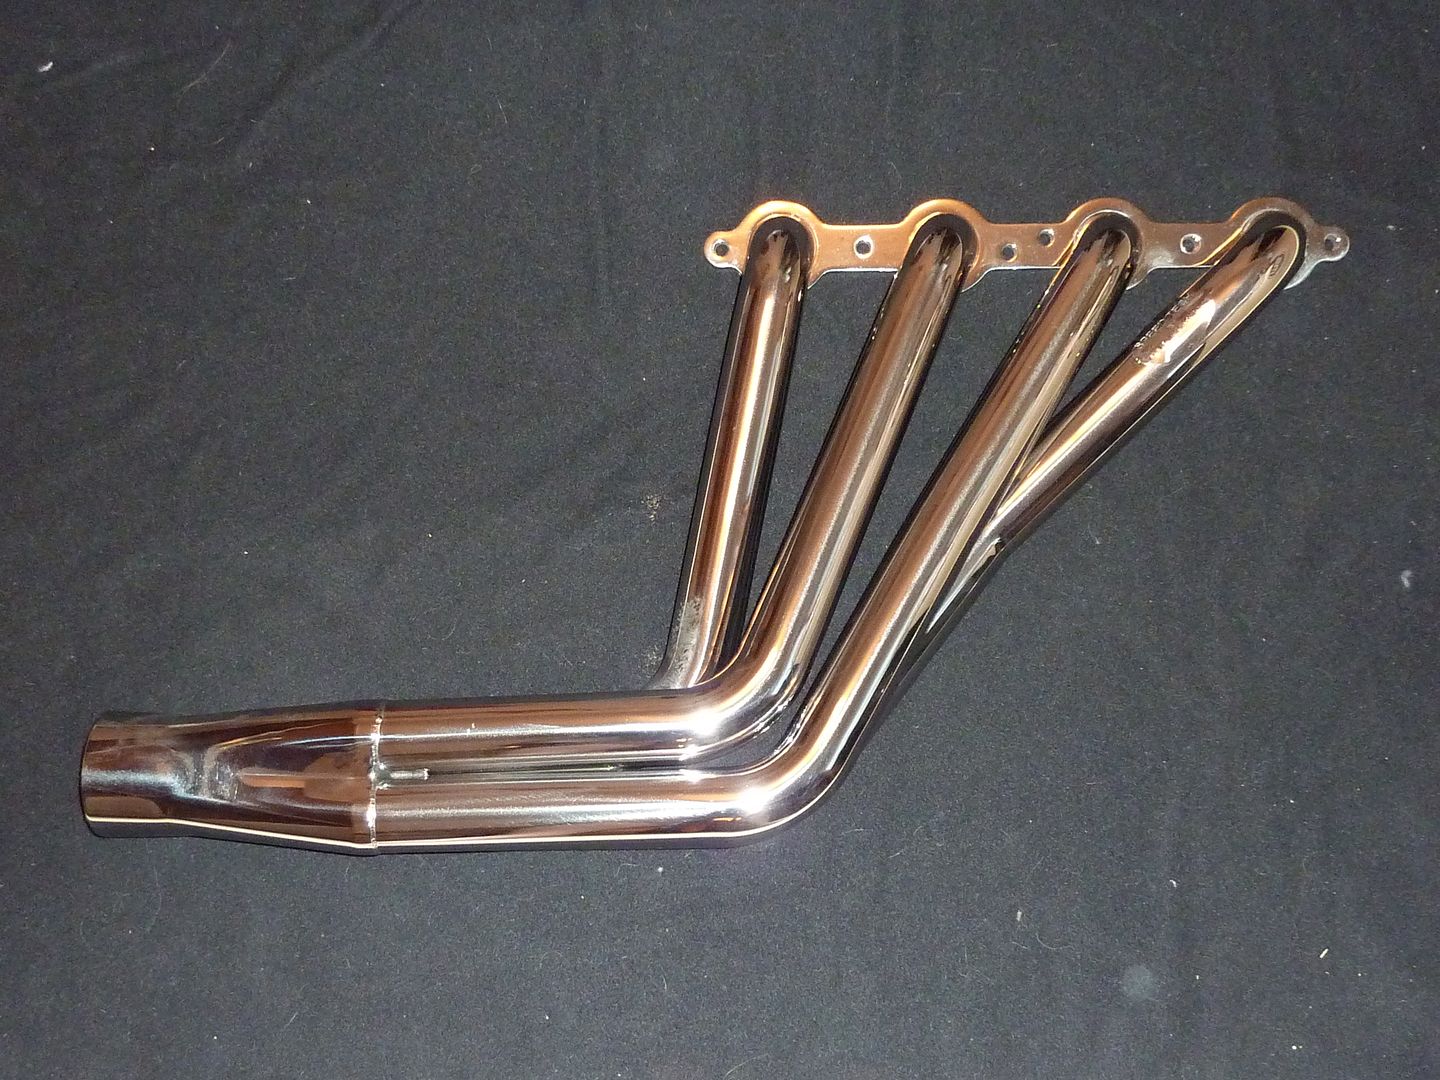
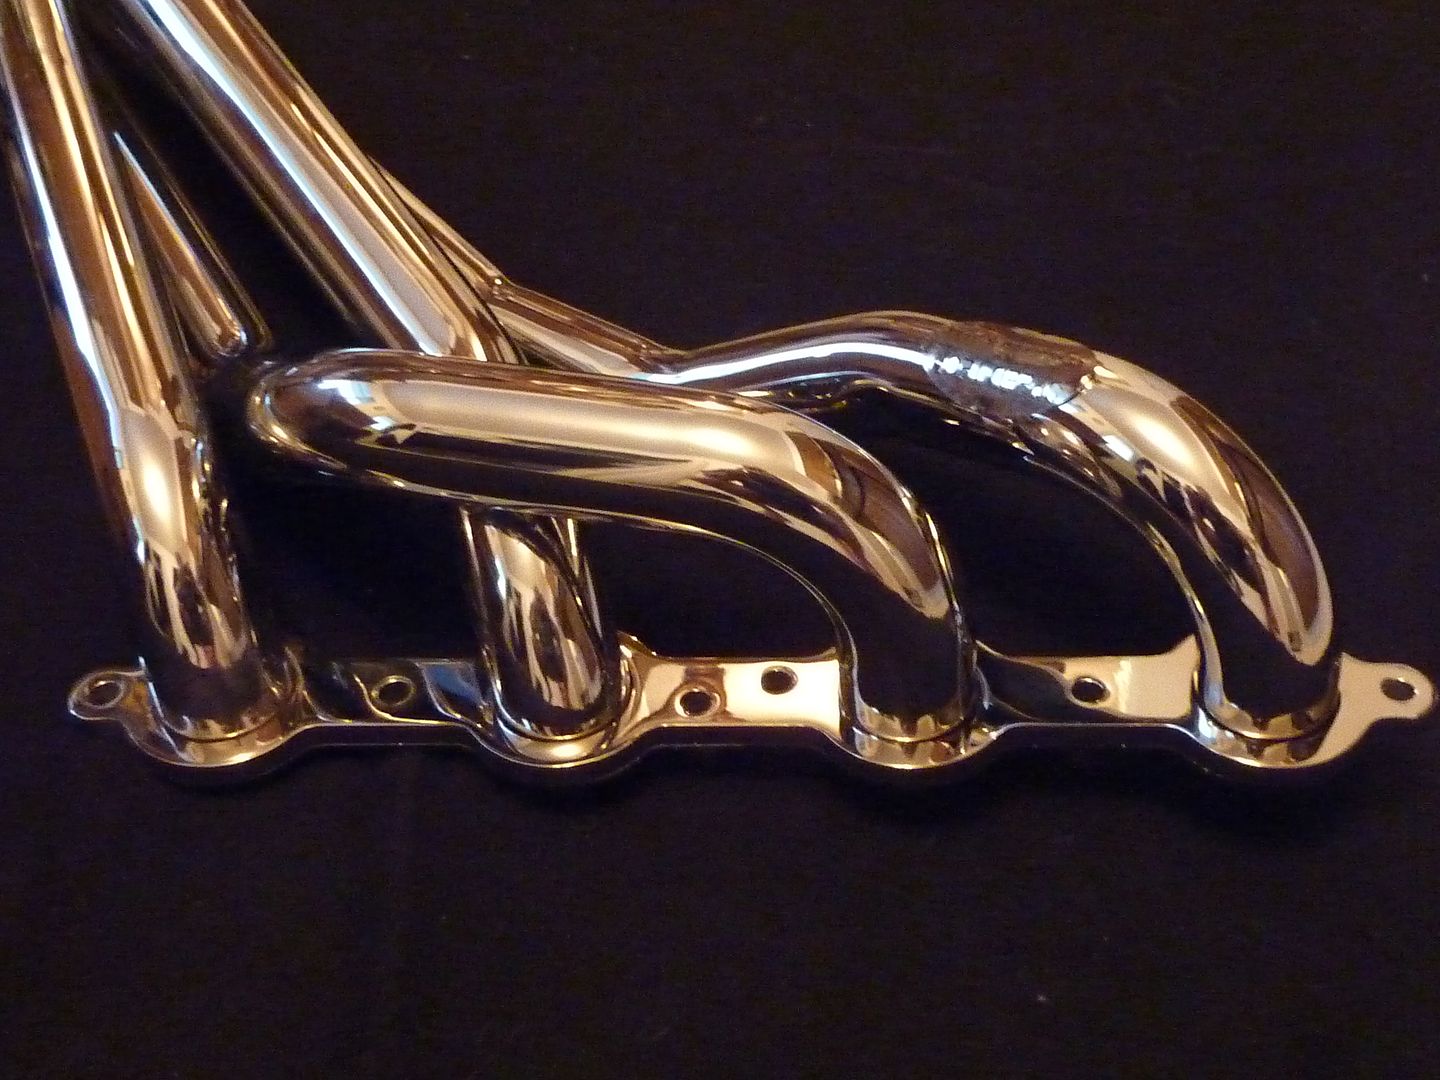
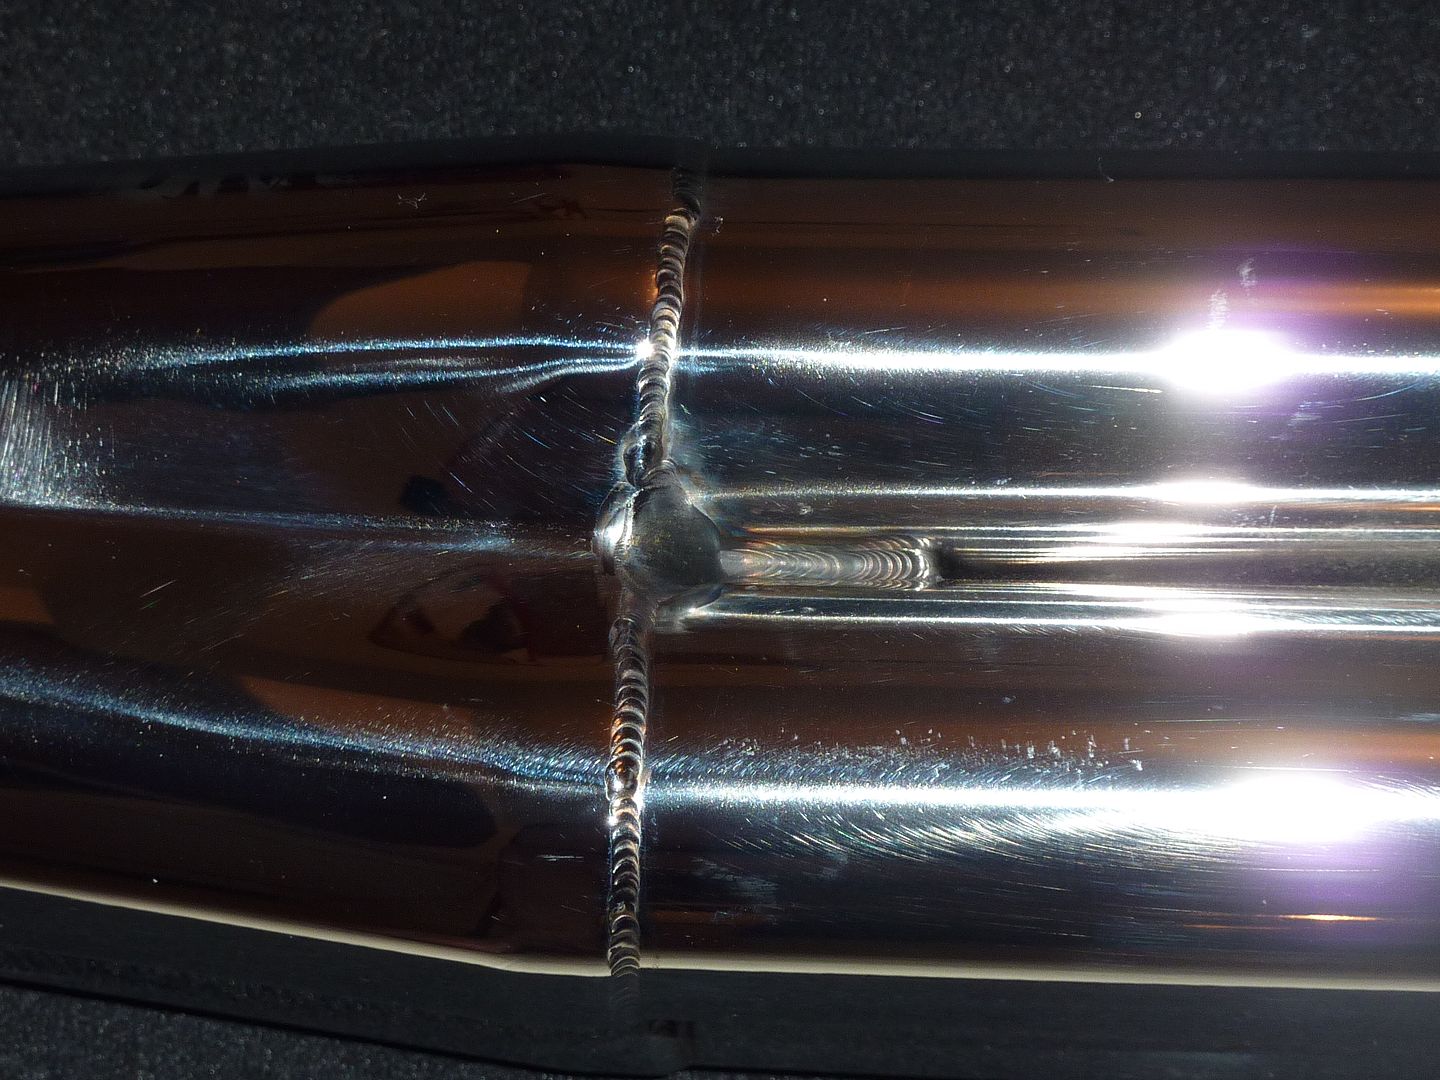
Nice thick flanges
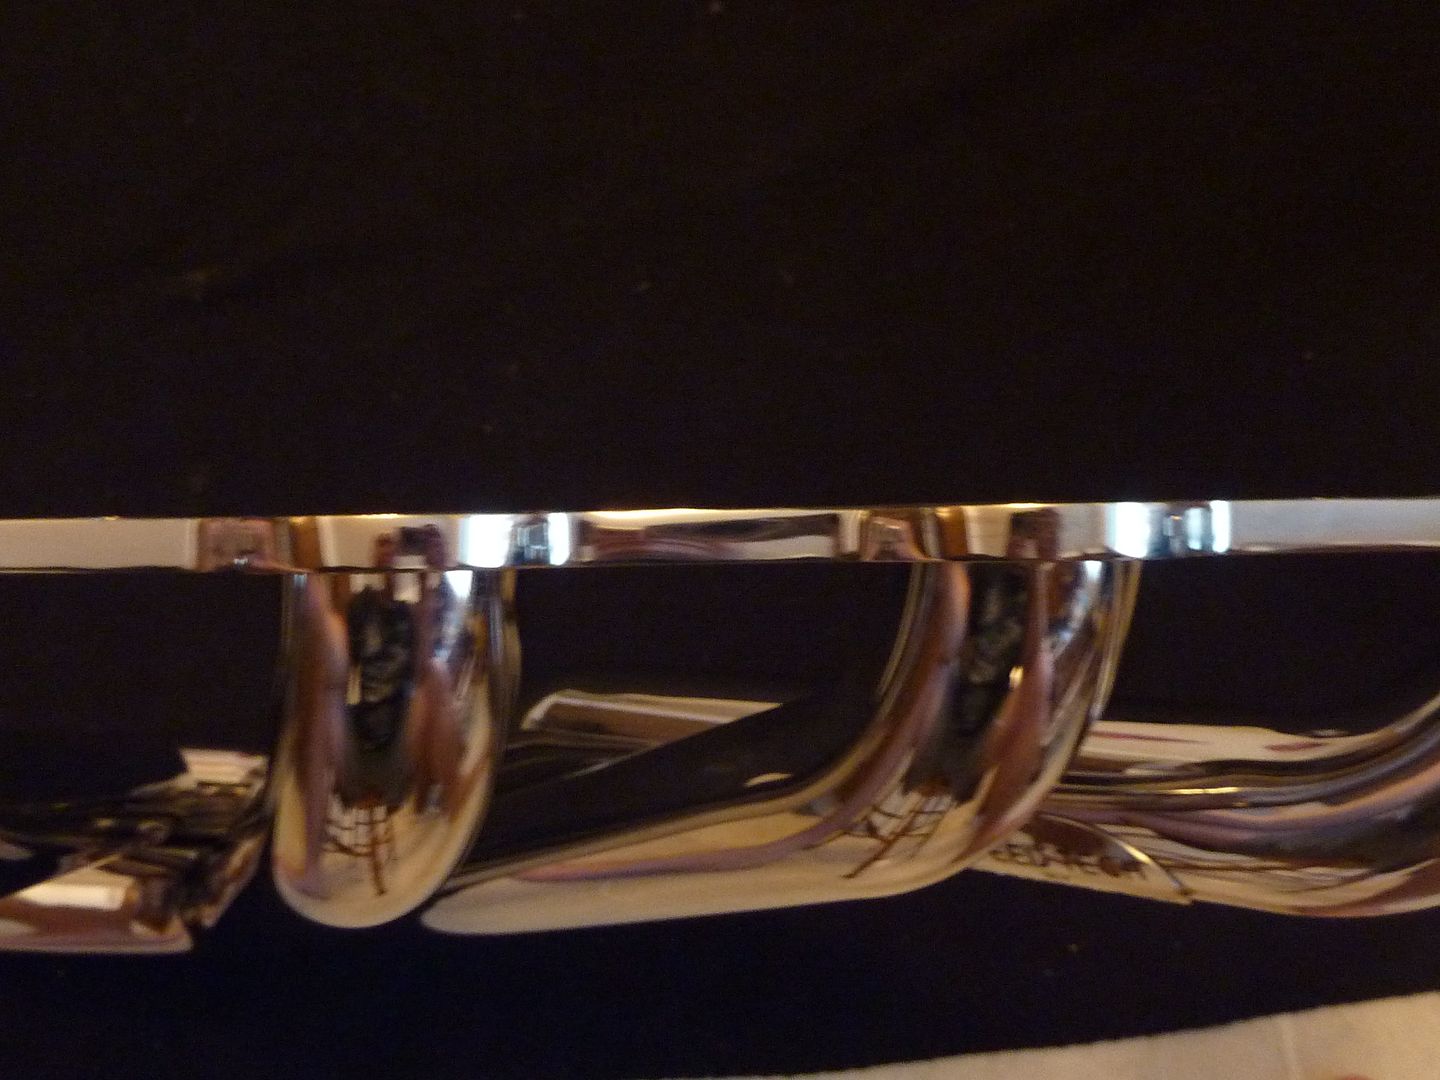
You can see how deep the polish is on these things
Thanks for the comments guys.
Just a quick update. I haven't done anything new to the car since October. It hasn't worked out with winter, xmas, work, etc. I plan on heading out on Monday though as the wife and daughter are gone until Thursday. What timing...I'm off Monday to Wednesday so I hope to get some stuff done.
These showed up this morning though. They are Speed Tech LSx headers that are built by Stainless Works. They are amazing quality. I know the polished isn't for everyone, but I'm glad I decided to get them. They will look awesome. Here's a few pics:
Nice thick flanges
You can see how deep the polish is on these things

 01-24-2011 | 08:44 PM
#74
Thread Starter
On The Tree
iTrader: (4)
Joined: Mar 2009
Posts: 132
Likes: 0
From: British Columbia, Canada
Thanks guys. I really appreciate it.
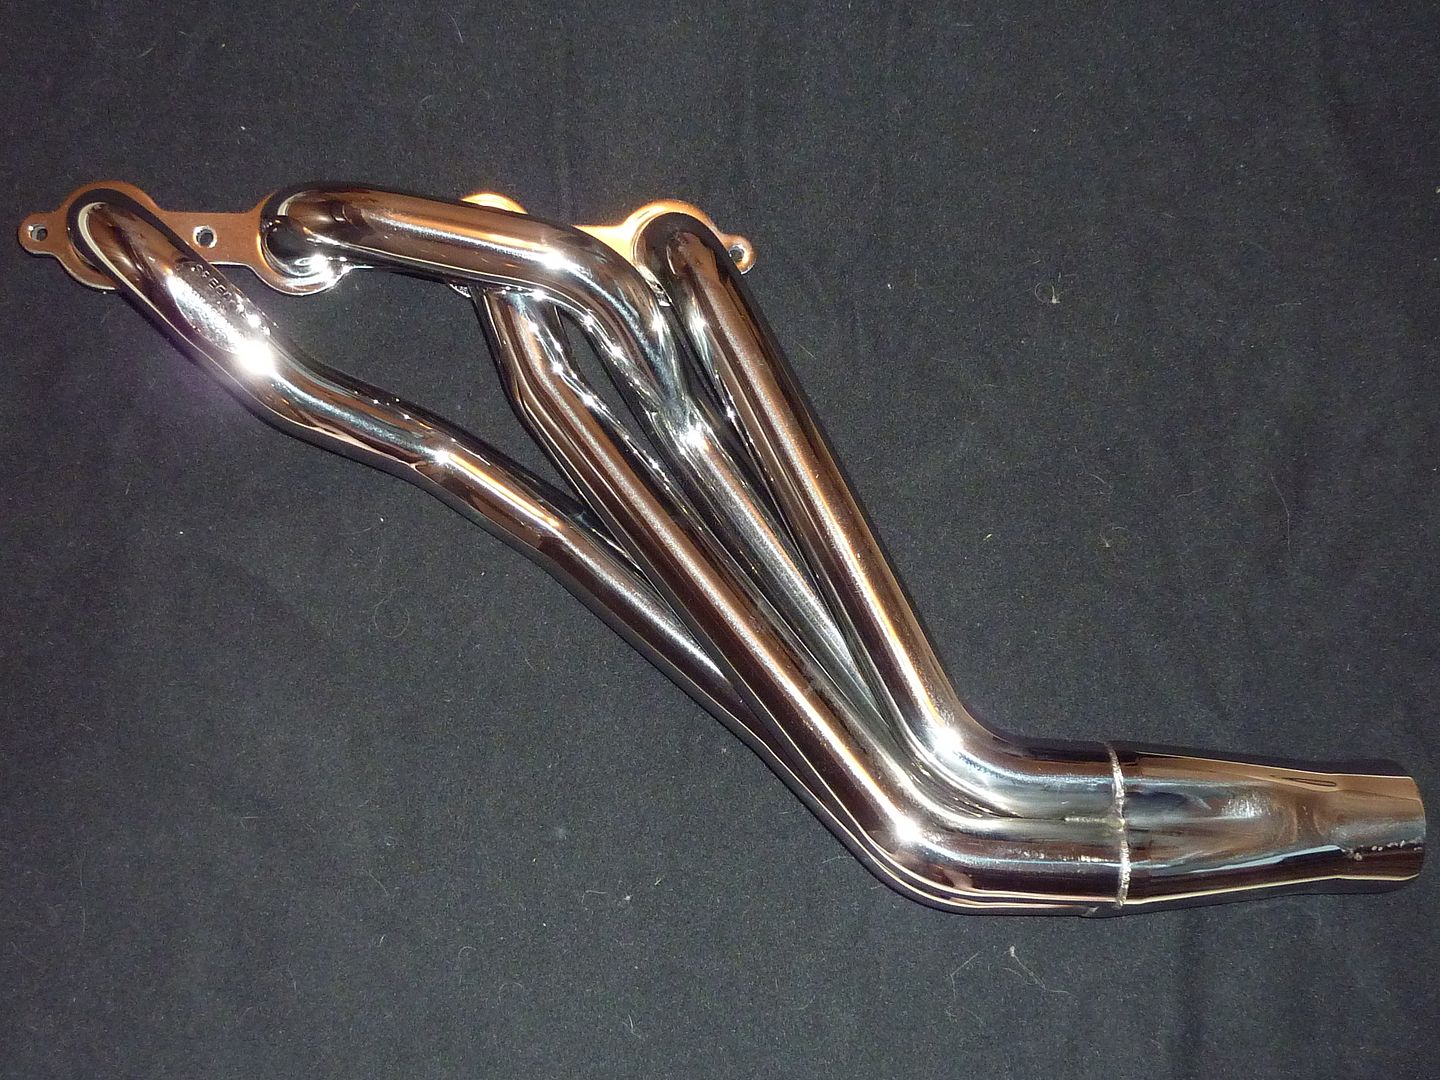
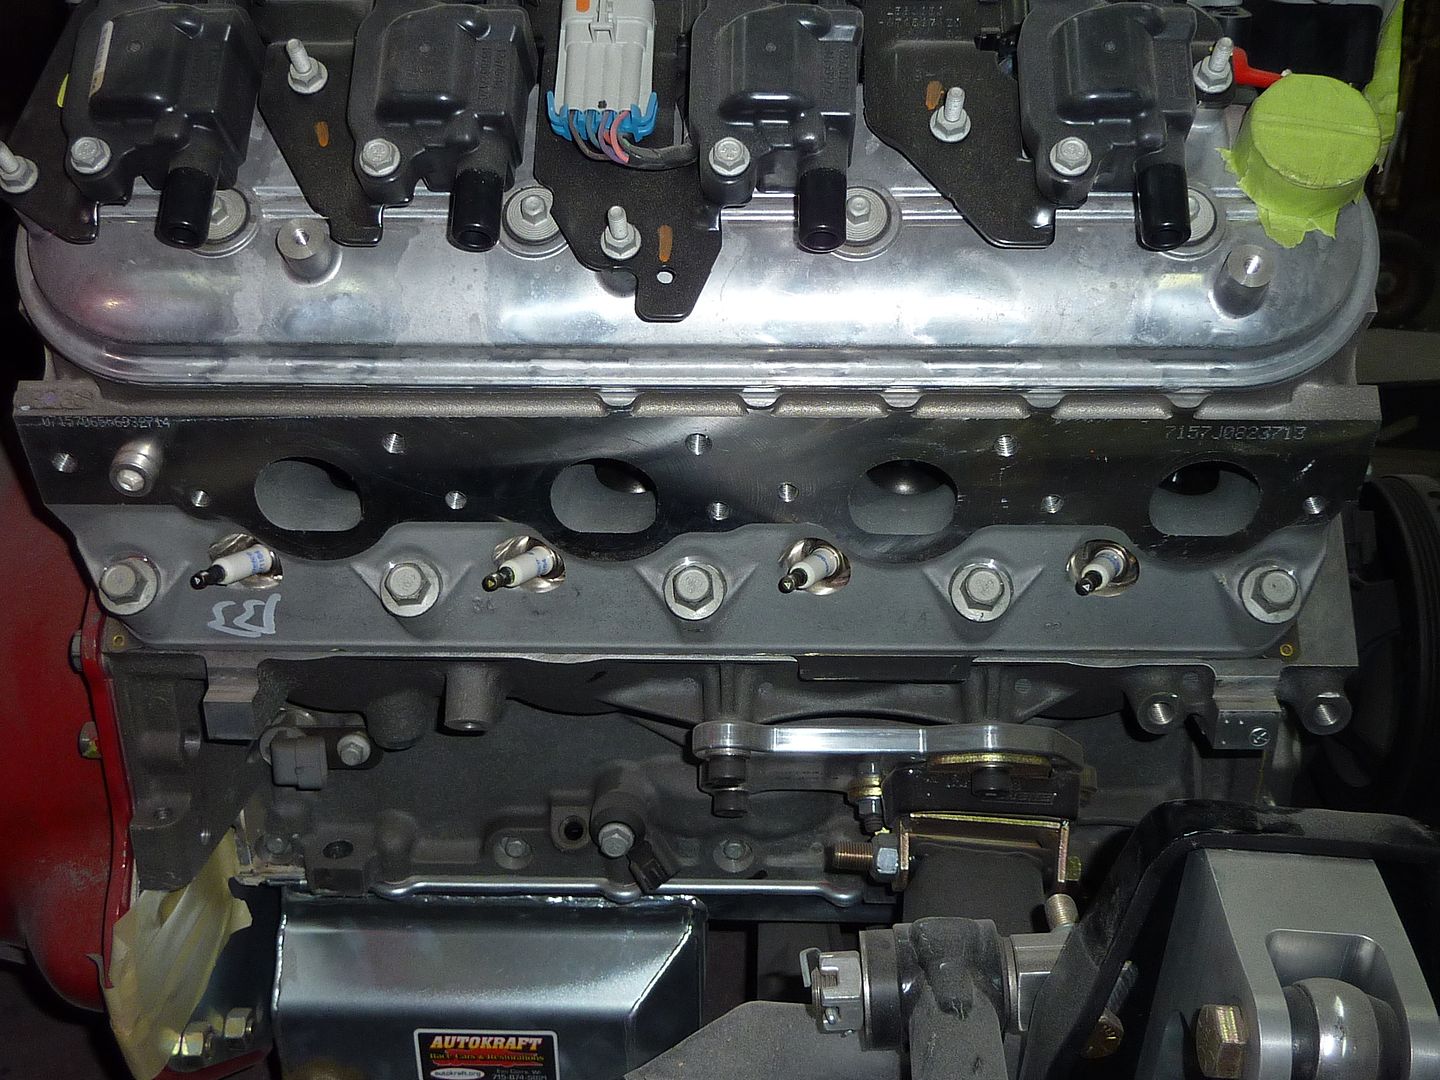
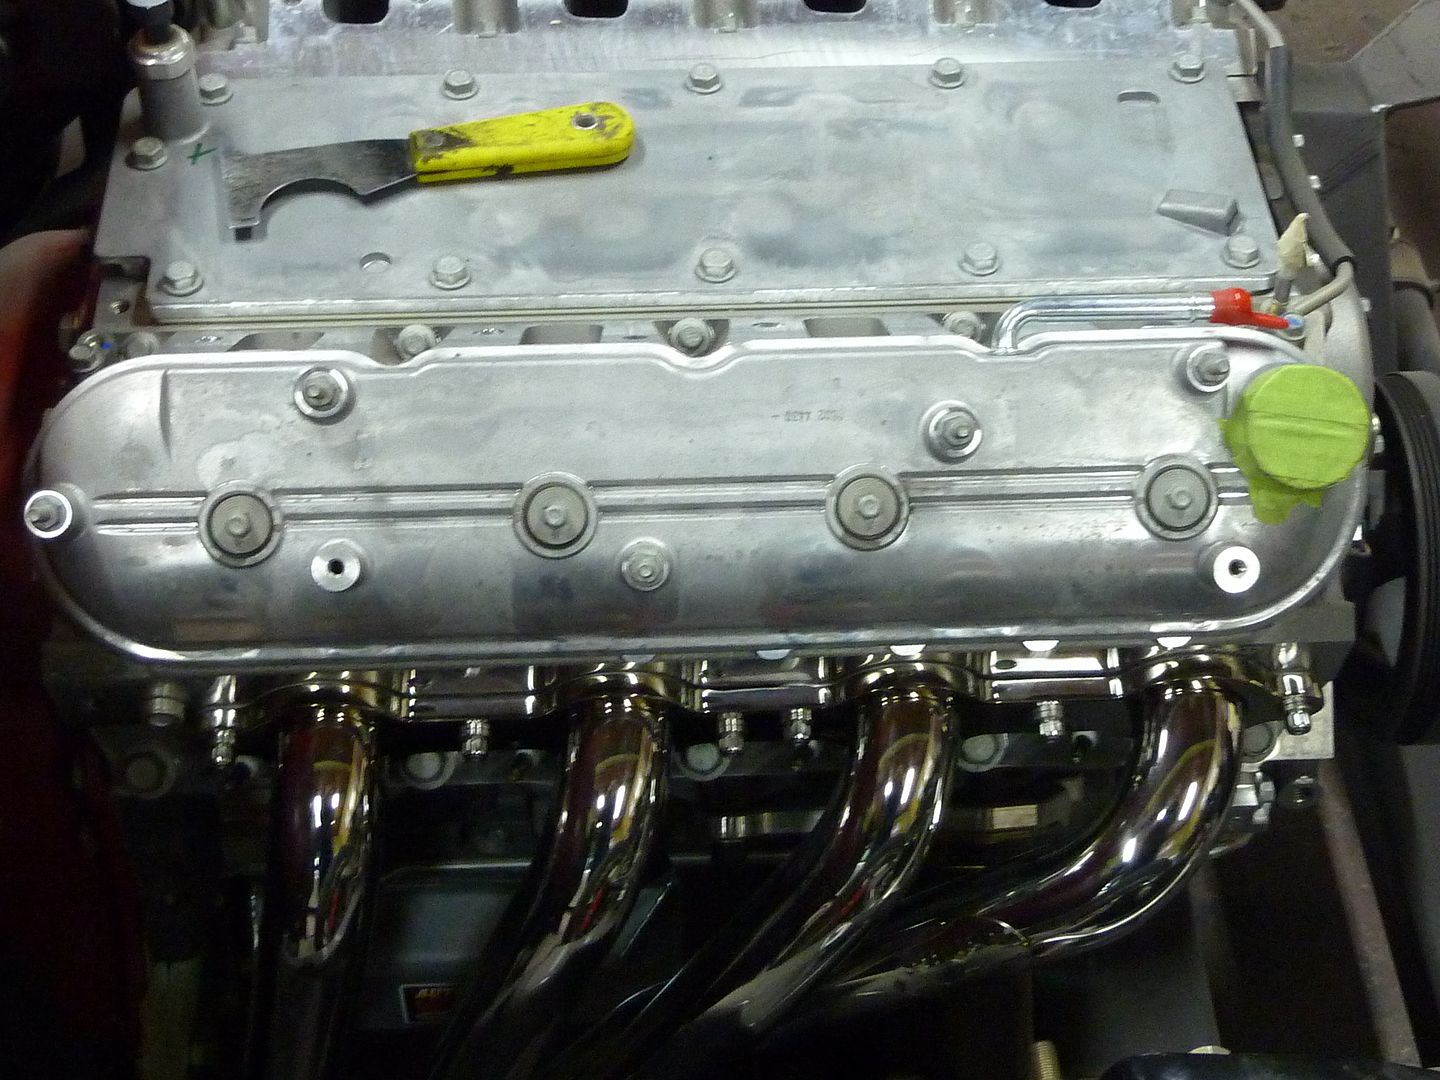
I got the headers installed today. They look great.
Got the tape off and cleaned up the head
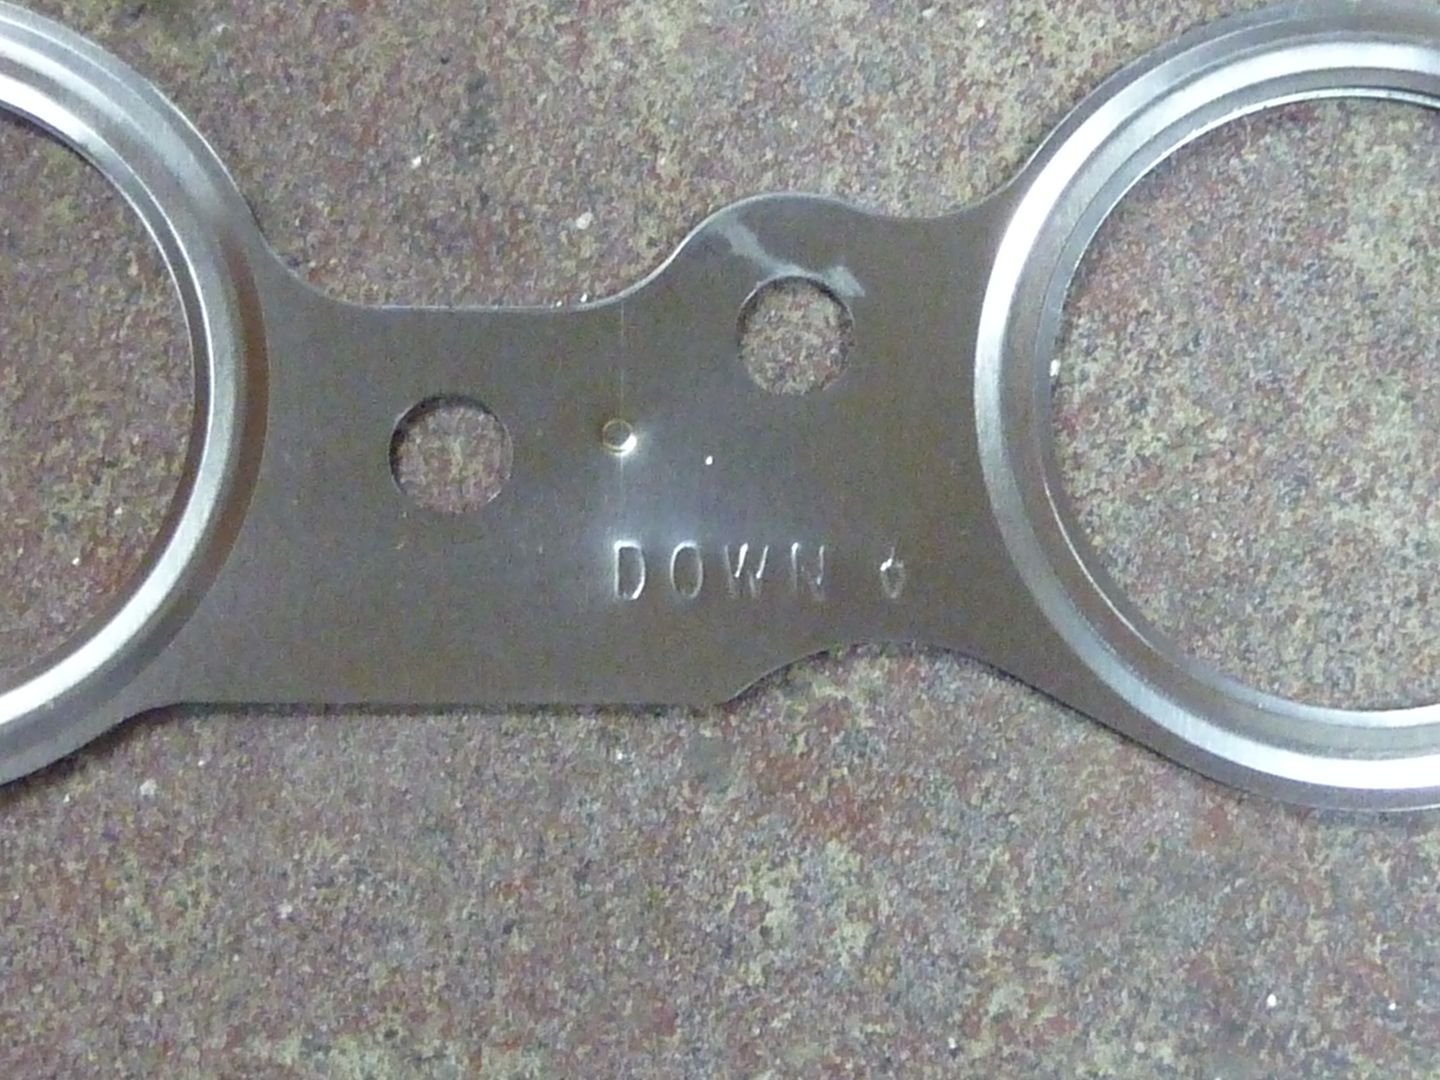
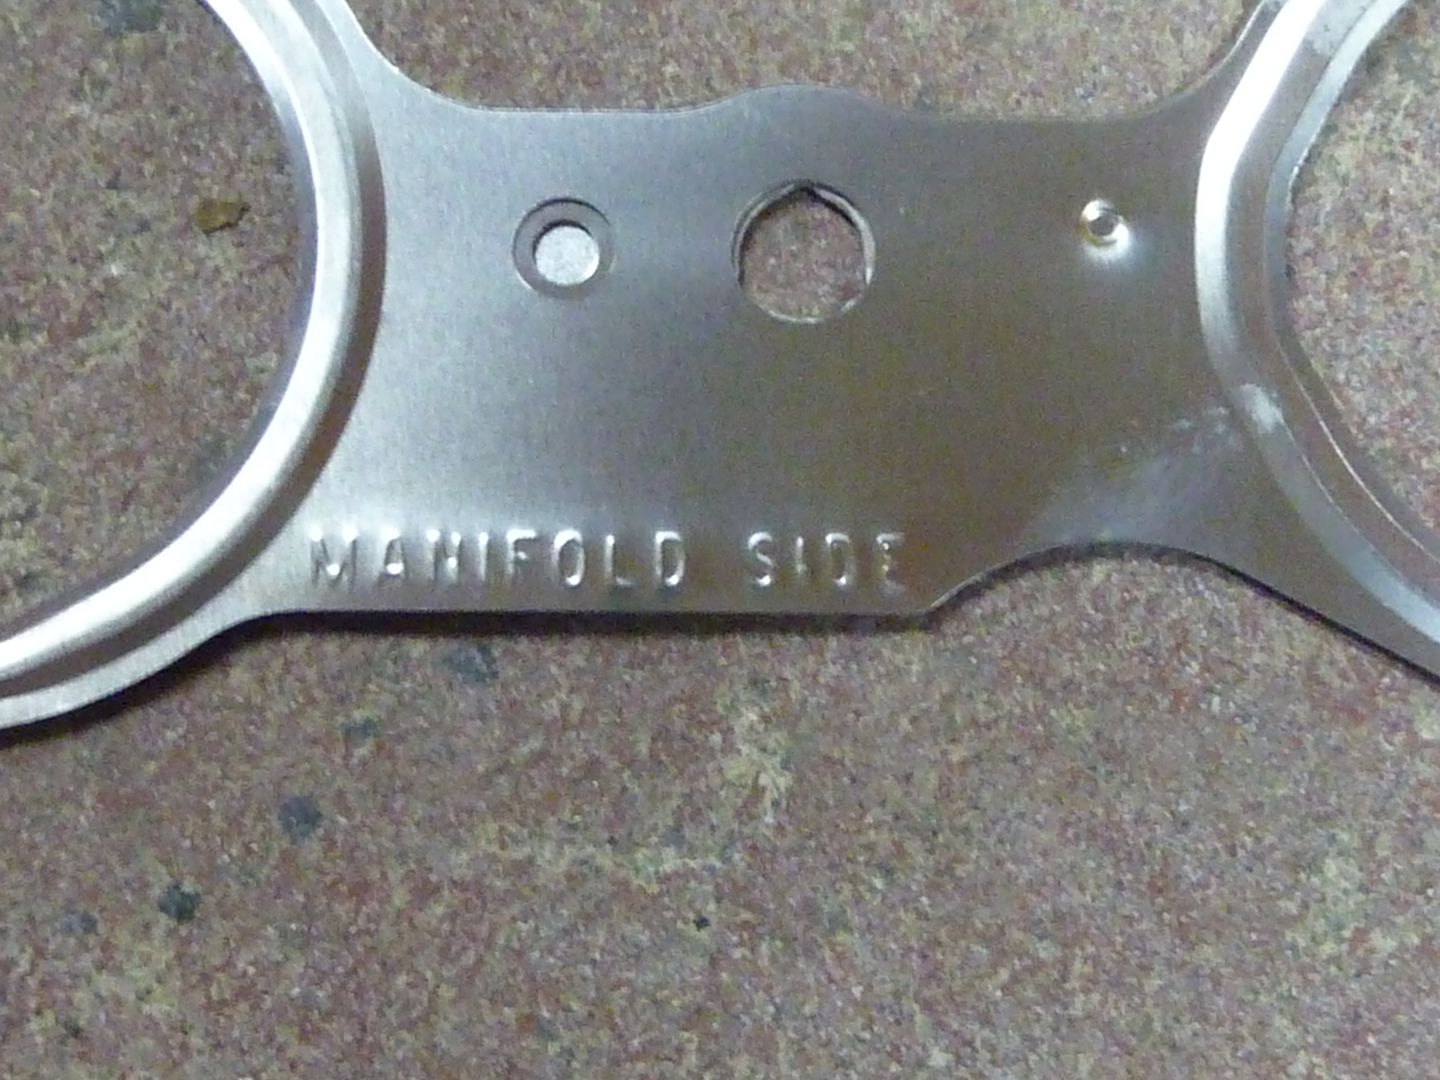
Stainless Works recommends using the stock steel gaskets. For once I didn't go and do something stupid like sell them or throw them out.

These things are dummy proof
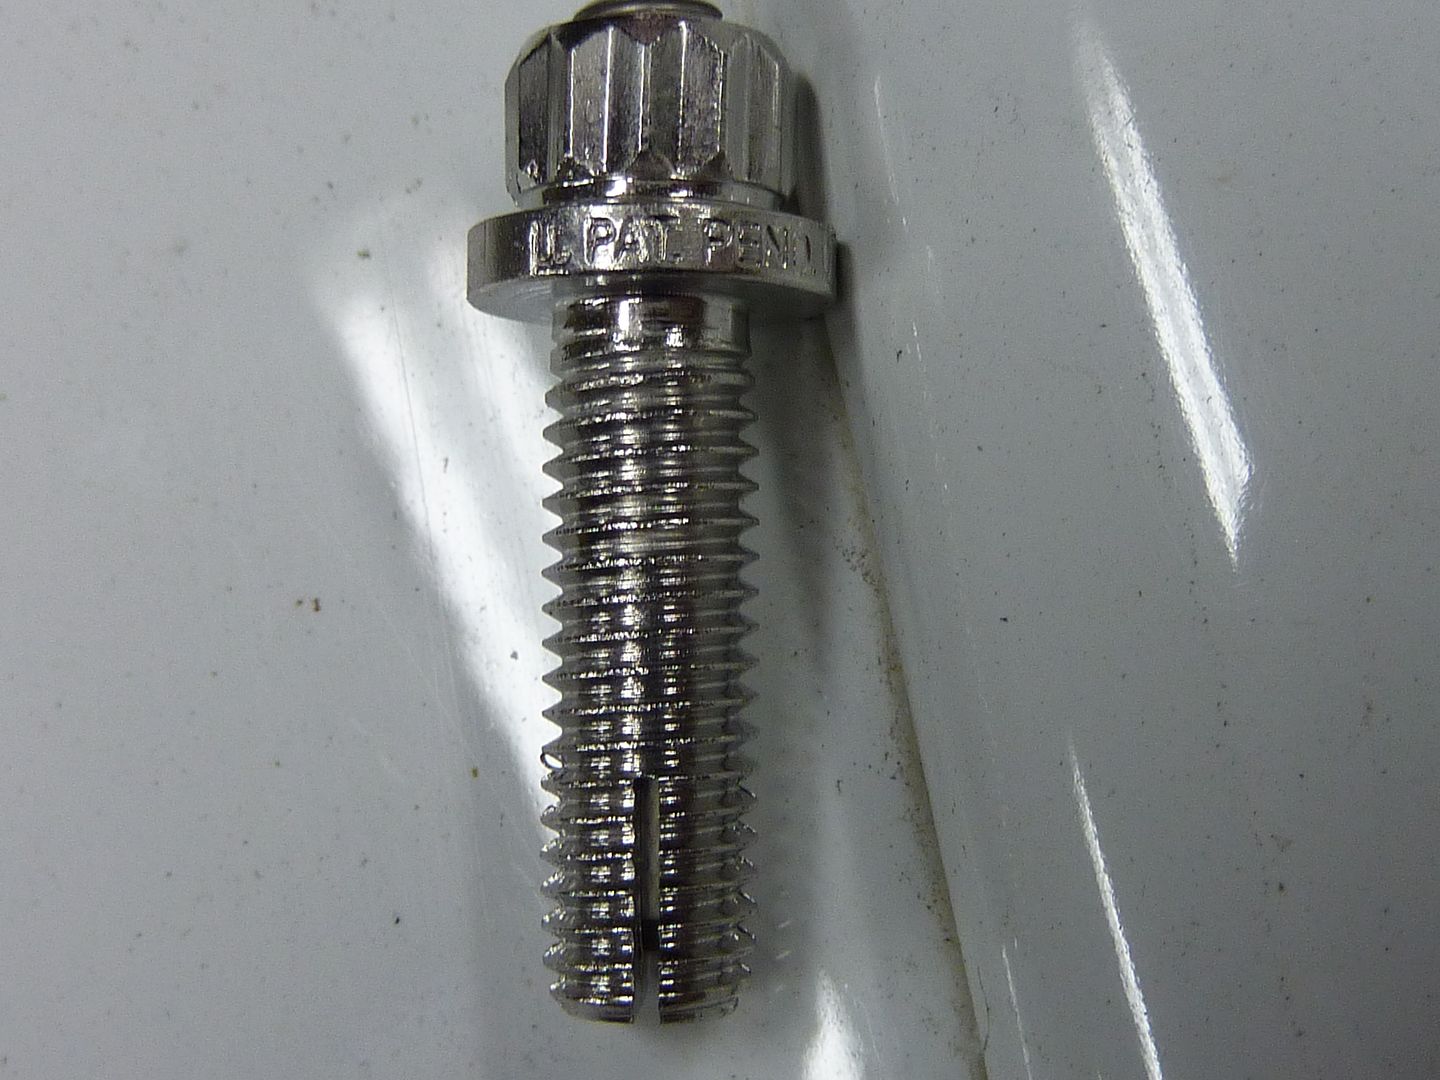
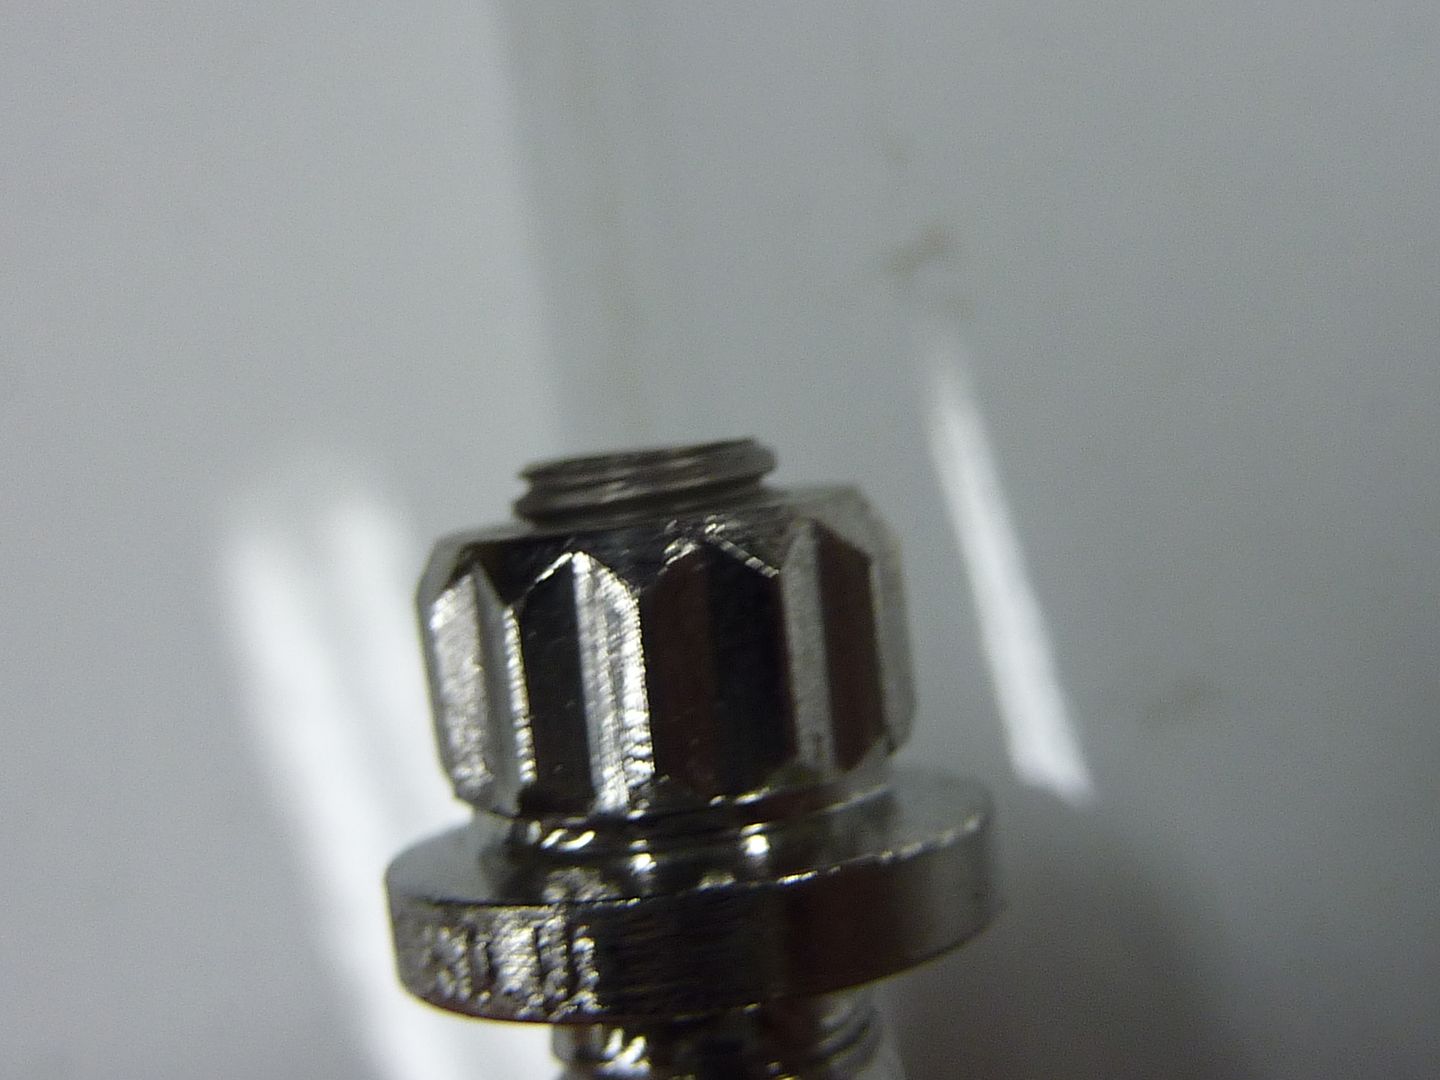
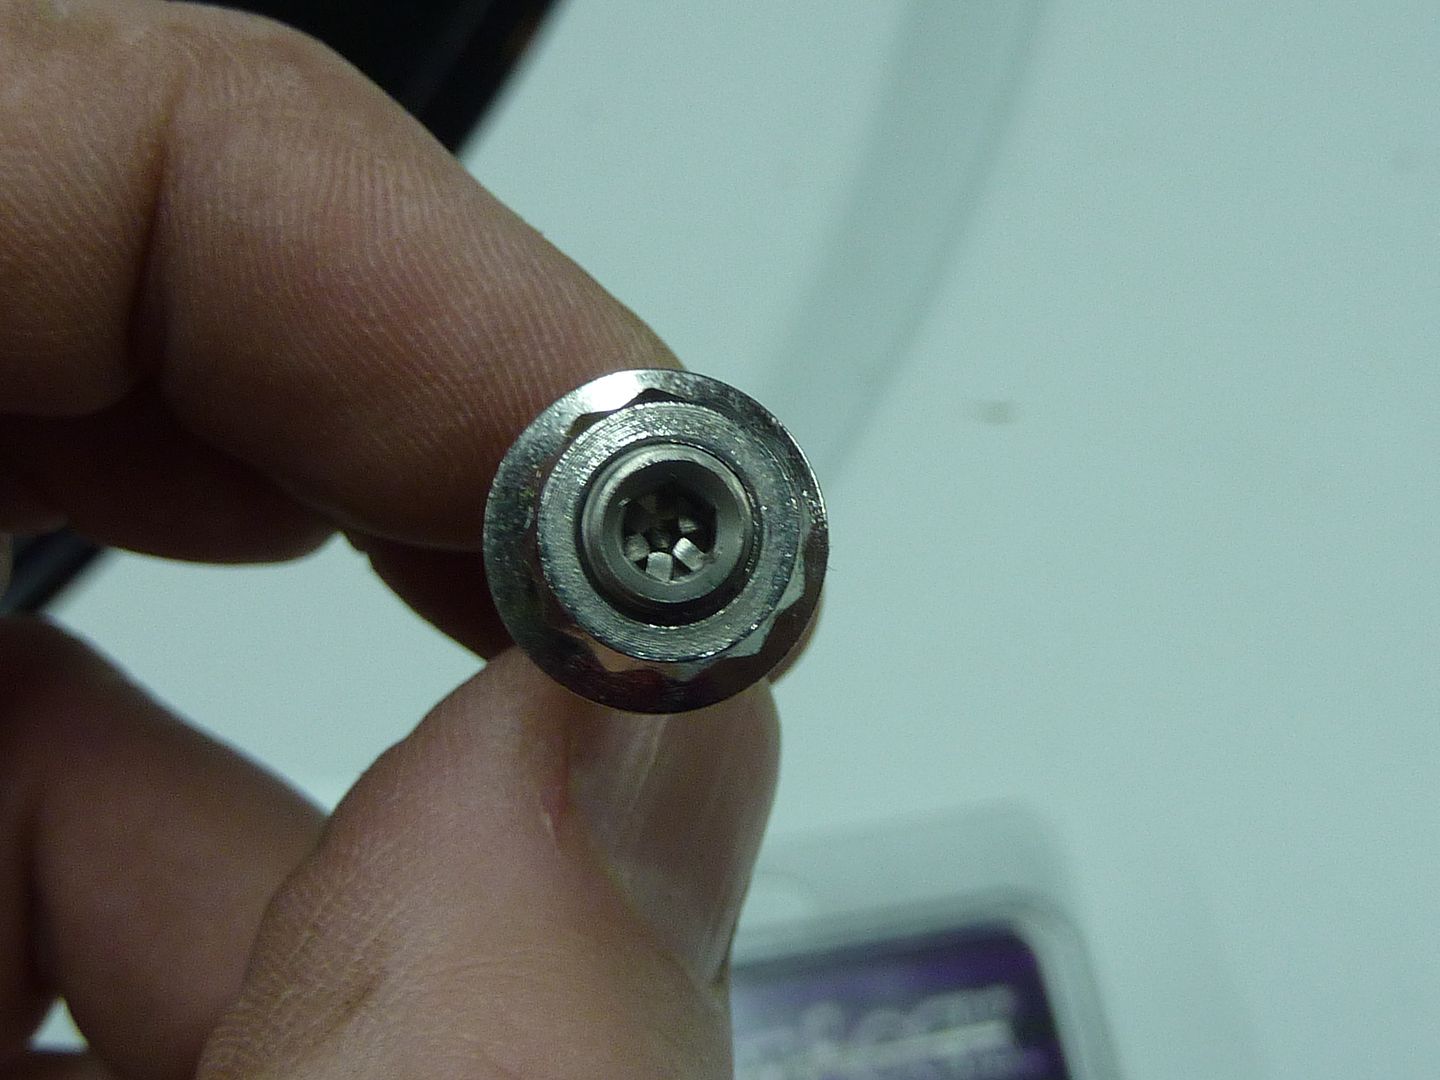
The last motor I had in this car had Stage 8 header bolts. Hated them. They came loose all the time so this time I decided to go with Percy's split lock header bolts
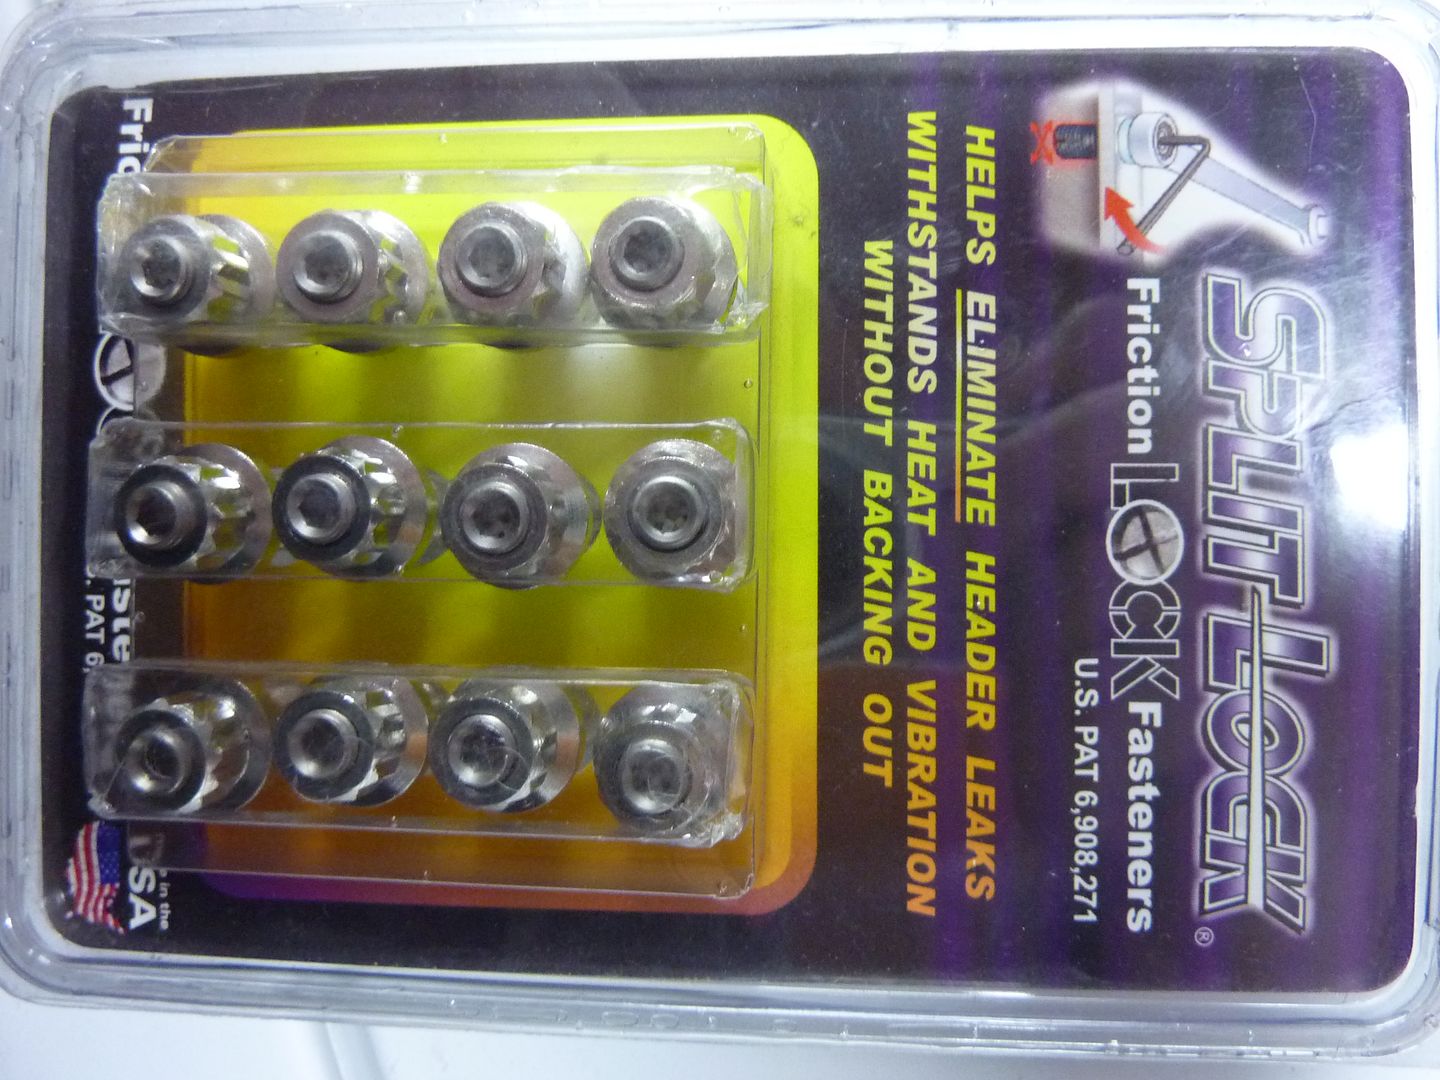
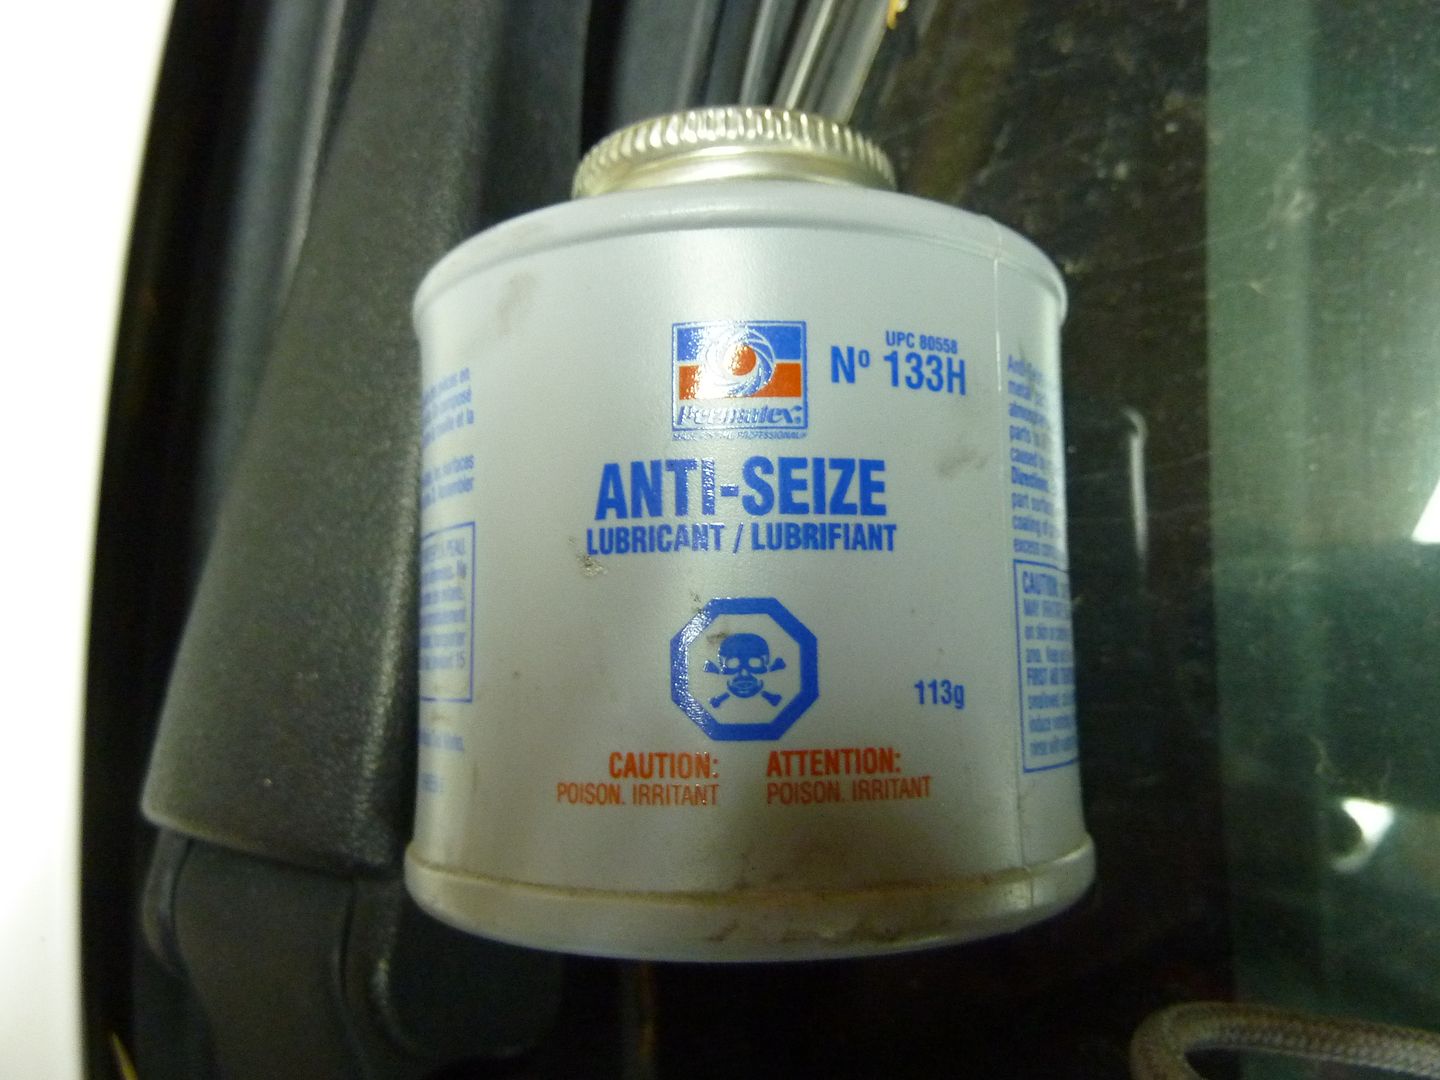
If you're wondering how they work, here's some close ups
Added some of this good stuff to each of the bolts
And they were on
Other than the obvious reasons to do a LS swap, one more great reason is putting on the headers. These things took me less than an hour to put on. And I was taking my time not to scuff any thing up. I didn't swear once while putting the bolts in. Here's a close up of the bolt pattern
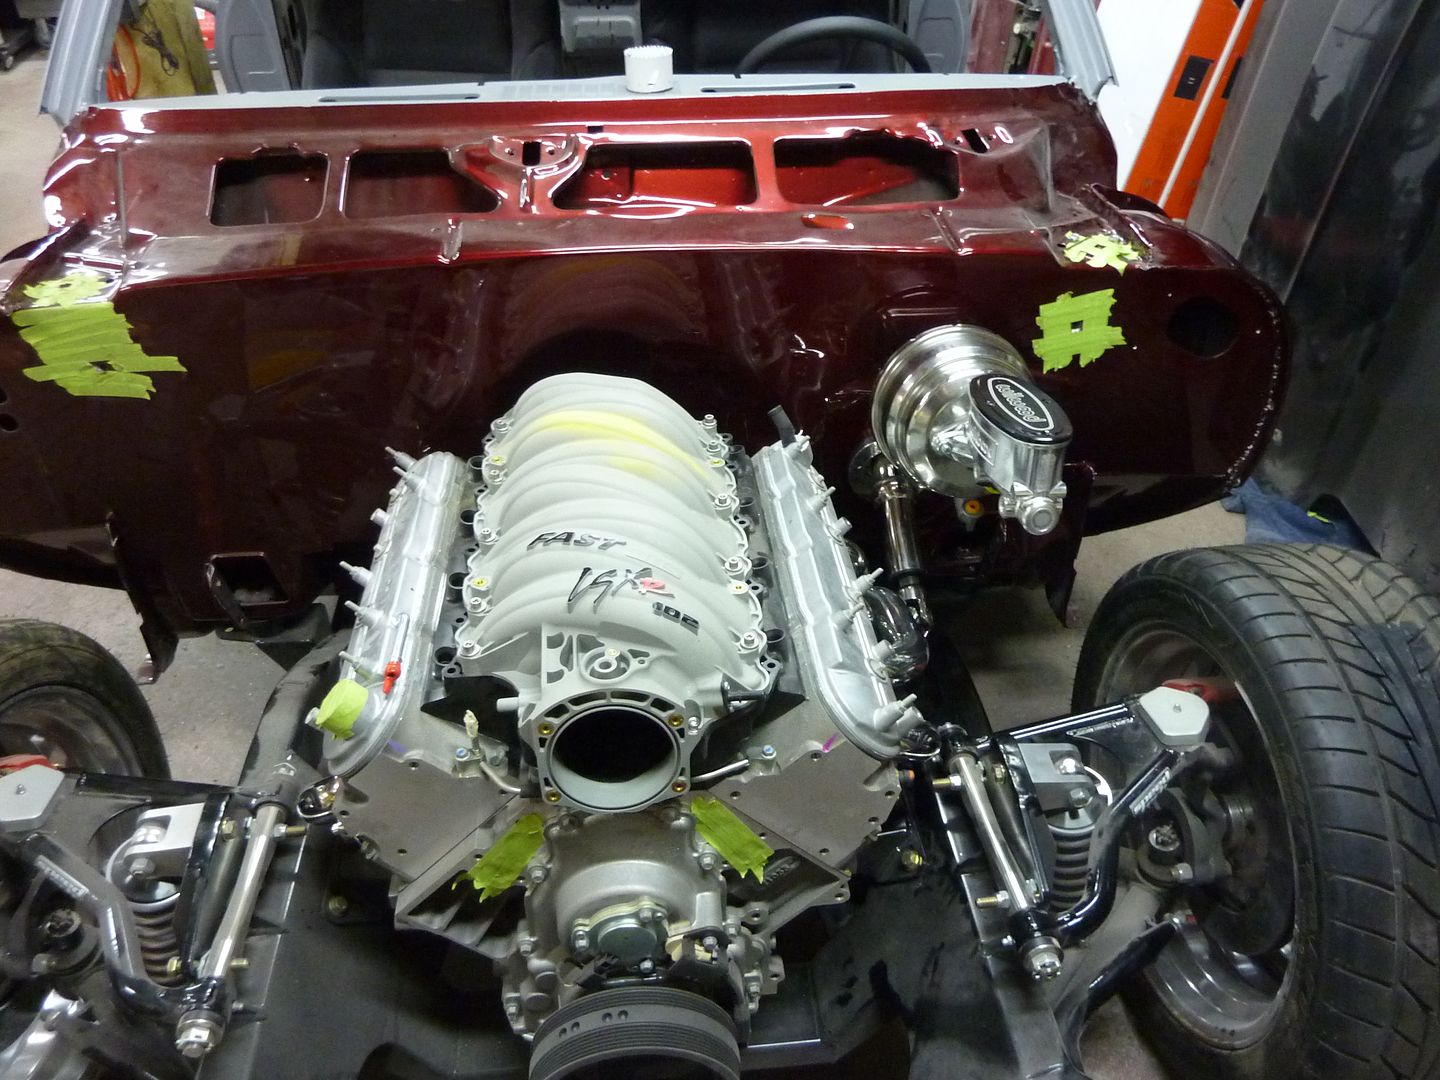
After I got the headers done, I decided to install the intake so it wasn't just sitting there. I started by taking off the coils and the coil mounts
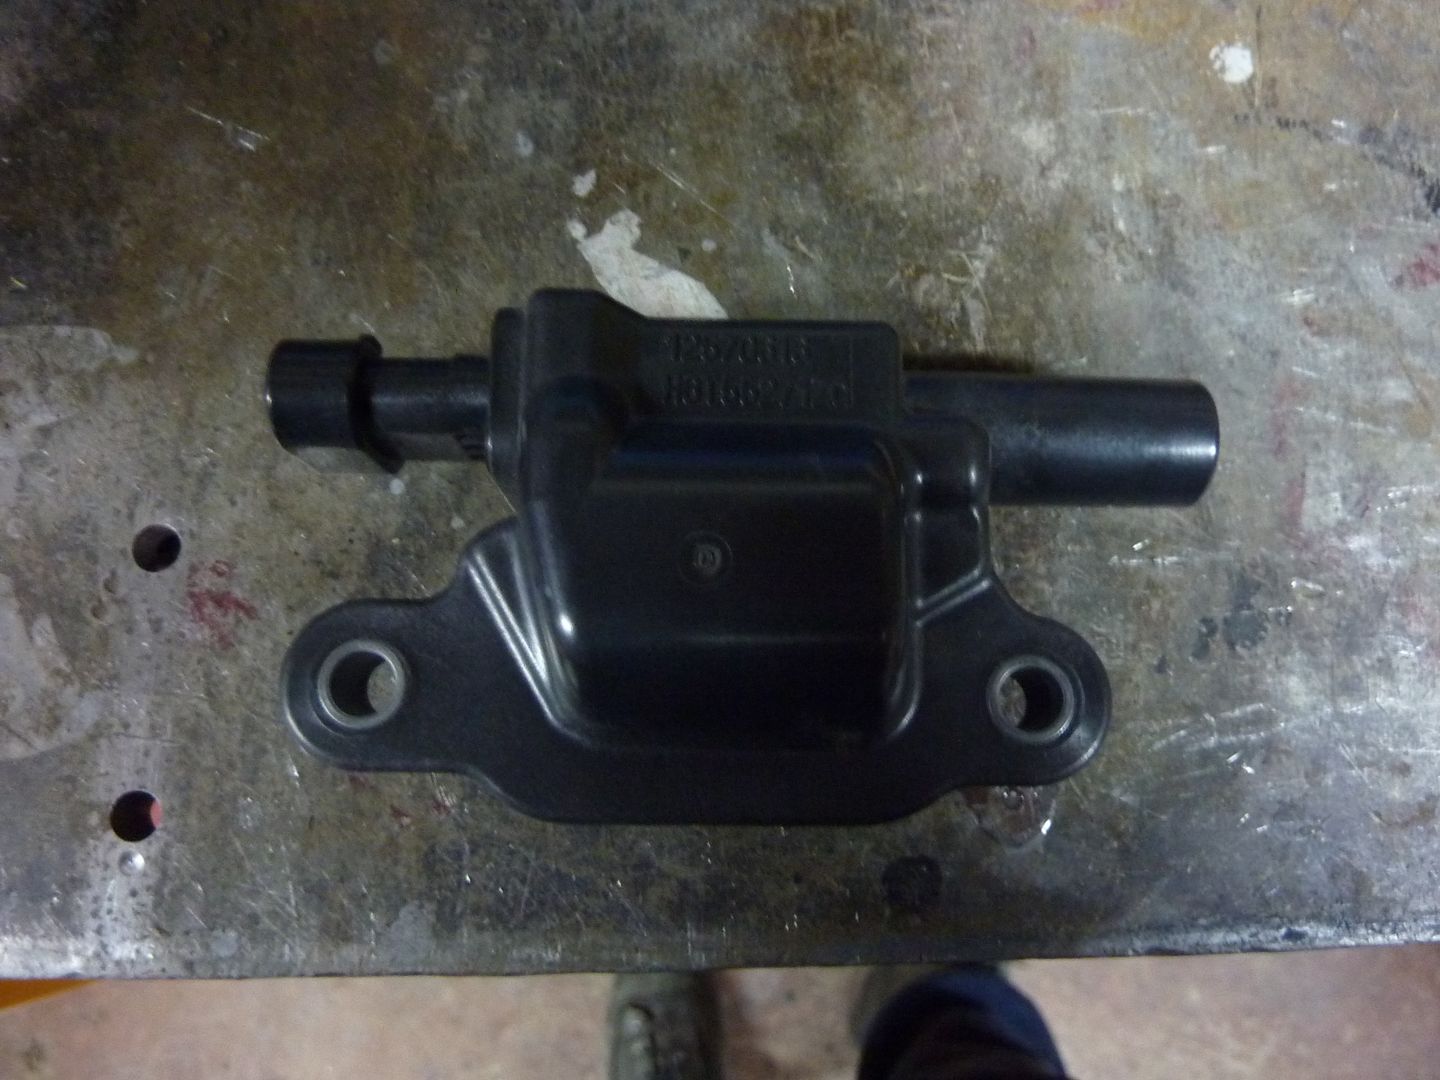
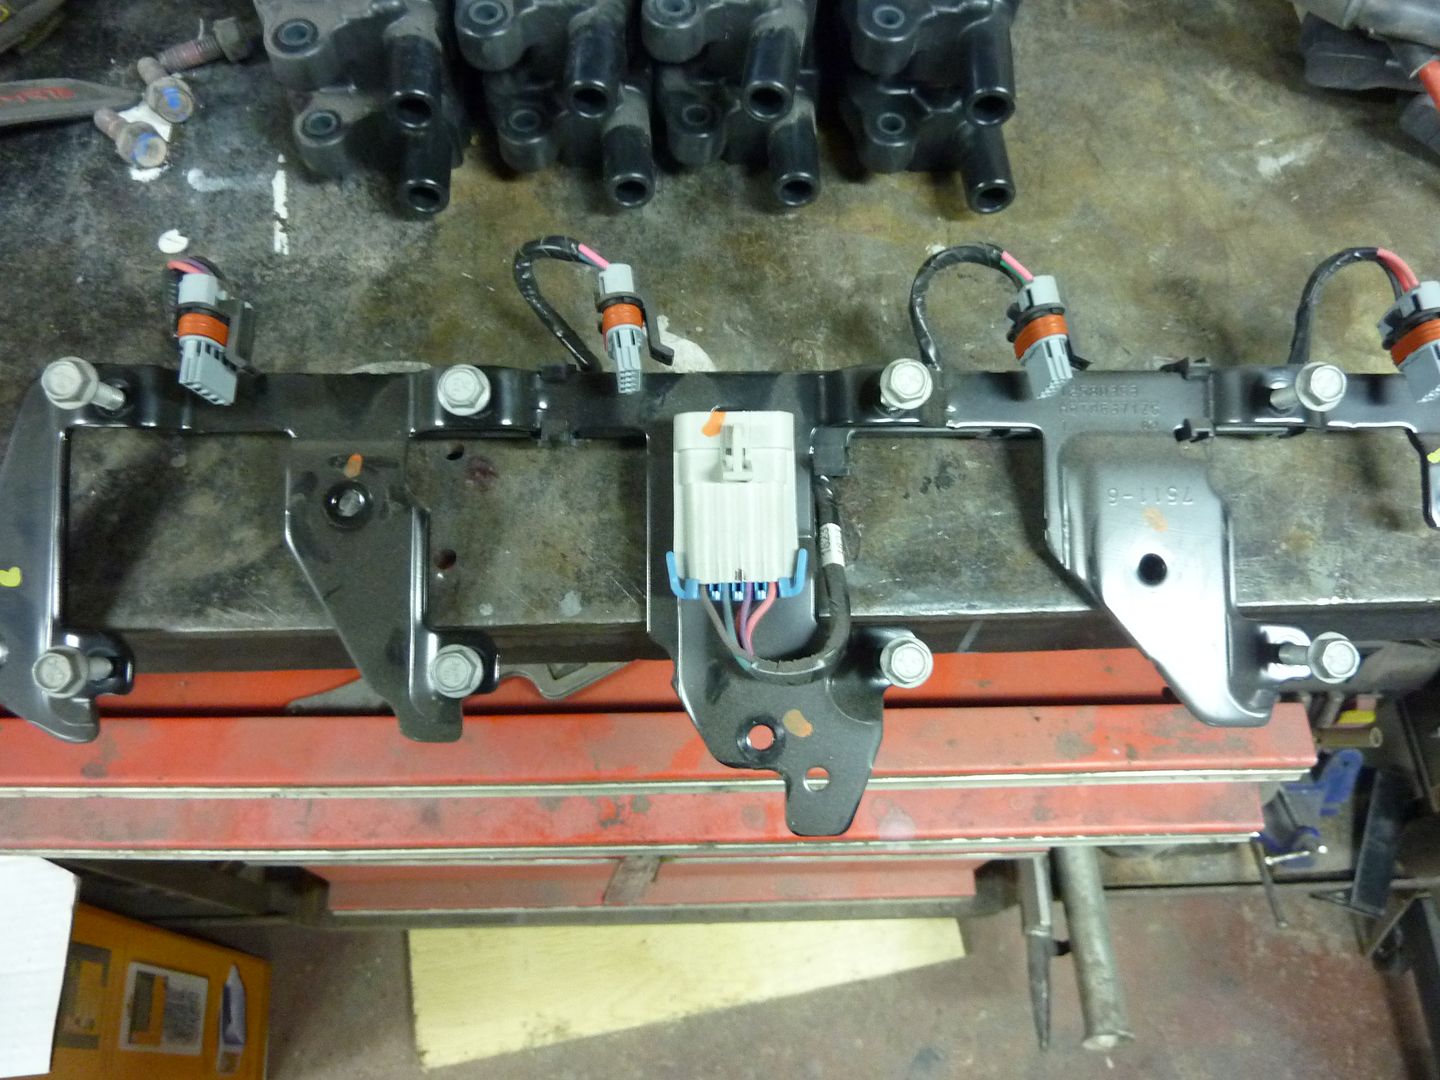
Then I cleaned up the valley cover and intake ports
I had to buy some new intake seals. Glad they were cheap.
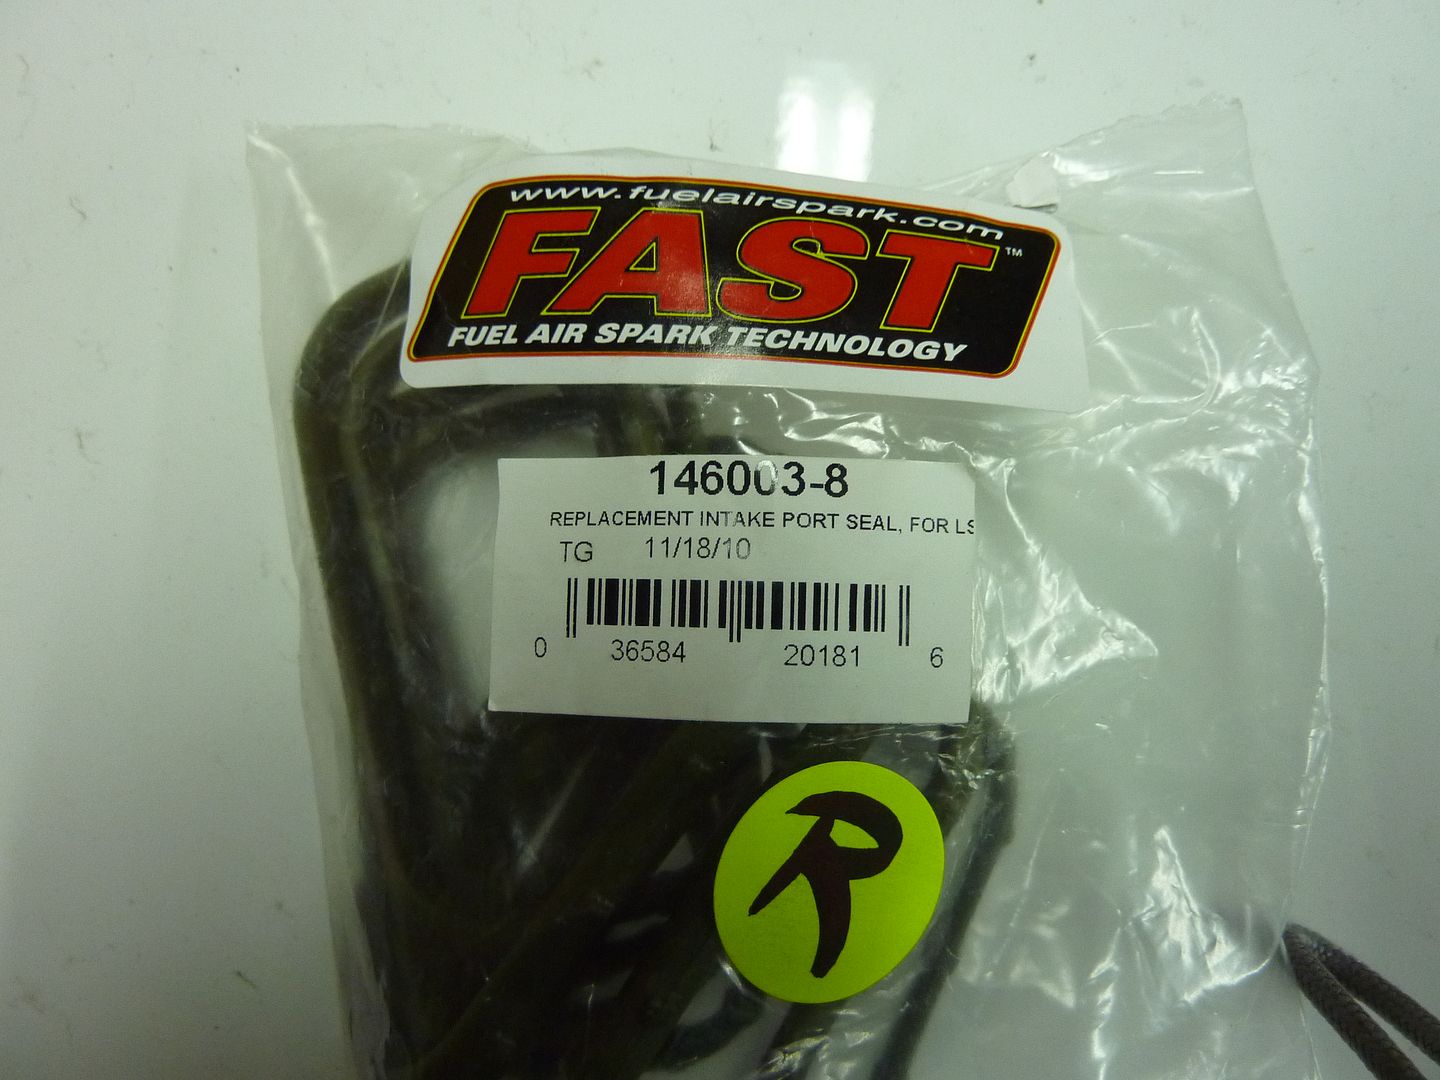
These
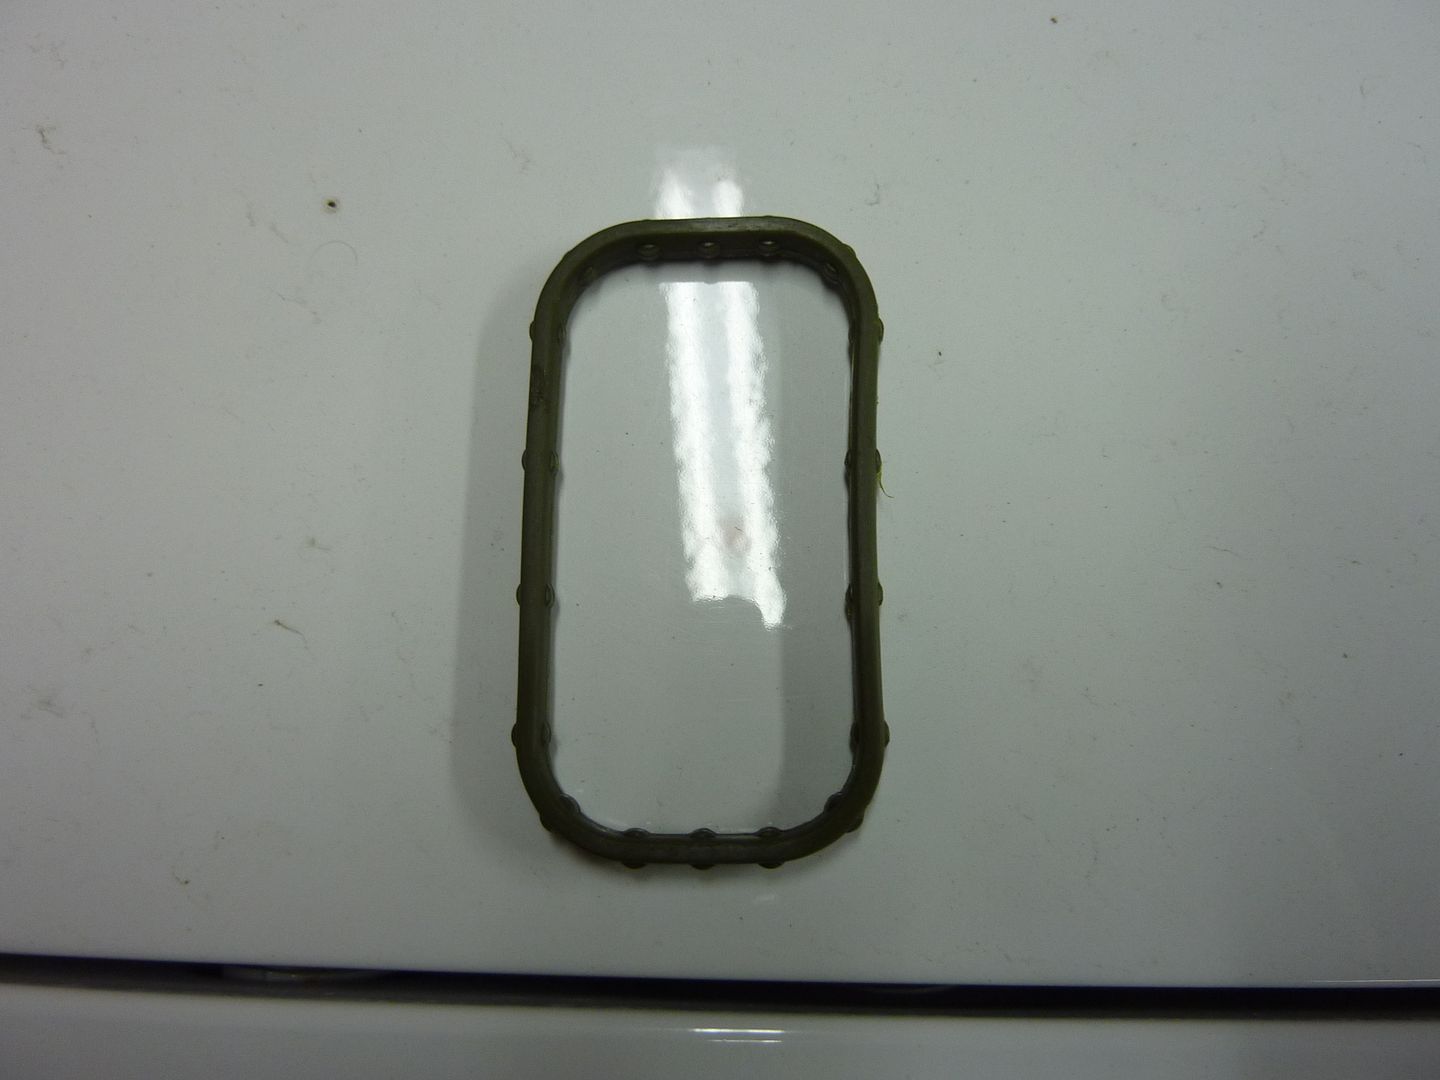
Go into there

Like so
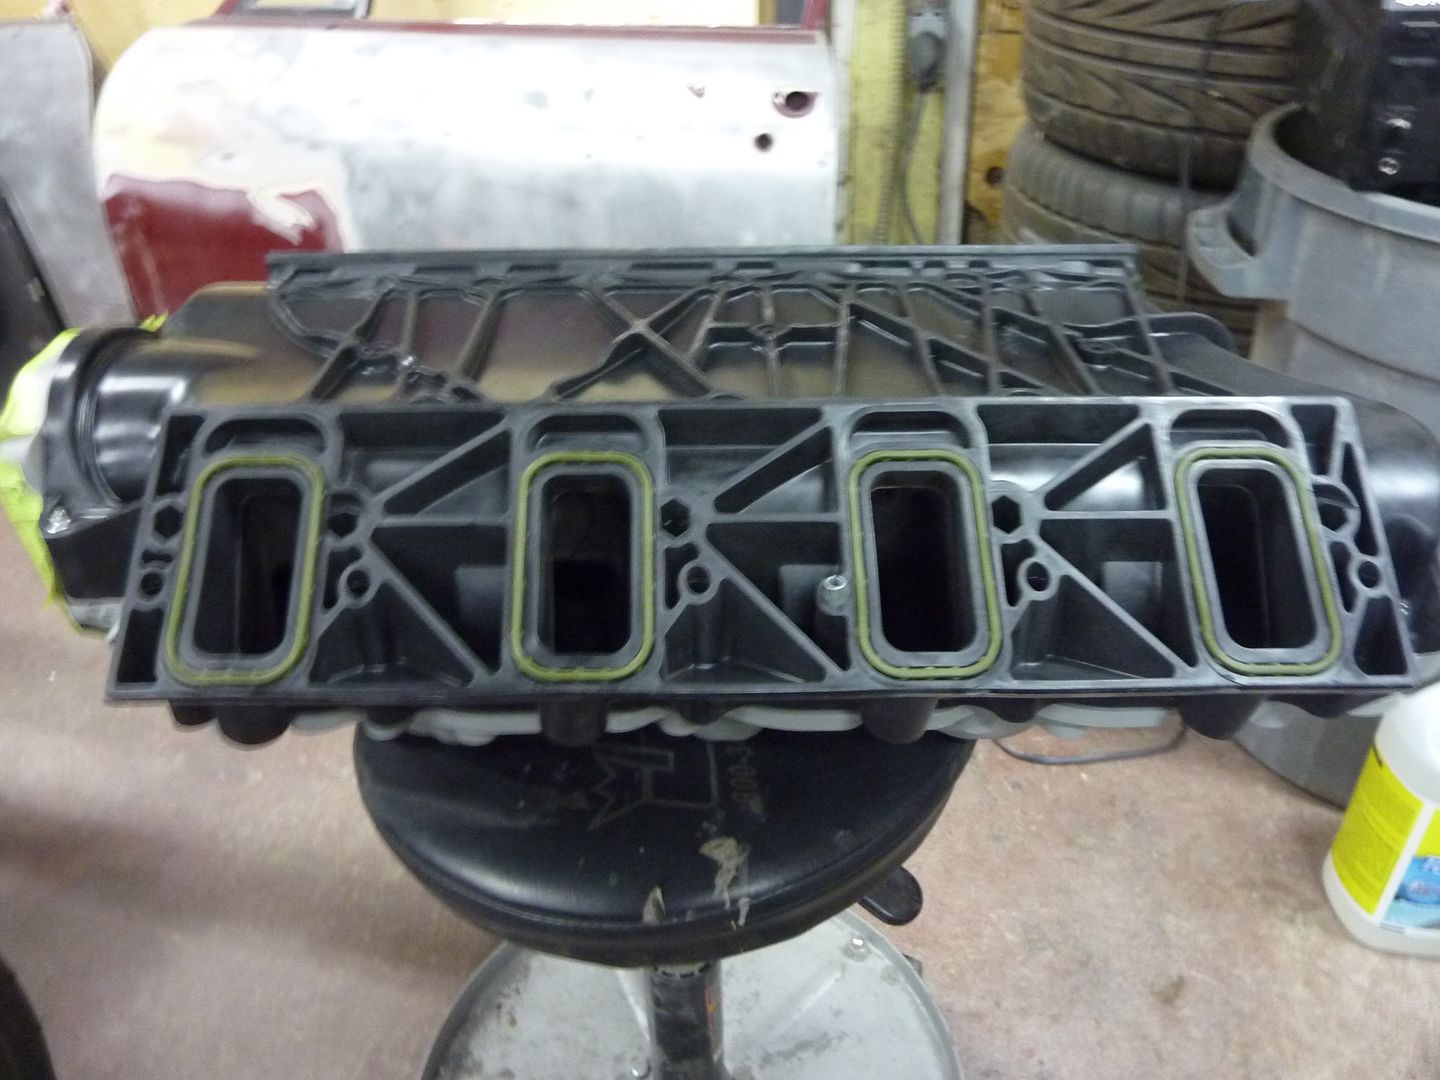
And it was back on
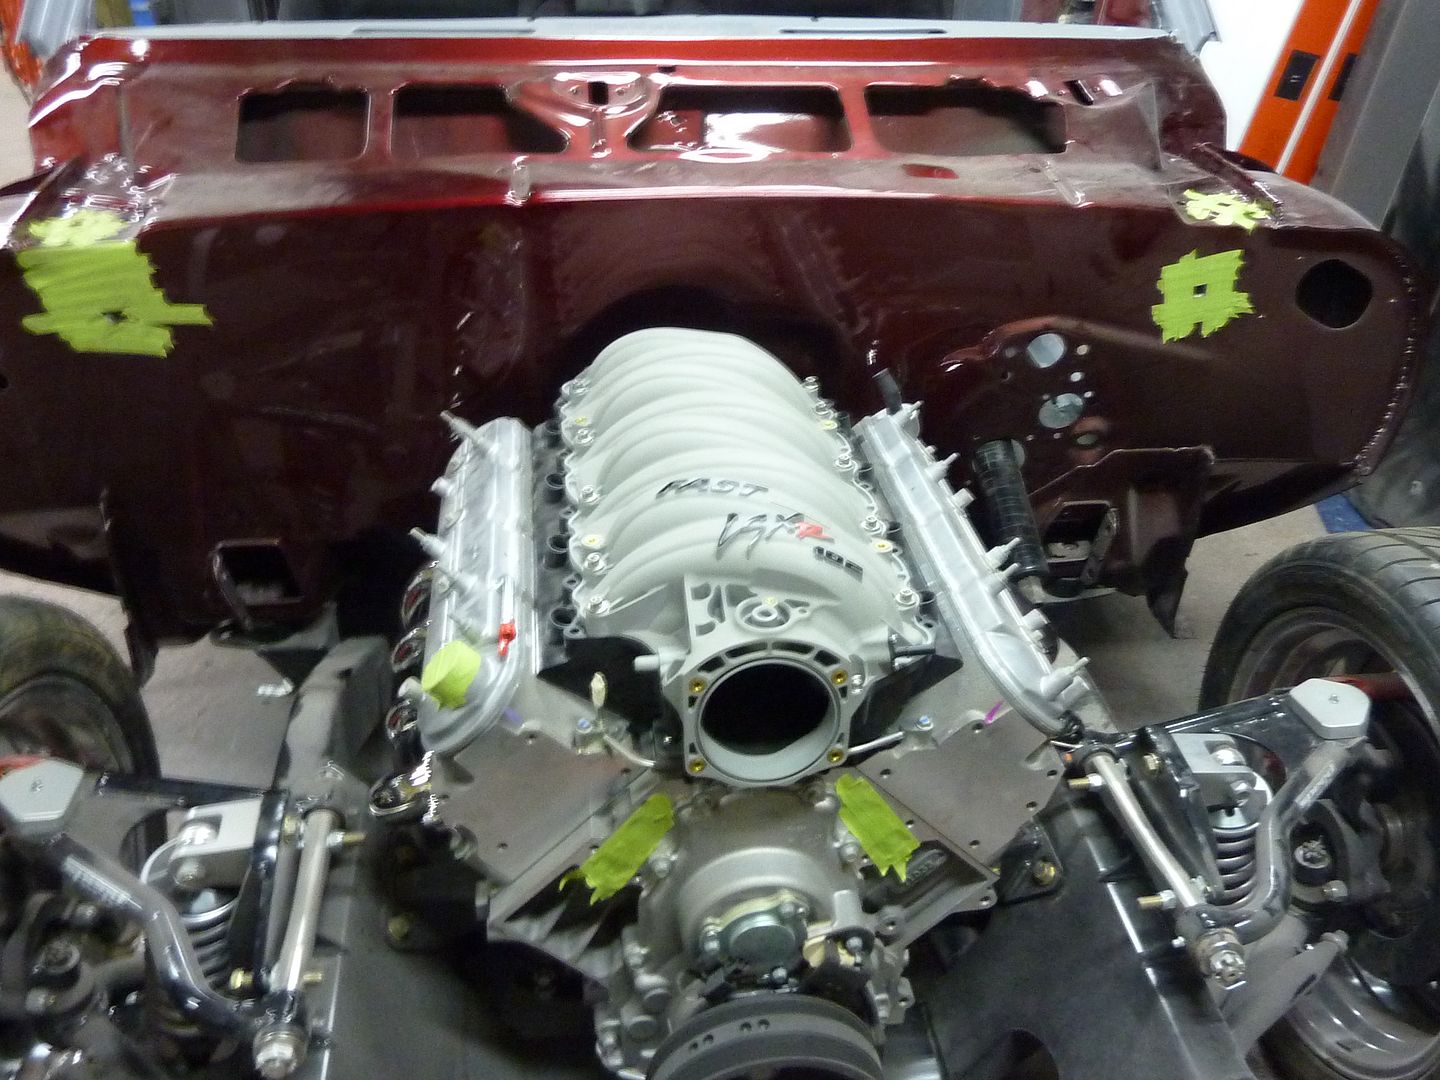
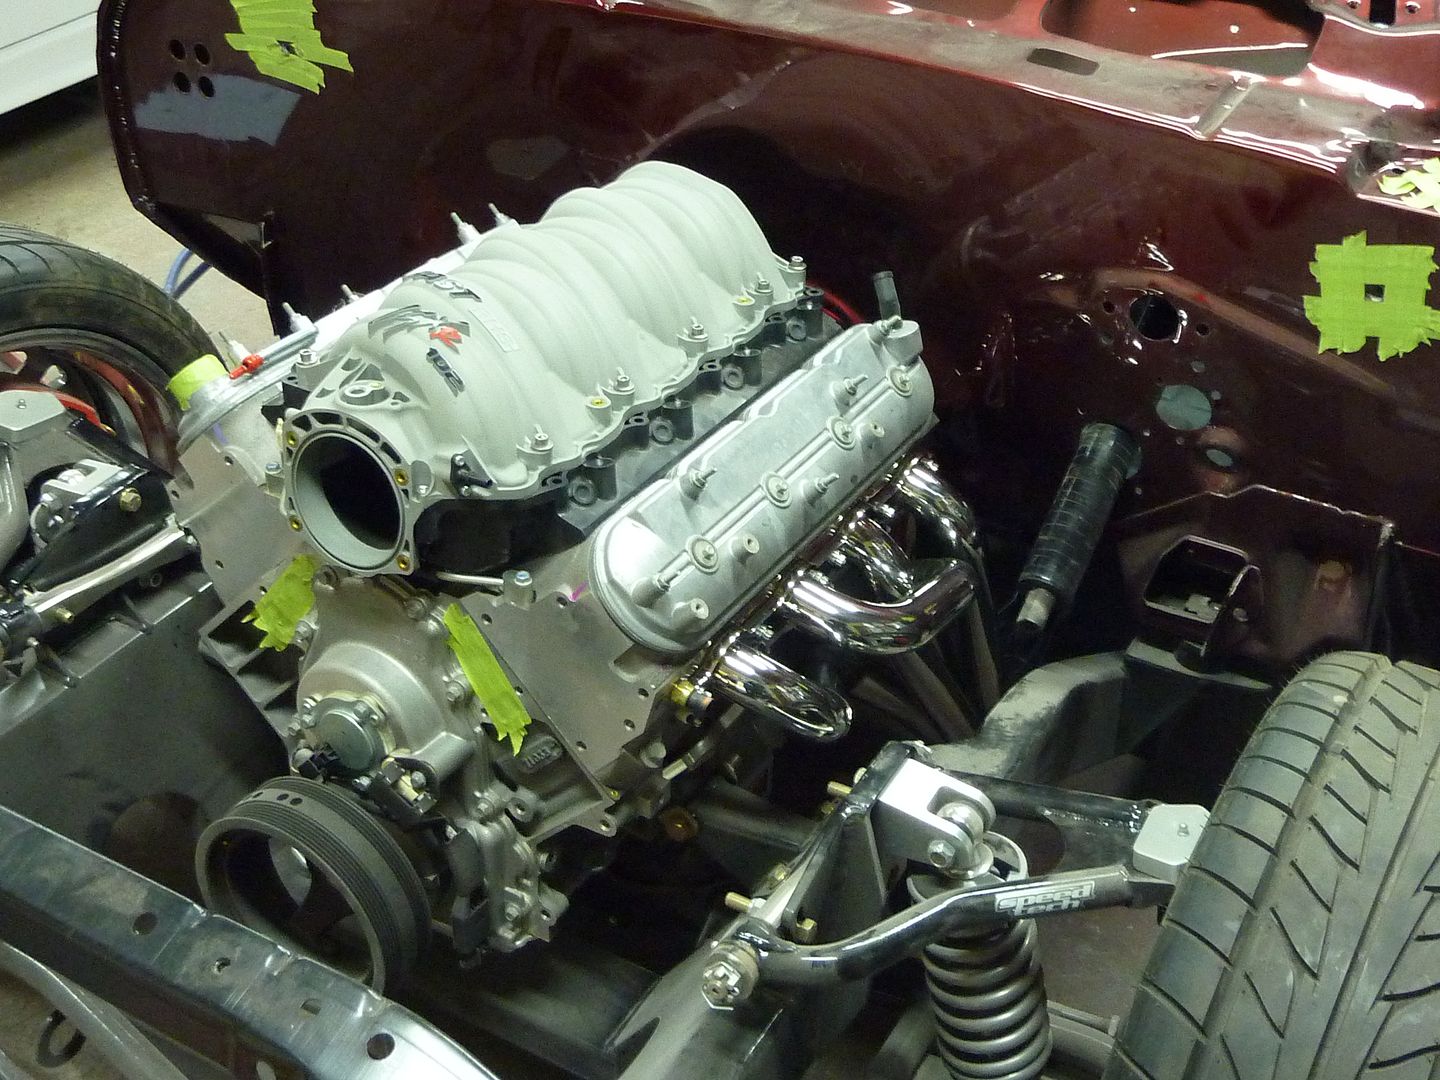
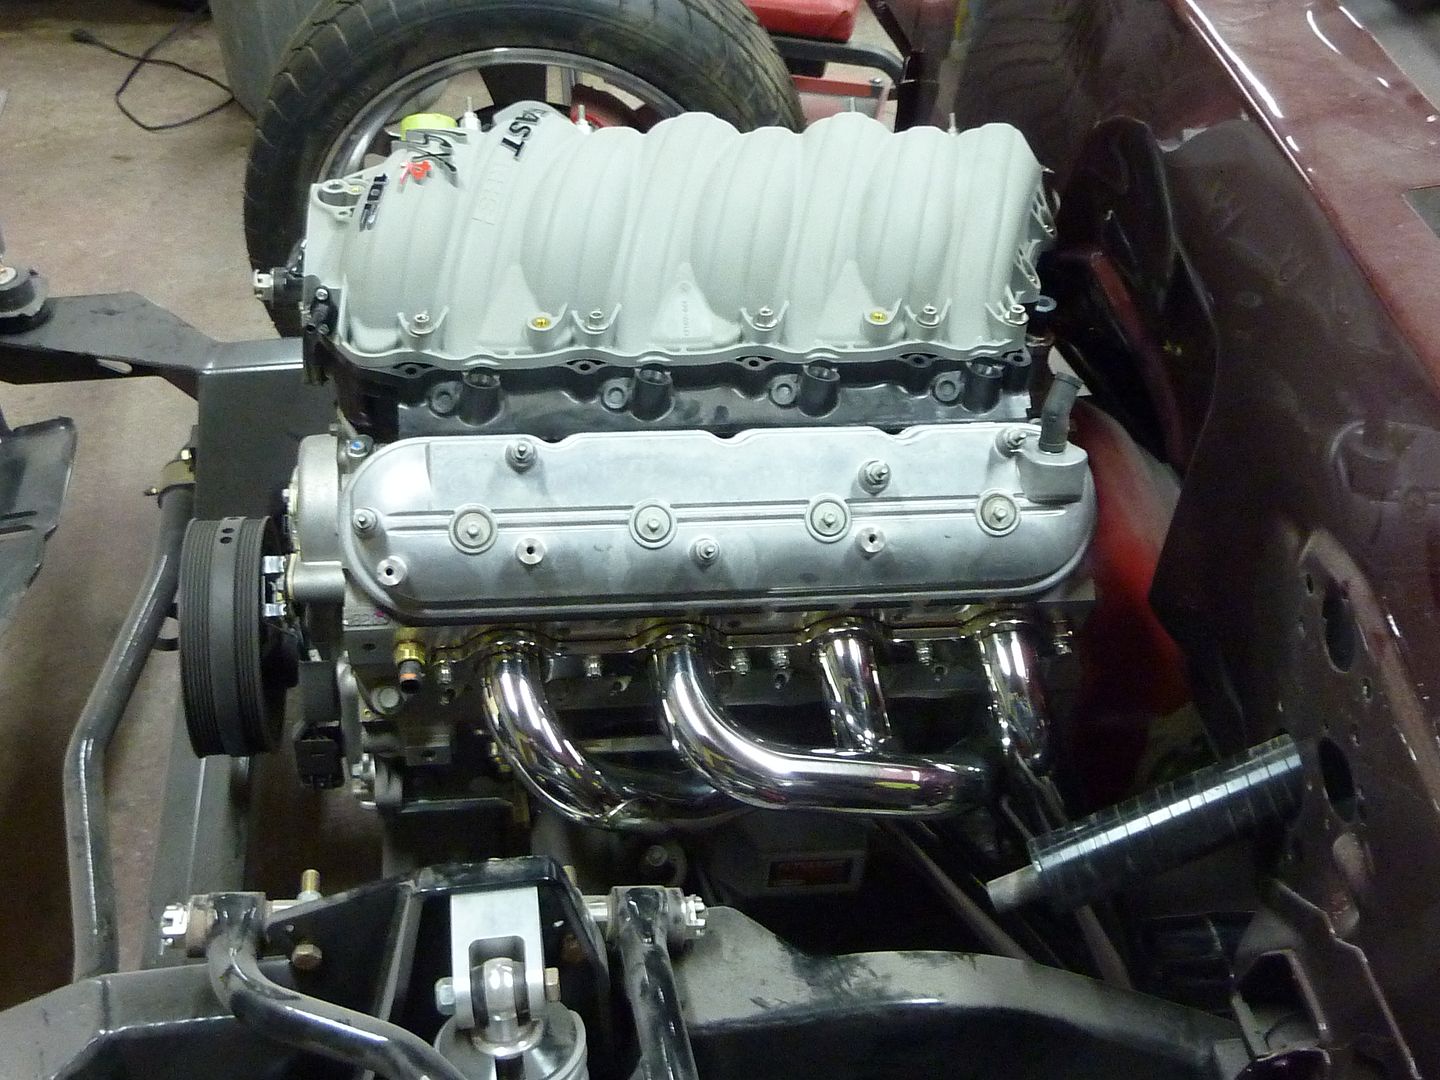
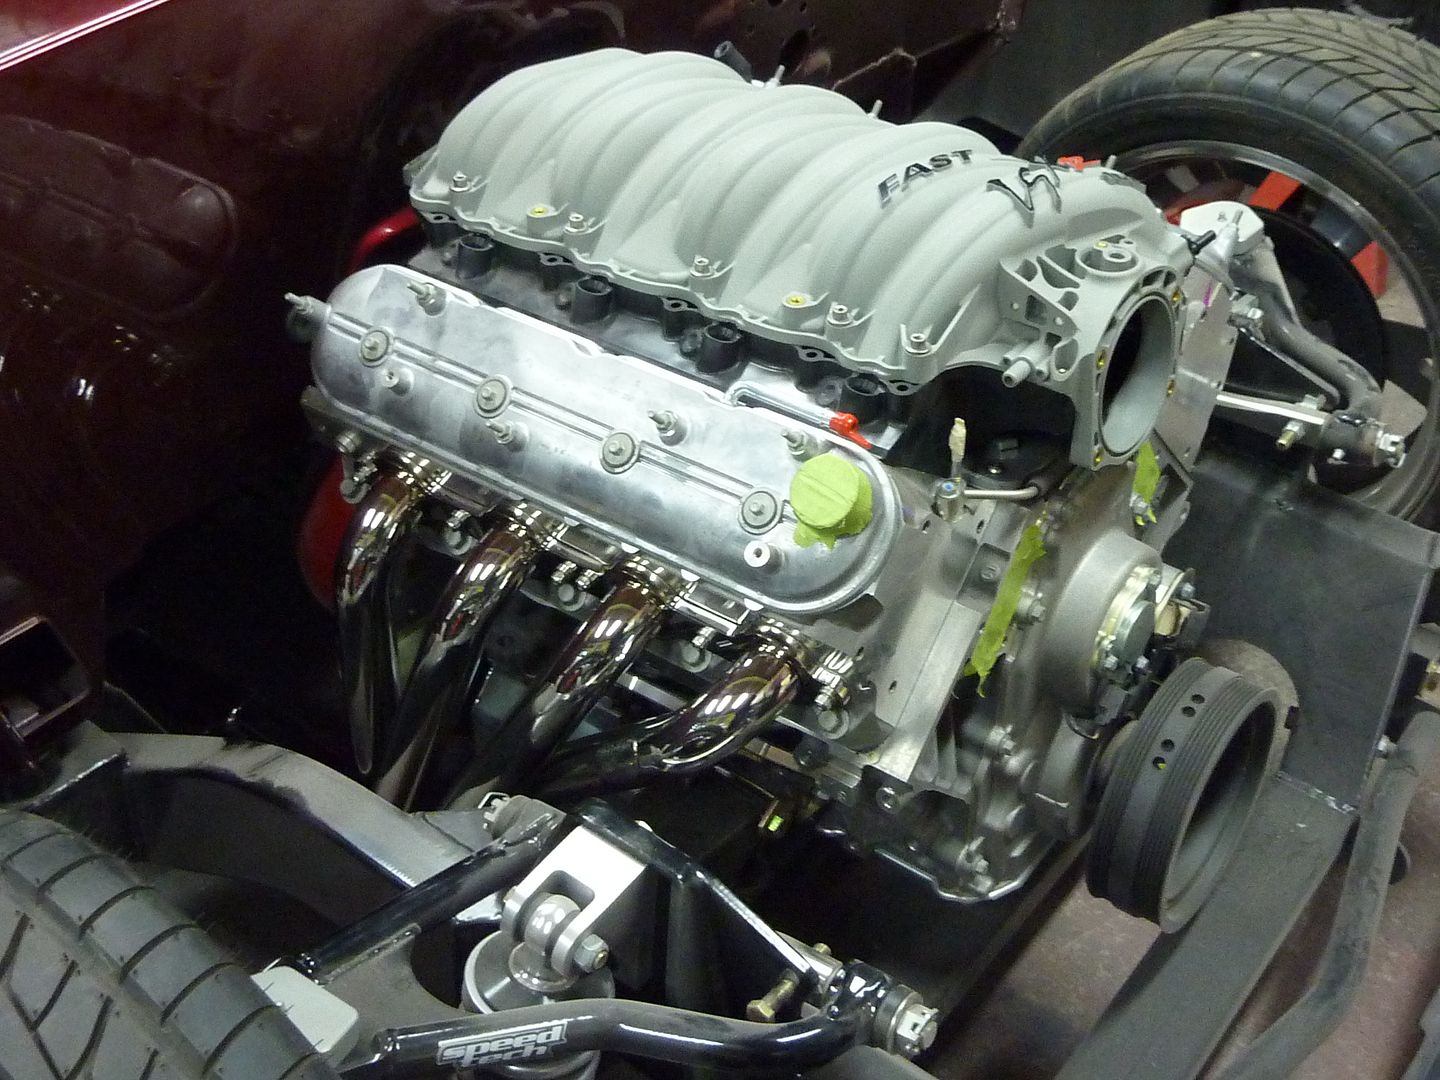
I plan on replacing the valve covers with some polished ones without coils mounts. I haven't decided yet exactly where I'm going to relocate the coils, but they will be hidden. I'm thinking about making a bracket and putting them on the subframe.
One other thing I'm debating about which I would love to hear your thoughts about. I'm leaning towards sanding down the intake and painting it body color. The way it is now, I think the grey doesn't really fit in. I plan on painting the engine compartment body color also, but I think the intake would look better red than grey. Thoughts???
Tomorrow I'll head back out to the shop. Not sure exactly what I will get done, but one thing I plan on doing is in regards to the ash tray. I don't smoke and I never will. I won't allow anyone to smoke in my car, so tomorrow I plan on filling in the ash tray area. I have two ashtrays for the car so I thought I might as well sell them and get some money towards the build.
I got the headers installed today. They look great.
Got the tape off and cleaned up the head
Stainless Works recommends using the stock steel gaskets. For once I didn't go and do something stupid like sell them or throw them out.
These things are dummy proof
The last motor I had in this car had Stage 8 header bolts. Hated them. They came loose all the time so this time I decided to go with Percy's split lock header bolts
If you're wondering how they work, here's some close ups
Added some of this good stuff to each of the bolts
And they were on
Other than the obvious reasons to do a LS swap, one more great reason is putting on the headers. These things took me less than an hour to put on. And I was taking my time not to scuff any thing up. I didn't swear once while putting the bolts in. Here's a close up of the bolt pattern
After I got the headers done, I decided to install the intake so it wasn't just sitting there. I started by taking off the coils and the coil mounts
Then I cleaned up the valley cover and intake ports
I had to buy some new intake seals. Glad they were cheap.
These
Go into there
Like so
And it was back on
I plan on replacing the valve covers with some polished ones without coils mounts. I haven't decided yet exactly where I'm going to relocate the coils, but they will be hidden. I'm thinking about making a bracket and putting them on the subframe.
One other thing I'm debating about which I would love to hear your thoughts about. I'm leaning towards sanding down the intake and painting it body color. The way it is now, I think the grey doesn't really fit in. I plan on painting the engine compartment body color also, but I think the intake would look better red than grey. Thoughts???
Tomorrow I'll head back out to the shop. Not sure exactly what I will get done, but one thing I plan on doing is in regards to the ash tray. I don't smoke and I never will. I won't allow anyone to smoke in my car, so tomorrow I plan on filling in the ash tray area. I have two ashtrays for the car so I thought I might as well sell them and get some money towards the build.
01-24-2011 | 08:52 PM
#75
Thread Starter
On The Tree
iTrader: (4)
Joined: Mar 2009
Posts: 132
Likes: 0
From: British Columbia, Canada
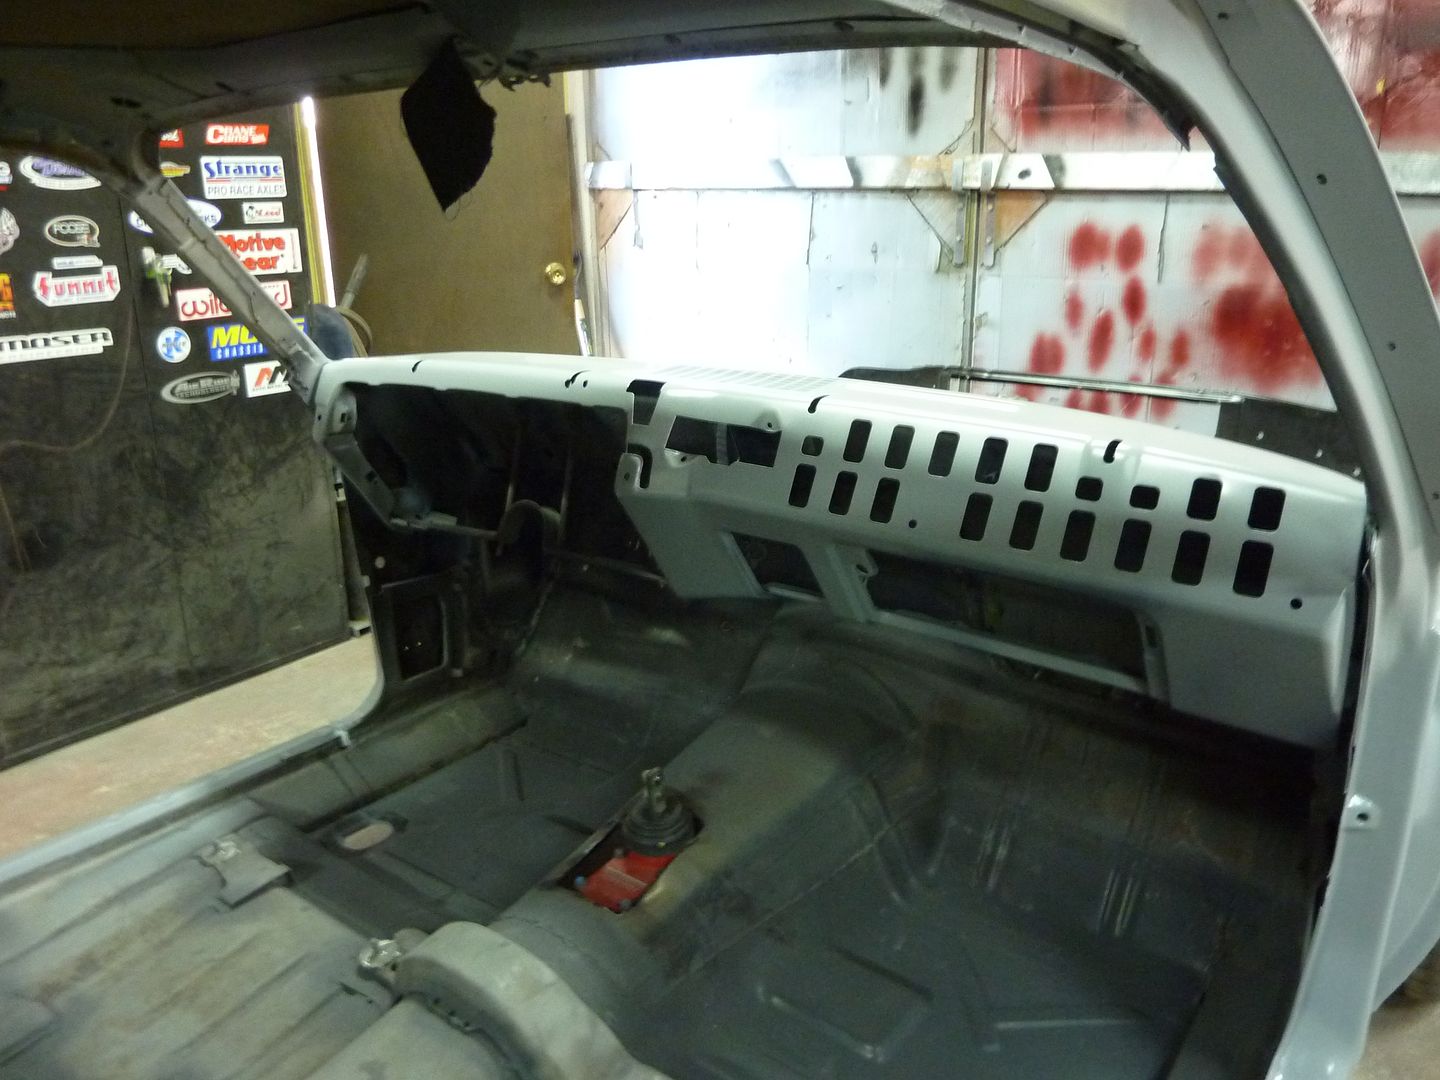
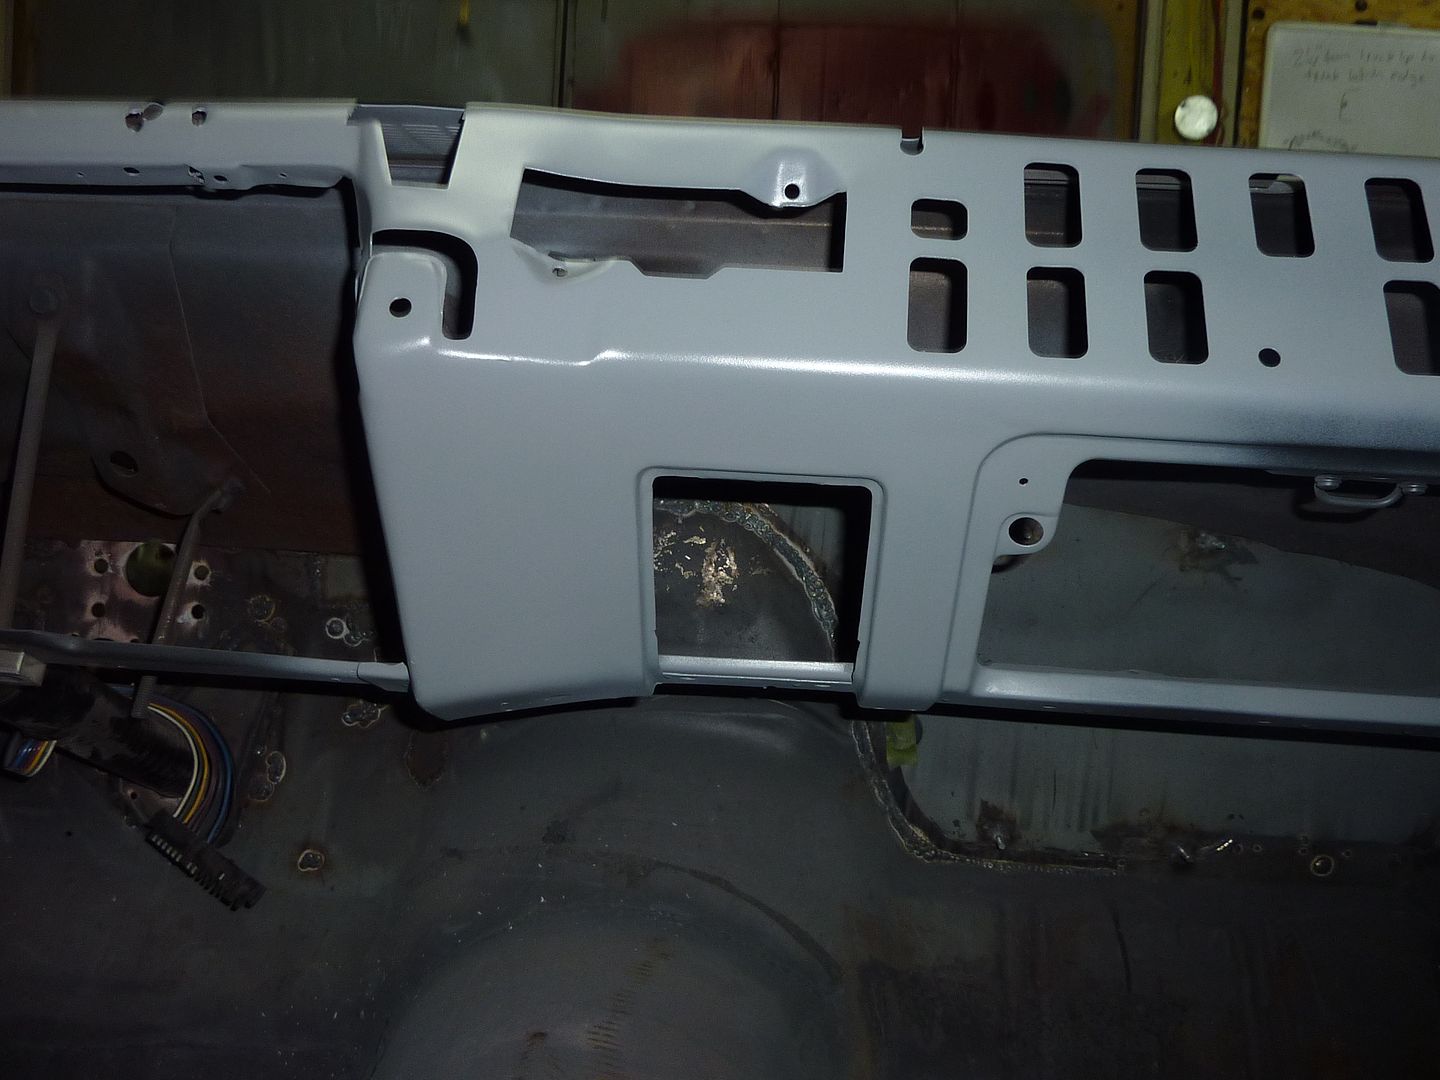
One other thing I forgot to add was a mistake I made by rushing a job. When I did the firewall and put the hole in for the steering column, I rushed it and didn't mount the column properly. Well I'm paying for it now. I have to expand the existing hole for the steering column so it sits better. Right now it it crooked towards the driver's side and too far down. I'll expand the hole and hope that the polished cover I have will cover up most of the hole, if not I'll have to figure out a fix to cover the ooops area. I already have an idea of what I'll do.
Here's a pics of what I'm talking about
Here's a pics of what I'm talking about
01-26-2011 | 05:41 PM
#76
Thread Starter
On The Tree
iTrader: (4)
Joined: Mar 2009
Posts: 132
Likes: 0
From: British Columbia, Canada
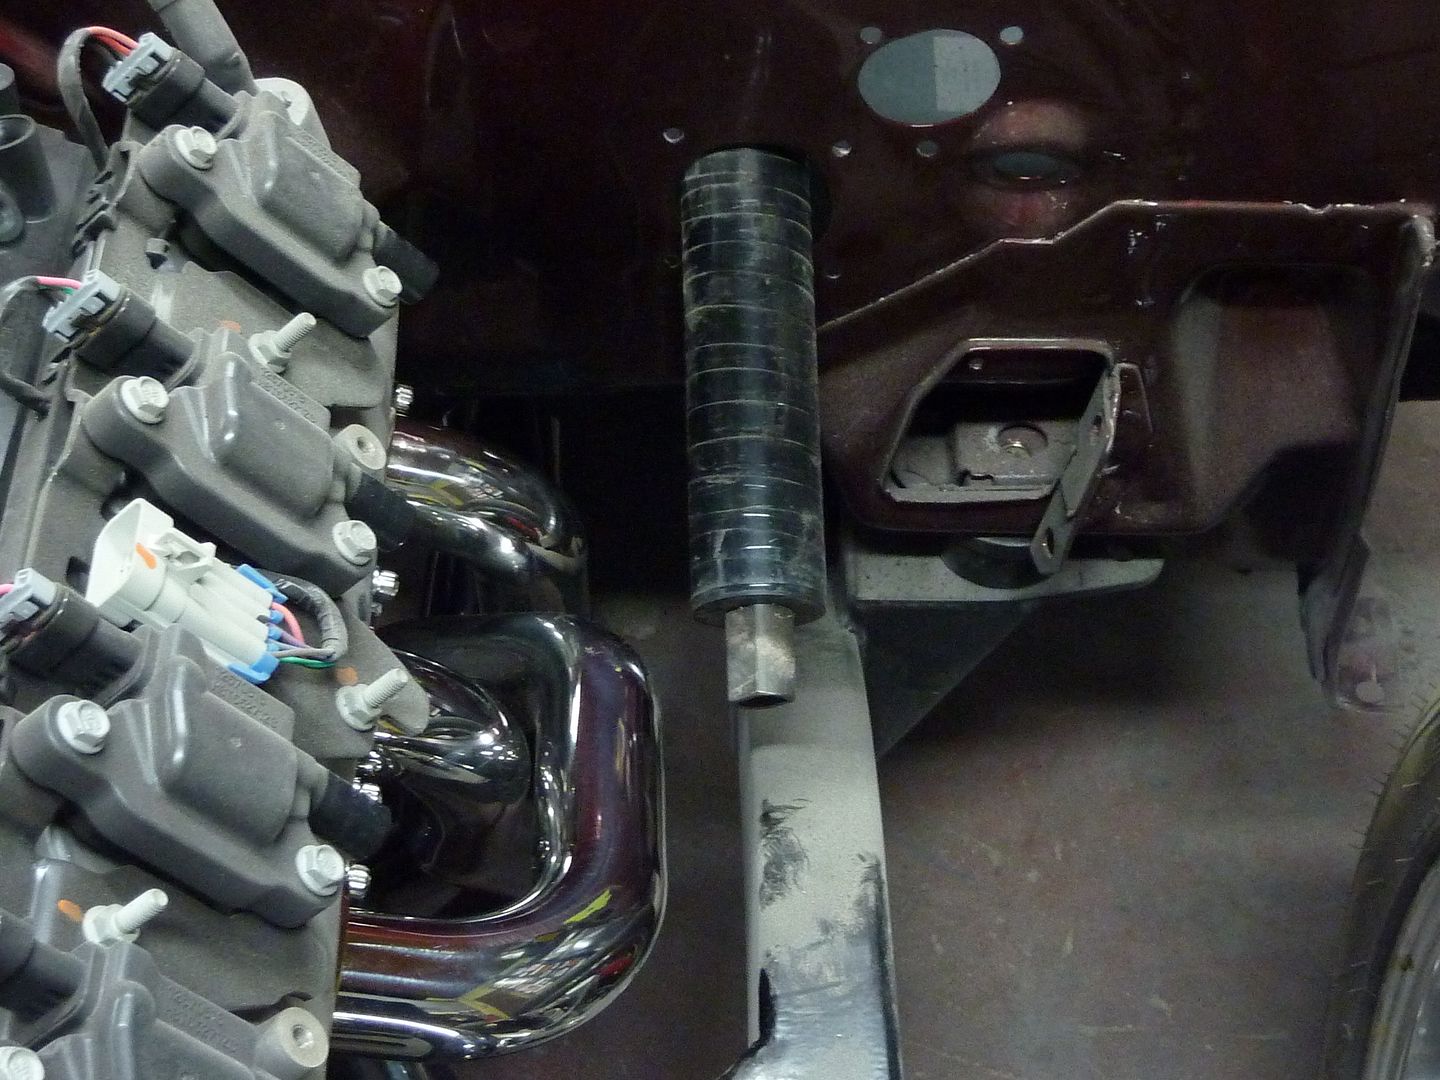
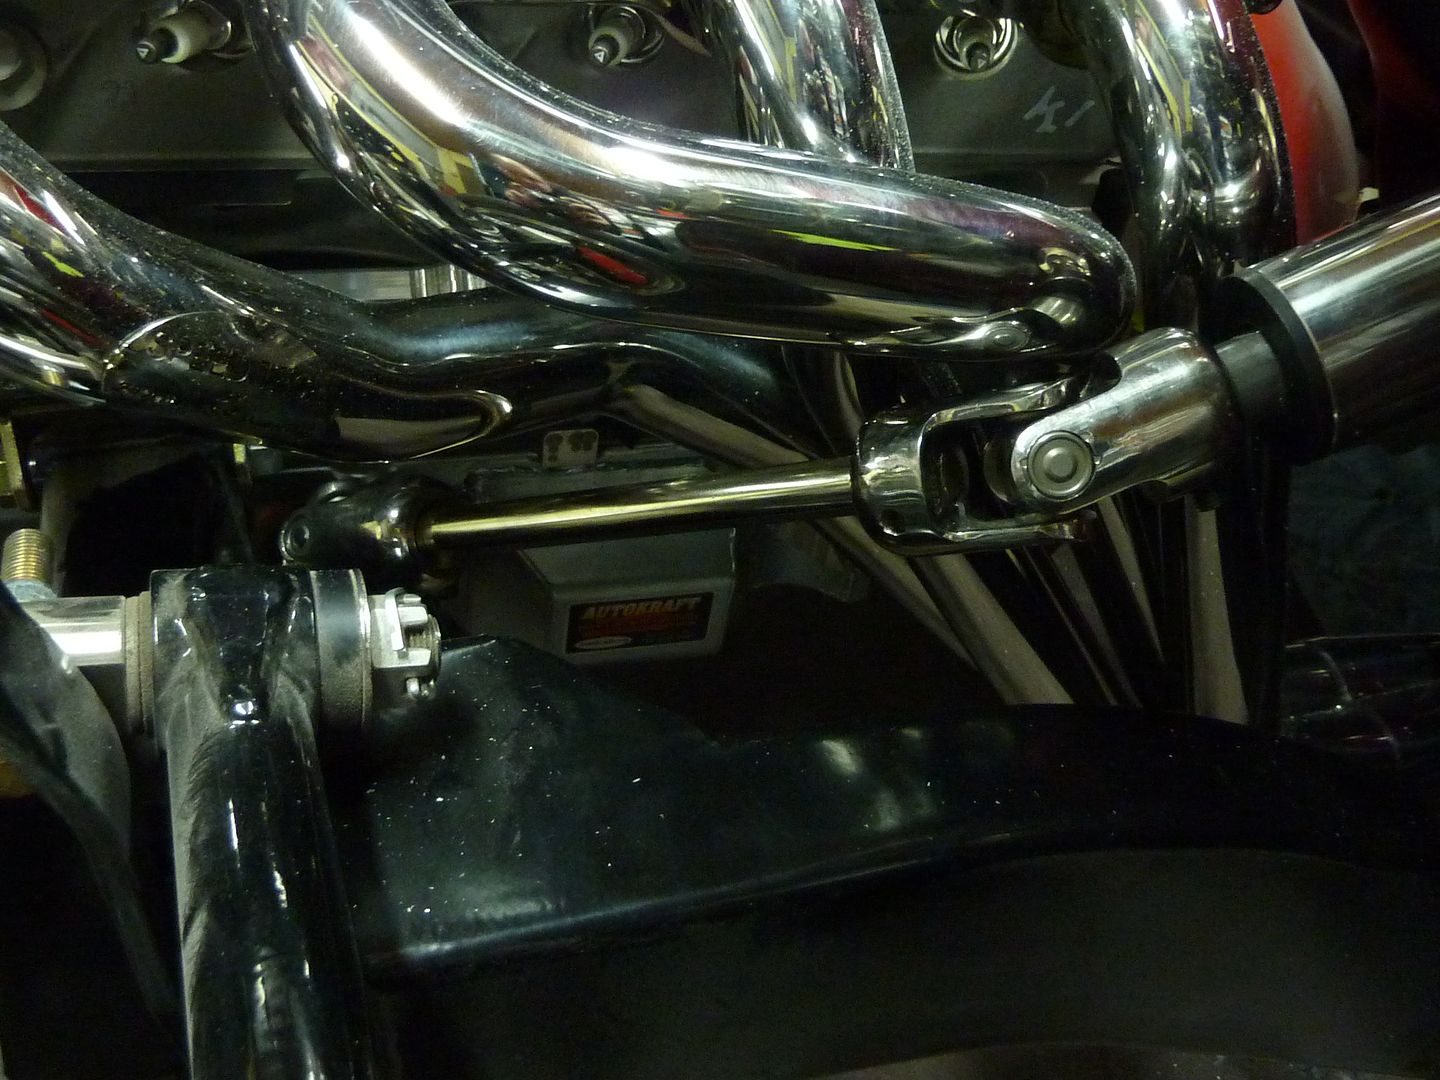
I didn't get around to filling in the ash tray like I wanted to, but I did get the steering linkage all hooked up. What a pain in the ***** that was. And it took forever, although it didn't help that I had to keep chopping up my firewall. A whole lot of trial and error. I also took a nice chunk out of my hand. I had my hand some place it shouldn't have been and when the drill slipped, my hand was there to stop it. Got it so deep, it barely even bled. Thankfully I was almost done the steering as it put a bit of a damper on the rest of the day. Oh well enough whining and onto the pics.
Linkage hooked up. That's the nice thing about the Speed Tech headers. They are designed so you only have to use two knuckles. I ended up making a bit of a mess of the hole in the firewall, thankfully the steering column mount covers most of it. I think there's only two holes not covered.
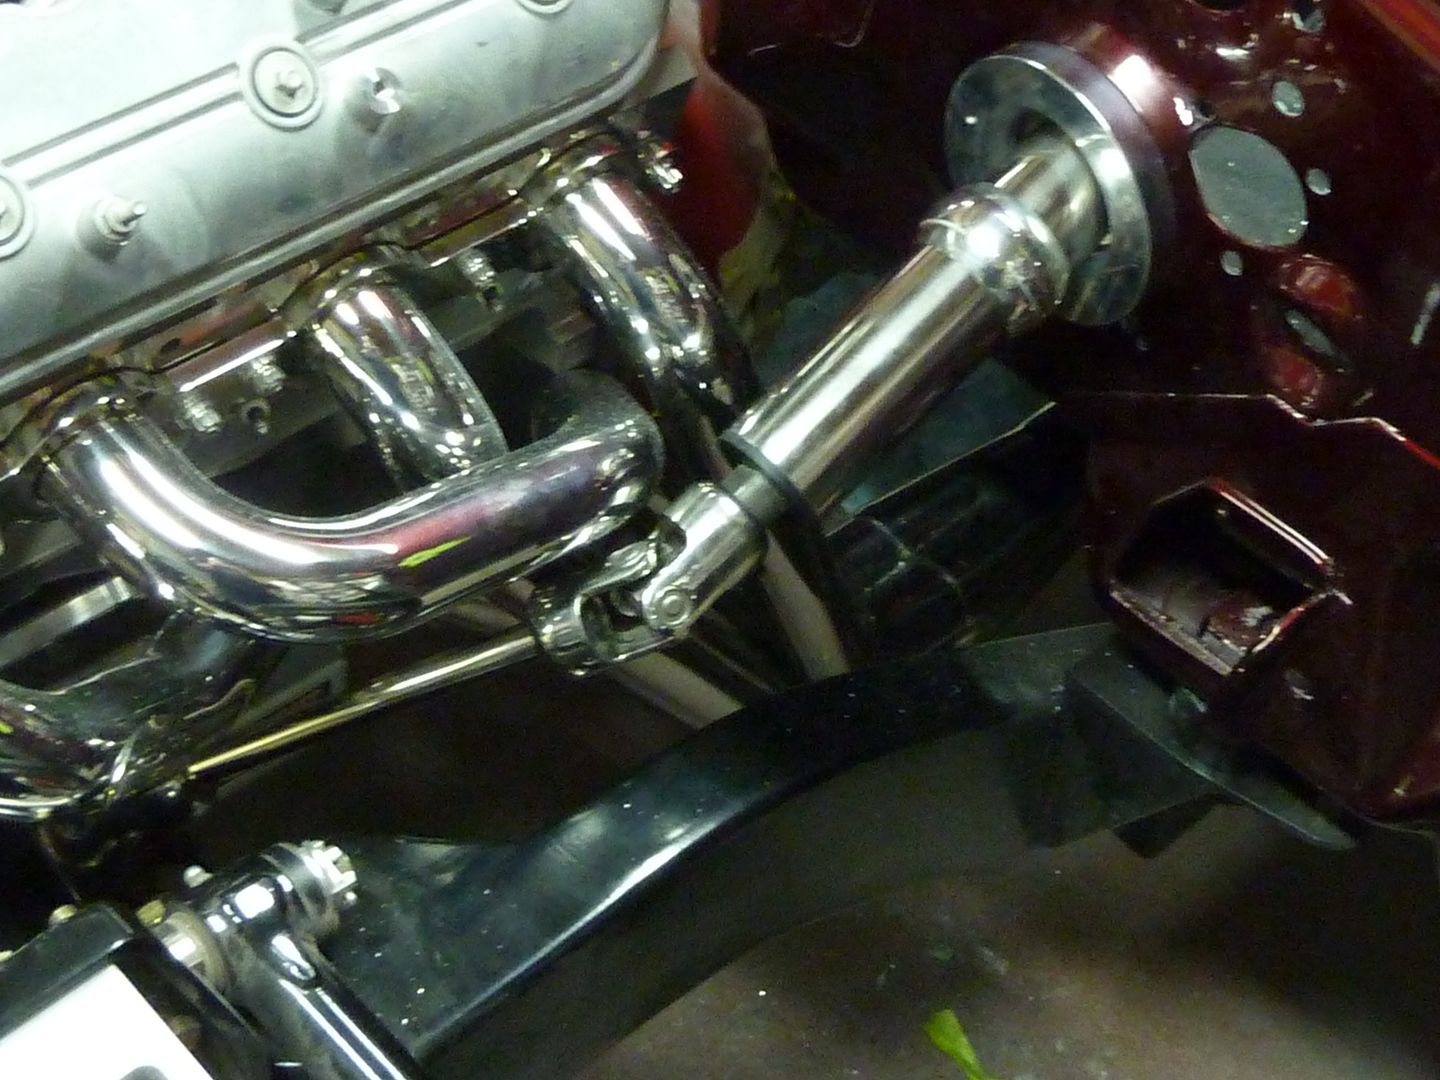
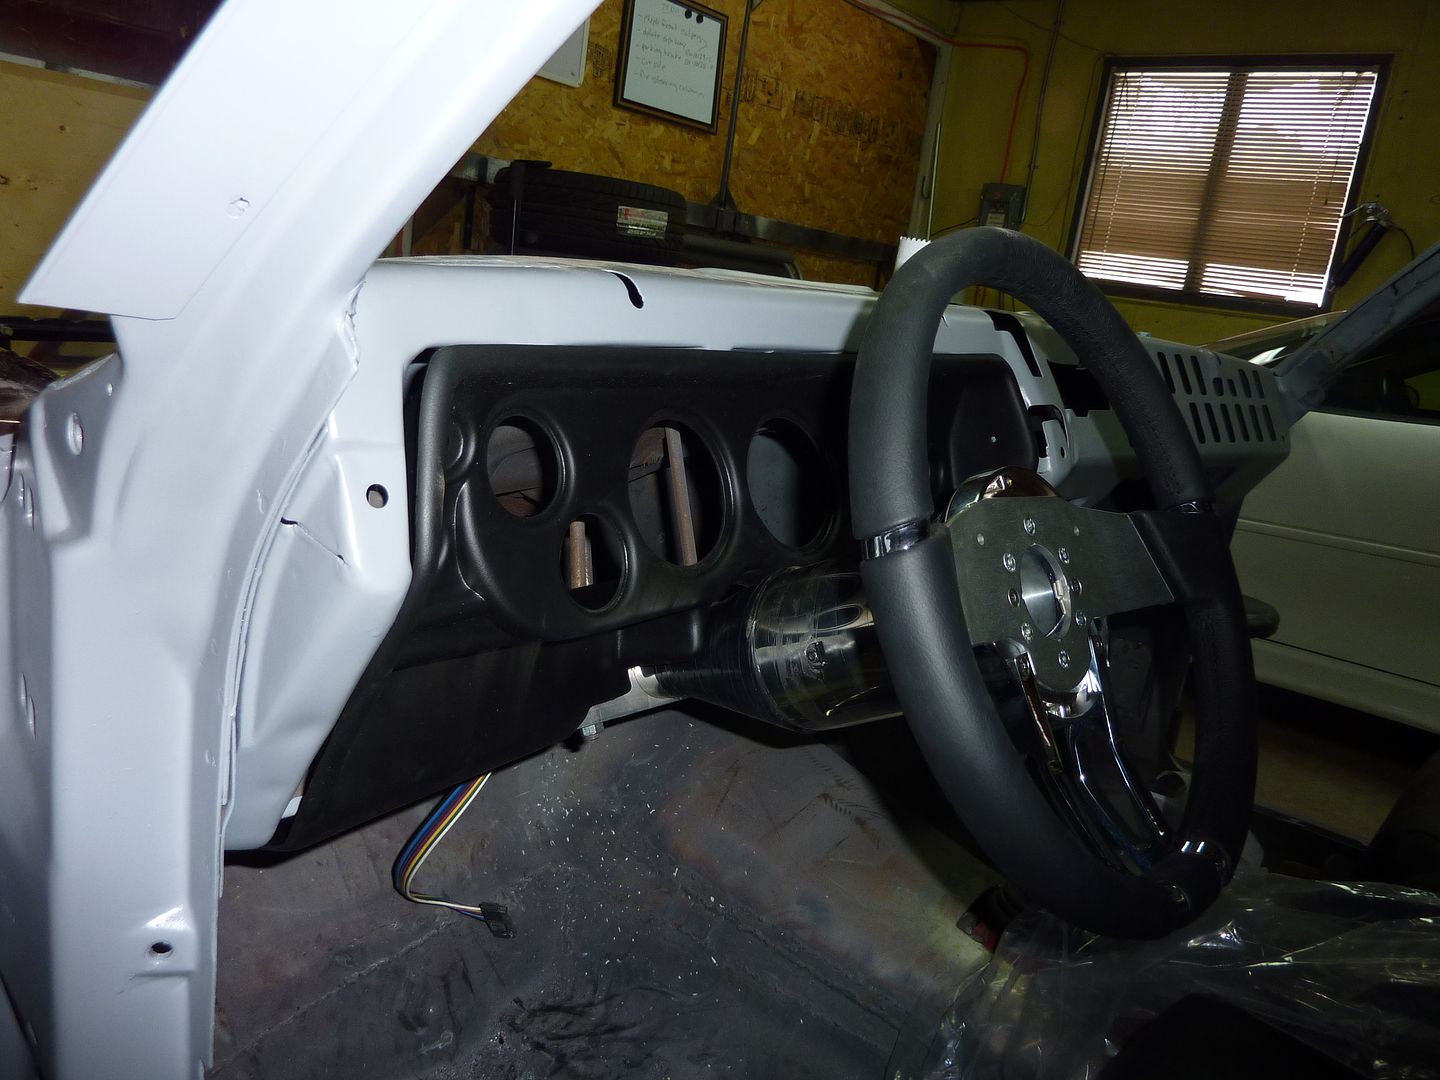
Thought I would see how it would look with everything else on.

I put the steering wheel on. Will be so nice that I can turn the wheels with the steering wheel now instead of forcing the wheels themselves. I also put the gauge cluster in just to see how it will look
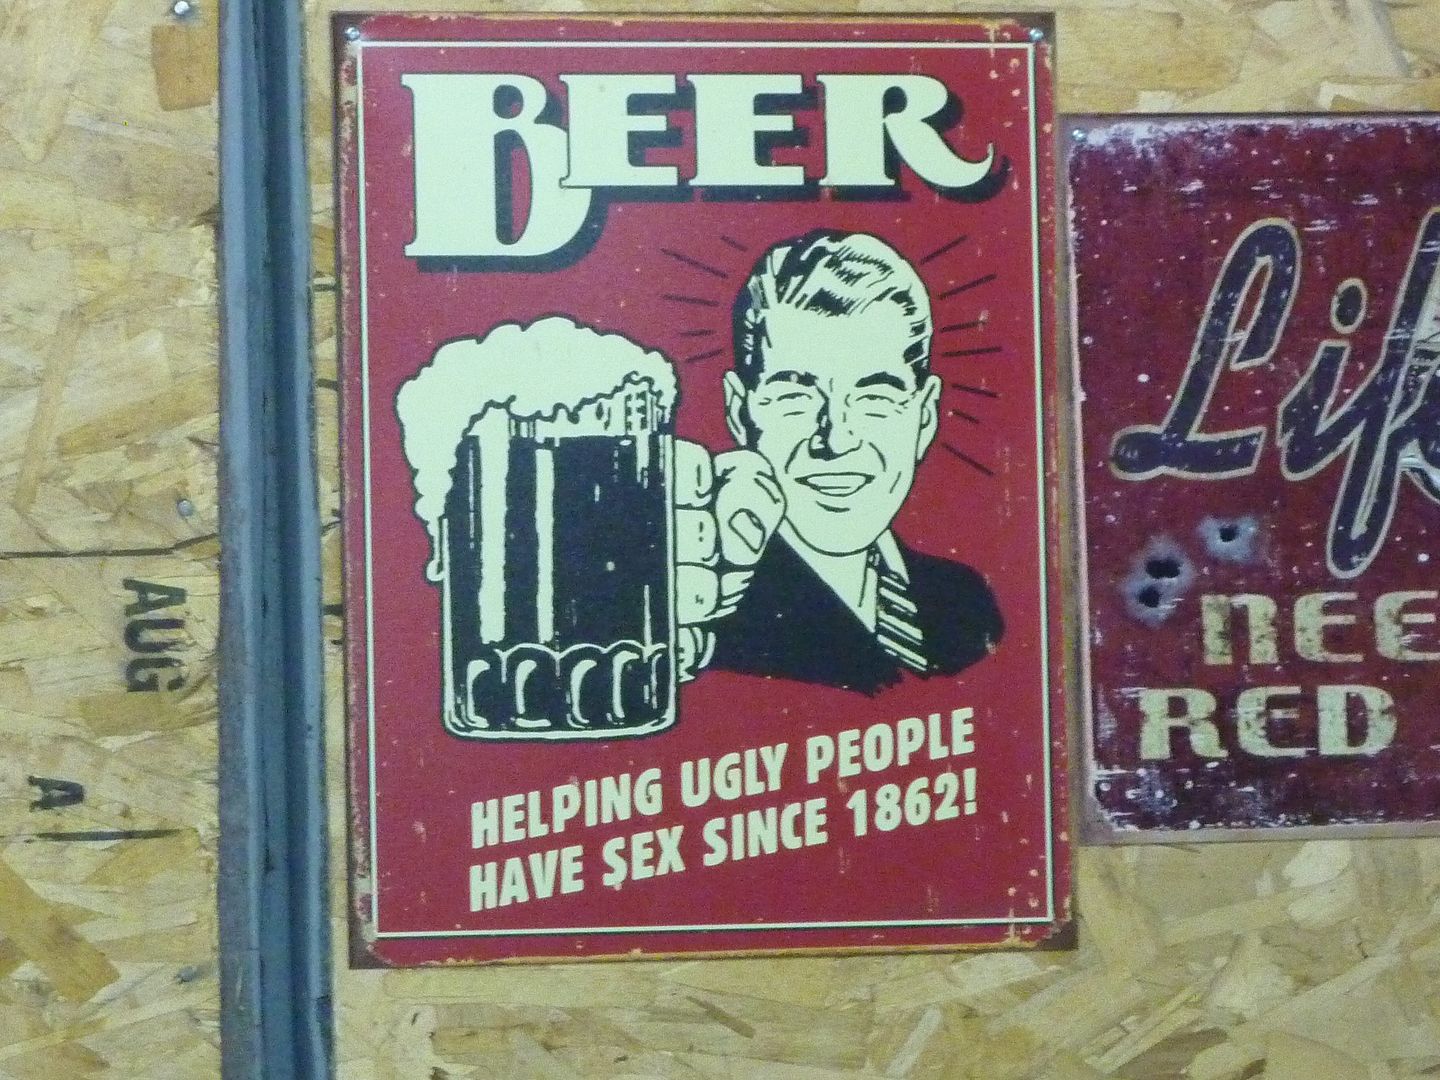
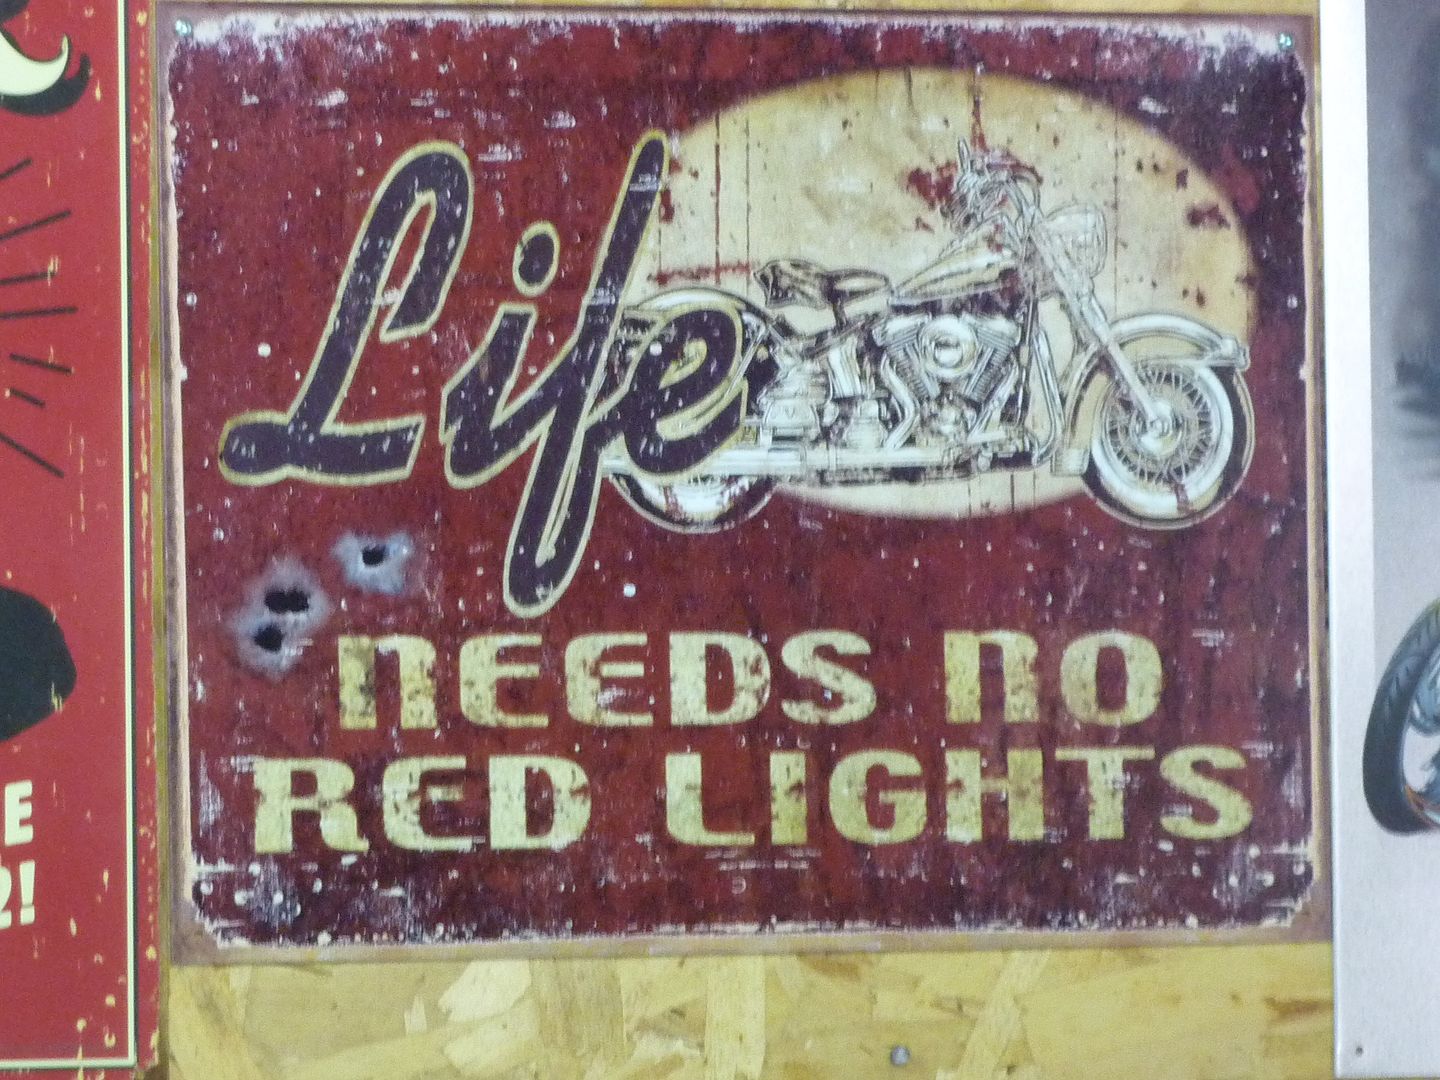
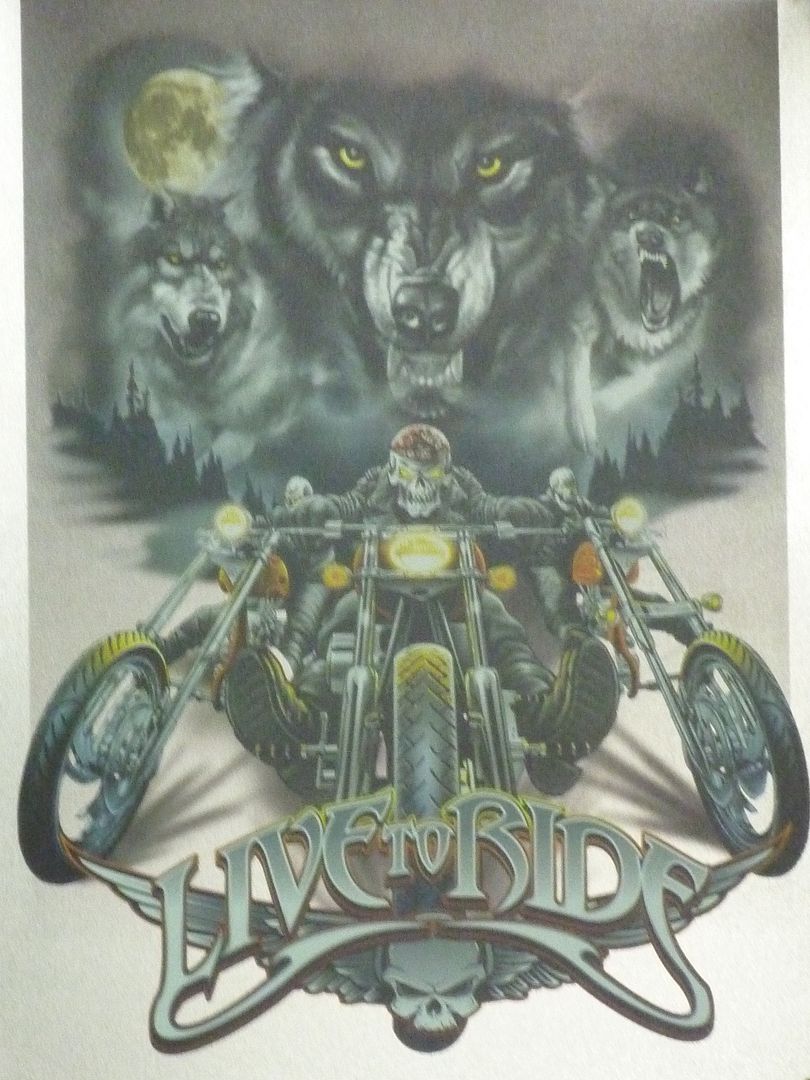
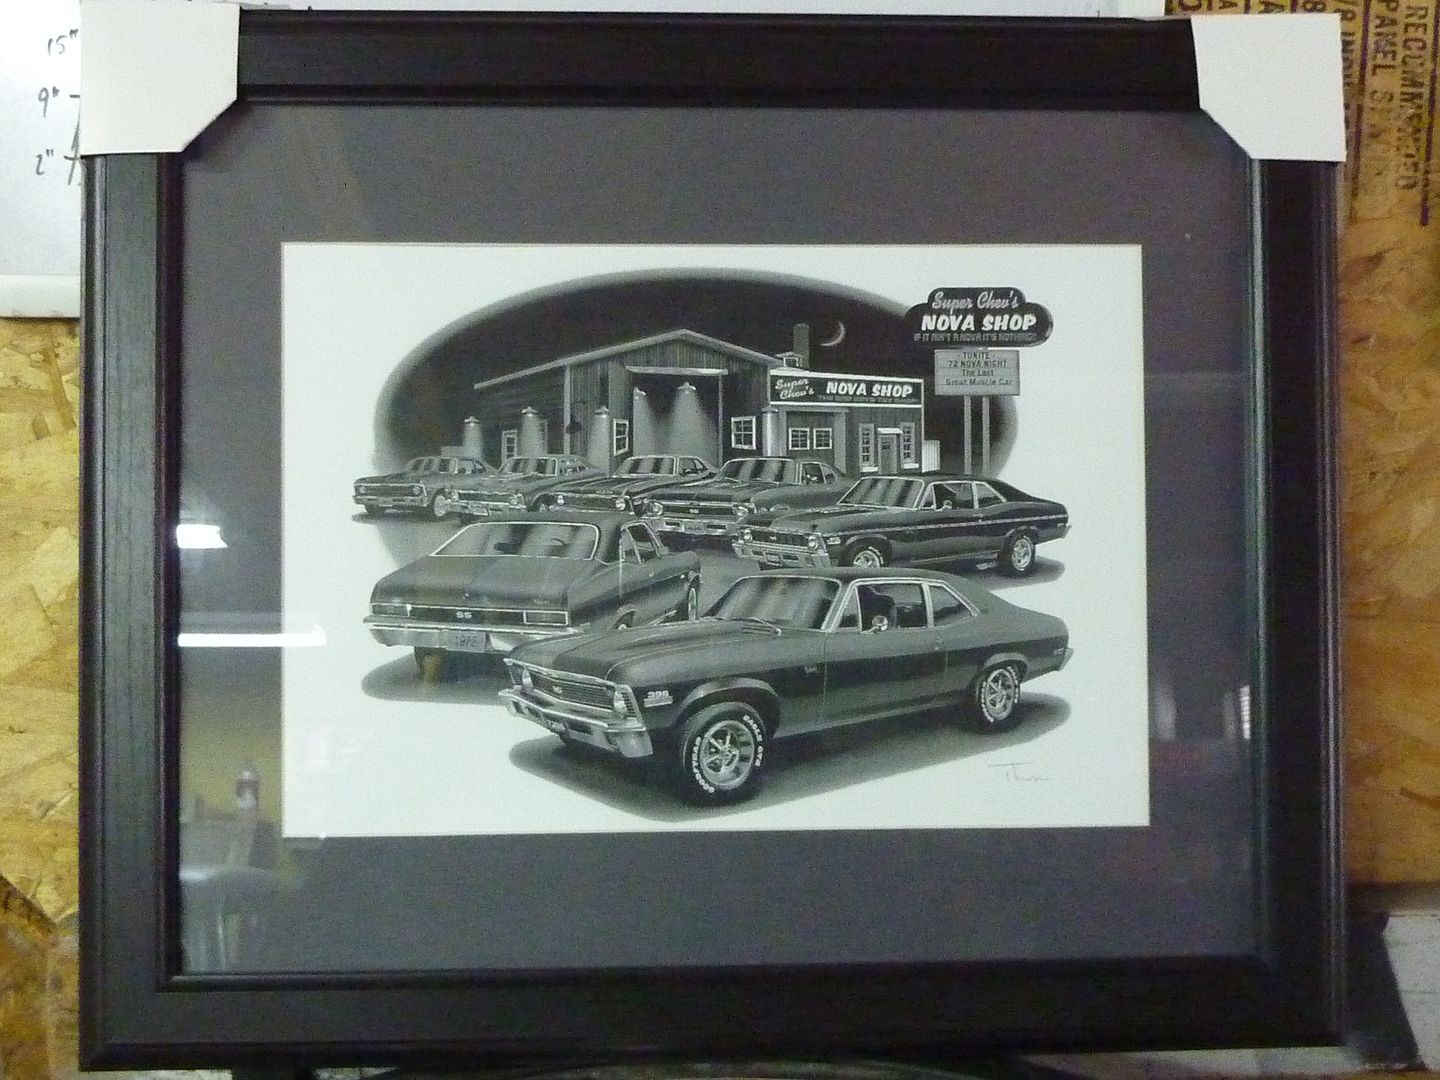
Since I messed up my hand, I thought I'd hang up some shop art that the wife got me for xmas. I've always wanted to get a bike, hence the bike ones (plus I love skulls)
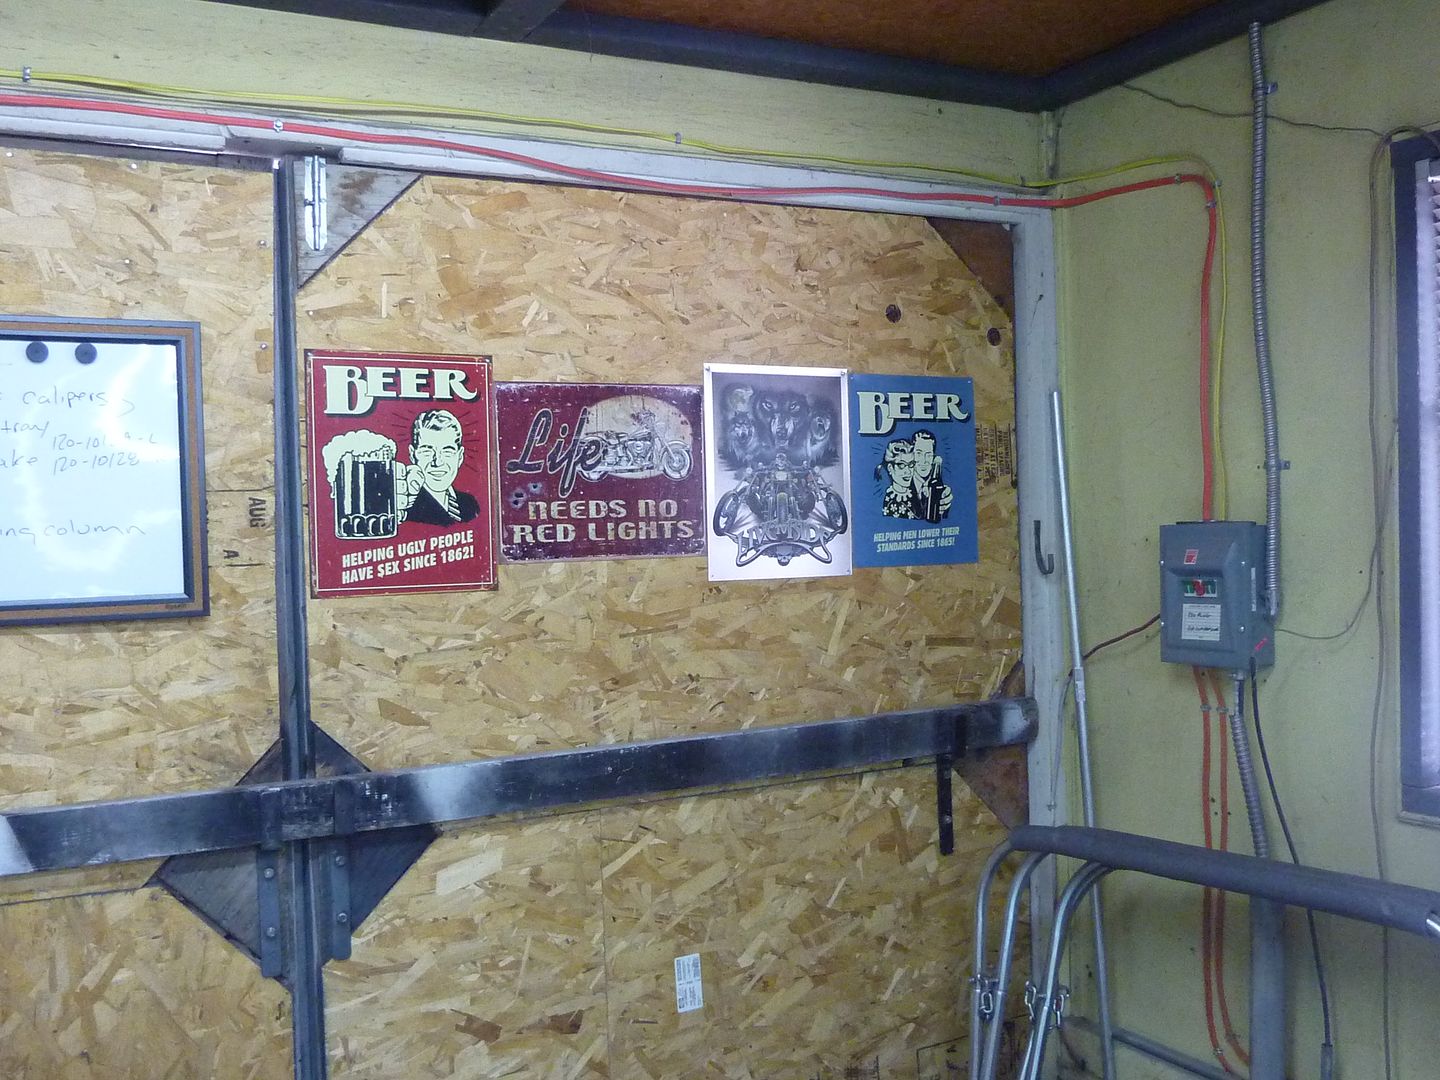

I still have one more pic that I got from Carl that I need to hang. Just haven't found a good spot yet.
This spring I hope to knock the shed that is behind the garage and put up a new one with a cement floor. I want to make the floor the same height and do the new shed as an attachment to the shop. I'll then punch a door way into the shed and move all my tools and cluster into the shed. Then I'll have more room for shop art.
I also ordered a few brackets from Ironworks that will make things easier. I ordered a Lokar parking brake bracket, a Mast ECU bracket and some coil relocation brackets. I then ordered a Lokar hand parking brake and a boot for it.
Linkage hooked up. That's the nice thing about the Speed Tech headers. They are designed so you only have to use two knuckles. I ended up making a bit of a mess of the hole in the firewall, thankfully the steering column mount covers most of it. I think there's only two holes not covered.
Thought I would see how it would look with everything else on.
I put the steering wheel on. Will be so nice that I can turn the wheels with the steering wheel now instead of forcing the wheels themselves. I also put the gauge cluster in just to see how it will look
Since I messed up my hand, I thought I'd hang up some shop art that the wife got me for xmas. I've always wanted to get a bike, hence the bike ones (plus I love skulls)
I still have one more pic that I got from Carl that I need to hang. Just haven't found a good spot yet.
This spring I hope to knock the shed that is behind the garage and put up a new one with a cement floor. I want to make the floor the same height and do the new shed as an attachment to the shop. I'll then punch a door way into the shed and move all my tools and cluster into the shed. Then I'll have more room for shop art.
I also ordered a few brackets from Ironworks that will make things easier. I ordered a Lokar parking brake bracket, a Mast ECU bracket and some coil relocation brackets. I then ordered a Lokar hand parking brake and a boot for it.
 01-31-2011 | 08:31 AM
#79

Teching In
Joined: Dec 2010
Posts: 3
Likes: 0
Hey Mike, Nice build you have put alot of time and effort to do your car right.. Looks good. I am building a 48 chevy stylemaster with a 2008 Ly6 and a 6l90E tranny converstion. I see that you have a intake what kind of prices do you have on it. Thanks Tony