

2001 porsche 996 ls1 conversion

 06-14-2010, 12:58 PM
#222
8 Second Club
Thread Starter
iTrader: (1)
Join Date: Nov 2001
Location: the not so stock tribe
Posts: 3,697
Likes: 0
Received 0 Likes
on
0 Posts

i definatly will do both .
i already cleaned it and added one layer of paint just to make it look a bit good, and there is a layer of heat insulation applied on the inside of the car where the engine compartment is.
the plan is to finish everything and then just before final assembly i'll spray the whole thing and powdercoat what ever i can in there . offcorse all mufflers and pipes will be heat-shielded or header wrapped.
i just think it would be a waste to paint and detail everything now only to have it scratched and ruined with all the times i take stuff in and out of the compartment.
06-16-2010, 12:06 AM
#223
Teching In

Join Date: Jun 2010
Posts: 3
Likes: 0
Received 0 Likes
on
0 Posts
Wow, awesome project! I'd love to do a similar project, I am eagerly following your posts.
Do you have any idea what a 996TT goes for with a blown engine, but in otherwise good condition? I saw a 2002 911 C2 going for $12k with a blown engine, but I'd want to start with an AWD car. Non-turbo 996s have a big controversy regarding engine reliability, and replacement engines are expensive. 996 turbos allegedly have more reliable engines, but replacement costs are even bigger (I've heard $30k!), so I'm hoping I can pick one up sans engine for $15-$20k.
Do you think you'll be able to keep ABS and the stock gauges? Or are all the electronics too integrated for that stuff to work without the original ECU and engine?
- Miles
06-16-2010, 05:00 AM
#224
8 Second Club
Thread Starter
iTrader: (1)
Join Date: Nov 2001
Location: the not so stock tribe
Posts: 3,697
Likes: 0
Received 0 Likes
on
0 Posts
to tell you the truth , i have no idea what they cost , and i'm sure it different here ( saudi arabia ) when it comes to their prices . you also have to keep in mind it took me about a year worth of searching till i found this one ( actually i wasn't looking for an AWD porsche - cause i thought it would just complicate things more ) .
as for the other question : the plan is to retain as much of the stock car systems as possible - which includes ABS and dash - only problem is the car uses CAN-BUS communication between systems, which means it sucks
so the easiest way to have stuff work is too keep the stock PCM in place and functioning , and only fool it by using the original porsche sensors on the LS1 . this way the PCM still gets the vital signals like RPM and temps and so on and all it does is relay it to the dash and other places its needed. the porsche PCM will not control the engine , that will be handled by a GM PCM .
 06-23-2010, 01:52 AM
#226
8 Second Club
Thread Starter
iTrader: (1)
Join Date: Nov 2001
Location: the not so stock tribe
Posts: 3,697
Likes: 0
Received 0 Likes
on
0 Posts
time for some updates,
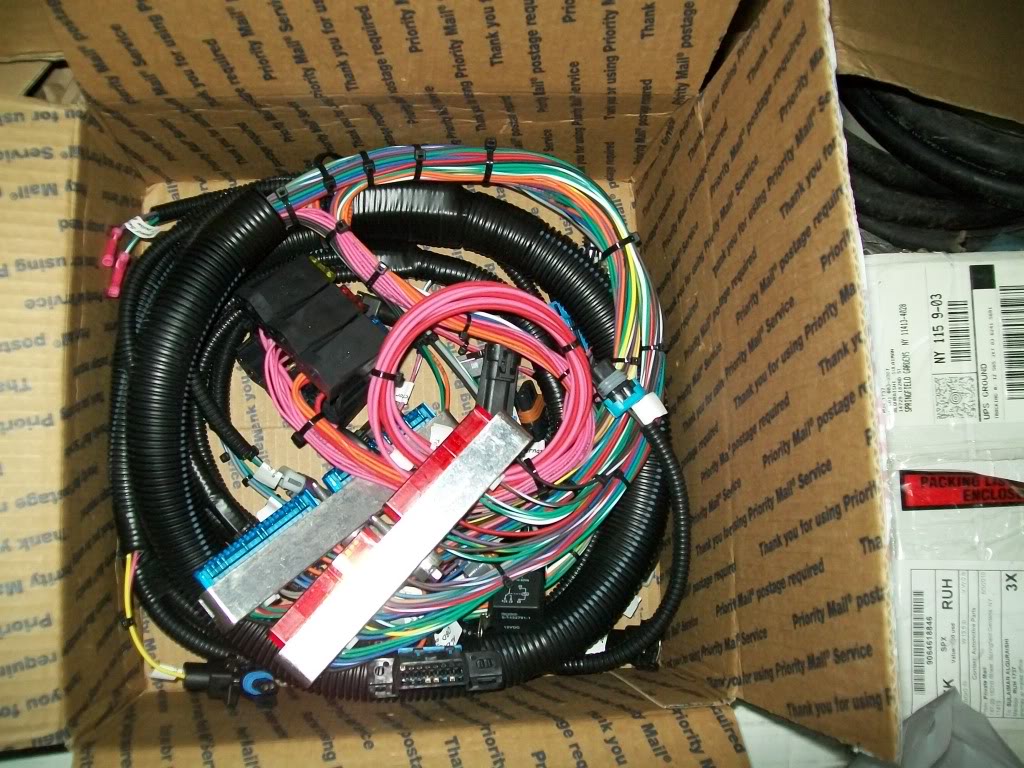
been waiting for parts to show up, and most of them are here now;
the wiring harness from ls1wiring.com is here
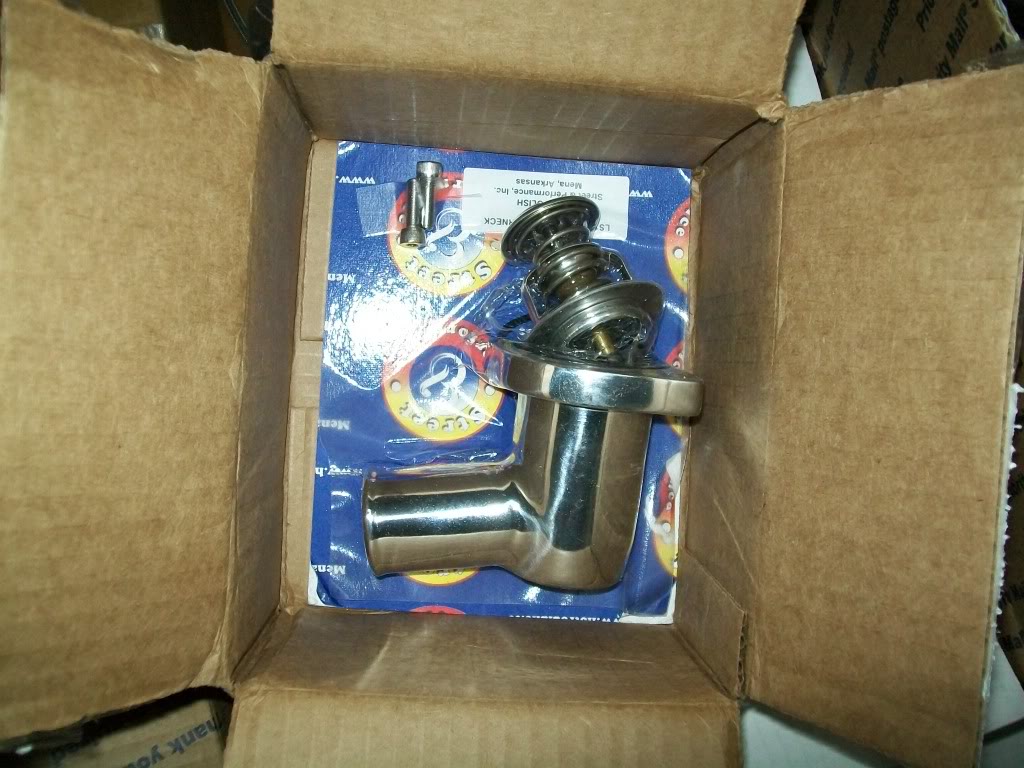
and so is the 360 deg. swivle thermostat housing ( i was hoping it would be smaller than that , but oh well,,, )
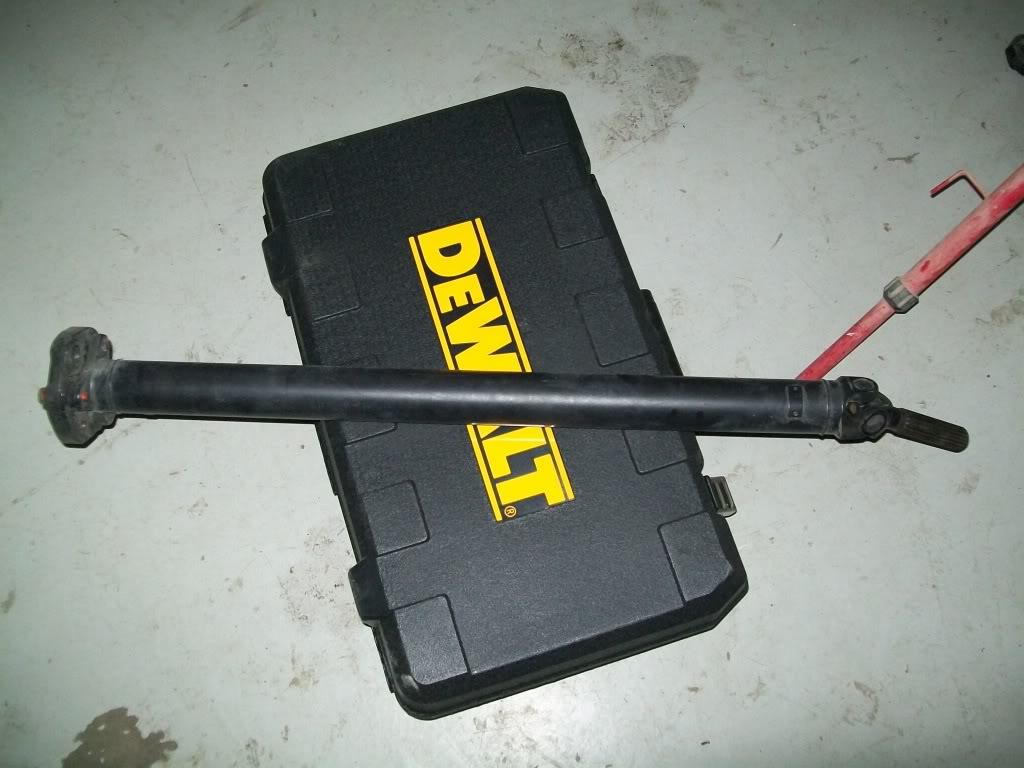
the front driveshaft also showed up , and it seems i have to shorten it by 3 to 4 inches!
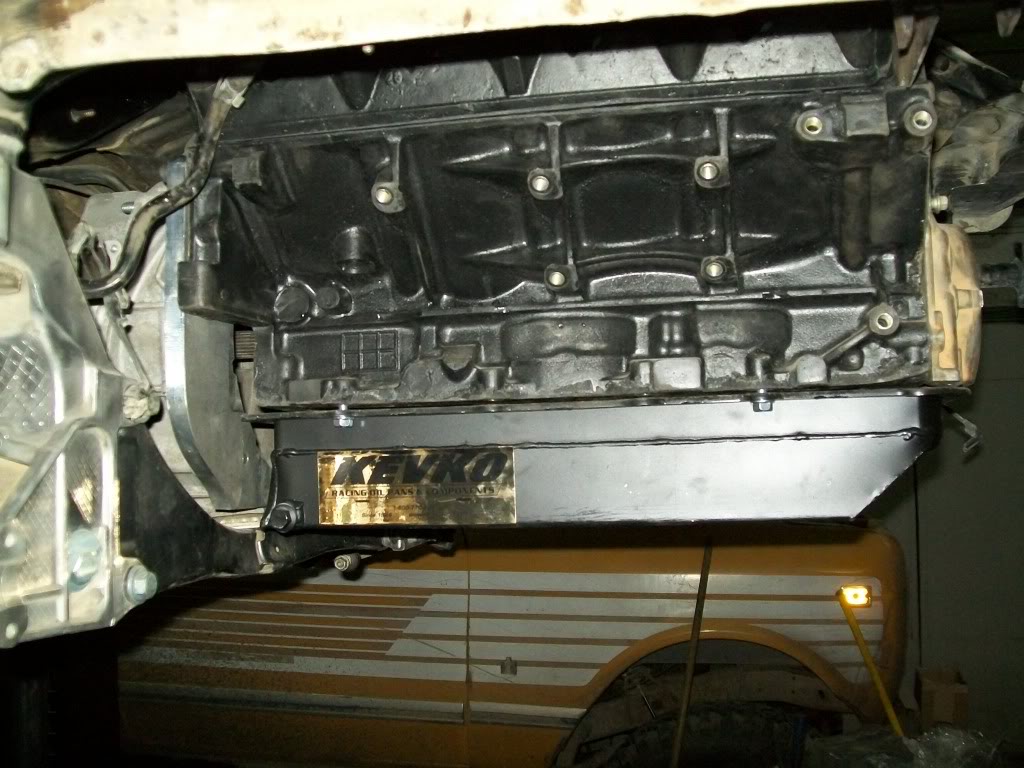
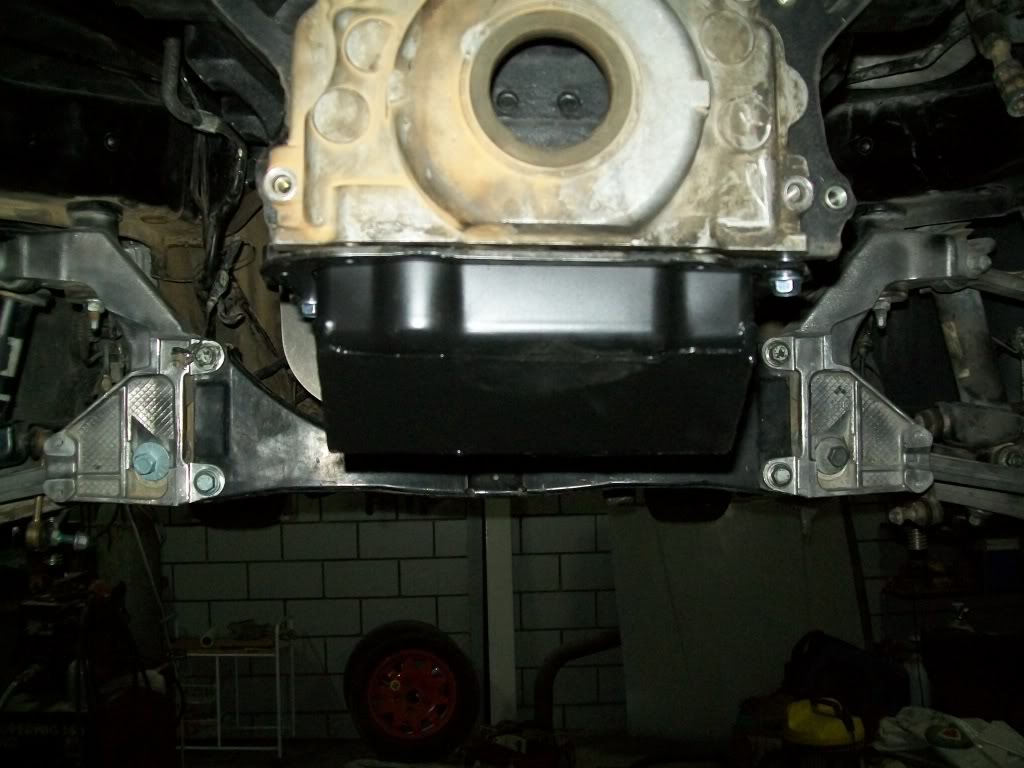
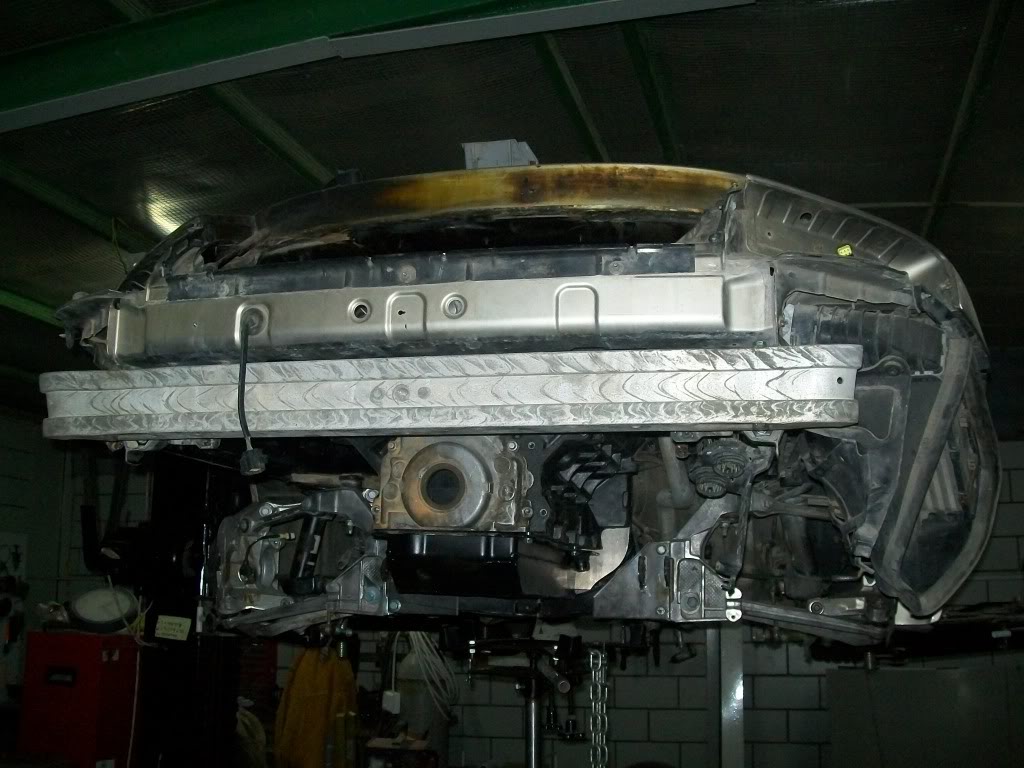
here you can see how the kevko pan fits , and how much clearance that got me :
and since i had some time on my hands while waiting , i decided to make something ,,,,,, you guessed it ! MORE ENGINE MOUNTS!
the thinking behind these mid mounts was that the front plate provides side to side bracing as well as lifting the front of the engine, while the trans mount kinda provied front to back bracing ( i say kinda cause its a huge floppy rubber donut mount), so i thought adding a bolt-in mid mount would not hurt anything and would provide front to back bracing ( helping to prevent the mounts on the face of the engine from bending ).
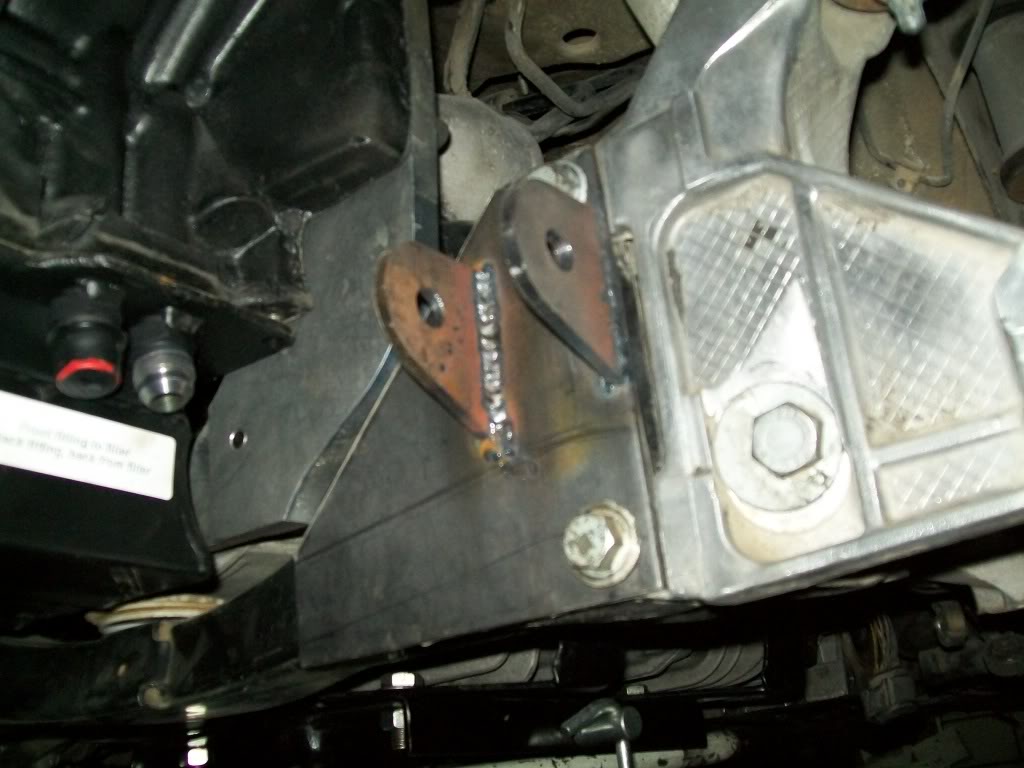
i started off with making two plates with tabs on them for the bushing , these plates would bolt to the suspension cross member on both sides:
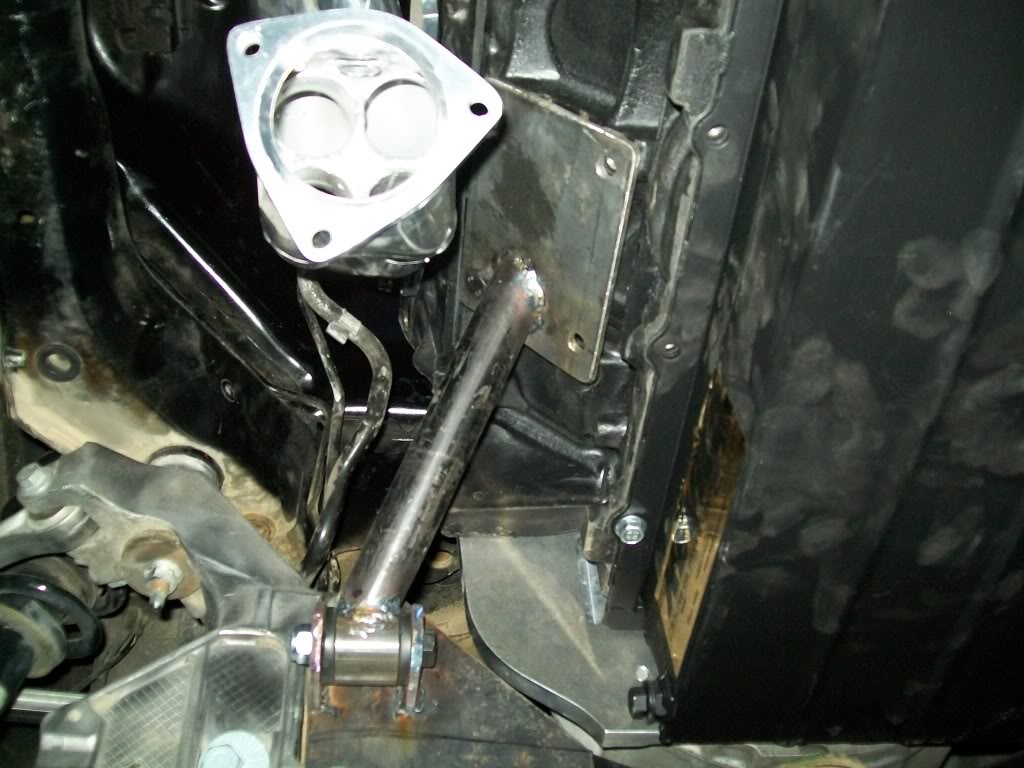
i then started building the part that connects the plates to the block , it just a simple tube with a bushing on one end and a plate that bolts to the block on the other :
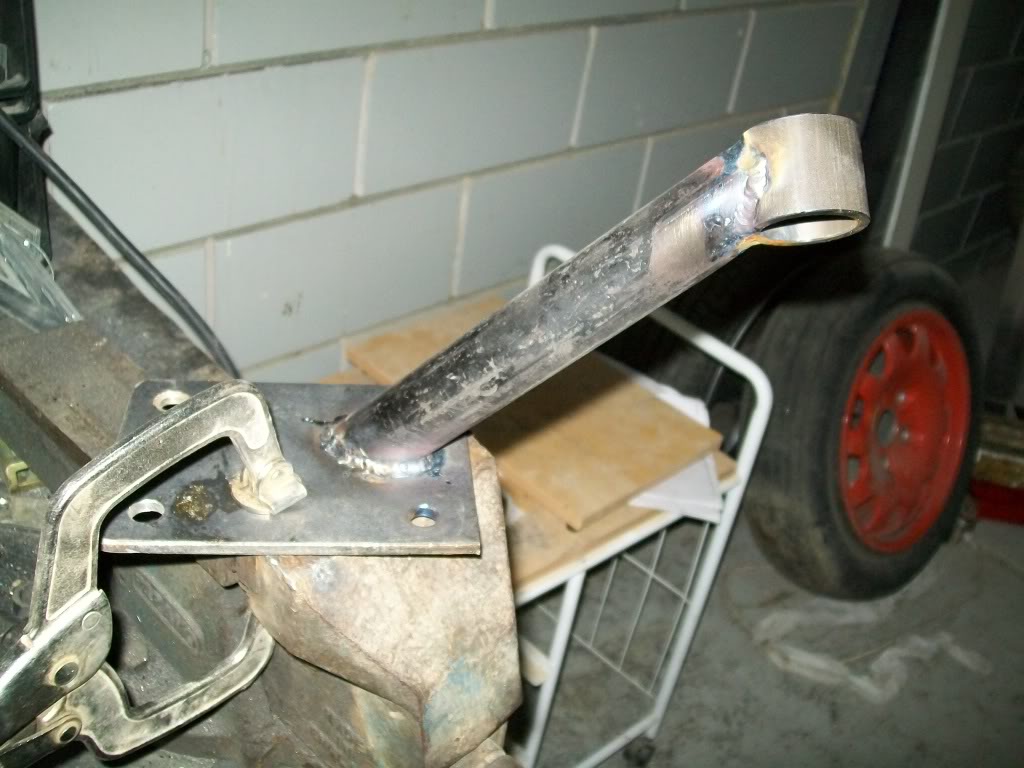
i like welding stuff
this is how it looks when done on the driver's side:
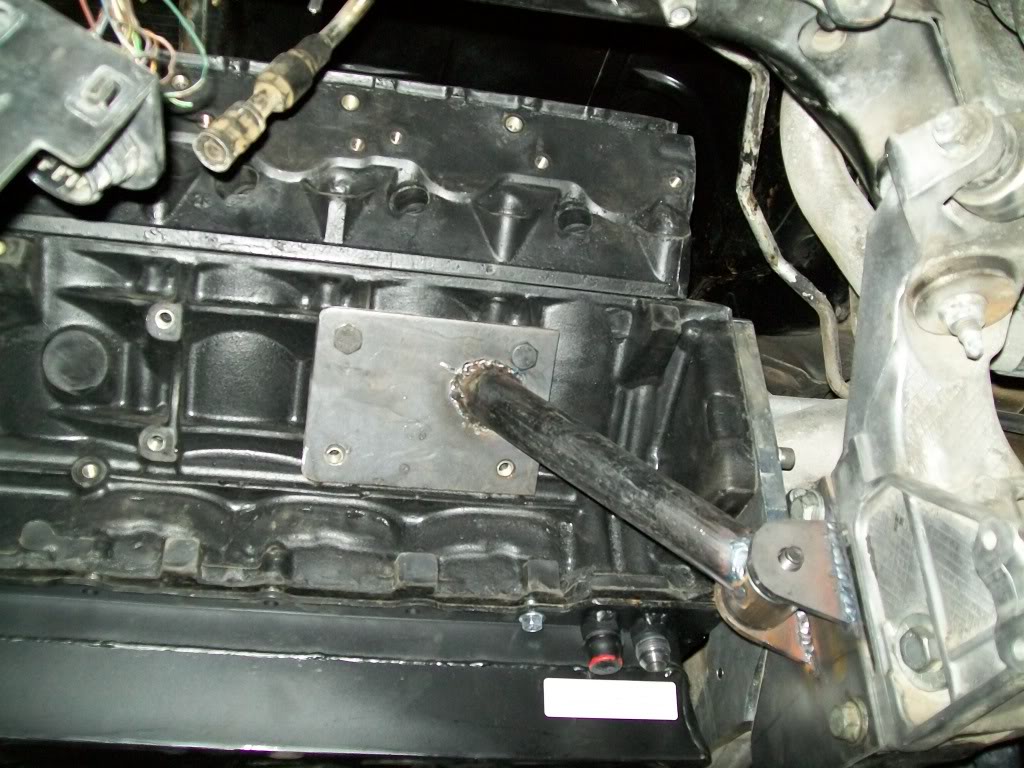
and on the pass. side :
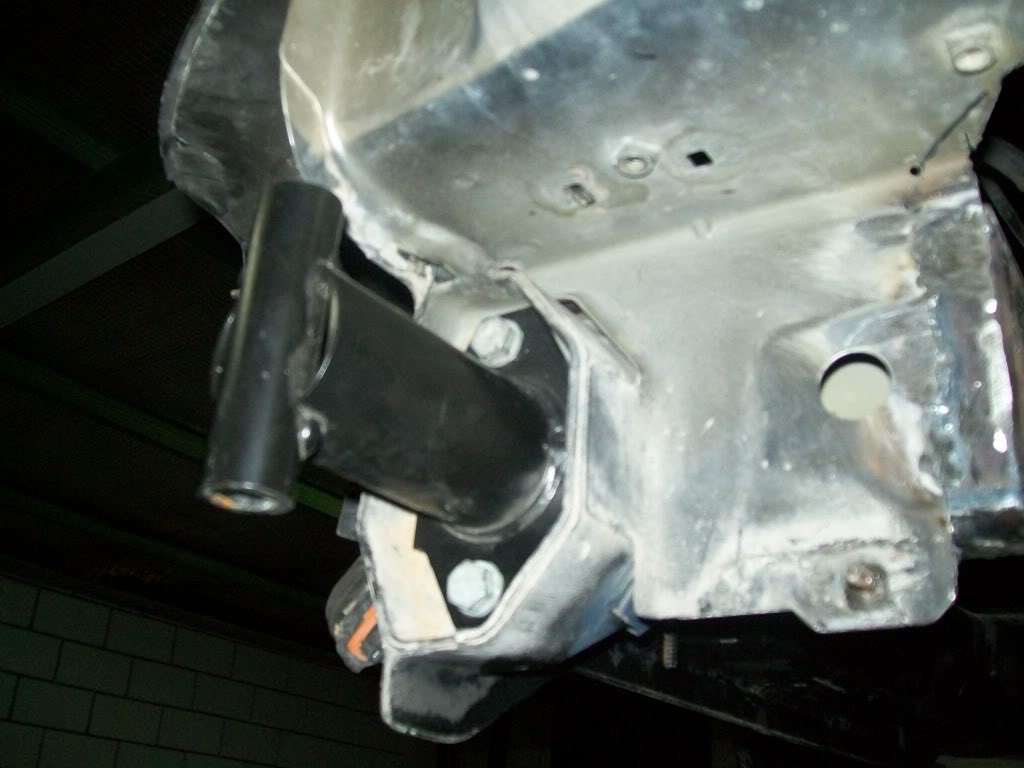
and how it looks from under the car :
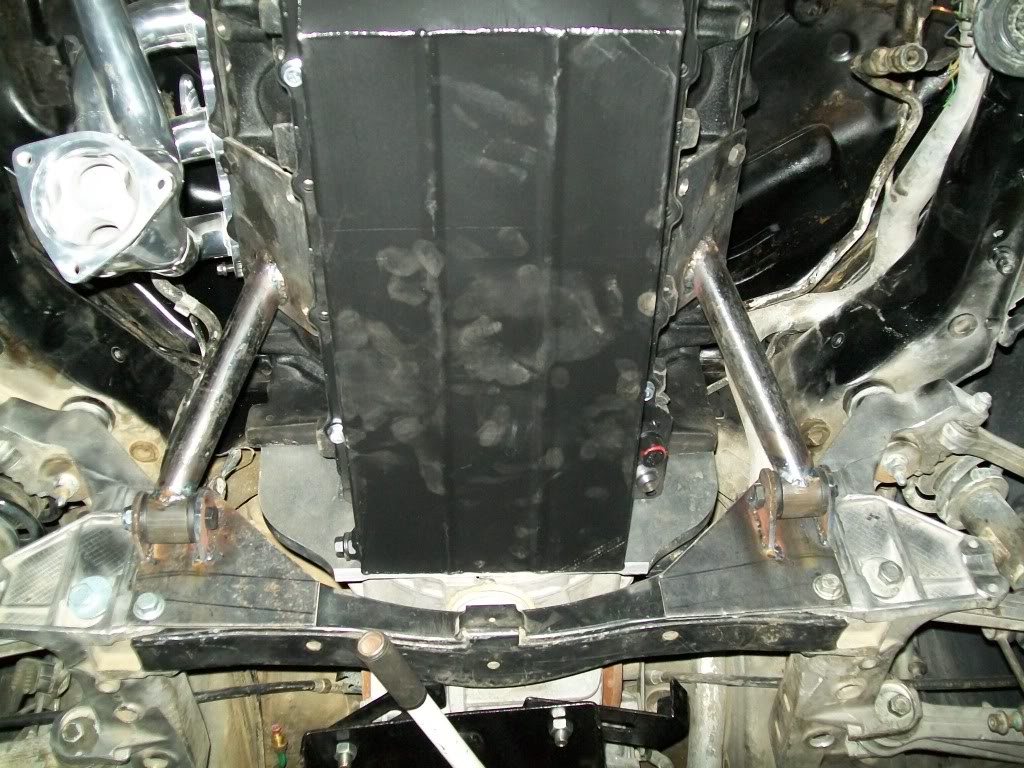
and here is a shot showing both front and mid mount :
so i guess i can scratch building the mounts off the list now
there are a few more parts on the way ( brakes and "U" mufflers ) that have to be here before i can continue , as well as some other assorted thingies here and there.
so when those show up i will start on the other things on the list :
- start fabbing the exhaust system
- finish bolting up the brakes and e-brake
- build the cradle that will be used to lift the engine/trans in place
- finish plumbing the clutch hydraulics
- start working on the coolant lines
- probably make some more engine mounts
been waiting for parts to show up, and most of them are here now;
the wiring harness from ls1wiring.com is here
and so is the 360 deg. swivle thermostat housing ( i was hoping it would be smaller than that , but oh well,,, )
the front driveshaft also showed up , and it seems i have to shorten it by 3 to 4 inches!
here you can see how the kevko pan fits , and how much clearance that got me :
and since i had some time on my hands while waiting , i decided to make something ,,,,,, you guessed it ! MORE ENGINE MOUNTS!
the thinking behind these mid mounts was that the front plate provides side to side bracing as well as lifting the front of the engine, while the trans mount kinda provied front to back bracing ( i say kinda cause its a huge floppy rubber donut mount), so i thought adding a bolt-in mid mount would not hurt anything and would provide front to back bracing ( helping to prevent the mounts on the face of the engine from bending ).
i started off with making two plates with tabs on them for the bushing , these plates would bolt to the suspension cross member on both sides:
i then started building the part that connects the plates to the block , it just a simple tube with a bushing on one end and a plate that bolts to the block on the other :
i like welding stuff
this is how it looks when done on the driver's side:
and on the pass. side :
and how it looks from under the car :
and here is a shot showing both front and mid mount :
so i guess i can scratch building the mounts off the list now
there are a few more parts on the way ( brakes and "U" mufflers ) that have to be here before i can continue , as well as some other assorted thingies here and there.
so when those show up i will start on the other things on the list :
- start fabbing the exhaust system
- finish bolting up the brakes and e-brake
- build the cradle that will be used to lift the engine/trans in place
- finish plumbing the clutch hydraulics
- start working on the coolant lines
- probably make some more engine mounts
 07-06-2010, 06:02 AM
#228
8 Second Club
Thread Starter
iTrader: (1)
Join Date: Nov 2001
Location: the not so stock tribe
Posts: 3,697
Likes: 0
Received 0 Likes
on
0 Posts
major mile stone acheived last night !!!!
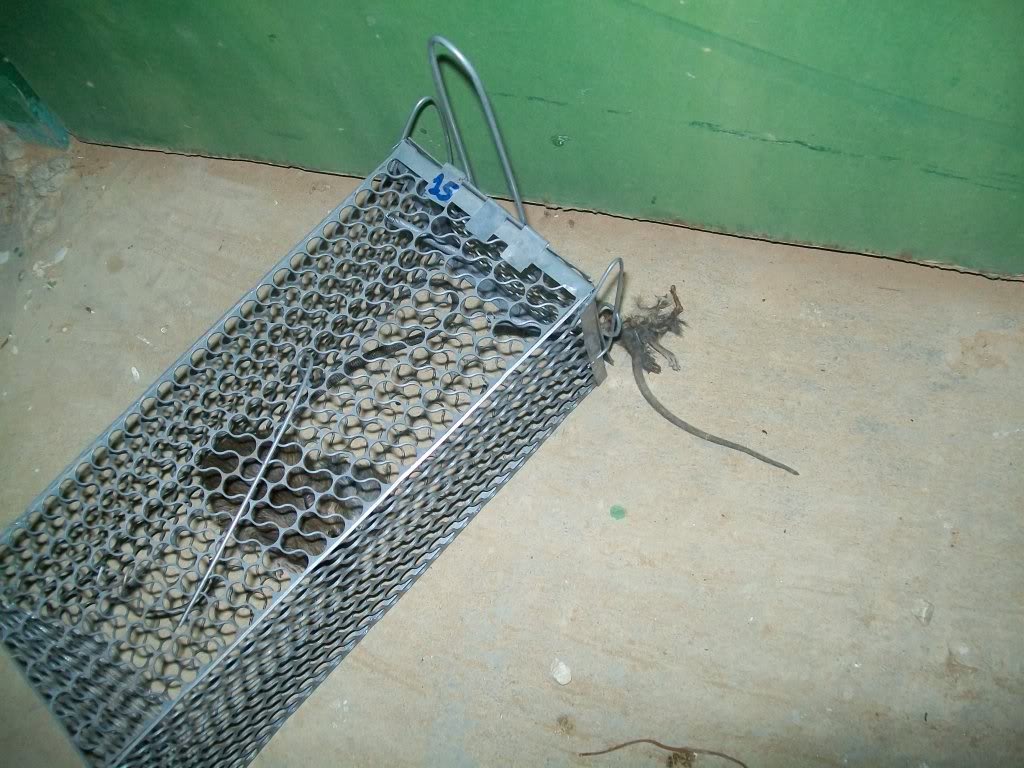
i caught the martha foaking rat in my garage !
(i actually caugth two but this $hit ate the other one - all of it except the head and tail end ! )
other than that some parts showed up but not all of them. got the caliper , most of the ebrake parts , puke tank, sway bar links , and hood struts in today , but the whole brake thing is on hold till i get one itty bitty part
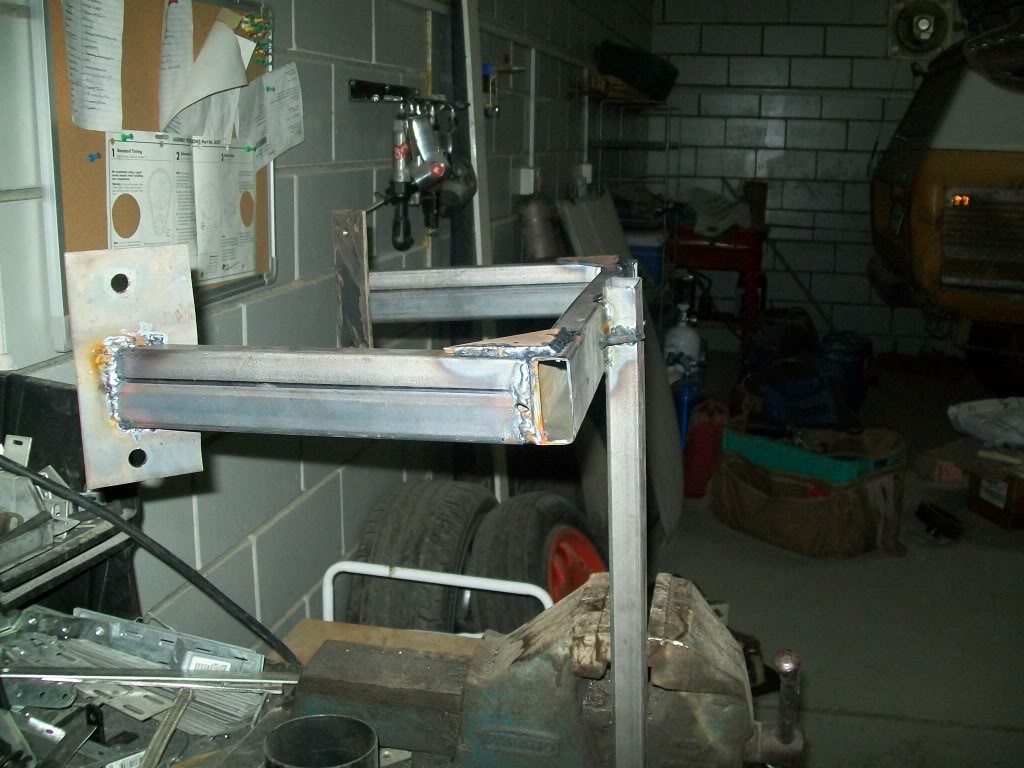
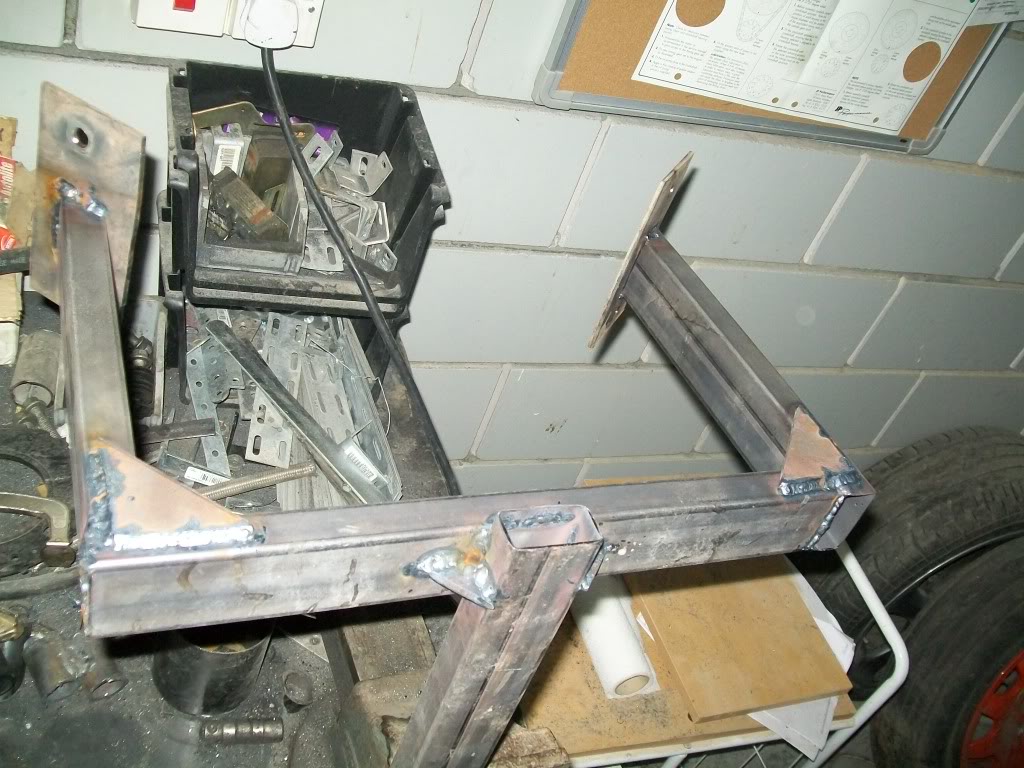
i'm almost done with the engine cradle that will be used to move the engine and trans in place :
also finished mounting the GT2 solid bumper mounts , making the rear bumper a stuctural peice :
mufflers should be here any day now , so when they show up i can start with the exhaust system.
i probably will start routing the coolant hoses for now untill i get some more goodies in .
i caught the martha foaking rat in my garage !
(i actually caugth two but this $hit ate the other one - all of it except the head and tail end ! )
other than that some parts showed up but not all of them. got the caliper , most of the ebrake parts , puke tank, sway bar links , and hood struts in today , but the whole brake thing is on hold till i get one itty bitty part
i'm almost done with the engine cradle that will be used to move the engine and trans in place :
also finished mounting the GT2 solid bumper mounts , making the rear bumper a stuctural peice :
mufflers should be here any day now , so when they show up i can start with the exhaust system.
i probably will start routing the coolant hoses for now untill i get some more goodies in .

 can't wait till its up and running.
07-07-2010, 03:36 AM
can't wait till its up and running.
07-07-2010, 03:36 AM
#231
8 Second Club
Thread Starter
iTrader: (1)
Join Date: Nov 2001
Location: the not so stock tribe
Posts: 3,697
Likes: 0
Received 0 Likes
on
0 Posts
hehhehee, the lighting is ok , its the flash that makes it look bad
as for pest control , i think i'm doing good considering this garage is in my dad's ranch and right between two chicken hangars ( yes my neighbors anre 100's of chicken )
and all i get is a rat or mouse every year or so
as for pest control , i think i'm doing good considering this garage is in my dad's ranch and right between two chicken hangars ( yes my neighbors anre 100's of chicken
)and all i get is a rat or mouse every year or so
07-07-2010, 04:05 AM
#232
Teching In

Join Date: Jul 2010
Posts: 1
Likes: 0
Received 0 Likes
on
0 Posts
how come some people have so much talent and ambition and i have so little?
good luck should be cool. when it is done i'd like to see you out at autobahn in Joliet and kick the **** out of some 'purest'.
good luck should be cool. when it is done i'd like to see you out at autobahn in Joliet and kick the **** out of some 'purest'.
07-07-2010, 09:32 AM
#233
hehhehee, the lighting is ok , its the flash that makes it look bad
as for pest control , i think i'm doing good considering this garage is in my dad's ranch and right between two chicken hangars ( yes my neighbors anre 100's of chicken )
and all i get is a rat or mouse every year or so
as for pest control , i think i'm doing good considering this garage is in my dad's ranch and right between two chicken hangars ( yes my neighbors anre 100's of chicken
)and all i get is a rat or mouse every year or so
07-07-2010, 10:50 AM
#234
Looks to me like you're gettin' close to having the mechanicals worked out. Earlier in the thread, you had discussed plans for the electrical portion. So, what's the fire her up for debugging date? Do I see a flicker of light @ the end of the tunnel?
BTW, am not asking bout when she'll be finished, they are never finished. They are just born & then modified indefinately...
BTW, am not asking bout when she'll be finished, they are never finished. They are just born & then modified indefinately...
07-12-2010, 06:01 PM
#235
8 Second Club
Thread Starter
iTrader: (1)
Join Date: Nov 2001
Location: the not so stock tribe
Posts: 3,697
Likes: 0
Received 0 Likes
on
0 Posts
loool, great idea tainted , i might just borrow my little sister's ferret for a few days
ls1-450 , i was thinking the same thing on my way today to the garage, i'm thinking in a month i should have it turning over , a mothe or so after that to finish up all the hoses and fluid stuff , then god knows how long to finish all the missing peices and odds and ends.
but just like i said , i'm in no rush at all and you have to figure in that i should start working on my camaro to get it ready for this coming season so all time lines are guesstimates
any how on with the build !
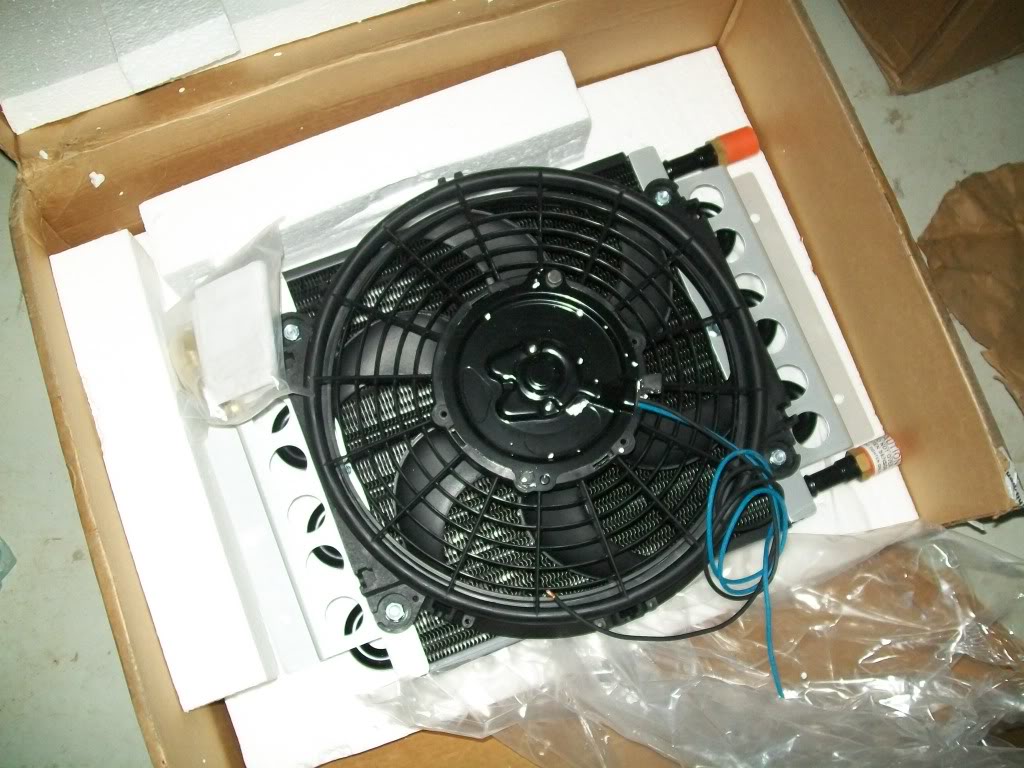
got the oil cooler/fan assembly in , this will most likely be fitted on the decklid :
the mufflers also finally showed up from extreme mufflers , and man do i like'em !

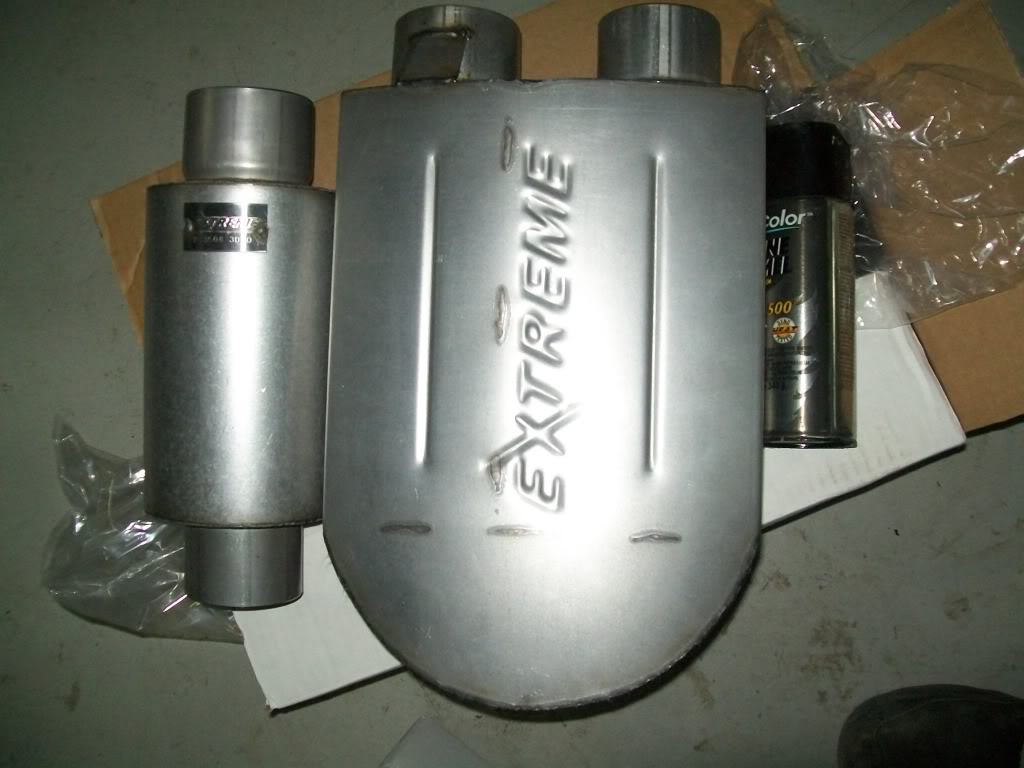
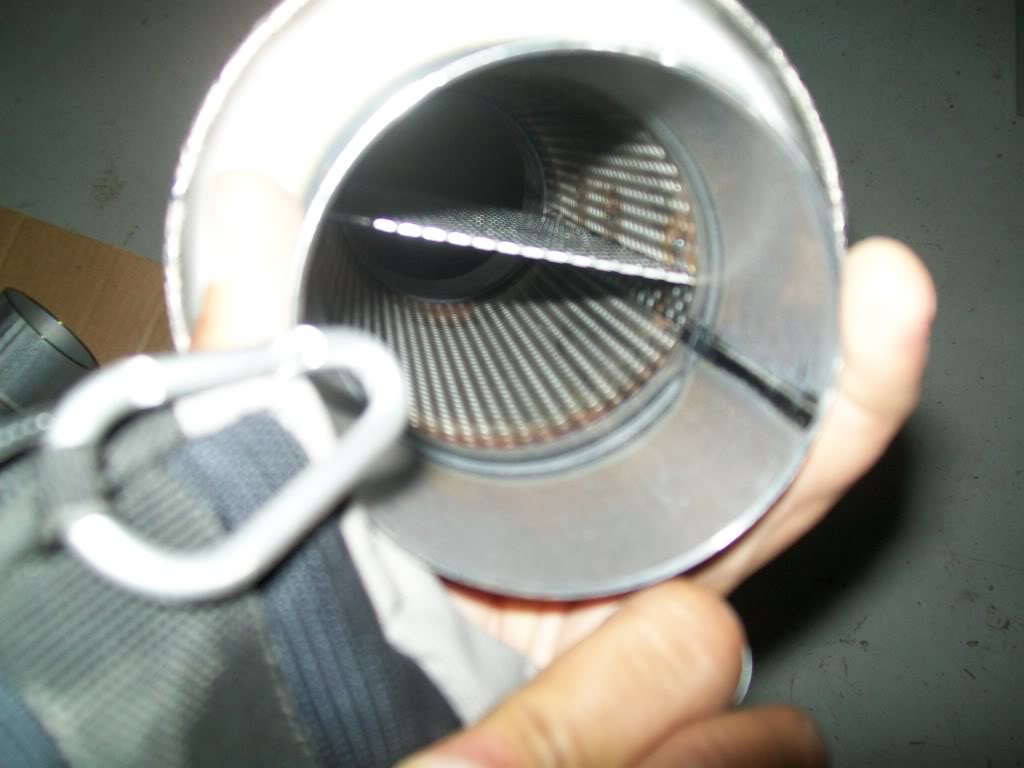
as you can see they are two "U" mufflers and two bullets , they are both as free flowing as they get and the plan is to use one of each on each side.
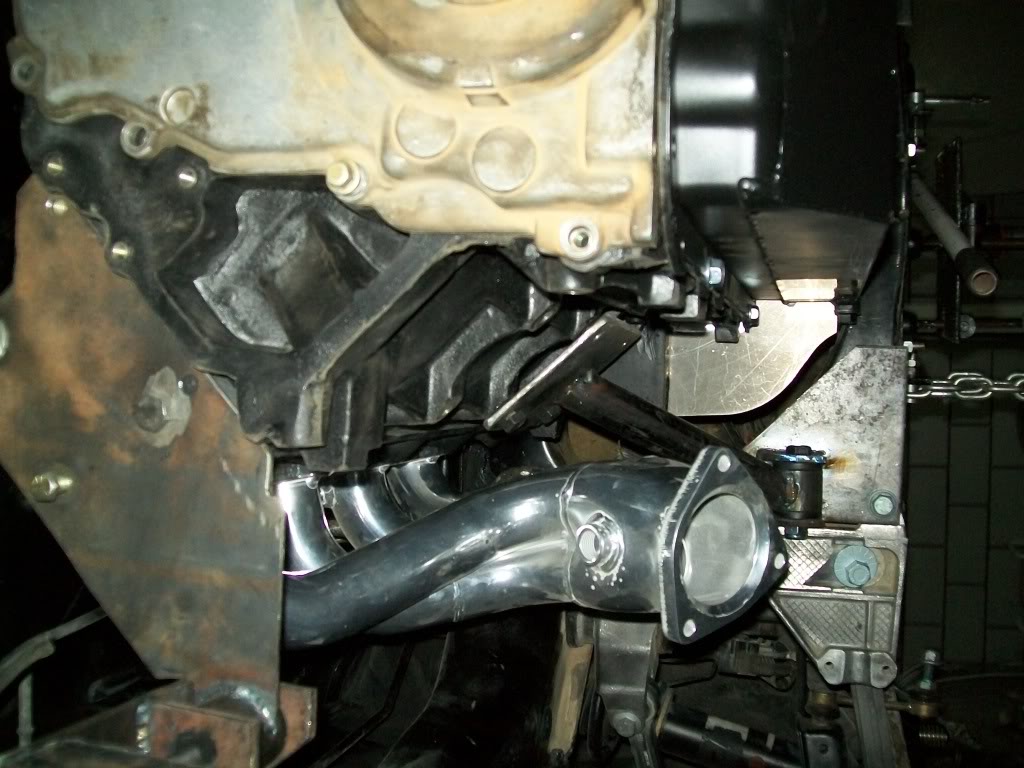
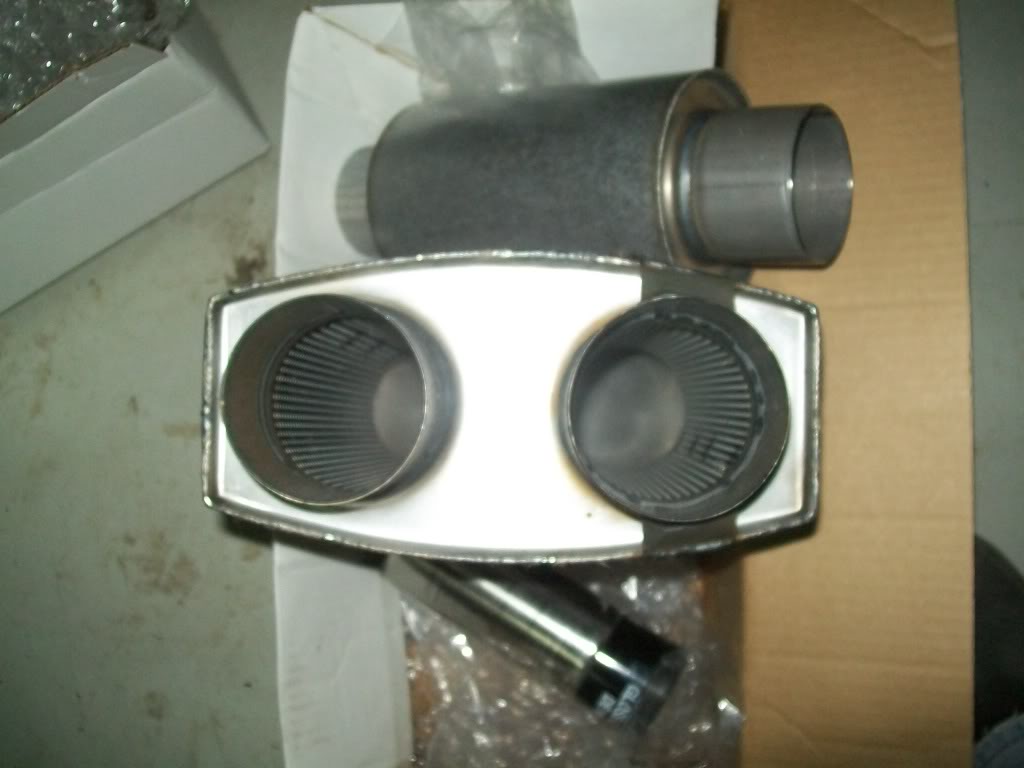
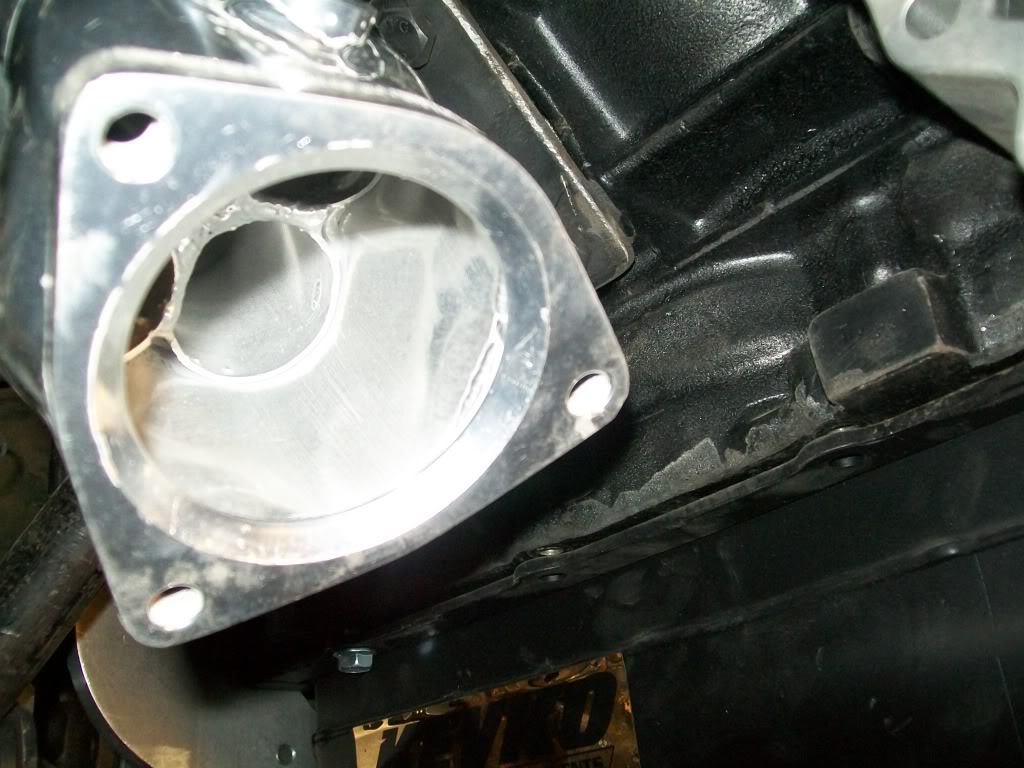
the headers will face backwards and i will not use the stupid stock flange on them , i'm going to port the lip on the original flange cause its only 2.5 inches in diameter ( seen here :
and will weld a small extension with a 45 deg. angle on it ending with a ball flange , i was going to go with flanges but using ball flanges offeres better fittment and is more flexible when it comes to pipe missalignment . after the ball flange there will be a U back into the muffler then the gases make another u turn and exit the muffler into the bullet muffler and the exhaust tip. here is approximatly how the mufflers will be placed :

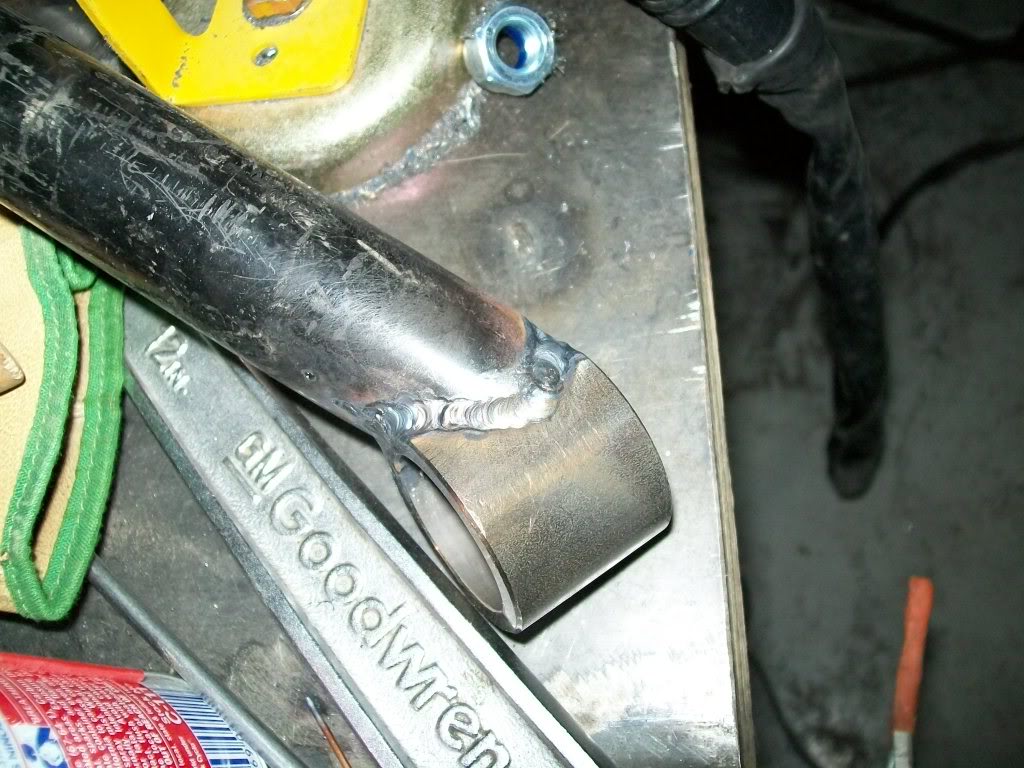
and the extension and ball flanges that will be welded on to the headers :

and here's a weird occurence , as soon as i finished cutting the metal donuts to make the 180 turns the pipe split at the seam :

but that wasnothing that the TIG welder couldn't fix
the oil cooler lines , remote filter and fittings should be here very soon as well as the rest of the brake parts , so finishing up the bottom side of the car should be happening soon
so the plan tomorow is to:
- port out the header flange so i can weld on the 3 inch ball flange.
- weld the rest of the exhaust and figure out where to mount the hangers
- put bait on the mouse trap to catch the other martha forking rat that i saw today
- i might just lay the harness in the compartment and see where i'll route it into the car.
- clean the mess i made over the last few weeks
ls1-450 , i was thinking the same thing on my way today to the garage, i'm thinking in a month i should have it turning over , a mothe or so after that to finish up all the hoses and fluid stuff , then god knows how long to finish all the missing peices and odds and ends.
but just like i said , i'm in no rush at all and you have to figure in that i should start working on my camaro to get it ready for this coming season so all time lines are guesstimates
any how on with the build !
got the oil cooler/fan assembly in , this will most likely be fitted on the decklid :
the mufflers also finally showed up from extreme mufflers , and man do i like'em !
as you can see they are two "U" mufflers and two bullets , they are both as free flowing as they get
and the plan is to use one of each on each side.the headers will face backwards and i will not use the stupid stock flange on them , i'm going to port the lip on the original flange cause its only 2.5 inches in diameter ( seen here :
and will weld a small extension with a 45 deg. angle on it ending with a ball flange , i was going to go with flanges but using ball flanges offeres better fittment and is more flexible when it comes to pipe missalignment . after the ball flange there will be a U back into the muffler then the gases make another u turn and exit the muffler into the bullet muffler and the exhaust tip. here is approximatly how the mufflers will be placed :
and the extension and ball flanges that will be welded on to the headers :
and here's a weird occurence , as soon as i finished cutting the metal donuts to make the 180 turns the pipe split at the seam :
but that wasnothing that the TIG welder couldn't fix
the oil cooler lines , remote filter and fittings should be here very soon as well as the rest of the brake parts , so finishing up the bottom side of the car should be happening soon
so the plan tomorow is to:
- port out the header flange so i can weld on the 3 inch ball flange.
- weld the rest of the exhaust and figure out where to mount the hangers
- put bait on the mouse trap to catch the other martha forking rat that i saw today
- i might just lay the harness in the compartment and see where i'll route it into the car.
- clean the mess i made over the last few weeks
07-12-2010, 07:03 PM
#236

All the exhaust dounuts Ive dealt with were unwelded on the inner seam. When they are formed, they start out as circular sheets of steel and are stamped into halves. The outside is seam welded and I suppose the inner is not for space constraints. No biggie
Thats some cool packaging for the exhaust. Very tight
Thats some cool packaging for the exhaust. Very tight
07-13-2010, 02:30 AM
#238
8 Second Club
Thread Starter
iTrader: (1)
Join Date: Nov 2001
Location: the not so stock tribe
Posts: 3,697
Likes: 0
Received 0 Likes
on
0 Posts
pocket , thanks for the compliment and heads up, guess i know better know
i thought it was a poor weld that split .
evil , the fittings are -10 male on the pan , and if i recall correctly the one closest to the flywheel is feed to the filter and the one fatrthest from the flywheel is the return . don't quote me on that , i'll check on it tonight and make sure .
i thought it was a poor weld that split .
evil , the fittings are -10 male on the pan , and if i recall correctly the one closest to the flywheel is feed to the filter and the one fatrthest from the flywheel is the return . don't quote me on that , i'll check on it tonight and make sure .
07-13-2010, 05:22 PM
#240
8 Second Club
Thread Starter
iTrader: (1)
Join Date: Nov 2001
Location: the not so stock tribe
Posts: 3,697
Likes: 0
Received 0 Likes
on
0 Posts
Evil , the sticker on the pand says the front fitting to the filter and the back one back from the filter .
on with the build , i got some oil filter fittings in today as well as the remote oil filter housing , fuel filter and lines as well as fuel line fittings .
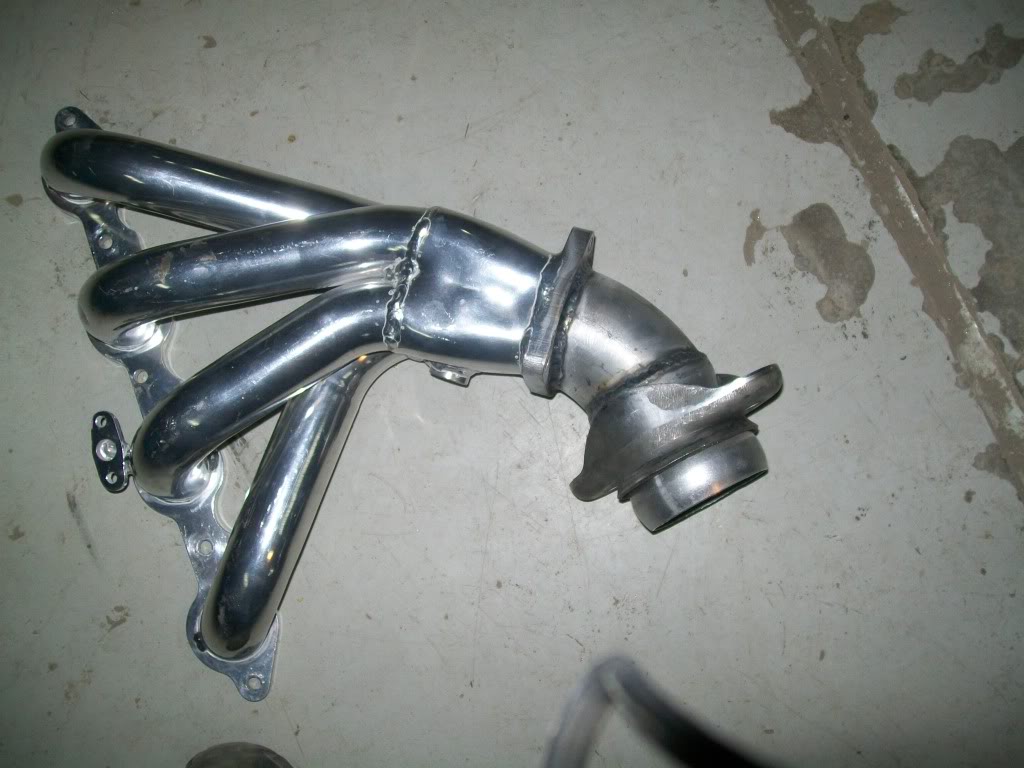
i didn't get much done today cause i got there late , but i did manage to weld the 45 deg extensions on the headers :
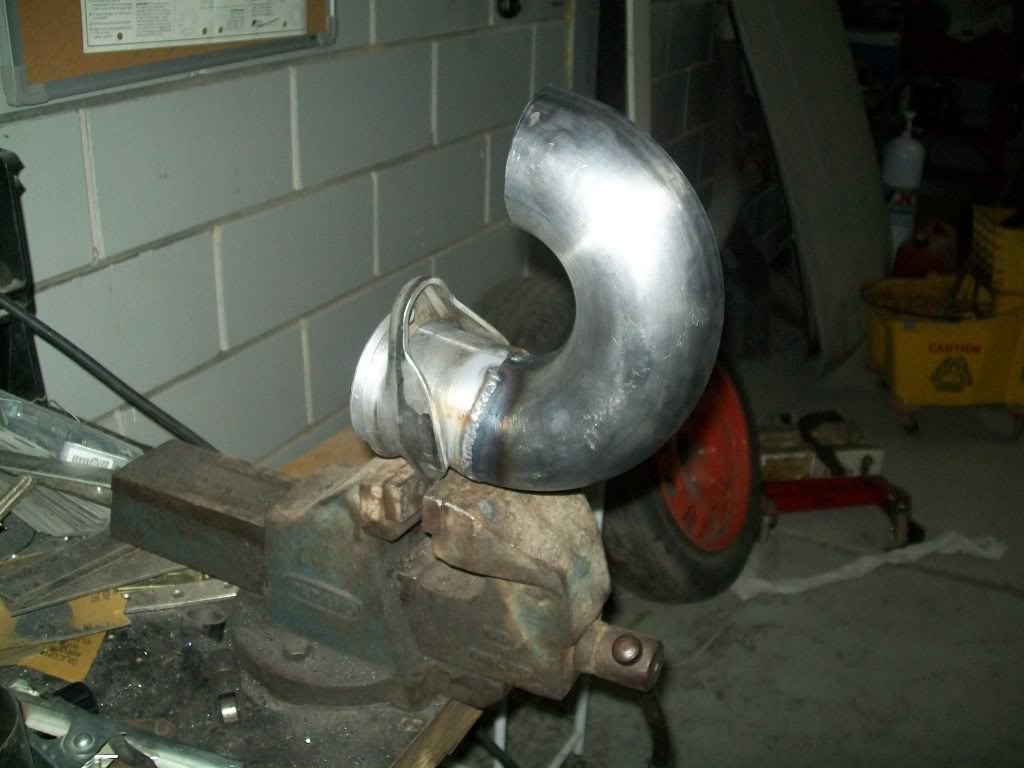
and finished welding both 180 deg bends to the ball flanges :
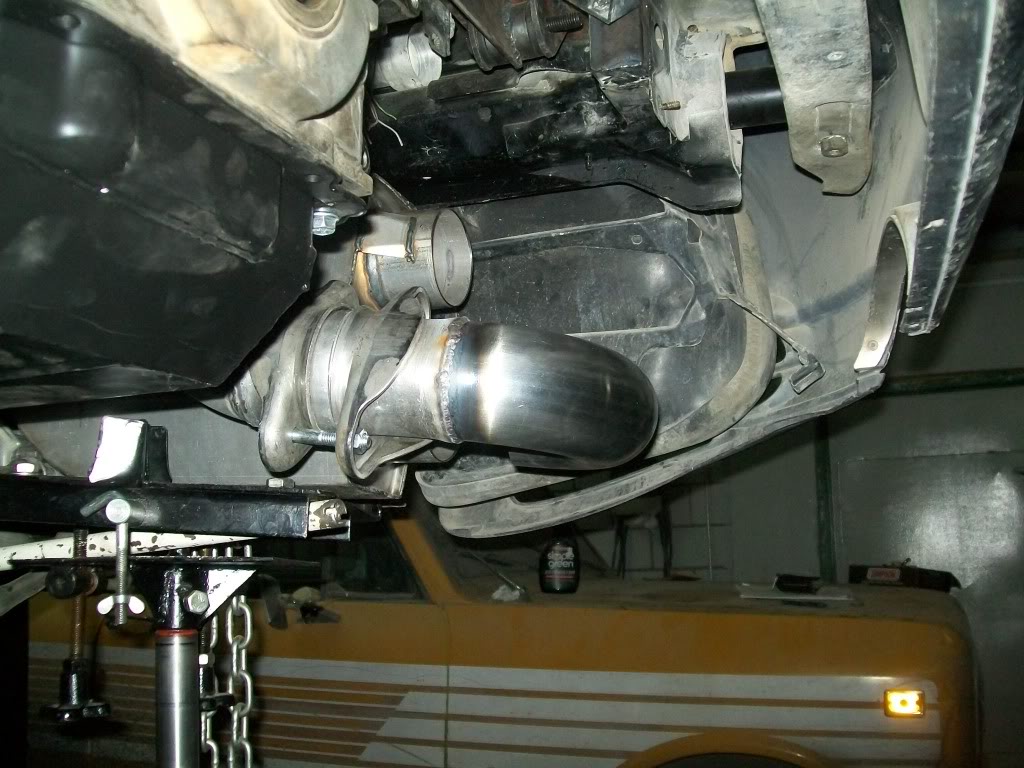
and yes ,,,, i did bait the trap
on with the build , i got some oil filter fittings in today as well as the remote oil filter housing , fuel filter and lines as well as fuel line fittings .
i didn't get much done today cause i got there late , but i did manage to weld the 45 deg extensions on the headers :
and finished welding both 180 deg bends to the ball flanges :
and yes ,,,, i did bait the trap