

2001 porsche 996 ls1 conversion

 09-16-2010 | 07:39 PM
#302
Thread Starter
8 Second Club
iTrader: (1)
Joined: Nov 2001
Posts: 3,697
Likes: 0
From: the not so stock tribe
finally some progress 
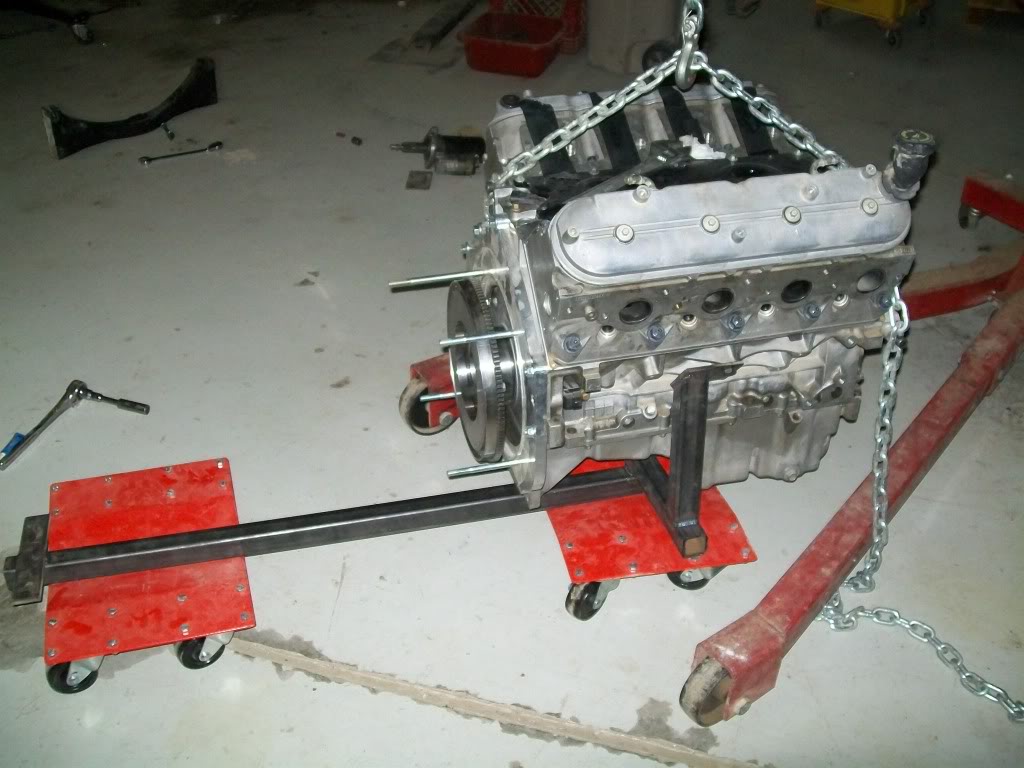
i had to build a new lifting cradle cause the first one i made was,,,well,,,, kinda flimsy
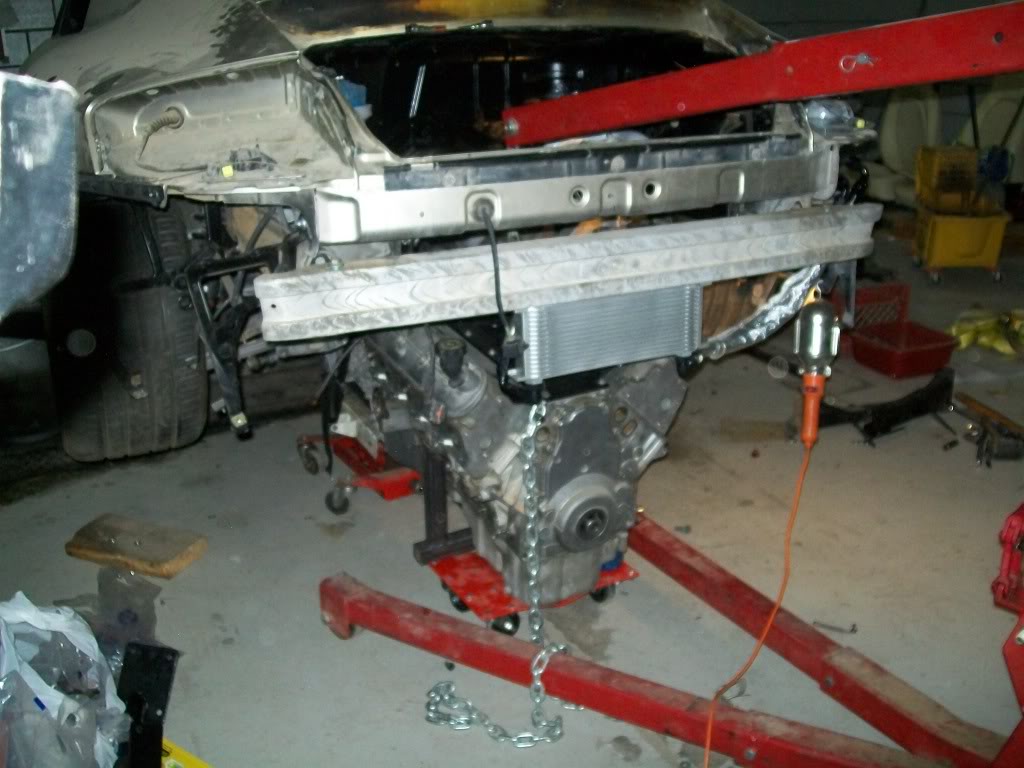
this one is made from much thicker material. this is really important cause you can't install the engine alone or remove the tranny by itself cause of how the flywheel fits ( more on that later ) so you have to mate them both on the ground then lift them as one unit into the car. This will have castors installed to make it easier to move the combo around and will have a jack adapter welded somwhere near the center of weight of the combo :
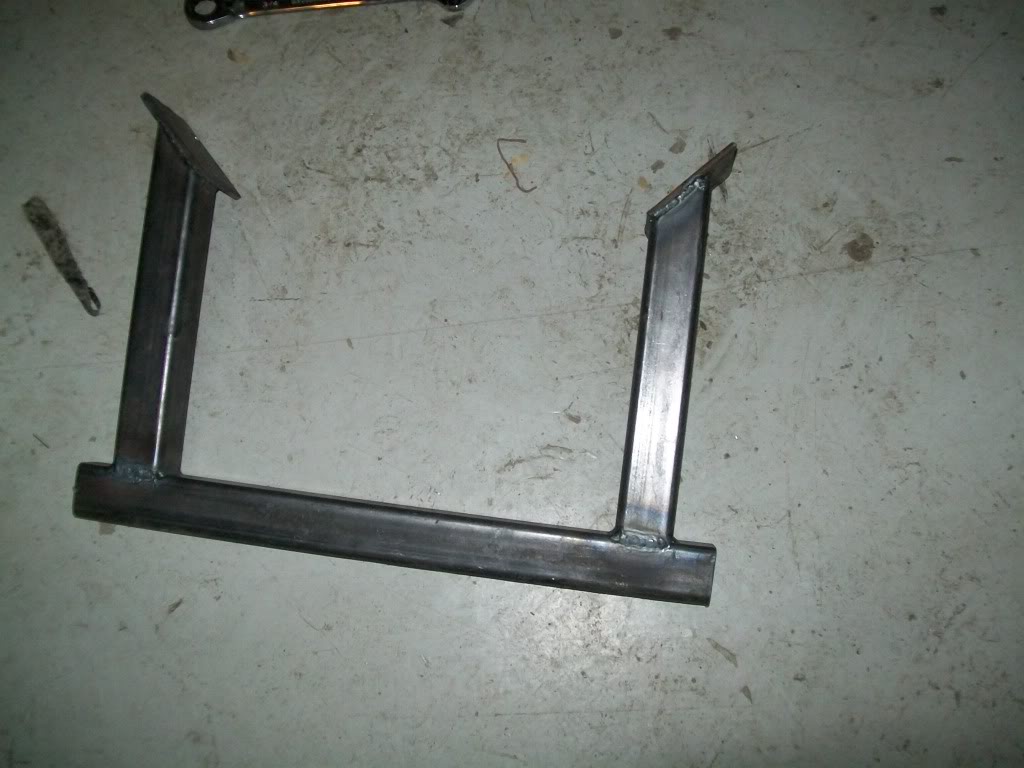
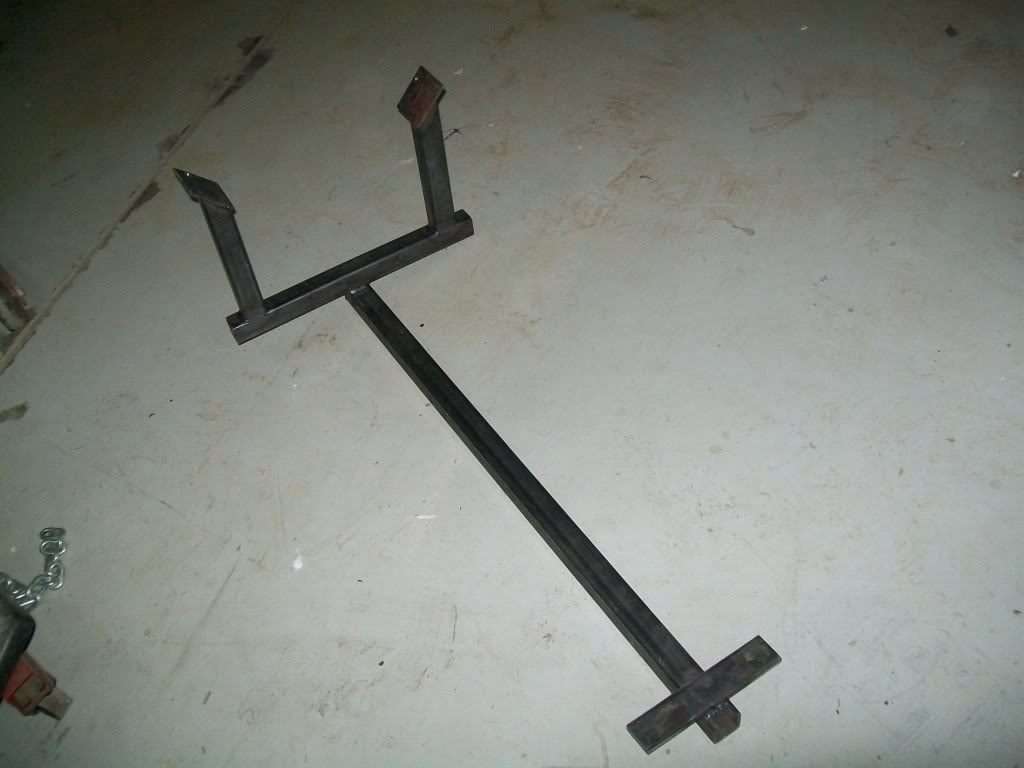
almost finished product :
i finally finished the clutch fork thingy
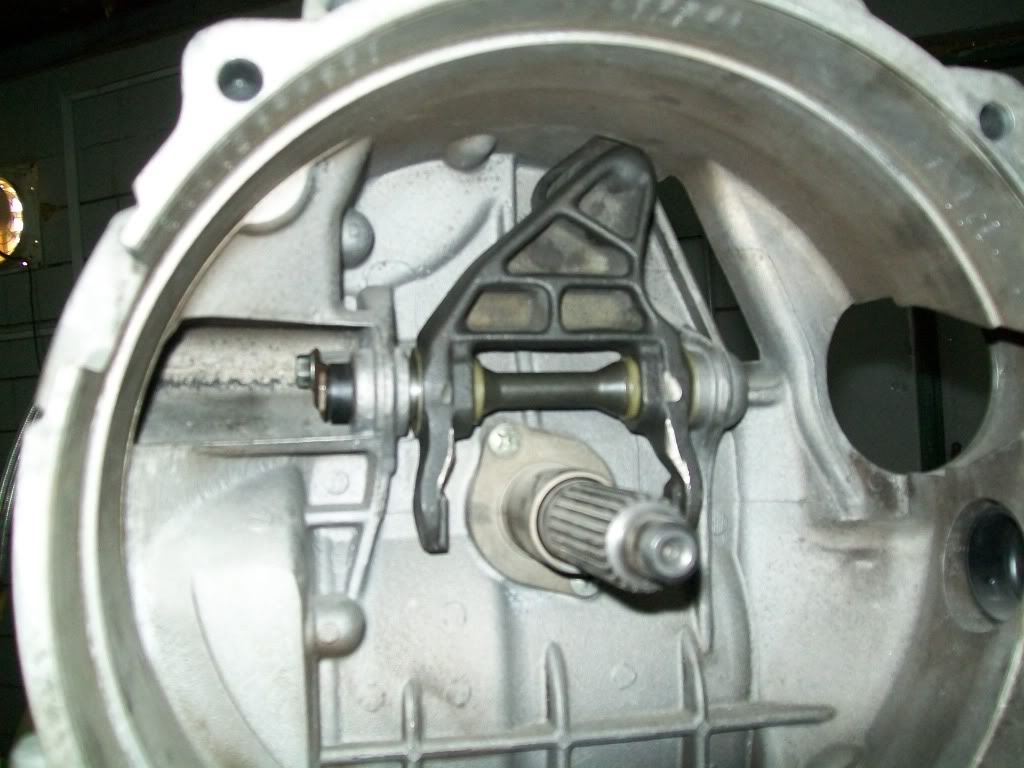
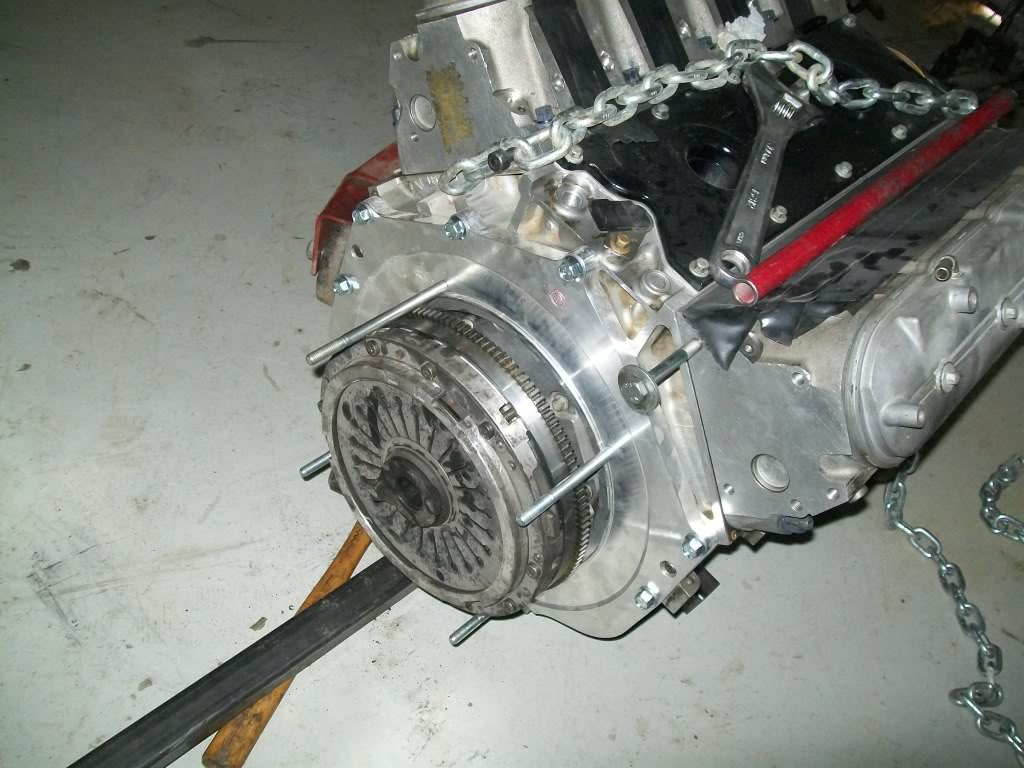
and i took the engine off the stand to install the adapter and flywheel:
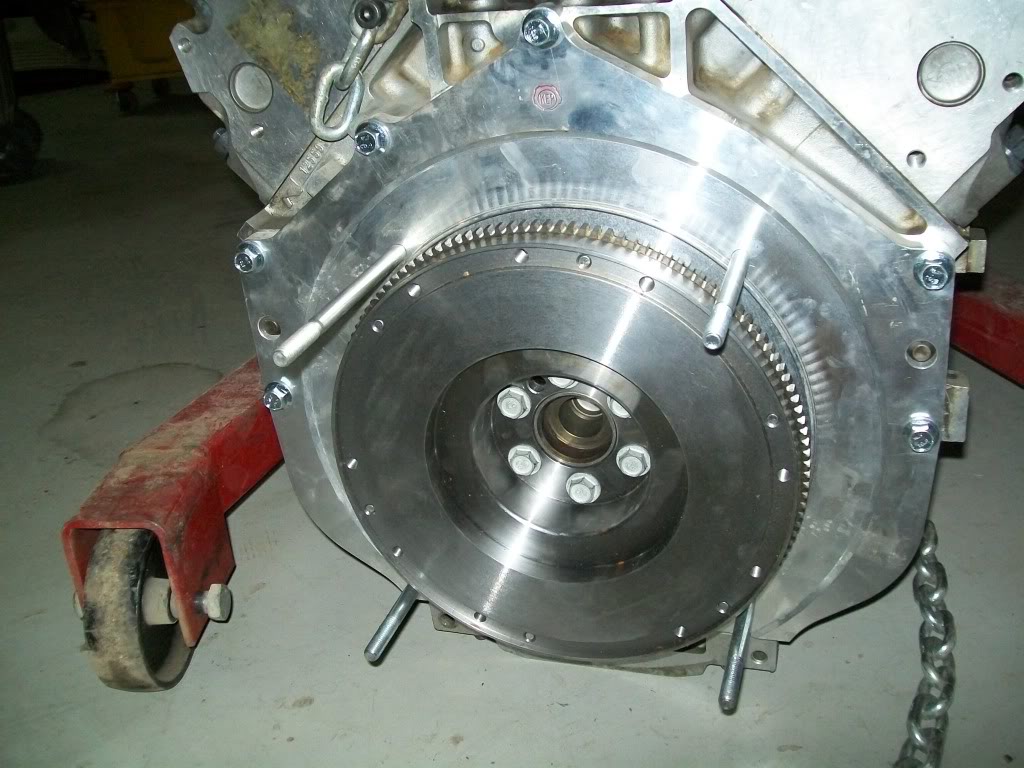
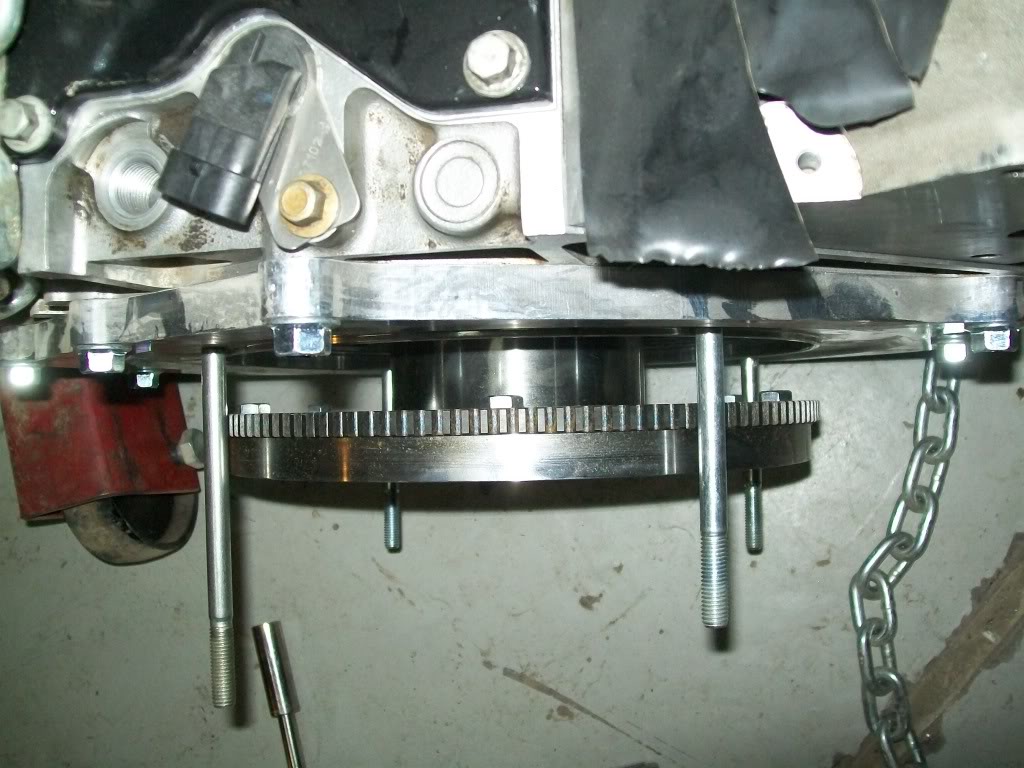
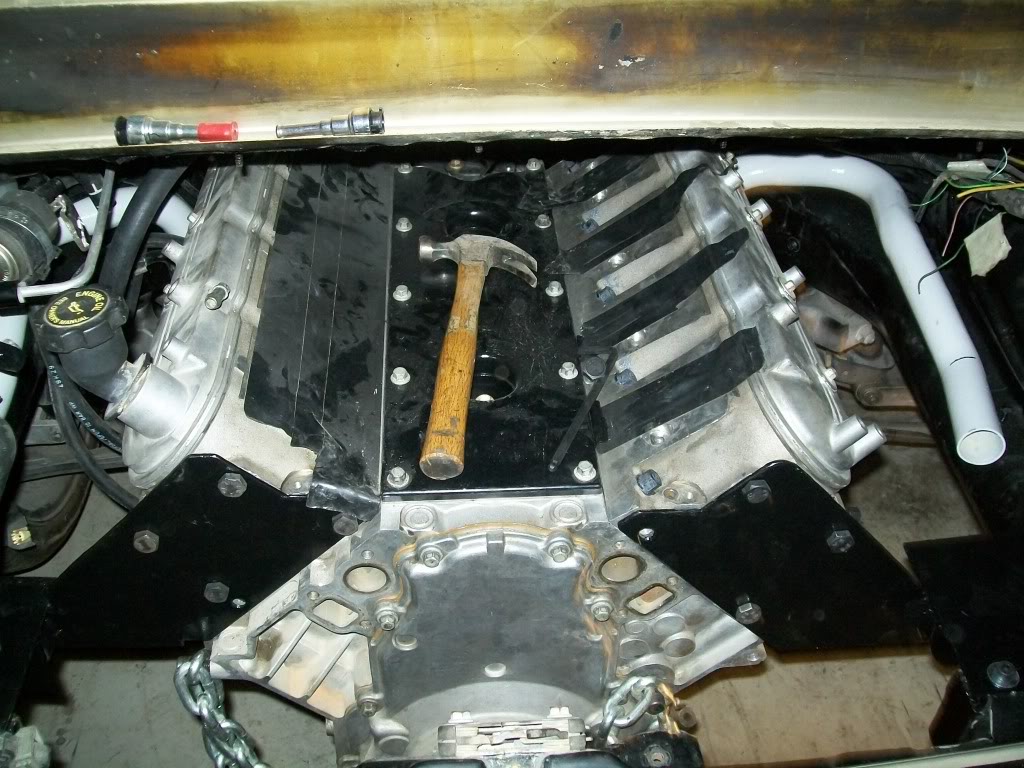
notice how the flywheel is larger than the adapter opening , which means you have to install the adapter then the flywheel , then slip the trans on to the adapter studs ( can't do that while they are in the car) .
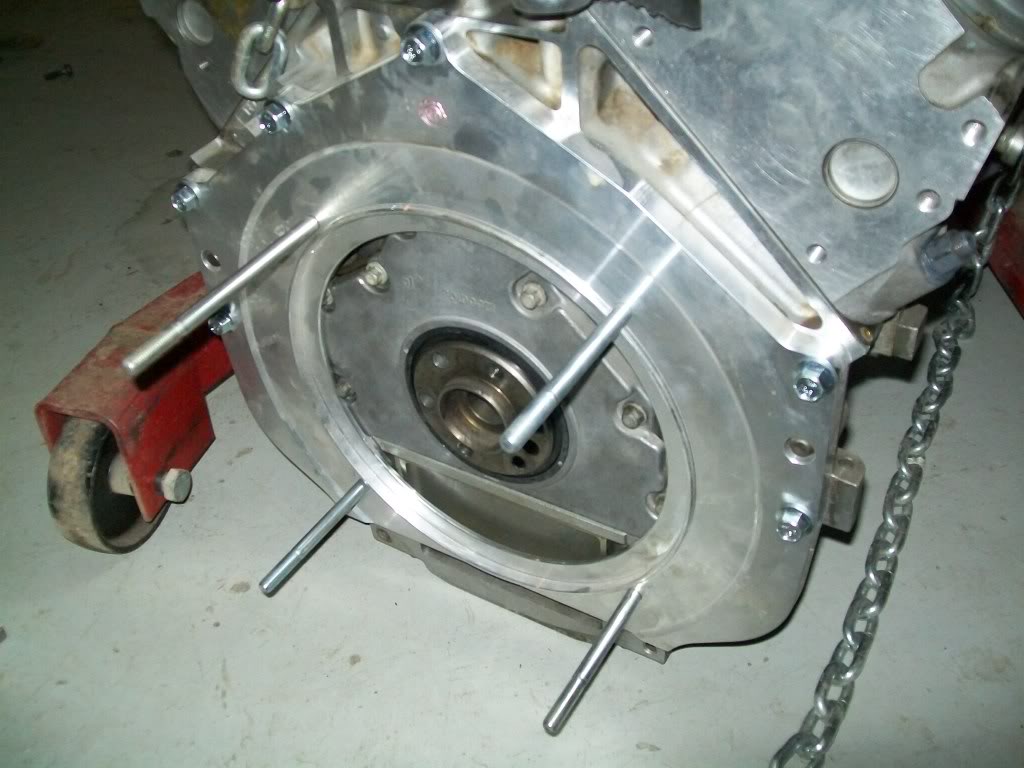
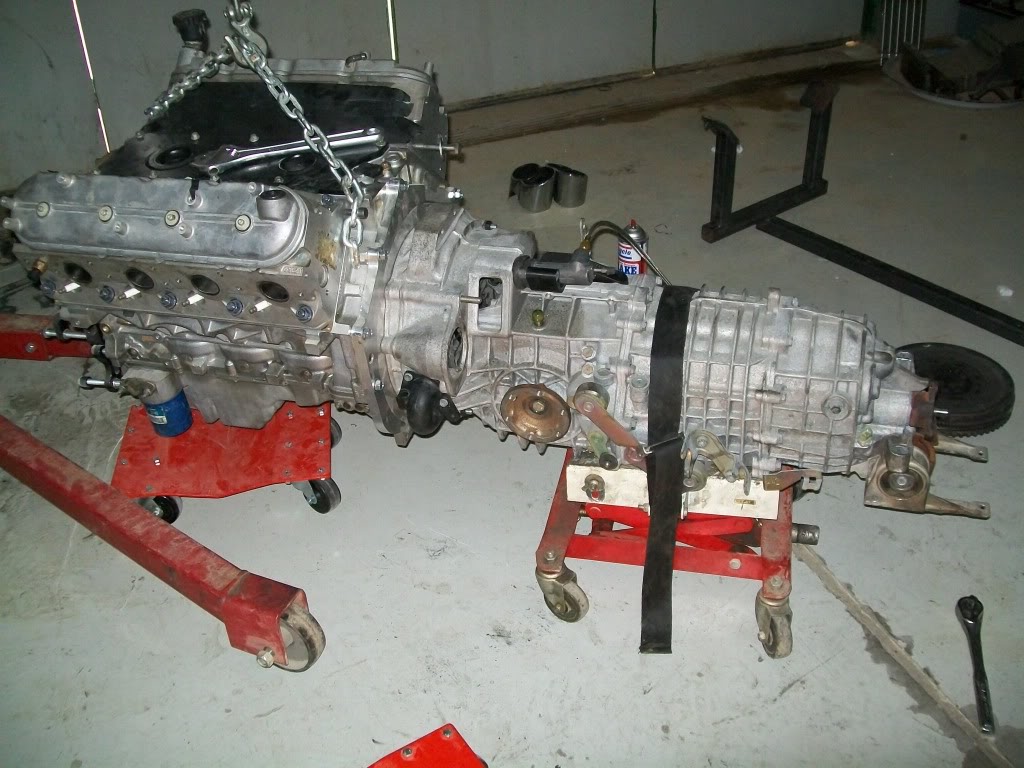
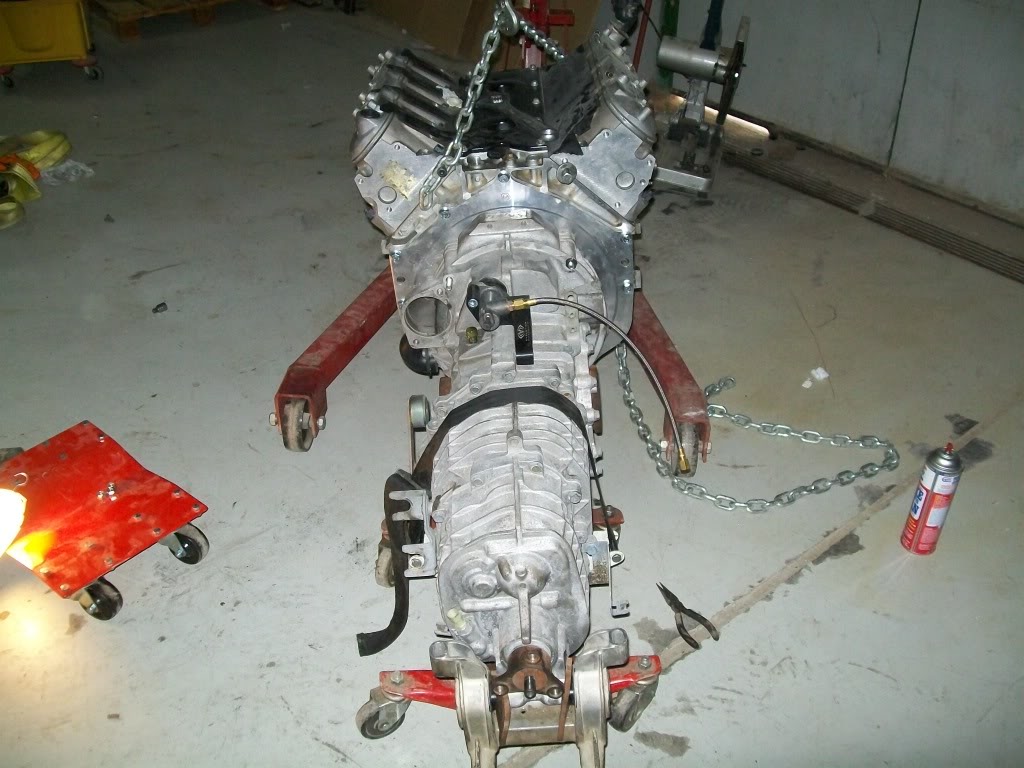
and here you see the engine on the lifting cradle :
so tomorow i have to:
- torque down the flywheel bolts
- pop in the pilot bearing
- and bolt up the clutch and tranny.
- lift up the engine/trans into the car.
- install all the accessories on the engine
- hook up clutch lines and shifter cables.
- install the powersteering pump and measure how long the lines need to be .
i had to build a new lifting cradle cause the first one i made was,,,well,,,, kinda flimsy
this one is made from much thicker material. this is really important cause you can't install the engine alone or remove the tranny by itself cause of how the flywheel fits ( more on that later ) so you have to mate them both on the ground then lift them as one unit into the car. This will have castors installed to make it easier to move the combo around and will have a jack adapter welded somwhere near the center of weight of the combo :
almost finished product :
i finally finished the clutch fork thingy
and i took the engine off the stand to install the adapter and flywheel:
notice how the flywheel is larger than the adapter opening , which means you have to install the adapter then the flywheel , then slip the trans on to the adapter studs ( can't do that while they are in the car) .
and here you see the engine on the lifting cradle :
so tomorow i have to:
- torque down the flywheel bolts
- pop in the pilot bearing
- and bolt up the clutch and tranny.
- lift up the engine/trans into the car.
- install all the accessories on the engine
- hook up clutch lines and shifter cables.
- install the powersteering pump and measure how long the lines need to be .
09-16-2010 | 09:32 PM
#303

I am sure you realize this but, you need to install the clutch fork pin after installing the clutch assembly, as this is a pull style clutch and not a push style. The way we do it is to tape it in place to the flywheel, slide the transmission onto the engine then pin it... Its a BLAST to do it in the car.
Mark...
Lookin great
Mark...
Lookin great
09-17-2010 | 06:21 PM
#304
Thread Starter
8 Second Club
iTrader: (1)
Joined: Nov 2001
Posts: 3,697
Likes: 0
From: the not so stock tribe
marky you are reading my mind
i was looking at it yesterday an saying to myself that this will be soooo much fun
thanks for the heads up !
any how ,,,, on to progress
i torqued down the flywheel , poped in the pilot bearing , then got the disk and pressure plate on there :
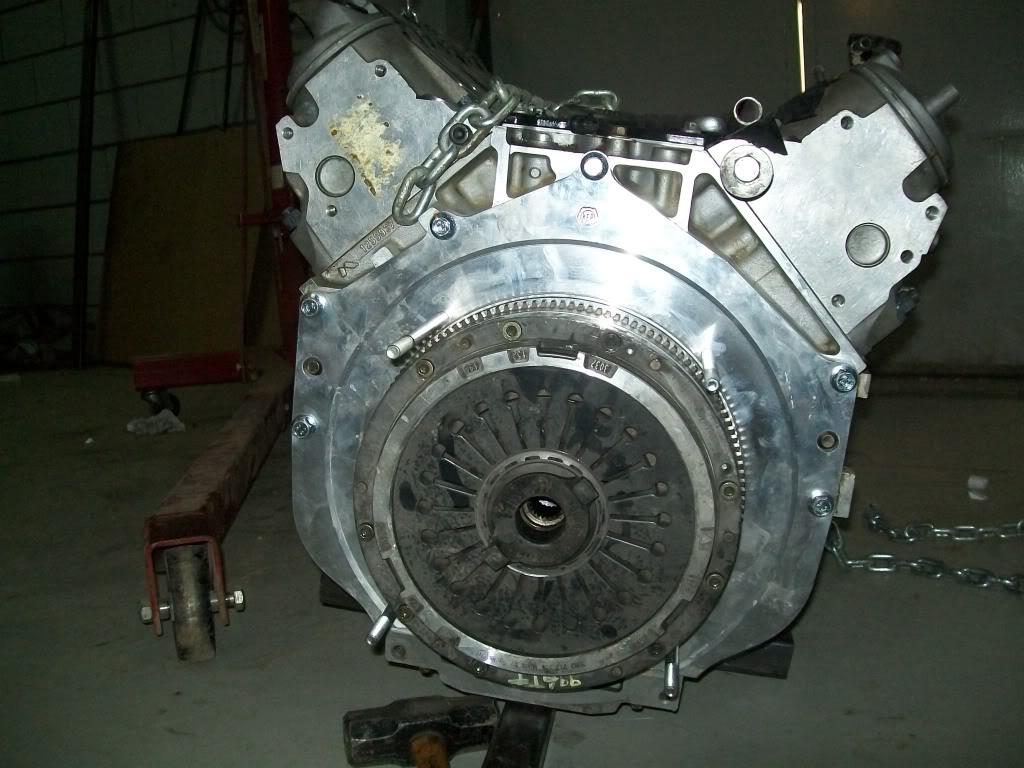
thats when i hit a small snag , the pressure plate uses some funky size torx bit bolts, which i didn't have at the moment , so i just hand tightened it by hand till i get some proper grade 8 allen bolts tommorrow .
so i decided to just see how it looks when done
.
.
.
.
"one small step for man , a huge setback for porsche purists " :
i think at that moment i felt a teardrop hit the ground in stutgart
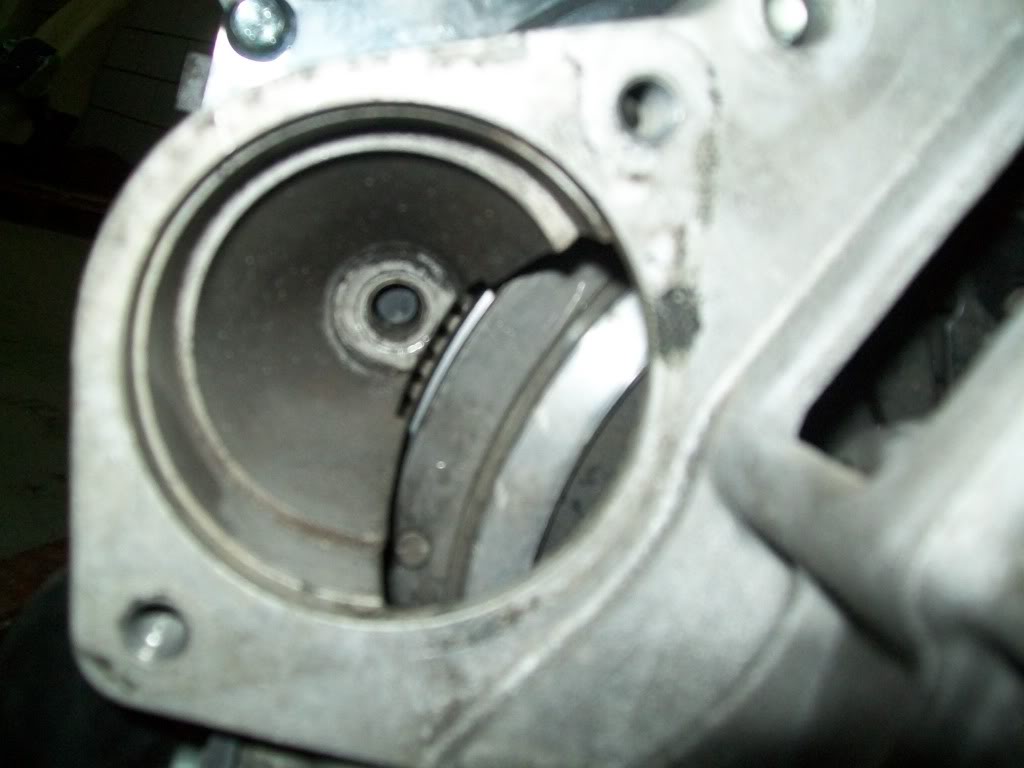
anyhow i almost had an "oh crap!" moment; when installing the trans on to the engine it looked like the starter ring would not fit into the bellhousing , but after a few words of pursuation it went in man do they have some tight clearances; you can see in the next pic the clearance between the ring and bellhousing is about nothing of an inch ( sorry for the out of focus pic but i could not get a proper pic no matter what i did )
i also made some templates for the heat shields that will cover the alternator and A/C compressor, i'll try to finish them soon using some sheetmetal or aluminum .
sooo, tommorow i'll get the allen bolts and finish bolting up the clutch , mate the trans to the engine , weld a few tabs on the lift cradle as well as castors and a jacking point to finalize it , then hopefully lift it into place in the car
and if i have time i should also mount the powersteering pump and figure out where to mount the reservoir ( its a GTO style unit with a remote resv. ) after that i have to take it off to compensate for the added thickness of the plate on the head by either machining the pad that the pump mounts to on the head or machining a bit off the back of the powersteering pulley so when i push it back on it lines up properly with the rest of the accesorries .
wish me luck
i was looking at it yesterday an saying to myself that this will be soooo much fun
thanks for the heads up !
any how ,,,, on to progress
i torqued down the flywheel , poped in the pilot bearing , then got the disk and pressure plate on there :
thats when i hit a small snag , the pressure plate uses some funky size torx bit bolts, which i didn't have at the moment , so i just hand tightened it by hand till i get some proper grade 8 allen bolts tommorrow .
so i decided to just see how it looks when done
.
.
.
.
"one small step for man , a huge setback for porsche purists " :
i think at that moment i felt a teardrop hit the ground in stutgart
anyhow i almost had an "oh crap!" moment; when installing the trans on to the engine it looked like the starter ring would not fit into the bellhousing , but after a few words of pursuation it went in
man do they have some tight clearances; you can see in the next pic the clearance between the ring and bellhousing is about nothing of an inch ( sorry for the out of focus pic but i could not get a proper pic no matter what i did )i also made some templates for the heat shields that will cover the alternator and A/C compressor, i'll try to finish them soon using some sheetmetal or aluminum .
sooo, tommorow i'll get the allen bolts and finish bolting up the clutch , mate the trans to the engine , weld a few tabs on the lift cradle as well as castors and a jacking point to finalize it , then hopefully lift it into place in the car
and if i have time i should also mount the powersteering pump and figure out where to mount the reservoir ( its a GTO style unit with a remote resv. ) after that i have to take it off to compensate for the added thickness of the plate on the head by either machining the pad that the pump mounts to on the head or machining a bit off the back of the powersteering pulley so when i push it back on it lines up properly with the rest of the accesorries .
wish me luck
09-17-2010 | 07:06 PM
#306
Thread Starter
8 Second Club
iTrader: (1)
Joined: Nov 2001
Posts: 3,697
Likes: 0
From: the not so stock tribe
thanks again marky ( you should hang here more often )
so if i use the square bits i have here somewhere it would work ??
either way i'm getting the allen bolts and swapping them out just for ease of replacing them later down the road
( you should hang here more often )so if i use the square bits i have here somewhere it would work ??
either way i'm getting the allen bolts and swapping them out just for ease of replacing them later down the road
09-17-2010 | 07:22 PM
#307

Check google for metalnerd tools, its where I got my triple squares for the audi/vw stuff. I don't know what size the triple squares are but they're a PITA without the right tool.
 09-17-2010 | 09:24 PM
#309


1dirtyz, did you have to clean & seal the gas tank or was it OK? I pulled mine to clean & seal...made me wonder about yours. BTW, my tank contained 8 gallons of the nastiest turpentine smelling "hand cleaner." The donor car had been sitting for years.
09-18-2010 | 01:44 AM
#310
Thread Starter
8 Second Club
iTrader: (1)
Joined: Nov 2001
Posts: 3,697
Likes: 0
From: the not so stock tribe
themachasy, thanks for the heads up !
theroberth , go right ahead and thanks for the kind words. check your PM's
Ls1-450 , this might sound strange , but i don't know what they add ( or not put in in the first place) to the gas we have here cause it never seems to go bad . i have a scout that sits for anywhere from six months to a year sometimes and the gas never goes bad ( the thing has a caddy engine with 11:1 compression , so i would know if the 95 octane i put in went bad ).
either way , i will pop the fuel pump cover on the tank and give it a looksee just to be safe

 09-20-2010 | 03:54 AM
#312
Thread Starter
8 Second Club
iTrader: (1)
Joined: Nov 2001
Posts: 3,697
Likes: 0
From: the not so stock tribe
well got to work on it again last night , i got the new allen keys for the pressure plate and did the tape track to hold the fork in place ( thanks marky) as i mated the engine and trans together for the last time ( i hope ). i was not planning on doing much more other than a few odds and ends here and there ,,,, but
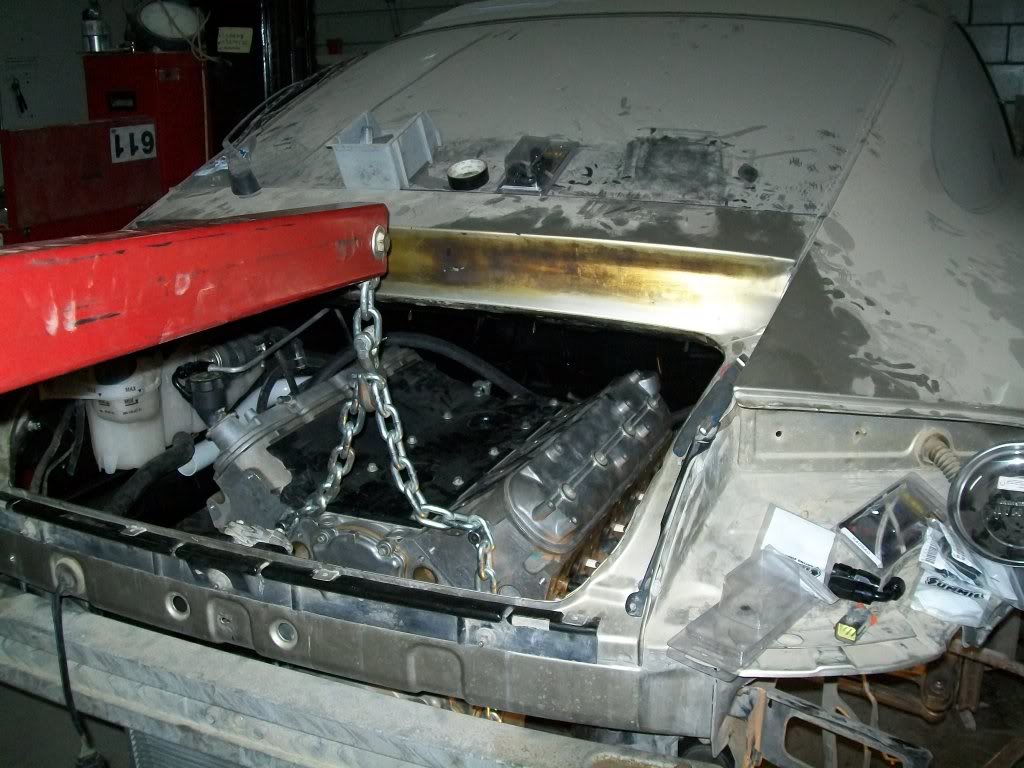
at 12:55AM monday the 20th of Sept. 2010 - one day ahead of schedule - the engine got a new home
pics of the whole process :
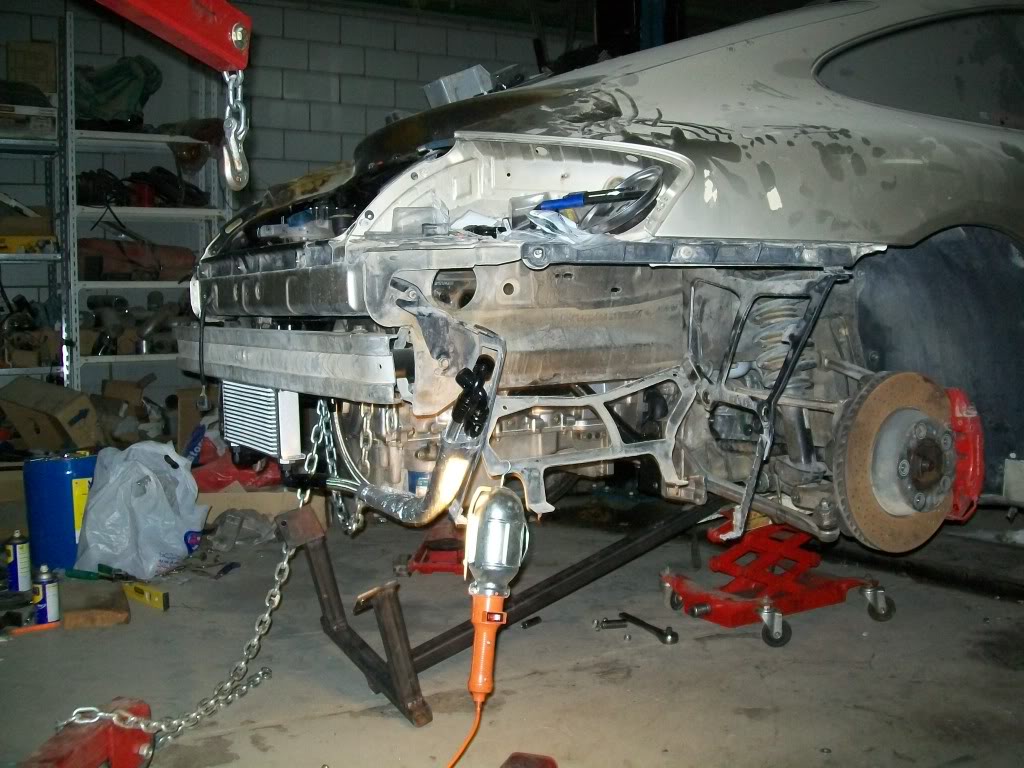
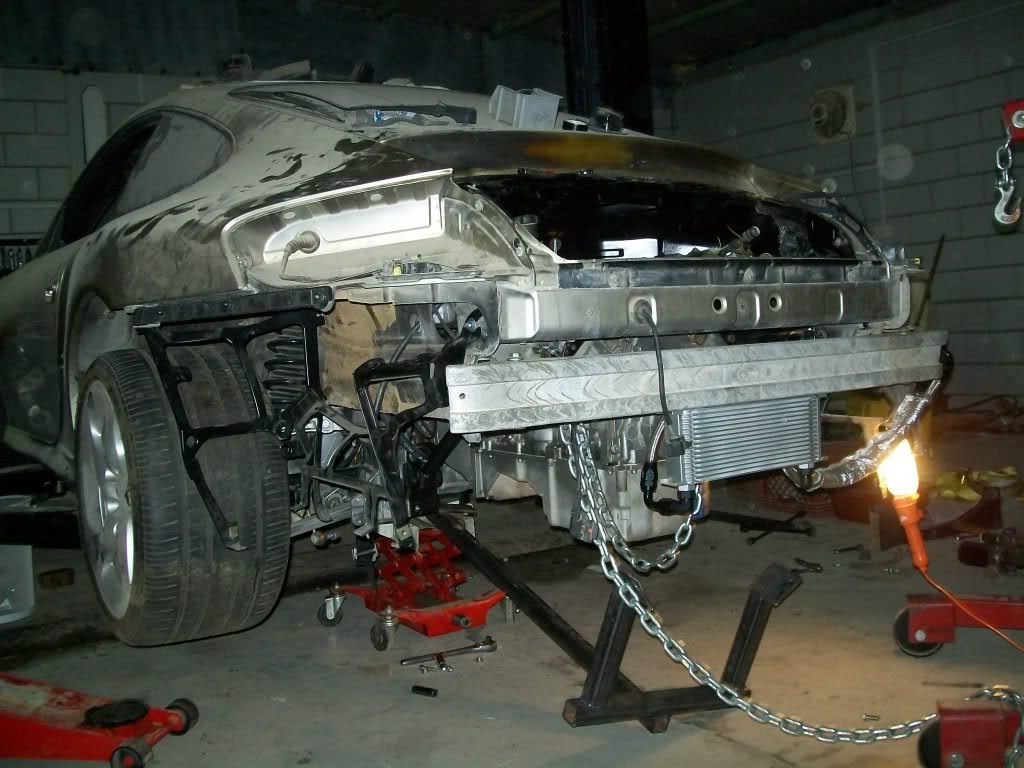
i rolled the engine into place under the car and started to lower the car on to it , when it got close enough i started to raise the tans end up into location to bolt up the trans mount , then proceeded into lifting the engine into place :
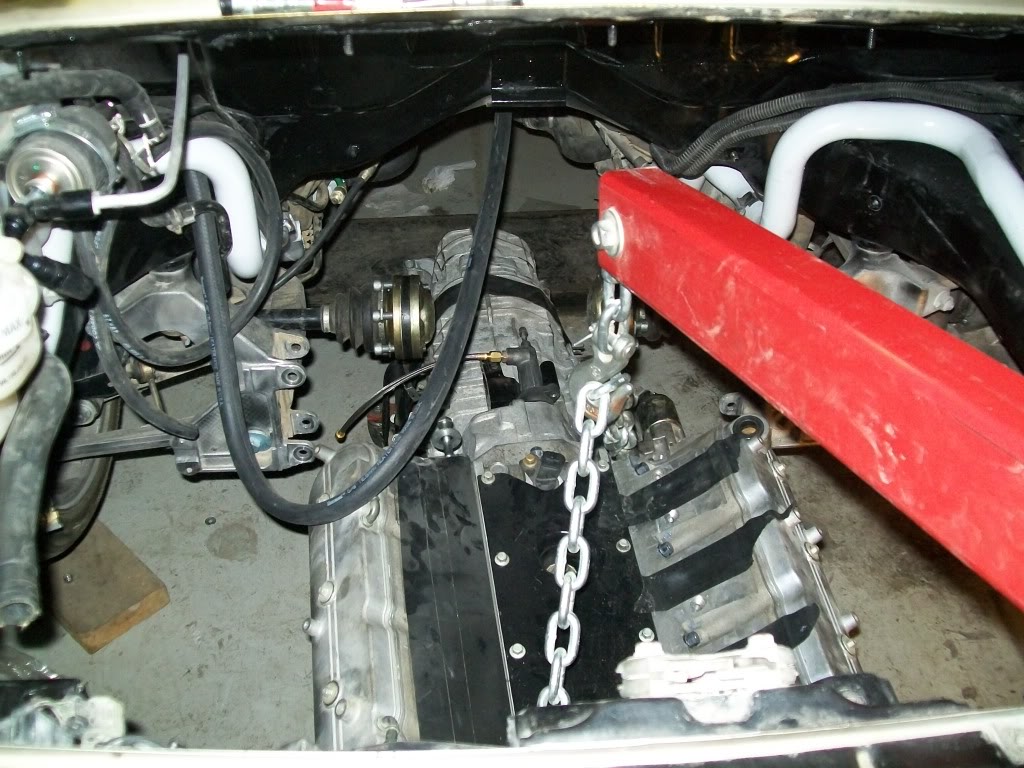
after bolting up the head plates / motor mounts i proceeded to cut the umbilical cord
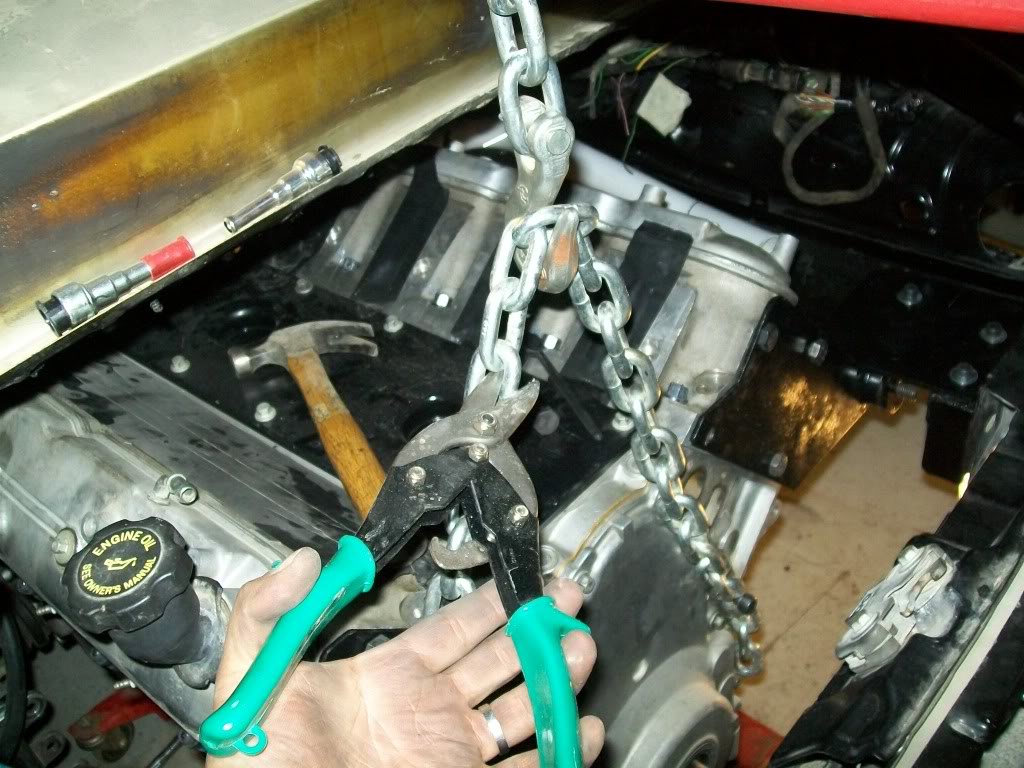
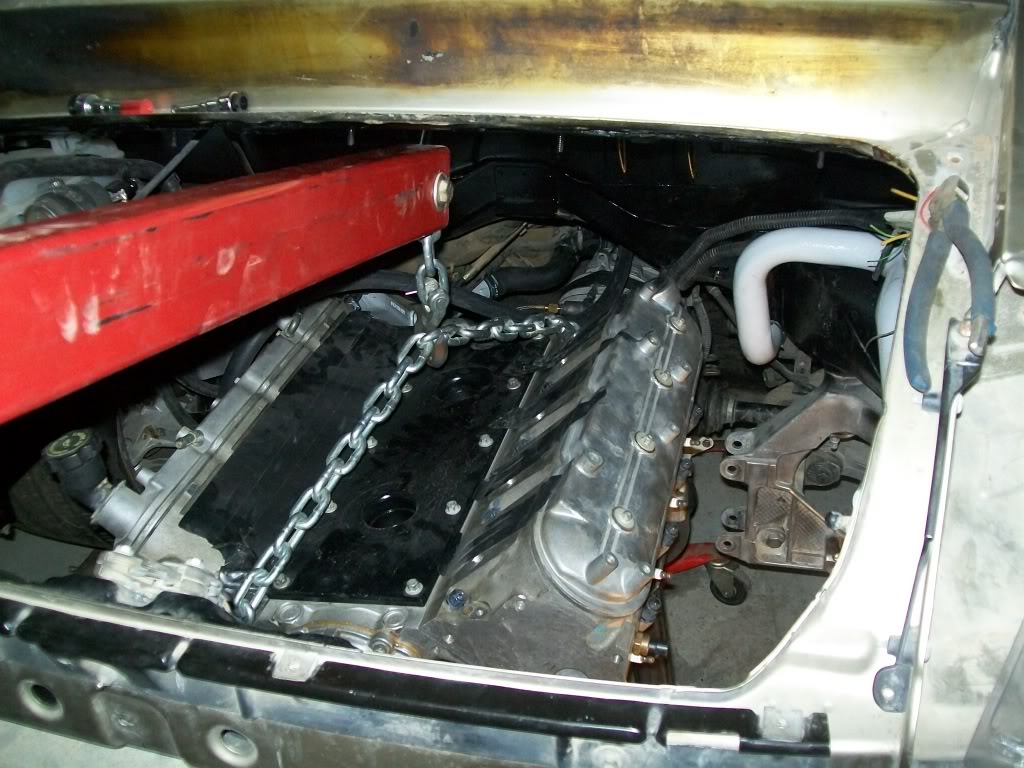
and now i have a fully self suspended engine
so now i a acheived a major milestone in the project , and things should start rolling a bit faster from now on
funny thing is a i got a bit caried away with the instalation and never finished the lifting cradle , thats why you see me using the engine hoist and the rolly thing underneath the engine , but now i know how important the cradle thingy is.
so next up on the list :
- replace the bolts i used on the head plate with allen bolts ( looks cleaner / better
- swap the gto oil pan to the kevko pan and pickup i have
- bolt up the suspension crossmember and finish tightening the engine mounts
- install accessories like the alternator and waterpump and other stuff.
- finish fabbing up the heatshields on the ac compressor and alt.
- finish ( or atleast start working on ) the engine compartment mini harness
- route the heater hoses under the car
that should be enough to get the car down and off the lift so i can roll it back and start working on the interior and engine electrics and harness.
after that its on to :
- palce engine harness and mount PCM
- intake / throttle and injectors
- power steering and lines
- mount rear bumper and trunk lid
- finalize coolant tubes
- install new dash ( converting from auto to manual requires swapping the under dash assembly for the pedals )
- widndow and regulator
- check gas tank
- and it goes on and on and on
). i was not planning on doing much more other than a few odds and ends here and there ,,,, but at 12:55AM monday the 20th of Sept. 2010 - one day ahead of schedule - the engine got a new home
pics of the whole process :
i rolled the engine into place under the car and started to lower the car on to it , when it got close enough i started to raise the tans end up into location to bolt up the trans mount , then proceeded into lifting the engine into place :
after bolting up the head plates / motor mounts i proceeded to cut the umbilical cord
and now i have a fully self suspended engine
so now i a acheived a major milestone in the project , and things should start rolling a bit faster from now on
funny thing is a i got a bit caried away with the instalation and never finished the lifting cradle , thats why you see me using the engine hoist and the rolly thing underneath the engine , but now i know how important the cradle thingy is.
so next up on the list :
- replace the bolts i used on the head plate with allen bolts ( looks cleaner / better
- swap the gto oil pan to the kevko pan and pickup i have
- bolt up the suspension crossmember and finish tightening the engine mounts
- install accessories like the alternator and waterpump and other stuff.
- finish fabbing up the heatshields on the ac compressor and alt.
- finish ( or atleast start working on ) the engine compartment mini harness
- route the heater hoses under the car
that should be enough to get the car down and off the lift so i can roll it back and start working on the interior and engine electrics and harness.
after that its on to :
- palce engine harness and mount PCM
- intake / throttle and injectors
- power steering and lines
- mount rear bumper and trunk lid
- finalize coolant tubes
- install new dash ( converting from auto to manual requires swapping the under dash assembly for the pedals )
- widndow and regulator
- check gas tank
- and it goes on and on and on
09-20-2010 | 01:16 PM
#315
Looks really good. I am at about roughly the same stage in my Porsche-LS swap, but not nearly as earth shattering as yours... I think Ferdinand just rolled over in his grave.... If you have any questions about any of the factory wiring etc just let me know.
Oh, BTW I hope you like a nice HEAVY clutch pedal, the turbo clutch without assist will help develop your left leg
Mark
Oh, BTW I hope you like a nice HEAVY clutch pedal, the turbo clutch without assist will help develop your left leg
Mark
09-20-2010 | 06:55 PM
#317
Thread Starter
8 Second Club
iTrader: (1)
Joined: Nov 2001
Posts: 3,697
Likes: 0
From: the not so stock tribe
loool, marky have you ever tried the early ram single disk clutches for an Fbody
i looked like a freak back then cause my left leg was so much bigger than the right one
and i appreciate the offer and i have a feeling i will be needing it soon
irish , it gets worse : gas in dubai andi think kuwait is 98 octane
anyhow , got cracking on it again and finished quite a bit of the things on the list above:
got the head plate bolts swapped out to allen bolts , swapped the pan and pickup tube, atttched the oil cooler lines, bolted up the suspension crossmember and tightened the engine mounts , mounted the alternator and bracket, installed the starter and the starter cable , bolted the driveshaft and tightened the axleshafts ( on the tranny side), and installed the swaybar.
up next is installing the headers and exhaust , water pump , tightening the axleshafts ( spindle side ) , bumper brackets , tightening the aluminum bumper , slapping on the bumper cover , and building the AC and alt. heatshields and i should be able to roll the car of the lift
i'm almost done with the bottom of the car but there are a few things i'm waiting on to really call it done. things like the ac lines and fittings to the compressor ,heater hoses ( still waiting on them) , and the mini harness .
i did get a few pics but its late and i'm too tired to upload and post them, will do it tommorow
09-21-2010 | 02:49 AM
#318
Thread Starter
8 Second Club
iTrader: (1)
Joined: Nov 2001
Posts: 3,697
Likes: 0
From: the not so stock tribe
sexy oil pan and lines
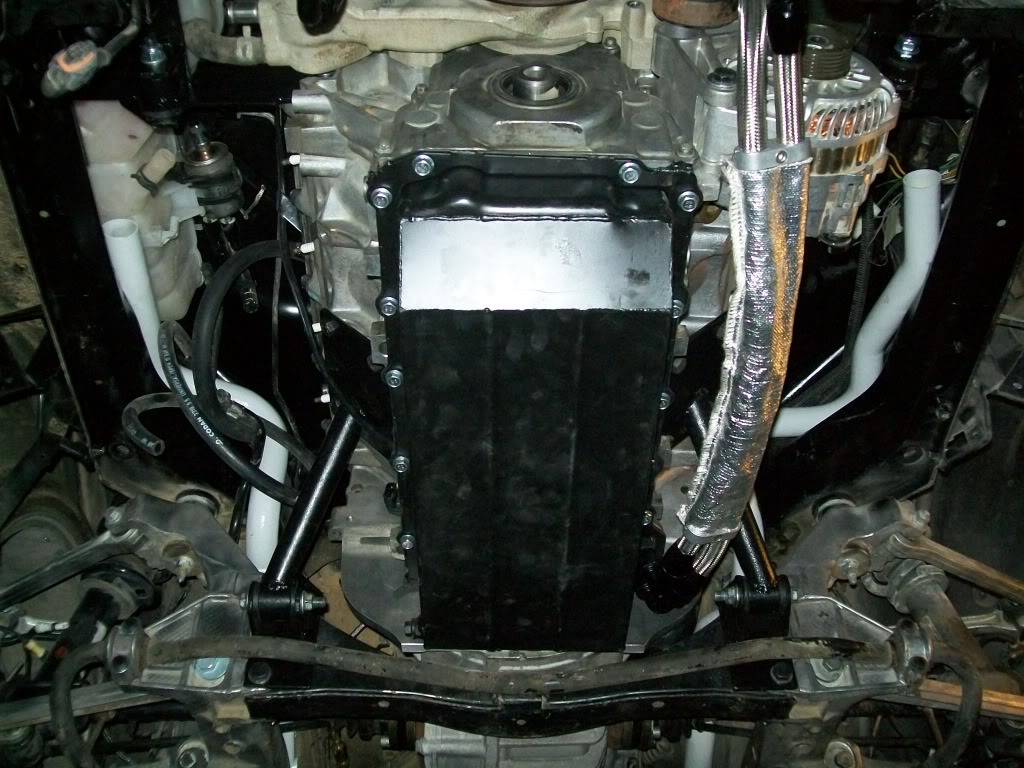
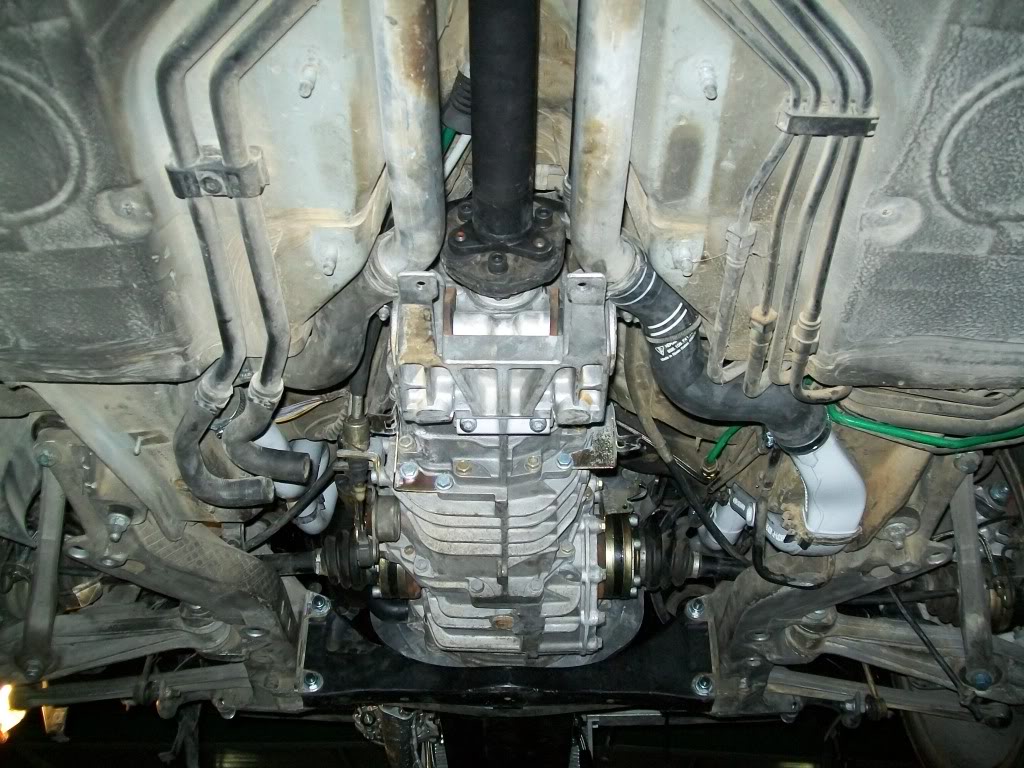
axleshafts and driveshaft and another angle of that sexy oil pan ( don't you think i have an oil pan fixation )
forgot to mention that i installed the dipstick
axleshafts and driveshaft and another angle of that sexy oil pan ( don't you think i have an oil pan fixation
)forgot to mention that i installed the dipstick
