

2001 porsche 996 ls1 conversion
 04-22-2010, 06:35 AM
#161
8 Second Club
Thread Starter
iTrader: (1)
Join Date: Nov 2001
Location: the not so stock tribe
Posts: 3,697
Likes: 0
Received 0 Likes
on
0 Posts

i could do that and have the accesories run under the brace along with a remote water pump , but that would not be inline with what i want the car to be ; having all the amneties along with dependability. i'm just annoyed that there is so much room behind the engine now 
 04-25-2010, 01:32 AM
#162
8 Second Club
Thread Starter
iTrader: (1)
Join Date: Nov 2001
Location: the not so stock tribe
Posts: 3,697
Likes: 0
Received 0 Likes
on
0 Posts
One small step for man , one giant leap for sam-kind 

Trans finally in the car, and like I said before moving it forward is almost impossible ,,,, if i use the stock transmission mount
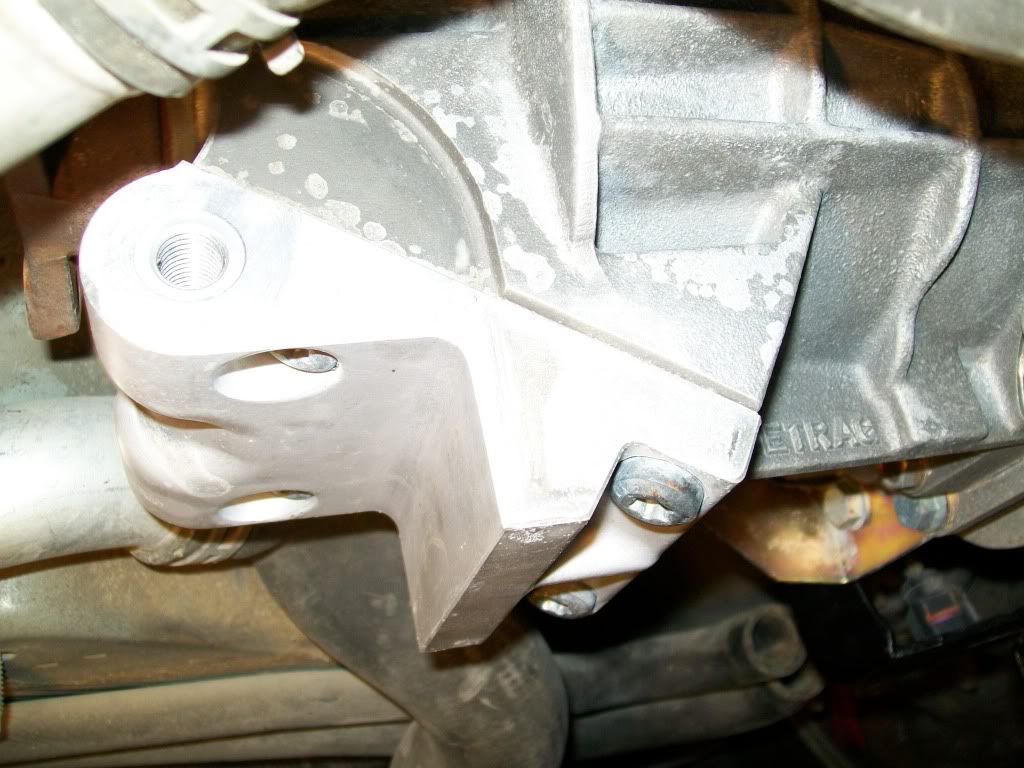
I’ve been messing with an idea of another trans mount (fabricated) that would get me those precious inches of clearance, but more on that later ( I just started thinking about it and I have no idea if it would work or not , I have to go back to the garage and physically check it). here is how the original trans mount looks like :
now,, i said before that i might have to redo the cradle because of interfernce between the cradle and oil pan , but now that i'm thinking about it , why not just notch the pan abit ( all i need is about 1"-1.5" of clearance) , or get a custom pan made that would be a bit shallower than this one (all this assuming the trans stays in place).
i guess now i have to start messing with the trans mount and see what i can do there. after that is done i can focus on the engine compartment again and locating the engine in there. ( guess no new cradle for now )
Trans finally in the car, and like I said before moving it forward is almost impossible ,,,, if i use the stock transmission mount
I’ve been messing with an idea of another trans mount (fabricated) that would get me those precious inches of clearance, but more on that later ( I just started thinking about it and I have no idea if it would work or not , I have to go back to the garage and physically check it). here is how the original trans mount looks like :
now,, i said before that i might have to redo the cradle because of interfernce between the cradle and oil pan , but now that i'm thinking about it , why not just notch the pan abit ( all i need is about 1"-1.5" of clearance) , or get a custom pan made that would be a bit shallower than this one (all this assuming the trans stays in place).
i guess now i have to start messing with the trans mount and see what i can do there. after that is done i can focus on the engine compartment again and locating the engine in there. ( guess no new cradle for now
) Last edited by 1dirtyZ; 04-25-2010 at 03:08 AM.
04-26-2010, 02:41 AM
#163
8 Second Club
Thread Starter
iTrader: (1)
Join Date: Nov 2001
Location: the not so stock tribe
Posts: 3,697
Likes: 0
Received 0 Likes
on
0 Posts
more progress !
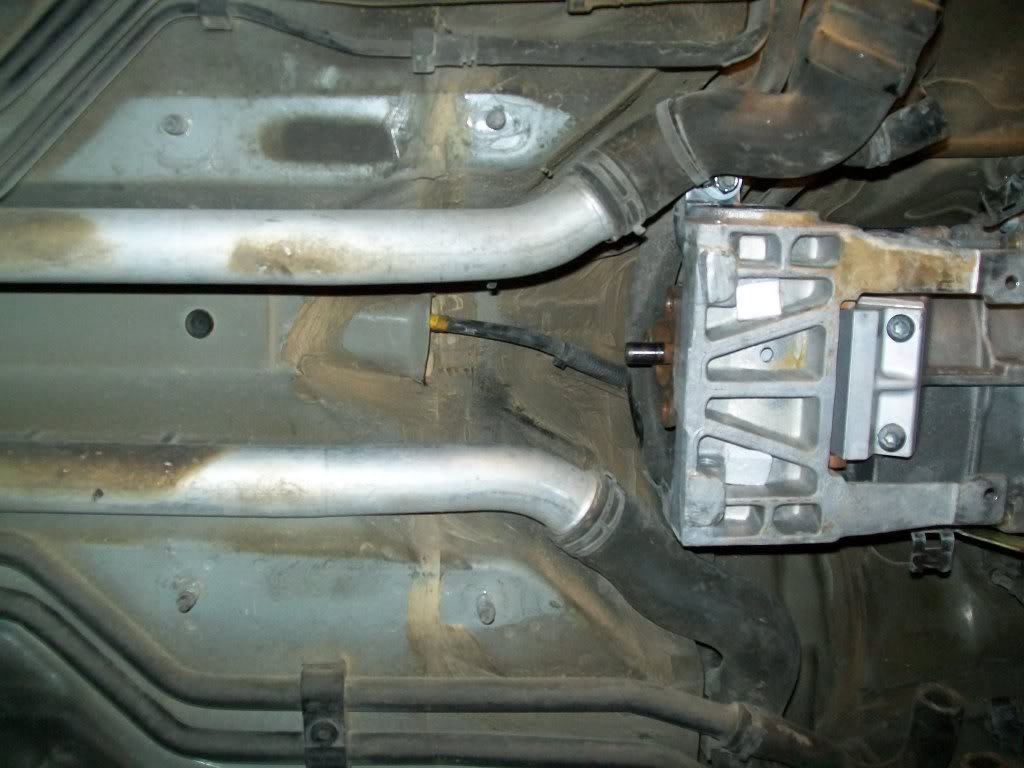
i got the original trans mount and xmember off and saw how much i can slide the tansmission ; i think i got about 5 inches of clearance ! enough to install the engine without needing to cut the brace.
here it is before :
and after :
removing the original mount will get you this nice little pad that porsche so kindly made removable ( 4 allen key bolts hold it on to a flat part of the trans):
i'm not going to take it off since it will be part of my new trans mount, it will have two tabs bolted to the sides and going down to a regular gm trans mount (poly) like so :
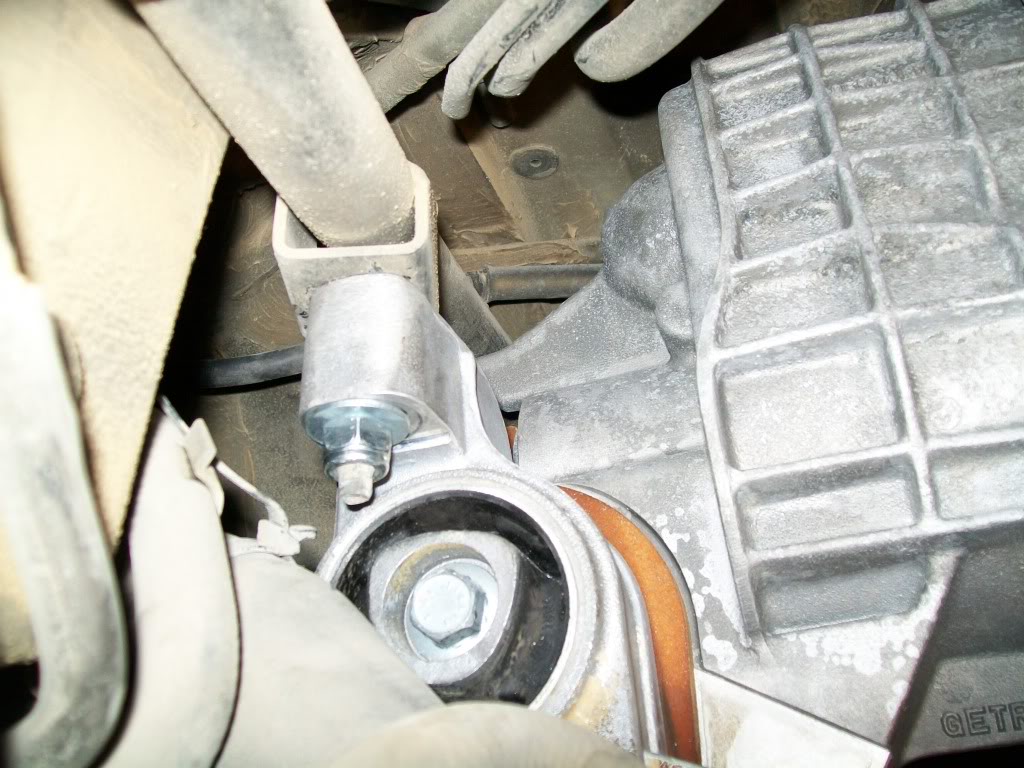
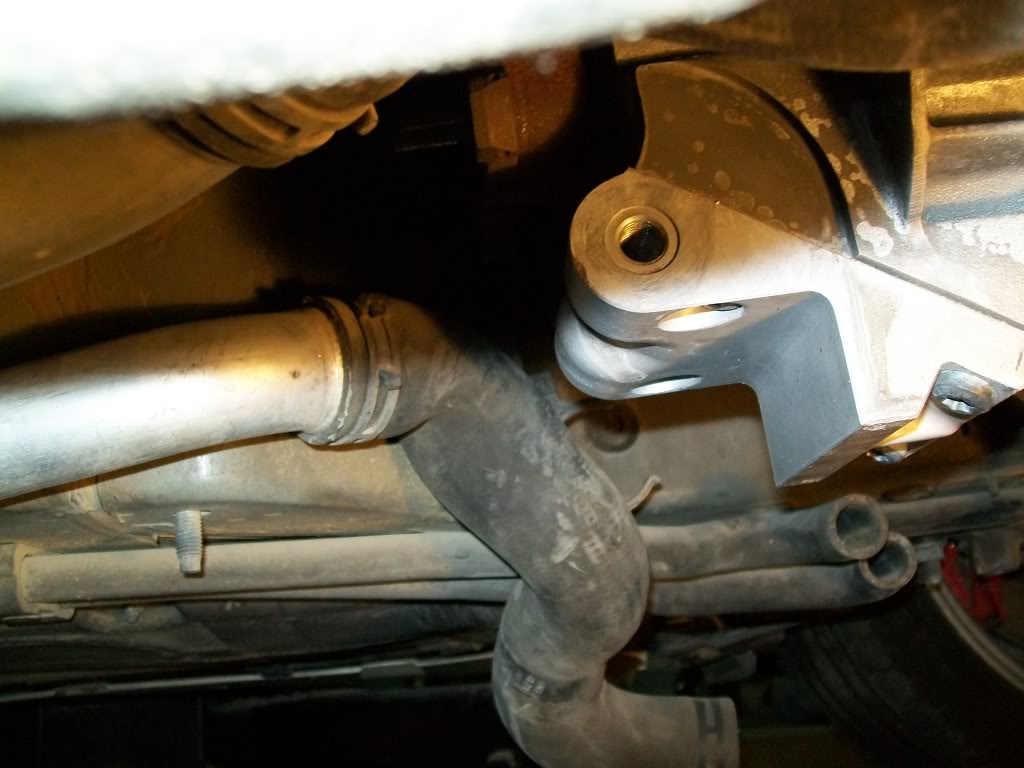
and the nice people at porsche also added four beefy studs under the car ( just like they knew someone would need them someday ) right infront of the transmission to use as a mounting point for the new trans xmember ( here is one on the left side of the picture ) :
and here are all 4 :
now it isn't all smooth sailing , there are a few issues to deal with :
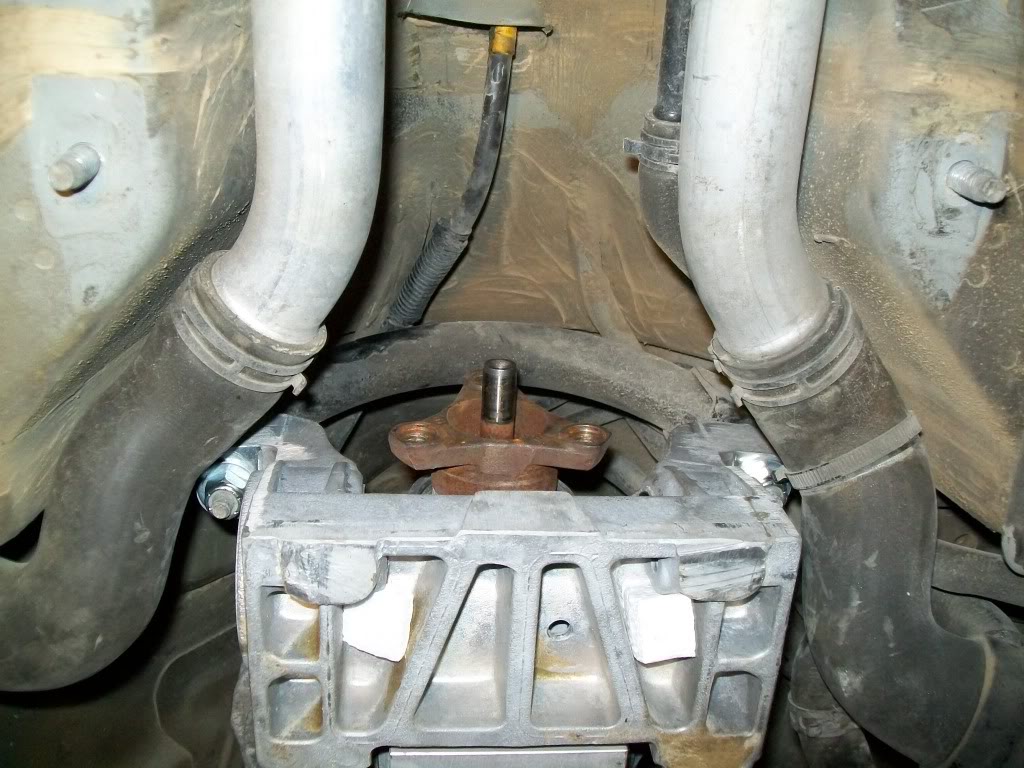
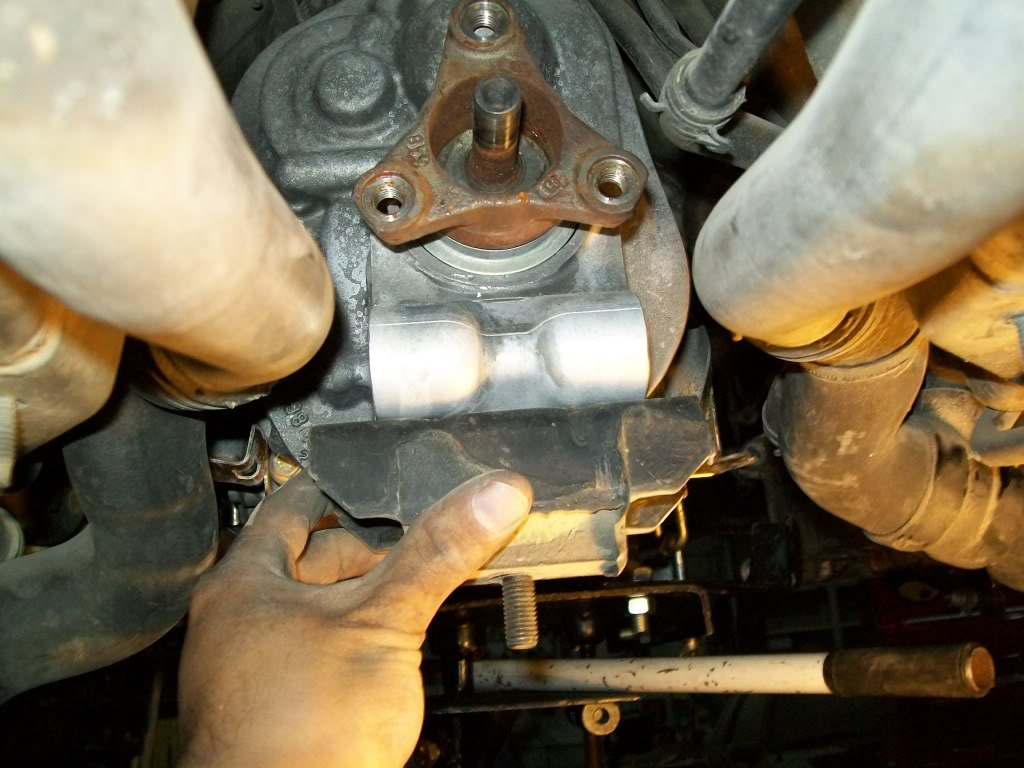
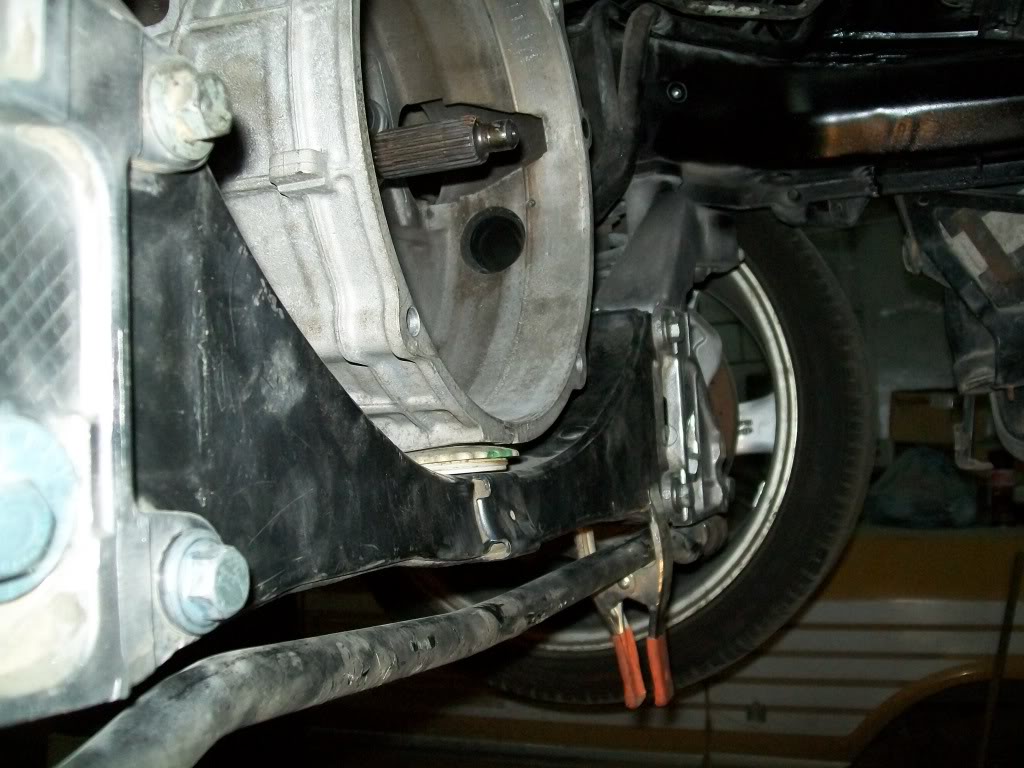
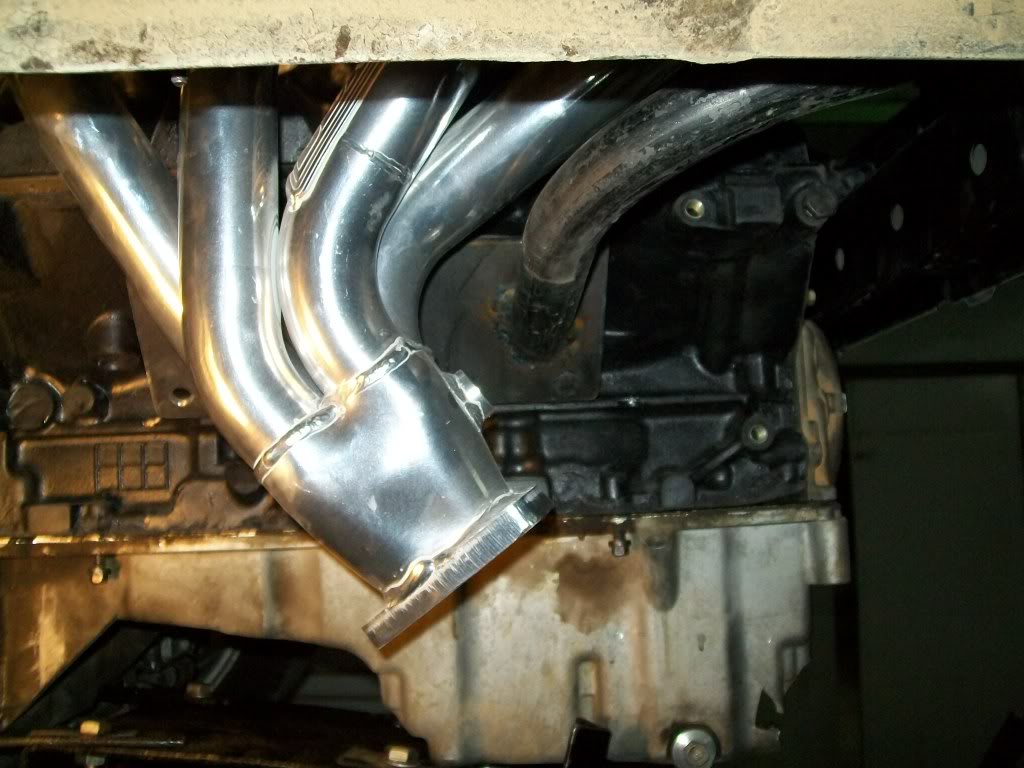
first off is the shifter mechanisim on the transmission hits the E-brake and strater + cable , it's not the shifter lever itself but a counter weight it has on it (see pic ) that is hitting , the solution would be to cut it but i don't know how that would affect shiter "feel"?
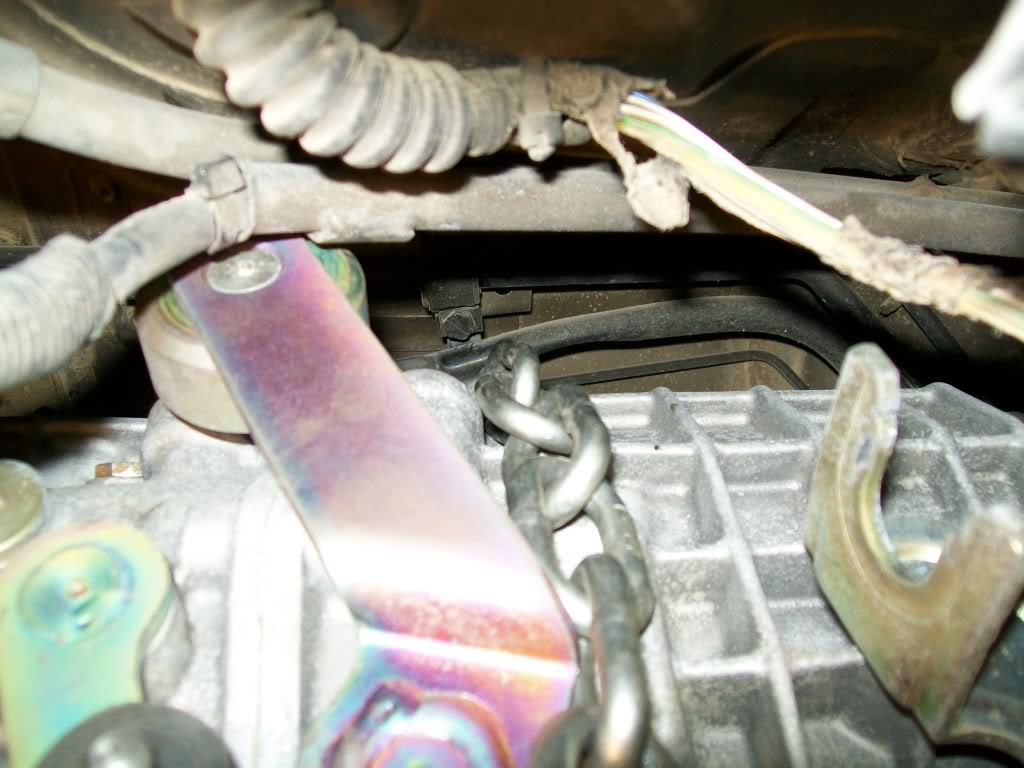
here is a better pic of the part :

the other issue is the driveshaft length , but that is not a huge problem since i can have it shortened ( it already has a loooong splined end)
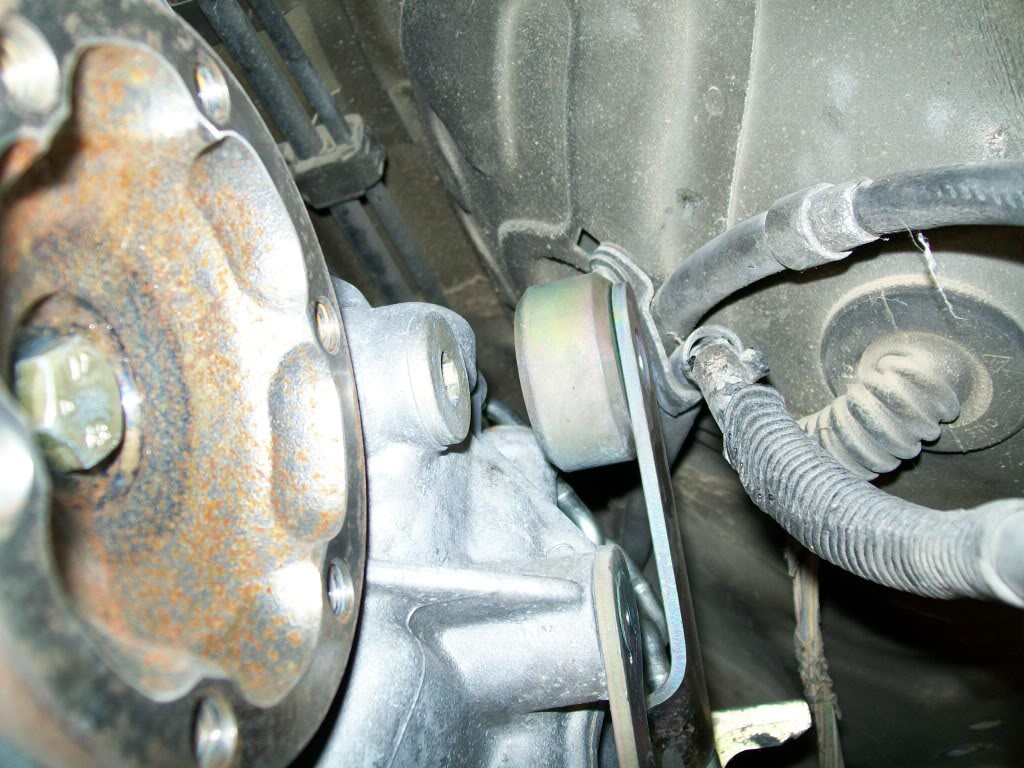
last issue is the cv joint angle , i'm doing some reading on how much is too much angle and if these are 930 style cv joints or not ( 930 joints can handle a good amount of angle).
here is the befroe angle (stock location ) :
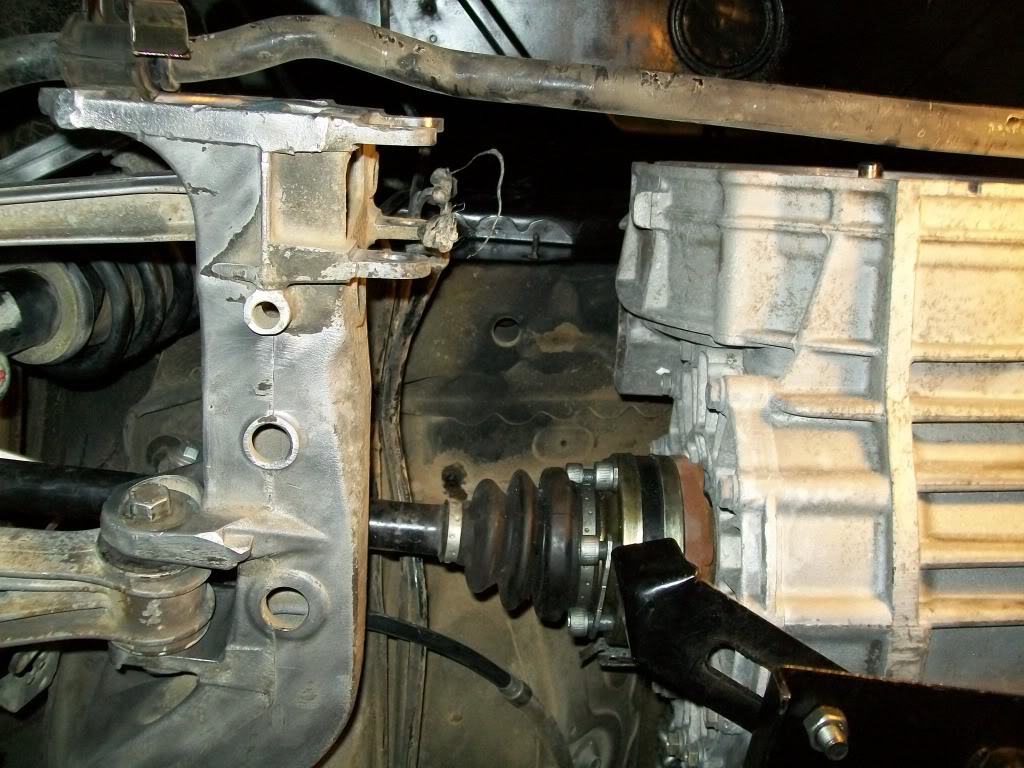
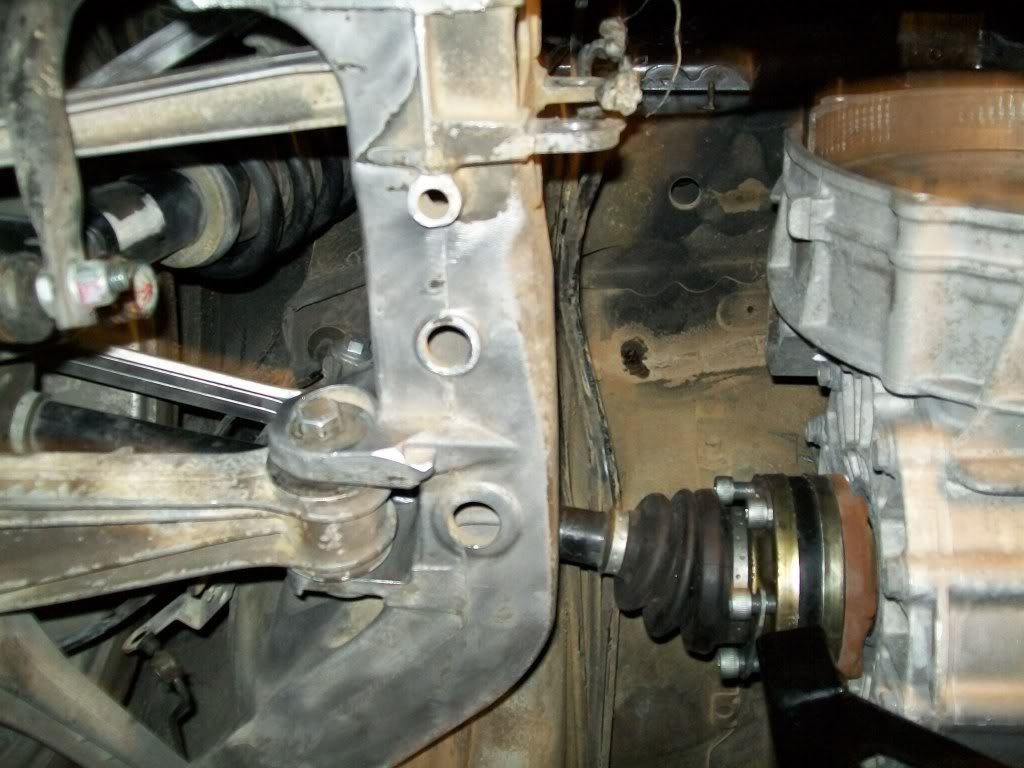
and the relocated angle :
what do you think?
(note , did some onscreen measurements and it seems the angle of the axle is around 12 deg.)
so , right now i'll just make the trans mount without cutting anything on the car ( so as to go back to stock location if need be) . it'll most likely be a plate that bolts to the 4 bolts and has a tab running under the trans mount .
if the relocation process fails , i guess its time for the sawzall !
i got the original trans mount and xmember off and saw how much i can slide the tansmission ; i think i got about 5 inches of clearance ! enough to install the engine without needing to cut the brace.
here it is before :
and after :
removing the original mount will get you this nice little pad that porsche so kindly made removable ( 4 allen key bolts hold it on to a flat part of the trans):
i'm not going to take it off since it will be part of my new trans mount, it will have two tabs bolted to the sides and going down to a regular gm trans mount (poly) like so :
and the nice people at porsche also added four beefy studs under the car ( just like they knew someone would need them someday
) right infront of the transmission to use as a mounting point for the new trans xmember ( here is one on the left side of the picture ) :and here are all 4 :
now it isn't all smooth sailing , there are a few issues to deal with :
first off is the shifter mechanisim on the transmission hits the E-brake and strater + cable , it's not the shifter lever itself but a counter weight it has on it (see pic ) that is hitting , the solution would be to cut it but i don't know how that would affect shiter "feel"?
here is a better pic of the part :
the other issue is the driveshaft length , but that is not a huge problem since i can have it shortened ( it already has a loooong splined end)
last issue is the cv joint angle , i'm doing some reading on how much is too much angle and if these are 930 style cv joints or not ( 930 joints can handle a good amount of angle).
here is the befroe angle (stock location ) :
and the relocated angle :
what do you think?
(note , did some onscreen measurements and it seems the angle of the axle is around 12 deg.)
so , right now i'll just make the trans mount without cutting anything on the car ( so as to go back to stock location if need be) . it'll most likely be a plate that bolts to the 4 bolts and has a tab running under the trans mount .
if the relocation process fails , i guess its time for the sawzall !
Last edited by 1dirtyZ; 04-26-2010 at 03:15 AM.
04-26-2010, 07:59 AM
#164

When you where show how much you could move the transmission, I was wondering " about the CV shaft angle.....? " I am glad to see you were comtaplating the same issues. Actually. I am glad I was following your build enough that I wasn't lost. LOL.
Keep up the good work. And as always. keep the pics coming. BTW....your thumb looks like its 3" long. Damn. LOL.
Keep up the good work. And as always. keep the pics coming. BTW....your thumb looks like its 3" long. Damn. LOL.
04-26-2010, 11:56 AM
#166

The counter weight on the gear change lever is meant to keep it from jumping out of gear. Audi transaxles use a similar counter weight.
From the angle in your photo, it looks like it's a lot. How much is the trans moved back?
I've been following your progress, but am having difficulty getting my head around the problems you are facing and what your options are. Seems like you're adding a lot of work by moving the transaxle forward (drive shaft, shifter linkage, water lines, mount, etc).
Good luck,
Andy1
 04-27-2010, 01:45 AM
#168
8 Second Club
Thread Starter
iTrader: (1)
Join Date: Nov 2001
Location: the not so stock tribe
Posts: 3,697
Likes: 0
Received 0 Likes
on
0 Posts
jimbo , it's two inches long, i measured
andy and ls1-450 , the trans was moved back around 5 inches . the more i think about moving the trans, the more it seems i'll be opening a can of worms later down the road .
i thought about it yesterday , and i think i will not relocate the transmission . just keep it where it is and go with it , that way i don't reengineer the wheel .
so i guess mr.brace will meet Mr.sawzall after all
04-29-2010, 03:18 PM
#169
Nice progress.
Modest CV angle is important to uniform lubrication within the CV, under 10 degrees, over 5. Extreme (over 17 degrees with these 930 joints) starts premature wear on the cage.
There is a huge aftermarket for 934 CV's for offroad and situations like this.
Before you make any hasty sawzall decisions, look into this at least for better weight distribution. I'm guessing you're well within the ranges. Stick your degree gauge on the axle with a longitudinal straight edge at ride height and move the control arm with in it's range. Easy to test.
If it's easier to hack the brace and use the existing trans mounts, that's probably what I'd do.
04-29-2010, 07:07 PM
#170
8 Second Club
Thread Starter
iTrader: (1)
Join Date: Nov 2001
Location: the not so stock tribe
Posts: 3,697
Likes: 0
Received 0 Likes
on
0 Posts
easy, i looked into different axles and just like you said there are options
i do agree the weight distribution comment , but over all moving the tranny that much is just too much of a hassle. soooooo, the next best thing is to move it just a bit!
i turns out if you flip the trans mount around and machine the small pad on one end that interferes with the transmission case, you end up moving the tranny forward about 2 inches !
here are some pics :

and the result :

cool thing is the cv axles are just slightly changed from stock , shifter works without interference and i get better weight distribution ,,, all while using stock parts
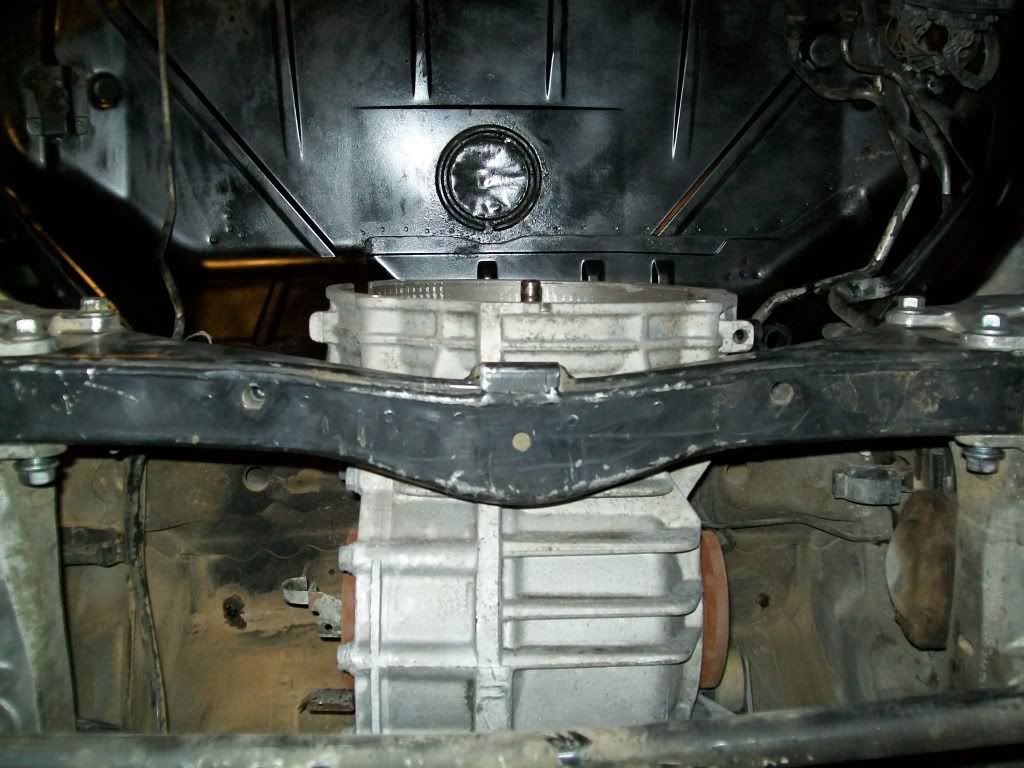
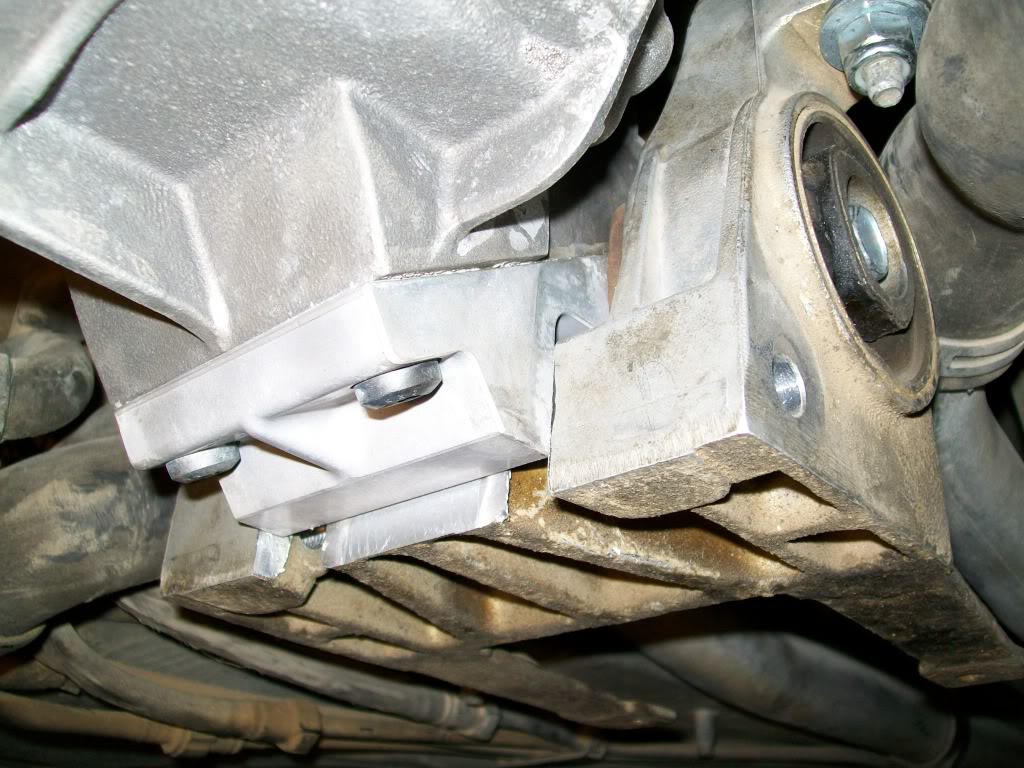
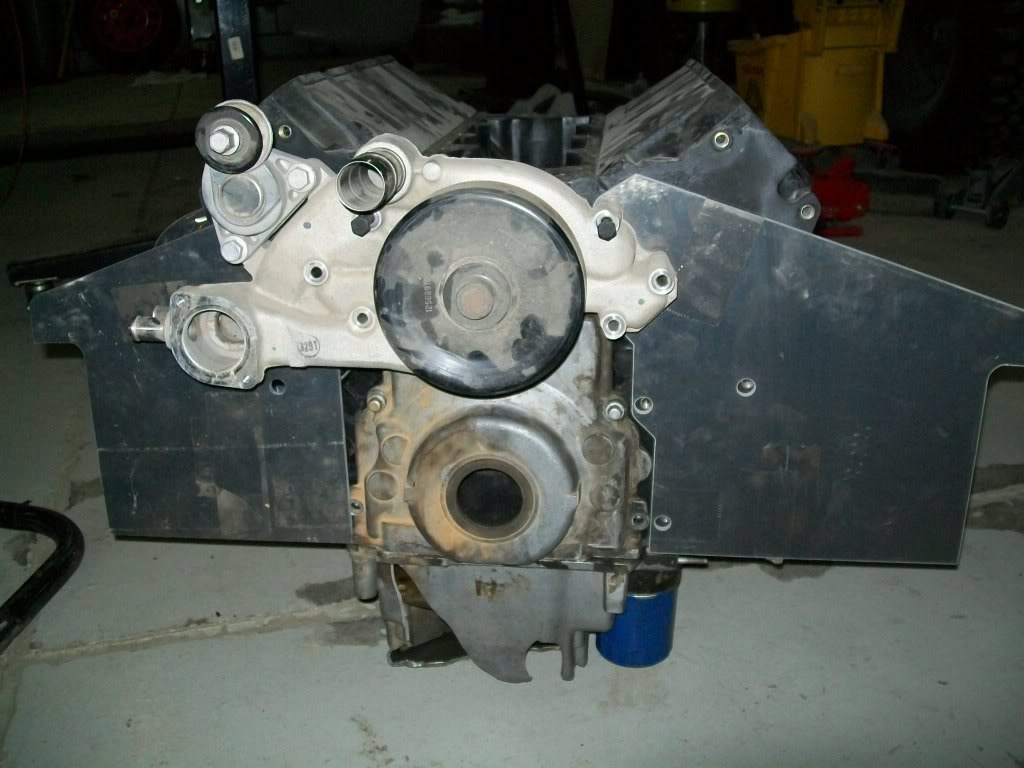
more progress news, i finished cradle V3.0 and they look like this :

and header clearance :
only thing that worries me with this design is the stress or leverage that is placed on the part itself.
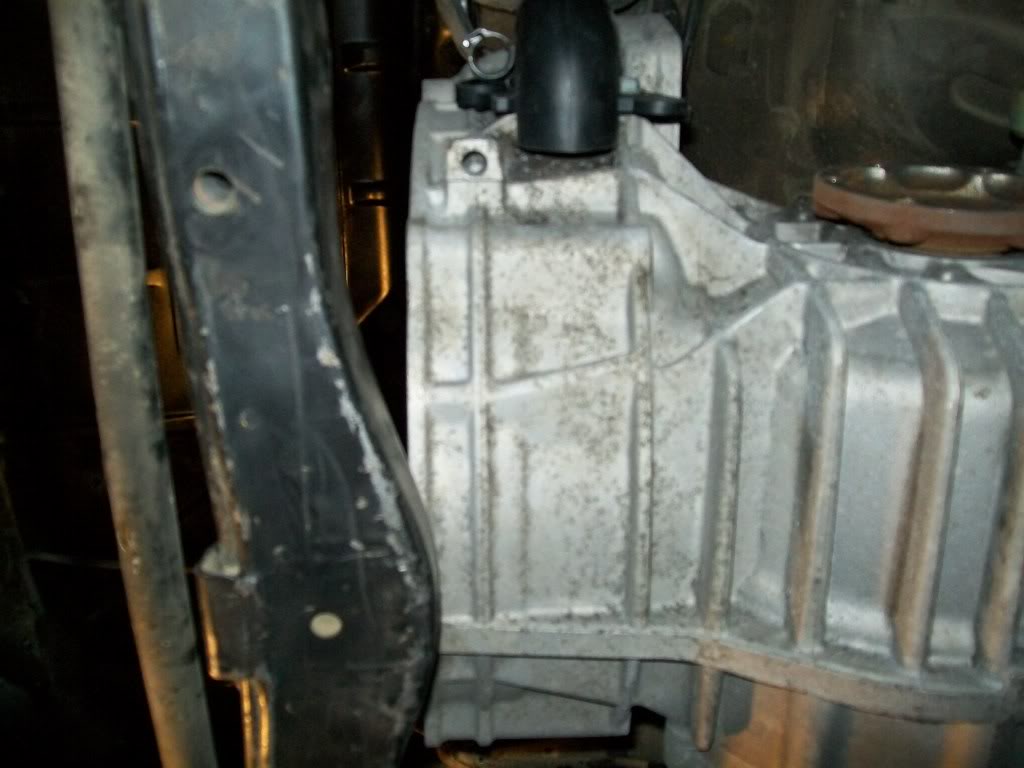
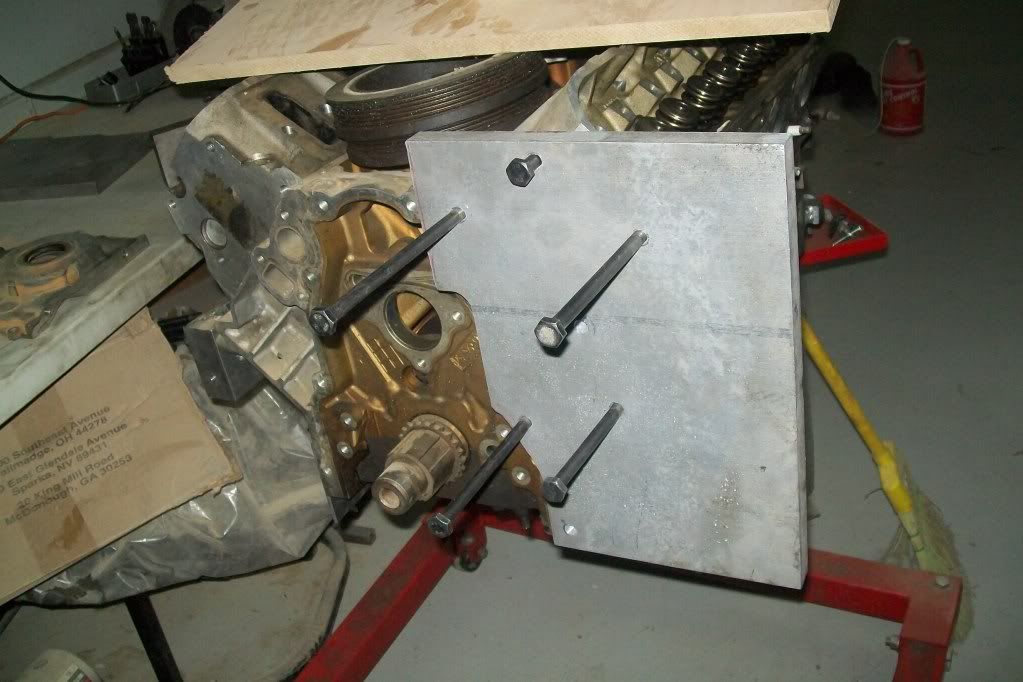
so after thinking some more and noticing that the engine now is sitting almost flush with the brace , i though why not do it like the porsche engine was mounted ,,,, soooo here's my other other other engine mount idea :
it fits nicley and lines up with the original mounts , i just have to make sure i can have everything lined up first ; the motor plate will cause both the water pump and alternator mount to be moved forward . so i plan on machining the waterpump mounting surface the thickness of the plate to compensate and pull the pump back in. the alternator bracket is not that easy ; i can't machine the back side of the mount cause there isn't enough material , so the solution is to bolt it as is , but move the alternator back by machining a bit off the alternator tabs and getting a small spacer to compensate . ( sorry forgot to take pics of that )
so more on that later
i do agree the weight distribution comment , but over all moving the tranny that much is just too much of a hassle. soooooo, the next best thing is to move it just a bit!
i turns out if you flip the trans mount around and machine the small pad on one end that interferes with the transmission case, you end up moving the tranny forward about 2 inches !
here are some pics :
and the result :
cool thing is the cv axles are just slightly changed from stock , shifter works without interference and i get better weight distribution ,,, all while using stock parts
more progress news, i finished cradle V3.0
and they look like this :and header clearance :
only thing that worries me with this design is the stress or leverage that is placed on the part itself.
so after thinking some more and noticing that the engine now is sitting almost flush with the brace , i though why not do it like the porsche engine was mounted ,,,, soooo here's my other other other engine mount idea :
it fits nicley and lines up with the original mounts , i just have to make sure i can have everything lined up first ; the motor plate will cause both the water pump and alternator mount to be moved forward . so i plan on machining the waterpump mounting surface the thickness of the plate to compensate and pull the pump back in. the alternator bracket is not that easy ; i can't machine the back side of the mount cause there isn't enough material , so the solution is to bolt it as is , but move the alternator back by machining a bit off the alternator tabs and getting a small spacer to compensate . ( sorry forgot to take pics of that )
so more on that later
04-30-2010, 04:30 AM
#172
8 Second Club
Thread Starter
iTrader: (1)
Join Date: Nov 2001
Location: the not so stock tribe
Posts: 3,697
Likes: 0
Received 0 Likes
on
0 Posts
actually it is not , they are some sort of rubber donut (look at the 4th pic from the bottom, it is the round silver thingy in the top left corner of the pic) and i re used them cause it was so convenient
04-30-2010, 02:24 PM
#174
What accessory set are you using?
The truck accessories are further out vs. the F Body/Y Body/GTO units. You should check what that difference is; you may be able to use a crank pulley from a truck to move it out enough to keep your pulley alignment on spec, without all the machining work.
Love the project, very cool stuff.
The truck accessories are further out vs. the F Body/Y Body/GTO units. You should check what that difference is; you may be able to use a crank pulley from a truck to move it out enough to keep your pulley alignment on spec, without all the machining work.
Love the project, very cool stuff.
04-30-2010, 04:07 PM
#176

I would use your engine plate idea, but with one alteration, i would cut a hole in the larger plate and have the alternator stick through the hole. You could do that and leave plenty of material around the hole, and its similar to the origonal porsche design, but your actually run the belt on the opposite side of the engine plate.
mark
mark
04-30-2010, 04:20 PM
#177

Why not build a new alt mount or machine the motor plates to not use the WP's already flimsy bolts? The cyl head and block mounting holes are substantially larger and located farther from the axis of rotation
Example, the application is different, but the concept the same
http://i150.photobucket.com/albums/s...s/HPIM1751.jpg
http://i150.photobucket.com/albums/s...lowers/3-1.png
Example, the application is different, but the concept the same
http://i150.photobucket.com/albums/s...s/HPIM1751.jpg
http://i150.photobucket.com/albums/s...lowers/3-1.png
04-30-2010, 05:10 PM
#178
8 Second Club
Thread Starter
iTrader: (1)
Join Date: Nov 2001
Location: the not so stock tribe
Posts: 3,697
Likes: 0
Received 0 Likes
on
0 Posts
digital , i'm using an ls3 accesory drive , which is shallower that anything out there except the ls4.
marky, are you saying run the alternator facing the engine?
if i do use this method of engine suspension , the motor plate will be sandwiched between the alternator mount and block and i still have to cut it to clear the alternator body.
pocket, i seriousy was thinking of that , the motor plates were just there so i threw them on . i totally agree that using only the waterpump bolts is not a great idea in my opinion. i am thinking in the same lines you are when it comes to building a new plate ,,,, actually i have that already done for another project i was toying around with :
i most likley will use more mounting holes on the plate and even use spacers on the passenger side head to tie that in with the plate as well.
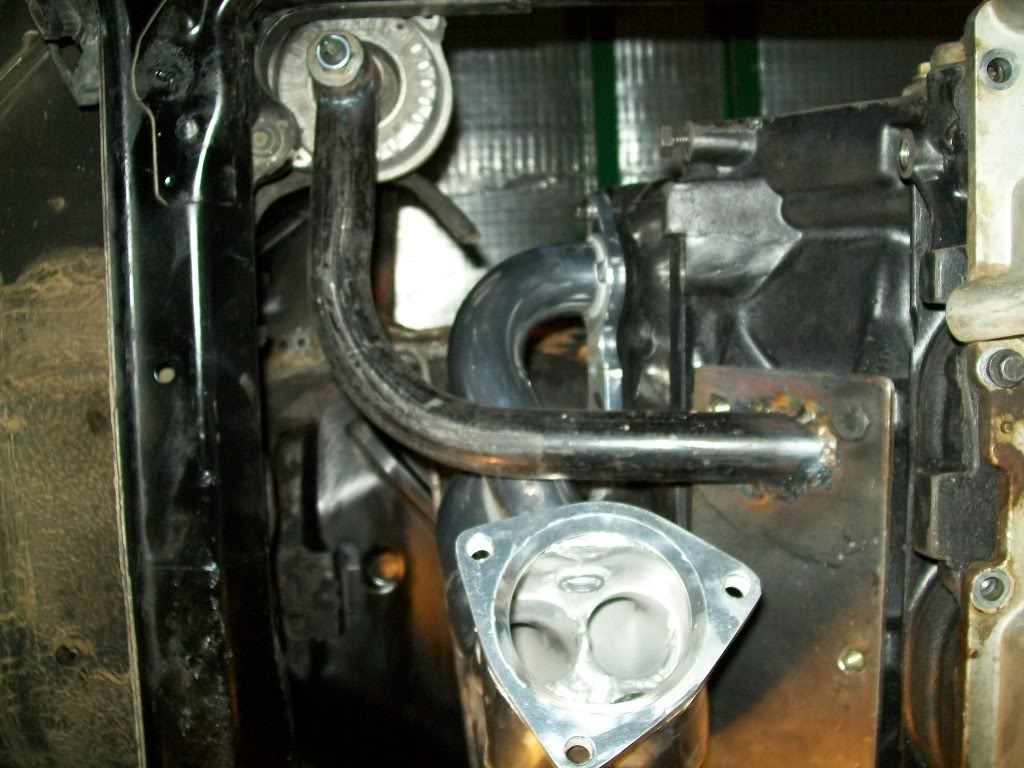
i've also been toying around with another accesory drive idea :
the plan is to use a remote waterpump ( fittings on the block water outlets would be much shallower than the pump itself) as well as an electric powersteering pump. by doing so i can have the accesory drive - which will consist of an alt. beltg and an A/C belt - run under the brace , while the water and steering pumps be located somewhere else .i've looked into MR2 pumps , and after some deep research , i found out that skoda Fabia's, Seat Ibiza's , Mercedes A class and BMW mini's all have electric power steering pumps,,,,, then i found the big surprise : the poreshe 996 GT3 CUP had electric power steering from the factory! which means i might find a bolt in electric power steering if i look hard for it
so now i'm researching more into the electric power steering route to see if i can use it or not and to see if it is reasonably priced to go with .
marky, are you saying run the alternator facing the engine?
if i do use this method of engine suspension , the motor plate will be sandwiched between the alternator mount and block and i still have to cut it to clear the alternator body.
pocket, i seriousy was thinking of that , the motor plates were just there so i threw them on . i totally agree that using only the waterpump bolts is not a great idea in my opinion. i am thinking in the same lines you are when it comes to building a new plate ,,,, actually i have that already done for another project i was toying around with :
i most likley will use more mounting holes on the plate and even use spacers on the passenger side head to tie that in with the plate as well.
i've also been toying around with another accesory drive idea :
the plan is to use a remote waterpump ( fittings on the block water outlets would be much shallower than the pump itself) as well as an electric powersteering pump. by doing so i can have the accesory drive - which will consist of an alt. beltg and an A/C belt - run under the brace , while the water and steering pumps be located somewhere else .i've looked into MR2 pumps , and after some deep research , i found out that skoda Fabia's, Seat Ibiza's , Mercedes A class and BMW mini's all have electric power steering pumps,,,,, then i found the big surprise : the poreshe 996 GT3 CUP had electric power steering from the factory! which means i might find a bolt in electric power steering if i look hard for it
so now i'm researching more into the electric power steering route to see if i can use it or not and to see if it is reasonably priced to go with .
04-30-2010, 10:14 PM
#179
Looks like you're on the right track. I've got the MR2 turbo pump. Even with the "sensor control computer" it'll pull 80 amps. Good luck with the GT3 cup pump
I actually ran my power rack without the pump or any pressure going to it for 2 seasons without problems and loved it. That was with relatively narrow (225) front tires. The parking lot REQUIRED two hands yanking the wheel since the power racks are a much quicker ratio than the manual. It really wasn't a problem, just kinda gave the car more character. Just primed the entire system from time to time to make sure the seals didn't go out.
I actually ran my power rack without the pump or any pressure going to it for 2 seasons without problems and loved it. That was with relatively narrow (225) front tires. The parking lot REQUIRED two hands yanking the wheel since the power racks are a much quicker ratio than the manual. It really wasn't a problem, just kinda gave the car more character. Just primed the entire system from time to time to make sure the seals didn't go out.