


 I've junked better than that.

The MoneyBu build thread

Thread Starter
Teching In
Joined: Feb 2010
Posts: 23
Likes: 0
From: Bridgewater, MA
Haven't worked on the car in a while (have been giving the daily driver some attention) but this is the last of the progress I had made.
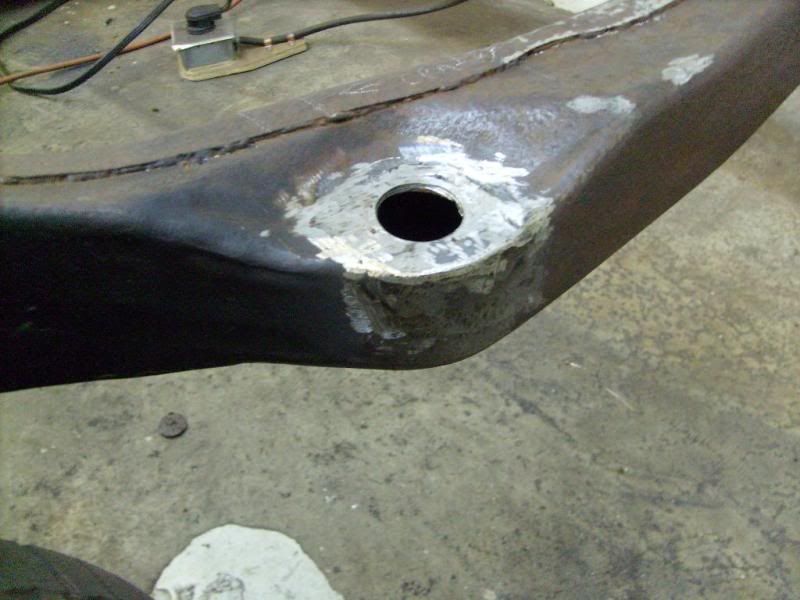
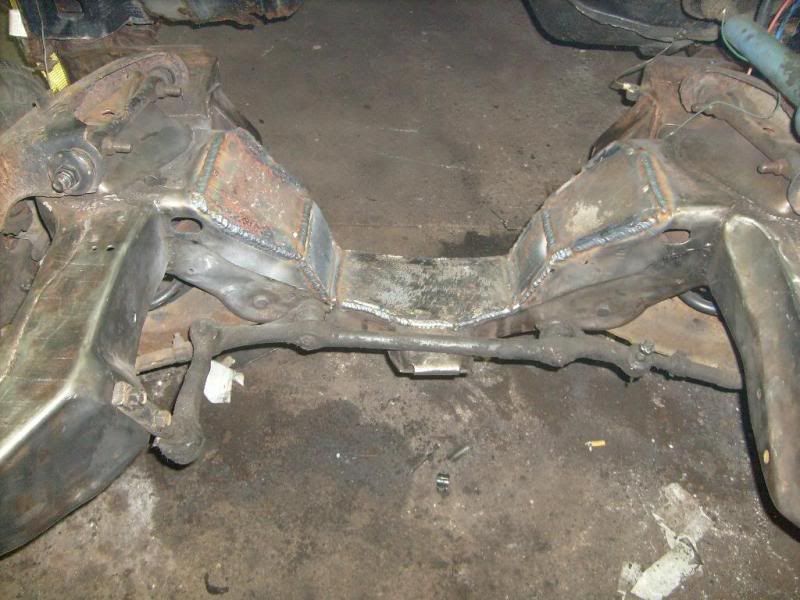
I had to rebuild four of the body mounts, here they are after repair. Sorry, no before pictures.
Rear-ish body mounts
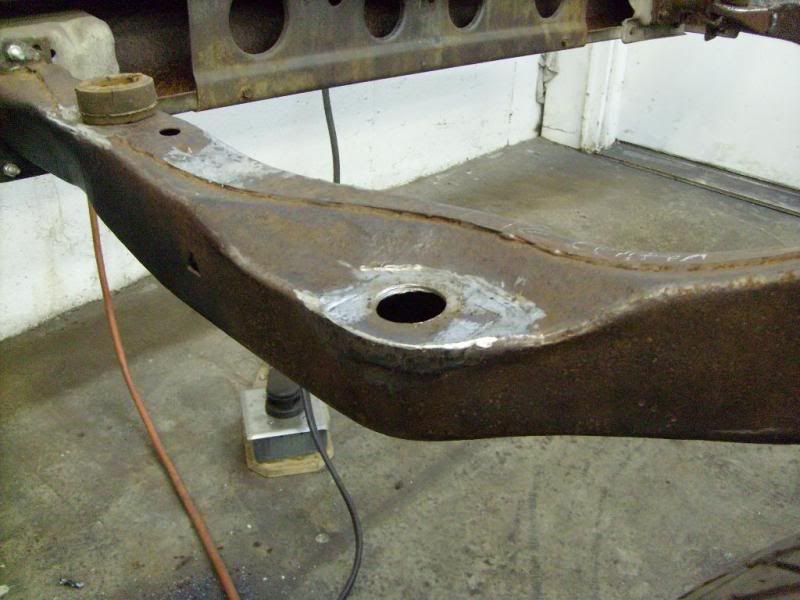
Front-ish body mounts
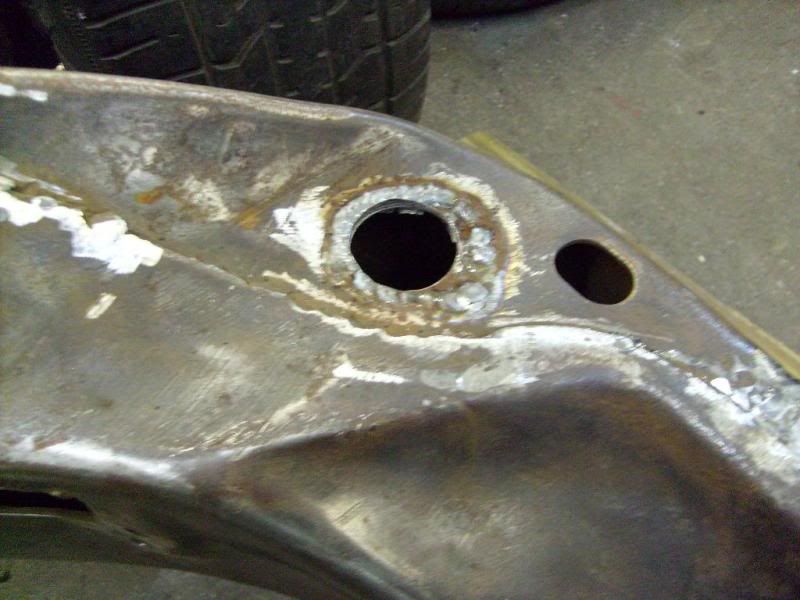

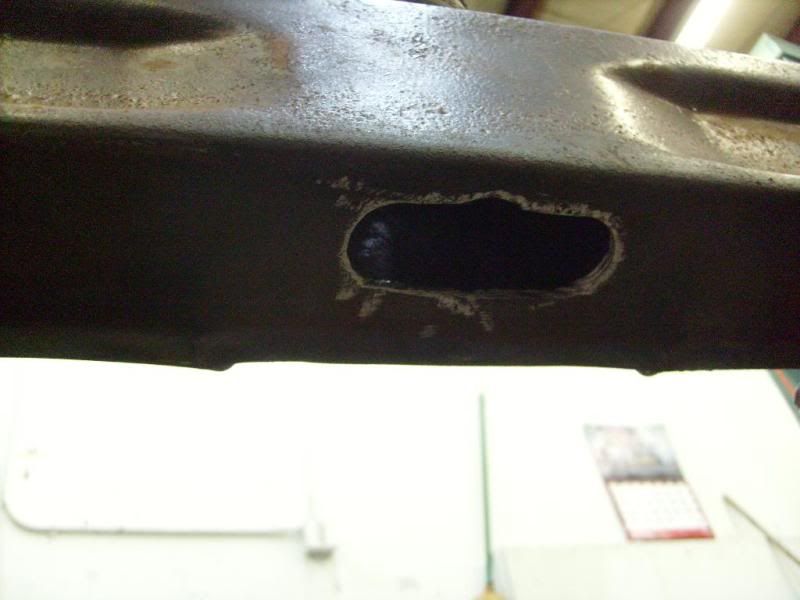
This is my solution to the middle body mounts everyone was so worried about. I cut an oval into the frame and the body mount goes in on edge and has room to spin into the correct position.
I got the frame into a roller, unfortunately it has all the stock parts (at the moment) but I did get some 5660 springs for the front and installed those. I also have the tire size on the front I'm going to run, I did this so the to get the correct ride height for the next stage of mockup so I can set my angles and whatnot when I build my crossmembers.
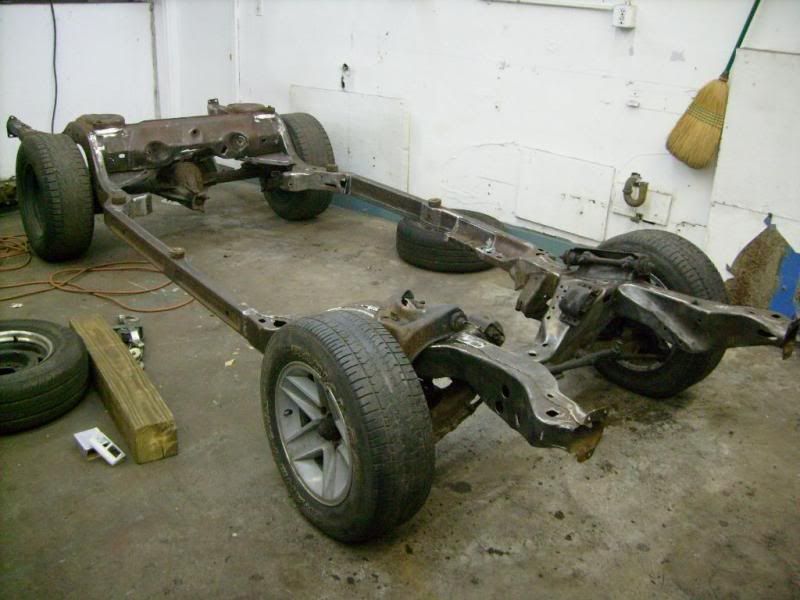
I set the body on the frame, no spreading issues. Only part that needs some coercing is one of the framerails at the end, its down a little bit. Just need to chain the frame down and bend it up. The body still needs to be bolted down and then I can do the last of my fabwork on the frame. After that the body comes back off and the frame gets painted.
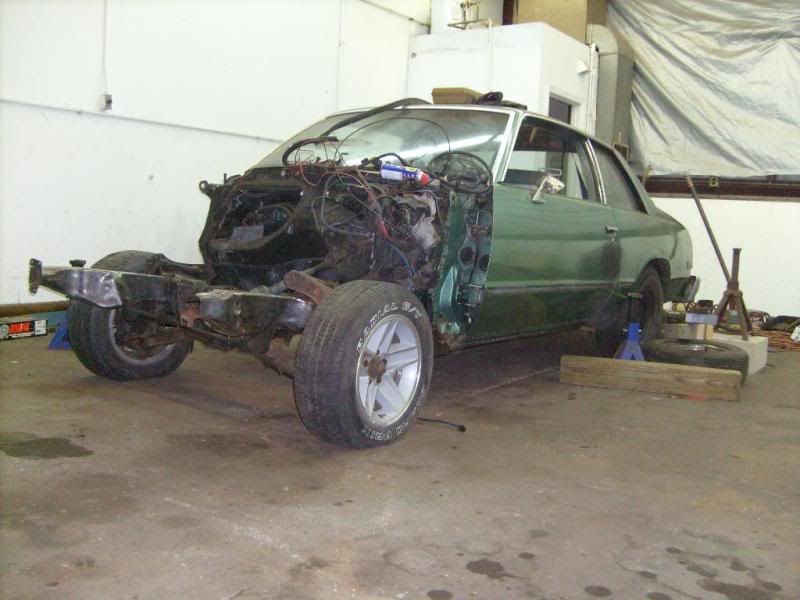
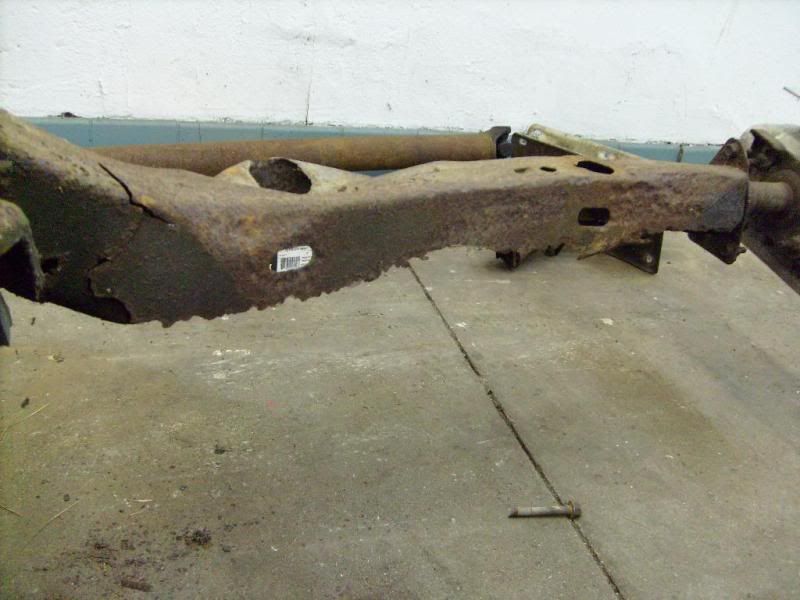
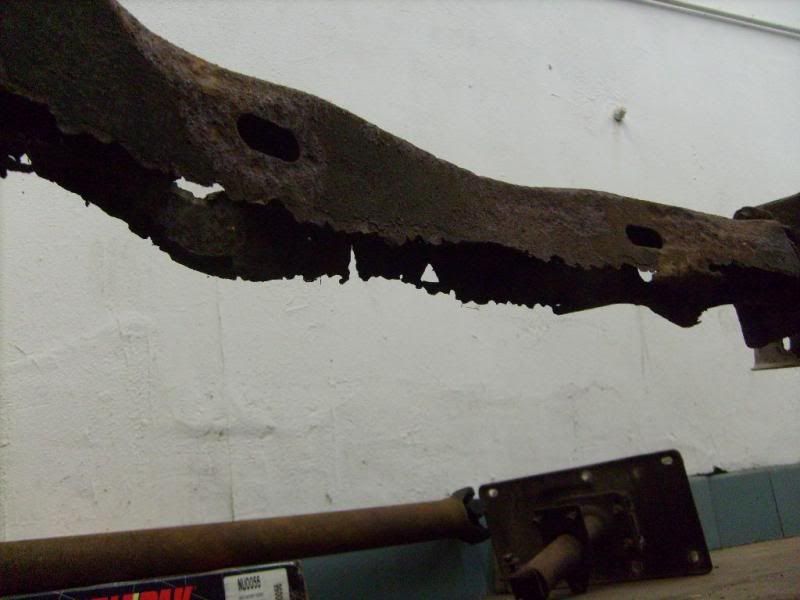
Oh, and this why I didn't use the frame frame the green car haha. I ripped the framerail off by hand.
I had to rebuild four of the body mounts, here they are after repair. Sorry, no before pictures.
Rear-ish body mounts
Front-ish body mounts
This is my solution to the middle body mounts everyone was so worried about. I cut an oval into the frame and the body mount goes in on edge and has room to spin into the correct position.
I got the frame into a roller, unfortunately it has all the stock parts (at the moment) but I did get some 5660 springs for the front and installed those. I also have the tire size on the front I'm going to run, I did this so the to get the correct ride height for the next stage of mockup so I can set my angles and whatnot when I build my crossmembers.
I set the body on the frame, no spreading issues. Only part that needs some coercing is one of the framerails at the end, its down a little bit. Just need to chain the frame down and bend it up. The body still needs to be bolted down and then I can do the last of my fabwork on the frame. After that the body comes back off and the frame gets painted.
Oh, and this why I didn't use the frame frame the green car haha. I ripped the framerail off by hand.
The rear portion of that frame was in bad shape... My neighbor had a malibu and he's looked he same way rear bumper just dropped on its own one day...
Good repair work on the replacement frame...
Good repair work on the replacement frame...
Thread Starter
Teching In
Joined: Feb 2010
Posts: 23
Likes: 0
From: Bridgewater, MA
Hey guys, haven't had any updates on the car in a while...have taken some time to get my daily driver looking a little better. After hitting a couple deer and getting in an accident the truck was looking pretty rough.
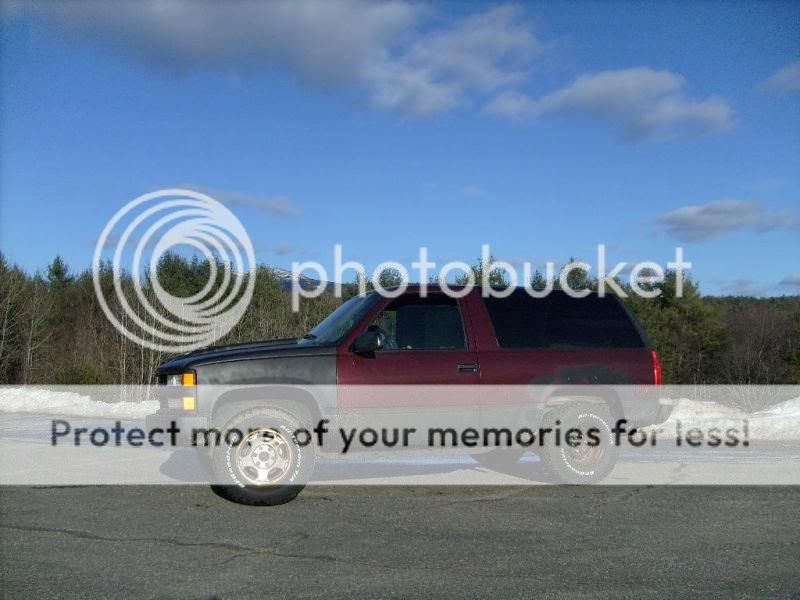
Now I still need to do some finishing work and am waiting for some parts to come out of paint, but you get the idea. The color is John Deere Blitz black and the truck was painted by Riverside Auto Body in Brockton, MA who I would highly recommend.

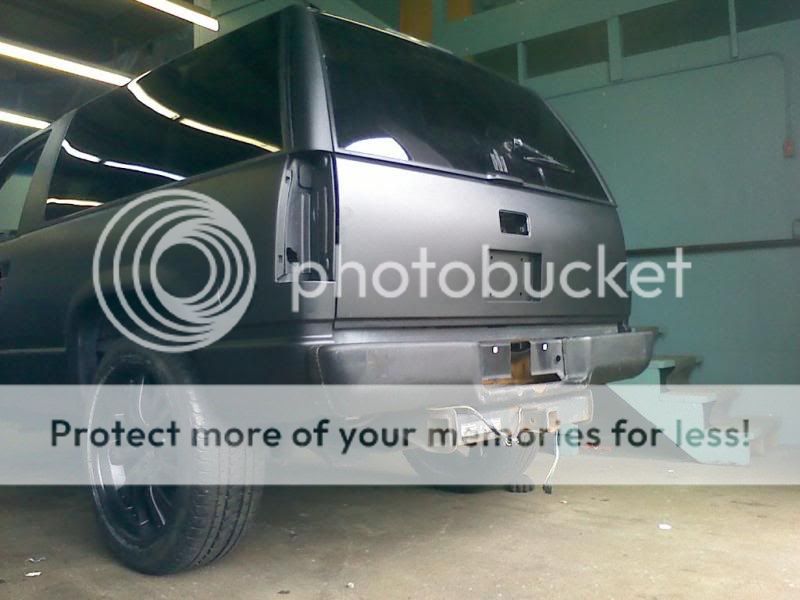
It's a '95 Tahoe and it has shaved roof-racks, shaved antenna, tucked rear bumper, license plate in the tailgate, 22's, and a dual exhaust. Other than that its pretty much stock. Once this is back together, I will be back to Malibu updates.
Now I still need to do some finishing work and am waiting for some parts to come out of paint, but you get the idea. The color is John Deere Blitz black and the truck was painted by Riverside Auto Body in Brockton, MA who I would highly recommend.
It's a '95 Tahoe and it has shaved roof-racks, shaved antenna, tucked rear bumper, license plate in the tailgate, 22's, and a dual exhaust. Other than that its pretty much stock. Once this is back together, I will be back to Malibu updates.
What are you going to do with the old license plate area since you moved it to the rear door / tailgate?
Is the color flat black or flat gunmetal gray? Interesting.
You almost need a gun turret on the roof and a push bumper now. Think of all the "respect" you would get in traffic!
Is the color flat black or flat gunmetal gray? Interesting.
You almost need a gun turret on the roof and a push bumper now. Think of all the "respect" you would get in traffic!
LS1 Tech Stories
The Best V8 Stories One Small Block at Time

Topdon ONE vs. Artidiag 800 BT2: Which is the Diagnostic Tablet For You?
Pouria Savadkouei
Gas Monkey Built a 6-Wheel Ferrari Testarossa With a Corvette LT4 Engine
Verdad Gallardo
7 Most Reliable High-Performance Engines GM Has Ever Built
Verdad Gallardo
Amazing '71 Camaro Restomod Is Modern Muscle Car Under the Skin
Verdad Gallardo
6 Common C5 Corvette Failures and What's Involved In Repairing Them
Pouria Savadkouei
Retro Modern Bandit Pontiac Trans AM Comes With Burt Reynolds' Autograph
Verdad Gallardo
Top 10 Greatest Cadillac V Series Performance Models Ever, Ranked
Pouria Savadkouei
Top 10 Most Powerful Chevy Trucks Ever Made!

Hennessey's New Supercharged Silverado ZR2 Has 700 HP
Verdad Gallardo Thread Starter
Teching In
Joined: Feb 2010
Posts: 23
Likes: 0
From: Bridgewater, MA
I have a rear bumper for the truck that I cut down, tucked, and smoothed out. I will post pictures soon, I have a nice little detail in the plate area.
The color is actually a John Deere color, Blitz black its called. Its a semi gloss black, same as hot rod black.
I wish I could get away with a gun turret on the roof haha. The trucks pretty loud, and I drive it like a fool...it gets plenty of respect on the road lol
The color is actually a John Deere color, Blitz black its called. Its a semi gloss black, same as hot rod black.
I wish I could get away with a gun turret on the roof haha. The trucks pretty loud, and I drive it like a fool...it gets plenty of respect on the road lol
What are you going to do with the old license plate area since you moved it to the rear door / tailgate?
Is the color flat black or flat gunmetal gray? Interesting.
You almost need a gun turret on the roof and a push bumper now. Think of all the "respect" you would get in traffic!
Is the color flat black or flat gunmetal gray? Interesting.
You almost need a gun turret on the roof and a push bumper now. Think of all the "respect" you would get in traffic!
Last edited by MoneyBu; Apr 5, 2010 at 12:13 PM.
Thread Starter
Teching In
Joined: Feb 2010
Posts: 23
Likes: 0
From: Bridgewater, MA
Thank you, I'm trying to have a real old school feel with this car. I can't afford a "real" muscle car, so I'm building my own. I'm probably going to start working on the car again at the end of this week/start of next...keep checking this, theres a lot of cool stuff to come.
Last edited by MoneyBu; Apr 5, 2010 at 04:52 PM.
Thread Starter
Teching In
Joined: Feb 2010
Posts: 23
Likes: 0
From: Bridgewater, MA
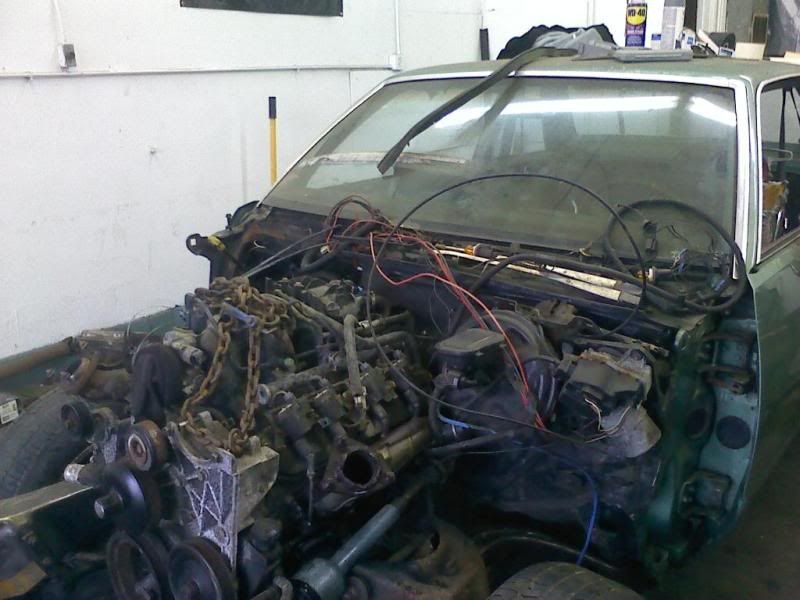
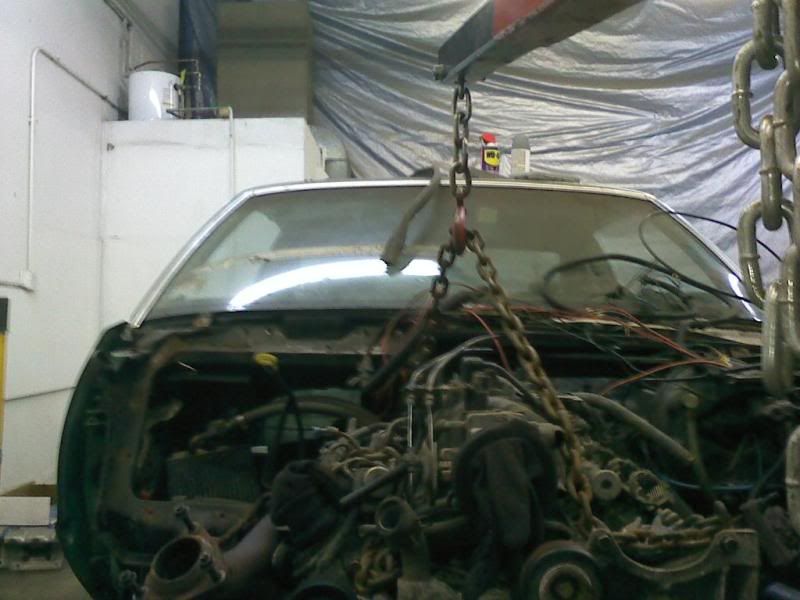
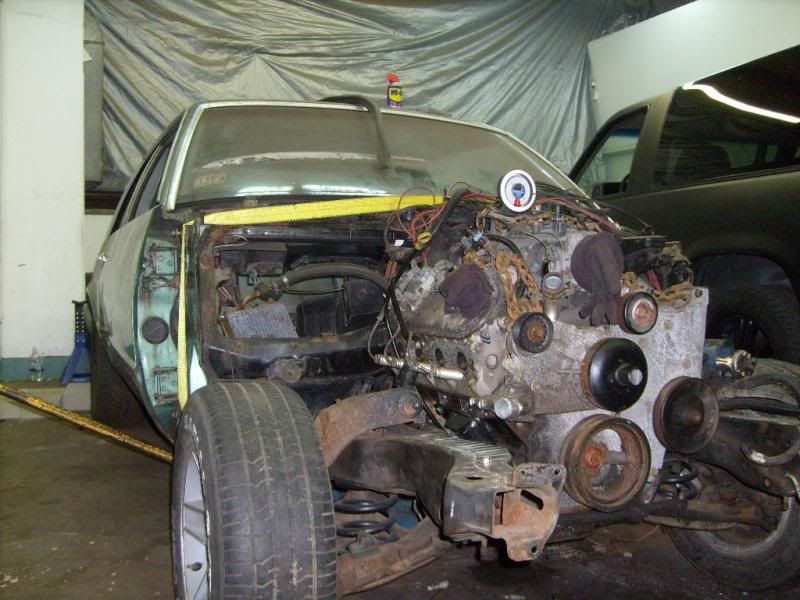
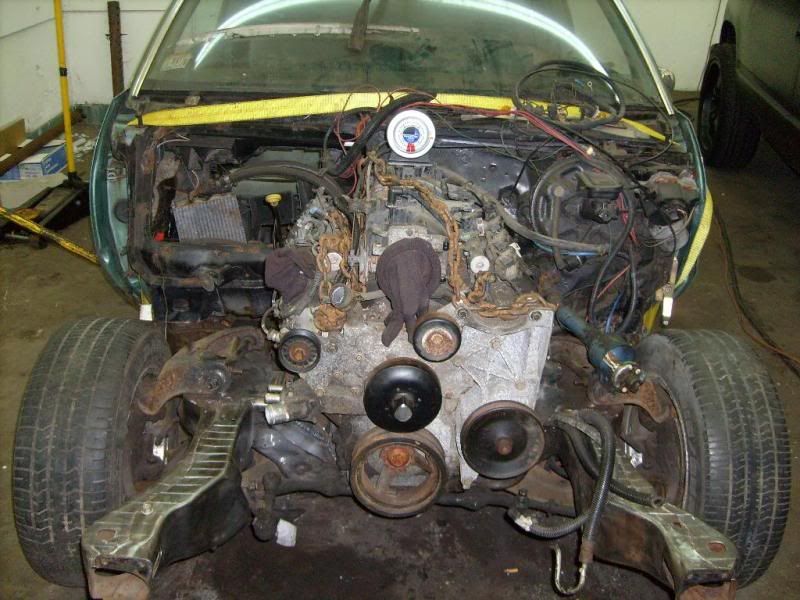
This is the only progress picture I have as of lately. This is just a test fit of the motor, still trying to figure out a solution to my motor mounting problem. Not having money is really putting a damper on the project right now, but hopefully soon I'll be back to good updates.
Thread Starter
Teching In
Joined: Feb 2010
Posts: 23
Likes: 0
From: Bridgewater, MA
So I started working on the car again, and have made some good progress. Gonna keep jammin' away at it 'till I lose my shop space at the end of the month.
Anyway, I'd been stumped with my motor mount issue and had unbolted the frame stands and was ready to drill new holes when I decided to check for hood clearance. Good thing I did, this car is going to have a flat hood and the motor was too tall by about an 1"-1 1/2."
So I pulled the motor back out and decided to notch my crossmember. Before.
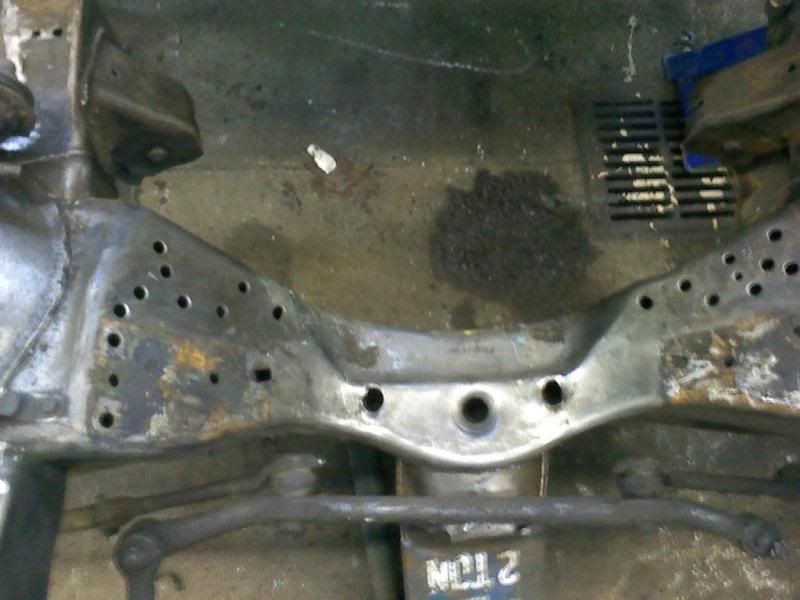
First cut
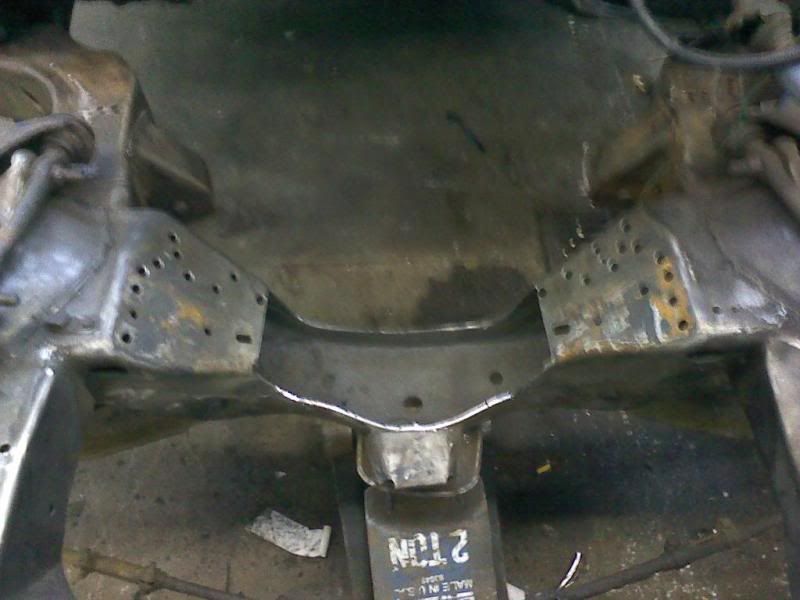
Test fit of the motor (not the best pictures but you can see how low it sits)
I ended up cutting a little more out and today I started plating it back up, using heavier steel (think it's 3/16") I tried getting a picture but it wasn't happening...going to bring my camera tomorrow. I should also add that I am changing motor mount style, not going to use the clamshells.I instead switched to some mounts included with the adapter plates, I think they are an older style GM mount.
Aside from this work, I've collected some parts for the car. Bought an '81 grille and header panel this past weekend at a swap meet and I pulled a grand-prix dash yesterday. Should have more updates tomorrow.
Anyway, I'd been stumped with my motor mount issue and had unbolted the frame stands and was ready to drill new holes when I decided to check for hood clearance. Good thing I did, this car is going to have a flat hood and the motor was too tall by about an 1"-1 1/2."
So I pulled the motor back out and decided to notch my crossmember. Before.
First cut
Test fit of the motor (not the best pictures but you can see how low it sits)
I ended up cutting a little more out and today I started plating it back up, using heavier steel (think it's 3/16") I tried getting a picture but it wasn't happening...going to bring my camera tomorrow. I should also add that I am changing motor mount style, not going to use the clamshells.I instead switched to some mounts included with the adapter plates, I think they are an older style GM mount.
Aside from this work, I've collected some parts for the car. Bought an '81 grille and header panel this past weekend at a swap meet and I pulled a grand-prix dash yesterday. Should have more updates tomorrow.
Thread Starter
Teching In
Joined: Feb 2010
Posts: 23
Likes: 0
From: Bridgewater, MA
Got the crossmember plated back up today. Came out pretty good I think.
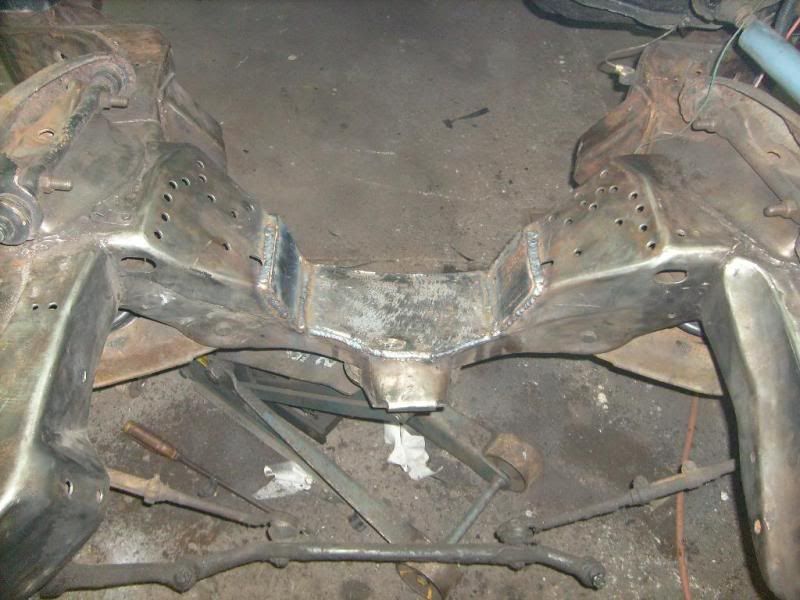
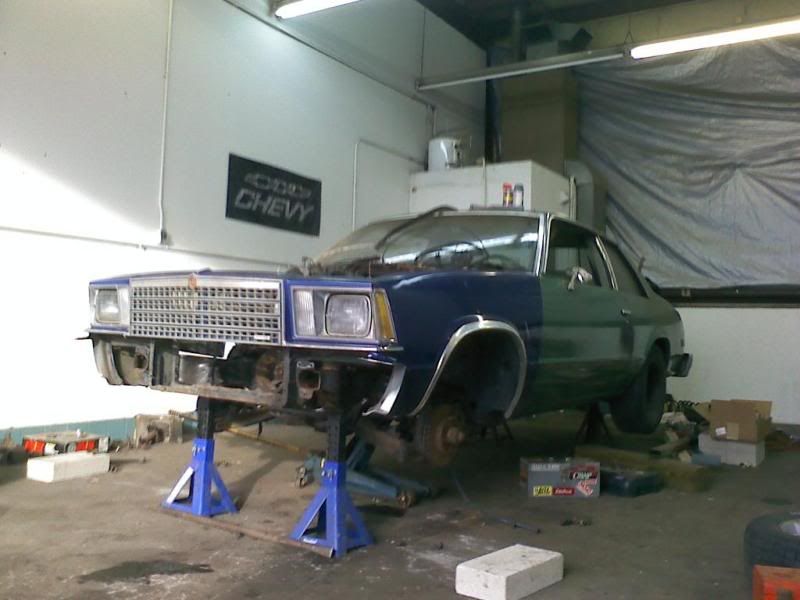
Tomorrow I'm going to bolt the body down, put the car back on the ground and hopefully make my motor mounts. Updates of the progress will be posted. Also want to share this pic I took outside my shop, kinda like it.
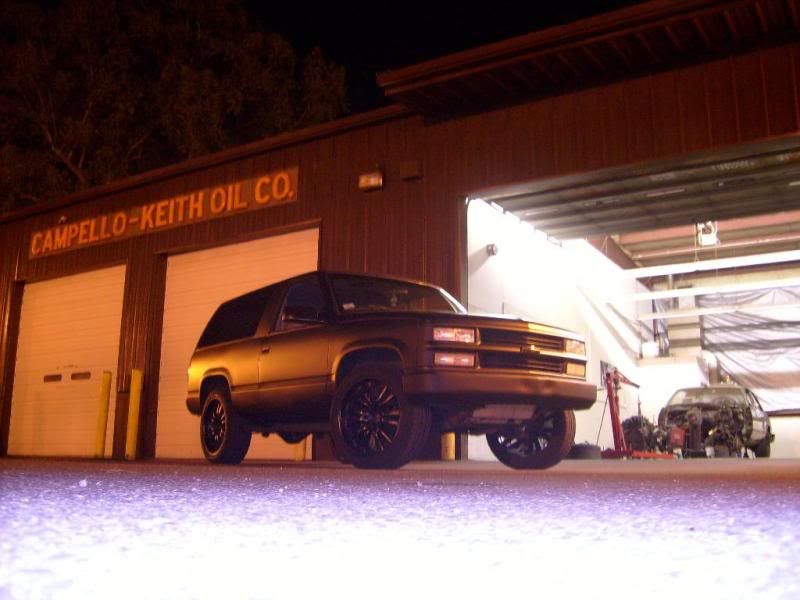
Tomorrow I'm going to bolt the body down, put the car back on the ground and hopefully make my motor mounts. Updates of the progress will be posted. Also want to share this pic I took outside my shop, kinda like it.
Thread Starter
Teching In
Joined: Feb 2010
Posts: 23
Likes: 0
From: Bridgewater, MA
Had a long day working on the car today, bolted the body on and kept at the crossmember.
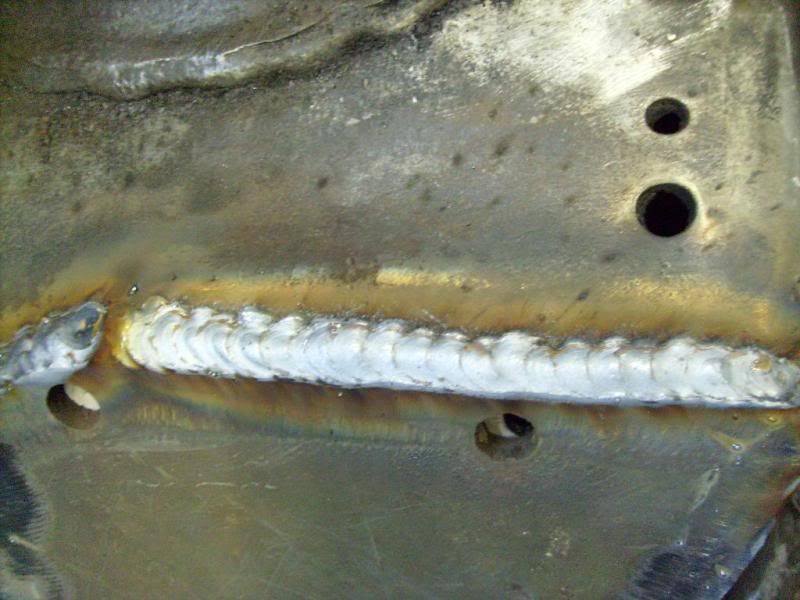
Just gotta weld some tabs on the plates I added and I'll be golden. Heres a close up of a weld on the crossmember, still need some more work but they're getting better.
I put the motor in the car and pulled it out probably 3 or 4 times by myself just to check clearances and to tweak little things here and there. I think this is going to be where the motor sits, just gotta take some more measurements and make some tabs. This is with the transmission in as well on a temporary crossmember I made to help square up the motor.