


The MoneyBu build thread

Thread Starter
Teching In
Joined: Feb 2010
Posts: 23
Likes: 0
From: Bridgewater, MA
This is my first post on the board, figured I might as well make it the start of a build thread. Anyway, I'm Jon and I'm from Bridgewater Ma. This is my first frame-off but not my first build. I"ve put together a couple International Scouts, and an '86 Cutlass along with a bunch of other little things.
The car is one from two. It's a '78 Malibu and its getting a 5.3, 4 speed, and an 8.5
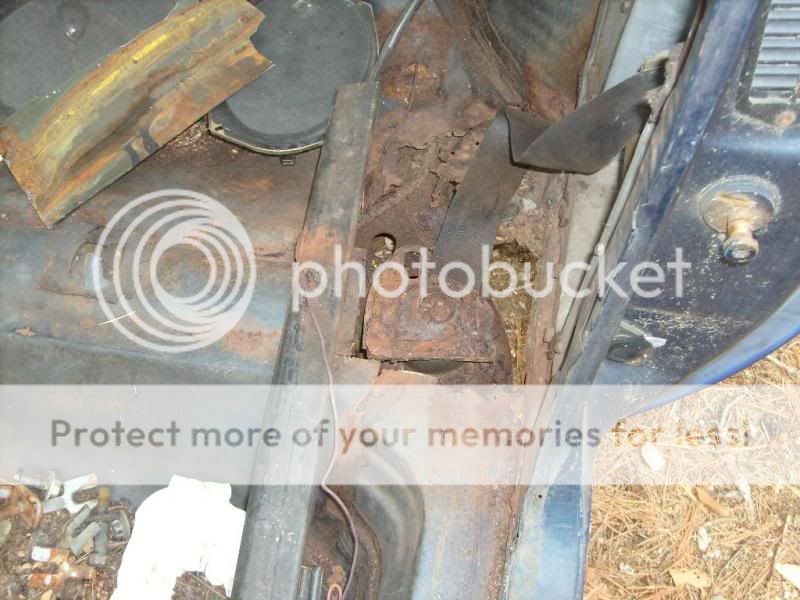
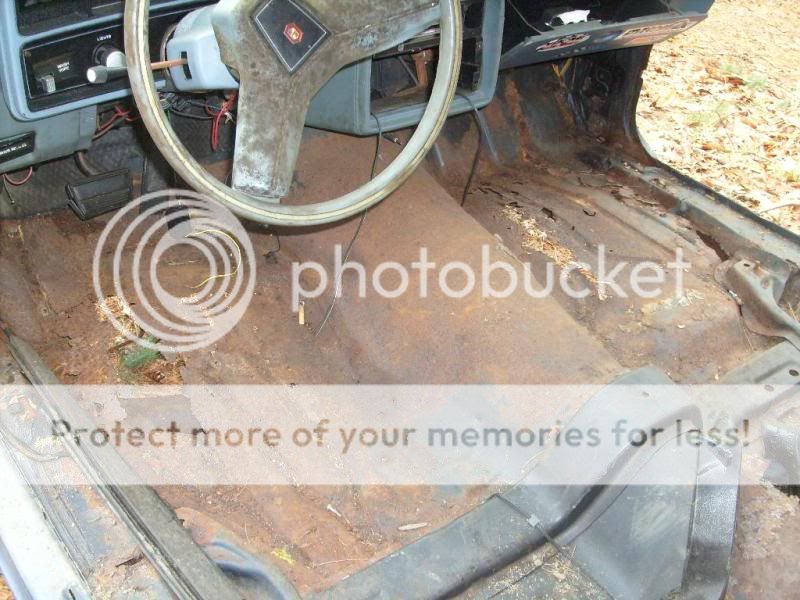
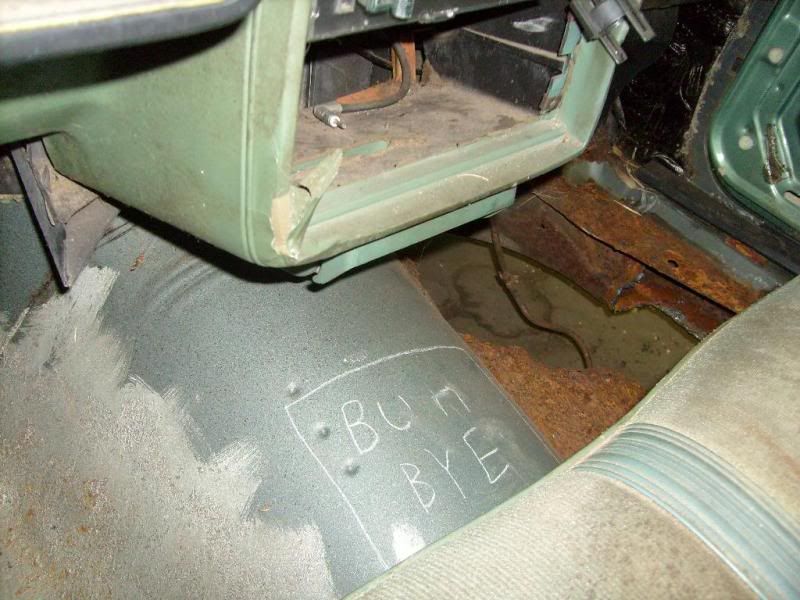
Bought this car over the summer. Rotted floors, solid frame, new shocks/springs, new dual exhaust etc.
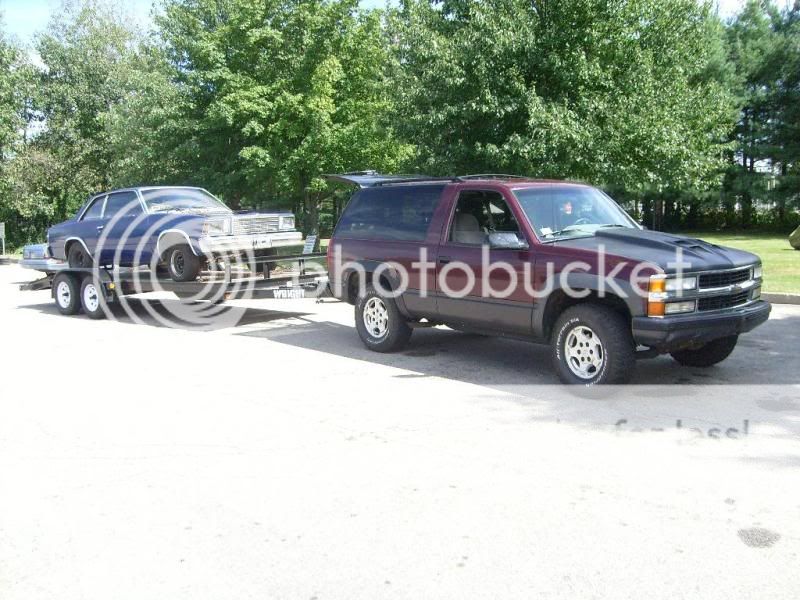


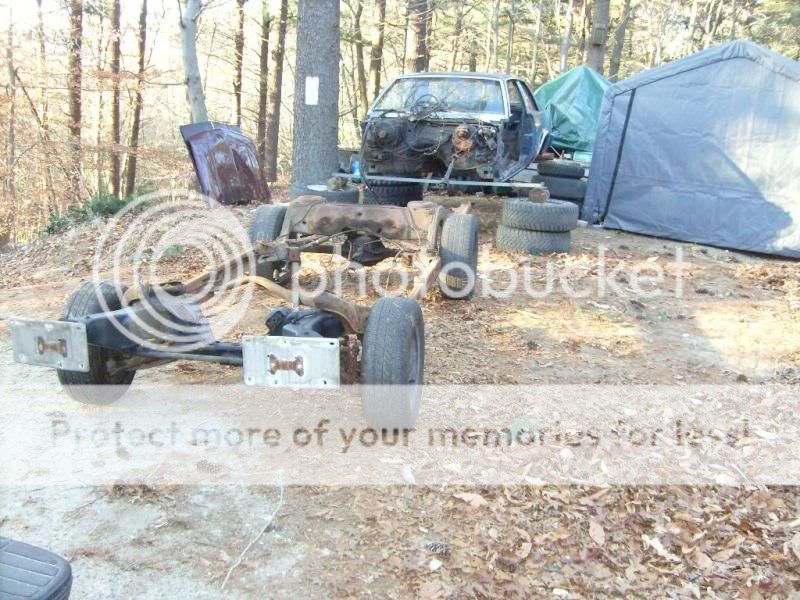
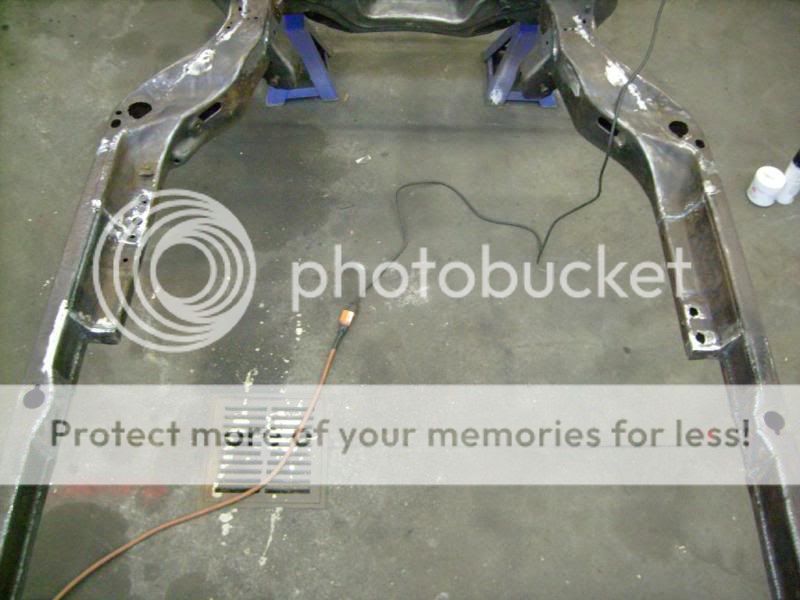
Car has a solid frame, and a really bad body. At first I thought it was just floor pans, but all the body mounts are junk...had to cut the body off the car. Here are some pics of the tear down.
A buddy of mine has had a Malibu project for a few years and hasn't had time to get to it. I've been after the car since I sold my Cutlass and he finally agreed to sell me the car. It has a good body and a shitty frame.
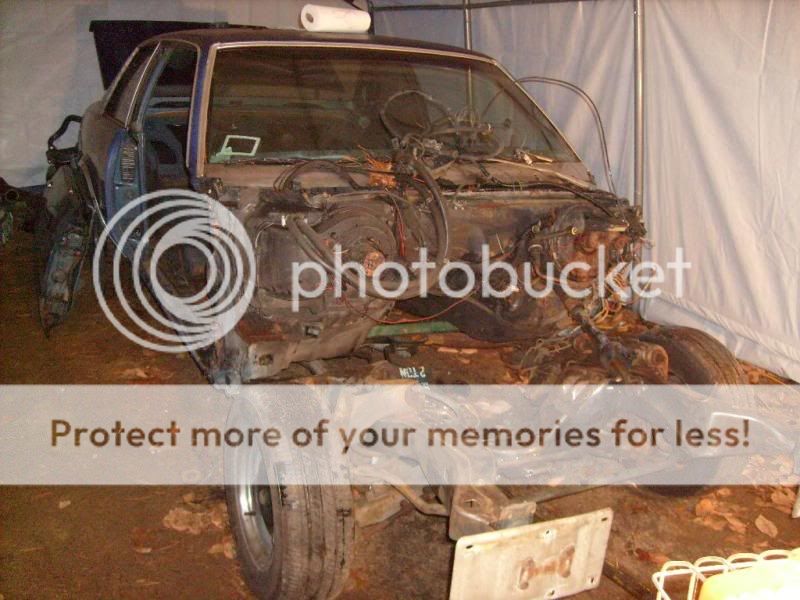
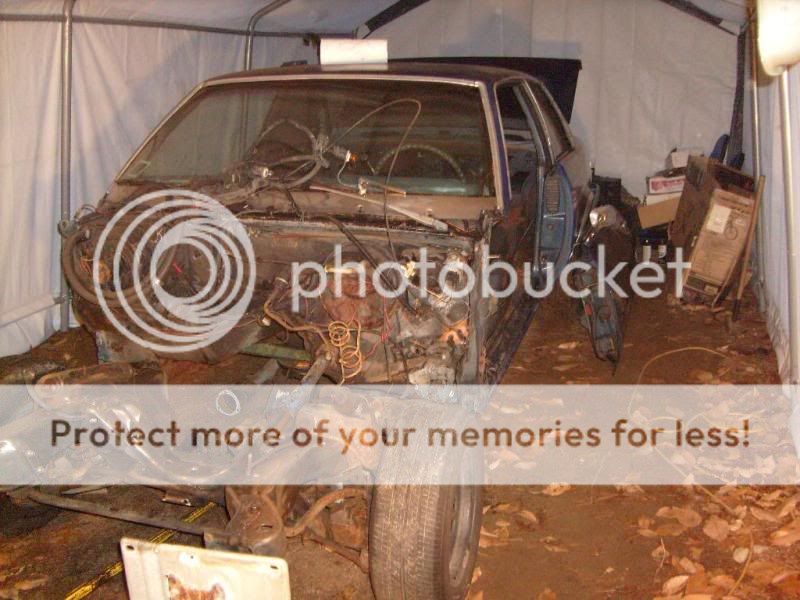
As I said, the floors were real bad and I had to literally cut the body off the car.
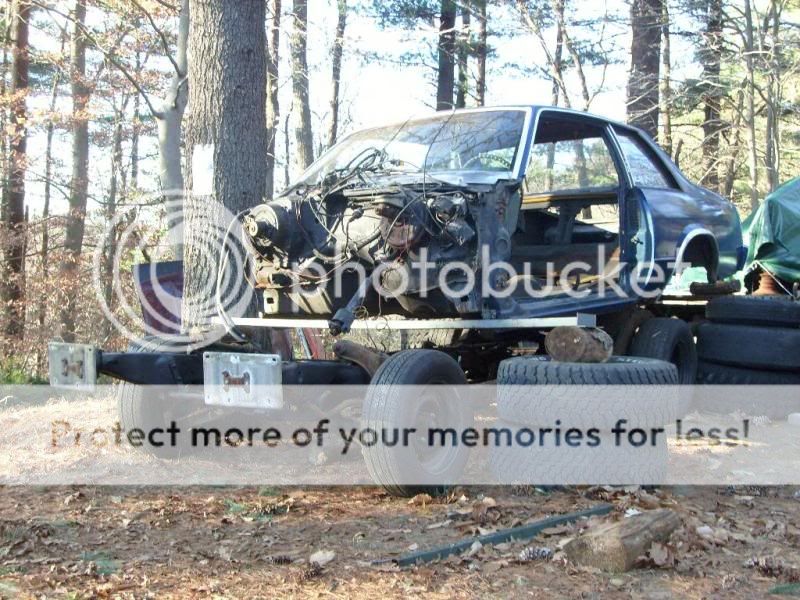
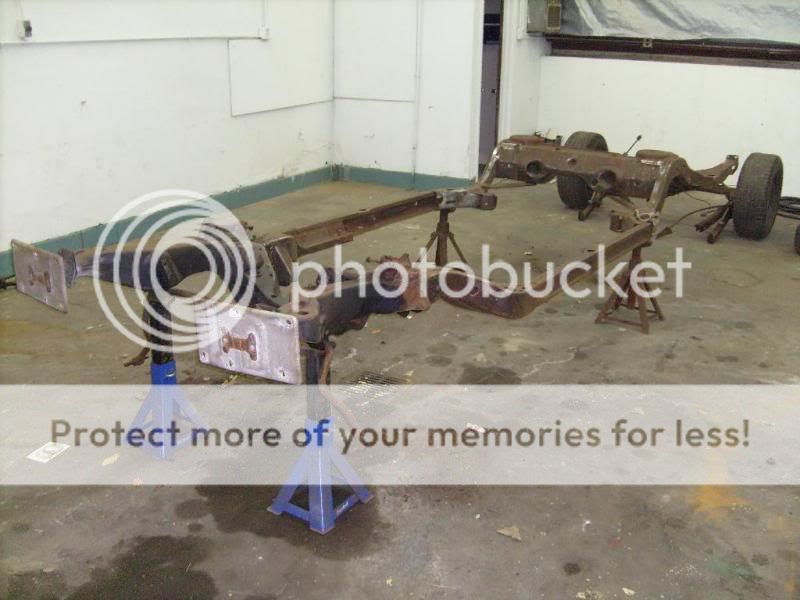
Just before pulling the body and the body off the car.
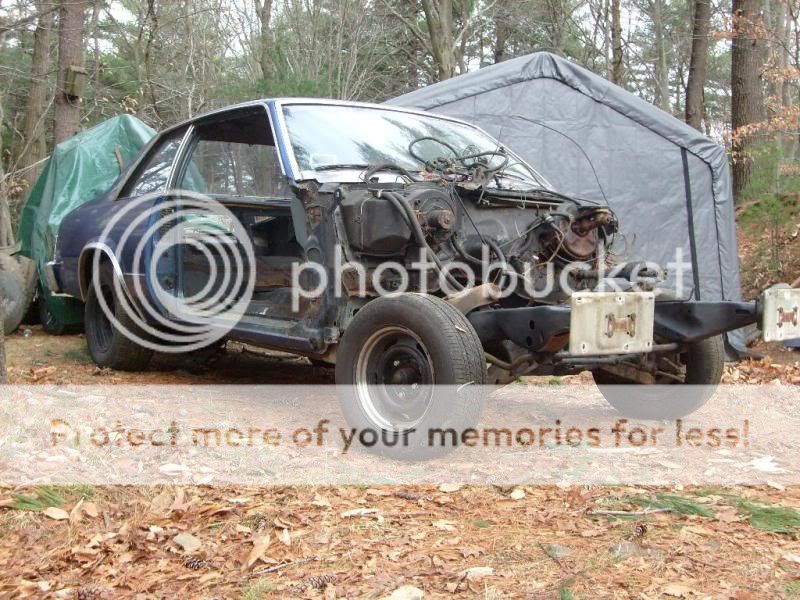
Big thanks to Campello Keith Oil Company and my Dad for letting me use this bay there.
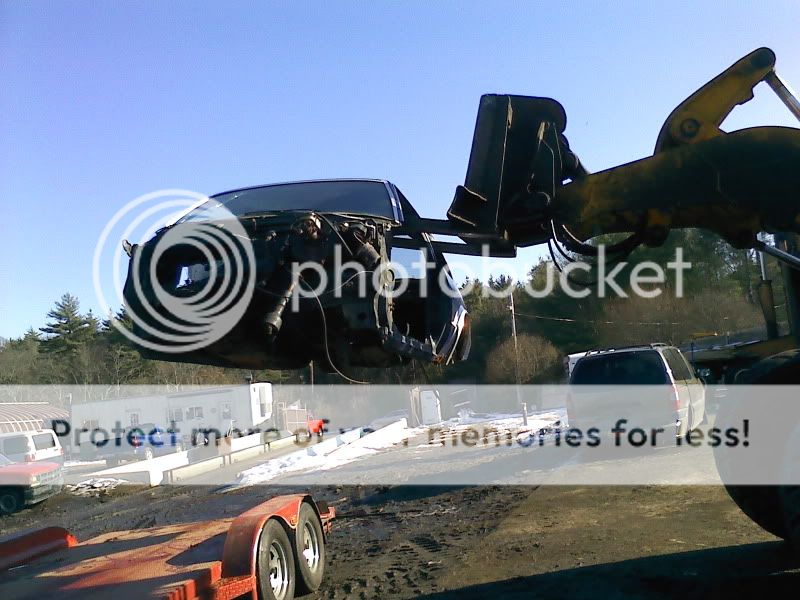
I junked the Blue body.
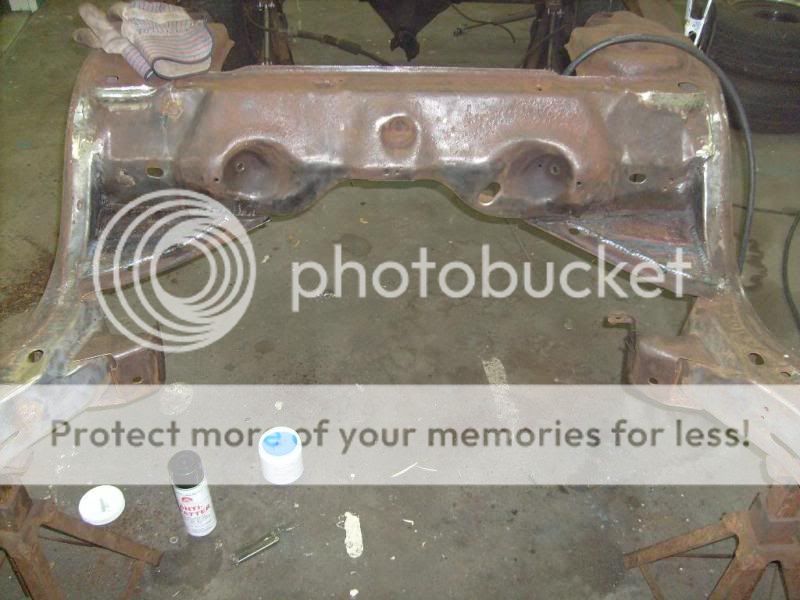
This week I started doing fabwork. I've fixed a ton of shitty factory welds and small spots that needed attention, you can see it in some of the pics. First thing I did was add some bracing.
Before:
After:
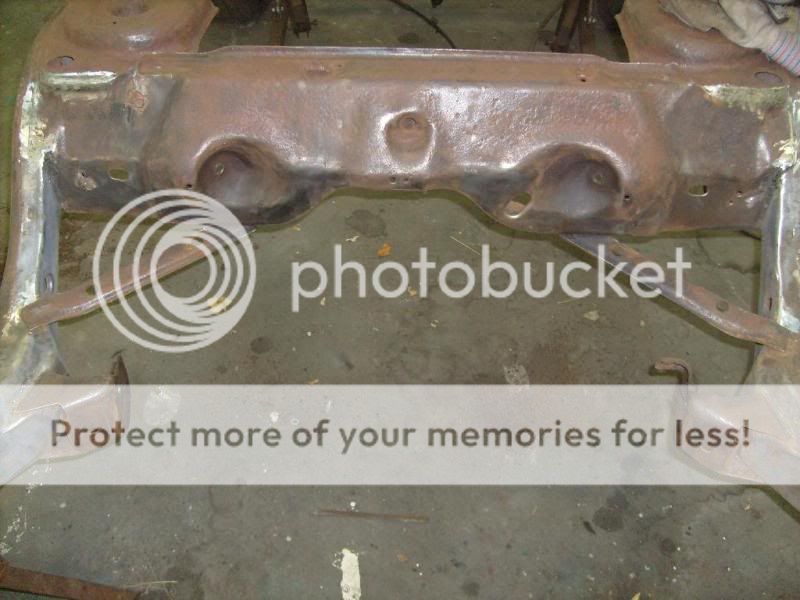
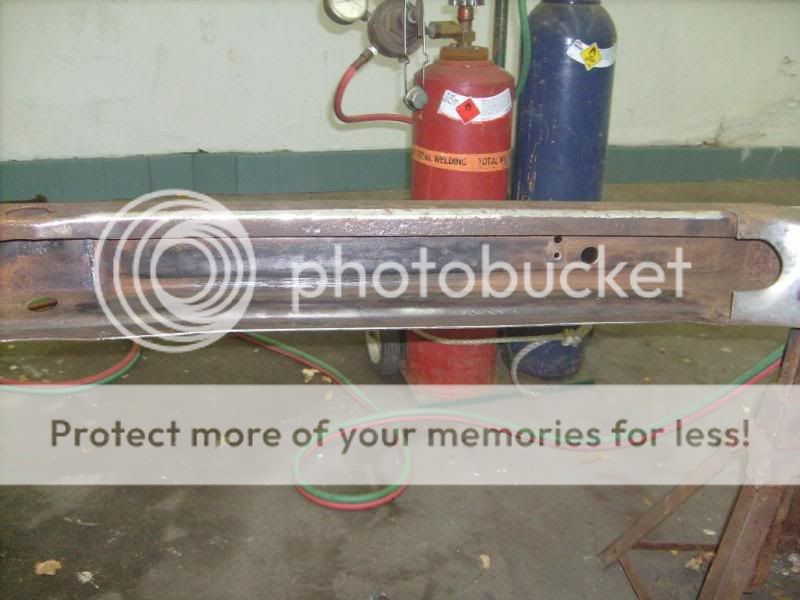
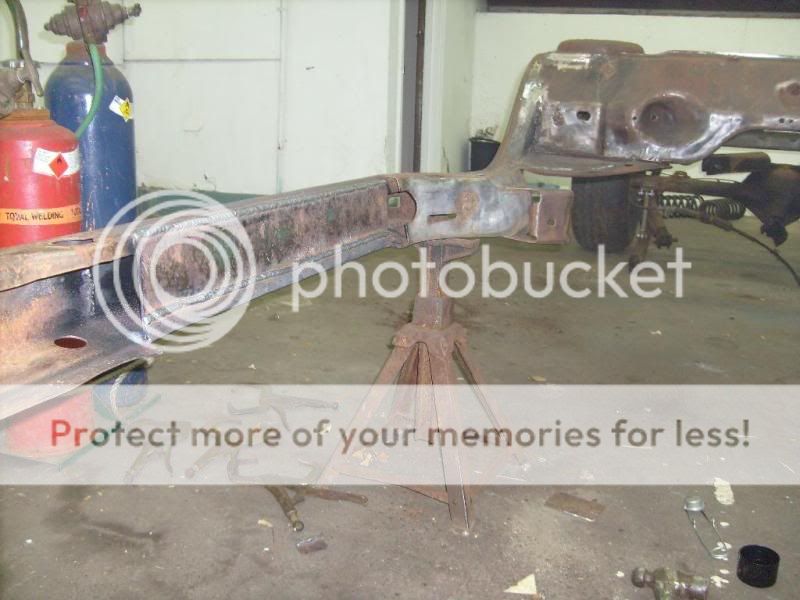
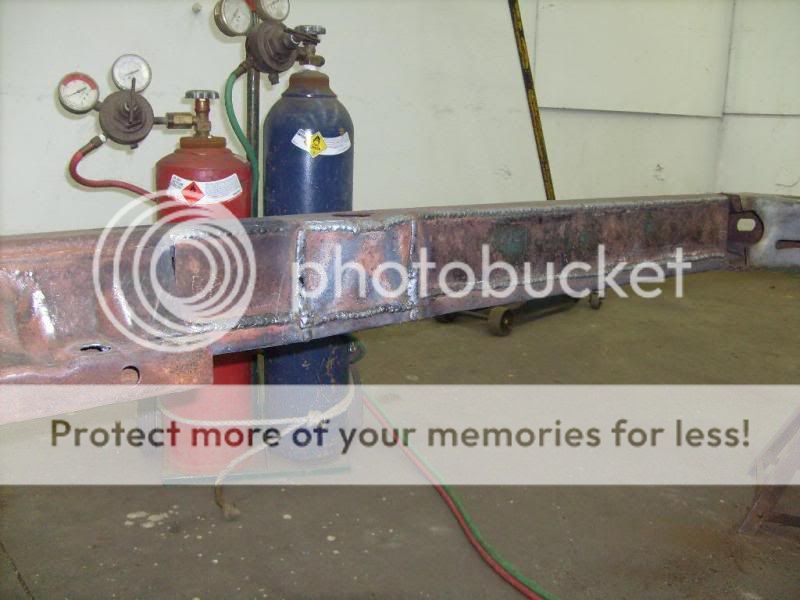
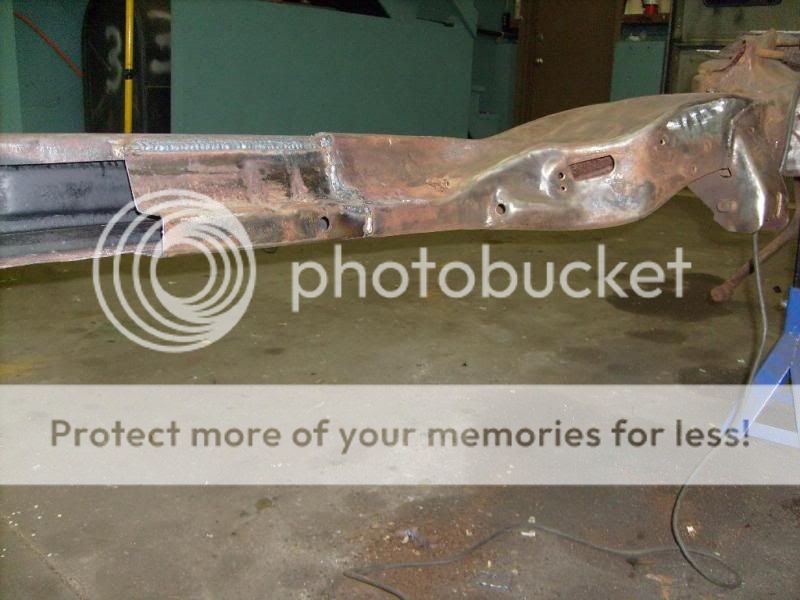
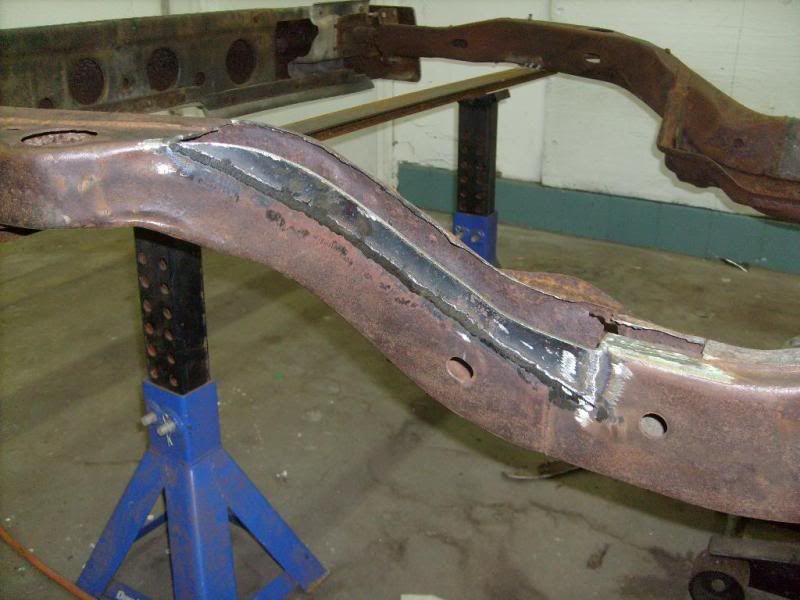
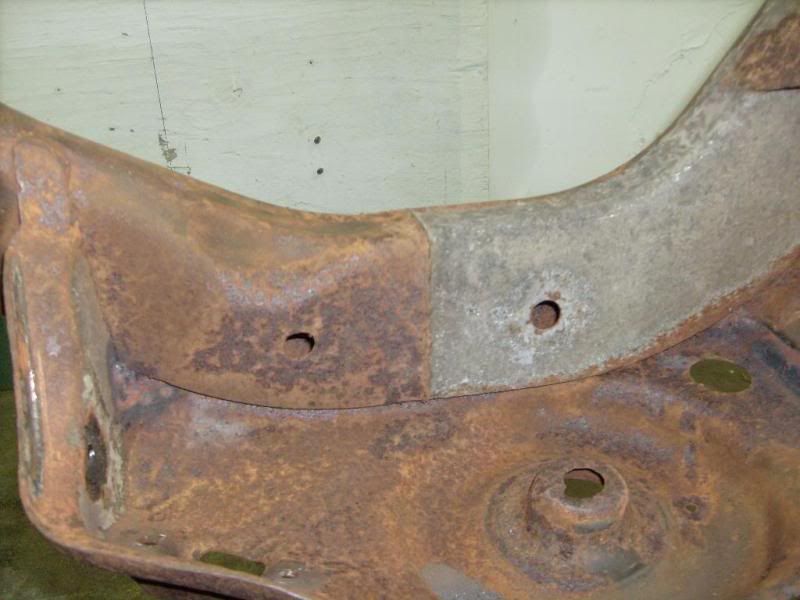
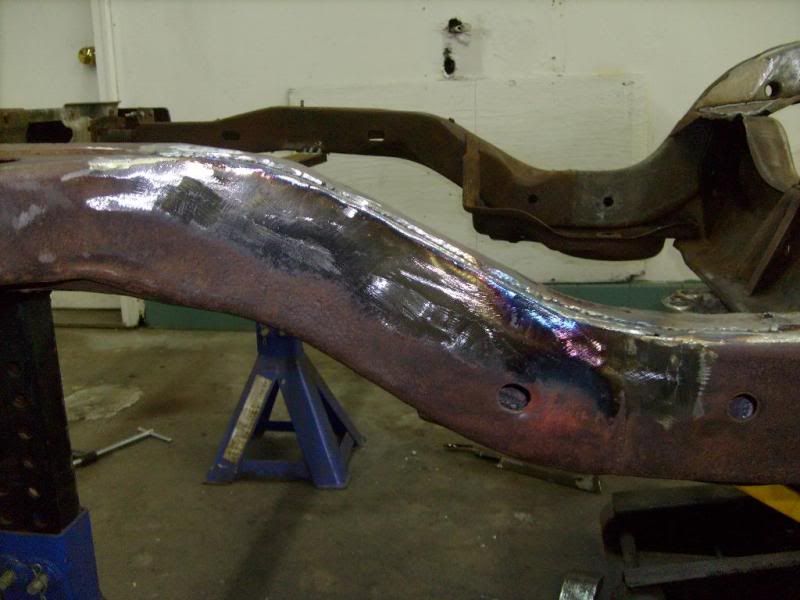
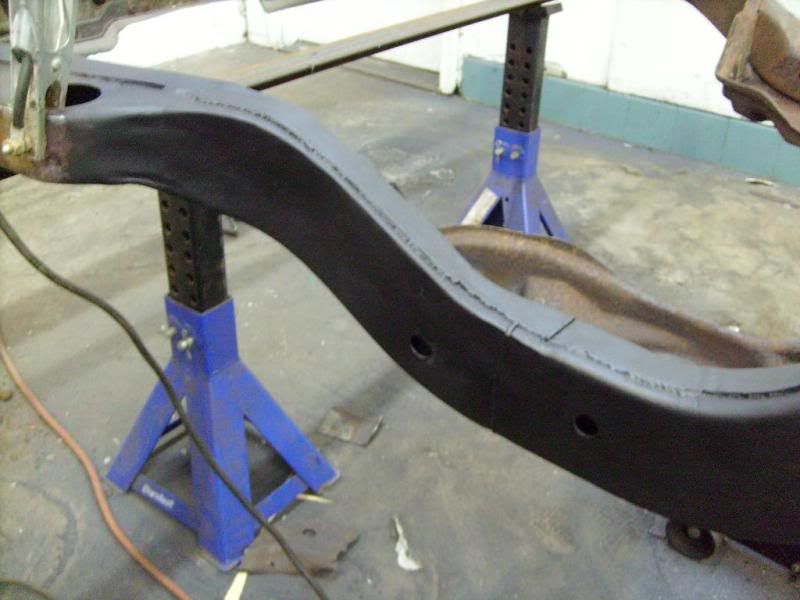
I'm also boxing the frame on this car for extra rigidity. Heres a shot of the framerail before.
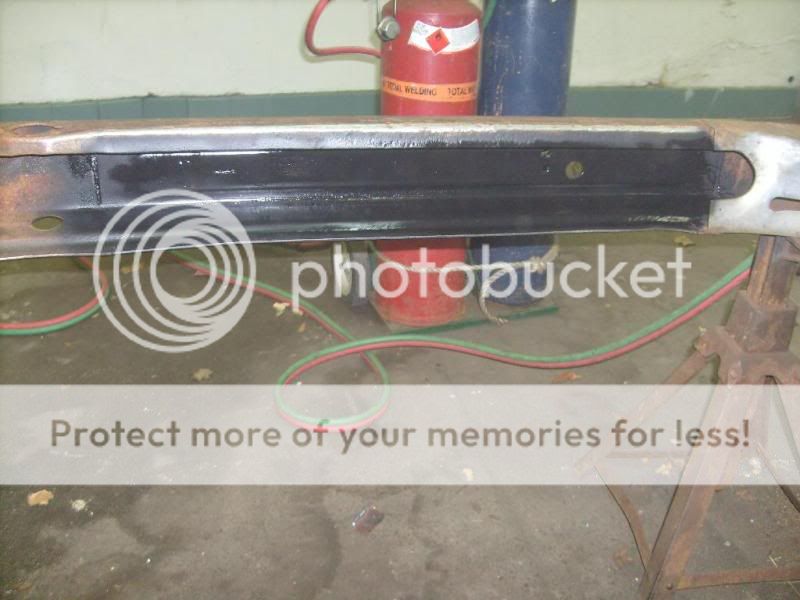
Cleaned/painted inside:
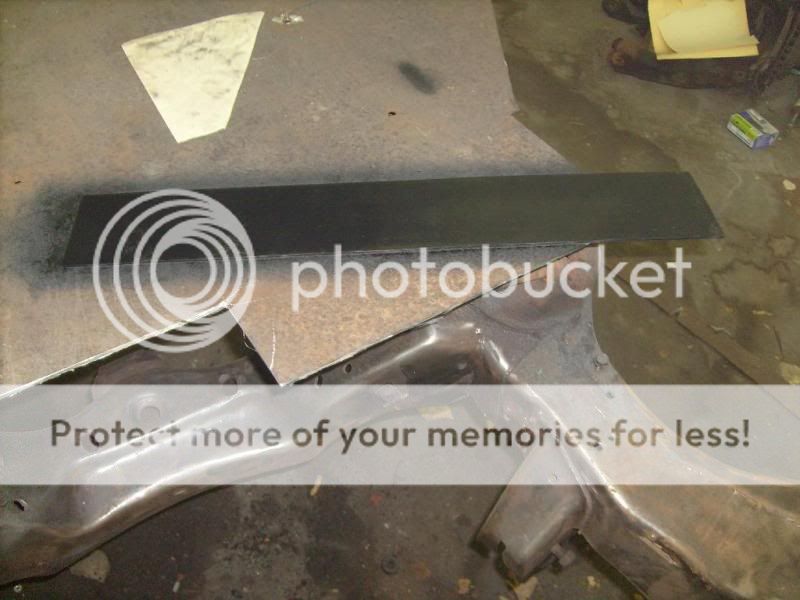
The filler panel with the backside painted up:
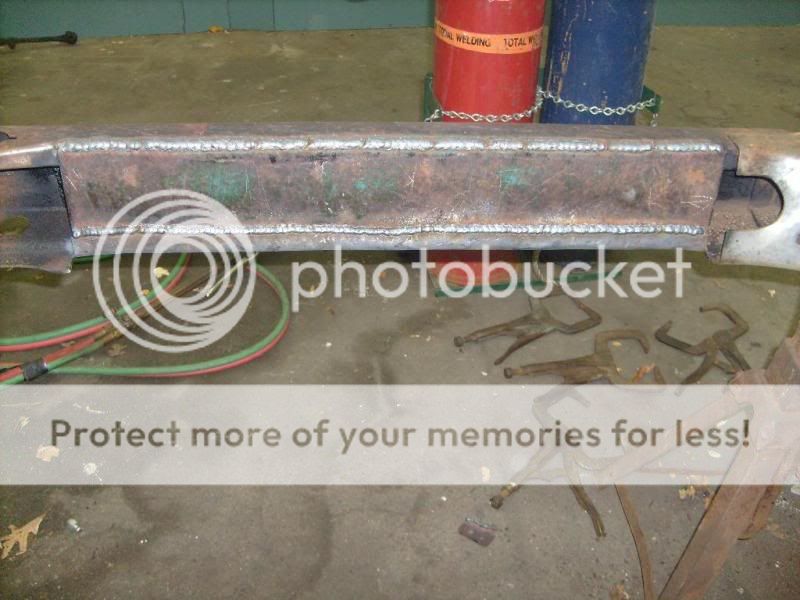
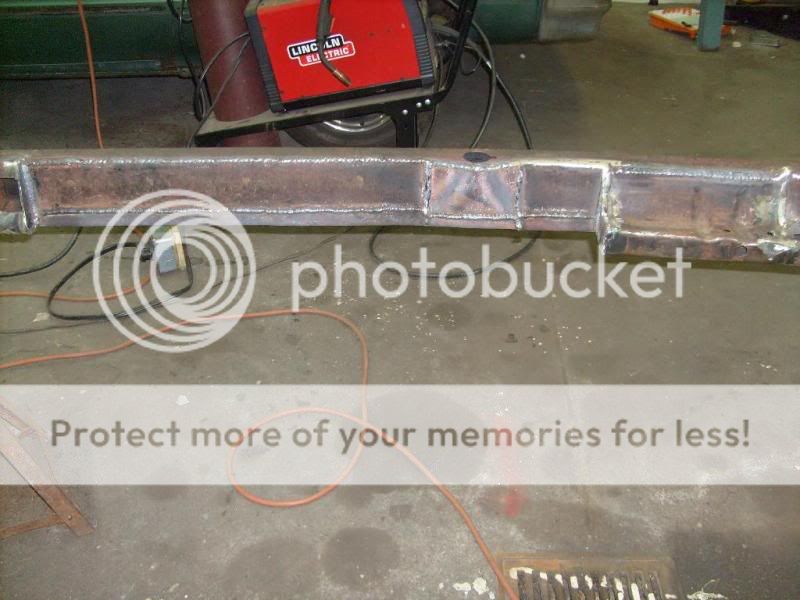
Finally, the first section boxed:
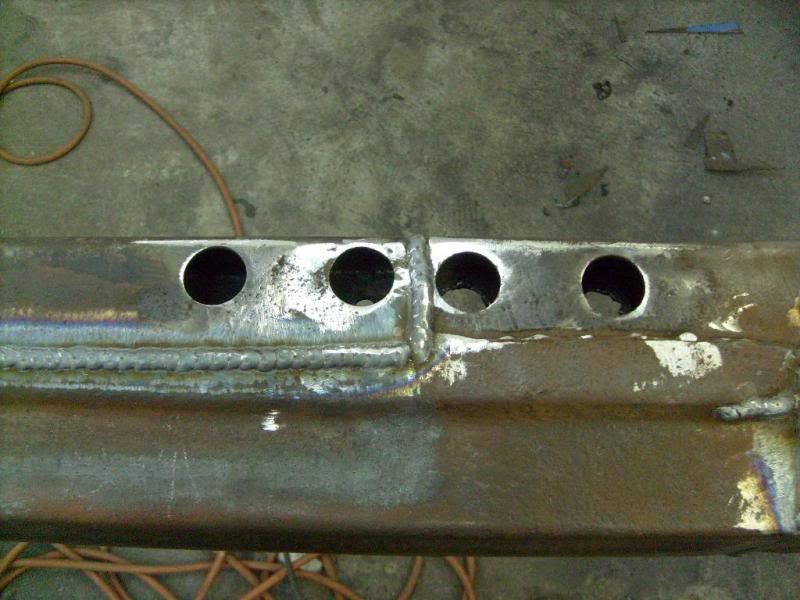
Plug welded some ugly holes I didn't like. Before:
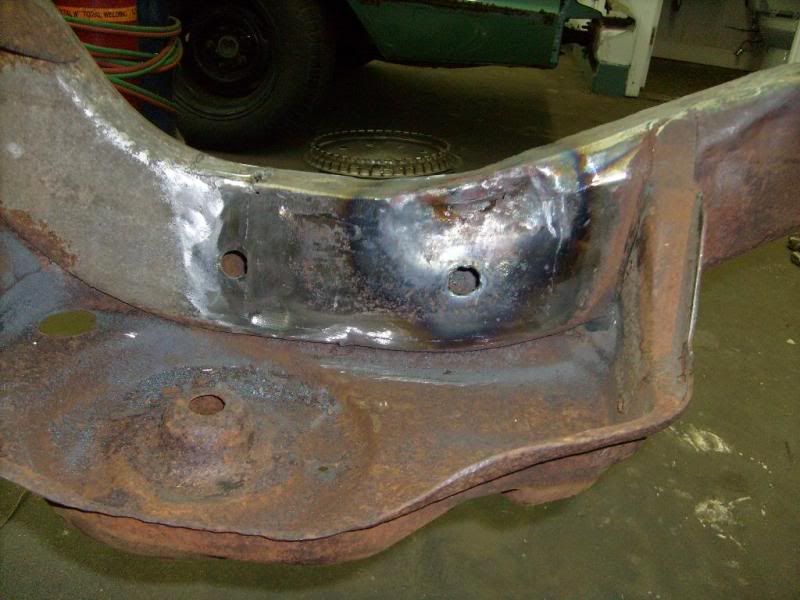
After:
Heres a shot of a framerail boxed in minus the very end pieces
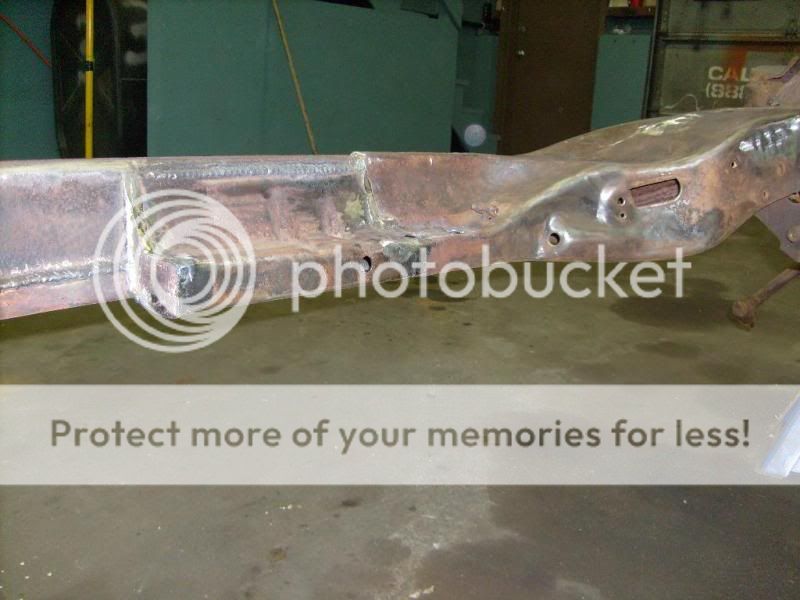
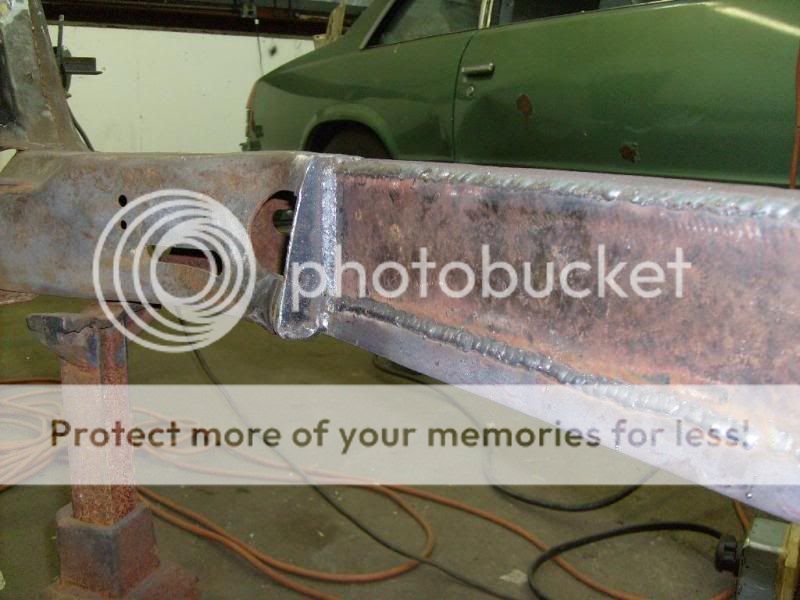
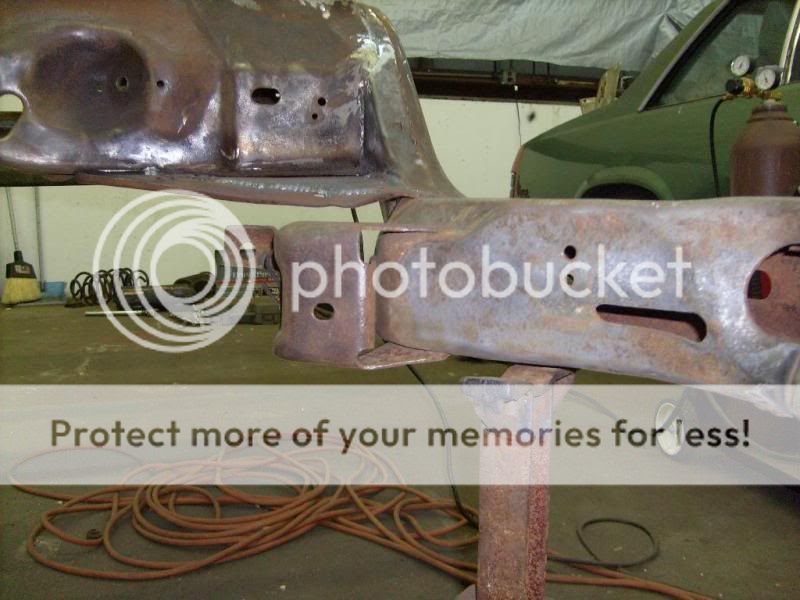
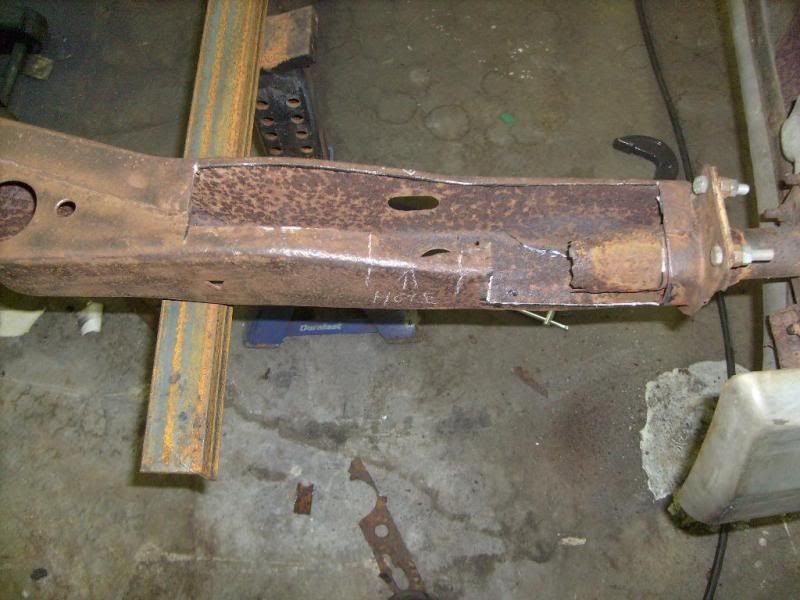
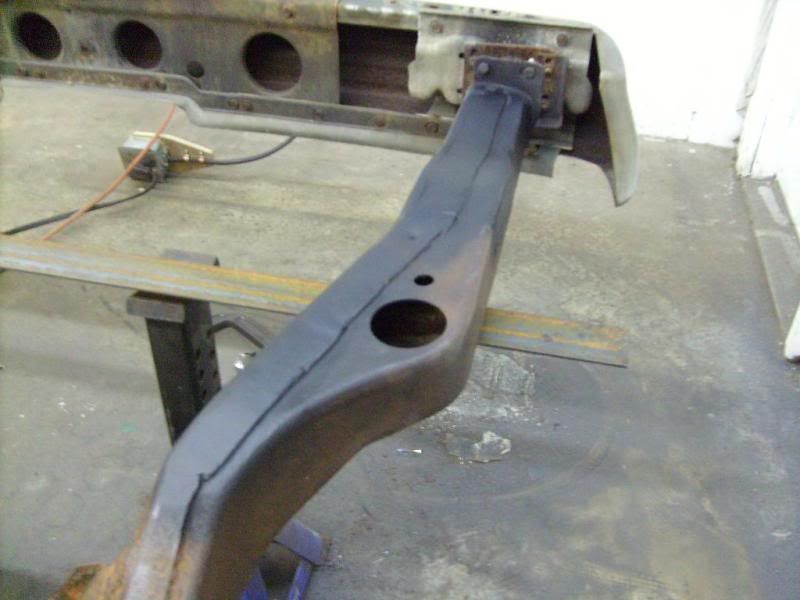
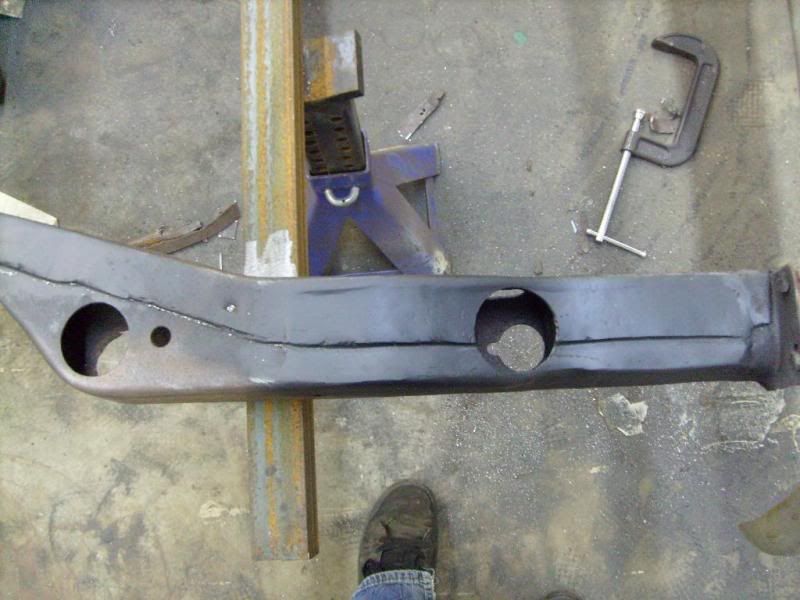
You guys know how the frame is extended further on one side than the other and the crossmember goes at at angle on our cars. I cut the passenger side mount out of my junk frame and worked it to fit on the passenger side of the good frame. Both sides of the frame are the same now.
Before:
I had to straighten the whole bottom of the framerail, it was bent up like it had been dragged over something. The frame extension was also a bitch to make fit well, but it came out good.
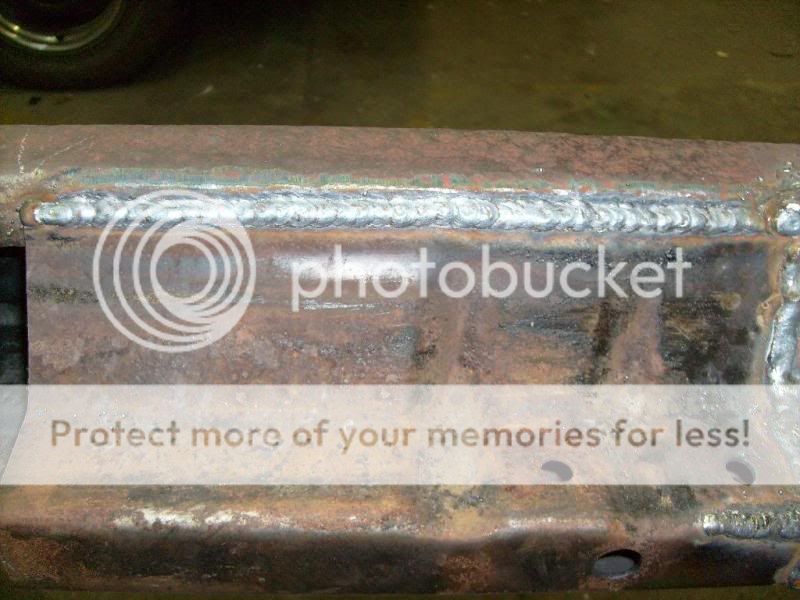
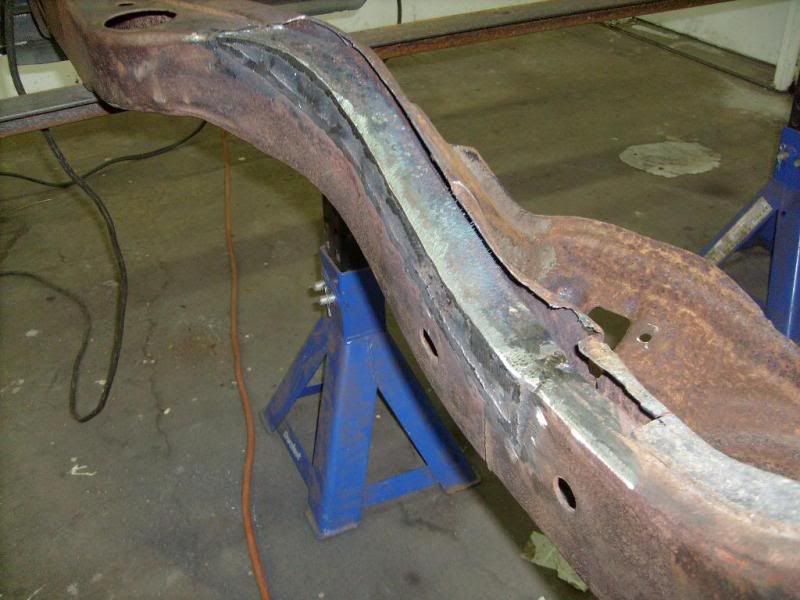
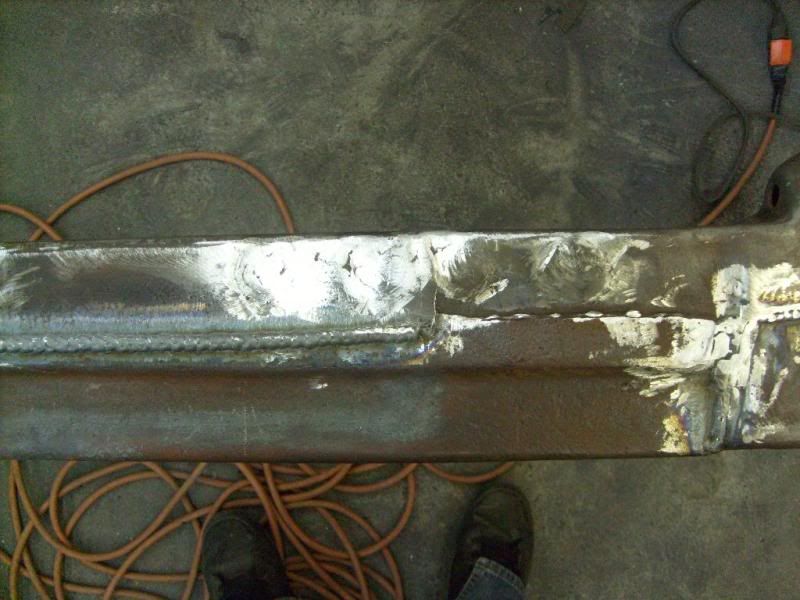
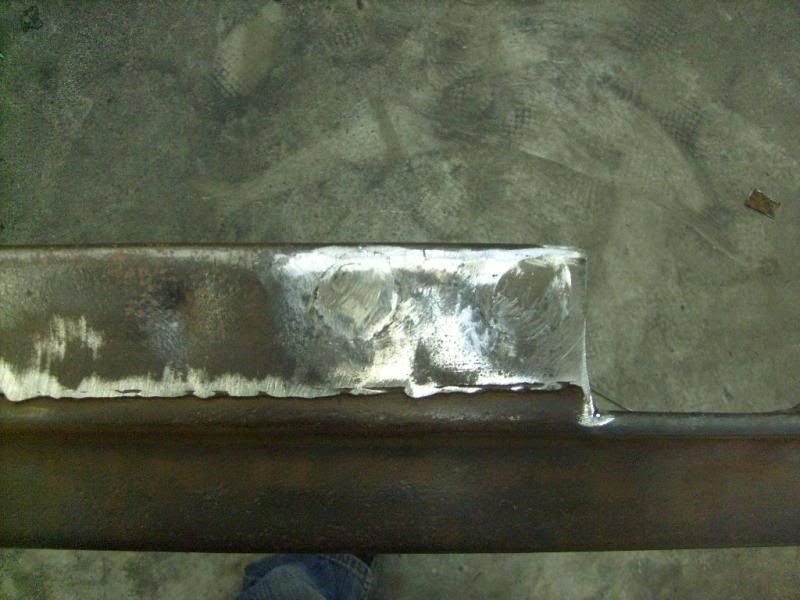
Heres a close-up shot of a weld, still getting used to my welder but they look pretty good.
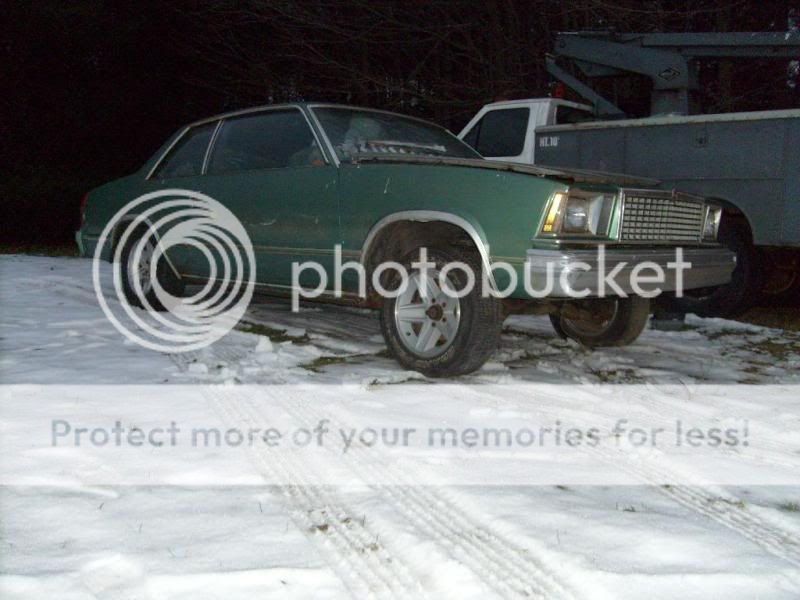
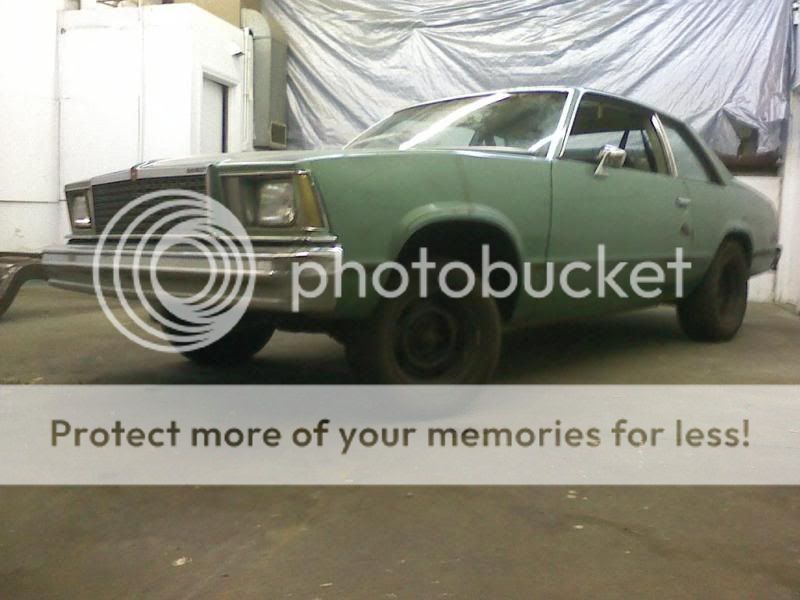
Oh, and just for ***** and giggles I put the rally wheels on the green car, got rid of the mouldings, and rocker trim.
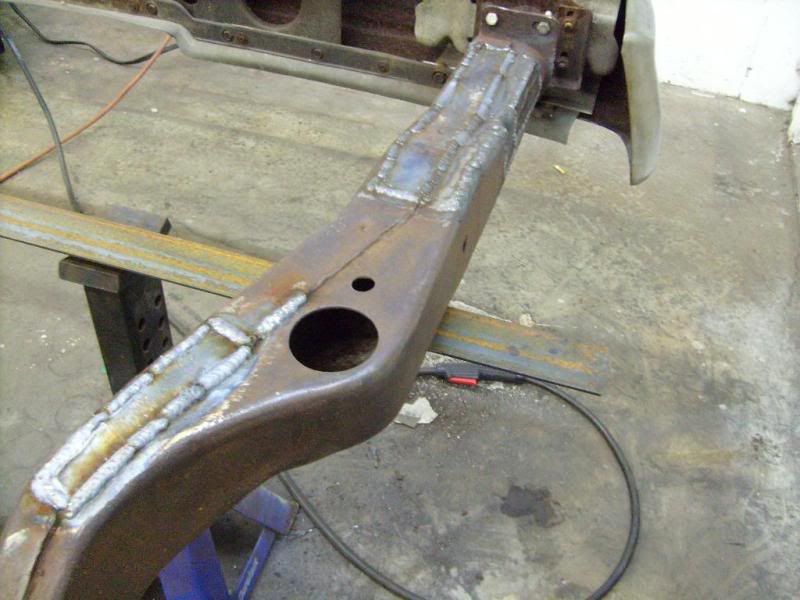
Heres another shot of the piece I added to the drivers side frame rail with everything done.
An aerial view
End filler piece toward the back of the car.
Another shot of the framerails boxed.
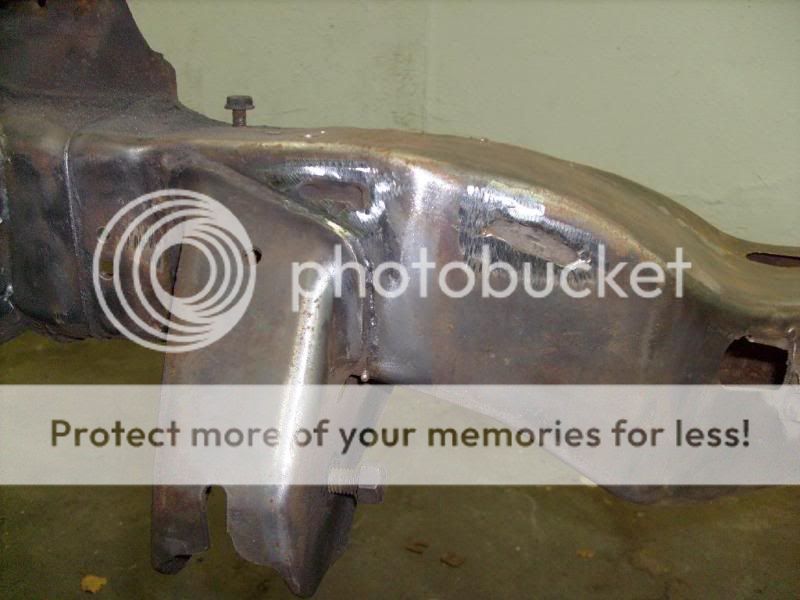
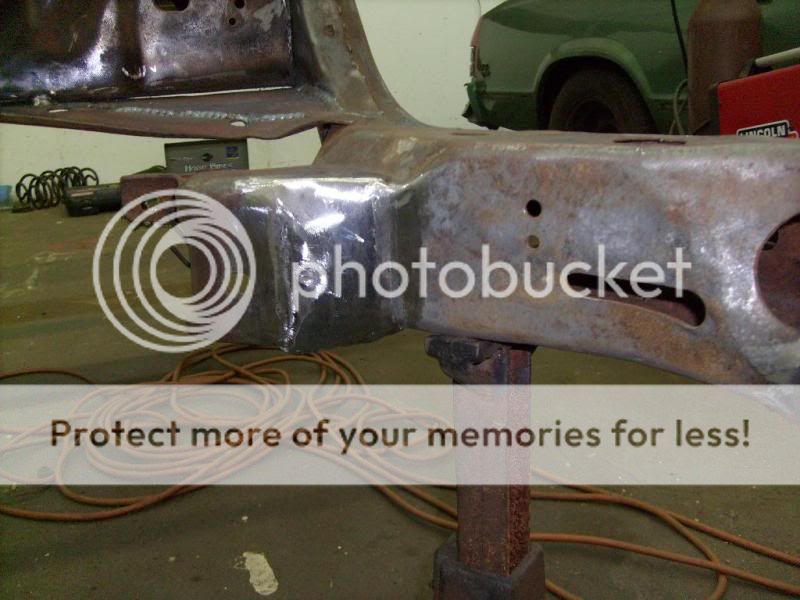
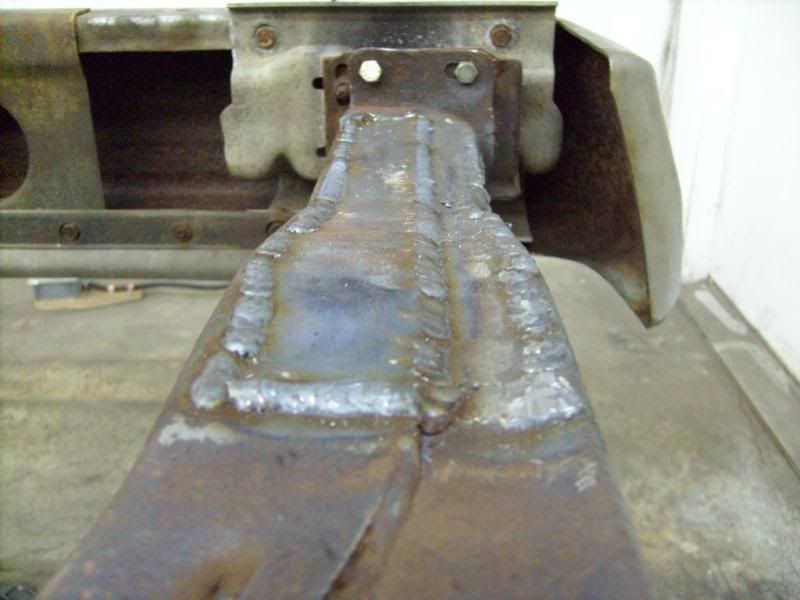
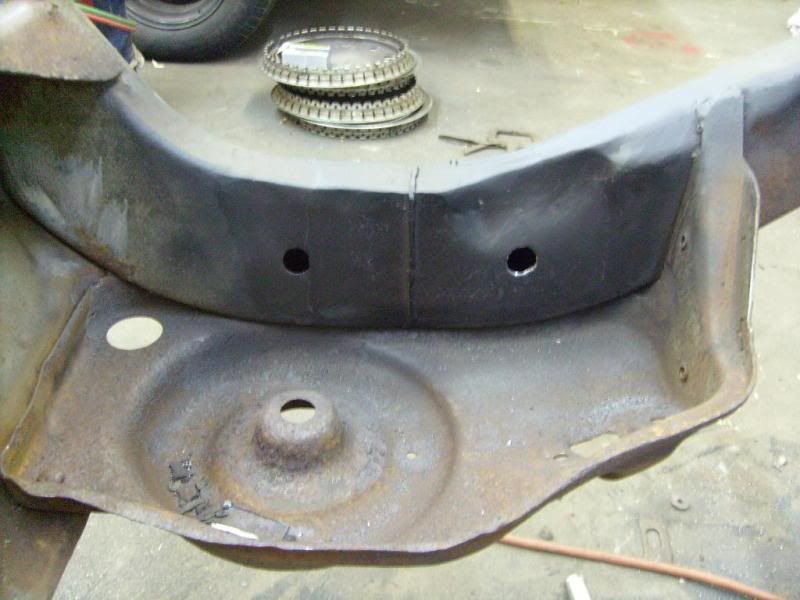
Boxed in the lower control arm mounts...what a bitch that was to do. Before.
After.
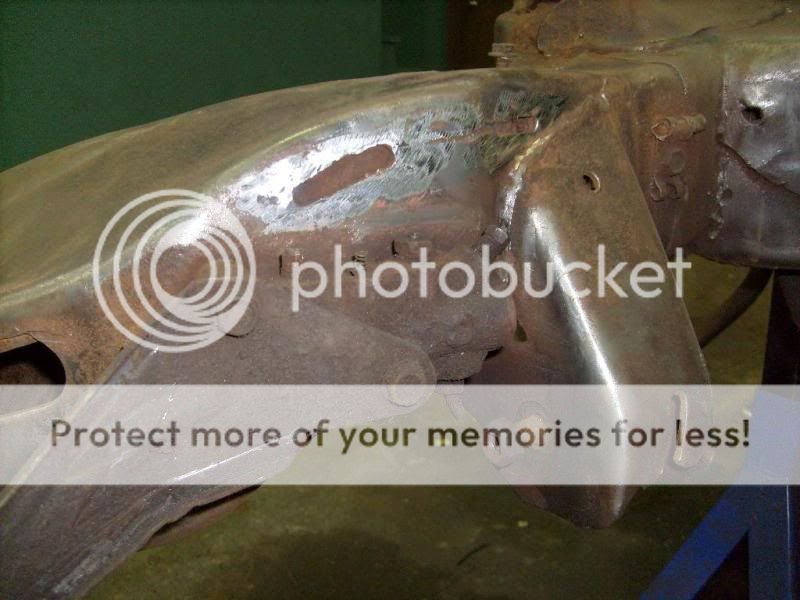
Lastly, a little patch I made to cover an opening on the coil buckets I didn't like. Before.
After.
Sorry for the long intro, I'll keep posting pics as I go along. Excuse me if this is in the wrong section, didn't really know where to post it.
The car is one from two. It's a '78 Malibu and its getting a 5.3, 4 speed, and an 8.5
Bought this car over the summer. Rotted floors, solid frame, new shocks/springs, new dual exhaust etc.
Car has a solid frame, and a really bad body. At first I thought it was just floor pans, but all the body mounts are junk...had to cut the body off the car. Here are some pics of the tear down.
A buddy of mine has had a Malibu project for a few years and hasn't had time to get to it. I've been after the car since I sold my Cutlass and he finally agreed to sell me the car. It has a good body and a shitty frame.
As I said, the floors were real bad and I had to literally cut the body off the car.
Just before pulling the body and the body off the car.
Big thanks to Campello Keith Oil Company and my Dad for letting me use this bay there.
I junked the Blue body.
This week I started doing fabwork. I've fixed a ton of shitty factory welds and small spots that needed attention, you can see it in some of the pics. First thing I did was add some bracing.
Before:
After:
I'm also boxing the frame on this car for extra rigidity. Heres a shot of the framerail before.
Cleaned/painted inside:
The filler panel with the backside painted up:
Finally, the first section boxed:
Plug welded some ugly holes I didn't like. Before:
After:
Heres a shot of a framerail boxed in minus the very end pieces
You guys know how the frame is extended further on one side than the other and the crossmember goes at at angle on our cars. I cut the passenger side mount out of my junk frame and worked it to fit on the passenger side of the good frame. Both sides of the frame are the same now.
Before:
I had to straighten the whole bottom of the framerail, it was bent up like it had been dragged over something. The frame extension was also a bitch to make fit well, but it came out good.
Heres a close-up shot of a weld, still getting used to my welder but they look pretty good.
Oh, and just for ***** and giggles I put the rally wheels on the green car, got rid of the mouldings, and rocker trim.
Heres another shot of the piece I added to the drivers side frame rail with everything done.
An aerial view
End filler piece toward the back of the car.
Another shot of the framerails boxed.
Boxed in the lower control arm mounts...what a bitch that was to do. Before.
After.
Lastly, a little patch I made to cover an opening on the coil buckets I didn't like. Before.
After.
Sorry for the long intro, I'll keep posting pics as I go along. Excuse me if this is in the wrong section, didn't really know where to post it.
I am considering boxing the frame of my Chevelle when I pull the body. I have read a few other threads where people have discussed the pros and cons. I like the added rigidity but a couple of people have said the frame rails spread out on them when the boxed them. I currently have a 72 Elcamino parts car that I could/may cut the factory boxing out of and add it to my Chevelle. I am thinking that I need to attach the frame to a jig or weld a X brace across the back side temporarily. What are your thought having done this?
Thread Starter
Teching In
Joined: Feb 2010
Posts: 23
Likes: 0
From: Bridgewater, MA
I will tell you this, the boxing added a ton of ridgidity...you can pick up one corner of the car and the whole side comes right up. When I started this I leveled the frame the best I could, put the rear bumper on, and tacked a piece of angle iron across the frame behind where the rear axle goes. As far as the frame "spreading," what do you mean?
By spreading I meant that people have found that when they went to bolt the transmission crossmember back in their bolt holes were off by 1/2 -1 inch. I guess as long as all of the body mounts and everything go back in then you're ok.
The simplest way to eliminate the spread issue is to make temporary strut bars in the middle before the work is started. Then weld slowly in 1 or 2 inch segments skipping sides or corners as you go similar to what you do for sheet metal but on a larger scale. This method takes a bit longer but the frame stays straight.
I've done the same frame work you are doing and those frames are FLIMSY from the factory. You could also run a bit of 1 x 1 at the far ends of the car to tie the rear rails together to help eliminate twist. In the front you have to worry about steering gear / sway bar placement, but on the rear if the bar is as far back as you can go things will be OK.
I've done the same frame work you are doing and those frames are FLIMSY from the factory.
You could also run a bit of 1 x 1 at the far ends of the car to tie the rear rails together to help eliminate twist. In the front you have to worry about steering gear / sway bar placement, but on the rear if the bar is as far back as you can go things will be OK. Thread Starter
Teching In
Joined: Feb 2010
Posts: 23
Likes: 0
From: Bridgewater, MA
I haven't gotten as far as putting the body back on, but hopefully it didn't spread. With the way I did the boxing I don't really think it could spread...but we will find out.
I wasn't wishing gloom and doom on ya, more just asking because I am considering doing something similar. I like your idea about the place where the crossmember goes and how you boxed that part in as well.
Trending Topics
Thread Starter
Teching In
Joined: Feb 2010
Posts: 23
Likes: 0
From: Bridgewater, MA
Thank you. I plan on running a straight crossmember in the car, a brace in front of the lower trailing arm mounts (with integrated driveshaft loop) and a brace behind the rear coil buckets. Stiffen things up and keep everything even.
LS1 Tech Stories
The Best V8 Stories One Small Block at Time

6 Gifts Neither Your Dad Nor Grad Will Shove Into the 'Trinket Drawer'
Brett Foote
Topdon ONE vs. Artidiag 800 BT2: Which is the Diagnostic Tablet For You?
Pouria Savadkouei
Gas Monkey Built a 6-Wheel Ferrari Testarossa With a Corvette LT4 Engine
Verdad Gallardo
7 Most Reliable High-Performance Engines GM Has Ever Built
Verdad Gallardo
Amazing '71 Camaro Restomod Is Modern Muscle Car Under the Skin
Verdad Gallardo
6 Common C5 Corvette Failures and What's Involved In Repairing Them
Pouria Savadkouei
Retro Modern Bandit Pontiac Trans AM Comes With Burt Reynolds' Autograph
Verdad Gallardo
Top 10 Greatest Cadillac V Series Performance Models Ever, Ranked
Pouria Savadkouei
Top 10 Most Powerful Chevy Trucks Ever Made!
Thread Starter
Teching In
Joined: Feb 2010
Posts: 23
Likes: 0
From: Bridgewater, MA
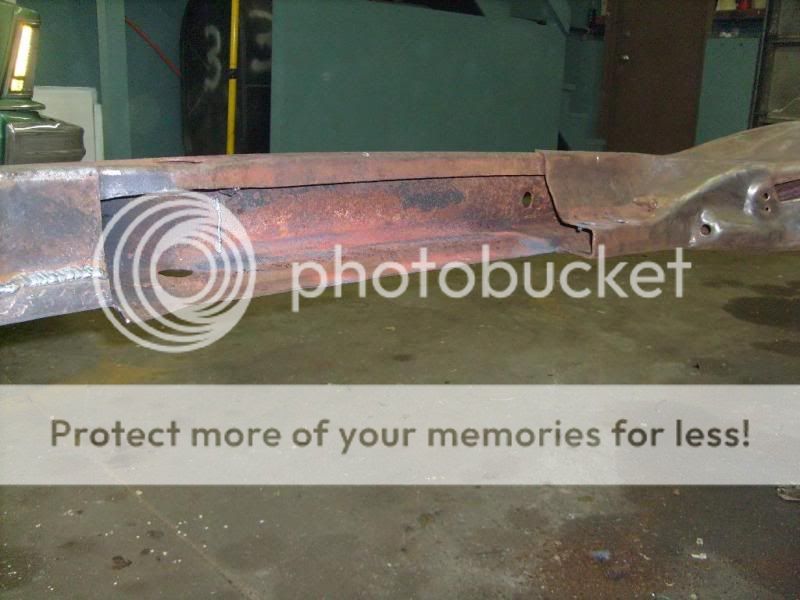
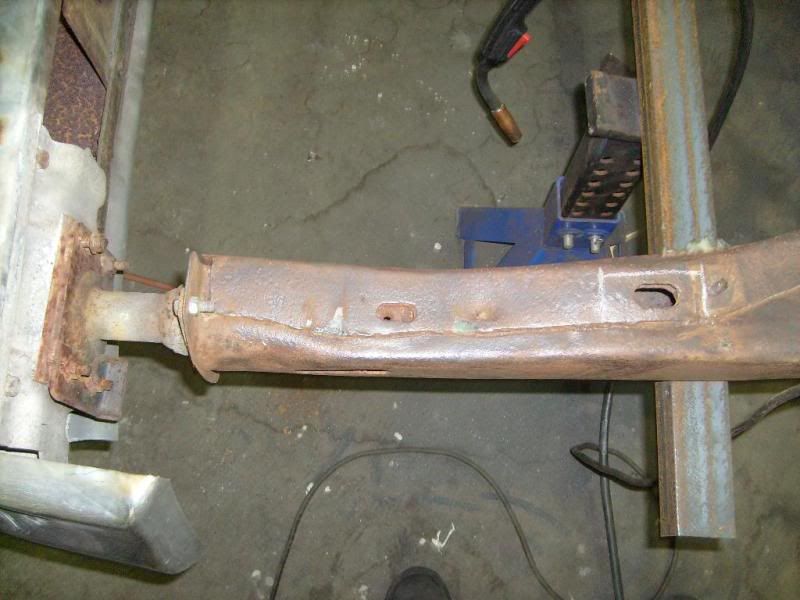
Finally have some more updates. I flipped the frame on the car and welded the bottoms of everything that needed it. I also started rot repair on the rear framerails. I don't ever want to do another northeast car again haha.
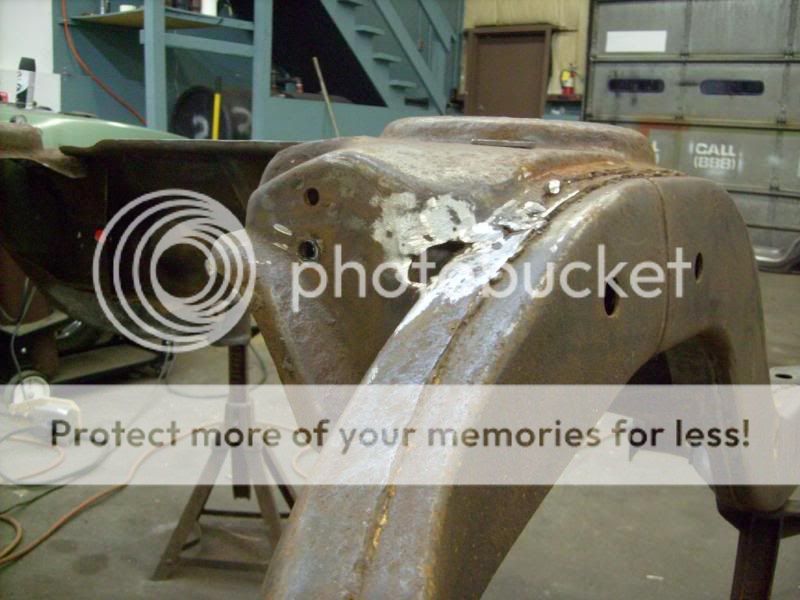
Anyway, this is the rot repair on the drivers side...forgot my camera so this update won't be quite as detailed as the earlier ones. Cut out the rot back to good metal...

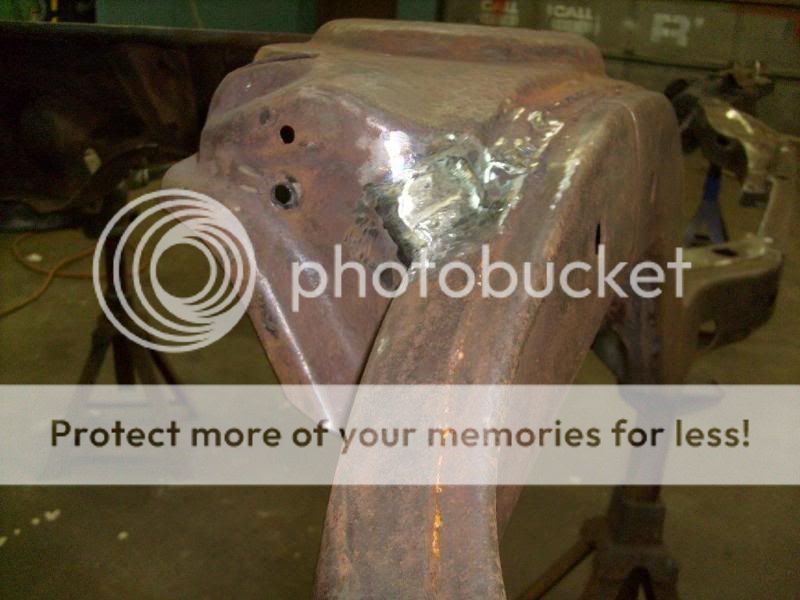
Welded in new material, trying to make this all look as factory as possible.
The bottom layer of steel in
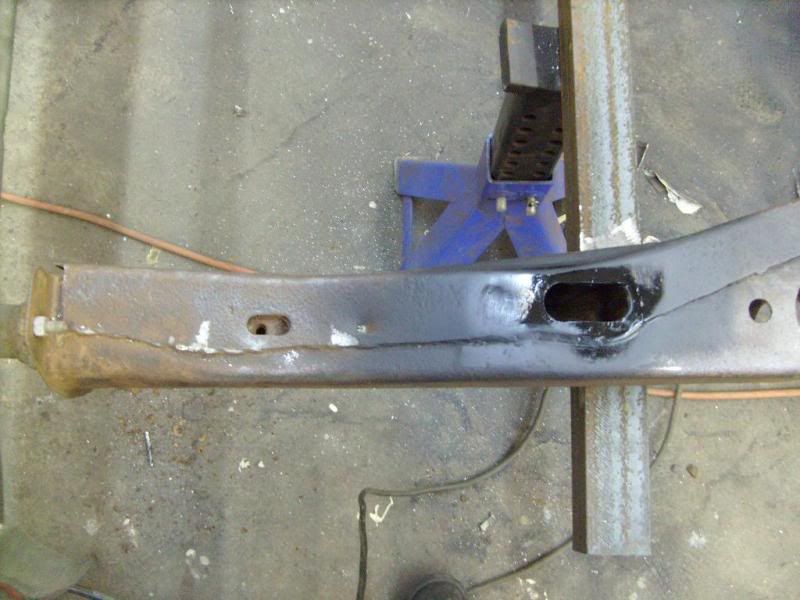
All finished up, just need to clean up a few spots.
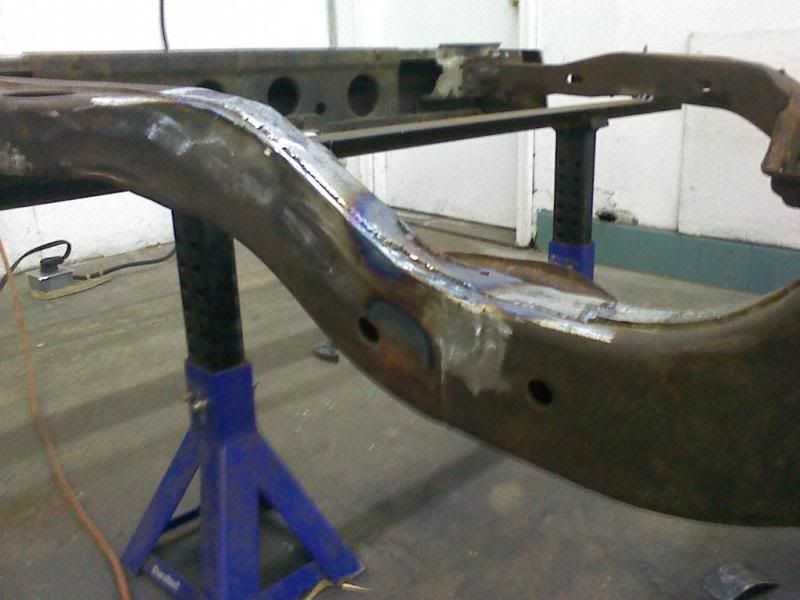
If you look close you can see the layers of steel, just like how it was from the factory when the frame sections were put together.
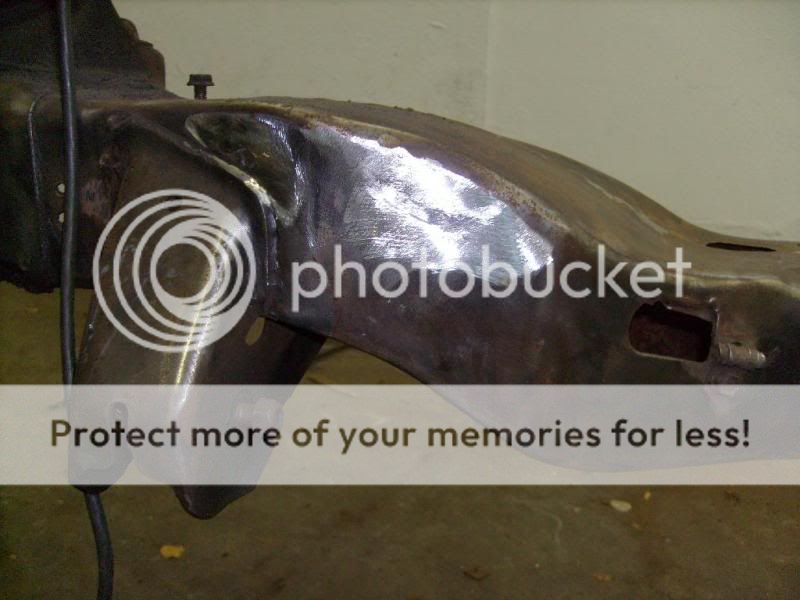
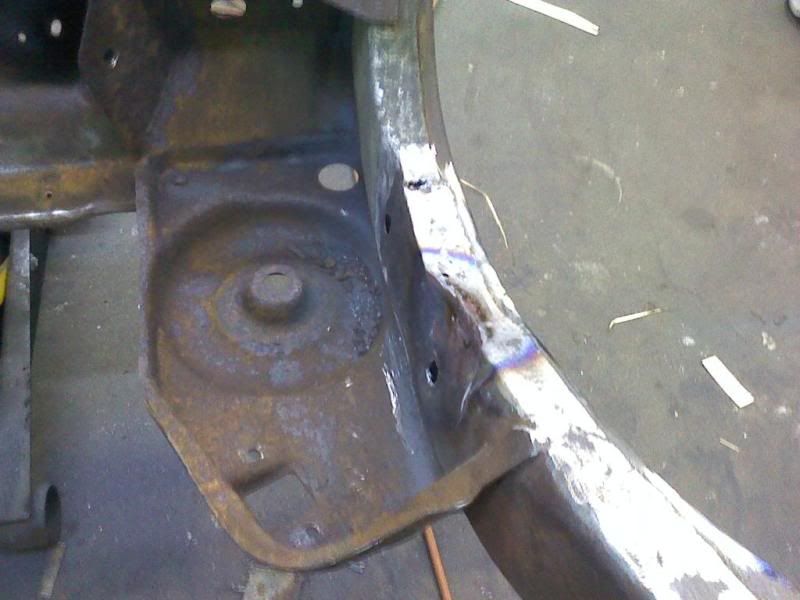
Even hammered out a spot for the shock and made a hole in the factory location...you could almost never tell it was repaired.
Anyway, this is the rot repair on the drivers side...forgot my camera so this update won't be quite as detailed as the earlier ones. Cut out the rot back to good metal...
Welded in new material, trying to make this all look as factory as possible.
The bottom layer of steel in
All finished up, just need to clean up a few spots.
If you look close you can see the layers of steel, just like how it was from the factory when the frame sections were put together.
Even hammered out a spot for the shock and made a hole in the factory location...you could almost never tell it was repaired.
Thread Starter
Teching In
Joined: Feb 2010
Posts: 23
Likes: 0
From: Bridgewater, MA
This weekend I got some parts for the car.
Picked up a transmission.
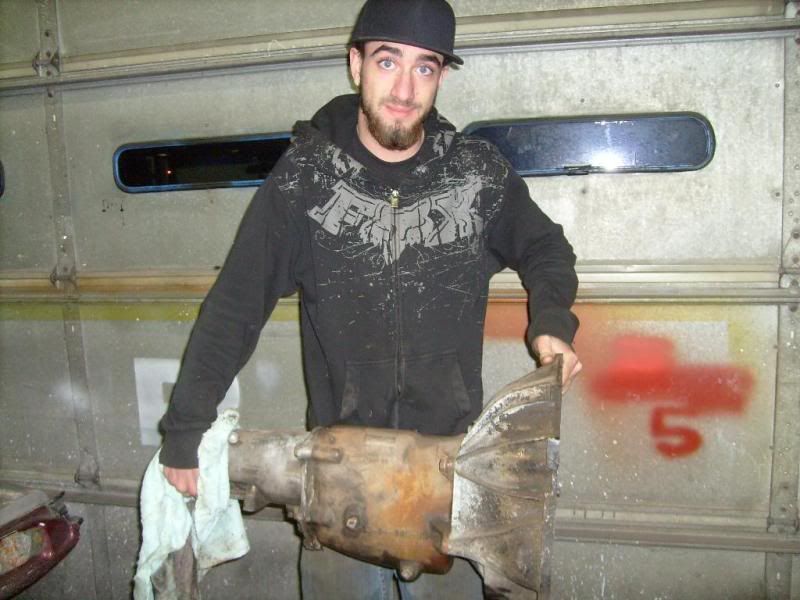
Its a super T-10. Came with pedals for my car, a bellhousing, shifter, and brand new clutch.
Also picked up some really cool gauges out of a Pontiac Grand LeMans.
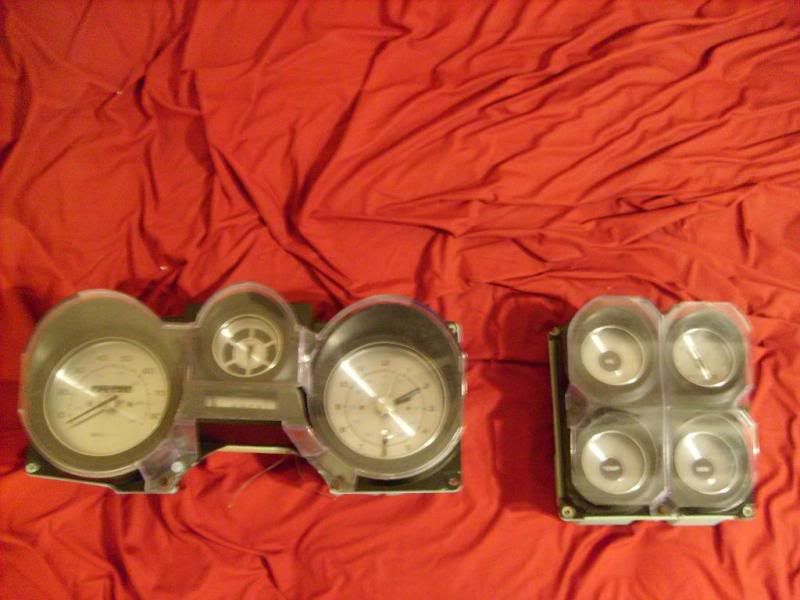
These will fit into the Grand Prix dash I need to pick up and are my reason for wanting that dash. I have some cool things planned for these gauges.
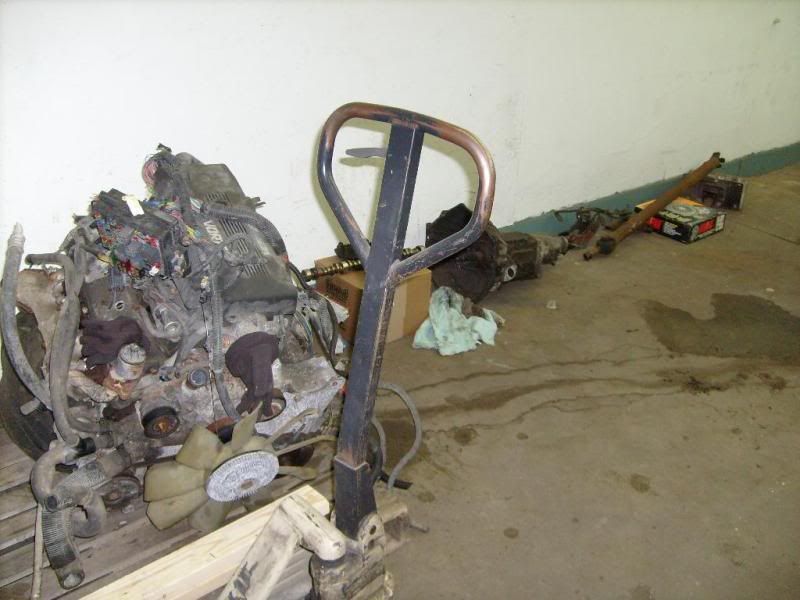
My growing parts pile
Washed the car again, it's really hard to get a good picture of it.
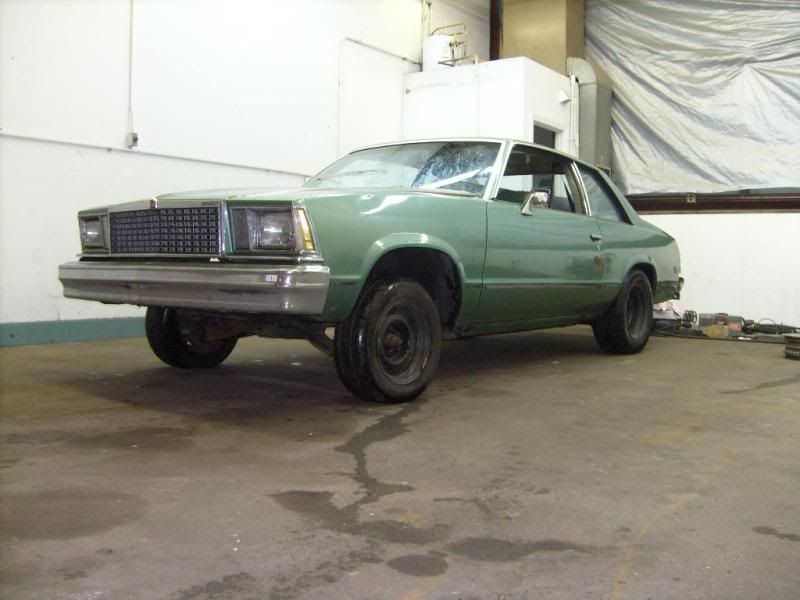
The car knows whats up.
Lastly, some more pictures of my frame repair.
Factory
Repaired

Just have a few more small things to fix on the drivers side, now I need to get my welder bottle filled and I can bang out the rest of the frame work and start taking the green car apart.
Picked up a transmission.
Its a super T-10. Came with pedals for my car, a bellhousing, shifter, and brand new clutch.
Also picked up some really cool gauges out of a Pontiac Grand LeMans.
These will fit into the Grand Prix dash I need to pick up and are my reason for wanting that dash. I have some cool things planned for these gauges.
My growing parts pile
Washed the car again, it's really hard to get a good picture of it.
The car knows whats up.
Lastly, some more pictures of my frame repair.
Factory
Repaired
Just have a few more small things to fix on the drivers side, now I need to get my welder bottle filled and I can bang out the rest of the frame work and start taking the green car apart.

Thread Starter
Teching In
Joined: Feb 2010
Posts: 23
Likes: 0
From: Bridgewater, MA
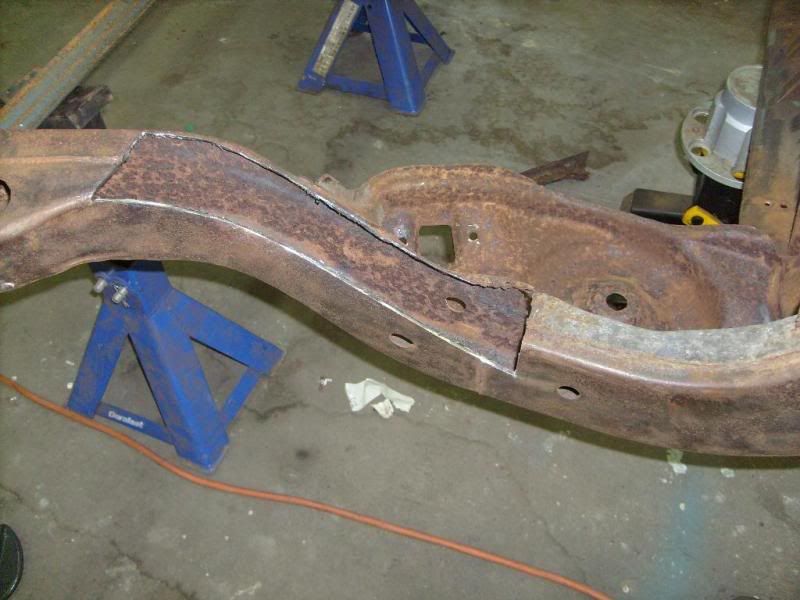
Had to fix a couple spots on the passenger side of the frame as well. Heres a shot of the section I had to cut out.
Found another section that needed to be repaired. Here it is after being repaired.
I still need to cut out an opening for access to the rearmost body mount.
I also threw a quick coat of spray-paint over the repaired parts on the framerails to see if it looked close to factory. I think it does, I even added the welded seems back to the drivers side.
Drivers side
Passenger side
Should have some real good updates soon (that are actually slightly Gen III related), stay tuned.
Thread Starter
Teching In
Joined: Feb 2010
Posts: 23
Likes: 0
From: Bridgewater, MA

TECH Senior Member


Joined: Jul 2009
Posts: 8,035
Likes: 664
I remember being the only one liking thses cars back in '86. (chuckle) I had a clean 66Chevelle SS and I had my eyes on a different car. Lol. Cars are like chicks. Always wanting something else once you acquired what you had your eyes on just a week before. lol

Thread Starter
Teching In
Joined: Feb 2010
Posts: 23
Likes: 0
From: Bridgewater, MA
Well I got some more work done on the car yesterday/last night.
Brought up my hole saw bits yesterday and added some little details.
Before
After
Body mount access on the passenger side
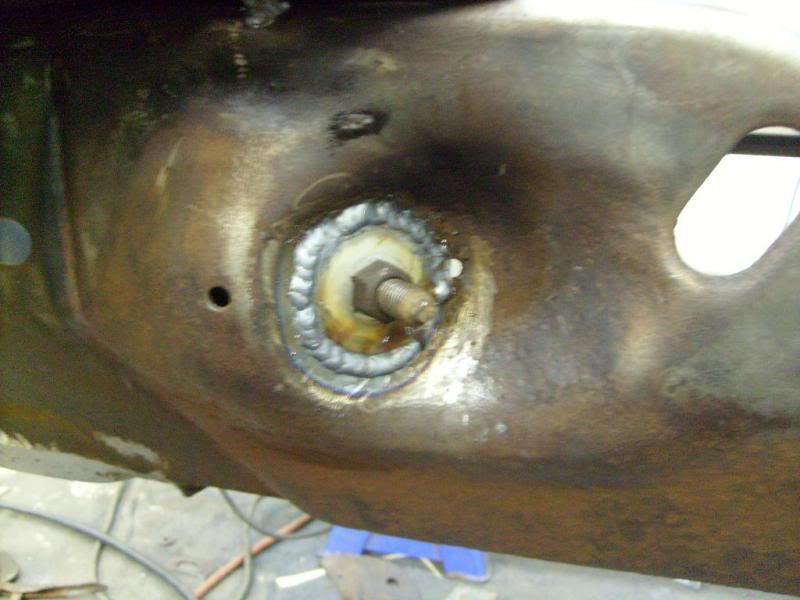
Speaking of details, heres the recessed area for the shock all finished and smoothed out.
Had to fill in some holes where the crossmember is going to go.
Before

After
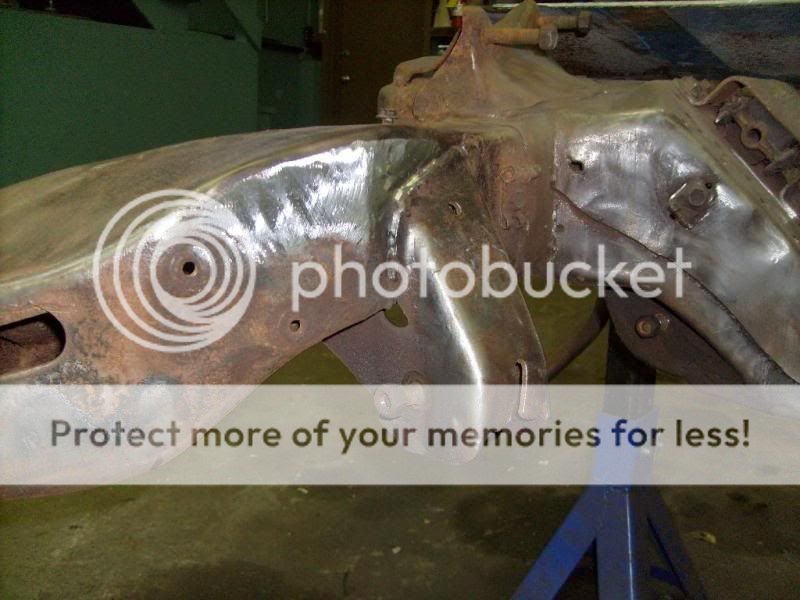
I also strengthened the upper trailing arm mounts.
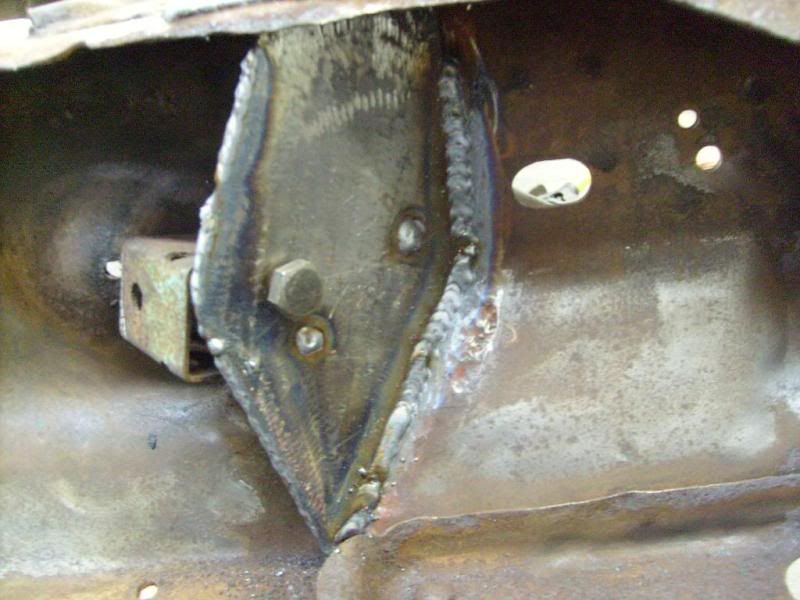
MMMHHMMMM Beefy. Right around 3/16" thick now.
Oh, almost forgot...did this too.
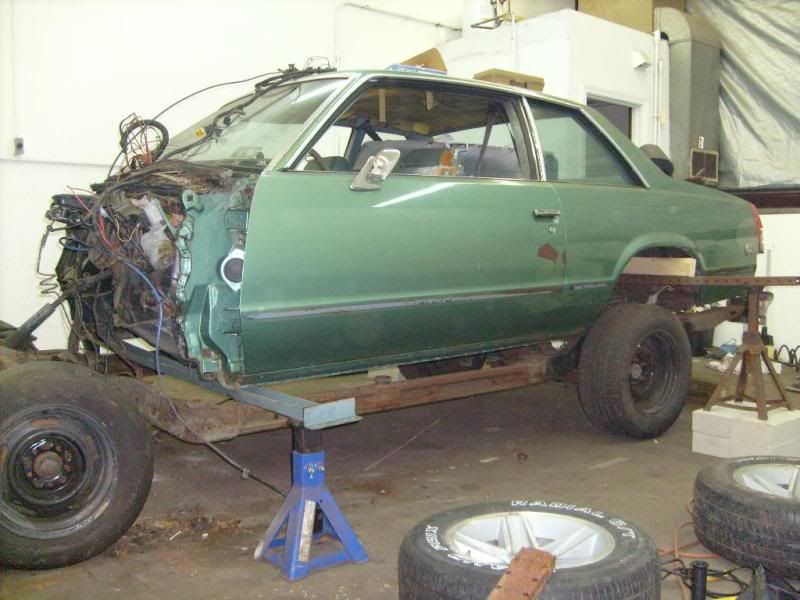
It came apart alright, not looking forward to having to repair a few of the body mounts in the body...
Brought up my hole saw bits yesterday and added some little details.
Before
After
Body mount access on the passenger side
Speaking of details, heres the recessed area for the shock all finished and smoothed out.
Had to fill in some holes where the crossmember is going to go.
Before
After
I also strengthened the upper trailing arm mounts.
MMMHHMMMM Beefy. Right around 3/16" thick now.
Oh, almost forgot...did this too.
It came apart alright, not looking forward to having to repair a few of the body mounts in the body...