

'64 Chevelle 5.3/4L60E swap build thread

 03-02-2011, 05:42 PM
#22
Launching!
Thread Starter
iTrader: (1)

Join Date: Oct 2008
Location: Russellville, Arkansas
Posts: 215
Likes: 0
Received 0 Likes
on
0 Posts

Attempted installing engine now that I have the Mast oil pan installed.
First problem: cannot install engine and tranny together with mast pan. I could do this with the modified truck pan but the mast pan is wider and will not go in with the tranny attached.
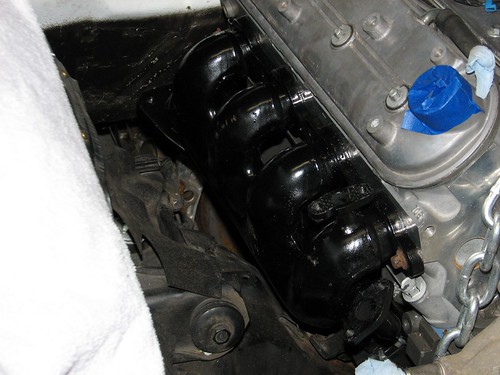
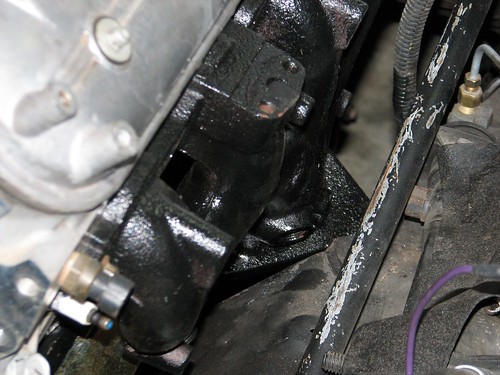
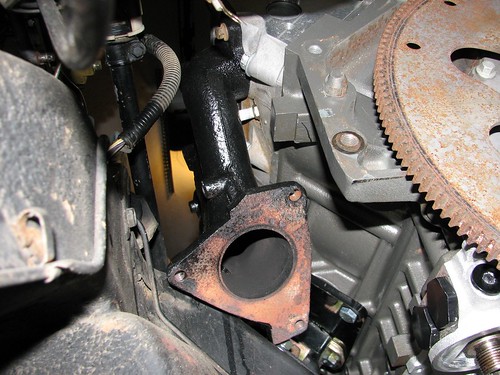
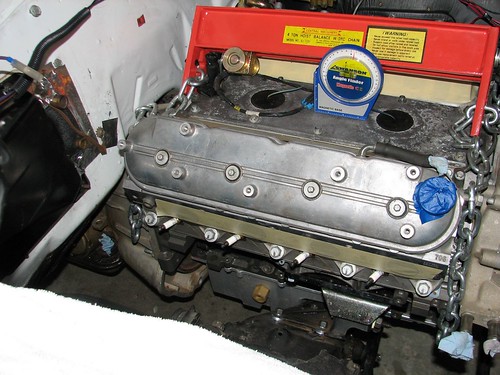
So I removed the tranny and installed the engine. Looked pretty good but the pan was still slightly against the crossmember. I put some spacers (about 1/2") under the frame stands and it looked pretty good. Attached the tranny and realized that I still have clearance issues with tranny to tranny tunnel. I think it can be managed with a few strategic blows from the sledge and that is next on my list. Test fitted the 98-02 F-body exhaust manifolds and they fit great except for slightly touching the crossmember on the drivers side. I plan to move the engine back about 1/2 inch and that will get rid of this interference.
Looks like I have the engine much more forward than most do but I think it will work for me. Here are a few pics. The first one shows how I cannot get the oil pan over the crossmember with the tranny attached.

First problem: cannot install engine and tranny together with mast pan. I could do this with the modified truck pan but the mast pan is wider and will not go in with the tranny attached.
So I removed the tranny and installed the engine. Looked pretty good but the pan was still slightly against the crossmember. I put some spacers (about 1/2") under the frame stands and it looked pretty good. Attached the tranny and realized that I still have clearance issues with tranny to tranny tunnel. I think it can be managed with a few strategic blows from the sledge and that is next on my list. Test fitted the 98-02 F-body exhaust manifolds and they fit great except for slightly touching the crossmember on the drivers side. I plan to move the engine back about 1/2 inch and that will get rid of this interference.
Looks like I have the engine much more forward than most do but I think it will work for me. Here are a few pics. The first one shows how I cannot get the oil pan over the crossmember with the tranny attached.
03-06-2011, 08:43 PM
#23
Launching!
Thread Starter
iTrader: (1)
Join Date: Oct 2008
Location: Russellville, Arkansas
Posts: 215
Likes: 0
Received 0 Likes
on
0 Posts
Still trying to find the right combo of mount position/frame stand spacing/tranny tunnel interference. Seems like I am way more forward than most are.
Can anyone comment on if this looks too far away from the firewall? This is with no setback on adapter plates and about 1/2 inches spacers between frame stands and crossmember.
Motor is out of car again now. Next attempt will be 1" setback plates and no spacers on frame stands. Working 72 hours this week so it will be another week before I can work on car again.
And if anyone is wondering after looking at that last picture the answer is yes, I crushed the brake line on the crossmember when I wasn't paying attention. Another reason I am planning to try the 1" setback plates.
 03-07-2011, 10:38 AM
#26

I say go with the 1" setback plates if possible. Depending on what front accessories you're going to run there may be clearance issues with the power steering pump/steering gear if the engine is not back far enough...not to mention the weight distribution benefit. You can always unbolt the frame mounts from the frame, bolt them to the motor mounts, set things in place and remount the frame mounts where they need to be to get the positioning you want.
03-07-2011, 05:11 PM
#27
Launching!
Thread Starter
iTrader: (1)
Join Date: Oct 2008
Location: Russellville, Arkansas
Posts: 215
Likes: 0
Received 0 Likes
on
0 Posts
I have already changed to the 1" setback plates on the block.
03-08-2011, 09:28 AM
#28
sometimes you also may need to ad some sort of spacer underneath the frame mount to get the right geometry between the block and frame to create some clearance between the pan/crossmember. Some mounts like the carshop ones take care of this, others like the trans dapt one don't. I ran trans dapt mounts on both of my swaps without a spacer and had enough clearance but sometimes this isn't the case depending on the car...
 03-12-2011, 09:38 PM
#30
Launching!
Thread Starter
iTrader: (1)
Join Date: Oct 2008
Location: Russellville, Arkansas
Posts: 215
Likes: 0
Received 0 Likes
on
0 Posts
I will let you know tomorrow, hopefully. I don't have to be back at work till Tuesday morning, hope to work on install and tranny tunnel hammering tomorrow and Monday.
03-13-2011, 09:39 PM
#31
Teching In

Join Date: Oct 2009
Posts: 41
Likes: 0
Received 0 Likes
on
0 Posts
Great build thread! Looking very good. I also have put an LS into a 1964 Chevelle. Here is a link to my build thread. Maybe it will help you too.
https://ls1tech.com/forums/conversio...l98-4l70e.html
Feel free to e-mail me with any questions you have. So far you are hitting on the same issues I had. Don't worry, it will fit just fine. Just need a little fine tuning.
Good luck and keep the updates coming.
https://ls1tech.com/forums/conversio...l98-4l70e.html
Feel free to e-mail me with any questions you have. So far you are hitting on the same issues I had. Don't worry, it will fit just fine. Just need a little fine tuning.
Good luck and keep the updates coming.
03-13-2011, 11:51 PM
#32
Launching!
Thread Starter
iTrader: (1)
Join Date: Oct 2008
Location: Russellville, Arkansas
Posts: 215
Likes: 0
Received 0 Likes
on
0 Posts
Great build thread! Looking very good. I also have put an LS into a 1964 Chevelle. Here is a link to my build thread. Maybe it will help you too.
https://ls1tech.com/forums/conversio...l98-4l70e.html
Feel free to e-mail me with any questions you have. So far you are hitting on the same issues I had. Don't worry, it will fit just fine. Just need a little fine tuning.
Good luck and keep the updates coming.
https://ls1tech.com/forums/conversio...l98-4l70e.html
Feel free to e-mail me with any questions you have. So far you are hitting on the same issues I had. Don't worry, it will fit just fine. Just need a little fine tuning.
Good luck and keep the updates coming.
I can verify at this point that the 98-02 f-body manifolds are going to fit great after I relocate the drivers O2 sensor to the exhaust pipe.
I found a thread the other day that is for a 64 tempest and reads like an instruction manual for what we are doing, you might want to check it out. https://ls1tech.com/forums/conversio...ping-list.html
12-26-2011, 12:57 AM
#33
Launching!
Thread Starter
iTrader: (1)
Join Date: Oct 2008
Location: Russellville, Arkansas
Posts: 215
Likes: 0
Received 0 Likes
on
0 Posts
Well, after almost a year off from working on the chevelle I am back at it.
This spring I had to build offices in the garage where my chevelle used to live. Therefore, I had to build a shop for the chevelle. So over the last several months I have been to busy to work on the car. Here is the new home for the chevelle.

Santa brought a new set of gauges since I could not figure out a "good" way to run the mechanical speedo that is currently in the dash. I have been looking at the speedhut gauges for a while now and the black friday sale was more than I could resist. I think they will look almost like factory after installed, at least to most people as they are the same color day and night as original and in the same layout and size as original. Not 100% sure how I will install them but I suspect it will become clear after I pull the dash.

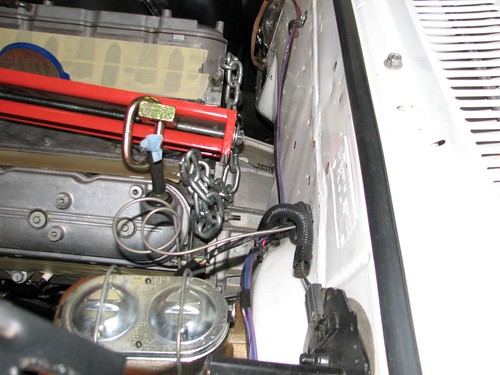
I finally took the spacers out from under the frame stands and "eureka!" the engine is at 4 degrees down. Hood shuts even with the DBW throttle body and truck intake. Had to change to the dorman 300-020 PS pulley to clear the Jeep GC steering box.

Spent this evening working on finishing up the wiring. Still not done but about 95% complete. Still have to run the fuel line from the frame to the engine in the front, but the plumbing, corvette filter/regulator, external pump, return line is all finished.
Will be pulling out the engine and tranny one more time and will try and move the engine stands forward about 1/4 - 1/2 inch to see if I can get to 3 degrees down angle if possible.


This spring I had to build offices in the garage where my chevelle used to live. Therefore, I had to build a shop for the chevelle. So over the last several months I have been to busy to work on the car. Here is the new home for the chevelle.
Santa brought a new set of gauges since I could not figure out a "good" way to run the mechanical speedo that is currently in the dash. I have been looking at the speedhut gauges for a while now and the black friday sale was more than I could resist. I think they will look almost like factory after installed, at least to most people as they are the same color day and night as original and in the same layout and size as original. Not 100% sure how I will install them but I suspect it will become clear after I pull the dash.
I finally took the spacers out from under the frame stands and "eureka!" the engine is at 4 degrees down. Hood shuts even with the DBW throttle body and truck intake. Had to change to the dorman 300-020 PS pulley to clear the Jeep GC steering box.
Spent this evening working on finishing up the wiring. Still not done but about 95% complete. Still have to run the fuel line from the frame to the engine in the front, but the plumbing, corvette filter/regulator, external pump, return line is all finished.
Will be pulling out the engine and tranny one more time and will try and move the engine stands forward about 1/4 - 1/2 inch to see if I can get to 3 degrees down angle if possible.
Last edited by neal64ss; 07-23-2012 at 08:48 AM.
 12-28-2011, 05:40 AM
#35
TECH Fanatic
Looks good. I noticed that you were loking for 4L60E / 4L80E wiring info in past posts. I did the research and found the differences. I am having trouble posting the chart I created. I can e-mail to you if you still need the info.
12-28-2011, 03:43 PM
#36
Staging Lane
iTrader: (3)
Join Date: Jun 2008
Location: Crestview, FL
Posts: 76
Likes: 0
Received 0 Likes
on
0 Posts
Nice find on the power steering pulley, does it clear the bolts that are behind it? and does it need to be pressed on further on the shaft than the stock one does?
12-28-2011, 05:01 PM
#37
Teching In

Join Date: Dec 2011
Location: Blair, NE
Posts: 13
Likes: 0
Received 0 Likes
on
0 Posts
I am swapping an ls1 into a 64 Chevelle also, your thread has been extremelly helpful. Was wandering where you got your speed hut guages. I have also been wrestling with the electronic conversion. Keep up the good work.

 12-30-2011, 02:35 AM
#39
Launching!
Thread Starter
iTrader: (1)
Join Date: Oct 2008
Location: Russellville, Arkansas
Posts: 215
Likes: 0
Received 0 Likes
on
0 Posts
Yes, it clears the bolts behind the pulley even after being pressed on about 1/4" more.
12-30-2011, 02:37 AM
#40
Launching!
Thread Starter
iTrader: (1)
Join Date: Oct 2008
Location: Russellville, Arkansas
Posts: 215
Likes: 0
Received 0 Likes
on
0 Posts