

71 Nogo slowly getting a boring lq4/4l80 build
 07-28-2010, 07:04 PM
#41

What about unbolting the frame mounts from the frame and bolting up the adapter/motormount/frame mount to the engine and setting the assembly in place. Wherever it ends up either mark or tack weld the frame mounts to the subframe, pull things apart and drill new holes for the frame mounts. If you do it that way you can put the motor/trans as far forward/backward as you want... If you still need spacers put some flat steel under the motor mounts...
 07-28-2010, 07:24 PM
#42
+1 on that.. I have used that for my swap and recommend it if mod'in everything else fails. This is also what and how the Early BRP mounts were used and installed.
You may only end up enlarging the frame hole in one direction just to move the stands a bit if that is all that is needed.
I was also able to move my engien as far back as I could. I also narrowed my Frame stands some and used spaces on either side to jack the engine a bit to get it centered as needed.
07-29-2010, 07:44 AM
#43

Funny enough i am going thru this exact thing on my '69 Cutlass right now...I believe the Energy Suspension mounts are part of the problem but I am going to try flipping them...
That may get me where I need to be. If that doesn't work I am picking up some stockers. Can anyone shoot me the PN for stocker Mounts for those style adapter plates in a Chevelle. I believe mine are the tall and narrow Energy ones.
Thanks!
Dave
PS Sorry for the thread jack, swap is looking good!!!!!
07-29-2010, 08:33 AM
#44
Launching!

Bill, I looked at the adapter plates you posted in an earlier post and you need to make a new set of plates out of 3/8 to 1/2 steel. You also need to offset your motor mount to plate holes downward on the plate by the same amount to compensate for the plate thickness. Look closely at the CARSHOP plates and you will notice this detail. You can vary your engine height some by changing your plate thickness. Without this compensation you are pushing the mounts outward only creating a wider pattern for the through mounting bolts that was originally designed into the frame stands.
07-29-2010, 10:06 AM
#45

I did exactly as mantycarguy suggests on my '71 I just finished. I used 3/8" plate and moved the mounting pattern down approximately 1 bolt hole (3/8"), don't remember exactly, but after completing, dropped right in using the frame stands that came in the original 307 car. I did not use the backing plates that come with the motor mounts.
07-29-2010, 06:17 PM
#47
Bill, I looked at the adapter plates you posted in an earlier post and you need to make a new set of plates out of 3/8 to 1/2 steel. You also need to offset your motor mount to plate holes downward on the plate by the same amount to compensate for the plate thickness. Look closely at the CARSHOP plates and you will notice this detail. You can vary your engine height some by changing your plate thickness. Without this compensation you are pushing the mounts outward only creating a wider pattern for the through mounting bolts that was originally designed into the frame stands.
The car shop plates look just like the ones I have with location of bolt holes, but did notice the 1" set-back plates are different with height of the motor mount bolt holes, but really don't want to run the motor 1" set-back as it is right on my firewall, way too close for me to want to use them. Tranny location is not an issue as I am using the 4l80e and will need to make my own crossmember.
Does anyone have a good picture, or diagram that shows the bolt locations on the car-shop motor plates? Or how thick they are?
Was loving this swap until now. Don't want to buy a bunch of mounts/plates/frame stands to keep trying to get this bugger to fit, I rather drill new holes before I go mad
 07-29-2010, 10:38 PM
#48
With all of the time you and effort you have been putting into this as bolt in effort (different plates, mounter mount, frame stands).. You could be done if you just bolted the plates, mounts and stands together on the engine, dropped the engine in, mark the location for the bolt holes of the stands or weld the stands in place and be done with it. One shoot and you could be done and down the road.
07-31-2010, 05:12 PM
#49
Teching In

Join Date: Apr 2010
Posts: 47
Likes: 0
Received 0 Likes
on
0 Posts

Where are you with the car now? Is the pan still hitting? Maybe you can tells what parts you are using now and you could match up with other novas that have done this swap. I used the 350 nova frame stands/ES-mounts/autokraft pan, and redrilled my hooker mounts to bolt up like the carshop ones in the link you have..
08-01-2010, 07:48 AM
#50
I am back to rubber mounts with the lip cut off, the motor plates that "look" like the car shop plates (non-setback) turned upside down so the point is facing forward, but on the bottom, the tall/wide frame stands, and the jz motorworks oil pan (hitting crossmember).
I think I will just get everything lined up and drill new holes if it can be done without the oil pan hitting the crossmember, if not the pan will be for sale and will get a autokraft pan instead
I think I will just get everything lined up and drill new holes if it can be done without the oil pan hitting the crossmember, if not the pan will be for sale and will get a autokraft pan instead
08-01-2010, 12:55 PM
#51
I think it is time to sell the pan and use a different one. I spent the $400 so I could avoid these problems. I swear I have read that others have used the truck pan in 1st gen f-body and novas, so why am I have trouble?
08-07-2010, 03:51 AM
#52
Well, after adding three washers per side under the motor mount, and using the backing plates on the energy suspension mounts I finally got it where the oil pan will clear the crossmember. I will still need to drill two holes for the frame mount on the passengers side, but can use the three holes on the drivers side.
I looked in the oil pan faq, but there are no dimensions on the autokraft pan. Does anyone know how thick the pan is in the non-sump area (front of pan)?
I looked in the oil pan faq, but there are no dimensions on the autokraft pan. Does anyone know how thick the pan is in the non-sump area (front of pan)?
08-08-2010, 09:20 AM
#54
Well, after adding three washers per side under the motor mount, and using the backing plates on the energy suspension mounts I finally got it where the oil pan will clear the crossmember. I will still need to drill two holes for the frame mount on the passengers side, but can use the three holes on the drivers side.
I looked in the oil pan faq, but there are no dimensions on the autokraft pan. Does anyone know how thick the pan is in the non-sump area (front of pan)?
I looked in the oil pan faq, but there are no dimensions on the autokraft pan. Does anyone know how thick the pan is in the non-sump area (front of pan)?
08-08-2010, 12:14 PM
#55
I might keep the pan, might not. Depends on how the dynatech headers fit. If they do not fit well, then I will sell this pan and go with a autokraft pan instead. Still may if I can find a deal better than $400


Also not sure if this is enough clearance for the coil pack as I have no plug wires to see if it will rub on the power booster. If not, may go with the different pan so I can lower the motor, or if I can get a decent setup to relocate my coil packs, I may just do that too.....
08-09-2010, 04:40 AM
#56
Nice build sorry to hear so many problem with the motor mounts. Here is my suggestions take them for what you will.
Bolt everything to the engine set it in where you want it using 3/8"-1/2" spacers under the stands. That should give you plenty of room for your pan.
And as far as your coil/booster I would just get a 9" booster and that would give you plenty of room there.
Good luck keep us posted.
Bolt everything to the engine set it in where you want it using 3/8"-1/2" spacers under the stands. That should give you plenty of room for your pan.
And as far as your coil/booster I would just get a 9" booster and that would give you plenty of room there.
Good luck keep us posted.
08-09-2010, 07:48 AM
#57
Teching In
Join Date: Apr 2010
Posts: 47
Likes: 0
Received 0 Likes
on
0 Posts
I hmde some 1/2 " spacers out of aluminum so that my R&P would clear... It did raise the motor up but the R&P was still hitting so I scrap that idea and went with a box. I would try that first before you spend $400.
Bryan
Bryan
09-25-2010, 06:50 PM
#58
Well, got new motivation and back to work on the nogo after getting motivation from LS1nova and his turbo charged beast 
Still waiting for the friggin headers from jegs. I am getting pretty ticked after I found out another person on here also had there on backorder from summit, but only had to wait a few days unlike me (looking at 2 months ) so not 100% sure which way to go. Ordered a new f-body pan, but might end up selling it anyways since things are going pretty well with the jzmotorworks pan. Not sure though.
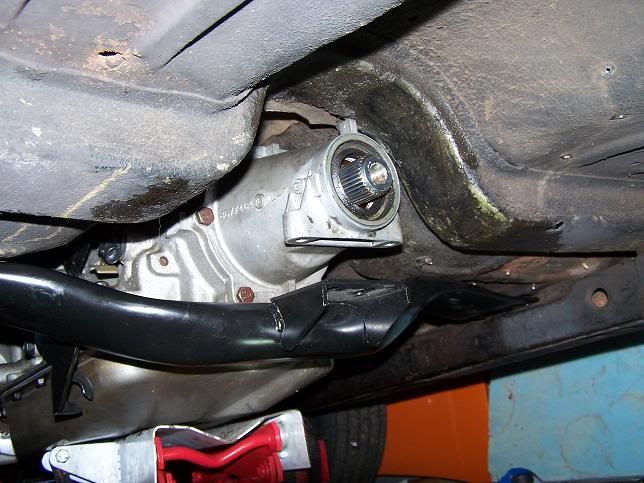
Put an angle finder on the crank pulley and shows about 4-4.5 degrees with the tail downward, and from what I can find, that is acceptable, and will be even less when the car is lowered as it is WAY to high in the front with the big block springs
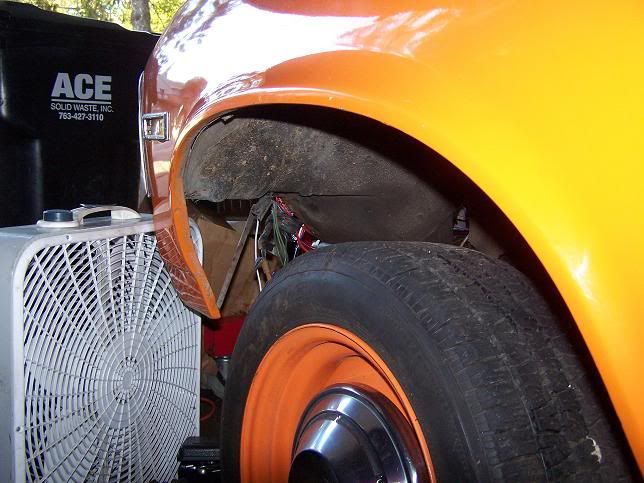
With three washers under each of the three bolts on the drivers side, and none on the passengers side, with the load plate behind the energy suspensions motor mounts, I get just enough oil pan clearance to not have contact, maybe just enough clearance for the coil to powerbooster, and have the alternator clear the subframe. But I will still need to drill two holes for the frame stand on the passengers side, only one existing hole can be used. Will use all three on the drivers side.
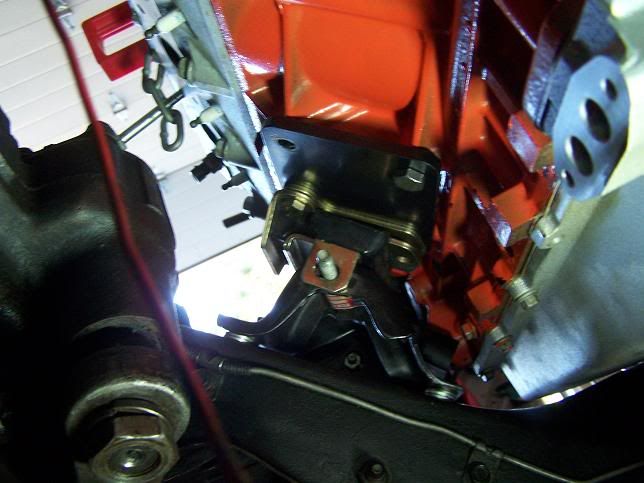
Not only that, it looks like I can use my th400 crossmember, one bolt hole lines up with existing hole, but will need to drill the second.
Unfortunately, the energy suspension tranny mount will not fit, I need a shorter one..... don't know if the factory rubber one is shorter, or will need to cut this one, but still pretty pleased
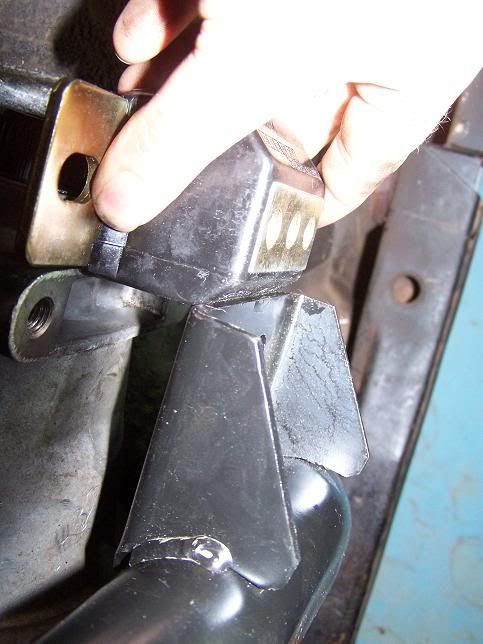
That, or I will cut out the plate where the mount meets the crossmember and lower it
Still waiting for the friggin headers from jegs. I am getting pretty ticked after I found out another person on here also had there on backorder from summit, but only had to wait a few days unlike me (looking at 2 months
) so not 100% sure which way to go. Ordered a new f-body pan, but might end up selling it anyways since things are going pretty well with the jzmotorworks pan. Not sure though.Put an angle finder on the crank pulley and shows about 4-4.5 degrees with the tail downward, and from what I can find, that is acceptable, and will be even less when the car is lowered as it is WAY to high in the front with the big block springs
With three washers under each of the three bolts on the drivers side, and none on the passengers side, with the load plate behind the energy suspensions motor mounts, I get just enough oil pan clearance to not have contact, maybe just enough clearance for the coil to powerbooster, and have the alternator clear the subframe. But I will still need to drill two holes for the frame stand on the passengers side, only one existing hole can be used. Will use all three on the drivers side.
Not only that, it looks like I can use my th400 crossmember, one bolt hole lines up with existing hole, but will need to drill the second.
Unfortunately, the energy suspension tranny mount will not fit, I need a shorter one..... don't know if the factory rubber one is shorter, or will need to cut this one, but still pretty pleased
That, or I will cut out the plate where the mount meets the crossmember and lower it

