
69 Nova Build - pumpgas twin turbo 408 LS


 05-28-2012, 11:31 AM
#162
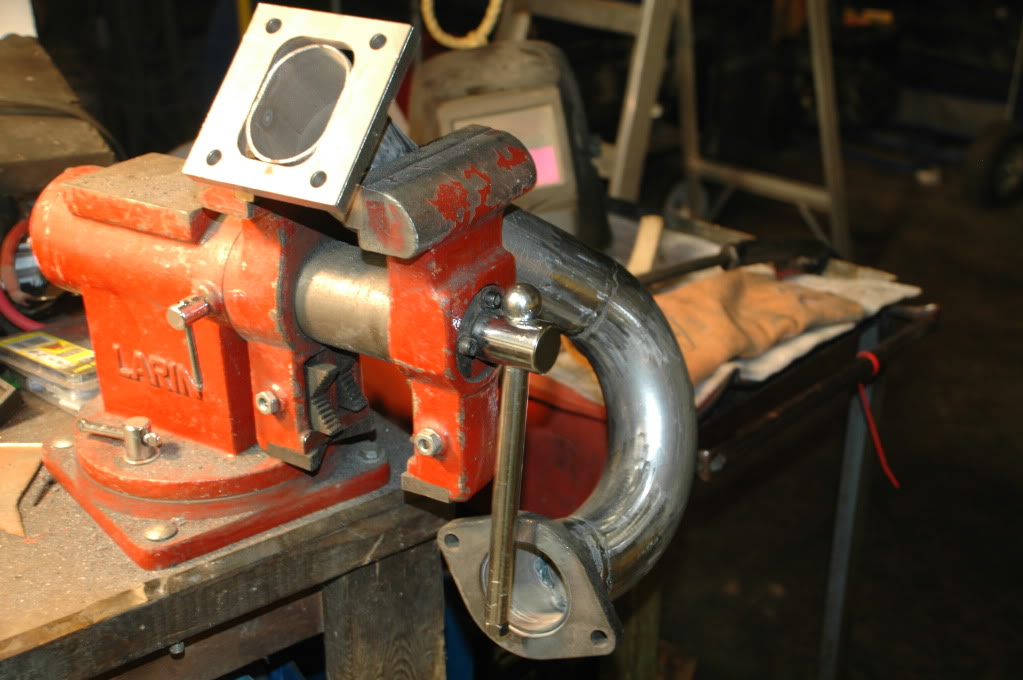
I decided to weld up the driver's side hot pipe instead of work on the steering shaft. I had to re-do the pipe into the T4 flange, then I worked on welding out the 4 sections until I ran out of wire. It was a decent weekend of activity after the long dry spell.
I need to work up an order to Jegs for some black -10 nylon braided hose for the turbo drains and some 1.75" tubing for the Tial wastegates.
I need to work up an order to Jegs for some black -10 nylon braided hose for the turbo drains and some 1.75" tubing for the Tial wastegates.
05-31-2012, 05:38 PM
#163
Mr. C, it appears that all is going well. I look forward to seeing it once it is done. I would guess that you are as well.
Keep plugging away. Let me know if you still need some help with the welding? I will get trash can to help you out!!!!!!!!
Keep plugging away. Let me know if you still need some help with the welding? I will get trash can to help you out!!!!!!!!
 06-12-2012, 11:52 PM
#165
I received this radiator fan/shroud assembly from an online company, and I am just not real thrilled by the looks of the fan assembly. The radiator appears to have good weld quality and looks nice, but the fans just look cheap - like the blades were trimmed to fit the shroud, and I can't imagine the thin, straight blades pull much air. I am also concerned with how little open surface area there is in the shroud. If you paid $750 for this radiator assembly would you keep it or send it back? I really wish I had asked for a picture before ordering this thing.


06-13-2012, 12:21 AM
#166
TECH Regular
iTrader: (12)
Join Date: May 2010
Location: Waxahachie, Tx
Posts: 446
Likes: 0
Received 0 Likes
on
0 Posts

pretty though......
In Alabama, send it back...
I think the close shroud will restrict flow too much.
But I live in the desert so I'm pretty biased on what works.
Quick look on Summit/Jegs should get you a similar fan and flow rating for info. I don't like the little cheap fans for anything but a tranny cooler.
Get an Al radiator of your choice and run a Tarus, MkVIII or Fbody twin fan setup.
06-13-2012, 03:54 AM
#167
If thats the Entropy radiator than it should be fine. Bmf150 and several others have used it with great success. The pic you posted a couple of replies back shows an entirely different fan/shroud setup. I have a smaller aluminum double pass with twin 10" Spahl fans and mine is borderline too little of volume. 90f degree weather with the air conditioning on sitting idle for several minutes mine got up to 218f. Once I started to move the temps hovered around 195-200f.
Turbos10 is right, I have seen several people use the Ford Tauras and 98-02 F-body fans and swear by them.
Speedway Motors have several aluminum double pass radiators starting around $175 and on up. They also have preassembled fan/shrouds. Speedway has some direct fit radiators that look rather nice. For example: http://www.speedwaymotors.com/AFCO-1...ors,58264.html
06-13-2012, 07:50 AM
#168
It is the Entropy setup. When I discussed my 6.5" clearance between the intercooler and the water pump, he suggested I use his "low profile" fans. I never got to see a picture of these fans. I have what I think is a Ford Mark VIII fan at the house and it is way to thick to fit in my configuration. I will say this setup leaves plenty of clearance - enough for me to leave an inch between the radiator and intercooler. But I just don't like the looks of the fans and I question their flow potential. I guess I'll contact him today and talk a bout a refund. I really don't want to have cooling problems.
06-16-2012, 08:57 AM
#170

I would send that back in a HURRY Clyde...Yes there is a shroud but no shroud around the fans themselves and they look dinky. They could add some metri pack connectors too instead of leaving you to solder/crimp the wires. JMO...
This is my setup and it moves some air!!! With your intercooler being in front I'd defintelyreconsider...
http://www.google.com/imgres?q=CPW+s...9,r:2,s:0,i:80
This is my setup and it moves some air!!! With your intercooler being in front I'd defintelyreconsider...
http://www.google.com/imgres?q=CPW+s...9,r:2,s:0,i:80
Last edited by Petraszewsky; 06-17-2012 at 09:57 AM.
06-16-2012, 11:59 AM
#171
On The Tree
iTrader: (4)
Join Date: Feb 2012
Location: Minnesota
Posts: 116
Likes: 0
Received 0 Likes
on
0 Posts
I would send it back those fans aren't going to move any air through the radiator its going to escape from the open edges, they don't have a shroud at all. All I see is a big plate blocking the airflow all together.
06-16-2012, 11:38 PM
#172
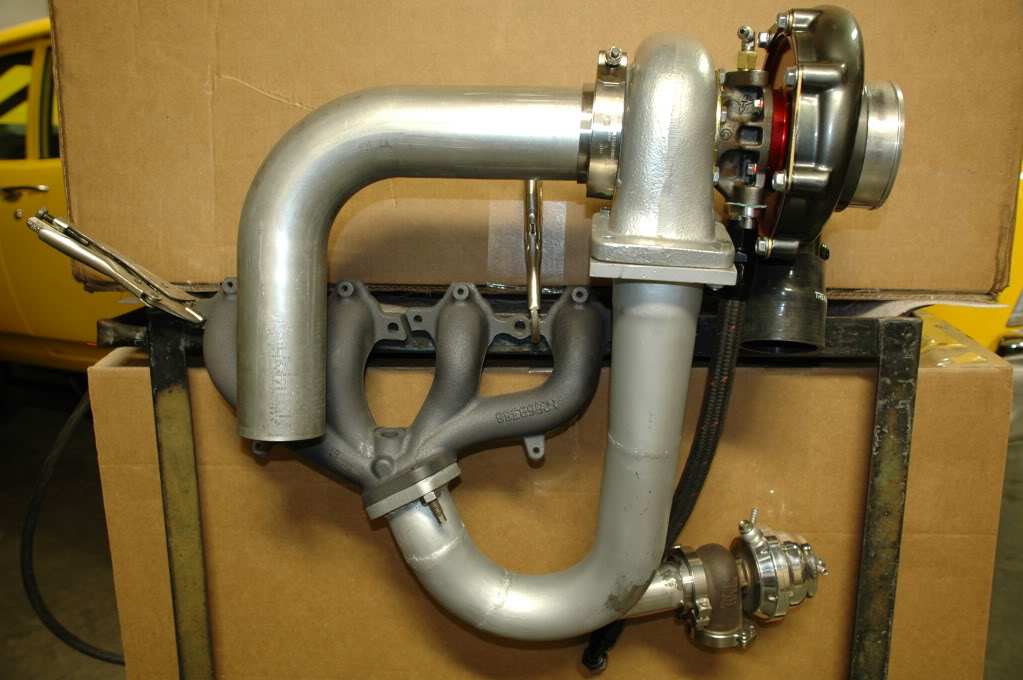
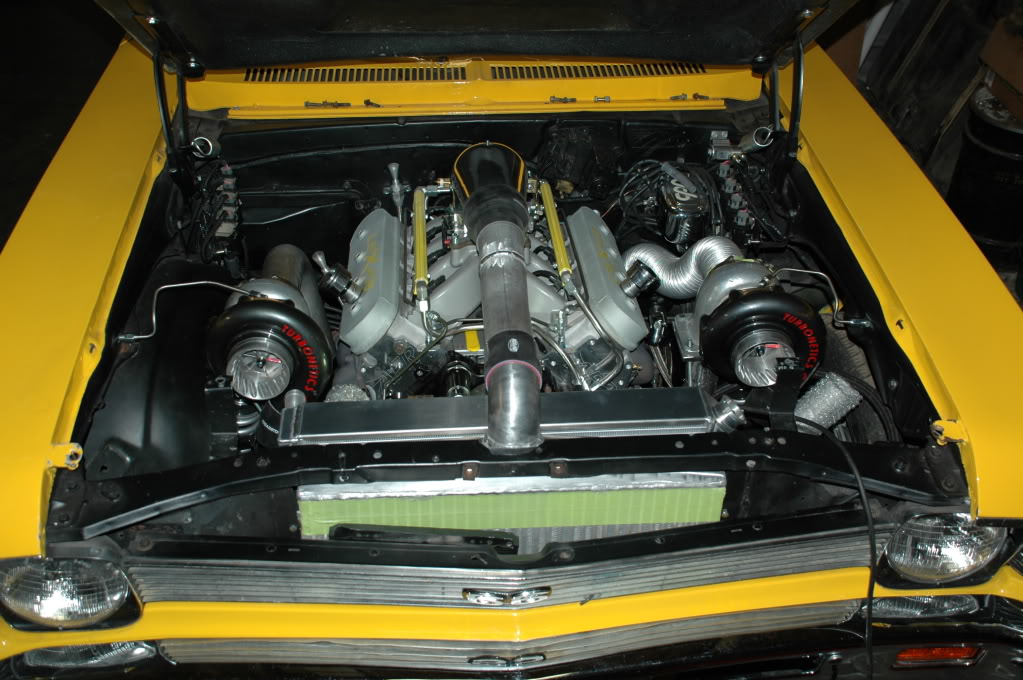
It's time for a project update. Ever since January I haven't had much time to work on the Nova due to other projects... but now with the backlog cleared up I have been able to work a little here and there on it the past couple of weeks. Both 2˝" hot pipes from the manifolds into the T4 flanges are complete. I used three 2˝" U-bends, two T4 flanges and two C6 flanges to route the tubing under the engine mounts. It takes a fair amount of heat and hammer to form a round peg into an oval T4 flange.
Today I added some 1-7/8" tubing for the Tial 44mm wastegates - just tacked on for now. Here is what the hot side looks like at this point:
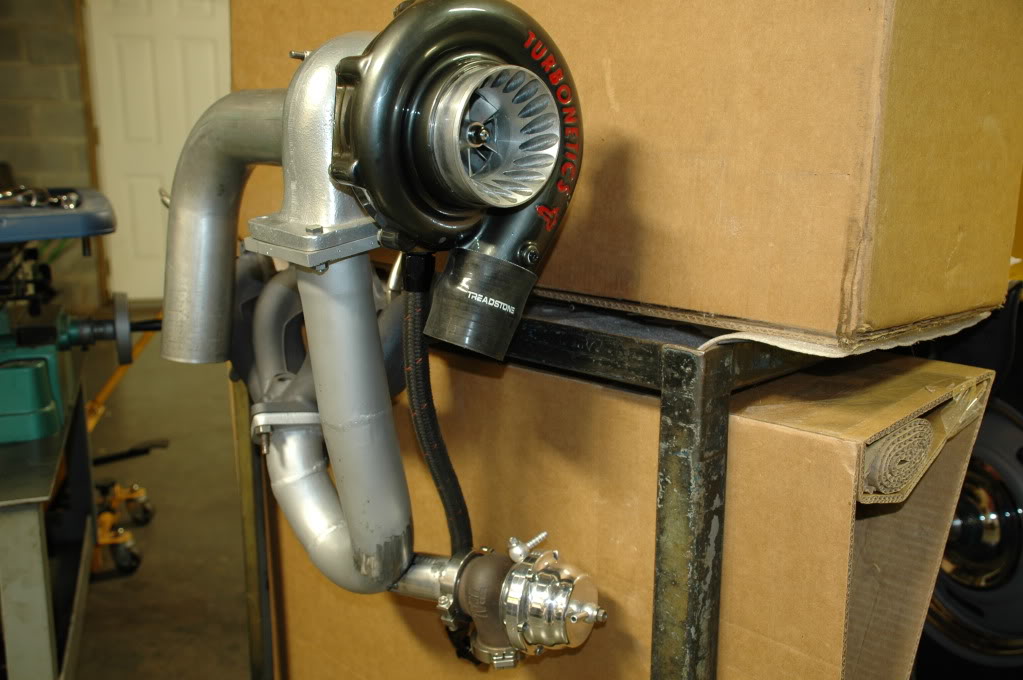
It gets pretty busy with the radiator/fan assembly, alternator, etc.. I'll need to either re-clock the alternator or use a different one to keep the wiring away from the hot pipes.
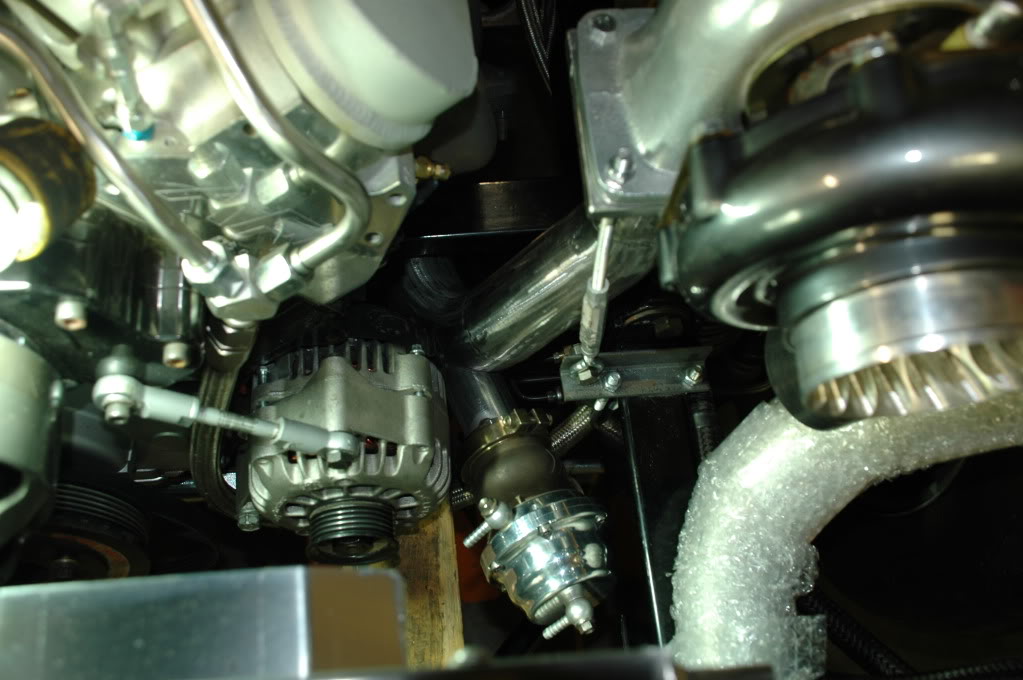
And here is an overall shot with the new radiator/fan assembly mocked in place. Note that at the recommendation from some friends, I ditched the 3" silicon elbow coming out of the intercooler and had a cast aluminum elbow welded in place. So far the aluminum welding is the only thing I had to farm out. I started polishing the top intercooler tank and elbow, but still have a ways to go there.
Even with this recent spurt of progress there is still so much remaining. But the good thing is I have purchased almost everything needed to get it running with boost. I just need to spend time on it. Biggest things left are fabricating the downpipes (that well-used dryer duct really needs to be retired), modifying the steering linkage, and mounting the radiator and finishing up a bunch of little loose ends.
By the way, I've contacted Entropy about replacing the fans but haven't received an answer. I must say that fan setup does allow a lot of clearance, but it's a moot point if they don't cool the engine.
Today I added some 1-7/8" tubing for the Tial 44mm wastegates - just tacked on for now. Here is what the hot side looks like at this point:
It gets pretty busy with the radiator/fan assembly, alternator, etc.. I'll need to either re-clock the alternator or use a different one to keep the wiring away from the hot pipes.
And here is an overall shot with the new radiator/fan assembly mocked in place. Note that at the recommendation from some friends, I ditched the 3" silicon elbow coming out of the intercooler and had a cast aluminum elbow welded in place. So far the aluminum welding is the only thing I had to farm out. I started polishing the top intercooler tank and elbow, but still have a ways to go there.
Even with this recent spurt of progress there is still so much remaining. But the good thing is I have purchased almost everything needed to get it running with boost. I just need to spend time on it. Biggest things left are fabricating the downpipes (that well-used dryer duct really needs to be retired), modifying the steering linkage, and mounting the radiator and finishing up a bunch of little loose ends.
By the way, I've contacted Entropy about replacing the fans but haven't received an answer. I must say that fan setup does allow a lot of clearance, but it's a moot point if they don't cool the engine.
06-23-2012, 01:05 AM
#173
Will those oil supply hardlines/bulkheads attached to the fender be prone to flex or bend the fender when the engine twists? I can't remember what type of mounts you had...I bet the aftermarket front assembly probably is a lot more rigid than stock..

 08-16-2012, 07:10 AM
#178
I should have some pretty good progress to report after this coming weekend. Between vacation and getting my son moved to college last weekend took a lot of time away from the garage. But I've been pecking away at it lately, and will hopefully start some final assembly by this weekend. The only fabrication left is running the 3" downpipes. I already have 45° and 90° mandrel bends and v-bands, so I think the downpipes will be fairly easy to knock out. I'll follow up with some pictures after this weekend.
08-16-2012, 06:44 PM
#179

Clean looking. I love the oil supply going into the fenders.
08-23-2012, 08:52 AM
#180
I have been pushing myself over the last 2 weeks to get this project on track again. I really want to drive it the 5 miles to the Meridianville Middle School car show this Saturday. It hasn't run since last fall...
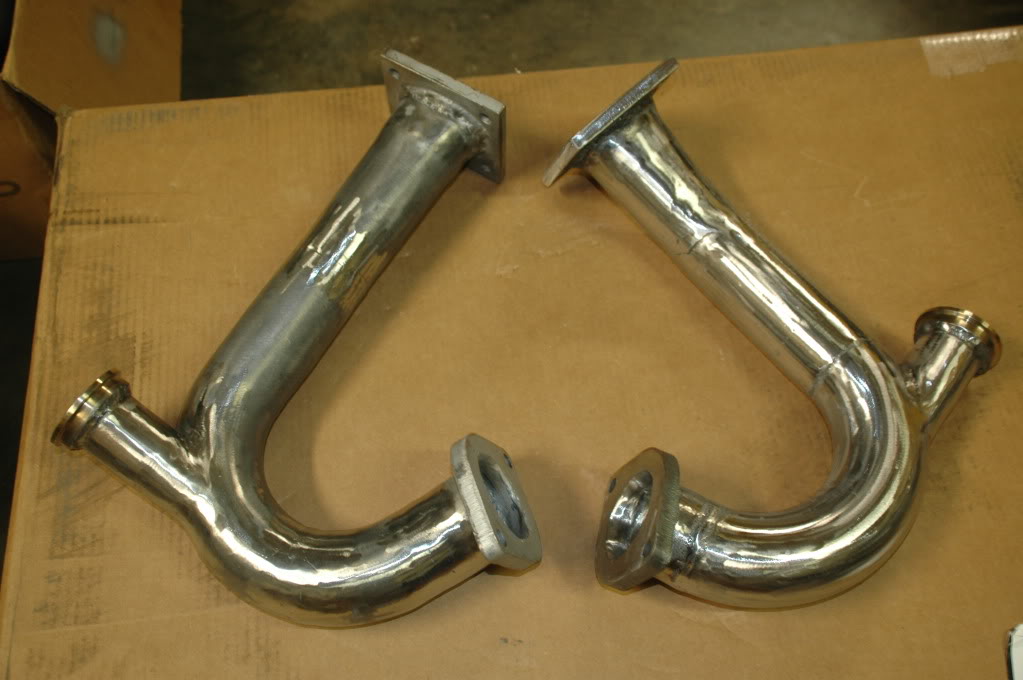
I finished up the 2˝" exhaust charge pipes that took so long to layout and weld up. My welding isn't pretty so I kept grinding the welds back down and touching them up again. Then I threw wrap over it all to make it a moot point. Here are some fabrication pictures adding a wastgate flange:
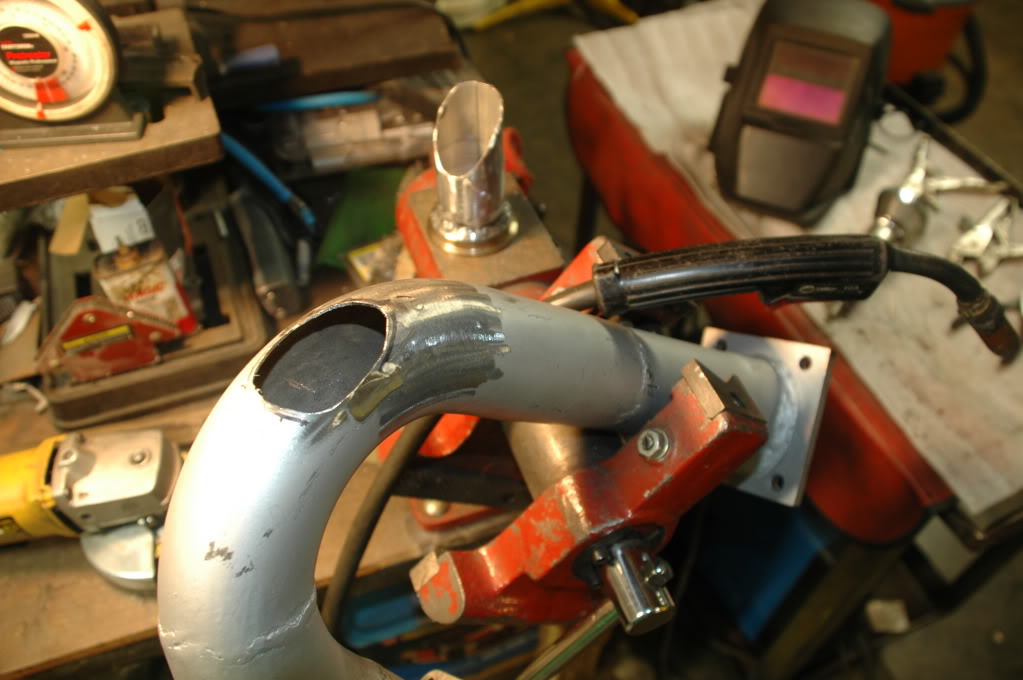
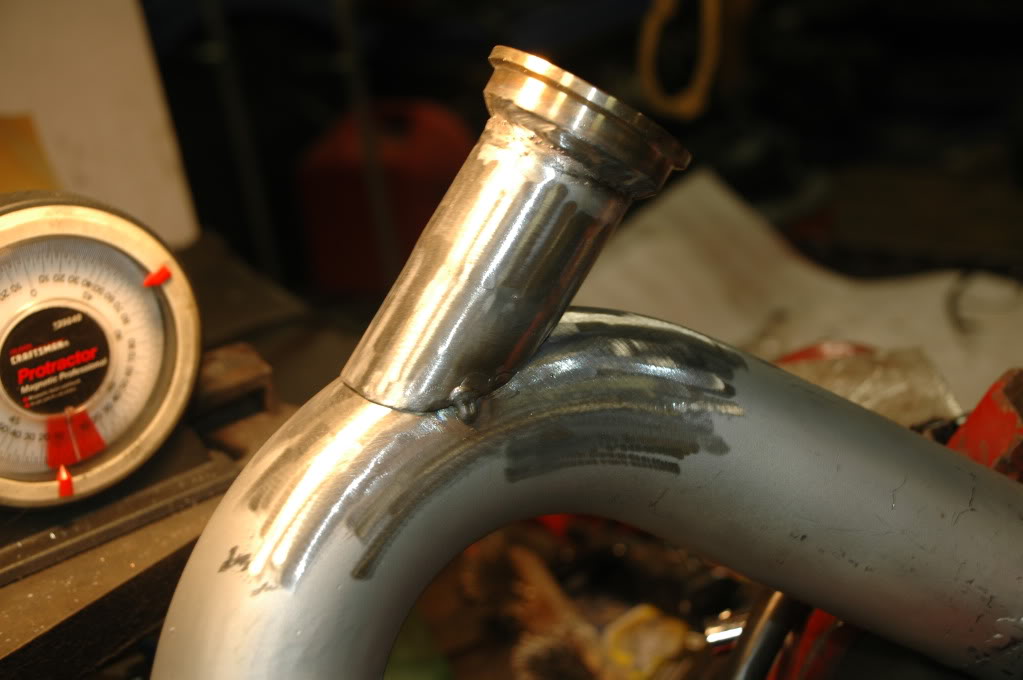
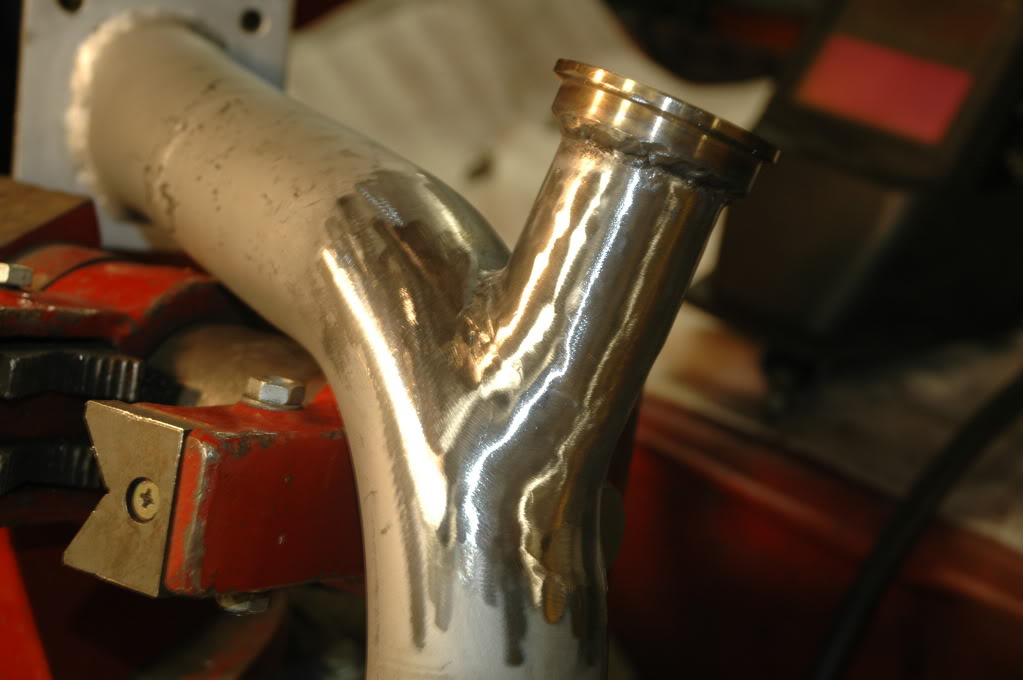
And the two pipes all finished. The left one still hadn't been fully sanded to get the aluminized coating off in this picture:
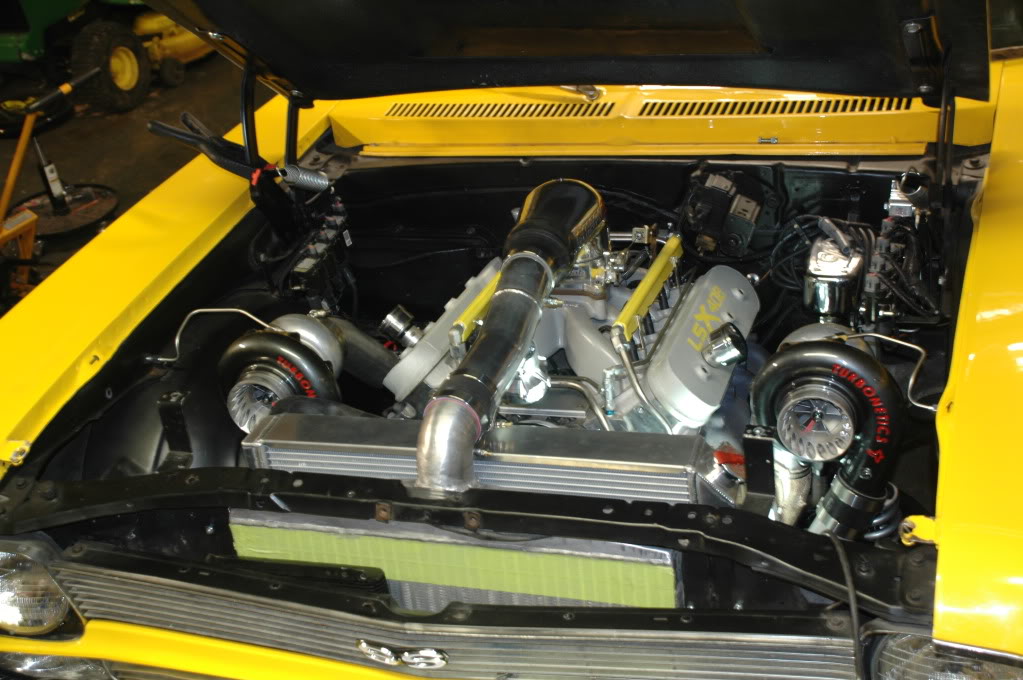
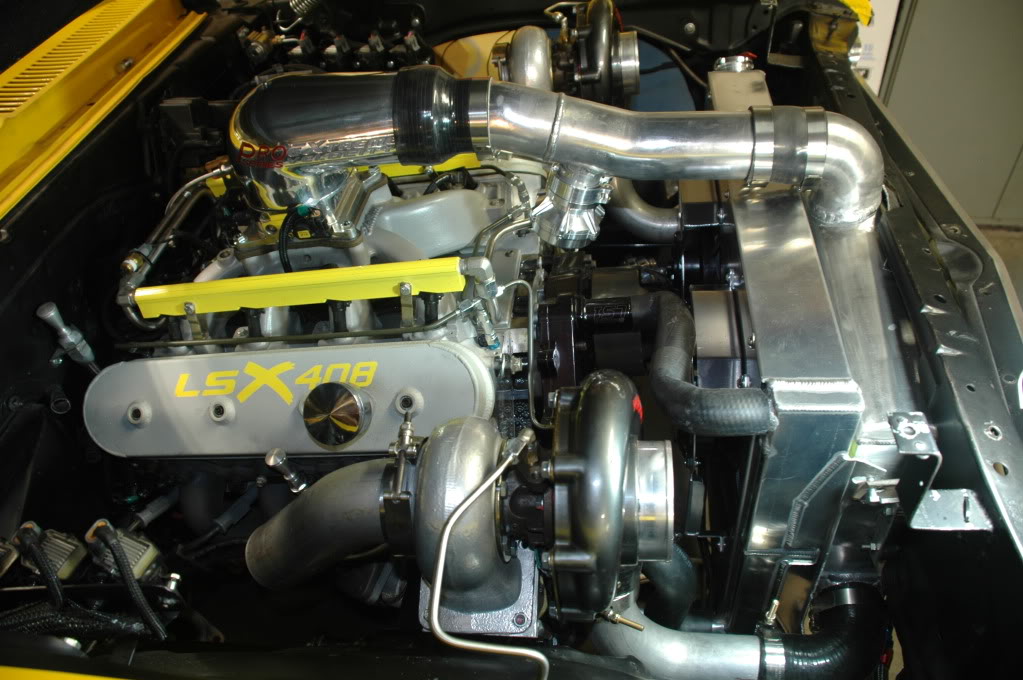
The underhood view doesn't look a whole lot different than the past several months, but at least this time there are exhaust gaskets involved (i.e. final assembly). You can also see the blow-off valve added beneath the charge pipe.
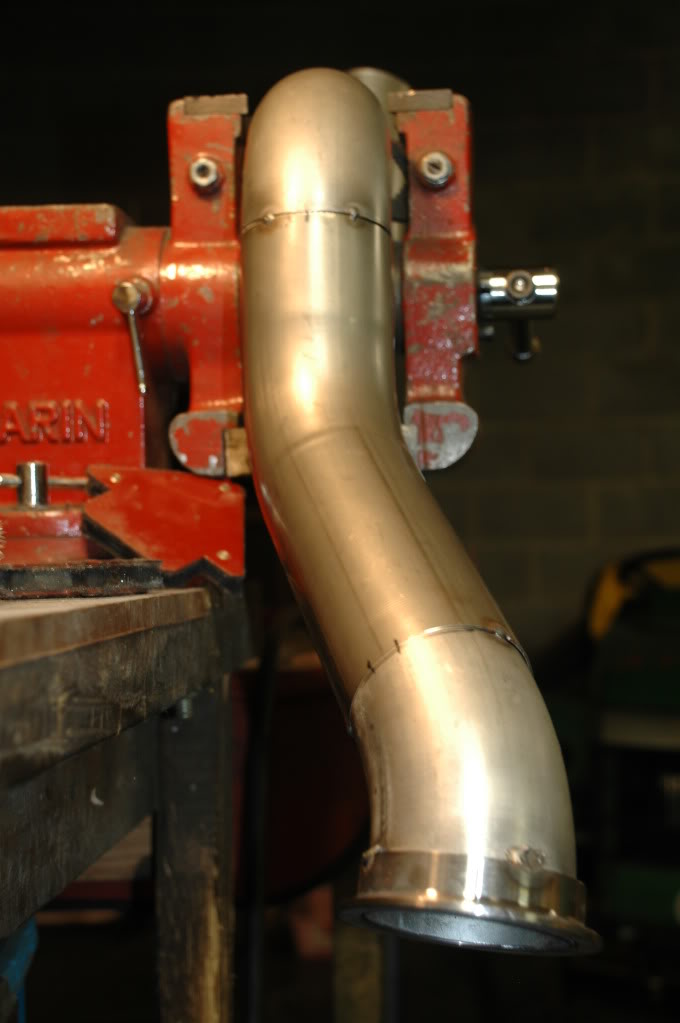
Last night I started fitting up the 3" downpipe for the driver's side. It will take two 45° bend and two 90° bends to snake below the brake booster and past the steering linkage. All that is tack welded together now, but it's too convoluted to install in one piece. I'll add a v-band tonight. The passenger side will be easier with just a couple 45° bends to get it under the car.
I finished up the 2˝" exhaust charge pipes that took so long to layout and weld up. My welding isn't pretty so I kept grinding the welds back down and touching them up again. Then I threw wrap over it all to make it a moot point. Here are some fabrication pictures adding a wastgate flange:
And the two pipes all finished. The left one still hadn't been fully sanded to get the aluminized coating off in this picture:
The underhood view doesn't look a whole lot different than the past several months, but at least this time there are exhaust gaskets involved (i.e. final assembly). You can also see the blow-off valve added beneath the charge pipe.
Last night I started fitting up the 3" downpipe for the driver's side. It will take two 45° bend and two 90° bends to snake below the brake booster and past the steering linkage. All that is tack welded together now, but it's too convoluted to install in one piece. I'll add a v-band tonight. The passenger side will be easier with just a couple 45° bends to get it under the car.
Last edited by Chevy406; 08-23-2012 at 08:58 AM.