
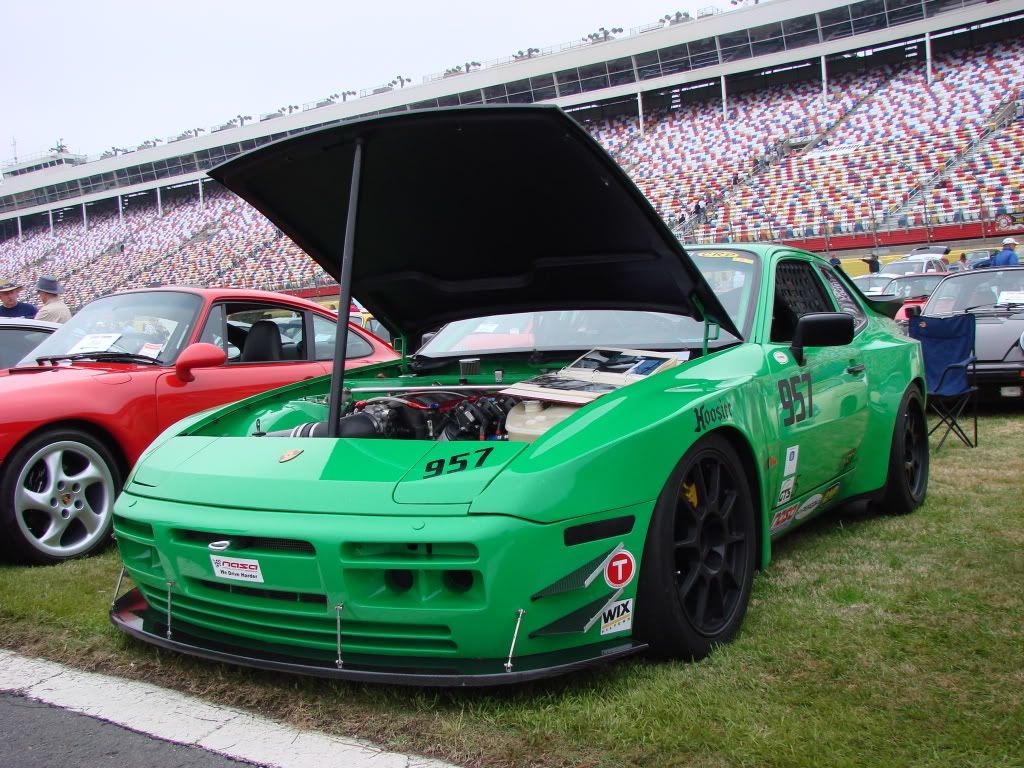
My History And The Building of my "LS44"


 03-03-2011, 08:39 PM
#24
On The Tree
Thread Starter
iTrader: (8)

Join Date: May 2009
Posts: 199
Likes: 0
Received 0 Likes
on
0 Posts
Thank you! I have so much more i want to add, i really wish I had been doing this all along...
The N/A trans will basically be "Sacrificial"..... I plan to take some agression out on that transmission... Then Ill end up with a modified turbo transmission. The only real modification will be a limited slip diff, there is supposed to be a new one to the aftermarket, if they ever produce.... It will always be a risk when i launch the car, but its not meant to be a drag car, i want to **** off GT3 owners at the track... a Lowly 944 just smoked us... * i better learn how to drive...)
Thank you very much, I cant wait to drive it!!!
Mark
Mark
 You really have a lot of patience.
04-12-2011, 07:19 PM
You really have a lot of patience.
04-12-2011, 07:19 PM
#27
TECH Enthusiast
iTrader: (1)

Join Date: Jan 2006
Location: Charlotte, NC
Posts: 581
Likes: 0
Received 0 Likes
on
0 Posts

Mark - do you happen to know this guy? His car has a Hendrick Porsche sticker on the back... I took this pic this past weekend at the Food Lion Auto Fair...

 [/end-hijack]
  05-23-2011, 09:44 AM
#32
On The Tree
Thread Starter
iTrader: (8)
Join Date: May 2009
Posts: 199
Likes: 0
Received 0 Likes
on
0 Posts
Sorry for the lack of updates, I have a bunch of stuff to add but....
It's Alive!!!
I primed the oil system with 20psi of oil through the remote oil filter using a pressure brake bleeder, primed the fuel system and it seriously cranked up IMMEDIATLY!!!!
http://www.youtube.com/watch?v=vaI_uEOt6p4
Will update soon!!
Mark
It's Alive!!!
I primed the oil system with 20psi of oil through the remote oil filter using a pressure brake bleeder, primed the fuel system and it seriously cranked up IMMEDIATLY!!!!
http://www.youtube.com/watch?v=vaI_uEOt6p4
Will update soon!!
Mark

 06-01-2011, 09:56 PM
#39
On The Tree
Thread Starter
iTrader: (8)
Join Date: May 2009
Posts: 199
Likes: 0
Received 0 Likes
on
0 Posts
Sorry for the lack of updates, I have a bunch of stuff to add but....
It's Alive!!!
I primed the oil system with 20psi of oil through the remote oil filter using a pressure brake bleeder, primed the fuel system and it seriously cranked up IMMEDIATLY!!!!
http://www.youtube.com/watch?v=vaI_uEOt6p4
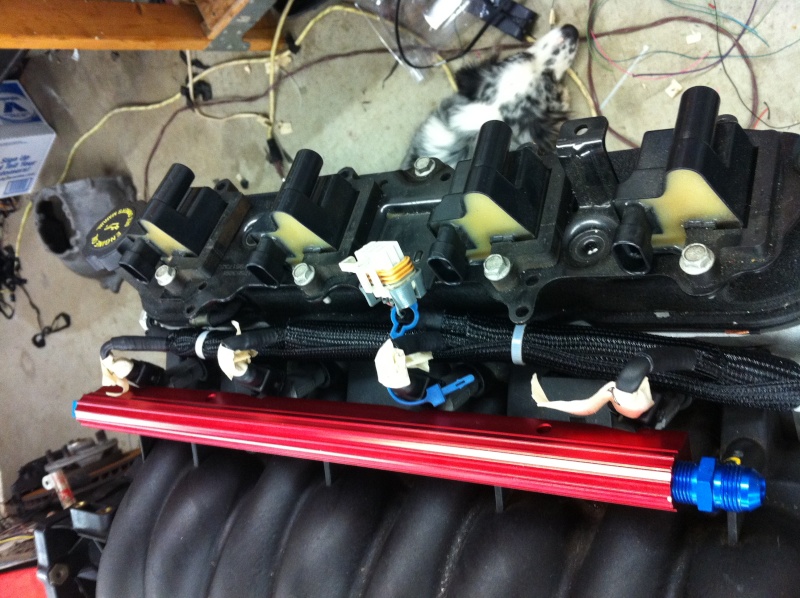
Here is how i connected my Walboro 255 to the GM Filter/regulator, I used one of the fuel line repair kits from dorman, the 3/8's with a 90' end, cost like $12 I think, took my factory fuel line from the pump to the filter, removed the end that went into the filter, its just a barbed fitting, trimmed it back slightly to get fresh plastic to push it into and used the barbed piece in the repair kit, boiled it in hot water for like 10 minutes and pushed it all together. Works great and no signs of leaks.
Kinda OT, but here are pics of a harness I built for a guy on here, turned out better than mine...

Here is what my firewall looked like...
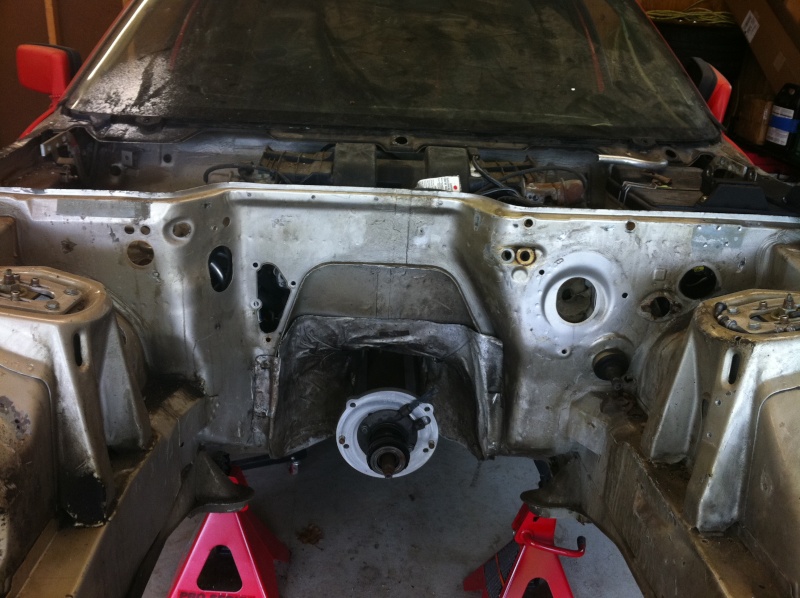
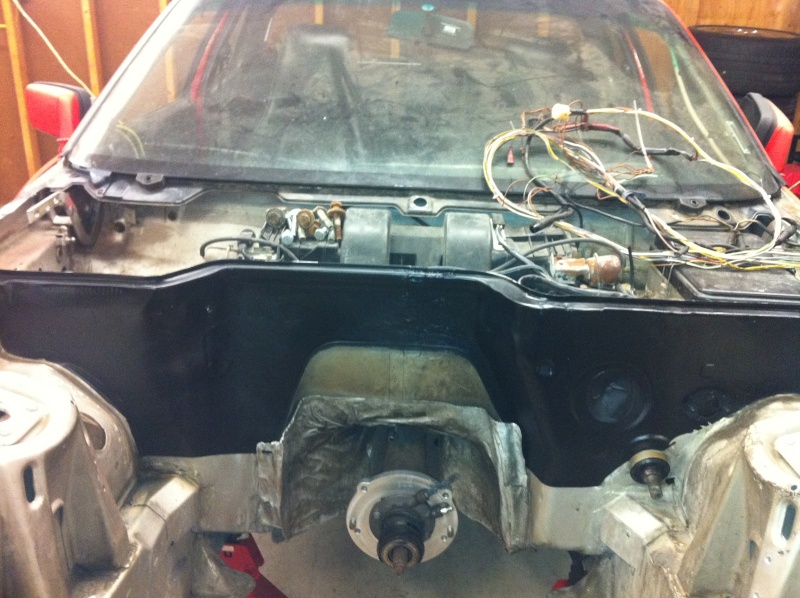
And after, much better with the holes filled...
Another boring day at work...
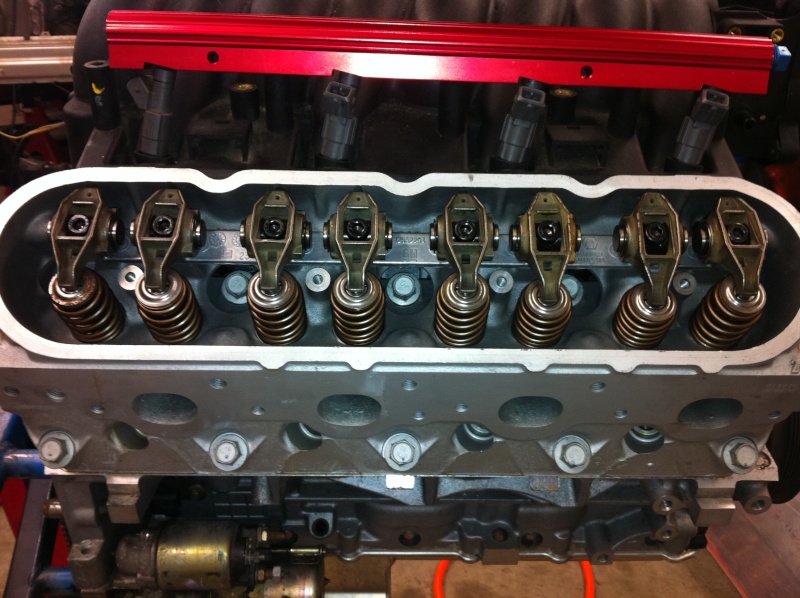
I went back and forth a million times on what springs to run... Double or beehive... the added saftey of the double is nice... but the added weight isnt... these springs are supposed to be the best for a beehive, untill recently I hadnt seen a single failure, PAC 1518
I replaced every exterior bolt to black allen button head, coil pack, front cover etc. I figured it was going to cost me $75 for the factory bolts i was missing, and it only cost me $80 for like 5x more bolts than i needed it was an easy choice...
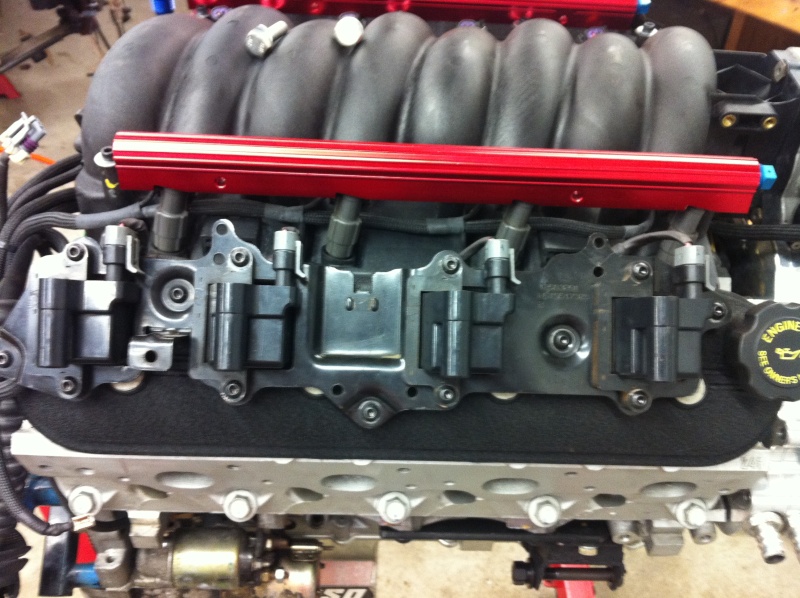
Didnt have button head for the alternator or the intake so i had to settle for regular black allen bolts
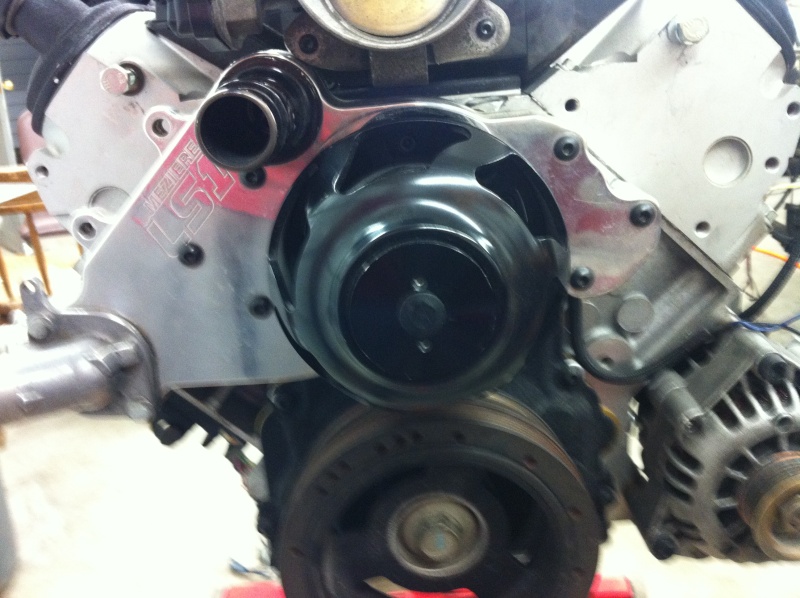
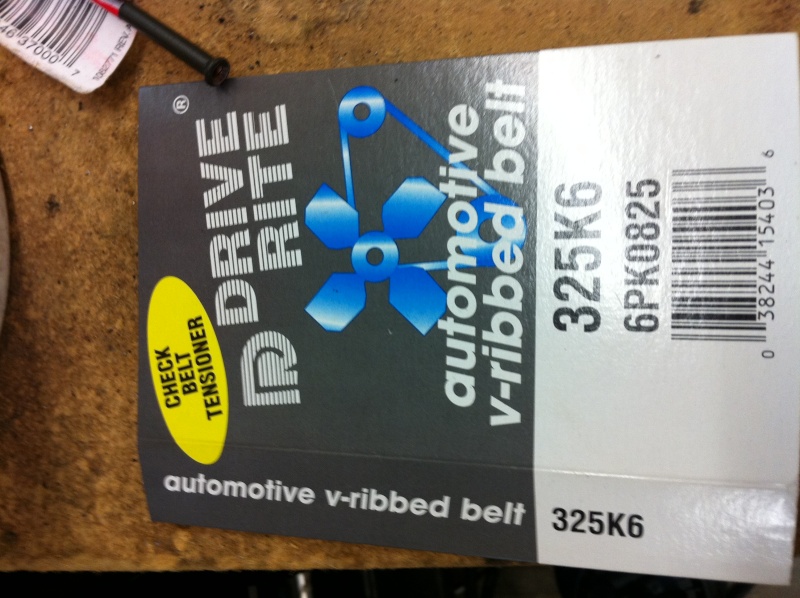
The belt i used for a solid mounted alternator... looped it around the alternator then half way around the crank and used a socket to spin the crank and the belt popped on... almost perfect, it could be like 5mm longer...
updated setup under passenger fender...
To make for less plumbing i moved it here... if i would have left it under the fender I would have needed to drill another hole for a 3rd bulkhead fitting into the battery tray so my coolant reseviour could "T" into the return heater line BEFORE the heater control valve. I will be fabbing up a cover for this area...
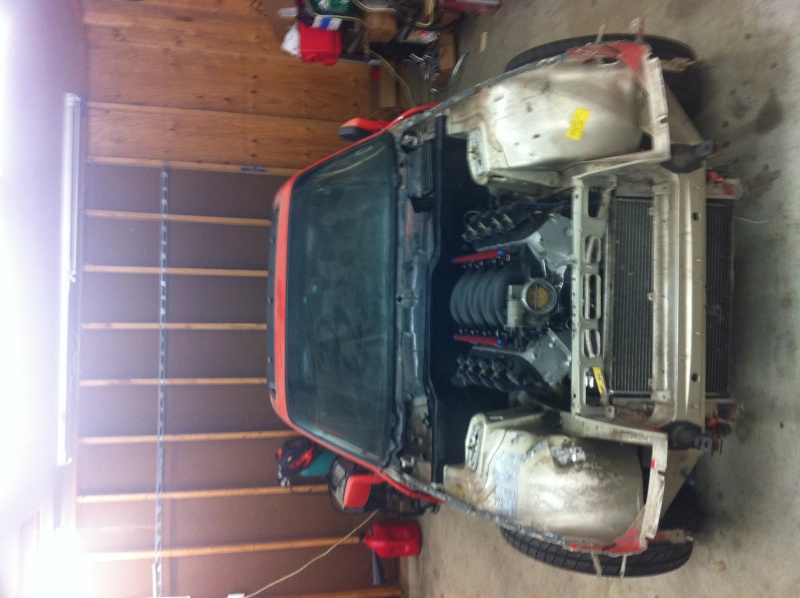
I forgot how low this car sits... ITs actually back on all 4 wheels... Ugly wheels.... but beggers cant be choosers...
This is about 95% of it... just waiting on the brake and clutch master cylinder's, and radiator hoses... Steering shaft....
This shows ground clearance... my front suspension is currently as HIGH as it will go, so the car was sitting lower... not sure i will go that low again, but its still plenty low...
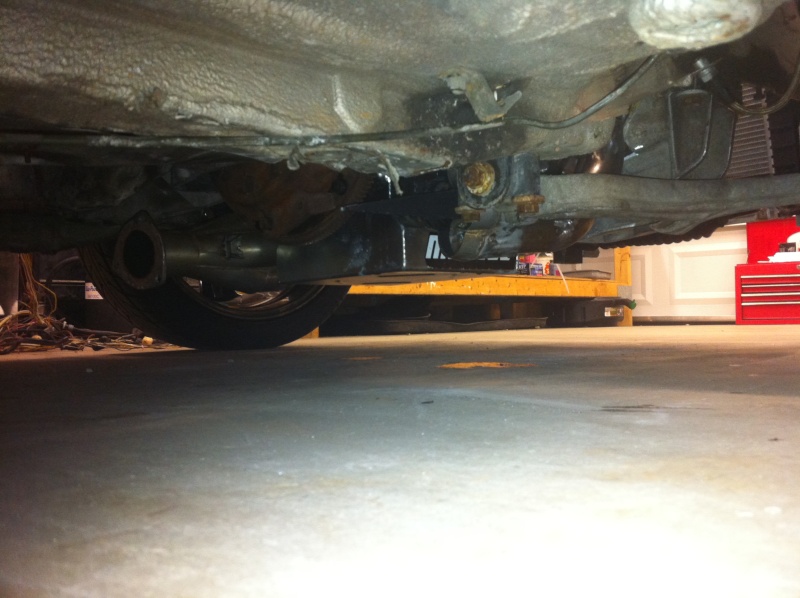
This picture is decieving, it makes the collector look very low, but you can see in the previous pic they dont sit below the body of the car, tucked up NICE!!!
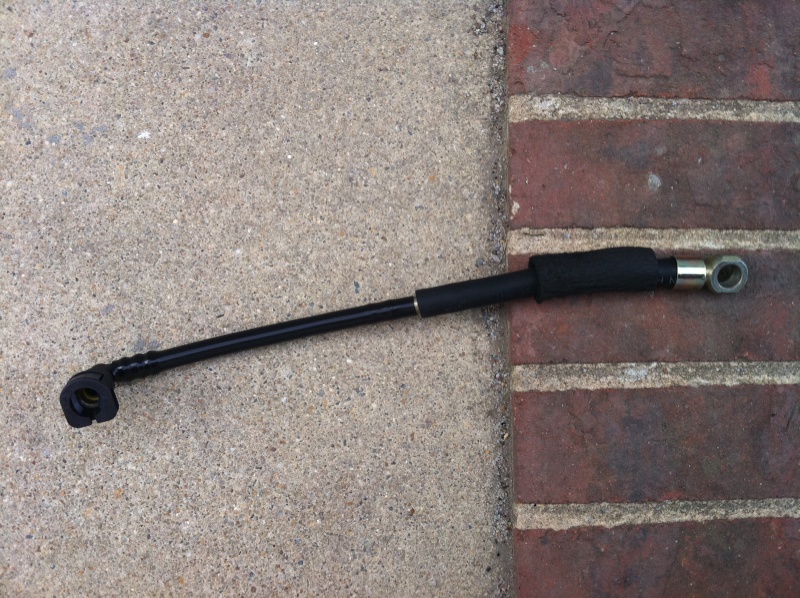
This shows it better... please ignore the brake line, its just pulled up out of the way till i get my new lines, and the nasty caster blocks are going to be replaced with either Elephant Racing monoballs or complete control arms...
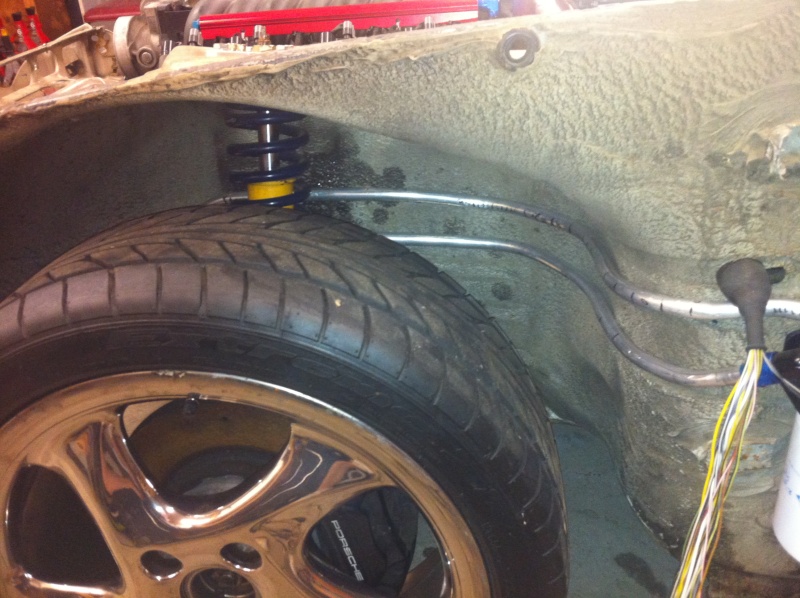
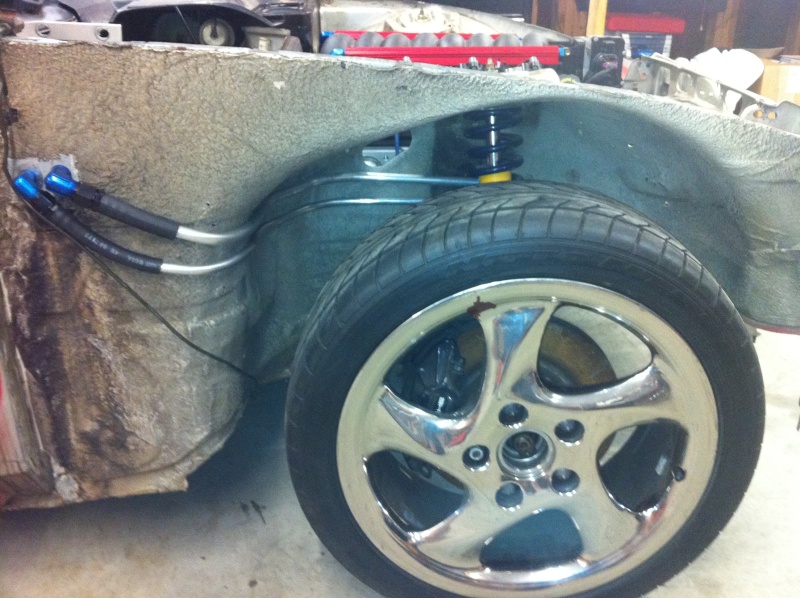
And these two make me feel MUCH better about my lines, there is no way the wheel is going to hit them, now i just need to setup my wheel well liners and shield the lines.
So I am currently waiting on my reseviour, I decided on a VW res its shaped like a soccer ball, came with the cap and coolant sensor for ....... $16 shipped new on ebay.... And my brake and clutch master's and the braided -3 lines i ordered to keep the M/c's clean. And i need to stop at advance and pickup some 3/8 line for coolant for my vent tubes to the overflow, solid vac line to feed the HVAC stuff, radiator hoses, and a cap for the fill port on the N/A radiator.
I have also contacted "Howe Racing" and was quoted a custom radiator according to the Turbo Dim's with AN -16 fittings, dual pass, both fittings on the passenger side, with a drain plug in the bottom, and mounting tabs across the top and bottom, ( I will remeasure before ordering as i plan to cut out all the factory radiator brackets so i may have more room to go wider) for around $400...
Feed back is welcome!!!
It's Alive!!!
I primed the oil system with 20psi of oil through the remote oil filter using a pressure brake bleeder, primed the fuel system and it seriously cranked up IMMEDIATLY!!!!
http://www.youtube.com/watch?v=vaI_uEOt6p4
Here is how i connected my Walboro 255 to the GM Filter/regulator, I used one of the fuel line repair kits from dorman, the 3/8's with a 90' end, cost like $12 I think, took my factory fuel line from the pump to the filter, removed the end that went into the filter, its just a barbed fitting, trimmed it back slightly to get fresh plastic to push it into and used the barbed piece in the repair kit, boiled it in hot water for like 10 minutes and pushed it all together. Works great and no signs of leaks.
Kinda OT, but here are pics of a harness I built for a guy on here, turned out better than mine...
Here is what my firewall looked like...
And after, much better with the holes filled...
Another boring day at work...
I went back and forth a million times on what springs to run... Double or beehive... the added saftey of the double is nice... but the added weight isnt... these springs are supposed to be the best for a beehive, untill recently I hadnt seen a single failure, PAC 1518
I replaced every exterior bolt to black allen button head, coil pack, front cover etc. I figured it was going to cost me $75 for the factory bolts i was missing, and it only cost me $80 for like 5x more bolts than i needed it was an easy choice...
Didnt have button head for the alternator or the intake so i had to settle for regular black allen bolts
The belt i used for a solid mounted alternator... looped it around the alternator then half way around the crank and used a socket to spin the crank and the belt popped on... almost perfect, it could be like 5mm longer...
updated setup under passenger fender...
To make for less plumbing i moved it here... if i would have left it under the fender I would have needed to drill another hole for a 3rd bulkhead fitting into the battery tray so my coolant reseviour could "T" into the return heater line BEFORE the heater control valve. I will be fabbing up a cover for this area...
I forgot how low this car sits... ITs actually back on all 4 wheels... Ugly wheels.... but beggers cant be choosers...
This is about 95% of it... just waiting on the brake and clutch master cylinder's, and radiator hoses... Steering shaft....
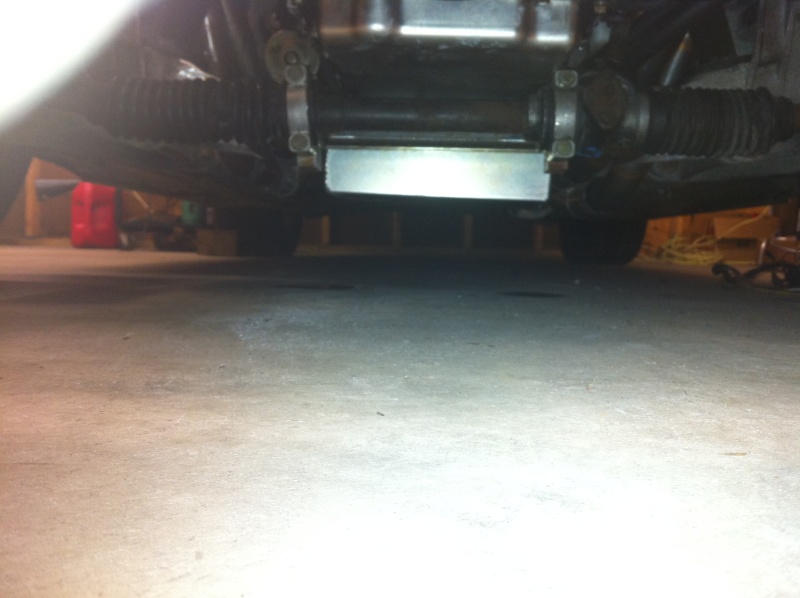
This shows ground clearance... my front suspension is currently as HIGH as it will go, so the car was sitting lower... not sure i will go that low again, but its still plenty low...
This picture is decieving, it makes the collector look very low, but you can see in the previous pic they dont sit below the body of the car, tucked up NICE!!!
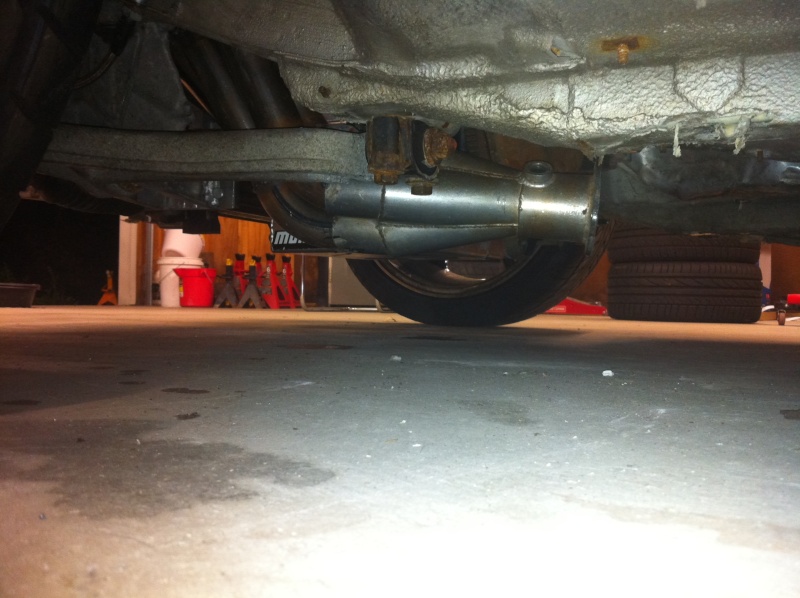
This shows it better... please ignore the brake line, its just pulled up out of the way till i get my new lines, and the nasty caster blocks are going to be replaced with either Elephant Racing monoballs or complete control arms...
And these two make me feel MUCH better about my lines, there is no way the wheel is going to hit them, now i just need to setup my wheel well liners and shield the lines.
So I am currently waiting on my reseviour, I decided on a VW res its shaped like a soccer ball, came with the cap and coolant sensor for ....... $16 shipped new on ebay.... And my brake and clutch master's and the braided -3 lines i ordered to keep the M/c's clean. And i need to stop at advance and pickup some 3/8 line for coolant for my vent tubes to the overflow, solid vac line to feed the HVAC stuff, radiator hoses, and a cap for the fill port on the N/A radiator.
I have also contacted "Howe Racing" and was quoted a custom radiator according to the Turbo Dim's with AN -16 fittings, dual pass, both fittings on the passenger side, with a drain plug in the bottom, and mounting tabs across the top and bottom, ( I will remeasure before ordering as i plan to cut out all the factory radiator brackets so i may have more room to go wider) for around $400...
Feed back is welcome!!!
08-10-2011, 10:54 AM
#40
On The Tree
Thread Starter
iTrader: (8)
Join Date: May 2009
Posts: 199
Likes: 0
Received 0 Likes
on
0 Posts
Ok, its been awhile, but i have made quite a bit of progress... Going on its second drive tonight, but will hopefully be able to go higher than 1500 RPMS with throttle cutting out. ( Was flashed wrong, didnt change from Auto to manual so Torque management was PISSED OFF  and would take throttle away) So i wasnt a happy camper, but i was able to screw with the PRNDL wiring at the PCM and fix it till i get Tuning software!
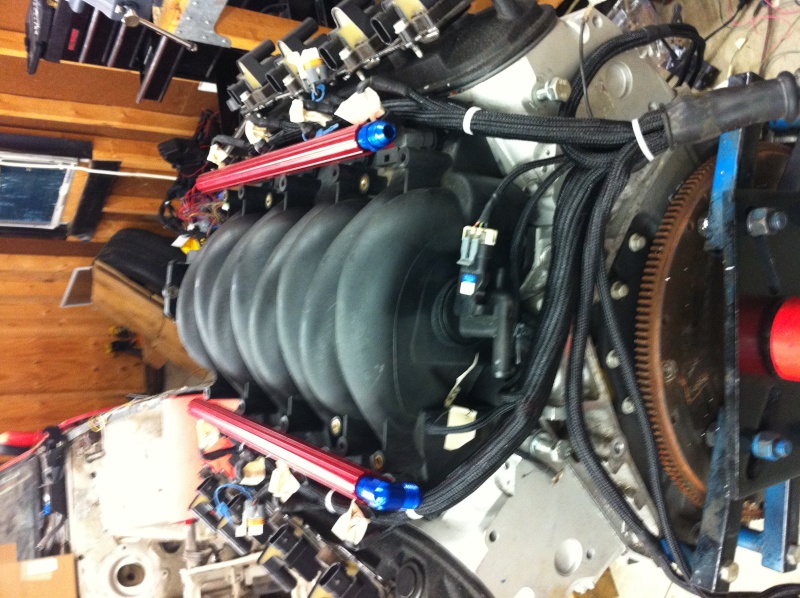
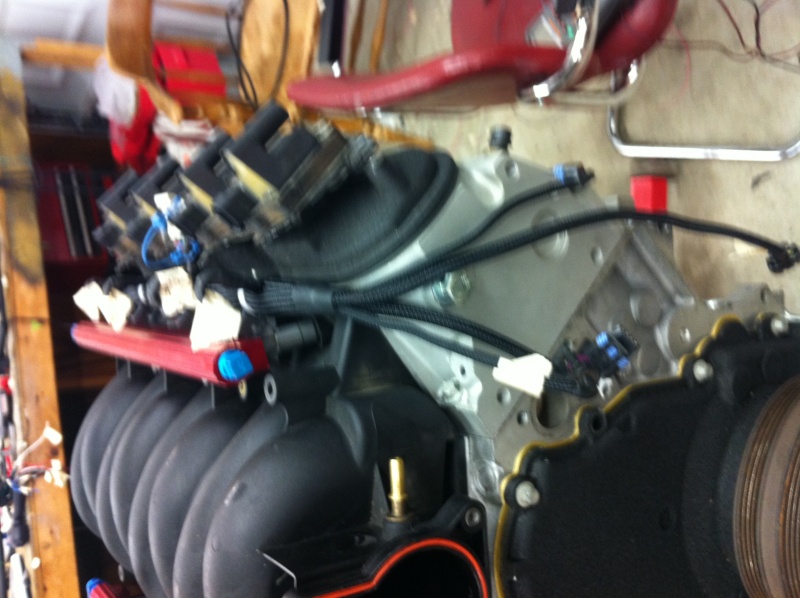
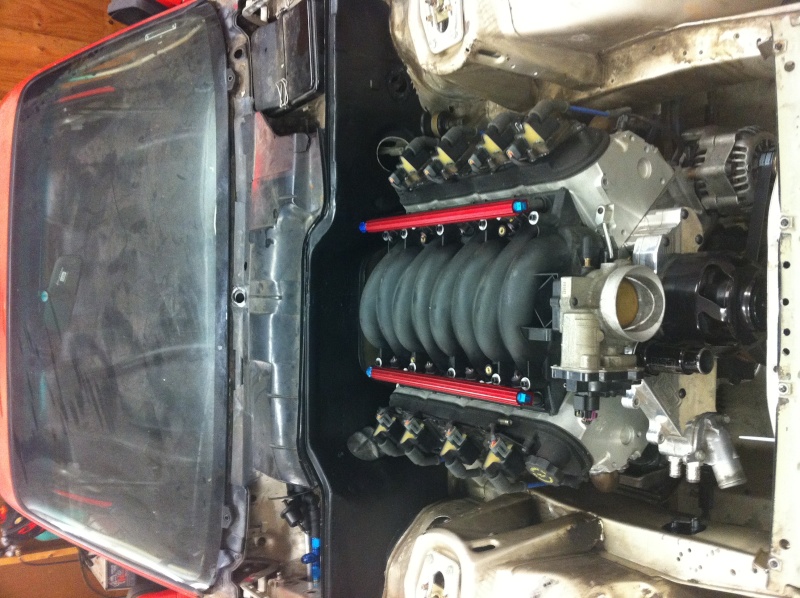
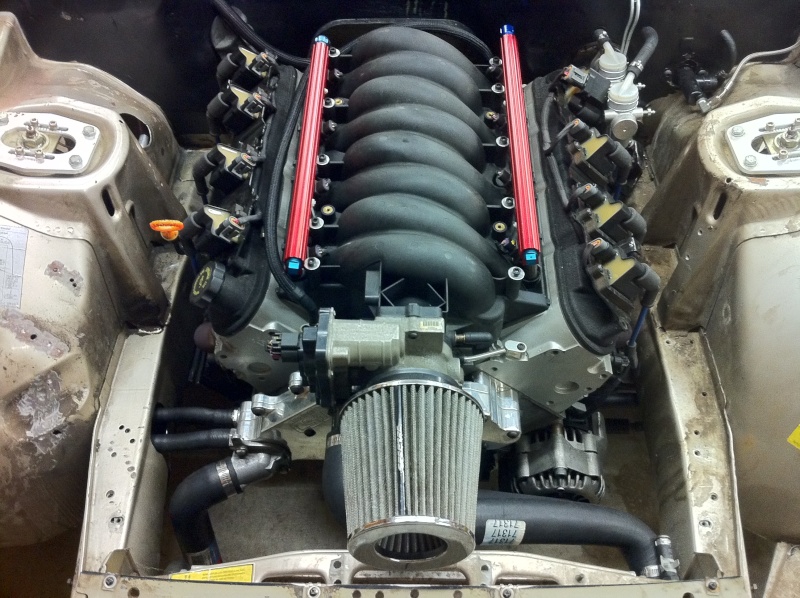
It appears i succeded in my quest for a clean engine bay! The air filter will be under the nose panel, i just need to trim the cross-bar, but im going to wait till I have a new radiator and gut everything between the rails, and make a bolt in panel since I always drop the engine in from the top it will make it a little easier. I also amd going to get a new plastic cowl cover and make aluminum covers for the left and right of the cowl.
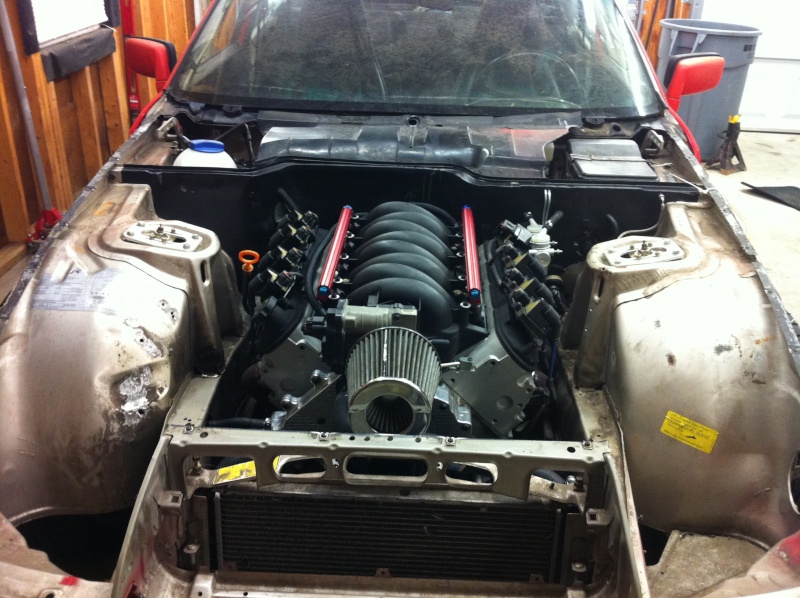
This just shows my heater hoses, and all the room in front of the engine! I have part numbers for the hoses, they worked GREAT!!! Just found them at Advance with my measurements!
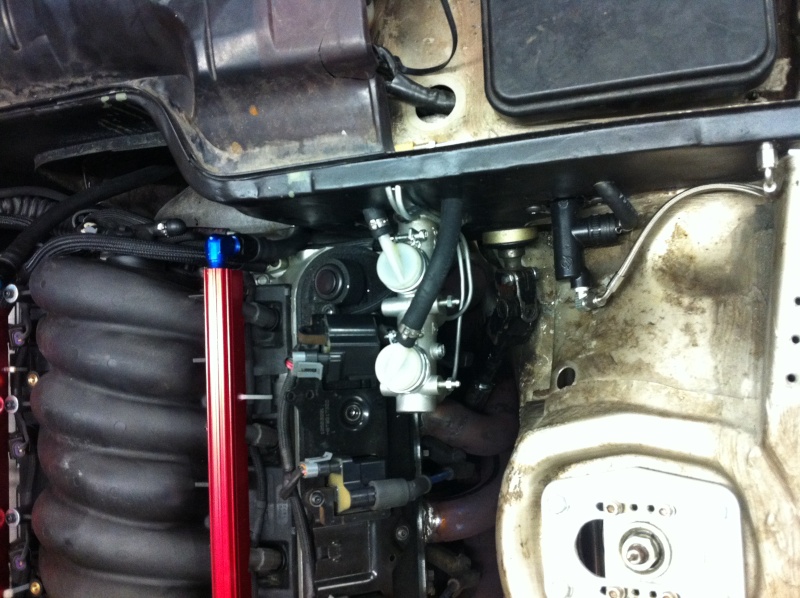
Clutch and Brake master, fed from two hidden reseviours, I actually mounted the clutch master from the inside of the firewall, had to make a oval hole, but its not noticable and allowed me to use stock pushrod!
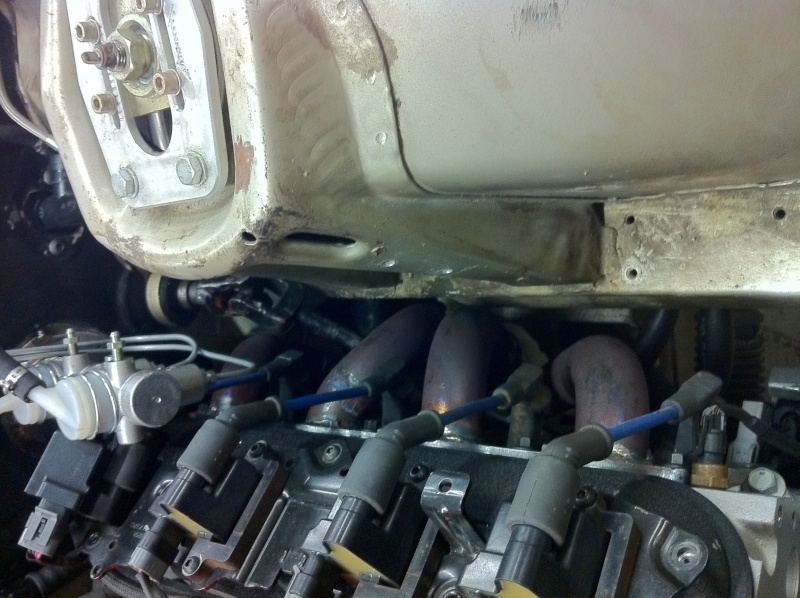
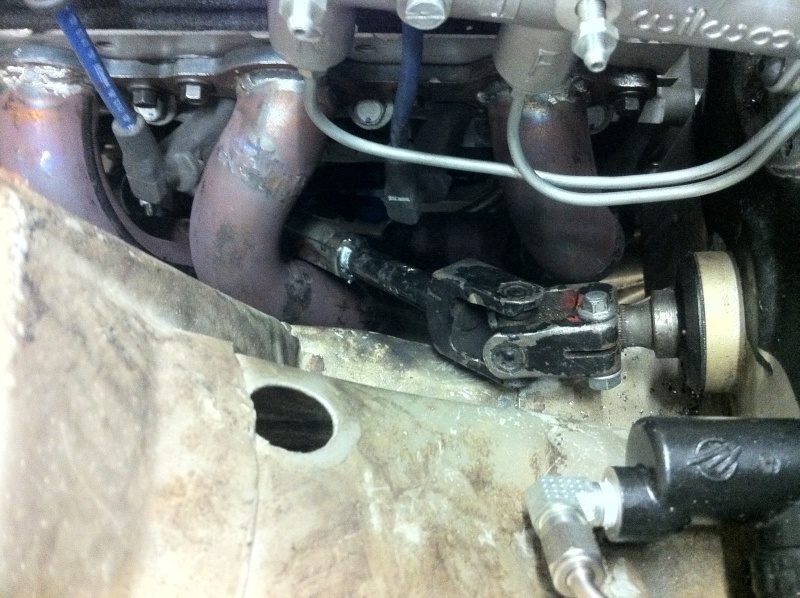
A shot of the steering shaft and headers from the front.
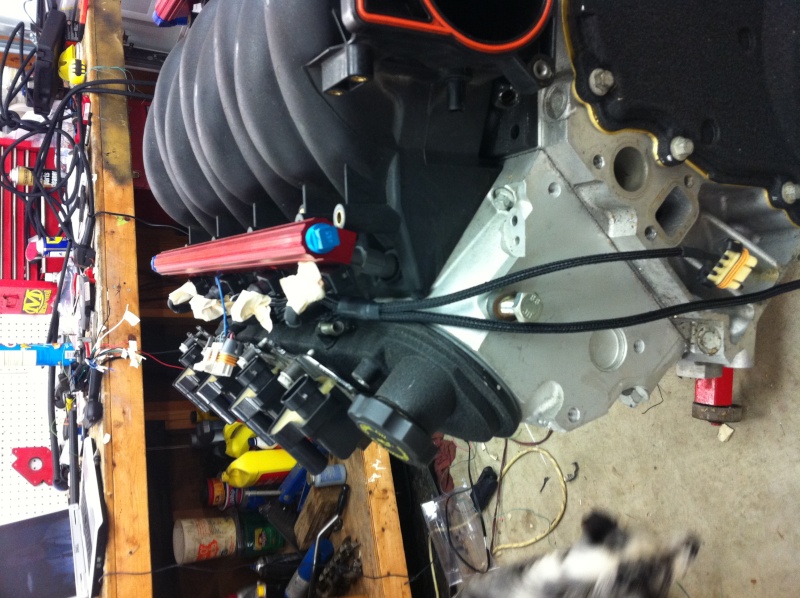
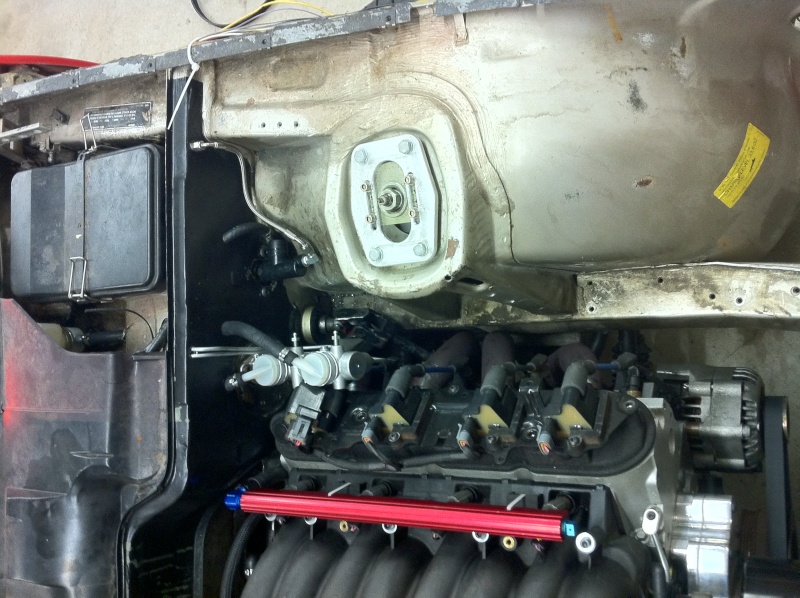
Passenger clearance, plenty, almost wish I had moved the engine slightly to the Passenger side but will need to clearance crossmember for my headers now! Dipstick tube needs to be shortened alot!
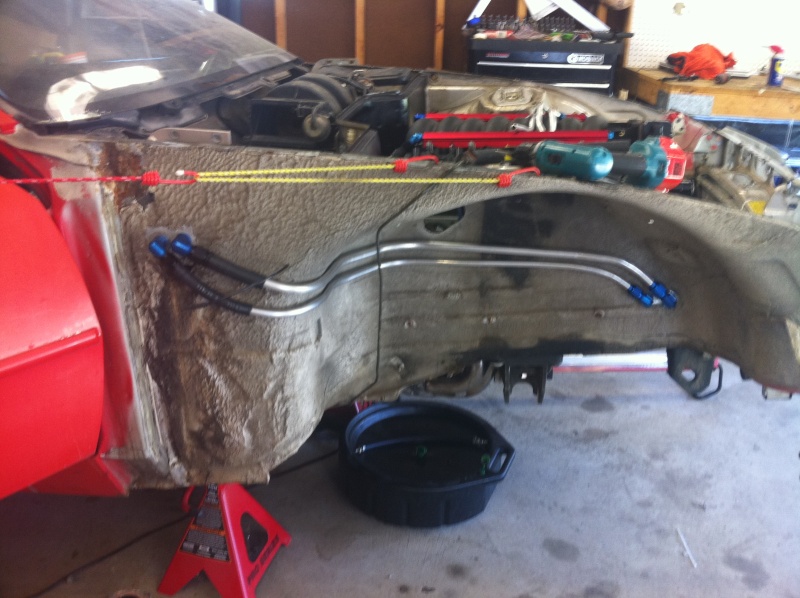
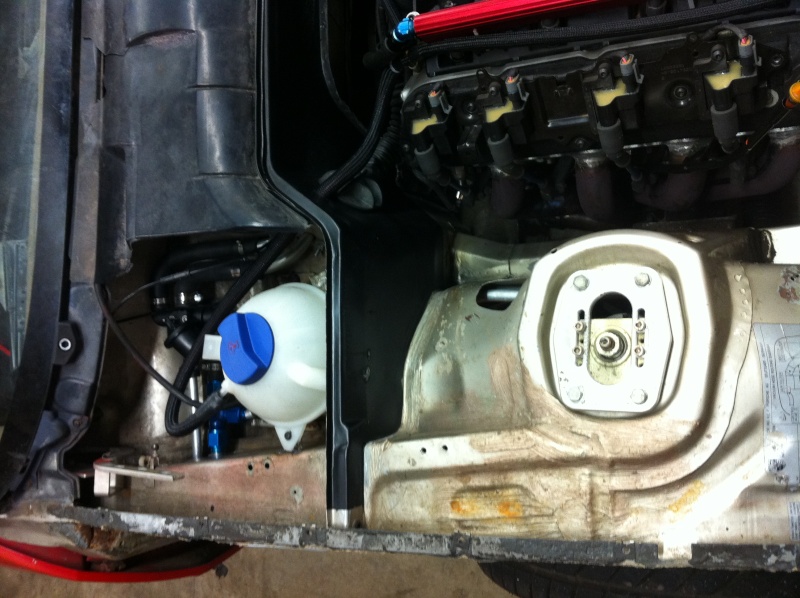
Coolant reseviour and heater control valve, my hose routing neds to be cleaned up a bit, but it all holds pressure!
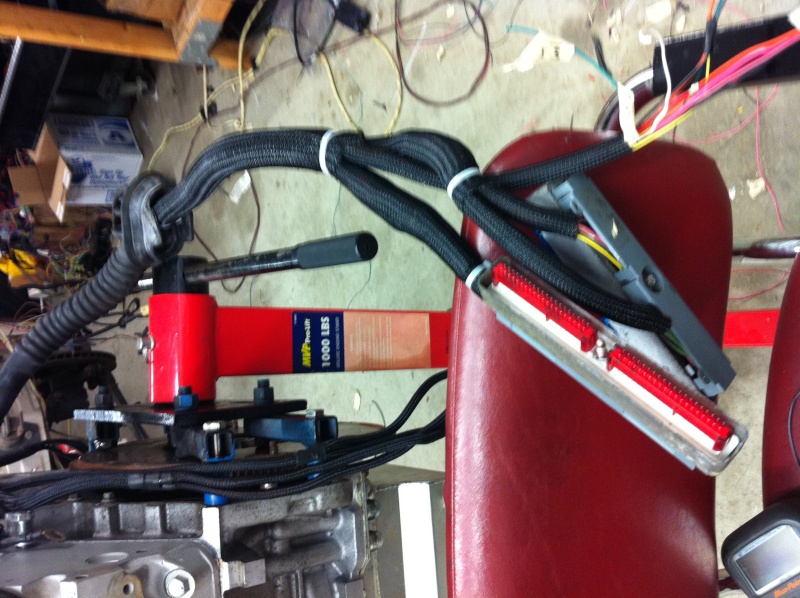
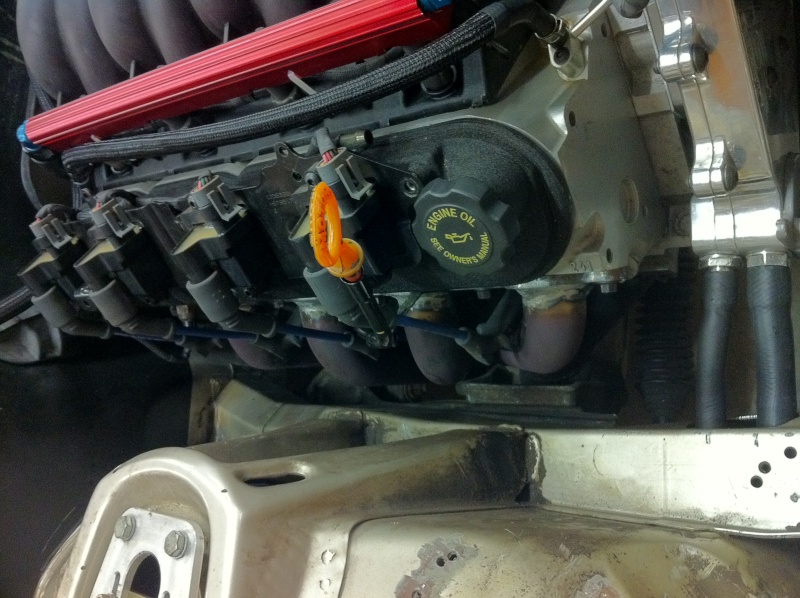
Overhead view of clutch/Brake master setup, need a longer wire for the #8 coil, need slightly longer wires for all of them, Suggestions?
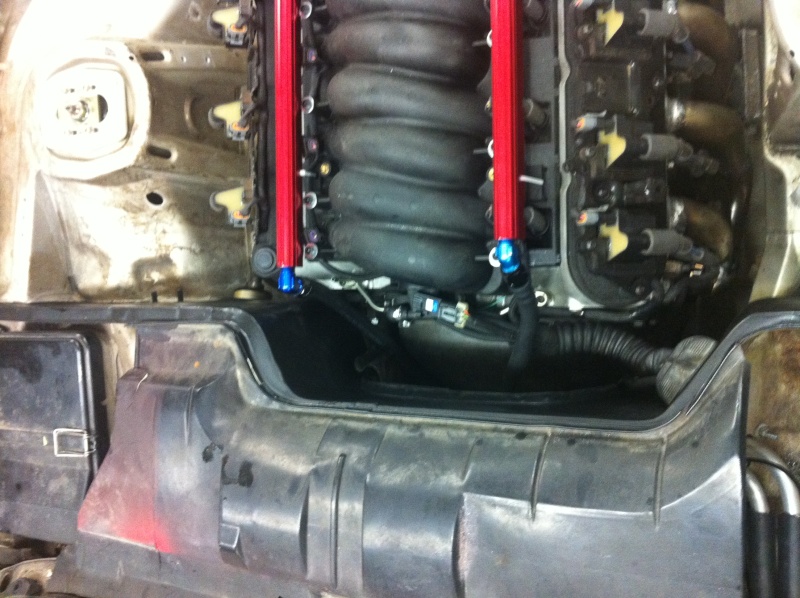
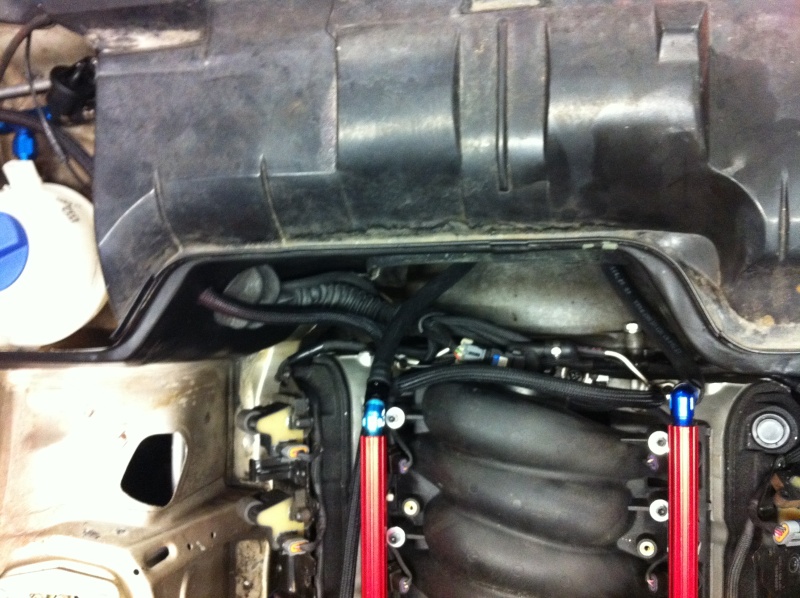
Firewall clearances, I need to cover the fuel lines in my braided loom, just wanted to verify no leaks!
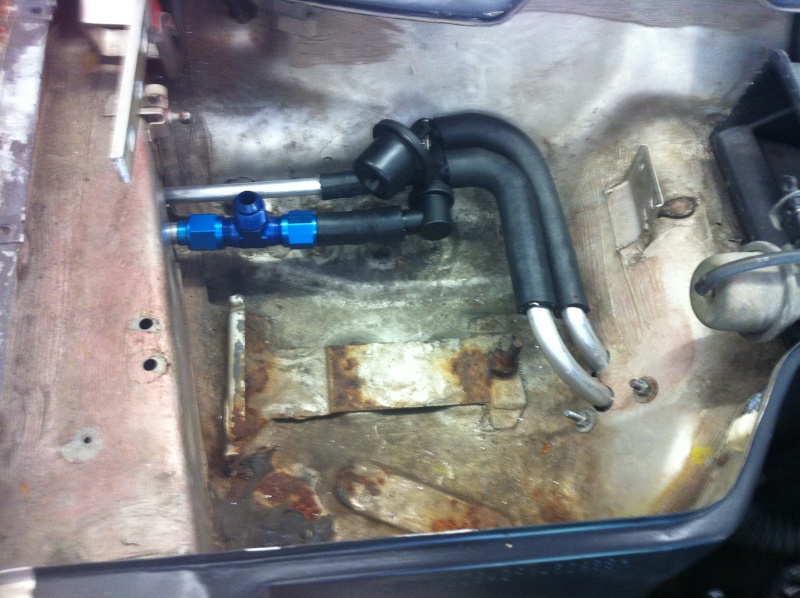
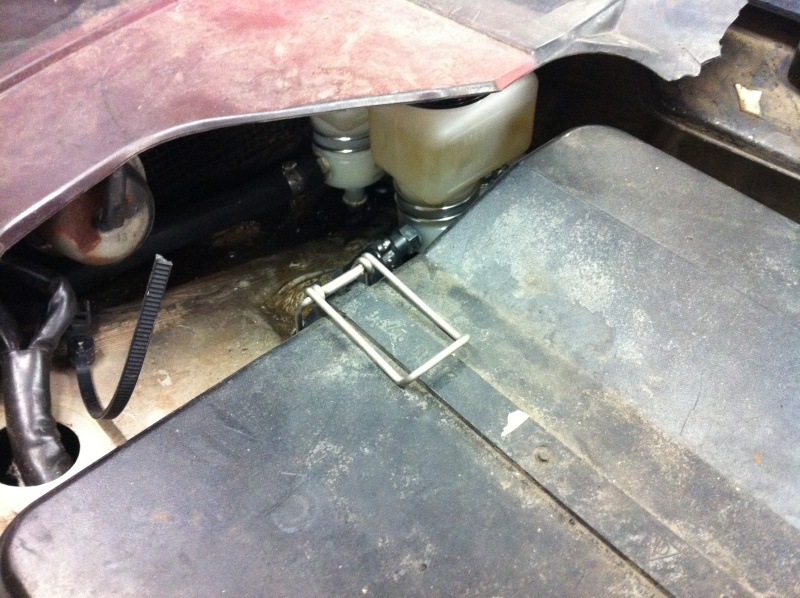
My hidden reseviours... Whats missing.... Didnt realize till AFTER i welded my mounting brackets in...
Steering shaft modified and installed, I got a S10 collapsable steering shaft, cut out a chunk of the slip fit Double D only cost me $10, for exaclty what Summit wanted $90 for....
Side view...
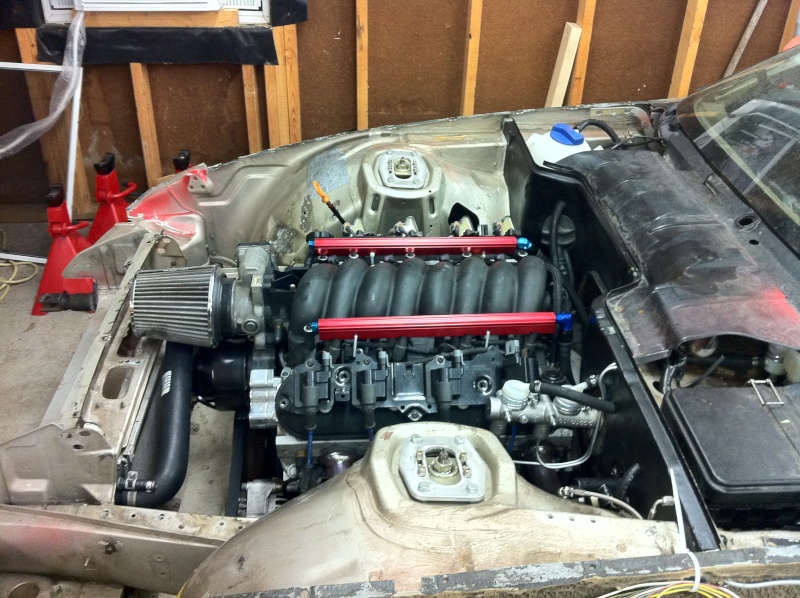
and would take throttle away) So i wasnt a happy camper, but i was able to screw with the PRNDL wiring at the PCM and fix it till i get Tuning software!It appears i succeded in my quest for a clean engine bay! The air filter will be under the nose panel, i just need to trim the cross-bar, but im going to wait till I have a new radiator and gut everything between the rails, and make a bolt in panel since I always drop the engine in from the top it will make it a little easier. I also amd going to get a new plastic cowl cover and make aluminum covers for the left and right of the cowl.
This just shows my heater hoses, and all the room in front of the engine! I have part numbers for the hoses, they worked GREAT!!! Just found them at Advance with my measurements!
Clutch and Brake master, fed from two hidden reseviours, I actually mounted the clutch master from the inside of the firewall, had to make a oval hole, but its not noticable and allowed me to use stock pushrod!
A shot of the steering shaft and headers from the front.
Passenger clearance, plenty, almost wish I had moved the engine slightly to the Passenger side but will need to clearance crossmember for my headers now! Dipstick tube needs to be shortened alot!
Coolant reseviour and heater control valve, my hose routing neds to be cleaned up a bit, but it all holds pressure!
Overhead view of clutch/Brake master setup, need a longer wire for the #8 coil, need slightly longer wires for all of them, Suggestions?
Firewall clearances, I need to cover the fuel lines in my braided loom, just wanted to verify no leaks!
My hidden reseviours... Whats missing.... Didnt realize till AFTER i welded my mounting brackets in...
Steering shaft modified and installed, I got a S10 collapsable steering shaft, cut out a chunk of the slip fit Double D only cost me $10, for exaclty what Summit wanted $90 for....
Side view...