








My wiring harness build thread

Most of the individual sensors have wrapped tape to protect the wires from chaffing against the split loom from the factory. The shrink tube on the ends it just a neater way to do this. Even pushing them up as tight to the connector as possible, there will always be 1/8"-1/4" exposed so identification is simple
Harbor freight has shrink tubing in bulk rolls for minimal out of pocket along with 10 packs of tape
For your solder, be sure to use resin core in whatever diameter you feel comfortable with. I use the .062" 60/40 stuff in 1lb rolls. You should never have to worry about getting too much solder on a connection. Just touch the iron to the joint and the excess should transfer over. For the 18-20ga stuff it doesnt make a huge amount of difference anyway. If the iron is hot enough, the first touch should flow all the solder in you would need
Oh, and be sure to double check each wire with a meter prior to wrapping it up into the loom. It is 100x easier to fix an bad connection right after you made it than to have to trace it out in the sea of spaghetti
Harbor freight has shrink tubing in bulk rolls for minimal out of pocket along with 10 packs of tape
For your solder, be sure to use resin core in whatever diameter you feel comfortable with. I use the .062" 60/40 stuff in 1lb rolls. You should never have to worry about getting too much solder on a connection. Just touch the iron to the joint and the excess should transfer over. For the 18-20ga stuff it doesnt make a huge amount of difference anyway. If the iron is hot enough, the first touch should flow all the solder in you would need
Oh, and be sure to double check each wire with a meter prior to wrapping it up into the loom. It is 100x easier to fix an bad connection right after you made it than to have to trace it out in the sea of spaghetti

Thread Starter
TECH Enthusiast
iTrader: (4)
Joined: Mar 2009
Posts: 648
Likes: 1
From: Smithfield, UT
I reached the point where it's helpful to have a mockup:

Now I need to buy a good used oil pressure sensor connector, I need to buy a good used IAT sensor with connector, and I need color pics of '02 L59 cam position sensor connector with wire colors visible, and I need color pics of '02 L59 MAF connector with wire colors visible.
Now I need to buy a good used oil pressure sensor connector, I need to buy a good used IAT sensor with connector, and I need color pics of '02 L59 cam position sensor connector with wire colors visible, and I need color pics of '02 L59 MAF connector with wire colors visible.
Thread Starter
TECH Enthusiast
iTrader: (4)
Joined: Mar 2009
Posts: 648
Likes: 1
From: Smithfield, UT
That's understandable, but that's why everything is numbered and color-coded.
The computer may have several wires coming out of it that are yellow with black stripe, but each of those has a number at the computer. With lt1swap.com, you can find out which number goes where. Then you can make labels and stick them on each wire.
Blue 21 is yellow with black stripe, and goes to the crankshaft position sensor.
Blue 37 is yellow with black stripe, but goes to injector 6.
There's no way to confuse an injector with a crankshaft position sensor.
It's either this, or spend hundreds of dollars more buying one.
This way, you learn more, you gain skills, you save money, you get something new to break the monotony of being a couch potato. It's all good.
You should tackle it, rather than talk yourself out of it.
If you do hit snags, there's lots of free help available. And what's life without challenges?
I can think of many challenges for which there's no help available. This is way less risky.
The computer may have several wires coming out of it that are yellow with black stripe, but each of those has a number at the computer. With lt1swap.com, you can find out which number goes where. Then you can make labels and stick them on each wire.
Blue 21 is yellow with black stripe, and goes to the crankshaft position sensor.
Blue 37 is yellow with black stripe, but goes to injector 6.
There's no way to confuse an injector with a crankshaft position sensor.
It's either this, or spend hundreds of dollars more buying one.
This way, you learn more, you gain skills, you save money, you get something new to break the monotony of being a couch potato. It's all good.
You should tackle it, rather than talk yourself out of it.
If you do hit snags, there's lots of free help available. And what's life without challenges?
I can think of many challenges for which there's no help available. This is way less risky.
LS1 Tech Stories
The Best V8 Stories One Small Block at Time

Gas Monkey Built a 6-Wheel Ferrari Testarossa With a Corvette LT4 Engine
Verdad Gallardo
7 Most Reliable High-Performance Engines GM Has Ever Built
Verdad Gallardo
Amazing '71 Camaro Restomod Is Modern Muscle Car Under the Skin
Verdad Gallardo
6 Common C5 Corvette Failures and What's Involved In Repairing Them
Pouria Savadkouei
Retro Modern Bandit Pontiac Trans AM Comes With Burt Reynolds' Autograph
Verdad Gallardo
Top 10 Greatest Cadillac V Series Performance Models Ever, Ranked
Pouria Savadkouei
Top 10 Most Powerful Chevy Trucks Ever Made!

Hennessey's New Supercharged Silverado ZR2 Has 700 HP
Verdad Gallardo
Coachbuilt N2A Anteros Is an LS2-Powered C6 Corvette In Italian Clothes
Verdad Gallardo Thread Starter
TECH Enthusiast
iTrader: (4)
Joined: Mar 2009
Posts: 648
Likes: 1
From: Smithfield, UT
Progress! The crank pos, cam pos, and oil psi are now all solved. I found a 3 wire that matches for oil psi, which only takes 1 wire. I'll just hide the extra 2 short wires in the harness.
Early tomorrow morning I'll be rested enough to attach an empty 4L60E case, s I should get more pics up tomorrow night.
Early tomorrow morning I'll be rested enough to attach an empty 4L60E case, s I should get more pics up tomorrow night.
Thread Starter
TECH Enthusiast
iTrader: (4)
Joined: Mar 2009
Posts: 648
Likes: 1
From: Smithfield, UT

So next was sorting the 2 yellow wires with black stripe. I found 2 of them in the connector at the trans. Luckily, I had this book from the last time I rebuilt this trans:

But this time, I added notes for future reference ( next week )

Problem solved.
Thread Starter
TECH Enthusiast
iTrader: (4)
Joined: Mar 2009
Posts: 648
Likes: 1
From: Smithfield, UT
One more update before I call it a night. I decided that putting the computer nearest cylinder # 8 would limit this harness to the 300ZX only. I looked at all my vehicles, and the only space that was available in all of them was nearest to cylinder # 1.
So I bundled the wires on the easier side, and then shot 3 pics. But one came out blurry, and one makes it look like they're against the EGR tube when they're not. Anyway;


So I bundled the wires on the easier side, and then shot 3 pics. But one came out blurry, and one makes it look like they're against the EGR tube when they're not. Anyway;
Thread Starter
TECH Enthusiast
iTrader: (4)
Joined: Mar 2009
Posts: 648
Likes: 1
From: Smithfield, UT
This morning, it looked silly. I changed it to this:

Then I got online looking for EGR plugs, since my '02 PCM doesn't need the EGR, and when I found some, I did this:

It looks much cleaner, and now that the chaotic "spaghetti" has become neat and orderly, I feel better. Now, on to the more challenging side. Pics this evening.
Then I got online looking for EGR plugs, since my '02 PCM doesn't need the EGR, and when I found some, I did this:
It looks much cleaner, and now that the chaotic "spaghetti" has become neat and orderly, I feel better. Now, on to the more challenging side. Pics this evening.





I'm putting a LS into my 91 corvette. I have a harness and computer from a 99 Z28. I looked at pocket's thread several times and am working up the courage to do it myself. Thanks for the informative thread.



True, you can simply repin the body connectors and have a fully functional harness. The problem is that it still holds all of the unused connectors, wrong connectors for mix-match conversions and looks like total *** because the factory routing isnt ideal for all conversions. Then, any issue with the old harness is inherited because each connection isnt testing individually, only the pins changed
Two ways of solving the issue much like the out the top vs out the bottom engine removal method
Two ways of solving the issue much like the out the top vs out the bottom engine removal method
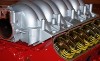

I did not say I dont remove any un-needed wires. I made a yr/engine model specific spreadsheet for car and truck harnesses. First I remove anll the harness outer plastic. I Zip tie each engine 'tree' brank to maintain the harness shape. Then removeall the un-needed wires starting at the PCM. Connect each cylinder bank injector, col and O2 sensor wires at the rear of the intake. Maf and trans power connects to each of the cylinder bank power leads. Truck harness, crnk posn wires get moved from under the oilpan to the passenger side harness, rear cylinder. O2 sensor wires get moved/shortened andconnected to the back of the cylinder head. This process removes tons of wires and makes for easy fuse and relay connections. I then add a main power relay, fuel pump relay, and two fan relays near the PCM plus an OBD2 port and CEL off the rear of the intake area.
Just my process and shows there is more than one way of skinning a cat. In the end. my harnesses arethe diameter of my thumb and is reliable and quick to re-work.
Just my process and shows there is more than one way of skinning a cat. In the end. my harnesses arethe diameter of my thumb and is reliable and quick to re-work.