

1981 Second Gen Camaro Berlinetta BUDGET build (Updated FiTech injection/Boost!)
 12-02-2011, 10:06 PM
#21


Hey whats up i got a good update, i sold the LM7 for $900. So when you figure the price i paid for it $700, sold harness for 200 and the harness and accessories of the L33 I ened up getting the shortblock L33 +$200. So i actually got paid to get it lol. Anyway both of us got what we were looking for. He plans on build a twin turbo 5.3 for an early 80's grand prix or lemans, which would be a cool sleeper.
I saw the comment about the transmission gear ratios and I hope you are right because I have the 3 groove super t10. But since its date coded 81 I believe it is out of either a firebird or camaro. And if you go to the nastyz28.com site the only gear ratio super t10 available in 1981 was the one I stated. Check it out at http://www.nastyz28.com/camaro/camaro81.php. It would be nice to have a 2.64 first gear. Anyone else have any experience with these super t10s?
I saw the comment about the transmission gear ratios and I hope you are right because I have the 3 groove super t10. But since its date coded 81 I believe it is out of either a firebird or camaro. And if you go to the nastyz28.com site the only gear ratio super t10 available in 1981 was the one I stated. Check it out at http://www.nastyz28.com/camaro/camaro81.php. It would be nice to have a 2.64 first gear. Anyone else have any experience with these super t10s?
 12-02-2011, 10:48 PM
#22
Staging Lane

Join Date: Sep 2011
Location: Waterford, MI
Posts: 66
Likes: 0
Received 0 Likes
on
0 Posts
Sounds like a great project. My first car was an 81 Camaro  , so I still have a soft spot for the late second gens. I'm currently starting my own budget swap on a 67 Camaro, so I'll be watching to see how your build goes.
I'm surprised that you said going carb would be much cheaper. I was planning to go carb for mine until I saw the price of the intakes/controllers. Then you're also limited to new cam sets (I think) to get the right grind for a carb. So I finally decided to go with fuel injection because of the lower cost of getting the used parts. Maybe I missed something....
Best of luck with the build!
, so I still have a soft spot for the late second gens. I'm currently starting my own budget swap on a 67 Camaro, so I'll be watching to see how your build goes. I'm surprised that you said going carb would be much cheaper. I was planning to go carb for mine until I saw the price of the intakes/controllers. Then you're also limited to new cam sets (I think) to get the right grind for a carb. So I finally decided to go with fuel injection because of the lower cost of getting the used parts. Maybe I missed something....
Best of luck with the build!
 12-04-2011, 11:34 PM
#26
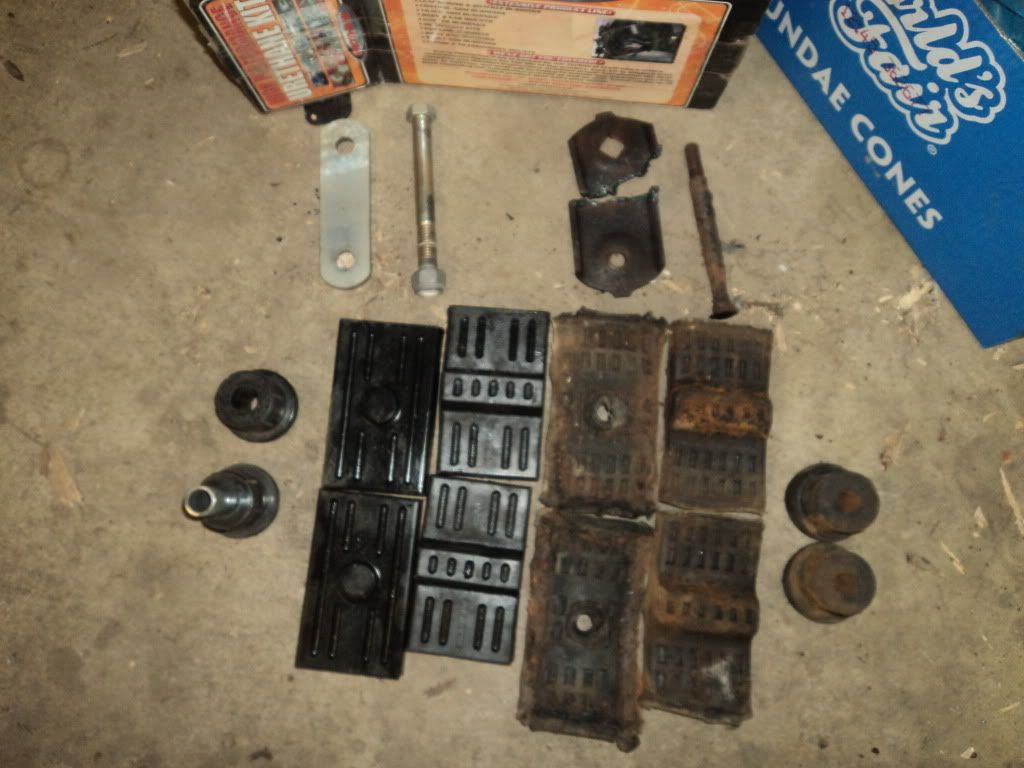
Finally got my GM Muscle Car oil pan (LH8) coming so i can finally fit the motor and trans. Also won an auction on ebay for a complete prothane leaf springs bushing kit with shackles, pads, hardware and all for $40...Budget is king if I ever wanna rip that 4 speed!
12-05-2011, 11:55 PM
#27
Does anyone else have any info on those super t10 gear ratios, since the rear gears in my car at set up for an automatic trans i need some help with the trans gears, bc the last thing i want is a trans and rear end that dont agree wit each other...
12-06-2011, 01:10 AM
#28
Launching!
iTrader: (7)

Join Date: Dec 2006
Location: Maryland
Posts: 252
Likes: 0
Received 0 Likes
on
0 Posts
youre gonna want to not use the LH8 pan... it hangs about 2 inches below the frame.... stock suspension, mine hit on any big dips that the suspension moved with....
12-06-2011, 08:35 AM
#29
Wildcamaro
Glad to see another guy with a working man budget build! I am building a 73' Nova on a similar budget, around $1500 not including car, so it will be cool to compare how our project progress! I have roughly a similar timeline to have the car up and running by the end of May for the cruising season. I am just trying to build a nice reliable cruiser with good power, so slightly different goals.
After researching the both EFI and carb route it seems that both can be done on similar budgets, but there is definetely more learning and work involved with the EFI conversion, and that is why I have choosen to go carb as well...for now!
Best of luck and keep the posts and pictures coming. Oh and total score on the L33, I am jealous!
12-07-2011, 01:59 PM
#30
When you compare EFI to carburerated the cost factor is definatly on the carb's side! unless you get a good deal on a donor ls1 camaro or a complete engine with trans, harness, pcm, pedals, etc. The fuel system is another one in the carbs favor. Especially on old cars because you can retain your stock fuel sender and pickup tube. I got a holley blue (14psi max) pump kit with regulator included for $80 (helps i get 20% discount from autozone lol!). Price an efi pump and its ridiculous, even though you can use the corvette regulator/filter ($45), all the AN fittings and adapters and stuff it just becomes downright outrageous. God bless the people that can afford to do efi swaps, because i agree 100% that would be better, but for alot less money invested with the carb setup, I'm only giving up about 5-7% max bottom end torque when compared to an EFI motor. Also with an older chevy the carb gives some nostalgic feel as well. I am pumped about getting the MSD 6LS controller too, I will be able to put a gas mileage tune on the car to get it to the track and then i can get as aggressive as I want with the spark and vacuum advance at the track to maximize ET. Overall when compared dollar for dollar the carb set up is king. All you need is the crank and cam sensor (map sensor too if you wanna control vacuum advance manually) and the coils and that is it, plug in and shred some tire.
Good luck on your project man!
PS....Does nobody have any info on the super t10 trans? Is there a definative way to tell what gearset your have. I have heard and read 3 rings is a 3.42 wide ratio dog AND i have heard its the close ratio bad boy? Anyone can confirm or refute? Thanks....
Also I will have some pics later because i just got my GM Musclecar oil pan in today and i only ordered it yesterday! good quick shipping service for sure! . The bolts werent even in a plastic bag, it looks like they just opened the box and just threw everything in it loose, but oh well I still love me some GM. Anyway there was an oil pan bolt missing, and i called JEGs to tell them and now i have a complimentary (FREE) arp oil pan bolt set coming for tommorrow! and i thought that nice guys finished last!
12-08-2011, 12:36 AM
#31
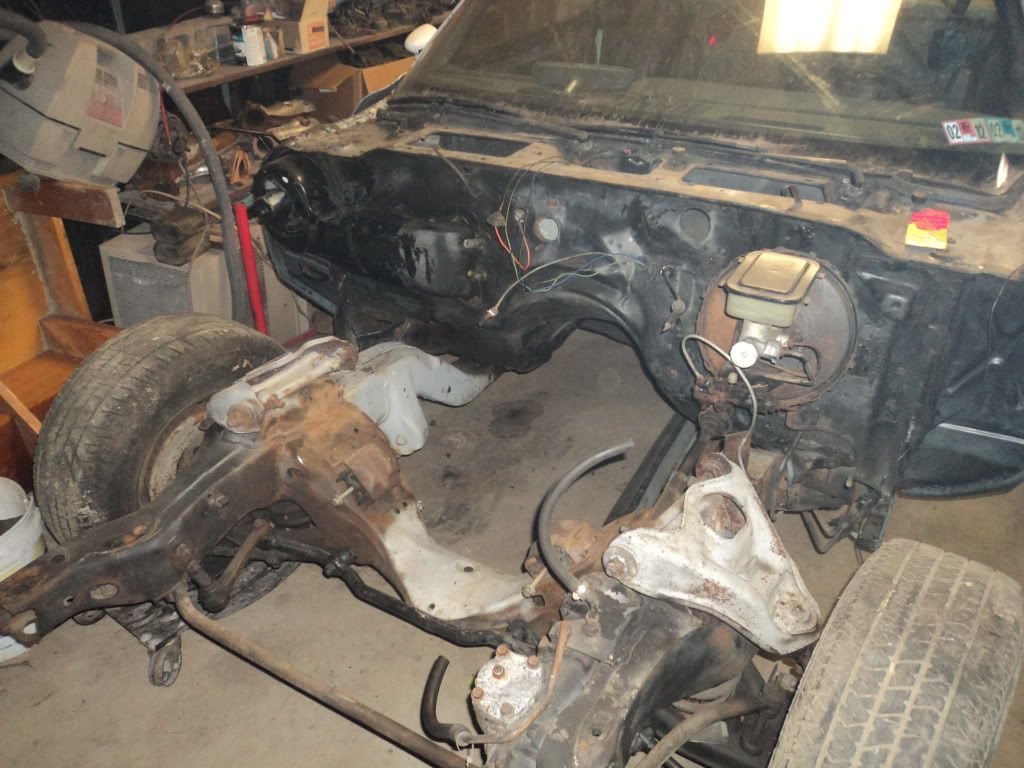
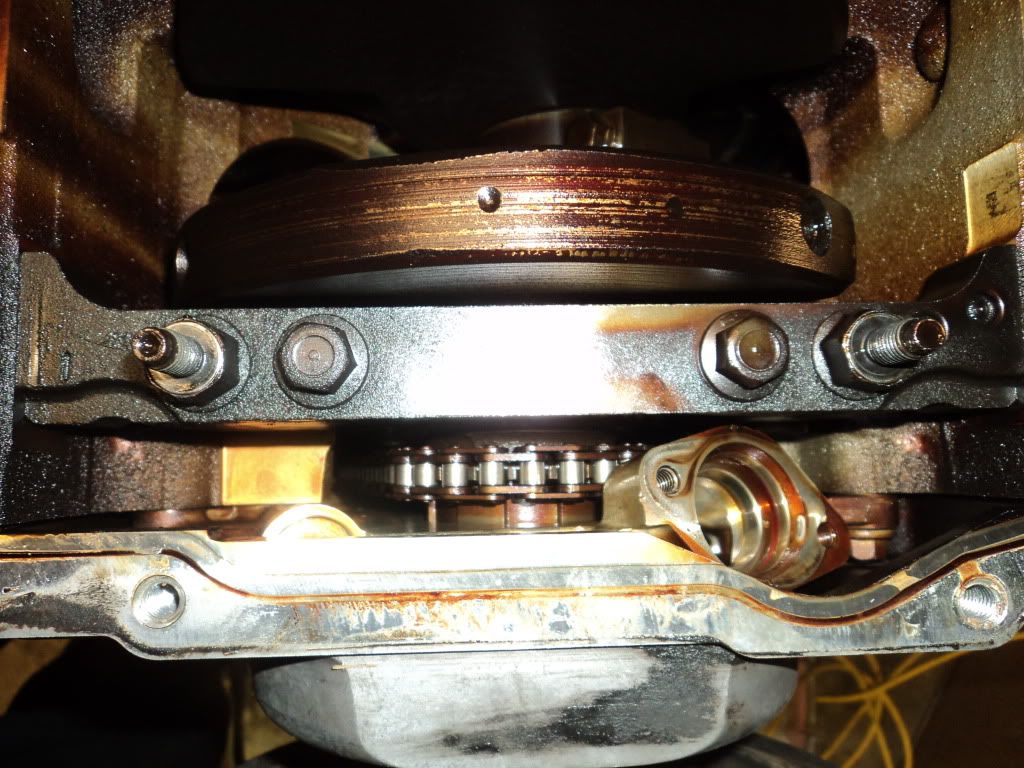
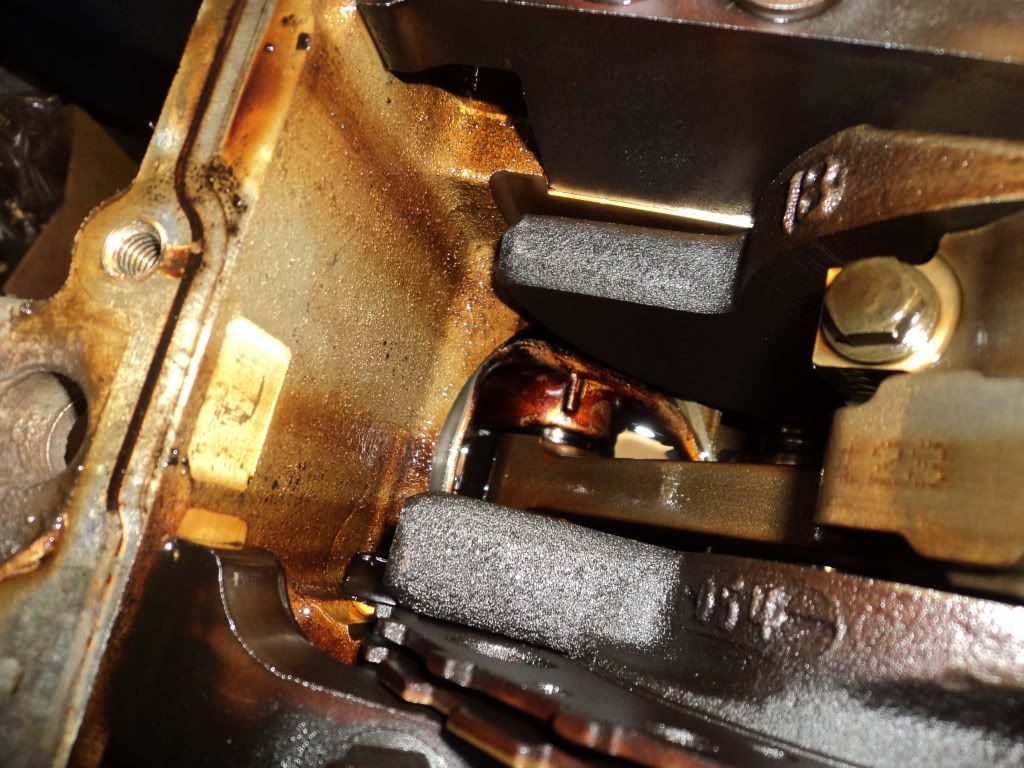
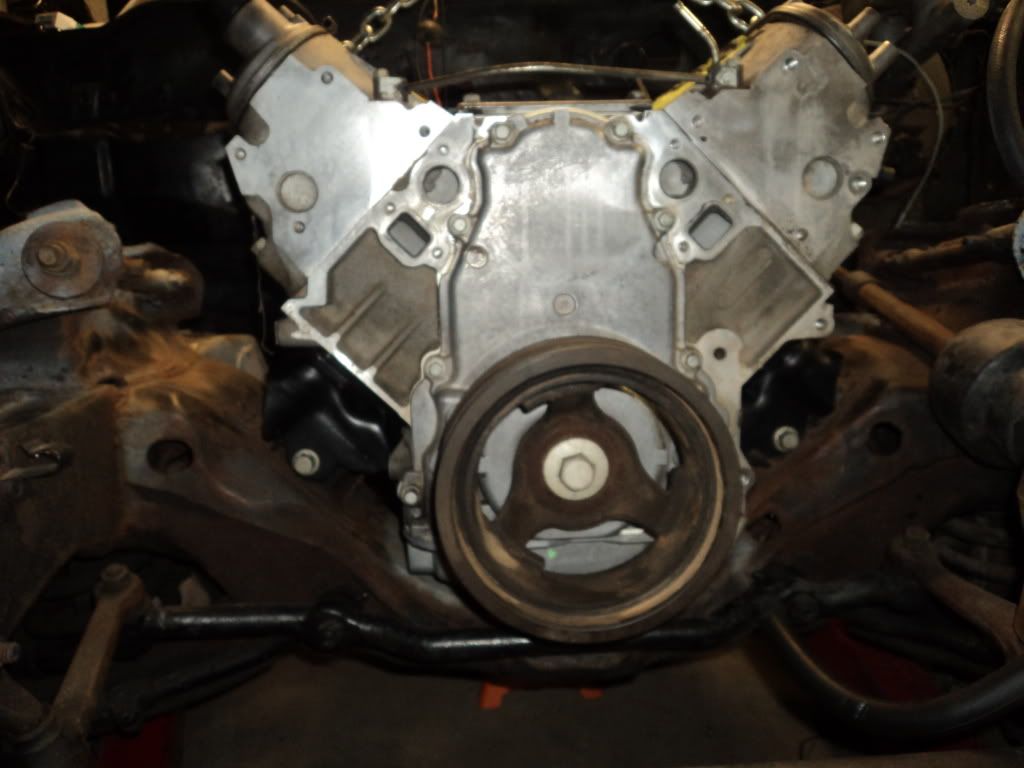
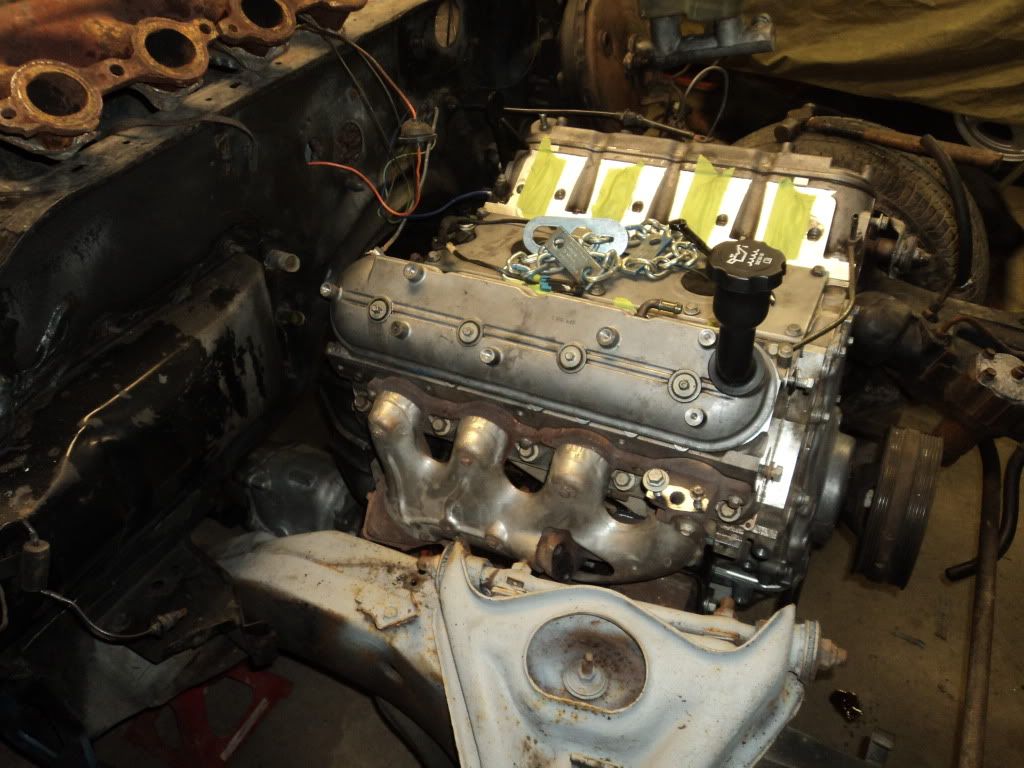
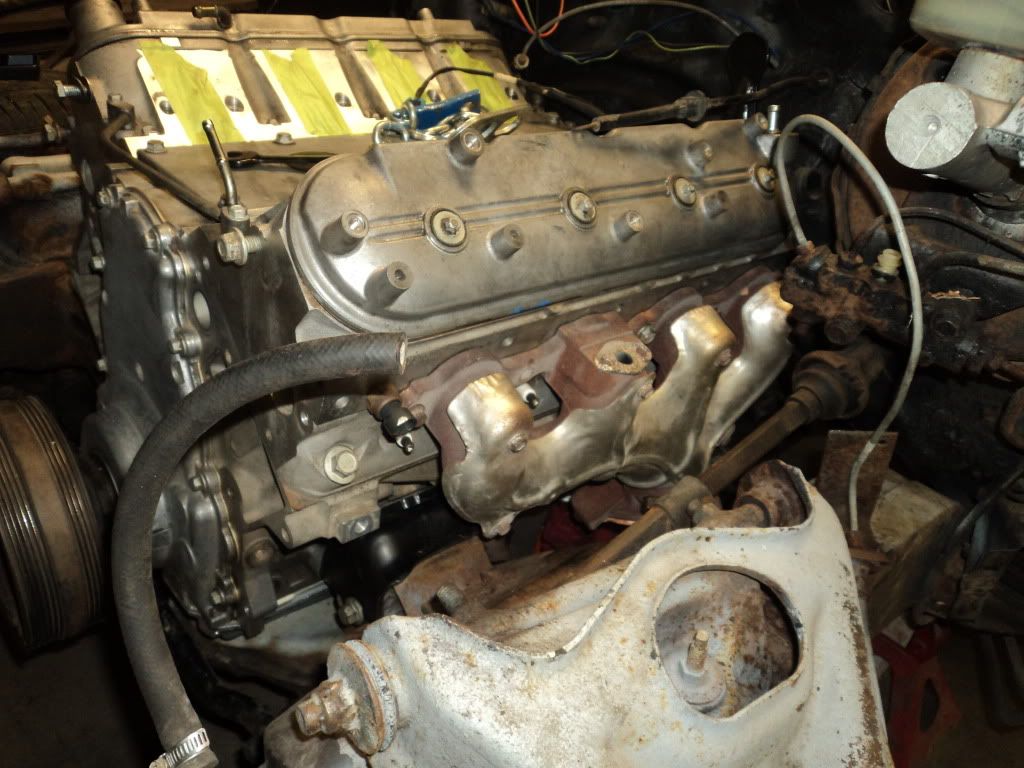
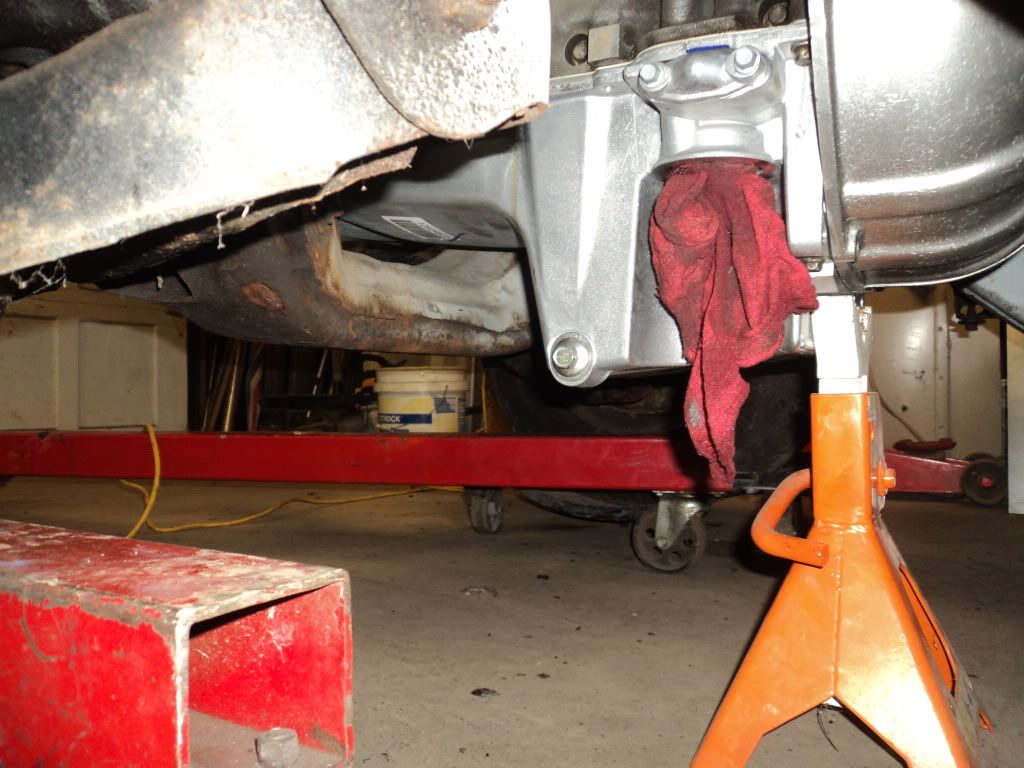
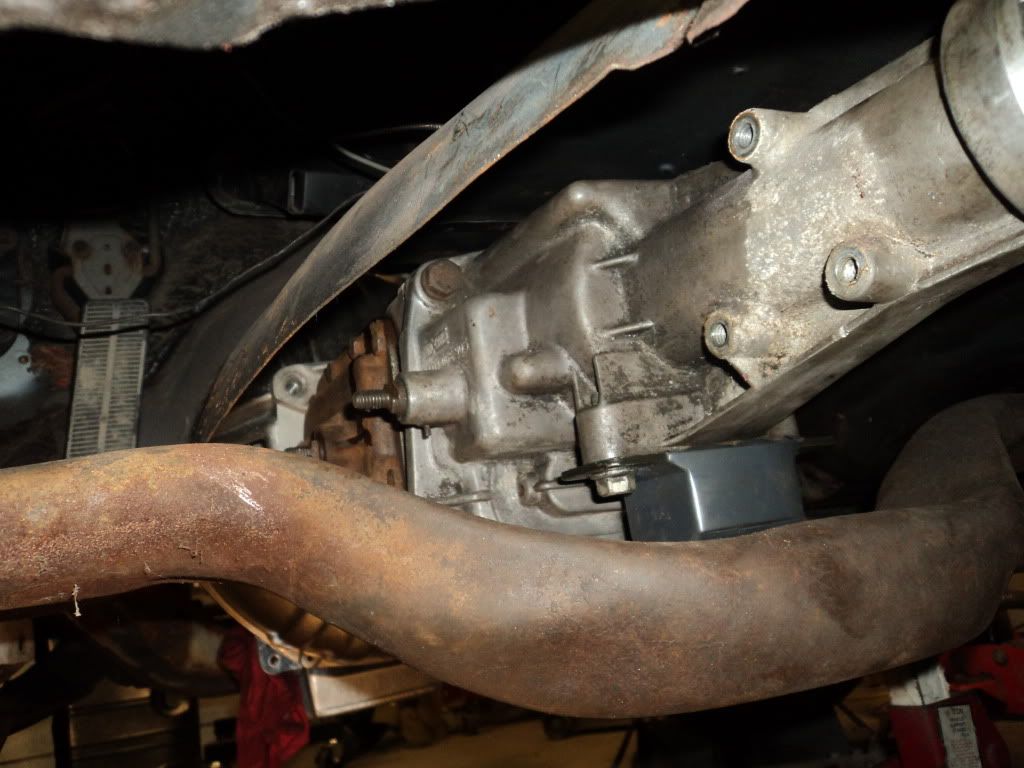
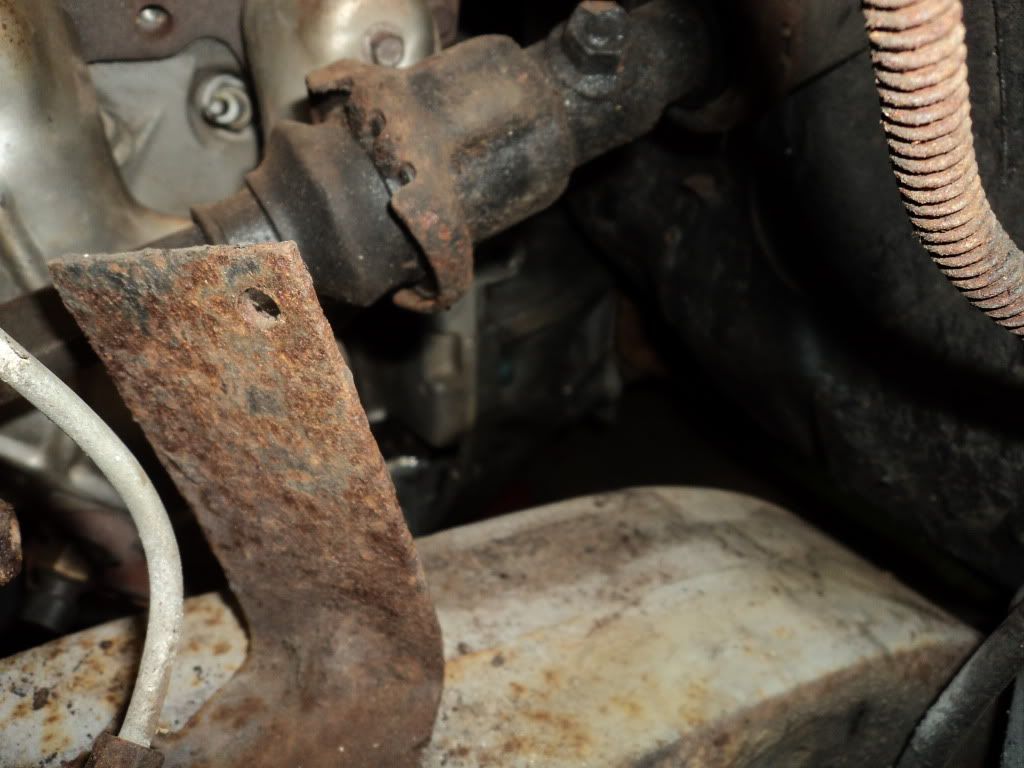
Well i got the L33 slid up in the framerails of the 81 today, other than me putting the motor mount adapters backwards at first (doh!) everything went really smooth, the GM Musclecar oil pan fit quite nicely and didnt hang down as far as i thought it would. Its only hangin down maybe 3/4' to 1" below cross memeber. I am really kicking myself for not trying to test fit the stock truck oil pan first, because between all the room i have with the LH8 oil pan i guarentee that the truck pan WOULD of fit, with no intereference from the cross memeber, although it would hang down an additional 1.5" lower than the already slightly low gm musclecar oil pan. I also test fit the two sets of stock manifolds i had, which were some stock 5.3 manifolds and some f-body manifolds. The driver side only worked with the f-body manifolds. The passenger side cleared both the truck and fbody manifold, im goin to use which ever one is easiest to build the exhaust with. Also after pulling the stock oil pan and windage tray i was astonished to see that the pistons still have the skirt coating even after 200,000 miles. I can tell the previous owner ran good synthetic oil by the golden tint on the entire bottom end. Also very minimal sludge build up in the pan if ANY. I also checked the timing chain and it still is pretty tight even though i will replace it for cheap insurance along with the oil pump. I also checked the crank endplay and came up with 0.005" which is still right in the factory 0.003-0.007" spec. Another thing i found out is i will have to flip the trans crossmember to accomodate the 4 speed trans, bc the car was an original automatic car. I will hopefully get lucky with driveshaft and have it perfect or a little long so i can shorten it. All and all it was a good night of progress, seeing the enigne in between the framerails is a great feeling, now hopefully the manual clutch linkage will prove to be just as easy! Alright im going to post a link to my new photobucket album page so you can see the pics now, until i can find how to get them directly on the site here. I used a better camera so the files are huge, thats why i used photobucket. Catch you all later!
link to recent pics: http://s1224.photobucket.com/albums/ee374/wildcamaro/
link to recent pics: http://s1224.photobucket.com/albums/ee374/wildcamaro/
12-08-2011, 12:09 PM
#32
Ok i figured out to use photobucket to post pics on here...
Here is the photos...
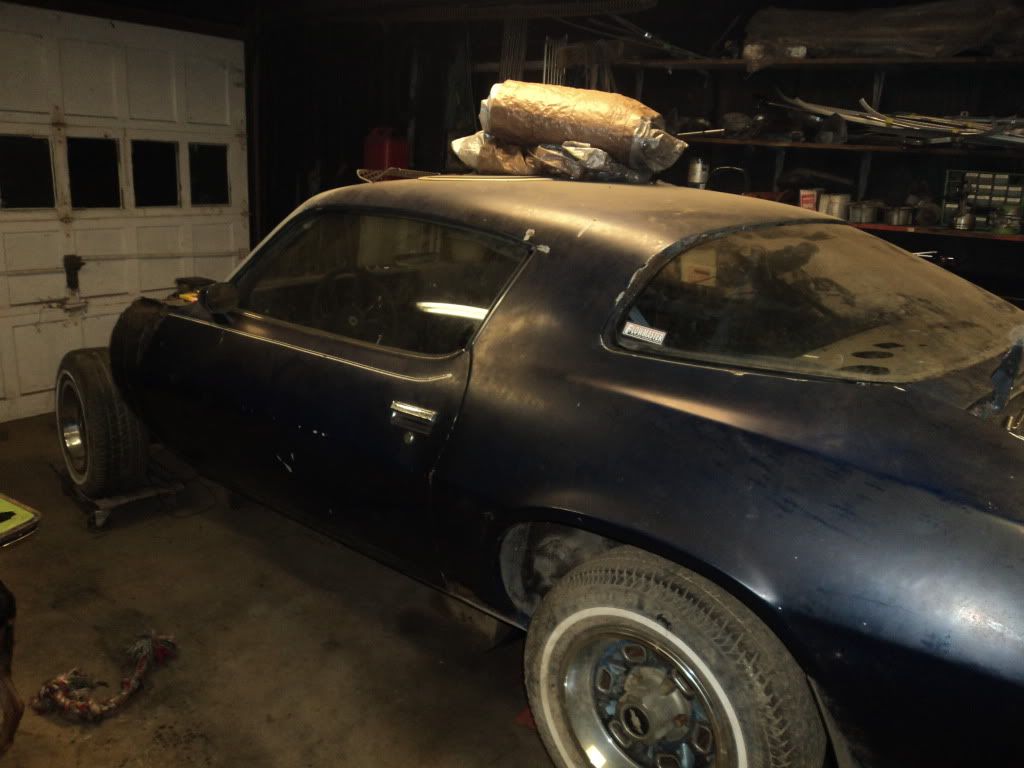
These are of the car before dropping engine...
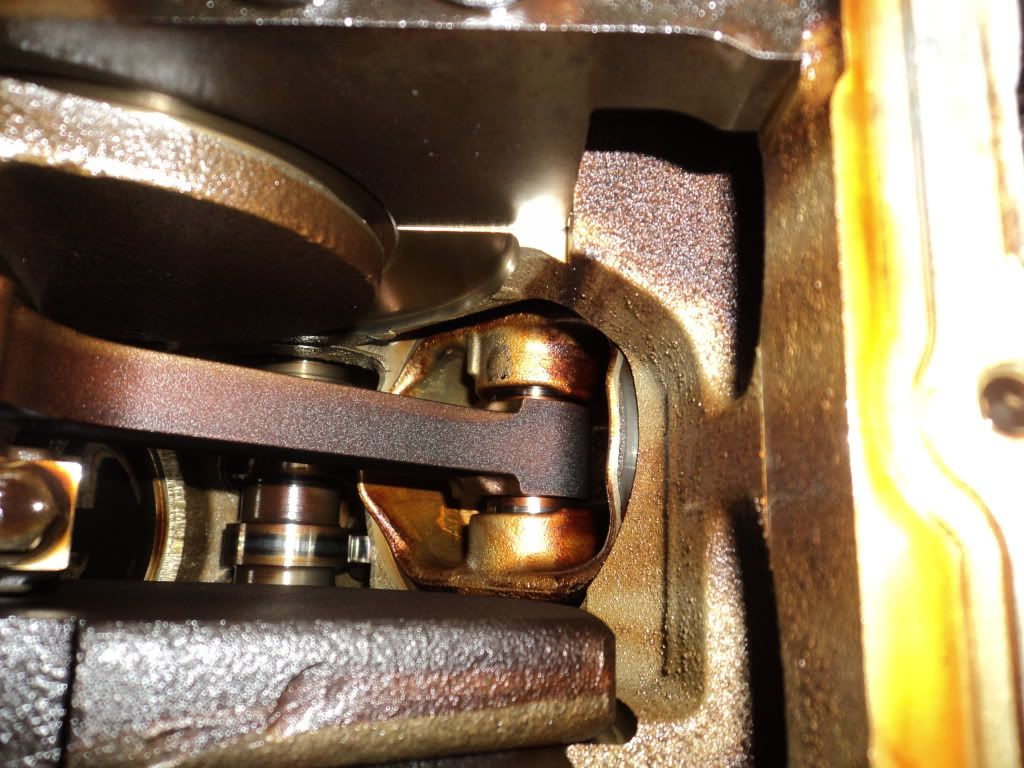
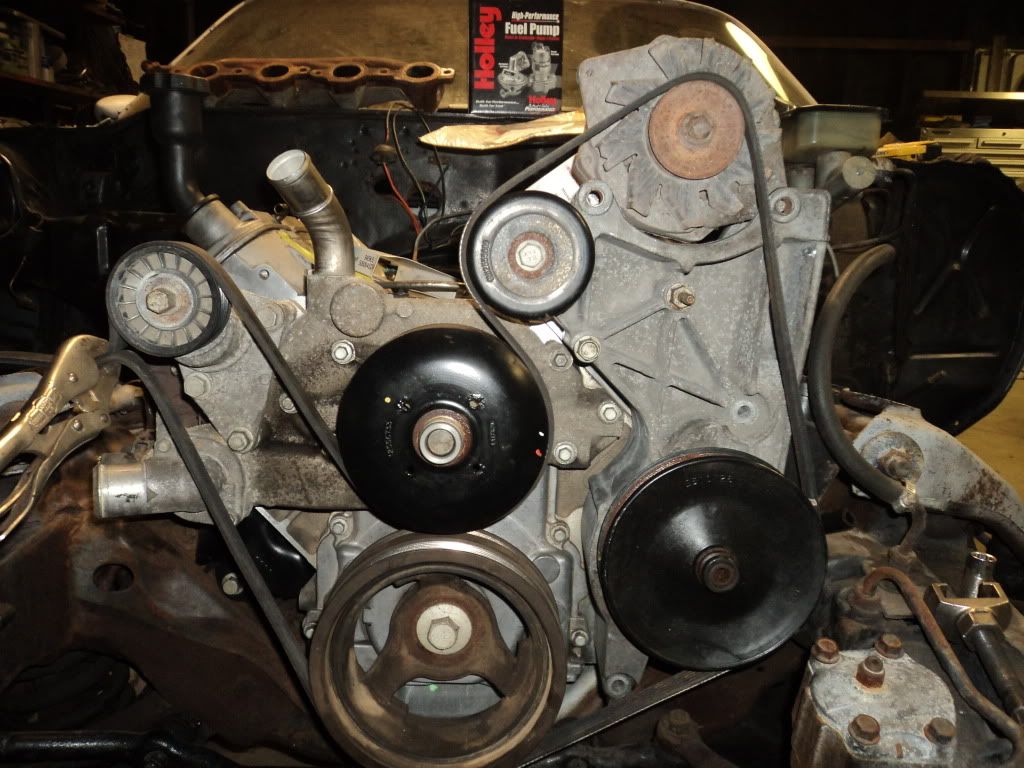
Here are the photos of the crank after i took off the oil pan and windage tray..I love to know that this motor only had good synthetic oil its whole life...lok at that beautiful gold tint...


I checked the tension on the timing chain and the crank endplay and they were all good! Suprising for a 200000+ mile motor!
Here are some up close shots where you can see there is still coating on the pistons skirts...
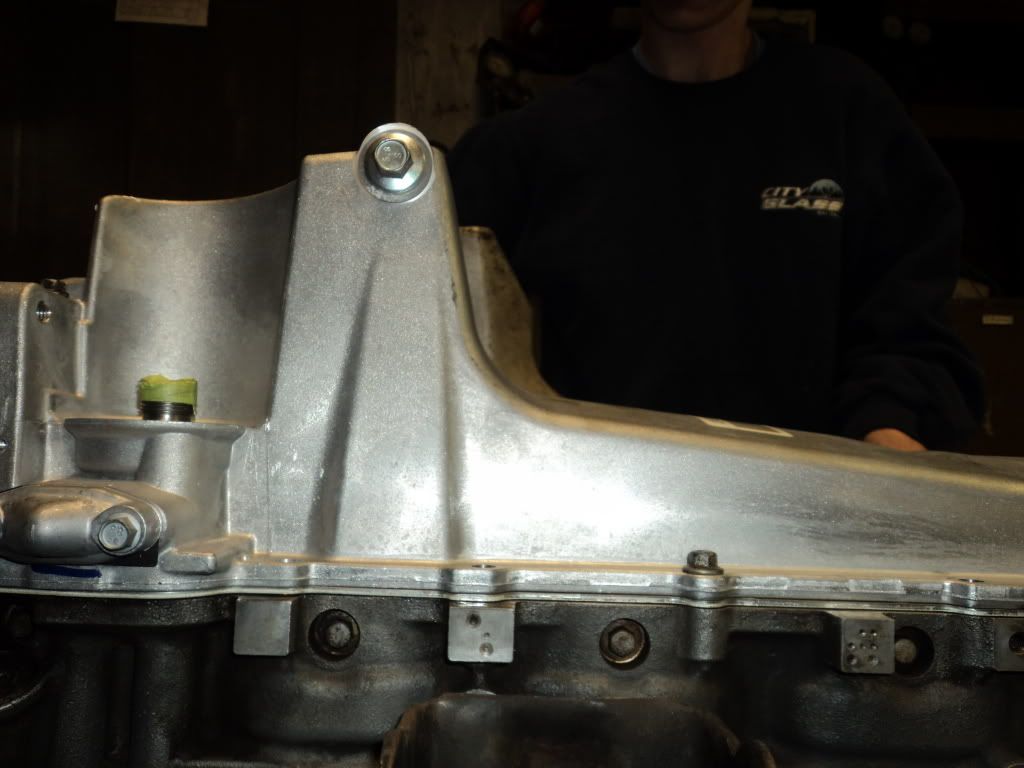
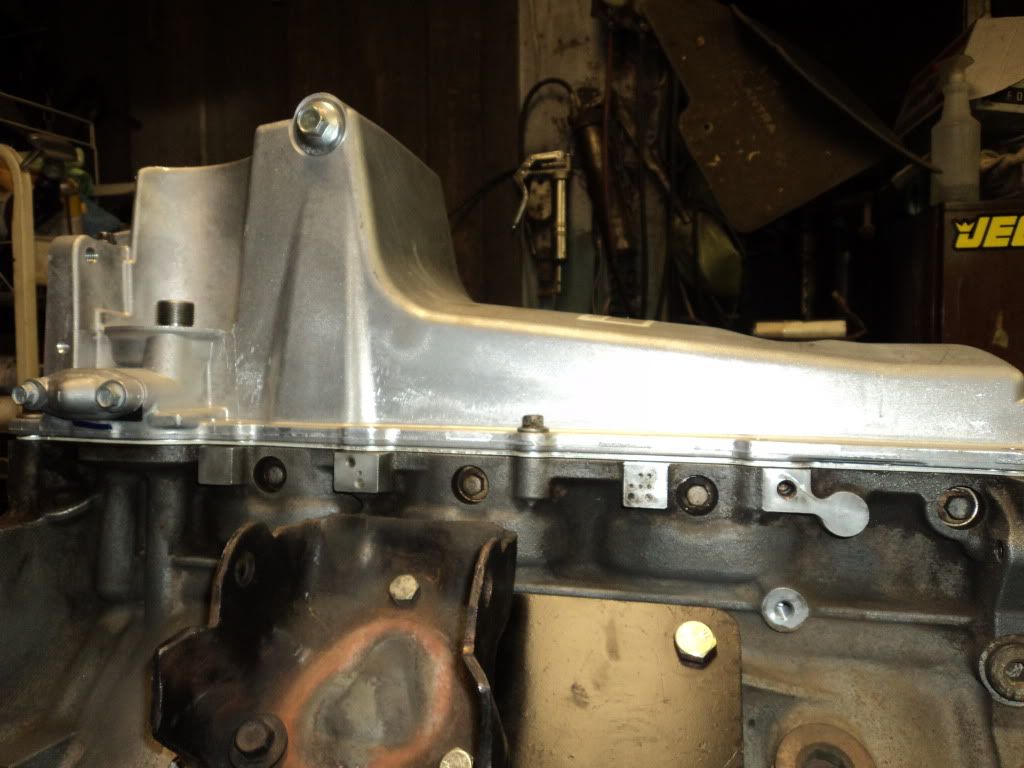
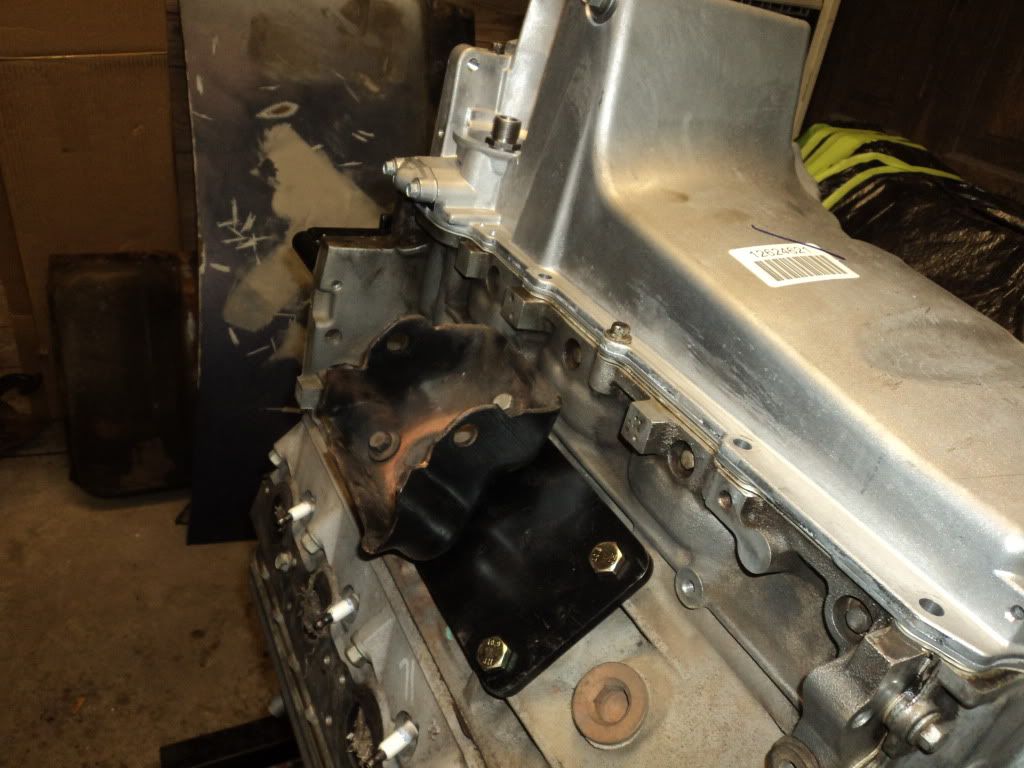
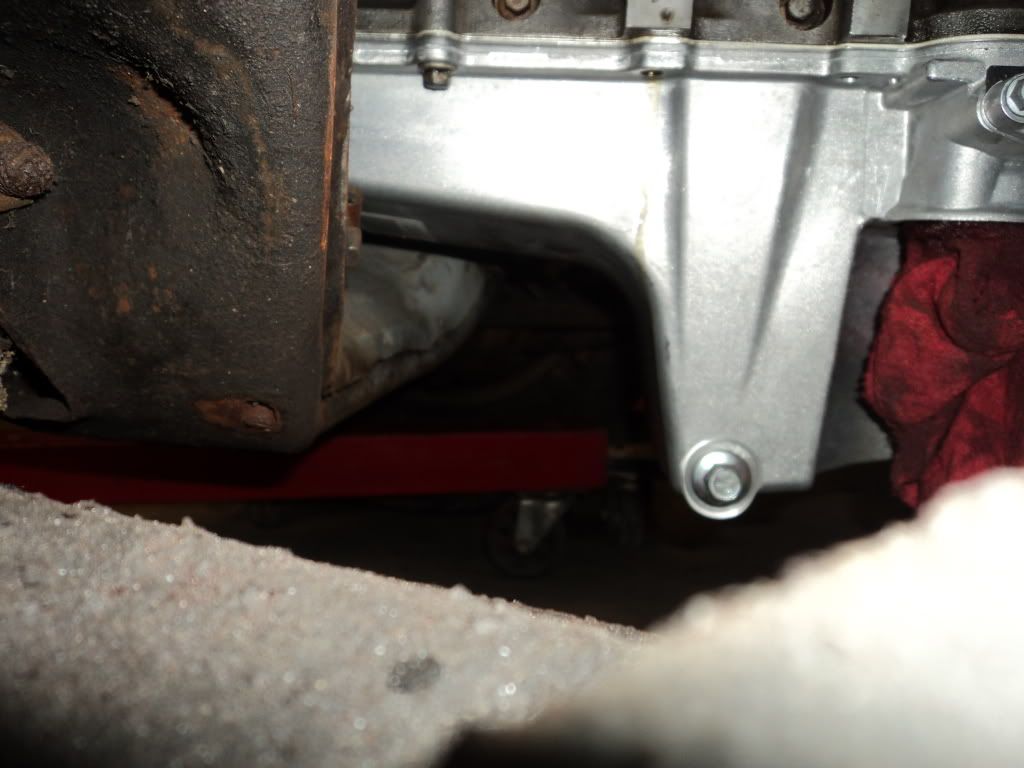
Here are pics of the difference in profile of the LH8 oil pan and the stock truck pan...
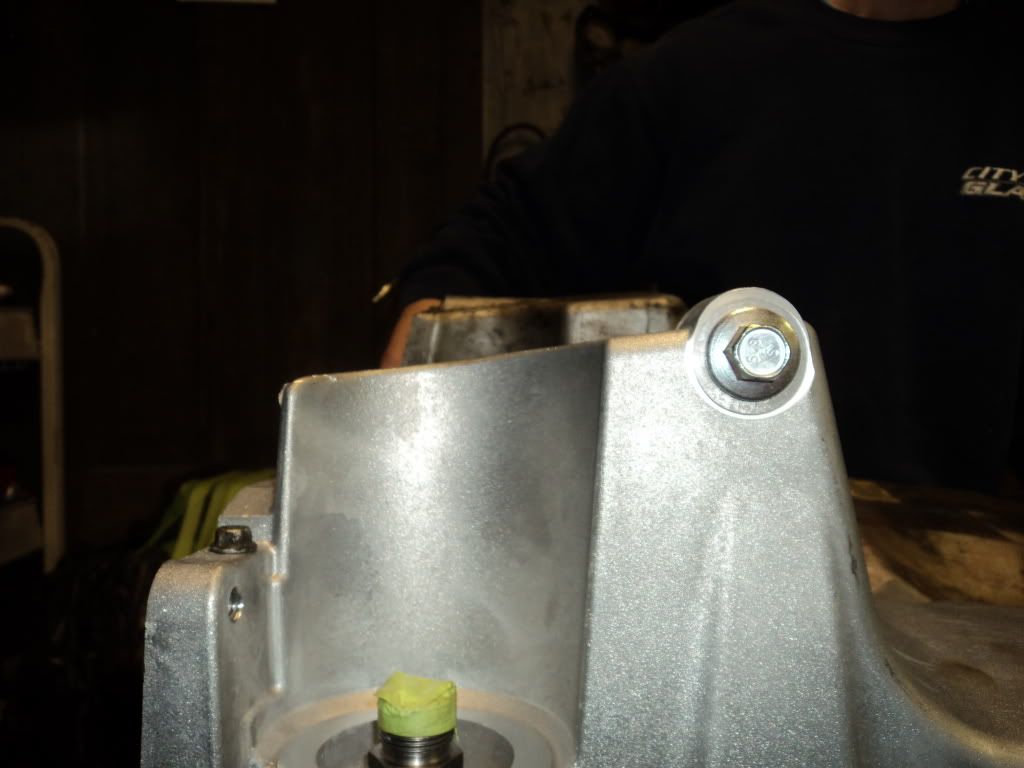
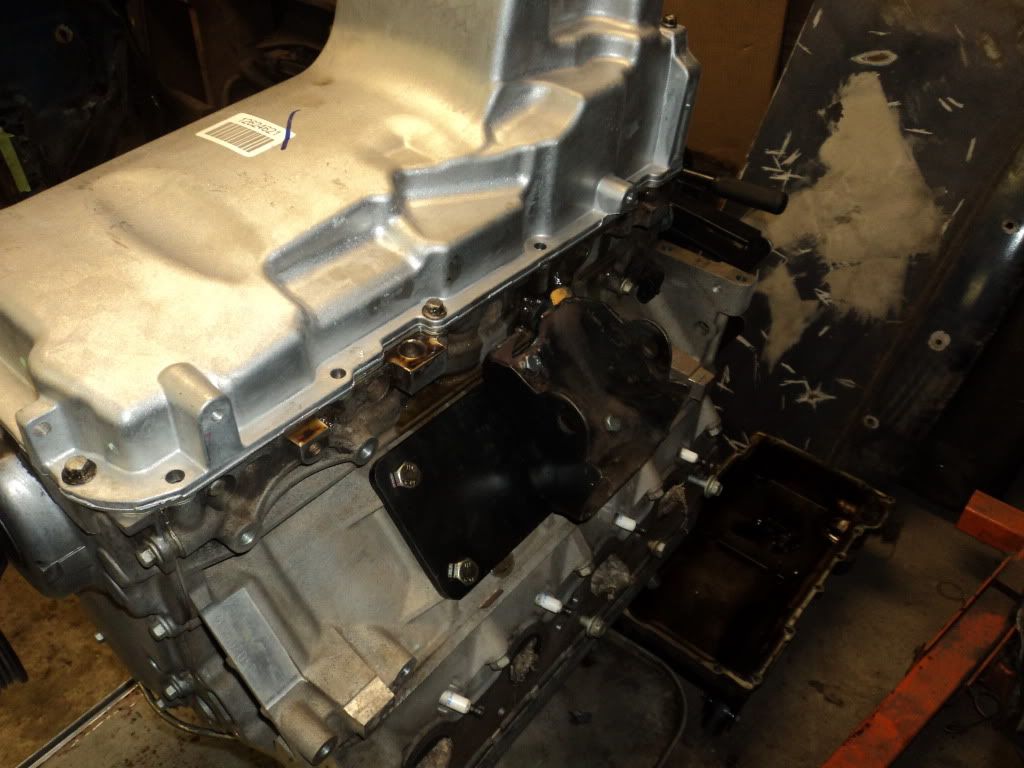
Here are pics of the car shop adapter plates and motor mount stands (adpater plates are on wrong sides though...they should be closer to the rear of the block rather than closer to the front like in the picture)...
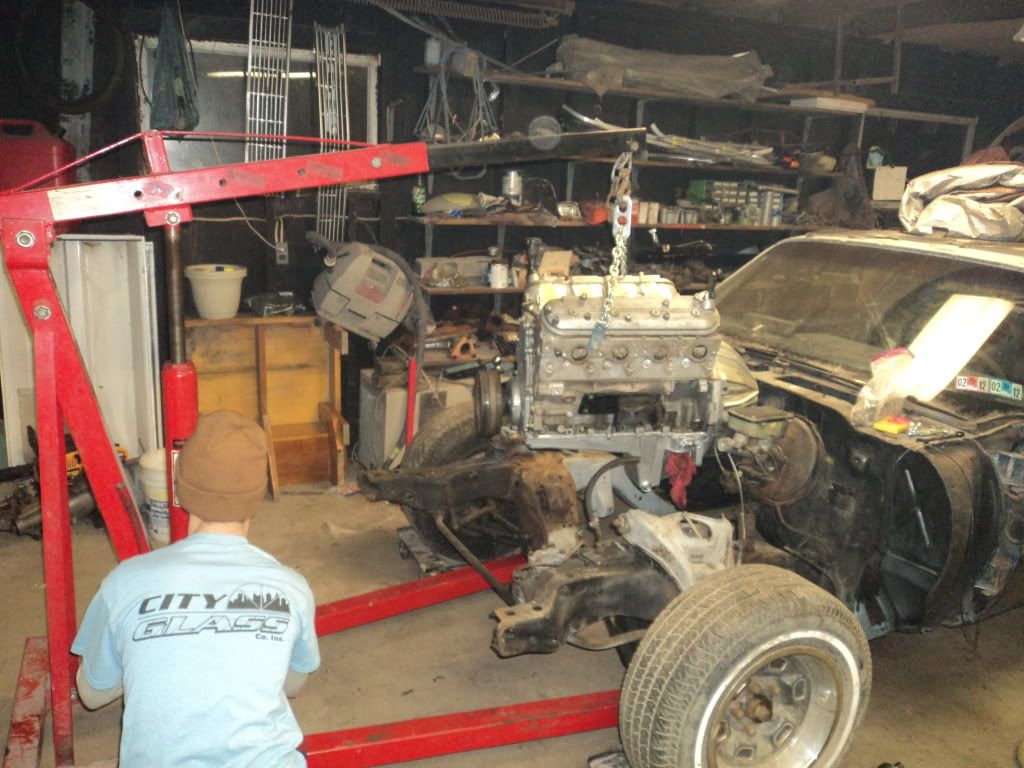
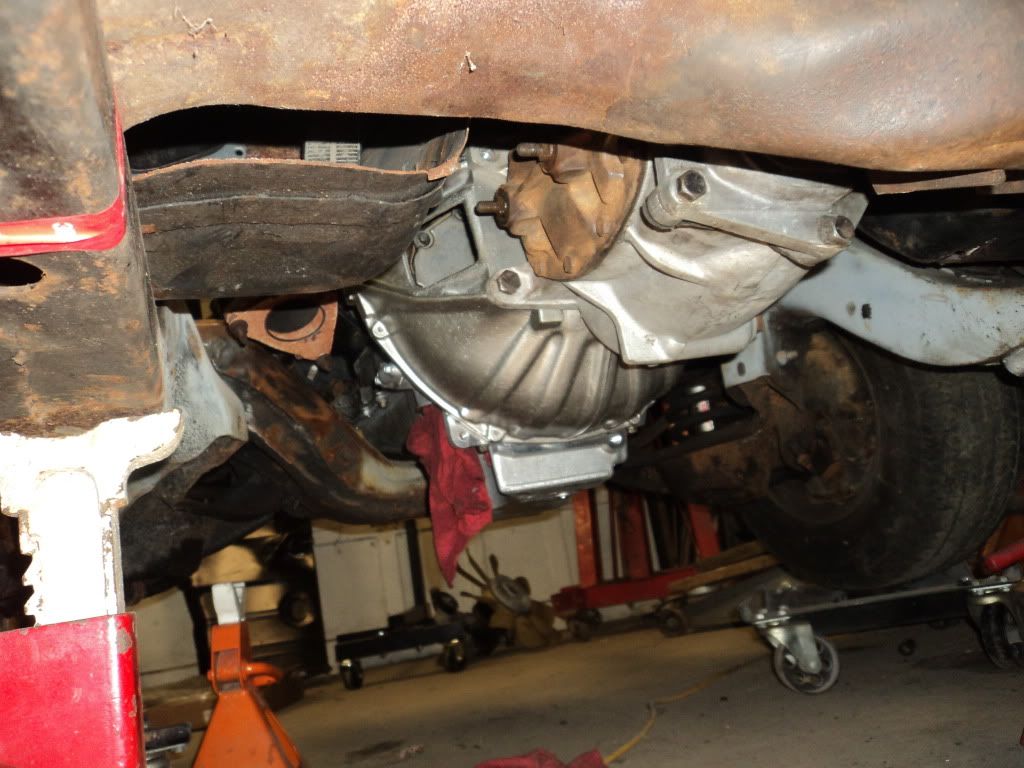
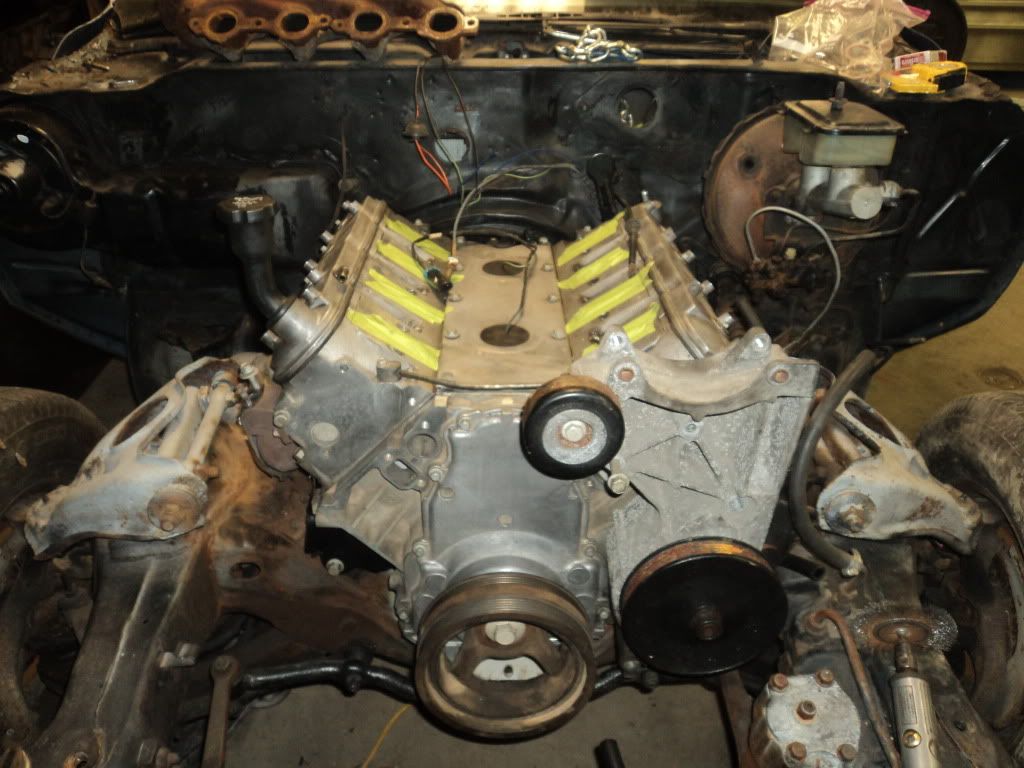
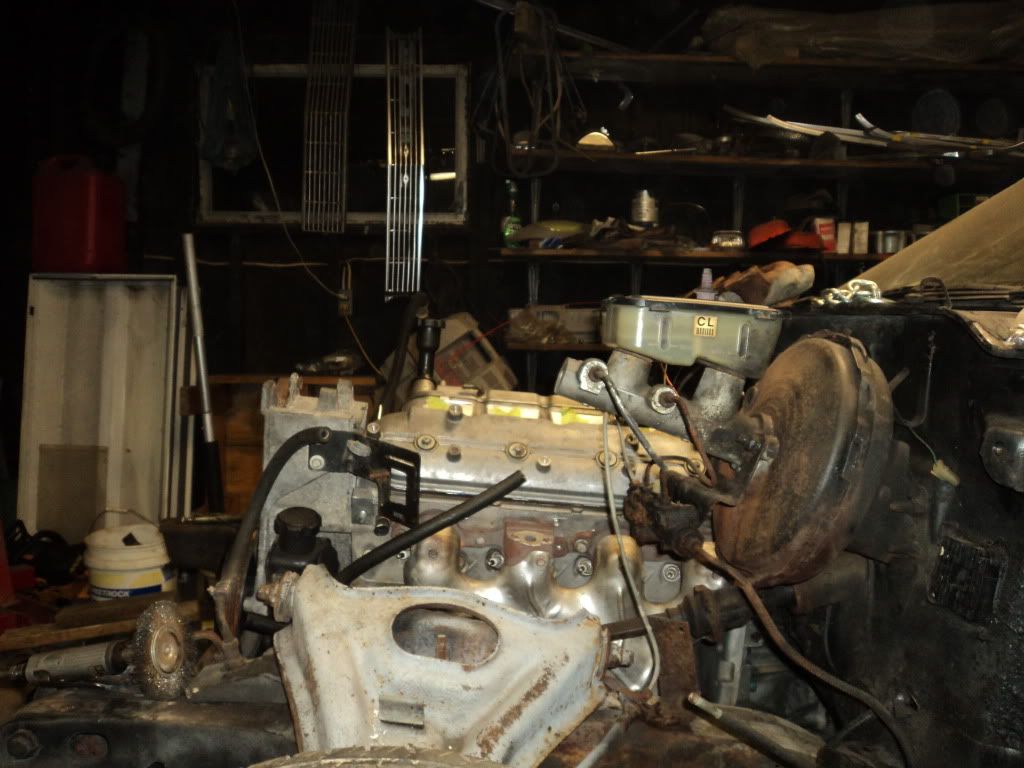
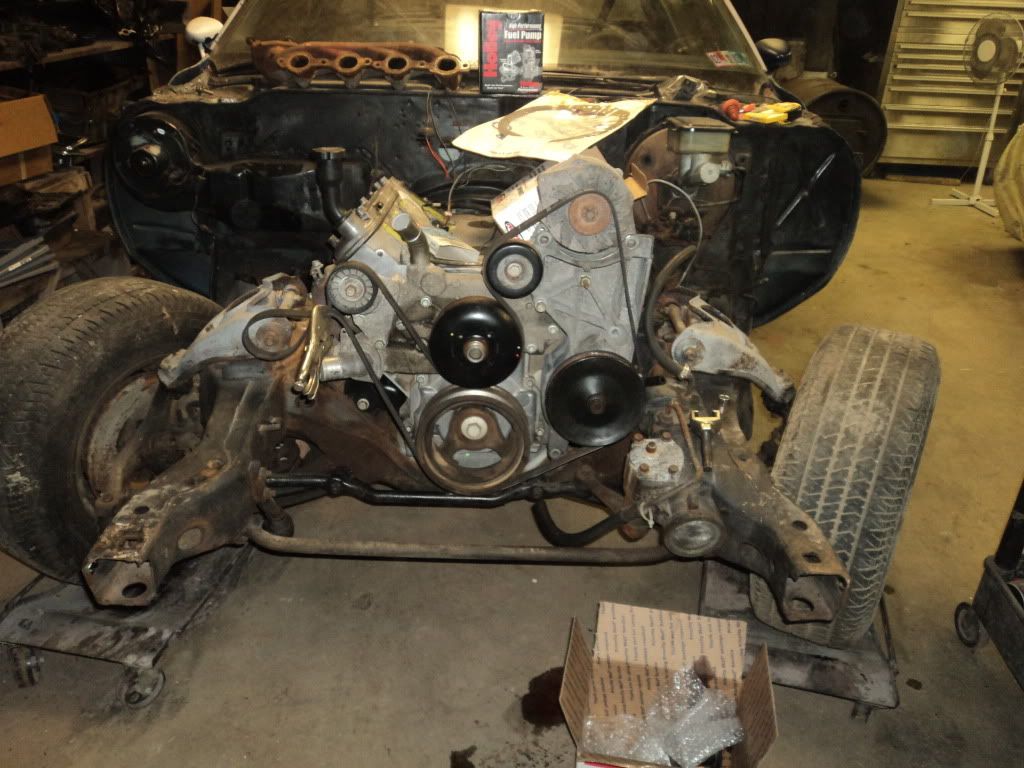
Dropping the engine in place with bellhousing attached to check clearances...
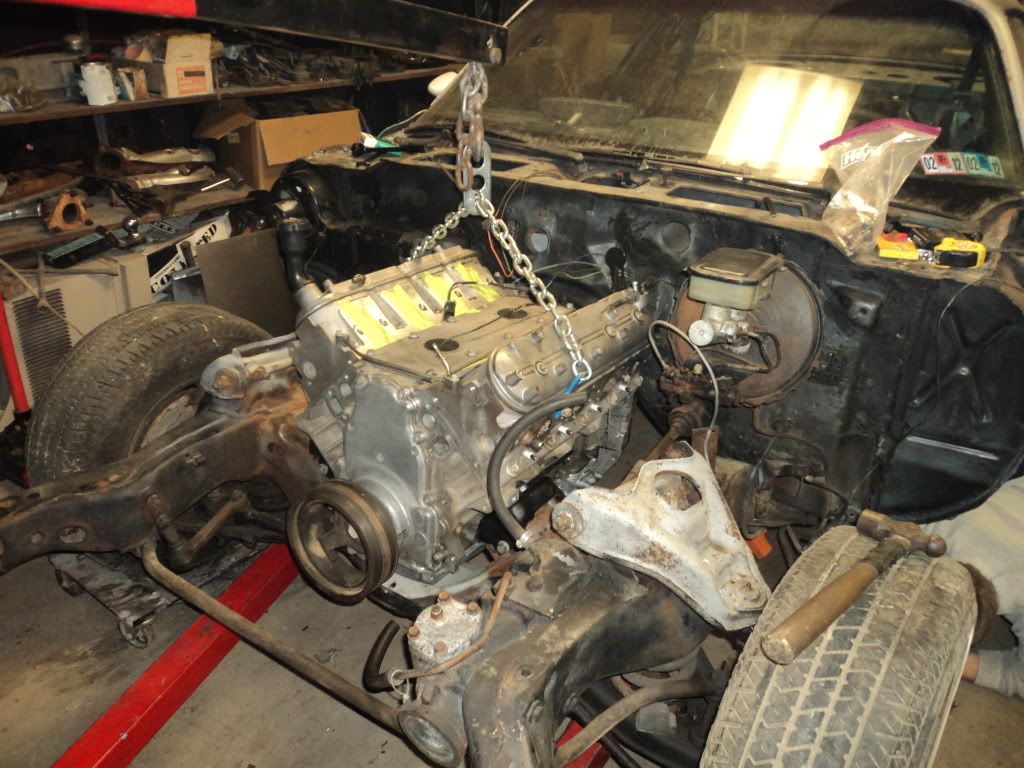
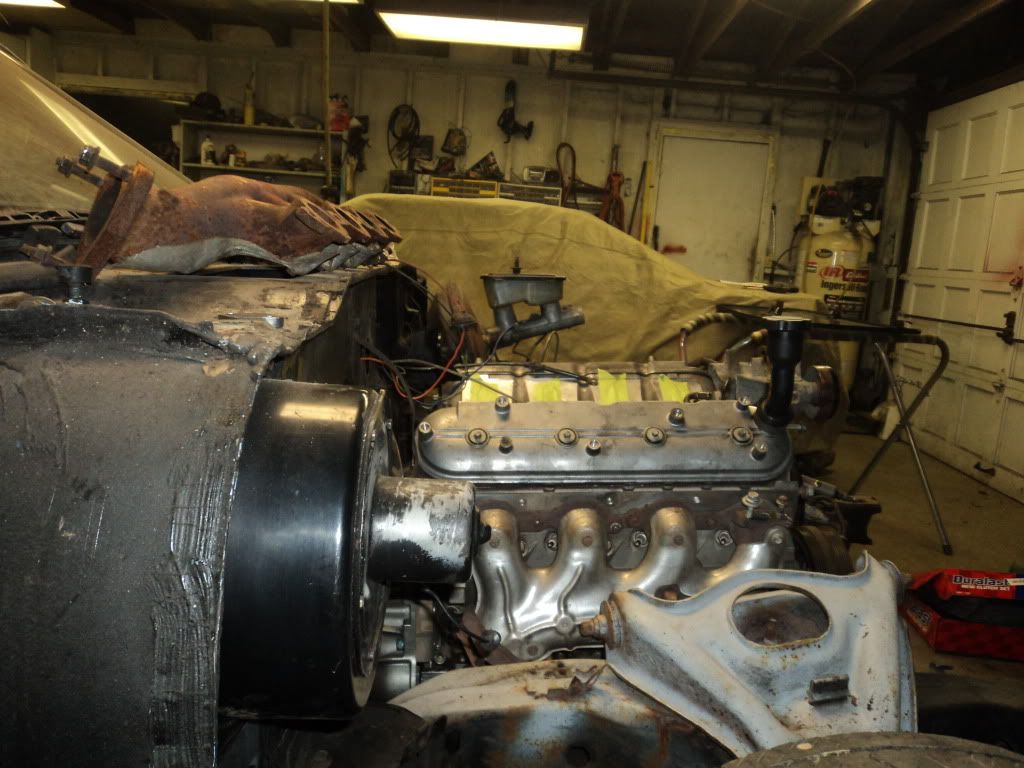
Motor in place and looking good!
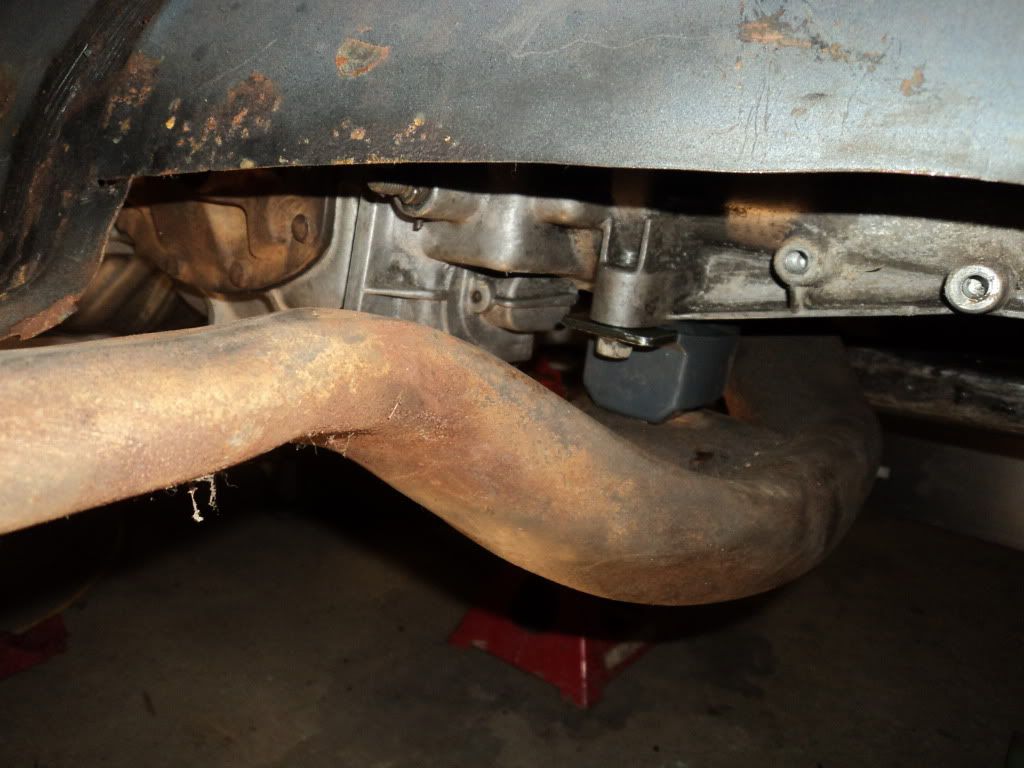
Here are pics of the manifolds fitting like they were meant for it!
Here are the pics of the LOADS of clearance with the 1 1/2" car shop adapter plates and the LH8 oil pan...I guarentee the truck oil pan would of worked!!! You can see why!
Here is the photos...
These are of the car before dropping engine...
Here are the photos of the crank after i took off the oil pan and windage tray..I love to know that this motor only had good synthetic oil its whole life...lok at that beautiful gold tint...
I checked the tension on the timing chain and the crank endplay and they were all good! Suprising for a 200000+ mile motor!
Here are some up close shots where you can see there is still coating on the pistons skirts...
Here are pics of the difference in profile of the LH8 oil pan and the stock truck pan...
Here are pics of the car shop adapter plates and motor mount stands (adpater plates are on wrong sides though...they should be closer to the rear of the block rather than closer to the front like in the picture)...
Dropping the engine in place with bellhousing attached to check clearances...
Motor in place and looking good!
Here are pics of the manifolds fitting like they were meant for it!
Here are the pics of the LOADS of clearance with the 1 1/2" car shop adapter plates and the LH8 oil pan...I guarentee the truck oil pan would of worked!!! You can see why!
 12-08-2011, 11:44 PM
#34
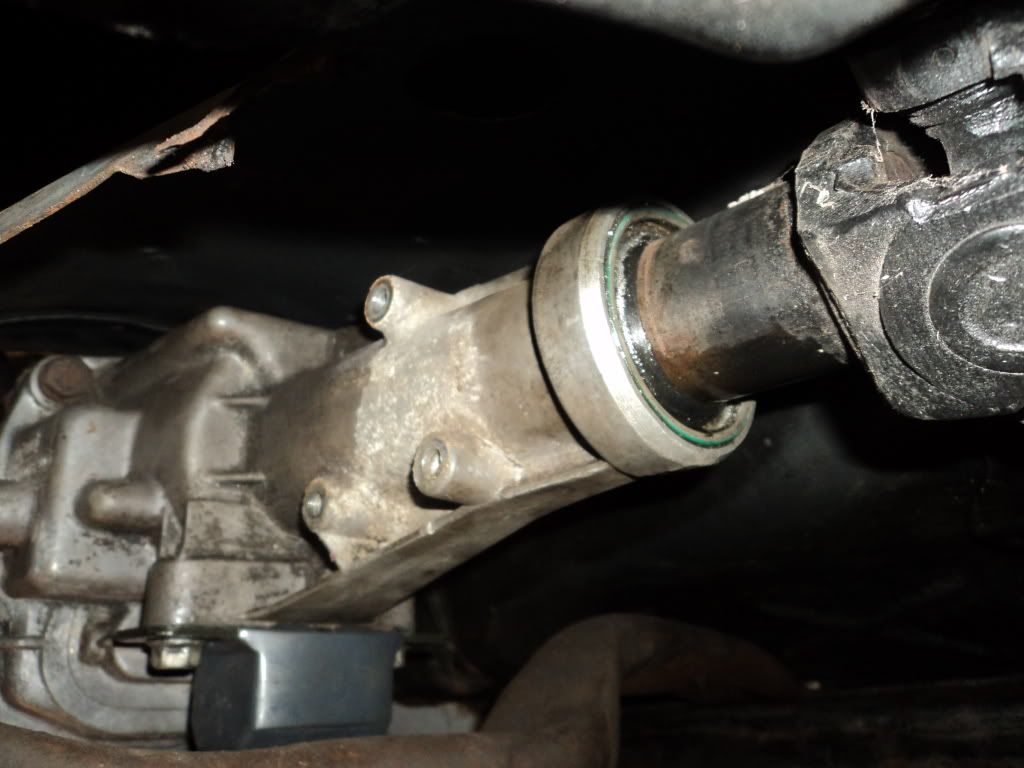
Tonight i got alot of good mockup including the trans/crossmember. Suprising enough with the 1 1/2" carshop adpater plates the crossmember, trans, and driveshaft all went it to place without a hitch. The car originally had TH250 auto trans, so i had to remove the crossmember and move it up towards the front of the car to the next set of holes in the factory location in the frame. I got the driveshaft with the trans in a combo deal, it was out of a 79 camaro so thats probably why it fit so good. In all reality i could use another 1/2-3/4 inch on thelength for the yoke to slip into the tras' output shaft a little further, but i think my current setup will work.
Anyway here are some pics of the highlights from this round of work...
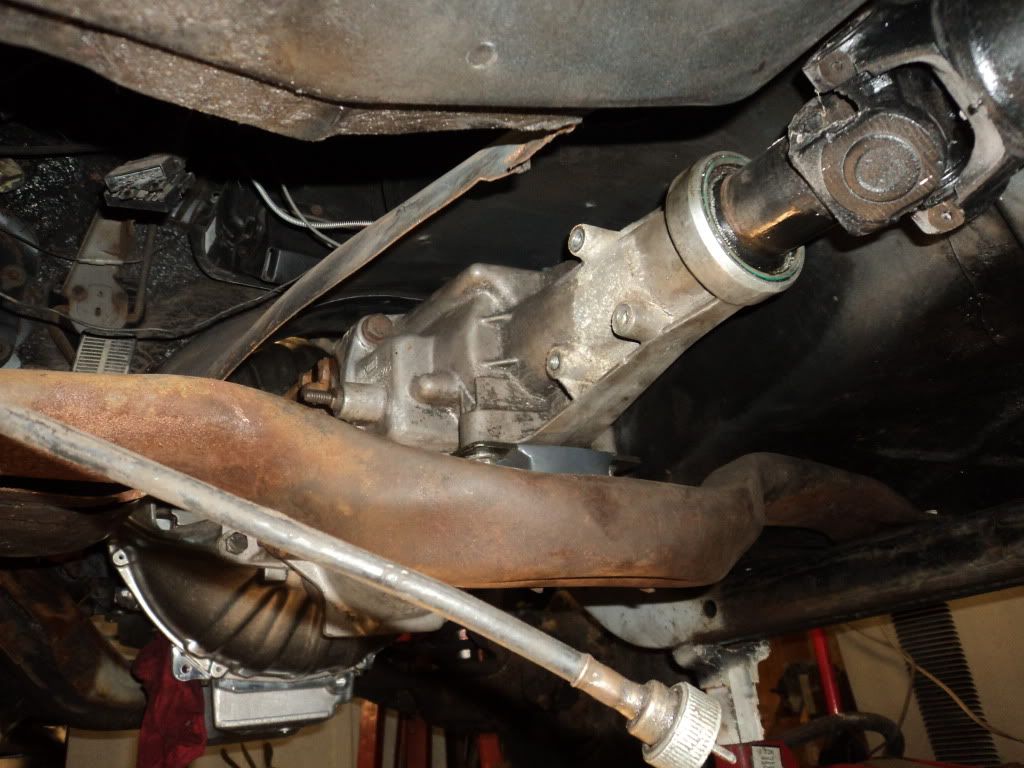
Here are some pics of the trans bolted in place in the the bellhousing and crossmember

Here is the space where i have fit the clutch inkage, i think i will be good though...
Here is a pic of the yoke on the front of the driveshaft, you can see that it fit good, just a hair loose...
There was plenty of clearance for the steering system...
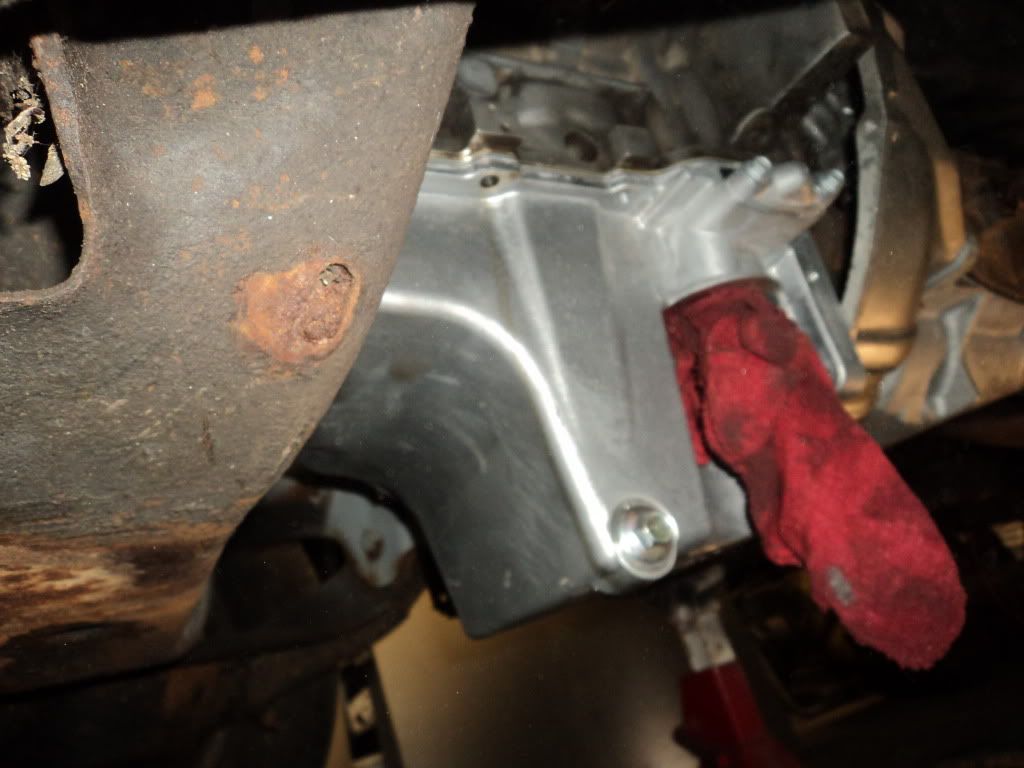
I still can believe how much room there is around the oil pan, anyone who says you CANT use a truck oilpan are wrong! It may hang low but it would work in all reality for a shoestring budget. Im using the other pan because i already have it and dont feel like fighting to return it.
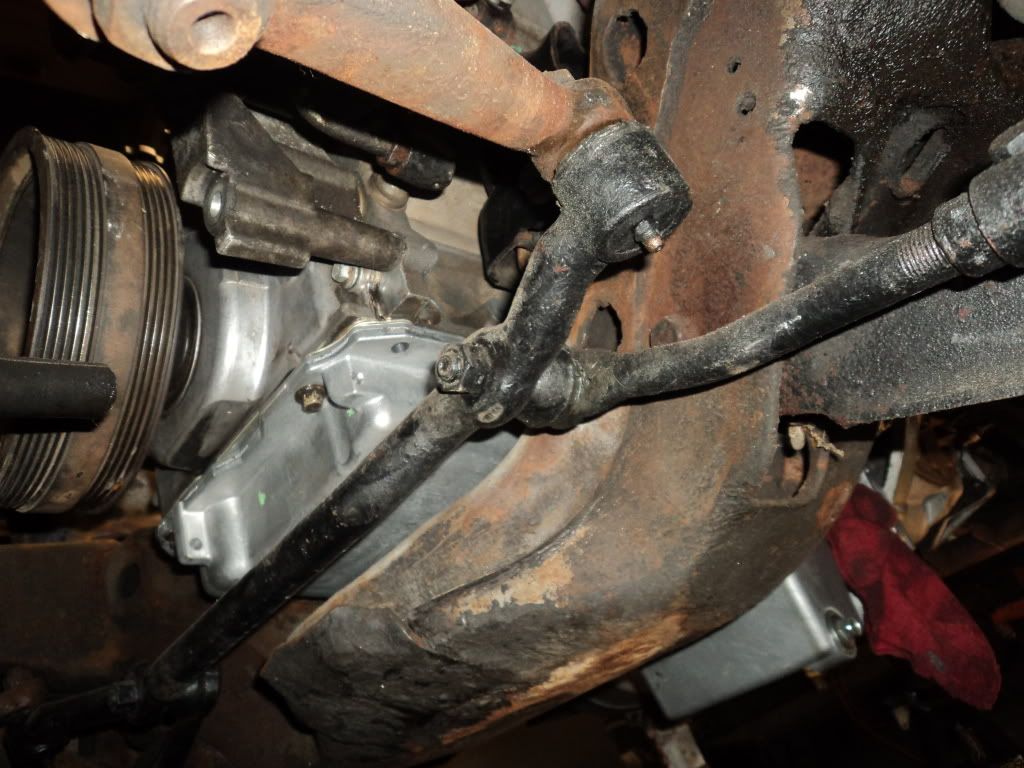
I also mounted up the truck alternator/powersteering bracket to see if it was even possible, and to my enjoyment it fit right on with no clearance issues with the steering box, matter of fact i think runniing the power steering lines will be a piece of cake.
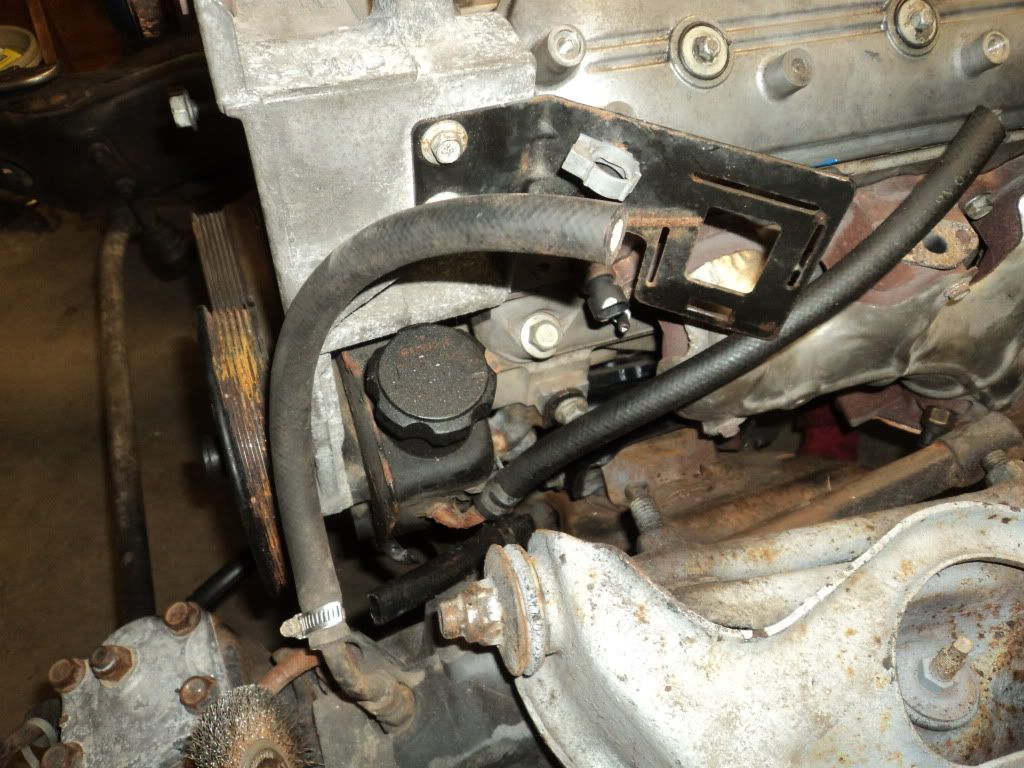
I took some side shots to see if the truck alternator bracket would theoretically clear the hood line, and while i dont have an alternator right now i think its going to work. I hope so because i hate to spend 40-50 bucks on an fbody alternator bracket, 65 on fbody balancer, and who knows how much on an fbody powersteering setup. As you can see the alternator bracket is lower than the master cylinder which is reassuring...
Next time I am going to mock up the shifter and see where i have to cut a big hole in the trans tunnel! Sounds like fun! I cant wait to pretend im banging some gears in the driver seat, even if it will be a milk crate lol! I have the stock sfter assembly as well as 3 hurst competition plus shifters form various 4 speeds. I am hoping one of the Hursts' will work!
Anyway here are some pics of the highlights from this round of work...
Here are some pics of the trans bolted in place in the the bellhousing and crossmember
Here is the space where i have fit the clutch inkage, i think i will be good though...
Here is a pic of the yoke on the front of the driveshaft, you can see that it fit good, just a hair loose...
There was plenty of clearance for the steering system...
I still can believe how much room there is around the oil pan, anyone who says you CANT use a truck oilpan are wrong! It may hang low but it would work in all reality for a shoestring budget. Im using the other pan because i already have it and dont feel like fighting to return it.
I also mounted up the truck alternator/powersteering bracket to see if it was even possible, and to my enjoyment it fit right on with no clearance issues with the steering box, matter of fact i think runniing the power steering lines will be a piece of cake.
I took some side shots to see if the truck alternator bracket would theoretically clear the hood line, and while i dont have an alternator right now i think its going to work. I hope so because i hate to spend 40-50 bucks on an fbody alternator bracket, 65 on fbody balancer, and who knows how much on an fbody powersteering setup. As you can see the alternator bracket is lower than the master cylinder which is reassuring...
Next time I am going to mock up the shifter and see where i have to cut a big hole in the trans tunnel! Sounds like fun! I cant wait to pretend im banging some gears in the driver seat, even if it will be a milk crate lol! I have the stock sfter assembly as well as 3 hurst competition plus shifters form various 4 speeds. I am hoping one of the Hursts' will work!
12-09-2011, 11:15 AM
#37
I think you are right, the car shop plates PN#CSP2370 are 1 inch setback, not 1 1/2" like i was saying. I lost the directions for them, thats why i put the on backwards first. At first when i was looking to buy the motor mount adapter plates i thought that the carshop plates were expensive at $50 dollars and i said i thought i would be slick and make my own, BUT after mocking up this motor/trans/driveshaft with the carshop plates, I would never do it another way...unless of course i do some measuring on the plates and then throw it on autocad that way i can get some steel/aluminum/billet ones made for other projects.
But anyway I cant endorse their plates enough. The guy helping me last night with the trans has been working on old chevys for more than 40 years, probably installing HUNDREDS of four speeds over the years. He flat out could not believe that drivetrain pretty much put itself in, in about 30min too. I'm sure everybody here knows that when you do any car project there is almost ALWAYS hitches in the install even if the parts were made for your specific vehicle. This install was the one that blew my mind.
http://carshop.carshopinc.com/produc...c6f75bcf89626a
So if you are looking at doing a 79-81 Camaro with an ls1/5.3/6.0 and a four speed borg warner super t10 trans all you have to do is use a stock 4 speed driveshaft, use the most front oriented crossmember location, and use the carshop 1" setback adapter plates with the stock clamshell frame mounts. Stock Fbody exhaust manifolds fit awesome, especially to accomodate the clutch linkage, but we will see. $200 is a pretty big hit for brake/clutch pedals/ complete clutch linkage, but i think it is worth it to have all the dust seals, washers, clips, and boots to make everything FACTORY fresh! Also a Hurst Super Comp Shifter should make slammin gears very nice!
12-09-2011, 01:34 PM
#38
Hey good news, I found a seller on ebay that was having a sale on his clutch linkage and pedal assembly...i got both of them brand new shipped to my door for $180 which isnt bad at all considering the next cheapest price was $230 shipped. The place was called Bowtie parts out of Shelbyville, Kentucky, and they were real good people to deal with, i suggest them to anyone needing some vintage chevy parts. Suprising enough people wanted more for old original crusty parts, so i jusy went with the new stuff. I want to get the clutch linkage and shifter hold sorted before i pull the motor and trans back out to do the front suspension rebuild. I'm all about making forward steps everyday, thats how stuff gets done!
 12-11-2011, 05:42 PM
#40
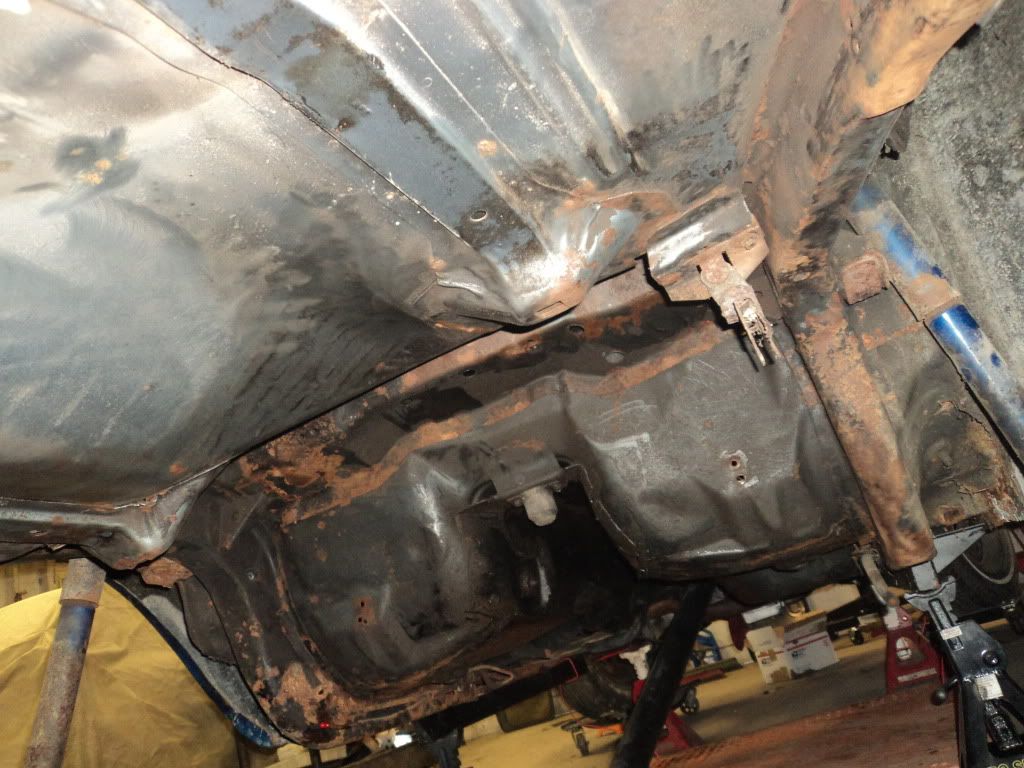
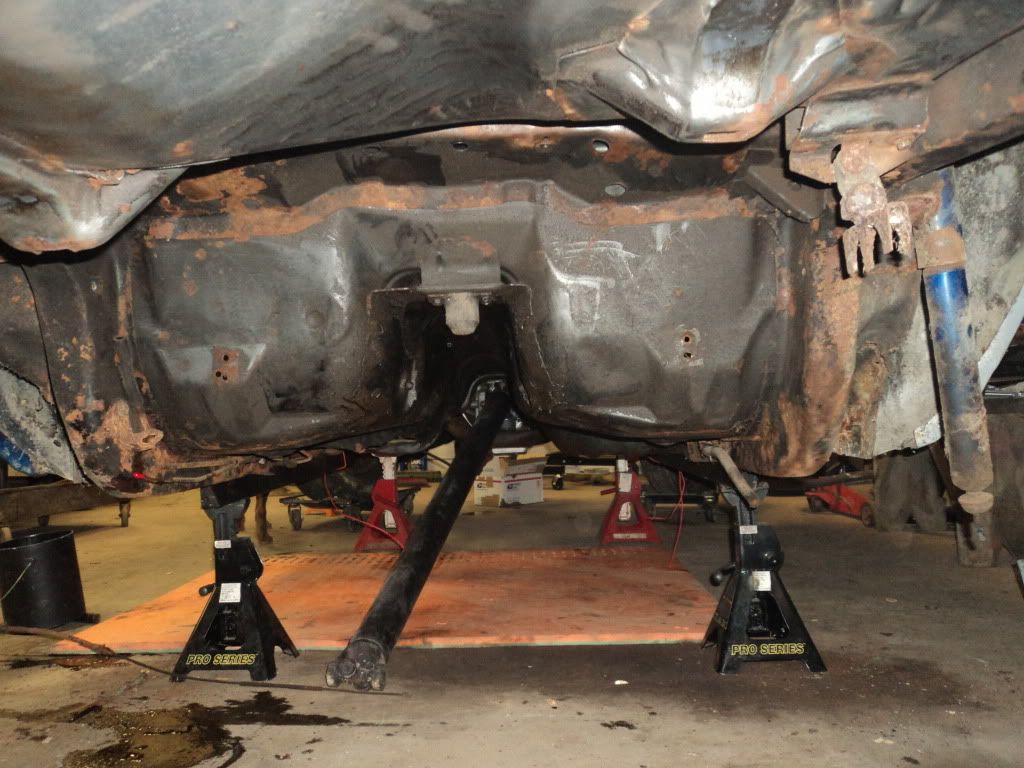
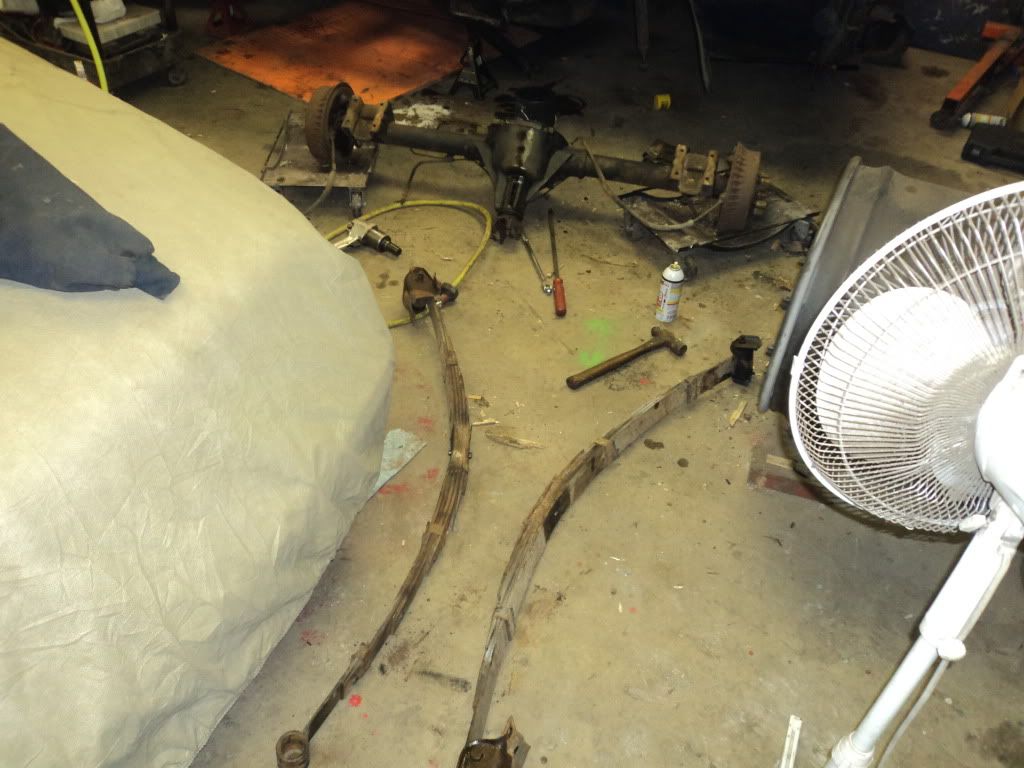
Got out in garage today and since i was waiting for my clutch pedal/linkage combo i figured i would pull the rearend and leaf springs because i already have the new leaf spring bushing kit and shocks. Plus it will give me some extra room to clean and paint the underside of the body. I also want to see where I am going to mount my Holley blue fuel pump. Here are some pics...
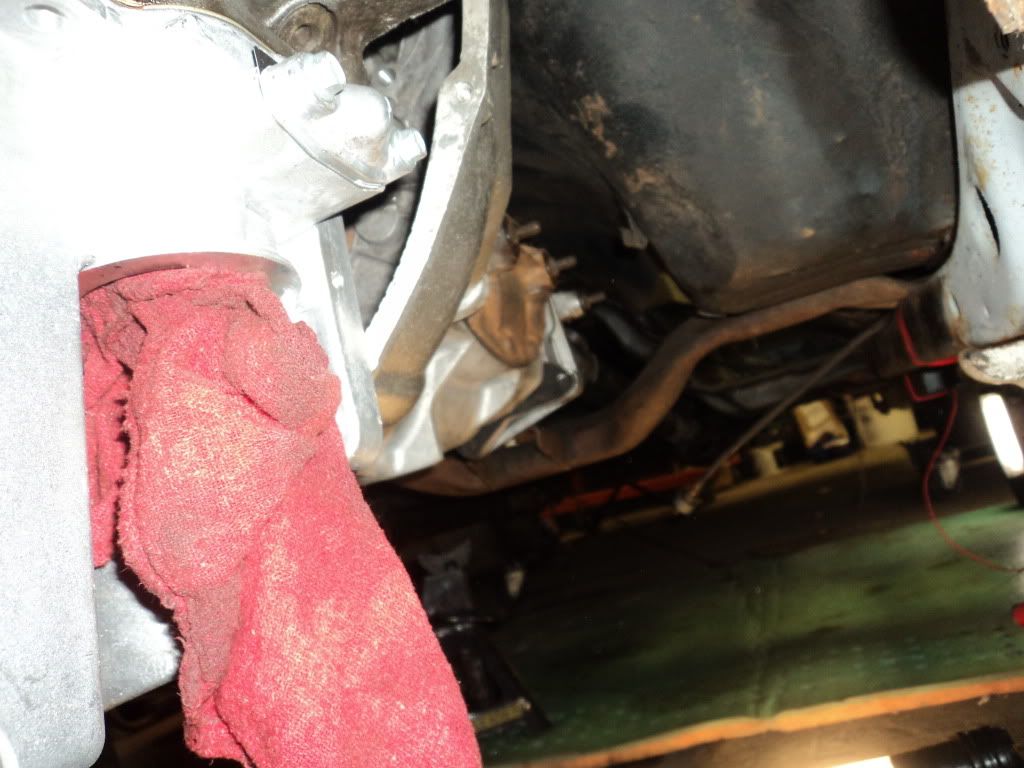
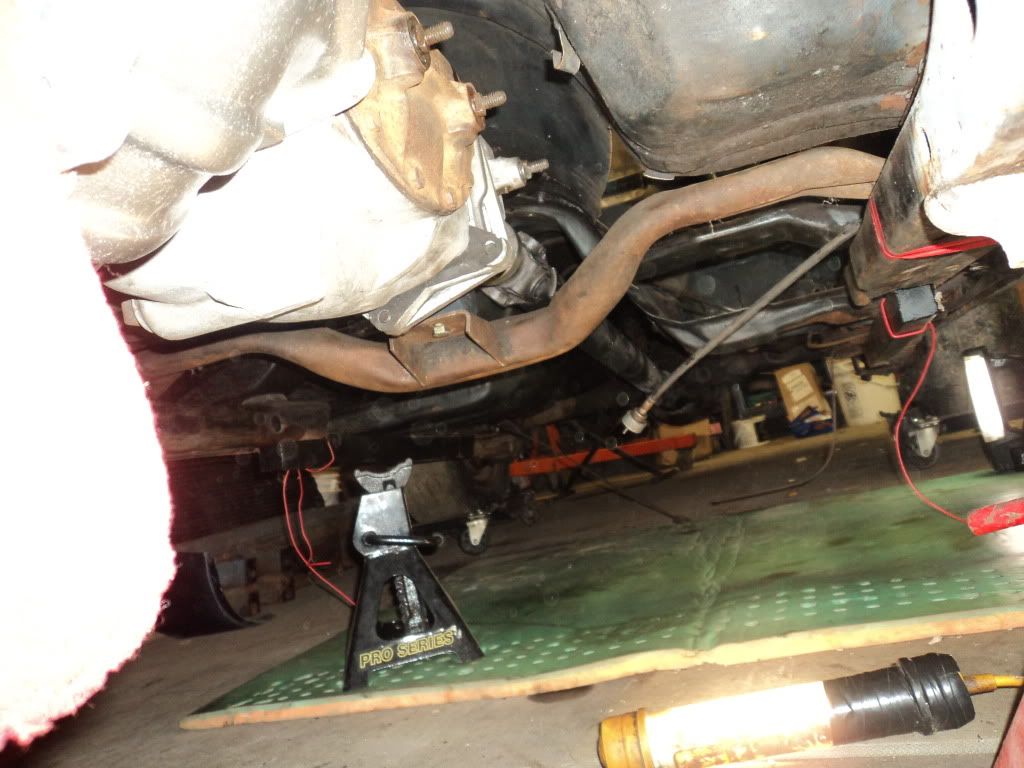
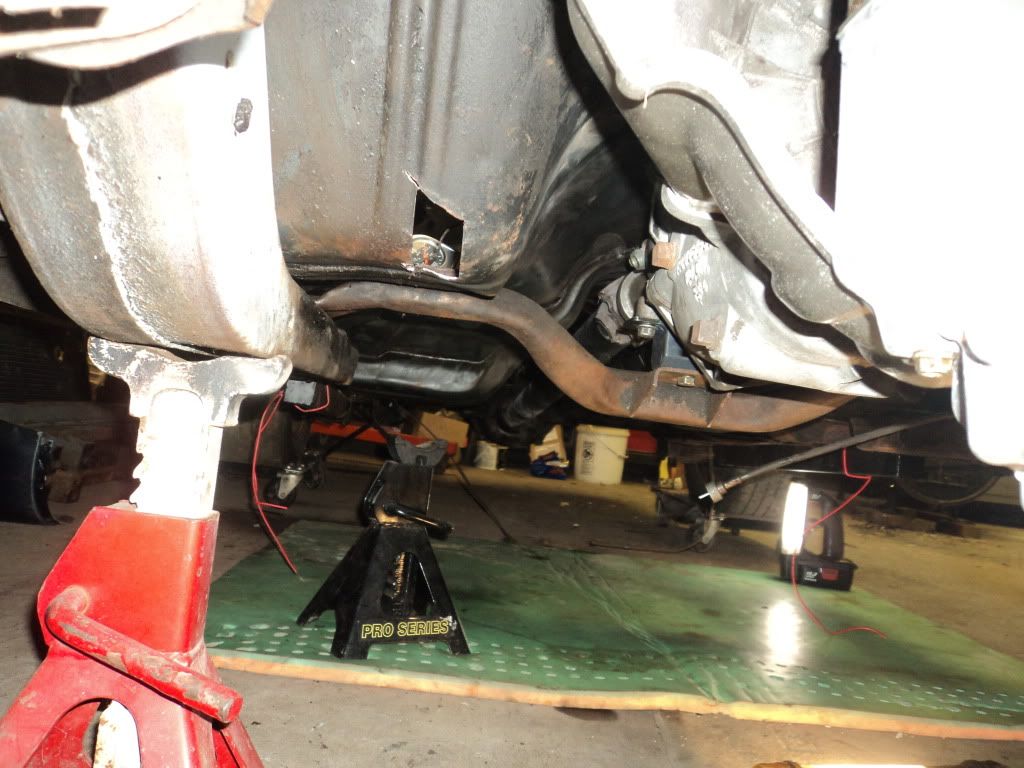
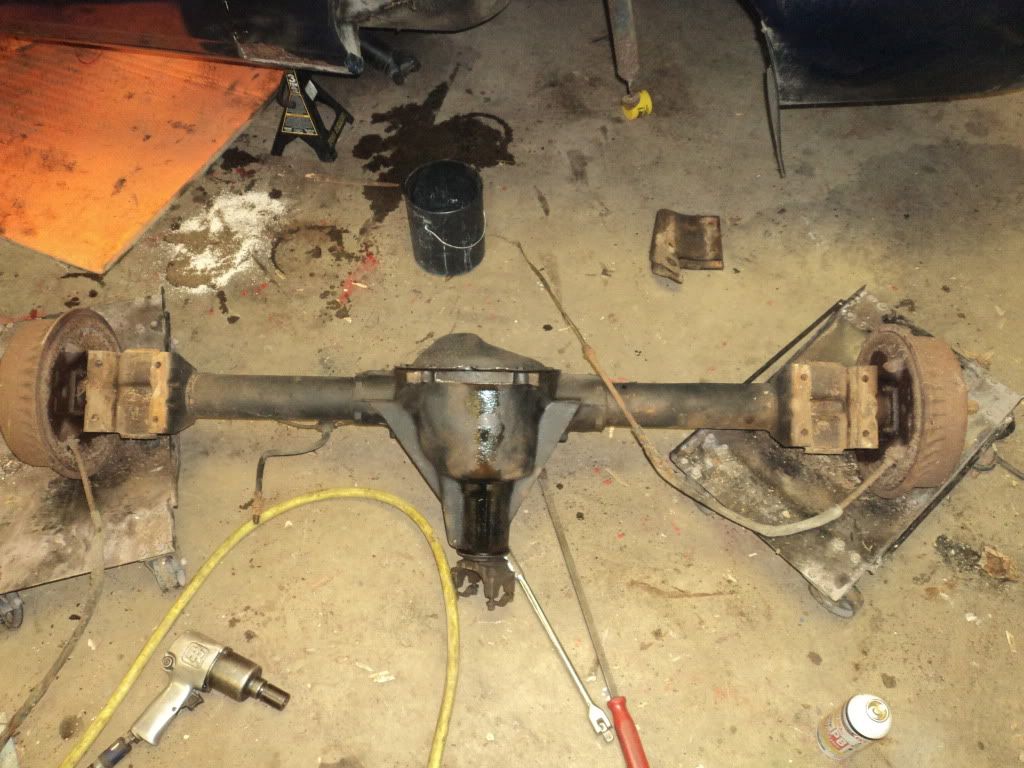
Here are the rearend pics...
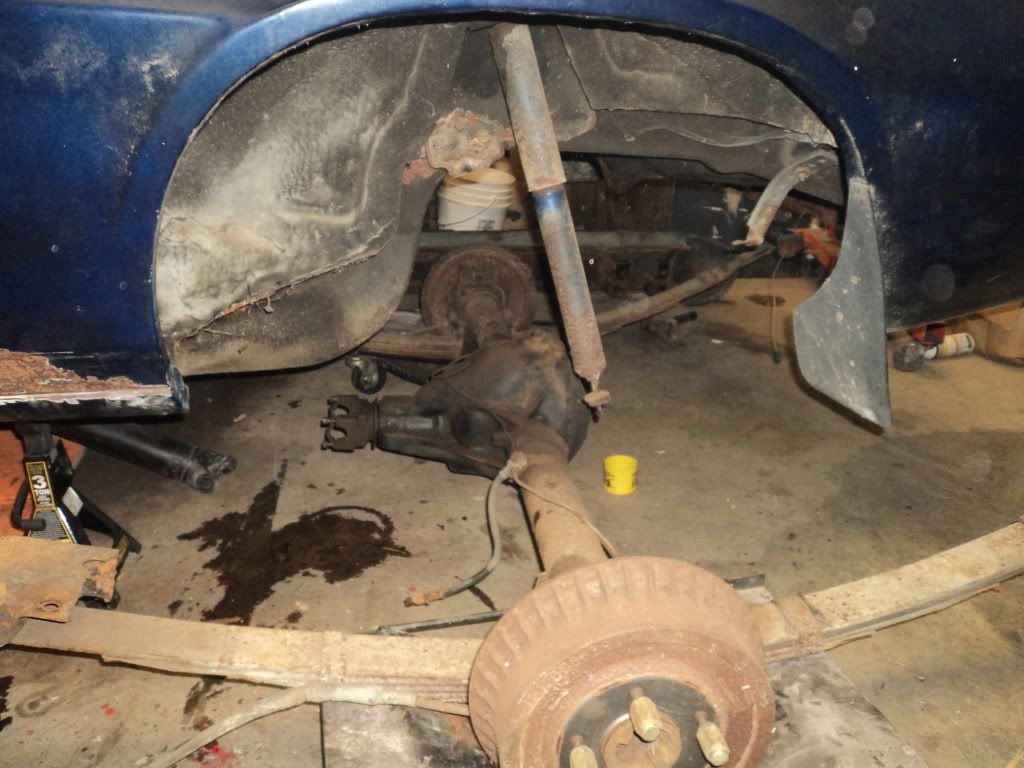

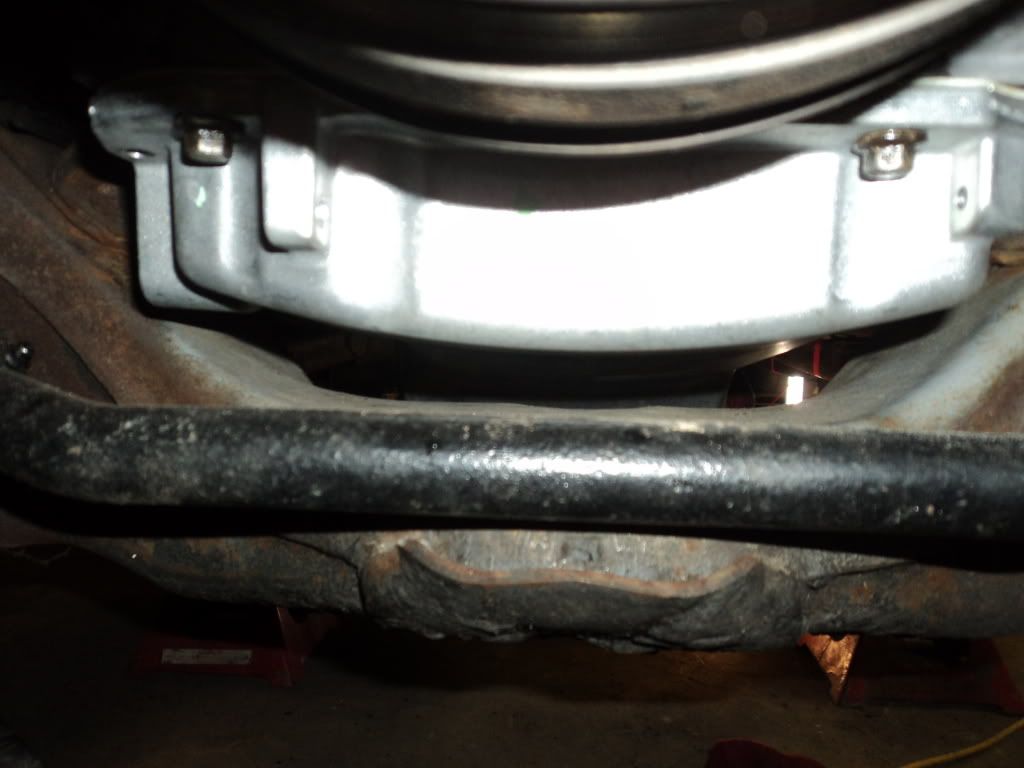
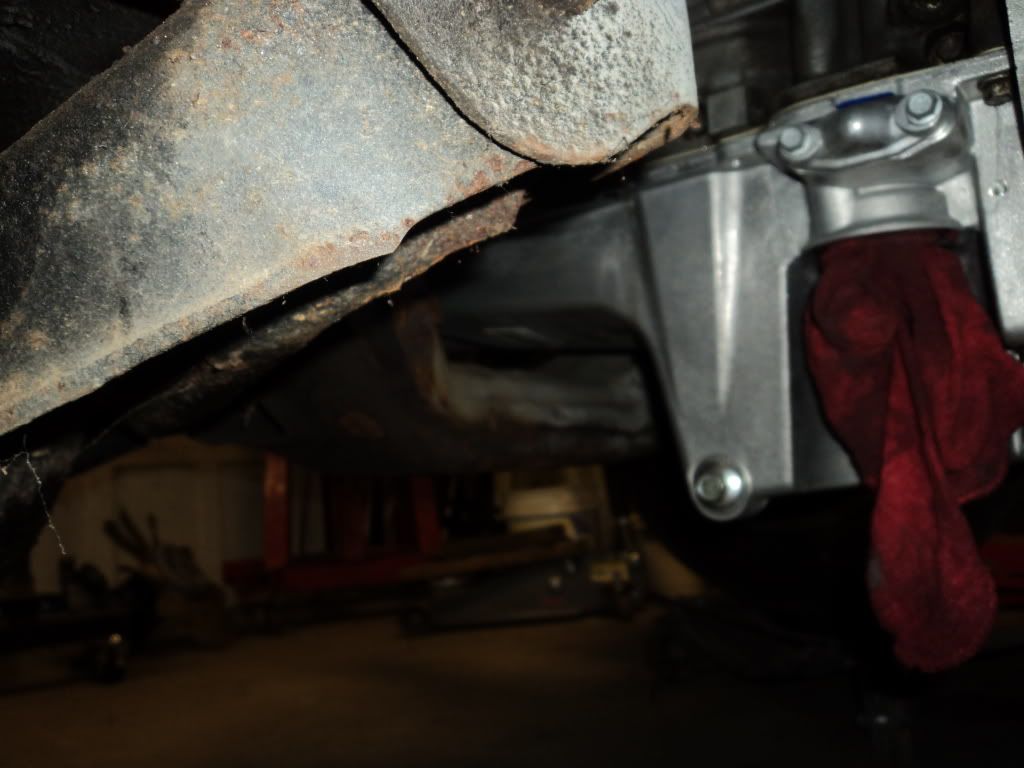
Heres the underbody pics, I have already cleaned a little bit...
Here are the leaf springs...look at the comparison of the 30 year old bushing/shackles compared to the new Prothane kit...man do i love new shiny parts!
Here is a shot of the Holley blue fuel pump and regulator combo...got it for $84, thanks to autozone's 30% off discount for the holidays!

I also was just messing around and i mounted an old style alternator (even though it didnt fit) just to see what the theoretical serpentine belt routing would look like...I'm not sure the way i have it would be enough contact on the power steering pump pulley...we will see....
Here are the rearend pics...
Heres the underbody pics, I have already cleaned a little bit...
Here are the leaf springs...look at the comparison of the 30 year old bushing/shackles compared to the new Prothane kit...man do i love new shiny parts!
Here is a shot of the Holley blue fuel pump and regulator combo...got it for $84, thanks to autozone's 30% off discount for the holidays!
I also was just messing around and i mounted an old style alternator (even though it didnt fit) just to see what the theoretical serpentine belt routing would look like...I'm not sure the way i have it would be enough contact on the power steering pump pulley...we will see....