
1970 GTO LS1/4L60e Swap Check List - Do I Have Everything Covered??
 12-18-2012, 09:54 AM
#41
On The Tree
Join Date: Nov 2011
Location: South east Wisconsin
Posts: 159
Likes: 0
Received 0 Likes
on
0 Posts
I always love the A body ls swaps! Just my 2 cents though, a judge numbers matching or not is worth some serious coin. That car can be restored to a numbers correct numbers matching original that would bring you enough money to build 3 LSX GTO Judge clones, or for that matter you could sell that car "as is" to some one and have more than enough money to buy another gto or lemans do the swap and have money to spare! If money is a little tight for the project, its a no brainer. A Judge is just too rare to cut up!
 12-18-2012, 03:11 PM
#42
TECH Apprentice
Thread Starter
iTrader: (10)
Join Date: Dec 2005
Location: Peoria IL
Posts: 340
Likes: 0
Received 0 Likes
on
0 Posts

I always love the A body ls swaps! Just my 2 cents though, a judge numbers matching or not is worth some serious coin. That car can be restored to a numbers correct numbers matching original that would bring you enough money to build 3 LSX GTO Judge clones, or for that matter you could sell that car "as is" to some one and have more than enough money to buy another gto or lemans do the swap and have money to spare! If money is a little tight for the project, its a no brainer. A Judge is just too rare to cut up!
Besides, the way I look at it is that an LS swap is no different from the non #'s matching hopped up 400 that was in it... the original engine is long gone and stock is boring. I'm looking forward to having discussions like this in person at cruises.
And the swap budget isn't really all that tight... I just like being able to say I built the car myself without pointlessly pouring out money.
12-19-2012, 06:09 AM
#43
TECH Fanatic
The nice thing about an LS swap is that nothing is irreversible. If the time ever comes that values skyrocket again you can always go back to stock. That is why I still have all of the original drive train for my car stashed away.
12-20-2012, 10:45 AM
#44
TECH Apprentice
Thread Starter
iTrader: (10)
Join Date: Dec 2005
Location: Peoria IL
Posts: 340
Likes: 0
Received 0 Likes
on
0 Posts
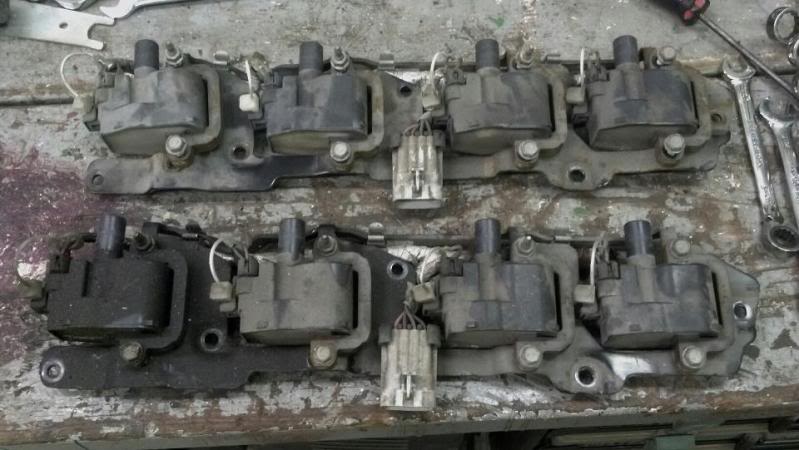
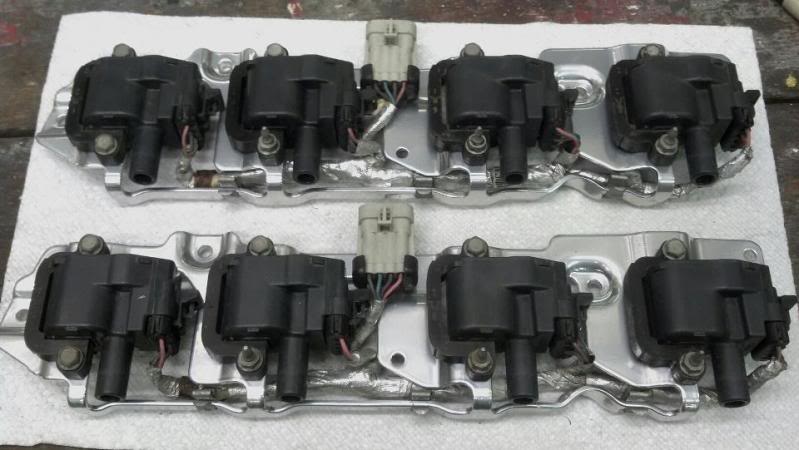
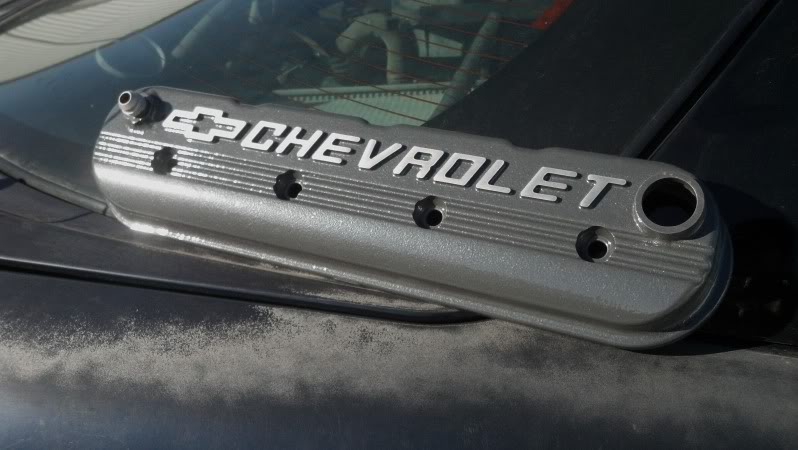
Before/After cleaning up the coils and beadblasting & powdercoating the coil brackets. The stock hardware will be replaced with some SS button head bolts... I want to be proud of this build when I open the hood.
12-20-2012, 04:13 PM
#45
TECH Fanatic
iTrader: (27)

Looks good. Could you post more info about your PC setup? Are you sandblasting the parts before you coat them? What type of ground are you using? Etc.
Great build, I like the looks of that black chrome. Nice.
Great build, I like the looks of that black chrome. Nice.
01-01-2013, 12:04 PM
#46
TECH Apprentice
Thread Starter
iTrader: (10)
Join Date: Dec 2005
Location: Peoria IL
Posts: 340
Likes: 0
Received 0 Likes
on
0 Posts
Its been a busy holiday season but I've managed to get some shop time in between family dinners.
I continued to clean, blast, and powdercoat engine parts:
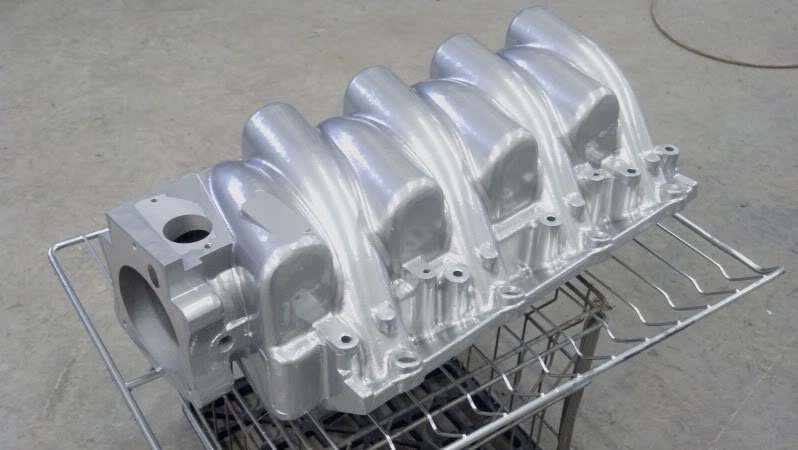
Most of this is for the judge, but a few covers are for CompressorSurge's turbo K5 '71 Blazer build.

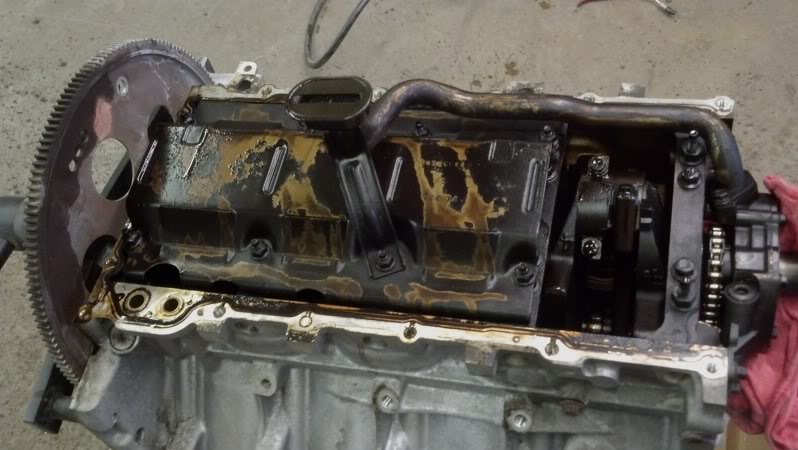
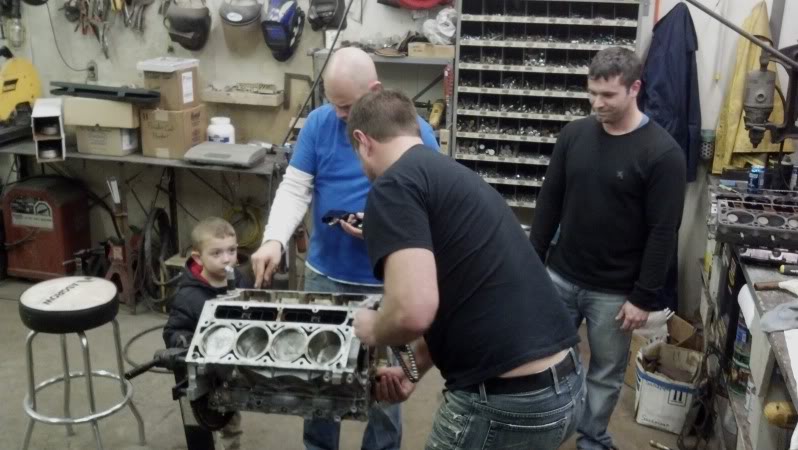
I tore the engine down to the short block and was planning to stop there, but there was an excessive amount of oil residue and build up. The Z28 this engine came from ran strong, but it looks like it had gone a while between oil changes or ran with Wal Mart brand oil... or both.
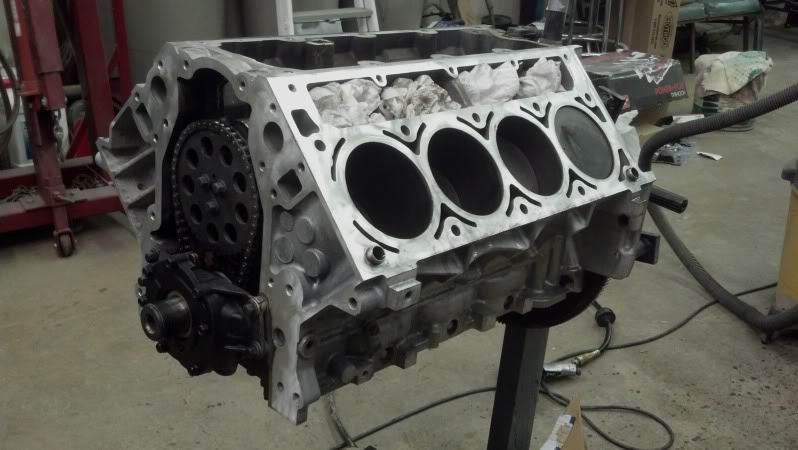
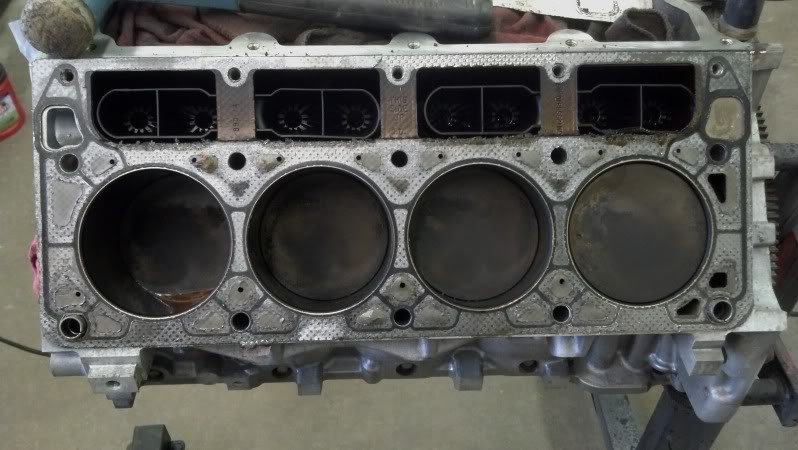
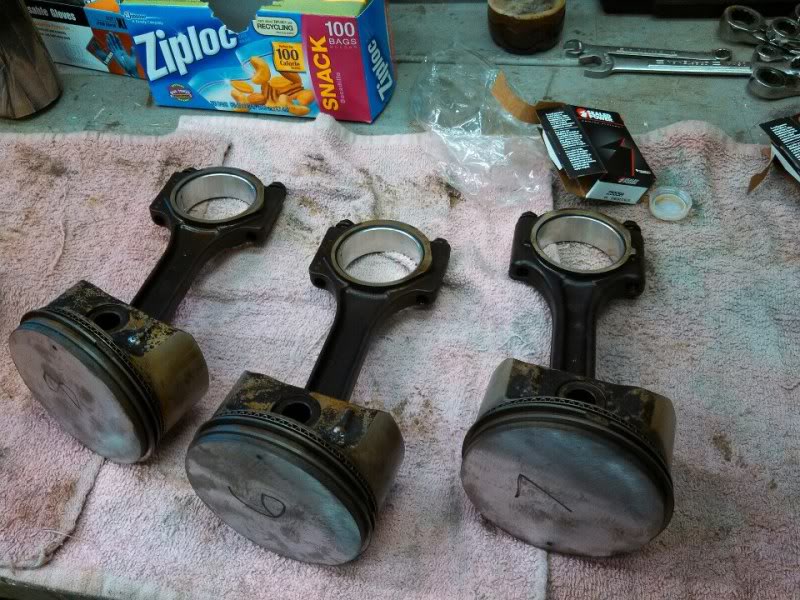
We decided that while we were there it was smart to pull a couple pistons and make sure the ring lands were clean and just a good gut check.
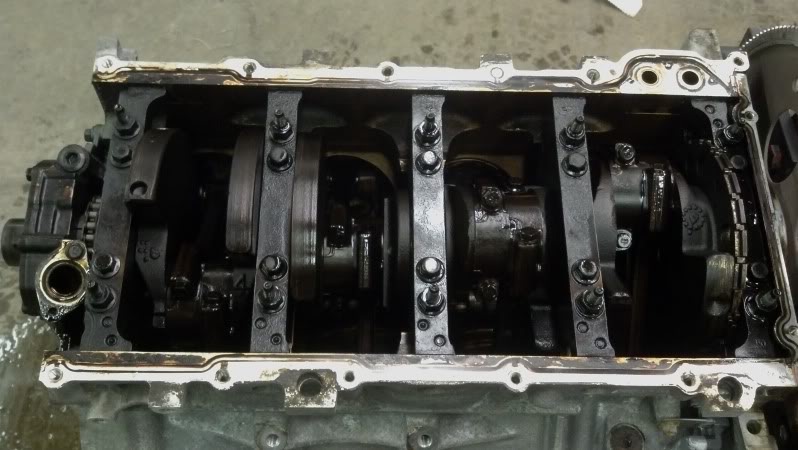
Turns out the pistons, rings and cylinders looked great, but the rod bearings were less than impressive. Luckily O'Rieley's had a full set in stock.
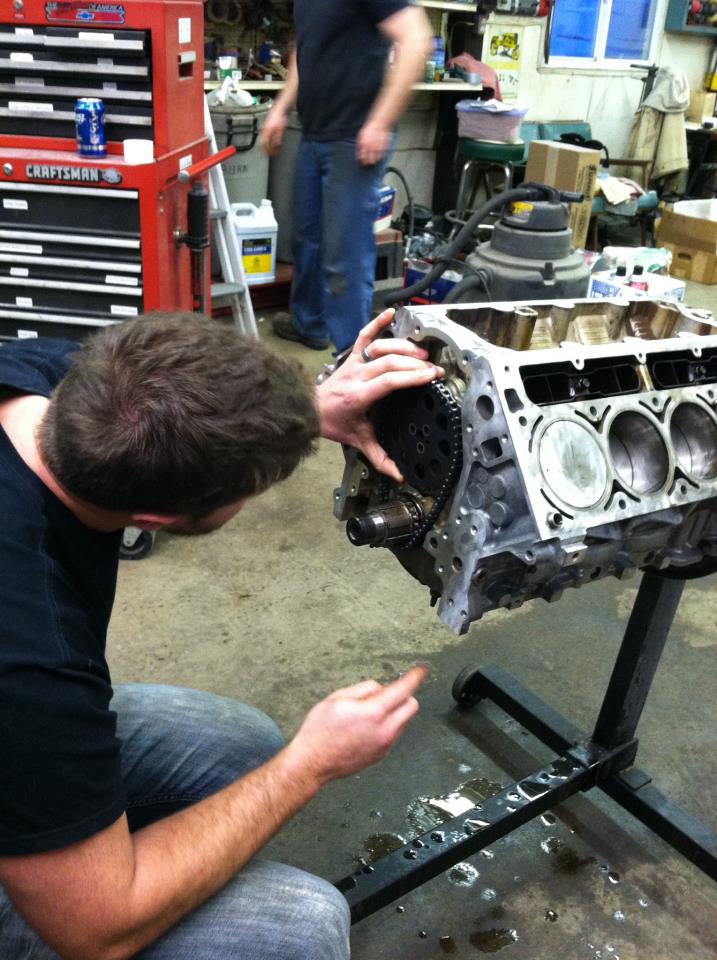
A little cleaning, lots of oil, and the short block was going back together.
Cam install: 222/224 566/568 on 112

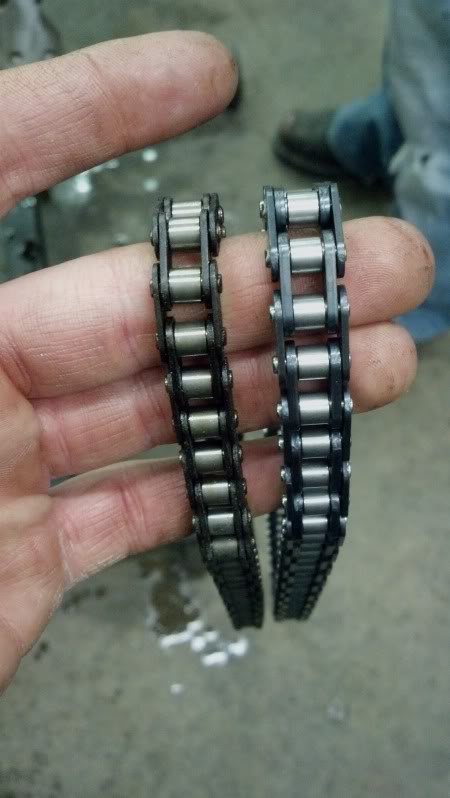
LS2 timing chain next to the stock LS1:
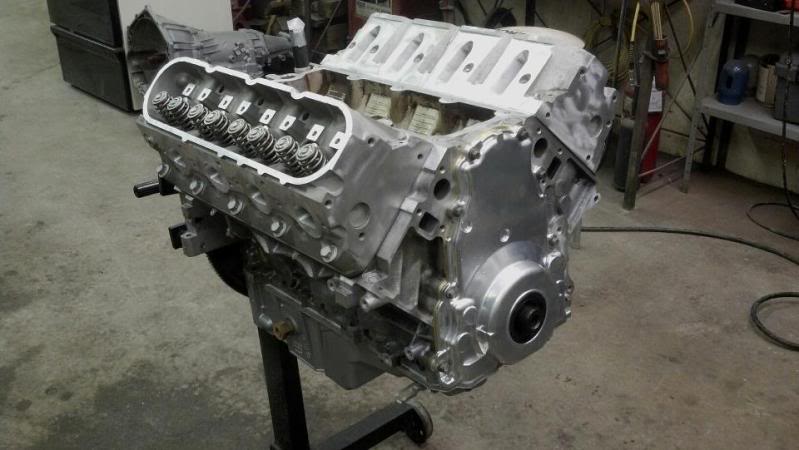
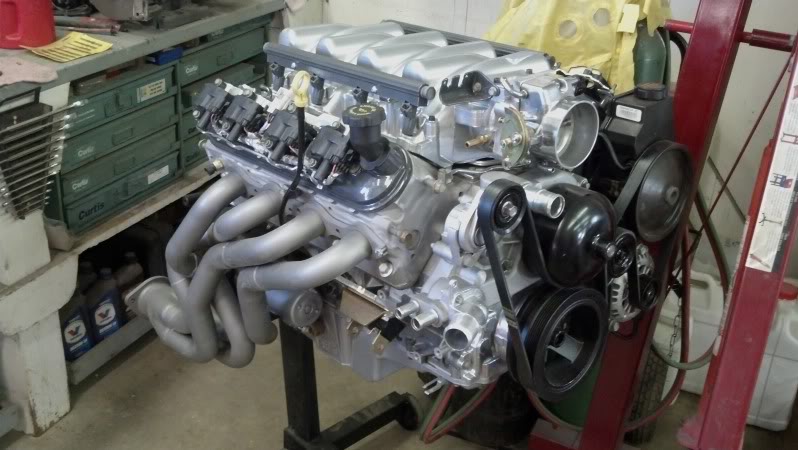
Long block is back together: 222/224 cam, p&p 799 heads with valve job and decked .005, Comp 918's and pushrods, .040 Cometic head gaskets, LS2 timing chain, LS6 oil pump and LS6 lifters.
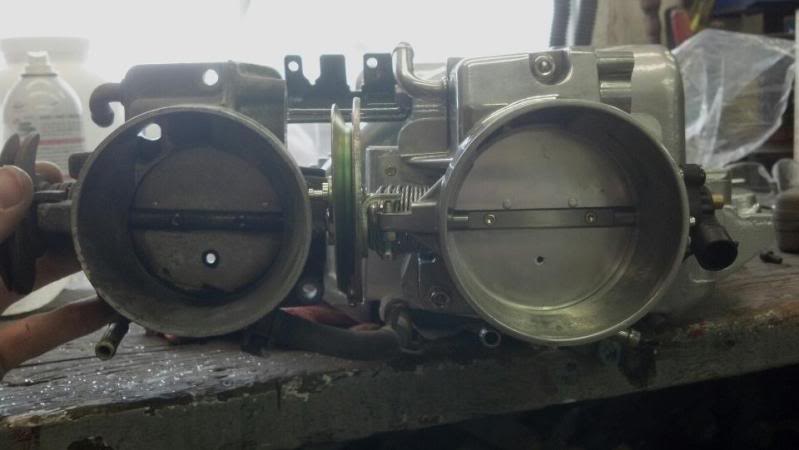
Shot of the stock 78mm TB and the PP 85mm TB:
That's all for now, but building a mild LS1 with a couple friends was a great way to end 2012.
I continued to clean, blast, and powdercoat engine parts:
Most of this is for the judge, but a few covers are for CompressorSurge's turbo K5 '71 Blazer build.
I tore the engine down to the short block and was planning to stop there, but there was an excessive amount of oil residue and build up. The Z28 this engine came from ran strong, but it looks like it had gone a while between oil changes or ran with Wal Mart brand oil... or both.
We decided that while we were there it was smart to pull a couple pistons and make sure the ring lands were clean and just a good gut check.
Turns out the pistons, rings and cylinders looked great, but the rod bearings were less than impressive. Luckily O'Rieley's had a full set in stock.
A little cleaning, lots of oil, and the short block was going back together.
Cam install: 222/224 566/568 on 112
LS2 timing chain next to the stock LS1:
Long block is back together: 222/224 cam, p&p 799 heads with valve job and decked .005, Comp 918's and pushrods, .040 Cometic head gaskets, LS2 timing chain, LS6 oil pump and LS6 lifters.
Shot of the stock 78mm TB and the PP 85mm TB:
That's all for now, but building a mild LS1 with a couple friends was a great way to end 2012.
01-12-2013, 10:39 PM
#47
TECH Apprentice
Thread Starter
iTrader: (10)
Join Date: Dec 2005
Location: Peoria IL
Posts: 340
Likes: 0
Received 0 Likes
on
0 Posts
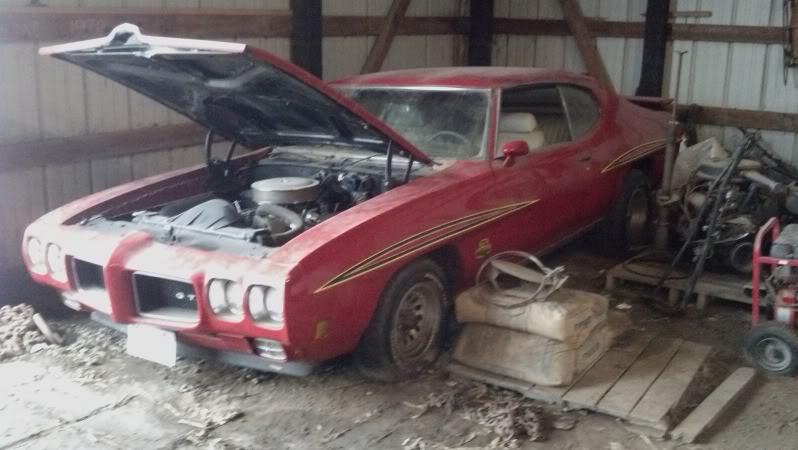
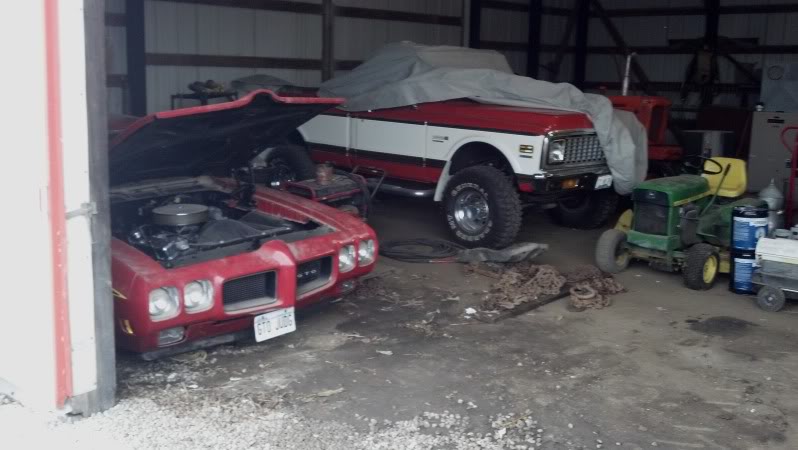
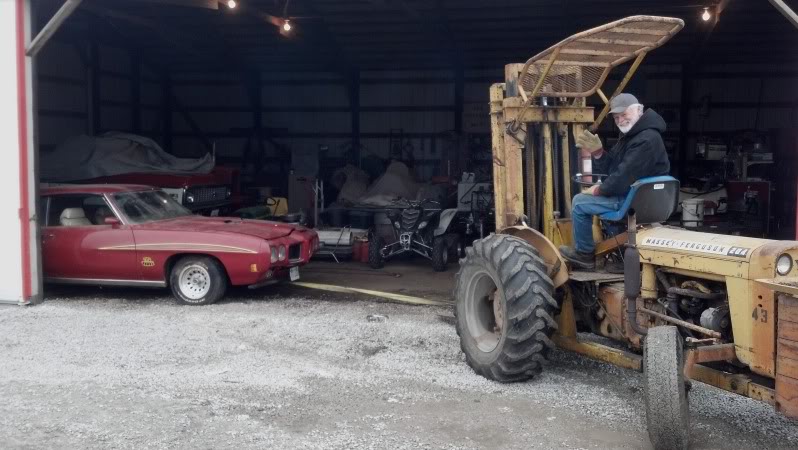
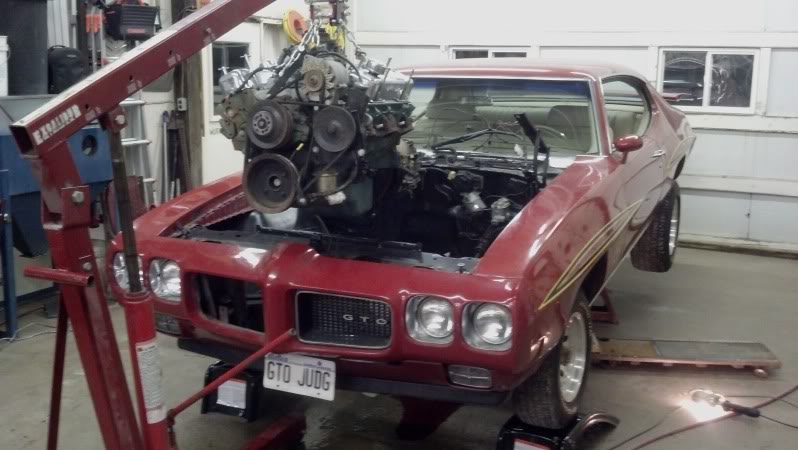
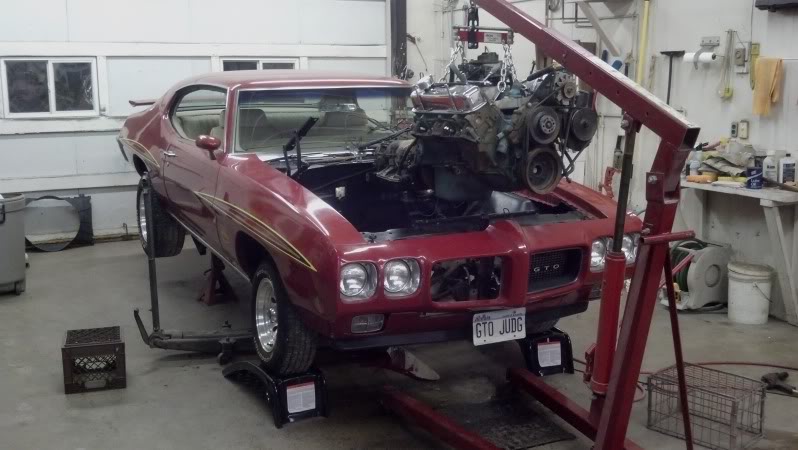
After a month of working on this project I finally got to touch the actual car. I have a couple things to finish up on the LS1, but I wanted to take advantage of the 53* weather, so my we dug the GTO out of its hiding spot. Here's a few pics:
My brother's '72 Super Cheyenne is in the background. Its a fun driver with 6" lift, 35's, and mild 396.
That's my dad on fork lift.
It cleans up pretty nice!
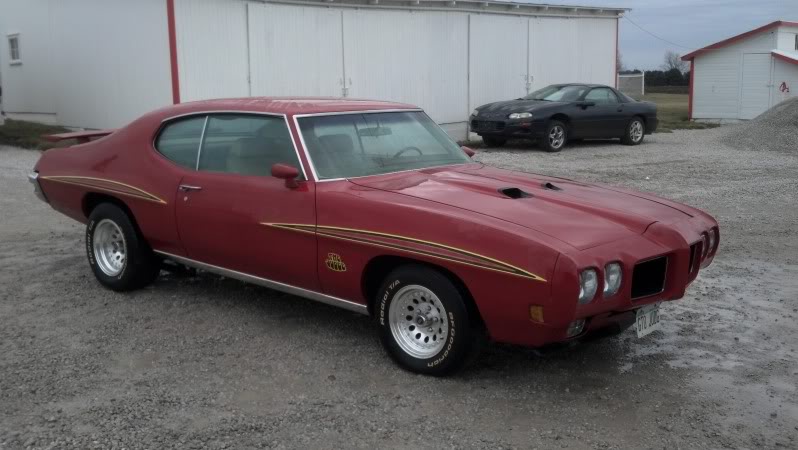
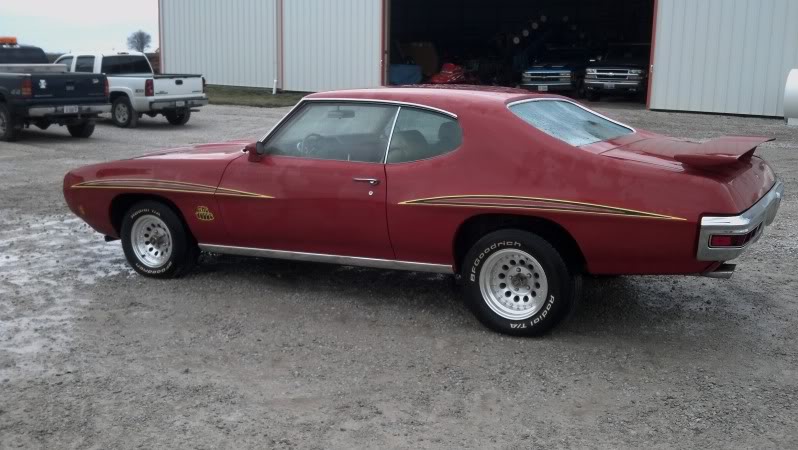
Hopefully I can start pulling the 400 and TH400 to start test fitting the LS1 this week.
My brother's '72 Super Cheyenne is in the background. Its a fun driver with 6" lift, 35's, and mild 396.
That's my dad on fork lift.
It cleans up pretty nice!
Hopefully I can start pulling the 400 and TH400 to start test fitting the LS1 this week.
01-14-2013, 11:21 AM
#49
TECH Apprentice
Thread Starter
iTrader: (10)
Join Date: Dec 2005
Location: Peoria IL
Posts: 340
Likes: 0
Received 0 Likes
on
0 Posts
We got the car up on jack stands and started looking everything over... I almost forgot how solid this car is. Both doors have 3 or 4 small bubbles in the rear lower corners, and the driver side floor board looks to have a small weak spot, otherwise the 1980's laquer paint checking and faded/cracked decals are the only other major cosmetic issues.
Judging by the condition of the fuel tank and heavy duty overload coil over shocks, I bet this car could tell some pretty interesting stories.
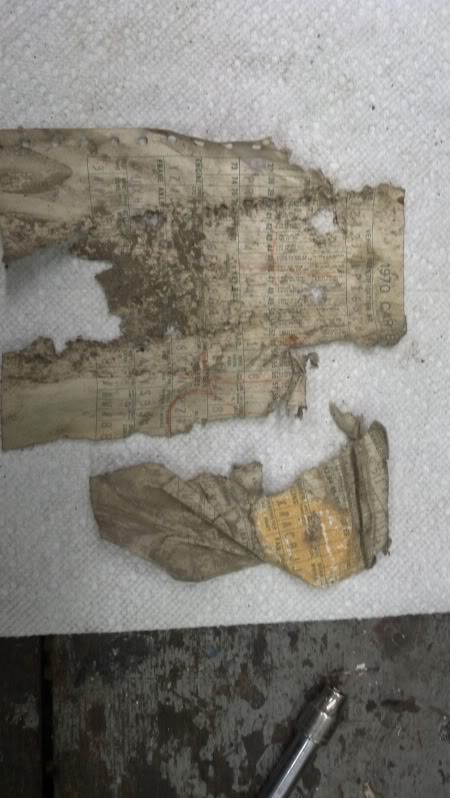
I found a broadcast sheet on top of the tank!
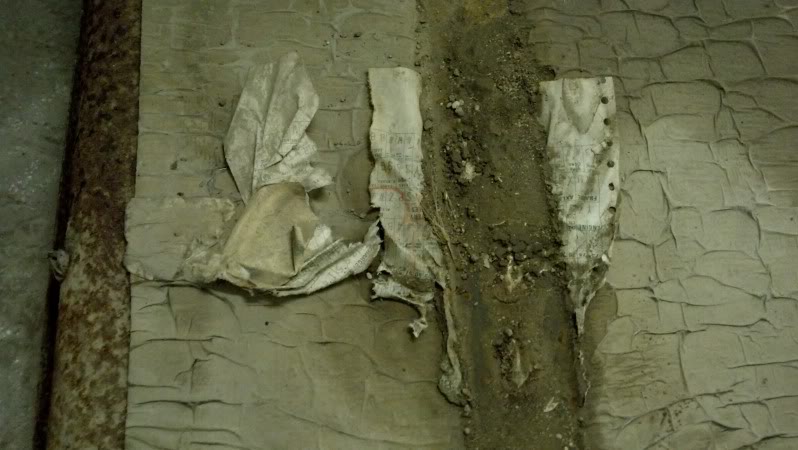
I was able to clean it up fairly decent, but there's still a lot that is not legible and I haven't been able to find a break down to explain what all the boxes and codes mean so I can fill in the blanks.
We're going to put some effort into getting the 400 Poncho running and take a short video just for selling purposes, but one way or another the 400/TH400 will be out this weekend or earlier.
Judging by the condition of the fuel tank and heavy duty overload coil over shocks, I bet this car could tell some pretty interesting stories.
I found a broadcast sheet on top of the tank!
I was able to clean it up fairly decent, but there's still a lot that is not legible and I haven't been able to find a break down to explain what all the boxes and codes mean so I can fill in the blanks.
We're going to put some effort into getting the 400 Poncho running and take a short video just for selling purposes, but one way or another the 400/TH400 will be out this weekend or earlier.
01-15-2013, 06:24 AM
#50
TECH Fanatic
The car is a time capsule for sure! My car was painted in pretty much the same era, I also have a few little bubbles and the odd soft spot in the floor. Look forward to seeing your progress. Have you thought about any suspension modifications? I went with big brakes and QA1 coilovers at all 4 corners, made a world of difference.
01-15-2013, 02:16 PM
#51
TECH Apprentice
Thread Starter
iTrader: (10)
Join Date: Dec 2005
Location: Peoria IL
Posts: 340
Likes: 0
Received 0 Likes
on
0 Posts
The car is a time capsule for sure! My car was painted in pretty much the same era, I also have a few little bubbles and the odd soft spot in the floor. Look forward to seeing your progress. Have you thought about any suspension modifications? I went with big brakes and QA1 coilovers at all 4 corners, made a world of difference.
The current plan is UMI tubular rear components with support bars and adjustable top arms and all 4 bars with one roto-joint each. I'll go with 350# springs (maybe 300# since its an alum block and this is not meant to be a corner carver) on QA1 hybrid coil overs up front, but the rear shock/spring combo is undecided. I'm currently thinking about the UMI 2" lowering rears and then using thicker isolaters to raise the back up if needed. Rear shock will probably just be some Bilstein HD's... I love them on my lowered '79 T/A. Thoughts?
We got the 400 Poncho running last night with just a borrowed battery from the Dmax and a make-shift fuel tank since I already had the actual tank sitting on the floor. It starts and runs good, but its just not want we want.
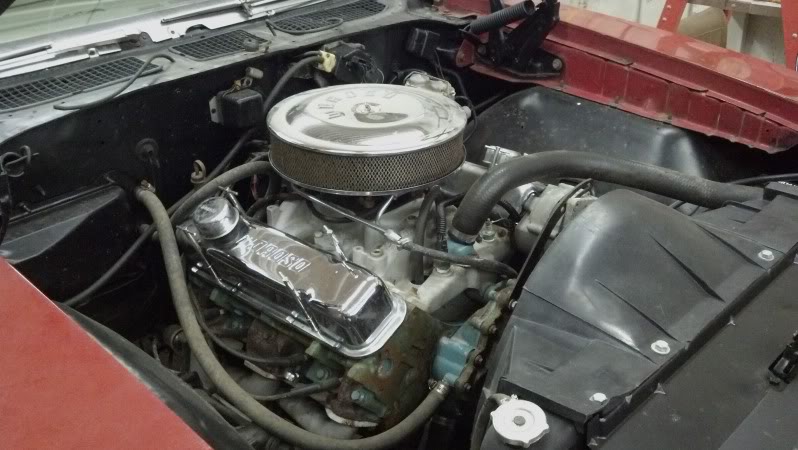
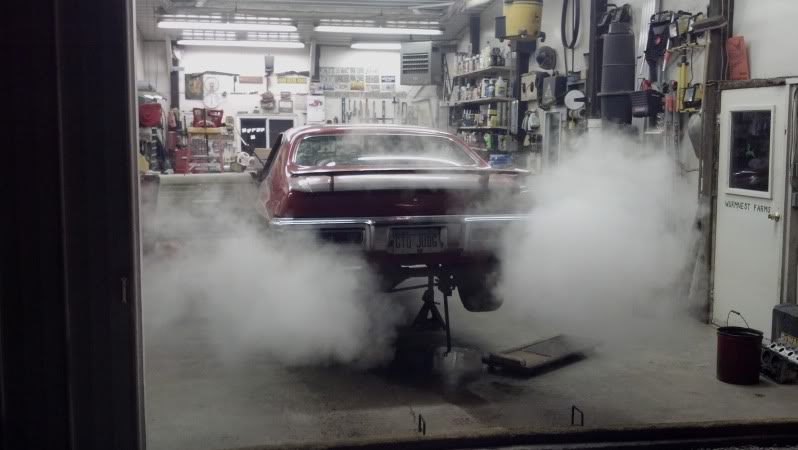
After I got the car running and took a couple short videos, I dropped the exhaust and driveshaft and then called it a night.
Last edited by krwyellowZ28; 01-15-2013 at 02:27 PM.
01-15-2013, 02:52 PM
#52

I love what you've done so far, keep it up. I too am doing a LS A body swap in my 69 Buick Skylark convertible...as for shocks I bought QA1 Stocker Stars...they are non adjustable and arent too pricey. They are a nice beefy well built shock.
01-16-2013, 06:17 AM
#53
TECH Fanatic
I went with the UMI control arms front and rear. I did the roto joints at all points. This improved the response and did not adversely affect the ride. I have the QA1 hybrid coil overs in front for now. I plan on creating my own mounts for a more conventional coil over nest winter. I prototyped rear coil over mounts based on the Global West engineering, moving the shock/spring to the front side of the axle. This has worked out better than I had hoped. I made patterns, not sure if I can find them though since the move.
01-22-2013, 07:48 AM
#54
TECH Apprentice
Thread Starter
iTrader: (10)
Join Date: Dec 2005
Location: Peoria IL
Posts: 340
Likes: 0
Received 0 Likes
on
0 Posts
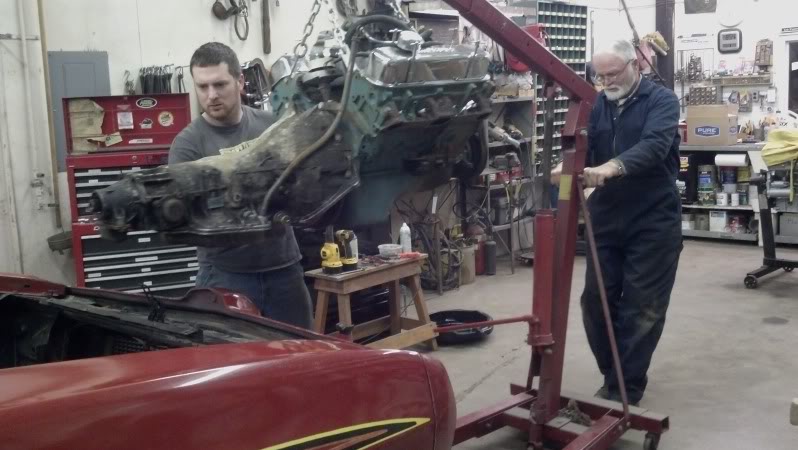
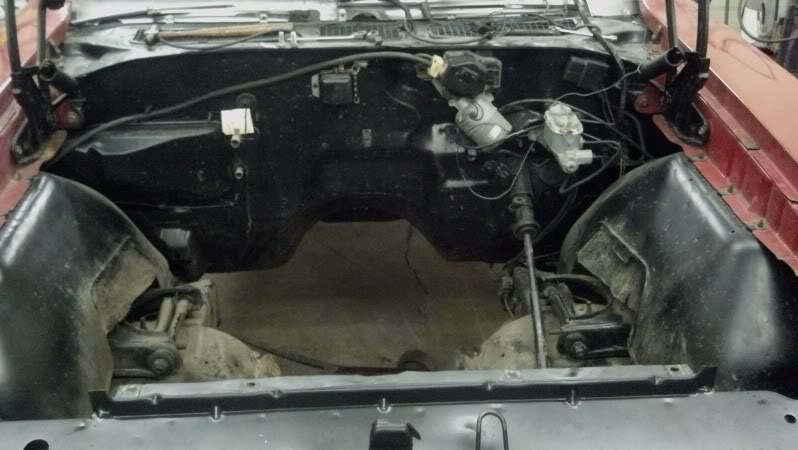
It's out! No more Poncho power for this Tin Indian. Then engine bay will be good enough for this year with just a good pressure washing since it has less than 200 miles on it from the last engine swap. After its cleaned up we'll push the car to the cold storage side of the shed and move the parts Camaro back in so I can pull off all the brake components and hopefully be done with that car all together.
01-22-2013, 07:49 AM
#55
TECH Apprentice
Thread Starter
iTrader: (10)
Join Date: Dec 2005
Location: Peoria IL
Posts: 340
Likes: 0
Received 0 Likes
on
0 Posts
I was hoping to get more done this weekend than I did, but I guess its still progress. I planned to get the brakes pulled off the 1999 Z28 donor car, cleaned up and powdercoated, but it didn't all happen.
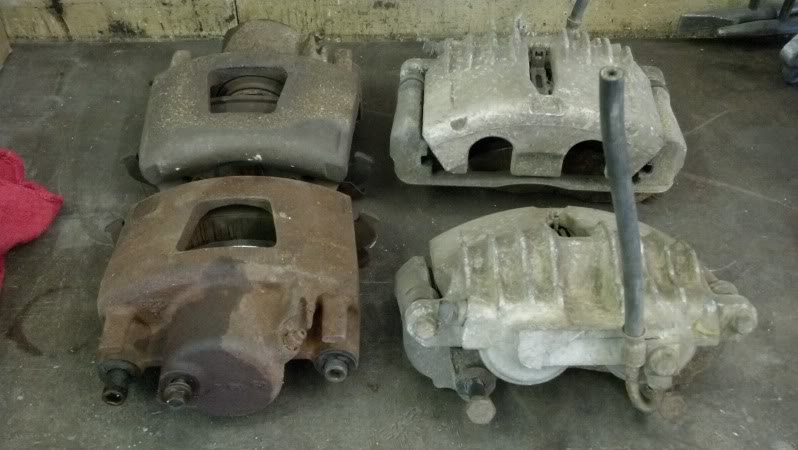
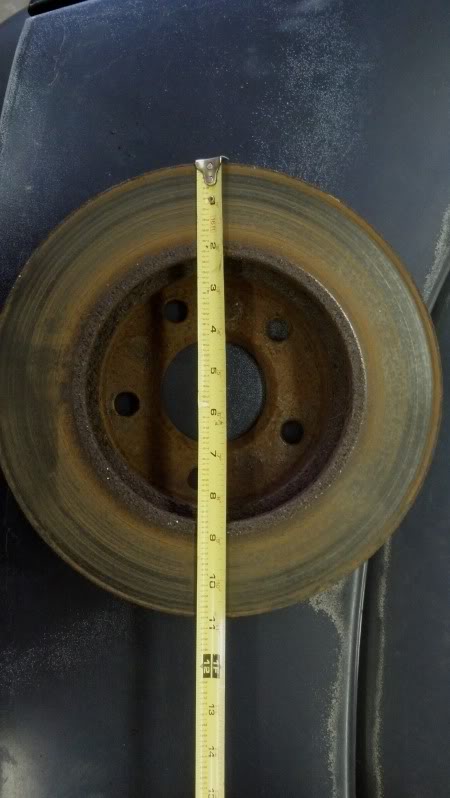
First off, this car, at some point in its life, had been switched over to LT1 front brakes!! I pulled the front calipers and rotors off in a hurry Saturday night and didn't pay attention, but Sunday I was looking at them and realized something wasn't right! I don't know what the thinking was of whomever did it, but this car had cast iron single piston LT1 calipers (and the LT1 spindles) along with the dinky 10.8" rotors.
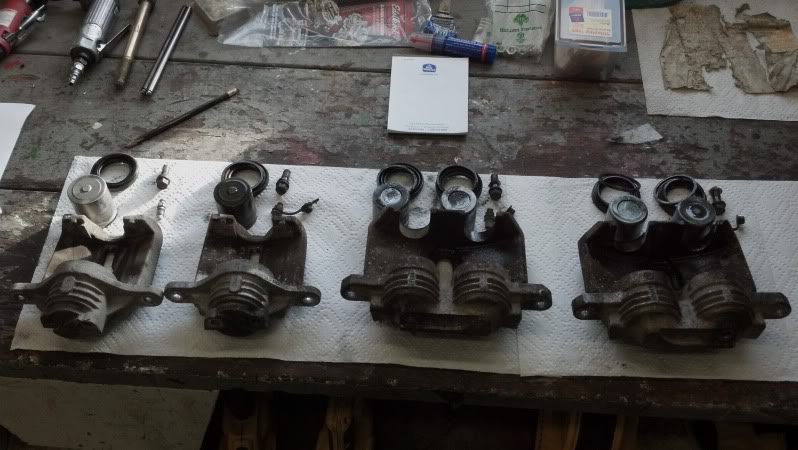
Luckily I had a set of LS1 calipers sitting around from a junk yard score last year. Here are the calipers off my donor car next to my LS1 fronts:
And the dinky LT1 front rotor:
That was a disappointment, but not a huge deal. Next, I tore the rear brakes off the donor car and found out that some one along the line decided that the emergency brake wasn't necessary, so they gutted anything that had to do with the e-brake! Again, not a huge set back, but it is frustrating.
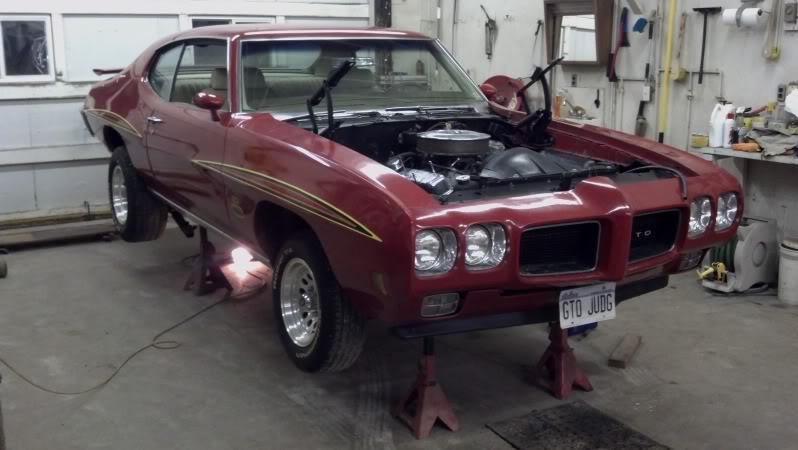
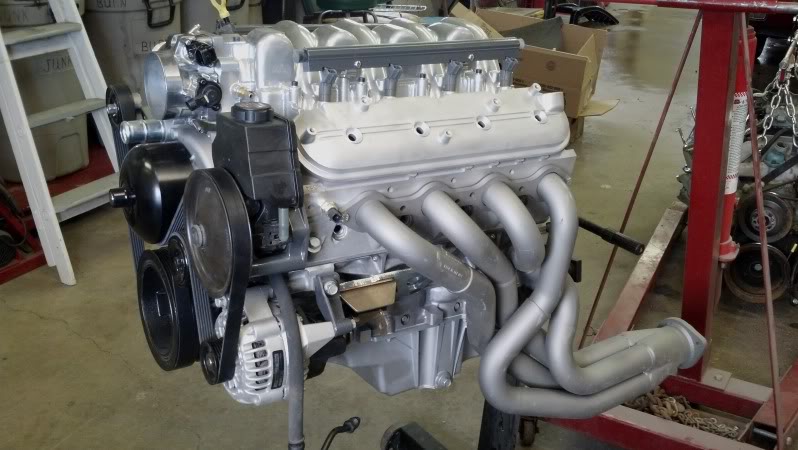
I changed gears and started messing with the LS1 on the engine stand. I threw the Edelbrock swap headers, brackets, and motor mounts on for grins. The Trick Flow push rods showed up in the mail but haven't made their way into the LS1 yet.
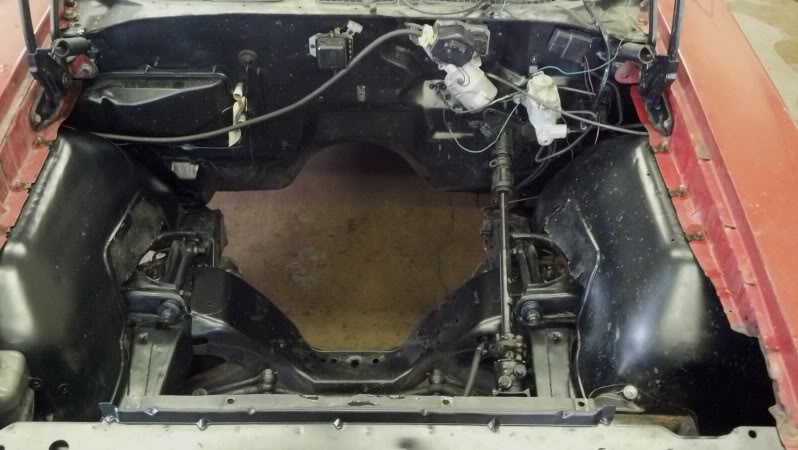
Also scrubbed the engine bay of the GTO and touched up the paint on the cross member. Its far from perfect, but I'll be addressing the cosmetic detailing next winter when the body comes off the frame.
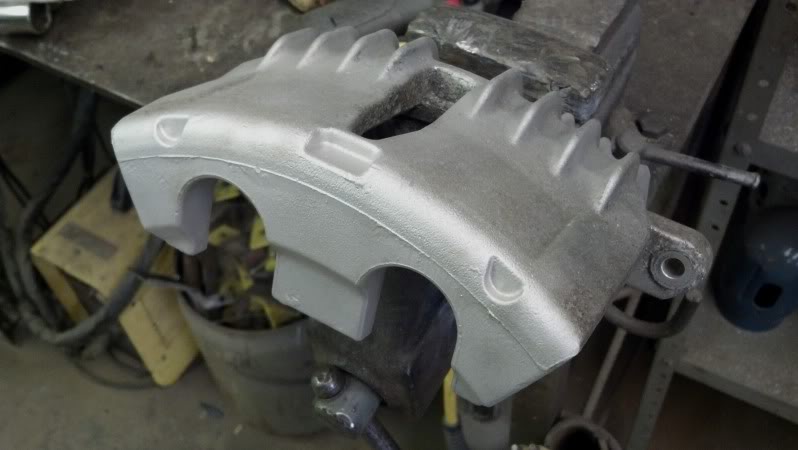
After enough procrastination on the brakes, I got back to it and pulled them completely apart:
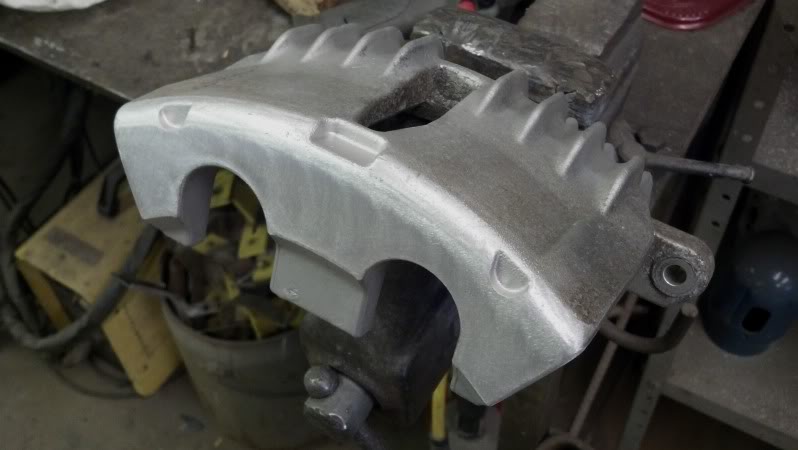
The calipers and abutment brackets will be powder coated cherry red, but I did a little finishing work to clean them up first.
Before (stock):
After (smoothed):
I'm going to set up the powder coating tomorrow and hopefully knock the brakes and a couple other items off my PC'ing list.
First off, this car, at some point in its life, had been switched over to LT1 front brakes!! I pulled the front calipers and rotors off in a hurry Saturday night and didn't pay attention, but Sunday I was looking at them and realized something wasn't right! I don't know what the thinking was of whomever did it, but this car had cast iron single piston LT1 calipers (and the LT1 spindles) along with the dinky 10.8" rotors.
Luckily I had a set of LS1 calipers sitting around from a junk yard score last year. Here are the calipers off my donor car next to my LS1 fronts:
And the dinky LT1 front rotor:
That was a disappointment, but not a huge deal. Next, I tore the rear brakes off the donor car and found out that some one along the line decided that the emergency brake wasn't necessary, so they gutted anything that had to do with the e-brake! Again, not a huge set back, but it is frustrating.
I changed gears and started messing with the LS1 on the engine stand. I threw the Edelbrock swap headers, brackets, and motor mounts on for grins. The Trick Flow push rods showed up in the mail but haven't made their way into the LS1 yet.
Also scrubbed the engine bay of the GTO and touched up the paint on the cross member. Its far from perfect, but I'll be addressing the cosmetic detailing next winter when the body comes off the frame.
After enough procrastination on the brakes, I got back to it and pulled them completely apart:
The calipers and abutment brackets will be powder coated cherry red, but I did a little finishing work to clean them up first.
Before (stock):
After (smoothed):
I'm going to set up the powder coating tomorrow and hopefully knock the brakes and a couple other items off my PC'ing list.
01-30-2013, 12:01 PM
#56
TECH Apprentice
Thread Starter
iTrader: (10)
Join Date: Dec 2005
Location: Peoria IL
Posts: 340
Likes: 0
Received 0 Likes
on
0 Posts
Again, we made progress on the GTO, but not as much as I wanted to.
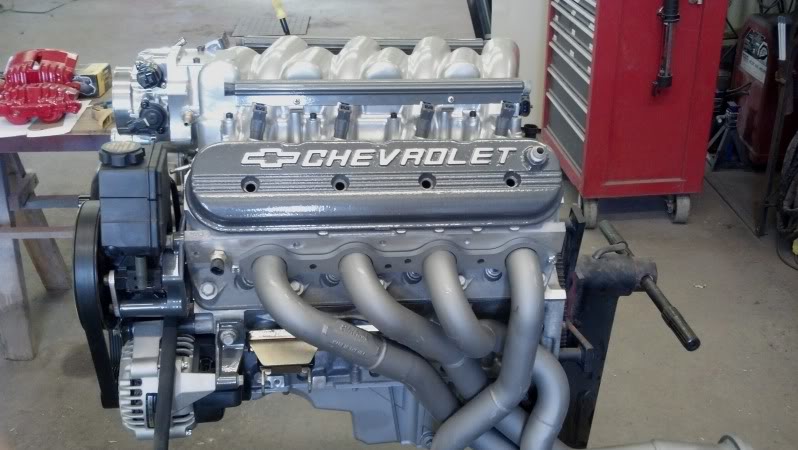
My Trick Flow pushrods finally got here and I pc'd the stock valve covers, so I was finally able to button up the valve train.
I also pc'd some valve covers for Jeff's (CompressorSurge) turbo LY6 K5 project and couldn't resist setting them on my LS1.
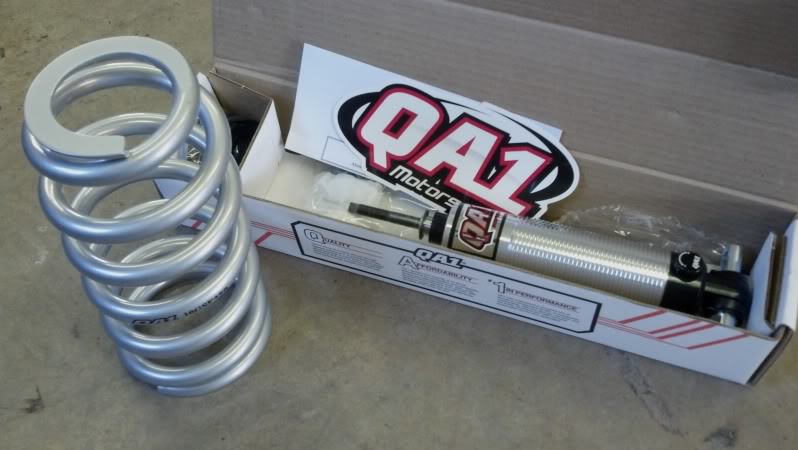
I placed my order with UMI for their tubular roto-joint rear control arms and QA1 hybrid coil overs. The coil overs showed up, but I special ordered the control arms to come unfinshed so I could powder coat them silver instead of the black or red that UMI offered.
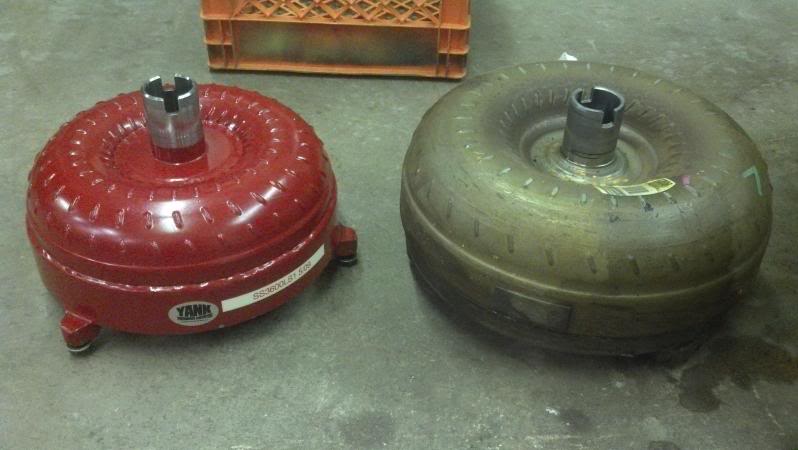
Here's a comparison of the Yank SS3600 next to the stock TC... I'm excited about this piece. :banana_dance:
After replacing the rear main and cover seals we trimmed the F-body bosses on the trans tail shaft housing, installed the Yank to the trans, bolted everything together, and went for a test fit.
Unfortunately we miscalculated the reach of our cherry picker and ended up about 4" shy of setting everything into place. Dad is going to get a longer boom and we'll counterbalance with some suitecase weights off a tractor... taking the front bumper off is a LAST resort.
**HOPEFULLY we can set everything into place tomorrow to check oil pan clearance... I'm kinda nervous.
My Trick Flow pushrods finally got here and I pc'd the stock valve covers, so I was finally able to button up the valve train.
I also pc'd some valve covers for Jeff's (CompressorSurge) turbo LY6 K5 project and couldn't resist setting them on my LS1.
I placed my order with UMI for their tubular roto-joint rear control arms and QA1 hybrid coil overs. The coil overs showed up, but I special ordered the control arms to come unfinshed so I could powder coat them silver instead of the black or red that UMI offered.
Here's a comparison of the Yank SS3600 next to the stock TC... I'm excited about this piece. :banana_dance:
After replacing the rear main and cover seals we trimmed the F-body bosses on the trans tail shaft housing, installed the Yank to the trans, bolted everything together, and went for a test fit.
Unfortunately we miscalculated the reach of our cherry picker and ended up about 4" shy of setting everything into place.
Dad is going to get a longer boom and we'll counterbalance with some suitecase weights off a tractor... taking the front bumper off is a LAST resort.**HOPEFULLY we can set everything into place tomorrow to check oil pan clearance... I'm kinda nervous.
01-30-2013, 12:07 PM
#57
TECH Apprentice
Thread Starter
iTrader: (10)
Join Date: Dec 2005
Location: Peoria IL
Posts: 340
Likes: 0
Received 0 Likes
on
0 Posts
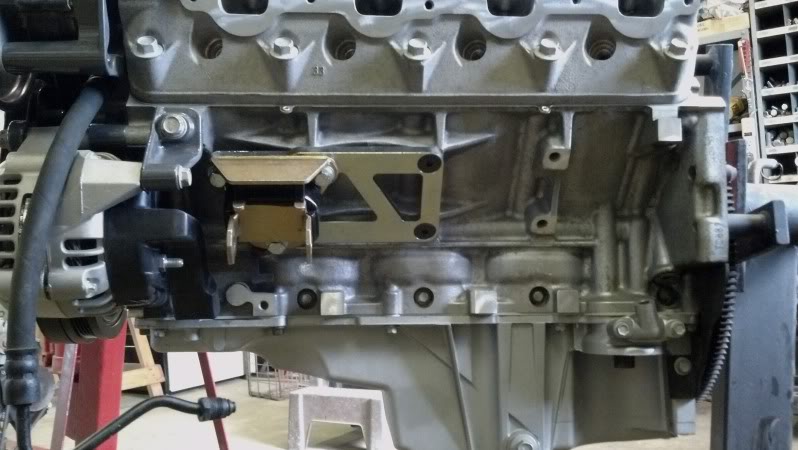
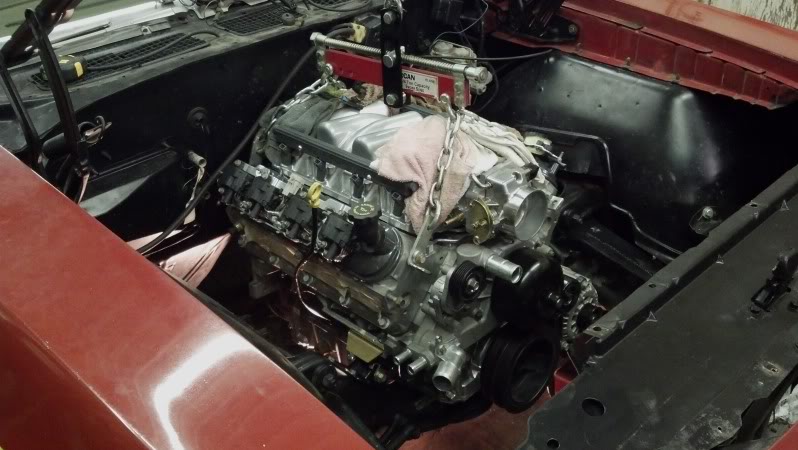
It's in!! Sorta. After 2 failed attempts at threading the needle w/the trans bolted to the engine we decided to drop the engine in by itself and things went a lot smoother. Most guys have had good luck squeezing the f-body pan into A-body cars with 1" setback plates, which is what I thought the Edelbrock mounts were until I measured them for myself... turns out they are 3/4" setback. 
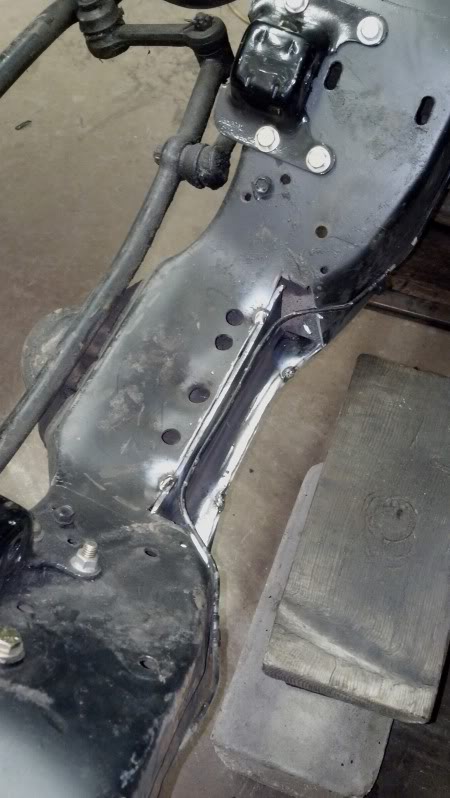
We were able to drop the engine in and get the motor mount bolts in, but the pan was just barely contacting the crossmember. Our plan of attack for tonight is to pull the engine frame stands back off the x-member and slot the holes about 1/2" to allow the engine to sit back farther. For good measure we're also going to persuade the interfering portions of the x-member with the trusty BFH (and maybe some heat).
Here's the engine set in place:
Shot from underneath the DS showing the x-member contacting:
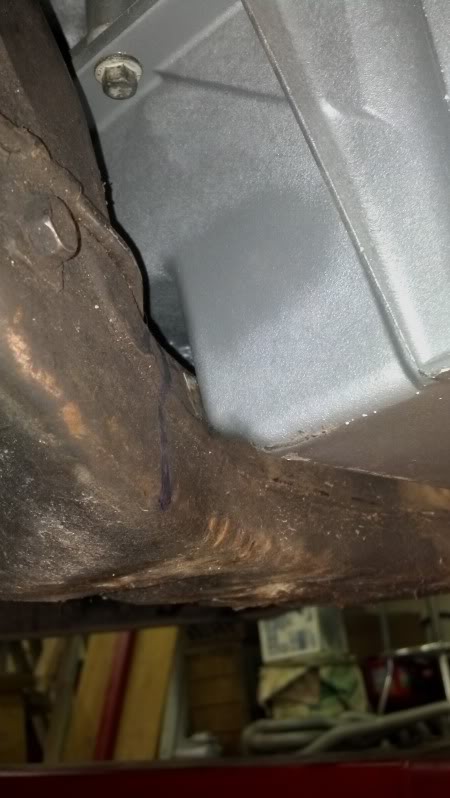
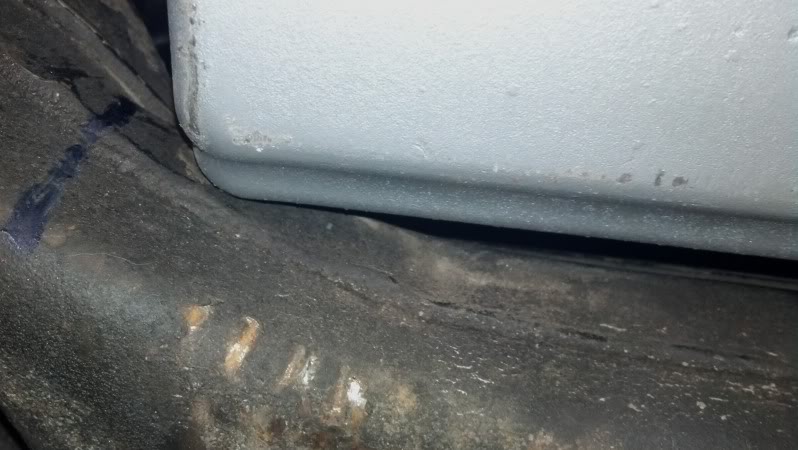
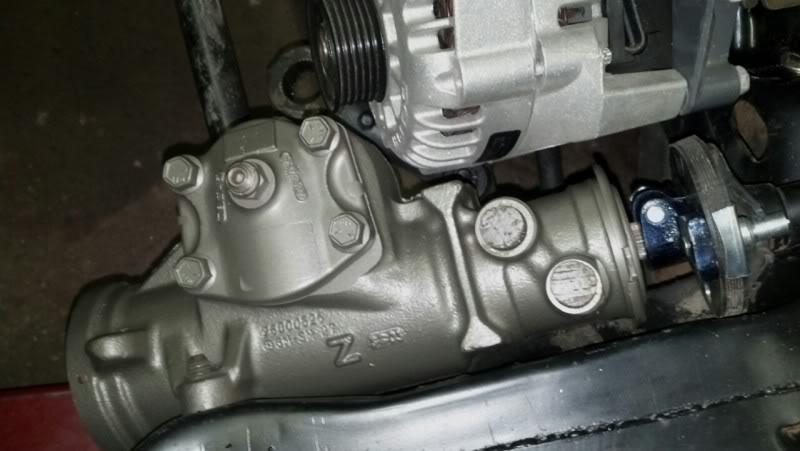
Looking down at the oil pan/x-member front the RH side:
Dad was concerned w/the steering box clearance, but we had a STRONG 1/4" of separation... plenty!! :leaving: The 1/2" more set back will help with this, too.
We were able to drop the engine in and get the motor mount bolts in, but the pan was just barely contacting the crossmember. Our plan of attack for tonight is to pull the engine frame stands back off the x-member and slot the holes about 1/2" to allow the engine to sit back farther. For good measure we're also going to persuade the interfering portions of the x-member with the trusty BFH (and maybe some heat).
Here's the engine set in place:
Shot from underneath the DS showing the x-member contacting:
Looking down at the oil pan/x-member front the RH side:
Dad was concerned w/the steering box clearance, but we had a STRONG 1/4" of separation... plenty!! :leaving: The 1/2" more set back will help with this, too.
02-04-2013, 12:22 PM
#58
TECH Apprentice
Thread Starter
iTrader: (10)
Join Date: Dec 2005
Location: Peoria IL
Posts: 340
Likes: 0
Received 0 Likes
on
0 Posts
We were throwing sparks all weekend and got a lot of the more involved fabrication mostly done, with just some finish welding/grinding to do.
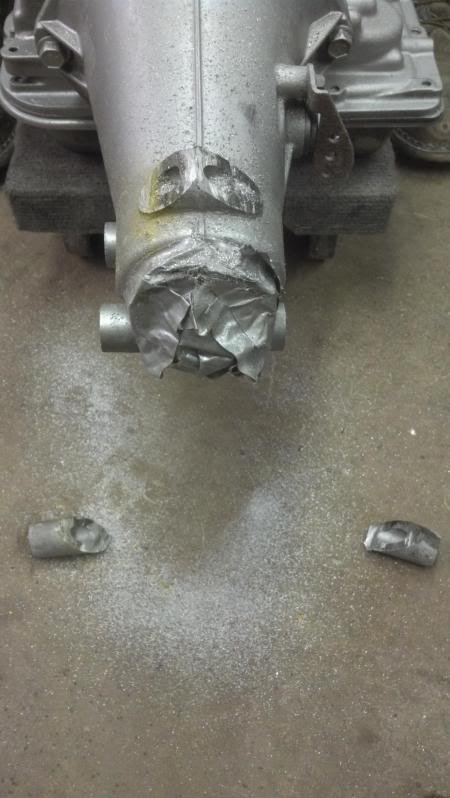
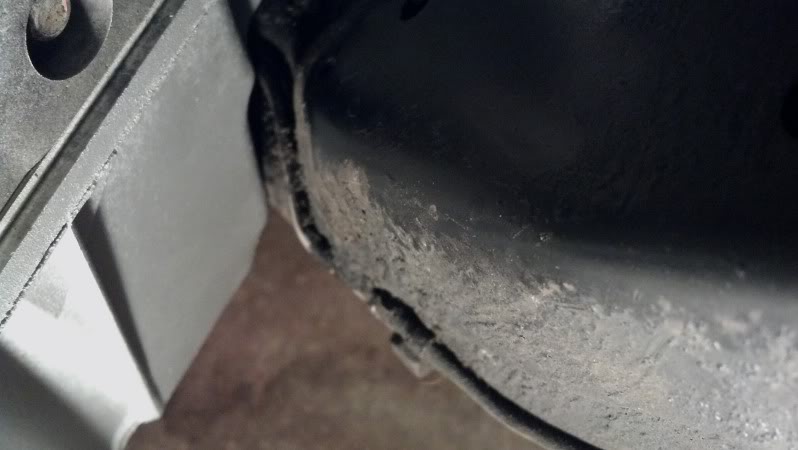
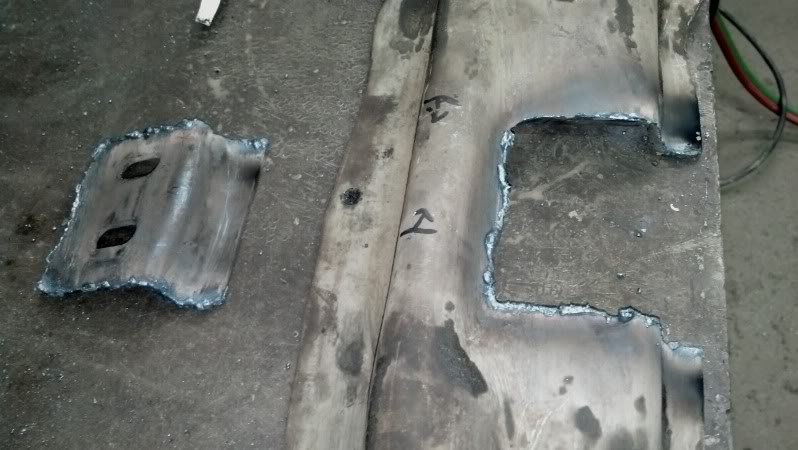
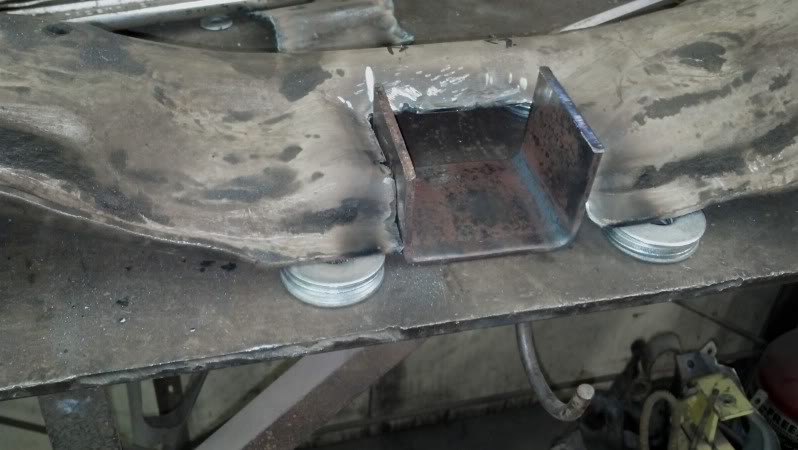
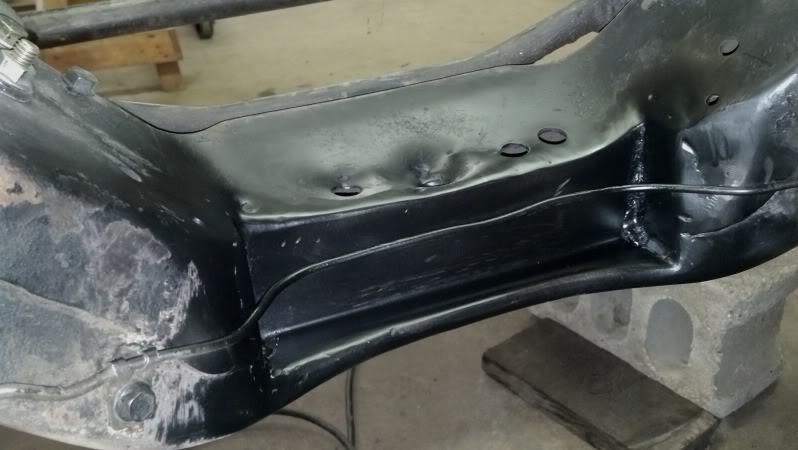
Past the point of no return. Had to notch the front cross member to clear the f-body oil pan:
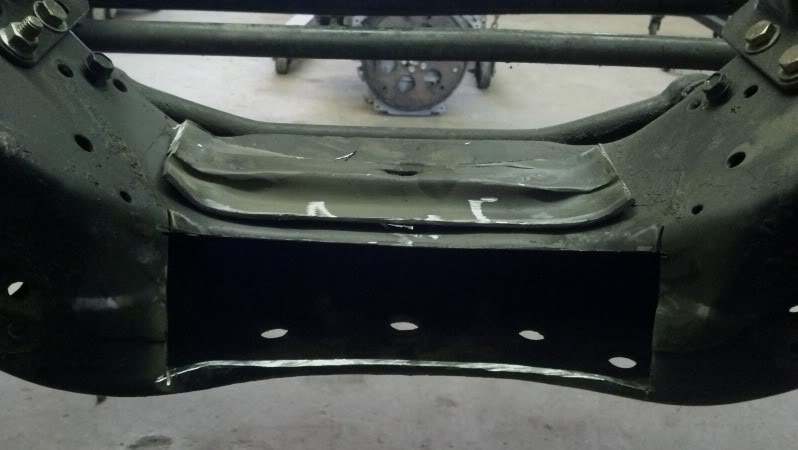
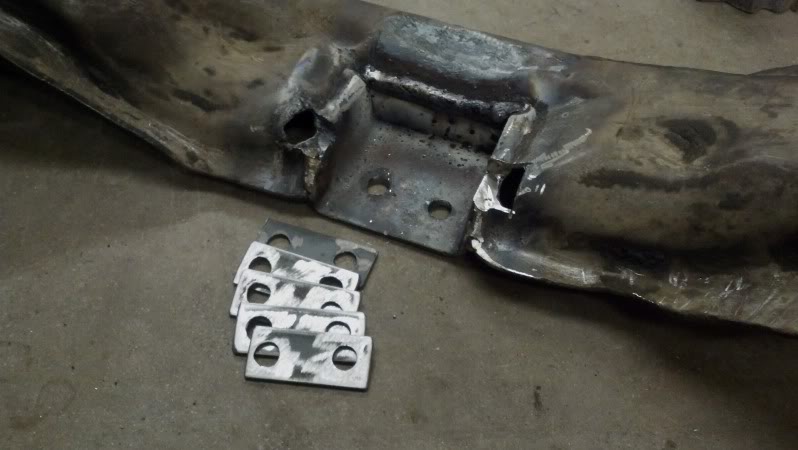
We were able to utilize the stock cross member after lowering the mounting surface and drilling only 2 new frame mounting holes. We also made some spacers to help with adjusting the driveshaft working angle:
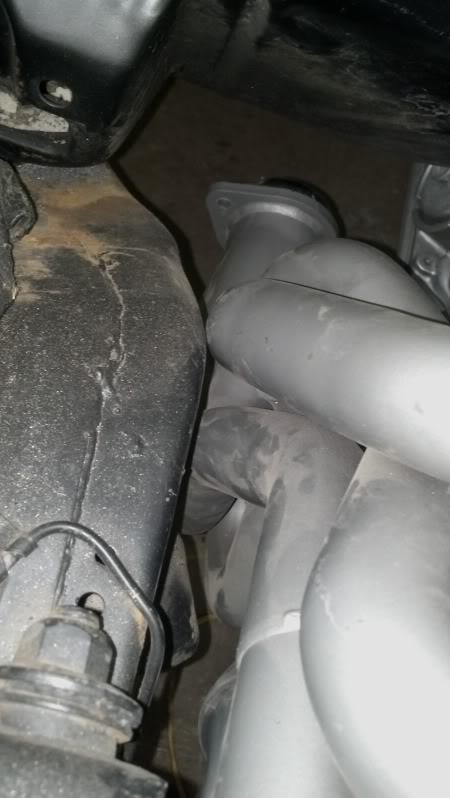
We were disappointed that the Edelbrock headers only had about 1/8" of clearance on the RH frame, so a little massaging and it'll be good:
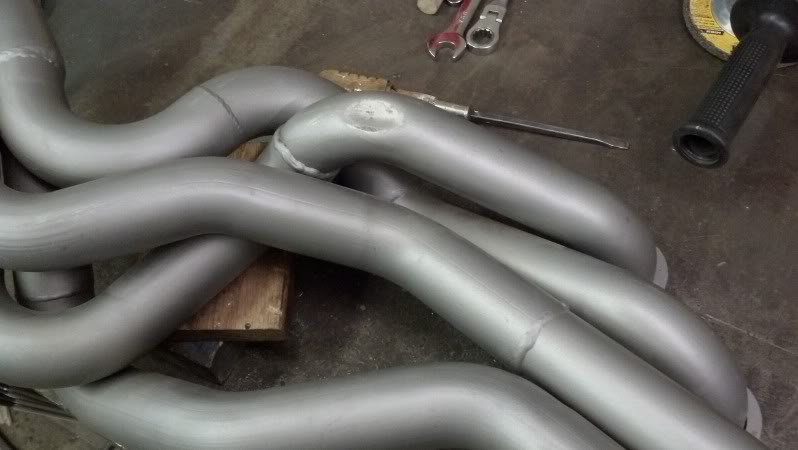
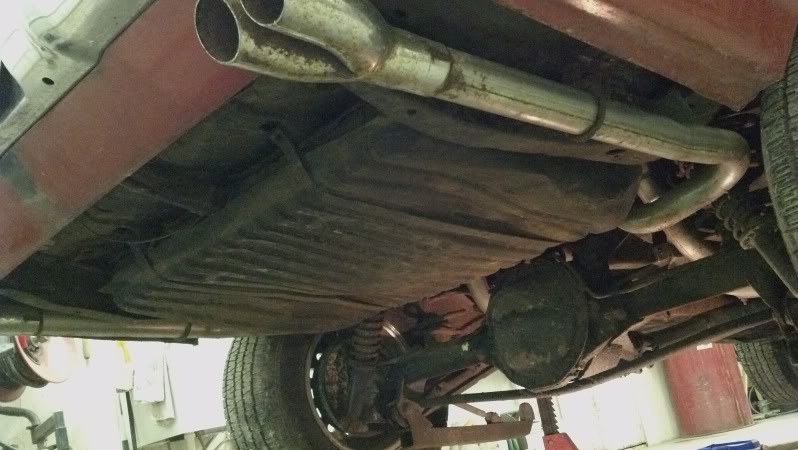
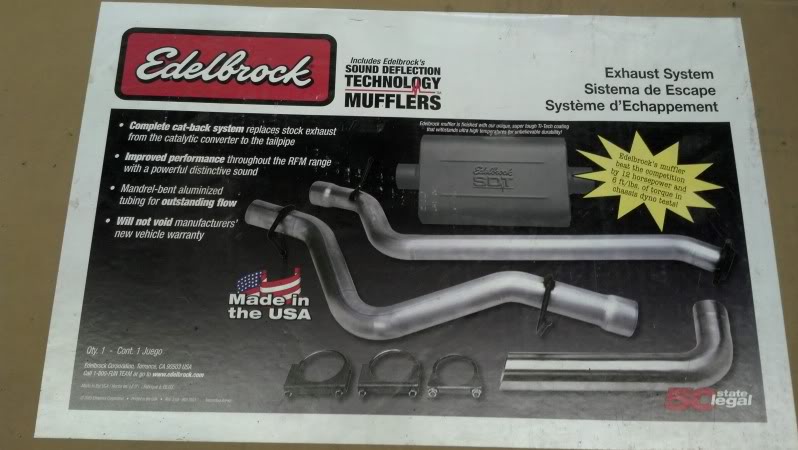
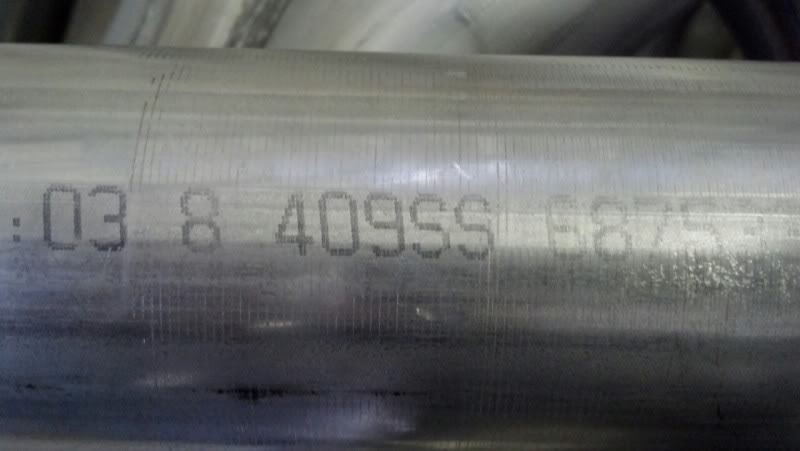
We got the Edelbrock exhaust out to verify clearance of the X-pipe and trans cross member, and got a pleasant surprise. The system is advertised as aluminized tubing, and it ended up being a full stainless steel system.
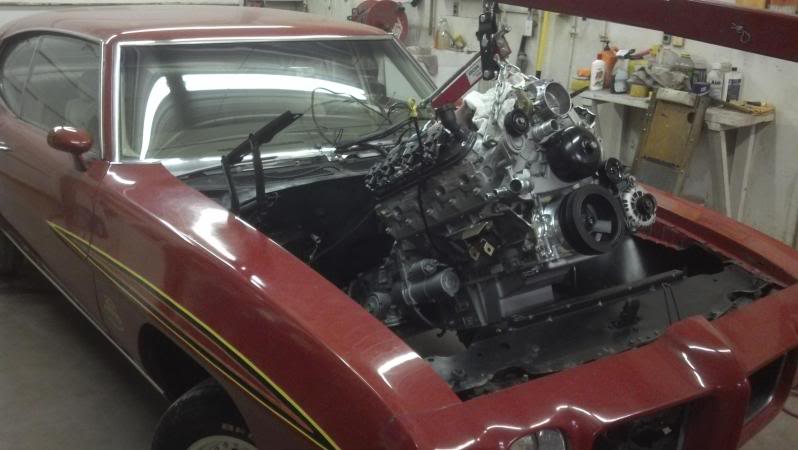
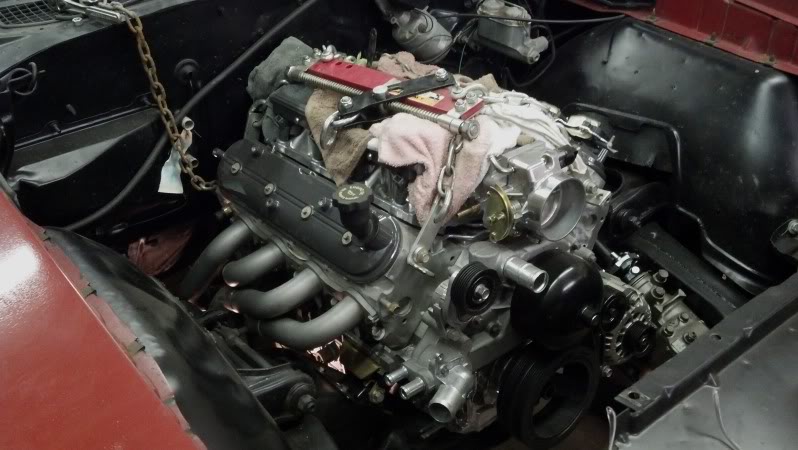
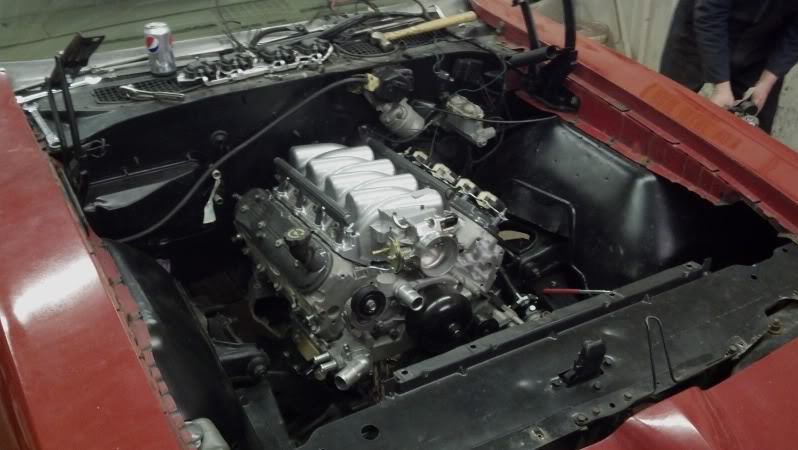
I couldn't resist snapping a shot of the LS1 sitting in the engine bay fully supported on its own. The engine and trans are back out of the car now so I can finish welding, but we're getting closer to putting them back in for the last time.
Past the point of no return. Had to notch the front cross member to clear the f-body oil pan:
We were able to utilize the stock cross member after lowering the mounting surface and drilling only 2 new frame mounting holes. We also made some spacers to help with adjusting the driveshaft working angle:
We were disappointed that the Edelbrock headers only had about 1/8" of clearance on the RH frame, so a little massaging and it'll be good:
We got the Edelbrock exhaust out to verify clearance of the X-pipe and trans cross member, and got a pleasant surprise. The system is advertised as aluminized tubing, and it ended up being a full stainless steel system.
I couldn't resist snapping a shot of the LS1 sitting in the engine bay fully supported on its own. The engine and trans are back out of the car now so I can finish welding, but we're getting closer to putting them back in for the last time.
02-04-2013, 09:07 PM
#59
On The Tree
Join Date: Nov 2011
Location: South east Wisconsin
Posts: 159
Likes: 0
Received 0 Likes
on
0 Posts
I just cant help but ask why didnt you just get a different oil pan or modify the oil pan instead of the frame?
That Yank converter you got is really going to wake your car up! You will like the launches!
That Yank converter you got is really going to wake your car up! You will like the launches!
02-08-2013, 02:17 PM
#60
TECH Apprentice
Thread Starter
iTrader: (10)
Join Date: Dec 2005
Location: Peoria IL
Posts: 340
Likes: 0
Received 0 Likes
on
0 Posts
OH NOOOO... an original GTO Judge was been modified to go fast!! 
We got the frame boxed back in and ready for the engine to be set one last time.
The engine and trans are in for the last time:
It's almost there. All I have left is 90% of the brakes, full fuel system/plumbing, install exhaust, shift linkage, haven't touched the wiring yet, need to measure and order a driveshaft, need to powder coat, assemble and install rear suspension, install front coil overs, tune, coolant system, and everything else that i forgot about...