
1970 GTO LS1/4L60e Swap Check List - Do I Have Everything Covered??
 02-08-2013, 04:38 PM
#61

Man this thing looks awseome, all the powder coating really makes it look really custom. I have a quick ratio power box on mine also, how are you planning to reduce pressure...cut the sping? I'd like to do the same thing to mine after i get it on the road. If you beat me there, let me know how much you cut and how you like it.
Goodl luck, subscribed.
Goodl luck, subscribed.
 02-20-2013, 11:45 AM
#62
TECH Apprentice
Thread Starter
iTrader: (10)
Join Date: Dec 2005
Location: Peoria IL
Posts: 340
Likes: 0
Received 0 Likes
on
0 Posts

Man this thing looks awseome, all the powder coating really makes it look really custom. I have a quick ratio power box on mine also, how are you planning to reduce pressure...cut the sping? I'd like to do the same thing to mine after i get it on the road. If you beat me there, let me know how much you cut and how you like it.
Goodl luck, subscribed.
Goodl luck, subscribed.
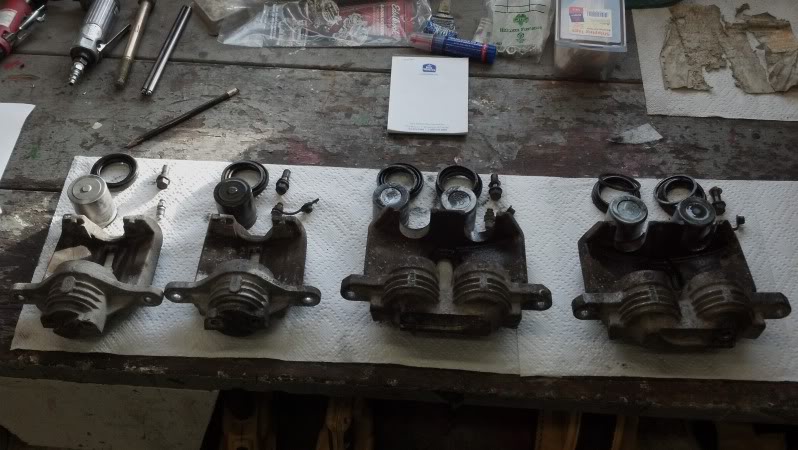
I've been busy bouncing from project to project on the GTO as parts allow. I had torn the brake calipers down to just the castings to clean, inspect, blast and powdercoat:
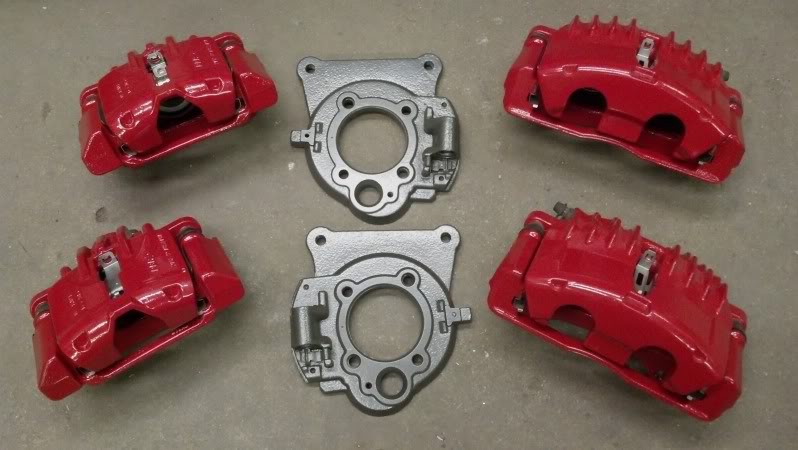
Brake calipers, cages, and rear brackets powder coated and reassembled:
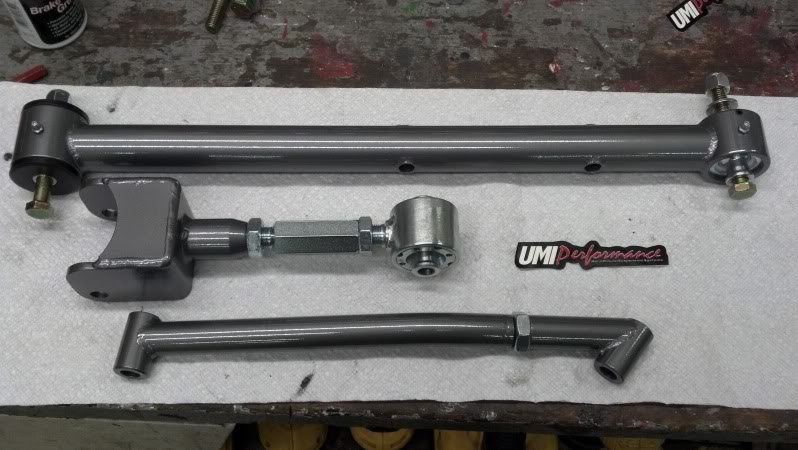
My brother was finally able to come up this weekend to help work on the Judge for a few hours. He has a 13 month old and 1 month old, so spare time is pretty much non-existent for him these days. After I got the UMI pieces powdercoated dark silver, we put the car back up on jack stands to work on brakes, rear suspension, and fuel system.
UMI roto-joint rear suspension pieces with Bonded Dark Silver base/clear powder:
My dad and brother are taking the axles out of the 12 bolt to mount the new rear brake brackets:

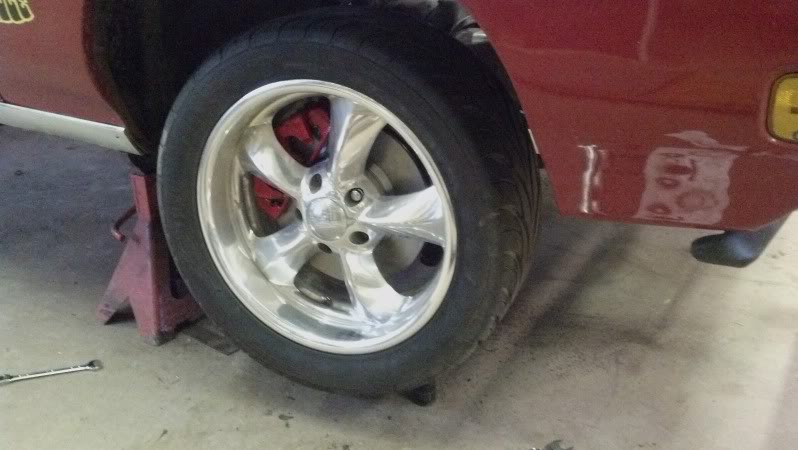
Front brake mock-up with the stainless adapter brackets:
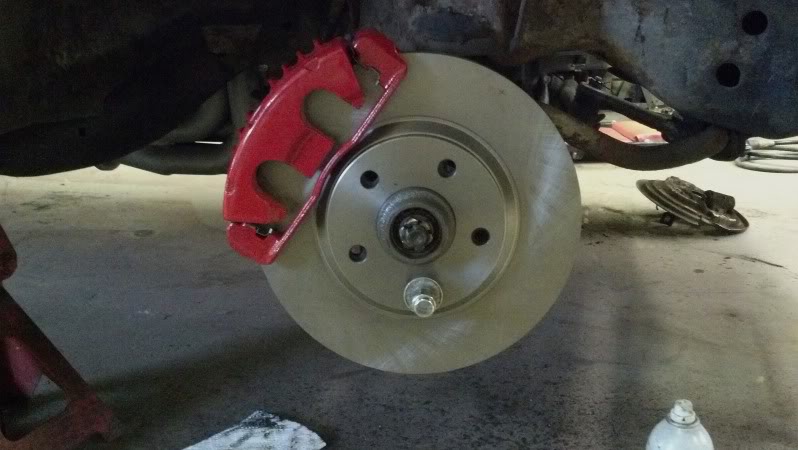
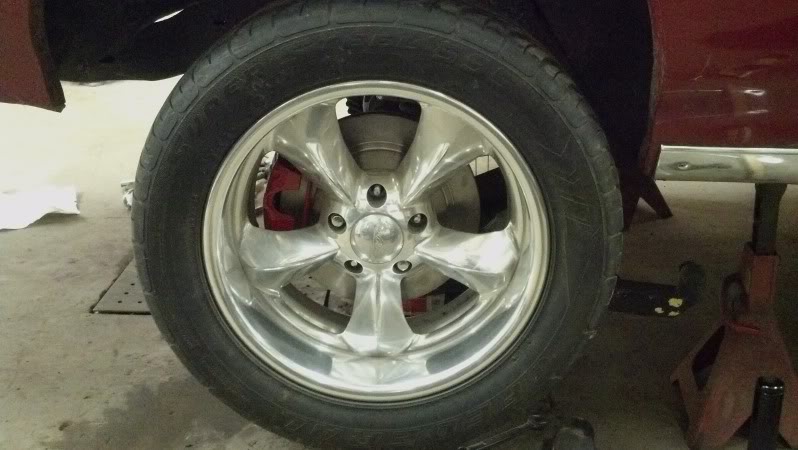
I couldn't resist tossing a Smoothie II on the front:
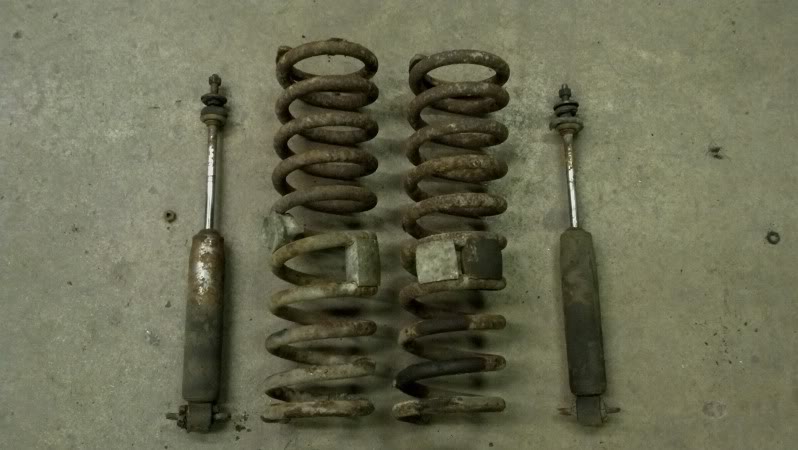
I don't feel bad about replacing the stock springs/shocks:
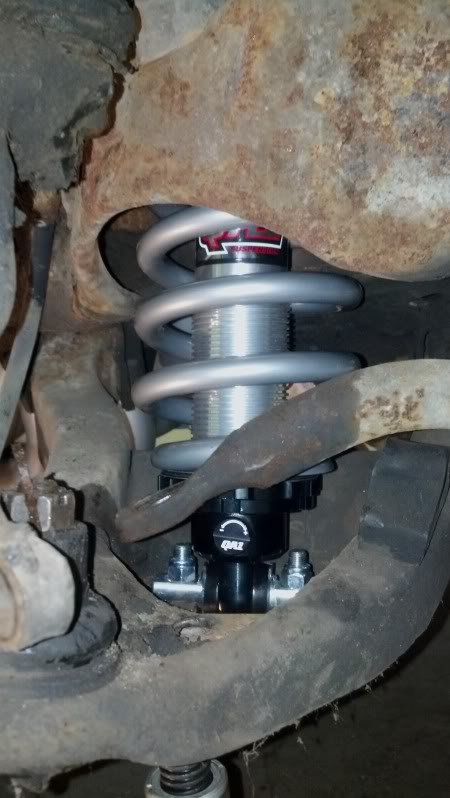
The QA1 coil-overs mounted in place. Ignore the dirty chassis/suspension... the car is getting blown apart next winter for a cosmetic frame off restoration.
**I have learned a couple key points that I want to mention in order to hopefully save some other non-Chevy A-body owners a lot of the headache I've experienced:
1. The drum front hubs and spindles are different on my GTO than similar Chevelles! I had to use Dorman stud 610-114 in the stock hubs instead of the 610-157 that a lot of guys use. These just barely long enough to use with the .333" thick LS1 rotor flange plus an aluminum wheel, so I'm using the extended shank ET lug nuts.
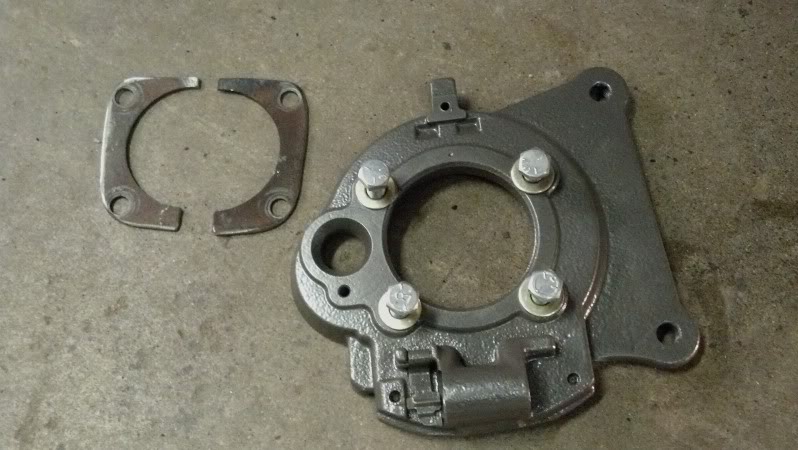
2. The hardware for the front LS1 brake caliper mounting bracket is different from the Chevy's!! All other posts I've read use a larger diameter bolt at the top center... this is not so with my Pontiac. The top bolt is the same thread size and the 2 lower bolts. This caused a problem with the bracket I bought since it had a larger top hole meant for the larger bolt.
The plan is to have the car back on the ground with the UMI suspension, brakes, and fuel plumbing installed by the end of this coming weekend.
02-22-2013, 09:50 AM
#63
TECH Apprentice
Thread Starter
iTrader: (10)
Join Date: Dec 2005
Location: Peoria IL
Posts: 340
Likes: 0
Received 0 Likes
on
0 Posts
We had a small challenge a couple nights ago with a spider gear thrust washer that fell out while removing the axles to install brake mounting brackets, and getting it back into place as not going well. After reading up on other guys having the same problem, we were able to get it into place and then keep going on the rear brakes.
This is the original drum mounting bracket. We had to pull the axles to get these off and the new brackets on:
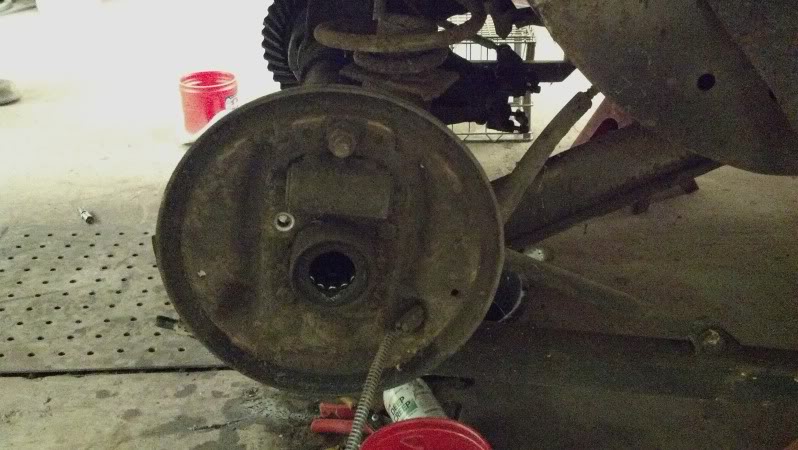
LS1 rear brake mounting bracket. For now I won't be using a parking brakes setup, but if we decided to add it later, it will be as simple as ordering the new parts from Auto Zone and installing as if it was a 1999 Camaro. Some guys use washers as spacers to center the bracket on the rotor, but I ended up cutting the bolt pattern out of the original drum backing plate to get more surface area and then cut that in half to be removable w/o pulling the axle. I also flipped the brackets left to right in order to make the parking brake cable pull from the front instead of the rear:
Mounted a wheel during mock up. I'm looking forward to not dealing with 4 wheel manual brakes any more!
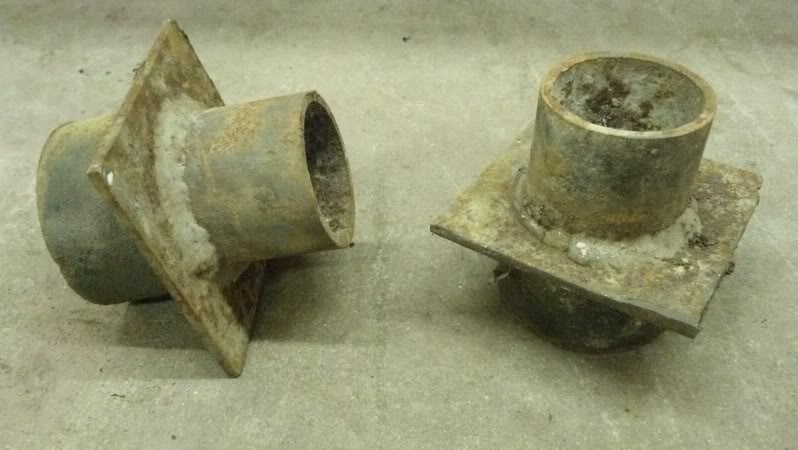
Here's another 1970's era "mod" that will not be going back onto the car... rear coil lift kit to give the car that mean rake. hahaha
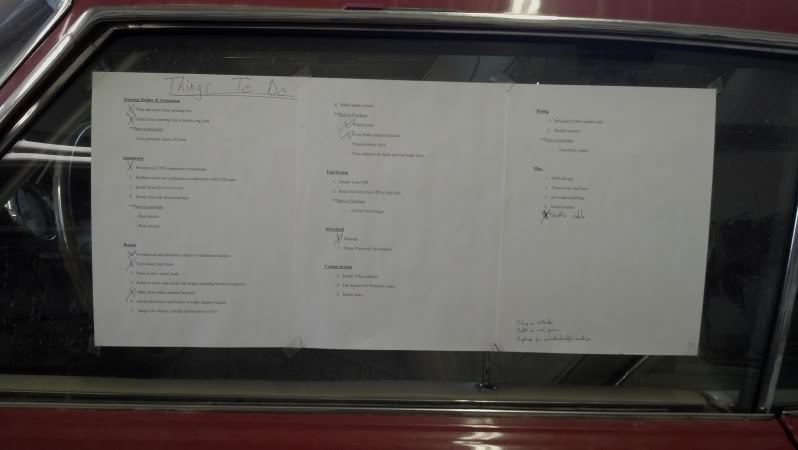
I figured I would post a picture of my To-Do Checklist... I'm slowly checking things off the list.
This is the original drum mounting bracket. We had to pull the axles to get these off and the new brackets on:
LS1 rear brake mounting bracket. For now I won't be using a parking brakes setup, but if we decided to add it later, it will be as simple as ordering the new parts from Auto Zone and installing as if it was a 1999 Camaro. Some guys use washers as spacers to center the bracket on the rotor, but I ended up cutting the bolt pattern out of the original drum backing plate to get more surface area and then cut that in half to be removable w/o pulling the axle. I also flipped the brackets left to right in order to make the parking brake cable pull from the front instead of the rear:
Mounted a wheel during mock up. I'm looking forward to not dealing with 4 wheel manual brakes any more!
Here's another 1970's era "mod" that will not be going back onto the car... rear coil lift kit to give the car that mean rake. hahaha
I figured I would post a picture of my To-Do Checklist... I'm slowly checking things off the list.
02-23-2013, 09:39 AM
#65

 02-24-2013, 07:04 PM
#67
 02-26-2013, 10:23 AM
#68
TECH Apprentice
Thread Starter
iTrader: (10)
Join Date: Dec 2005
Location: Peoria IL
Posts: 340
Likes: 0
Received 0 Likes
on
0 Posts
The Columbus meet hasn't been on my radar, but it could be! We've gone to the IA Good Guys meet a few years and always have fun. I might try talking my dad into going that weekend since we should be mostly out of the fields by then.
I'm slowly making progress still. Ironically enough, the LS1 brake swap is the hardest part of this project so far. Here's a couple pics with the suspension loaded to give an idea of how it'll sit once its back on the ground... which is still going to be a while, unfortunately.
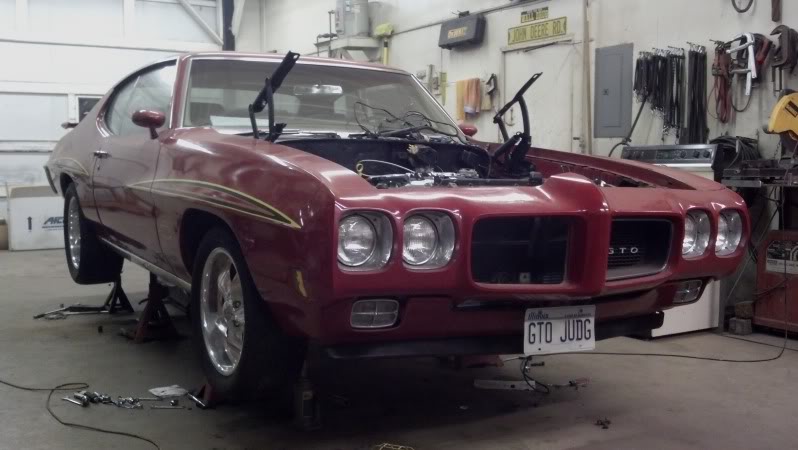
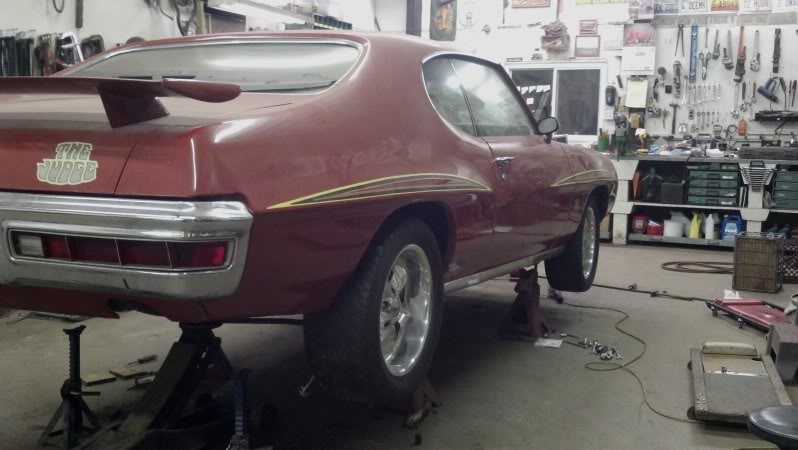
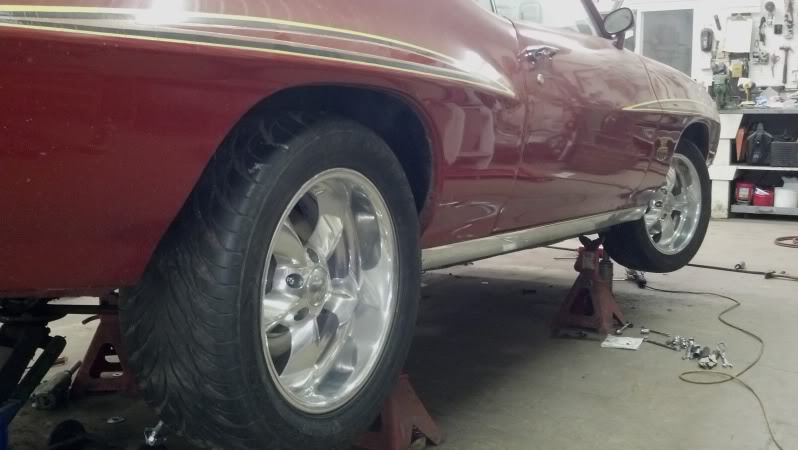
I'm slowly making progress still. Ironically enough, the LS1 brake swap is the hardest part of this project so far. Here's a couple pics with the suspension loaded to give an idea of how it'll sit once its back on the ground... which is still going to be a while, unfortunately.
 03-06-2013, 12:54 PM
#70
TECH Apprentice
Thread Starter
iTrader: (10)
Join Date: Dec 2005
Location: Peoria IL
Posts: 340
Likes: 0
Received 0 Likes
on
0 Posts
It was nice to step away from the Judge for a week and have fun on the sleds up in northern WI. I went up with Compressor Surge's brother who is a MegaSquirt EFI nut. He had his old early 90's Indy 650 tripple that has been modified with a GT15 turbo, MS3x fuel injection using an automotive alternator, Ford injectors, LS1 coils, and self contained oiling system for the turbo. It's a pretty neat project and he was happy to finally get some on-snow tuning.

One good thing about being away from the car for a week is that I have a LOT of parts to start working with. I got the console I won on eBay. Its driver quality, but will do for now. The car is pretty unique in that its a factory bench seat column shift car... but I obviously am more concerned with form and function over originality:

I was able to modify the stock battery tray to move from the LH side to the RH side. The Affco dual pass radiator puts both coolant lines on the RH side, so the intake tube needs to go to the left. I'll blast and powder coat it soon.
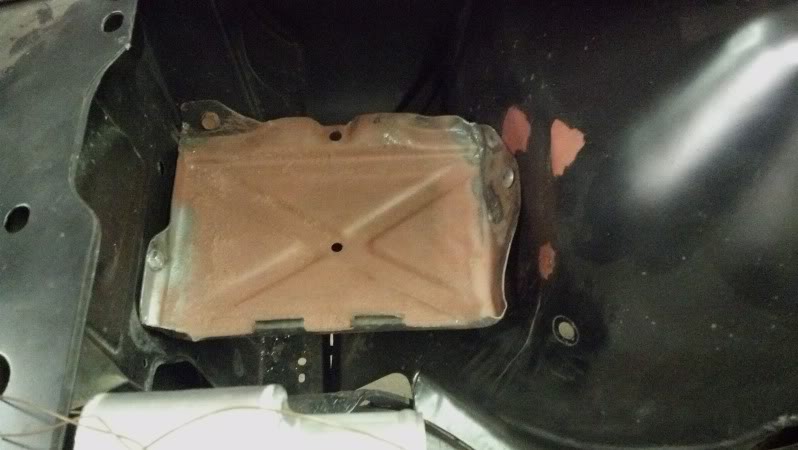
This is what a stock one looks like from the bottom.

I also got the $69 eBay special intake for a 2003+ Silverado. Its a 4" aluminum tube and I bought a K&N filter to replace the one it came with.
The new brake brackets came in as well, so I'll be able to work on them this week. And the rear spring isolaters came in, too, so the rear end should be about ready to button up.
One good thing about being away from the car for a week is that I have a LOT of parts to start working with. I got the console I won on eBay. Its driver quality, but will do for now. The car is pretty unique in that its a factory bench seat column shift car... but I obviously am more concerned with form and function over originality:
I was able to modify the stock battery tray to move from the LH side to the RH side. The Affco dual pass radiator puts both coolant lines on the RH side, so the intake tube needs to go to the left. I'll blast and powder coat it soon.
This is what a stock one looks like from the bottom.
I also got the $69 eBay special intake for a 2003+ Silverado. Its a 4" aluminum tube and I bought a K&N filter to replace the one it came with.
The new brake brackets came in as well, so I'll be able to work on them this week. And the rear spring isolaters came in, too, so the rear end should be about ready to button up.
 03-08-2013, 10:48 AM
#73
TECH Apprentice
Thread Starter
iTrader: (10)
Join Date: Dec 2005
Location: Peoria IL
Posts: 340
Likes: 0
Received 0 Likes
on
0 Posts
I haven't gotten to work on the car much this week, but I was able to check off some big items on my To-Do list. I got the driveshaft back from the local shop and it fit up perfect. I had them remove 3" off the stock TH400 GTO driveshaft with a new 1310 yoke and had them go ahead and install the new u-joints with the stock 4L60e yoke off the '99 Z28 driveshaft. I'm pretty sure I held my breath the entire time I was fitting it into the car, but it was a success!
Other than the fuel tank/plumbing, I'm getting really close to being done with the with everything behind the transmission of the car. New spring insolaters and springs are in, new Bilstein shocks are in, and the brakes are fit up on both sides. All that's left is to cut/flare some new short brake lines from the rear end T-fitting out to the Kore3 SS flex lines.
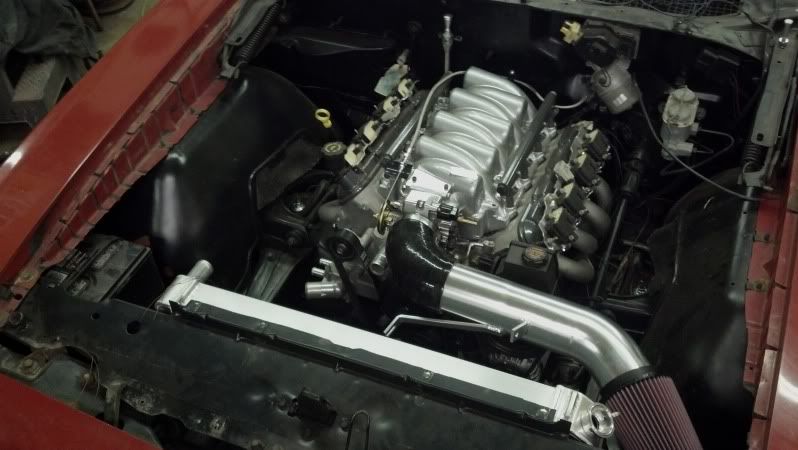
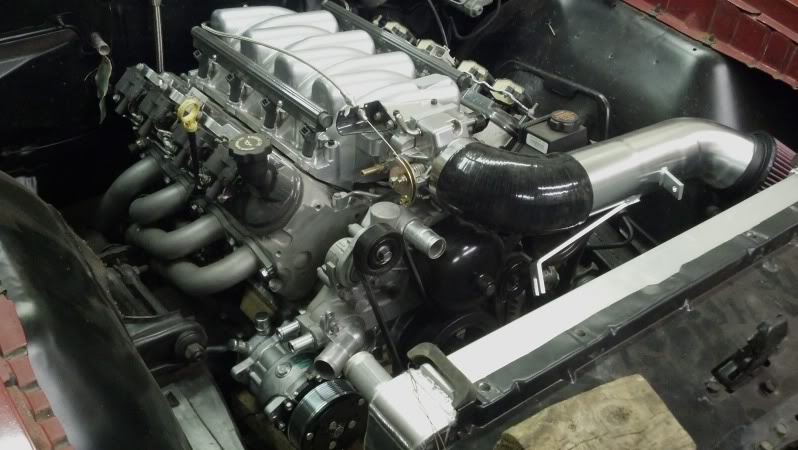
I bought a Vintage Air Sanden AC compressor and the Holley cast alum mounting bracket that sets it high on the RH side. I'm not a fan of the placement, but I figured it was my best option under $1800. I just got the compressor last night, and now I think I can fab up my own mounts to put it on the low RH stock position. The compressor is a lot more compact than the OEM unit, and with the fitting coming out the side it might actually be doable. Here's a couple pics showing where I think I can mount it:
Other than the fuel tank/plumbing, I'm getting really close to being done with the with everything behind the transmission of the car. New spring insolaters and springs are in, new Bilstein shocks are in, and the brakes are fit up on both sides. All that's left is to cut/flare some new short brake lines from the rear end T-fitting out to the Kore3 SS flex lines.
I bought a Vintage Air Sanden AC compressor and the Holley cast alum mounting bracket that sets it high on the RH side. I'm not a fan of the placement, but I figured it was my best option under $1800. I just got the compressor last night, and now I think I can fab up my own mounts to put it on the low RH stock position. The compressor is a lot more compact than the OEM unit, and with the fitting coming out the side it might actually be doable. Here's a couple pics showing where I think I can mount it:
Last edited by krwyellowZ28; 03-08-2013 at 10:55 AM.
 03-08-2013, 12:13 PM
#75
TECH Apprentice
Thread Starter
iTrader: (10)
Join Date: Dec 2005
Location: Peoria IL
Posts: 340
Likes: 0
Received 0 Likes
on
0 Posts
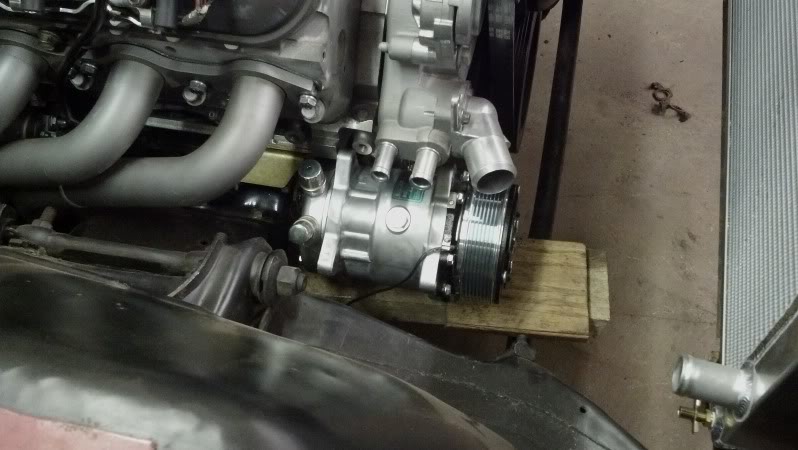
In the short amount of time that I messed with it last night, I plan to leave some adjustment in the brackets for/aft to use spacers/shims to dial in the location. At the current location, I will probably need to get 2 more idlers in order to keep the right amount of belt wrap on the crank pulley, and to route past the thermostat neck.
03-10-2013, 10:02 PM
#76
TECH Apprentice
Thread Starter
iTrader: (10)
Join Date: Dec 2005
Location: Peoria IL
Posts: 340
Likes: 0
Received 0 Likes
on
0 Posts
Made some progress this weekend, but the LS1 brake swap continues to be the hardest part of this entire project so far. Other than the stub hard lines on the rear end, the rear brakes are all buttoned up. On the front I switched back to the Chevelle front hubs and the right front is ready to be bled.
The big hurdle right now is modifying the LS1 f-body booster and master cylinder to fit the factory GTO mounting and pedal. I shaved the studs off the booster bracket, added some material to the bottom of the mount, and drilled 4 holes to match up with the studs in the GTO firewall. The only modification I had to make to the GTO was slightly enlarging the hole in the firewall for the push rod plunger. I also made my own clevis to mate up to the pedal welding some flat stock to the LS1 booster push rod.
Comparison of the original manual drum/drum vs. the 1999 Z28 booster:
2013-03-09_16-46-39_321_zpscf4c31bc.jpg?t=1362967097
Mounted up to the firewall ready to be plumbed:
2013-03-10_12-12-31_527_zps05d98b24.jpg?t=1362967092
The brake lines are proving to be a challenge. The combination of the original rear lines being 1/4", the prop valve and front lines are 3/16" with multiple different thread sizes, and the LS1 MC being metric bubble flare makes this tricky. I just borrowed an inverted flaring tool, so once the in-line proportioning valve comes in, I should be able get it plumbed up.
03-11-2013, 06:15 AM
#77
TECH Fanatic
The AC pump ends up being right about where the truck bracket set it with a stock pump. You may need to to add the truck tensioner if the Holley bracket does not include it.
03-11-2013, 12:03 PM
#78
TECH Apprentice
Thread Starter
iTrader: (10)
Join Date: Dec 2005
Location: Peoria IL
Posts: 340
Likes: 0
Received 0 Likes
on
0 Posts
Do you mean if I end up using the Holley bracket? I really hope I can get away with placing the compressor low/right with my own brackets. I got the compressor and Holley bracket from a friend that is going a different direction with his TT LSx '69 Camaro. He already had the bracket bolted up to his engine with the same f-body accessories I have, so I should have everything I need if that's the route I have to go.
03-12-2013, 06:01 AM
#79
TECH Fanatic
Sorry, I guess I should be more clear. The picture that shows your intended location is pretty much right on where the truck compressor mount is. Not so sure if a Sanden will fit the same bracket.
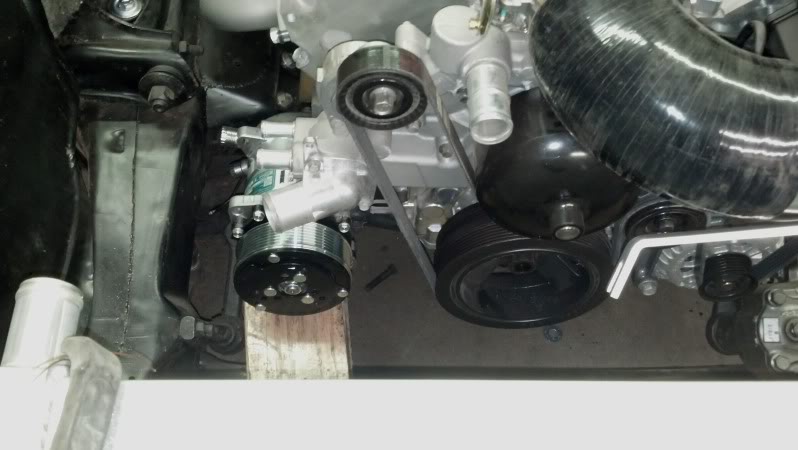
Here is the engine as I received it with the AC bracket in place. You can see the tensioner mounted forward and inboard.
Here is the engine as I received it with the AC bracket in place. You can see the tensioner mounted forward and inboard.
03-12-2013, 08:26 AM
#80
TECH Enthusiast

The brake lines are proving to be a challenge. The combination of the original rear lines being 1/4", the prop valve and front lines are 3/16" with multiple different thread sizes, and the LS1 MC being metric bubble flare makes this tricky.