


84 Monte 5.3 Build
Looks good.. All this work I see you guys do is giving me the motivation to work on mine.. lol Need to finish stripping the frame and paint as well as paint the firewall. Too cold to paint in a non heated garage >.<

Thread Starter
Staging Lane
Joined: Nov 2011
Posts: 95
Likes: 1
From: Elk River, MN

Anywho, sorry for not having pics on this one, still need to upload them. I got my braided harness wrap today, looks great, as well as my harness tape from PSI Conversions (purchased through ebay). I also got my sender for the oil pressure gauge, so I'll be installing that in the block-off plate just above the filter.
I'm planning to test-fit the motor without the trans tomorrow night, so I'll get pics of that as well. That will give me a better idea of what kind of clearancing I need to do on the heater box and all that, as well as how much I need to shorten the truck oil pan.
Thanks for looking, more pics in a day or so.
-matt
Thread Starter
Staging Lane
Joined: Nov 2011
Posts: 95
Likes: 1
From: Elk River, MN
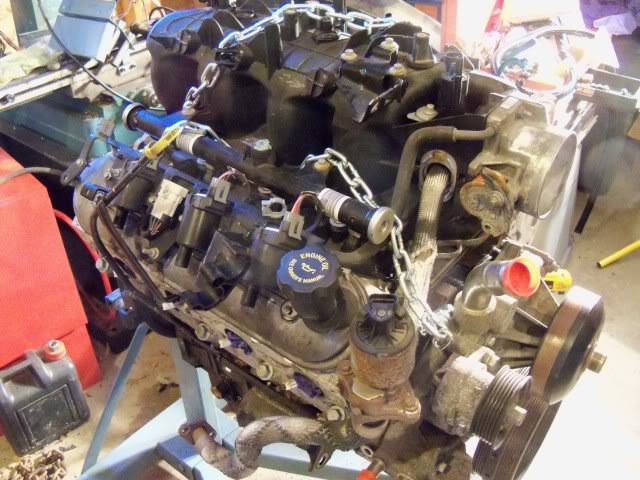
Time for a little update, with a bunch of pictures, 42 to be exact. To start with, I had to remove some broken exhaust manifold bolts . . . hell on earth.
The first one wasn't too terrible, left-hand drill bit, a little heat, and an Easy-out got it right out.
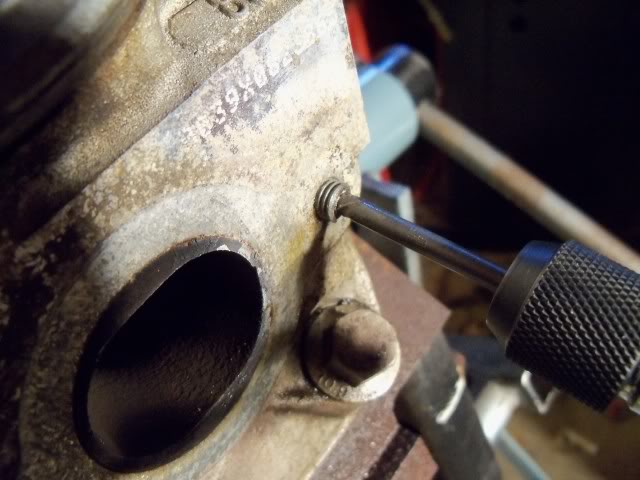
Glorious.
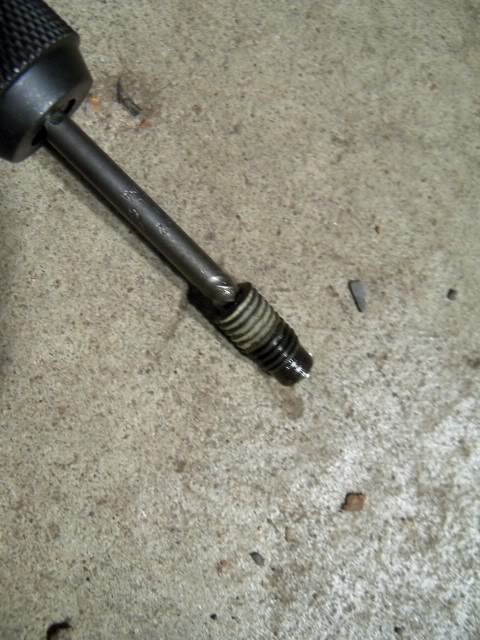
The next pain in my ****.
On it's way out, now we're rolling.

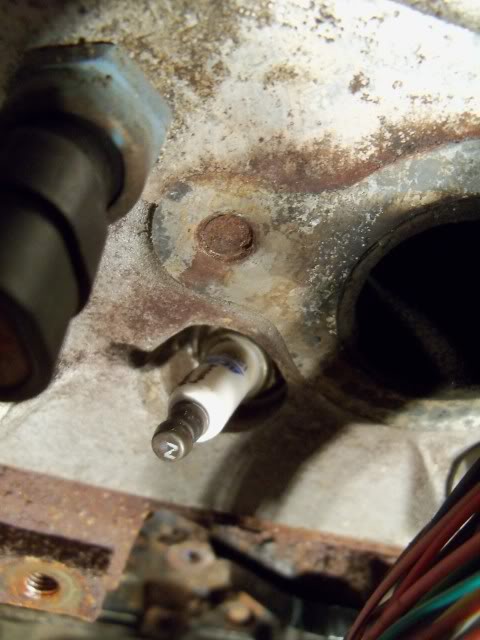
This one, not so much. it was a major pain, I ended up drilling down the the center of it with a 1/4" center drill and slowly backing it out with the Easy-out, bit by bit.
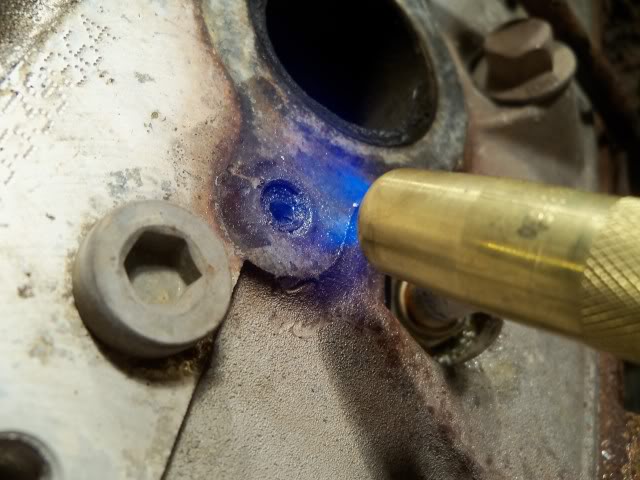
I decided to to do a little clean-up on the block to make sure it'd be easy enough to clean it for paint later. I'm not doing the whole thing right now since it's 30 degrees outside, and I'm doing this in an unheated garage, which isn't exactly good painting weather.

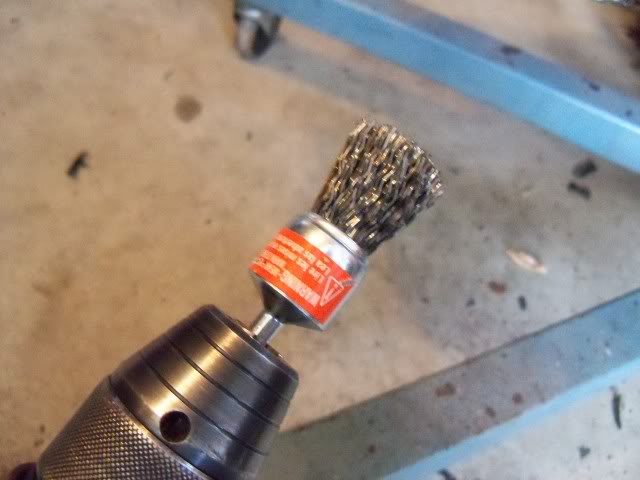
Secret weapon from Home Depot, works great for block cleanup.
That'll be enough for now, I'll clean it up more later once it's back out of the car from mocking it up.

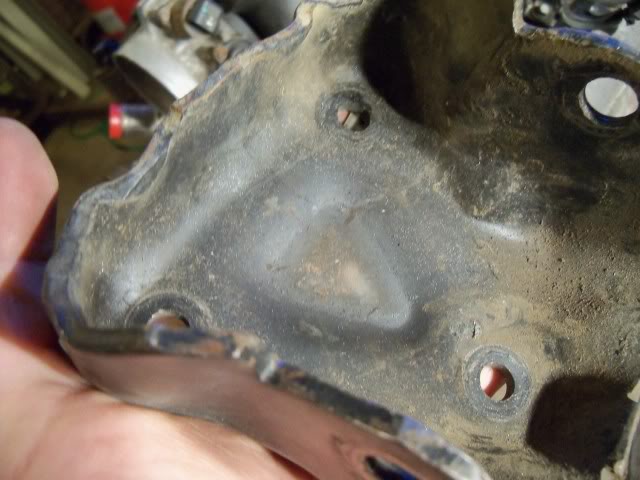
As you can see here, the SBC mount is stamped in the center, which kept it from sitting flat on the adapter plates.
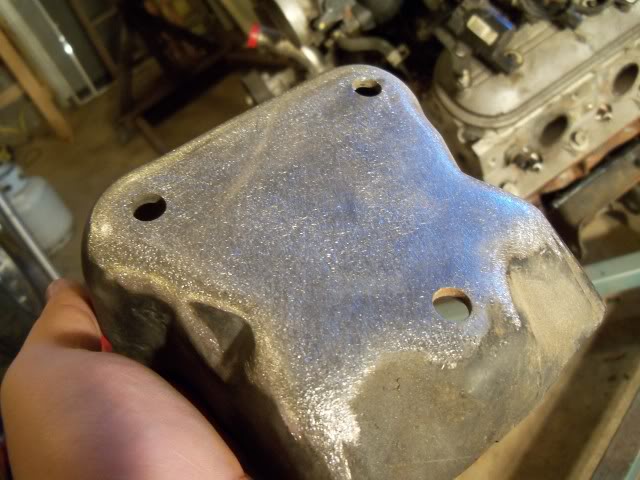
All better. These will get painted when I do the block later.
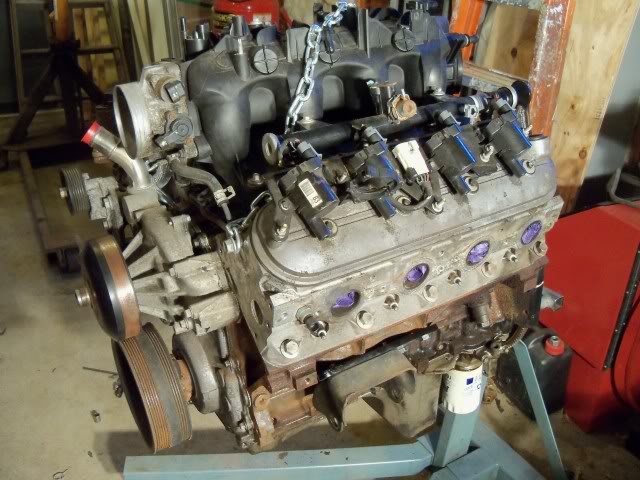
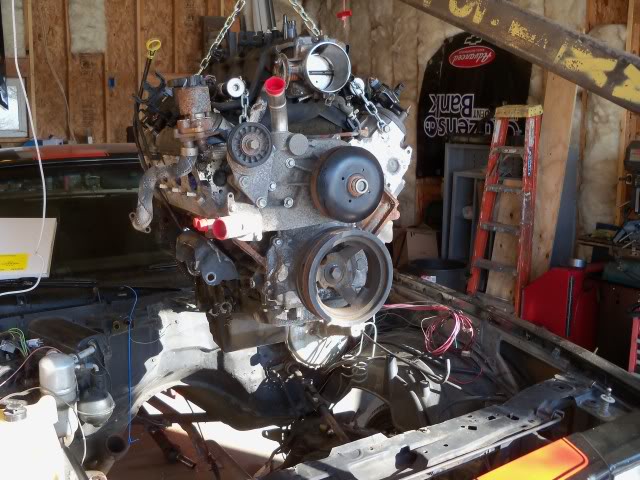
In all her glory, ready to set in for mock-up.
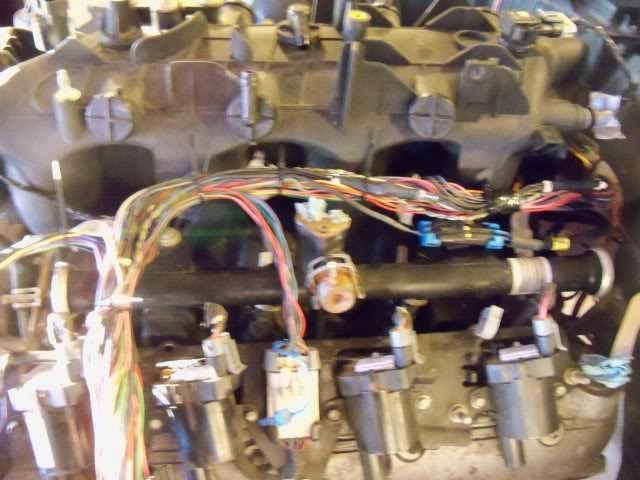
Another angle. I pulled the harness off to mock it in there. I also pulled off the #8 coil pack in case there were clearance issues.
Beautiful MN January day to work in the garage. With the door open, no less.
Looks a little empty in there.
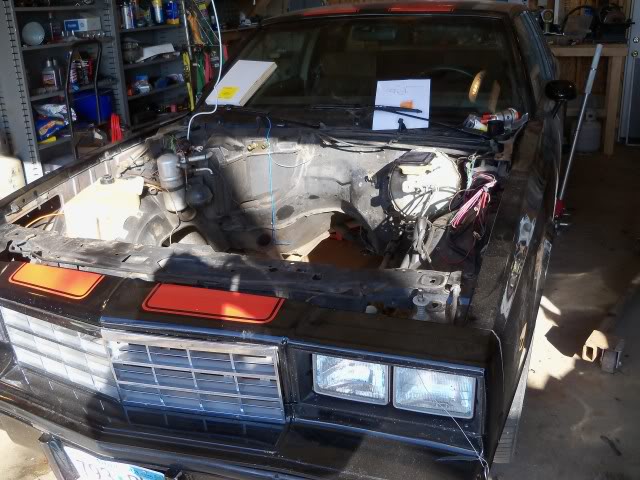
My messy garage. I'll clean it, tomorrow....
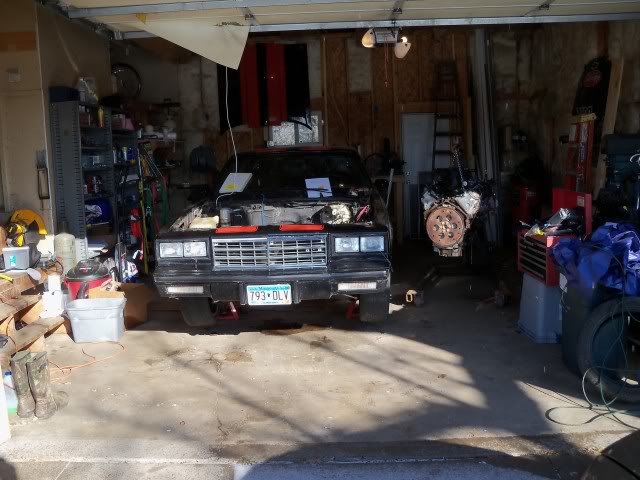
<Insert Dramatic Theme Song here> Ready to set it in for mock-up.

If you look closely, you can see it slowly dropping into the engine bay...
That'll do.
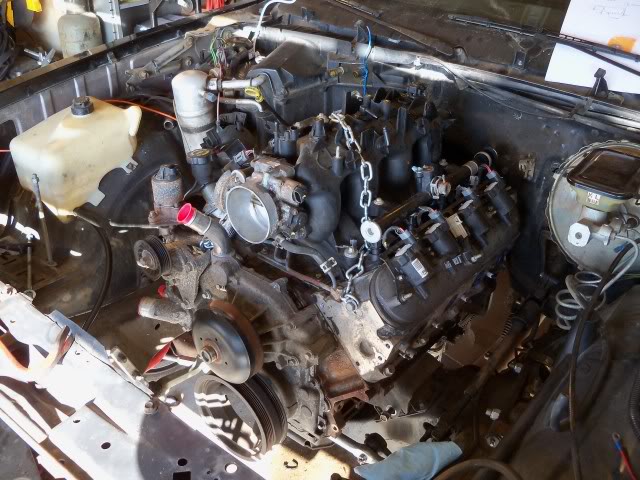
Lots of room back here!

Plenty more room over here.
and back here, good Lord, could fit an Ecotec between the motor and firewall. In all honesty, it looks like more room in the picture than there actually is. I'll probably keep the motor where it's at to keep from having to cut too much up for fitment. Besides, moving the motor back 1" has less of a handling impact than moving the battery to the trunk. so I'll keep it easy to work on.
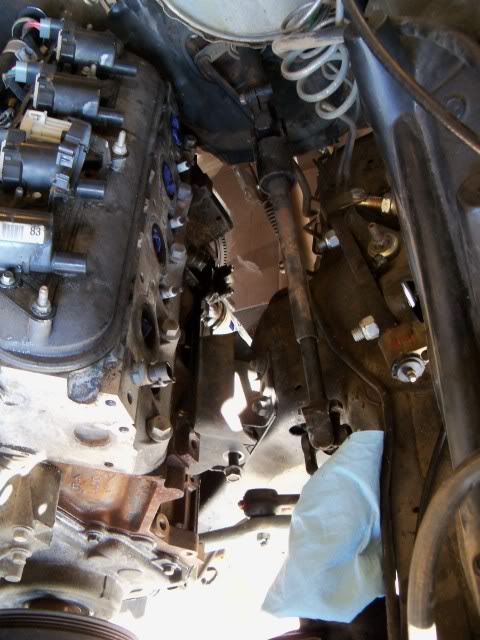
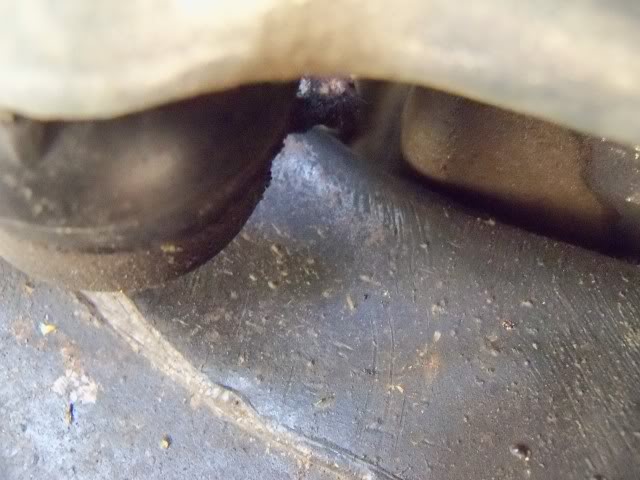
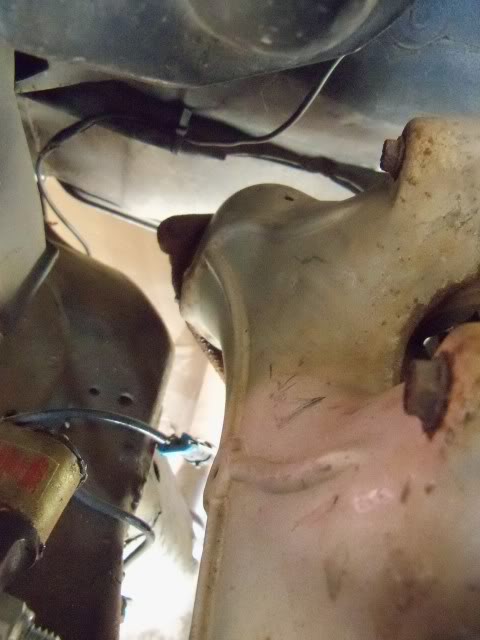
This picture is hard to decipher, but what it is showing is how close the pan is to the crossmember. This is from the front passenger side, you can see the tie rod end in the corner of the pic.
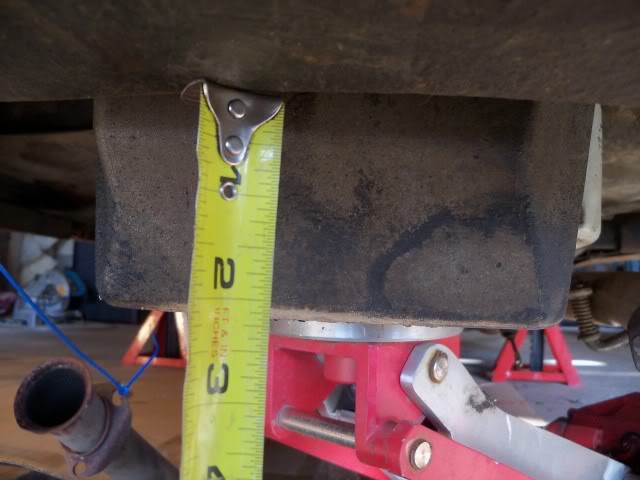
This is almost comical. I knew the truck pan would be low, I just didn't know it'd be 2 inches too low. This car sits at 5 inches here already, so the pan would be at 3 inches
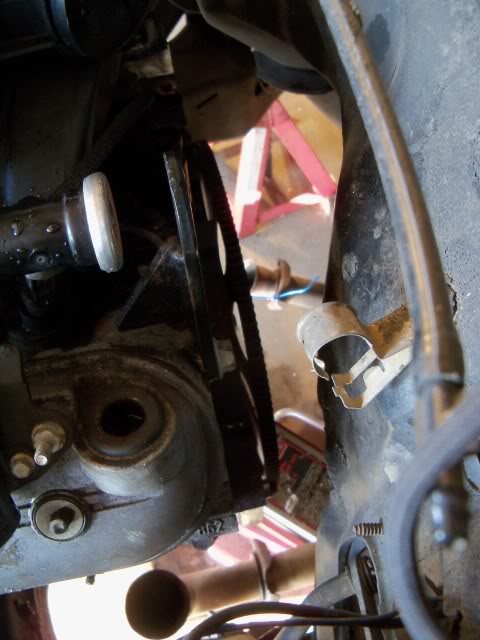
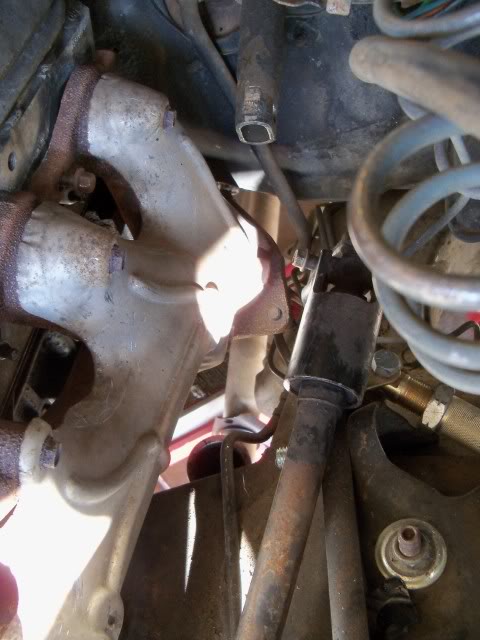
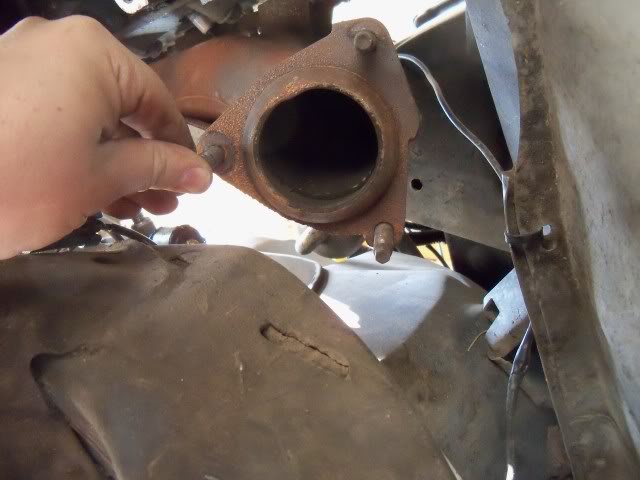
This is where I started to use some colorful words, the truck manifold isn't even close to fitting on the driver's size. This means I need LS1 manifolds or headers, but more importantly, something that costs more money.
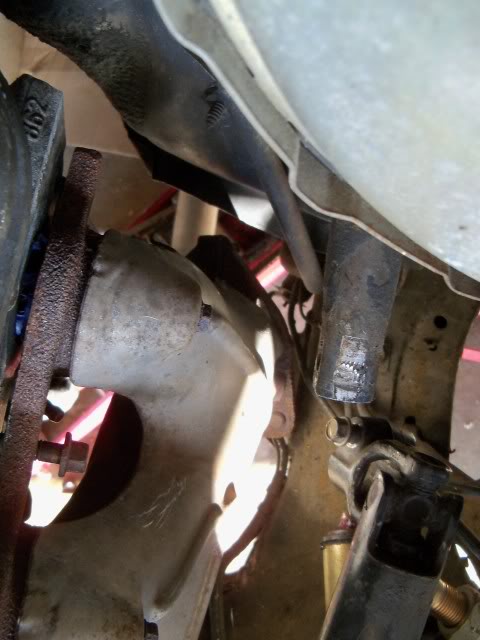
Passenger side is a better situation, not that it does me any good.
Found a cracked weld on the frame while I was down there.

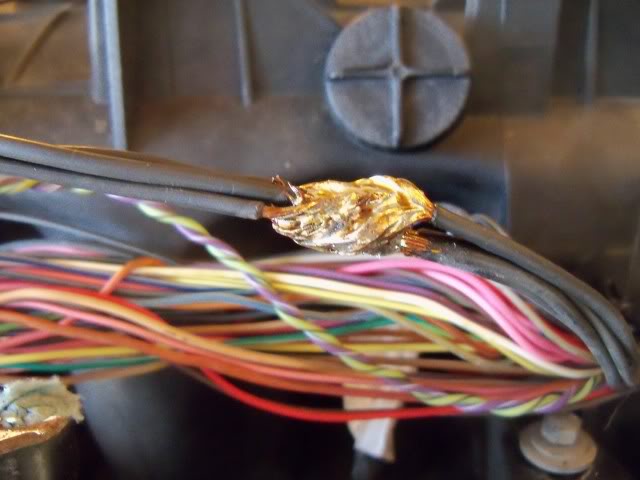
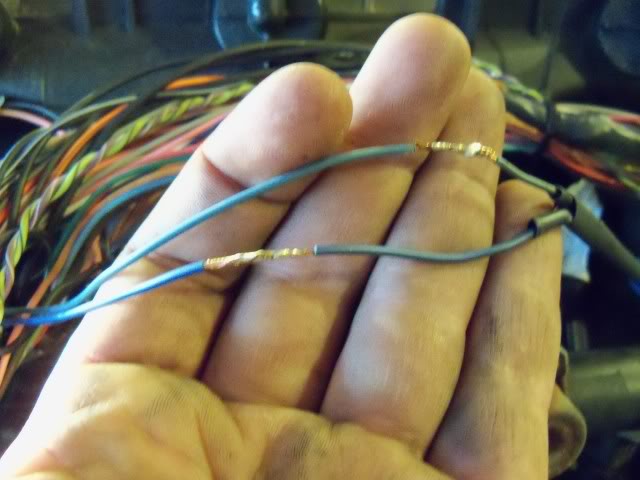
Now, for some harness clean-up. As you can see, the grounds have extra length from re-routing the harness.
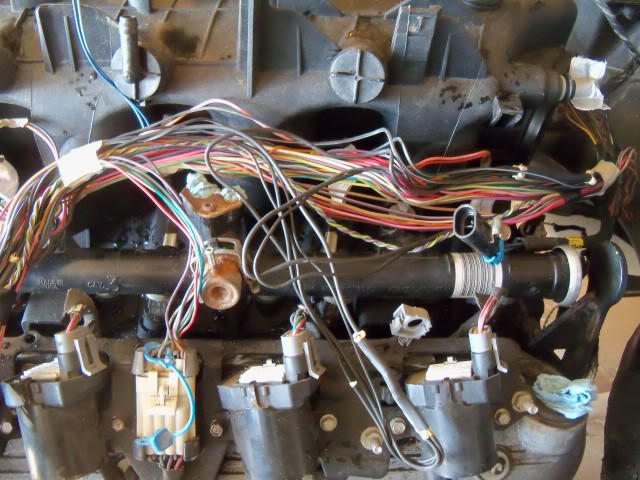
With the extra length cut out and the wires stripped, they're ready to join.
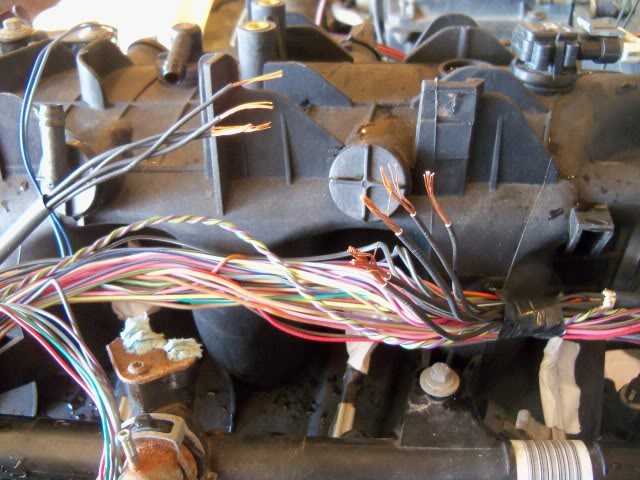
Not the most beautiful solder job ever, but it's strong.
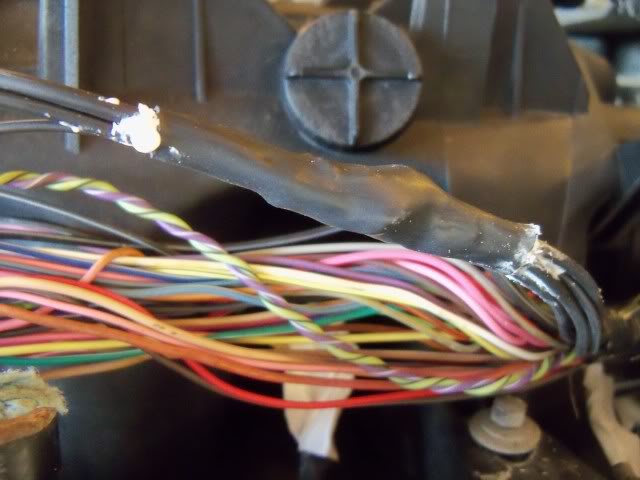
This also looks sloppy, but it's as close to water-tight as I could get it. Thankfully it will be covered by my braided harness wrap when the install is complete.
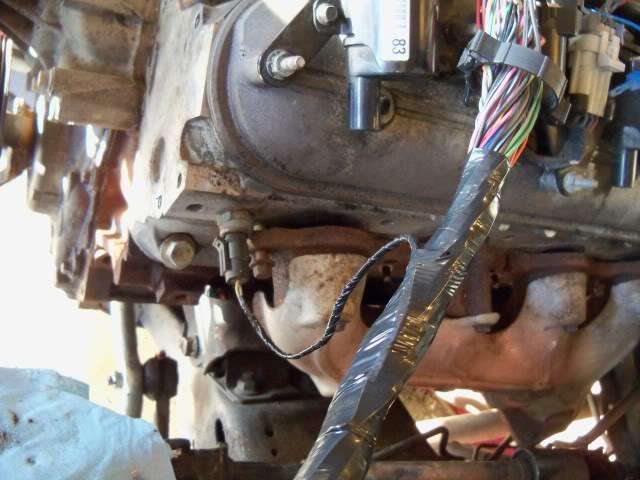
This temp sender had a bunch of extra wire.

Shortened and wrapped.
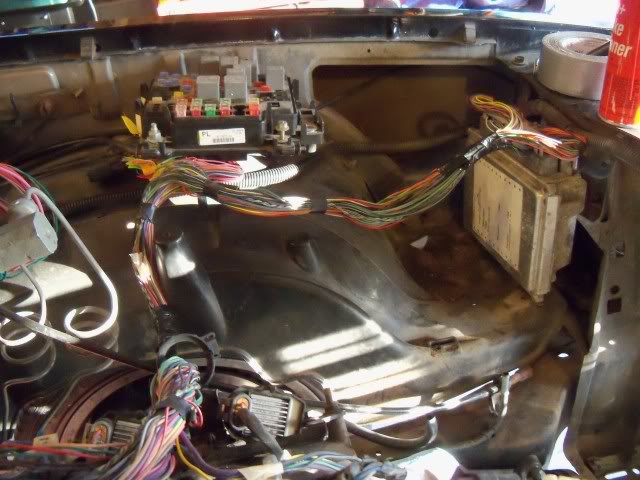
Probably where the fuse block and ECM will live.
Shortened up the knock sensor wires.
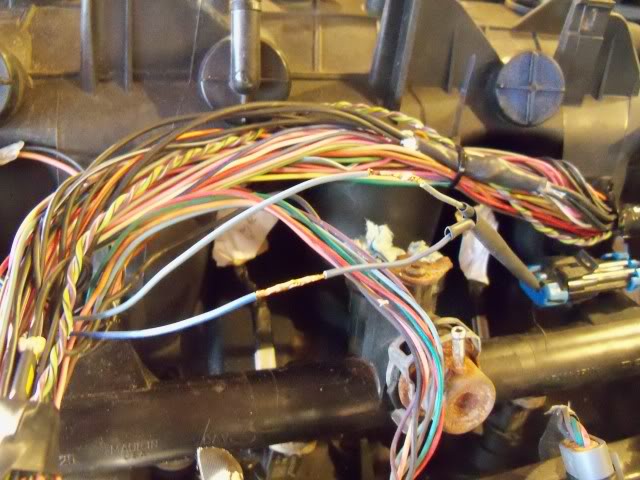
Soldered.
Heatshrunk and ready for action.
I have more pictures, but no time to caption them tonight, so I'll post them tomorrow after work. Thanks for looking.
-matt
The first one wasn't too terrible, left-hand drill bit, a little heat, and an Easy-out got it right out.
Glorious.
The next pain in my ****.
On it's way out, now we're rolling.
This one, not so much. it was a major pain, I ended up drilling down the the center of it with a 1/4" center drill and slowly backing it out with the Easy-out, bit by bit.
I decided to to do a little clean-up on the block to make sure it'd be easy enough to clean it for paint later. I'm not doing the whole thing right now since it's 30 degrees outside, and I'm doing this in an unheated garage, which isn't exactly good painting weather.
Secret weapon from Home Depot, works great for block cleanup.
That'll be enough for now, I'll clean it up more later once it's back out of the car from mocking it up.
As you can see here, the SBC mount is stamped in the center, which kept it from sitting flat on the adapter plates.
All better. These will get painted when I do the block later.
In all her glory, ready to set in for mock-up.
Another angle. I pulled the harness off to mock it in there. I also pulled off the #8 coil pack in case there were clearance issues.
Beautiful MN January day to work in the garage. With the door open, no less.
Looks a little empty in there.
My messy garage. I'll clean it, tomorrow....
<Insert Dramatic Theme Song here> Ready to set it in for mock-up.
If you look closely, you can see it slowly dropping into the engine bay...
That'll do.
Lots of room back here!
Plenty more room over here.
and back here, good Lord, could fit an Ecotec between the motor and firewall. In all honesty, it looks like more room in the picture than there actually is. I'll probably keep the motor where it's at to keep from having to cut too much up for fitment. Besides, moving the motor back 1" has less of a handling impact than moving the battery to the trunk. so I'll keep it easy to work on.
This picture is hard to decipher, but what it is showing is how close the pan is to the crossmember. This is from the front passenger side, you can see the tie rod end in the corner of the pic.
This is almost comical. I knew the truck pan would be low, I just didn't know it'd be 2 inches too low. This car sits at 5 inches here already, so the pan would be at 3 inches
This is where I started to use some colorful words, the truck manifold isn't even close to fitting on the driver's size. This means I need LS1 manifolds or headers, but more importantly, something that costs more money.
Passenger side is a better situation, not that it does me any good.
Found a cracked weld on the frame while I was down there.
Now, for some harness clean-up. As you can see, the grounds have extra length from re-routing the harness.
With the extra length cut out and the wires stripped, they're ready to join.
Not the most beautiful solder job ever, but it's strong.
This also looks sloppy, but it's as close to water-tight as I could get it. Thankfully it will be covered by my braided harness wrap when the install is complete.
This temp sender had a bunch of extra wire.
Shortened and wrapped.
Probably where the fuse block and ECM will live.
Shortened up the knock sensor wires.
Soldered.
Heatshrunk and ready for action.
I have more pictures, but no time to caption them tonight, so I'll post them tomorrow after work. Thanks for looking.
-matt
Last edited by monteboy84; Jan 18, 2012 at 06:50 AM.
Thread Starter
Staging Lane
Joined: Nov 2011
Posts: 95
Likes: 1
From: Elk River, MN
So, I'll be running a wire from the C100 connector to my stock temp sender wire to feed the gauge. As for the oil pressure, I bought a stock gauge sender for my car, and will be adding that to the oil cooler block-off plate. I'll run the wire for this through the C100 connector as well.
Thanks,
-matt
TECH Apprentice
Joined: Apr 2011
Posts: 390
Likes: 0
Looks like you're making a lot of progress! I just finished a 5.3/th350 swap into my 81 Malibu. If you have any questions about what fits and what doesn't or where to locate a part let me know!
I used Carshop 1in setback plates (to help with oil pan to k member clearance)
SBC clamshells and lower mounts (in factory position on k member)
Caddilac CTSV Oil pan as my car is on coilovers on the front and is LOW.. much needed.
Pacesetter F body headers (98-02) I would not reccomend these as I had to make a lot of modification for the passenger side to fit (dented header tube and notched frame)
Also, I didn't see it listed but you have two options for your flexplate. You can utilize the flexplate you already have (curved 5.3), and drill it for a th350 converter spacing and use a crank spacer (a factory GM part), so the converter has the correct snout spacing.
OR, you can get a crank spacer and use a flat flexplate (spacer between crank and flexplate) It will already have the th350 spacing for the converter so no drilling is necessary.
I got my flexplate and spacer for 80 bucks shipped from GMpartsdirect
LS1 Tech Stories
The Best V8 Stories One Small Block at Time

6 Common C5 Corvette Failures and What's Involved In Repairing Them
Pouria Savadkouei
Retro Modern Bandit Pontiac Trans AM Comes With Burt Reynolds' Autograph
Verdad Gallardo
Top 10 Greatest Cadillac V Series Performance Models Ever, Ranked
Pouria Savadkouei
Top 10 Most Powerful Chevy Trucks Ever Made!

Hennessey's New Supercharged Silverado ZR2 Has 700 HP
Verdad Gallardo
Coachbuilt N2A Anteros Is an LS2-Powered C6 Corvette In Italian Clothes
Verdad Gallardo
Awesome K5 Blazer Restomod Comes With C7 Corvette Power
Verdad Gallardo
10 Camaros You Should Never Buy

10 LS Engine Myths That Refuse to Die
Verdad Gallardo
Teching In
Joined: Jan 2011
Posts: 22
Likes: 0
From: Richmond ca
good progress cant wait to hear it start lol you plan on adding headers? also i notice when you pulled of the old motor you had the intake im looking for if you still have it im willing to purchase it off you.
Thread Starter
Staging Lane
Joined: Nov 2011
Posts: 95
Likes: 1
From: Elk River, MN
I haven't decided what to do about exhaust yet, headers are one option but I may be able to modify the truck manifold for a V-band like the turbo guys are doing. I need to spend some time looking at my options before I make a decision.
As for the intake, sorry but it's long gone, sold the motor as a complete drop-in kit with everything from the alternator to the fuel pump.
-matt
As for the intake, sorry but it's long gone, sold the motor as a complete drop-in kit with everything from the alternator to the fuel pump.
-matt

Thread Starter
Staging Lane
Joined: Nov 2011
Posts: 95
Likes: 1
From: Elk River, MN
Thread Starter
Staging Lane
Joined: Nov 2011
Posts: 95
Likes: 1
From: Elk River, MN


Staging Lane
Joined: Jan 2008
Posts: 69
Likes: 0
From: Quebec in Canada
hi ! when i did my 6.0 cutlass swap, I kept the truck manifolds but had the same problem than you with the driver's side one. what I did is that I cutted it near the flange and cutted another slice on the manifold to change the angle,. I'm trying to explain it the best i can for you to understand. i speak french so my english is not the best. I took the time to test fit before cutting to be sure the exact place i wanted to cut and after, I heated the two pieces with torches and made a nice weld in small sections alle the way around. hope this will help, theres no need to buy headers, it only needs a little more time and welding skills !
Thread Starter
Staging Lane
Joined: Nov 2011
Posts: 95
Likes: 1
From: Elk River, MN
hi ! when i did my 6.0 cutlass swap, I kept the truck manifolds but had the same problem than you with the driver's side one. what I did is that I cutted it near the flange and cutted another slice on the manifold to change the angle,. I'm trying to explain it the best i can for you to understand. i speak french so my english is not the best. I took the time to test fit before cutting to be sure the exact place i wanted to cut and after, I heated the two pieces with torches and made a nice weld in small sections alle the way around. hope this will help, theres no need to buy headers, it only needs a little more time and welding skills !
I'm on a temporary hold with the project due to weather, it's below 0 degrees in my garage right now

-matt
TECH Apprentice
Joined: Apr 2011
Posts: 390
Likes: 0
I also had to use a tpi/ls1 36in throttle cable