

69 Buick GS 415/T56
 07-16-2012 | 05:46 PM
#22
Thread Starter
On The Tree
Joined: Nov 2011
Posts: 159
Likes: 0
From: South east Wisconsin
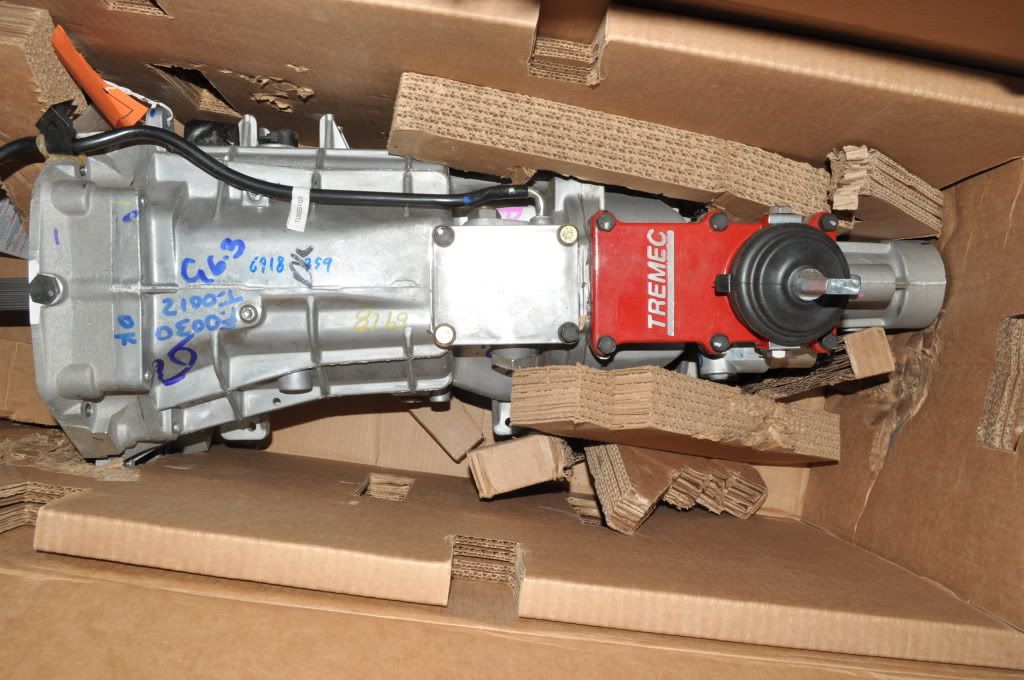
For anyone who has a t56, is there any difference in the housing between a swap t56 from a donor car and the t56 magnum from american powertrain? I thought that there is some kind of a difference.
07-16-2012 | 06:07 PM
#23
That brings back memories of my brothers car. He had a 69/GS350 in 79-80 and wanted to pull out the factory 350 and put an L88-427 in it.  Came close to the swap even had an engine ready to go for it but then lost his license for a year(street-racing) so everything was halted and sold off. I can only imagine if he would of completed it.
Came close to the swap even had an engine ready to go for it but then lost his license for a year(street-racing) so everything was halted and sold off. I can only imagine if he would of completed it.
07-16-2012 | 07:23 PM
#24

The T56 magnum is based on the tr6060 which is a newer updated version of the t56. There rated at 750ft lbs. and a takeout is rated at 450 ft lbs.
07-17-2012 | 07:38 PM
#25
Thread Starter
On The Tree
Joined: Nov 2011
Posts: 159
Likes: 0
From: South east Wisconsin
I went with the magnum instead of the 06 gto t56 due to the durability, I was not sure if there was any difference externaly. Like everybody else I would like to do as little tunnel cutting as possible.
Hey bigmandengo, where abouts in wisconsin are you, I would like to see your regal! There are not a lot of ls swap cars around here.
Hey bigmandengo, where abouts in wisconsin are you, I would like to see your regal! There are not a lot of ls swap cars around here.
07-24-2012 | 01:45 PM
#26
07-24-2012 | 03:17 PM
#27

Joined: Mar 2003
Posts: 10,225
Likes: 1,513
From: The City of Fountains
Andrew

 08-20-2012 | 11:42 PM
#31
Thread Starter
On The Tree
Joined: Nov 2011
Posts: 159
Likes: 0
From: South east Wisconsin
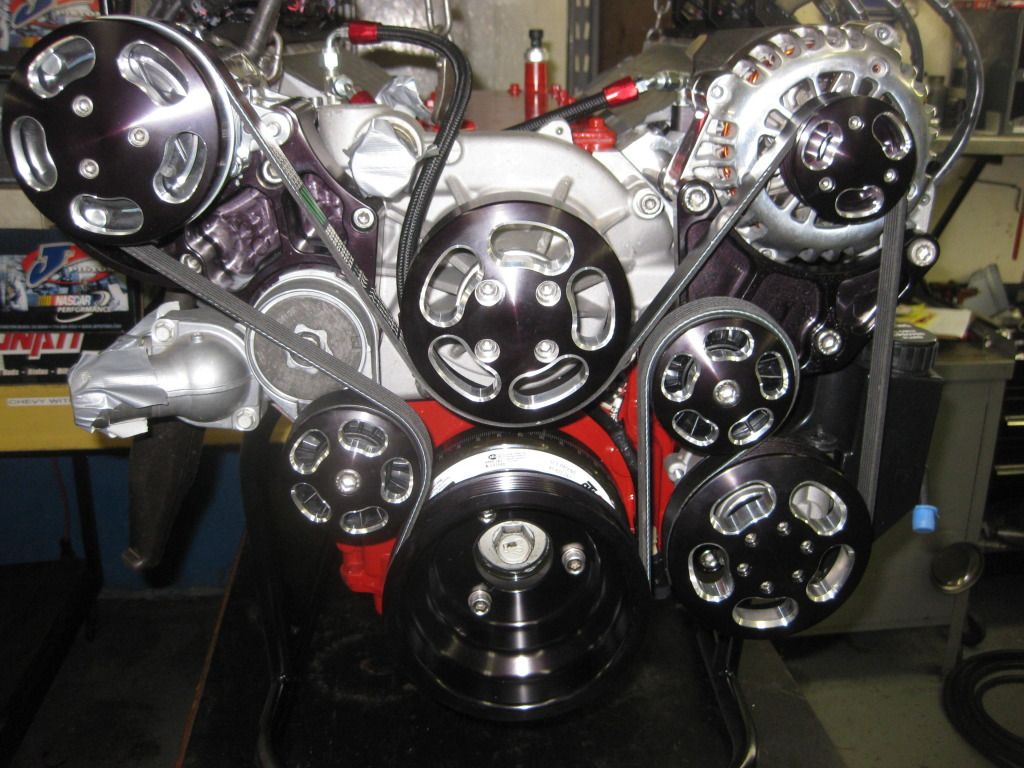
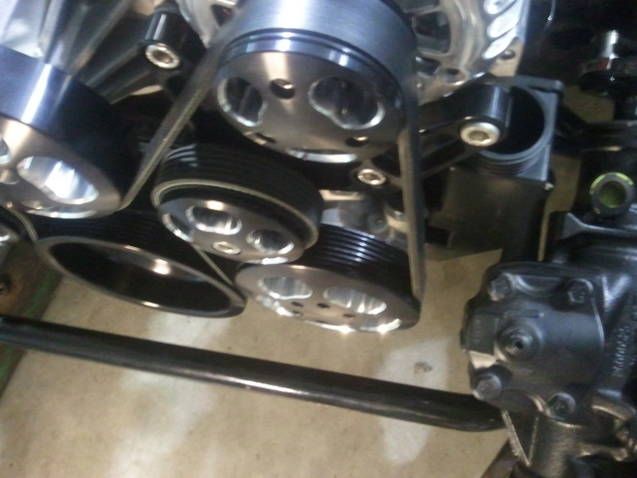
The next pull it got the best of 654hp 545tq. More than I expected! The valve covers were custom made by Casey Wegner. Hopefully I dont have any issues with the power steering pulley contacting the steering box!
08-21-2012 | 09:05 PM
#33
Thread Starter
On The Tree
Joined: Nov 2011
Posts: 159
Likes: 0
From: South east Wisconsin
Thought you would like those speedtigger! The relocation brackets are a wegner design and you can buy them through their online store. The valve covers at this point are one of a kind but I am sure casey can make more or different style!
09-03-2012 | 10:58 PM
#35
Thread Starter
On The Tree
Joined: Nov 2011
Posts: 159
Likes: 0
From: South east Wisconsin
I figure I better post up some of the progress. Took the GS over to my buddys shop. He has a lift that is not used very often and is kind enough to let me use for an extended amount of time. Thanks Mel! Its nice to have some guidance and help too!
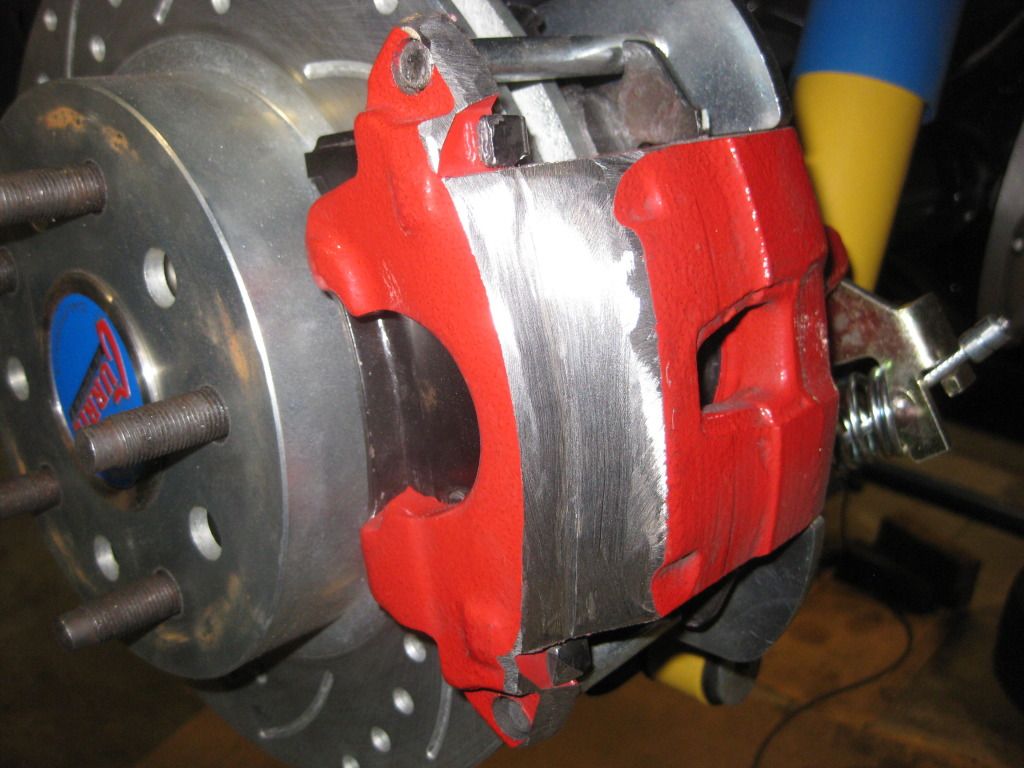
Anyways, did some grinding on my rear calipers so my factory rims would clear(got to keep the factory look!). After some shaping they clear. I think there is enough meat to where I did not compromise the integrity of the caliper. The really bad news was that even though I was wearing safety glasses, I managed to get metal splinters in both eyes. Ouch! Missed out on sight for a day and a half tryin to tough it out
After looking around here I was trying to figure out what to do for the steam vent. I thought that plumbing it in to the water pump was the best idea. Casy advised tapping it in to the suction side of the water pump instead of the pressure side as I seen many do on here. Makes sense to me. Thoughts??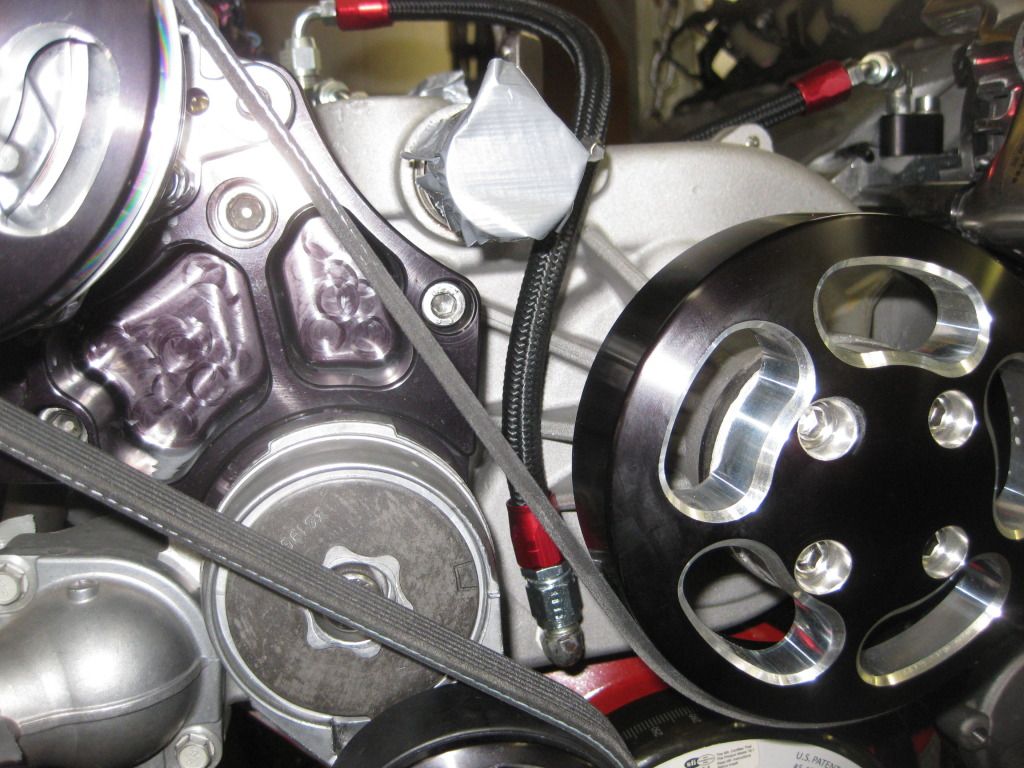
Hopefully Wednesday we will slap the engine and trans together And do some test fitting and tunnel cutting!
09-05-2012 | 11:12 PM
#36
Thread Starter
On The Tree
Joined: Nov 2011
Posts: 159
Likes: 0
From: South east Wisconsin
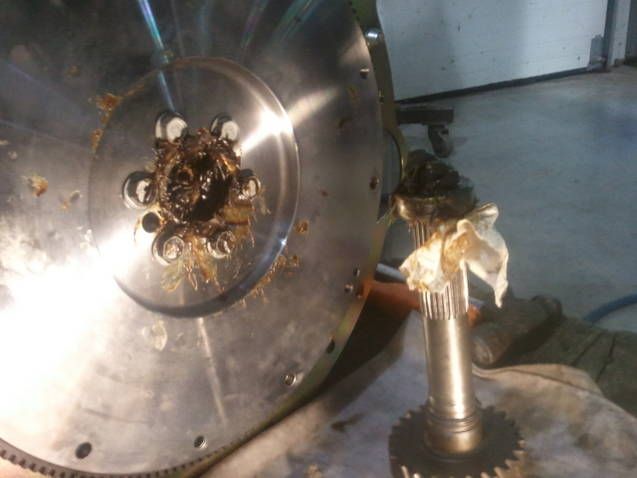
So I got to the shop and was happy to see the trans was just about bolted up to the motor. Just about.... My buddy who owns the shop took it upon himself to supply a bearing for the crank. Wrong one!! We had to pack it with grease and paper towel and drive it back out with presure. Messy!
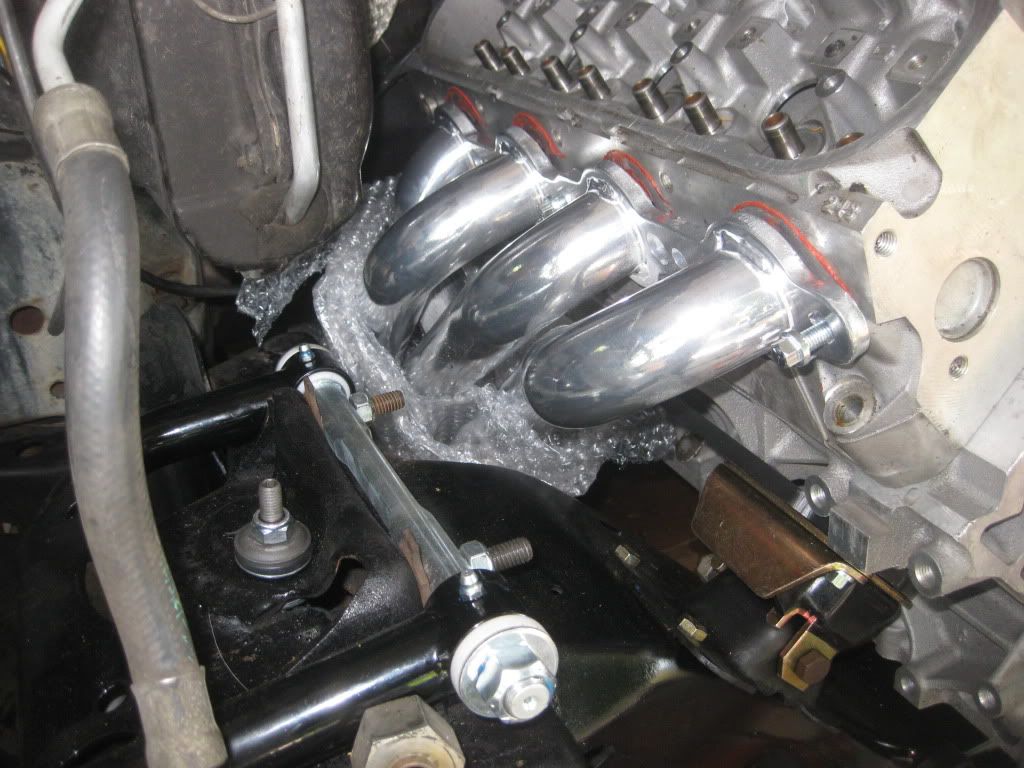
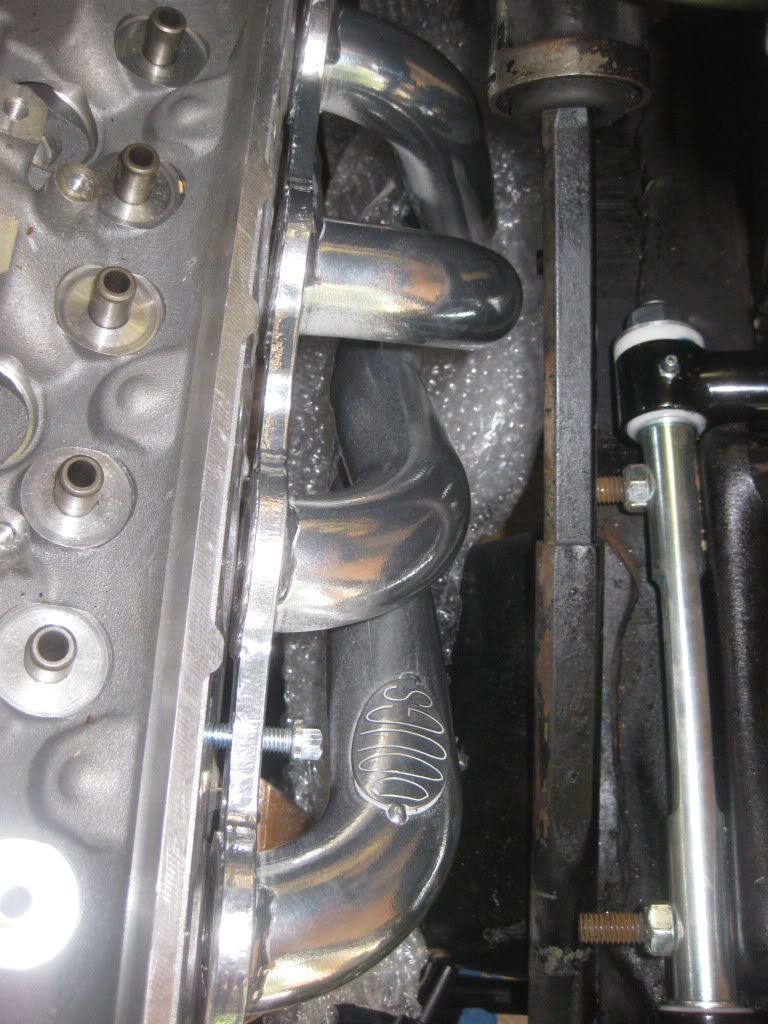
After cleaning up the mess and changed the bearing we test fit the engine to see how everything lines up. Used the tall and narrow engine stands, the Dougs headers adapter plates, and Holley oil pan. Everything fit perfect and I have no contact issues with the tierods and the oil pan from lock to lock!
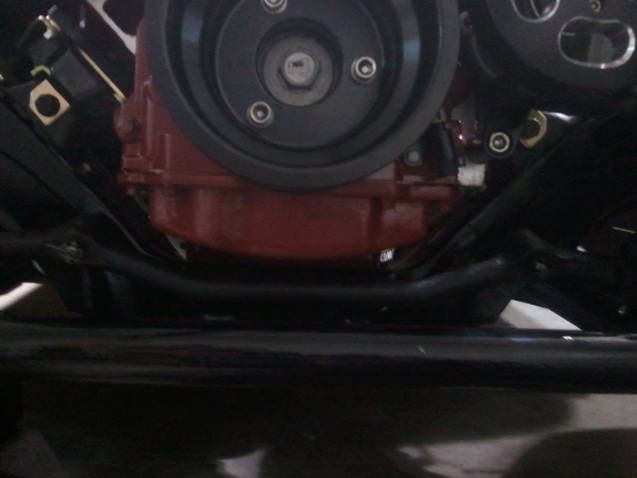
Tomorrow I think I am going to move the adapter plates mounting position in the inch forward position and then I am going to slot the frame stands holes to move them back a half inch. This should move my engine a half inch forward total from its current location. This will give me just enough clearance from the power steering pump/ steering box clearance, and a little more wiggle room between the firewall. If I did not mention it before, I have a rebuilt Grand Cherokee steering box.
After cleaning up the mess and changed the bearing we test fit the engine to see how everything lines up. Used the tall and narrow engine stands, the Dougs headers adapter plates, and Holley oil pan. Everything fit perfect and I have no contact issues with the tierods and the oil pan from lock to lock!
Tomorrow I think I am going to move the adapter plates mounting position in the inch forward position and then I am going to slot the frame stands holes to move them back a half inch. This should move my engine a half inch forward total from its current location. This will give me just enough clearance from the power steering pump/ steering box clearance, and a little more wiggle room between the firewall. If I did not mention it before, I have a rebuilt Grand Cherokee steering box.
09-05-2012 | 11:43 PM
#38
Thread Starter
On The Tree
Joined: Nov 2011
Posts: 159
Likes: 0
From: South east Wisconsin
I currently dont have the build sheet, but the engine has ported ls3 heads, 10.8 to 1 comp, 617 lift on the intake side of the cam. Love the hp numbers and it makes at least 500lb/ft fom 4000-7000.
