
Beginners build on a 72 Nova

 12-20-2012, 12:53 PM
#22
On The Tree
Join Date: Sep 2010
Location: San Luis Obispo CA
Posts: 155
Likes: 0
Received 0 Likes
on
0 Posts
 thanks
12-20-2012, 04:14 PM
thanks
12-20-2012, 04:14 PM
#25
Teching In

Join Date: Nov 2011
Location: Elkhart Lake, WI
Posts: 6
Likes: 0
Received 0 Likes
on
0 Posts
this sounds stupid i know, but when do you think chevy, or anyone by that matter, will go back and create a system of hybrid that you could retrofit older cars with. kind of the opposite of muscle i guess, but still....
12-20-2012, 05:43 PM
#26
Teching In
Thread Starter

Join Date: Dec 2012
Posts: 34
Likes: 0
Received 0 Likes
on
0 Posts
this sounds stupid i know, but when do you think chevy, or anyone by that matter, will go back and create a system of hybrid that you could retrofit older cars with. kind of the opposite of muscle i guess, but still....
 07-31-2013, 12:04 PM
#28
Teching In
Thread Starter
Join Date: Dec 2012
Posts: 34
Likes: 0
Received 0 Likes
on
0 Posts
Hey, I know ive been neglecting this thread. Sorry, New baby and furloughs has the money tied up, But... i have made alot of headway, so tonight after work and honey doo's ill update the thread.

 08-02-2013, 11:15 AM
#31
Teching In
Thread Starter
Join Date: Dec 2012
Posts: 34
Likes: 0
Received 0 Likes
on
0 Posts
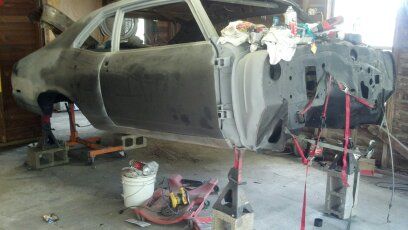
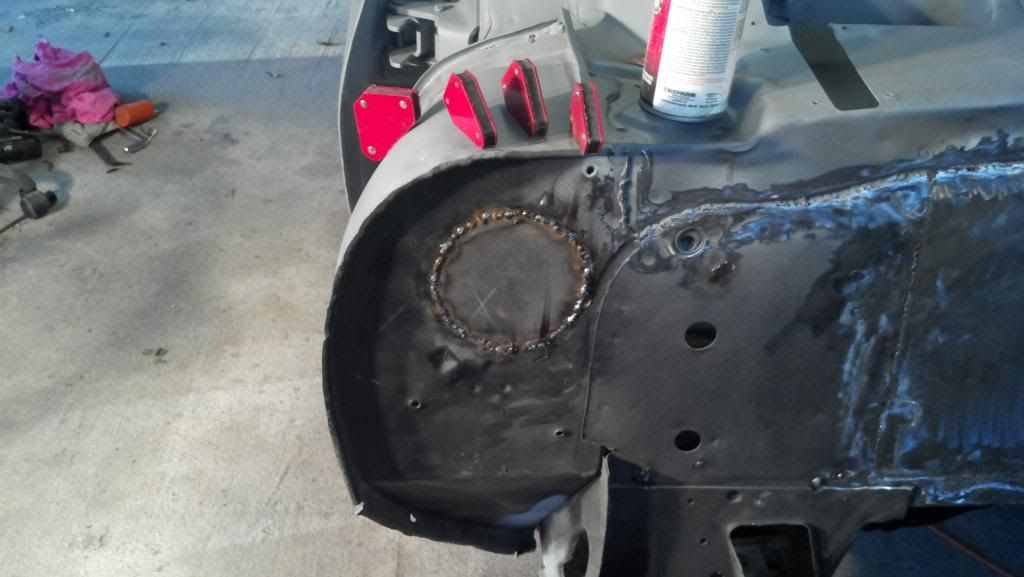
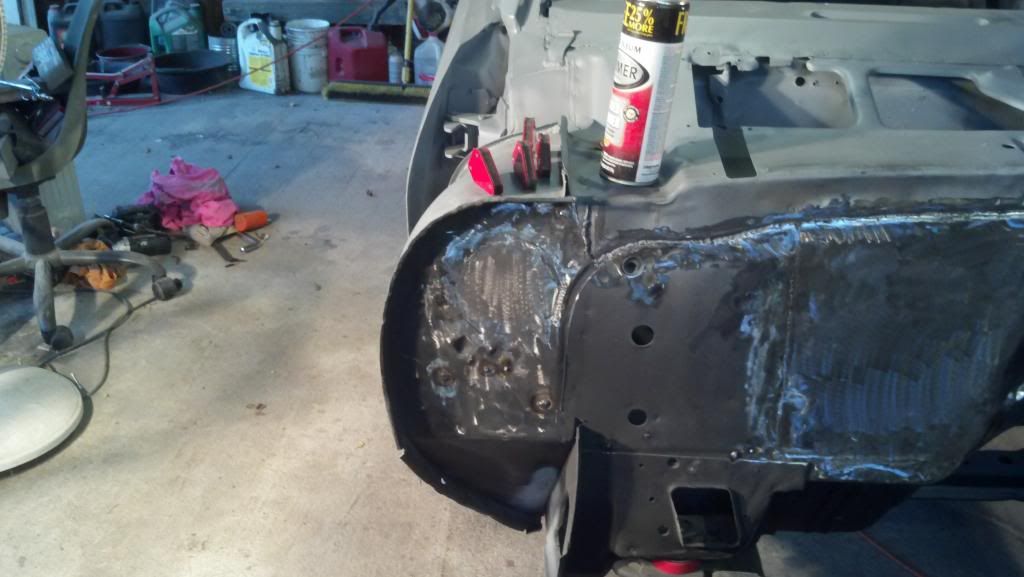
Hey all. Got a lot of things done on the nova over the past few months. I had a little time on my hands today and thought id post up some photo's.
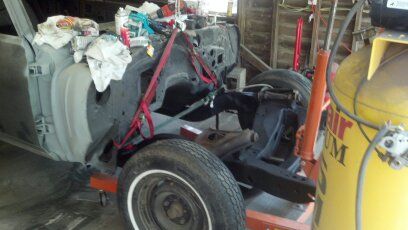
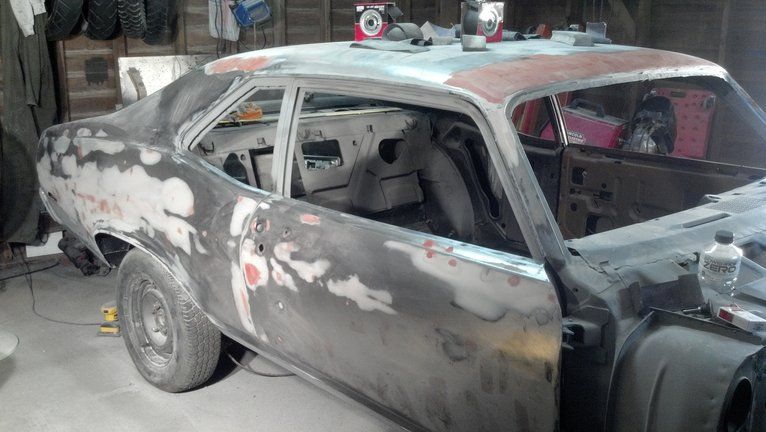
OK so after getting the fenders fixed up, it was time to move onto to another part. So out comes the subframe. I didnt get any pics of pulling out, kinda difficult by yourself.lol
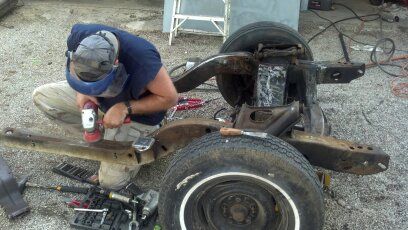
After removing the subframe i went ahead and put the nova in the air to gain access to the under side for some cleaning and painting. And no i wasnt under it like it was. I had the cherry picker holding up the front and had the rear strapped to the engine stand.
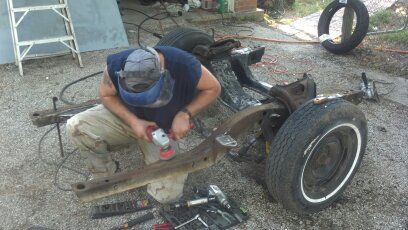
My buddy came by to help. so I let him have at it with the wire wheel. He did a great job, and it gave me the oppotunity to make the patterns for the new subframe mount pads.
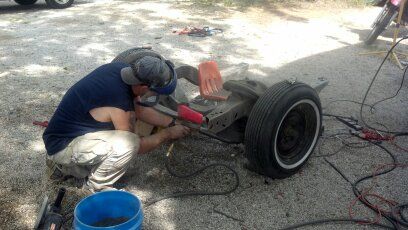
After all the sanding and blasting, we gave it a coat of undercoating. then added the new subframe bushings. I think it looks pretty good. I didnt do anything with the A arms yet. not sure if im going aftermarket or originals.

And here it is back under the car and lined up. I was real lucky that the subrame was real close and i didnt have to fiddle with it gettting it close. After all the measuring and cross measuring i went ahead and tightend it down.
Some how i must have misplaced the pics that had me making the subframe mounts. If i find them ill repost them.
I have more pics that im fixing to upload as well.
OK so after getting the fenders fixed up, it was time to move onto to another part. So out comes the subframe. I didnt get any pics of pulling out, kinda difficult by yourself.lol
After removing the subframe i went ahead and put the nova in the air to gain access to the under side for some cleaning and painting. And no i wasnt under it like it was. I had the cherry picker holding up the front and had the rear strapped to the engine stand.
My buddy came by to help. so I let him have at it with the wire wheel. He did a great job, and it gave me the oppotunity to make the patterns for the new subframe mount pads.
After all the sanding and blasting, we gave it a coat of undercoating. then added the new subframe bushings. I think it looks pretty good. I didnt do anything with the A arms yet. not sure if im going aftermarket or originals.
And here it is back under the car and lined up. I was real lucky that the subrame was real close and i didnt have to fiddle with it gettting it close. After all the measuring and cross measuring i went ahead and tightend it down.
Some how i must have misplaced the pics that had me making the subframe mounts. If i find them ill repost them.
I have more pics that im fixing to upload as well.
08-02-2013, 12:00 PM
#32
Teching In
Thread Starter
Join Date: Dec 2012
Posts: 34
Likes: 0
Received 0 Likes
on
0 Posts
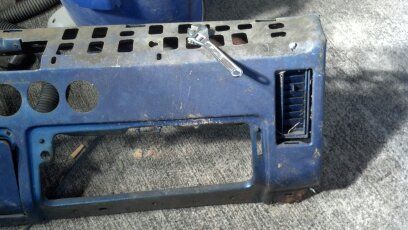
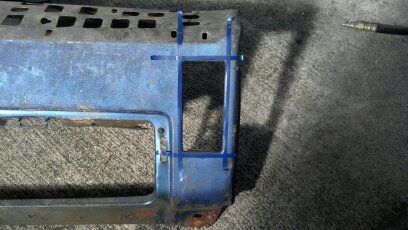
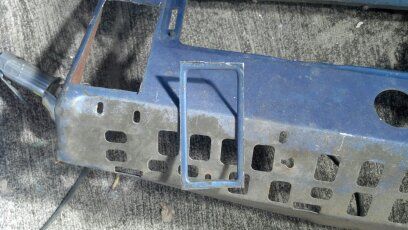
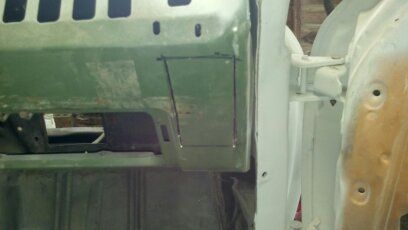
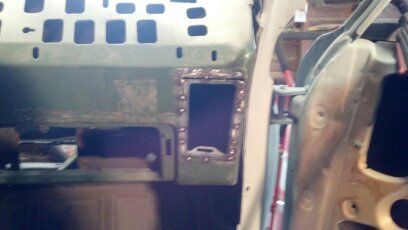
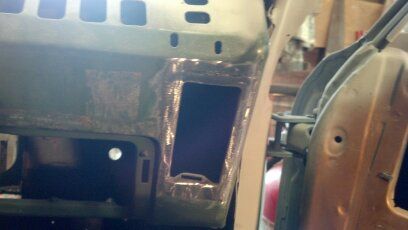
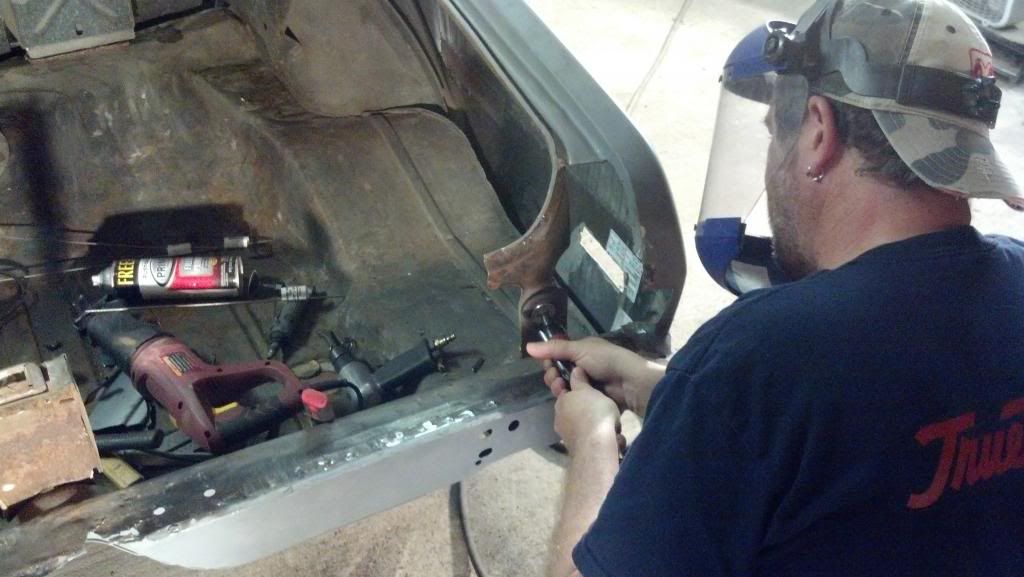
Ok, so remember when i said i was working on the dash? This is what i was doing. If you remember i cutout the old dash because it had holes cut in it and everything. so it was junk. I used the dash out of the 4 door. The only down side is that it didnt have factoy air, so i was missing the vent on the pass side by the glove box.
First i took measurements to get the lines square. then i laid out some tape to double check everything and reconfirm my measurements. Laid out some lines with the marker and began cutting with the air grinder. After getting the piece that i needed out of the old dash i used it as a template for the new dash. Basic same thing, cut out the blank and clean up the edges. I then used magnets to hold it in place while i centerd it up and tack welded it in place. I then spot welded my way around and kept it cool with compressed air to avoid warpage. After all the weld were ground down with 60 grit da disc. All thats left is a skim coat of filler and ready she is.

Ill try to get some more pics up soon. i still have lots going on. stay tuned in.
First i took measurements to get the lines square. then i laid out some tape to double check everything and reconfirm my measurements. Laid out some lines with the marker and began cutting with the air grinder. After getting the piece that i needed out of the old dash i used it as a template for the new dash. Basic same thing, cut out the blank and clean up the edges. I then used magnets to hold it in place while i centerd it up and tack welded it in place. I then spot welded my way around and kept it cool with compressed air to avoid warpage. After all the weld were ground down with 60 grit da disc. All thats left is a skim coat of filler and ready she is.
Ill try to get some more pics up soon. i still have lots going on. stay tuned in.
08-02-2013, 12:33 PM
#33
Teching In
Thread Starter
Join Date: Dec 2012
Posts: 34
Likes: 0
Received 0 Likes
on
0 Posts
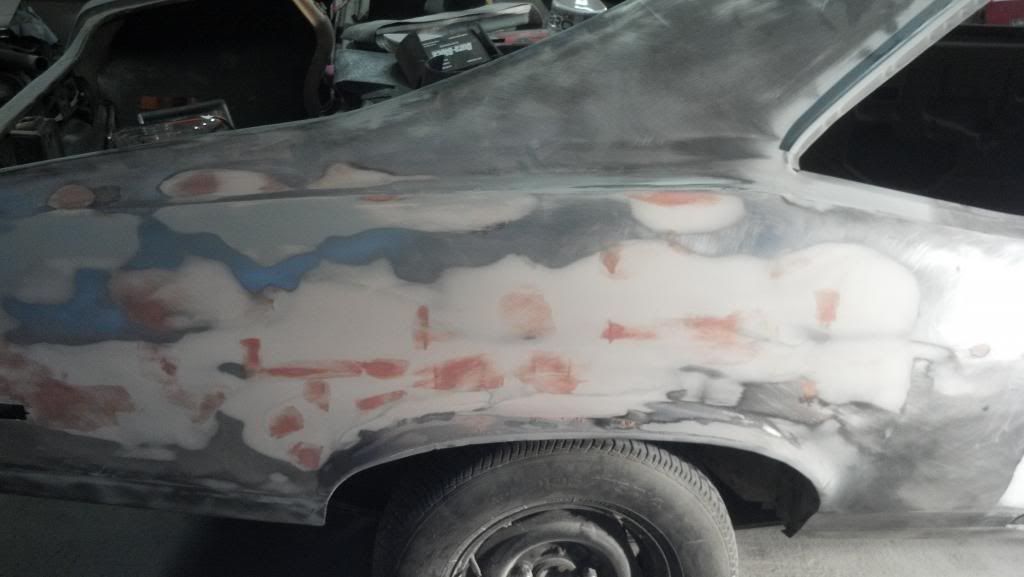
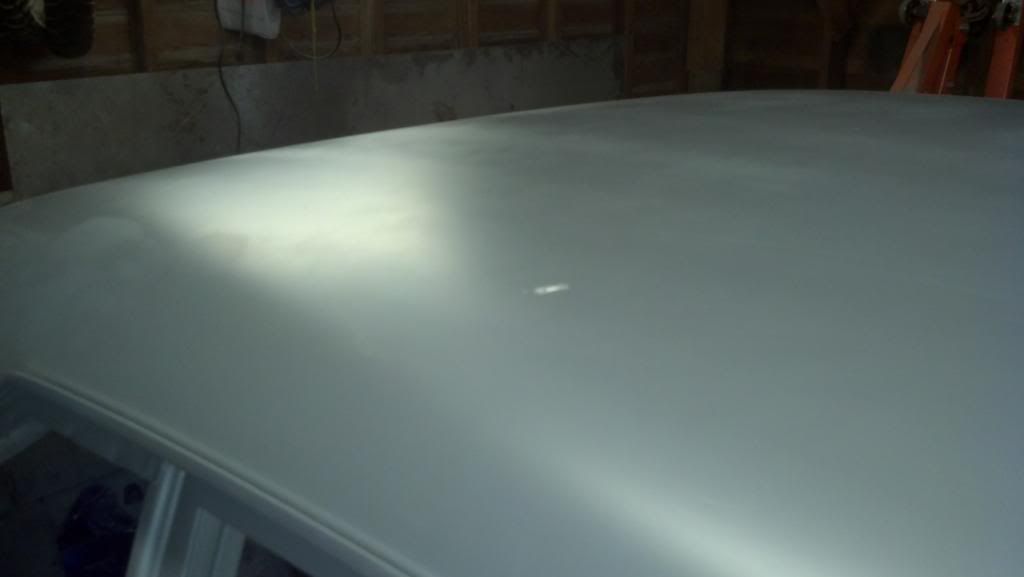
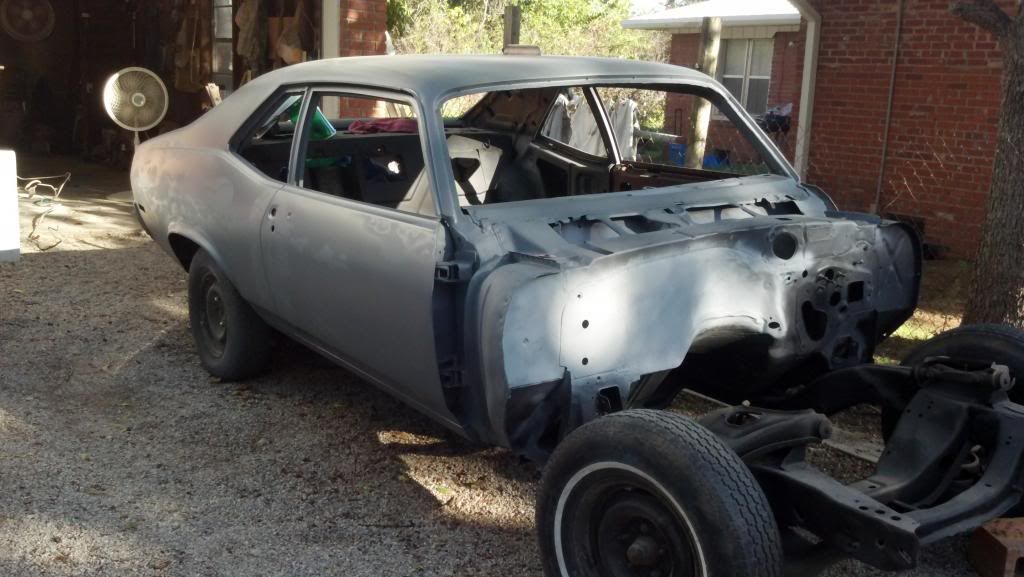
Had a little bit of time to work on the car and decided I needed to get some sealer on the car. It took me a little extra work on the area where I welded the roof. I don't think it turned out to bad for my first time, A lil tiger stripping. At least it wont rust.
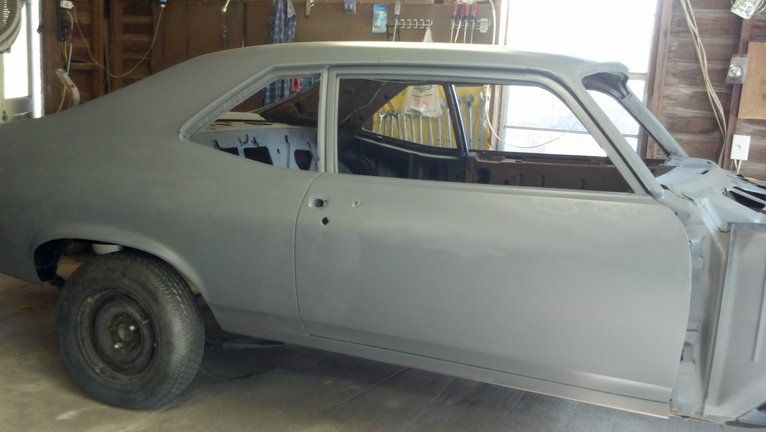
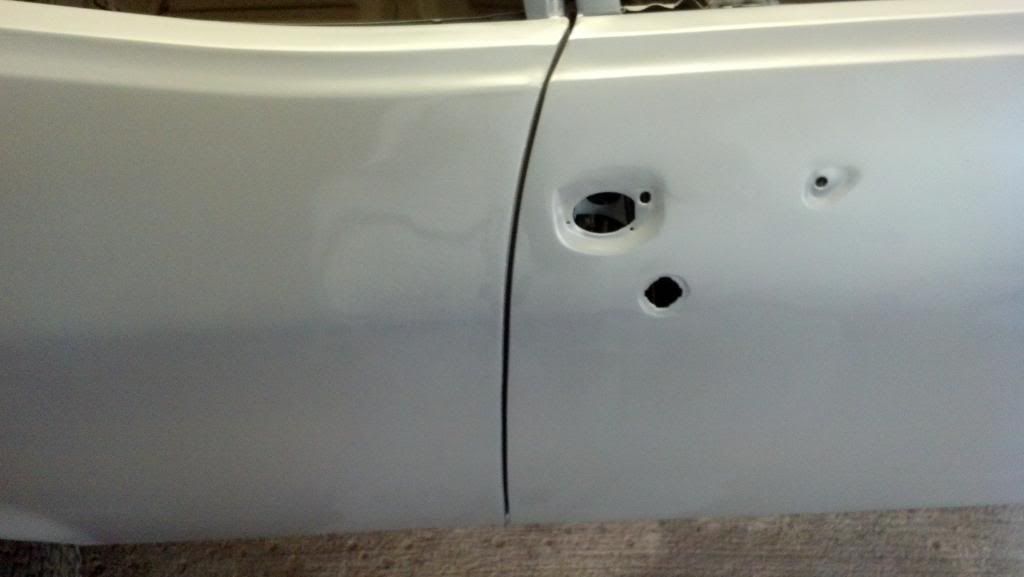
Look at that door gap. Not to bad I don't think.
Next up is the firewall.


Look at that door gap. Not to bad I don't think.
Next up is the firewall.
08-02-2013, 12:58 PM
#34
Teching In
Thread Starter
Join Date: Dec 2012
Posts: 34
Likes: 0
Received 0 Likes
on
0 Posts
So i cut out the bent up area around the heat core spot and used the angle grinder to cut out a patch peice for the big hole and the fan hole. I took my time getting it lined up as i didnt want to have to do alot of grinidng . I havent dont any finising work on the firewall yet. Waiting till i get the engine bay done first. so for now, just a lil primer.
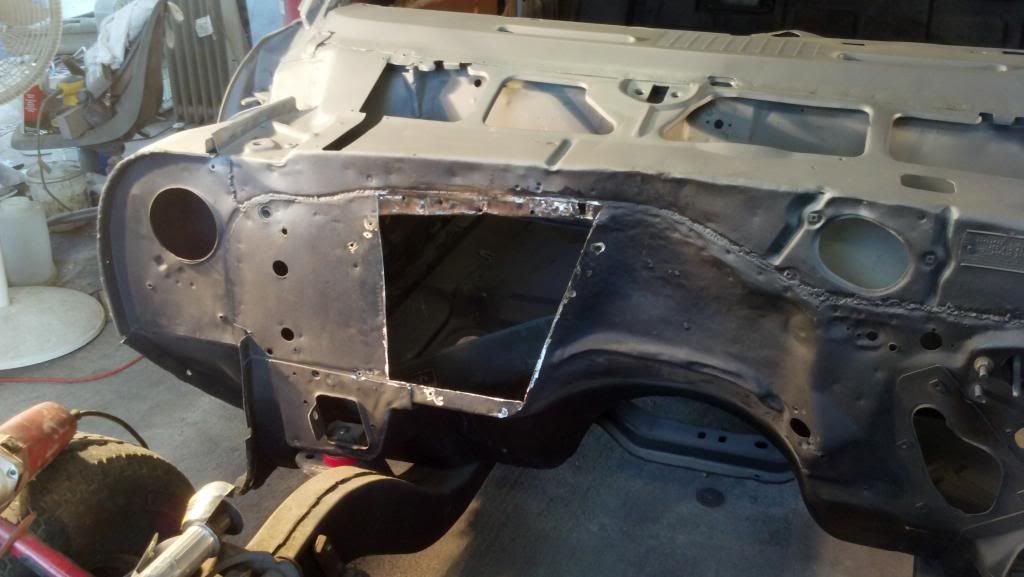
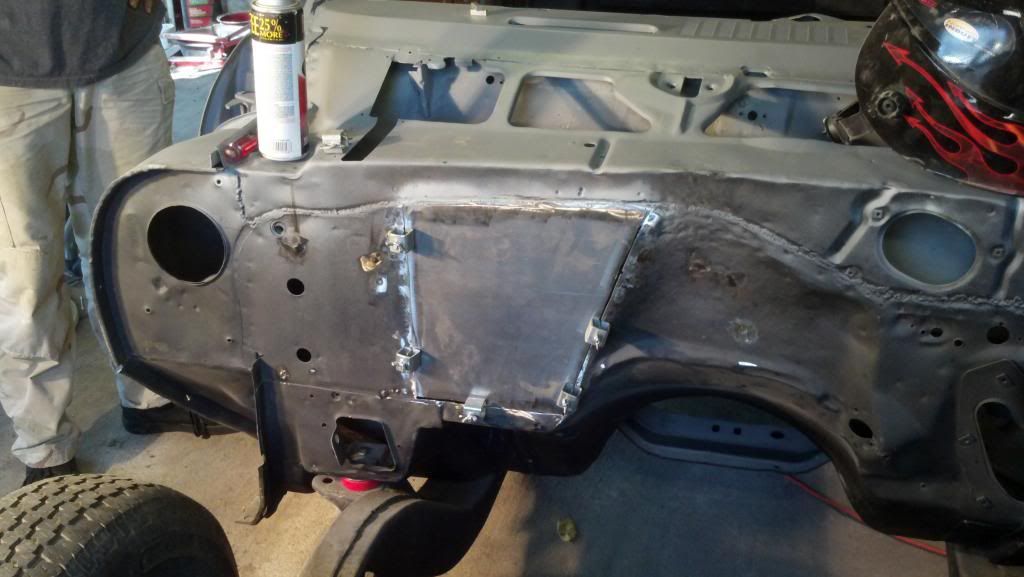
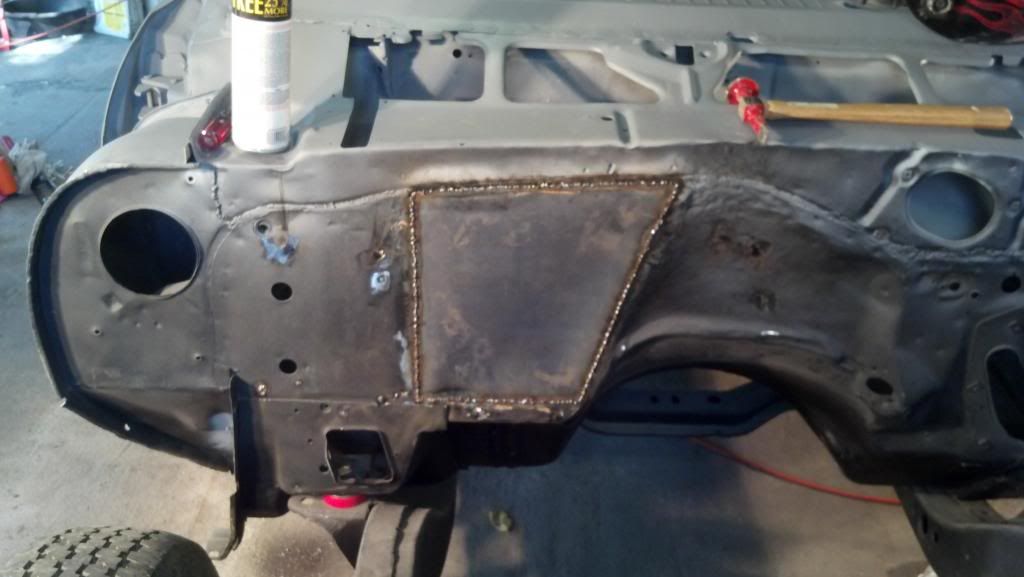
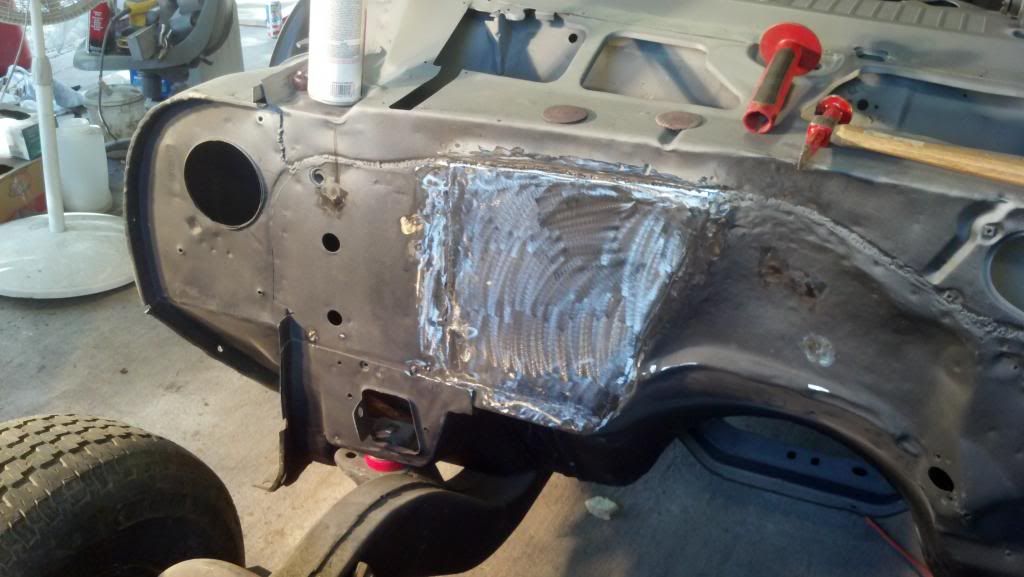
Next up is the wheelwell.


Next up is the wheelwell.
08-02-2013, 01:22 PM
#35
Teching In
Thread Starter
Join Date: Dec 2012
Posts: 34
Likes: 0
Received 0 Likes
on
0 Posts
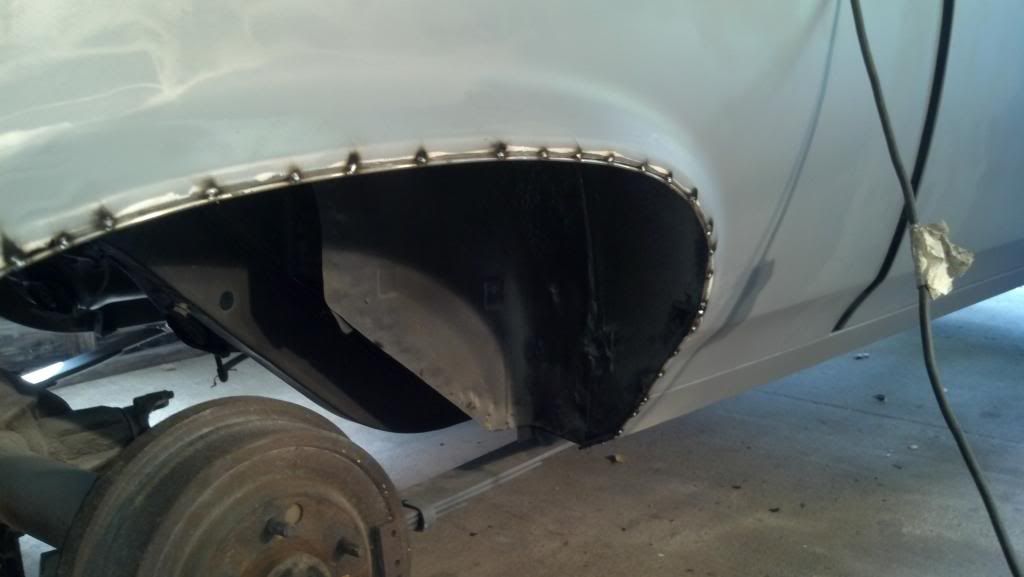
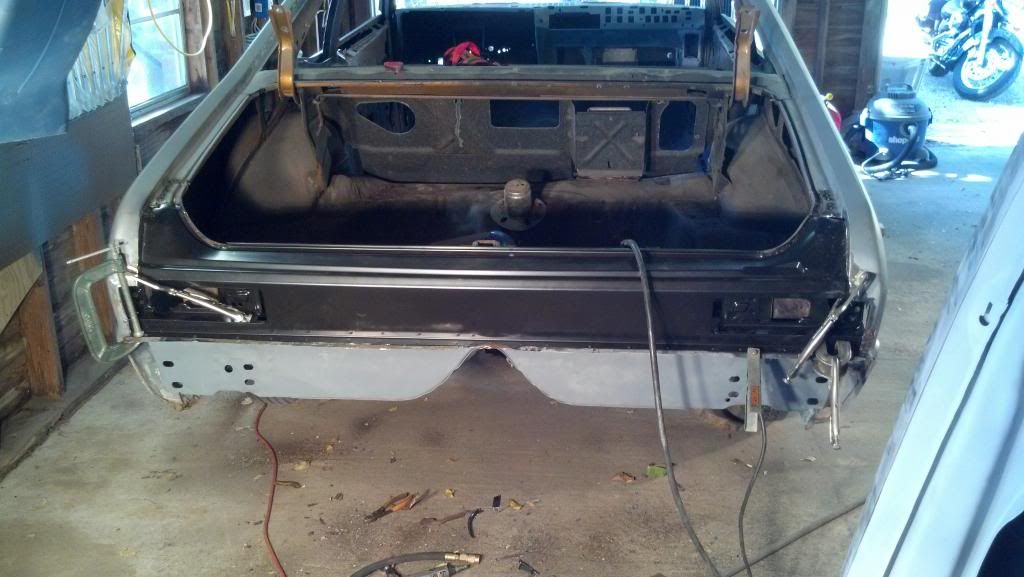
Ok so i wanted to make sure i wasnt going to cut a tire in the rear, so i cut out the inner spot welded peice and welded in the round bar. I started in the middle and used my thumbs to slowly put a curve in it. I would do a tack and then a lil bend, and so on. The trick on this is to go slow and pre plan your next bend . I think the rod is 3/16th's. I cant find the finished pic of it, but it made everything smooth on the inside and cleened it up real nice. Kinda makes it look a lil wider.
I know i did alot of work on the tail panel, but after doing some filler work, i noticed that the panel was warped pretty bad and wasnt going to work, so i saved a bit and bought a new one. It didnt take me long to get the old one out and cleaned up, then welded the new one back in. It took some time, but lots of clamps is the way to do it. Again, to humid to do body work, so i just sprayed a bit more primer for now.
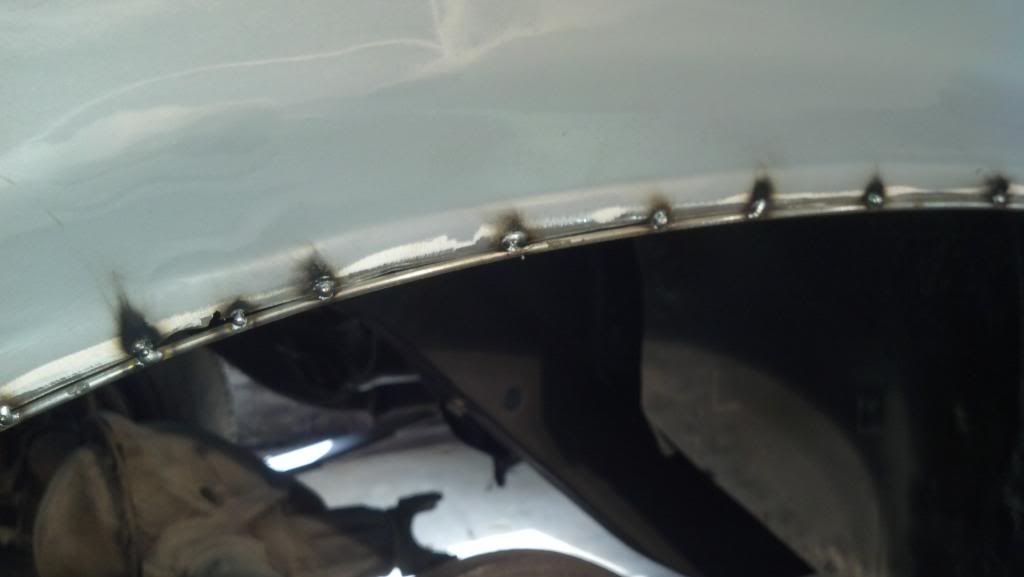

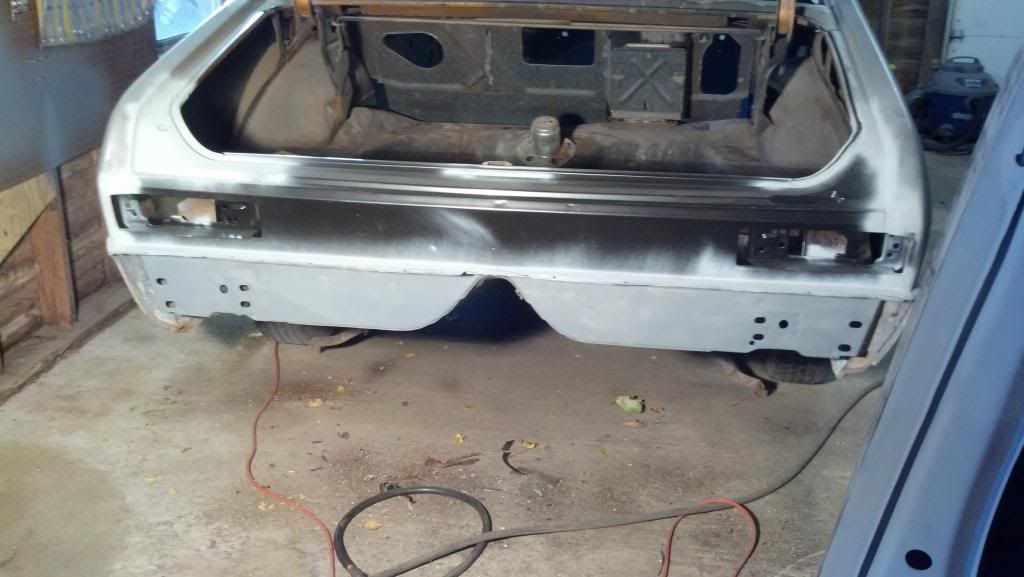
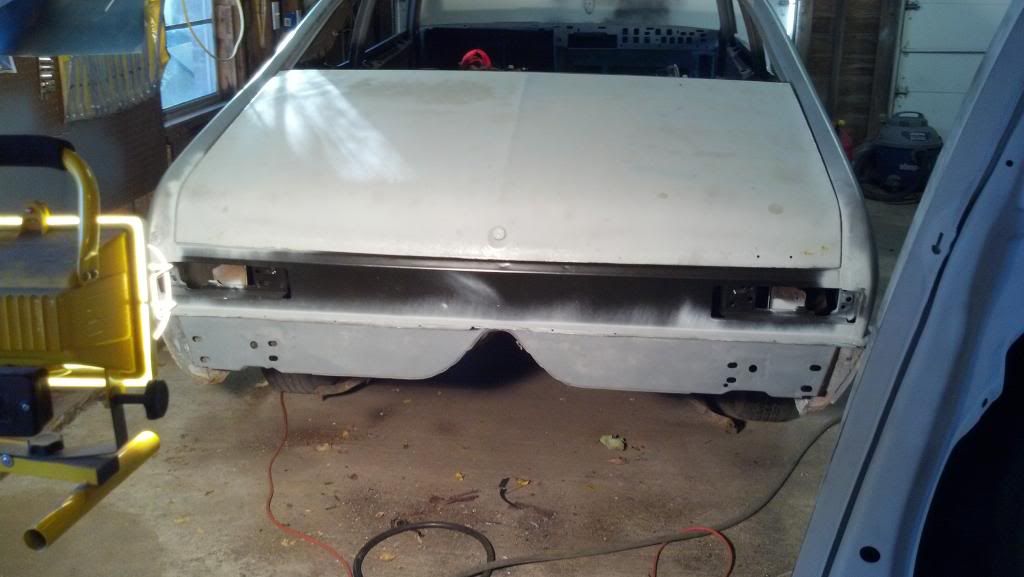
With the trunk on, i think it turned out pretty nice.
I know i did alot of work on the tail panel, but after doing some filler work, i noticed that the panel was warped pretty bad and wasnt going to work, so i saved a bit and bought a new one. It didnt take me long to get the old one out and cleaned up, then welded the new one back in. It took some time, but lots of clamps is the way to do it. Again, to humid to do body work, so i just sprayed a bit more primer for now.


With the trunk on, i think it turned out pretty nice.

 08-02-2013, 02:42 PM
#37
I hate to see an original AC firewall blocked off, but I understand. I assume you're going to use Vintage air or similar since you added the AC vent back in on the passenger side? Why are you keeping the holes for the heater core since you have everything else blocked off?
Enormous amount of work you're doing. Kudos!
Are you using the engine & trans out of the donor truck? What are they?
Enormous amount of work you're doing. Kudos!
Are you using the engine & trans out of the donor truck? What are they?
08-02-2013, 04:06 PM
#38
Teching In
Thread Starter
Join Date: Dec 2012
Posts: 34
Likes: 0
Received 0 Likes
on
0 Posts
Hi. Thanks for the compliments. I thought about what to do with the firewall for a while I decided that I wanted a cleaner engine bay and decided on vintage air. I think that should work pretty good for me. The heater core holes. I just haven't finished them yet. The Silverado is going to be my parts truck. It has the 5.3l and 4l60 in it. I have a lot of plans for a lot off of the truck.