
ls swap into 75 gm a body
 02-28-2013, 06:30 AM
#21
Teching In
Thread Starter

Join Date: Feb 2013
Posts: 41
Likes: 0
Received 0 Likes
on
0 Posts
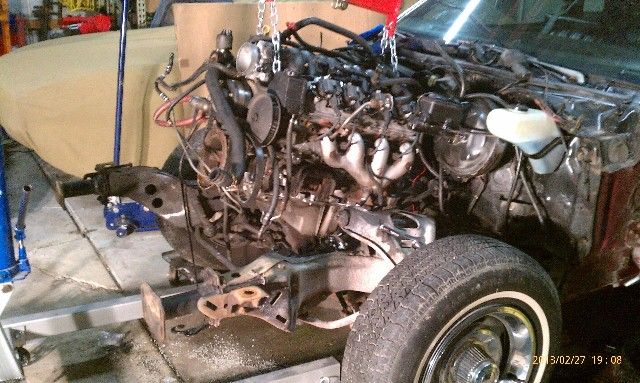
Here is what I got done last night. She is sitting in her new home. Still need to get it slid back a touch and get the trans x member back in but I shoe horned it in there by myself last night. It fought me all the way but finally it popped in.
Last edited by MichiganLarry; 03-17-2013 at 05:31 PM.


 03-03-2013, 06:18 PM
#23
Teching In
Thread Starter
Join Date: Feb 2013
Posts: 41
Likes: 0
Received 0 Likes
on
0 Posts
The front clip is held on by 12 bolts. 5 on each side at the back of the fender. Keep track of what body shims were where. 1 bolt through each side of the radiator support. Remove the tires so you can slide the clip forward and get 4 guys to lift it. My son and I did it by ourselves but its a lot for 2. We almost dropped it!
03-03-2013, 06:33 PM
#24
Teching In
Thread Starter
Join Date: Feb 2013
Posts: 41
Likes: 0
Received 0 Likes
on
0 Posts
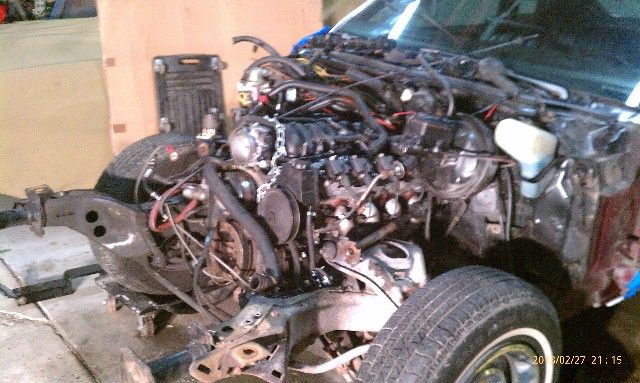
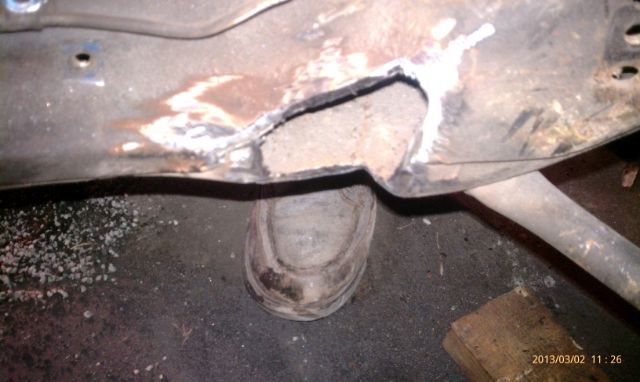
So the other night when I put the engine in it seemed like it went in hard. So I started checking it out yesterday. The oil pan was touching the crossmember on the passenger side so out it came. This is what I found.
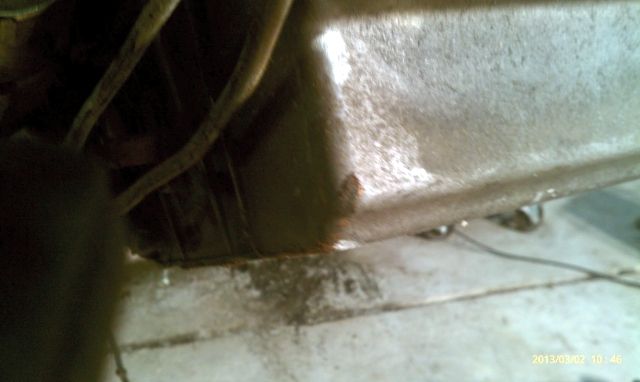
And on the crossmember
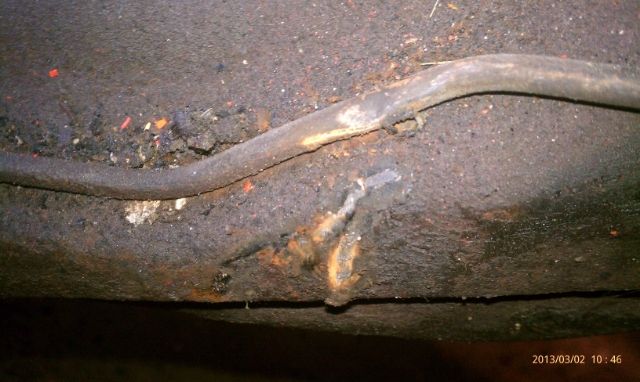
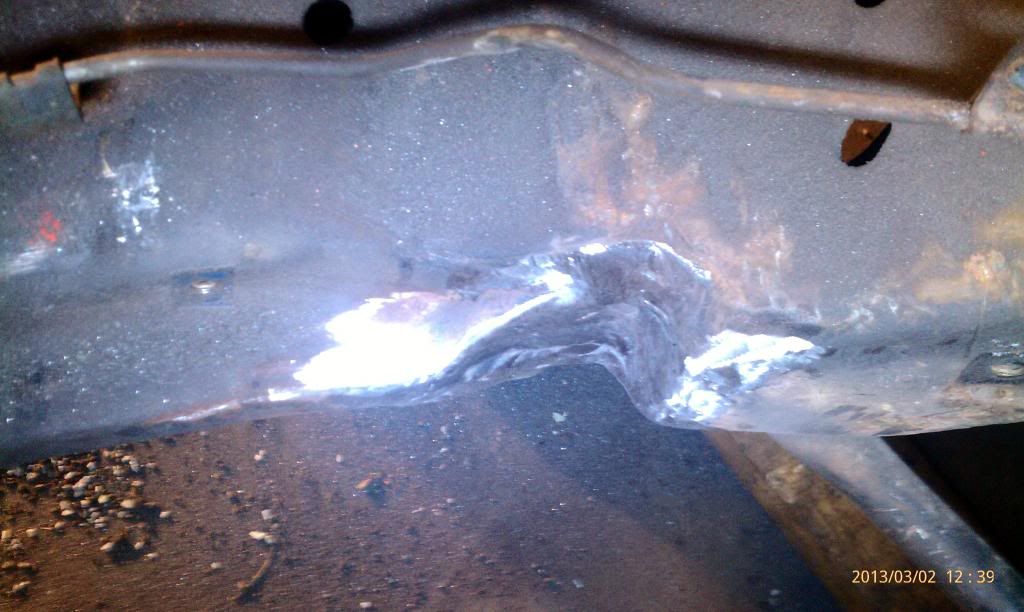
The brake line had to be replaced. The decision was a $200 swap oil pan or notch the crossmember. I figured notching the crossmember would take me a couple hours and a hundred bucks an hour is pretty good pay. So I notched.
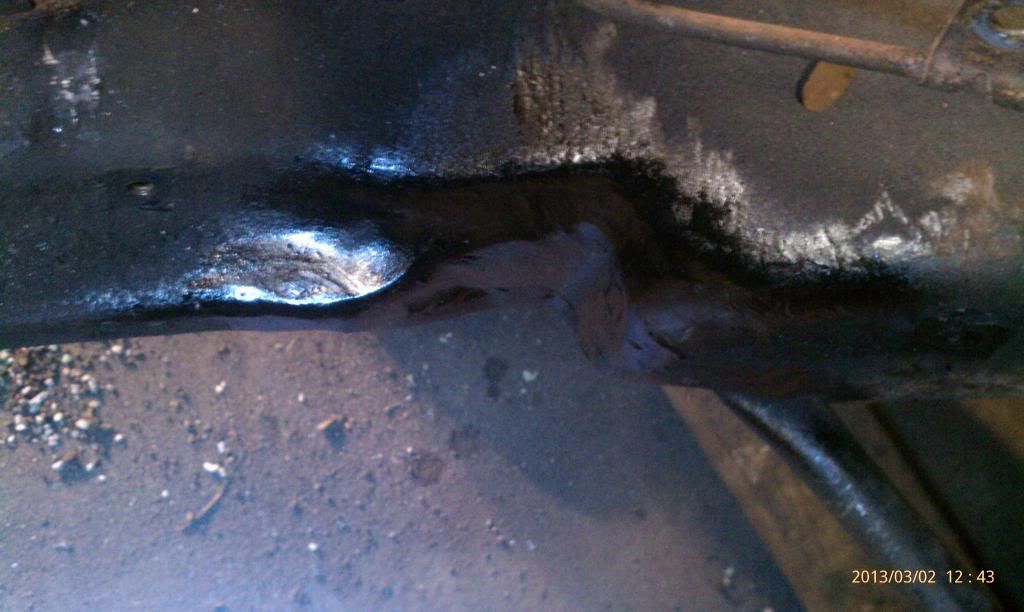
Cut a patch from some flat stock I had laying around. Welded and ground the welds.
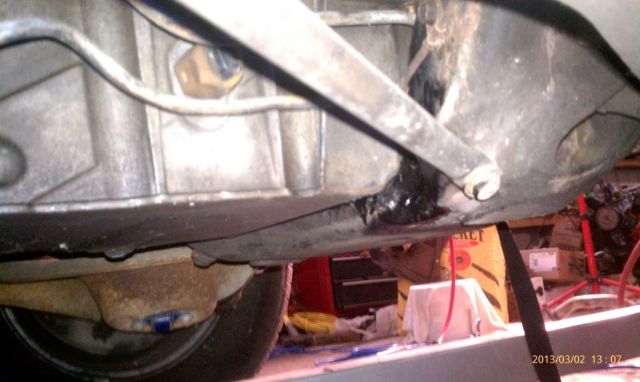
Painted
Reinstalled the engine and trans. Much better.
And on the crossmember
The brake line had to be replaced. The decision was a $200 swap oil pan or notch the crossmember. I figured notching the crossmember would take me a couple hours and a hundred bucks an hour is pretty good pay. So I notched.
Cut a patch from some flat stock I had laying around. Welded and ground the welds.
Painted
Reinstalled the engine and trans. Much better.
Last edited by MichiganLarry; 03-17-2013 at 05:29 PM.
03-03-2013, 06:43 PM
#25
Teching In
Thread Starter
Join Date: Feb 2013
Posts: 41
Likes: 0
Received 0 Likes
on
0 Posts
Today I laid my new harness over the engine to try to figure out where the connectors all went to and where I was going to put the harness through the firewall. Everything looks pretty good except the connectors for the O2 sensors in the harness are flat and the ones on the exhaust I have are square. Also ECT connector is a different shape. Are there different kinds of sensors that would have different connectors? Can I splice in my connectors or should I replace the sensors?
03-03-2013, 07:00 PM
#26
Nice Weld work.. There was another Guy on here doing a Malibu and he had issues in the same area.. Im working on a 77 Cutlass.. I think I will notch mine just to be safe.
Thanks for the front clip info.. I would imagine mine should come off just as easy.. Hopefully
Thanks for the front clip info.. I would imagine mine should come off just as easy.. Hopefully
03-03-2013, 08:33 PM
#27
98 ECT Sensor is 3 wire, 99 and newer ECT are two wire sensors. If you need a different connector give me a call and let me know. Nice notching!
Jon
PSI
Jon
PSI
__________________

Your Source for LSX Conversion Parts!
www.psiconversion.com
Ebay Store
Facebook/psiconversion
Instagram/psiconversion
'Dont Let EFI Pass You By!'
Your Source for LSX Conversion Parts!
www.psiconversion.com
Ebay Store
Facebook/psiconversion
Instagram/psiconversion
'Dont Let EFI Pass You By!'
03-10-2013, 07:40 PM
#29
Teching In
Thread Starter
Join Date: Feb 2013
Posts: 41
Likes: 0
Received 0 Likes
on
0 Posts
It is the stock f-body oil pan. Ater notching the cross member it fits fine. I ended up getting new O2 sensors and welding new bungs into the downpipes. Since my last post I have ordered the holley brackets to raise the alternator and ac compressor. Dropped the driveshaft off to be rebuilt to the correct length. I elected to go with the sanden 508 compressor to eliminate any possible issues with the stock variable unit. Today I pulled the radiator and shroud out of the Chevelle front clip and test fit the radiator from the transam. Realized I didn't have the ac condensor from the transam so I ordered one on Ebay. Also order some ball and socket connectors for the exhaust. Seems like at this point of projects there isn't a lot getting done.
Took the day off yesterday to install a new dishwasher and kitchen faucet. If momma aint happy nobody is happy!
Hopefully this week I will be able to get the ac and alternator mounted, exhaust fabbed up, drive line finished up and start on the wiring. Hopefully..........
Took the day off yesterday to install a new dishwasher and kitchen faucet. If momma aint happy nobody is happy!
Hopefully this week I will be able to get the ac and alternator mounted, exhaust fabbed up, drive line finished up and start on the wiring. Hopefully..........
03-11-2013, 09:58 PM
#30
So Im assuming your also using the stock f-body exhaust after the manifolds.. I may have worded that wrong.. (The exhaust parts that bolt directly to the manifolds) but anyway how did they fit clearance wise?
Any pics?
Any pics?
03-12-2013, 06:36 AM
#31
Teching In
Thread Starter
Join Date: Feb 2013
Posts: 41
Likes: 0
Received 0 Likes
on
0 Posts
The car had a relatively new header back exhaust so I plan on using the down pipes from both manifolds and then welding up some pipes with ball and socket connectors to get into the old exhaust. Probably not the best solution but I cant bring my self to just just the old exhaust and my funding for this project is getting pretty thin. At some point down the road my son can add a nice set of headers and stainless exhaust. I will get some pics when its all done.
03-13-2013, 10:57 AM
#32
Teching In
Thread Starter
Join Date: Feb 2013
Posts: 41
Likes: 0
Received 0 Likes
on
0 Posts
Finally time to update this thread
I got all the egr and air pump stuff off the engine and welded up the manifolds
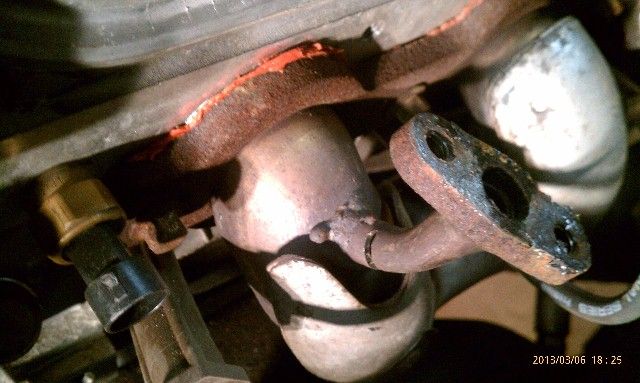
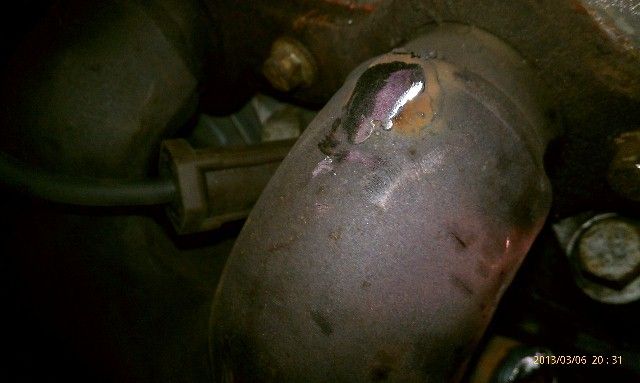
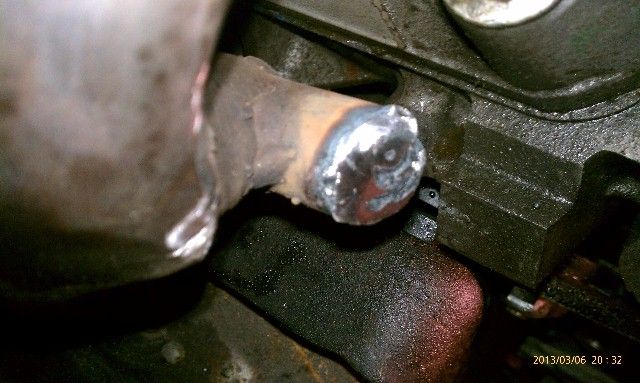
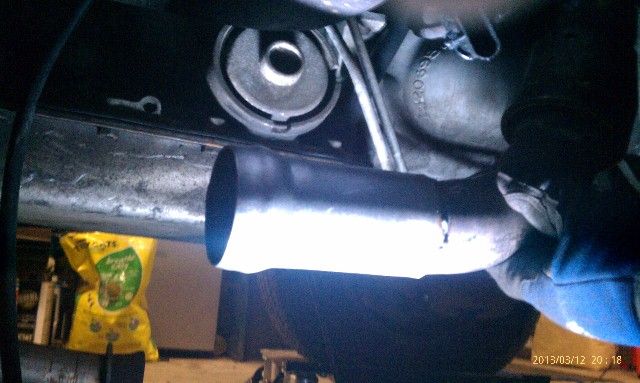
Started on the down pipes. Need to rotate the drivers side and weld in O2 sensor bungs in both sides. Then weld on adaptors for existing exhaust sytem. I am trying not to cut up the exhaust so we can install headers at some point.

finished product

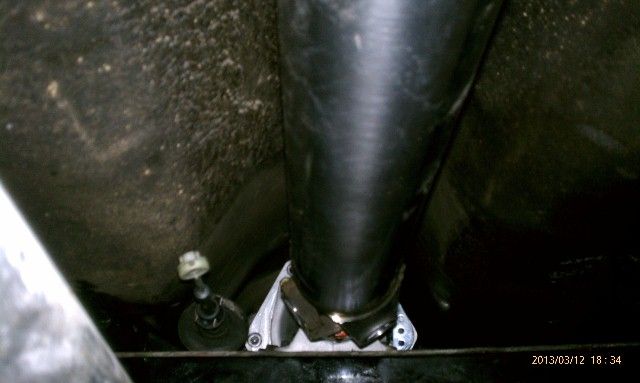
how the passenger side looks in the car
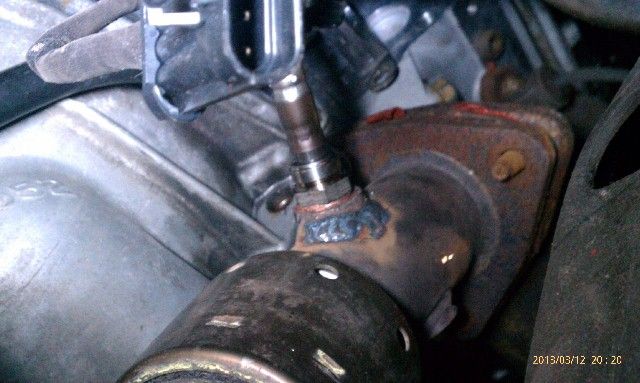
looking up towards the manifold and repositioned O2 sensor
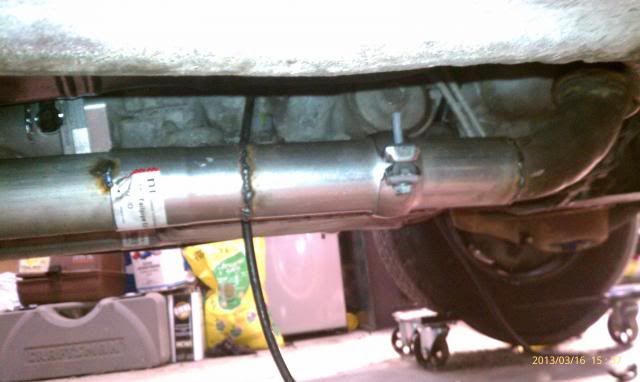
The new drive shaft is installed
Picked up this ls6 engine cover. Need to figure out how to mount it.
Waiting on the Holley alternator and ac bracket. Going to wrap up the exhaust tonight and start on the fuel system. Have an impalal gas tank and internal pump to install.
I got all the egr and air pump stuff off the engine and welded up the manifolds
Started on the down pipes. Need to rotate the drivers side and weld in O2 sensor bungs in both sides. Then weld on adaptors for existing exhaust sytem. I am trying not to cut up the exhaust so we can install headers at some point.
finished product
how the passenger side looks in the car
looking up towards the manifold and repositioned O2 sensor
The new drive shaft is installed
Picked up this ls6 engine cover. Need to figure out how to mount it.
Waiting on the Holley alternator and ac bracket. Going to wrap up the exhaust tonight and start on the fuel system. Have an impalal gas tank and internal pump to install.
Last edited by MichiganLarry; 03-18-2013 at 06:40 AM.
03-17-2013, 05:10 PM
#33
Teching In
Thread Starter
Join Date: Feb 2013
Posts: 41
Likes: 0
Received 0 Likes
on
0 Posts
This weekends work. Started Saturday wrapping up the exhaust. Broke a stud off in the passenger side manifold so almost an hour wasted removing that. Hung the down pipes and then cut and welded pipes to connect to old exhaust system.
Once the exhaust was done I moved on to the gas tank. The old tank came out without to much effort
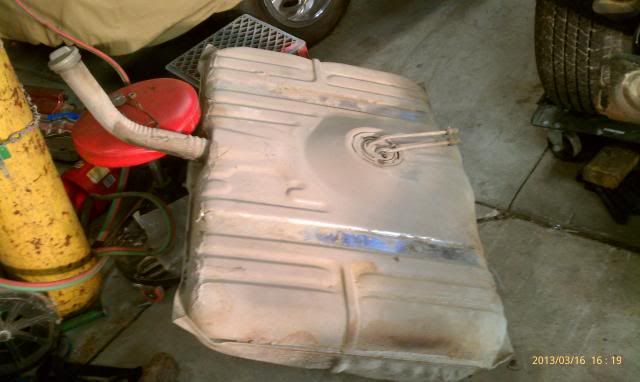
and I starting installing the new fuel pump / sending unit into the 95 caprice tank

I then realized that the junk yard did not include the lock ring with the tank. Grrrrrrr. Done for the night. Found one at Rock Auto and ordered the $6 part that is holding up that part of the project. That is the worst part for me. I hate waiting for parts. This morning I went out and lit the woodstove and came back in the house for coffee for an hour. Laid out the new harness and familiarized myself with the basic layout.
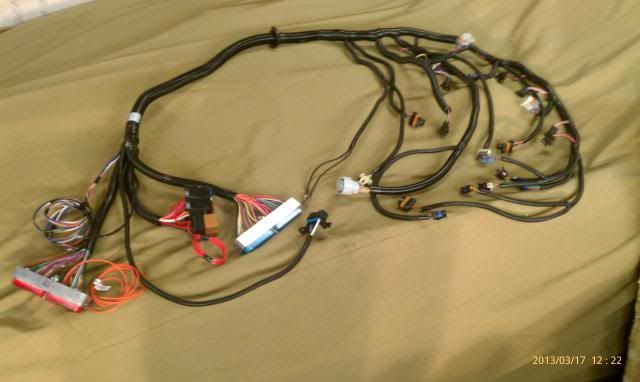
Next I found a good spot for the harness to go through the firewall and cut a 2" hole.
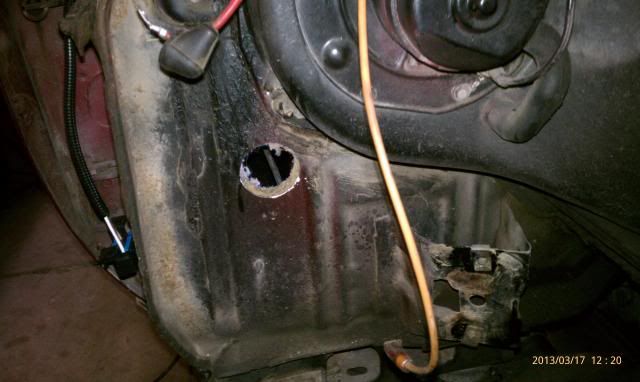
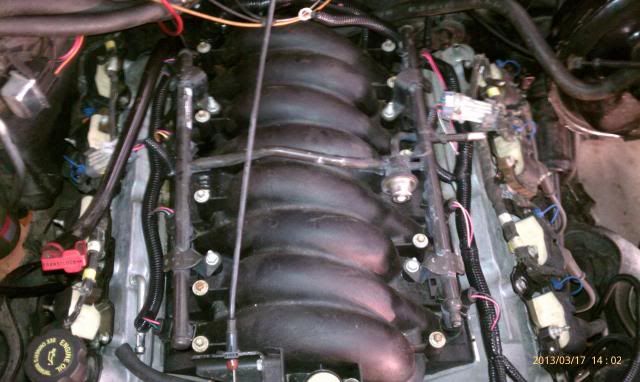
The harness was fed through the hole from the inside and the rubber sealing grommit was installed. Then I fed the harness up behind the passenger side head and layed it on the engine
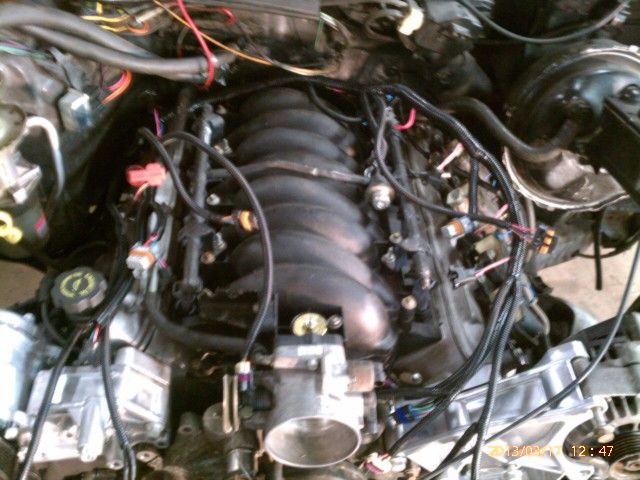
Then I started connecting the harness to the engine.
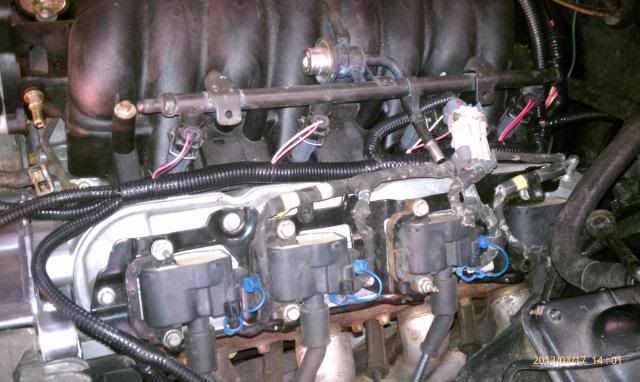
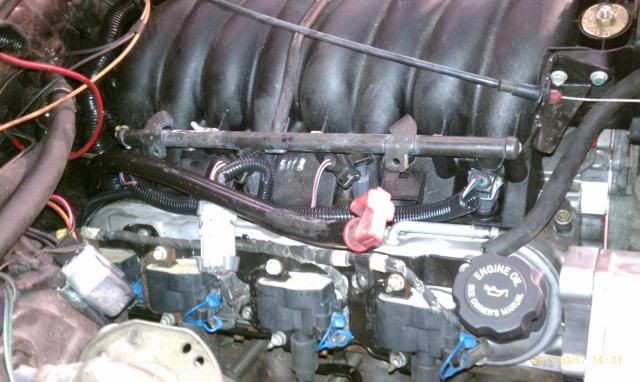
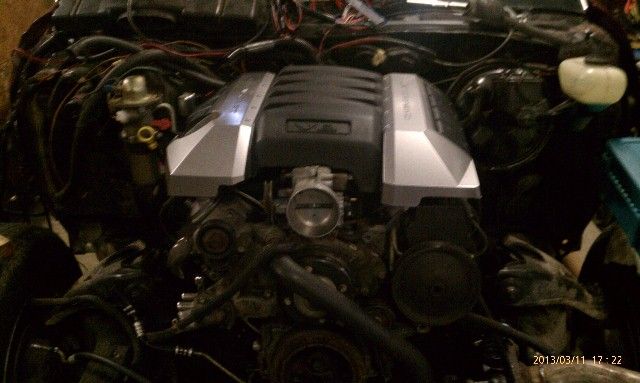
Finished top of engine
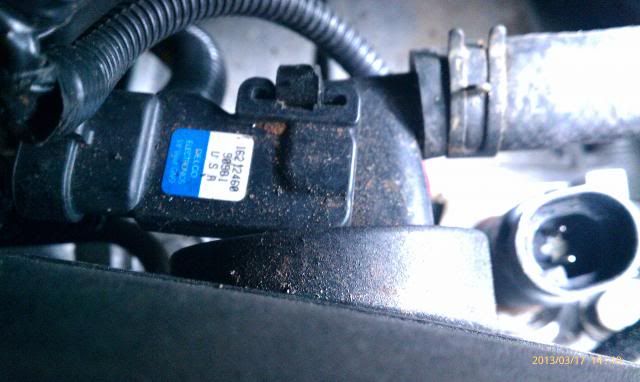
I found this empty connector the 2 pin one on the right. Not sure what its for.
Inside the car I removed the glove box and there is all kind of room above it for the pcm. Should make a nice neat install.
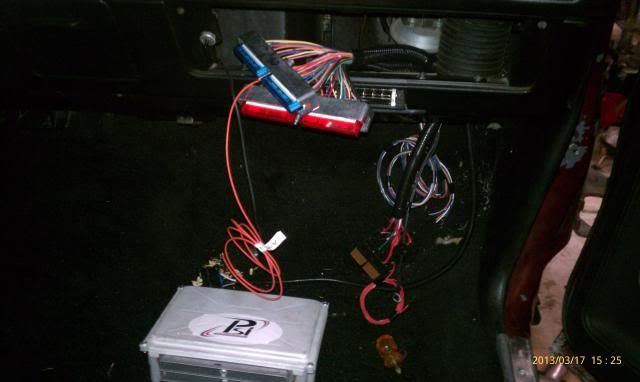
Waiting for parts again now.....
Once the exhaust was done I moved on to the gas tank. The old tank came out without to much effort
and I starting installing the new fuel pump / sending unit into the 95 caprice tank
I then realized that the junk yard did not include the lock ring with the tank. Grrrrrrr. Done for the night. Found one at Rock Auto and ordered the $6 part that is holding up that part of the project. That is the worst part for me. I hate waiting for parts. This morning I went out and lit the woodstove and came back in the house for coffee for an hour. Laid out the new harness and familiarized myself with the basic layout.
Next I found a good spot for the harness to go through the firewall and cut a 2" hole.
The harness was fed through the hole from the inside and the rubber sealing grommit was installed. Then I fed the harness up behind the passenger side head and layed it on the engine
Then I started connecting the harness to the engine.
Finished top of engine
I found this empty connector the 2 pin one on the right. Not sure what its for.
Inside the car I removed the glove box and there is all kind of room above it for the pcm. Should make a nice neat install.
Waiting for parts again now.....
03-17-2013, 09:22 PM
#34
The picture links from the 3/13 arent working Larry. Your doing great I cant wait to see a running video..
Who did you go with for your harness?
What fuel pump are you using?
This is good inspiration for me to get off my @ss and get to work. I have plenty of questions but I will be patient.. lol
Who did you go with for your harness?
What fuel pump are you using?
This is good inspiration for me to get off my @ss and get to work. I have plenty of questions but I will be patient.. lol
03-18-2013, 06:43 AM
#35
Teching In
Thread Starter
Join Date: Feb 2013
Posts: 41
Likes: 0
Received 0 Likes
on
0 Posts
The picture links from the 3/13 arent working Larry. Your doing great I cant wait to see a running video..
Who did you go with for your harness?
What fuel pump are you using?
This is good inspiration for me to get off my @ss and get to work. I have plenty of questions but I will be patient.. lol
Who did you go with for your harness?
What fuel pump are you using?
This is good inspiration for me to get off my @ss and get to work. I have plenty of questions but I will be patient.. lol
I used PSI for the harness. Great people to work with.
I went with a stock replacement for a 95 caprice fi. Needed a new sending unit and found one on Amazon with the fuel pump for less than the sending unit alone. Go figure.
I am hoping to have it running by the end of the month.
03-18-2013, 06:57 AM
#36
Nice work Larry. The connector in the right of that picture if your factory oil pressure connector. If you are using aftermarket gages this will not be used.
Jon
PSI
Jon
PSI
__________________
Your Source for LSX Conversion Parts!
www.psiconversion.com
Ebay Store
Facebook/psiconversion
Instagram/psiconversion
'Dont Let EFI Pass You By!'
Your Source for LSX Conversion Parts!
www.psiconversion.com
Ebay Store
Facebook/psiconversion
Instagram/psiconversion
'Dont Let EFI Pass You By!'
03-28-2013, 10:46 AM
#37
Teching In
Thread Starter
Join Date: Feb 2013
Posts: 41
Likes: 0
Received 0 Likes
on
0 Posts
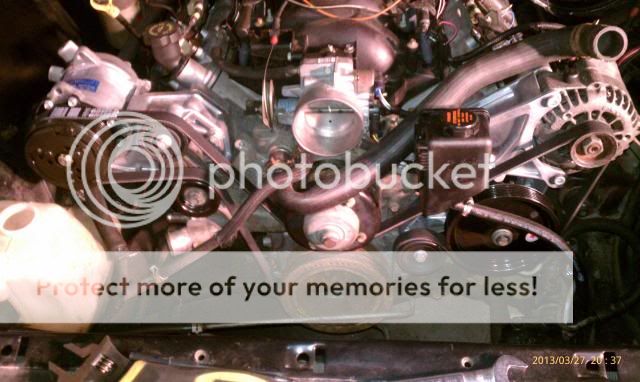
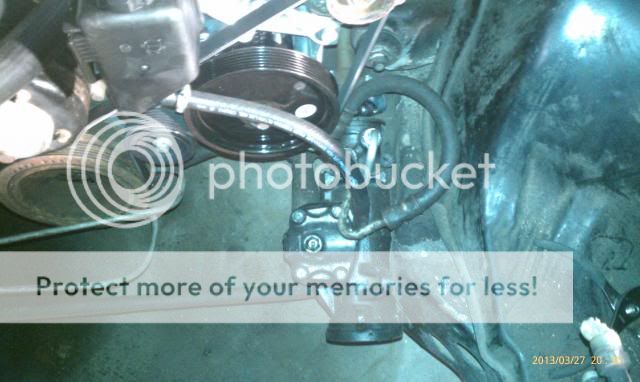
Got out to the garage again last night for a couple hours. Got the Holley relocation brackets and the rest of the front accessory drive installed and wrapped up along with the power steering plumbing. Got the belt right on the first try! Slow but sure wins the race.
04-01-2013, 06:33 AM
#40
Teching In
Thread Starter
Join Date: Feb 2013
Posts: 41
Likes: 0
Received 0 Likes
on
0 Posts
It's running!. Woohoo.
Made the first attempt yesterday and it popped and sputtered then started but was running horribly, popping and sputtering. I shut it down and started rubbing my chin. My scanner showed no major issues so time for a little investigation. The passenger side exhaust manifold was warm to the touch but the entire drivers side was cold. Hmmmmm. When it was running it sounded like a sbc that was 180 degrees off on the timing. I took a shot and flipped the coil harness on the drivers side and turned the key. It started right up and after clearing the extra fuel it settled right down. I do have an pretty good oil leak from the timing cover seal around the crank so tonight I will be changing that out. Need to figure out how to post videos.
Made the first attempt yesterday and it popped and sputtered then started but was running horribly, popping and sputtering. I shut it down and started rubbing my chin. My scanner showed no major issues so time for a little investigation. The passenger side exhaust manifold was warm to the touch but the entire drivers side was cold. Hmmmmm. When it was running it sounded like a sbc that was 180 degrees off on the timing. I took a shot and flipped the coil harness on the drivers side and turned the key. It started right up and after clearing the extra fuel it settled right down. I do have an pretty good oil leak from the timing cover seal around the crank so tonight I will be changing that out. Need to figure out how to post videos.