

1972 el camino ls1 swap
 09-27-2013, 09:28 AM
#41
On The Tree
Thread Starter
iTrader: (3)

Join Date: Sep 2012
Location: Newcastle, Ok
Posts: 113
Likes: 0
Received 0 Likes
on
0 Posts
I like the silver frame paint. A nice change to the black.
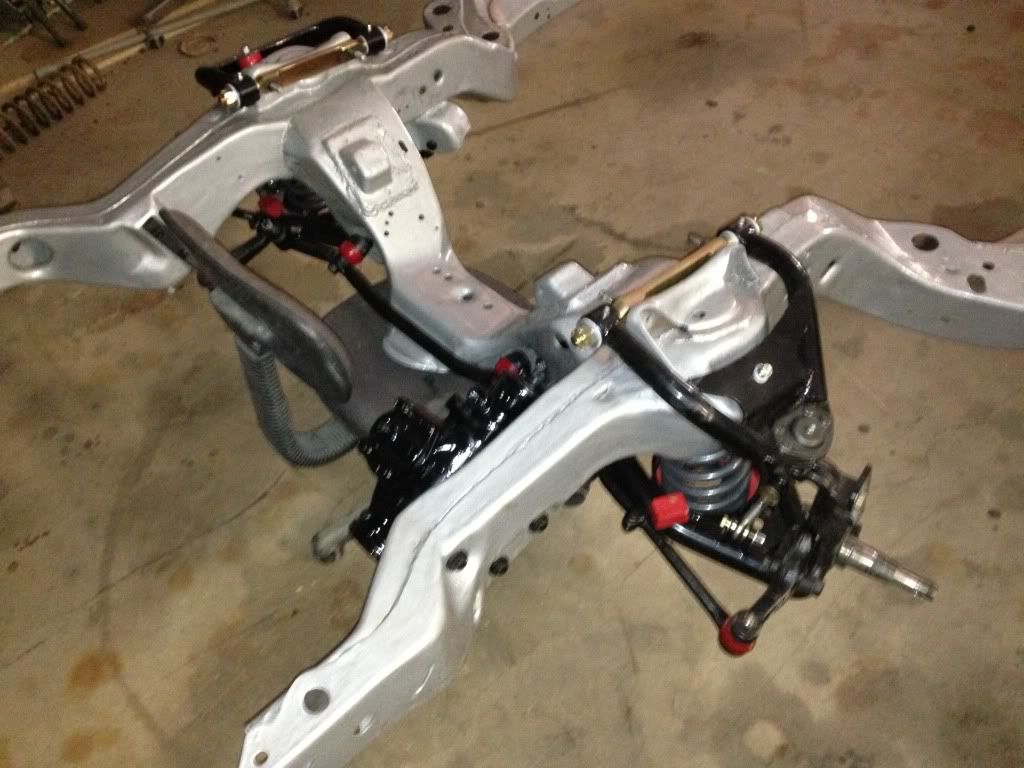
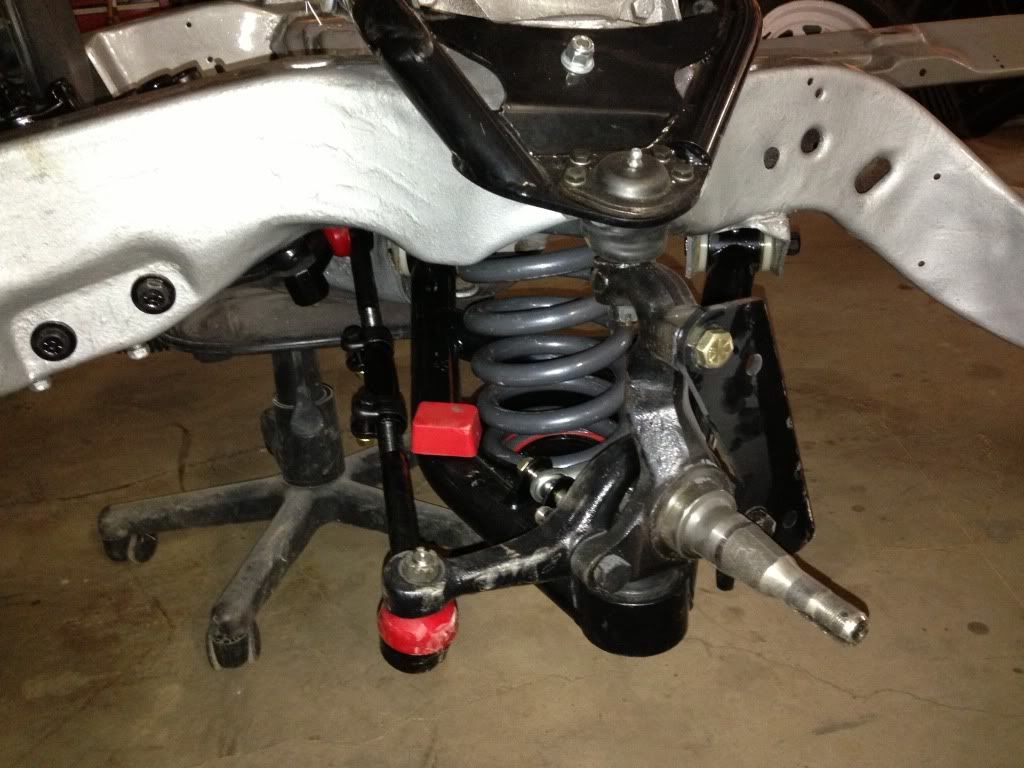
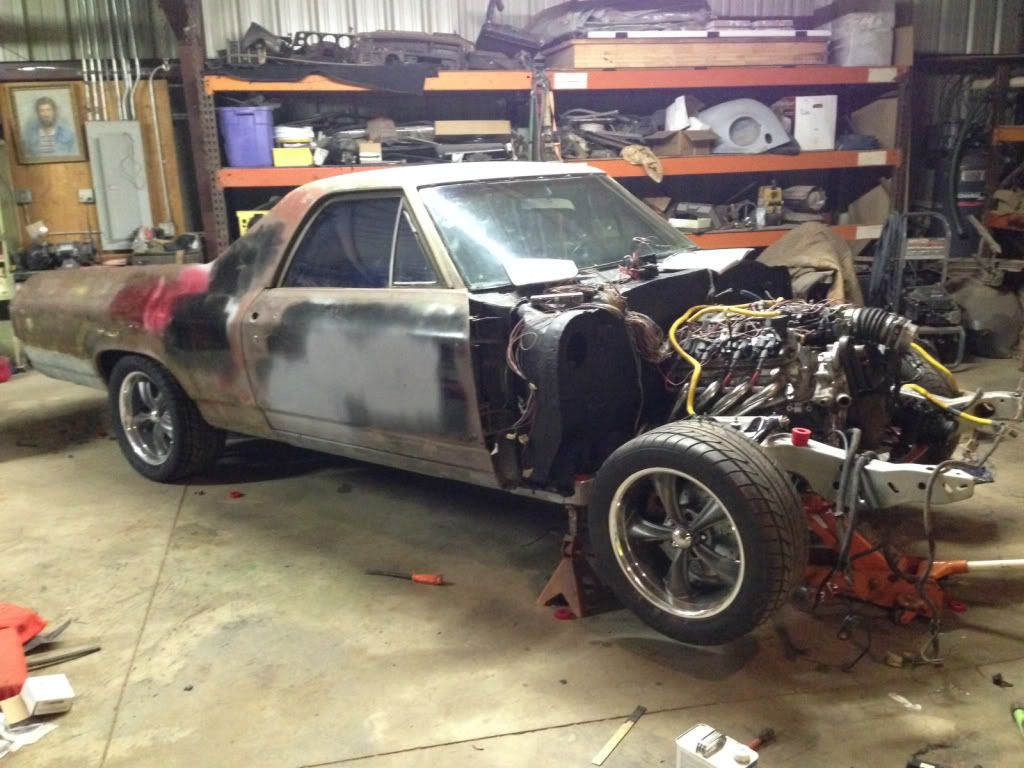
Finished up the front end for the most part now, i would have completely finished it but i broke one of my hubs that were turned down to fit in my fbody brake rotor while i was installing longer wheel studs. So now im waiting on a hub in the mail, then i gotta see if i can talk the guys at oriellys into turning it down in their lathe again. Gonna clean up the motor and tranny today and see if i can get it all back on the frame, also gonna plumb up my brake lines.

Here is a picture of the adaptors that i got from Rich Hoag to adapt my fbody brake calipers. Only $60 shipped, Good quality! Emailed him about them sunday night, i had them tuesday morning! You just gotta grind down the top boss on the spindle and get some bolts. They bolt right up!
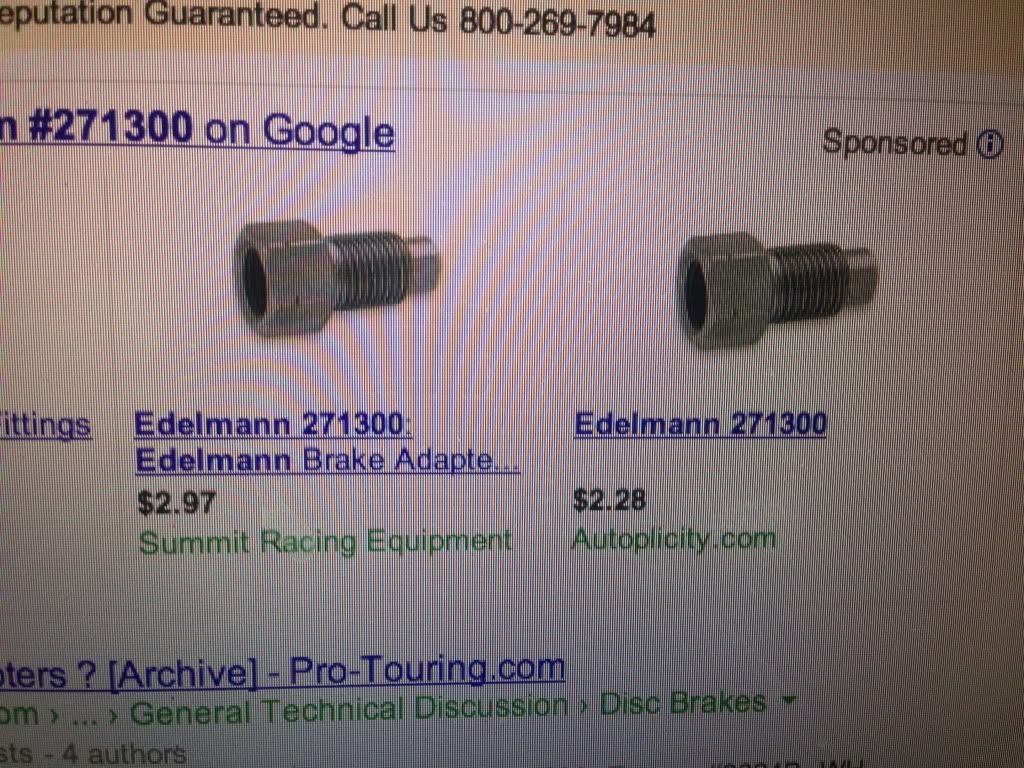
Here are the brake line adapter fittings that go between the 4th gen F-body rubber line, and the el camino hard line. Works on all 4 wheels. Things are moving along relatively quick now! Getting excited about finishing this thing.

 04-16-2014, 12:11 AM
#43
On The Tree
Thread Starter
iTrader: (3)
Join Date: Sep 2012
Location: Newcastle, Ok
Posts: 113
Likes: 0
Received 0 Likes
on
0 Posts
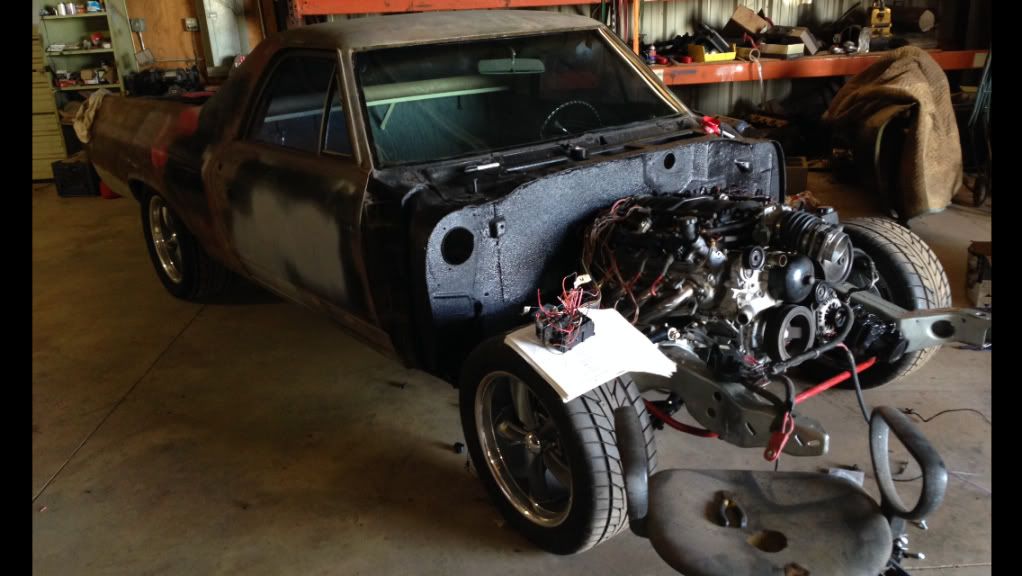
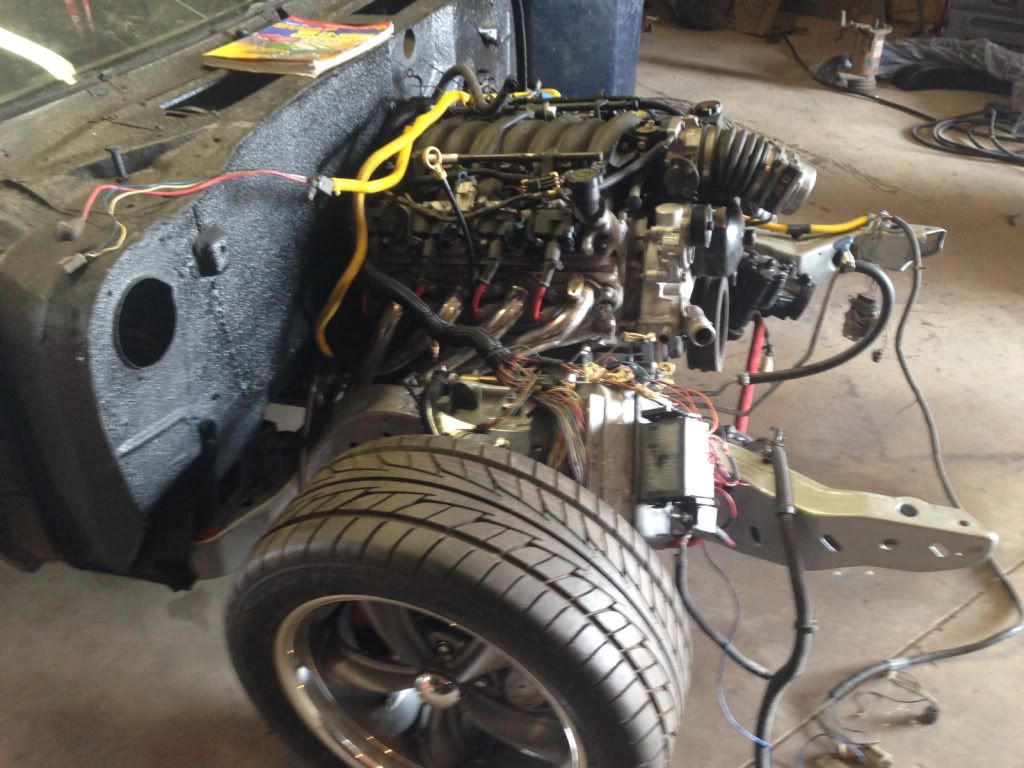
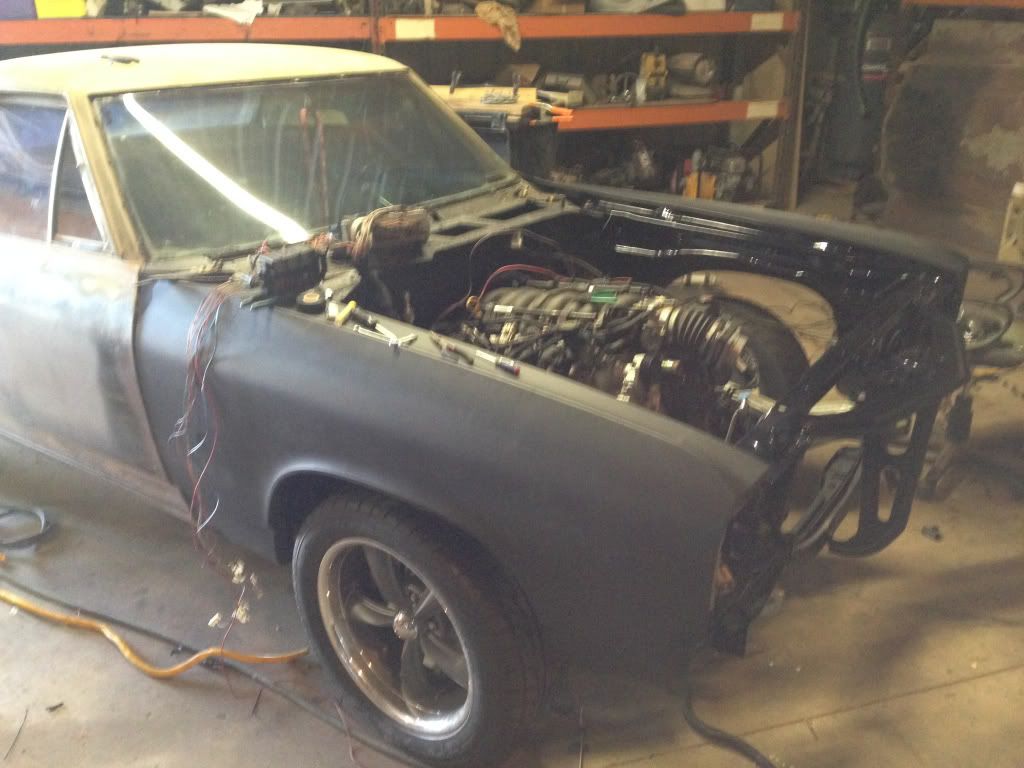
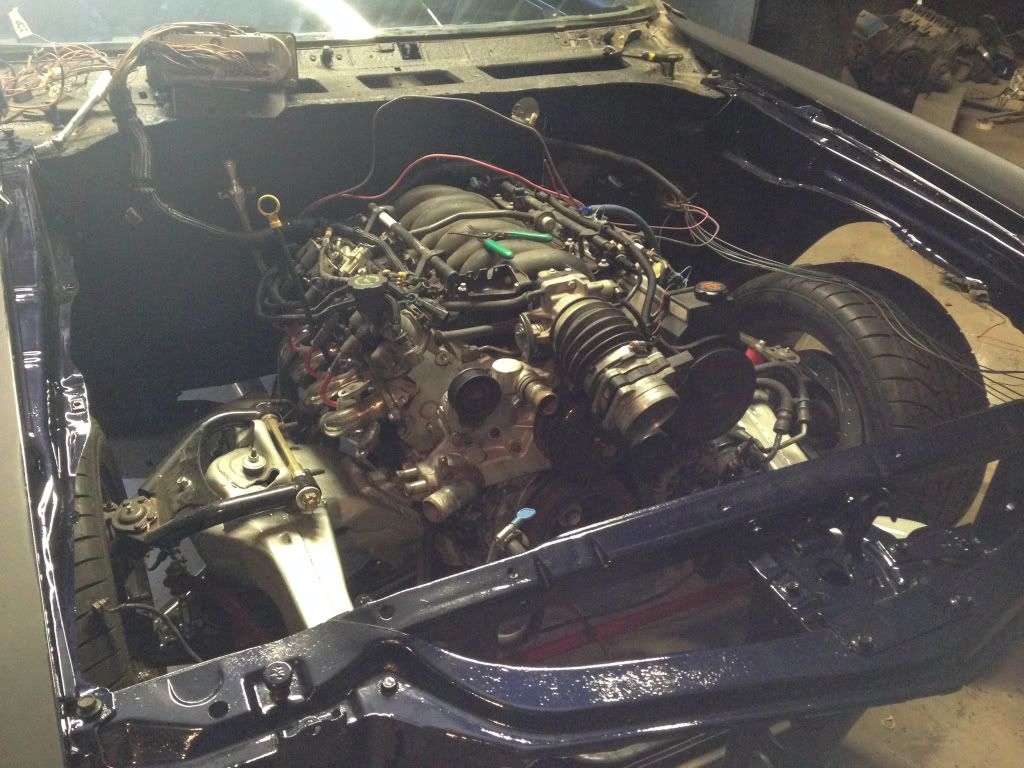
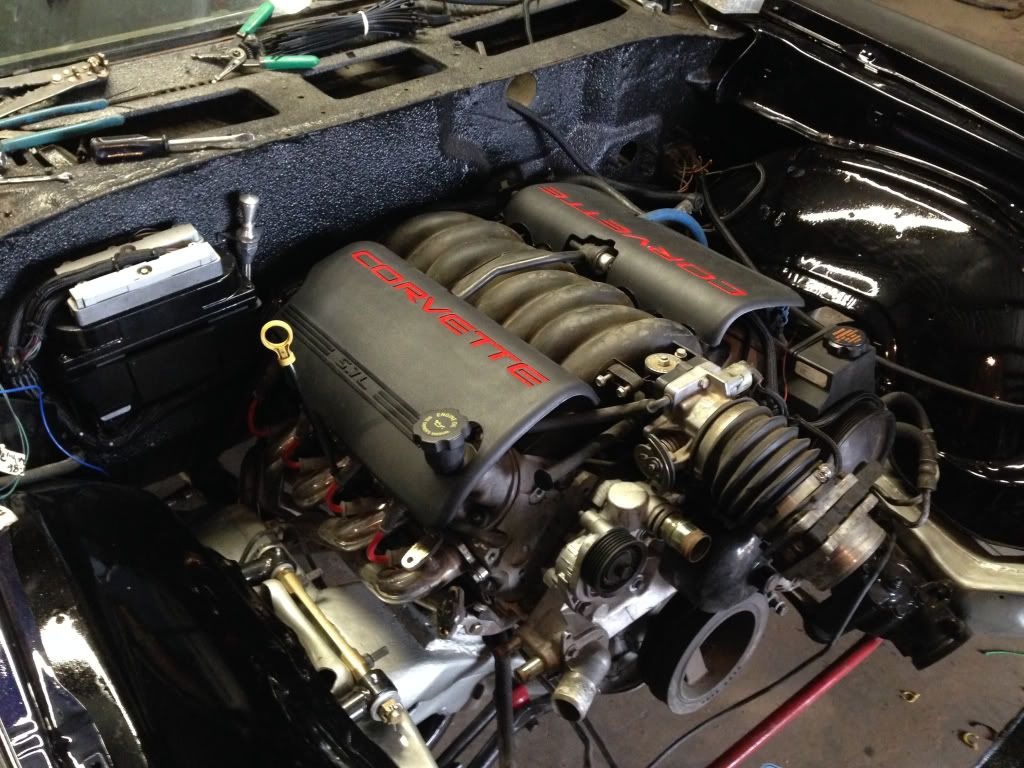
Haven't updated on the car lately, but it has come a long way. The body is finally back on the frame again, motor is in, and the best part... It runs! Started it up last weekend for the first time. It only runs for 5 seconds because of vats but at least it runs and my wiring is correct. Now I'm just trying to get it together so I can drive it. Still need to find a place to shorten my driveshaft, need to get vats, egr, air etc tuned out of the PCM. I'm gonna use the factory el camino radiator for now, I need to find some junkyard cooling fans for it, and I need to finish up the front brakes and mount my master cylinder. Here are the pics for now. More to come! Trying to decide what to do about mounting the PCM and fuse box and where. Also need to finishing welding the sump on my factory gas tank and get it installed. Let me know what you guys think!
My fuel set up, walbro 255 and a corvette reg/filter. All plumbed up with 6an push loc hose

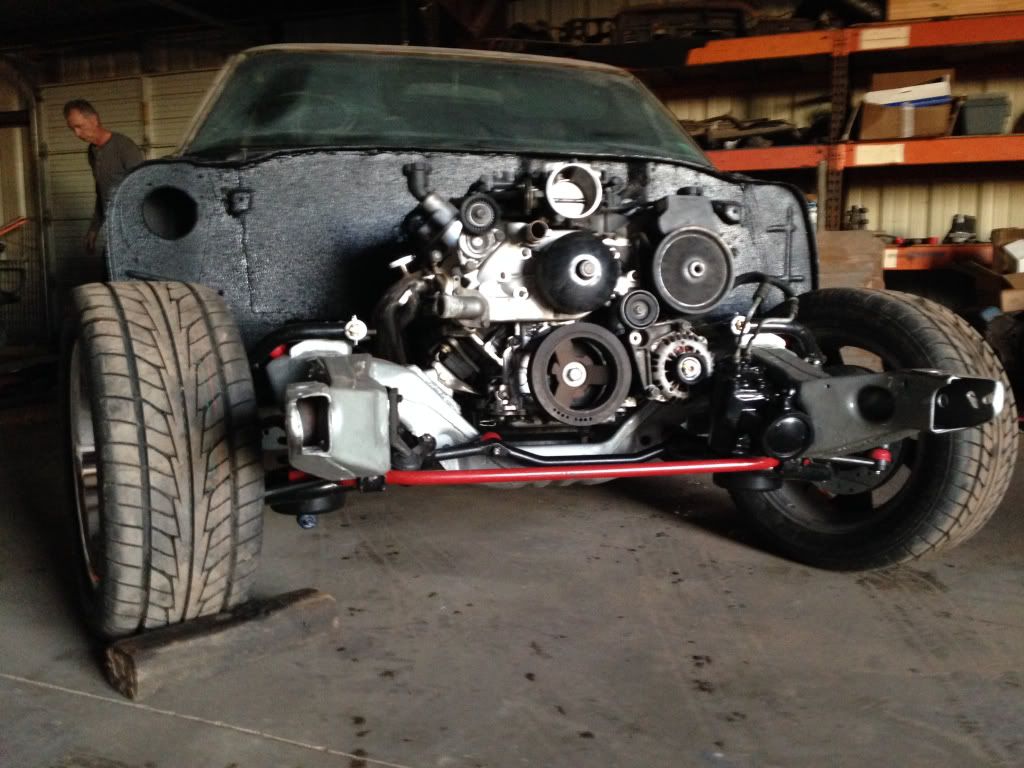
The chassis all back together and ready to back under the car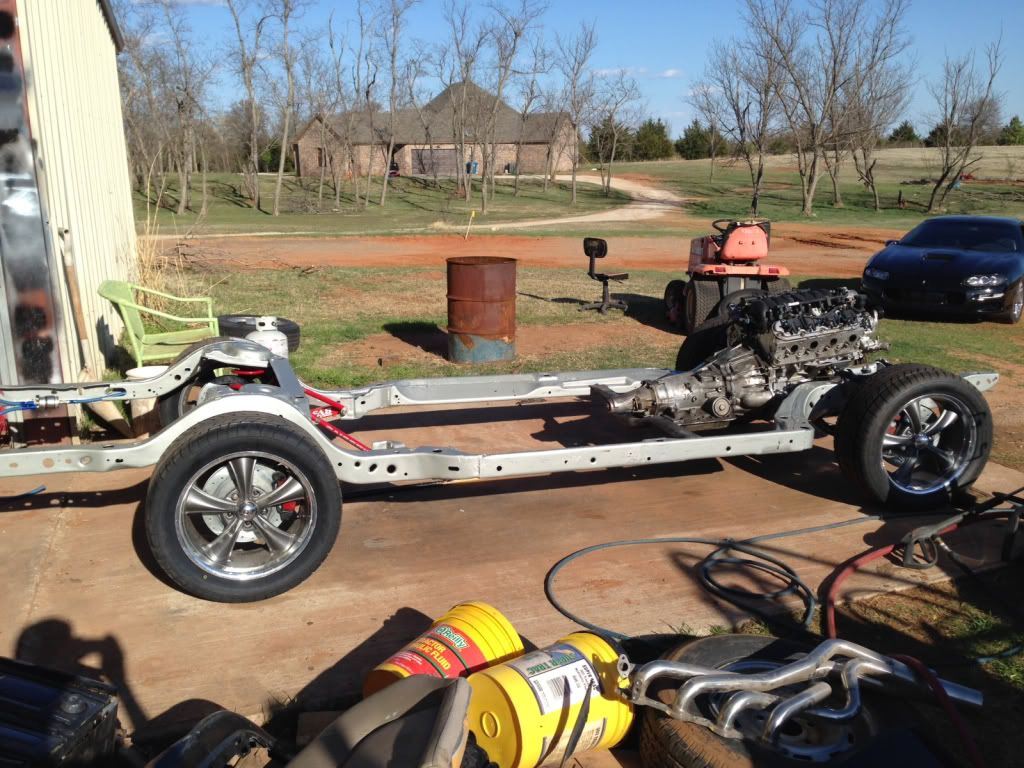
The body is home! Underside and firewall is u pol raptor Bedliner. Looks awesome, had a lot of rust repair on the floor boards and also shaved the firewall. The rust repair ate up a bunch of time.
First time this car has rolled out of my building since 1988. After a good power washing.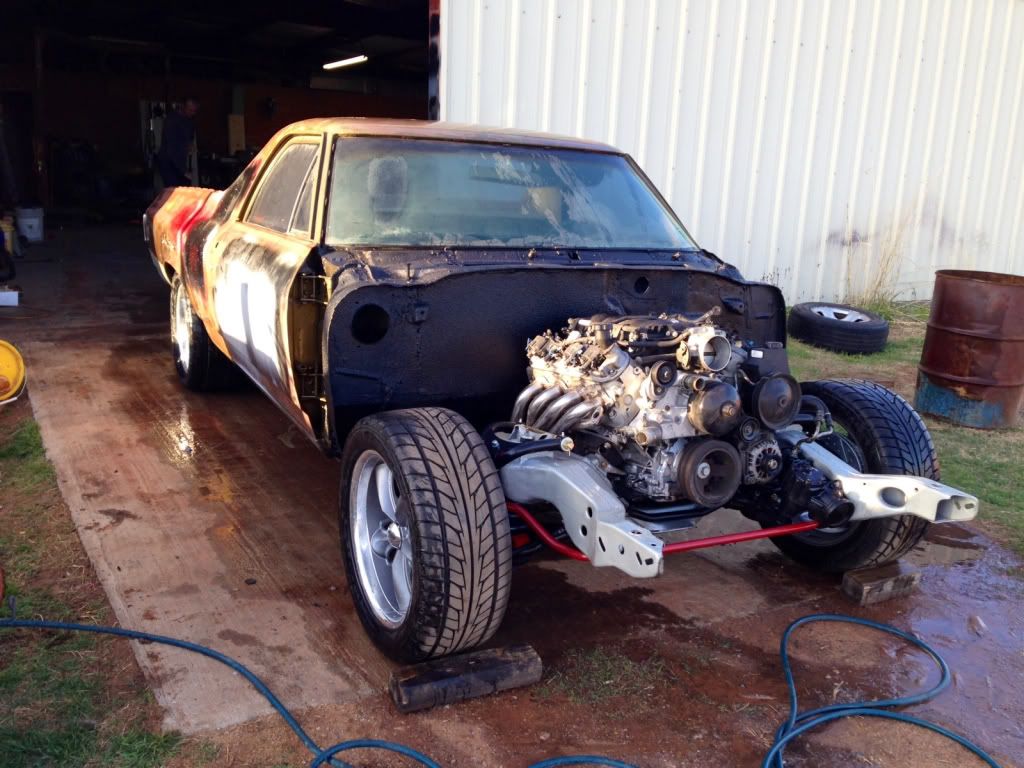
Finishing up some wiring
And finally how it sits now, don't worry yellow wire loom is gone, waiting on more braided split loom to come in the mail.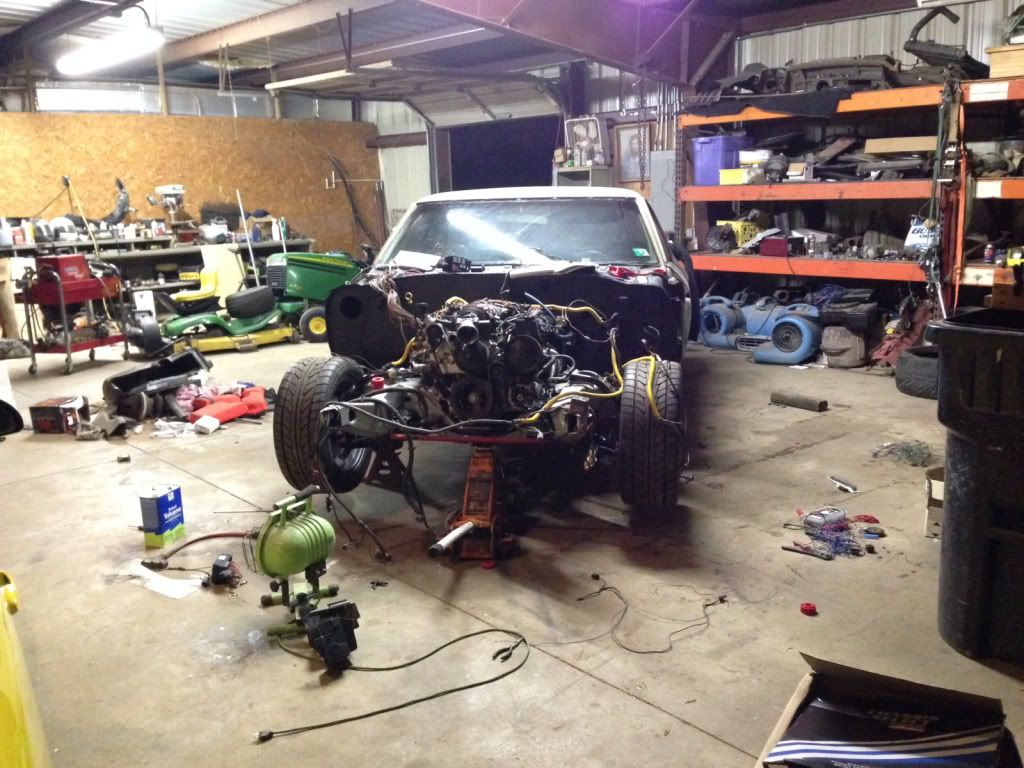
My fuel set up, walbro 255 and a corvette reg/filter. All plumbed up with 6an push loc hose
The chassis all back together and ready to back under the car
The body is home! Underside and firewall is u pol raptor Bedliner. Looks awesome, had a lot of rust repair on the floor boards and also shaved the firewall. The rust repair ate up a bunch of time.
First time this car has rolled out of my building since 1988. After a good power washing.
Finishing up some wiring
And finally how it sits now, don't worry yellow wire loom is gone, waiting on more braided split loom to come in the mail.
04-16-2014, 09:26 AM
#46
12 Second Truck Club
Join Date: Jan 2004
Location: CA
Posts: 820
Likes: 0
Received 0 Likes
on
0 Posts

Cool. I'm running 285 40 17 BFG's on the back of my 69. I was planning on getting the Nitto's here in the next month. I'm running 245's up front but was looking to switch to the 255's.
 04-16-2014, 07:27 PM
#48
On The Tree
Thread Starter
iTrader: (3)
Join Date: Sep 2012
Location: Newcastle, Ok
Posts: 113
Likes: 0
Received 0 Likes
on
0 Posts
Wow just saw your car, I have been looking over a year for an ls swapped 68-72 el camino. I have not seen a single one finished. Your car looks awesome. How much is your car lowered? Pretty much exactly what I'm going for, love the 69. And on the nittos.. I love them, I have them on my 00 ss same 285 in back, they hook up well. Stickiest street tire I've seen. After multiple burn outs, drag days, and 10k miles they still look new also.
04-16-2014, 07:47 PM
#49
On The Tree
Thread Starter
iTrader: (3)
Join Date: Sep 2012
Location: Newcastle, Ok
Posts: 113
Likes: 0
Received 0 Likes
on
0 Posts
Got some primer on the fenders, painted the inner fenders and core support with the color that I think I'm gonna go with for the car. And loosely bolted them up to the car so I can see some progress. Also did some more wiring. Need to find some cooling fans and wire those, then ill be done with wiring under the hood. Starting to come together nicely! 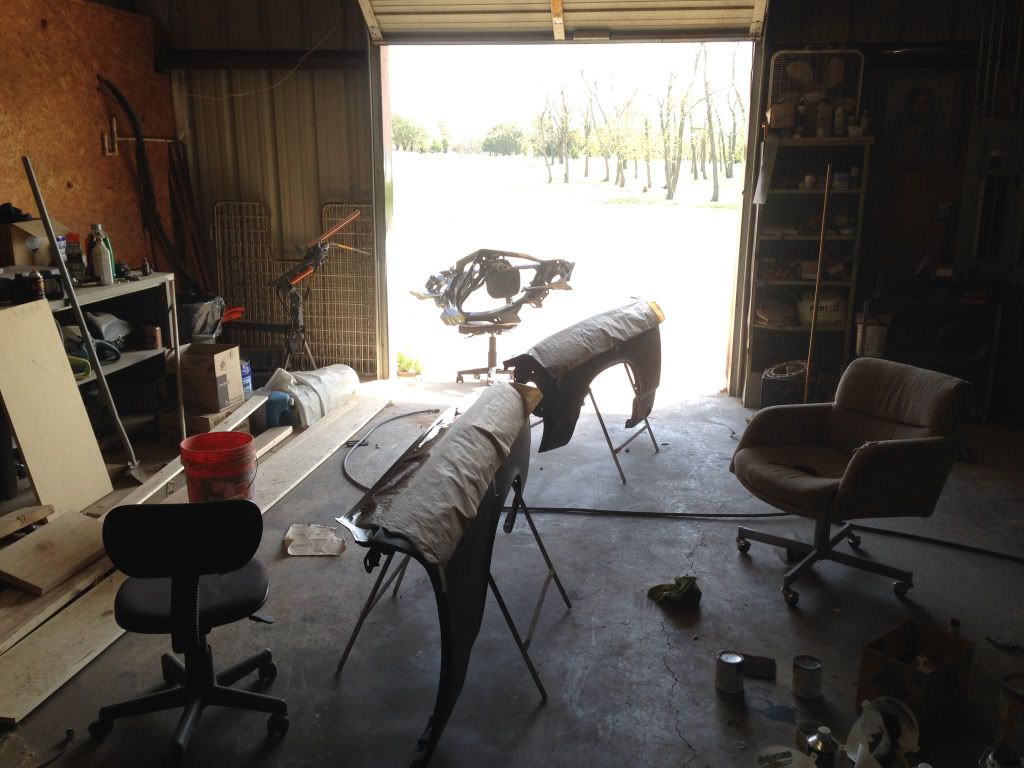
04-17-2014, 08:36 PM
#50
On The Tree
Thread Starter
iTrader: (3)
Join Date: Sep 2012
Location: Newcastle, Ok
Posts: 113
Likes: 0
Received 0 Likes
on
0 Posts
Got a ton done today, wiring is pretty much done, PCM and fuse box mounted, my coil covers came in, and got my inner fender wells in. Very excited after today. 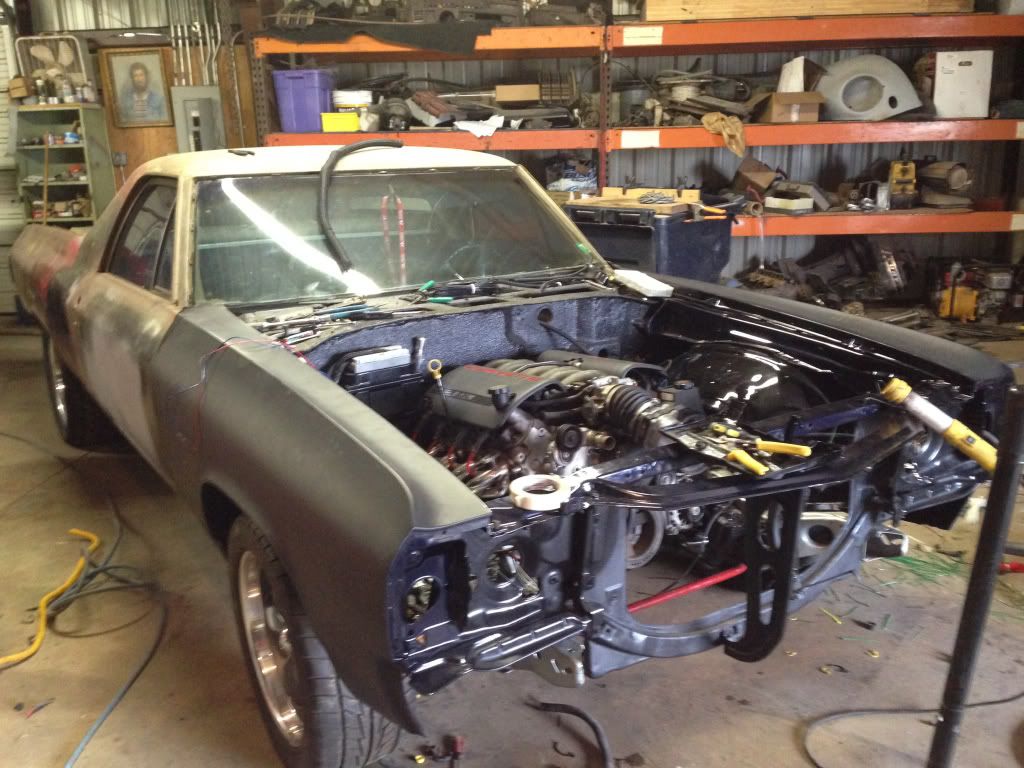
04-27-2014, 03:43 PM
#51
On The Tree
Thread Starter
iTrader: (3)
Join Date: Sep 2012
Location: Newcastle, Ok
Posts: 113
Likes: 0
Received 0 Likes
on
0 Posts
My PCM should be back from the tuner tomorrow, then ill actually get to hear it run for more than 5 sec finally, got my fbody fans mounted to my factory radiator along with my trans cooler. A thick aluminum radiator with aluminum fans would be nice, but are not in the budget if I want this thing driving in the next few weeks. I'm using the stock lower hose for a 350 el camino that I cut up to fit, the upper hose I'm gonna get is from an 82 riviera. I've read that it's a perfect fit. Also got my fuel tank in and finished with all the fuel lines. Gonna try and find a filter to put on before the pump soon. Here are some pictures for now.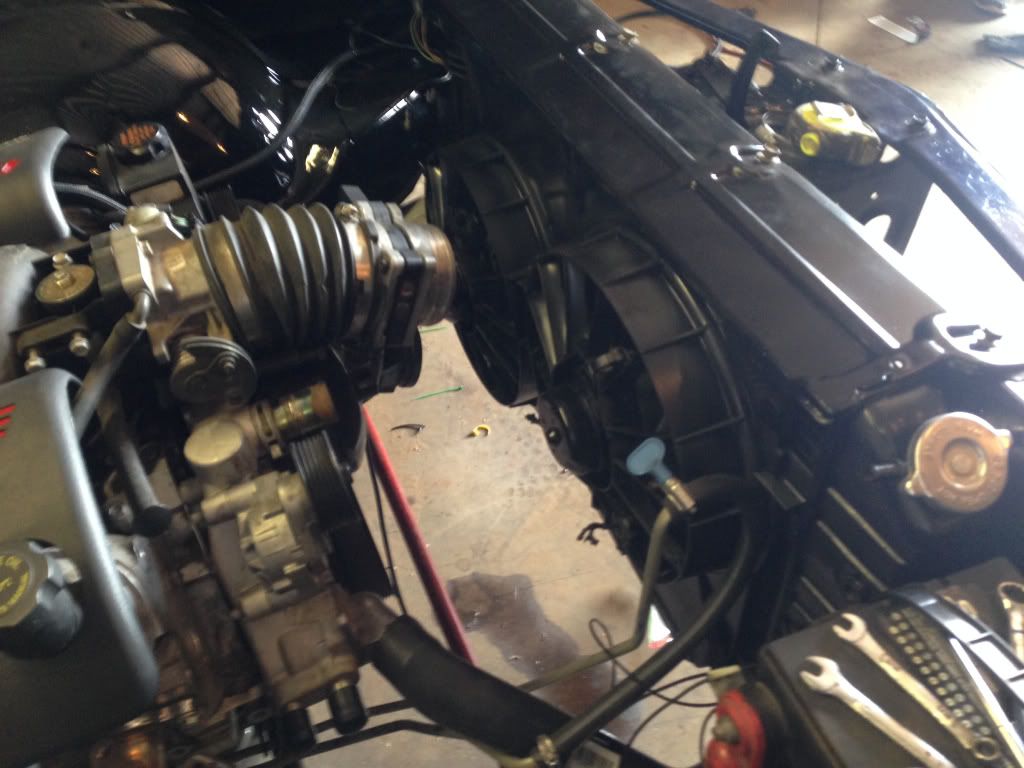

04-28-2014, 08:44 PM
#52
On The Tree
Thread Starter
iTrader: (3)
Join Date: Sep 2012
Location: Newcastle, Ok
Posts: 113
Likes: 0
Received 0 Likes
on
0 Posts
Got my pcm back from Brendan at lt1swap. Plugged it in and fired the car right up! Sounds awesome and very smooth! Still waiting on an upper radiator hose, so I didn't get to run it very long, but am getting very ambitious with the fact that it actually starts up and runs so well. Should be up and driving in no time.
05-06-2014, 10:31 AM
#53
On The Tree
Thread Starter
iTrader: (3)
Join Date: Sep 2012
Location: Newcastle, Ok
Posts: 113
Likes: 0
Received 0 Likes
on
0 Posts
No pictures yet, but did get and upper radiator hose figured out. Took the lower radiator hose from a 1998 ls1 camaro which has the larger end for the stock radiator and a smaller end the same size of the water pump, then got a hose coupler from ace hardware, drilled and tapped the hose coupler for a steam port, and finally used a 2008 cobalt upper hose from the water pump to the coupler. Actually worked out really well and the hose forms around the fans nicely. Need to finish the brakes, pick up my shortened driveshaft, have the exhaust done, order some gauges, figure out what to do about an air intake, then throw the interior together and it'll be my new daily driver!
 05-09-2014, 05:23 PM
#55
Teching In

Join Date: Nov 2013
Location: southestern wisconsin
Posts: 30
Likes: 0
Received 0 Likes
on
0 Posts
Hi:
Great job. I also have a 68 ElCamino I am nearing completion. I noticed you ran your fuel line through the frame. Are you comfortable with that? Did you insulate the line at all? I plan on using the nylon fuel line that would be insulated. I think it looks a little cleaner. i was thinking about running mine through the frame, but wasnt too sure.
Great job. I also have a 68 ElCamino I am nearing completion. I noticed you ran your fuel line through the frame. Are you comfortable with that? Did you insulate the line at all? I plan on using the nylon fuel line that would be insulated. I think it looks a little cleaner. i was thinking about running mine through the frame, but wasnt too sure.
06-29-2014, 08:16 PM
#56
On The Tree
Thread Starter
iTrader: (3)
Join Date: Sep 2012
Location: Newcastle, Ok
Posts: 113
Likes: 0
Received 0 Likes
on
0 Posts
Hi:
Great job. I also have a 68 ElCamino I am nearing completion. I noticed you ran your fuel line through the frame. Are you comfortable with that? Did you insulate the line at all? I plan on using the nylon fuel line that would be insulated. I think it looks a little cleaner. i was thinking about running mine through the frame, but wasnt too sure.
Great job. I also have a 68 ElCamino I am nearing completion. I noticed you ran your fuel line through the frame. Are you comfortable with that? Did you insulate the line at all? I plan on using the nylon fuel line that would be insulated. I think it looks a little cleaner. i was thinking about running mine through the frame, but wasnt too sure.
06-29-2014, 08:35 PM
#57
On The Tree
Thread Starter
iTrader: (3)
Join Date: Sep 2012
Location: Newcastle, Ok
Posts: 113
Likes: 0
Received 0 Likes
on
0 Posts
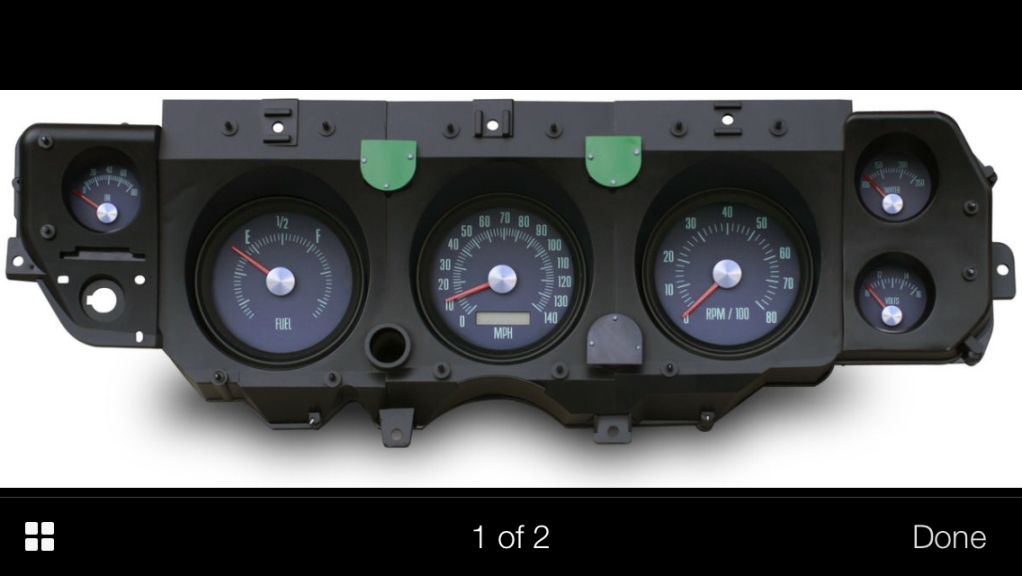
Don't have many pictures right now but do have a question, I had my drum brake hubs turned down to fit in the 4th gen rotors and I tried to install new wheel studs in them and the hubs just shatter. I have broke 2 hubs, first tried pressing them in, then tried tapping them in. Same result. I am ordering the cheap cast iron hubs off eBay, only ones I can find. I'm almost afraid to get the linger studs in these and driving 70 mph, it would be in the back of my head the whole time. Does anyone know of a stronger hub that will fit the drum spindle? Other than that issue things are good, ordered my gauges finally! They are from new vintage, they have a classic look to them that I love. Got my wilwood proportioning valve in, fabbed up mounts for the cobalt ss seats and got one installed. The seat install was a project, not a simple install. But they look great. Also I now have an intake, all spectra stuff. Need to hook up the brakes, make a decision on hubs, have the exhaust done and wire the gauges. Should be driving after that! Here's the only pictures I have now. 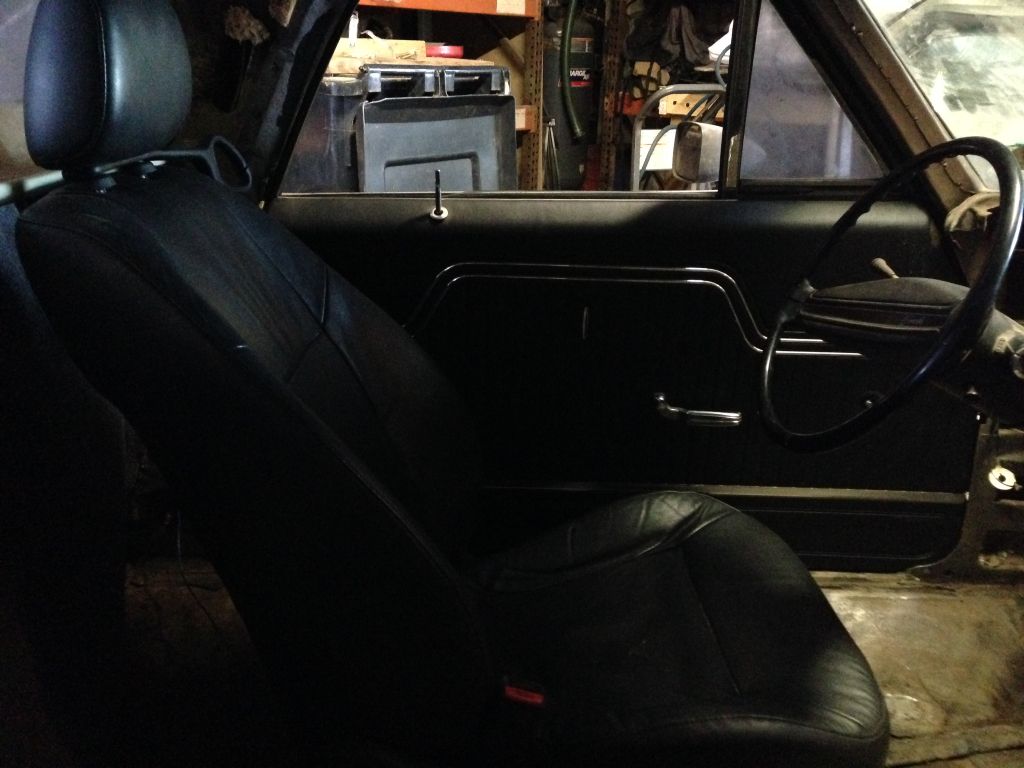
07-01-2014, 11:00 AM
#58
TECH Fanatic
It sounds to me like the studs are too large at the knurl for the hubs. It is common to require reaming the stud holes to get within .010" of the stud OD at the knurl. If you are using the 7/16 studs my guess is that you have a stud with .465" knurl. Measure the hub hole. Later metric studs are much larger. The best way to install the studs is to pull them in with a lugnut. Grease the knurl, thread and the face of the hub, use a washer as a bearing between the lugnut and the face of the hub. They pull in much straighter this way.
07-08-2014, 06:28 PM
#60
On The Tree
Thread Starter
iTrader: (3)
Join Date: Sep 2012
Location: Newcastle, Ok
Posts: 113
Likes: 0
Received 0 Likes
on
0 Posts
It sounds to me like the studs are too large at the knurl for the hubs. It is common to require reaming the stud holes to get within .010" of the stud OD at the knurl. If you are using the 7/16 studs my guess is that you have a stud with .465" knurl. Measure the hub hole. Later metric studs are much larger. The best way to install the studs is to pull them in with a lugnut. Grease the knurl, thread and the face of the hub, use a washer as a bearing between the lugnut and the face of the hub. They pull in much straighter this way.