


Have i gone mad?
Thread Starter
TECH Resident
Joined: Nov 2007
Posts: 816
Likes: 0
From: Texas
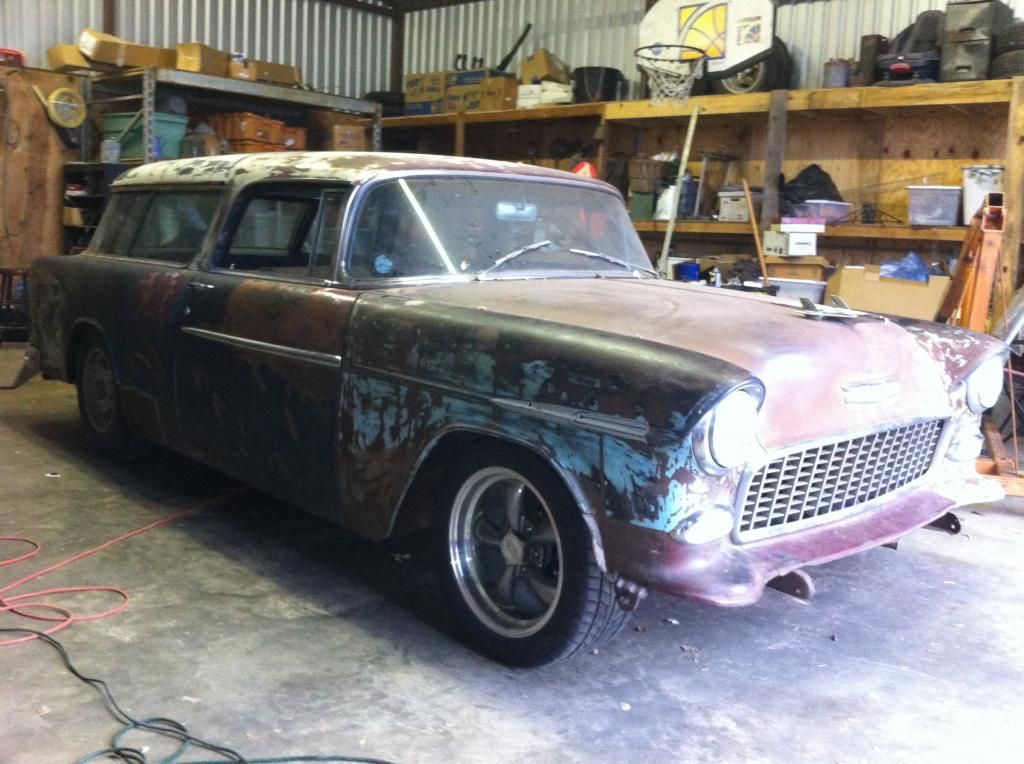
New suspension has been installed. The car sets nice with 2 inch drop springs. I plan to run 27 inch tall tires on front. 26 inch on front in pictures. 27 inch tall on drivers side. Might stager the rear to an 18 inch 265 tire that is 10.8 wide and 28.4 tall.
TECH Fanatic

Joined: May 2010
Posts: 1,081
Likes: 8
From: Atlanta, Ga
Maybe just an optical illusion, but PS looks a bit small and DS looks a bit big. Might just be a matter of the angle. Are you planning to run the front bumper, that will change the perspective as well.
Thread Starter
TECH Resident
Joined: Nov 2007
Posts: 816
Likes: 0
From: Texas
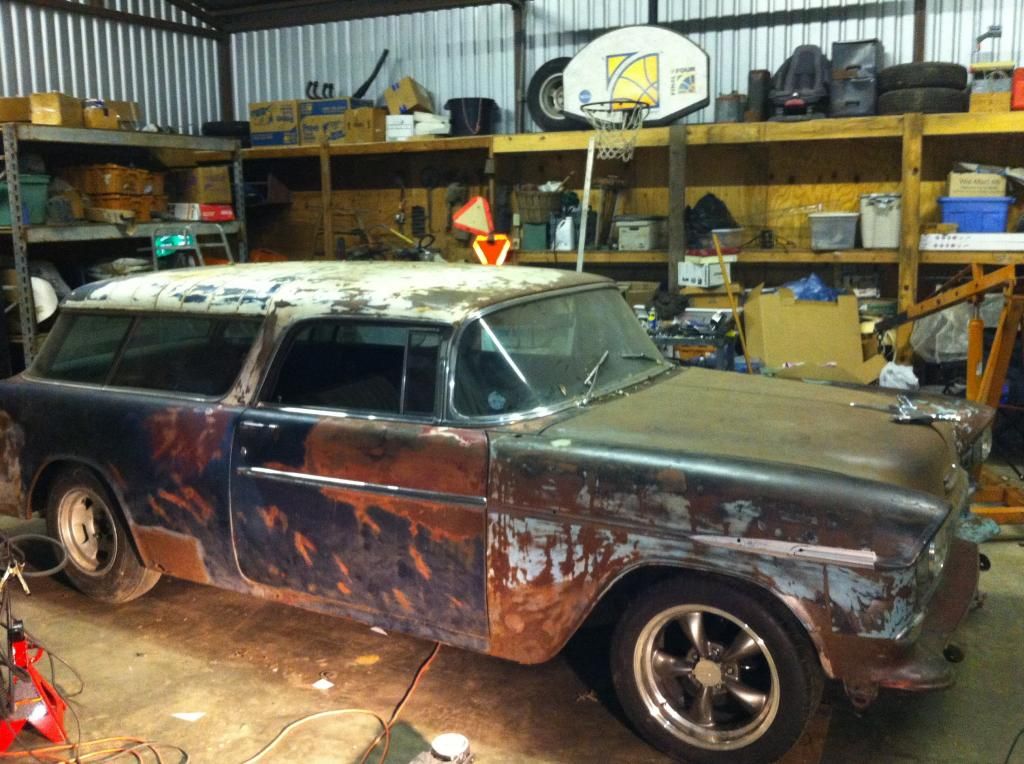
I agree,I was wrong the DS tire is 28 inch tall. The PS is 26 tall. I'm going to cut a coil and drop the front about 2 inches for a more aggressive look. I'm plannig 27 inch tall tires on front and maybe 28.4 tall on back.
TECH Fanatic
Joined: May 2010
Posts: 1,081
Likes: 8
From: Atlanta, Ga
That look really good! Are you planing to shoot it a satin black? My old neighbor did his 55 that way, really made a big improvement and cost very little. Or you could tint some DP in the turquoise?
LS1 Tech Stories
The Best V8 Stories One Small Block at Time

Amazing '71 Camaro Restomod Is Modern Muscle Car Under the Skin
Verdad Gallardo
6 Common C5 Corvette Failures and What's Involved In Repairing Them
Pouria Savadkouei
Retro Modern Bandit Pontiac Trans AM Comes With Burt Reynolds' Autograph
Verdad Gallardo
Top 10 Greatest Cadillac V Series Performance Models Ever, Ranked
Pouria Savadkouei
Top 10 Most Powerful Chevy Trucks Ever Made!

Hennessey's New Supercharged Silverado ZR2 Has 700 HP
Verdad Gallardo
Coachbuilt N2A Anteros Is an LS2-Powered C6 Corvette In Italian Clothes
Verdad Gallardo
Awesome K5 Blazer Restomod Comes With C7 Corvette Power
Verdad Gallardo
10 Camaros You Should Never Buy
Thread Starter
TECH Resident
Joined: Nov 2007
Posts: 816
Likes: 0
From: Texas
For now all efforts are on restoring or up grading its mechanicals, chassis and body floors and braces.
Way bad those are both Waybad !!!!
Got to love an original low miles 55 nomad!!!!
I sold 68k running driving 265 PG 4 door belair with PS.
A lot of fun.....last year.
Thread Starter
TECH Resident
Joined: Nov 2007
Posts: 816
Likes: 0
From: Texas
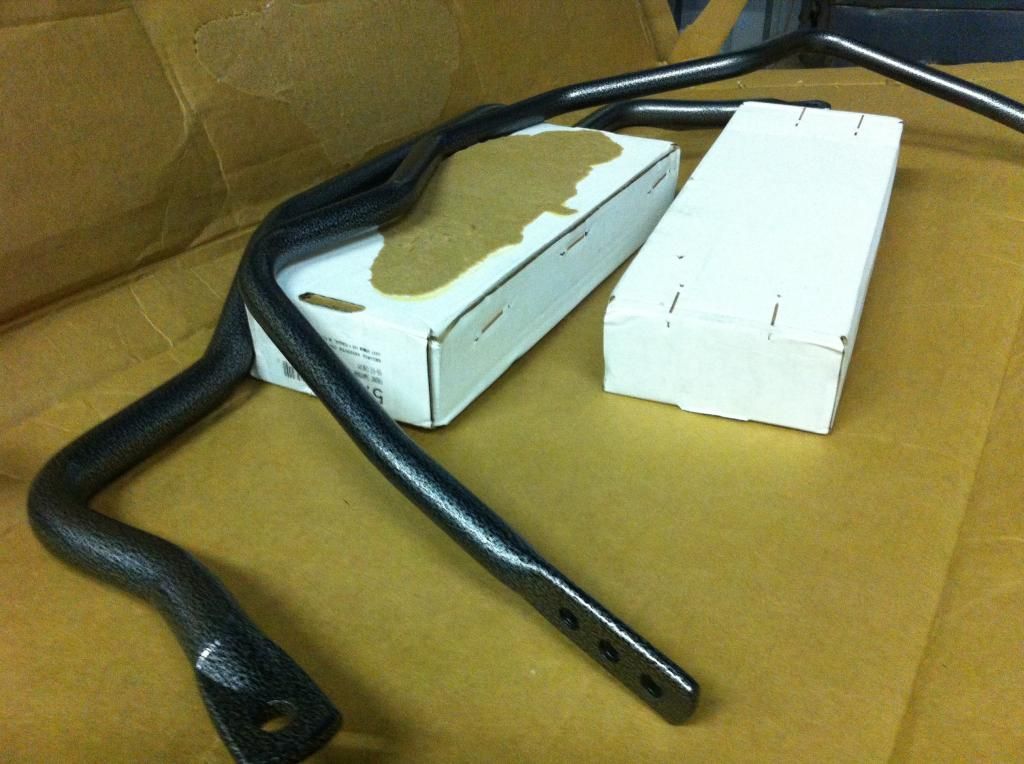
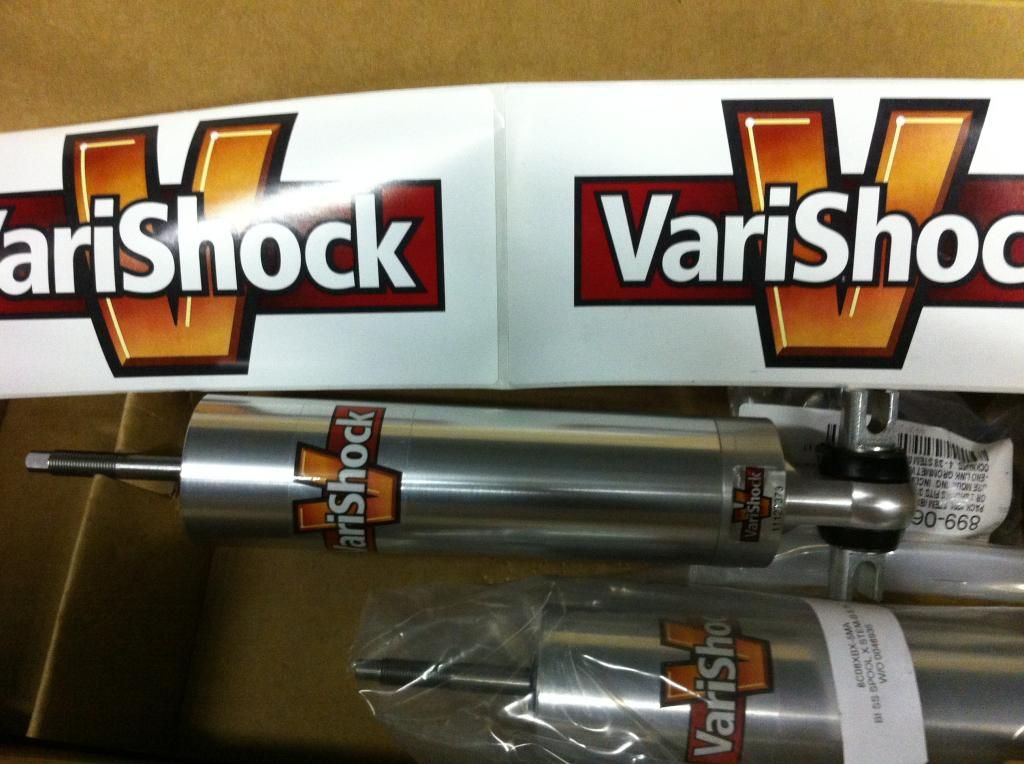
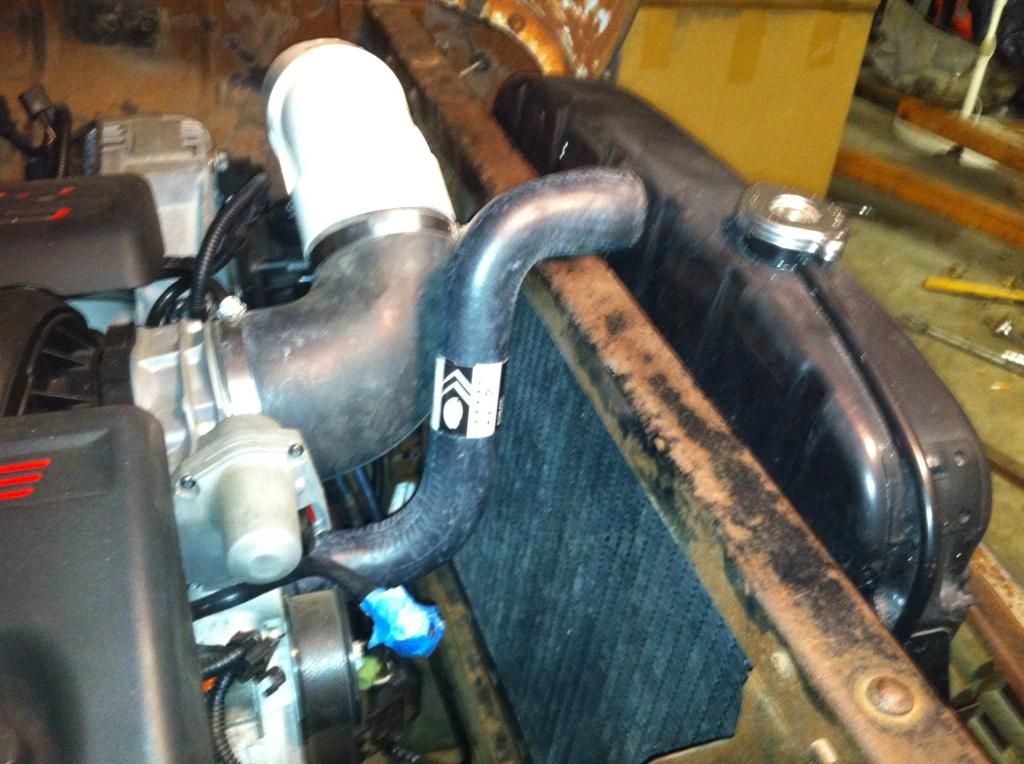
I Finally recieved my new shocks (fronts) and both my hellwig sway bars. I have no excuses now for completing the chassis mockup and welding except its 28 deg out side and I have a hard time leaving the warmth of this wood stove.... I have my exhaust down pipes in work and have the ls2 plumbed to a factory rad thanks to those who have already figured out hose part numbers that work perfect!!!! I am also starting to mock up the air intake progress goes on.


Thread Starter
TECH Resident
Joined: Nov 2007
Posts: 816
Likes: 0
From: Texas
I'm not sure about the family ride thing, I have installed new seat slides on my front bench seat that have 12 inches of travel. I use almost all of that to fit in the nomad comfortably so the back is seat is kind of tight just like my cutlass is.....
Thread Starter
TECH Resident
Joined: Nov 2007
Posts: 816
Likes: 0
From: Texas
Thanks!
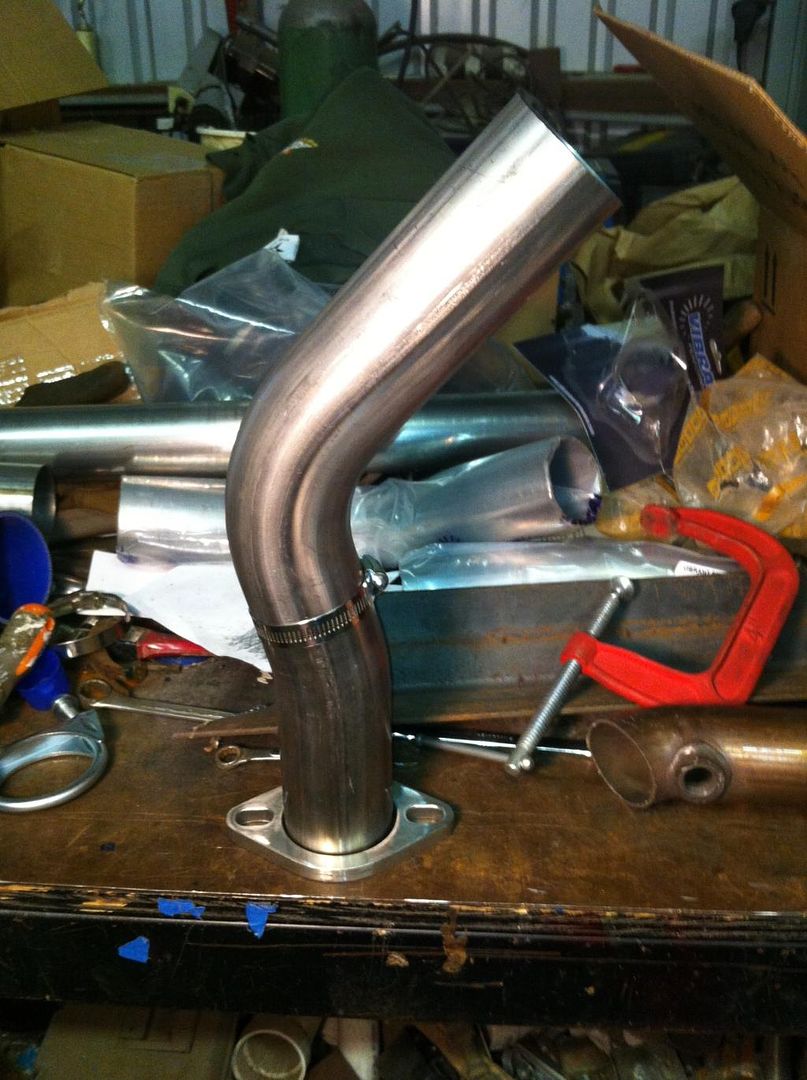
I picked up my down pipes from the weld shop not overly impressed with welds considering the price tag so I went out and bought some stainless mig wire and plan to weld the rest of the system myself. After a little post weld hand forming(large cheater pipe bender) I managed to fit them in and tuck them up against the old trans horns nicely. The exhaust system sits in nice now in front. I'm working on hanging the back now trying to figure out frame hanger brackets. The stock emergency cables and brackets need to be relocated to avoid scraping the mufflers every time you use the E-brake. So I'm trying to figure out how to integrate a new E-brake cable bracket that will also serve to hang the exhaust system. I could have removed the trans horns and tucked the entire exhaust system above the frame but the 6l80 trans pan then becomes the landing spot for bottoming out. I am going to design a semi structural member across the trans horns in front of the trans pan and integrate a skid pad that runs from the front cross member back to the trans cross member. I cross 2 cattle guards in my driveway and there approach and exit are hard on low riders.
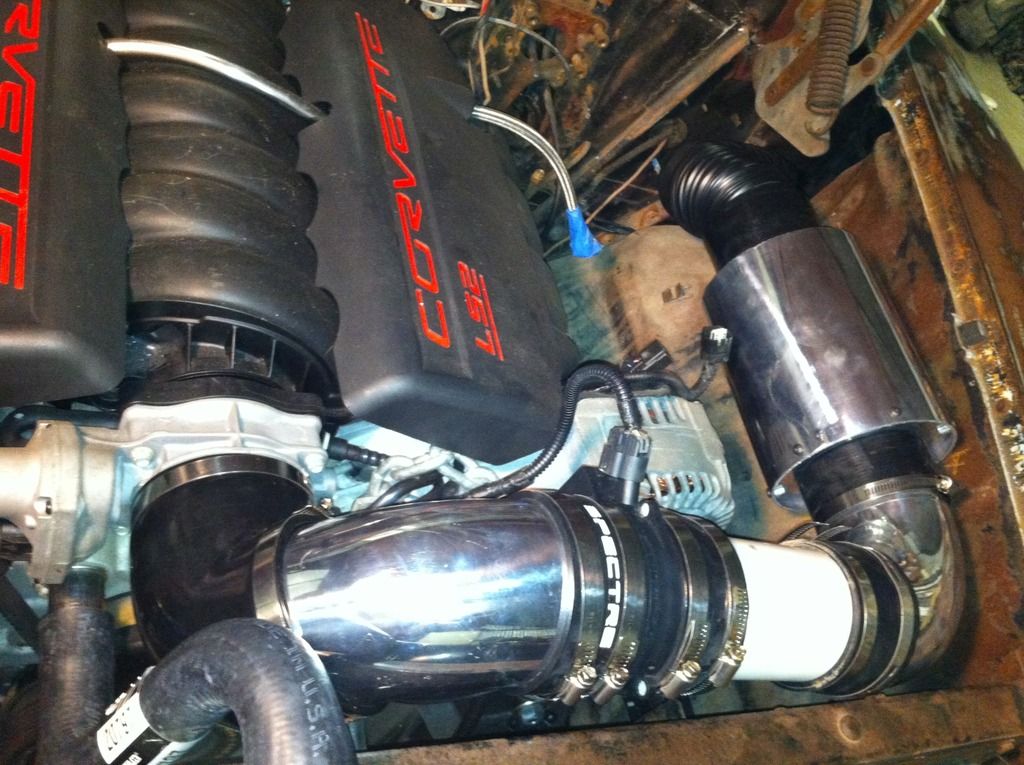
My air intake components showed up so I started mocking them up. I�m going to try and draw cold air in from behind the inner fender. I plan to paint it all black & hard mount the air filter box to the inner fender.

I picked up my down pipes from the weld shop not overly impressed with welds considering the price tag so I went out and bought some stainless mig wire and plan to weld the rest of the system myself. After a little post weld hand forming(large cheater pipe bender) I managed to fit them in and tuck them up against the old trans horns nicely. The exhaust system sits in nice now in front. I'm working on hanging the back now trying to figure out frame hanger brackets. The stock emergency cables and brackets need to be relocated to avoid scraping the mufflers every time you use the E-brake. So I'm trying to figure out how to integrate a new E-brake cable bracket that will also serve to hang the exhaust system. I could have removed the trans horns and tucked the entire exhaust system above the frame but the 6l80 trans pan then becomes the landing spot for bottoming out. I am going to design a semi structural member across the trans horns in front of the trans pan and integrate a skid pad that runs from the front cross member back to the trans cross member. I cross 2 cattle guards in my driveway and there approach and exit are hard on low riders.
My air intake components showed up so I started mocking them up. I�m going to try and draw cold air in from behind the inner fender. I plan to paint it all black & hard mount the air filter box to the inner fender.
Thread Starter
TECH Resident
Joined: Nov 2007
Posts: 816
Likes: 0
From: Texas
Only in my dreams. I'm a long ways off from running. But I'm slowly witling my punch list down. Building the car as a whole & getting the engine running at the same time is increasing the schedule so to speak lol.
Last edited by rockytopper; Mar 20, 2015 at 07:43 AM.
Thread Starter
TECH Resident
Joined: Nov 2007
Posts: 816
Likes: 0
From: Texas
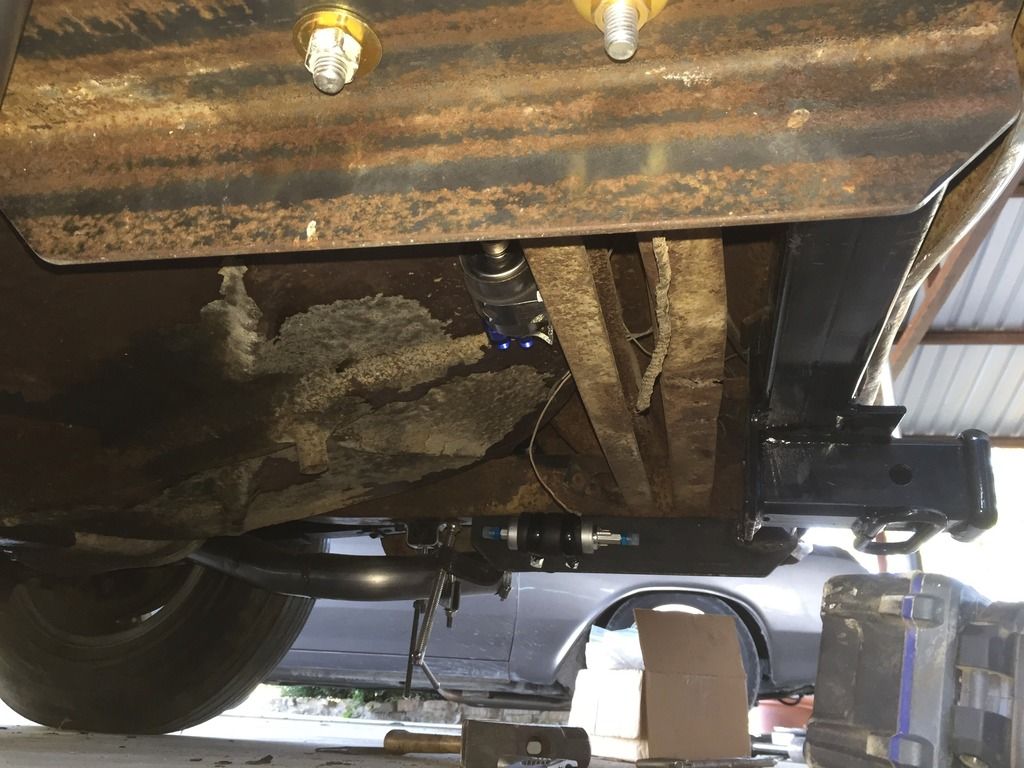
I Installed my trailer hitch. It worked out great for mounting the fuel system. The russell hoses are a piece of cake to assemble my first ever. Routing turned out fairly simple. I'm picking up fuel from the plug hole in the bottom of the wagon tank and using the factory sending unit as the return port. I even layed out a route for the main feed line all the way to the engine. I understand now why guys choose to route the fuel line on the outside of the frame rail of a trifive. I ordered 10 ft of russell hose and it turned out to he the exact amount I needed for this part of the fuel system. Just need to add the P clamps and it will be done.


Last edited by rockytopper; Jul 19, 2015 at 05:30 PM.