When you click on links to various merchants on this site and make a purchase, this can result in this site earning a commission. Affiliate programs and affiliations include, but are not limited to, the eBay Partner Network.
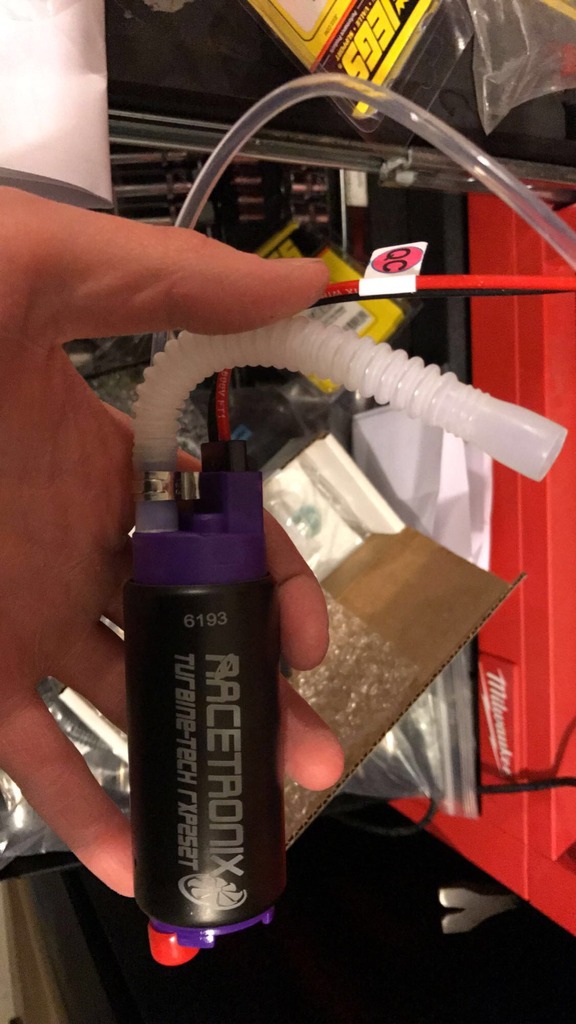
Well I finally got some more work done... got my racetronix pump in and installed, reworked my racetronix hot wire kit to work with a third gen (pics of that upon final installation) and got my lines made on the top of the tank to run towards the filter. Here's a pic of the pump. It's the F99 600hp pump
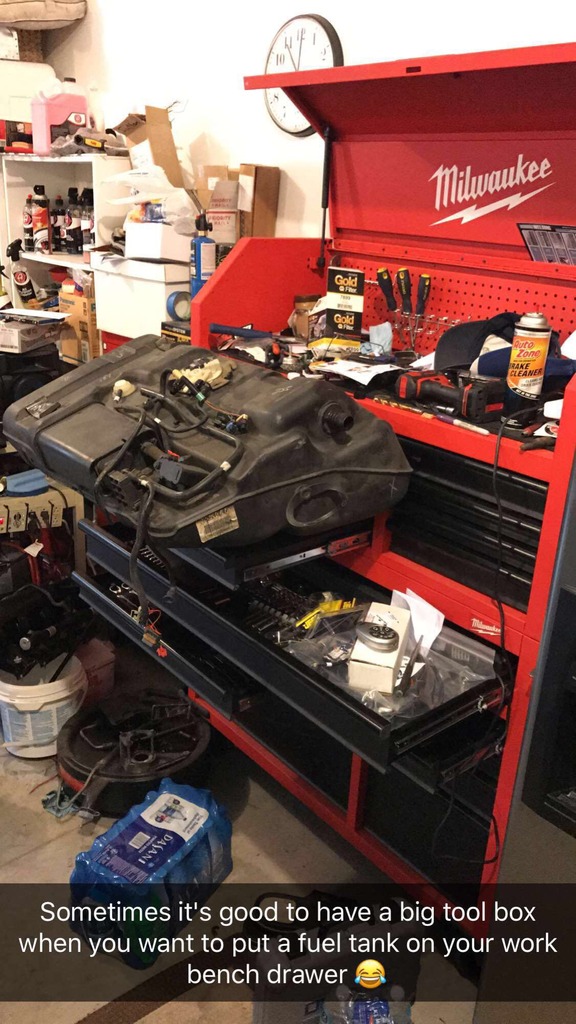
Also took off the charcoal canister and evap garbage off the top of the tank. Here's pics of that too
Here's after I took all of the junk off. Should shed a little weight and I've already deleted evap wires out of the pcm harness so it serves no purpose but to be a boat anchor pretty much.
And here's a picture of the stainless lines I fabbed with the old lady today.
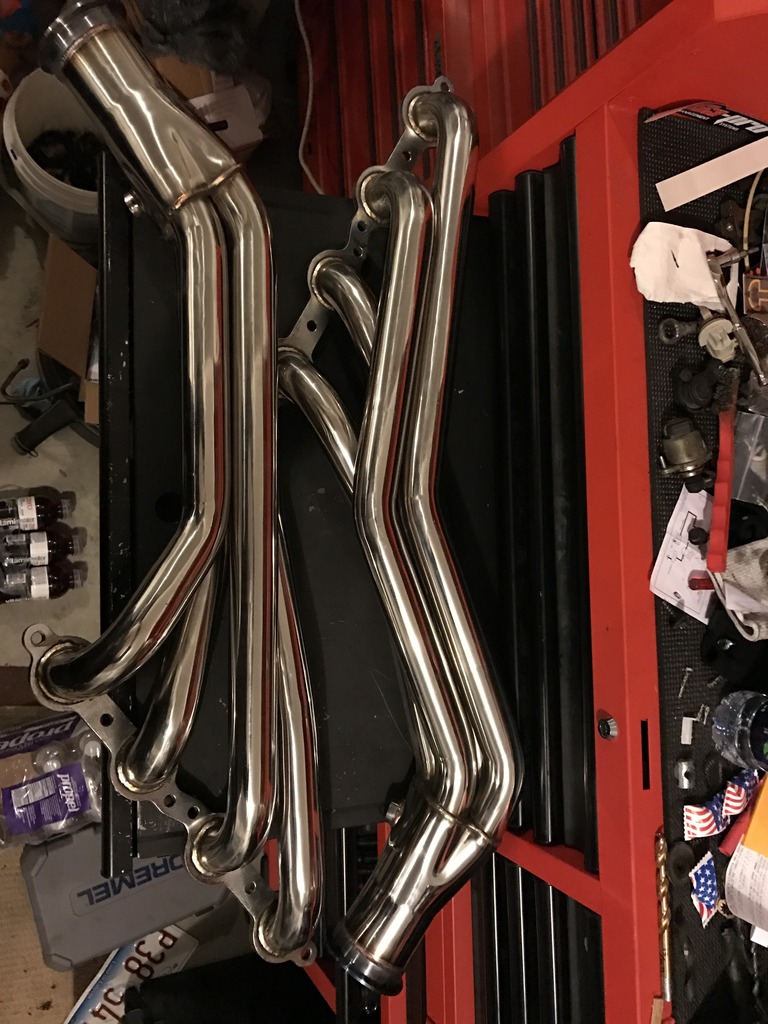
Got some stuff done today. First thing this morning Cody, our friend Eric, and myself put on a new exhaust on Cody's car and then I installed what I ordered earlier this week! Got Racing Innovations & Supply's headers temporarily installed.. The fitment is great and the quality seems absolute top notch. I was concerned about how long it would take to install the headers because when we put long tubes on Cody's 4th gen it took a whole weekend, and 18 hours of actual labor to get them in. It took maybe half an hour for mine to slip in, tighten a couple bolts down, and check clearance haha. I only have them in for now until I can get my transmission sent out and rebuilt and back in to install and then when I can get V bands welded onto the collector of the headers so I can have modular exhaust to have different setups... here's pictures of the headers!
Here's clearance from underneath. Should be perfectly fine.
Please tape up those intake ports before something falls in.
Lol well I was hoping that my intake was coming in but it's been on backorder for over 3 months. But heads will soon be coming off again to be sent out for porting. Haha
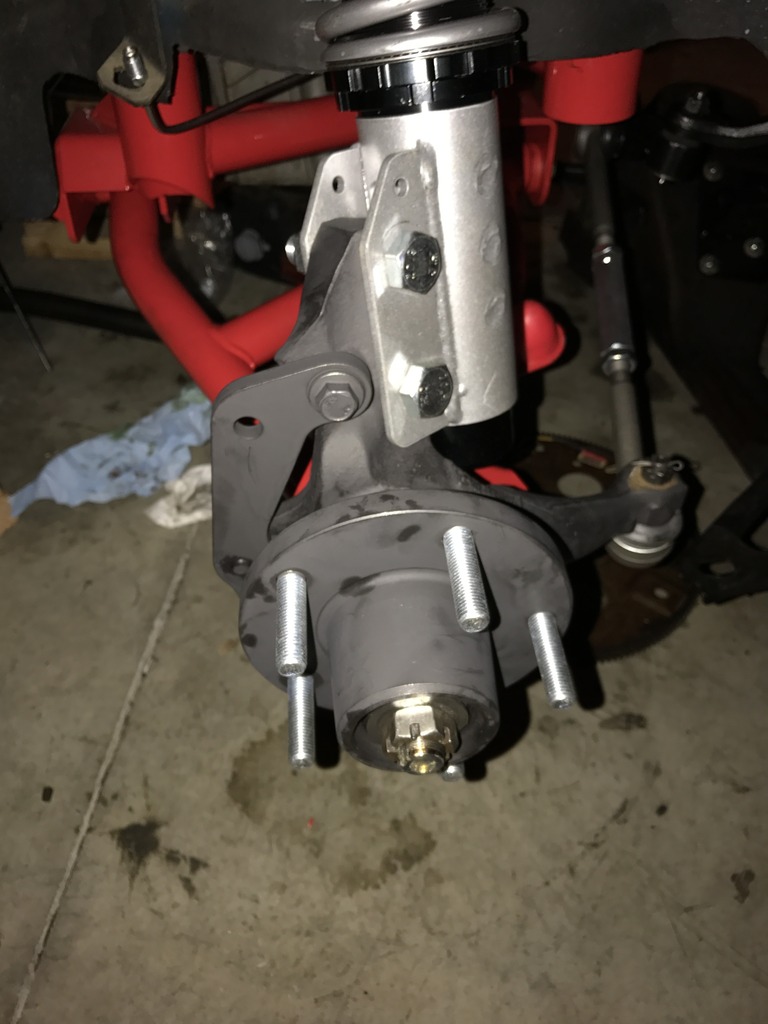
Got some work done today. Haven't been able to do much because I've been sick as can be since the end of January. But I got my BigBrakeUpgrade hubs and brackets in a couple weeks ago, got my Spohn chromoly tie rod ends, got my V bands welded onto my headers, got my oil pump girdle, my oil barbell, and ordered my transmission that will hopefully be here by the end of March or the beginning to middle of April! Here's some pics of the stuff I installed.
Here's a picture of the headers since I forgot to put one up previously.
The pictures of the V bands welded on by a local Racecraft shop that did an amazing job and only charged me $35 for both.
Here's a picture of my BigBrakeUpgrade stuff installed onto my original spindles that Cody and I modified.
Here's an oil pump girdle picture kinda lol so story of the day about this. When I was originally installing my oil pump pickup tube, I torqued the bolt and felt it act like it was stripping something out. Well I still put the motor together thinking it would be okay but saw the oil pump girdle in the parts classified section here and I knew I should get one. Well I unscrewed the old bolt and the top half looked like it had fine threads and the part close to the bolt head looked like it had course threads. Katie was over and I showed her that I thought it was close to breaking...grabbed my channel locks and my pliers and grabbed each end, and it snapped clear in half with less force than it takes to pop a finger... so I'm really glad I did this mod. It was a b*tch to get in because I couldn't drop the pan very much and dropped the bolts in the pan multiple times but used a magnet to get them out. Here's a picture of it installed
Here's a picture of the oil barbell difference. New billet one on the left from SacCityCorvette and the old plastic one on the right. Ended up having to use a self tapping screw and screw it into the end of the old barbell to pull it out lol also a great cheap assurance mod
Got probably the most important part that I had left in the other day!! It's a Rossler Terminator 2.5 TH400 with billet high gear drum, trans brake and RMVB, deep cast aluminum pan, electronic speedo, and AN fittings with copper washers installed in the case already. Just need the correct flexplate, TC, cooler, and X-member and it'll be ready for install. Here's pics:
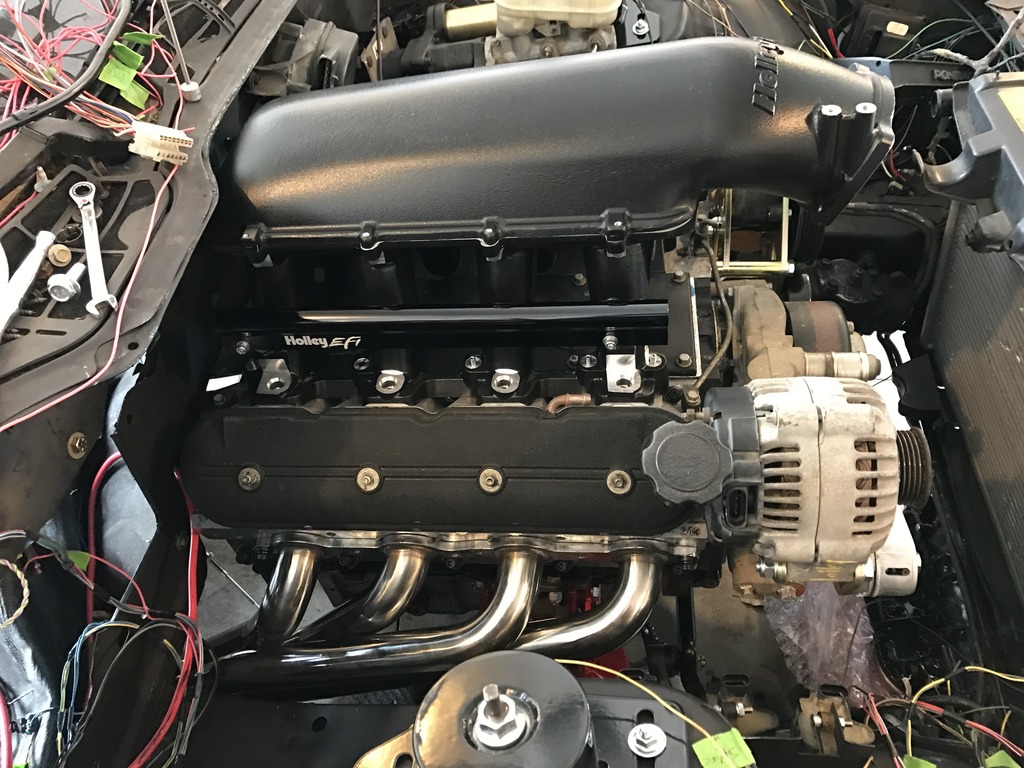
Finally got what I ordered on December 28th!! Here she is. A cathedral port 105mm black powder coated Holley hi ram.
Then I put it on the motor with no bolts or anything to see fitment. It'll be close but should be fine. You can say goodbye to the stock hood though lmao
Thanks man! I'm hoping it'll be a bad b*tch when it's done lmao
Did some test fitting with the hi ram today. Put the lower intake on and checked port alignment because I read a thread from about 6 years ago (I know, a lot can change in that time. Hence why I checked with my intake) where most of the ports were halfway matching and halfway completely just hitting the mating surface of the head so I decided to check and each port was perfect. Here's a shot of one of the ports just to show how well the alignment is along with some others just because I'm diggin how bad this intake looks.
Well I sold my incorrect flexplate to Cody (was told I had a short crank lq4, turns out I had a long crank and didn't realize until after I bought the TCI SFI flexplate for a short crank ls). Well sold it to Cody and bought my trans mount/torque arm. The correct JW SFI flexplate is on order and should ship Friday. Here's pics of the mount and torque arm, don't wanna unwrap them until they're ready to install haha
Finished up the drivers side today and it went much easier than the passengers side. Here's pics of both sides finished and them sitting where they'll stay in the car.
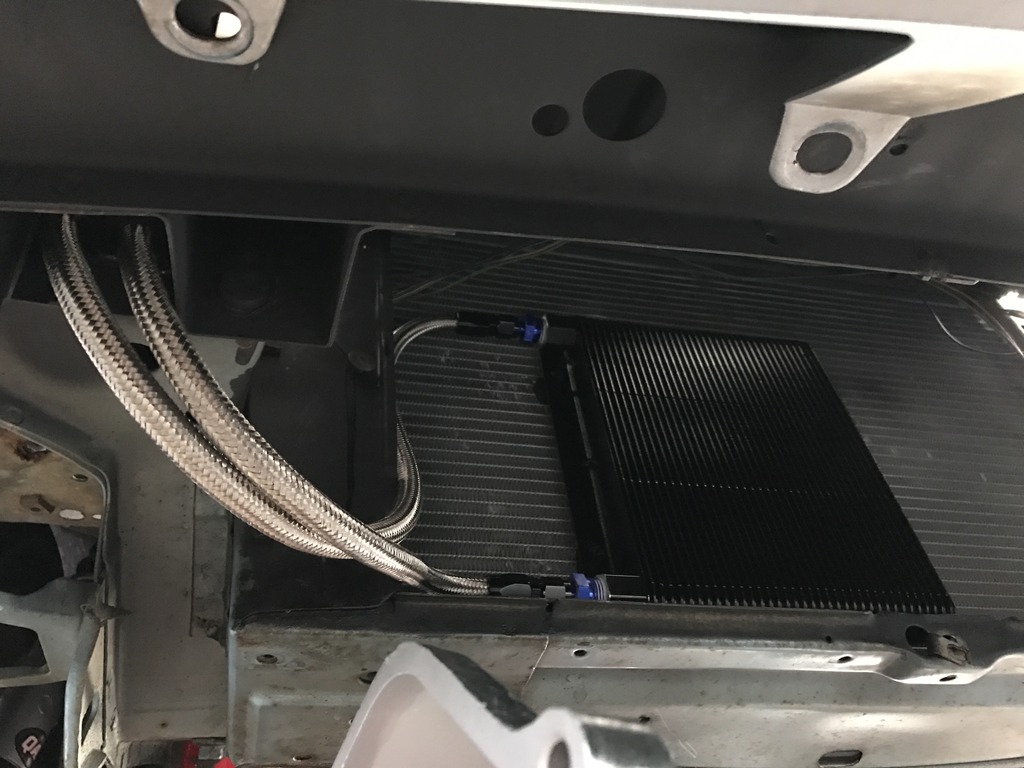
Got something else done today. Got my B&M SuperCooler in with all the lines and fittings I would need and then mounted it onto the radiator and routed the lines the way I wanted to, down the passenger's side frame rail (actually inside it, not in between the frame rail and the motor), so here's that mounted and everything that came in the box. Also ordered my trans temp gauge w/sender and my Madman Racing TH400 locking dipstick which should both be in next week.
Nice progress and some high end parts going on. Im jealous about your tranmission. Should be bulletproof. Keep it going!!!
Thanks Darren! I'm trying my best with what I got I guess haha but Katie and I are finally ready to get a house/apartment so most of my funds lately have gone into that, not to mention we had a failure at the plant that gave us 2 weeks of down time so I missed a paycheck or two... but hopefully at the end of the month I'll be ordering a big part of the build! Looks like my goal of taking the car to LSFest this year is going to be a bust unfortunately though.
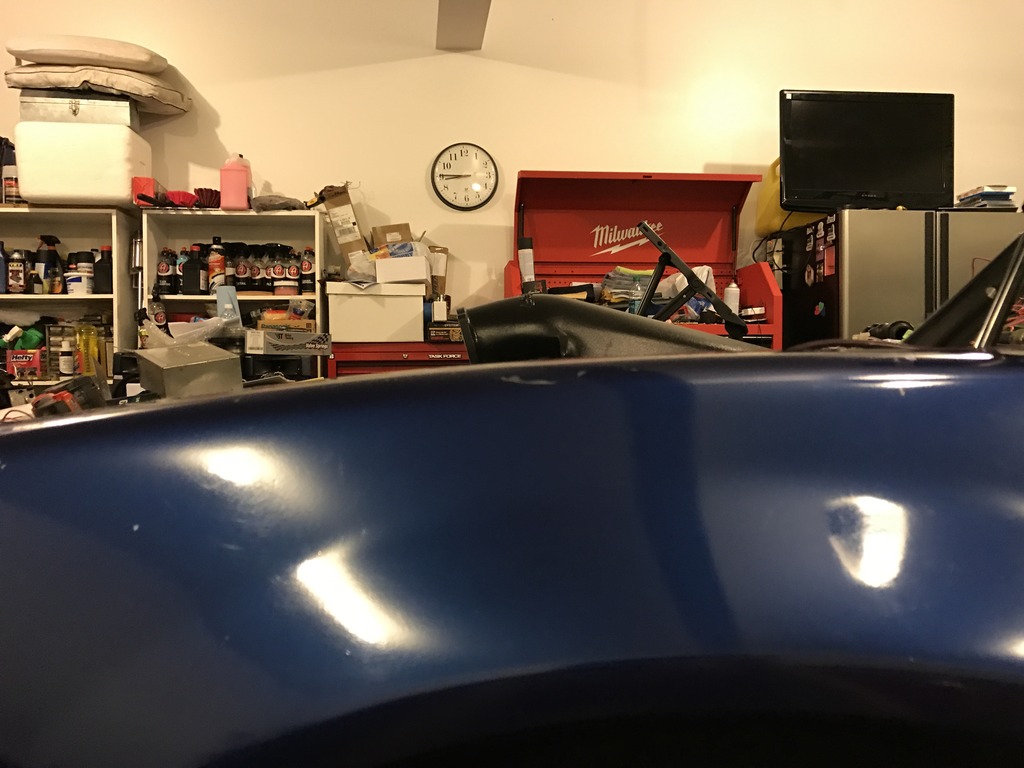
Hey guys, sorry for no updates lately. Been busy with wedding/apartment stuff so haven't had much time or money but I ordered my wire covering and started routing and covering wires, luckily a buddy let me borrow a set of injectors to route the injector wires. Also got my 3-bar MAP and IAT sensor that I'm using the rear bungs on the intake for. Some people might say that the IAT would suffer from heat soak but I don't think it would be any worry considering the actual heating element is inside a plastic "cage" and isolated from the metal that is screwed into the intake. Here's pictures of some wiring


 01-21-2017 | 06:19 PM