
1990 VW Corrado - 5.3 S475 th400


 02-01-2015, 03:32 PM
#22
Launching!
Thread Starter

Join Date: Oct 2013
Posts: 239
Likes: 0
Received 0 Likes
on
0 Posts
Been busy at work lately so I haven't had much time to get away but I was able to get a little bit of time in to figure some stuff out.
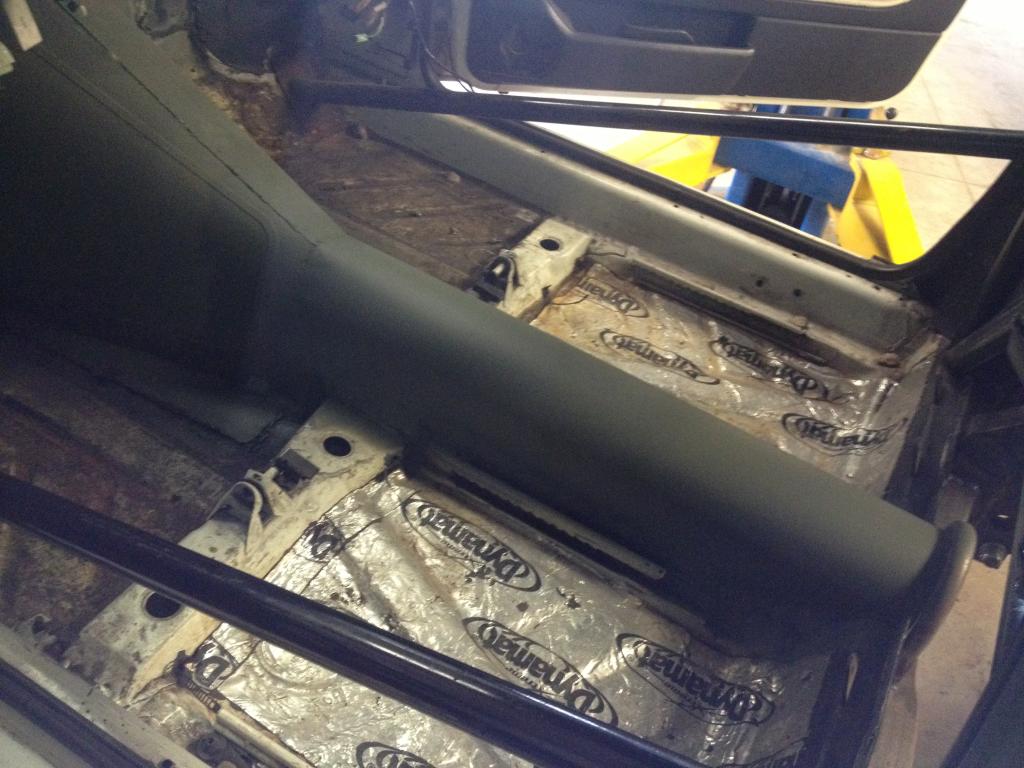
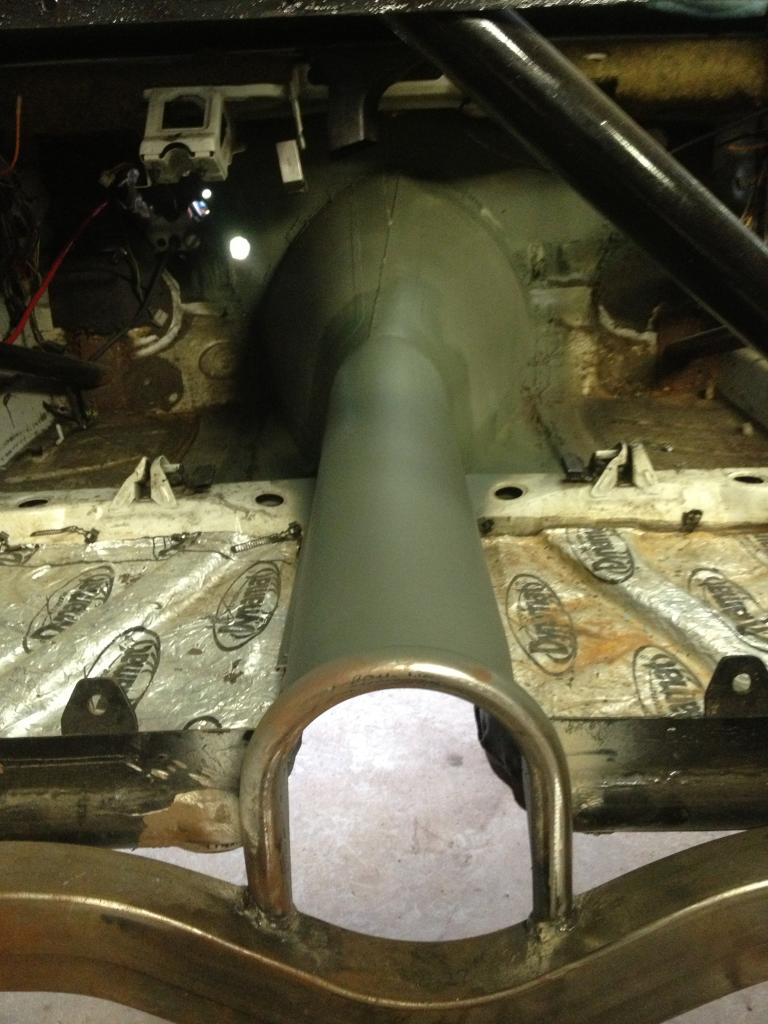
I took the drivers seat out of the parts corrado to determine pedal placement. The seat is VERY close to the new driveshaft tunnel about an 1/8" gap?
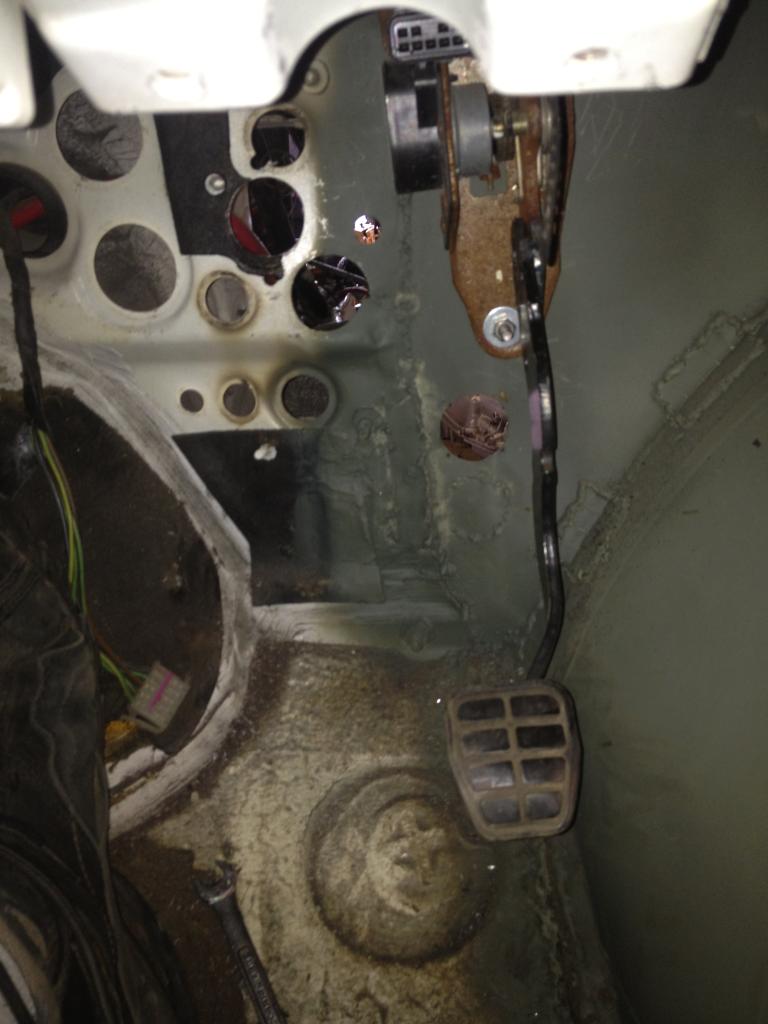
I'm using a drive by wire throttle body and the silverado pedal is massive and its bent towards the transmission tunnel. To get proper placement it needed to go around the steering shaft. Steaksauce gave me a mk2 pedal cluster a while back and I noticed the brake pedal was bent the way I needed it. So I cut both pedals off and welded them together and the proper measurements to get the full sweep of the pedal sensor.
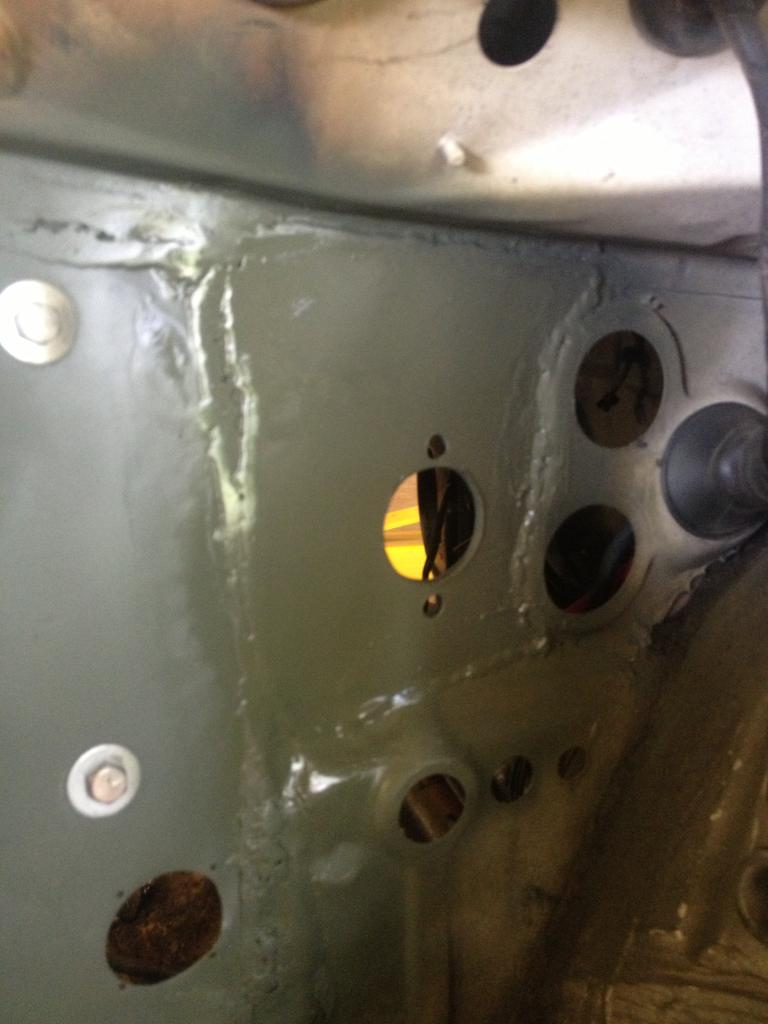
As you can see I have a million holes for wiring. It's hard to make out on a phone but I also have the holes drilled for the wilwood brake pedal/master cylinder.
Since all the holes are there and I don't need them all (I hope) I made a template and cut a plate to cover them up and strengthen it up. It's bolted and riveted together to draw it together for tack welding.

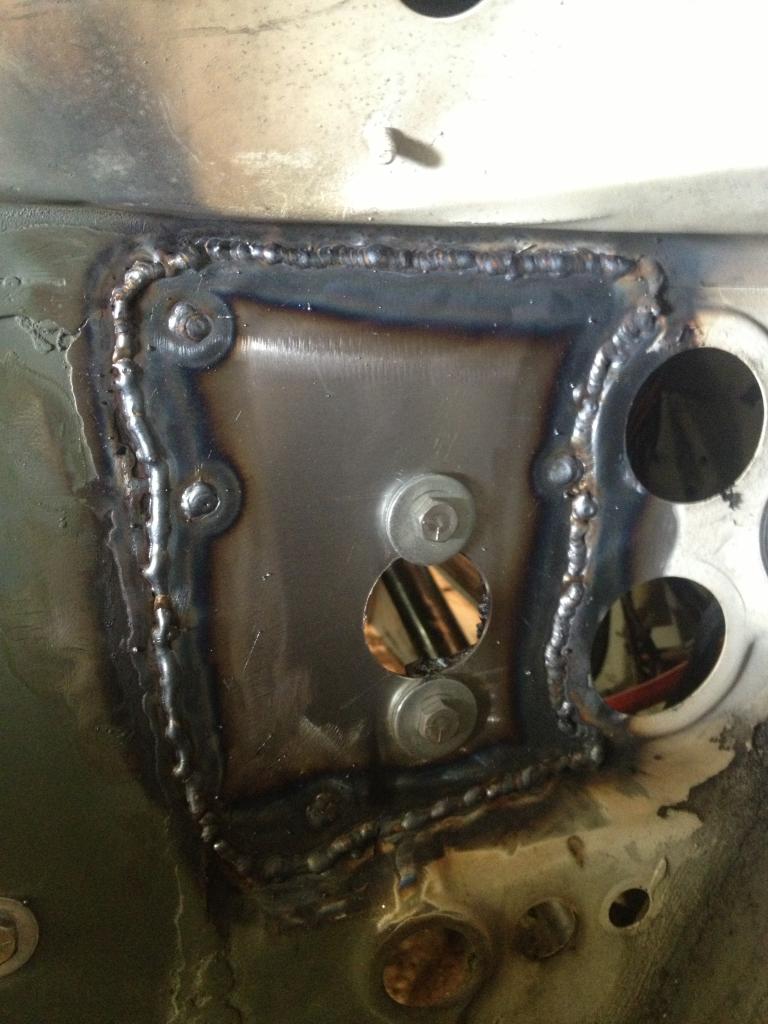
Used self etching primer to keep everything from flash rusting. I'm gonna need to do some bondo work.
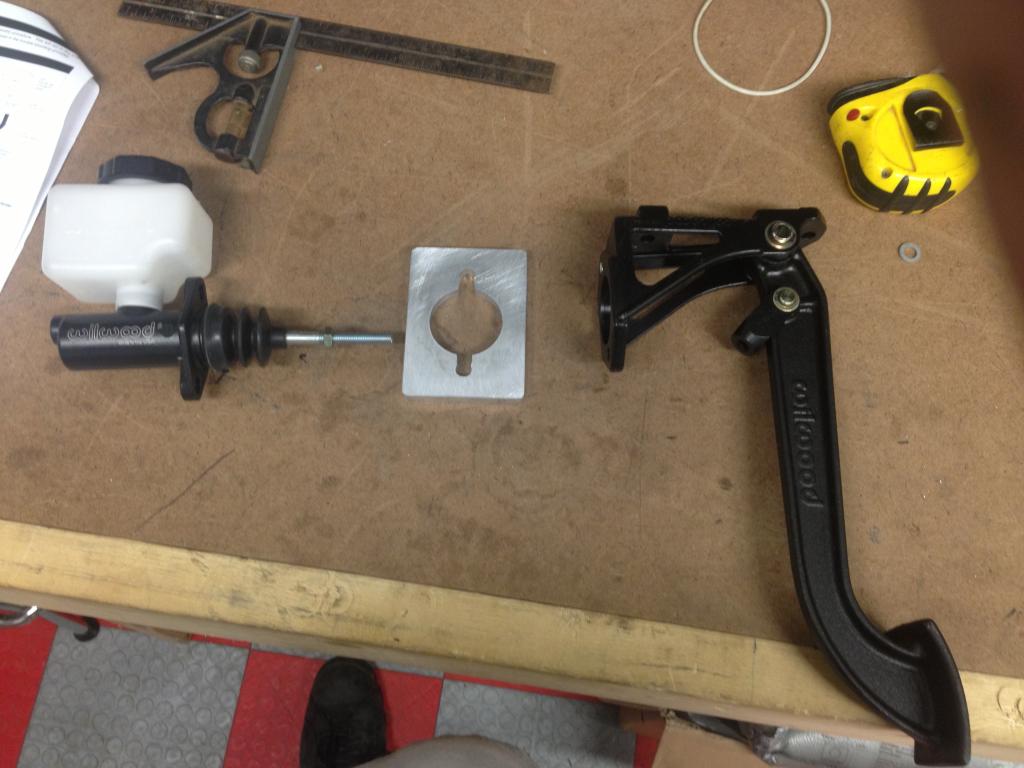
Im mot going to run a brake booster due to space constraints, there is simply no room under the hood. I have done a lot of research on not using one. Everything comes into play such as pedal ratio and master cylinder bore size. I went with a 8:1 pedal and 7/8 bore master cylinder. It should give good pedal feel and solid braking. I can fine tune with different size master cylinders if need be. Typically, iirc, power brake pedal ratio is around 5:1 meaning is a shorter length pedal as the booster is making the job easier and you don't need the leverage.
Here's the setup. The aluminum plate is a spacer that will go between the master cylinder and firewall. This master cylinder can also be used with a remote reservoir which Im sure I will be using.
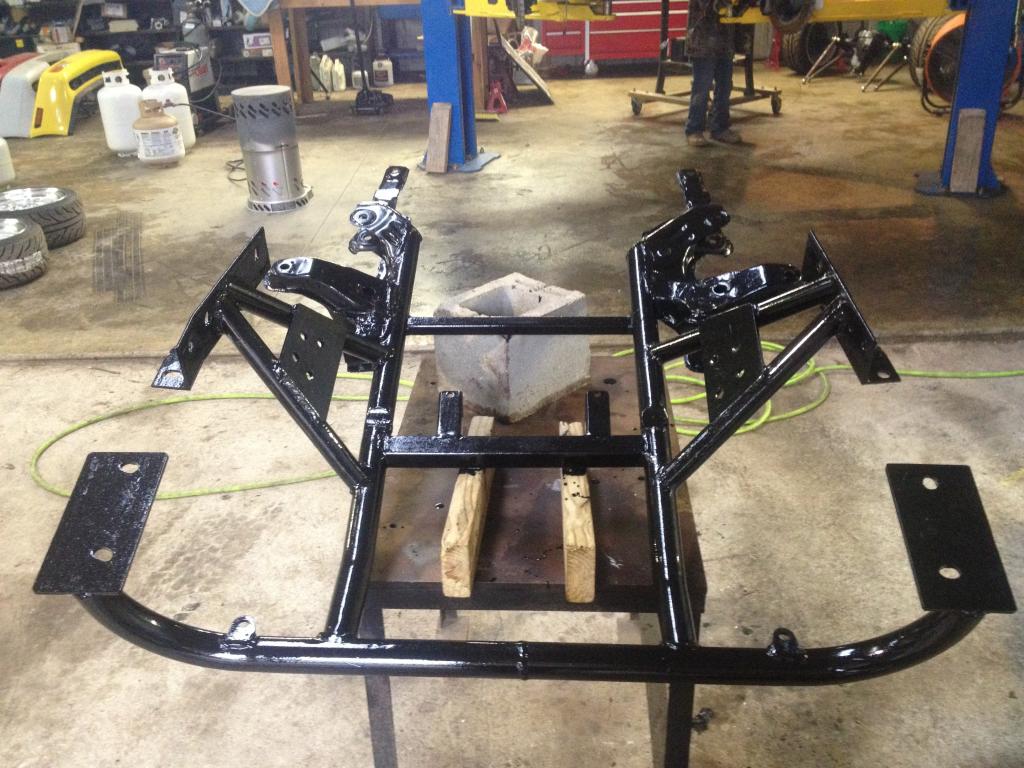
I got the subframe all welded up and in place. When I took it out I checked out the control arm bushings and of course they were toast. I bought new meyle control arms without bushings and pressed in some urethane ones and replaced the ball joints.
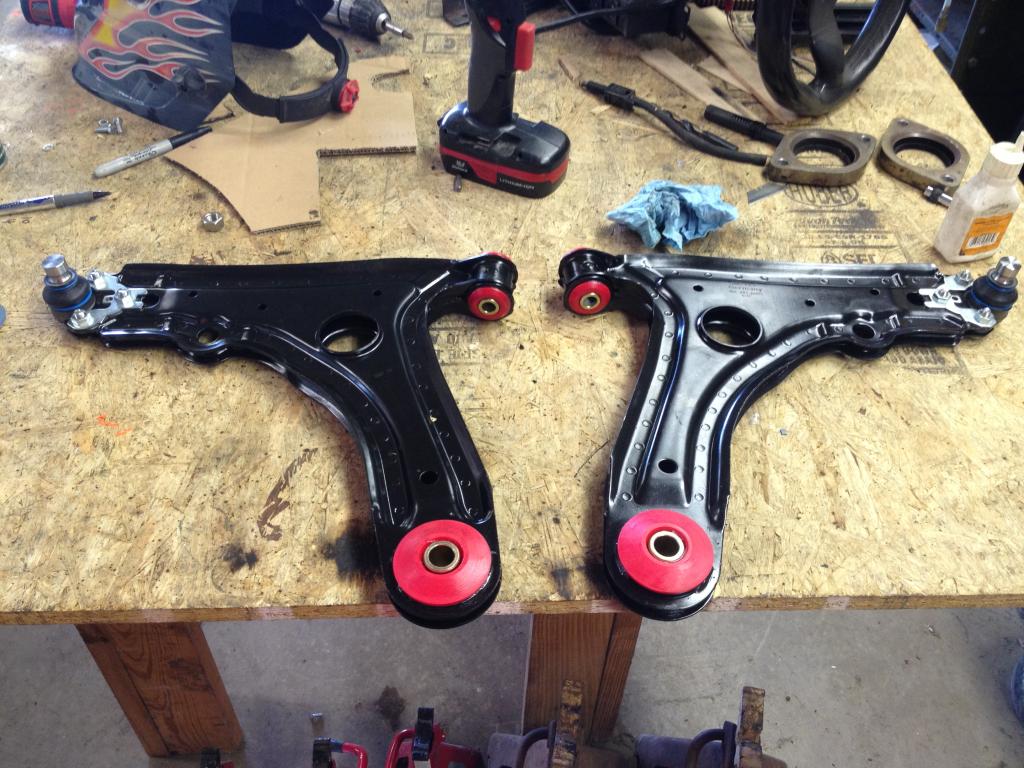
They rears were pretty easy to get in but the fronts posed a problem. A press doesnt work, for me anyways. Here is the simple way. A full thread bolt that's long enough to go thru everything, large washers and nut. I used a partial threaded bolt so I had to finish it off in the press. But if you have a fully threaded one it will work perfect. I used synthetic grease for lube the stuff they give you isn't very slippery.


I took the drivers seat out of the parts corrado to determine pedal placement. The seat is VERY close to the new driveshaft tunnel about an 1/8" gap?
I'm using a drive by wire throttle body and the silverado pedal is massive and its bent towards the transmission tunnel. To get proper placement it needed to go around the steering shaft. Steaksauce gave me a mk2 pedal cluster a while back and I noticed the brake pedal was bent the way I needed it. So I cut both pedals off and welded them together and the proper measurements to get the full sweep of the pedal sensor.
As you can see I have a million holes for wiring. It's hard to make out on a phone but I also have the holes drilled for the wilwood brake pedal/master cylinder.
Since all the holes are there and I don't need them all (I hope) I made a template and cut a plate to cover them up and strengthen it up. It's bolted and riveted together to draw it together for tack welding.
Used self etching primer to keep everything from flash rusting. I'm gonna need to do some bondo work.
Im mot going to run a brake booster due to space constraints, there is simply no room under the hood. I have done a lot of research on not using one. Everything comes into play such as pedal ratio and master cylinder bore size. I went with a 8:1 pedal and 7/8 bore master cylinder. It should give good pedal feel and solid braking. I can fine tune with different size master cylinders if need be. Typically, iirc, power brake pedal ratio is around 5:1 meaning is a shorter length pedal as the booster is making the job easier and you don't need the leverage.
Here's the setup. The aluminum plate is a spacer that will go between the master cylinder and firewall. This master cylinder can also be used with a remote reservoir which Im sure I will be using.
I got the subframe all welded up and in place. When I took it out I checked out the control arm bushings and of course they were toast. I bought new meyle control arms without bushings and pressed in some urethane ones and replaced the ball joints.
They rears were pretty easy to get in but the fronts posed a problem. A press doesnt work, for me anyways. Here is the simple way. A full thread bolt that's long enough to go thru everything, large washers and nut. I used a partial threaded bolt so I had to finish it off in the press. But if you have a fully threaded one it will work perfect. I used synthetic grease for lube the stuff they give you isn't very slippery.

 02-01-2015, 03:33 PM
#24
Launching!
Thread Starter
Join Date: Oct 2013
Posts: 239
Likes: 0
Received 0 Likes
on
0 Posts
Disclaimer: what you are about to see will/may **** of your significant other. Do not get caught, if you do don't blame it on me.
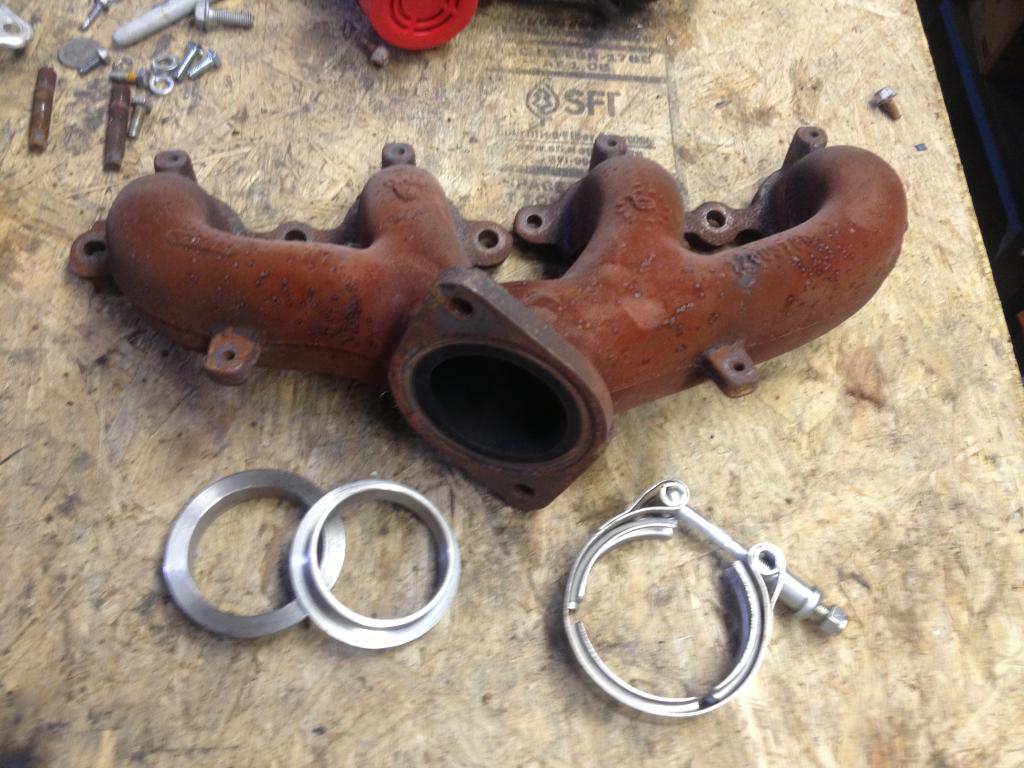
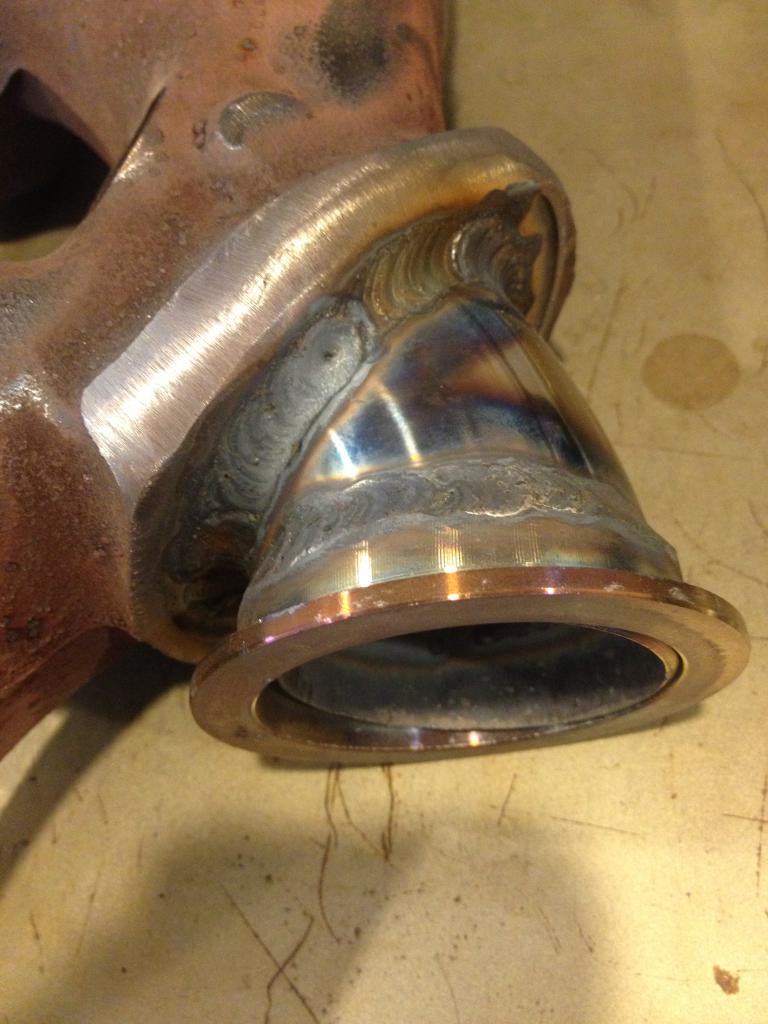
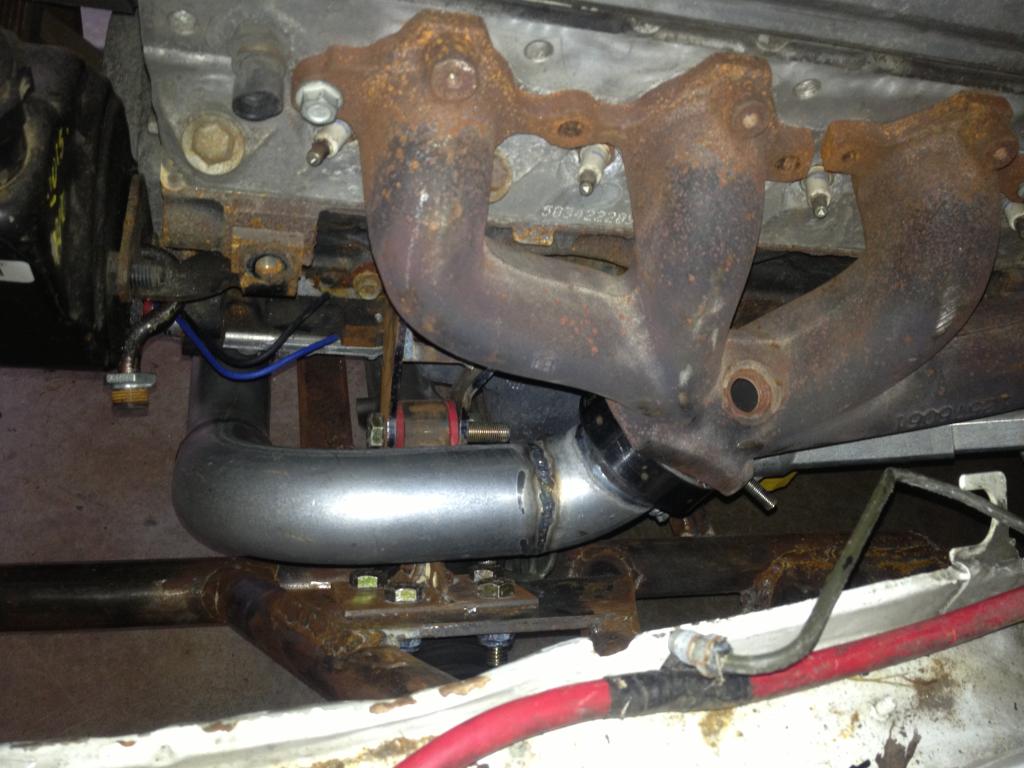
This post is about welding stainless v-band flanges onto cast iron GM ls3 exhaust manifolds courtesy of the resident The Viper's corvette. V-bands get rid of any gaskets, make exhaust connections easier and allow more room.
I have never welded cast iron before but knew the basics. I used stainless v-bands as stainless has similar flexing during heat cycles as cast so hopefully when done nothing will crack. They were tig welded with 309lsi wire as 309 is for dissimilar metals.
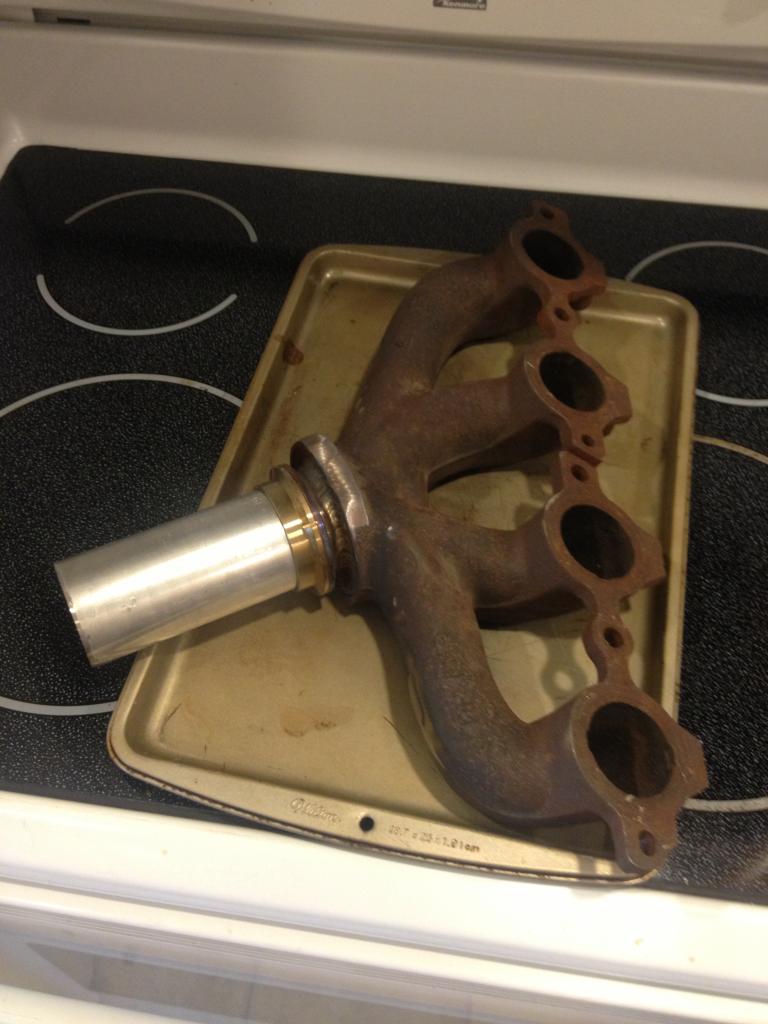
When welding cast iron you need to preheat and post heat and let cool very slowly to prevent cracks. I used a cookie sheet for the manifold and preheated the oven to 450 and let it heat for a couple of hours while the wife's at work.
Prior to heating i had cut off the heat shield mounting tabs along with the ears of the 2 bolt exhaust flanges that are getting replaced. After the preheat, I had a piece of scrap pipe that I slid the vband's on for a tight fit and prevent warping and inserted it into the manifold for welding. These manifolds welded like butter which I'm amazed about as i think they turned out great. After welding I threw them back into the oven for another hour and turned it off and they will stay until completely cool.
Manifold and v-band parts
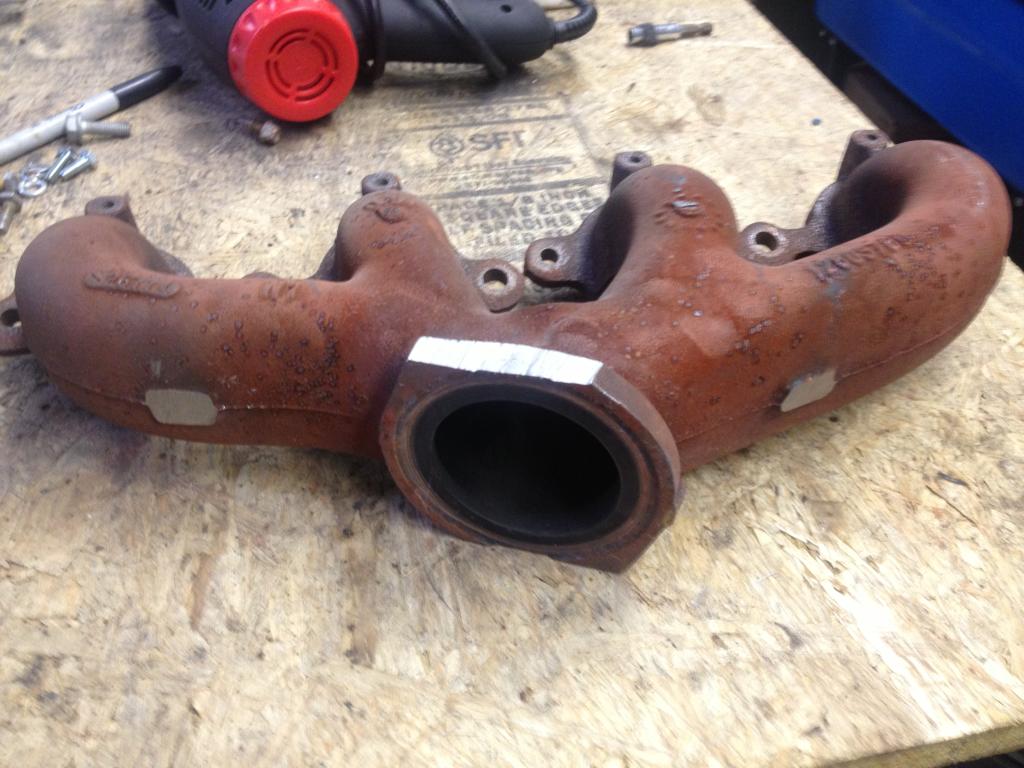
Cut off the heat shield tabs and 2 bolt flange ears.
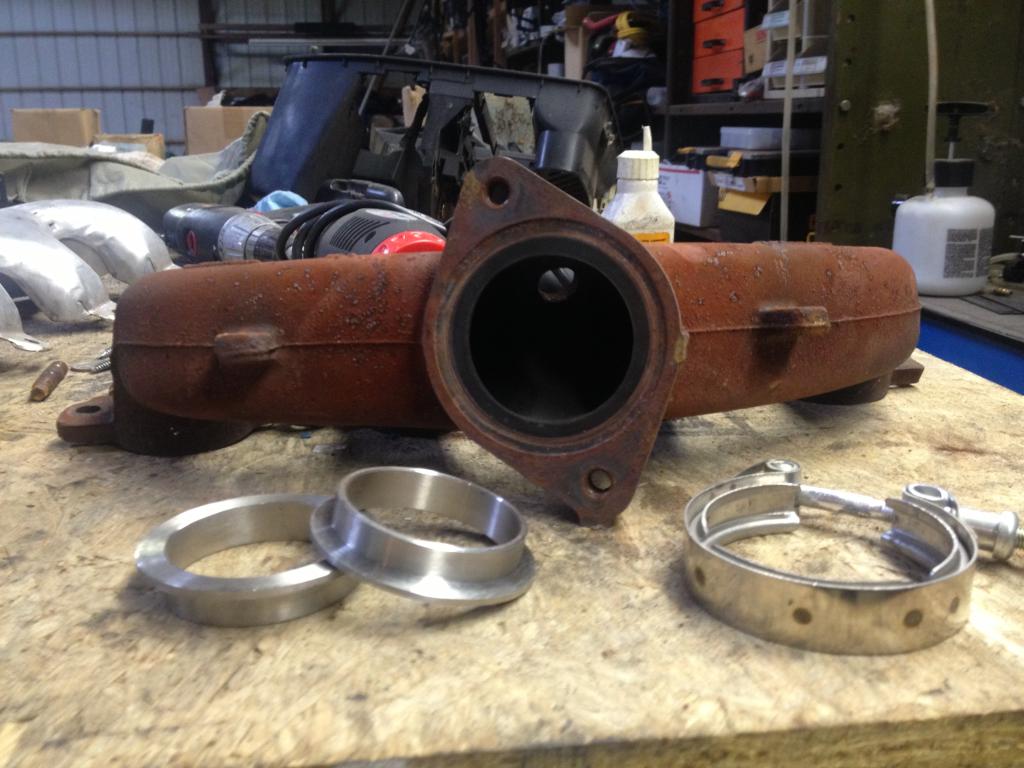
V-band welded onto manifold. Pipe is still inserted thru v-bands to minimize warping. Clamp was also applied.

This post is about welding stainless v-band flanges onto cast iron GM ls3 exhaust manifolds courtesy of the resident The Viper's corvette. V-bands get rid of any gaskets, make exhaust connections easier and allow more room.
I have never welded cast iron before but knew the basics. I used stainless v-bands as stainless has similar flexing during heat cycles as cast so hopefully when done nothing will crack. They were tig welded with 309lsi wire as 309 is for dissimilar metals.
When welding cast iron you need to preheat and post heat and let cool very slowly to prevent cracks. I used a cookie sheet for the manifold and preheated the oven to 450 and let it heat for a couple of hours while the wife's at work.
Prior to heating i had cut off the heat shield mounting tabs along with the ears of the 2 bolt exhaust flanges that are getting replaced. After the preheat, I had a piece of scrap pipe that I slid the vband's on for a tight fit and prevent warping and inserted it into the manifold for welding. These manifolds welded like butter which I'm amazed about as i think they turned out great. After welding I threw them back into the oven for another hour and turned it off and they will stay until completely cool.
Manifold and v-band parts
Cut off the heat shield tabs and 2 bolt flange ears.
V-band welded onto manifold. Pipe is still inserted thru v-bands to minimize warping. Clamp was also applied.
 02-01-2015, 03:34 PM
#27
Launching!
Thread Starter
Join Date: Oct 2013
Posts: 239
Likes: 0
Received 0 Likes
on
0 Posts
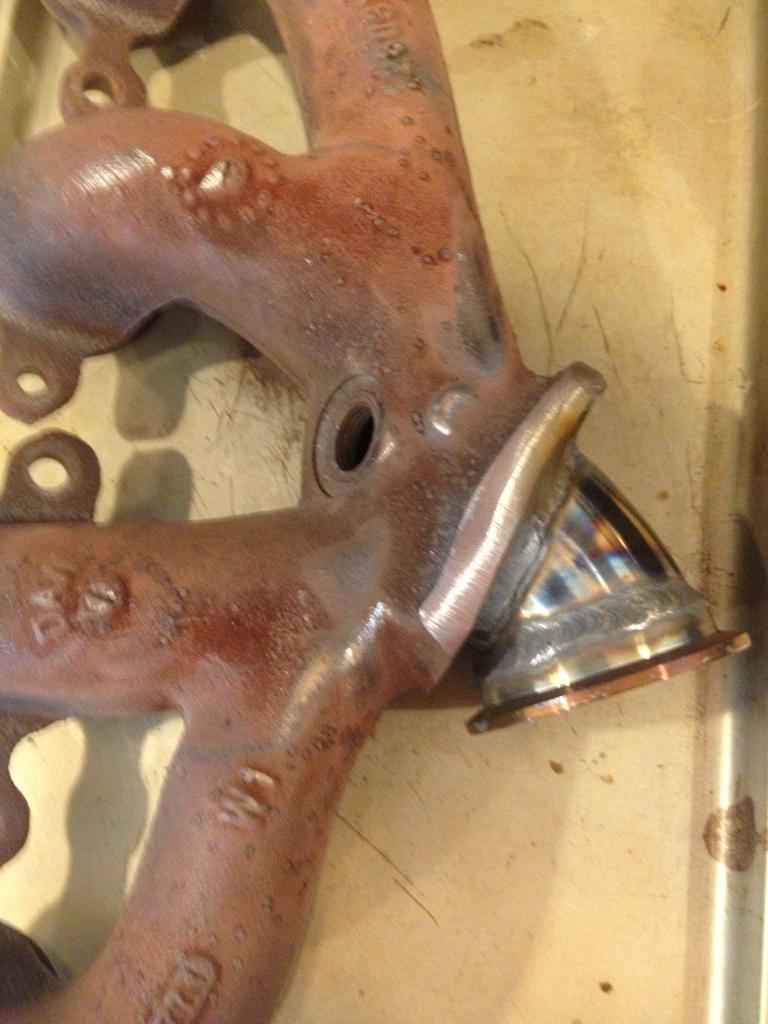
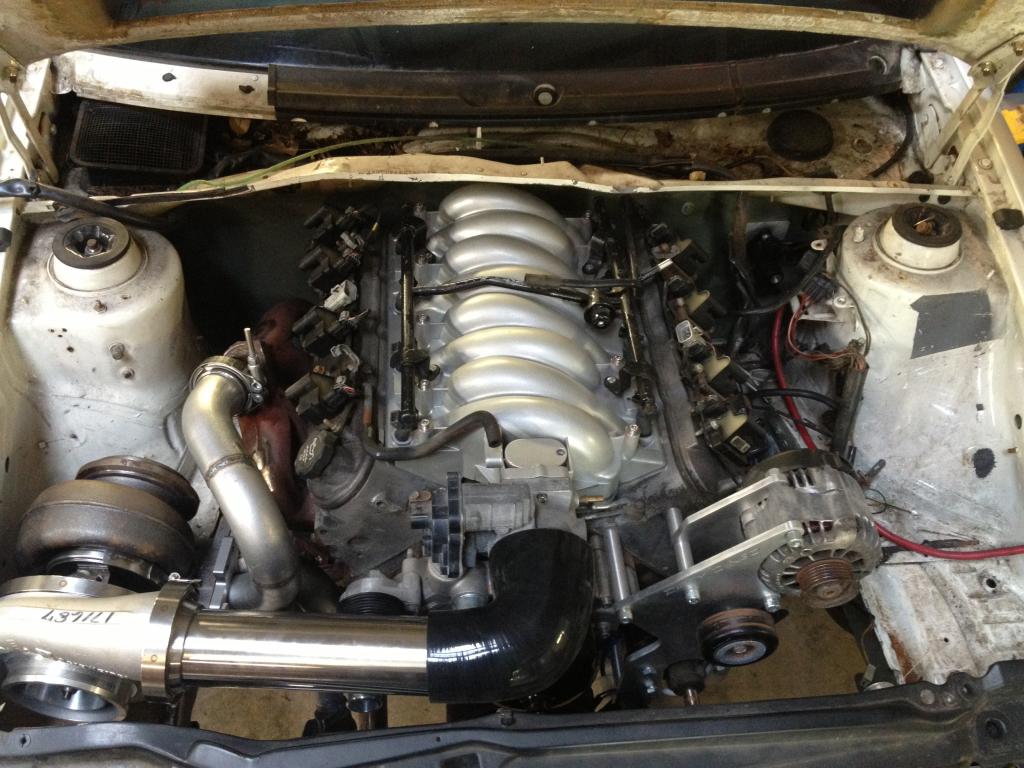
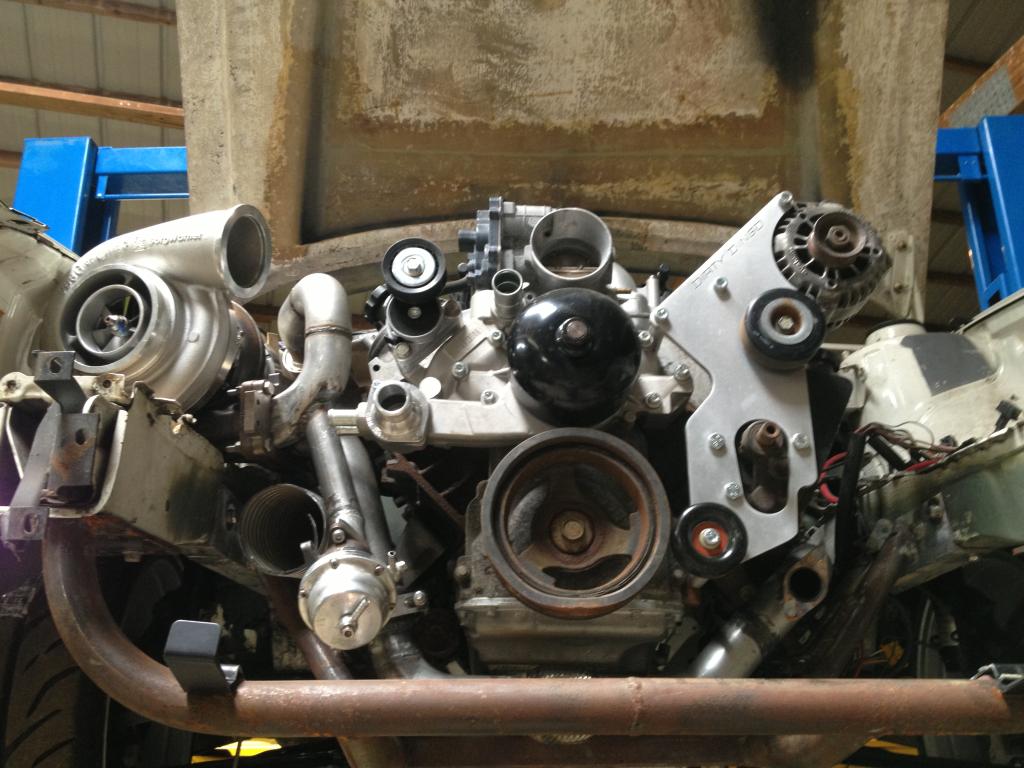
Drivers side from top.
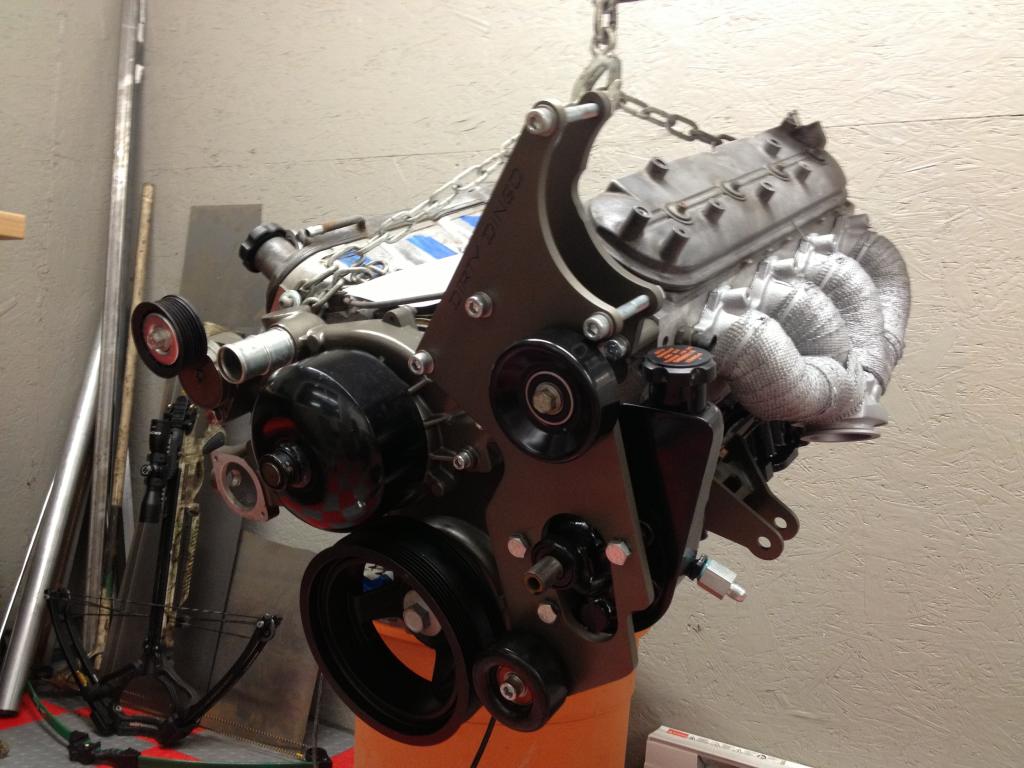
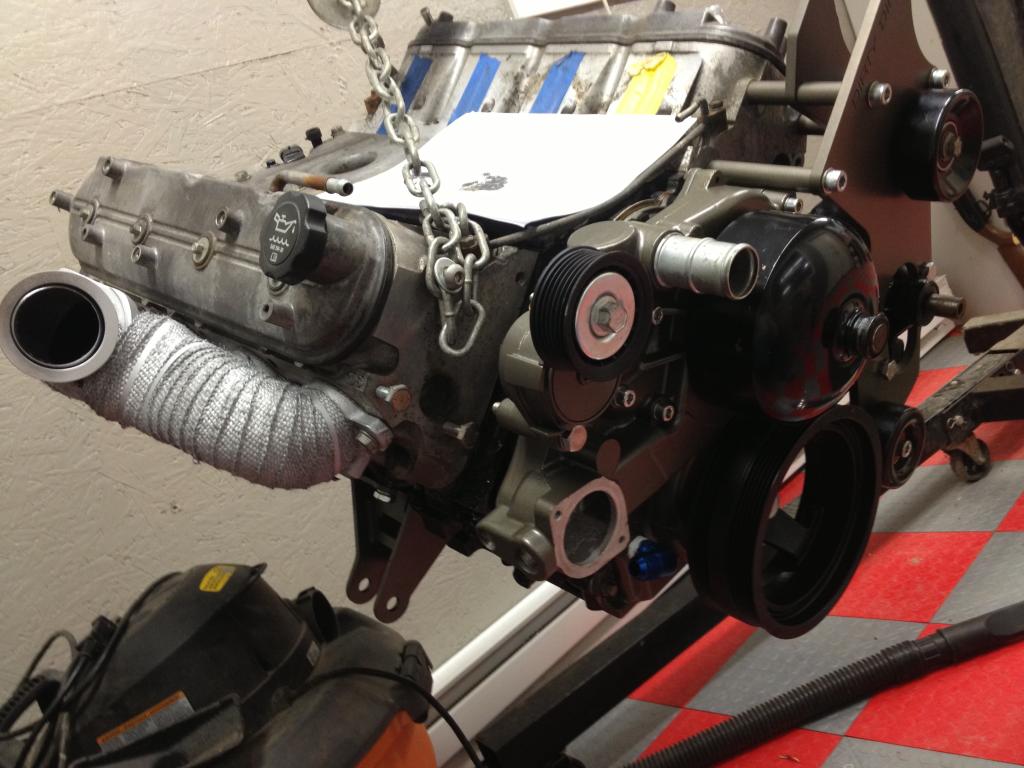
Passenger side. The exhaust pipe will run from the vband on the manifold on left to the other hole on the t6 turbo flange. It's going to be very tight what isnt on this?) to the heater hose inlet/outlet on the water pump. I think I'm going to have to remove those barbs, thread them and put some elbows on them to loop them downwards. Once I get the pipes fabbed ill be building a turbo brace using heim joints as the turbo weighs in at around 45 lbs.
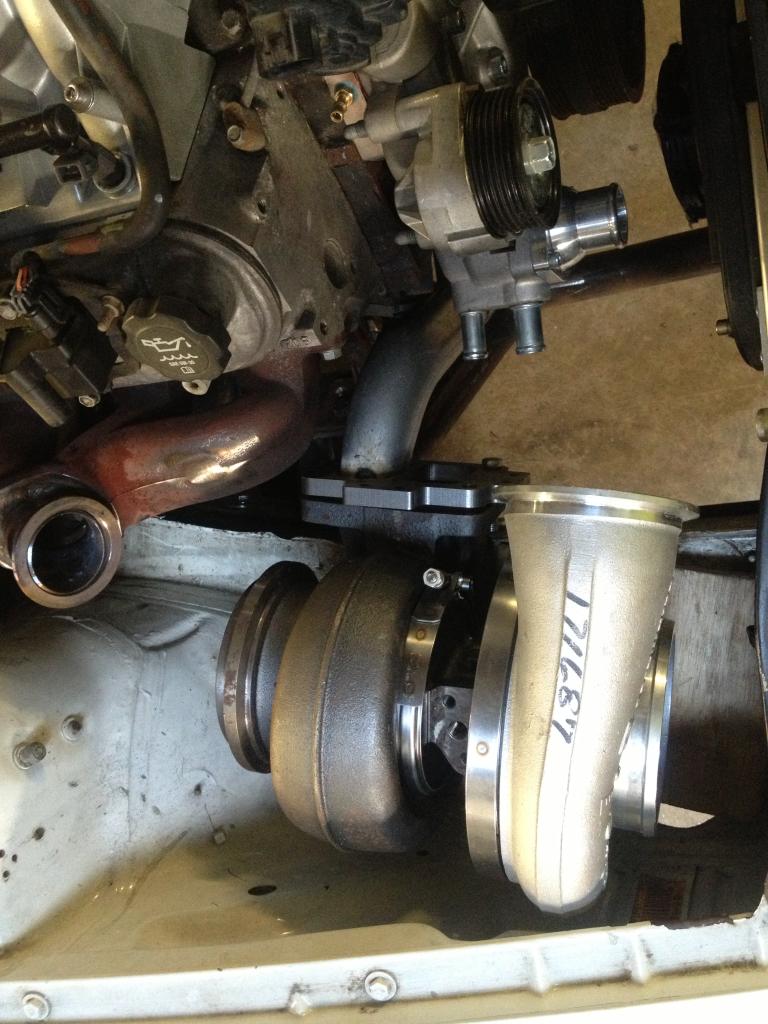
Passenger side. The exhaust pipe will run from the vband on the manifold on left to the other hole on the t6 turbo flange. It's going to be very tight what isnt on this?) to the heater hose inlet/outlet on the water pump. I think I'm going to have to remove those barbs, thread them and put some elbows on them to loop them downwards. Once I get the pipes fabbed ill be building a turbo brace using heim joints as the turbo weighs in at around 45 lbs.
02-01-2015, 03:34 PM
#28
Launching!
Thread Starter
Join Date: Oct 2013
Posts: 239
Likes: 0
Received 0 Likes
on
0 Posts
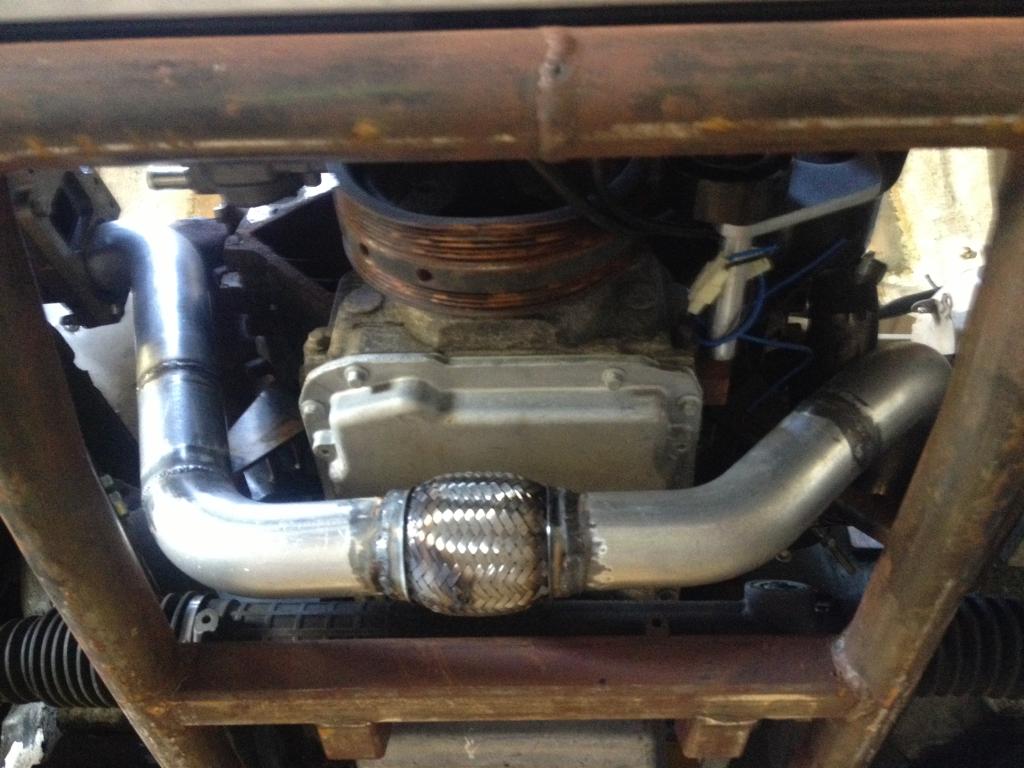
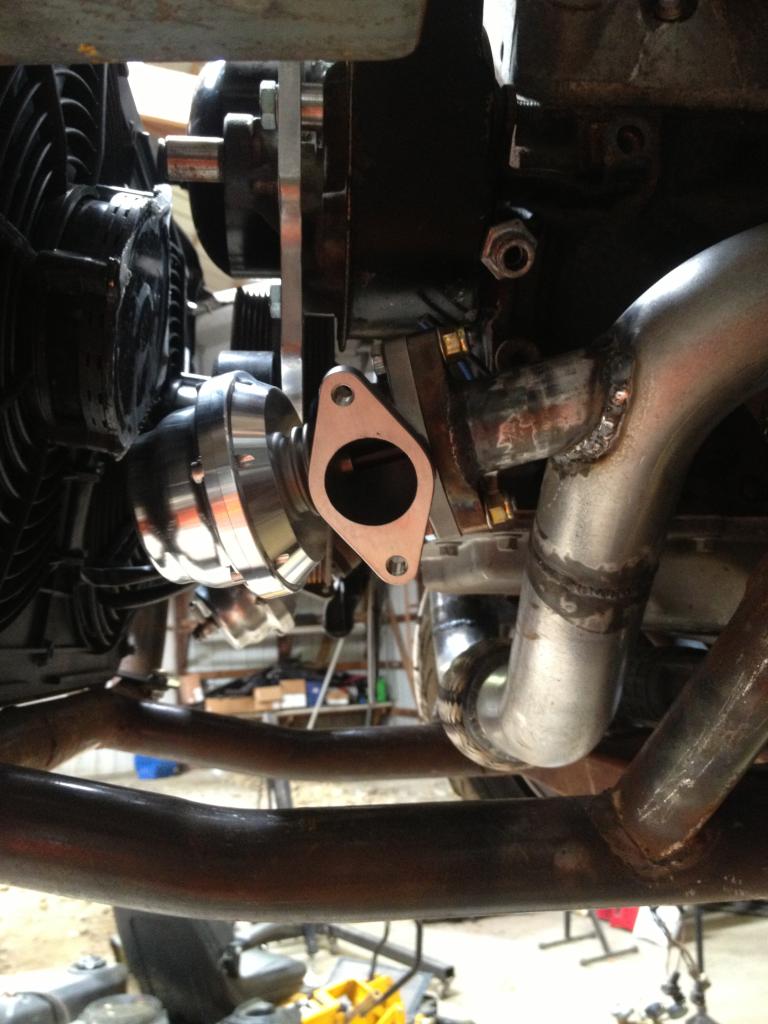
Passenger side piping.
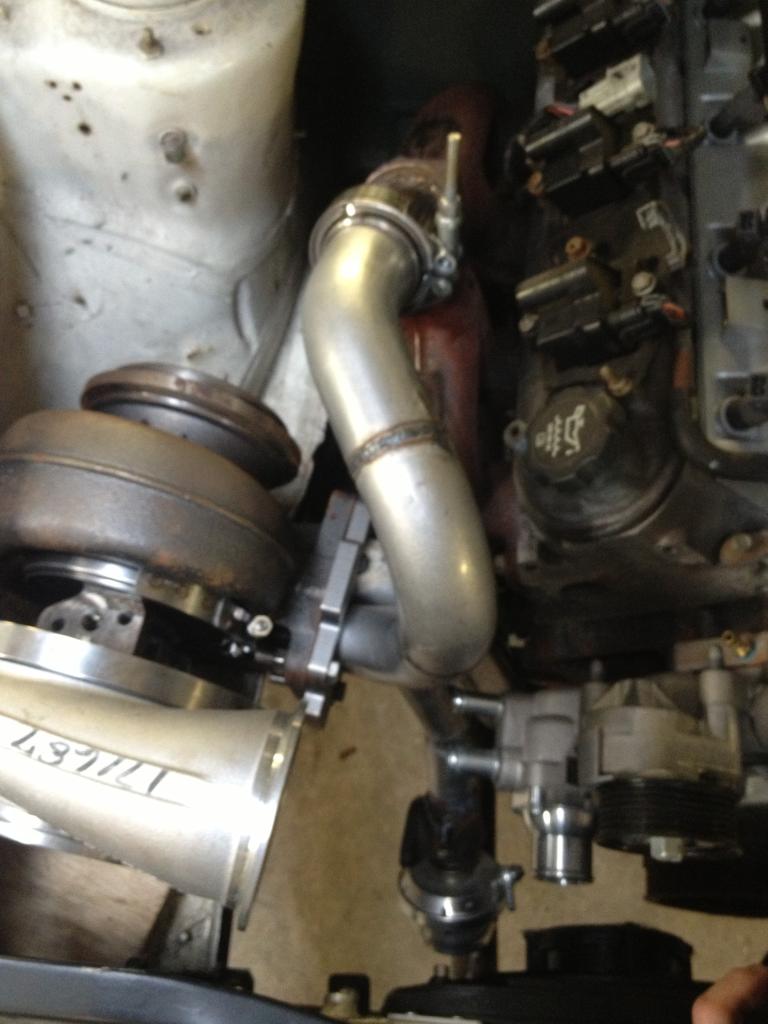
First 38mm tial wastegate installed.
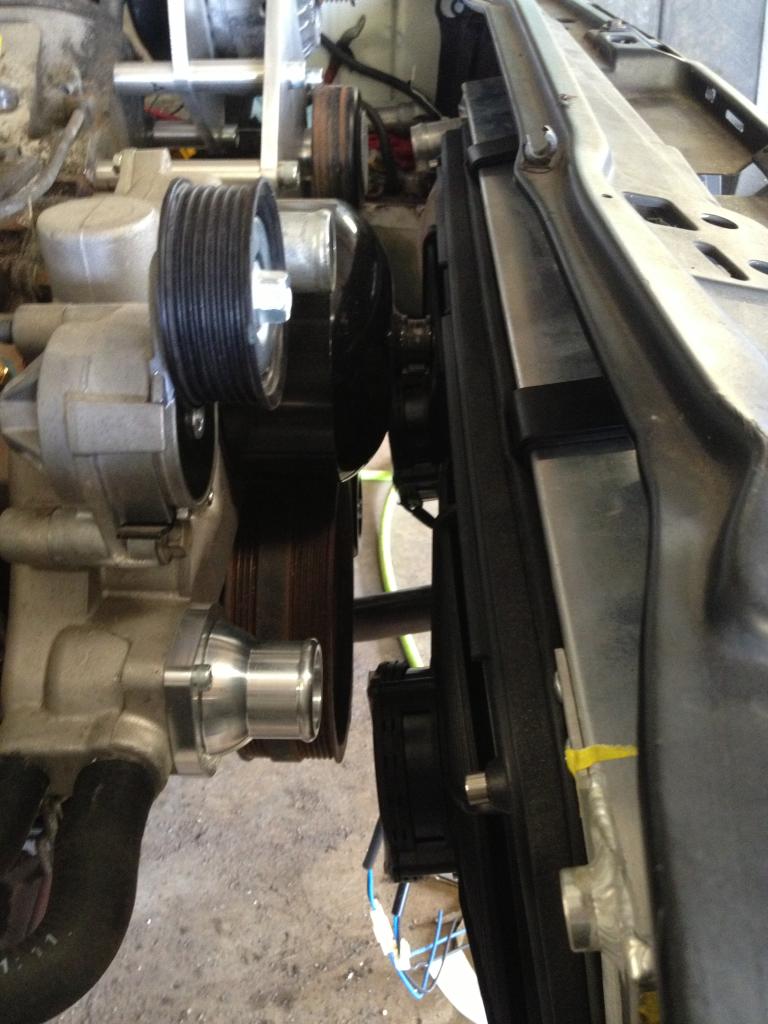
The pipe that goes from the turbo to throttle body is hitting the tensioner so it will need an elbow welded in for clearance. But amazingly everything still clears the hood so thats a huge plus.

First 38mm tial wastegate installed.
The pipe that goes from the turbo to throttle body is hitting the tensioner so it will need an elbow welded in for clearance. But amazingly everything still clears the hood so thats a huge plus.
02-01-2015, 03:35 PM
#29
Launching!
Thread Starter
Join Date: Oct 2013
Posts: 239
Likes: 0
Received 0 Likes
on
0 Posts
No room without cutting the hell out of the bumper. It will be running e85 @ ~10 psi so octane isn't a problem but if the intake air temps get out of hand I could run a meth system if needed for cooling effects.
2nd wastegate in.

2nd wastegate in.
02-01-2015, 03:35 PM
#30


ballsy build. Keep up the great work !!!
02-01-2015, 03:35 PM
#31
Launching!
Thread Starter
Join Date: Oct 2013
Posts: 239
Likes: 0
Received 0 Likes
on
0 Posts
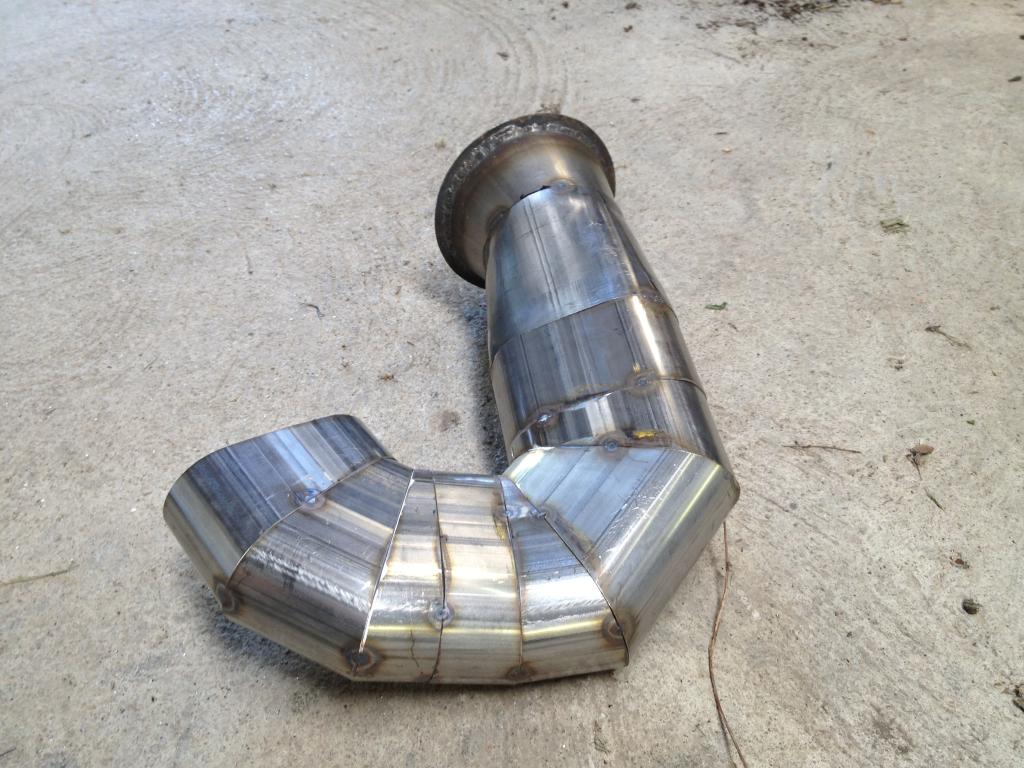
Added another vband to the crossover pipe from drivers side to turbo. Doing that allowed me to pull all turbo piping out without taking any of the car apart.
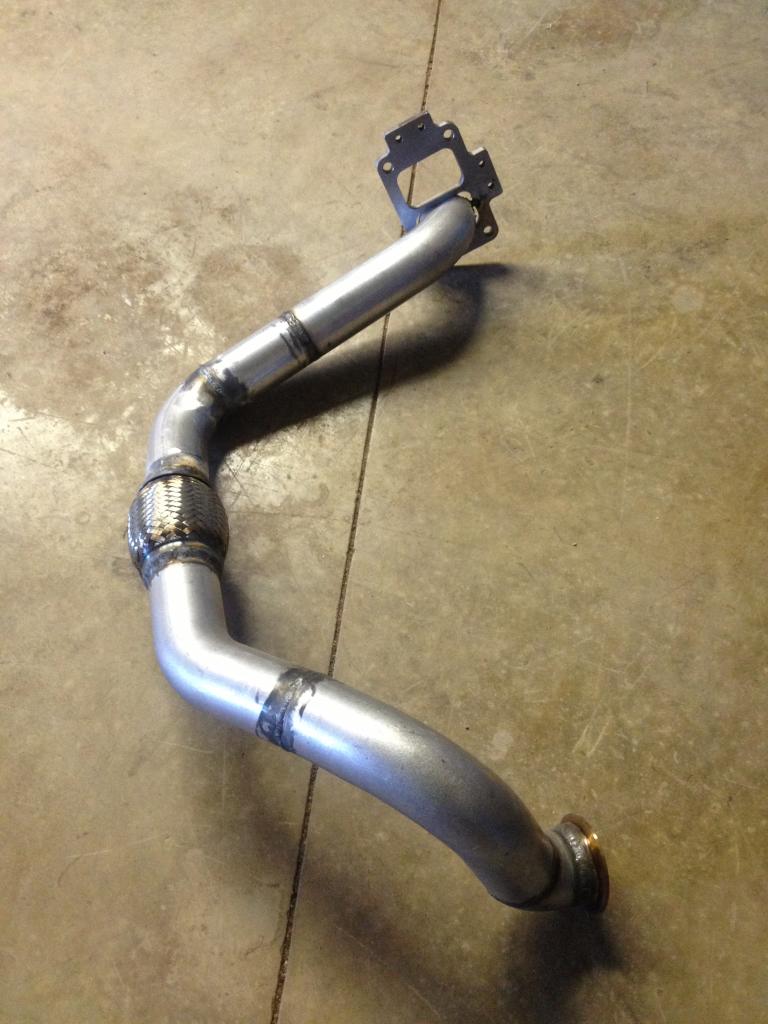
Here's the beginning of the downpipe. Goes from 5" to 4" to oval. It fits past the strut tower but I may have to massage it a little for more room.
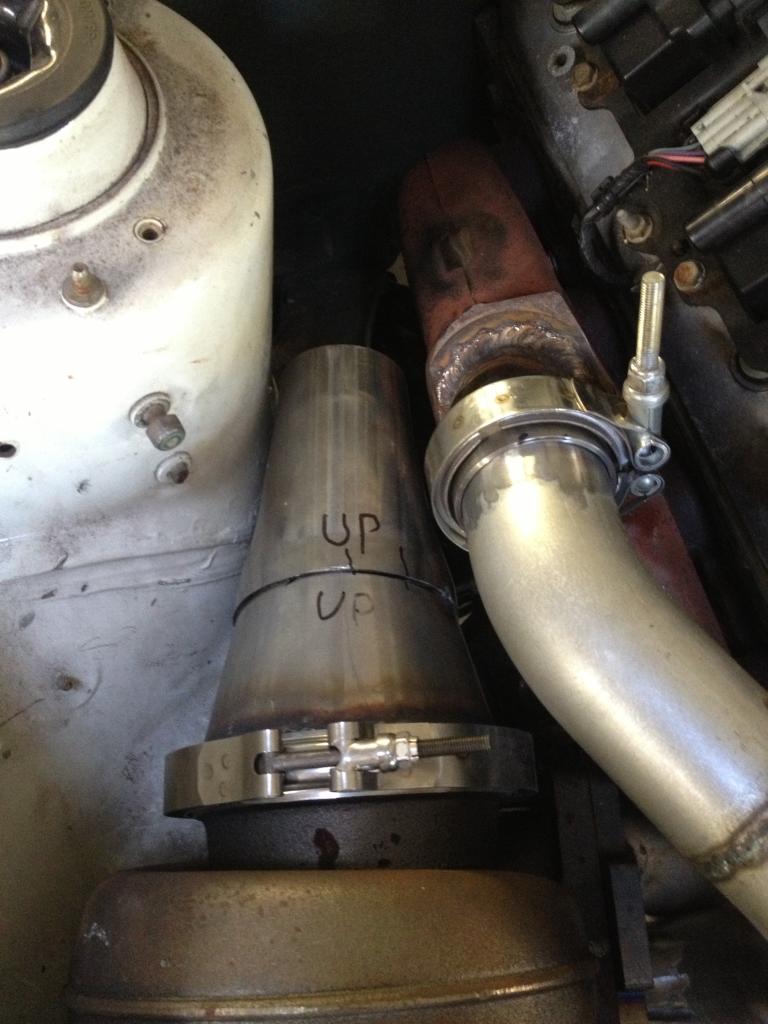
Here's the beginning of the downpipe. Goes from 5" to 4" to oval. It fits past the strut tower but I may have to massage it a little for more room.
02-01-2015, 03:36 PM
#32
Launching!
Thread Starter
Join Date: Oct 2013
Posts: 239
Likes: 0
Received 0 Likes
on
0 Posts
Nice!
I'm probably going to por-15 the rear and front subframe.
The car has had all emblem and corresponding holes shaved sometime in its life. I think the only thing ill do is get a corrado badge and 3m it on.
Now, on to business. I took a break from exhaust work.
I put in some more braces from the roll cage onto the rear frame rails I built.
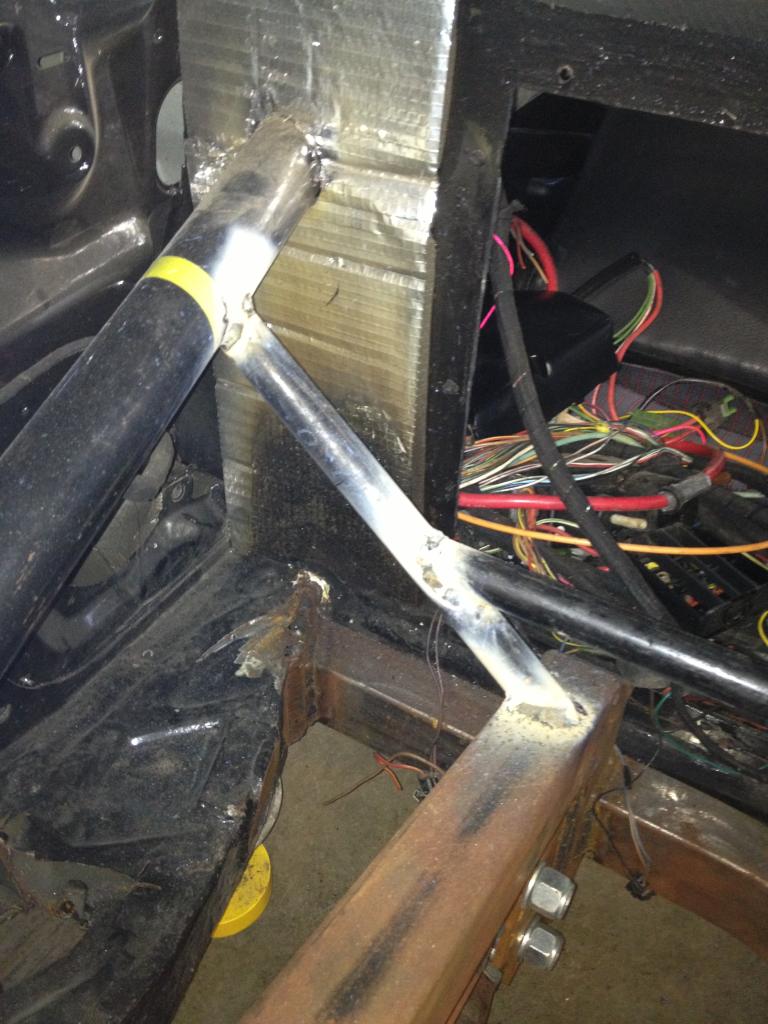
Both sides in along with a crossmember on them.
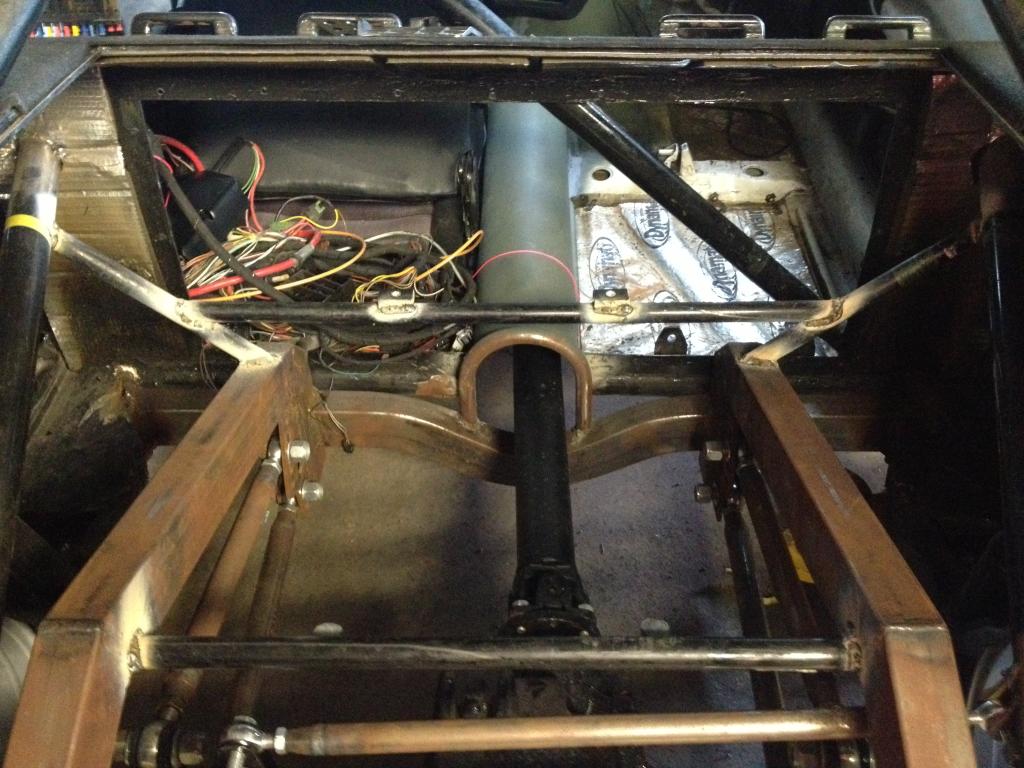
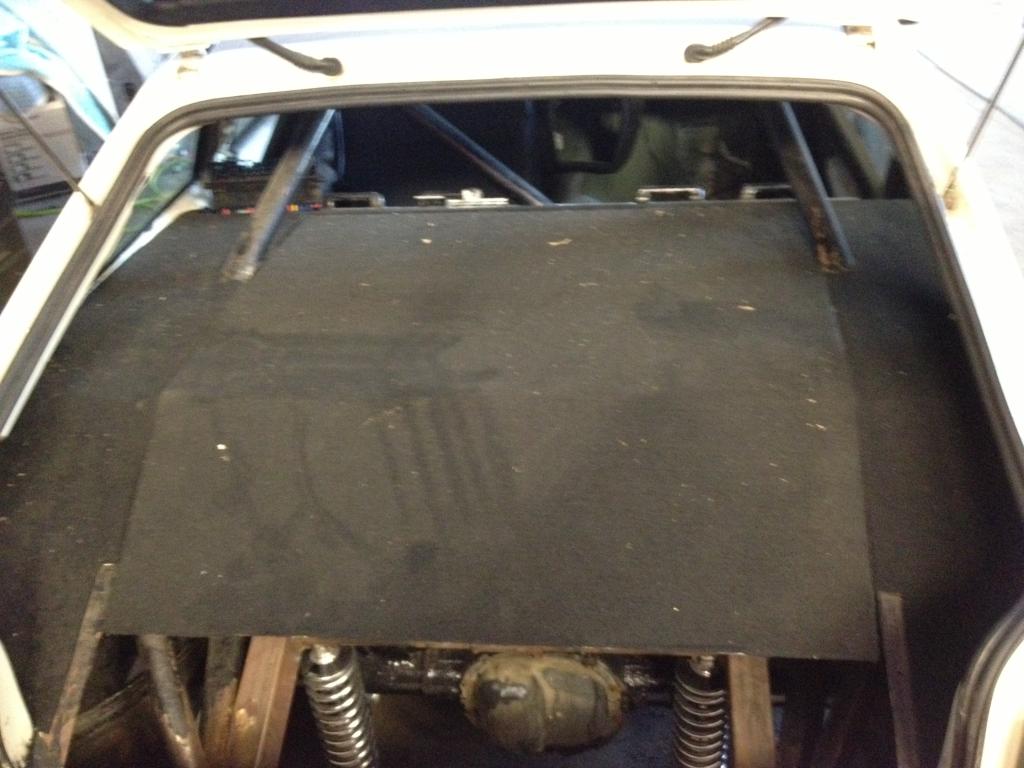
Here's the reason of the crossmember. Now you see it...
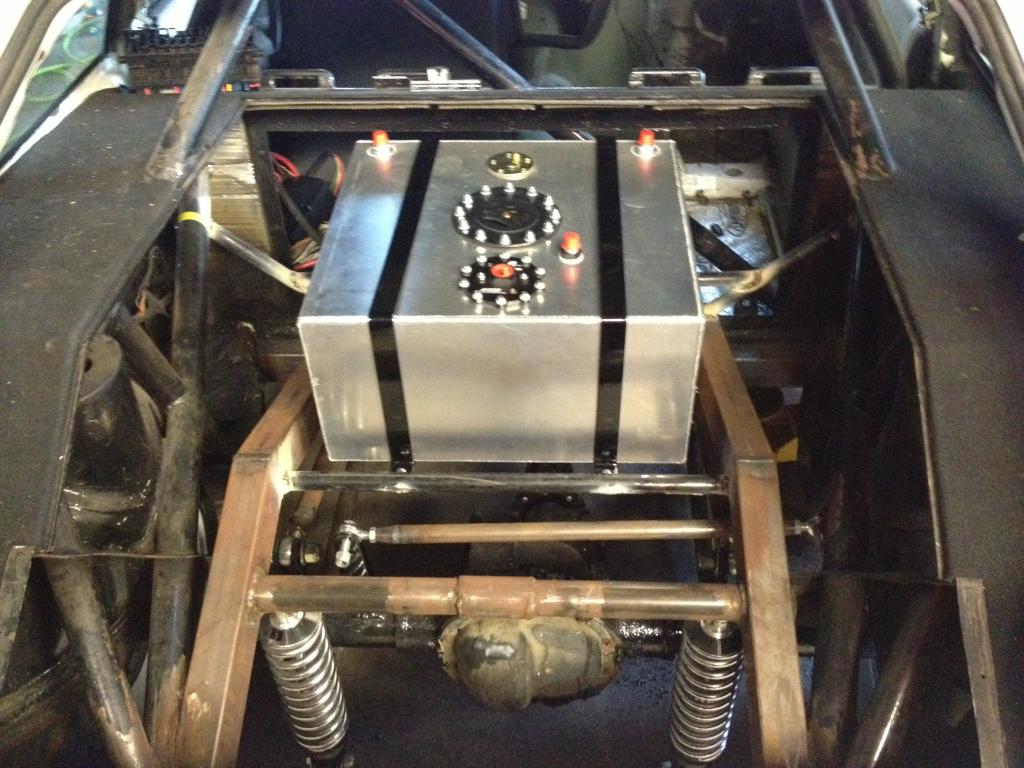
Now you don't.
I'm probably going to por-15 the rear and front subframe.
The car has had all emblem and corresponding holes shaved sometime in its life. I think the only thing ill do is get a corrado badge and 3m it on.
Now, on to business. I took a break from exhaust work.
I put in some more braces from the roll cage onto the rear frame rails I built.
Both sides in along with a crossmember on them.
Here's the reason of the crossmember. Now you see it...
Now you don't.
02-01-2015, 03:37 PM
#33
great fab work too
02-01-2015, 03:37 PM
#34
Launching!
Thread Starter
Join Date: Oct 2013
Posts: 239
Likes: 0
Received 0 Likes
on
0 Posts
Haven't touched it for a few weeks as I had to order a few parts and proceeded to work on my bathroom remodel. My next move is to pull the engine/transmission to drill/tap a oil return fitting and start working on brake lines.
Here's a few pics from then.
The exhaust will now be routed out the passenger side bumper in front of the wheel.
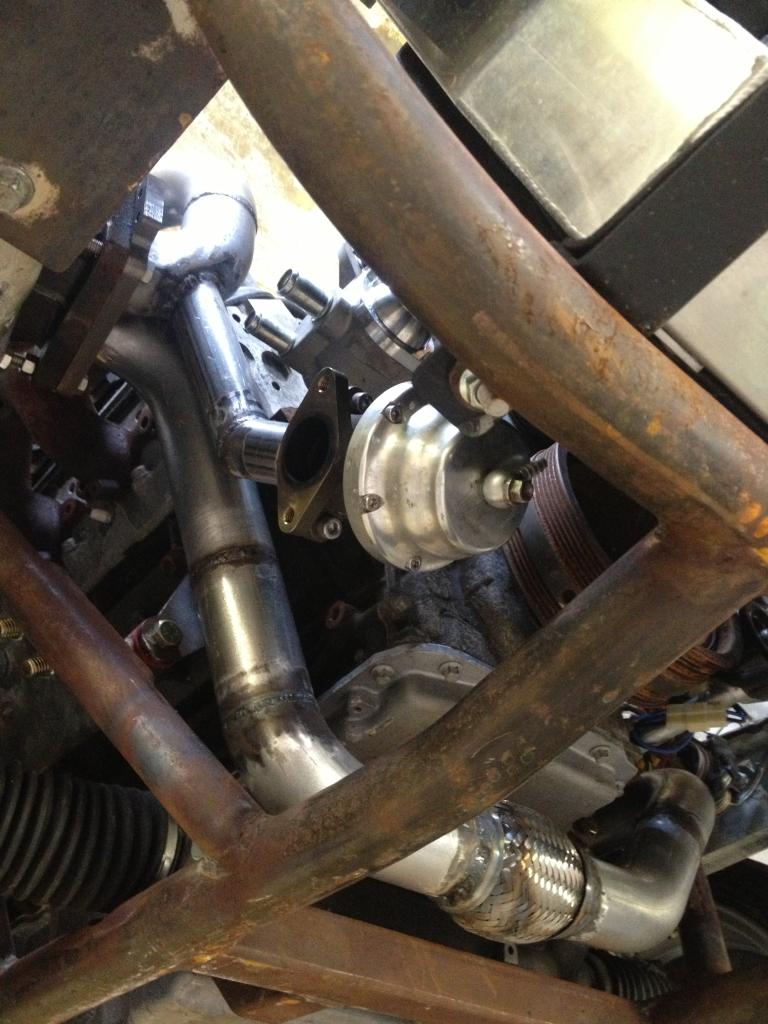
Turbo brace fabbed up and still allows a little movement. Its 3/8" rod that bolts to the cyl head and the t6 turbo flange. You can also see the 4" exhaust being routed back up front along side of the frame.
Here's a few pics from then.
The exhaust will now be routed out the passenger side bumper in front of the wheel.
Turbo brace fabbed up and still allows a little movement. Its 3/8" rod that bolts to the cyl head and the t6 turbo flange. You can also see the 4" exhaust being routed back up front along side of the frame.
02-01-2015, 03:39 PM
#35
Launching!
Thread Starter
Join Date: Oct 2013
Posts: 239
Likes: 0
Received 0 Likes
on
0 Posts
I bought a new alternator yesterday as my bearing were toast.
I also got a wilwood dual stage master cylinder as I see that I have room now.
I'm off Christmas week so maybe my son and I can get some work done.
I also got a wilwood dual stage master cylinder as I see that I have room now.
I'm off Christmas week so maybe my son and I can get some work done.
02-01-2015, 03:39 PM
#36
Launching!
Thread Starter
Join Date: Oct 2013
Posts: 239
Likes: 0
Received 0 Likes
on
0 Posts
I'm going to hold out on a cam until it has some miles under its belt.
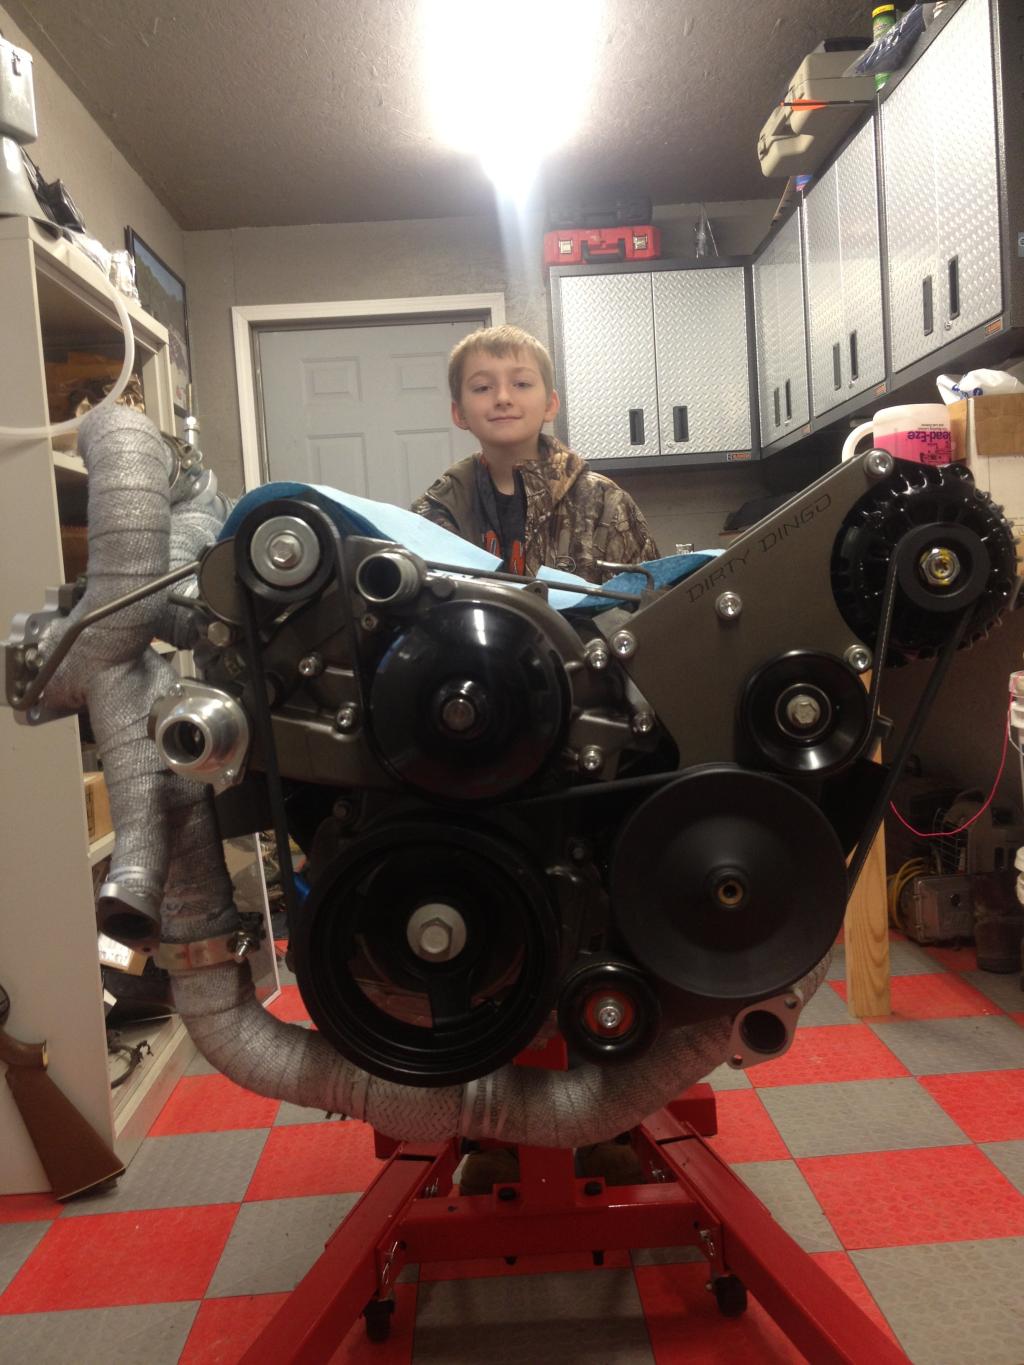
Took this week off work and got to spend time with my oldest and the corrado. I took the rear end and front subframe out for the 50th time and got it all coated in gloss black por-15.


Got to work on the engine as well. All new gaskets minus the head gaskets.
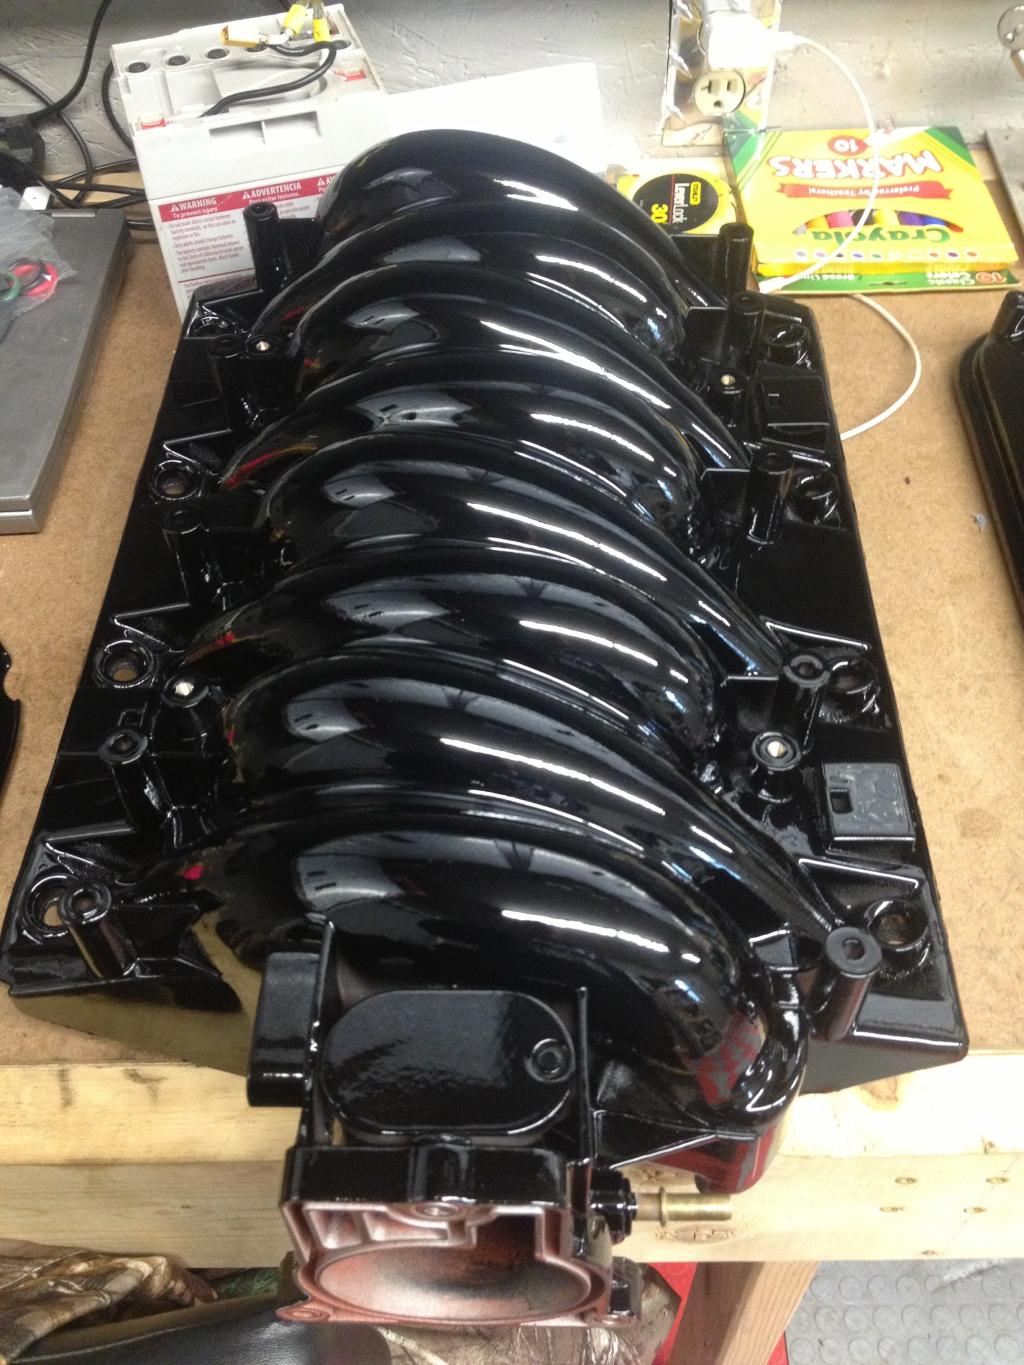
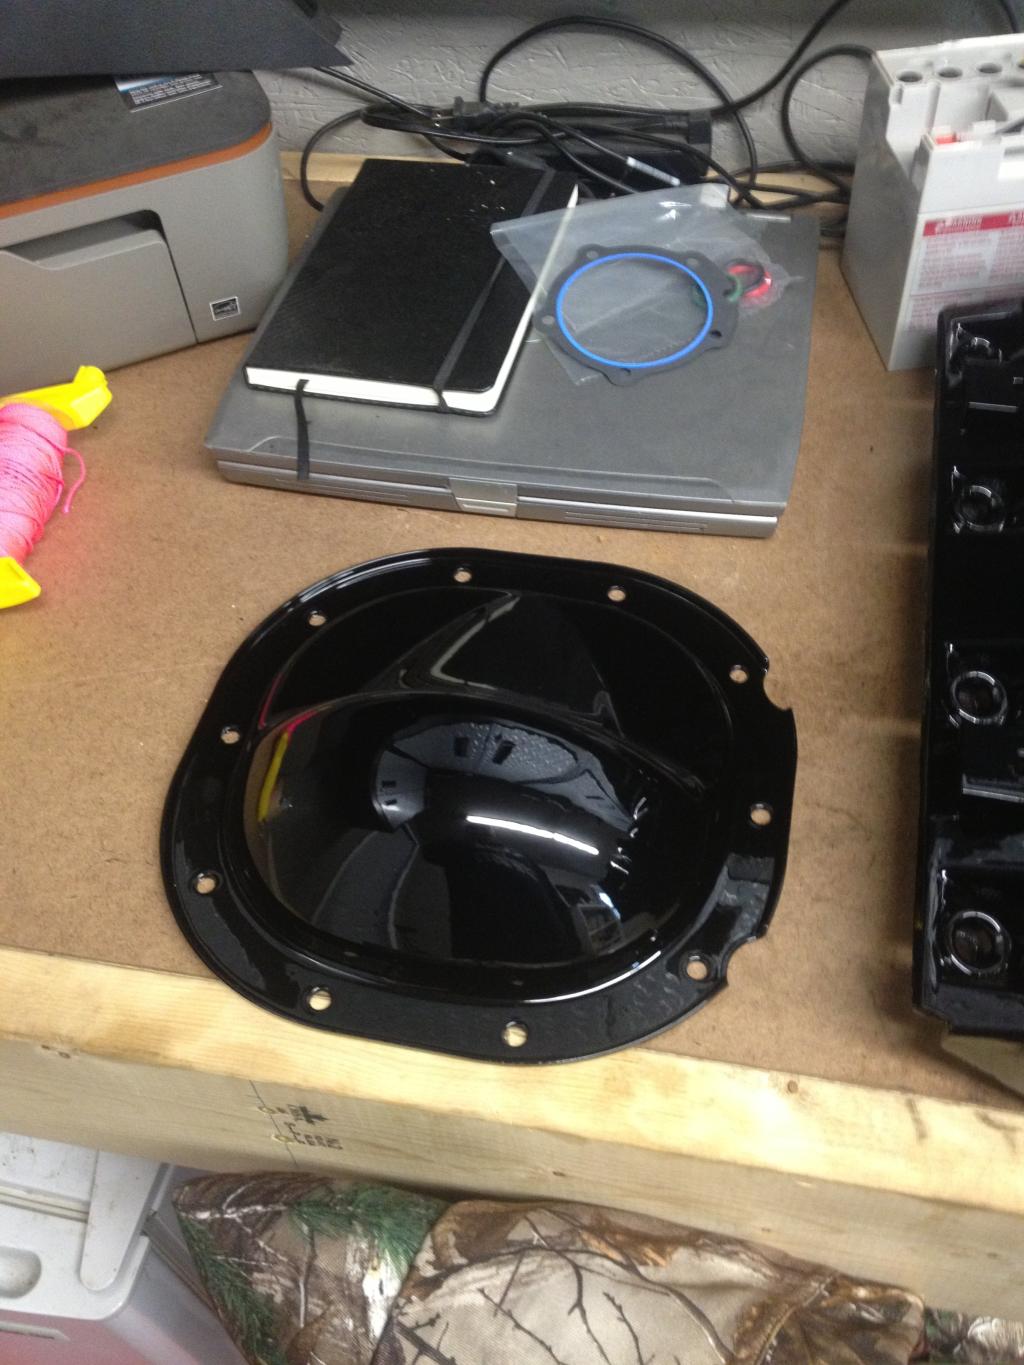
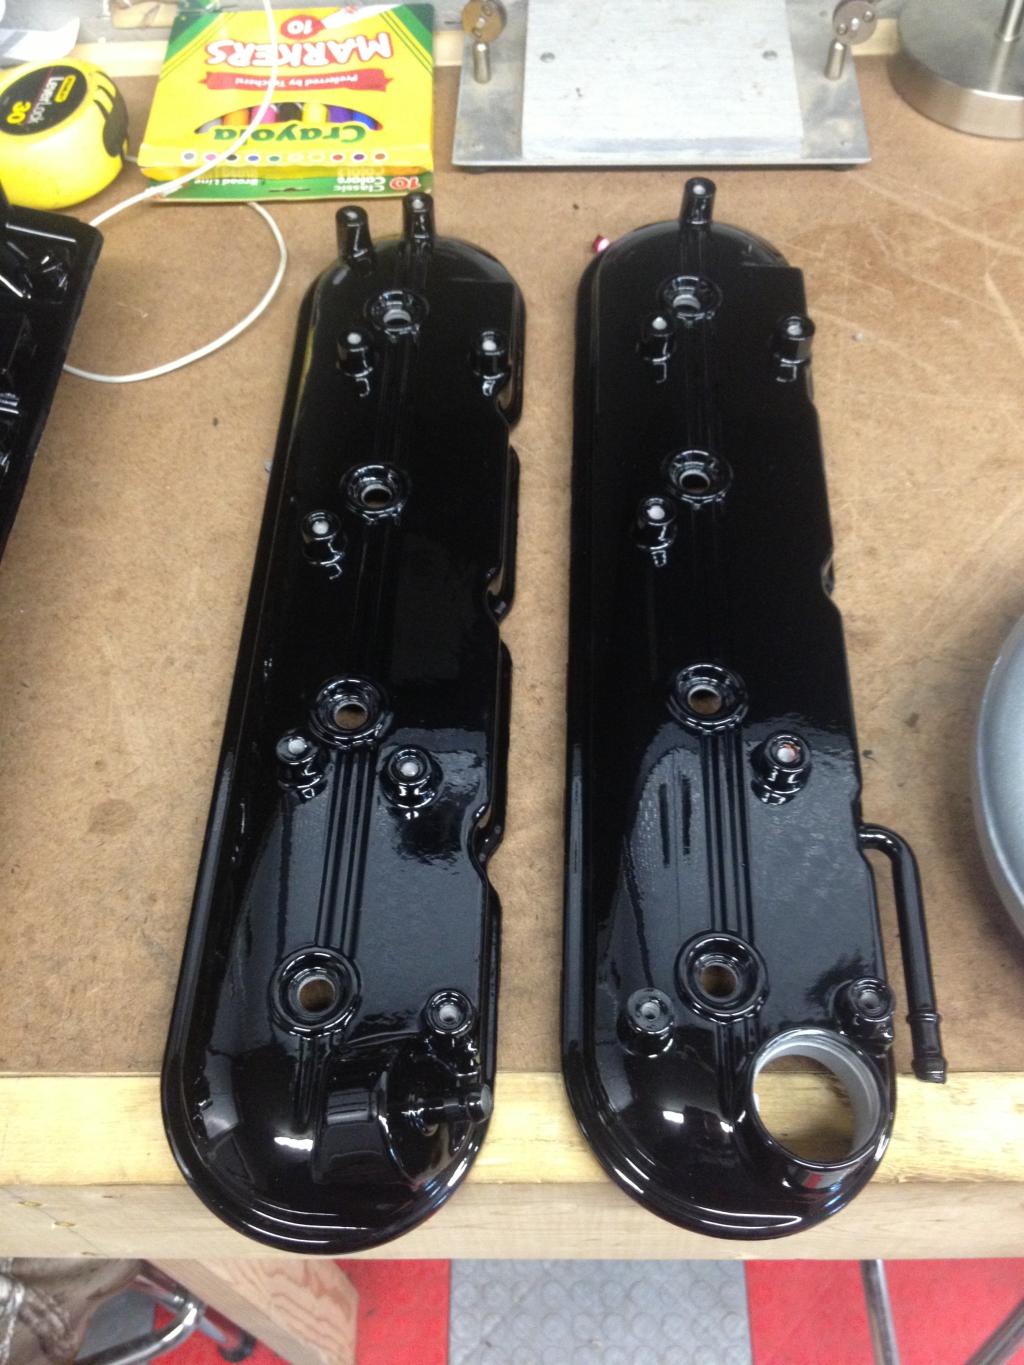
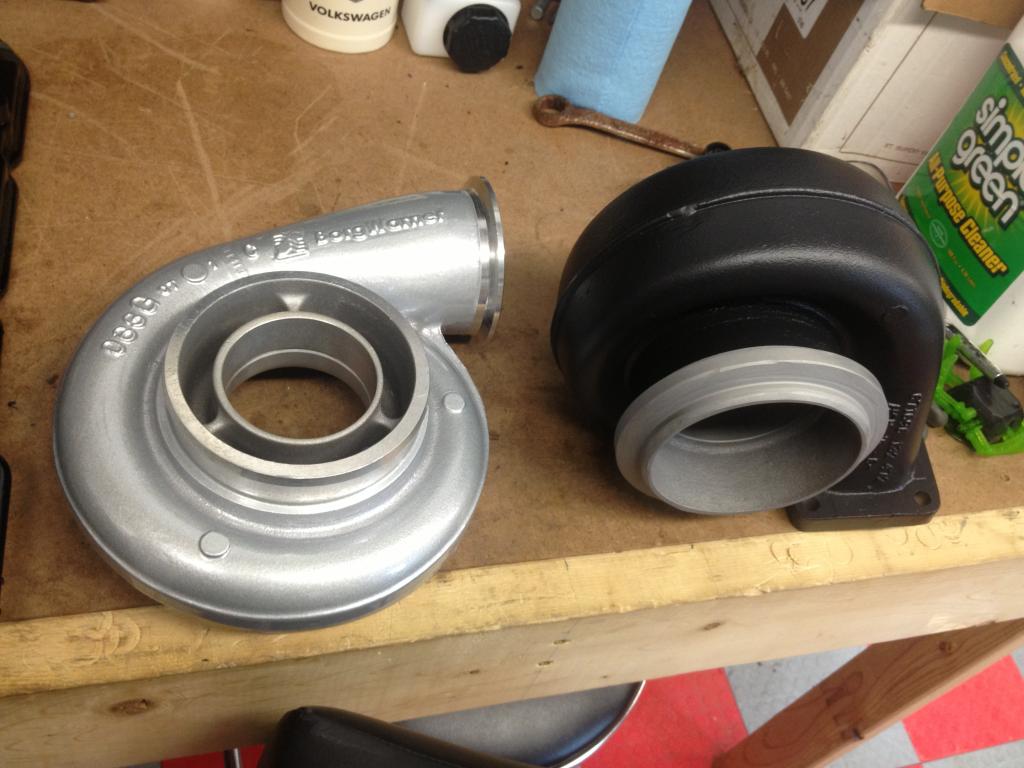
A few weeks ago I dropped off the valve covers, intake manifold, diff cover, compressor housing and turbine housing for powdercoating/paint/ceramic coating.
Took this week off work and got to spend time with my oldest and the corrado. I took the rear end and front subframe out for the 50th time and got it all coated in gloss black por-15.
Got to work on the engine as well. All new gaskets minus the head gaskets.
A few weeks ago I dropped off the valve covers, intake manifold, diff cover, compressor housing and turbine housing for powdercoating/paint/ceramic coating.
02-01-2015, 03:40 PM
#37
Launching!
Thread Starter
Join Date: Oct 2013
Posts: 239
Likes: 0
Received 0 Likes
on
0 Posts
Got a few things painted, powdercoated and ceramic coated at Paint and Powder Pros in Cincinnati.
Compressor housing is a silver metallic with pearl. Hot side is ceramic coated.
Compressor housing is a silver metallic with pearl. Hot side is ceramic coated.
02-01-2015, 03:40 PM
#38
Launching!
Thread Starter
Join Date: Oct 2013
Posts: 239
Likes: 0
Received 0 Likes
on
0 Posts
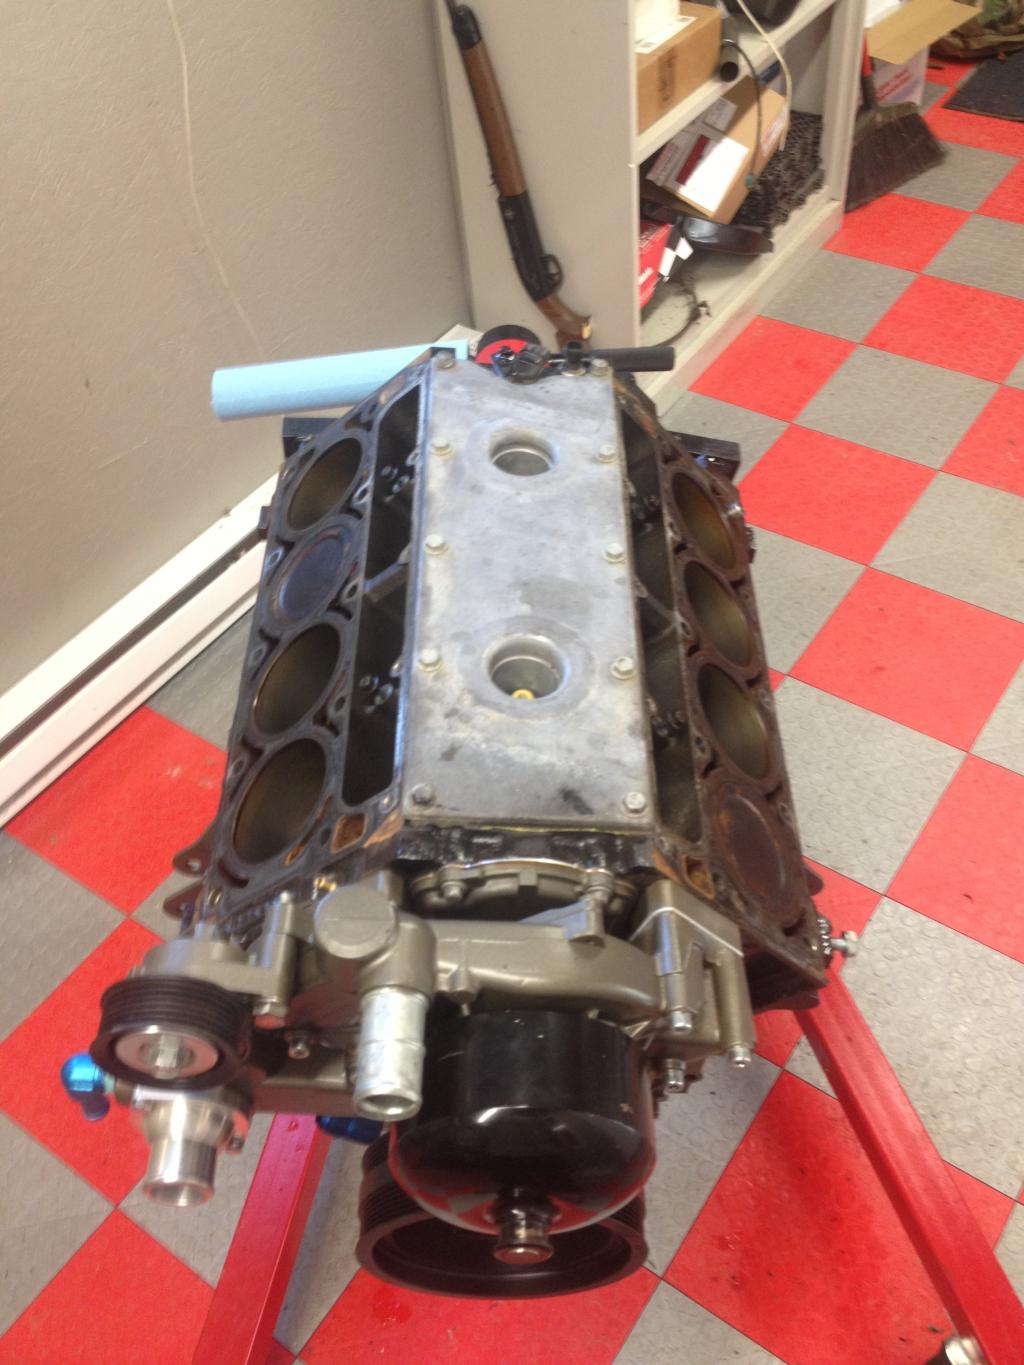
I've been slowly assembling everything onto the engine while its been on the stand while I'm tweaking and painting parts on the car.
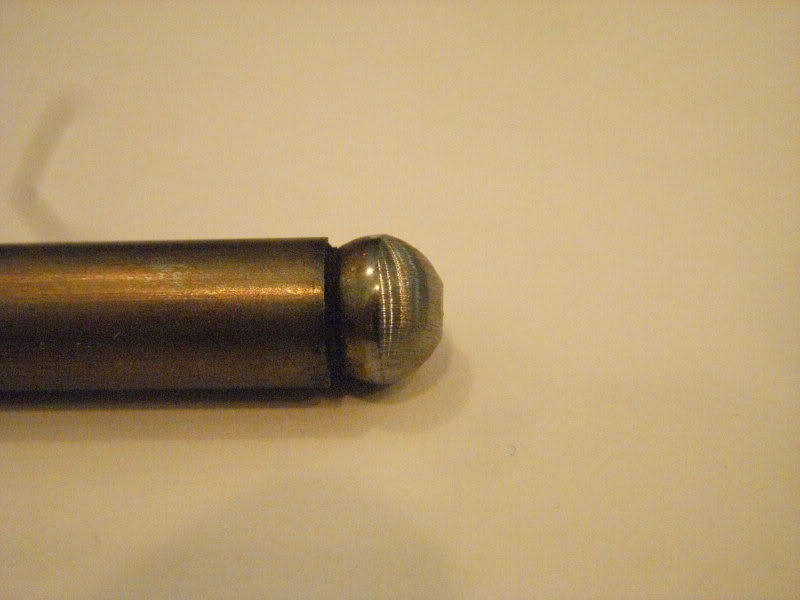
The other week I started to put in stronger valve spring as the factory ones will cause valve float with boost. While swapping the springs out one by one, I came a crossed 2 push rods that were worn at the rocker end. Damn.
On the LS engines you have to pull the heads to get access to the lifters. Damn.
Pushrods and rockers marked for proper location for replacement.
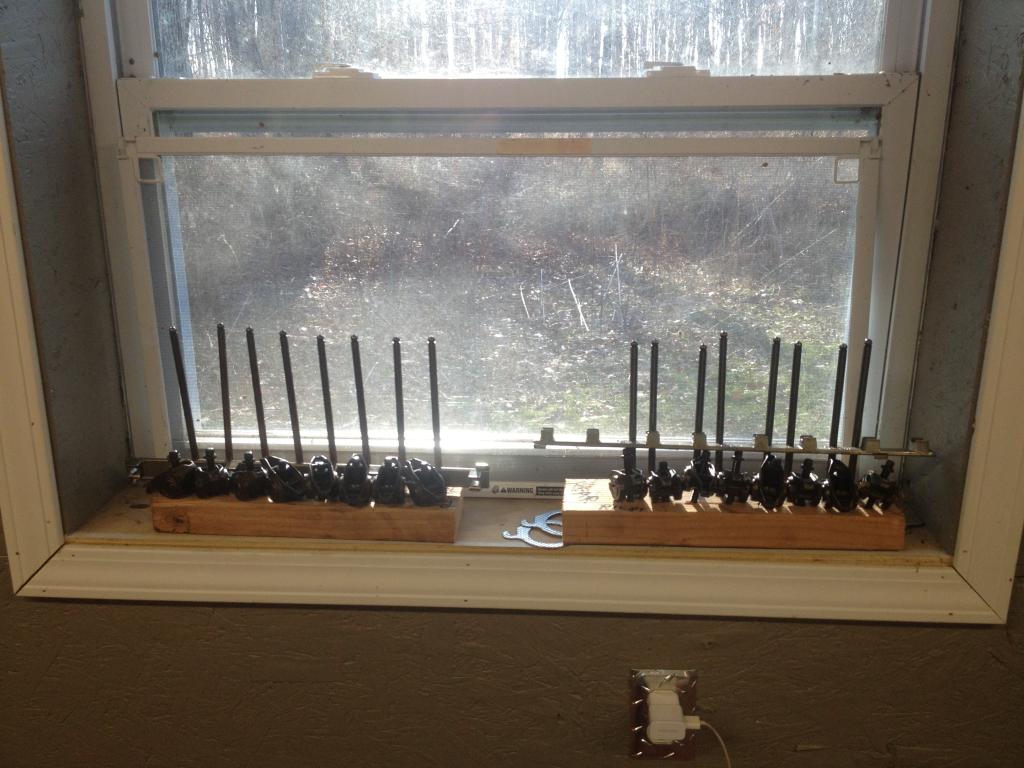
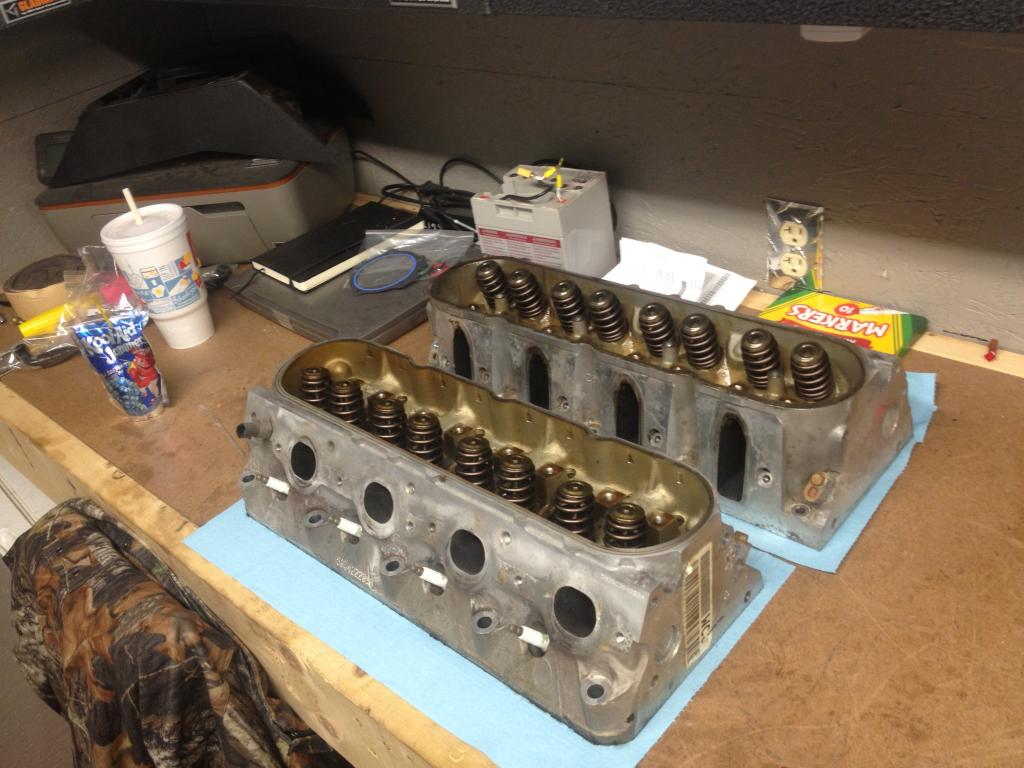
So here we are again, waiting on parts. I'm using all gm parts and I'm amazed on how cheap these parts are. I guess I've been messing with vw's too long. 16 Ls7 lifters, GM performance MLS head gaskets, 2 roller rockers, 4 pushrods are on the way. Ill be ordering my headstuds later today. Damn.
The other week I started to put in stronger valve spring as the factory ones will cause valve float with boost. While swapping the springs out one by one, I came a crossed 2 push rods that were worn at the rocker end. Damn.
On the LS engines you have to pull the heads to get access to the lifters. Damn.
Pushrods and rockers marked for proper location for replacement.
So here we are again, waiting on parts. I'm using all gm parts and I'm amazed on how cheap these parts are. I guess I've been messing with vw's too long. 16 Ls7 lifters, GM performance MLS head gaskets, 2 roller rockers, 4 pushrods are on the way. Ill be ordering my headstuds later today. Damn.
02-01-2015, 03:44 PM
#39
Launching!
Thread Starter
Join Date: Oct 2013
Posts: 239
Likes: 0
Received 0 Likes
on
0 Posts
All parts are in to reassemble the engine. I have decided and ordered an LS9 cam, im this far cam is only another hour away. Turns out that since this engine is an 05, it already has the timing set necessary for this cam swap. Only other 2 part i needed was an extension cam sensor harness and a front timing cover off san ls2, which is on it way as well. From my understanding it should be good for a 50 whp gain, not too bad for $150.
02-01-2015, 04:01 PM
#40
Launching!
Thread Starter
Join Date: Oct 2013
Posts: 239
Likes: 0
Received 0 Likes
on
0 Posts
The last post is up to date as of today.
Exhaust - I'm going to try my best to get the exhaust to go out the back. If like it to be as quiet as I can get it.
Here it is from fall after it was washed. The plan was to get it in a body shop this summer.
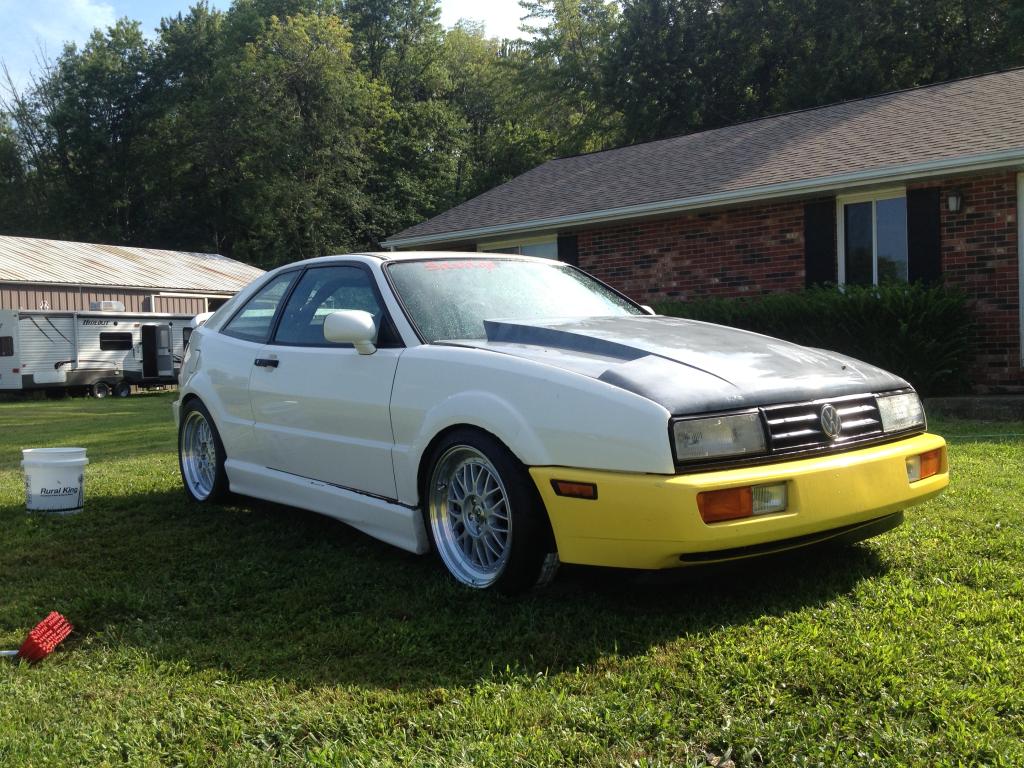
Exhaust - I'm going to try my best to get the exhaust to go out the back. If like it to be as quiet as I can get it.
Here it is from fall after it was washed. The plan was to get it in a body shop this summer.