

2000 Durango SLT 4x4 LS Swap-Build thread


 12-05-2015, 01:35 PM
#42
On The Tree

Join Date: May 2014
Posts: 123
Likes: 0
Received 0 Likes
on
0 Posts
sweet baby jeebus thats fits so nice! this is going to be awesome to drive. good documentation on the build too, great info. being able to use the stock trans support and mount would be awesome. i'm surprised more 4x4 dak/dur swaps haven't been done, it appears to fit like a glove.
Time to roll my dakota into the workshop and get to work. Its awesome the bw hi/lo case is the same length too.
Time to roll my dakota into the workshop
and get to work. Its awesome the bw hi/lo case is the same length too.
12-12-2015, 11:43 AM
#43

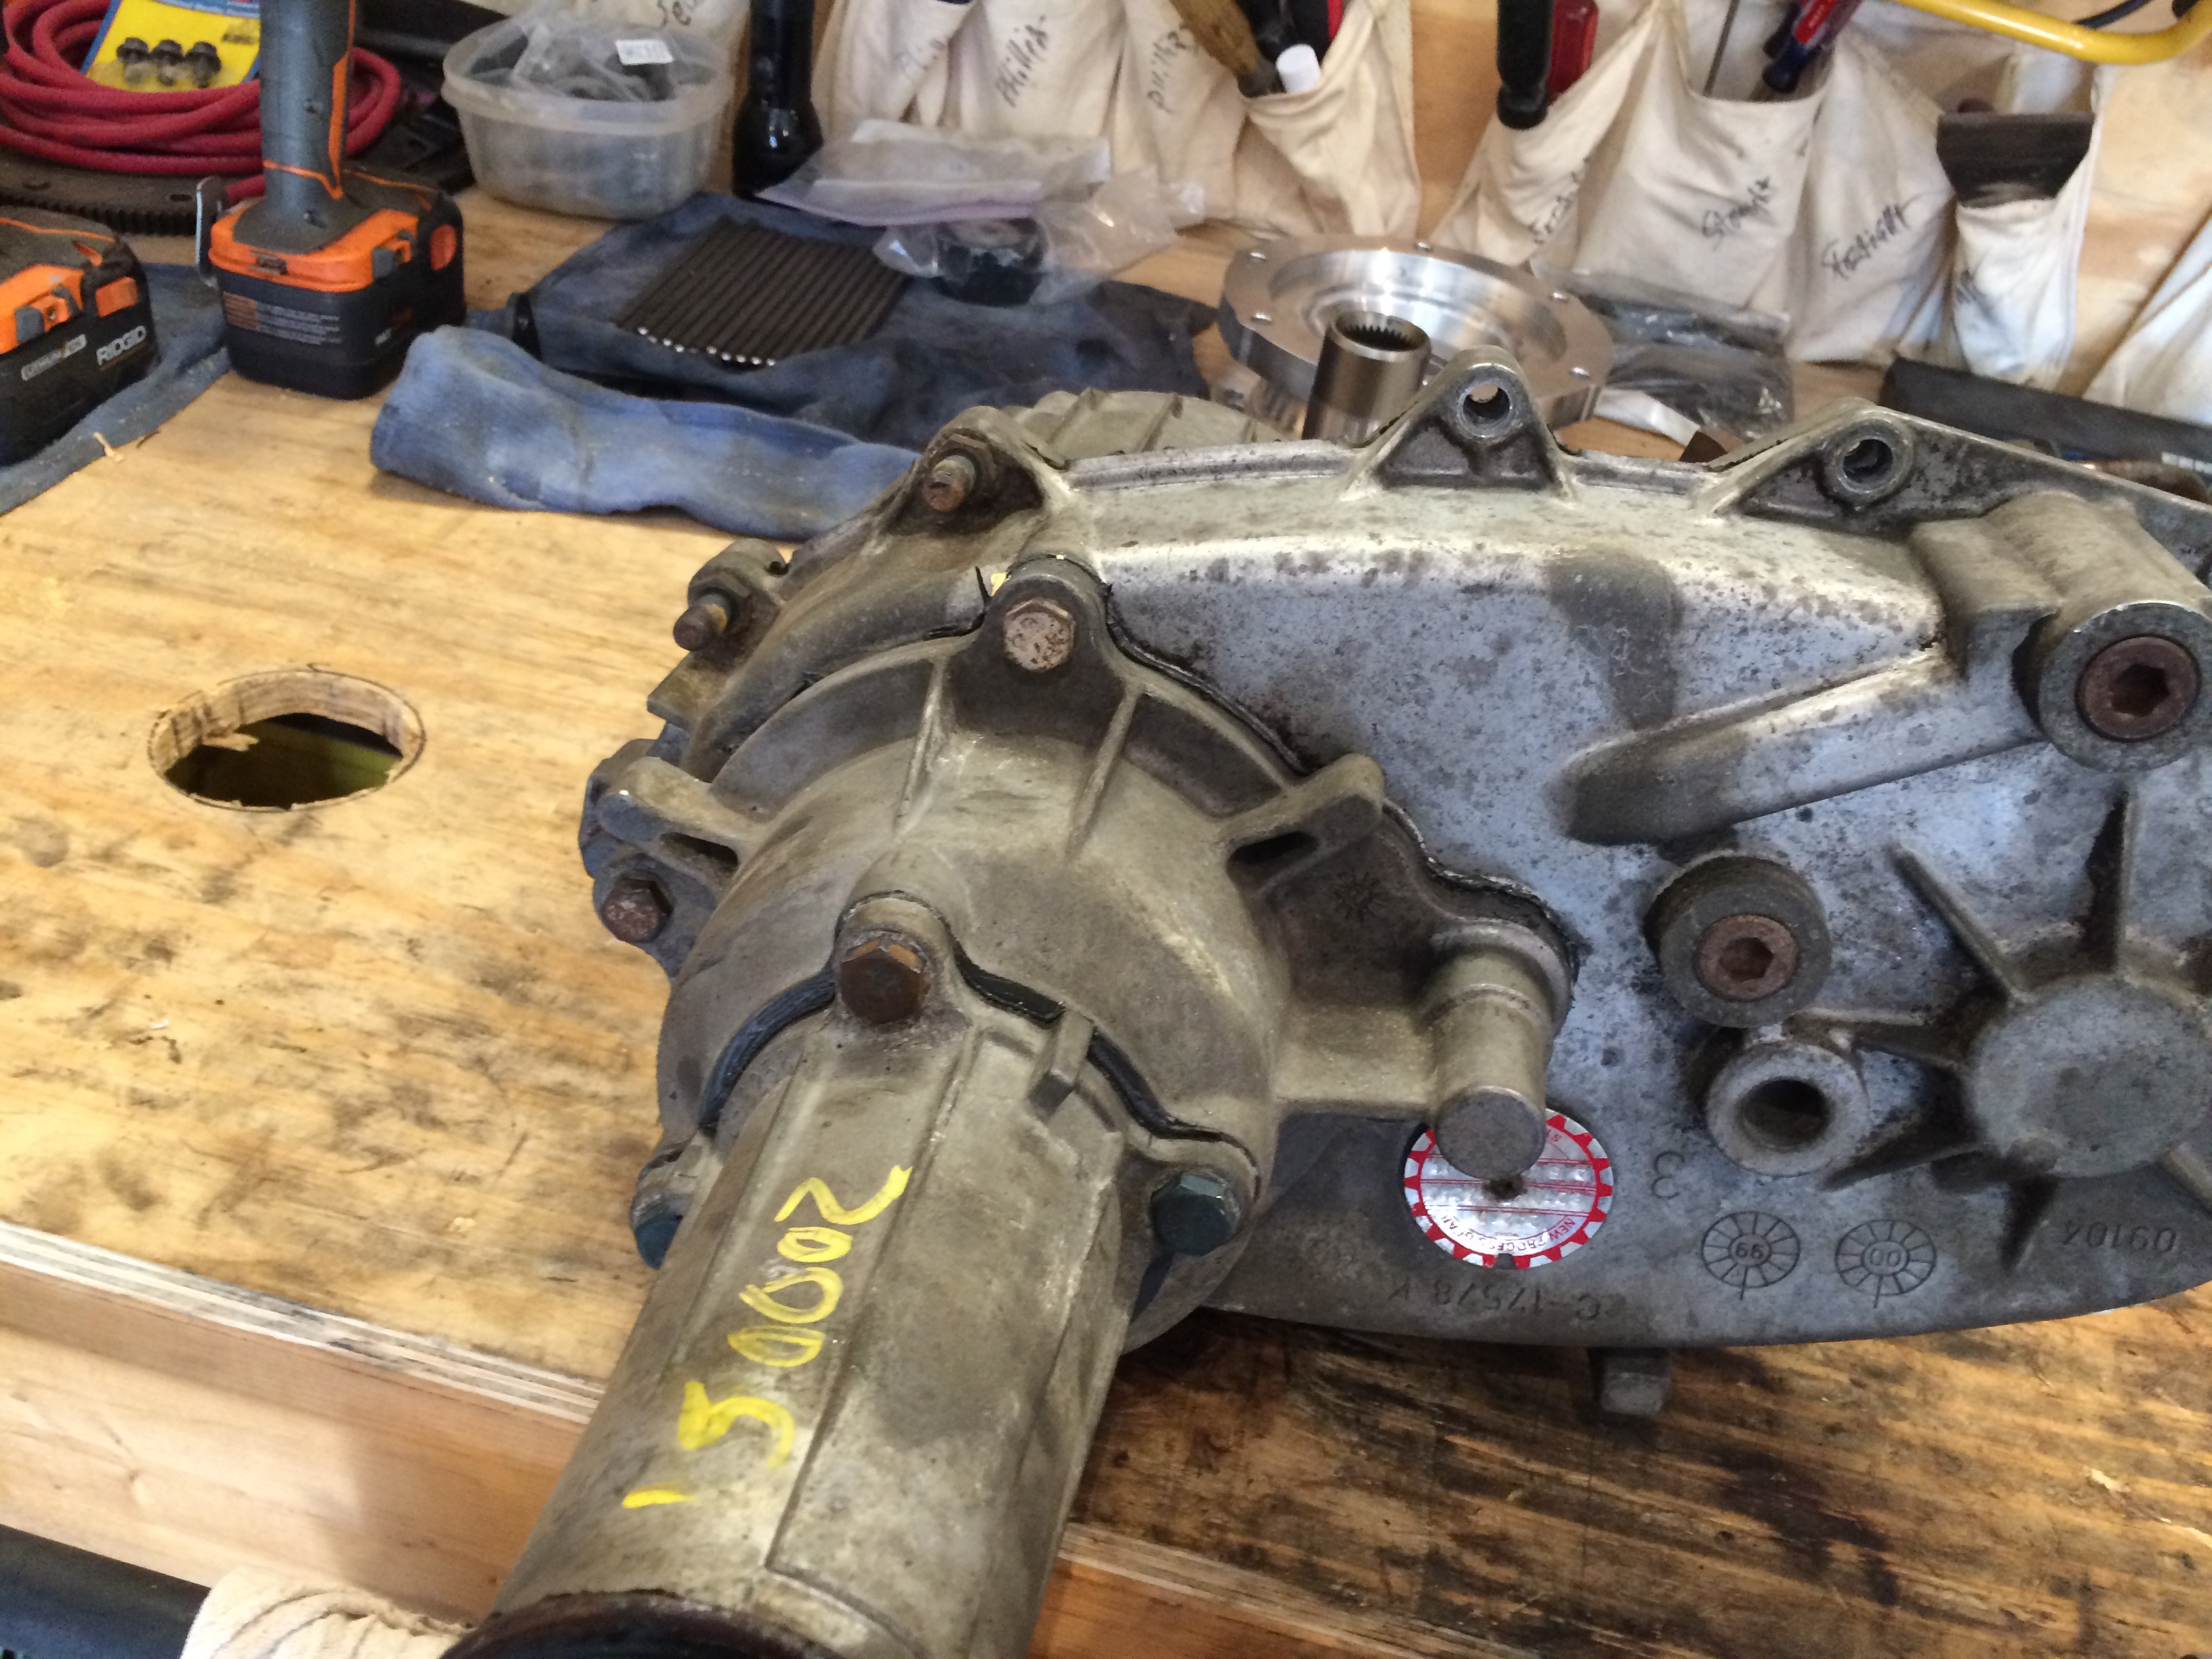
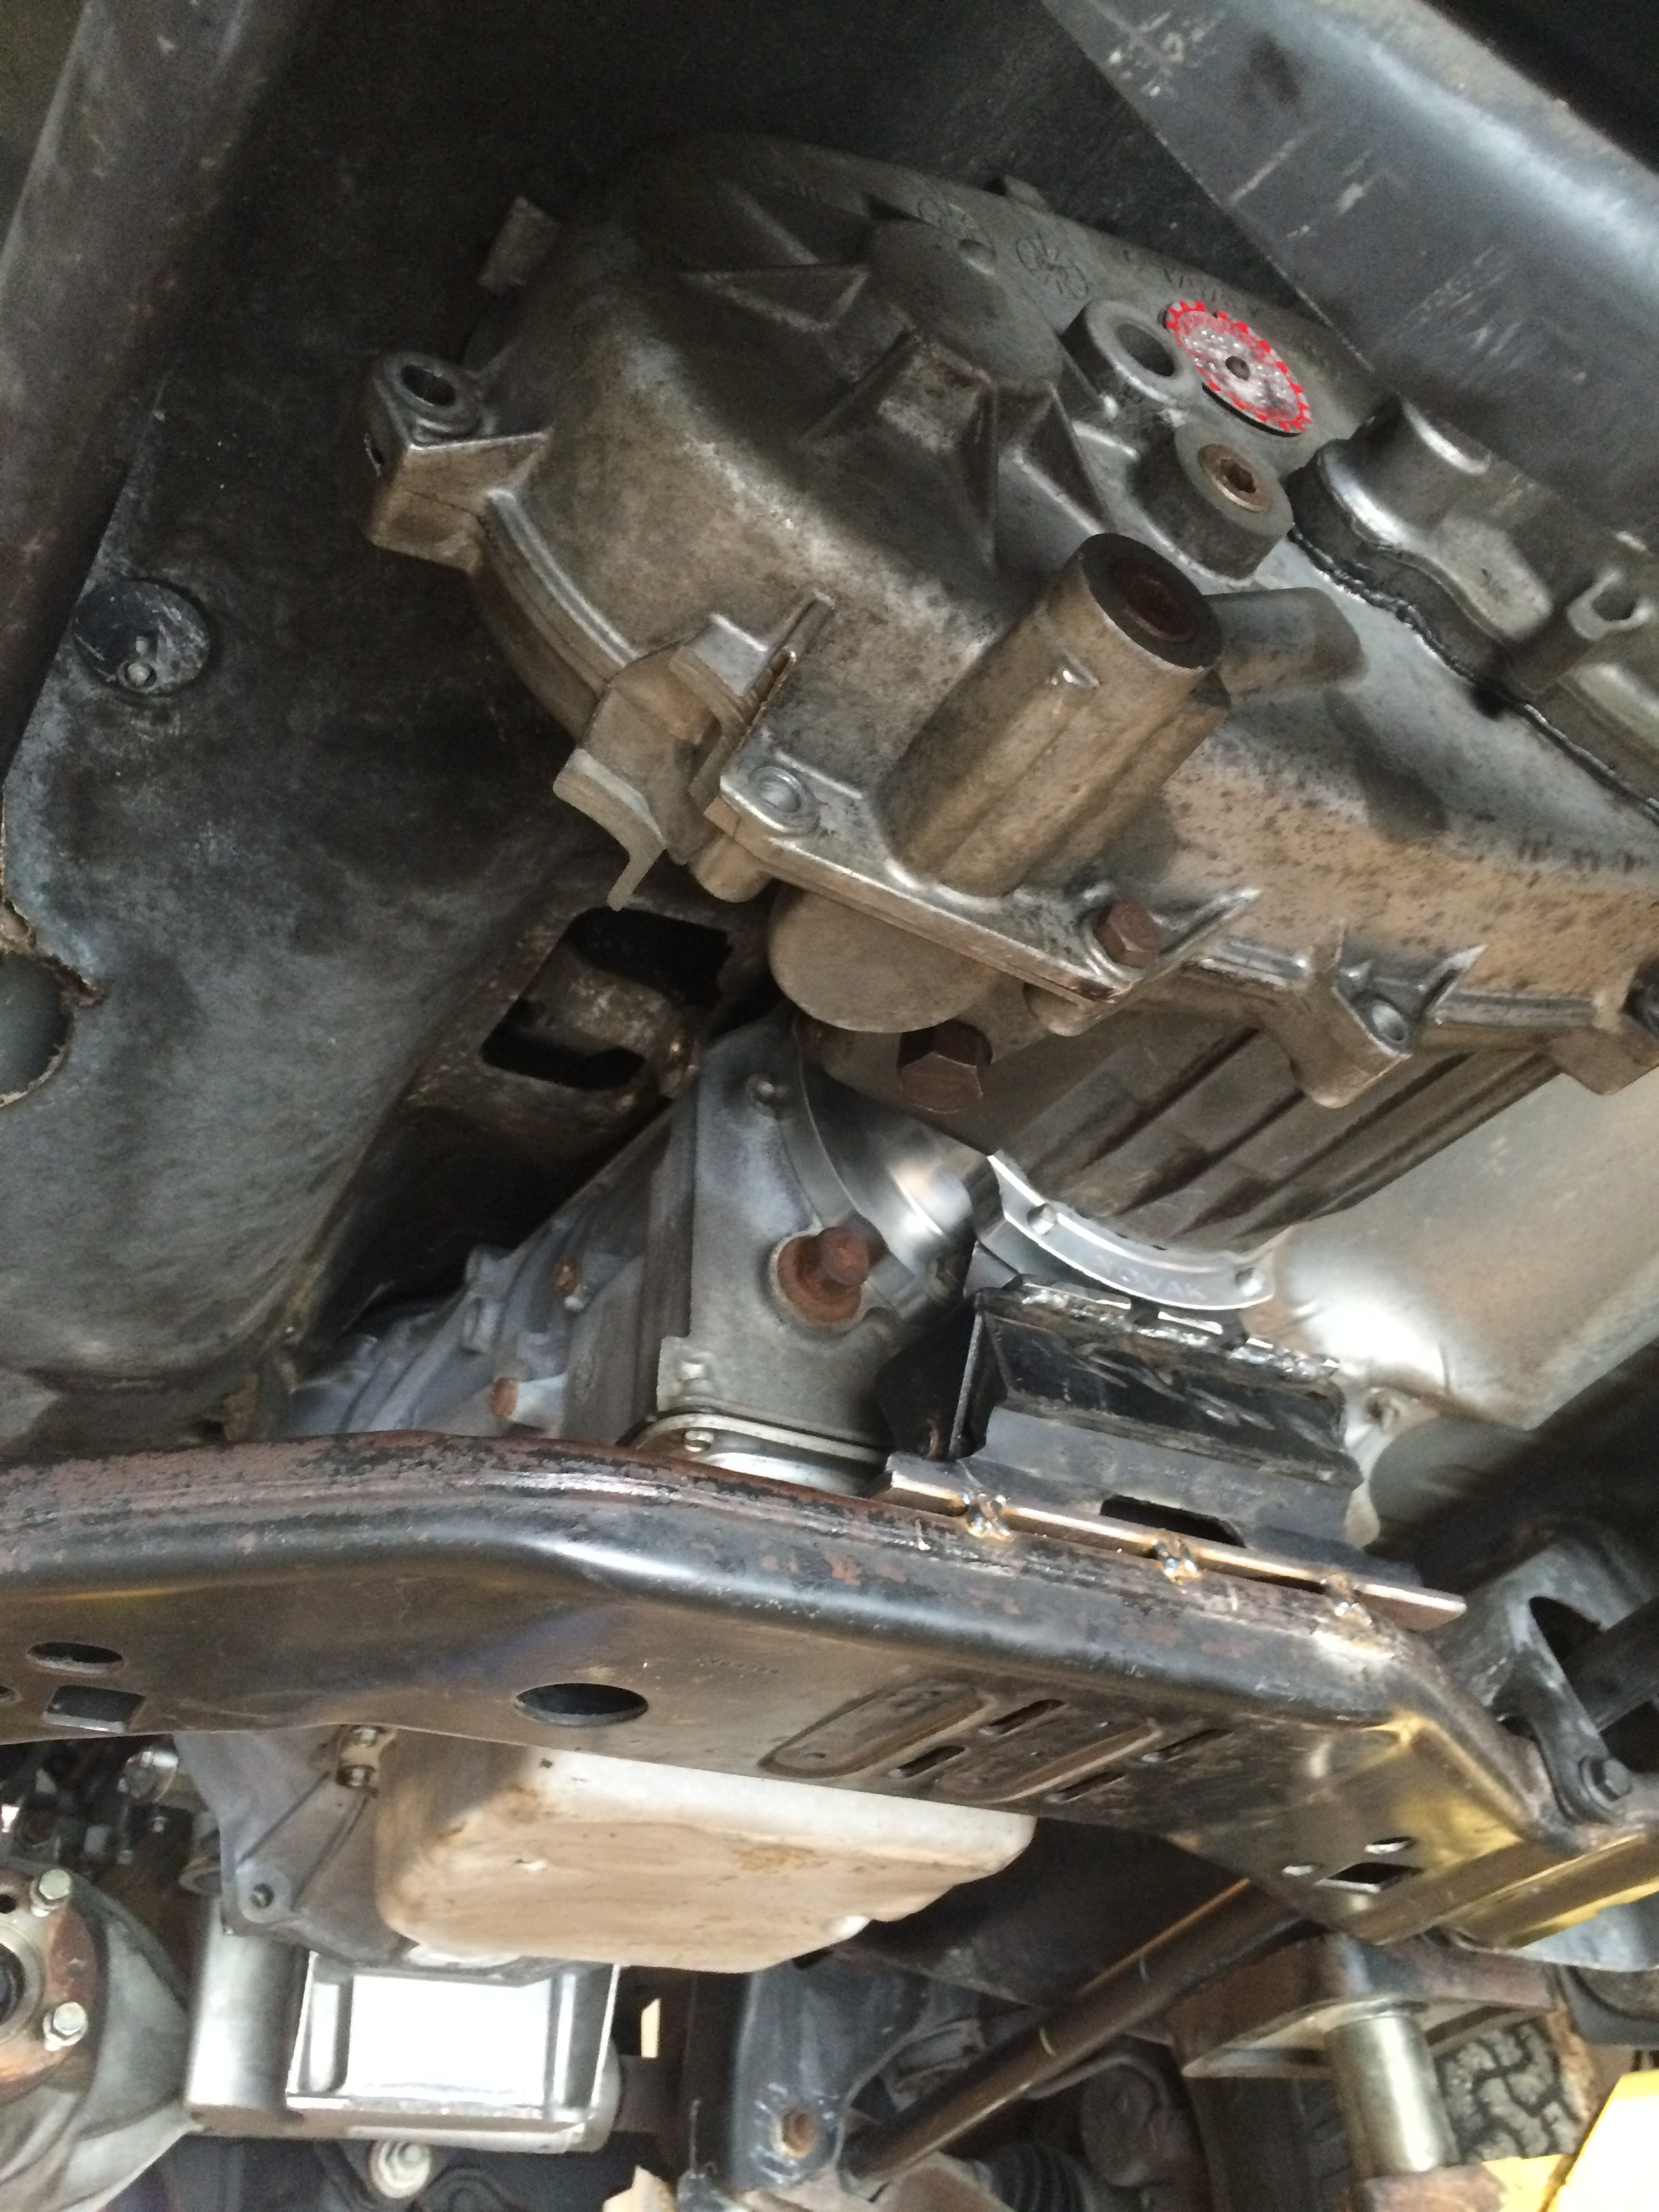
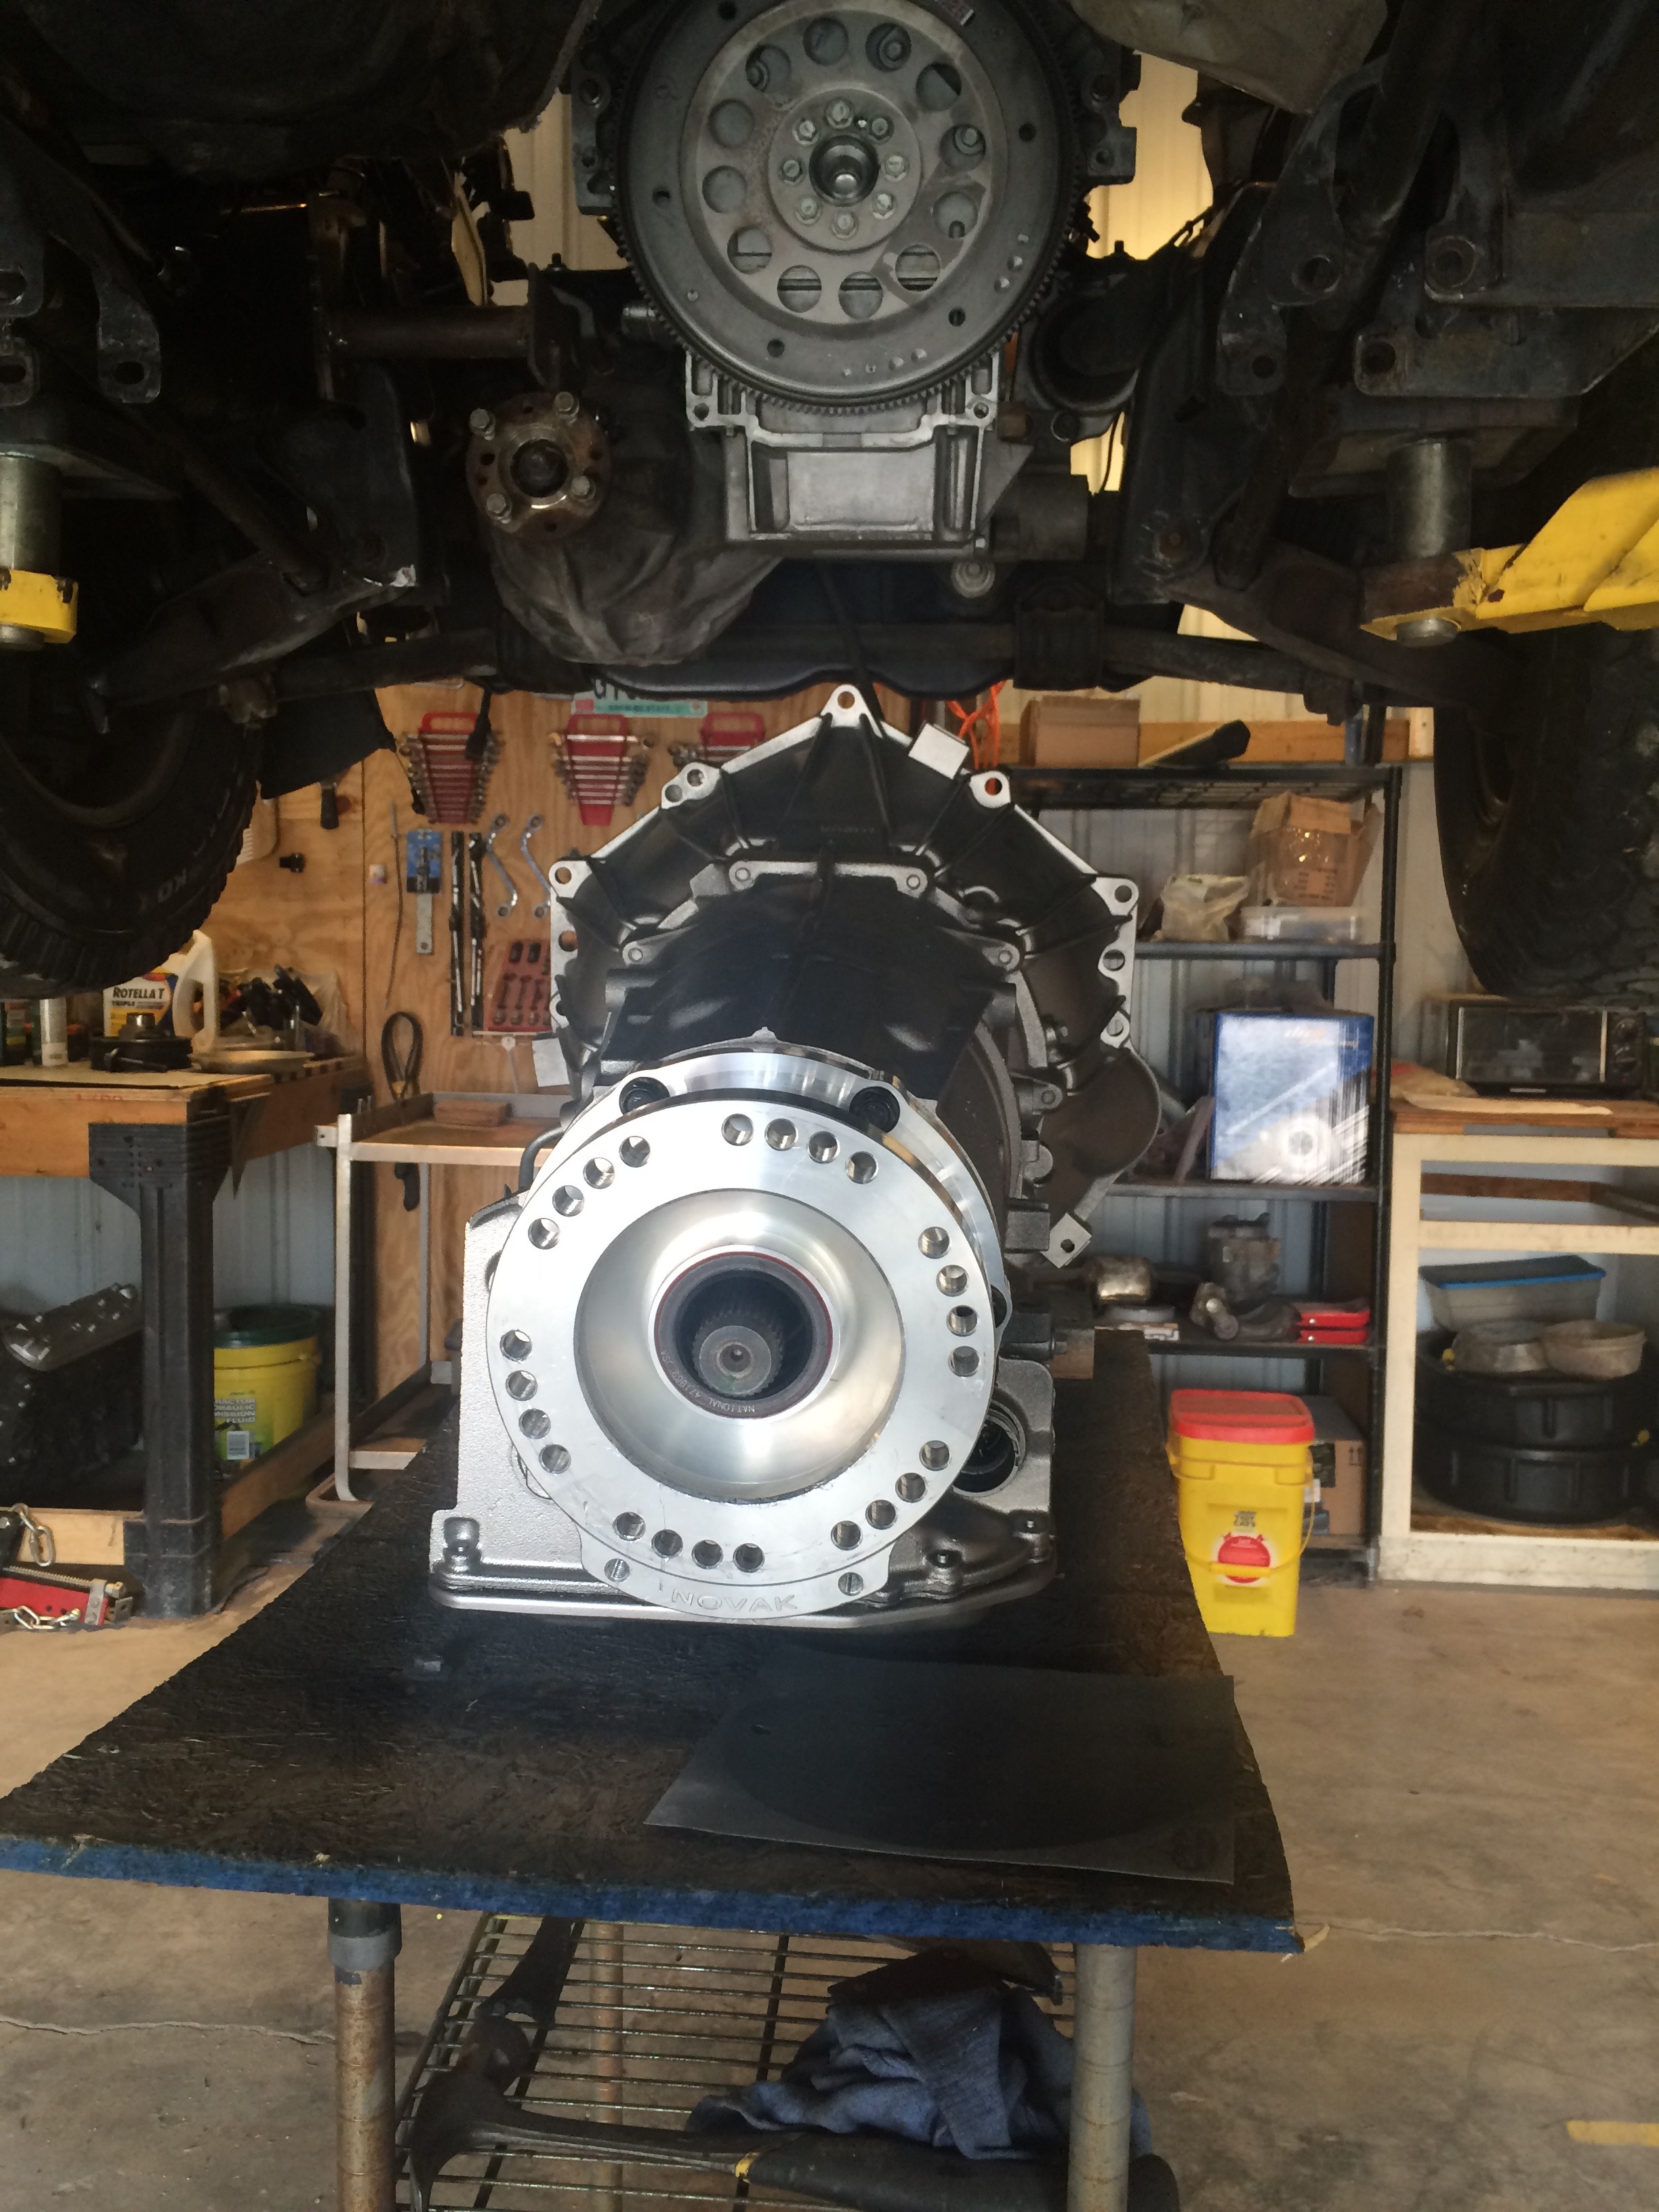
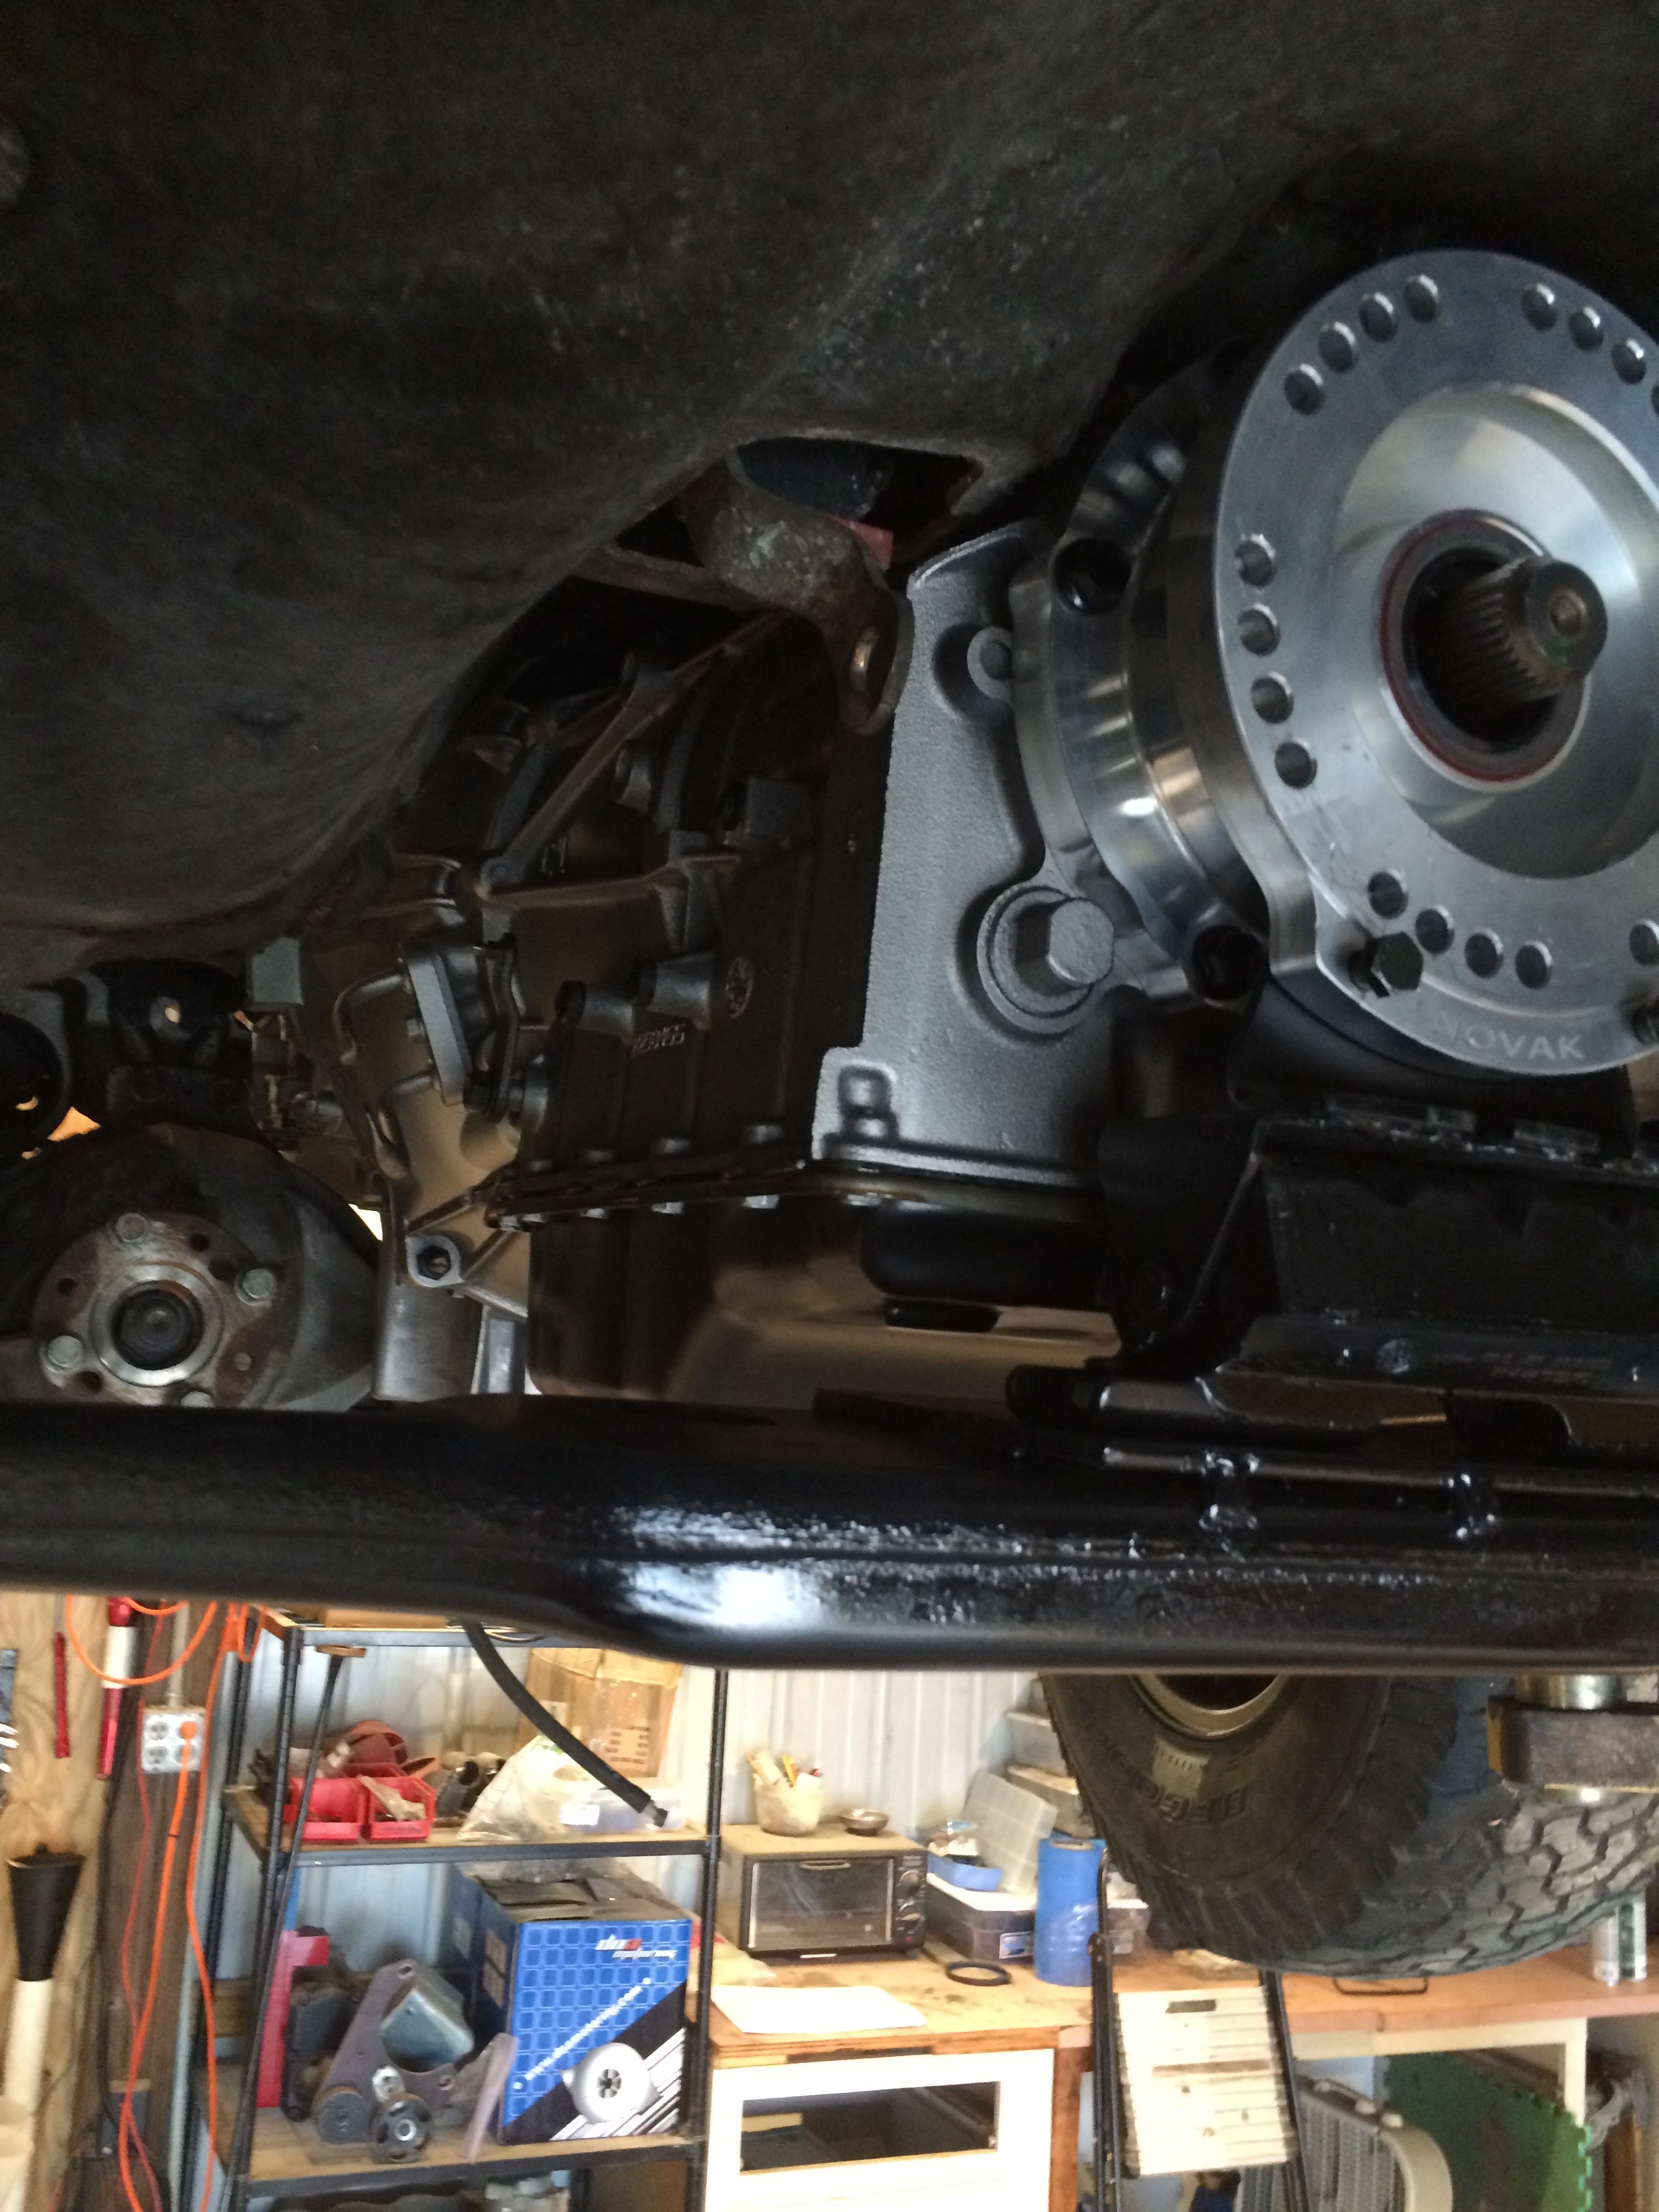
Update this week is bitter-sweet. I really wanted to use the Borg-Warner transfer case that came with the 6l80 transmission I bought, but......it is too wide. It would fit between the frame rails, if someone was planning a solid front axle swap, but the torsion bars cause interference in the independent front suspension setup. So I went back to the original 231 that came in this truck. Turns out, Novak makes an adapter kit to fit the 231/242 to the 6l80/6l90....fantastic!
So, for anyone wanting to do this swap with the 6l80 or 6l90 and retain the independent front suspension, you can re-use the 231 or 242 transfer case from the Durango (depending on whether it is AWD or 4WD), and save buying a new transfer case. See....bitter/sweet.
The upside of these transfer cases is that they are plentiful, strong, and have huge aftermarket support to make them stronger. So I bought a 242 off of ebay for $165 shipped to my door.
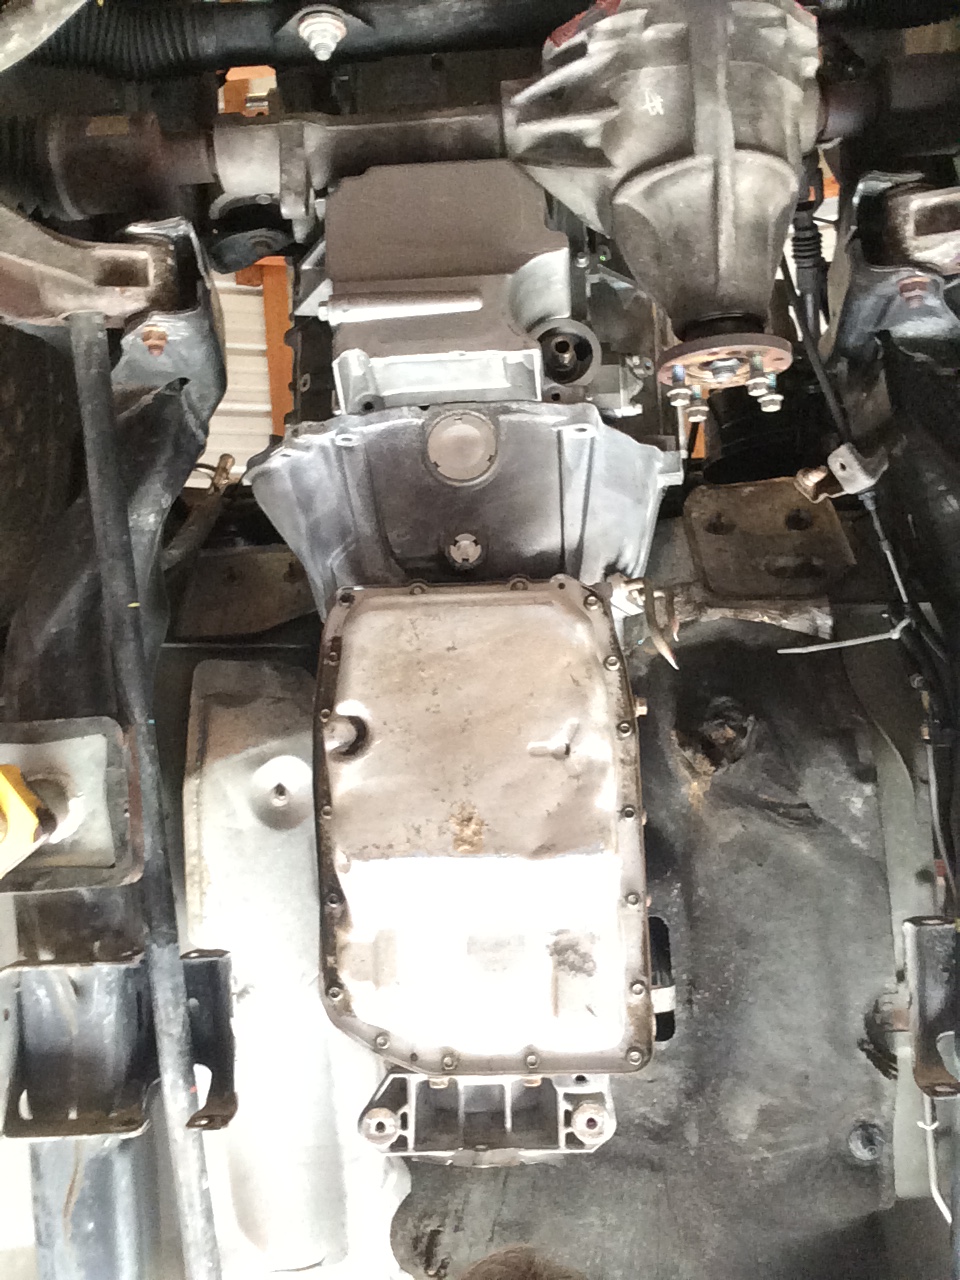
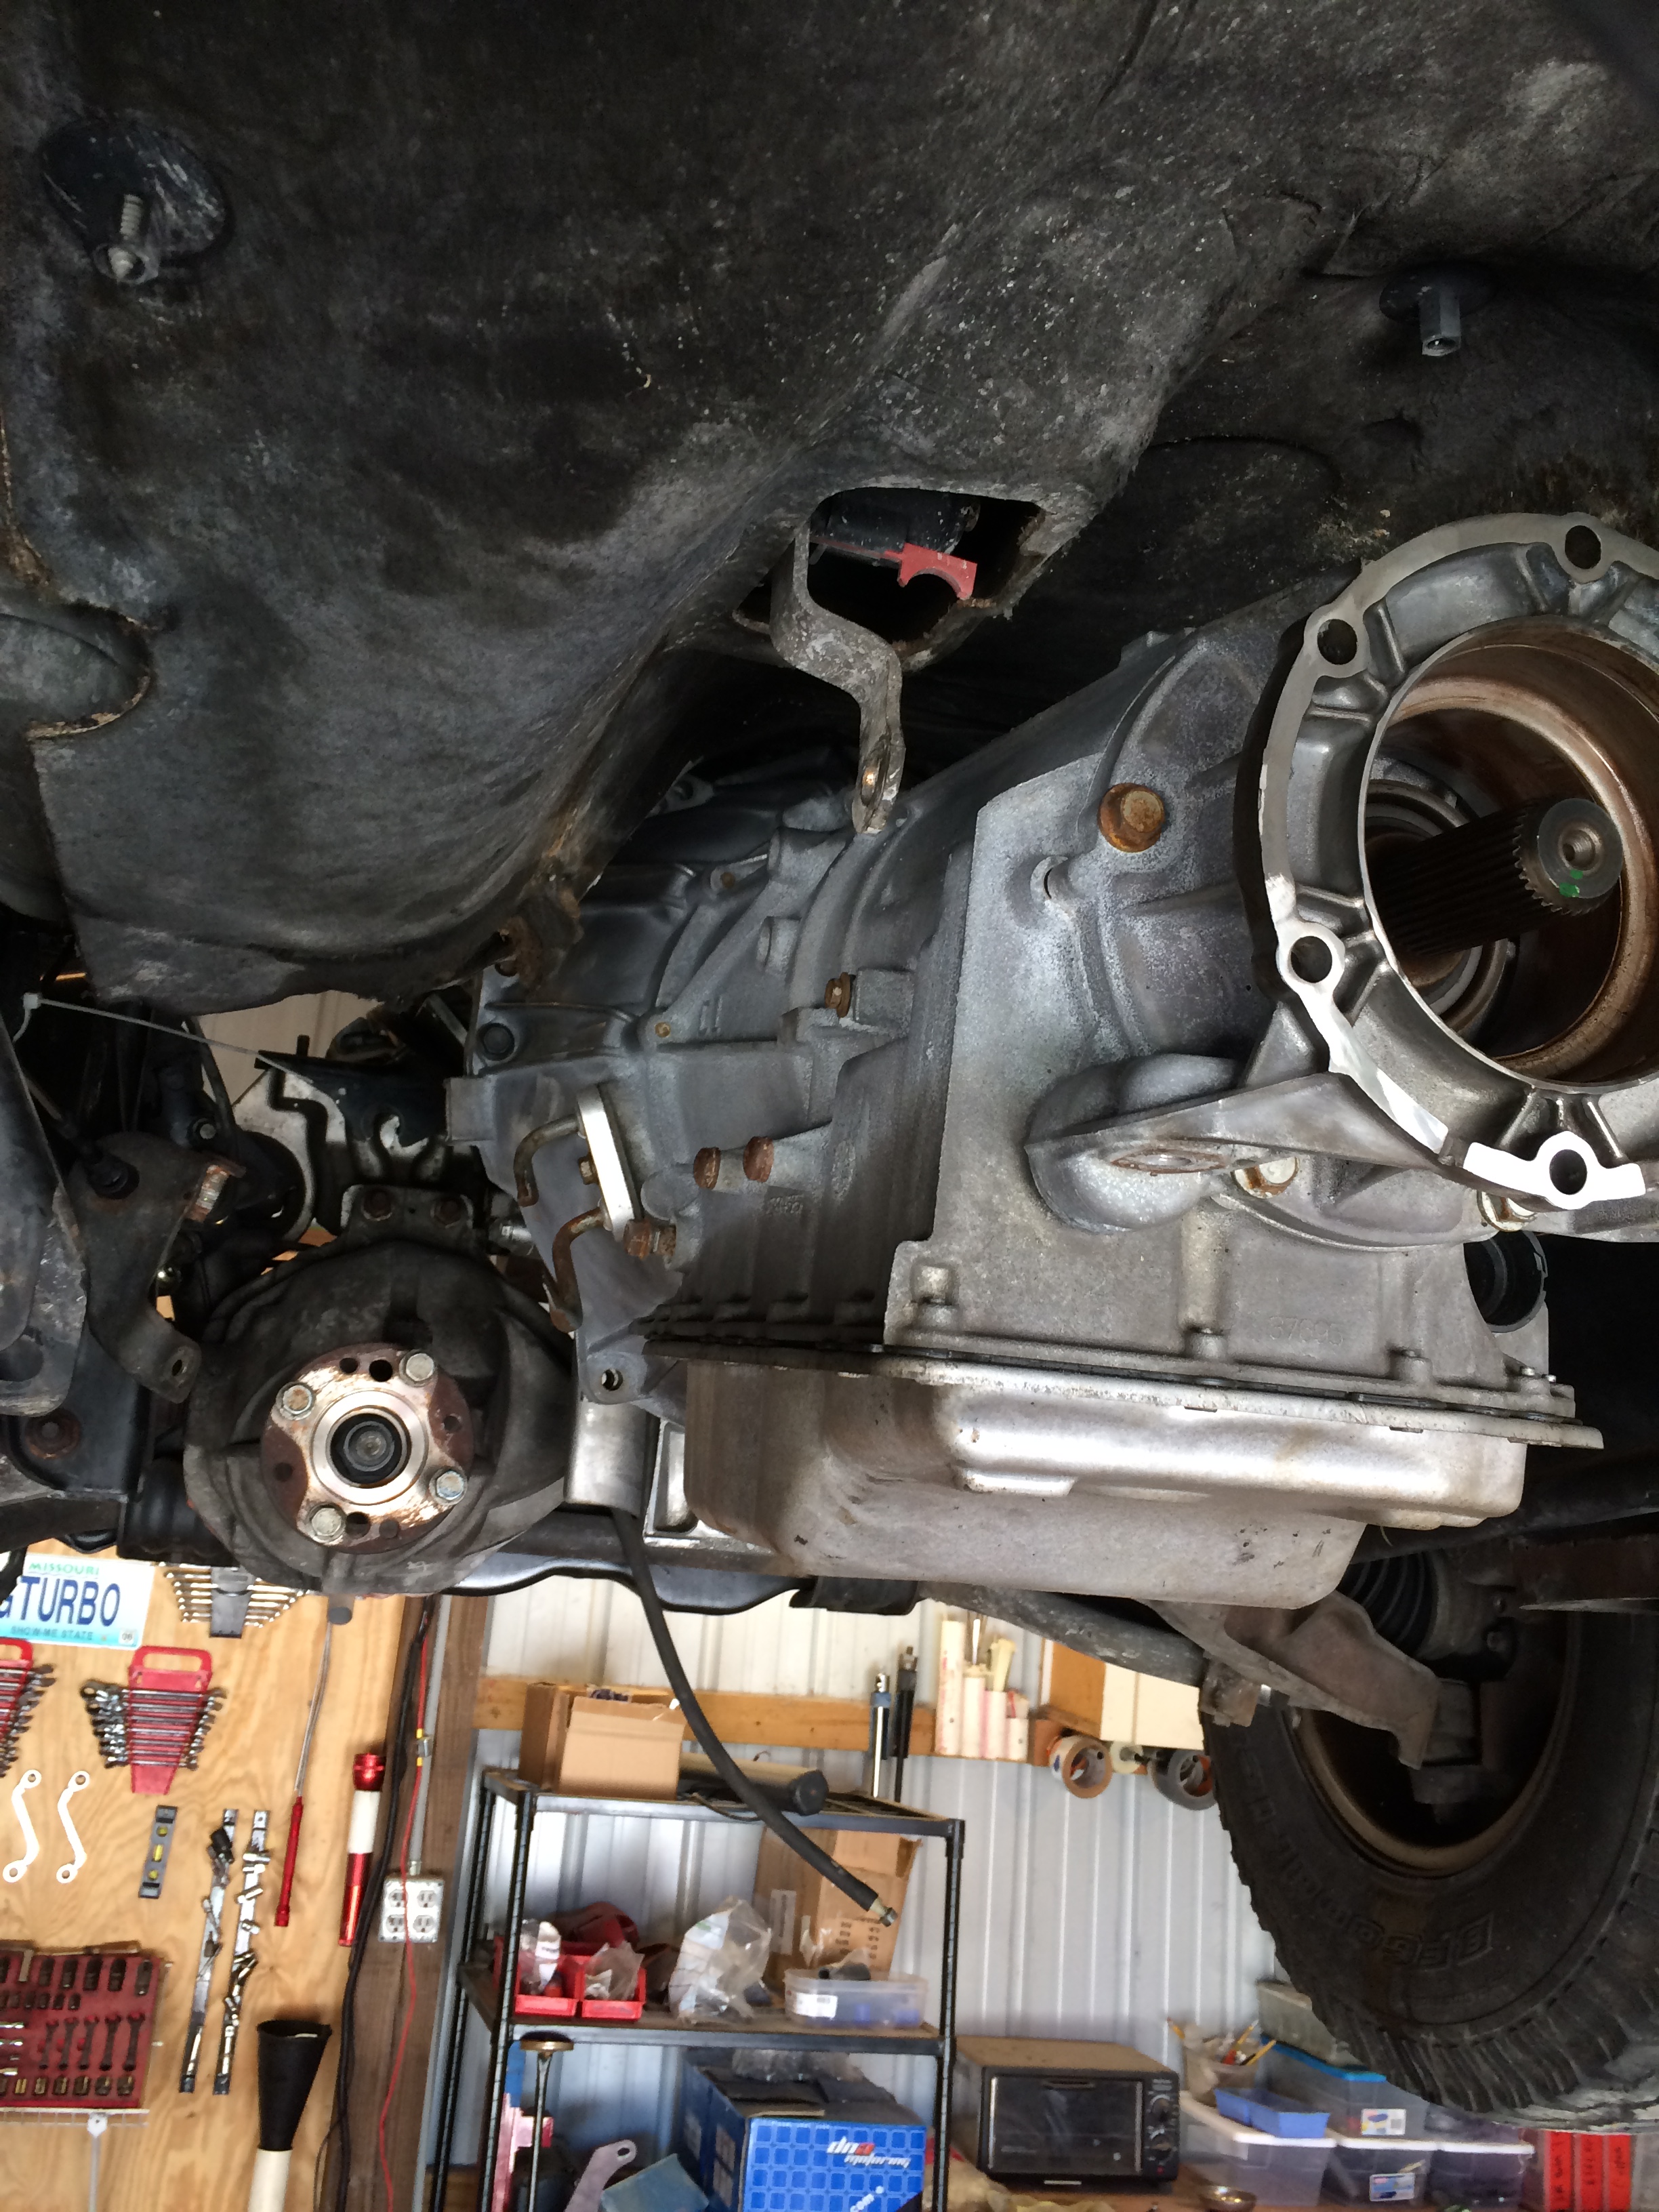
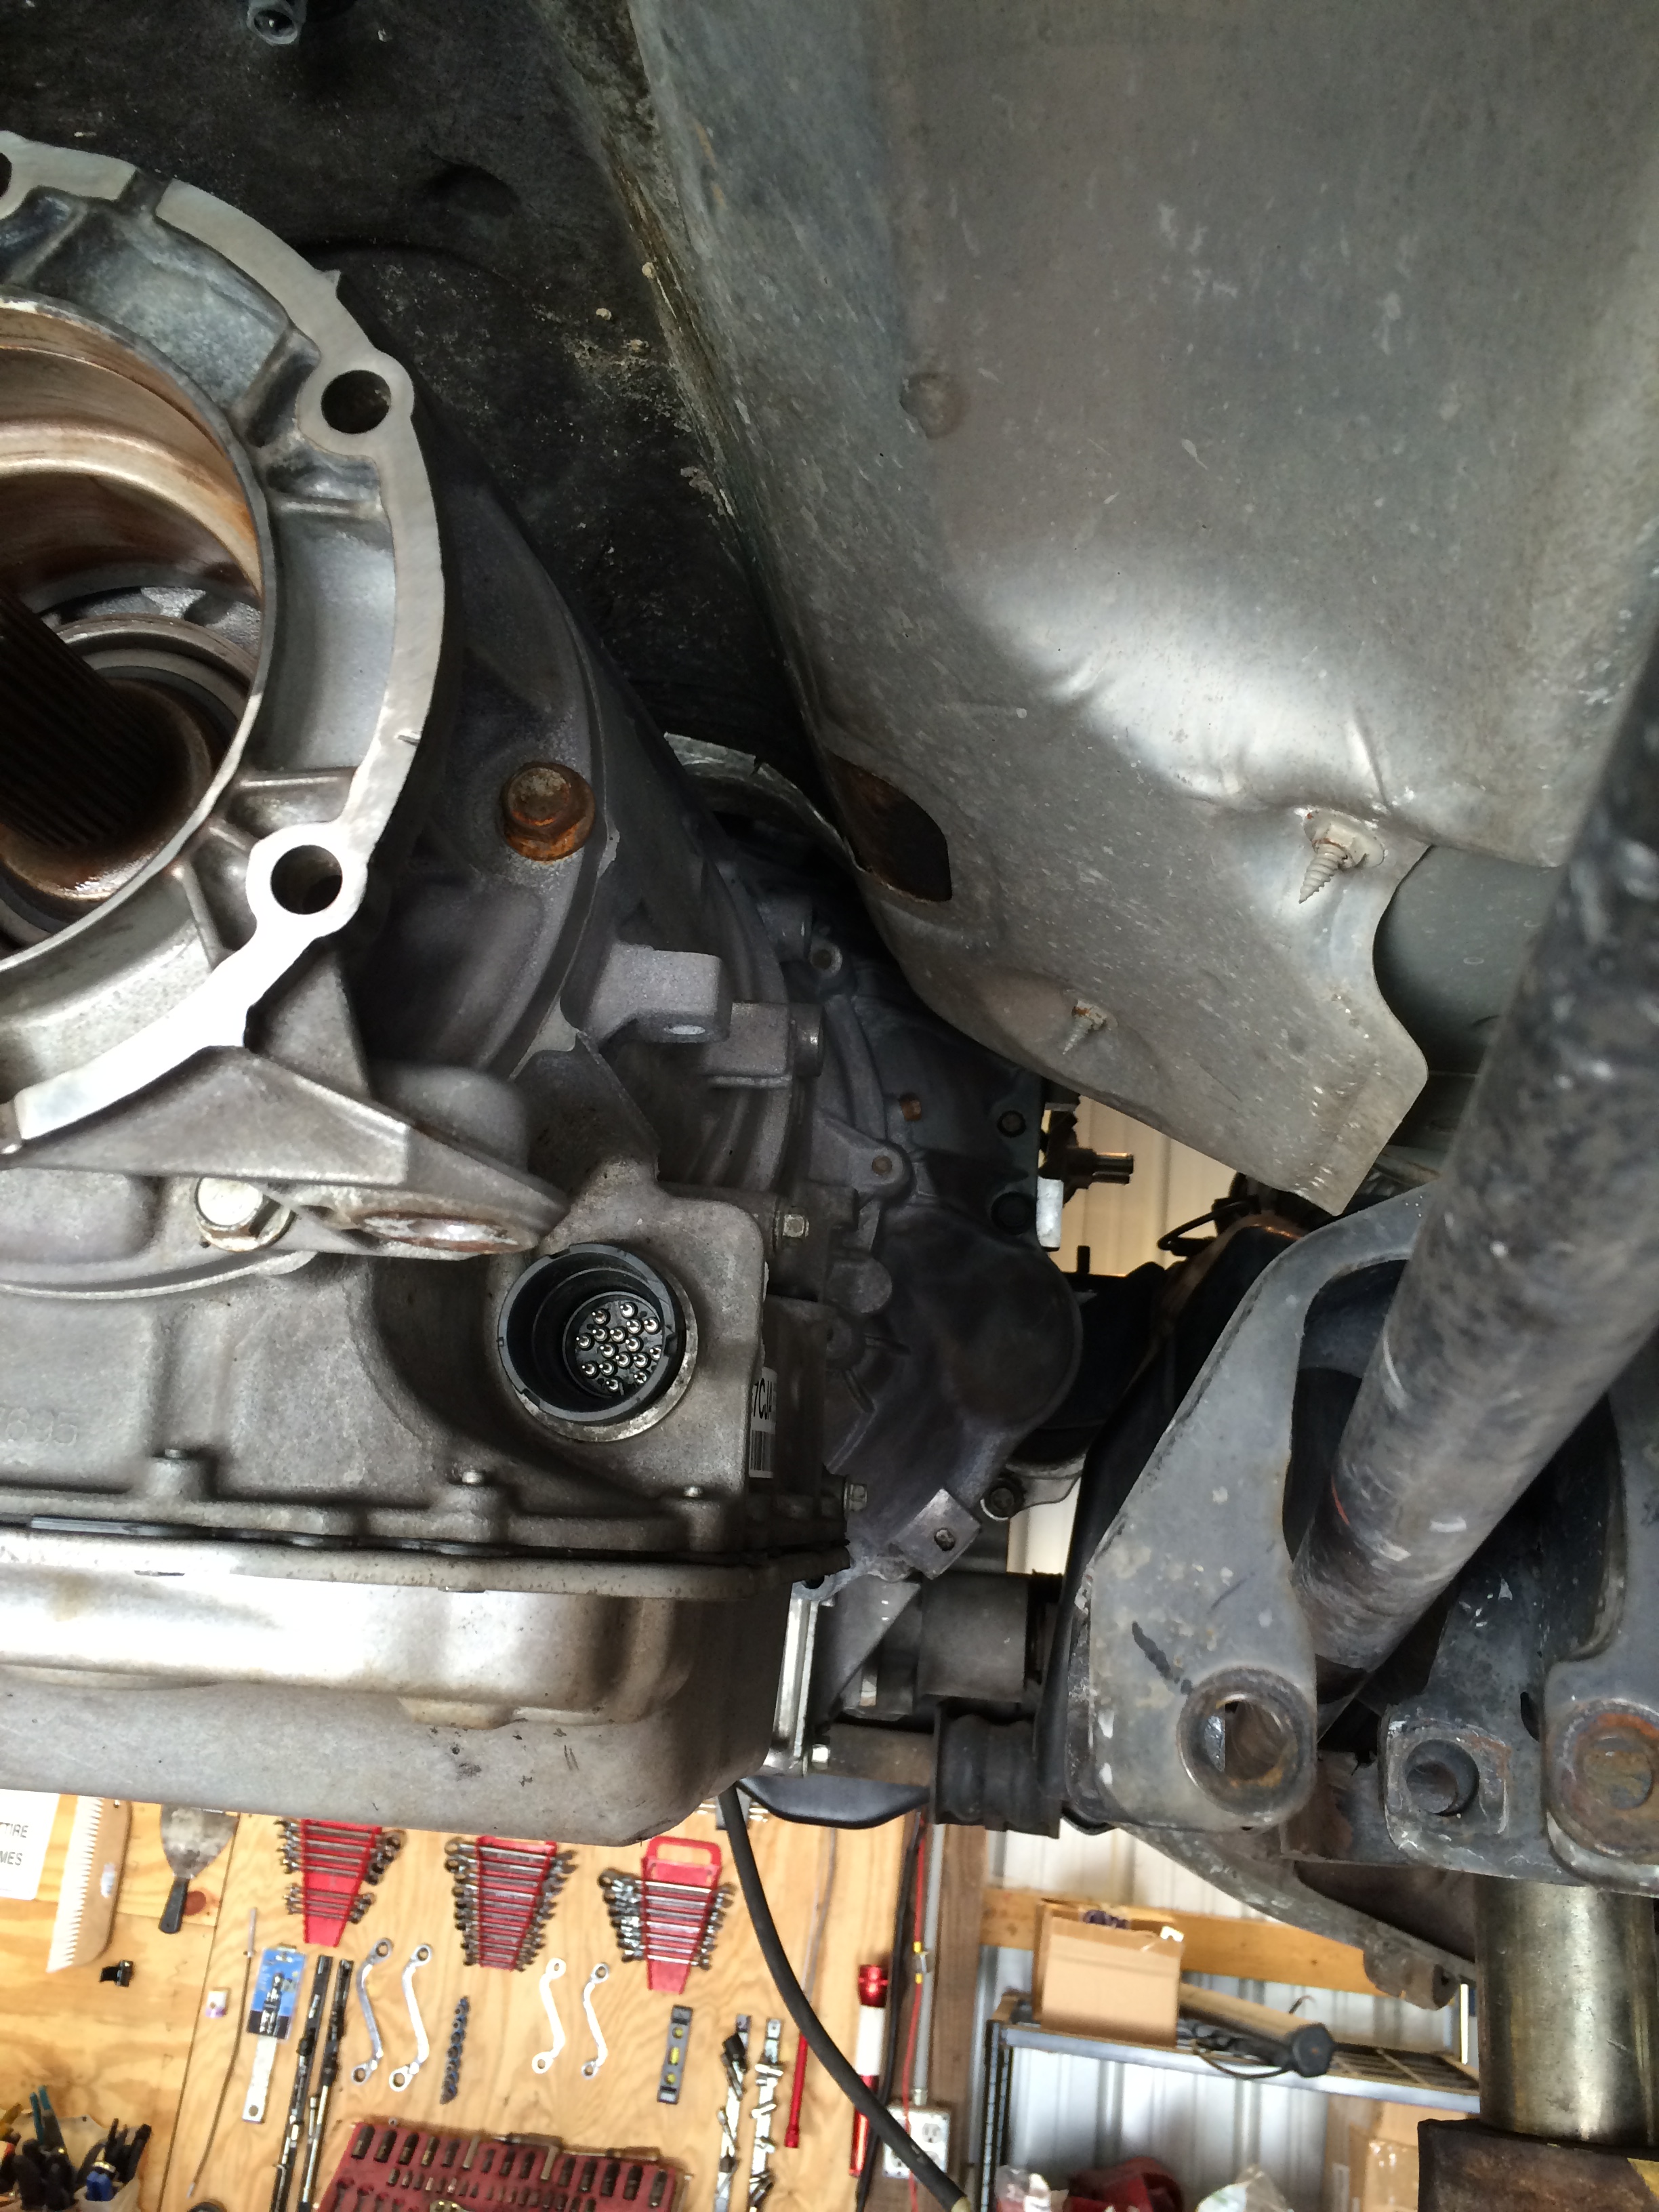
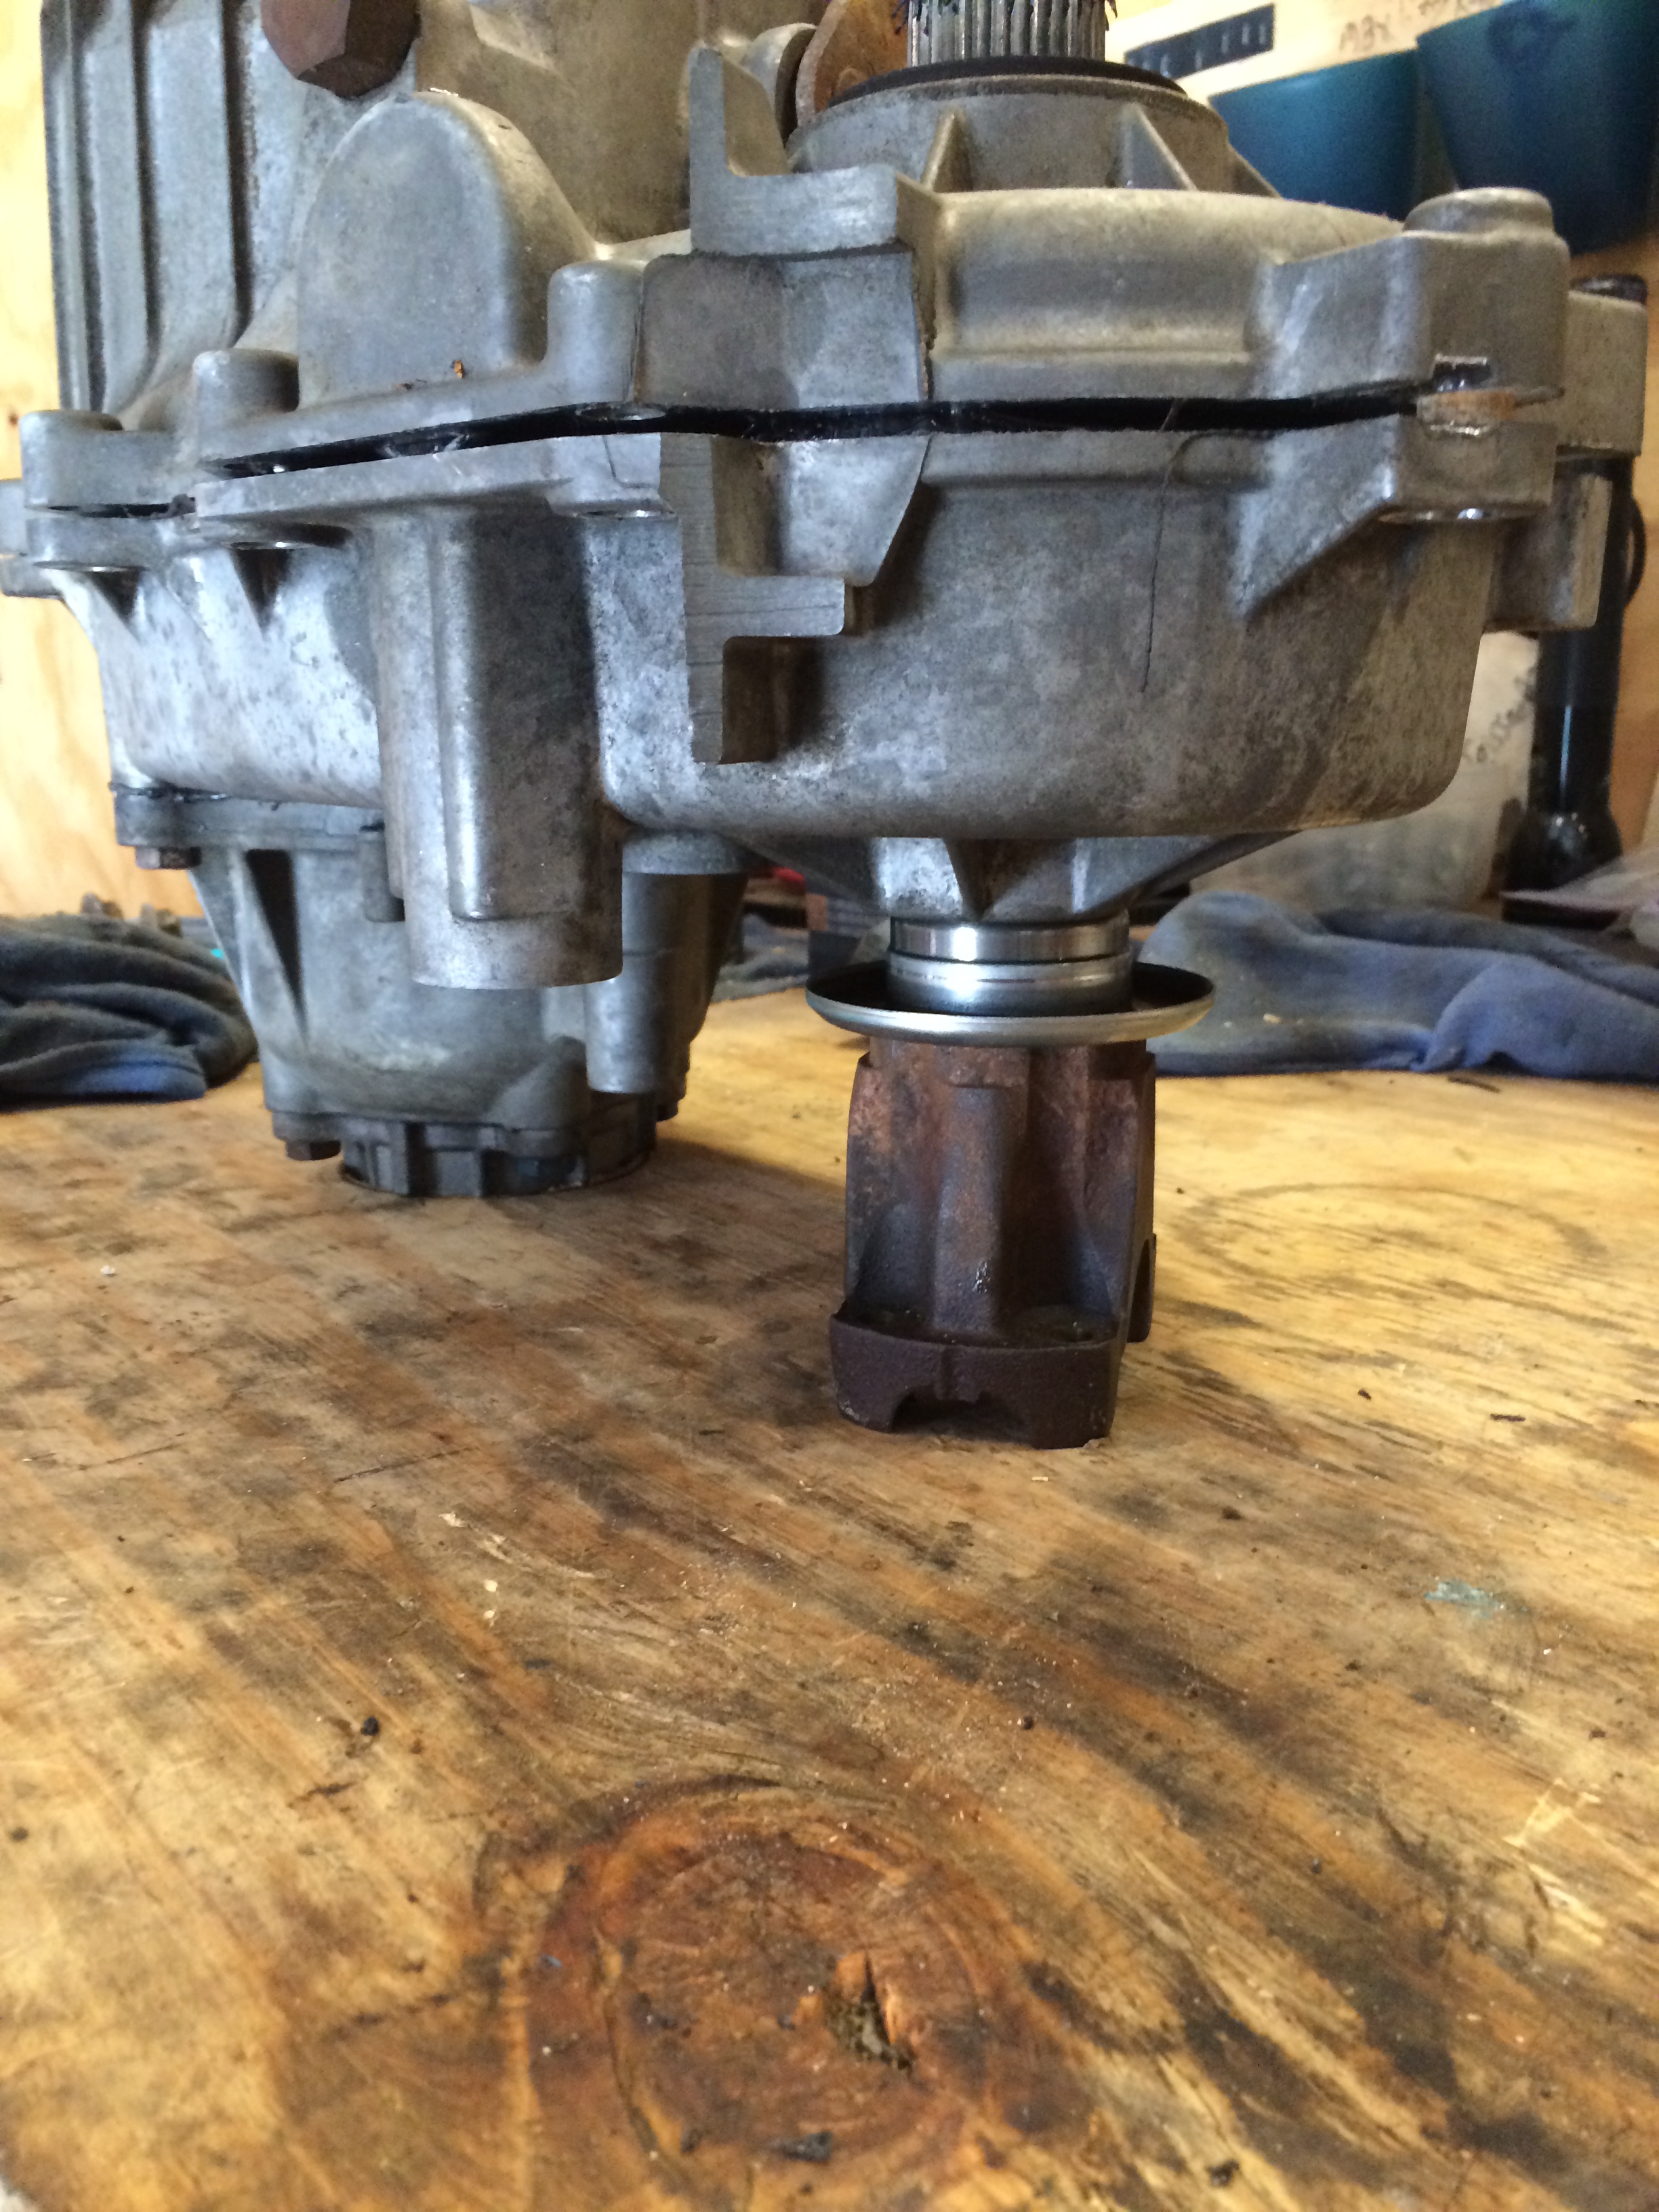
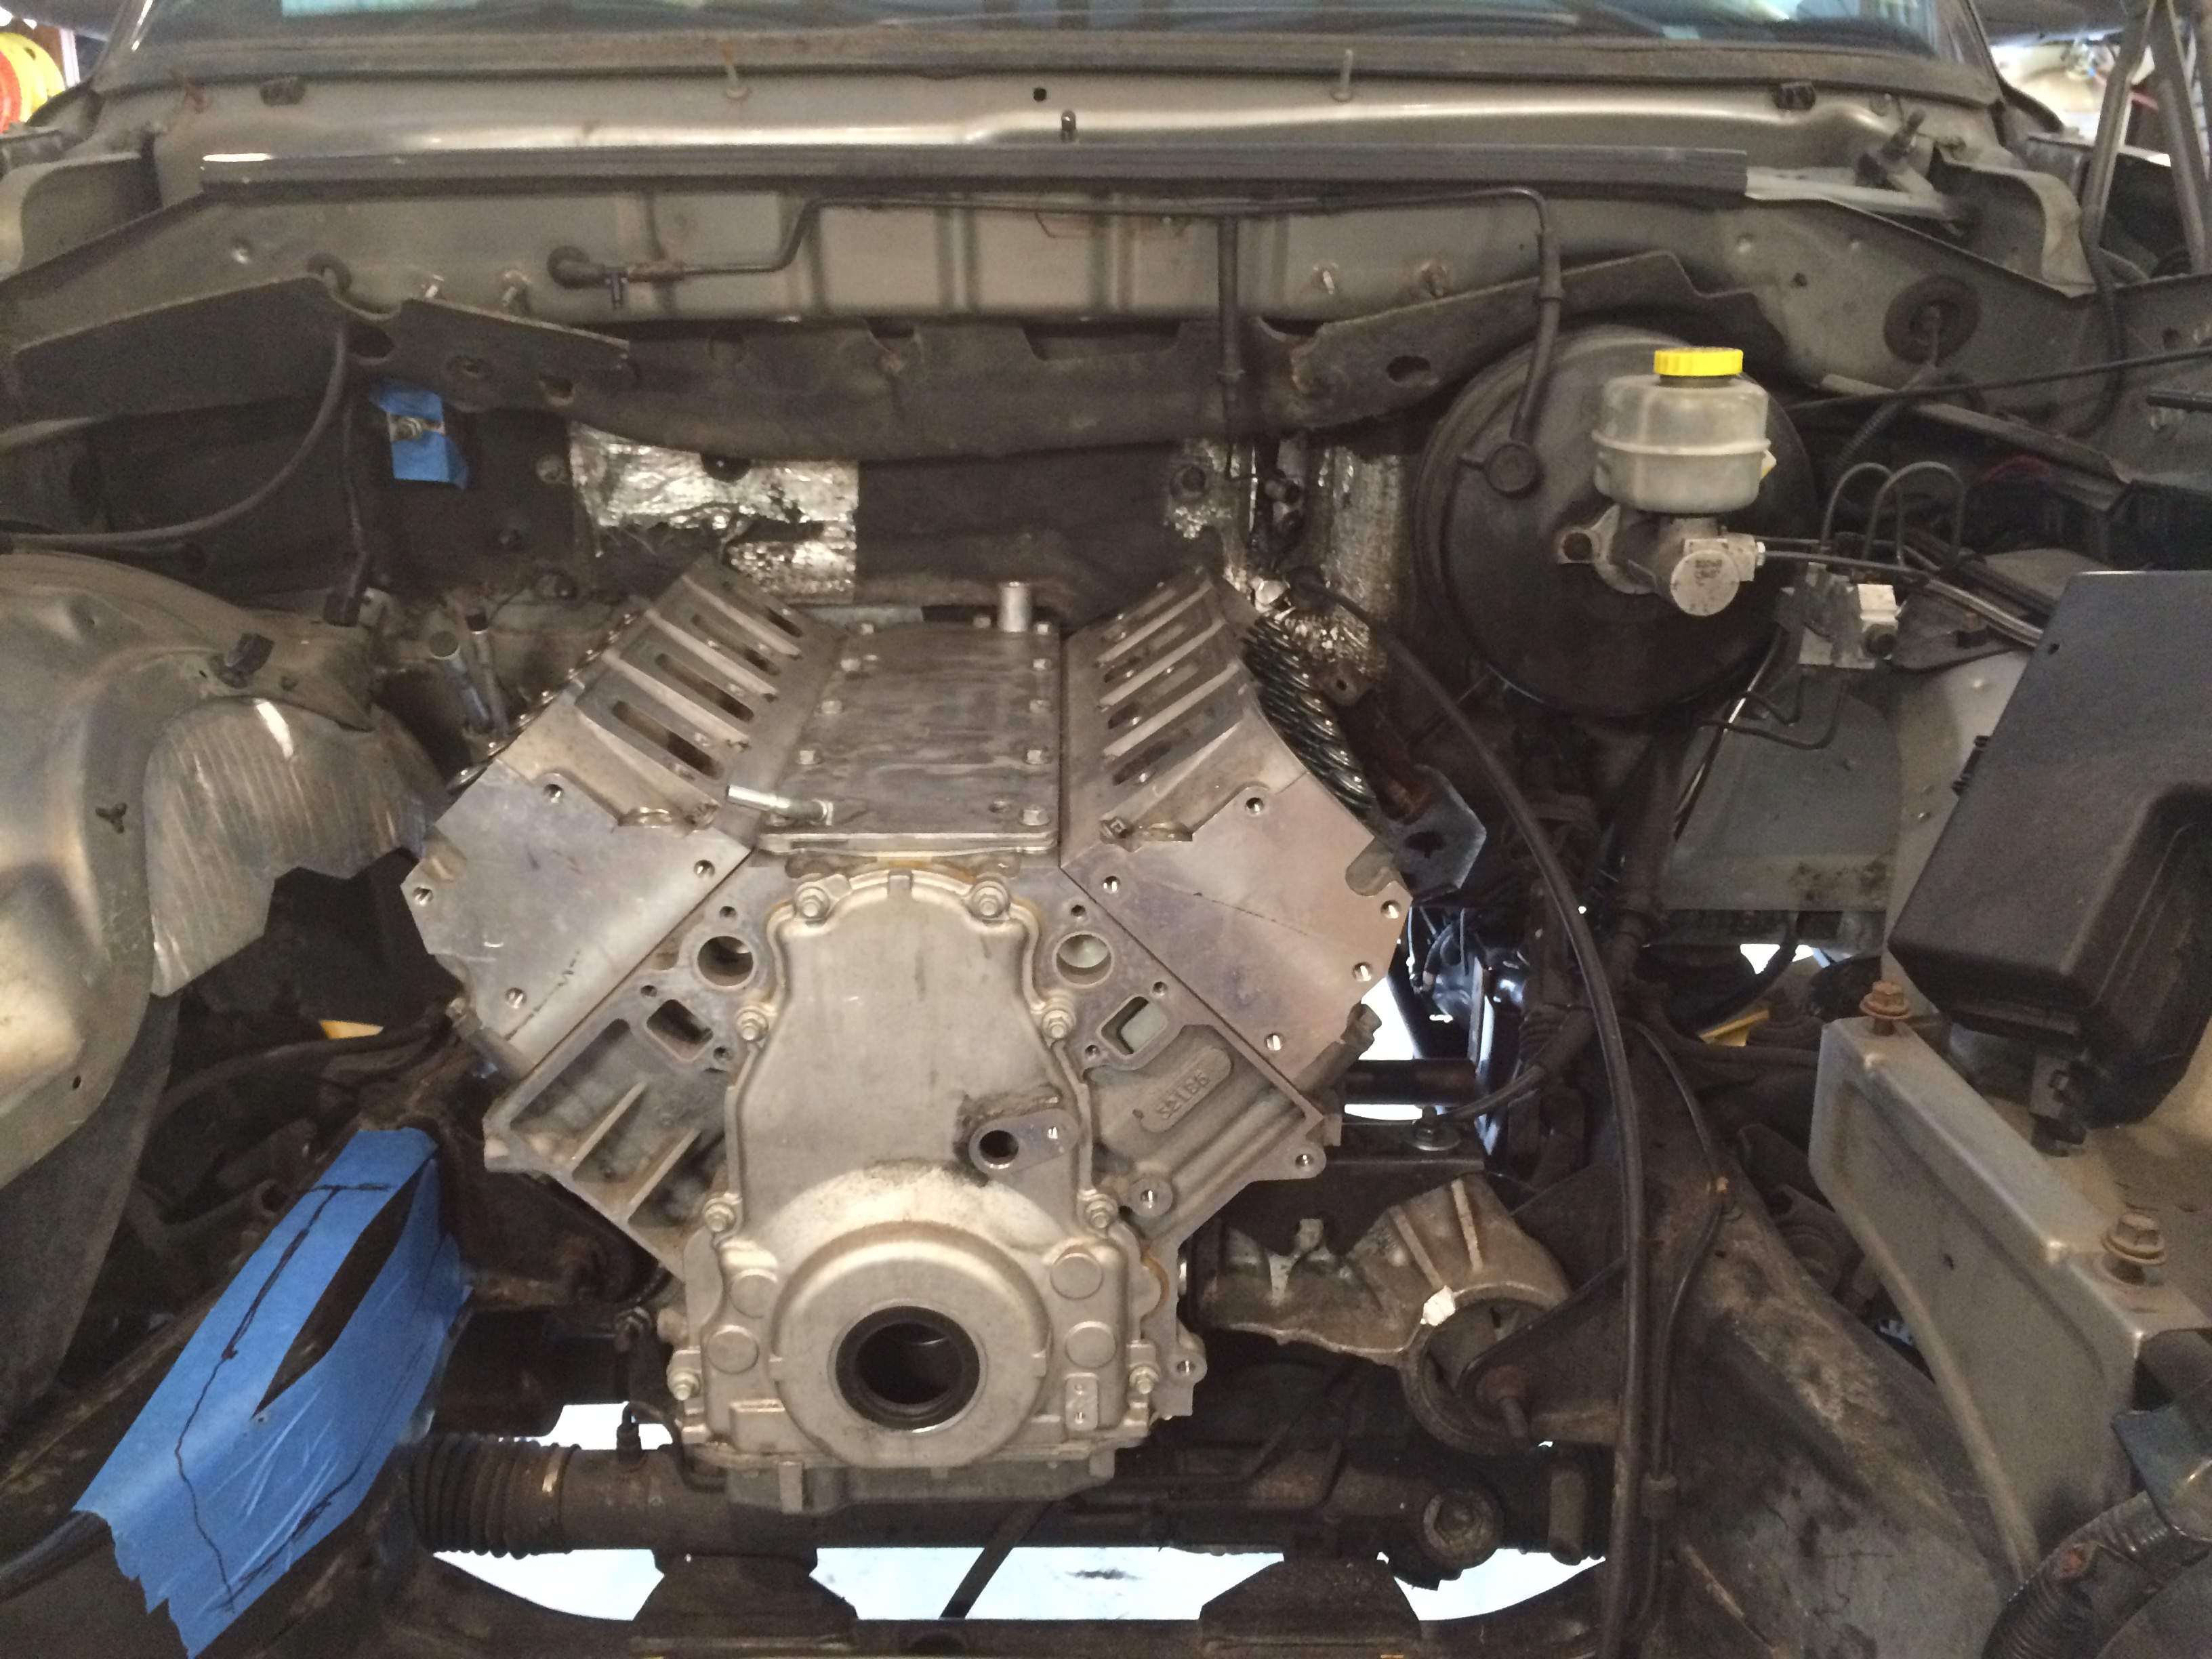
Moving on...... The transmission is in, and has plenty of clearance. The tunnel on the 4wd Durango is generous, just like the engine bay. No interference issues at all.
Transmission went in. Took about 10 minutes with the usual wrestling and wiggling.
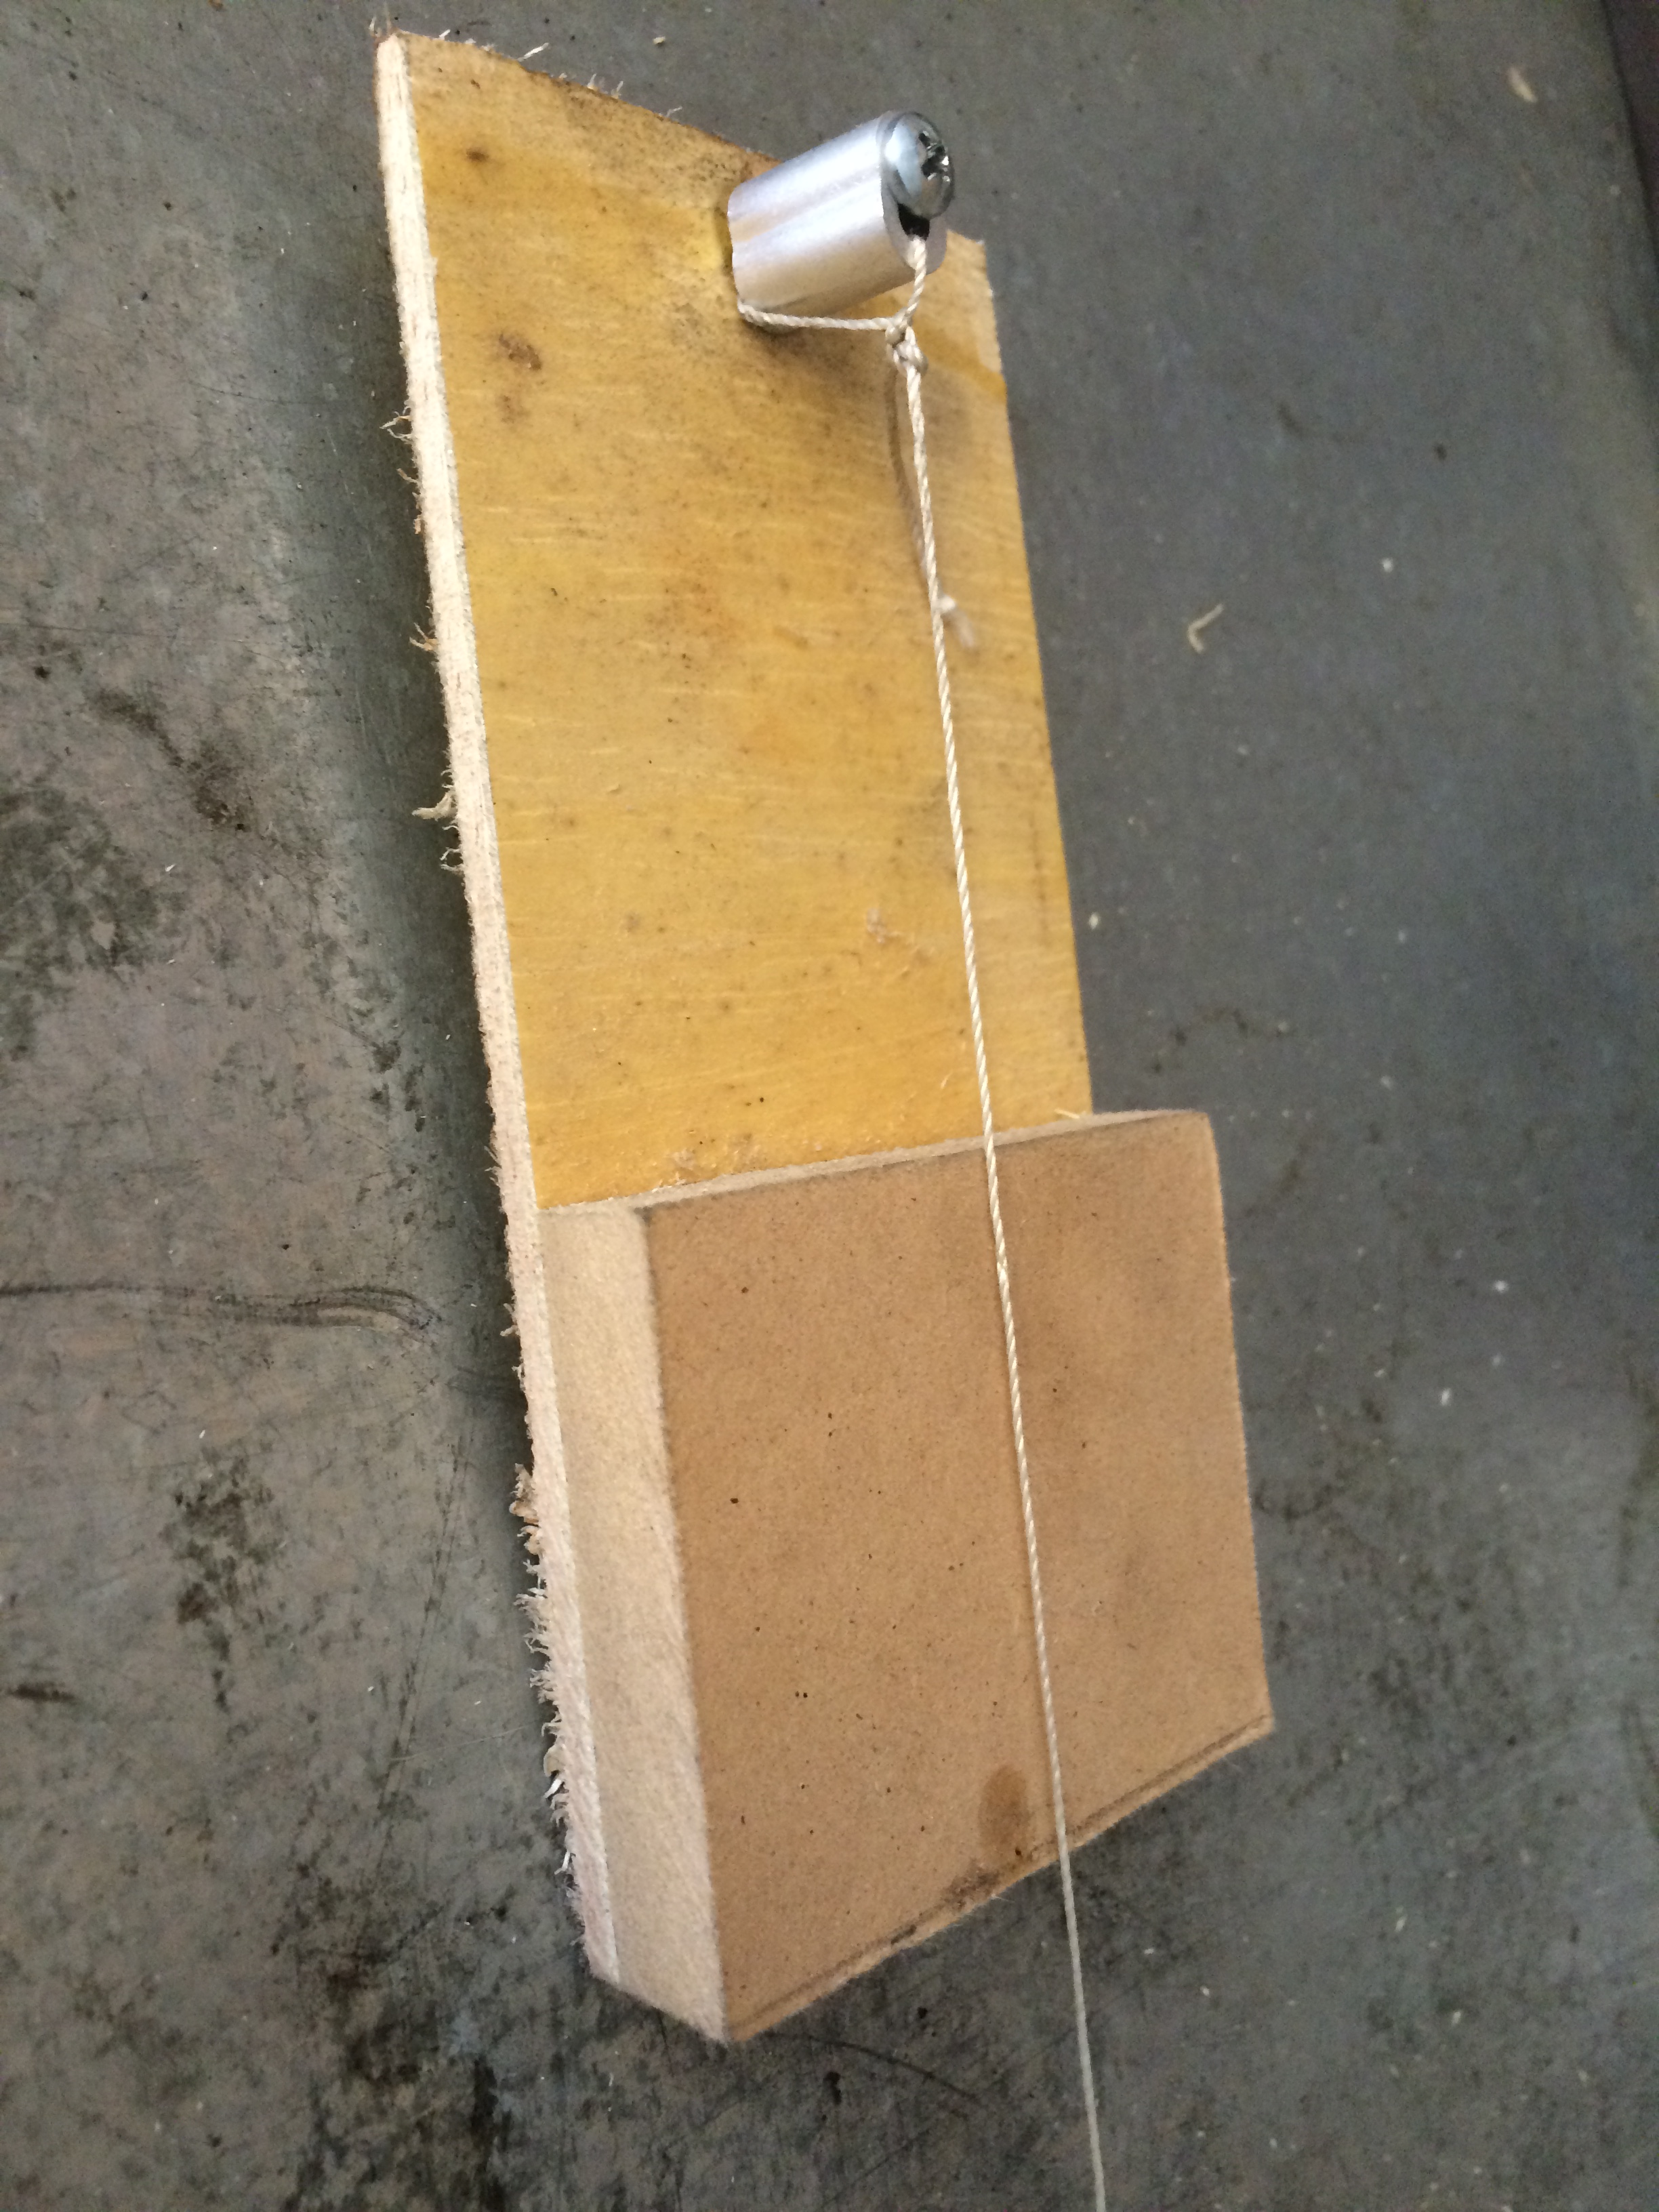
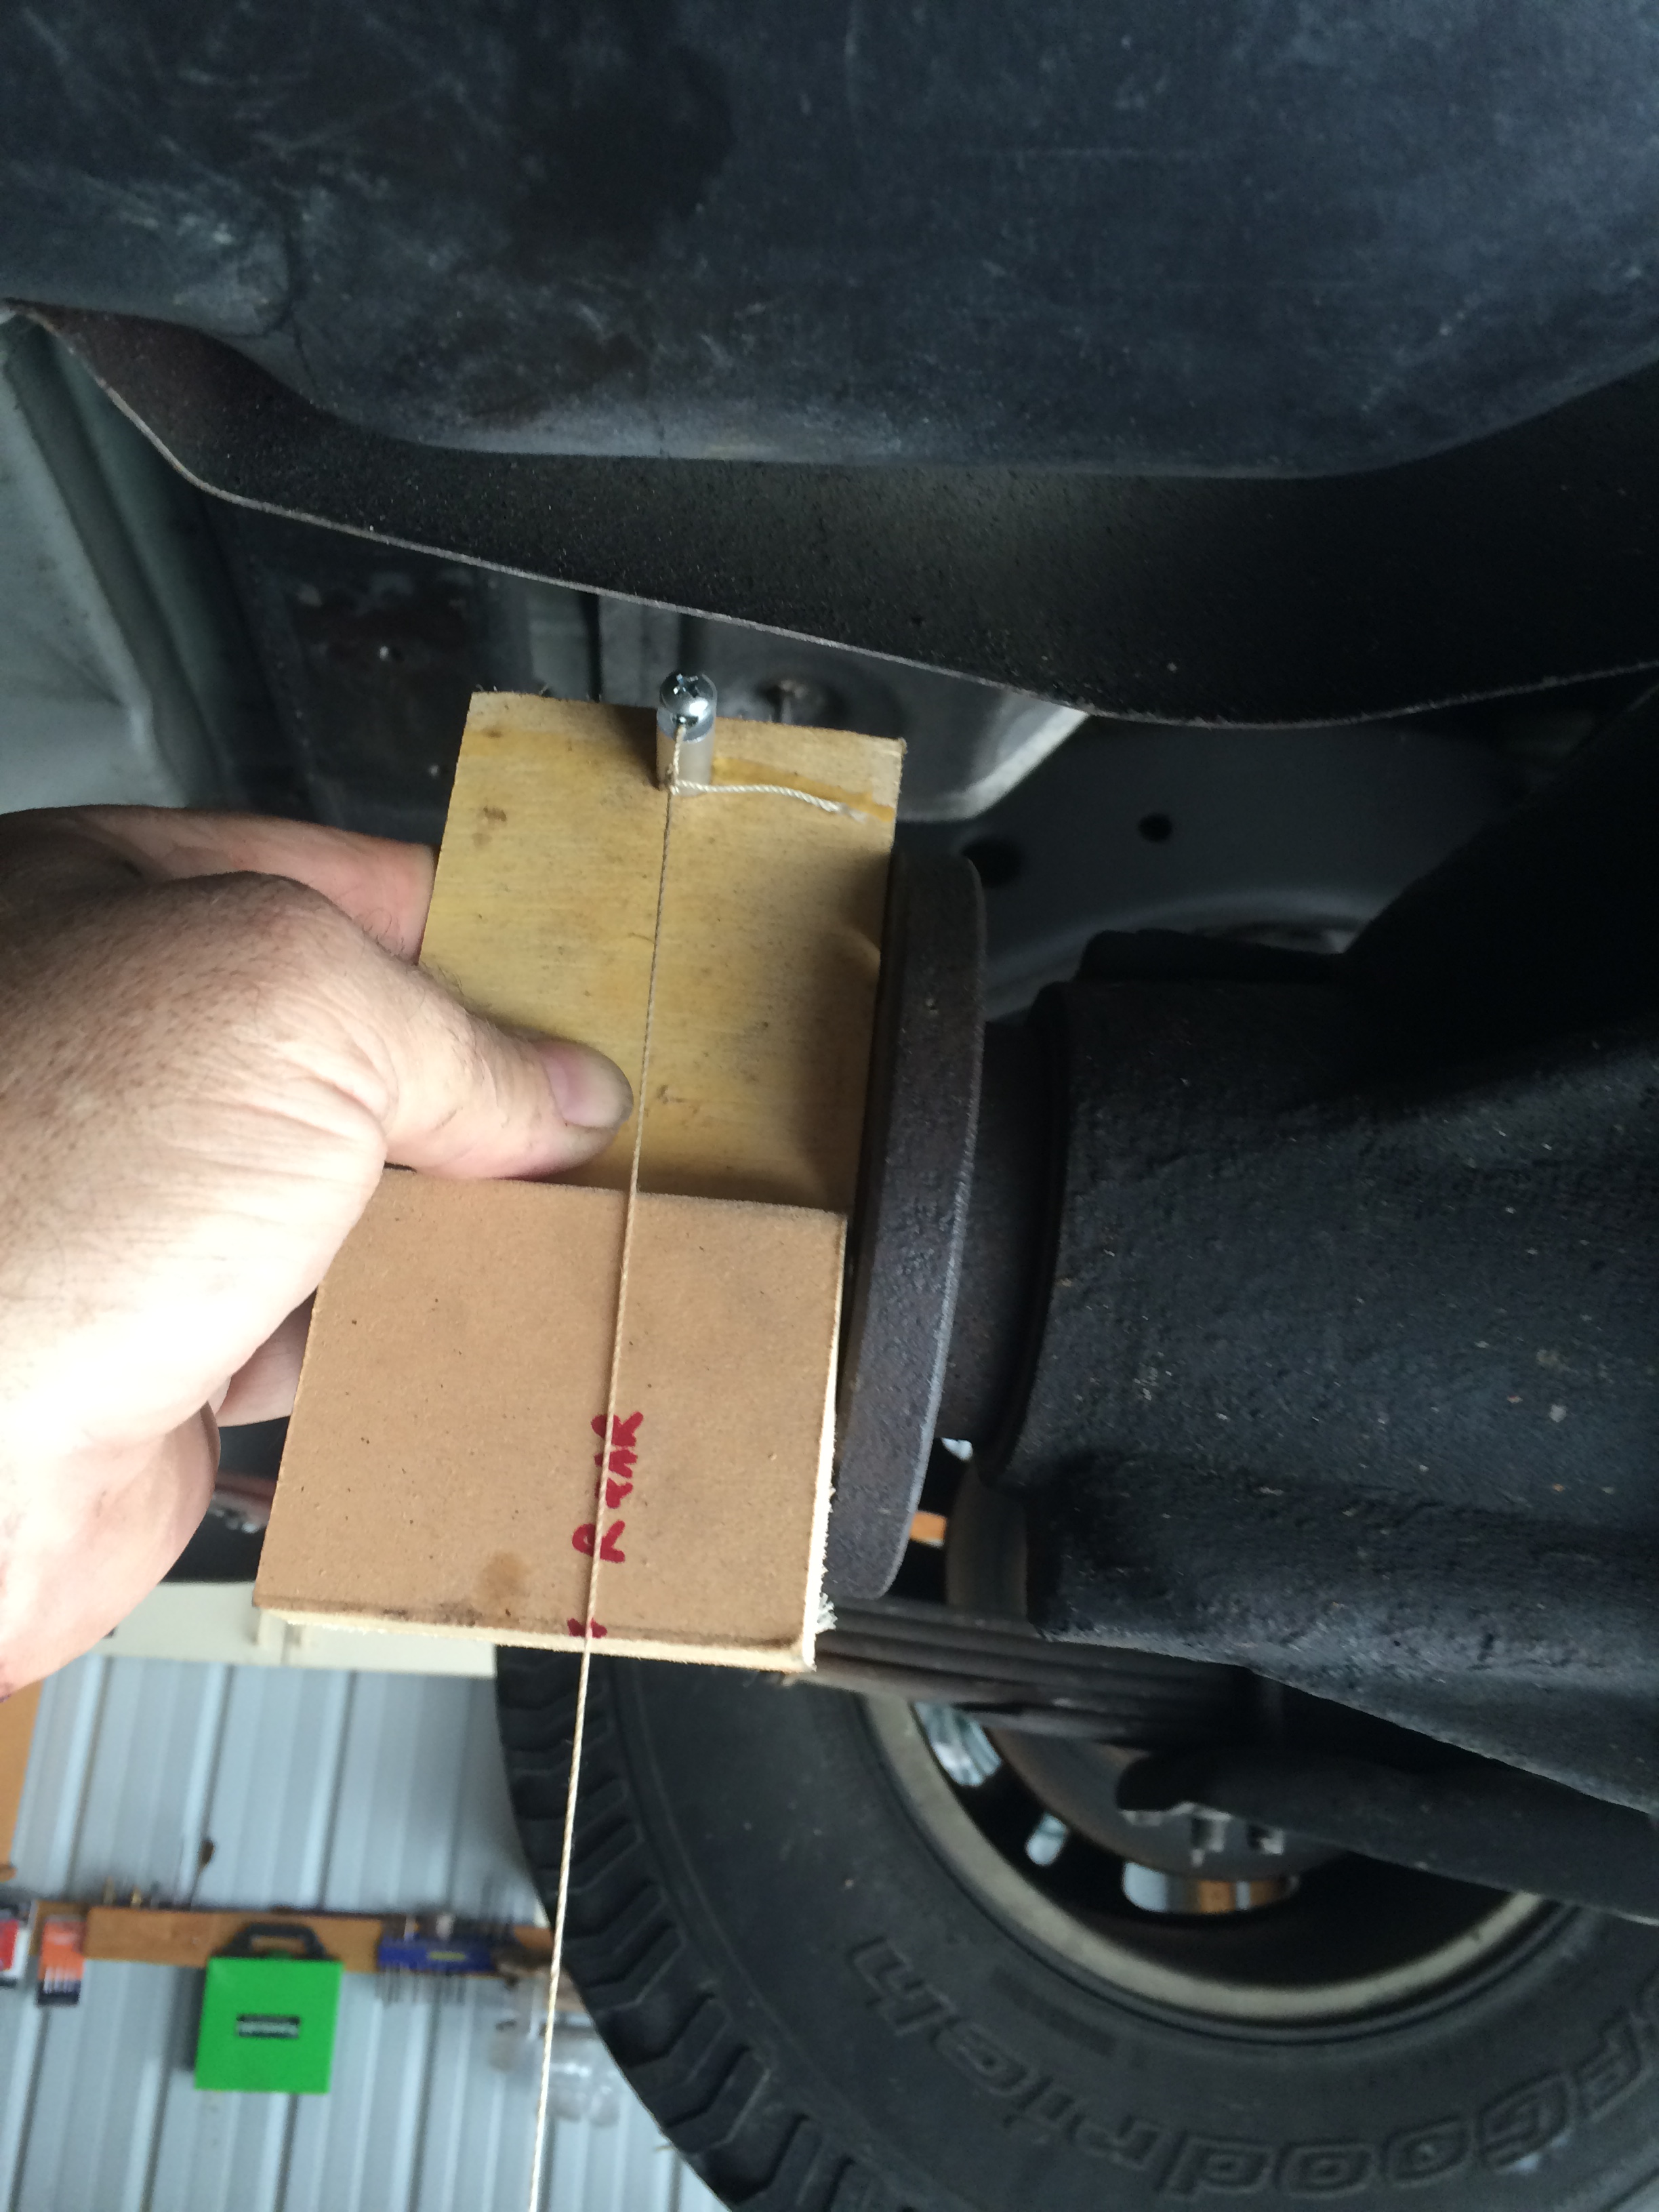
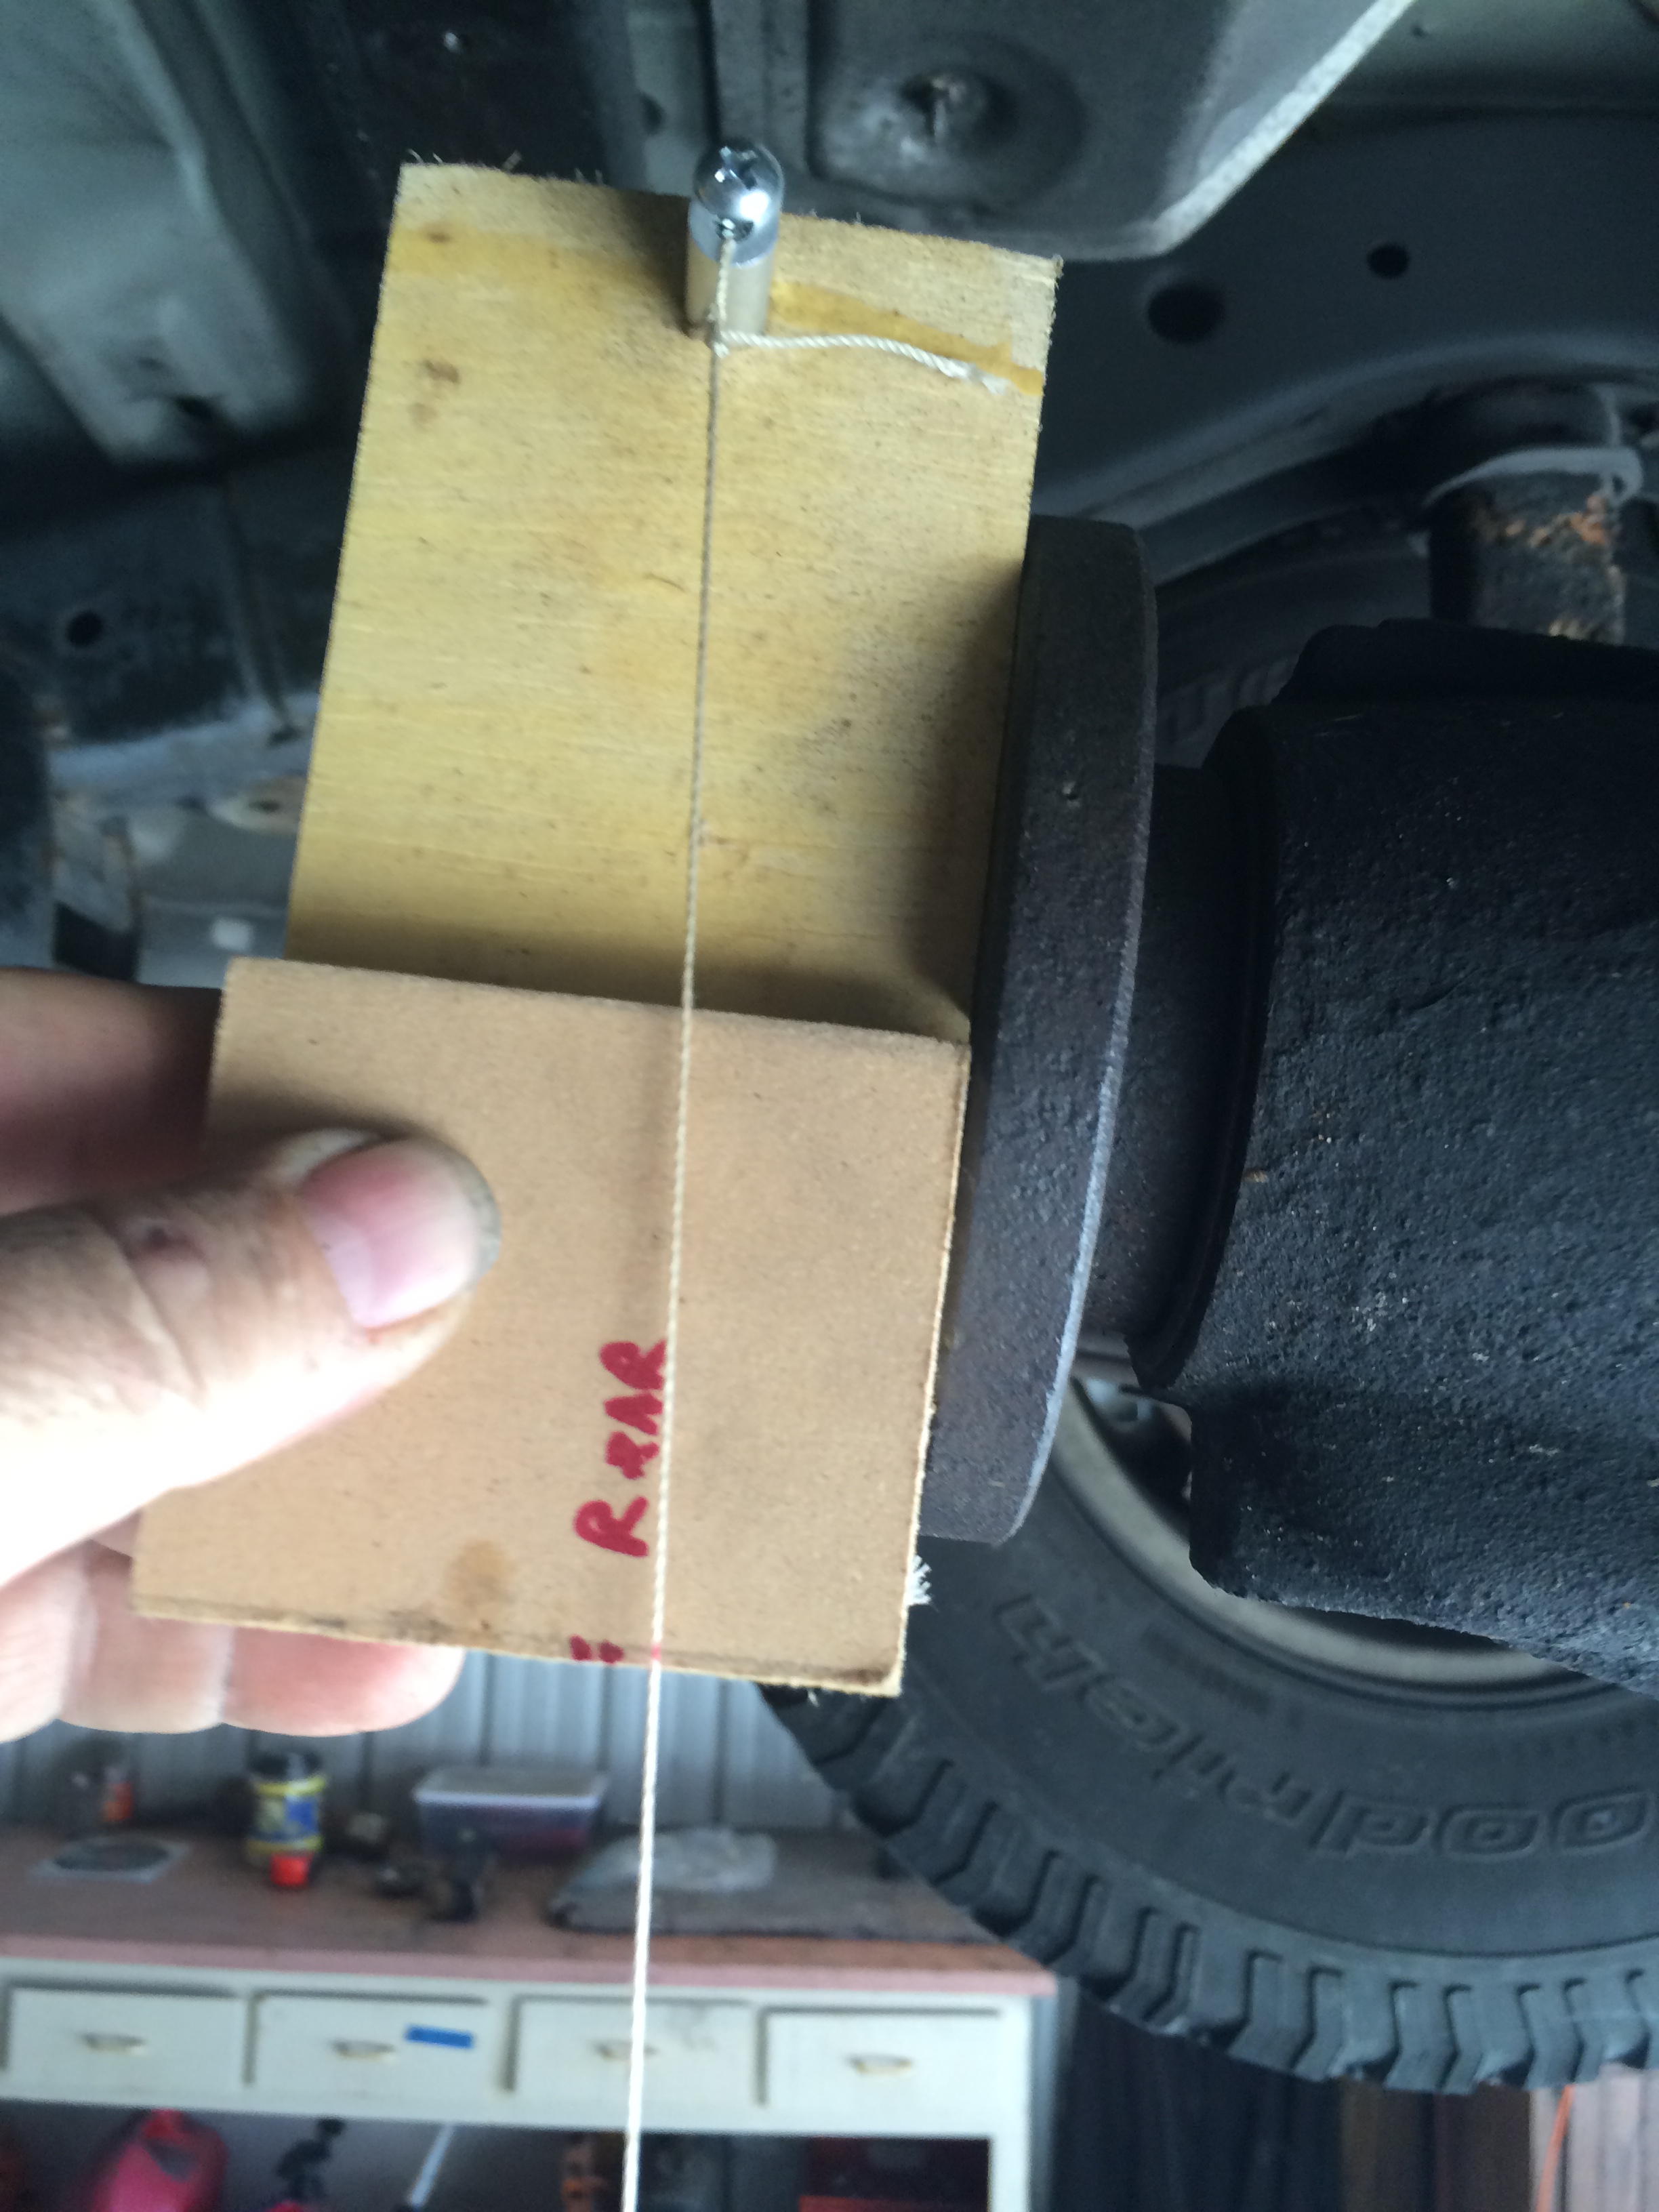
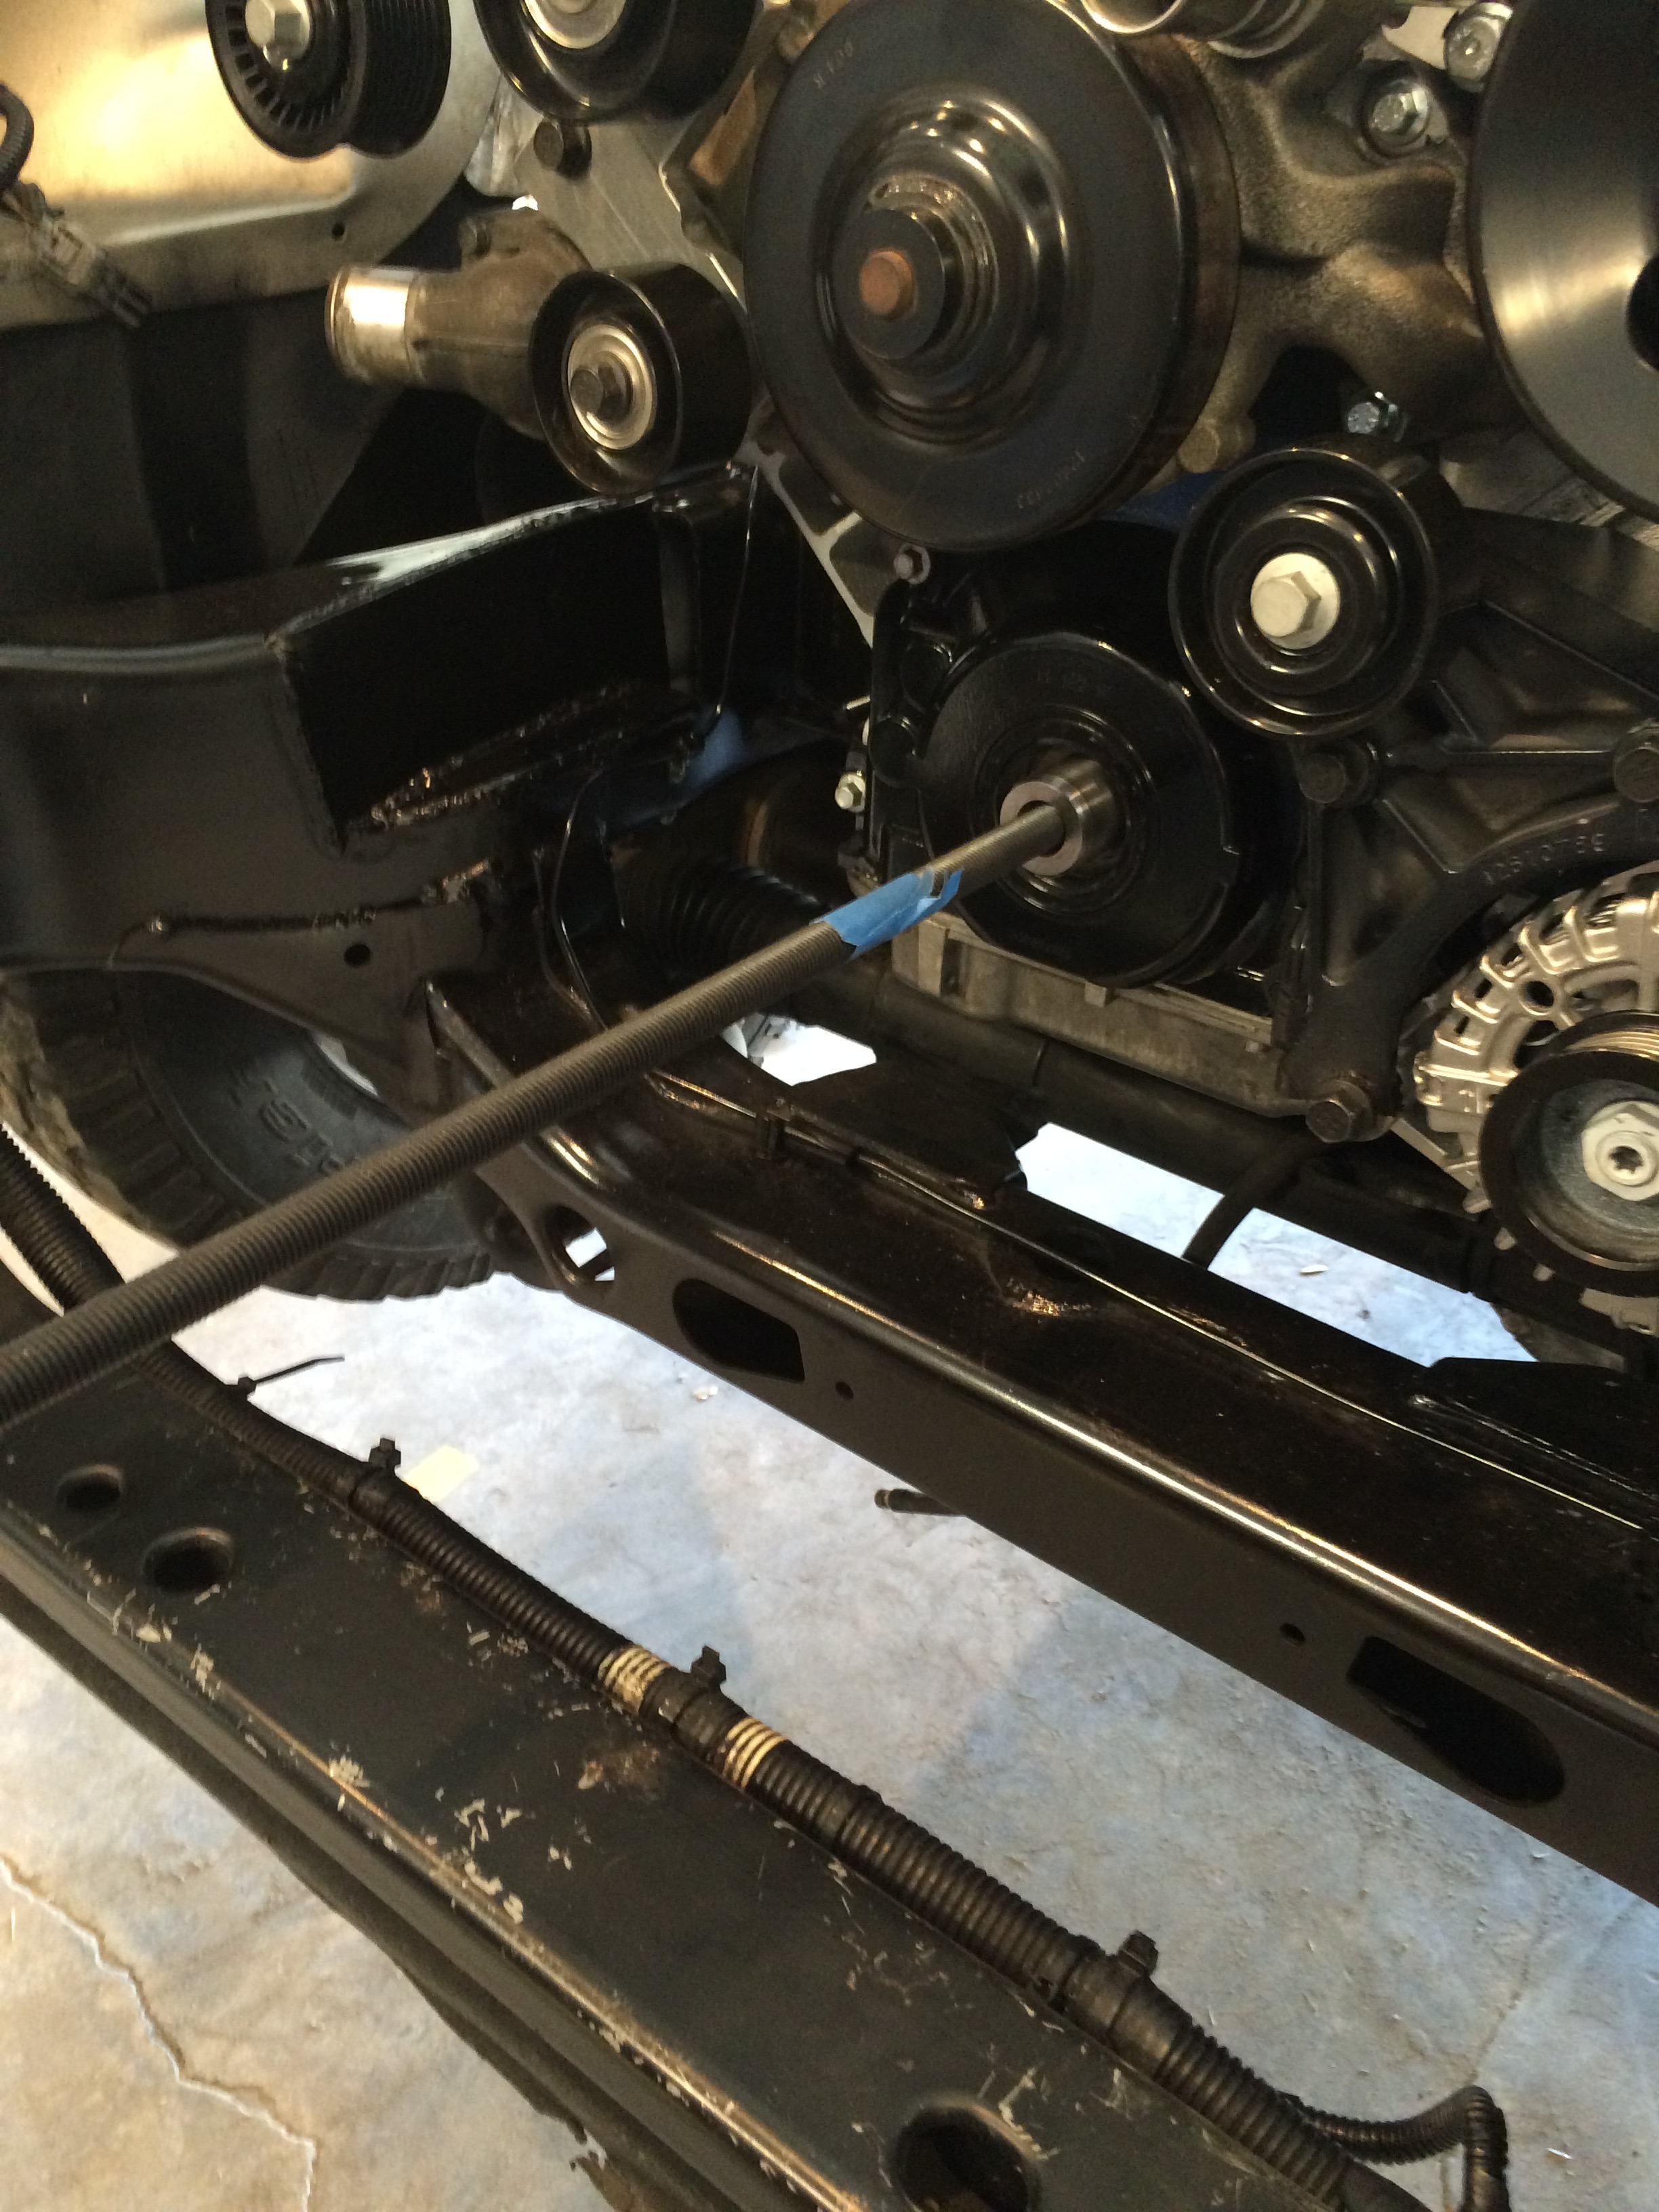
Now, how about that driveline angle. I use string and gravity. I have this diy gauge, made with string, a piece of aluminum tube and a washer.
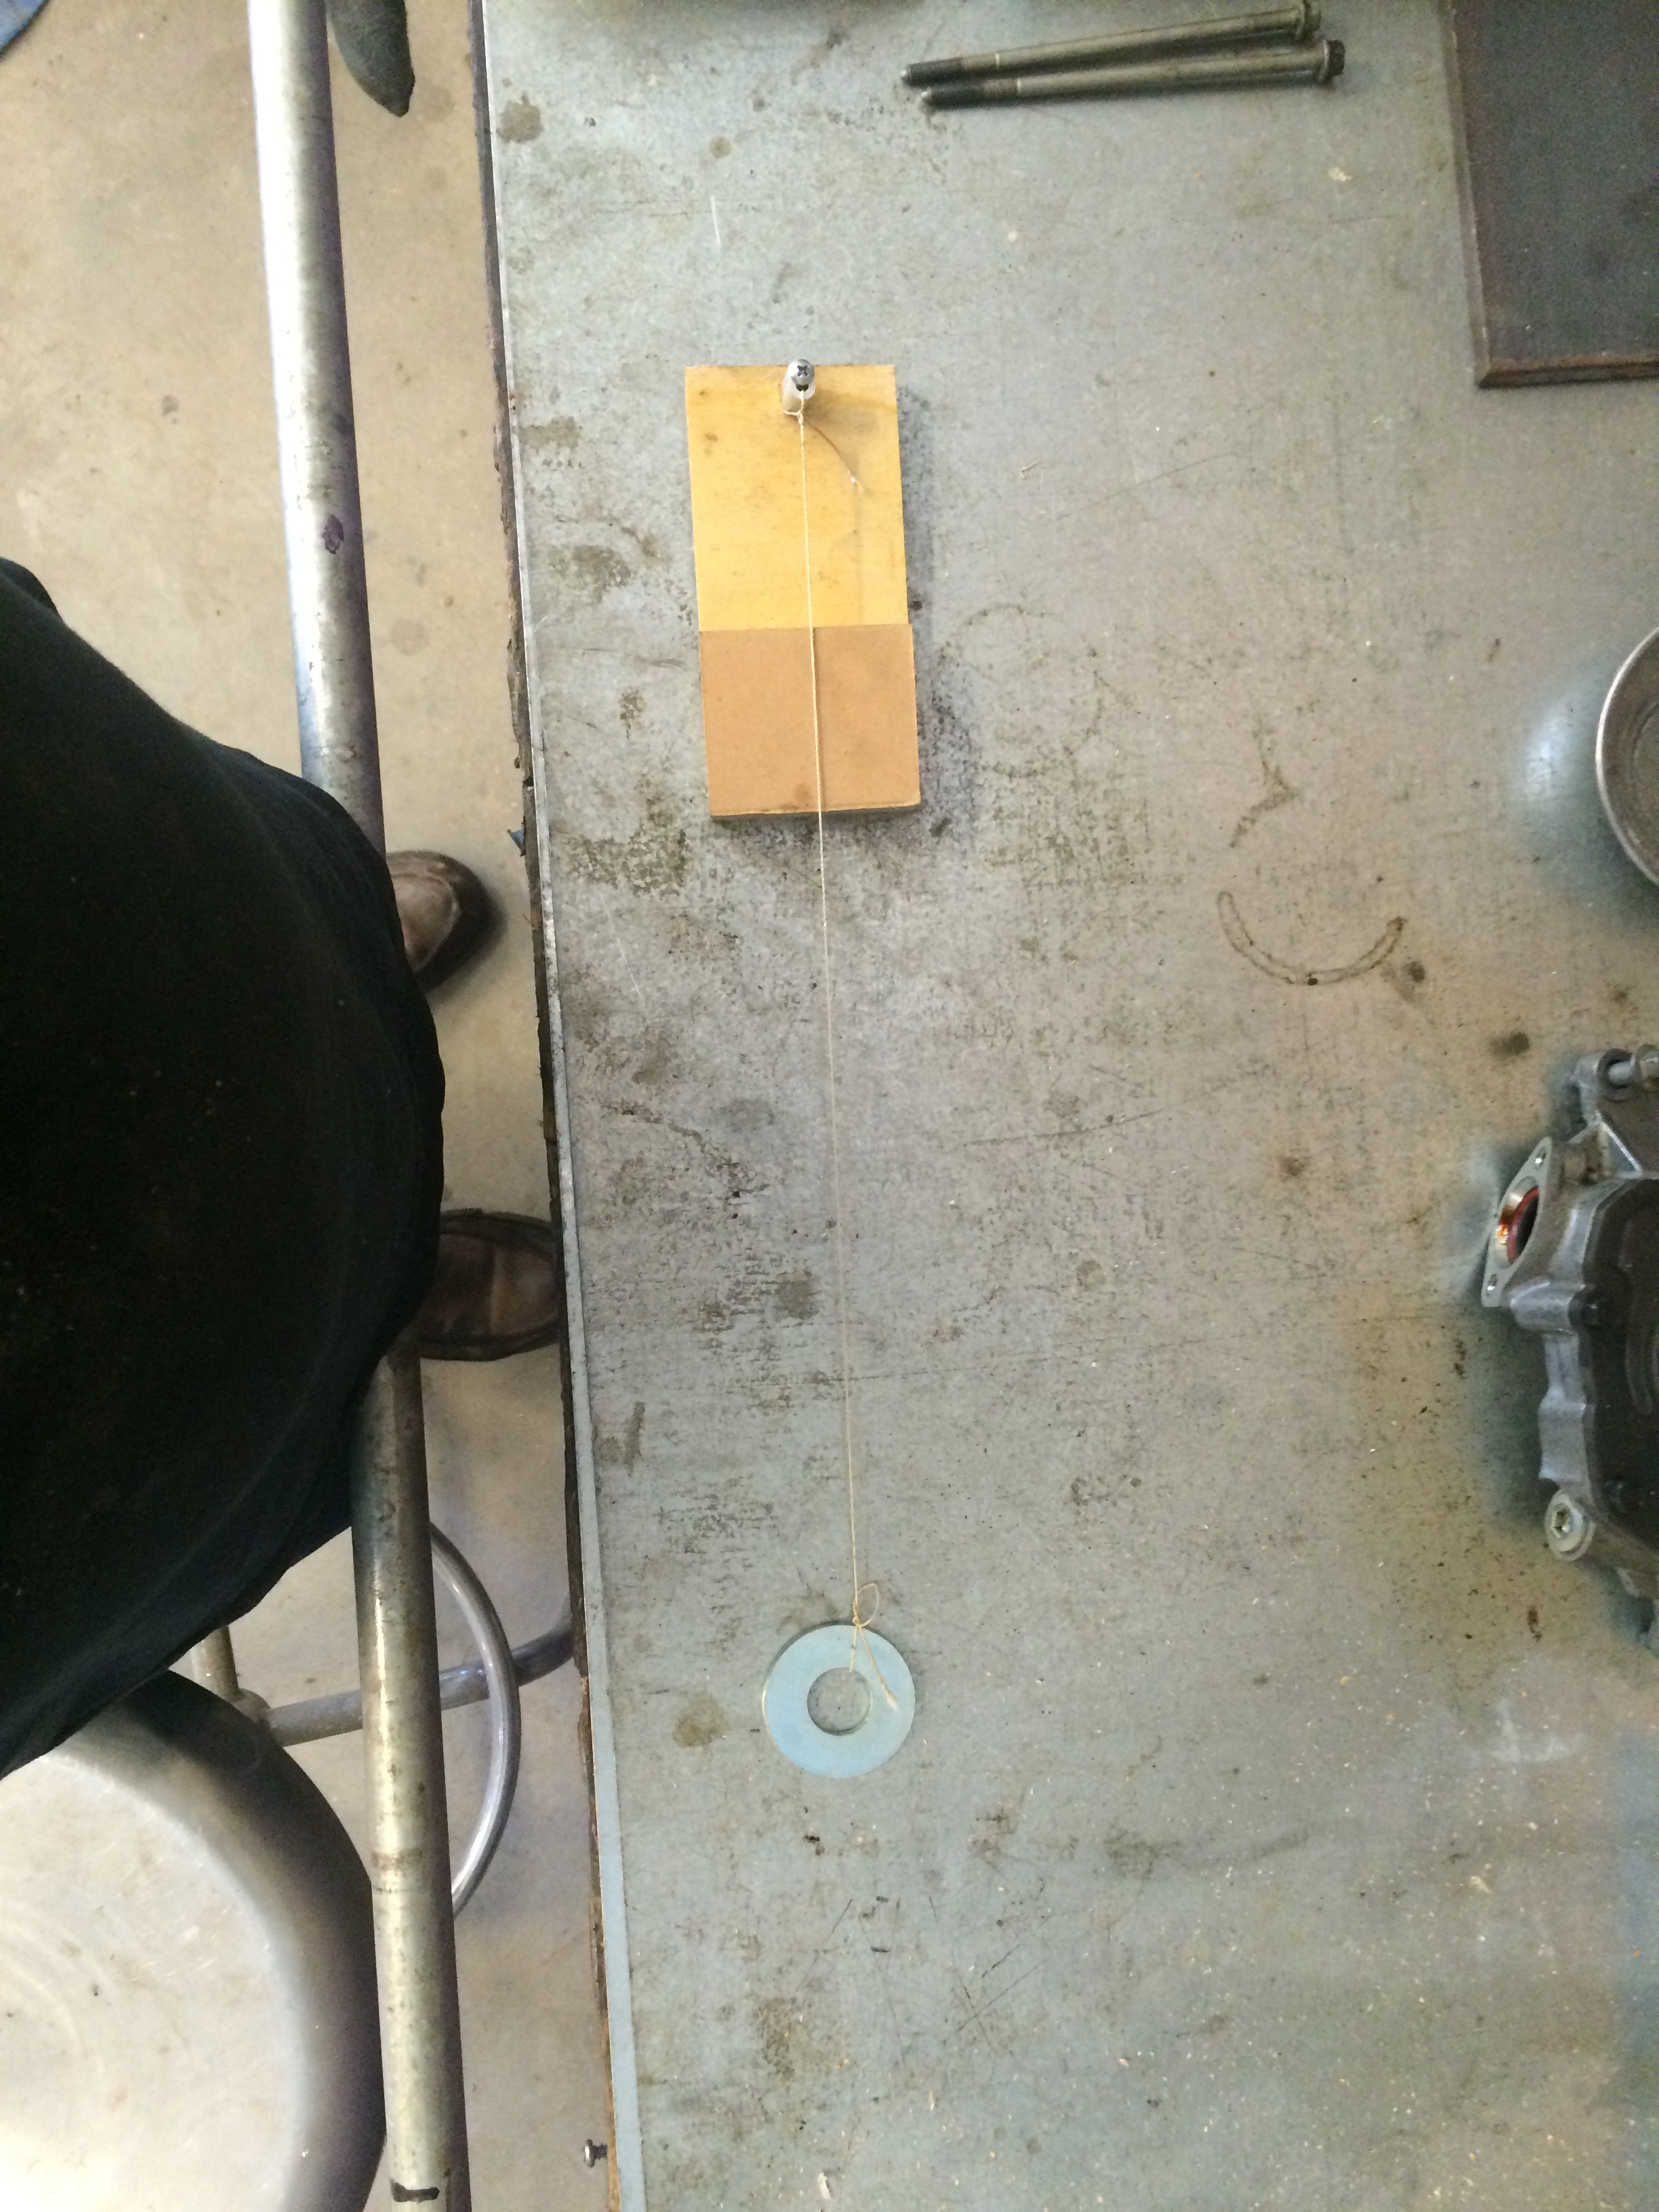
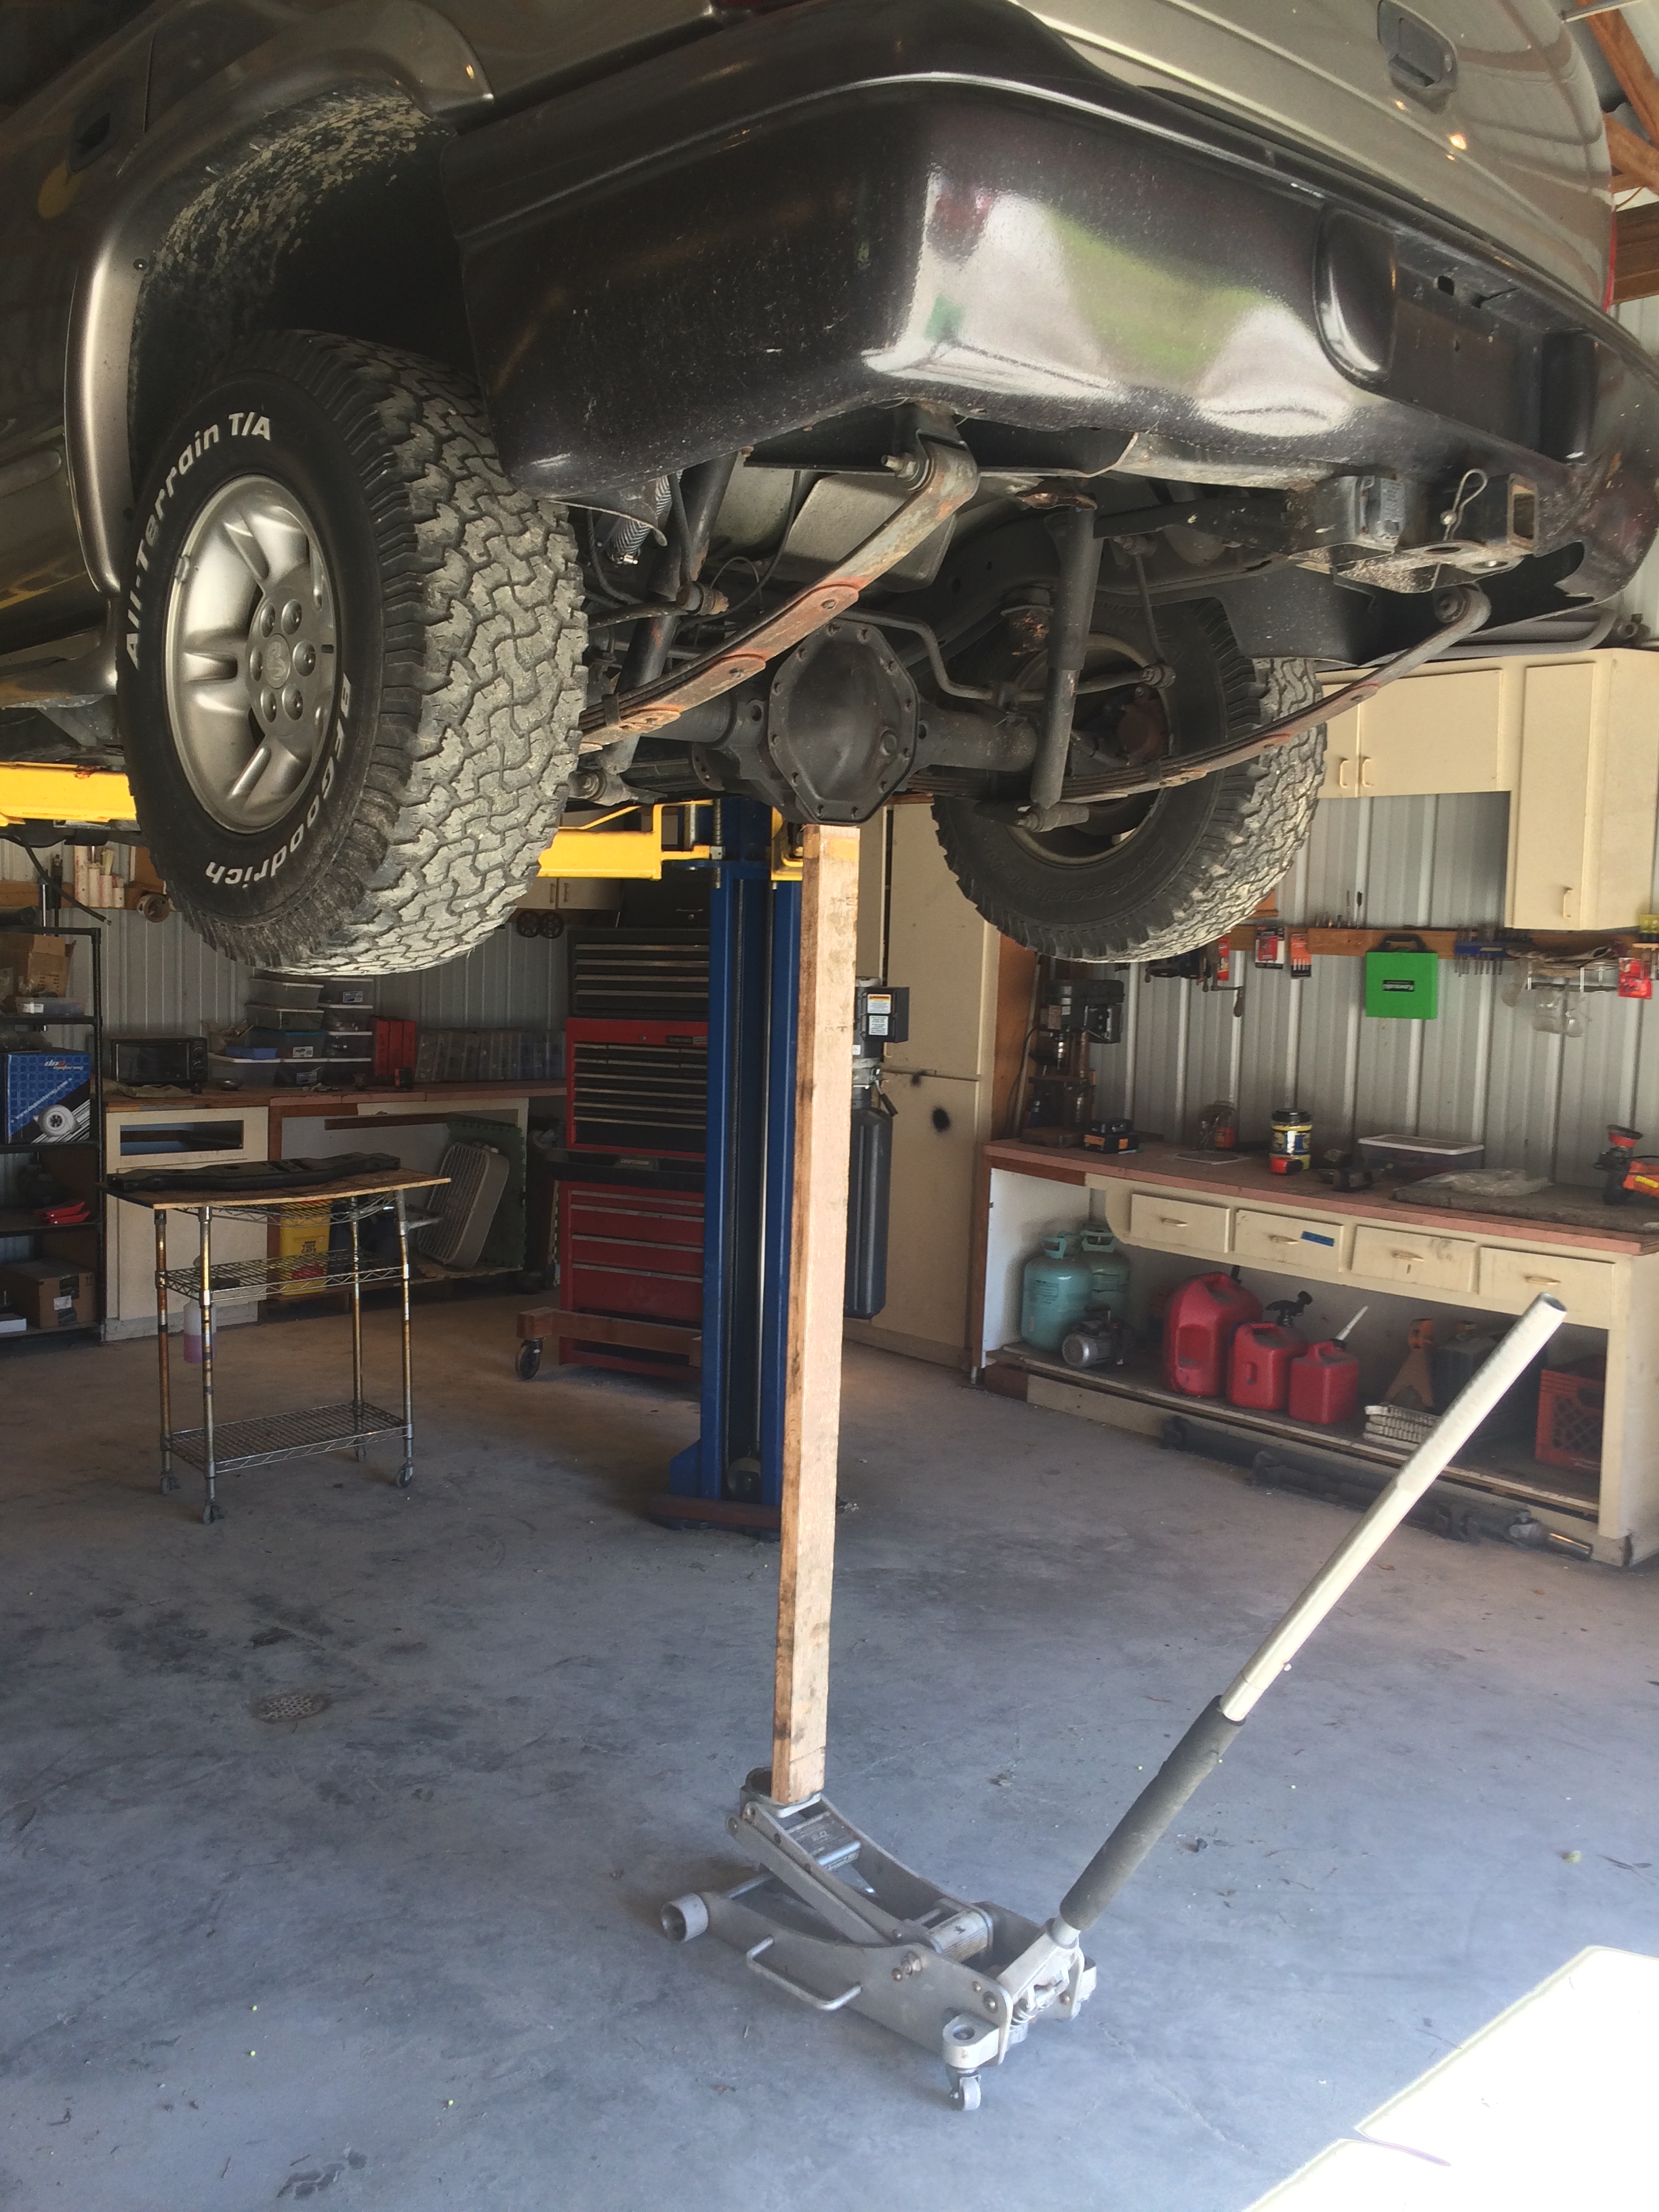
I don't like lying on the floor, so I compress the rear axle using a 2x4 and floor jack, until the rear springs are fully compressed and the frame is just lifting off of the lift pads.
And make a mark on each side of the string (it's hard to accurately mark directly under the string).
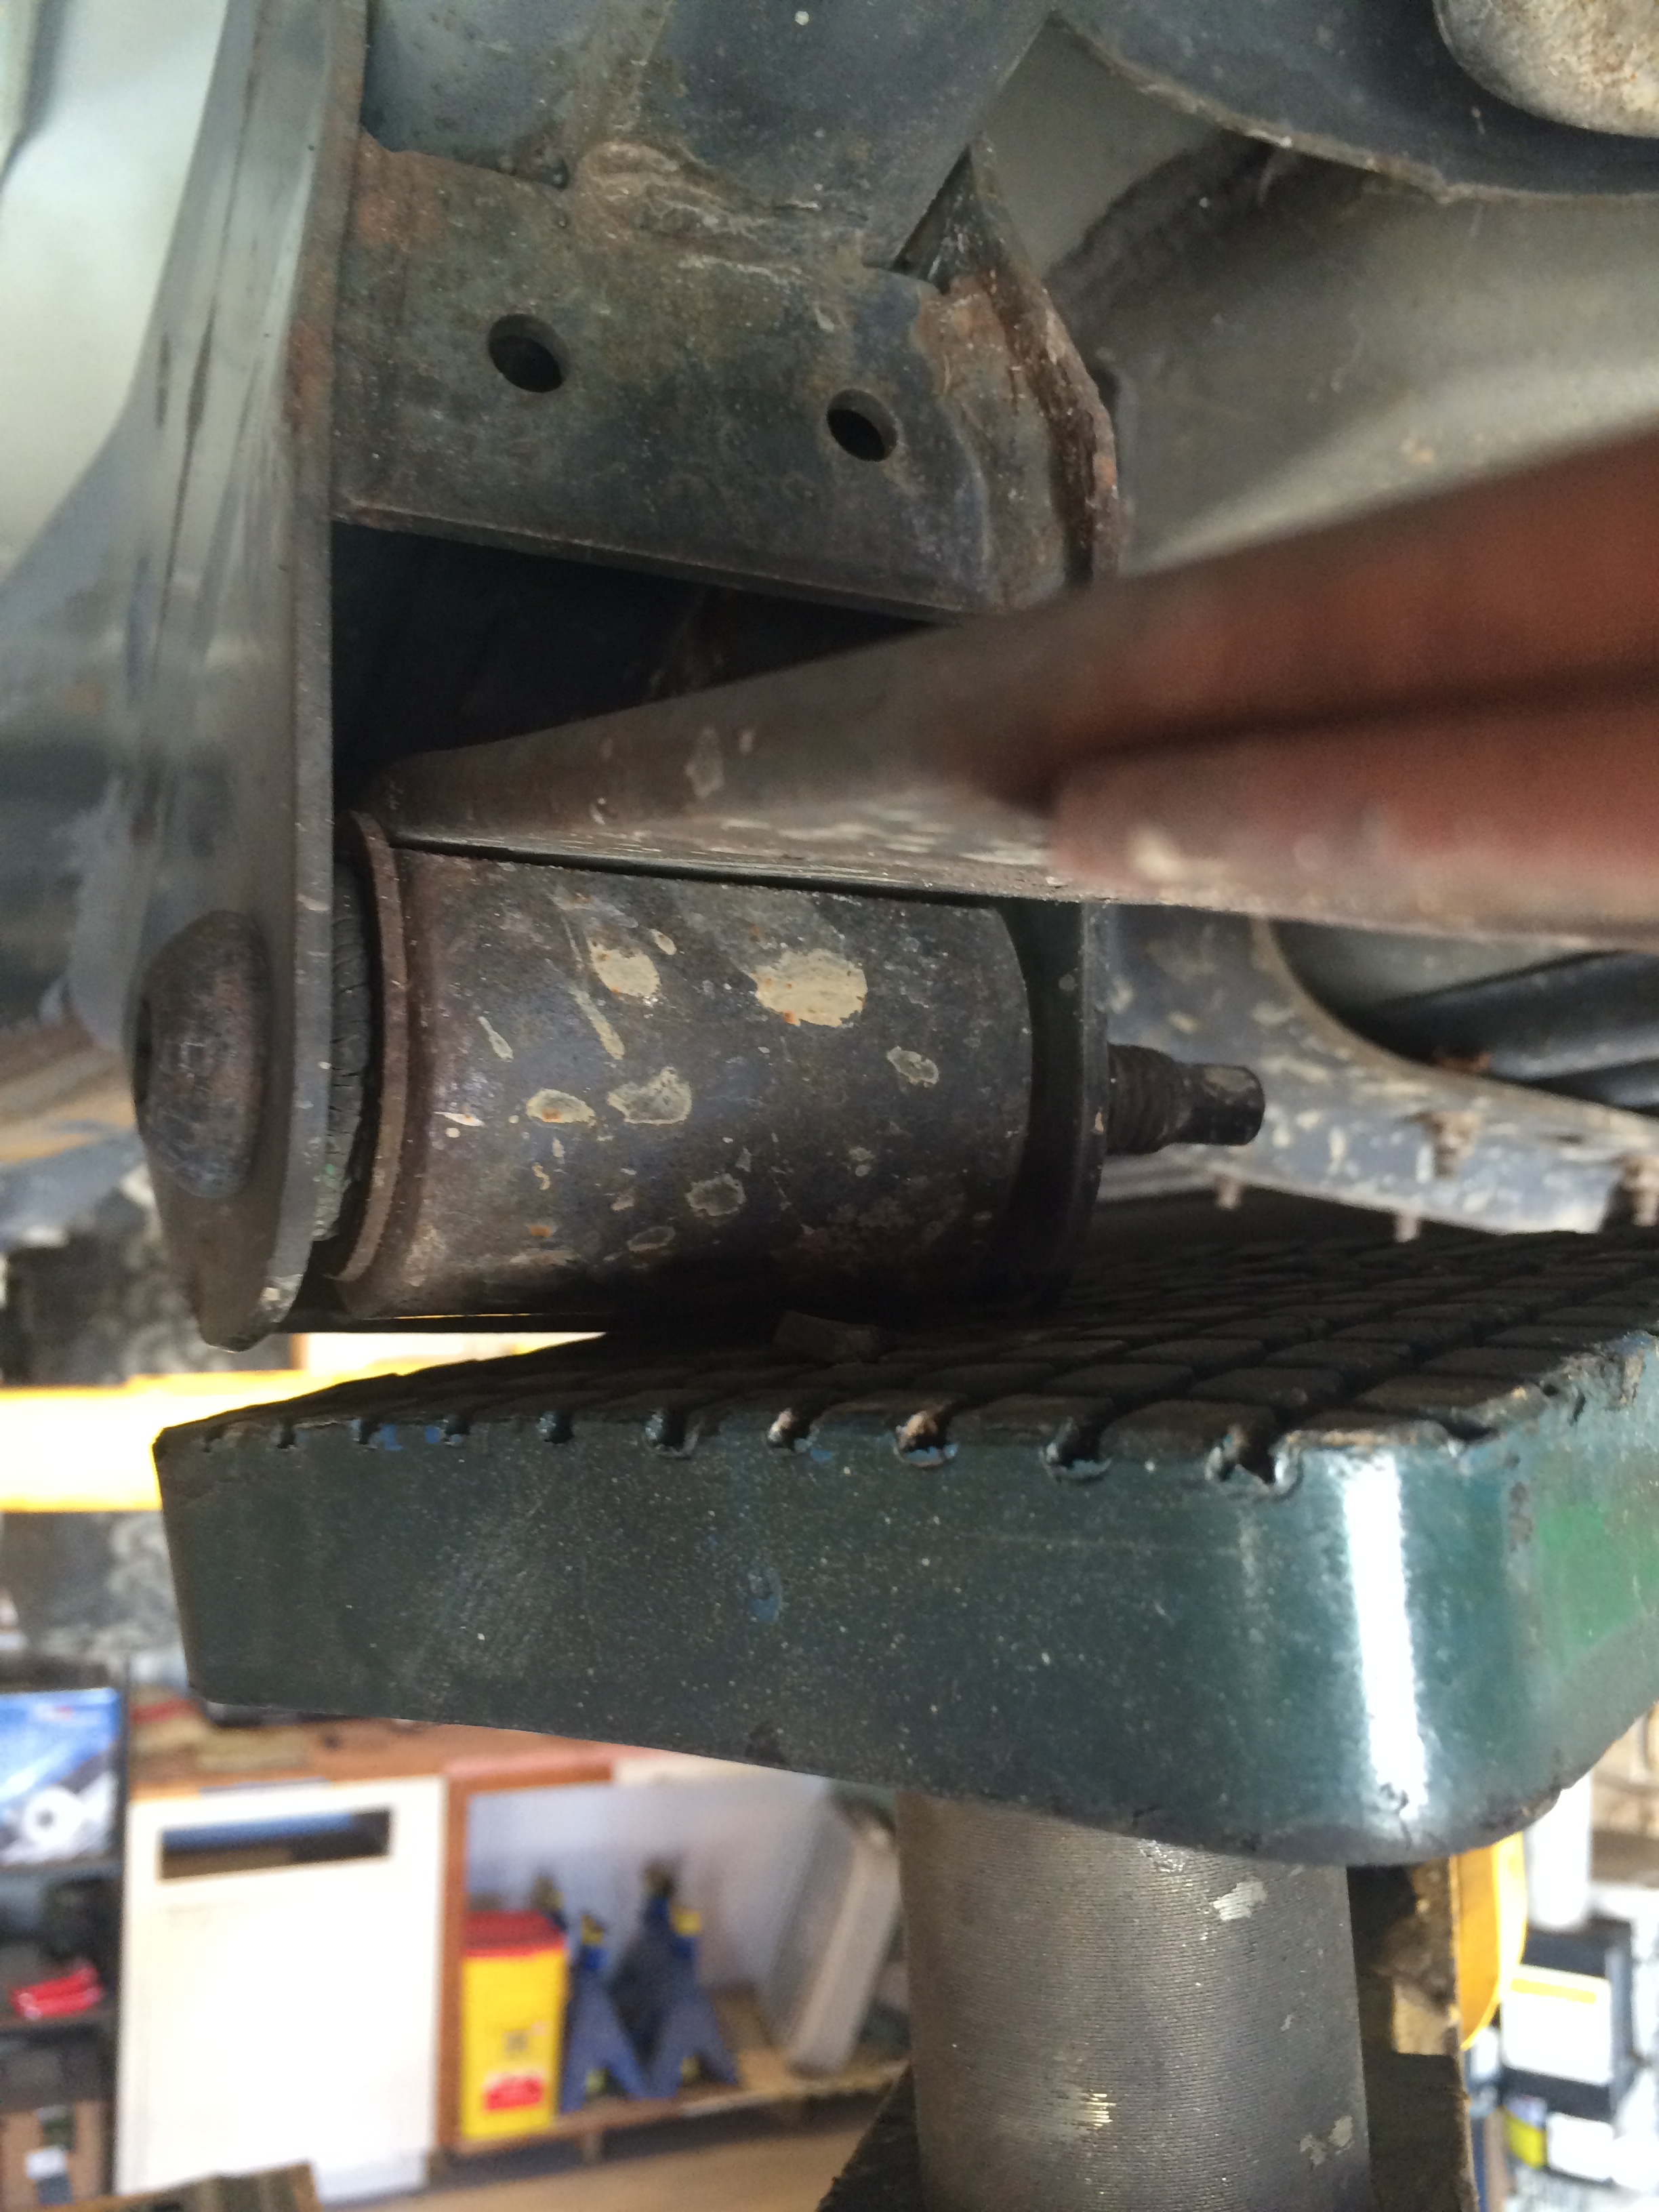
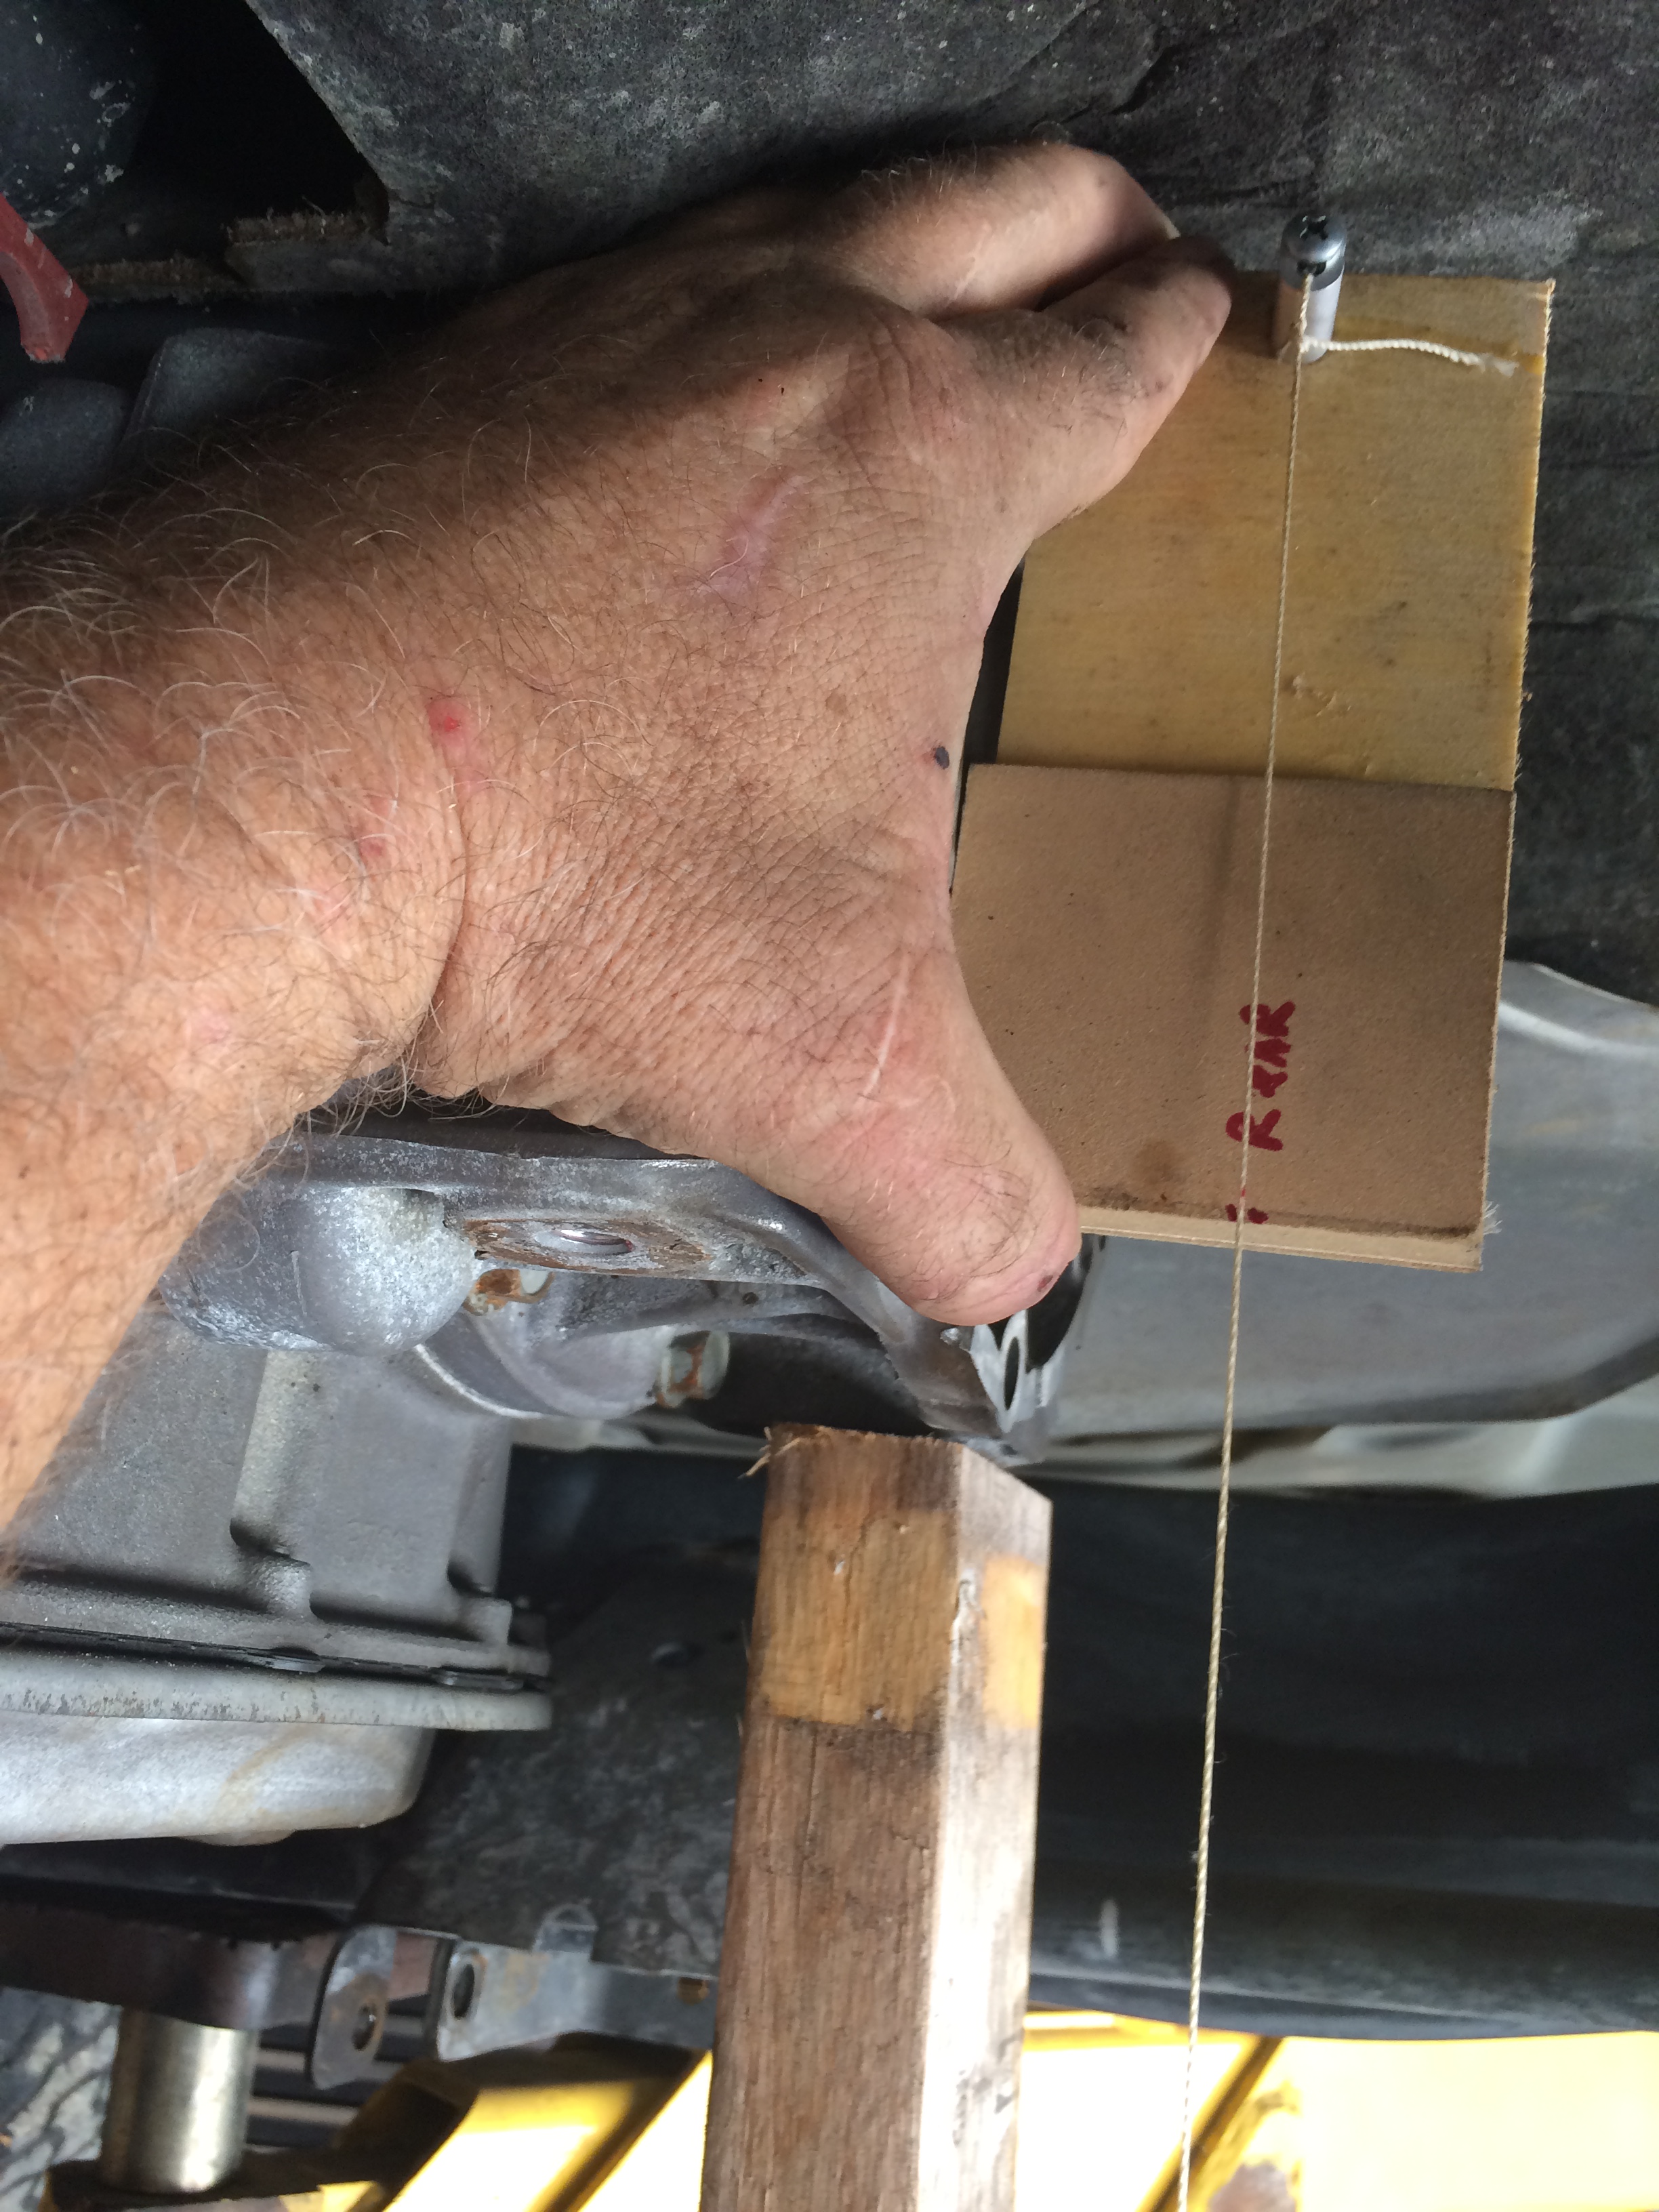
Any question about how much the rear axle angle changes when it is not compressed? Here is the angle when not compressed. Set up the transmission to match that, and your driveshaft would wobble for sure.
And jacking the transmission up to match still leaves enough room in the tunnel. It is snug, but won't require any cutting or hammering. The engine has about and inch clearance to the firewall. Perfect.
So, for anyone wanting to do this swap with the 6l80 or 6l90 and retain the independent front suspension, you can re-use the 231 or 242 transfer case from the Durango (depending on whether it is AWD or 4WD), and save buying a new transfer case. See....bitter/sweet.
The upside of these transfer cases is that they are plentiful, strong, and have huge aftermarket support to make them stronger. So I bought a 242 off of ebay for $165 shipped to my door.
Moving on...... The transmission is in, and has plenty of clearance. The tunnel on the 4wd Durango is generous, just like the engine bay. No interference issues at all.
Transmission went in. Took about 10 minutes with the usual wrestling and wiggling.


Now, how about that driveline angle. I use string and gravity. I have this diy gauge, made with string, a piece of aluminum tube and a washer.


I don't like lying on the floor, so I compress the rear axle using a 2x4 and floor jack, until the rear springs are fully compressed and the frame is just lifting off of the lift pads.


And make a mark on each side of the string (it's hard to accurately mark directly under the string).

Any question about how much the rear axle angle changes when it is not compressed? Here is the angle when not compressed. Set up the transmission to match that, and your driveshaft would wobble for sure.

And jacking the transmission up to match still leaves enough room in the tunnel. It is snug, but won't require any cutting or hammering. The engine has about and inch clearance to the firewall. Perfect.
 12-27-2015, 01:51 PM
#44
Ok, time for some updates from the holiday weekend. The Novak adapter arrived, so I swapped out the input shaft from 27 spline (?) to 32 spline to match with the 6l80 transmission. The adapter is billet aluminum, and really high quality. Kind of expensive, but......
I didn't want to wrestle the NP 242 around the table, and it should be flat when it is opened so the pieces don't spill out. So I cut a hole in the worktable and stood it on its tailshaft, using the front yoke as a spacer.

Opening up the case and pulling out the shift fork. There is a right way, and a pry-bar way.
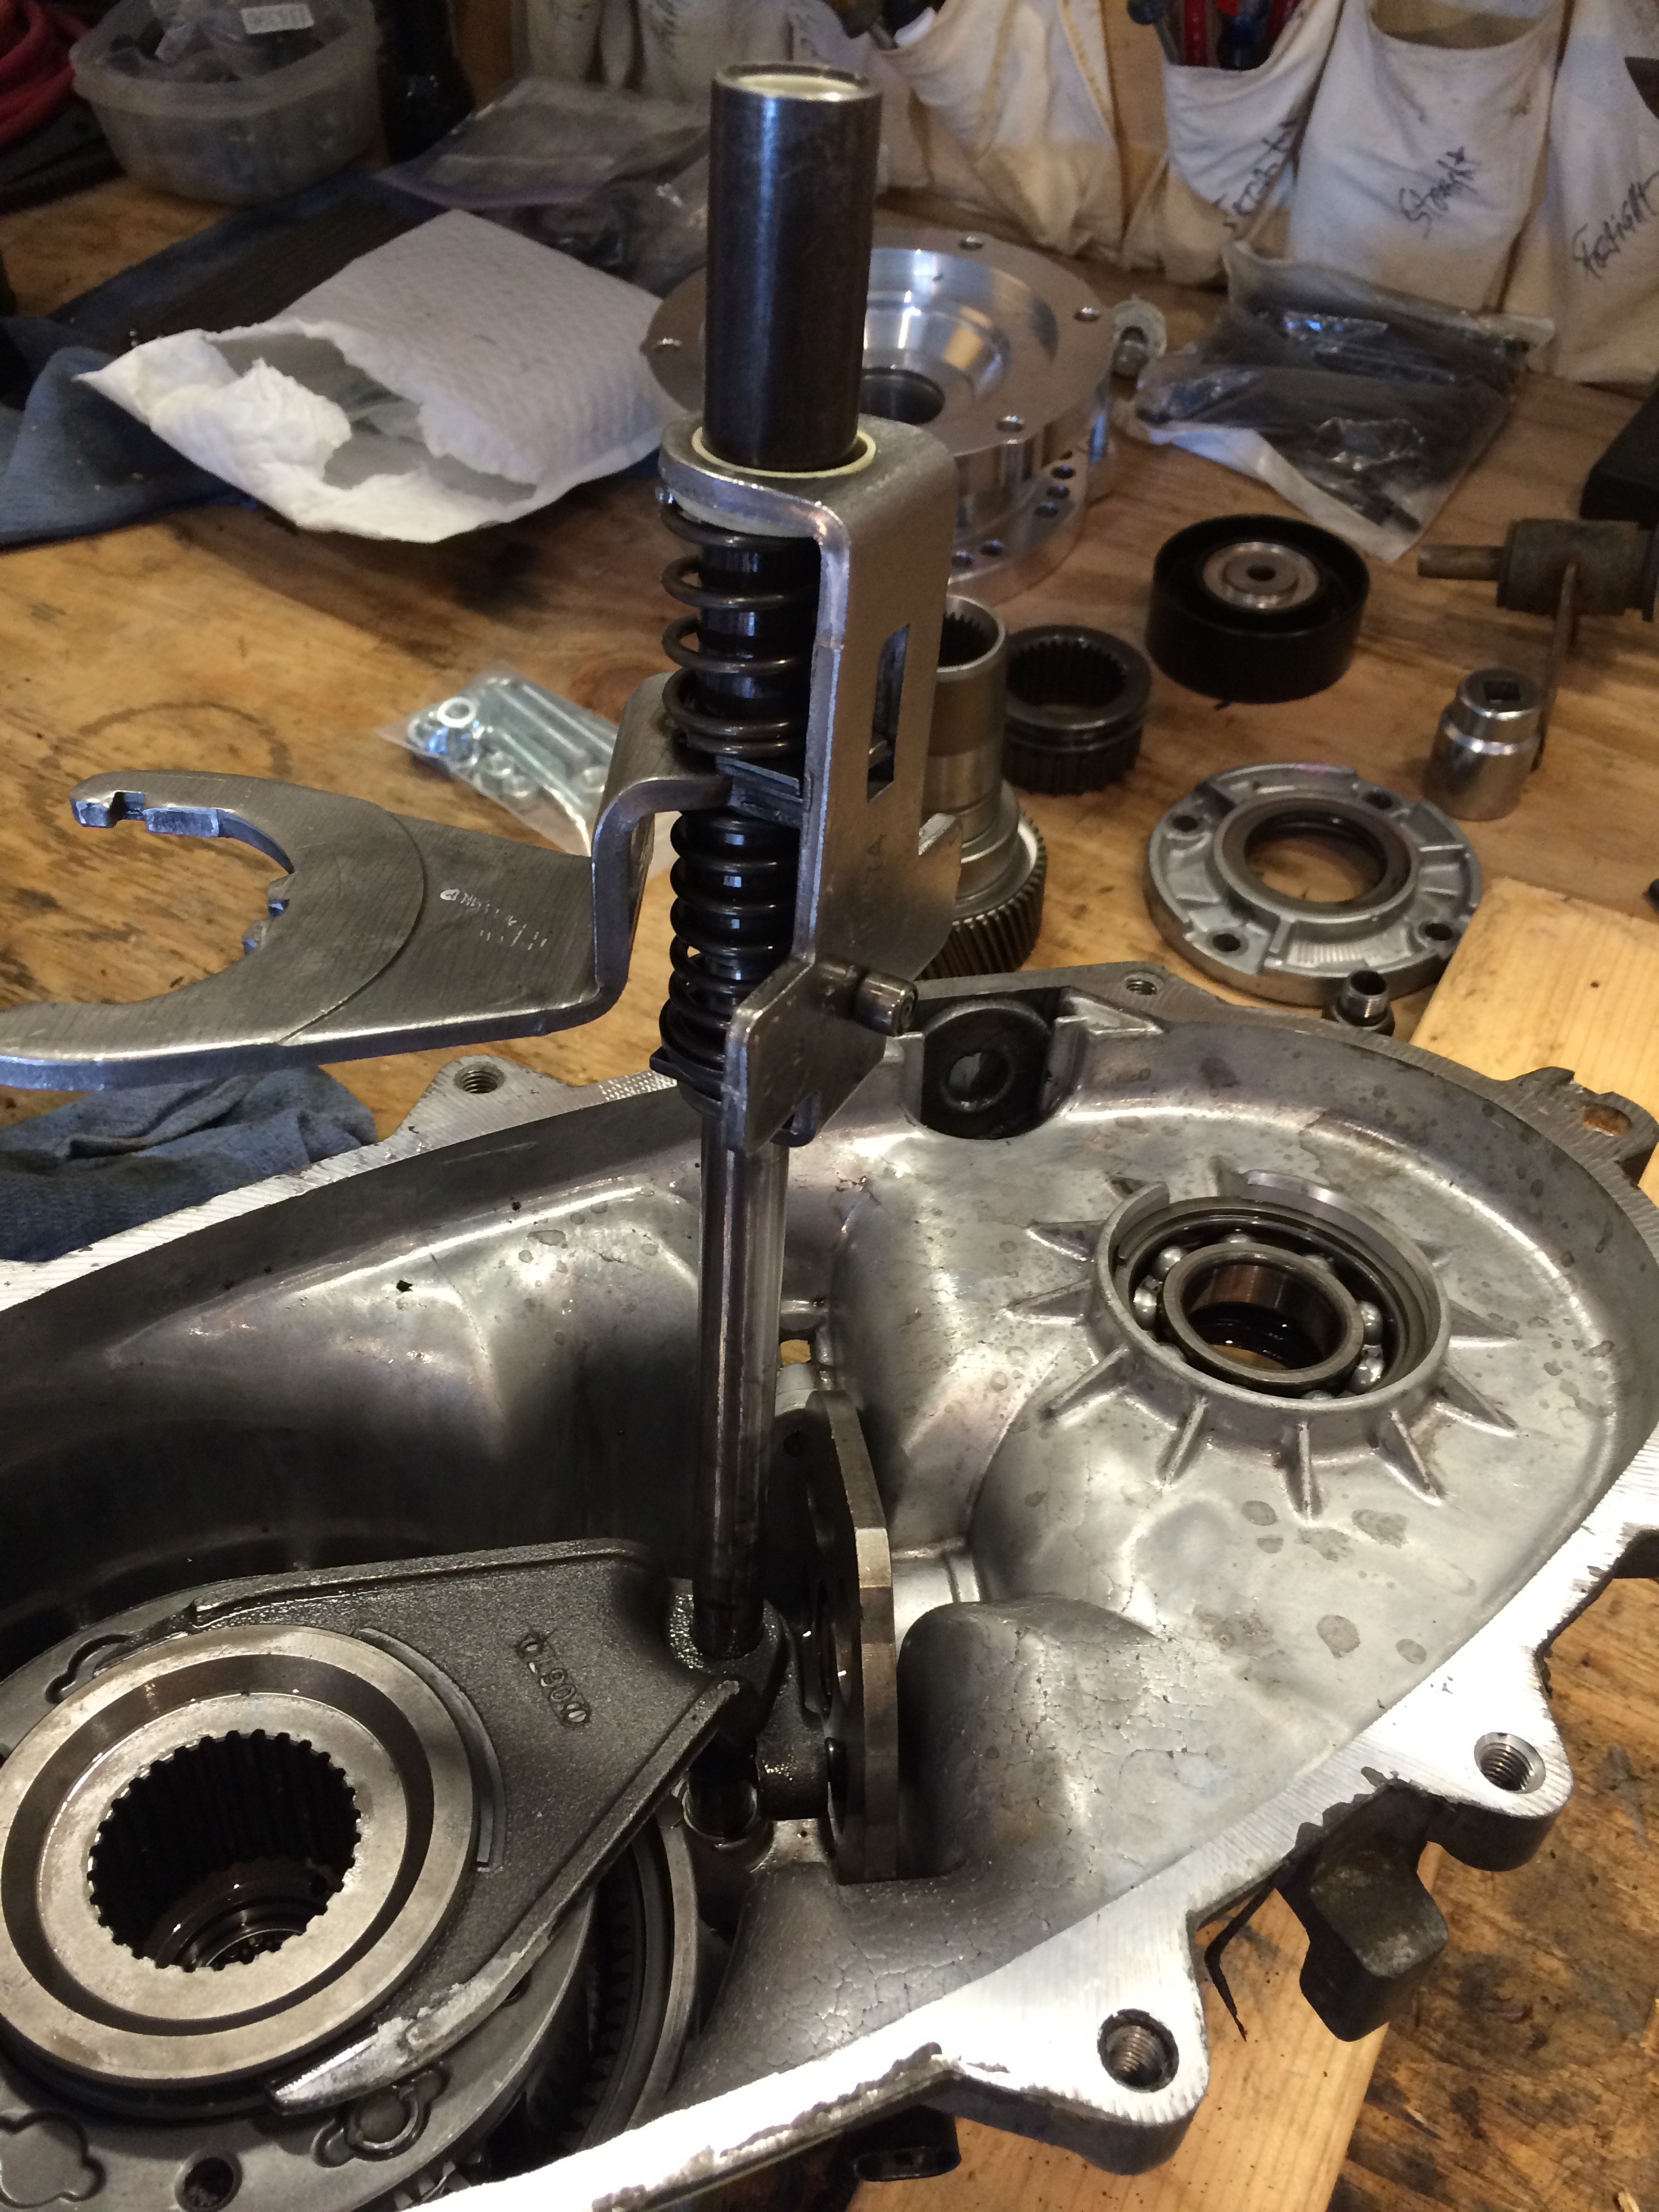
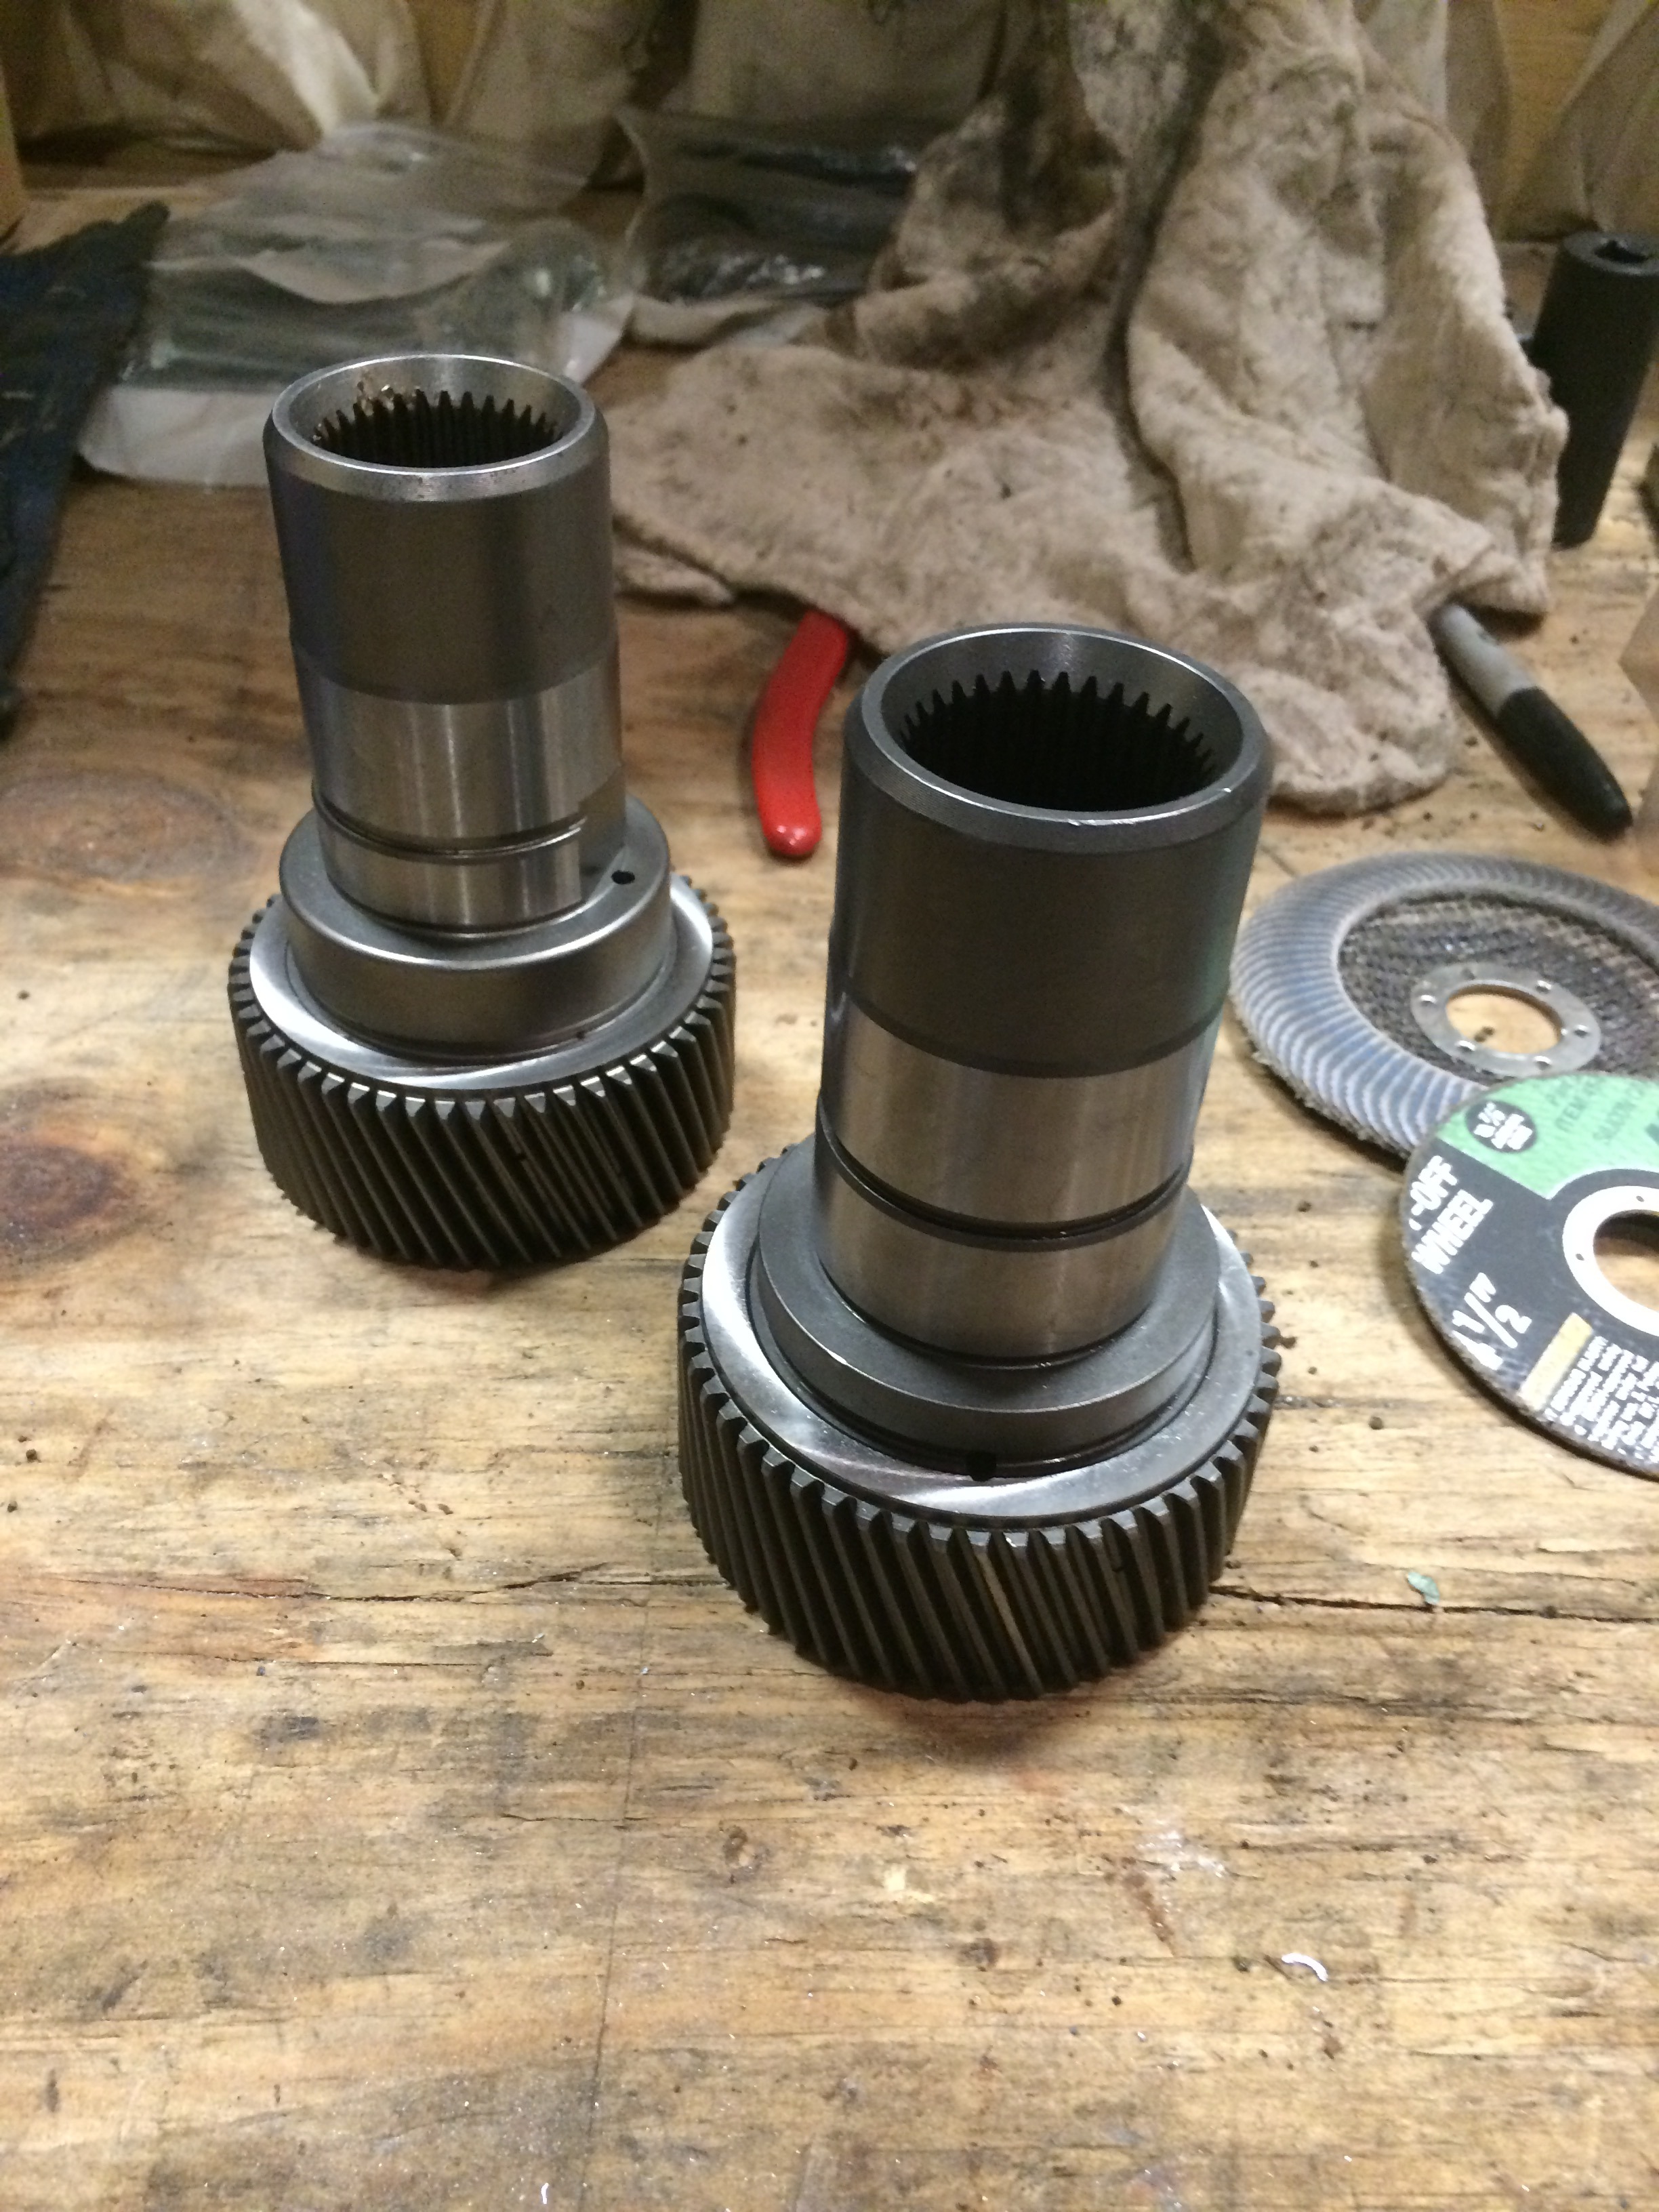
Planetary and input shaft.

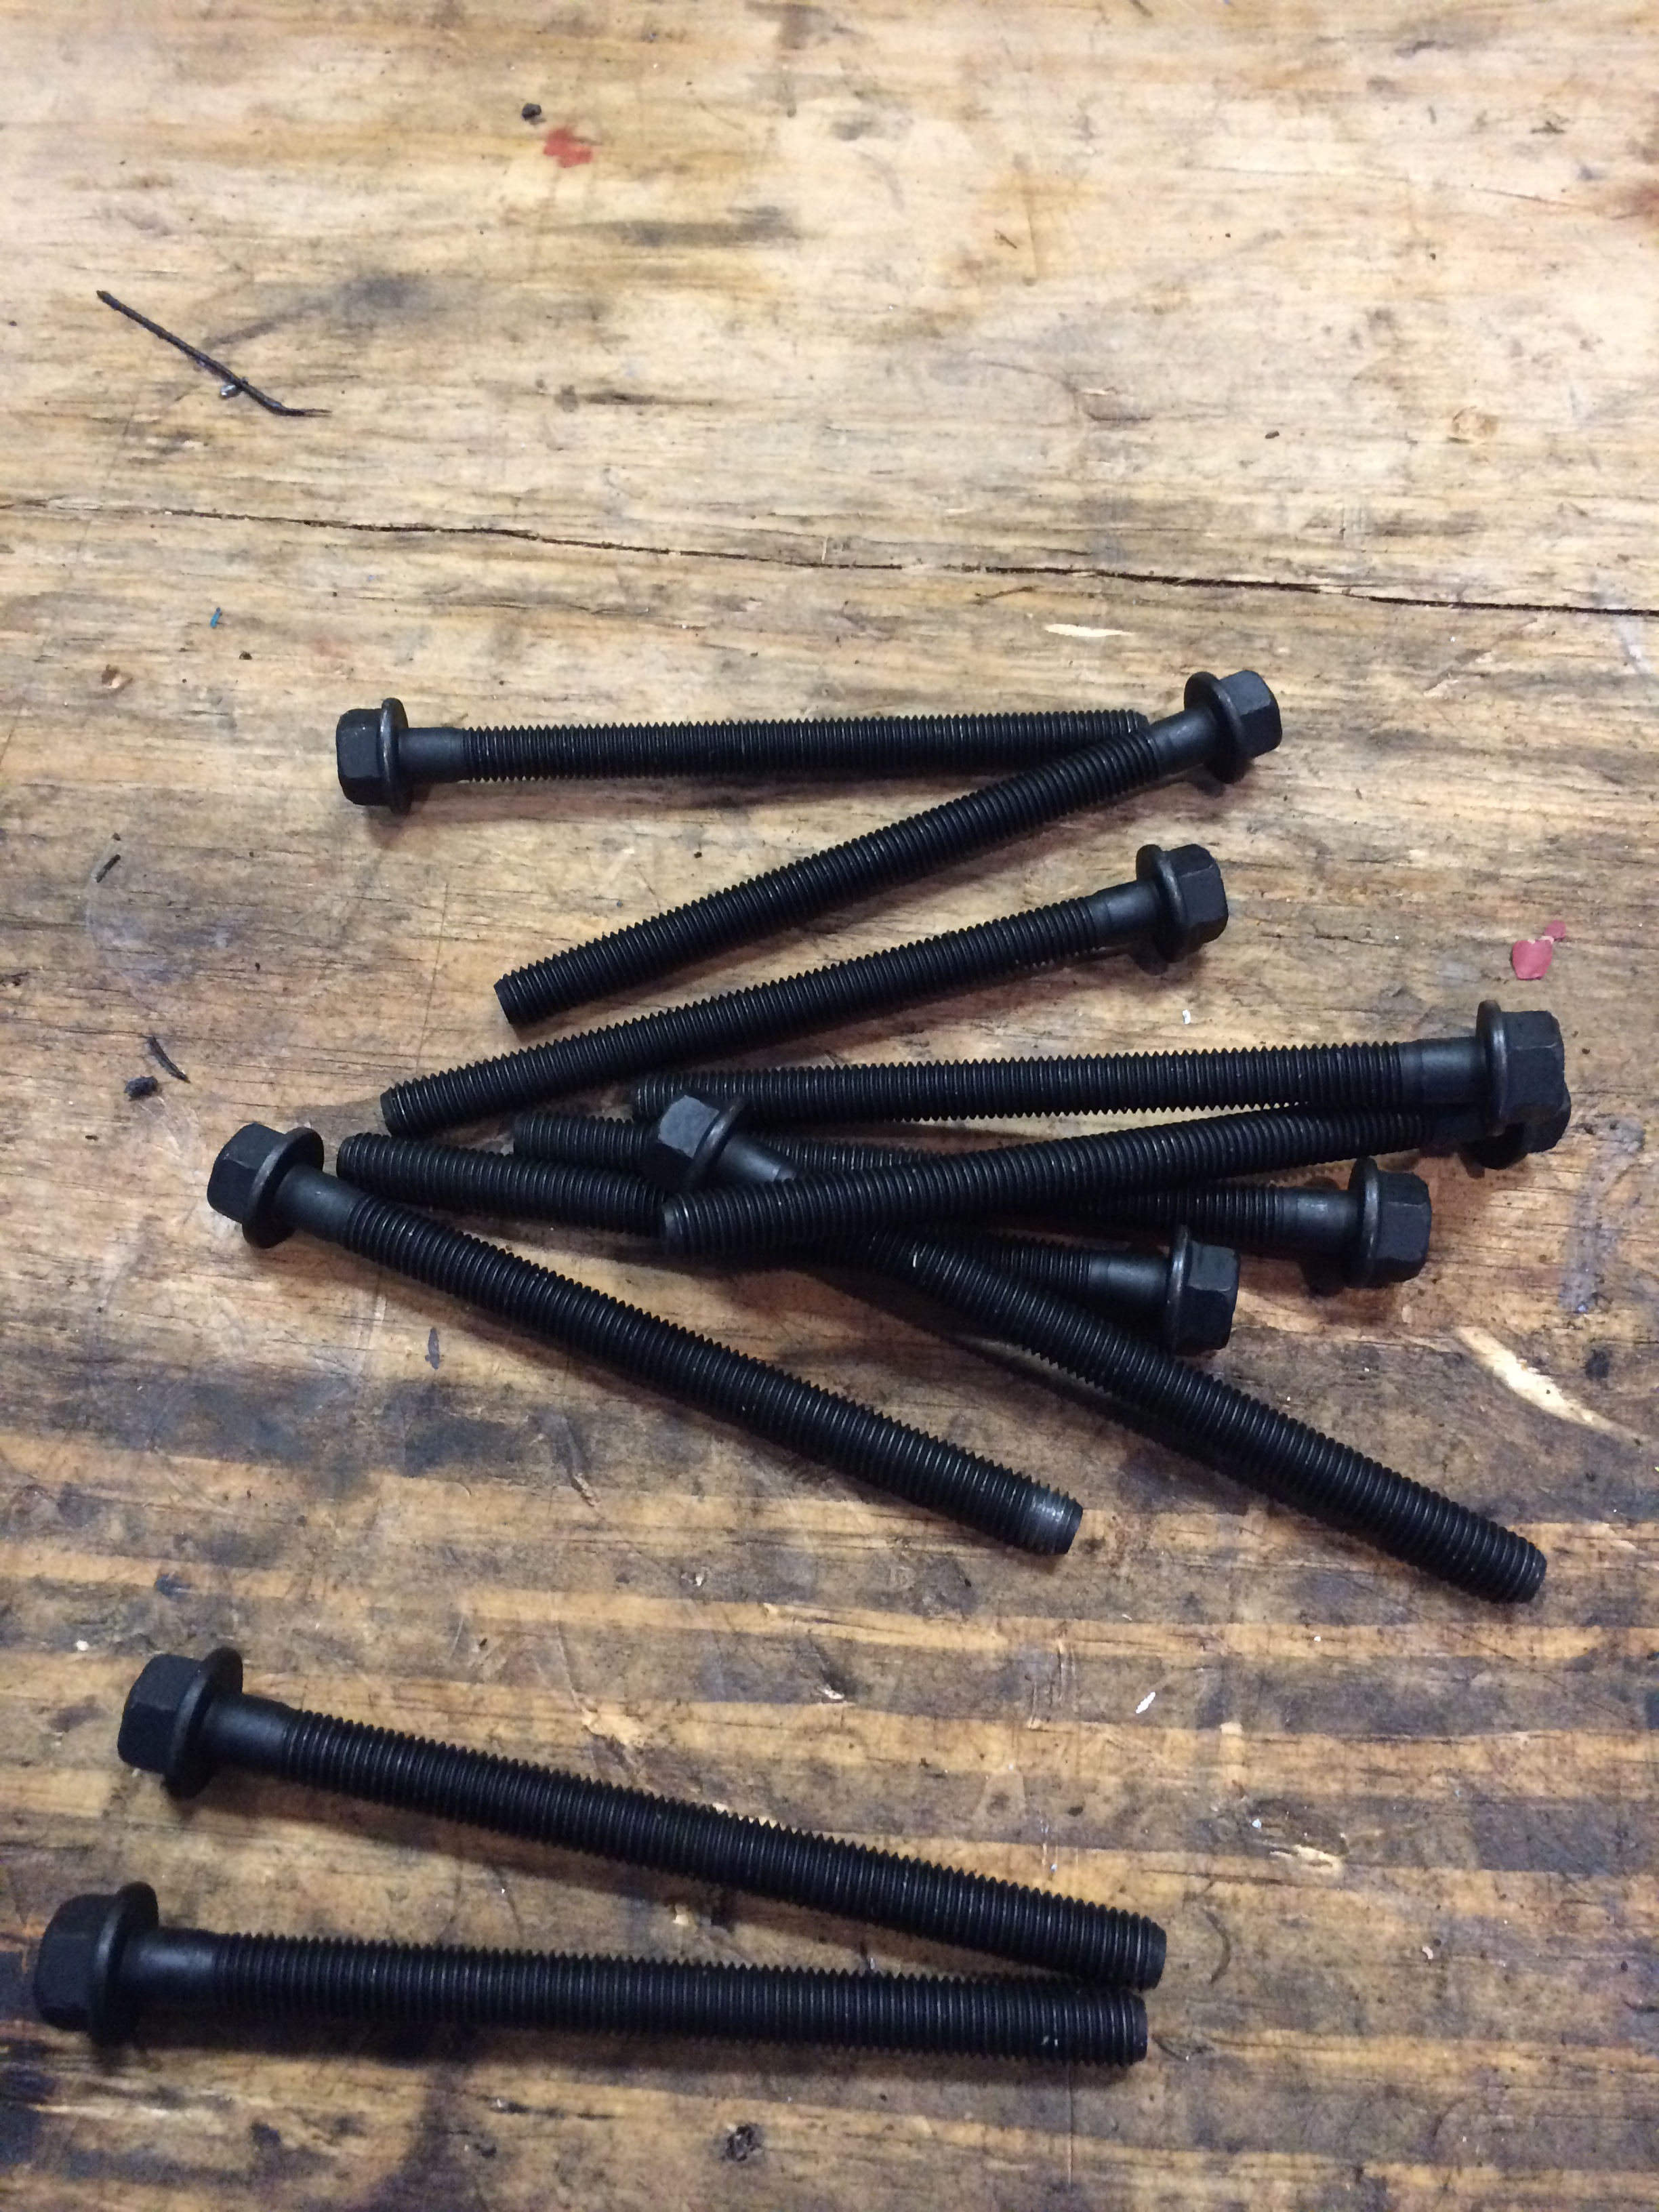
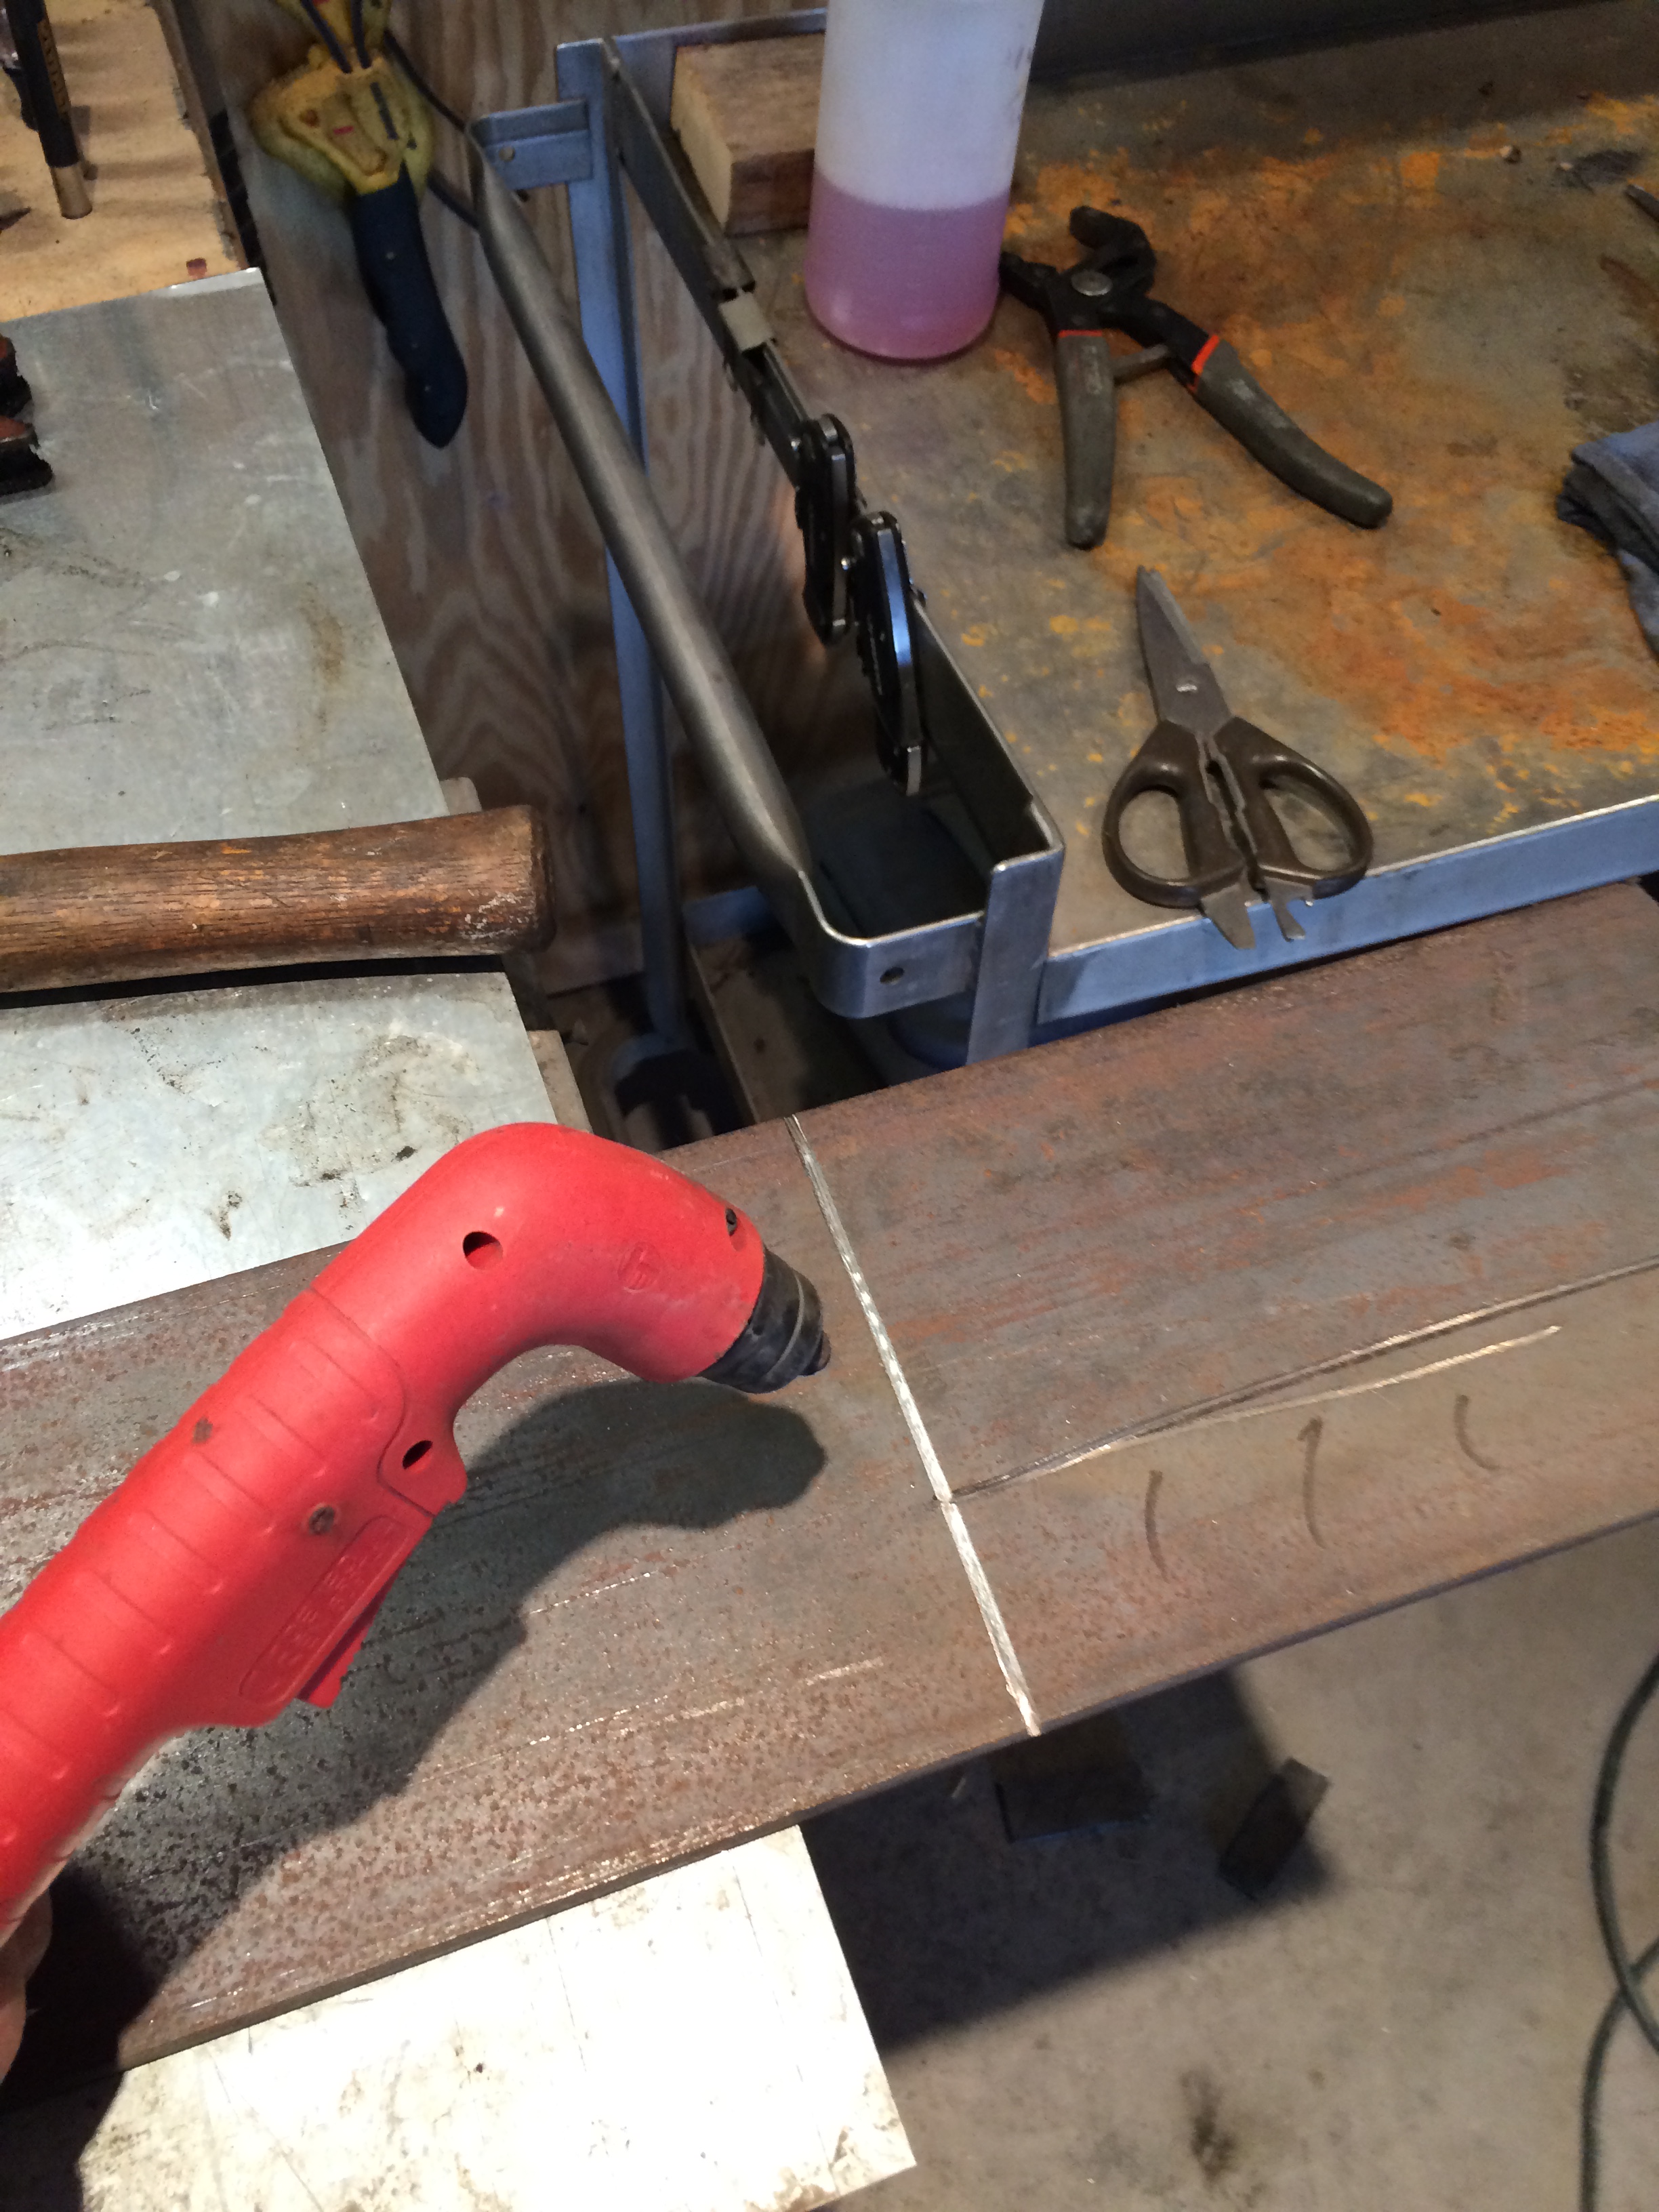
And time for another stupid pet trick. LS engines mostly use 10M X 1.5 metric bolts, but come in sizes from 23 mm to 135 mm. Dealers charge $ 2-3 for each bolt. Ouch. Also, if they don't have it in stock, you wait. If no one can figure out which one it is, you guess. And in my case, I drive 45 minutes round-trip for that experience.
I went on ebay, and bought full-thread M10 X 1.5 bolts 135 mm long. I measure the bolt I need, thread a M10 die on the bolt, and cut it to length. Custom. Takes 2 minutes. Cost...a about .35 cents each. I think I bought 100 for around $35 shipped. Zoro.com or find them on ebay. Check it out.
Pile of bolts.
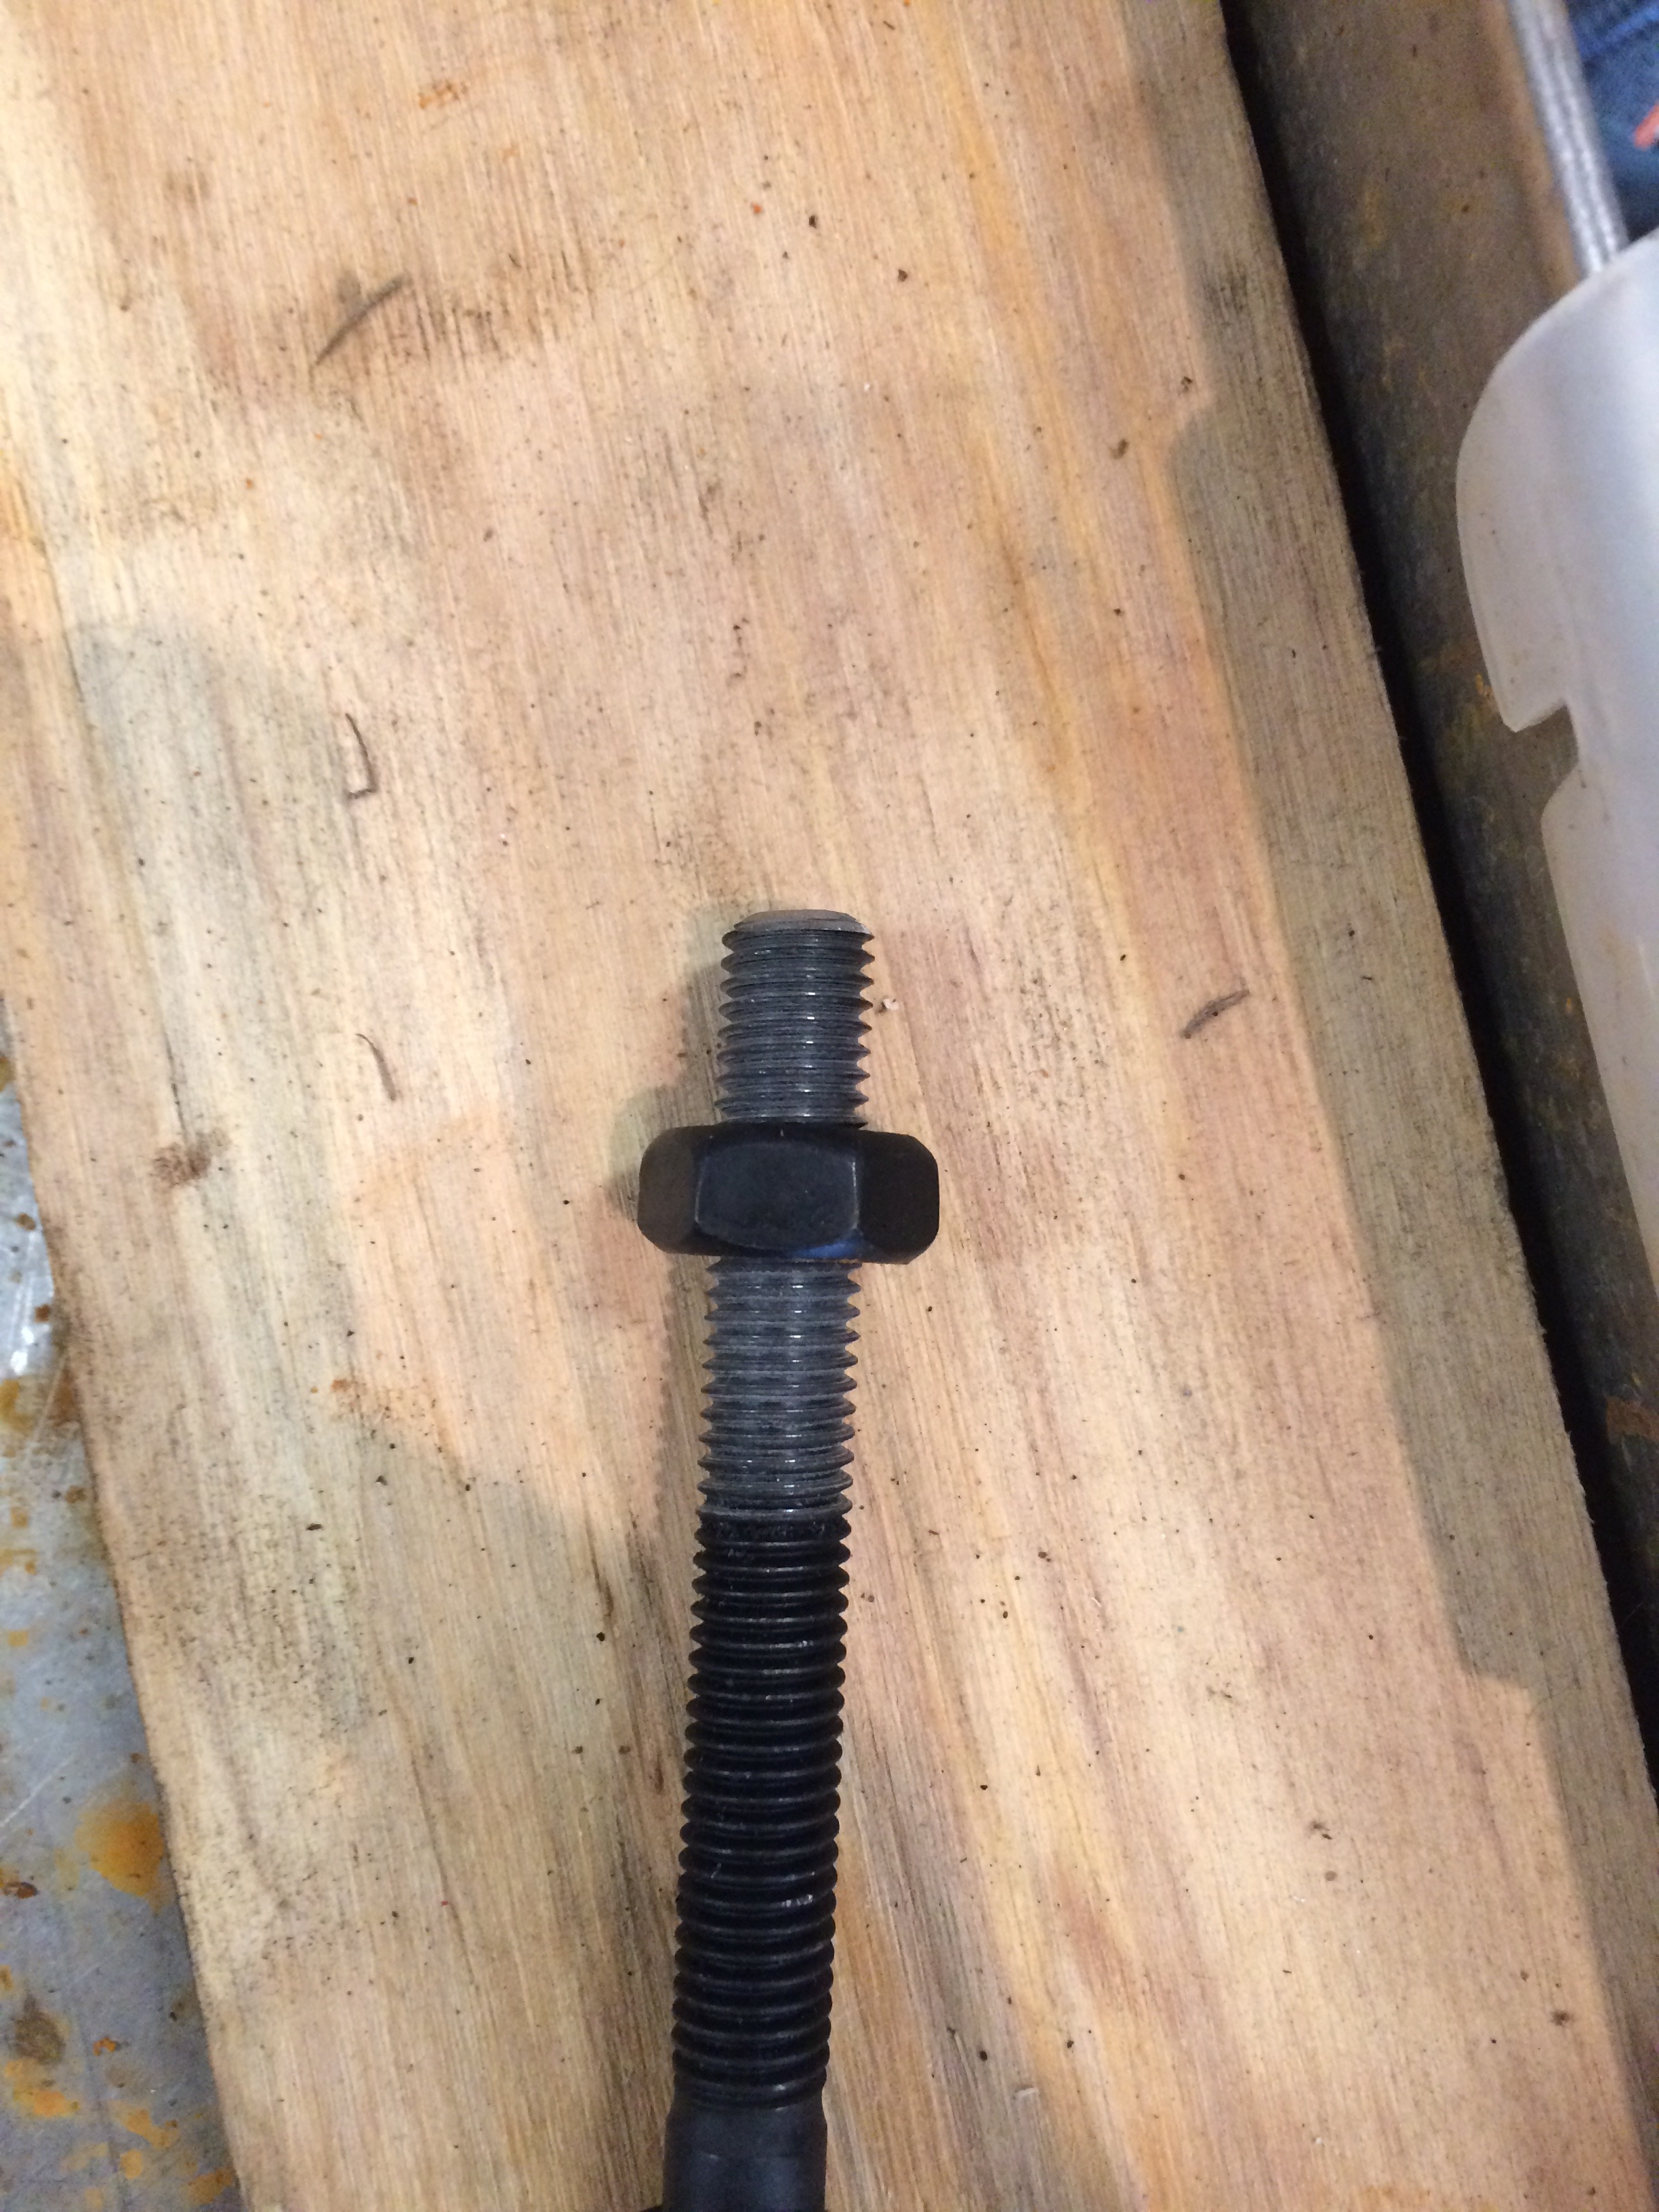
Thead the appropriate die on. The handle helps hold the bolt while you cut it, and the die corrects the threads when you take it off.
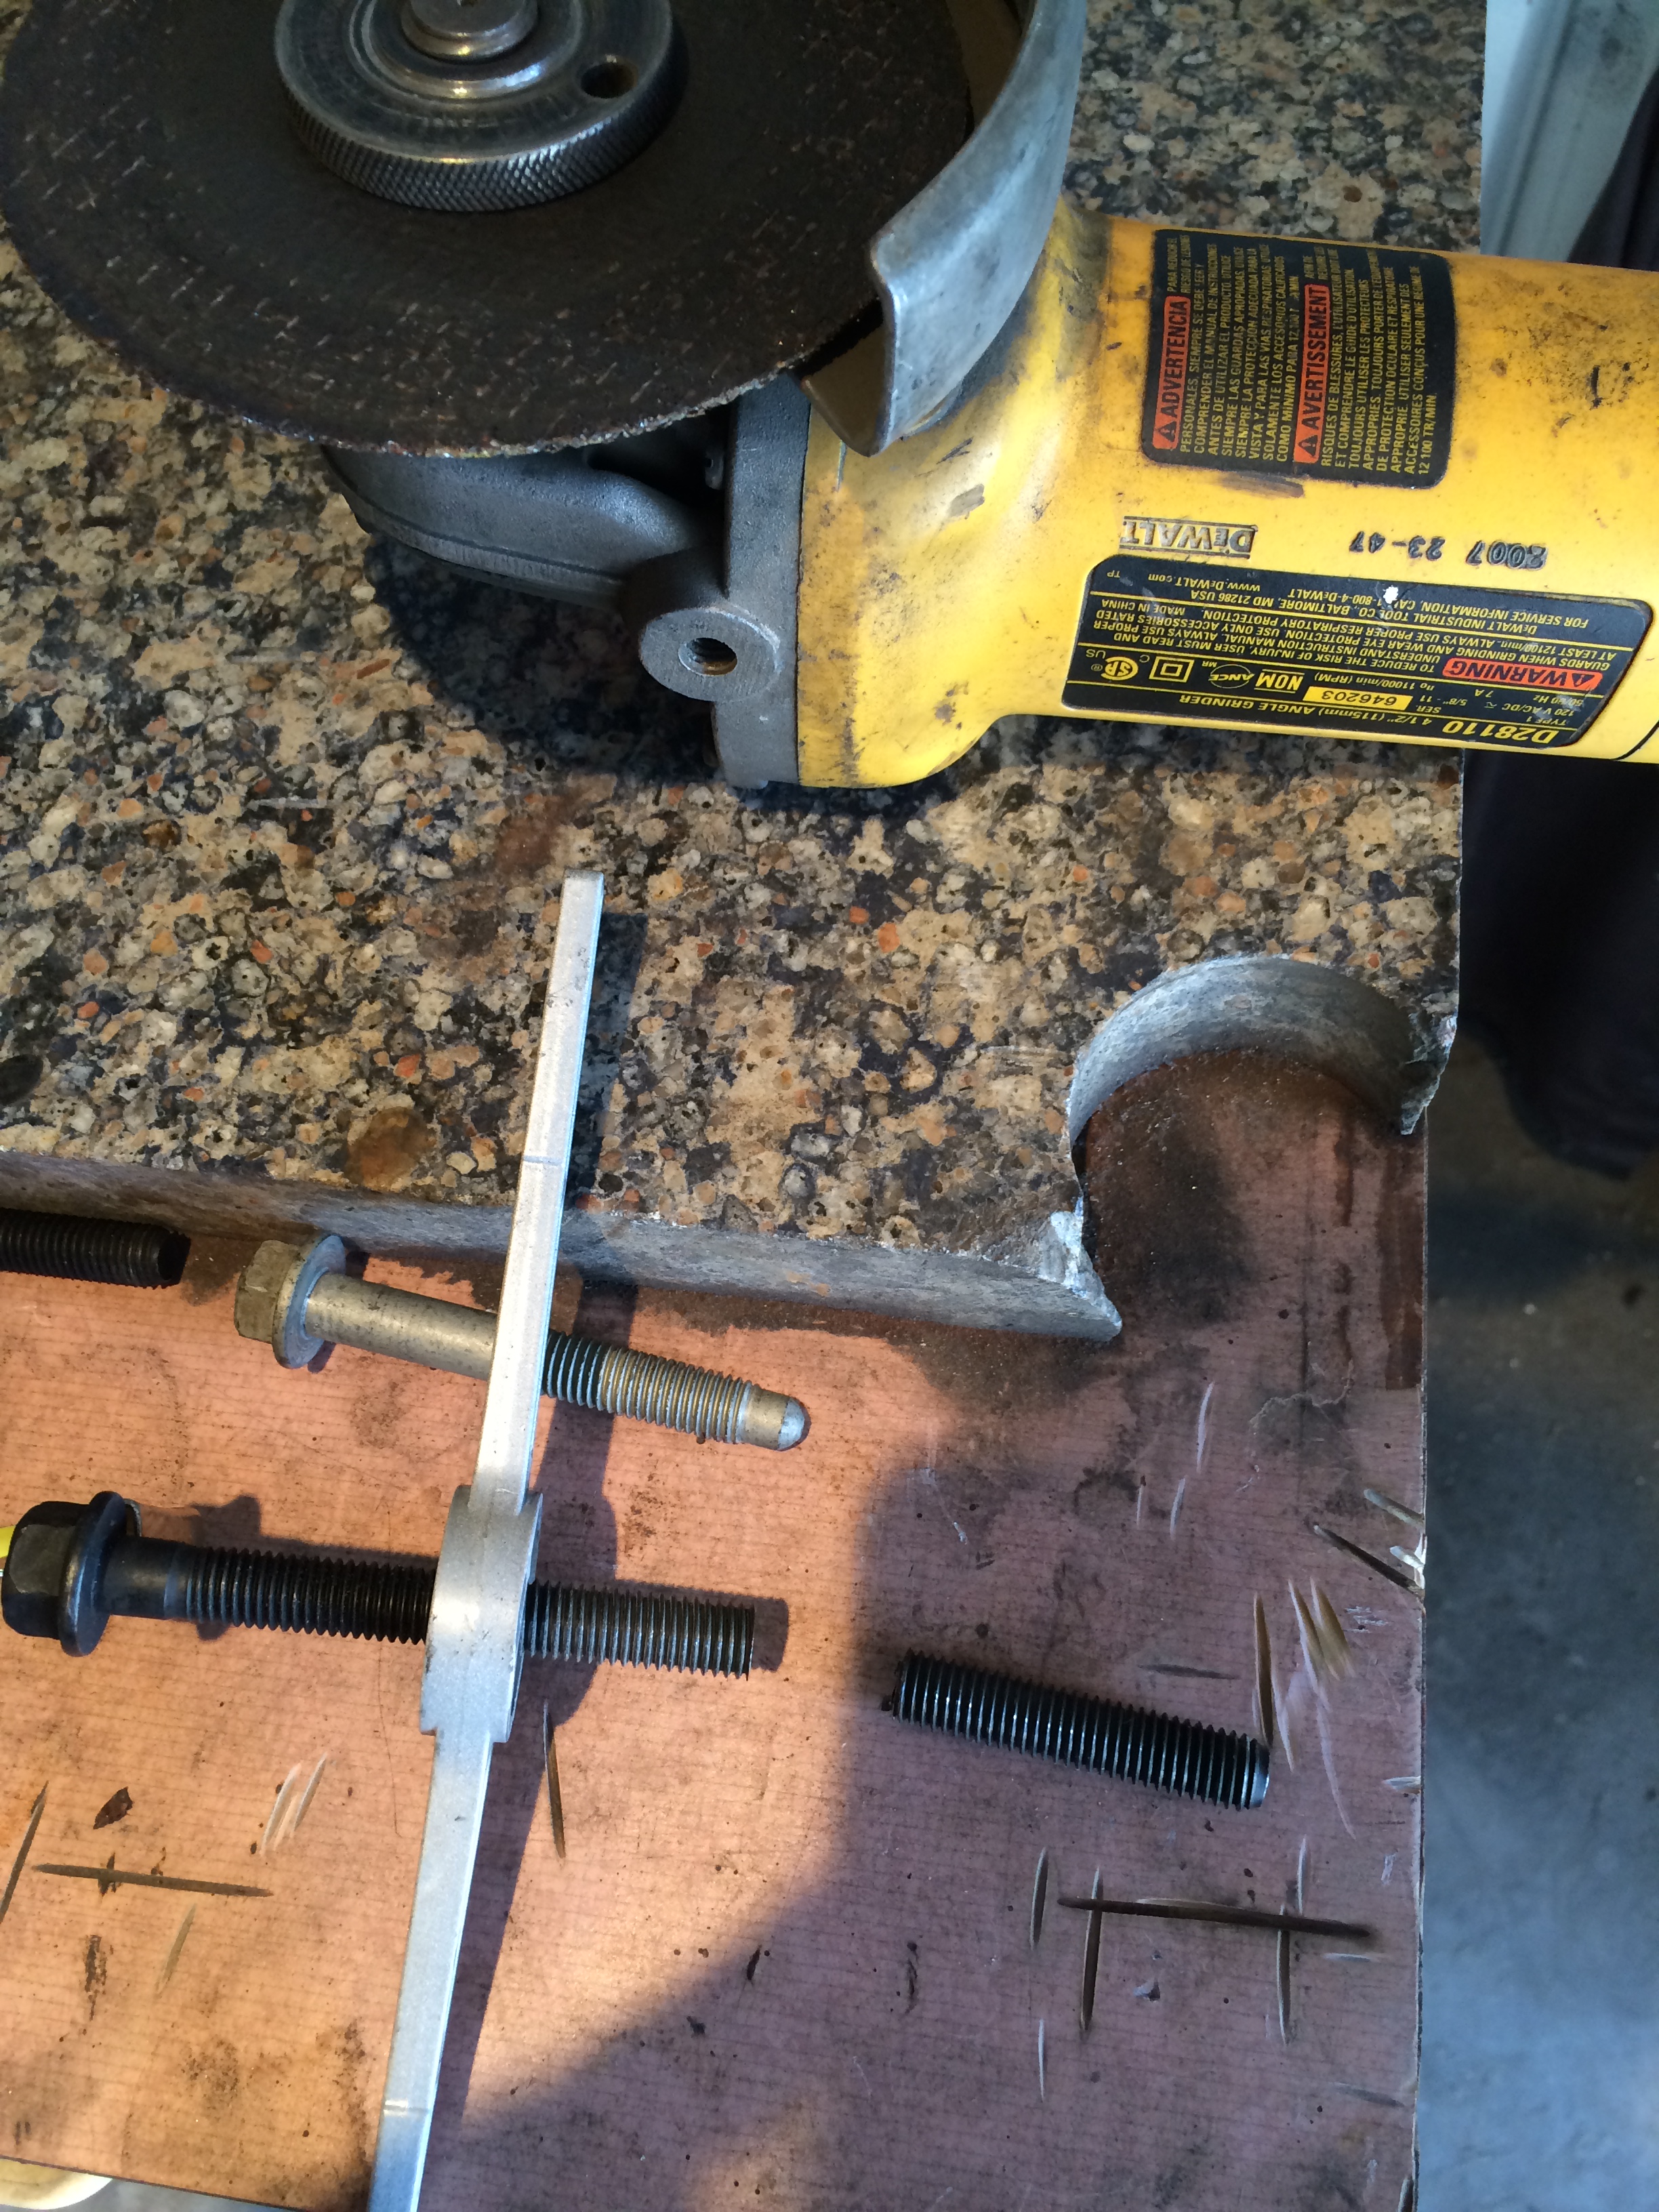
I use a 4 1/2 inch angle grinder with a flap wheel to bevel the nose, and thread a nut on and off to check it before I use it. Quality assurance.
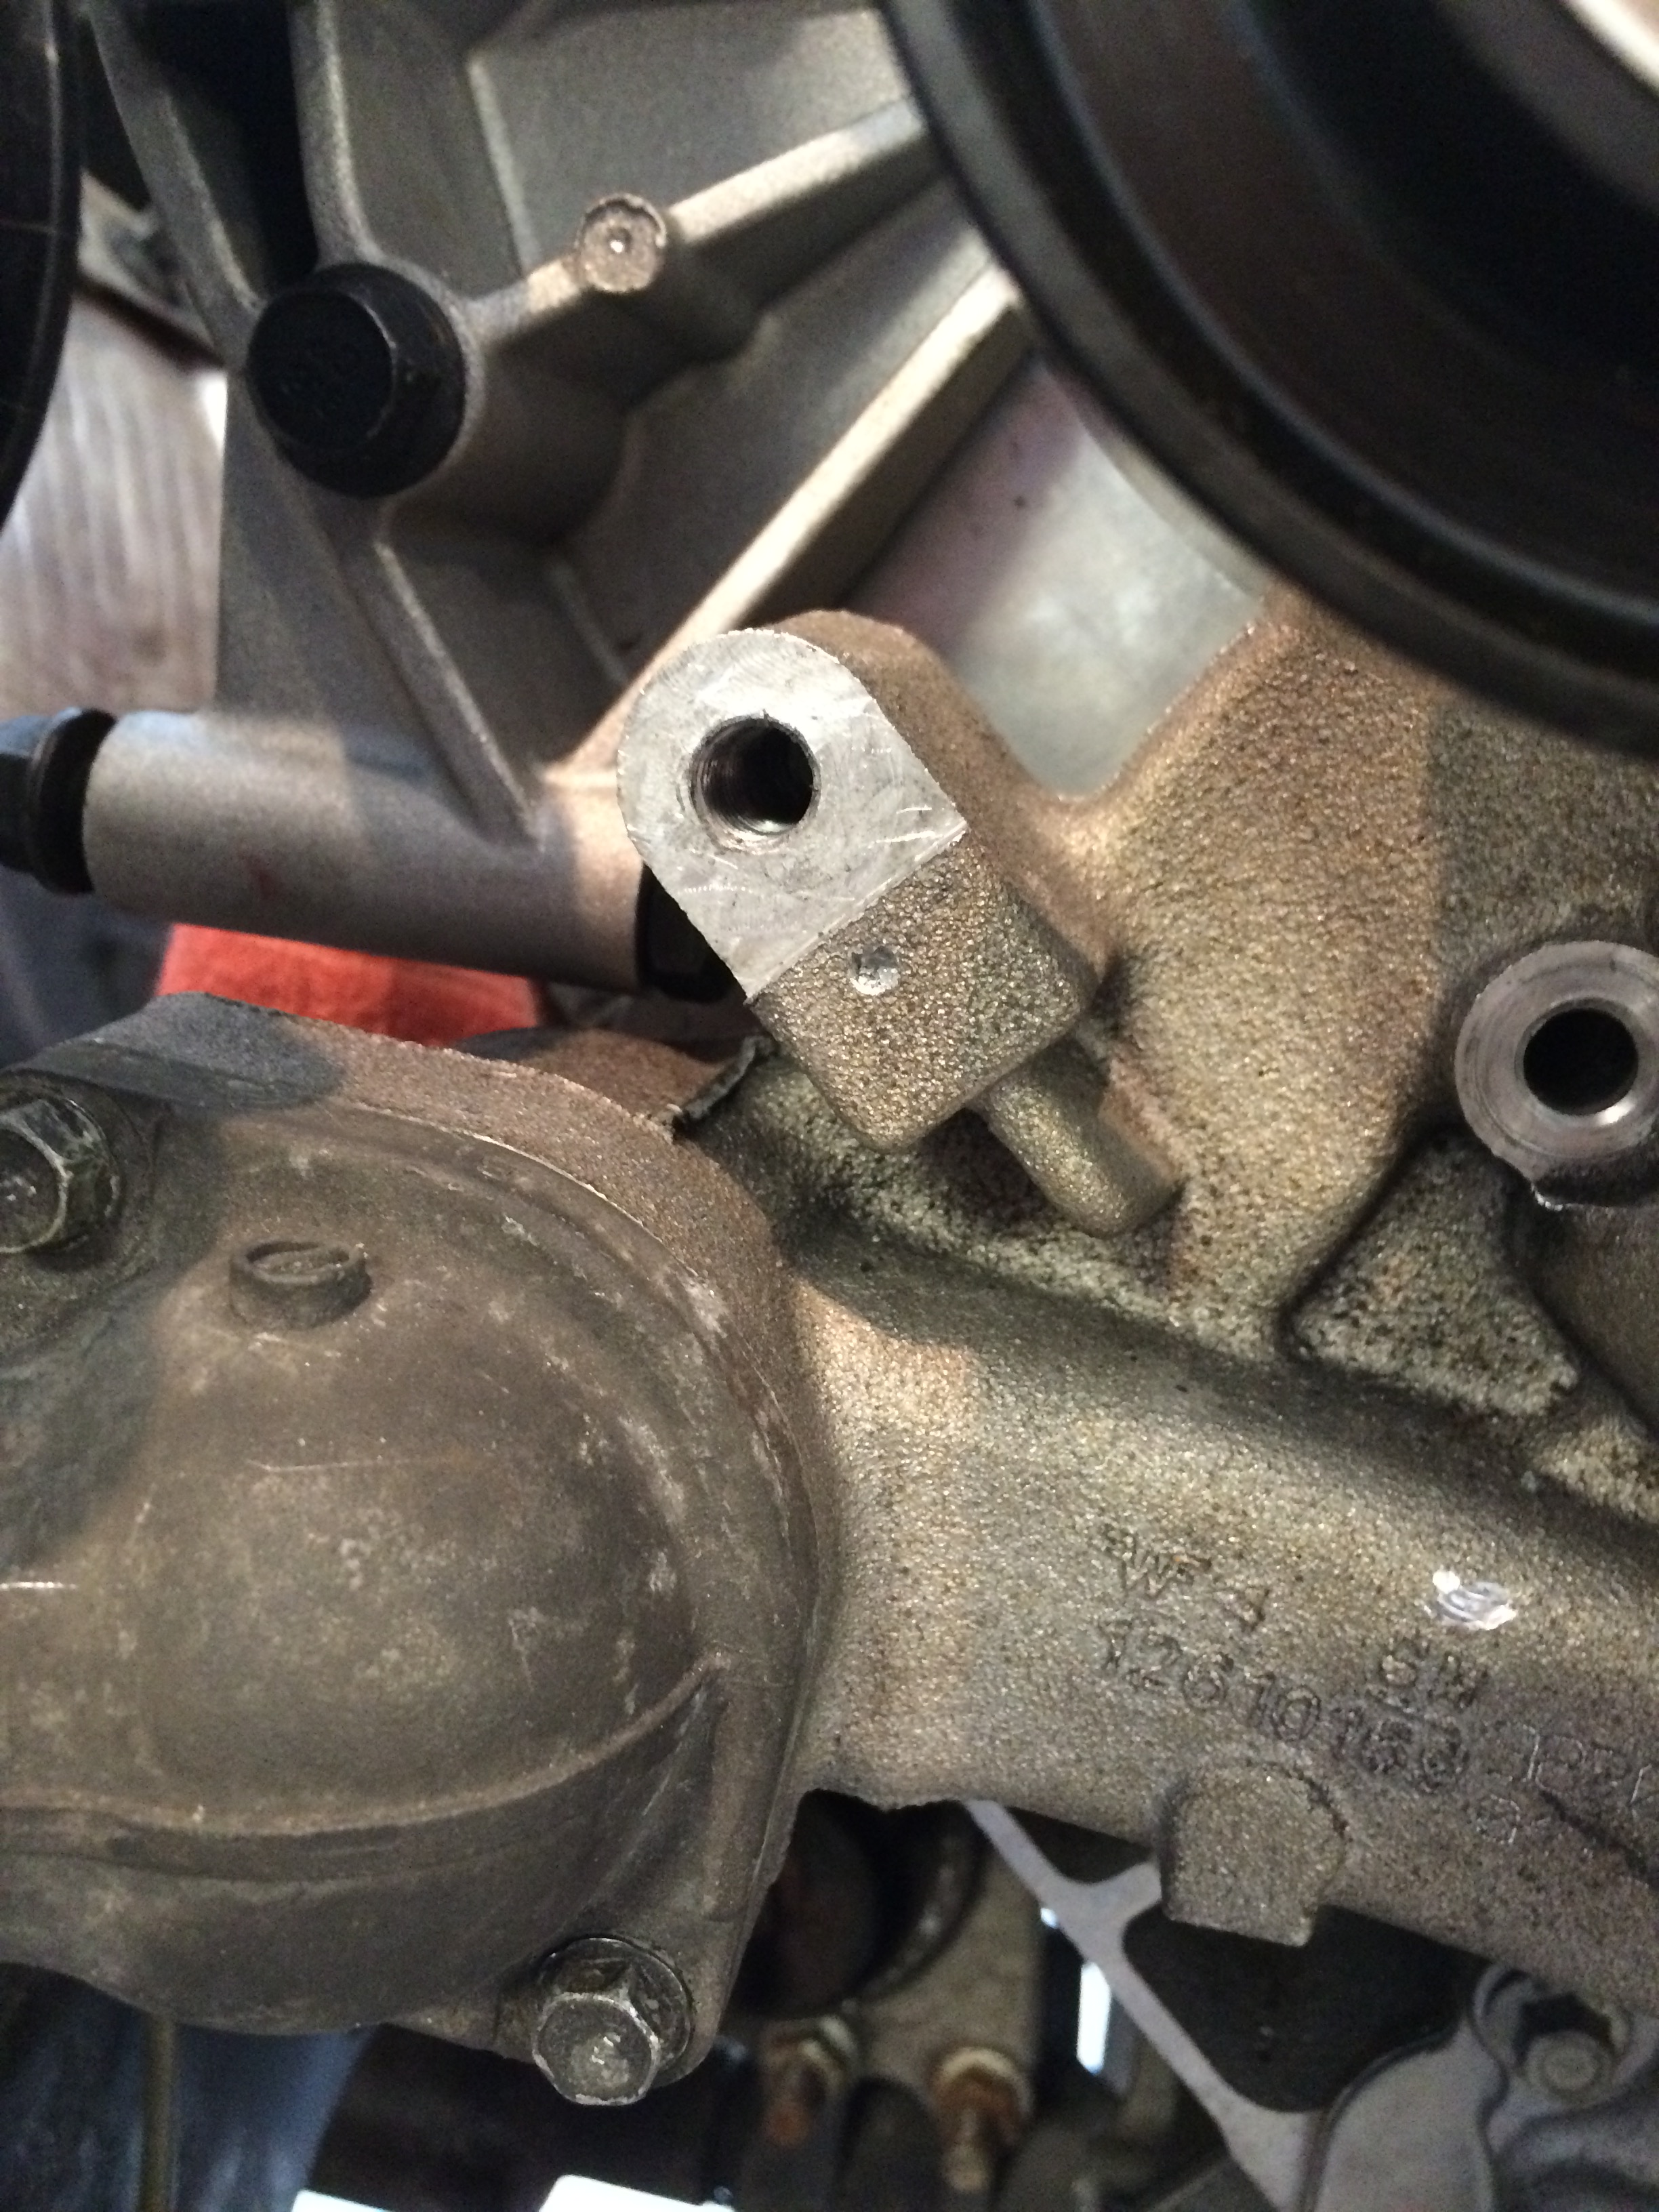
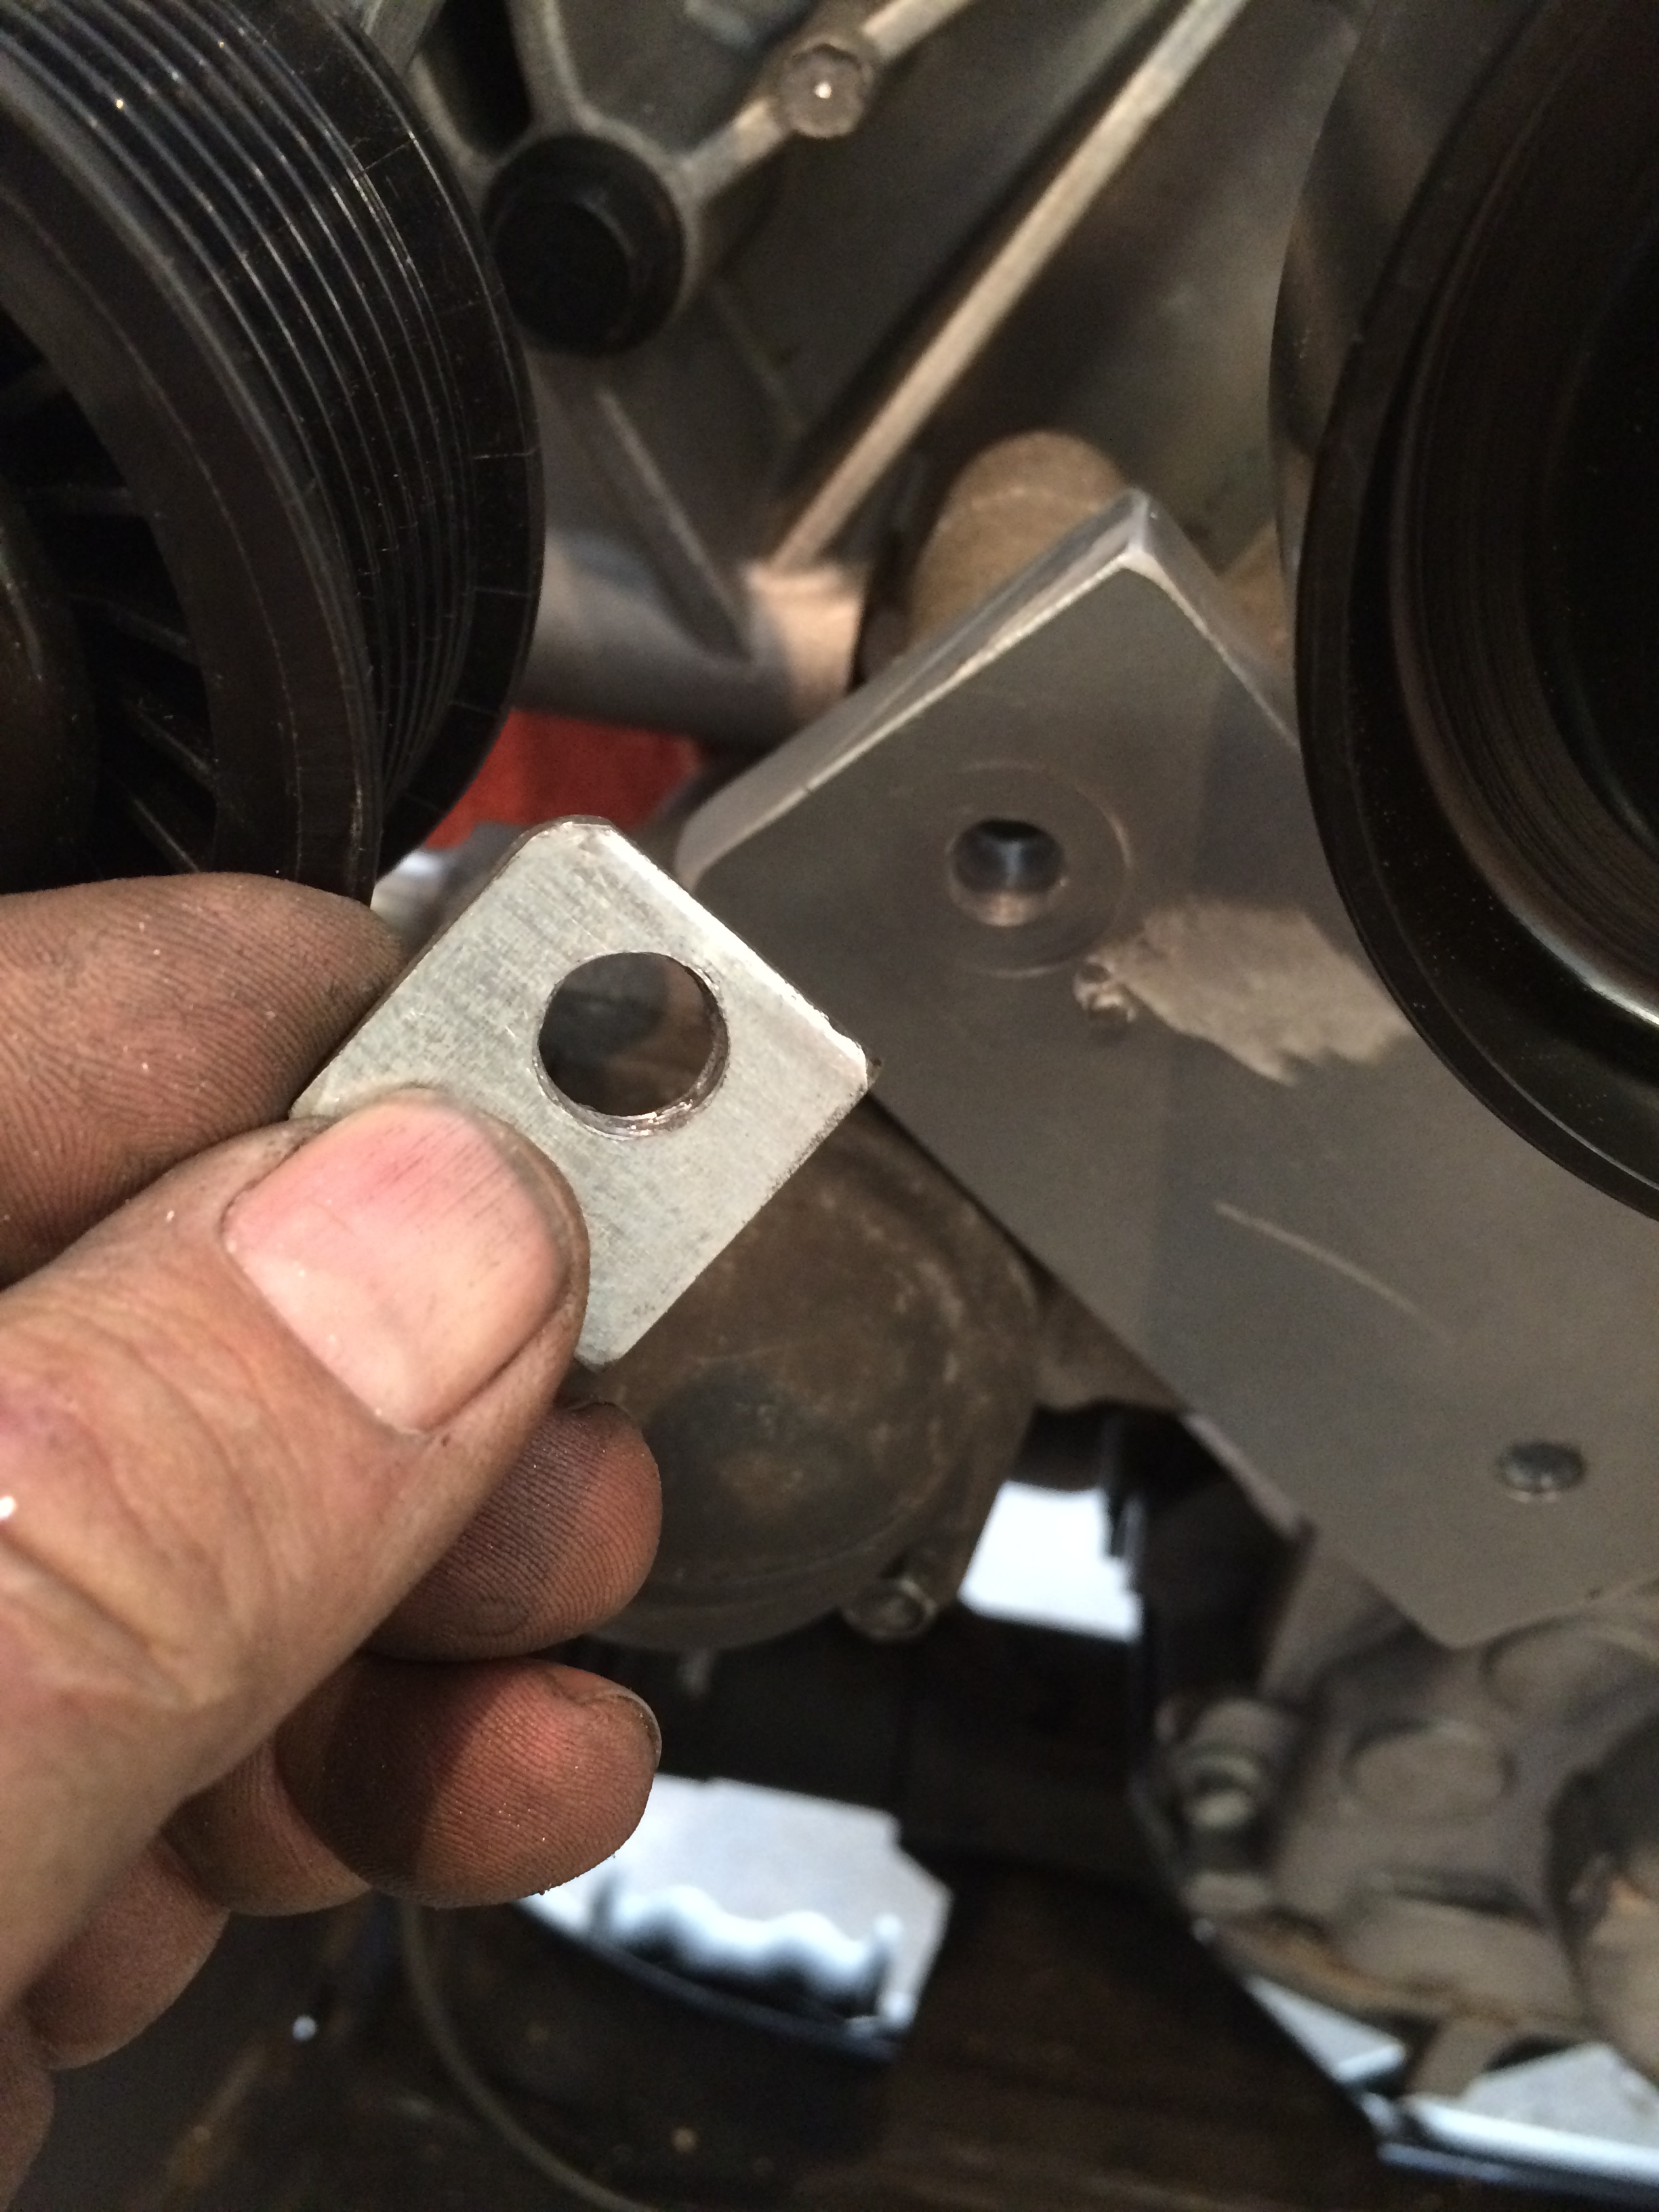
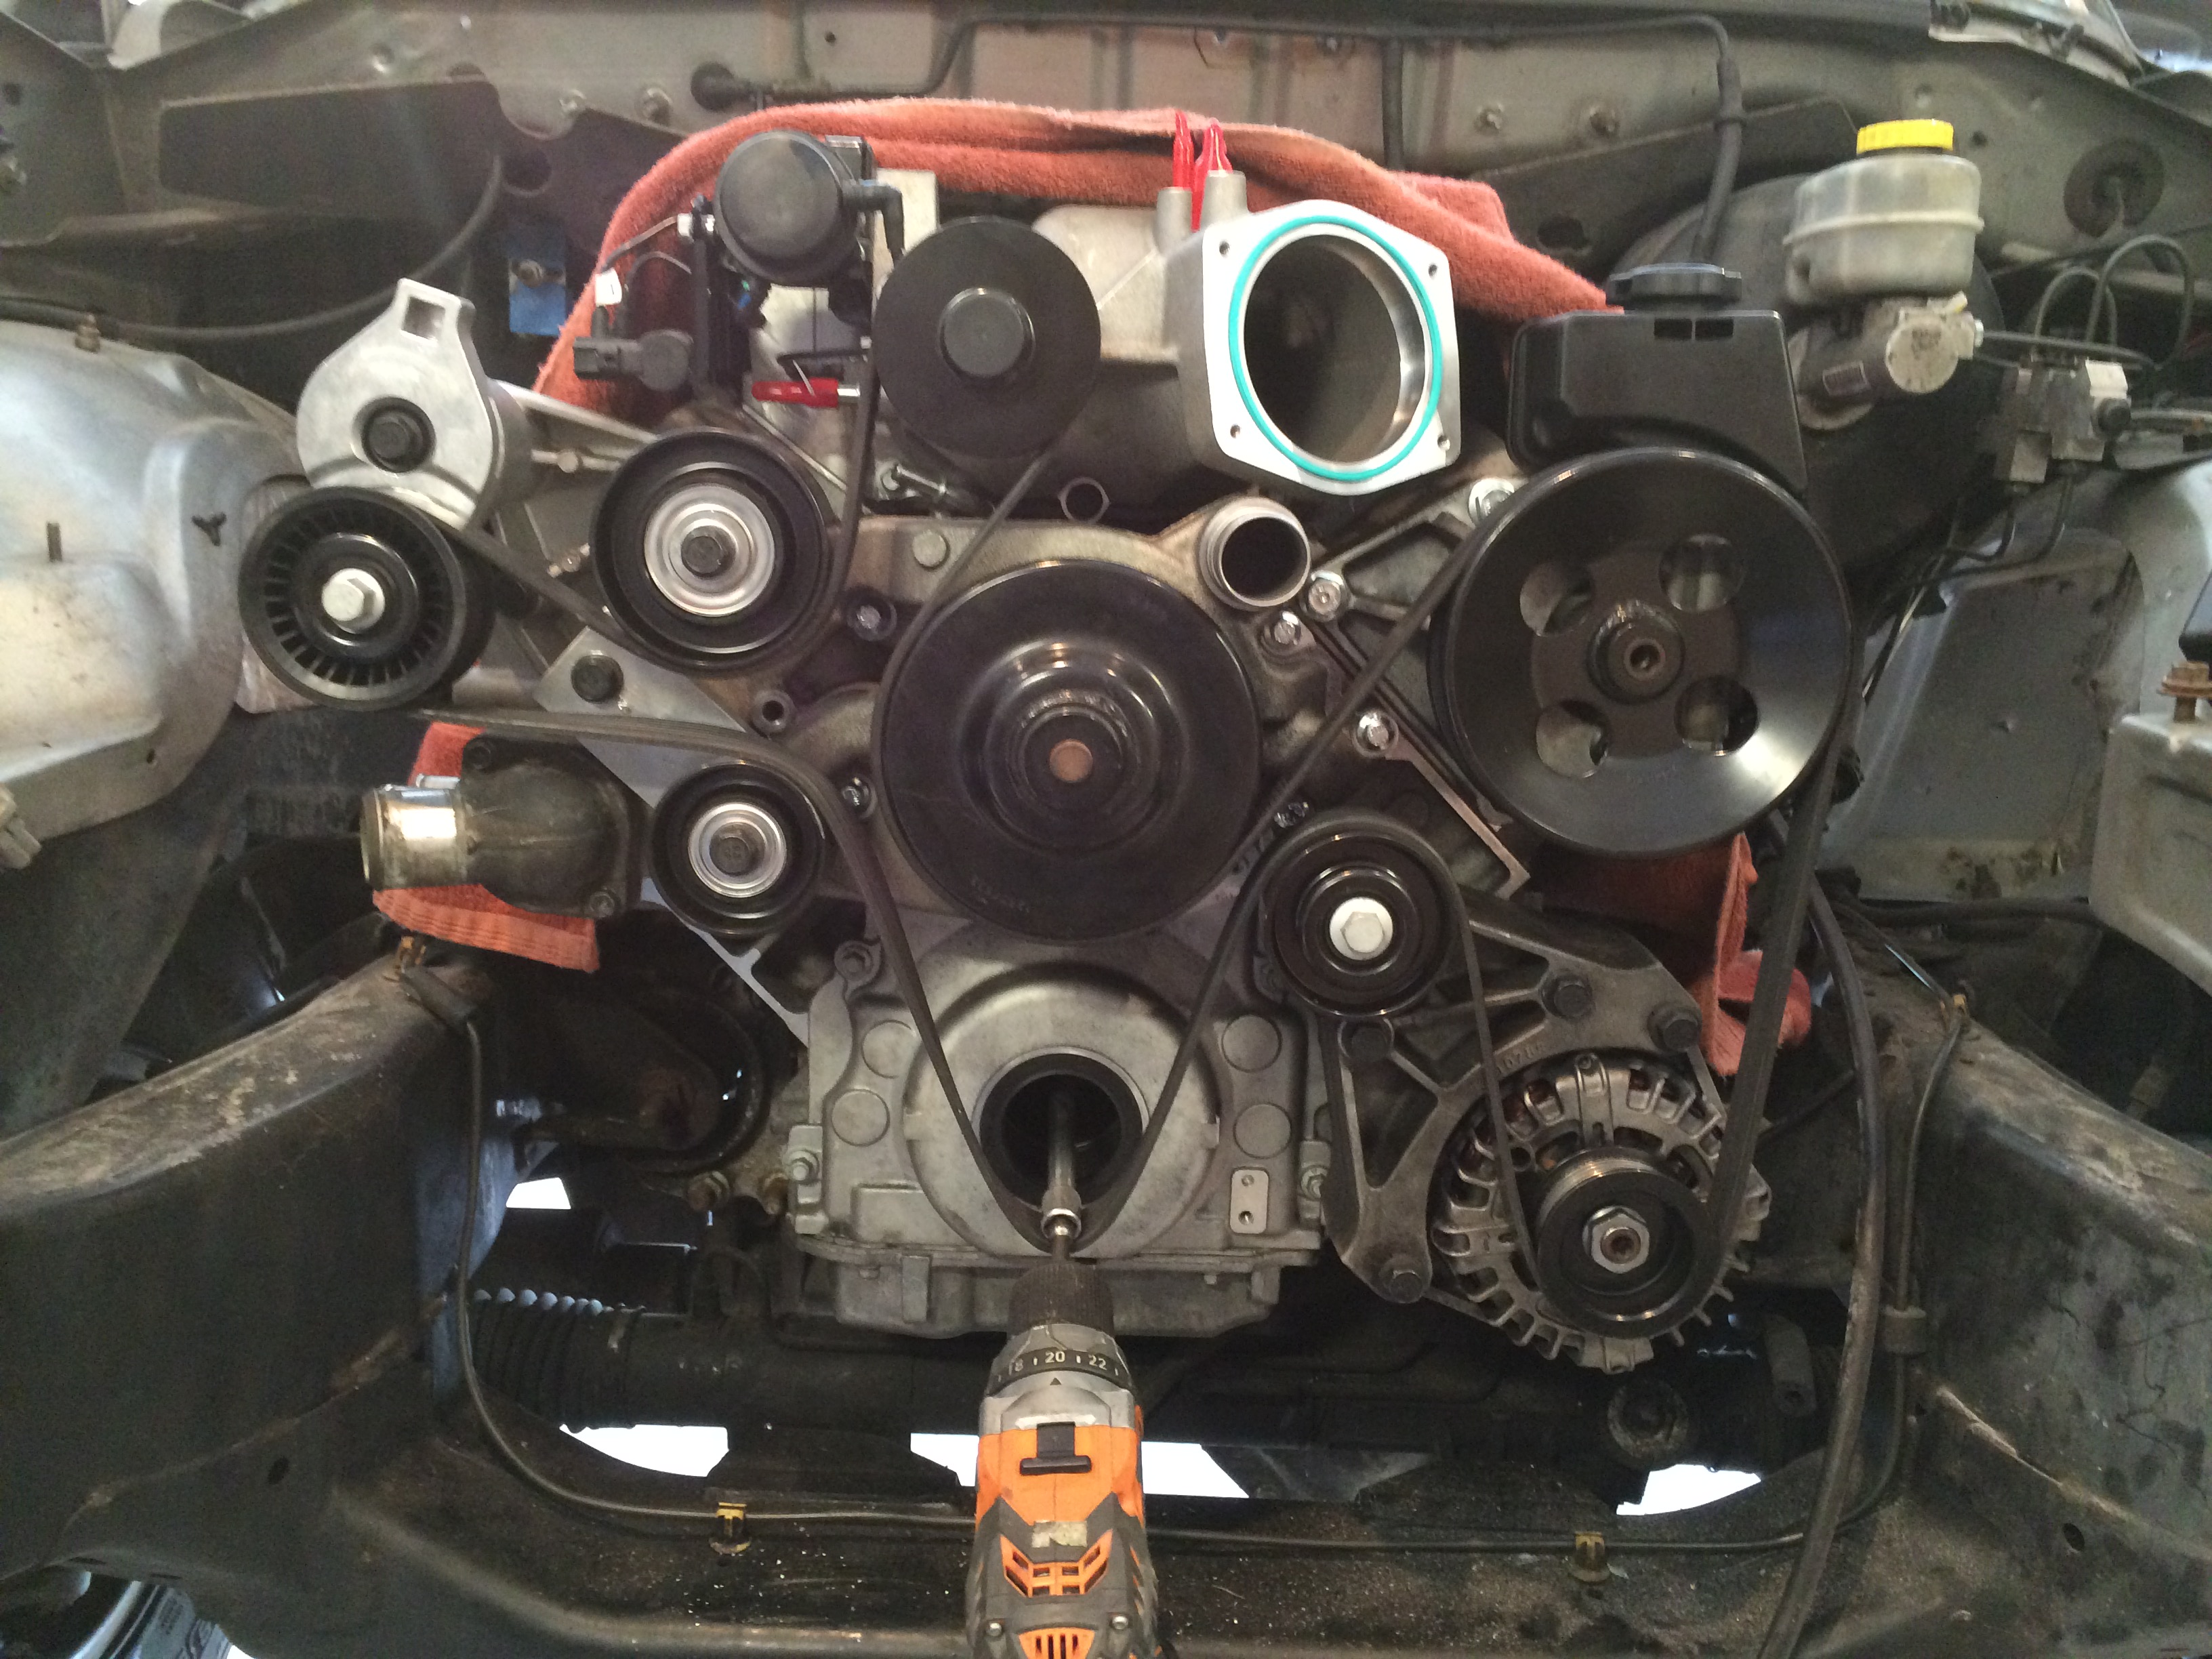
And, I made this Idler pulley bracket from 2 X 5 inch 1/2 inch thick 6061 aluminum stock. I put a small locator pin in, and put a small hole in the water pump mounting boss to keep the bracket from rotating. It doesn't take much.
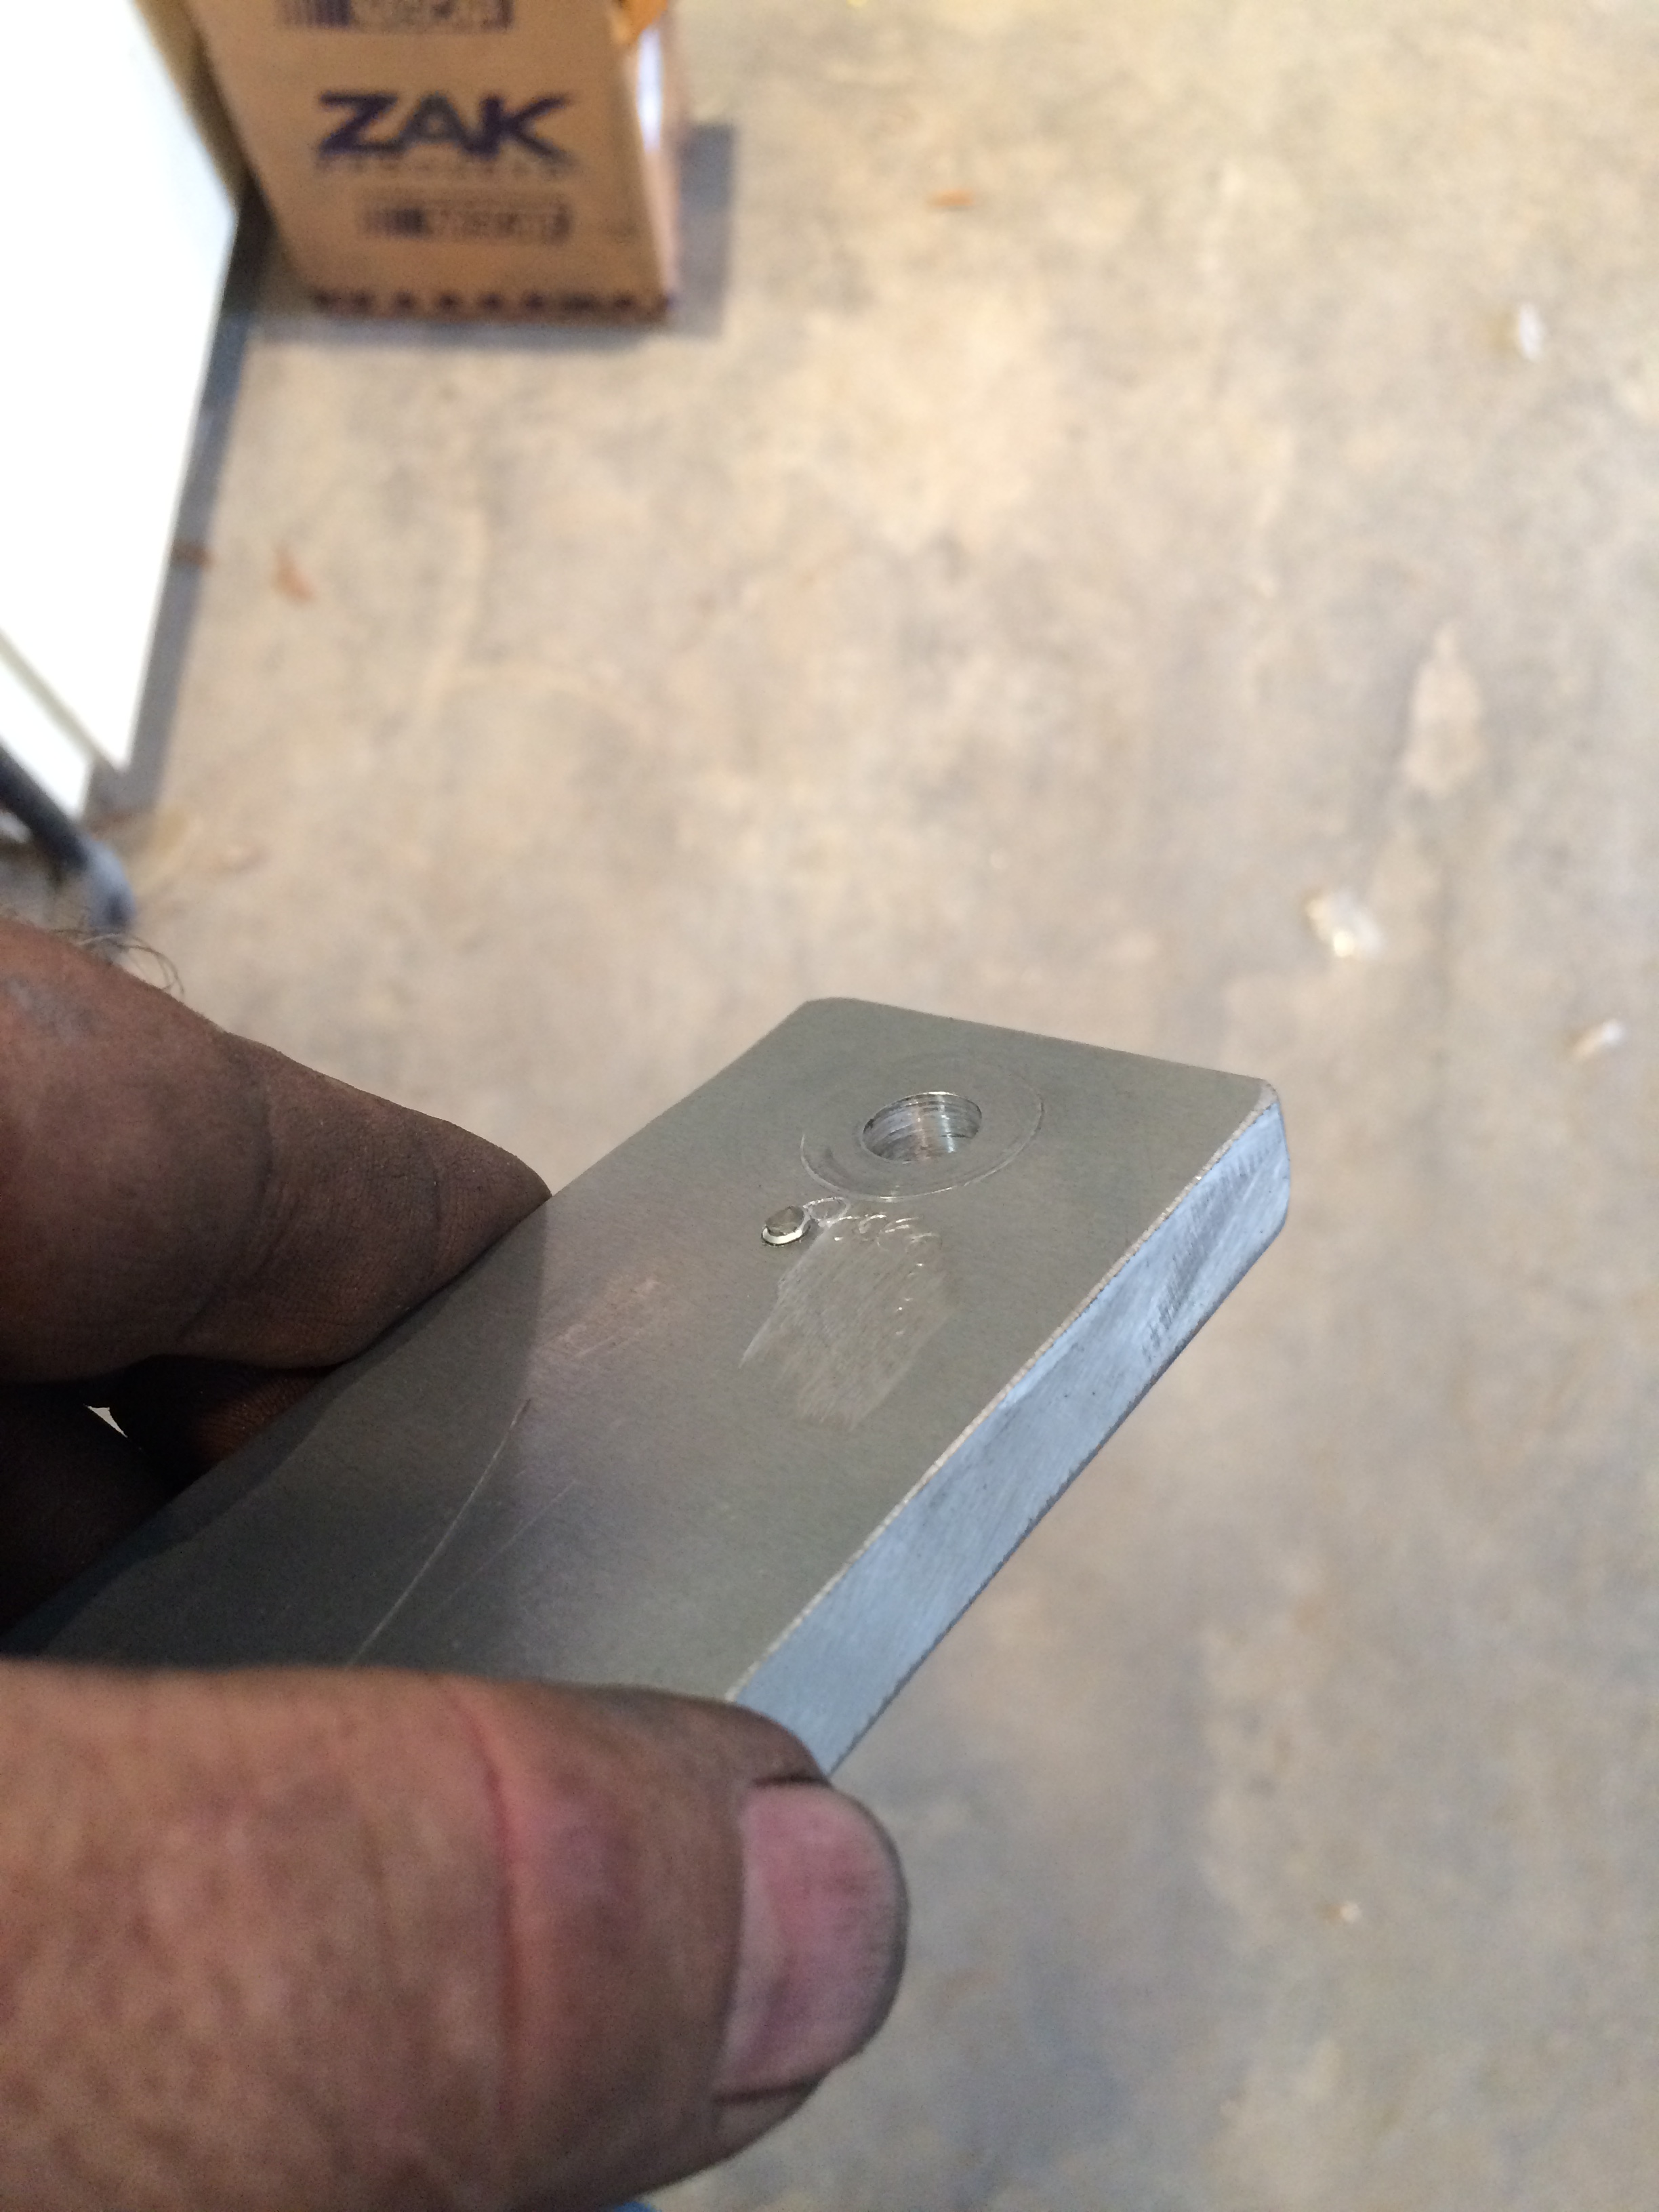
And I had to add a shim to make the idler pulley true.
Tapped for the lower pulley. They upper pulley went into the other water pump boss

As shown here. Pretend the drill is the crankshaft.
I didn't want to wrestle the NP 242 around the table, and it should be flat when it is opened so the pieces don't spill out. So I cut a hole in the worktable and stood it on its tailshaft, using the front yoke as a spacer.


Opening up the case and pulling out the shift fork. There is a right way, and a pry-bar way.

Planetary and input shaft.

And time for another stupid pet trick. LS engines mostly use 10M X 1.5 metric bolts, but come in sizes from 23 mm to 135 mm. Dealers charge $ 2-3 for each bolt. Ouch. Also, if they don't have it in stock, you wait. If no one can figure out which one it is, you guess. And in my case, I drive 45 minutes round-trip for that experience.
I went on ebay, and bought full-thread M10 X 1.5 bolts 135 mm long. I measure the bolt I need, thread a M10 die on the bolt, and cut it to length. Custom. Takes 2 minutes. Cost...a about .35 cents each. I think I bought 100 for around $35 shipped. Zoro.com or find them on ebay. Check it out.
Pile of bolts.

Thead the appropriate die on. The handle helps hold the bolt while you cut it, and the die corrects the threads when you take it off.

I use a 4 1/2 inch angle grinder with a flap wheel to bevel the nose, and thread a nut on and off to check it before I use it. Quality assurance.

And, I made this Idler pulley bracket from 2 X 5 inch 1/2 inch thick 6061 aluminum stock. I put a small locator pin in, and put a small hole in the water pump mounting boss to keep the bracket from rotating. It doesn't take much.


And I had to add a shim to make the idler pulley true.

Tapped for the lower pulley. They upper pulley went into the other water pump boss

As shown here. Pretend the drill is the crankshaft.
 12-27-2015, 03:26 PM
#45

LOL @ Pretend the drill is the crankshaft.
01-10-2016, 08:33 AM
#46
Time for a few updates. With the holiday, busy work schedule and extra call, I haven't been able to post stuff. But I have been moving forward. This week, it is all about driveline angles.
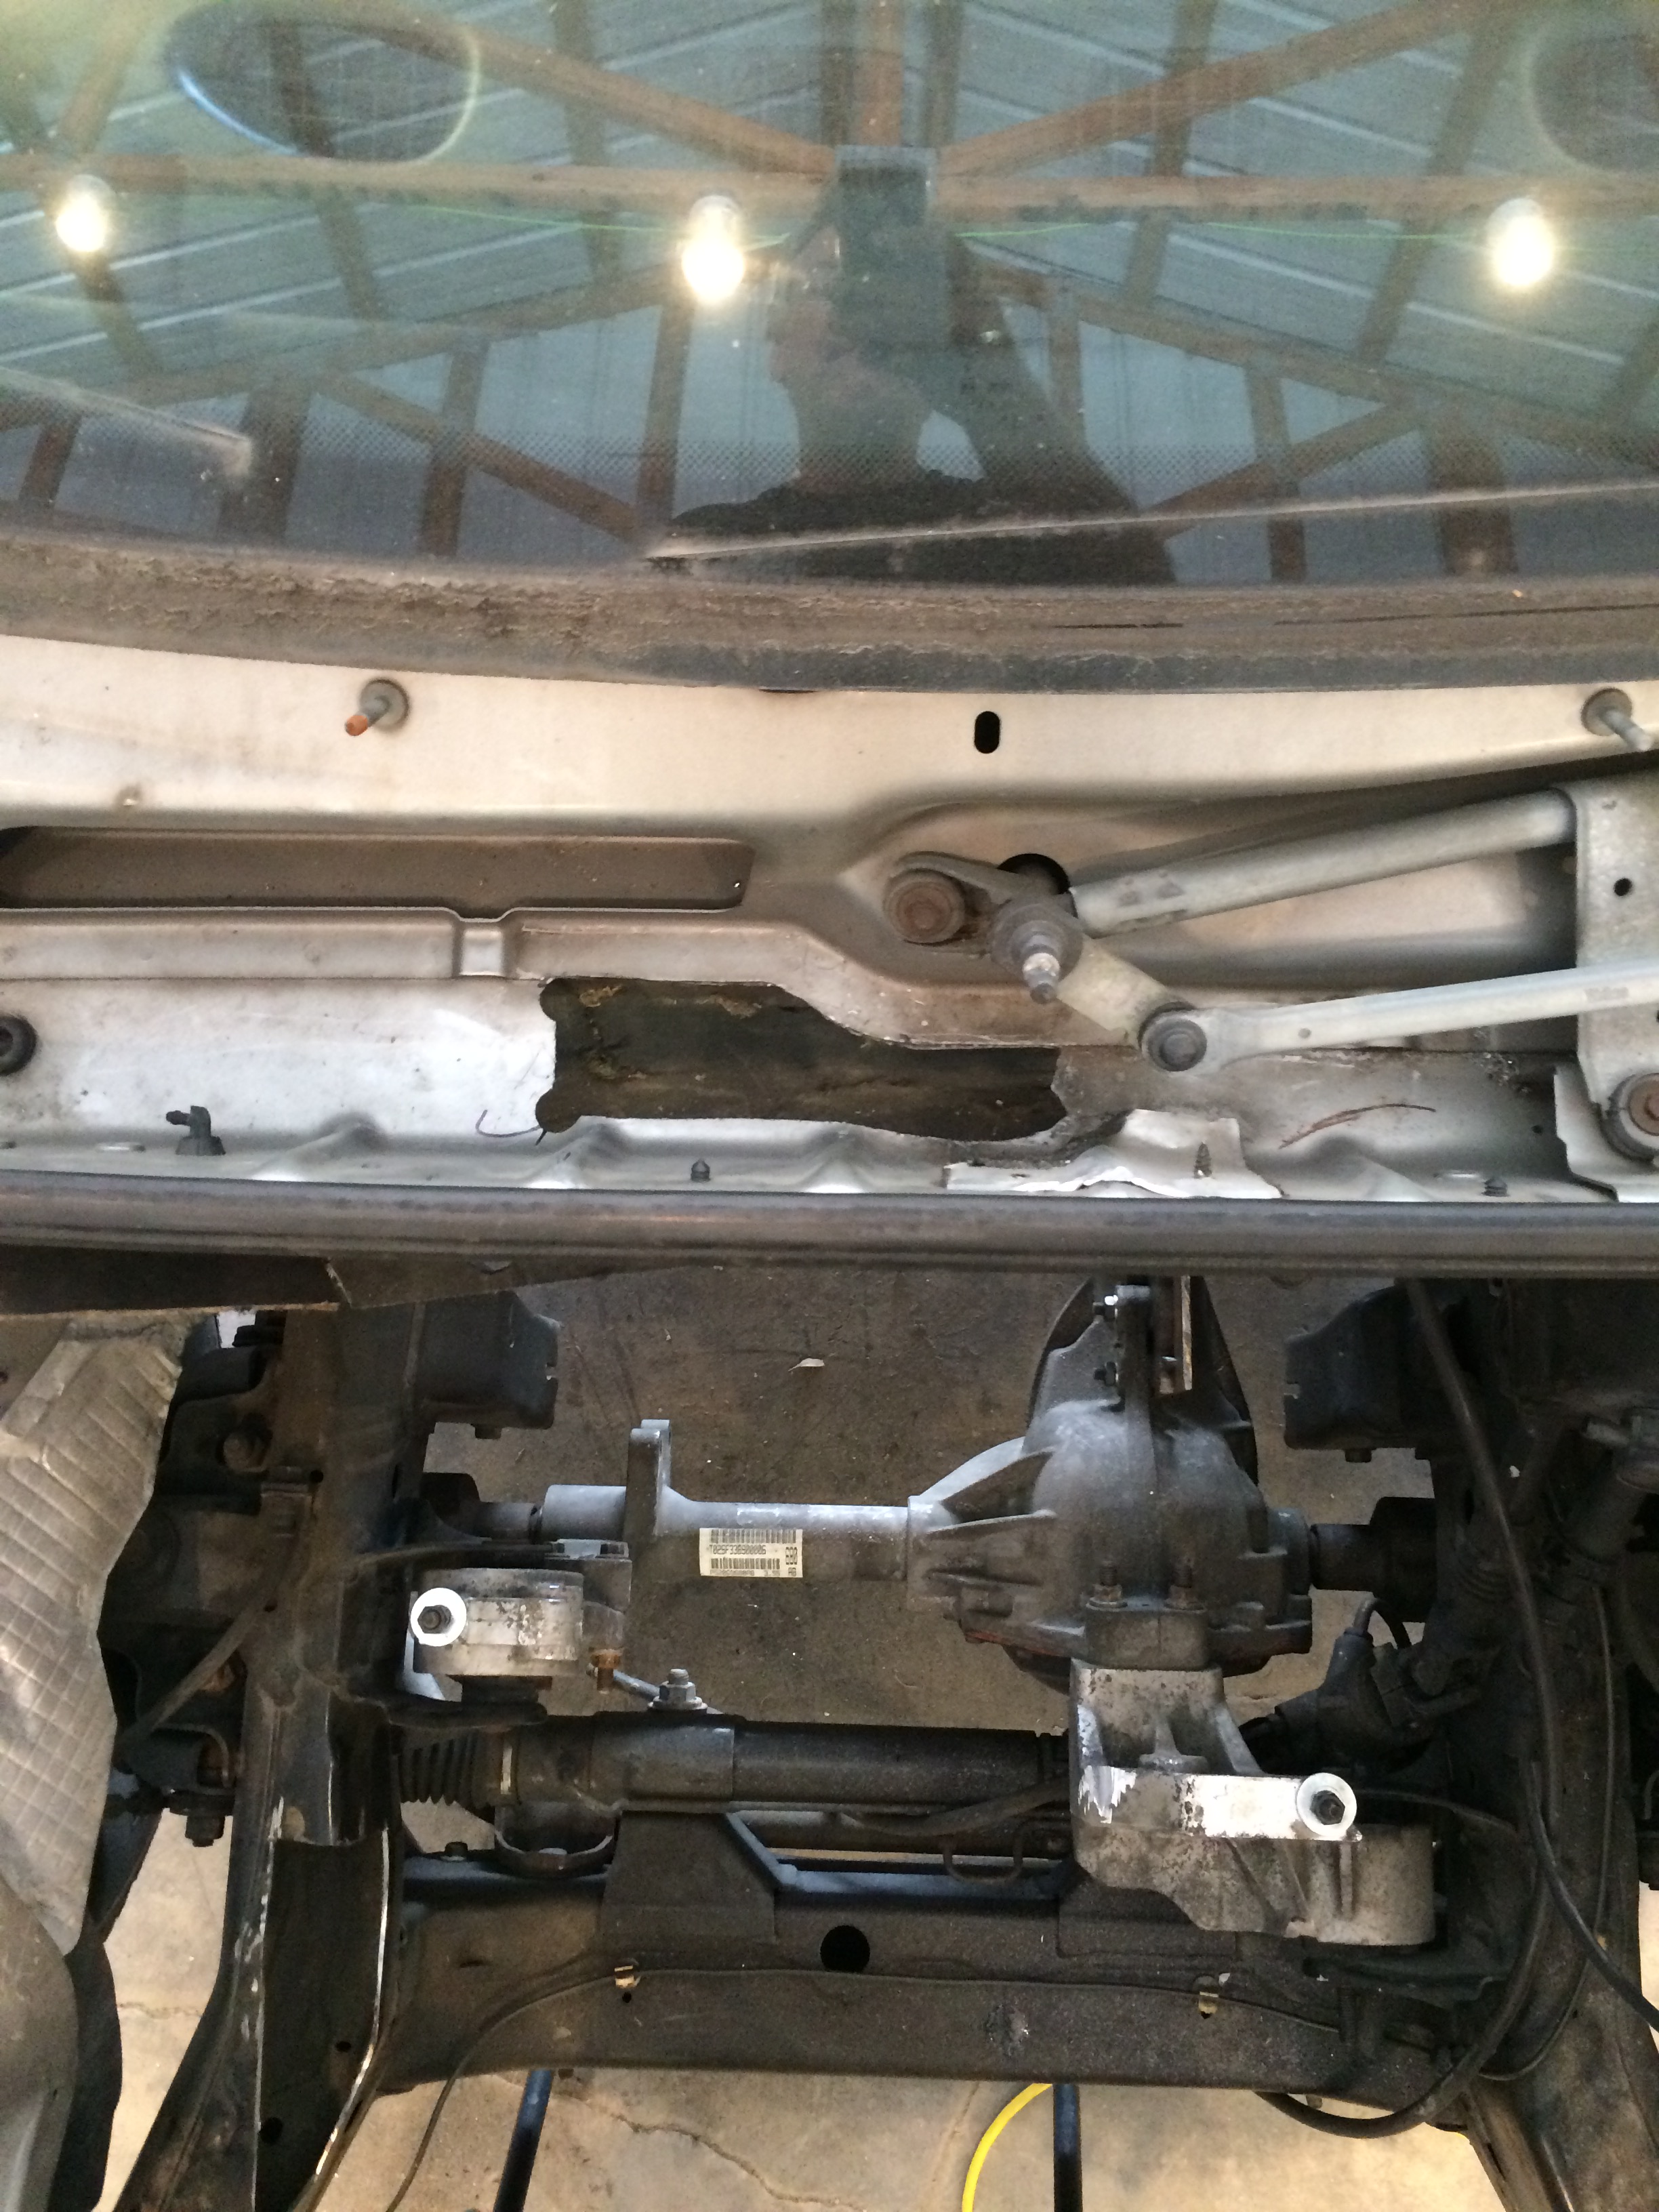
After setting the motor where it would fit with the stock truck oil pan, I liked the clearances all the way around. If I wanted to spend $400 on a Holley oil pan, I could move the motor forward about an inch, and use the front and rear driveshafts again without modifying them. Crazy, huh? But, these driveshafts have 180k miles on them, so I figure having them rebuilt, modified and balanced is worth the $400 or so to have the work done. So, here are the pictures.
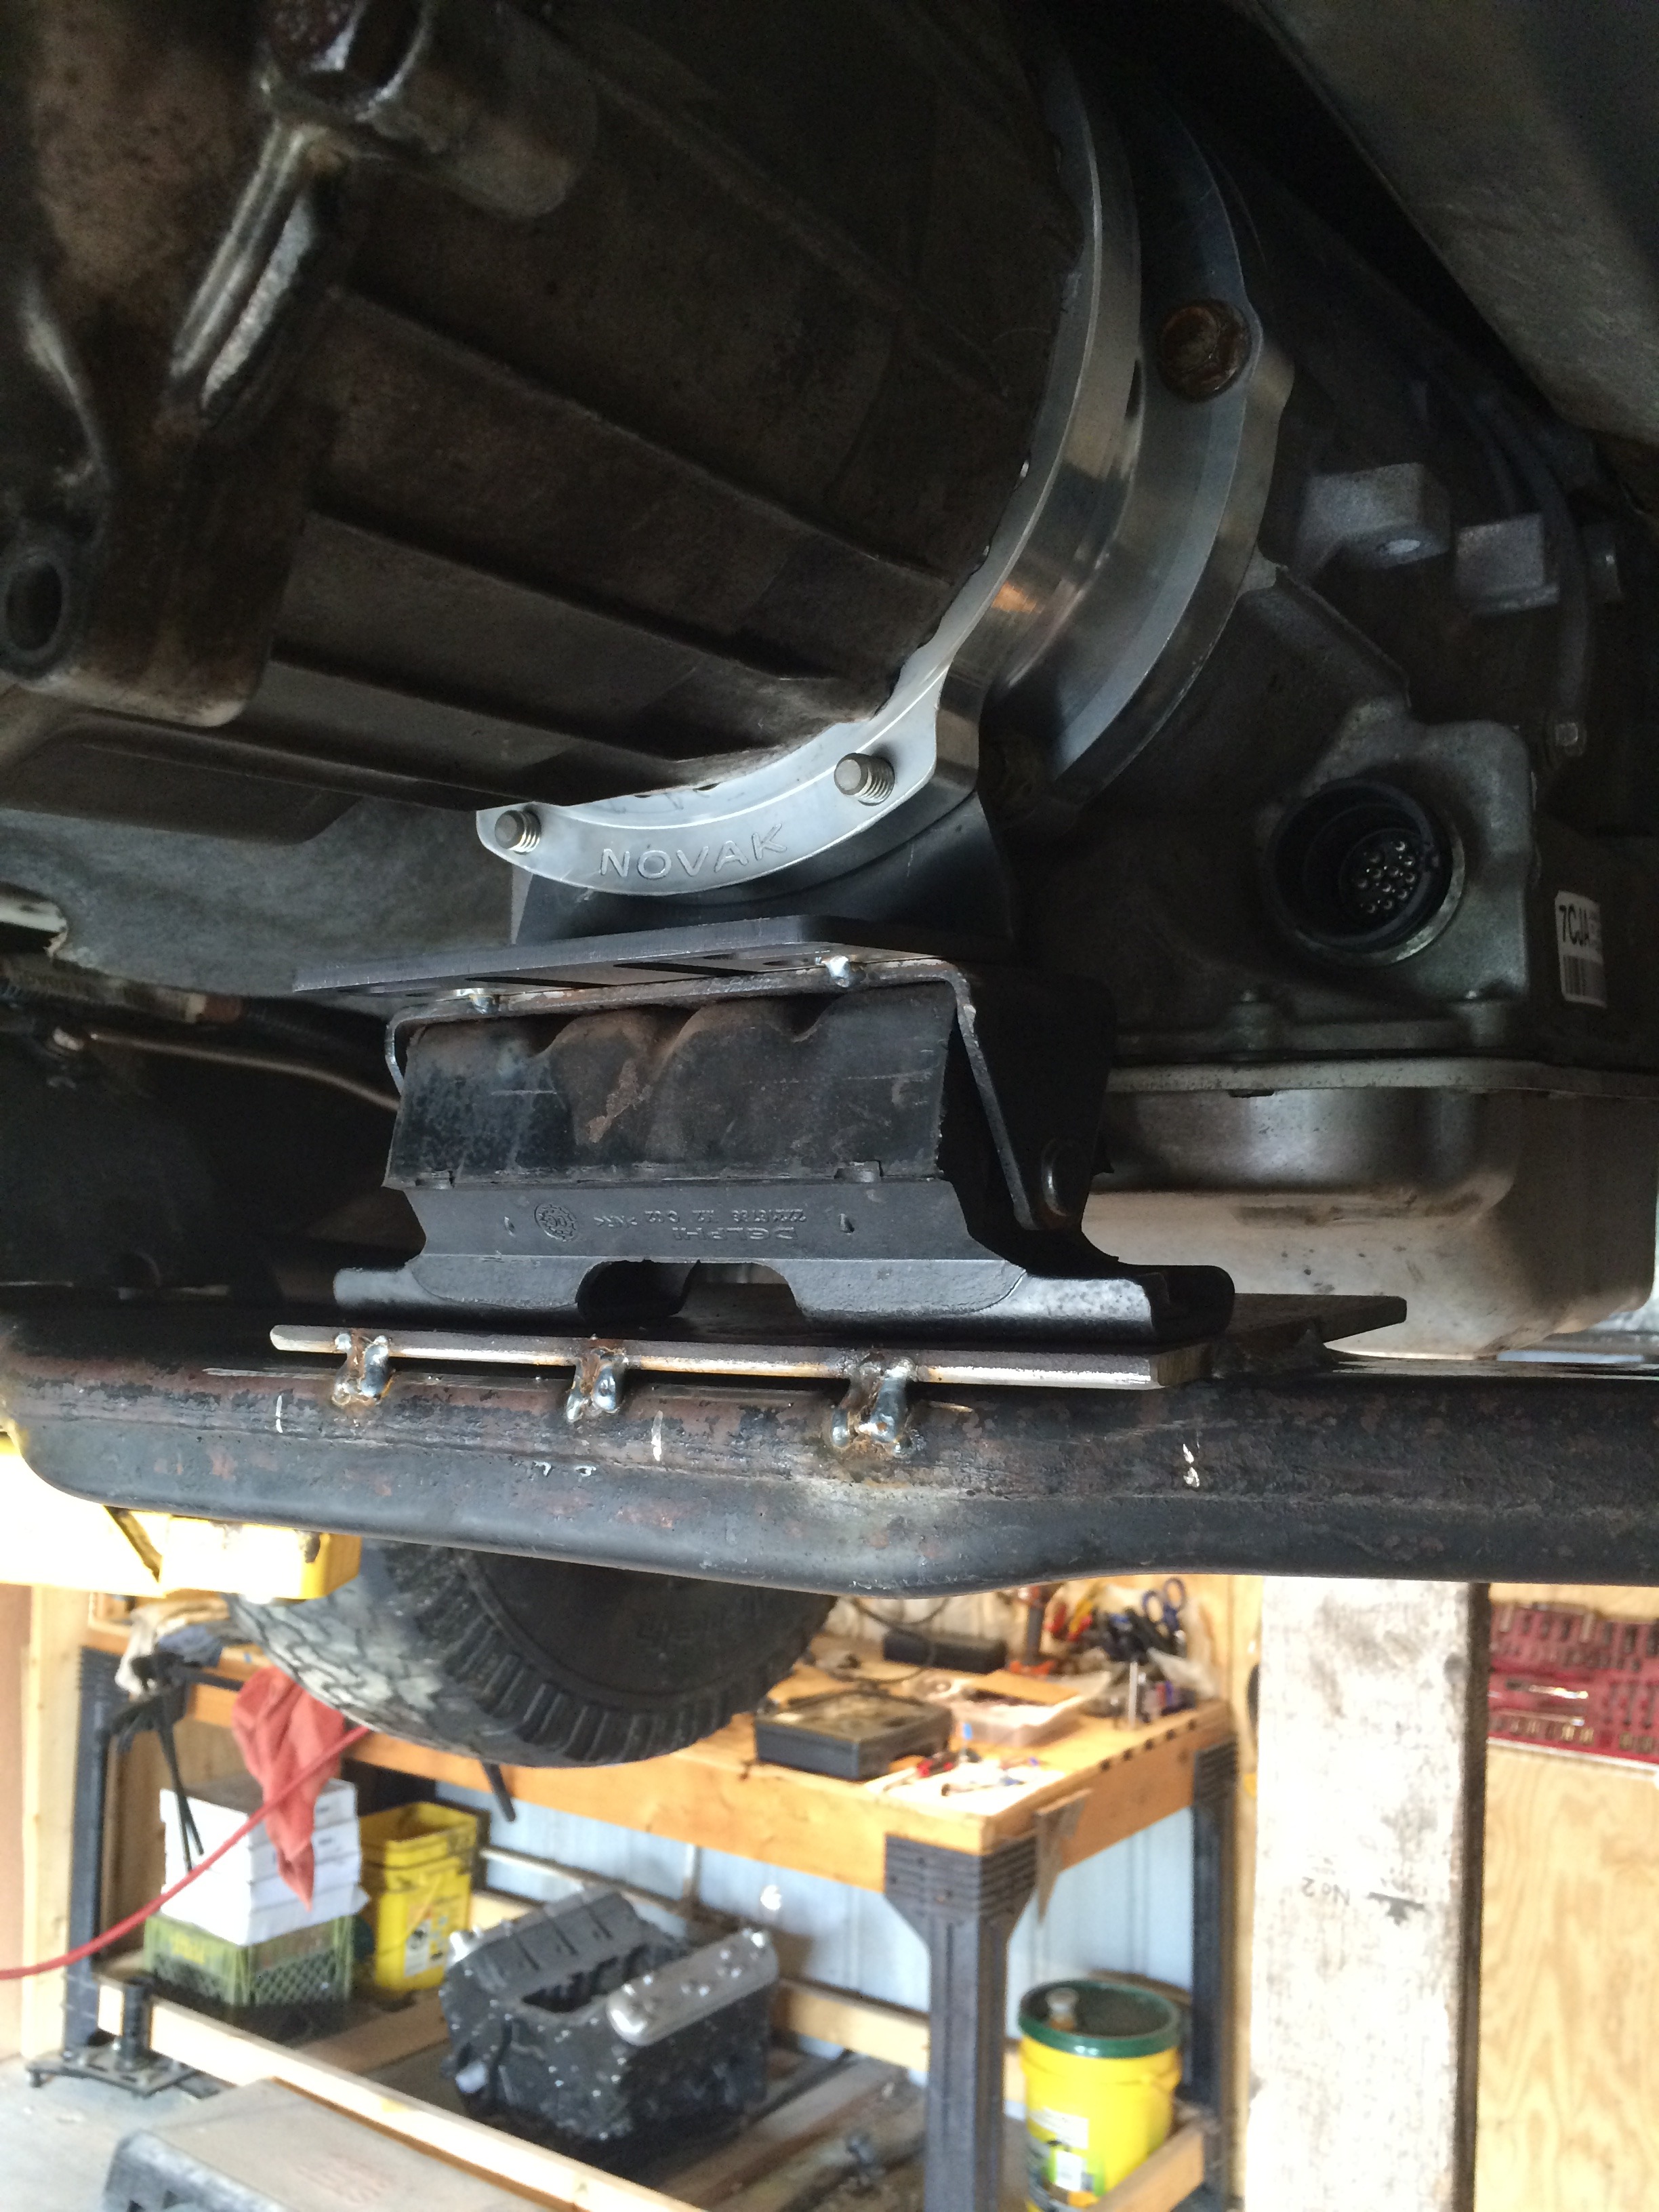
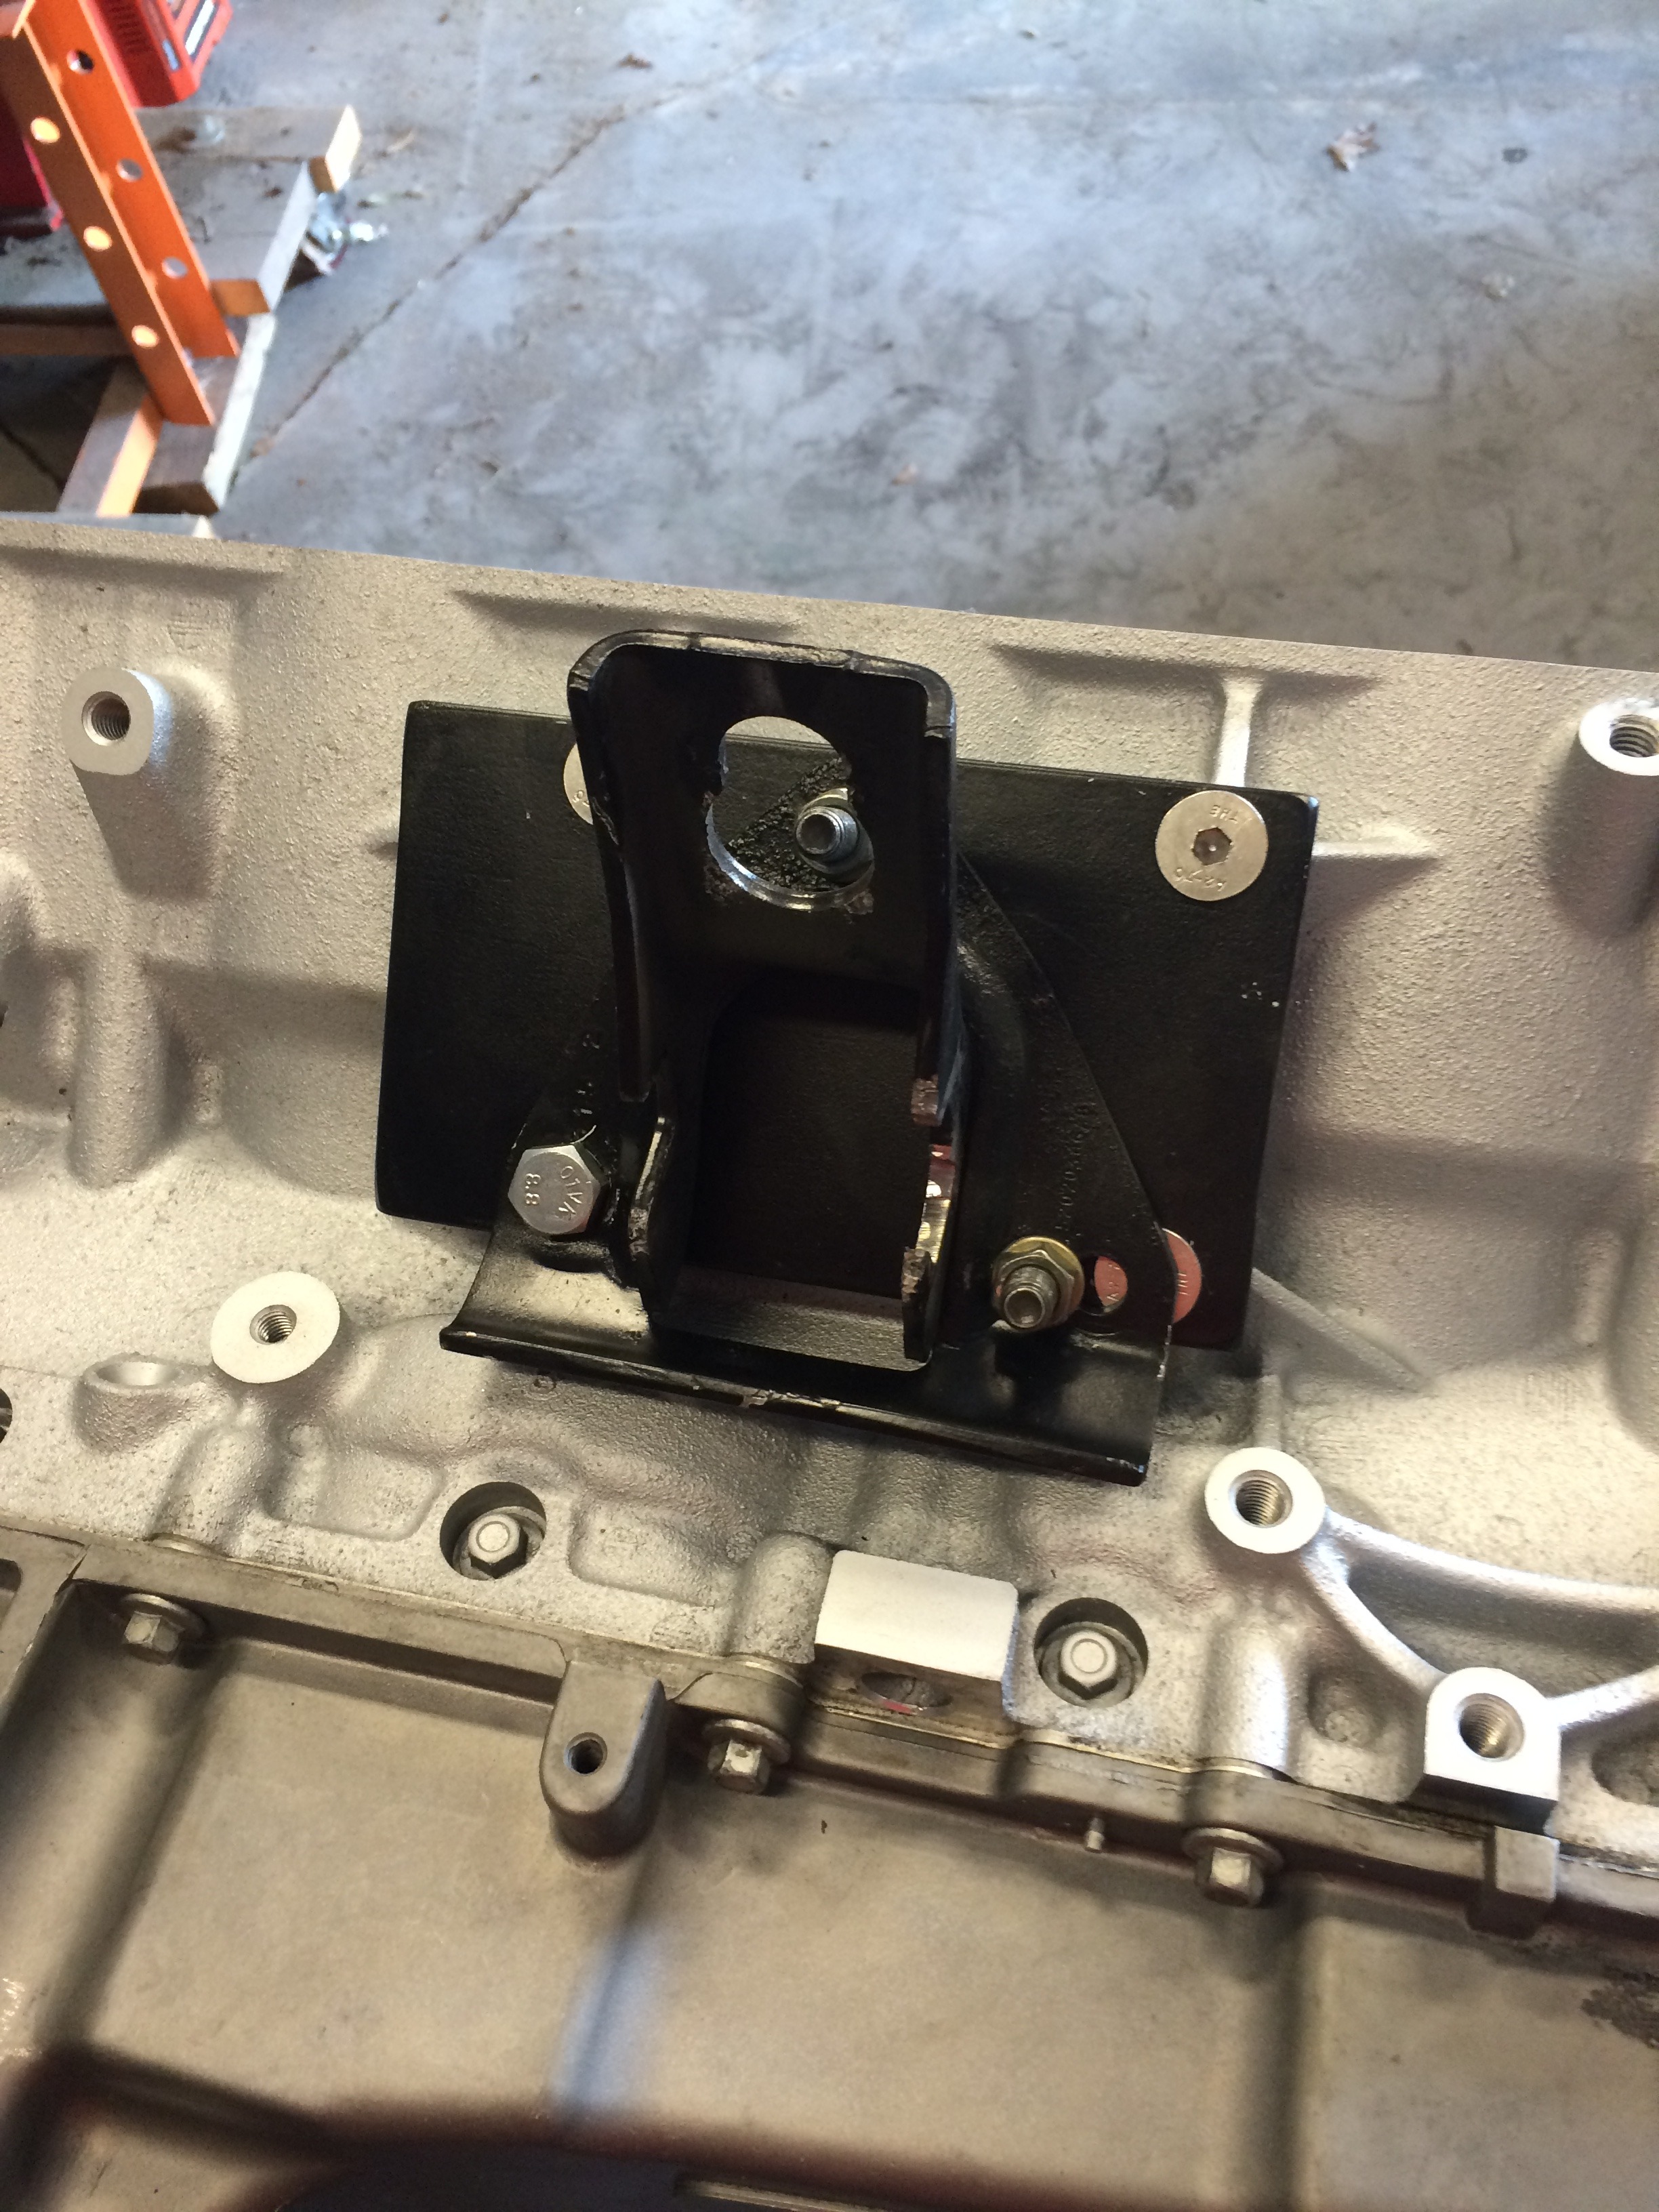
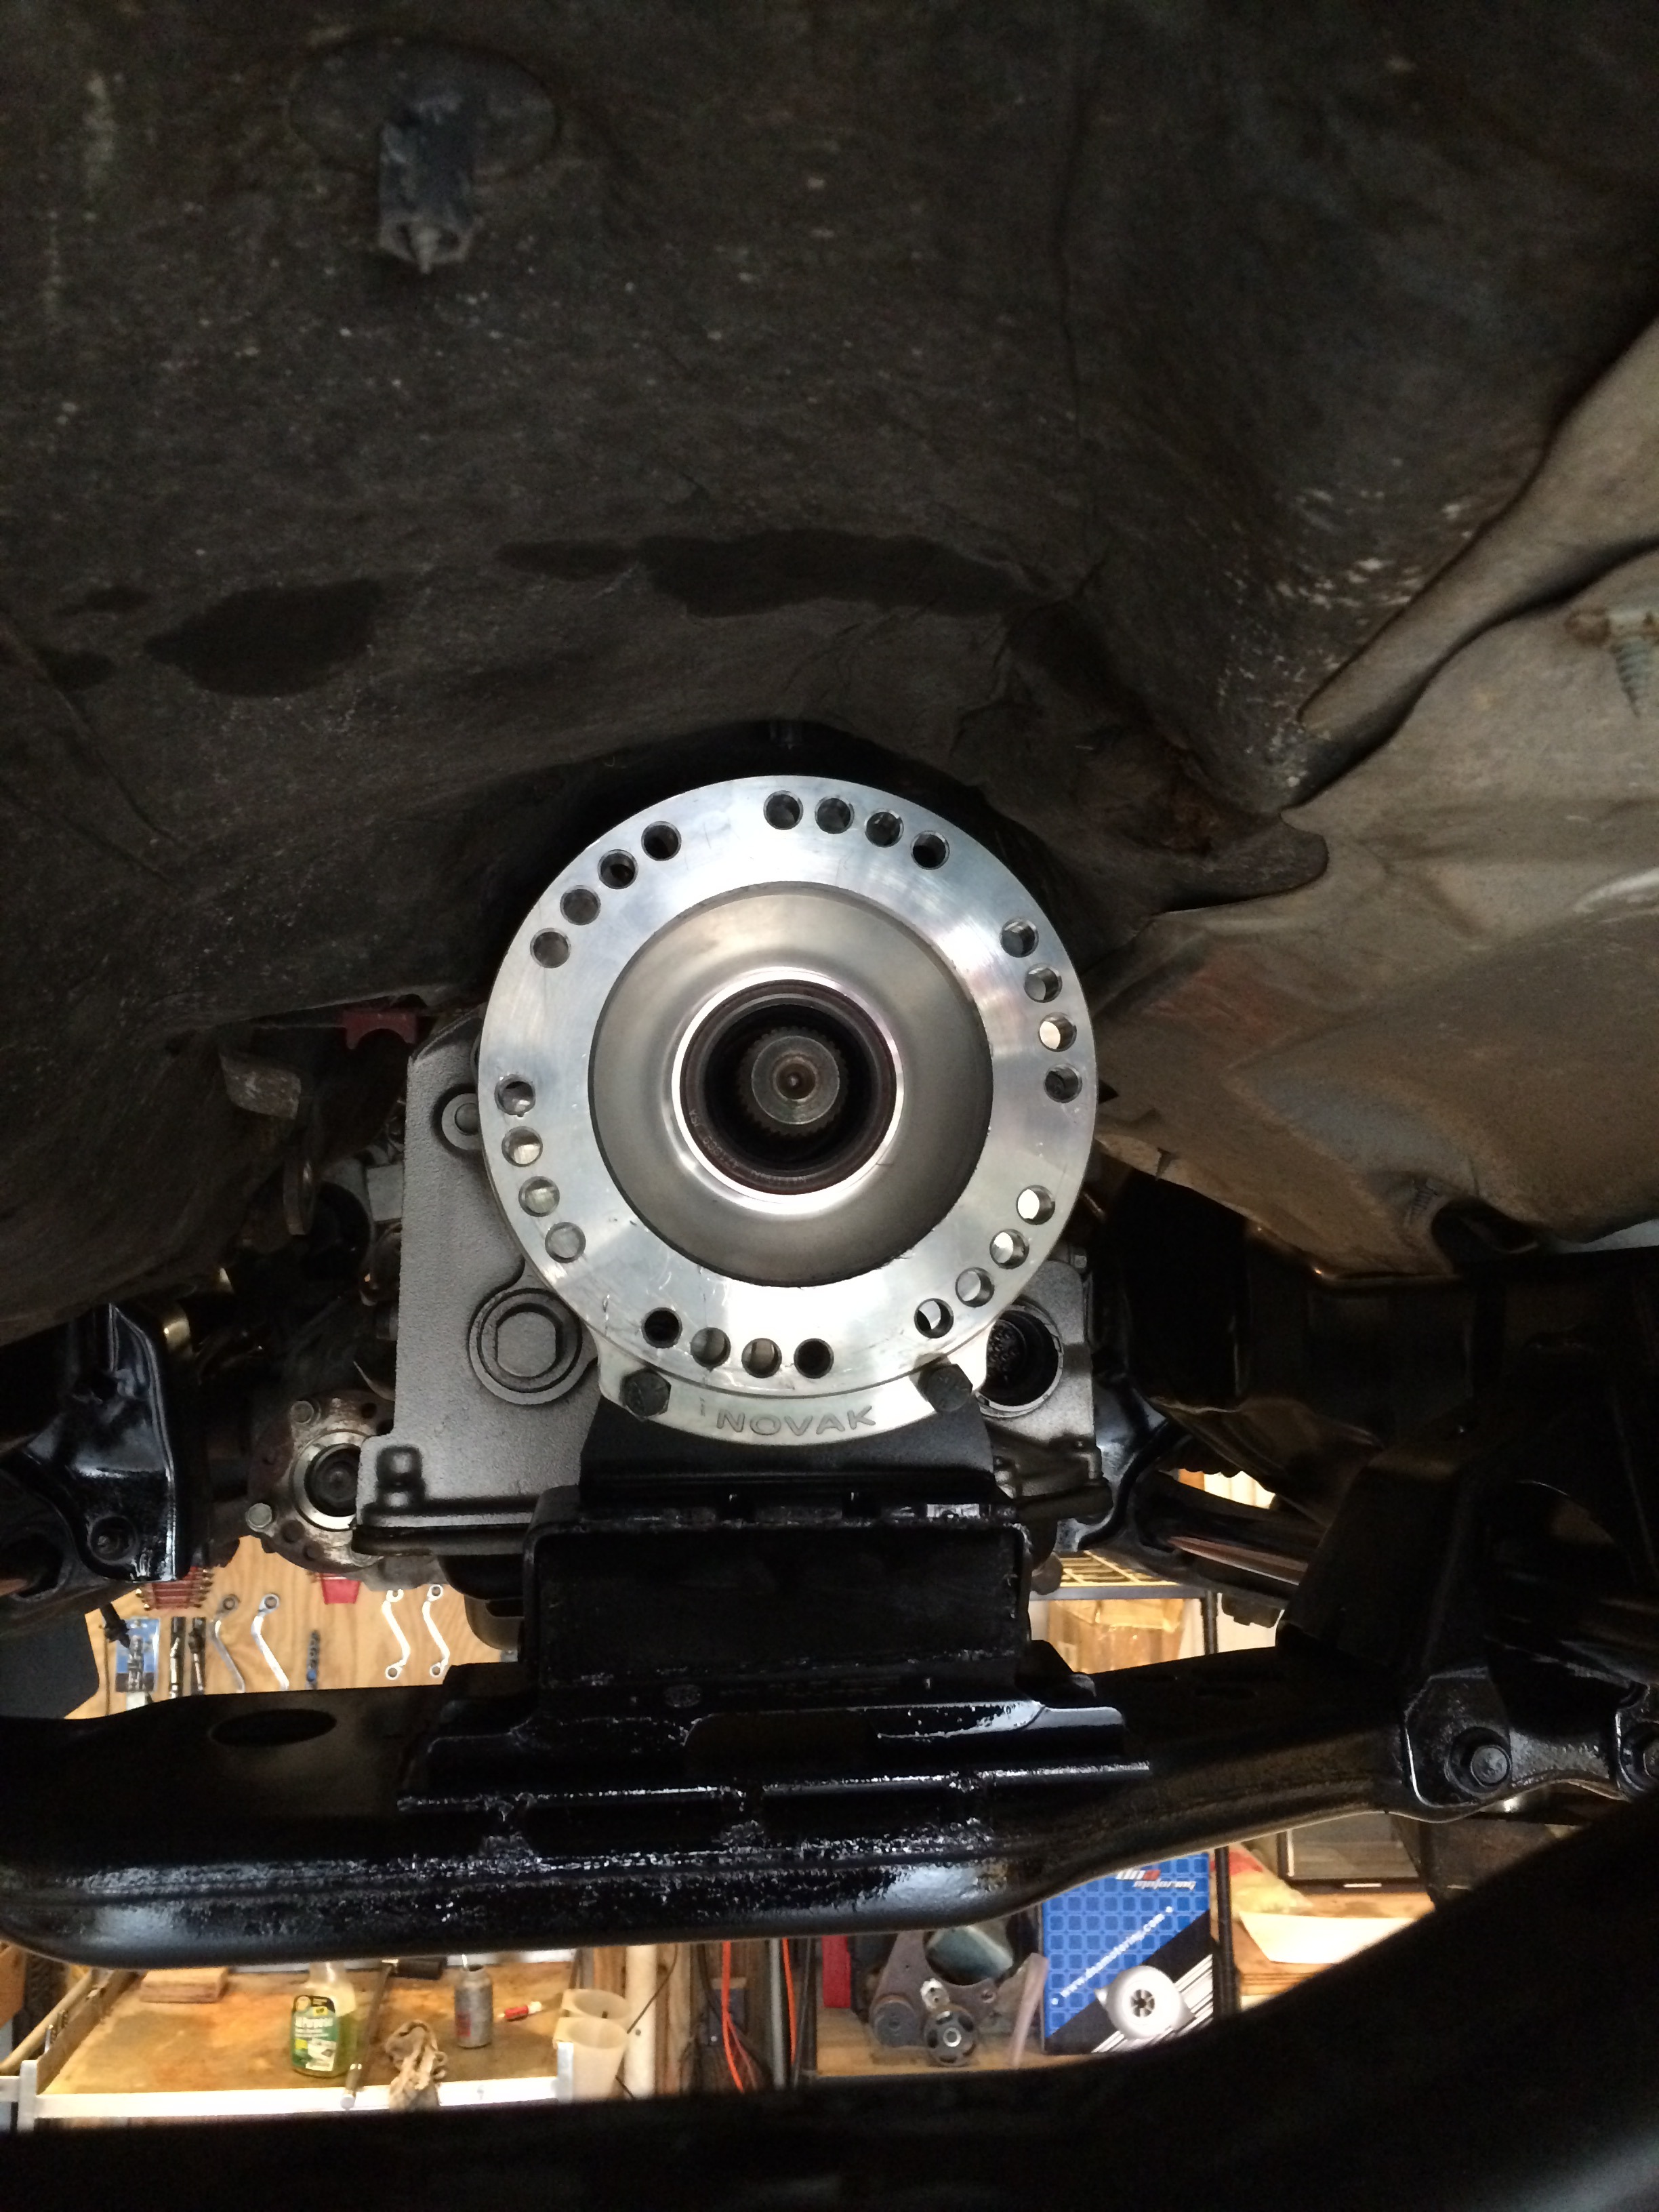
After getting the NP242 installed using the Novak adapter, I made a transmission mount which is a combination of the GM mount (Flippded over, studs cut off) with the Novak-supplied adapter welded on. I welded a clean piece of 1/4 inch steel to the top of the transmission cross member (also flipped over), to give me a stable base. I drilled two 11/32 holes, and tapped for M10 bolts. The assembly is connected to the adapter with the supplied studs and nuts.

Here is the oil pan clearance to front axle.

Front axle about an inch short

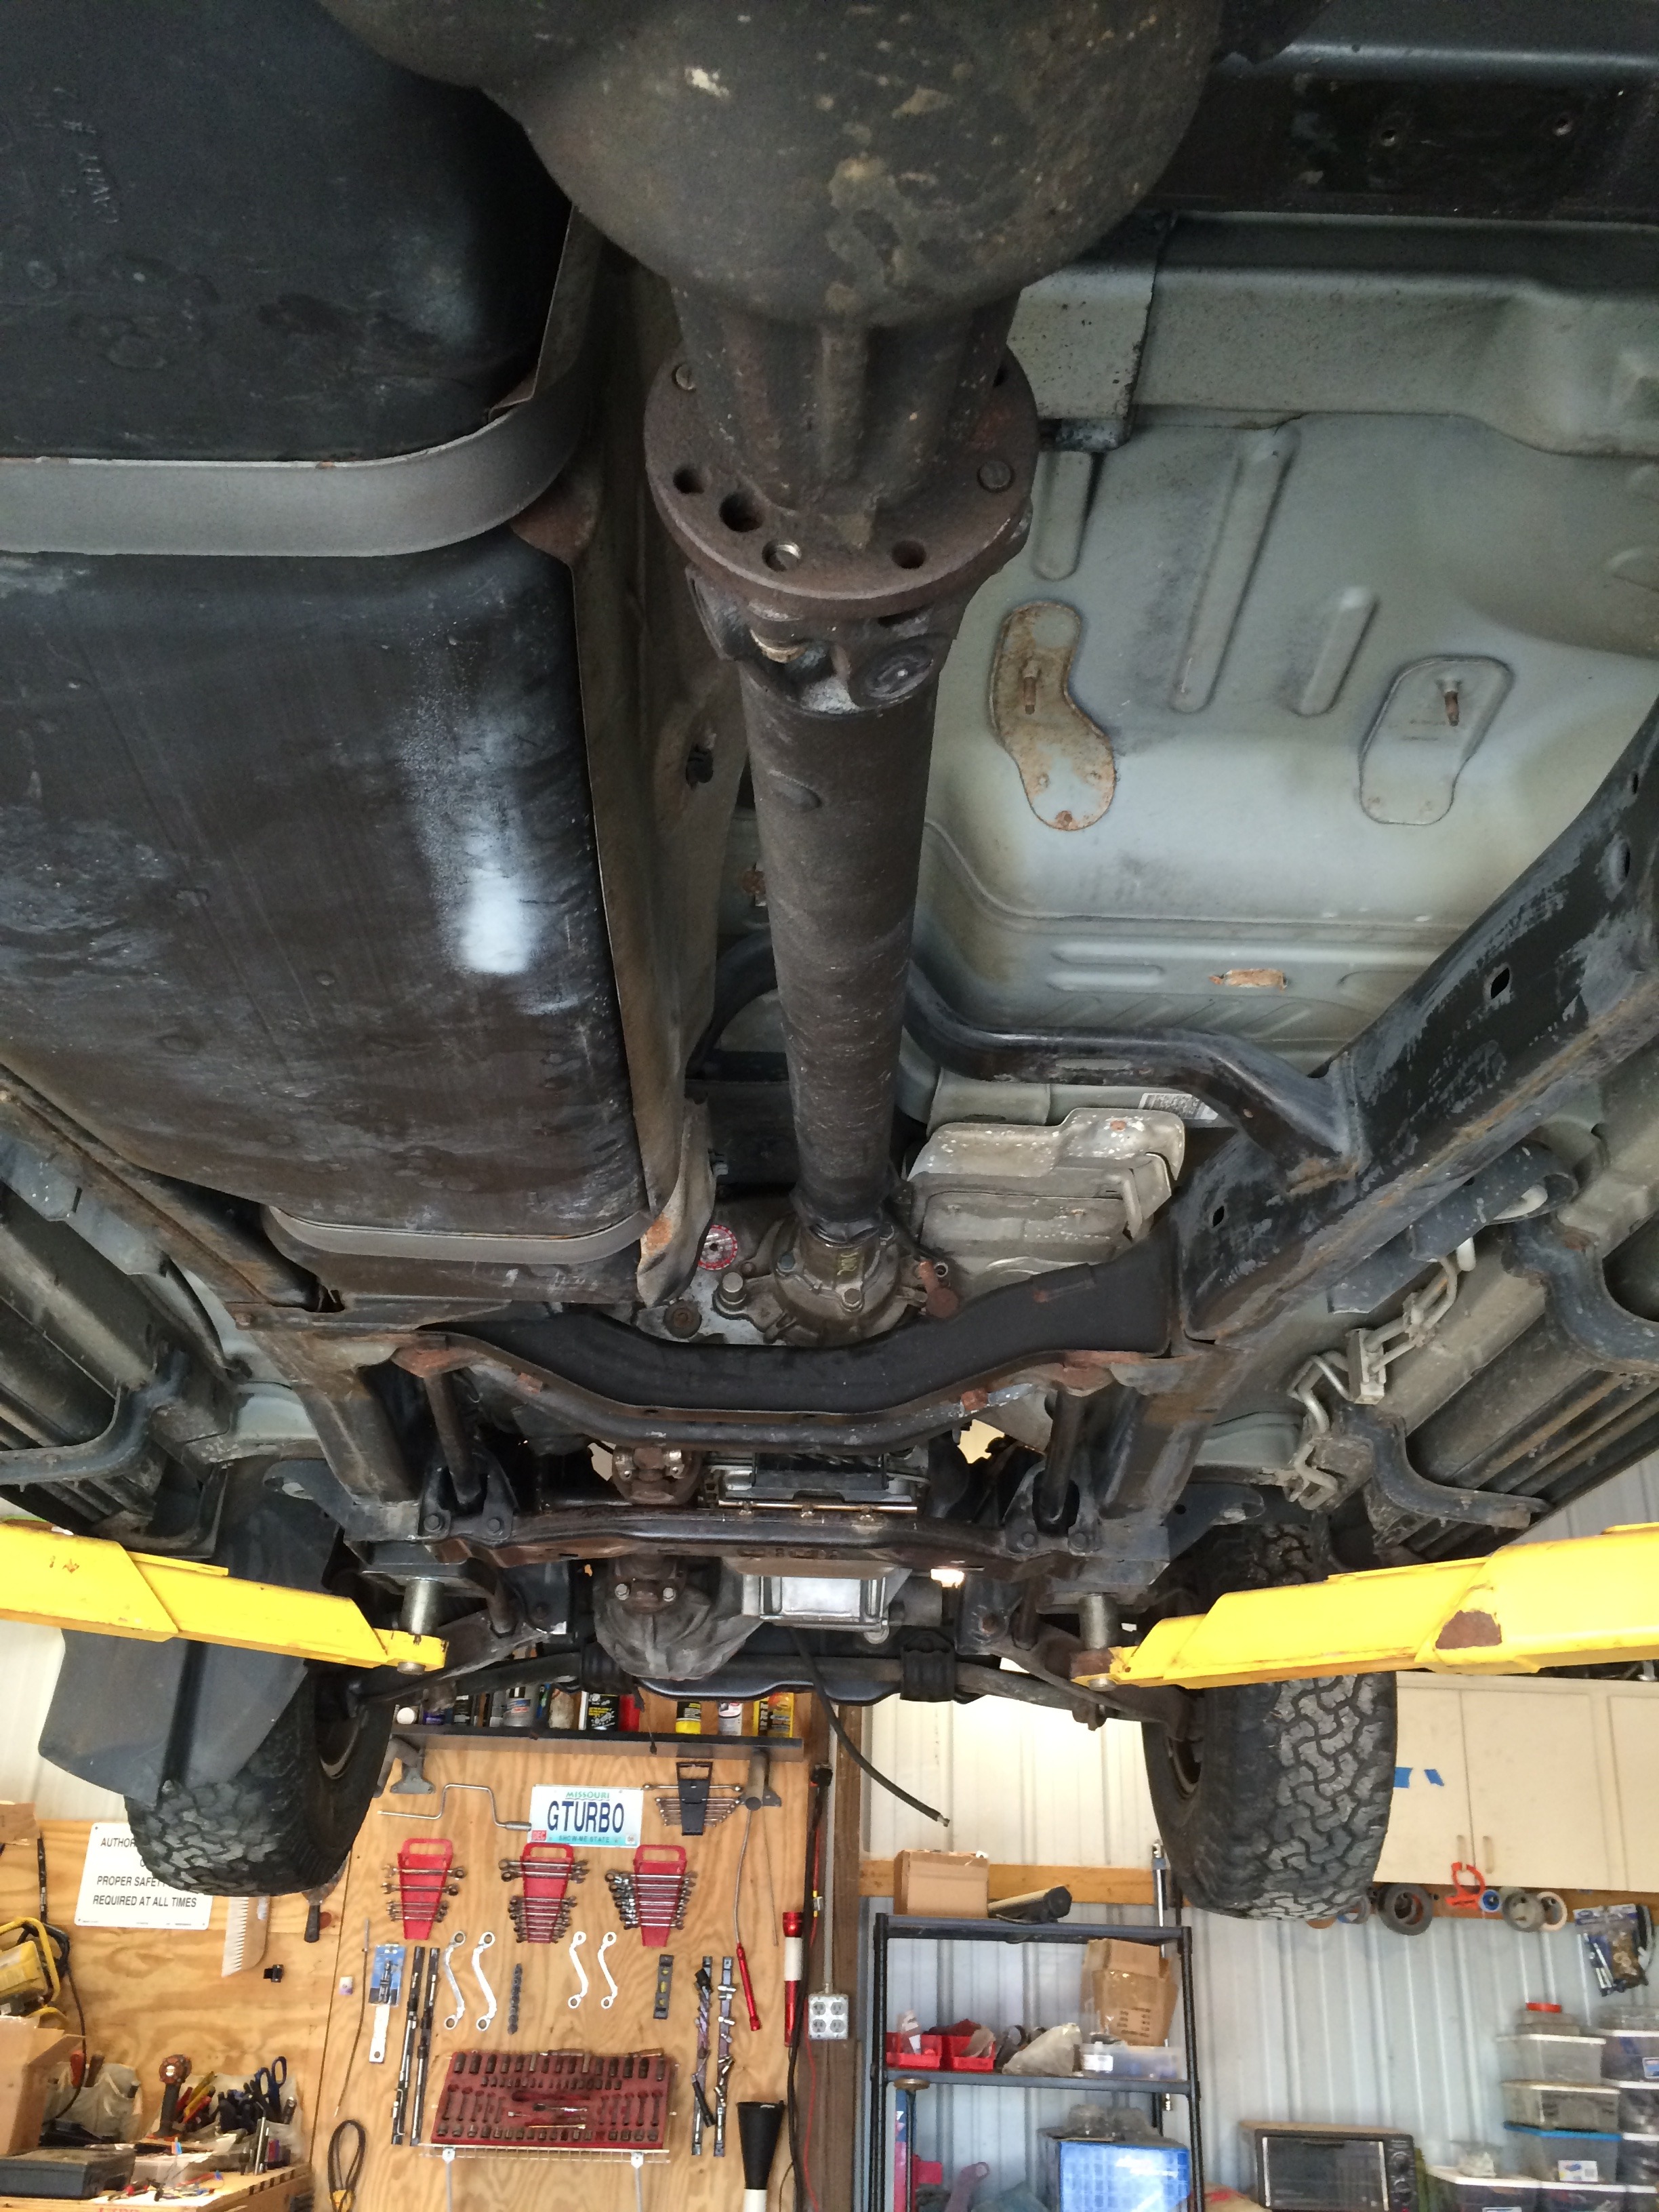
Rear driveshaft installed
Needs to be a little shorter. The rubber seal is completely compressed, with the suspension at full extension.
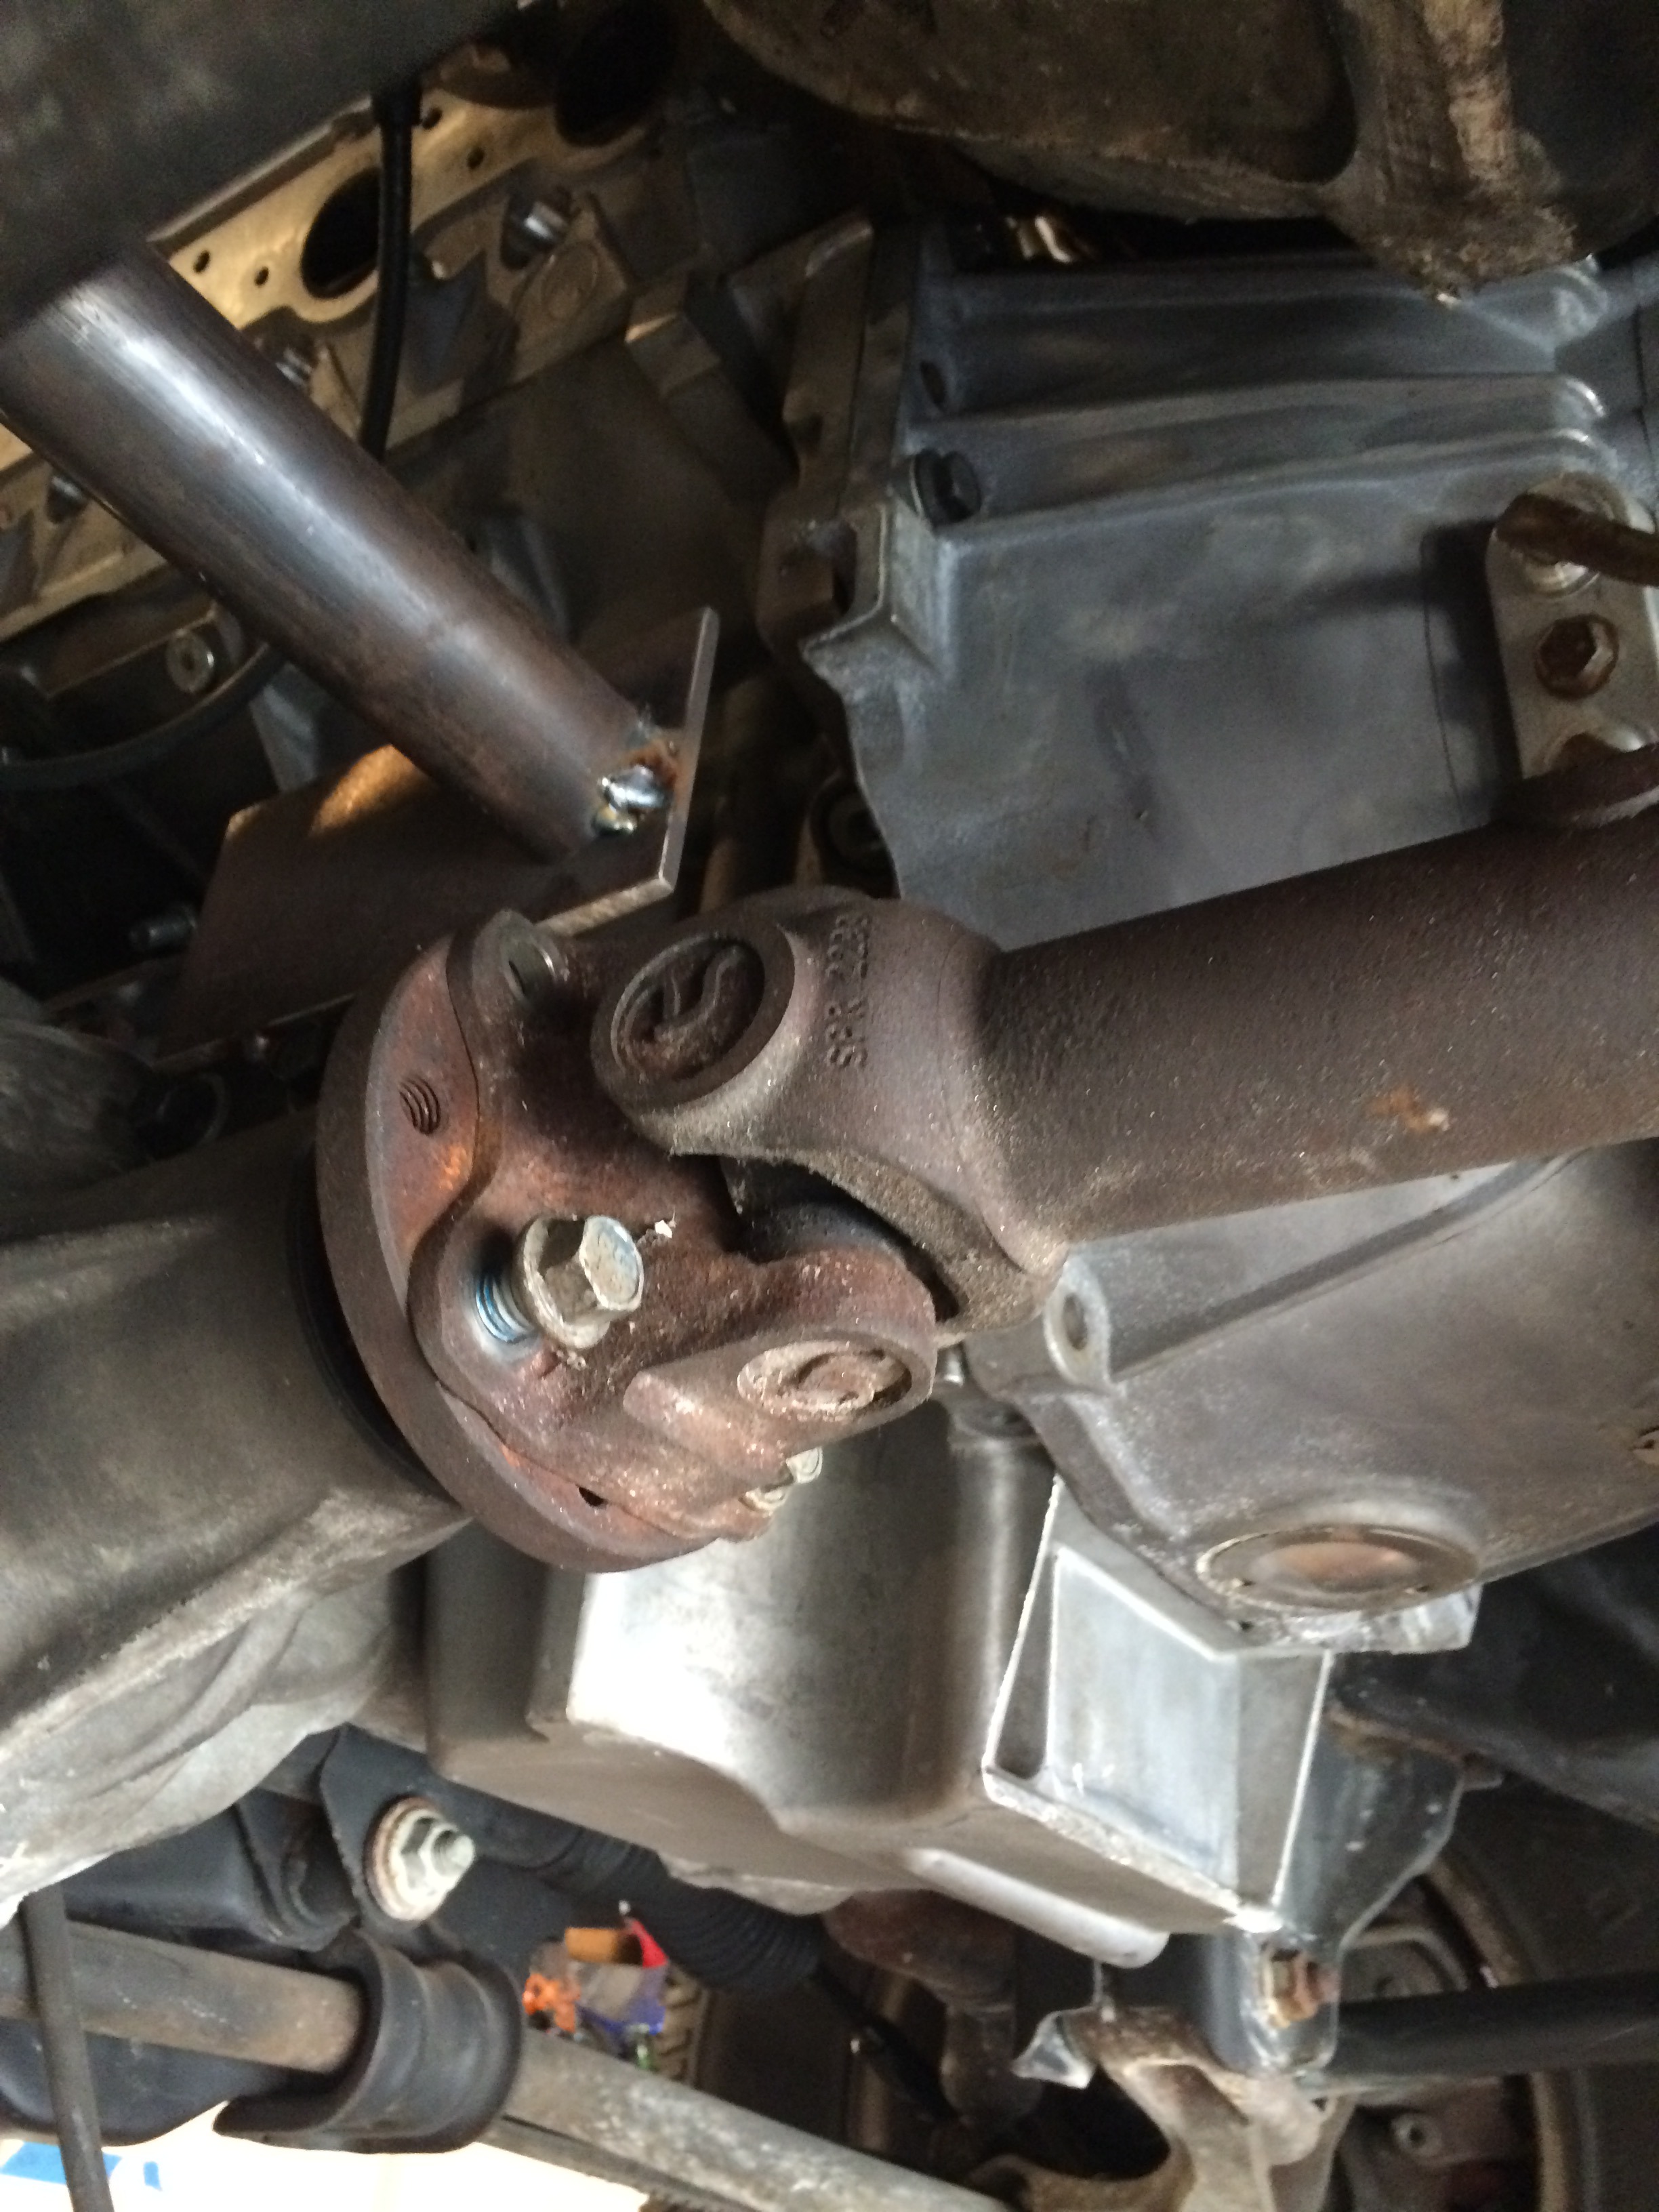
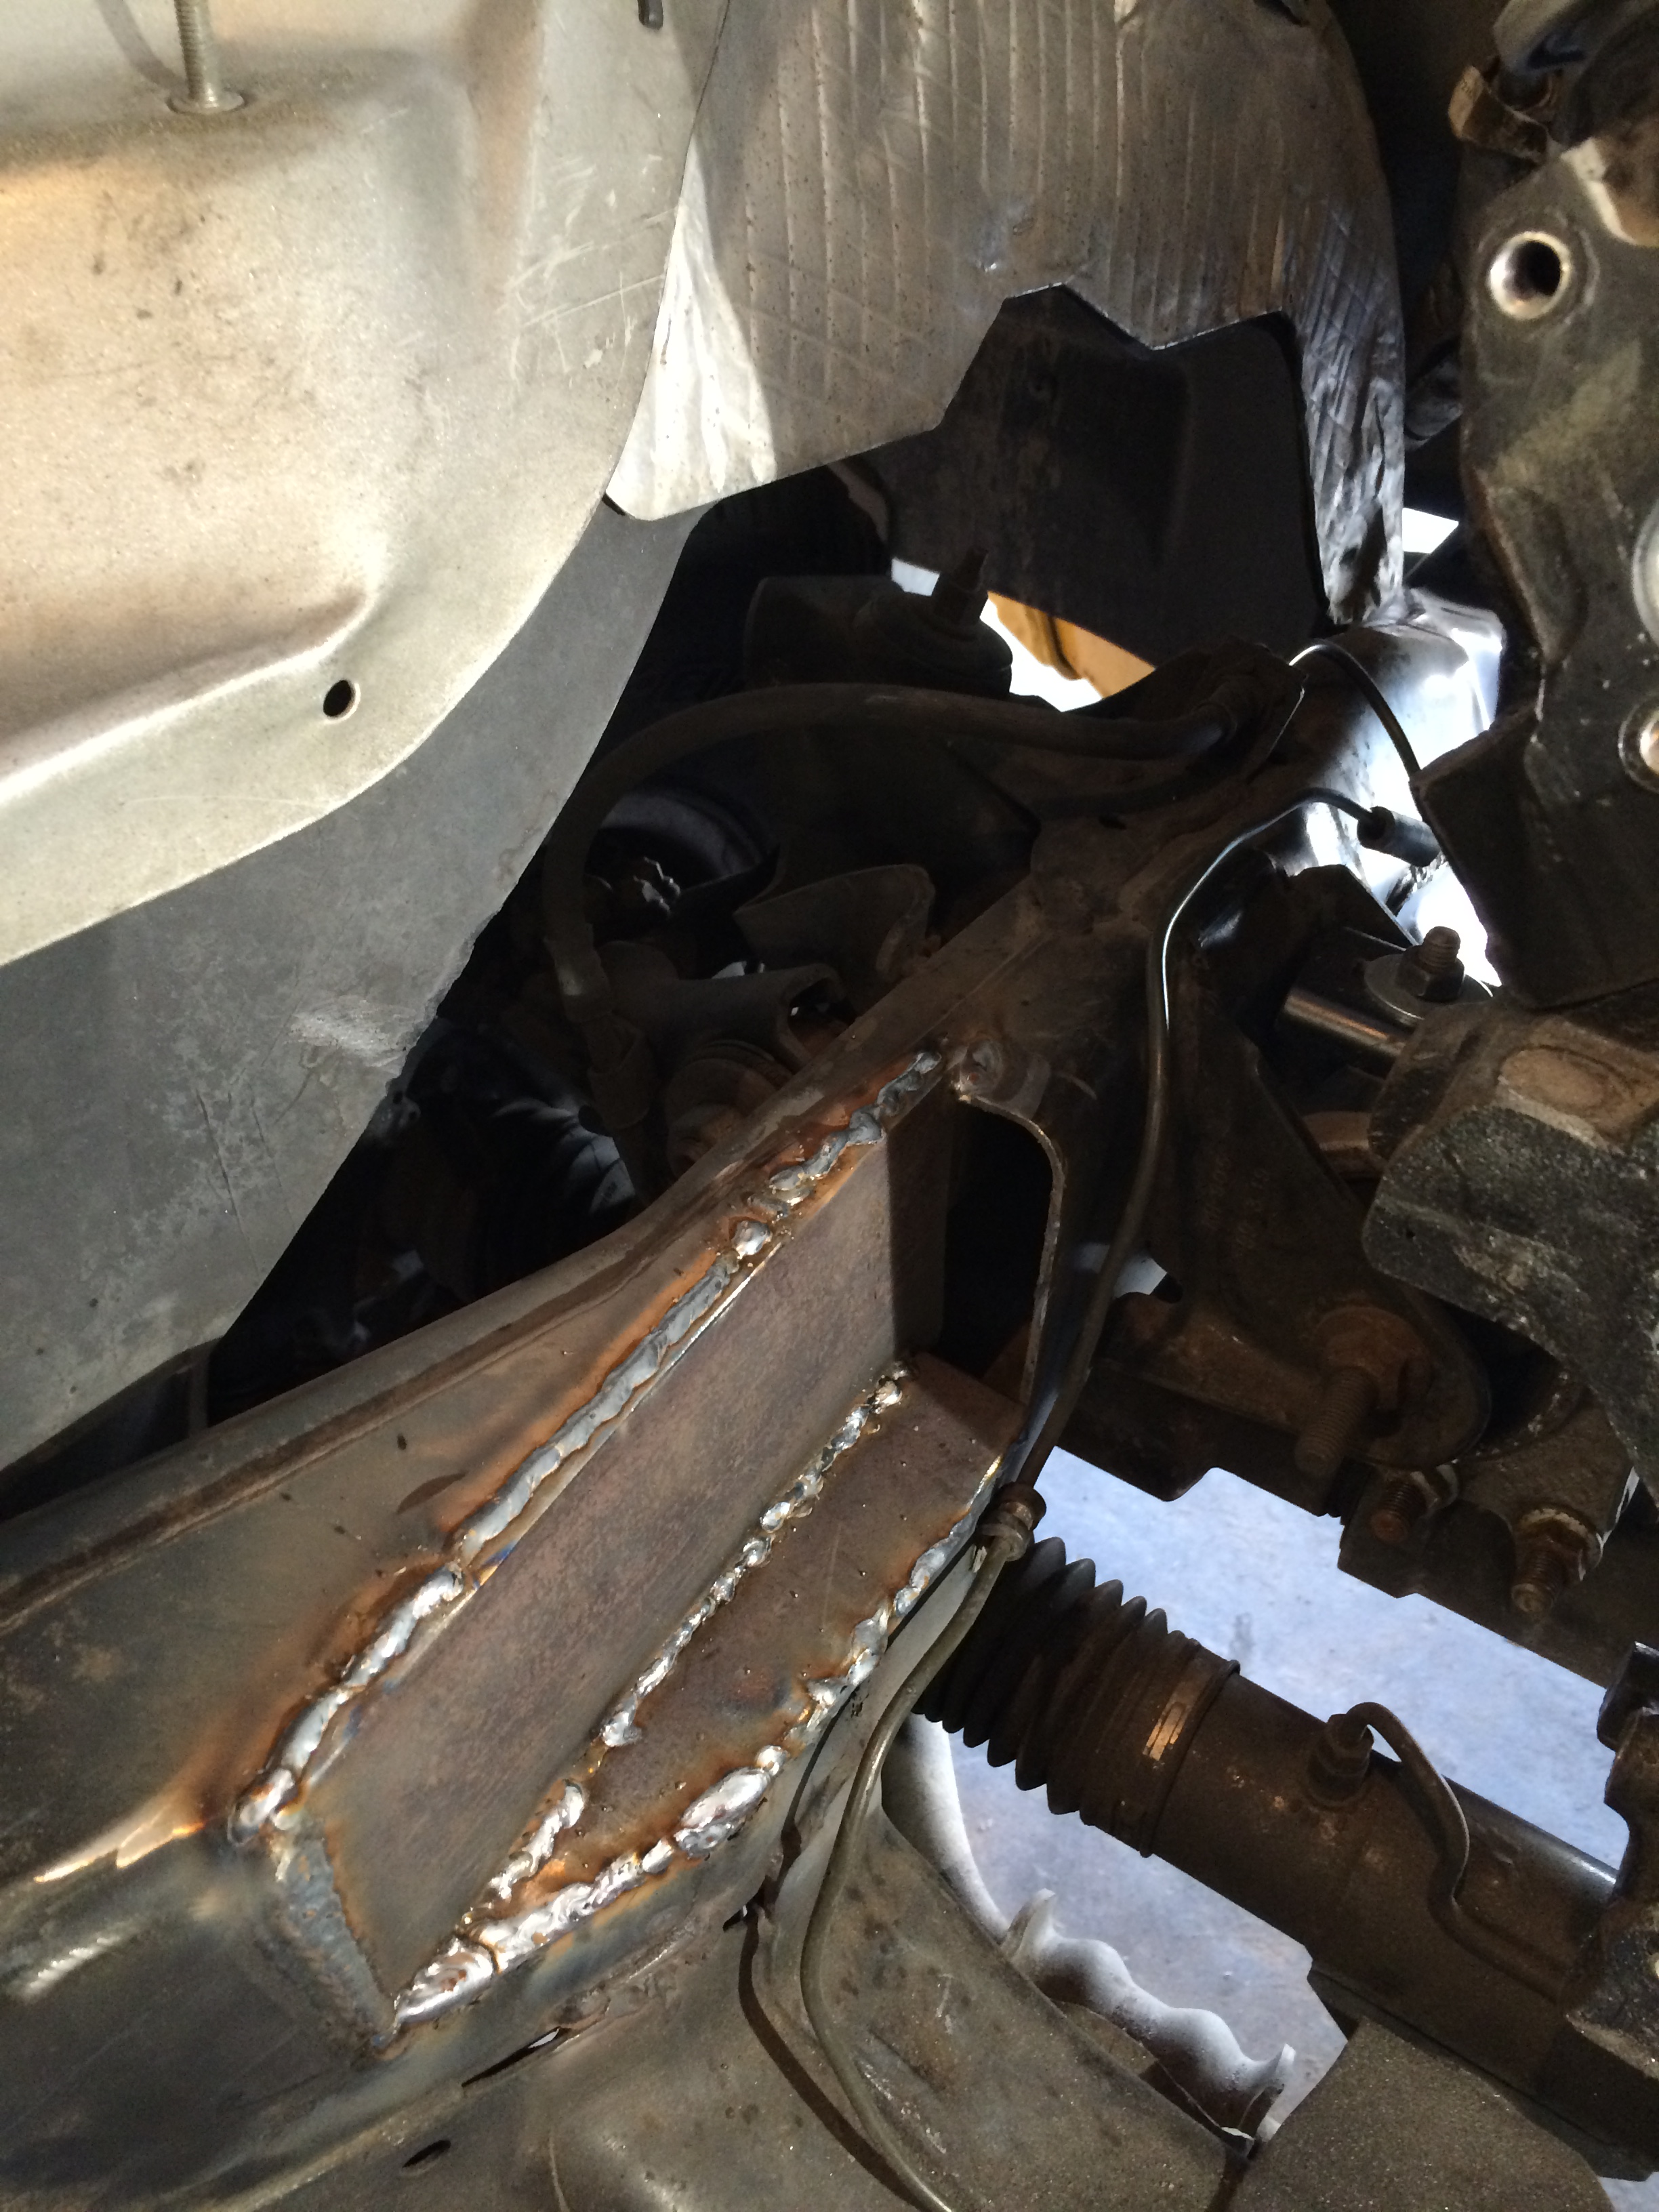
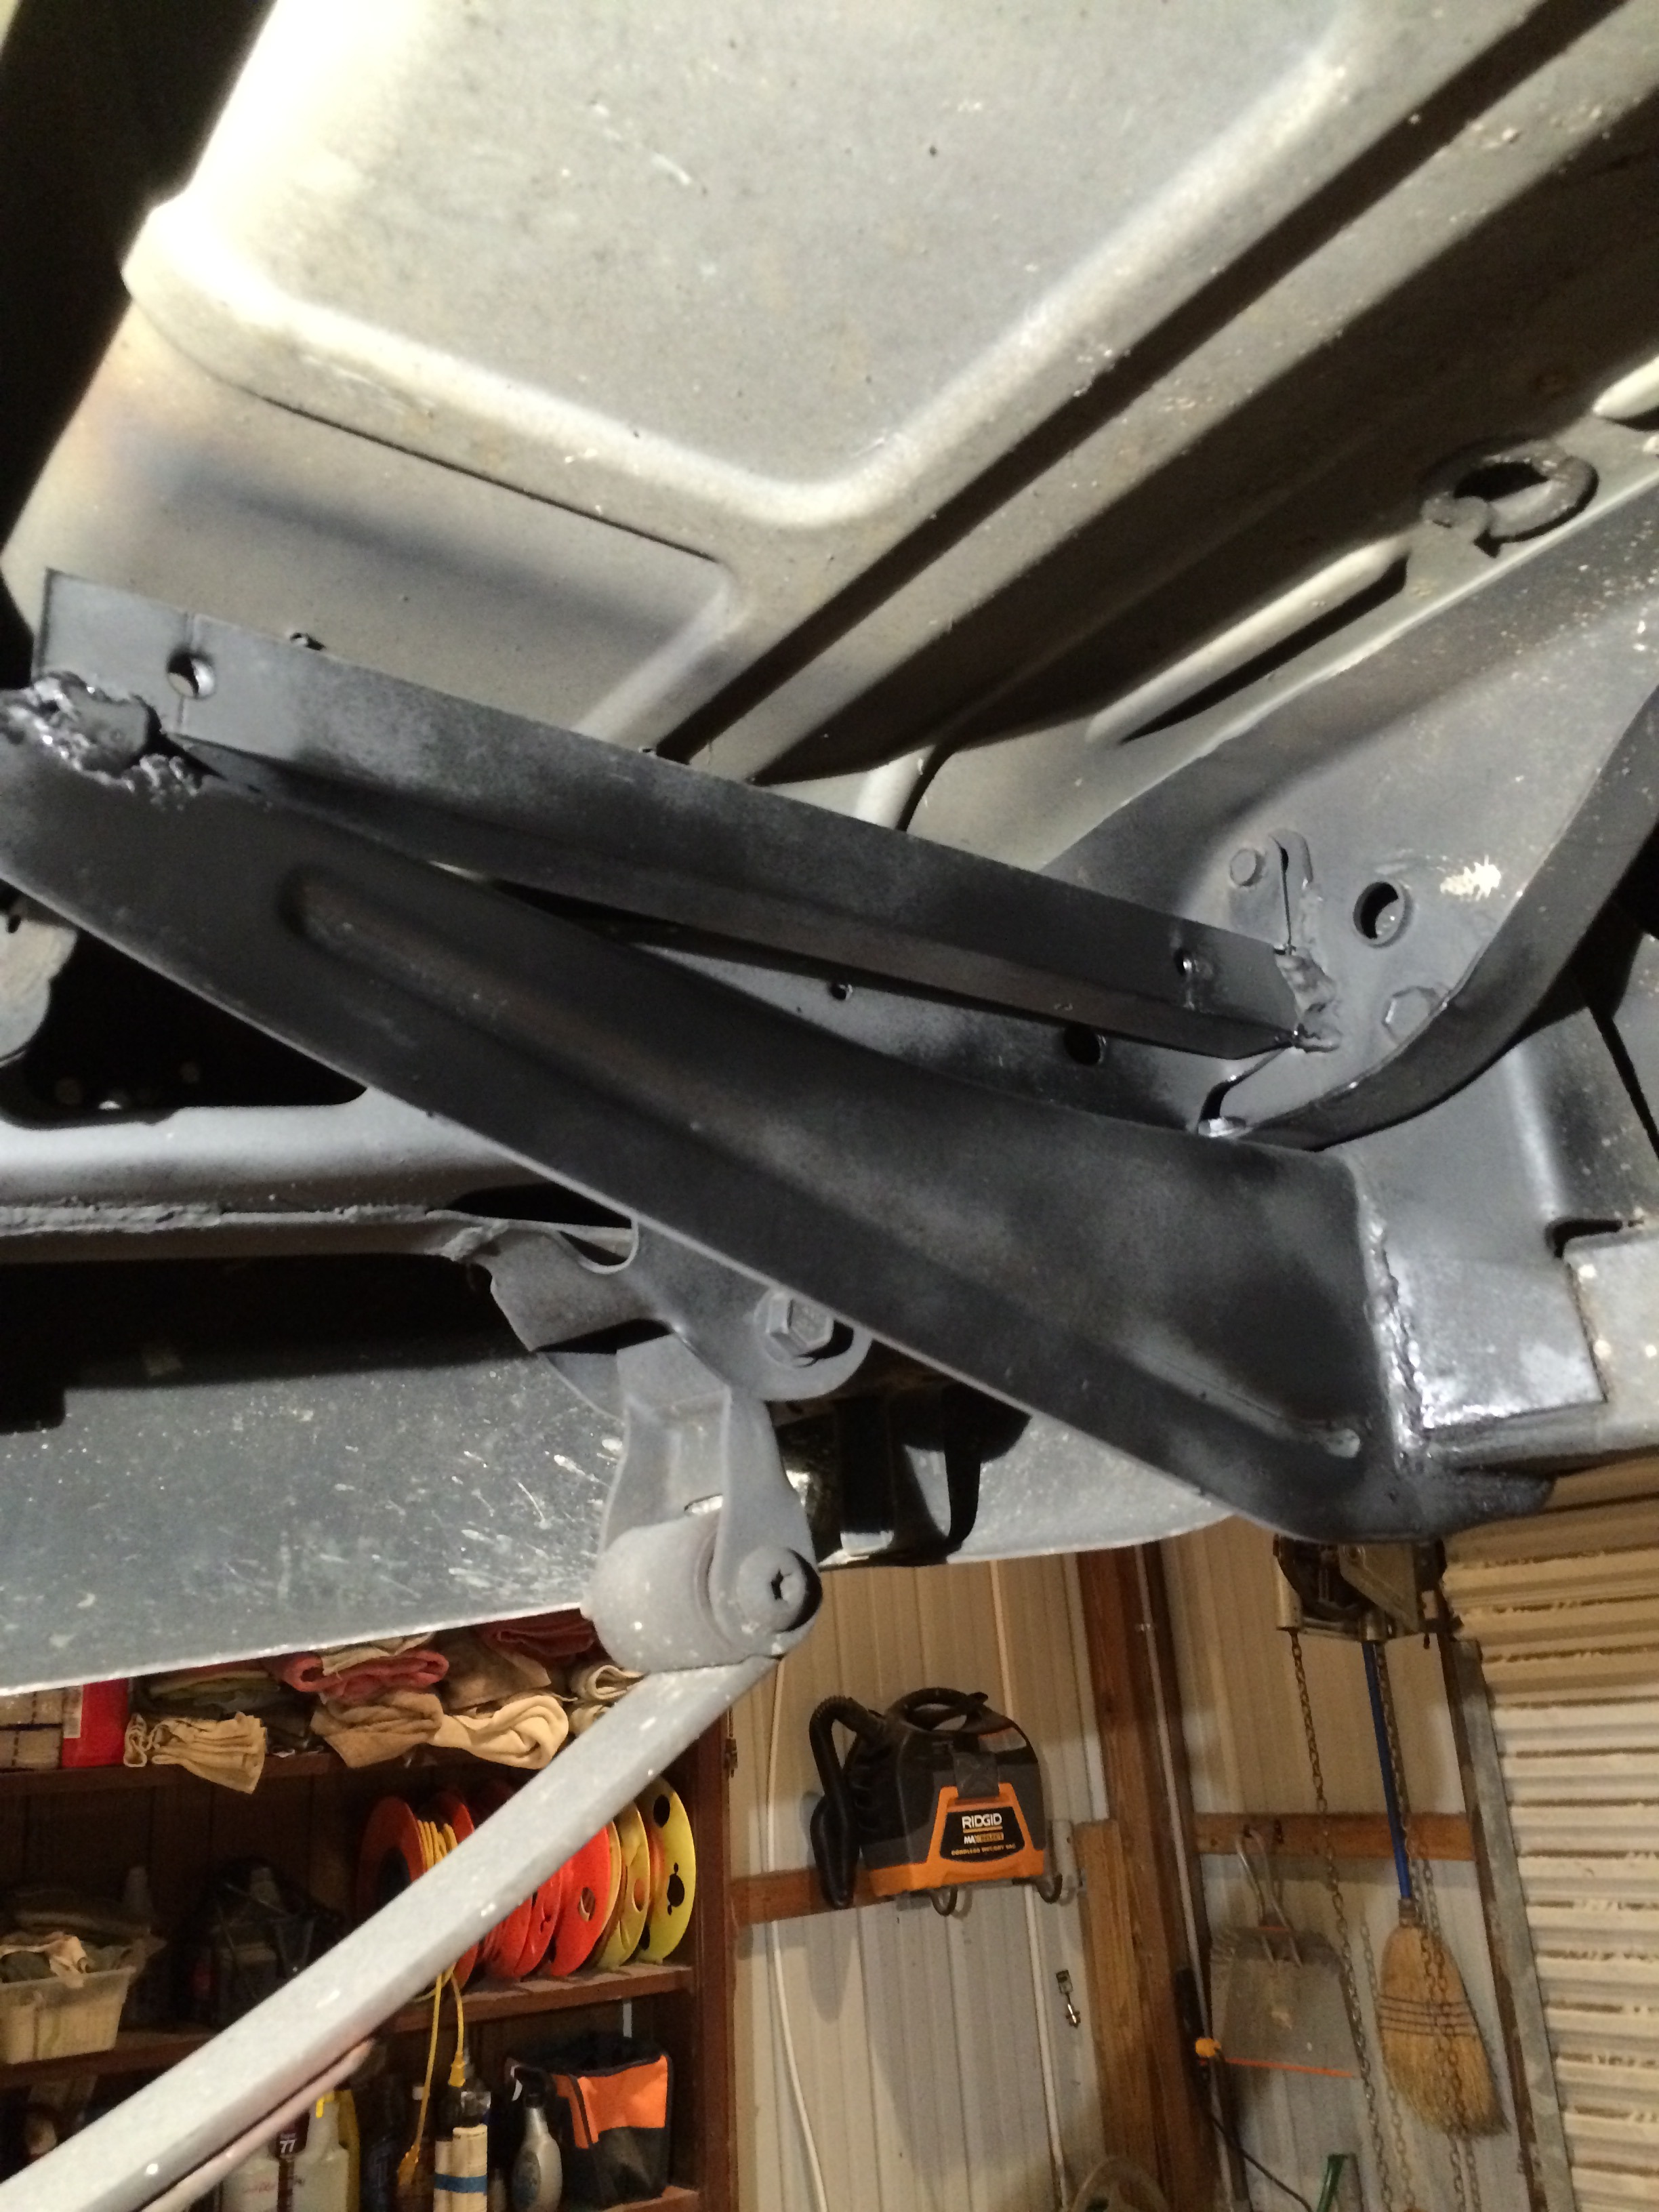
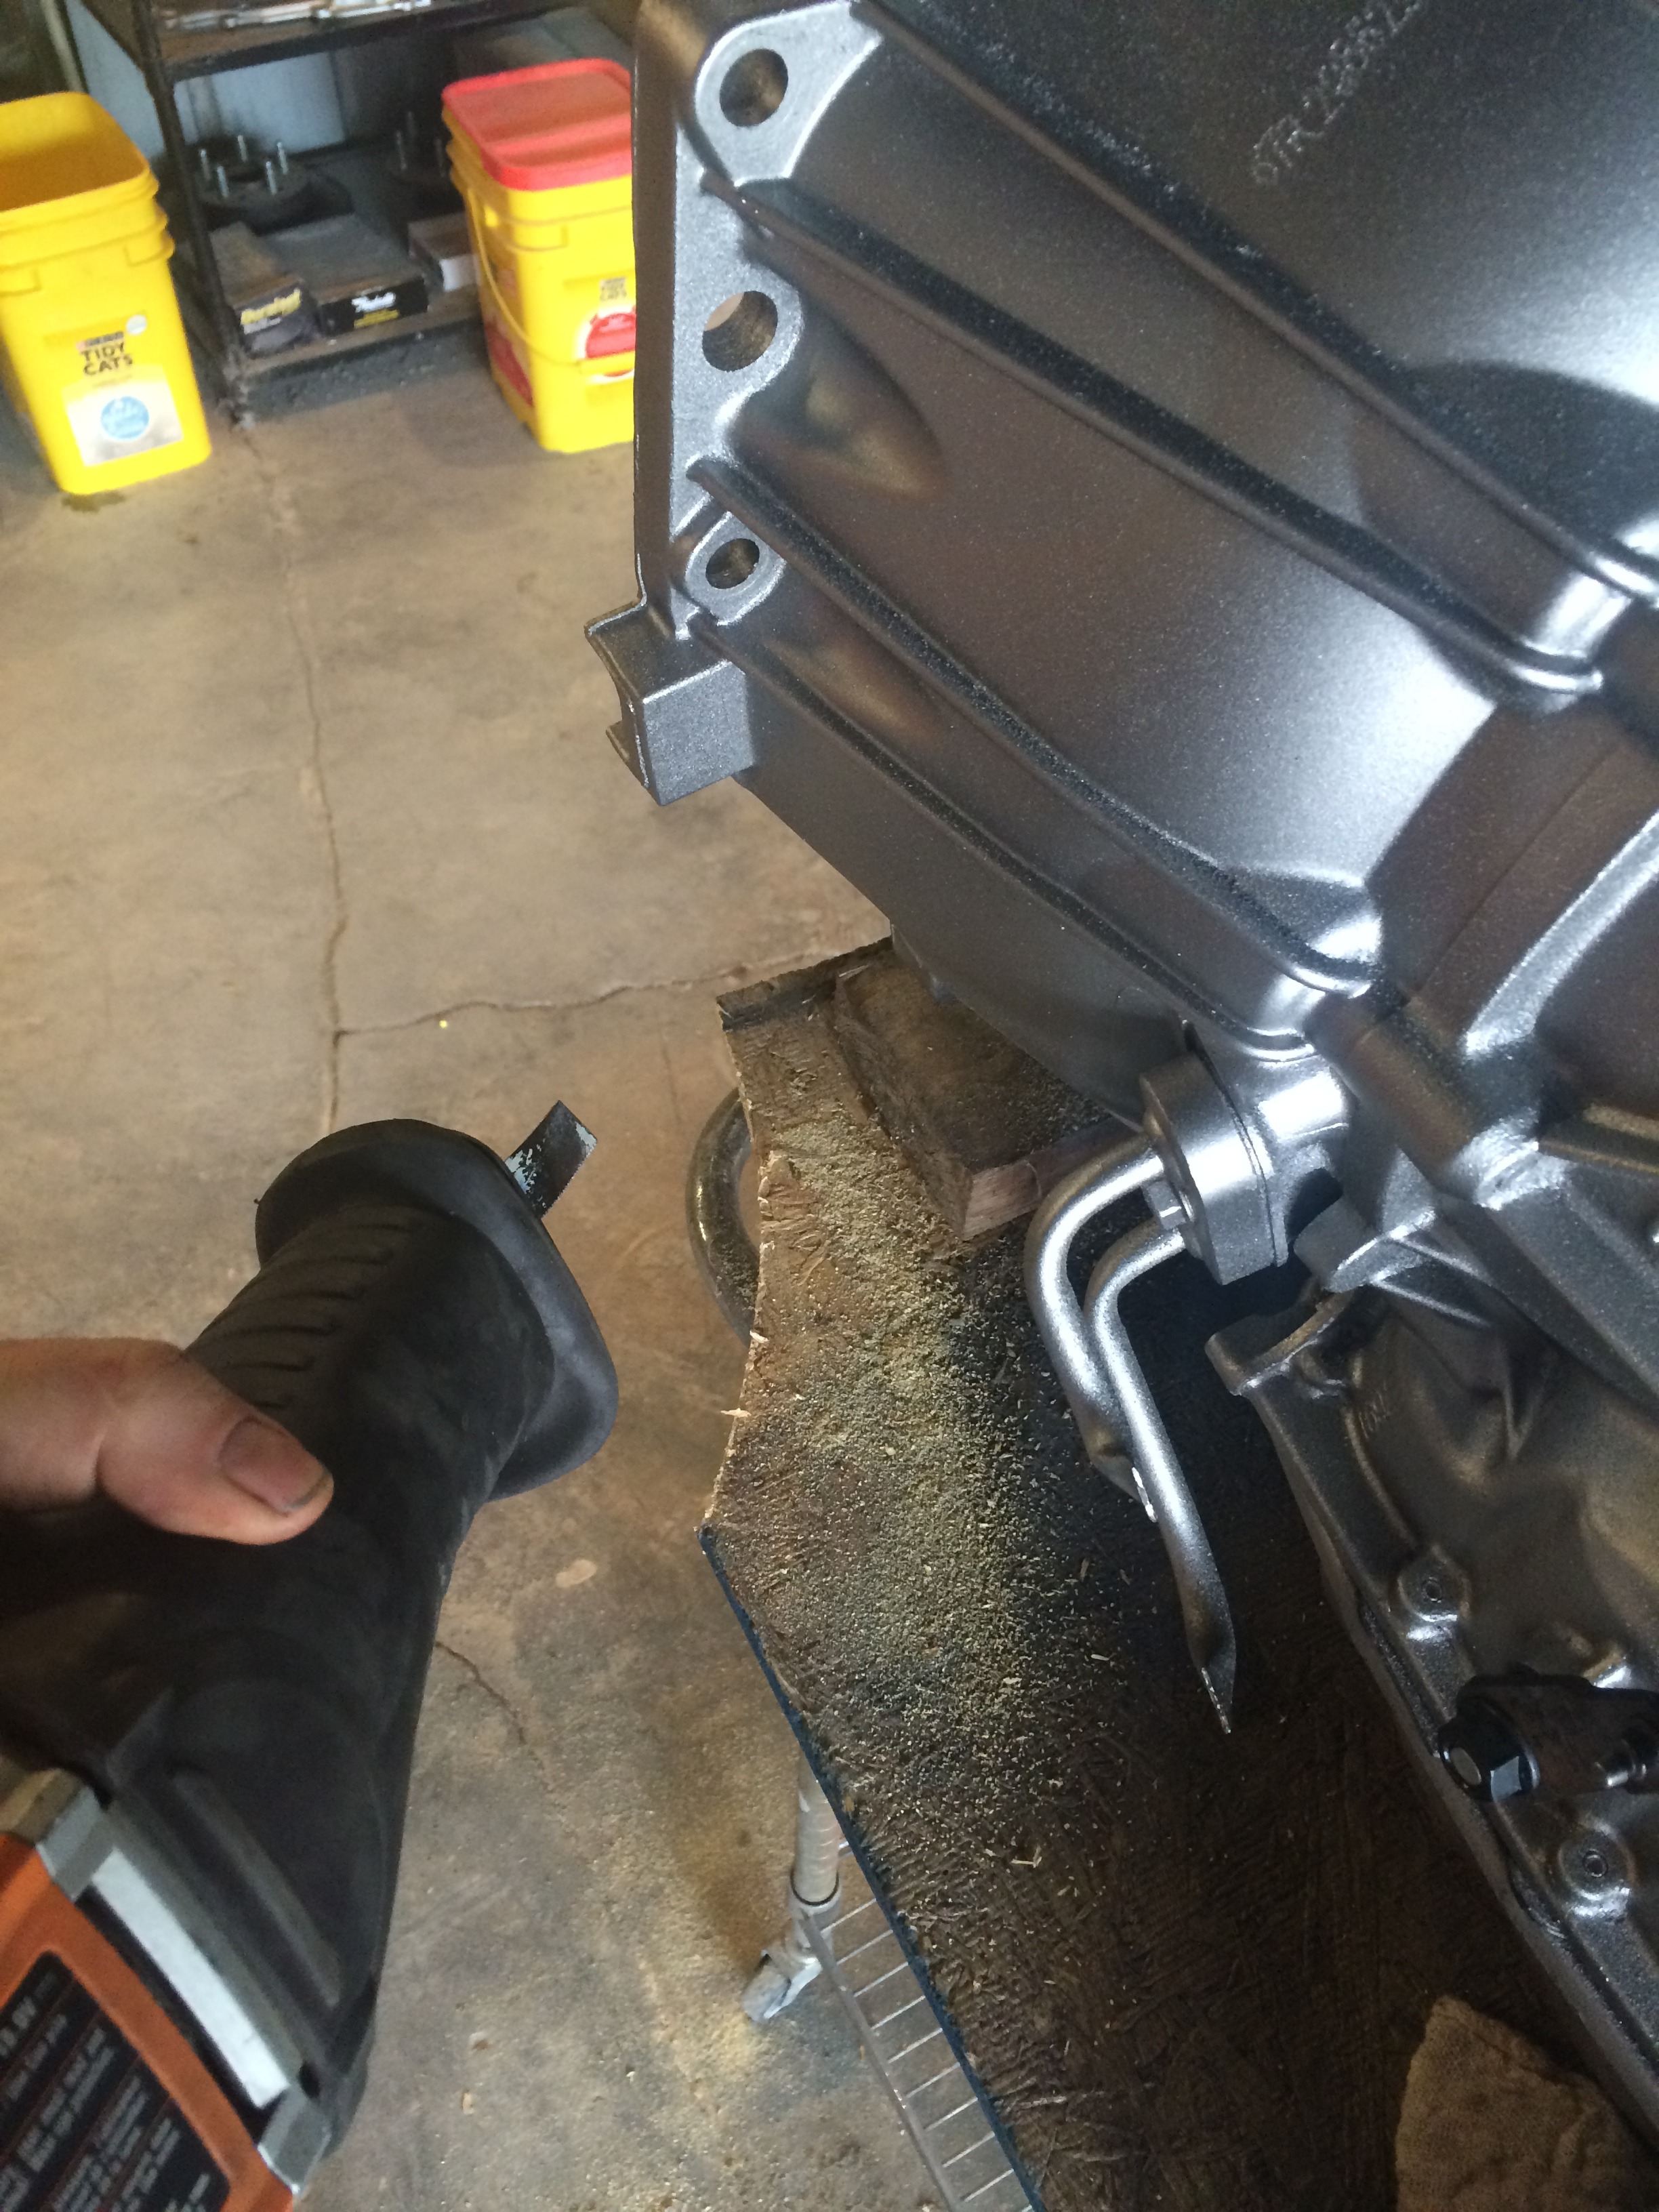
Front axle support welded in. The original Durango drivetrain had a cast connector that secured the front axle to the transmission bell housing. This prevents the front axle from wrapping. I don't have that option this time, so I chose to attach it to the frame. This is temporary. Once the engine is out, I will make a more permanent brace using smaller tubing and webbing.
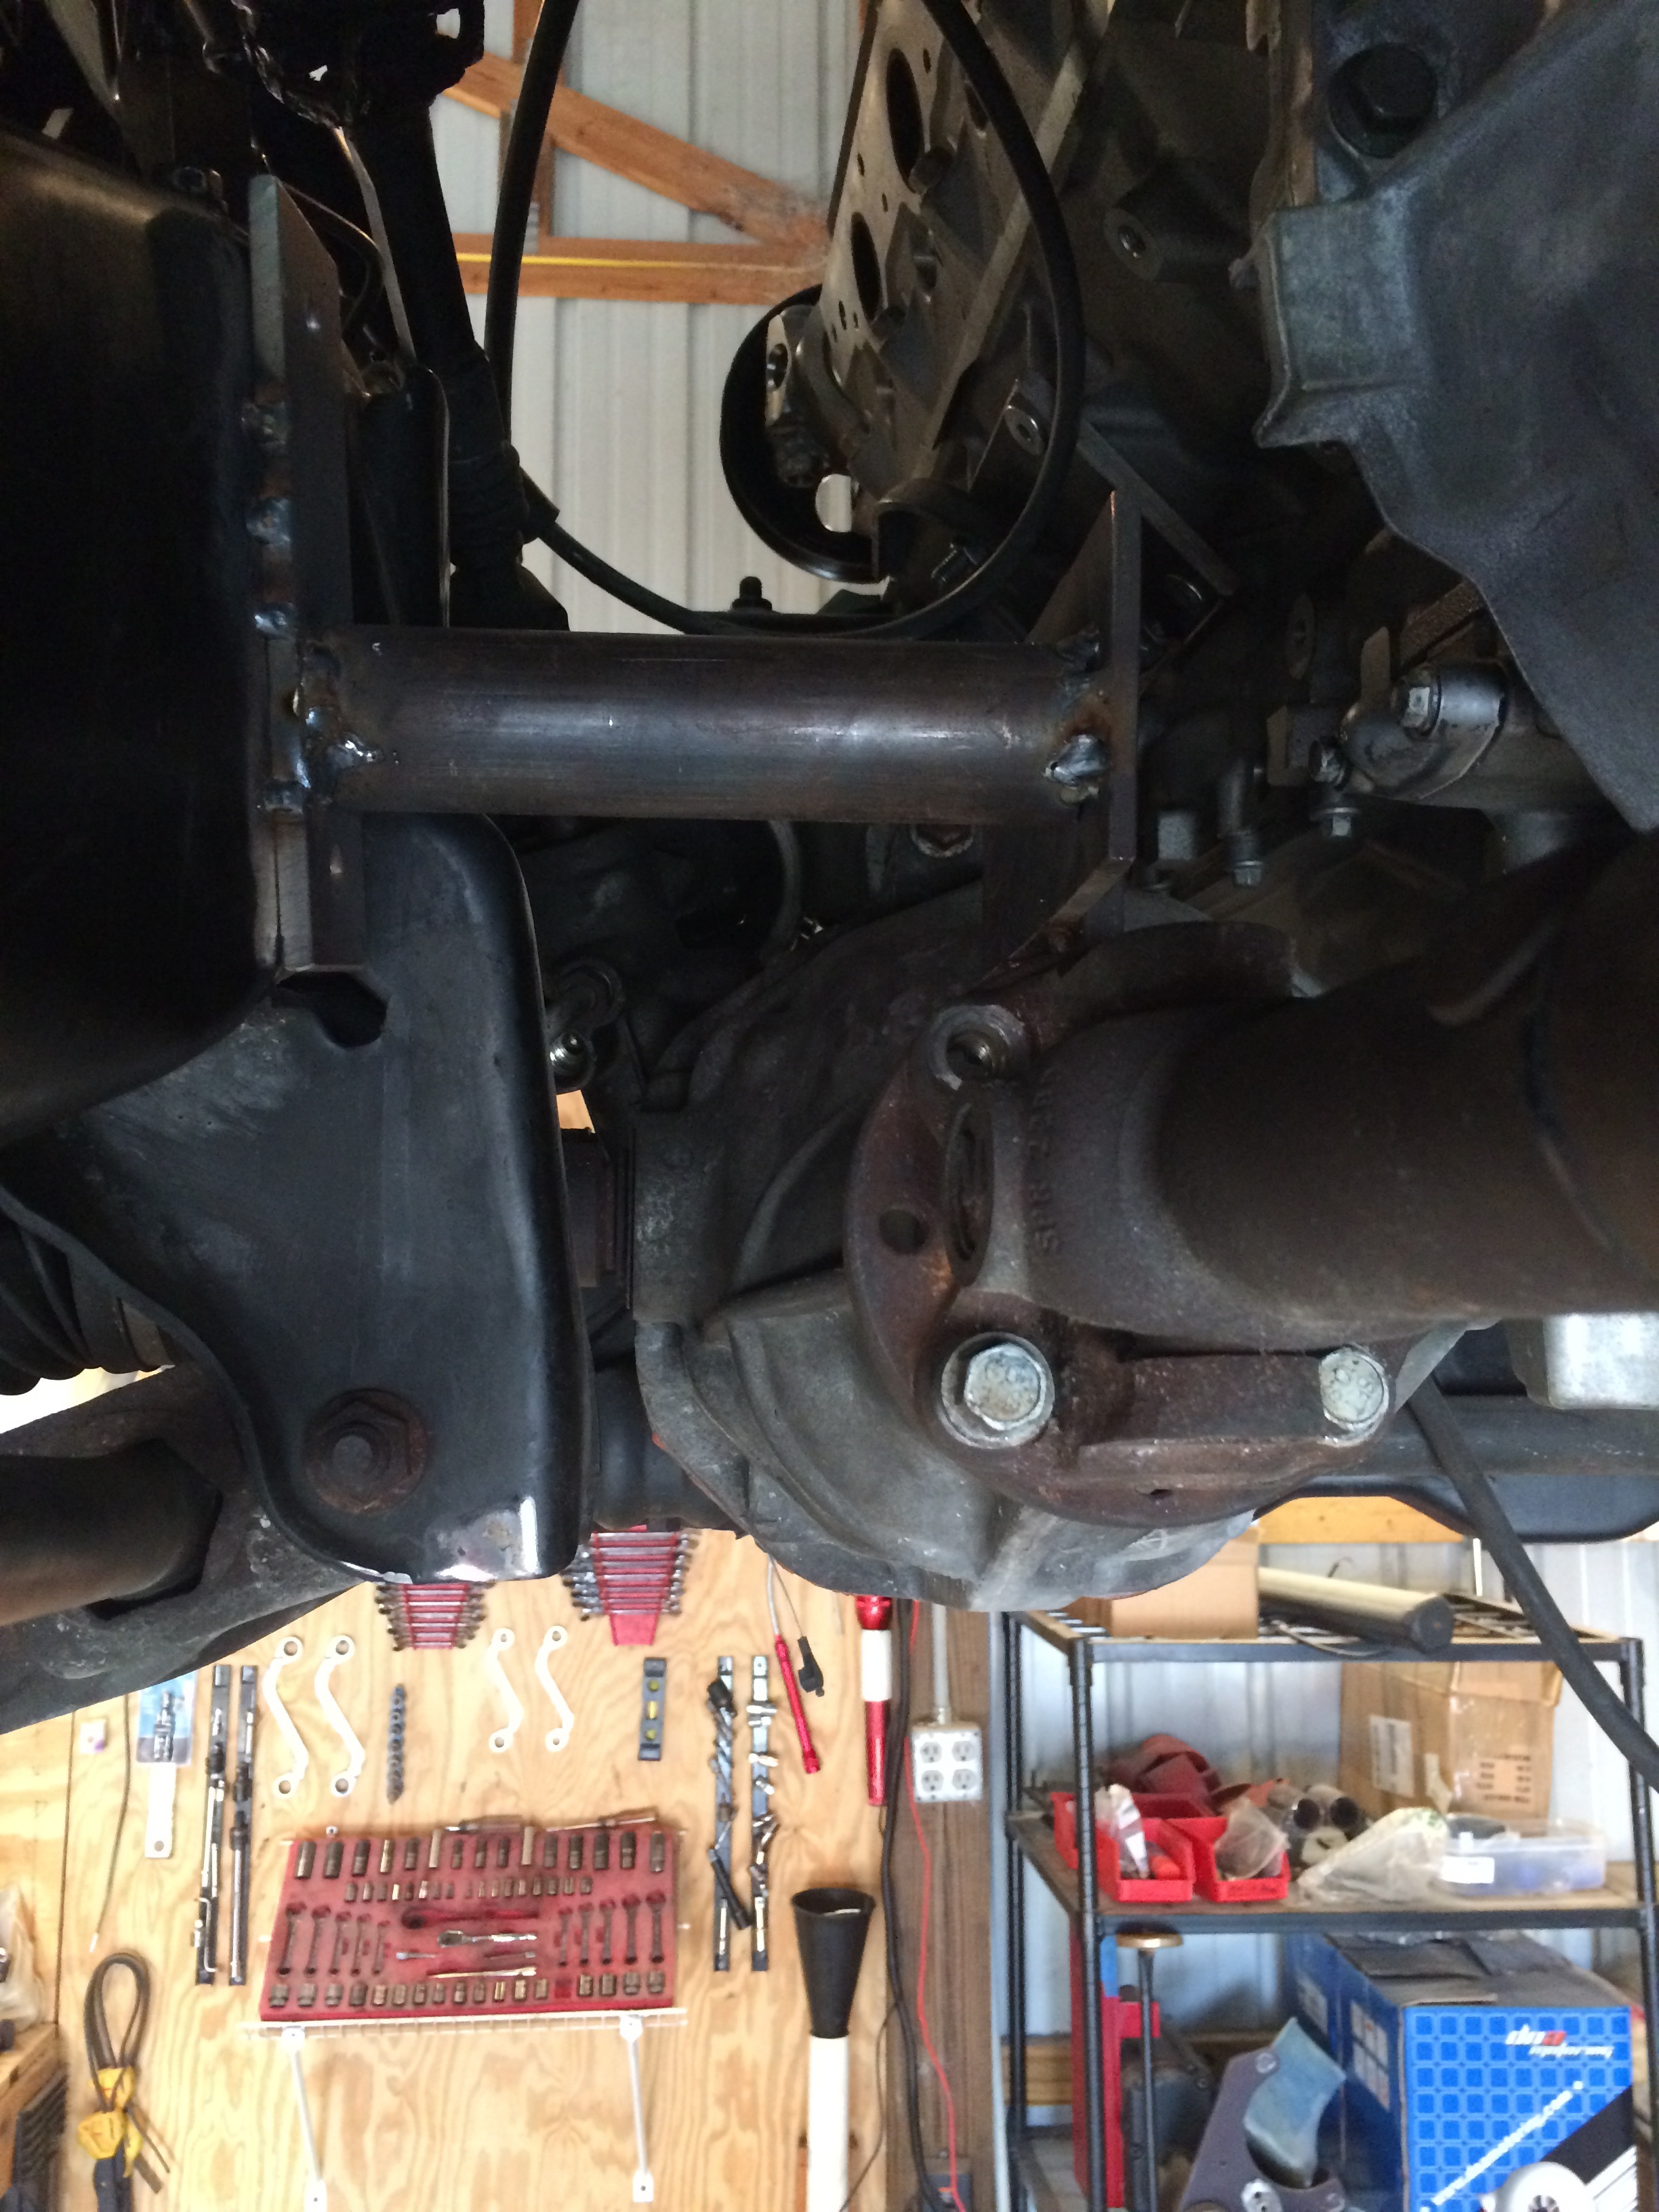
Front axle angle. With a double cardan on the transfer case side, this angle has to be 0-degree. Unfortunately, the picture doesn't show that this is actually 0-degree. It was hard to hold it exact and take a picture.
Now it's time to take it all out, build the motor, clean and paint, and put it all back in. Then wiring. More on that next week.
After setting the motor where it would fit with the stock truck oil pan, I liked the clearances all the way around. If I wanted to spend $400 on a Holley oil pan, I could move the motor forward about an inch, and use the front and rear driveshafts again without modifying them. Crazy, huh? But, these driveshafts have 180k miles on them, so I figure having them rebuilt, modified and balanced is worth the $400 or so to have the work done. So, here are the pictures.
After getting the NP242 installed using the Novak adapter, I made a transmission mount which is a combination of the GM mount (Flippded over, studs cut off) with the Novak-supplied adapter welded on. I welded a clean piece of 1/4 inch steel to the top of the transmission cross member (also flipped over), to give me a stable base. I drilled two 11/32 holes, and tapped for M10 bolts. The assembly is connected to the adapter with the supplied studs and nuts.


Here is the oil pan clearance to front axle.

Front axle about an inch short

Rear driveshaft installed

Needs to be a little shorter. The rubber seal is completely compressed, with the suspension at full extension.

Front axle support welded in. The original Durango drivetrain had a cast connector that secured the front axle to the transmission bell housing. This prevents the front axle from wrapping. I don't have that option this time, so I chose to attach it to the frame. This is temporary. Once the engine is out, I will make a more permanent brace using smaller tubing and webbing.

Front axle angle. With a double cardan on the transfer case side, this angle has to be 0-degree. Unfortunately, the picture doesn't show that this is actually 0-degree. It was hard to hold it exact and take a picture.

Now it's time to take it all out, build the motor, clean and paint, and put it all back in. Then wiring. More on that next week.
01-18-2016, 07:18 AM
#47
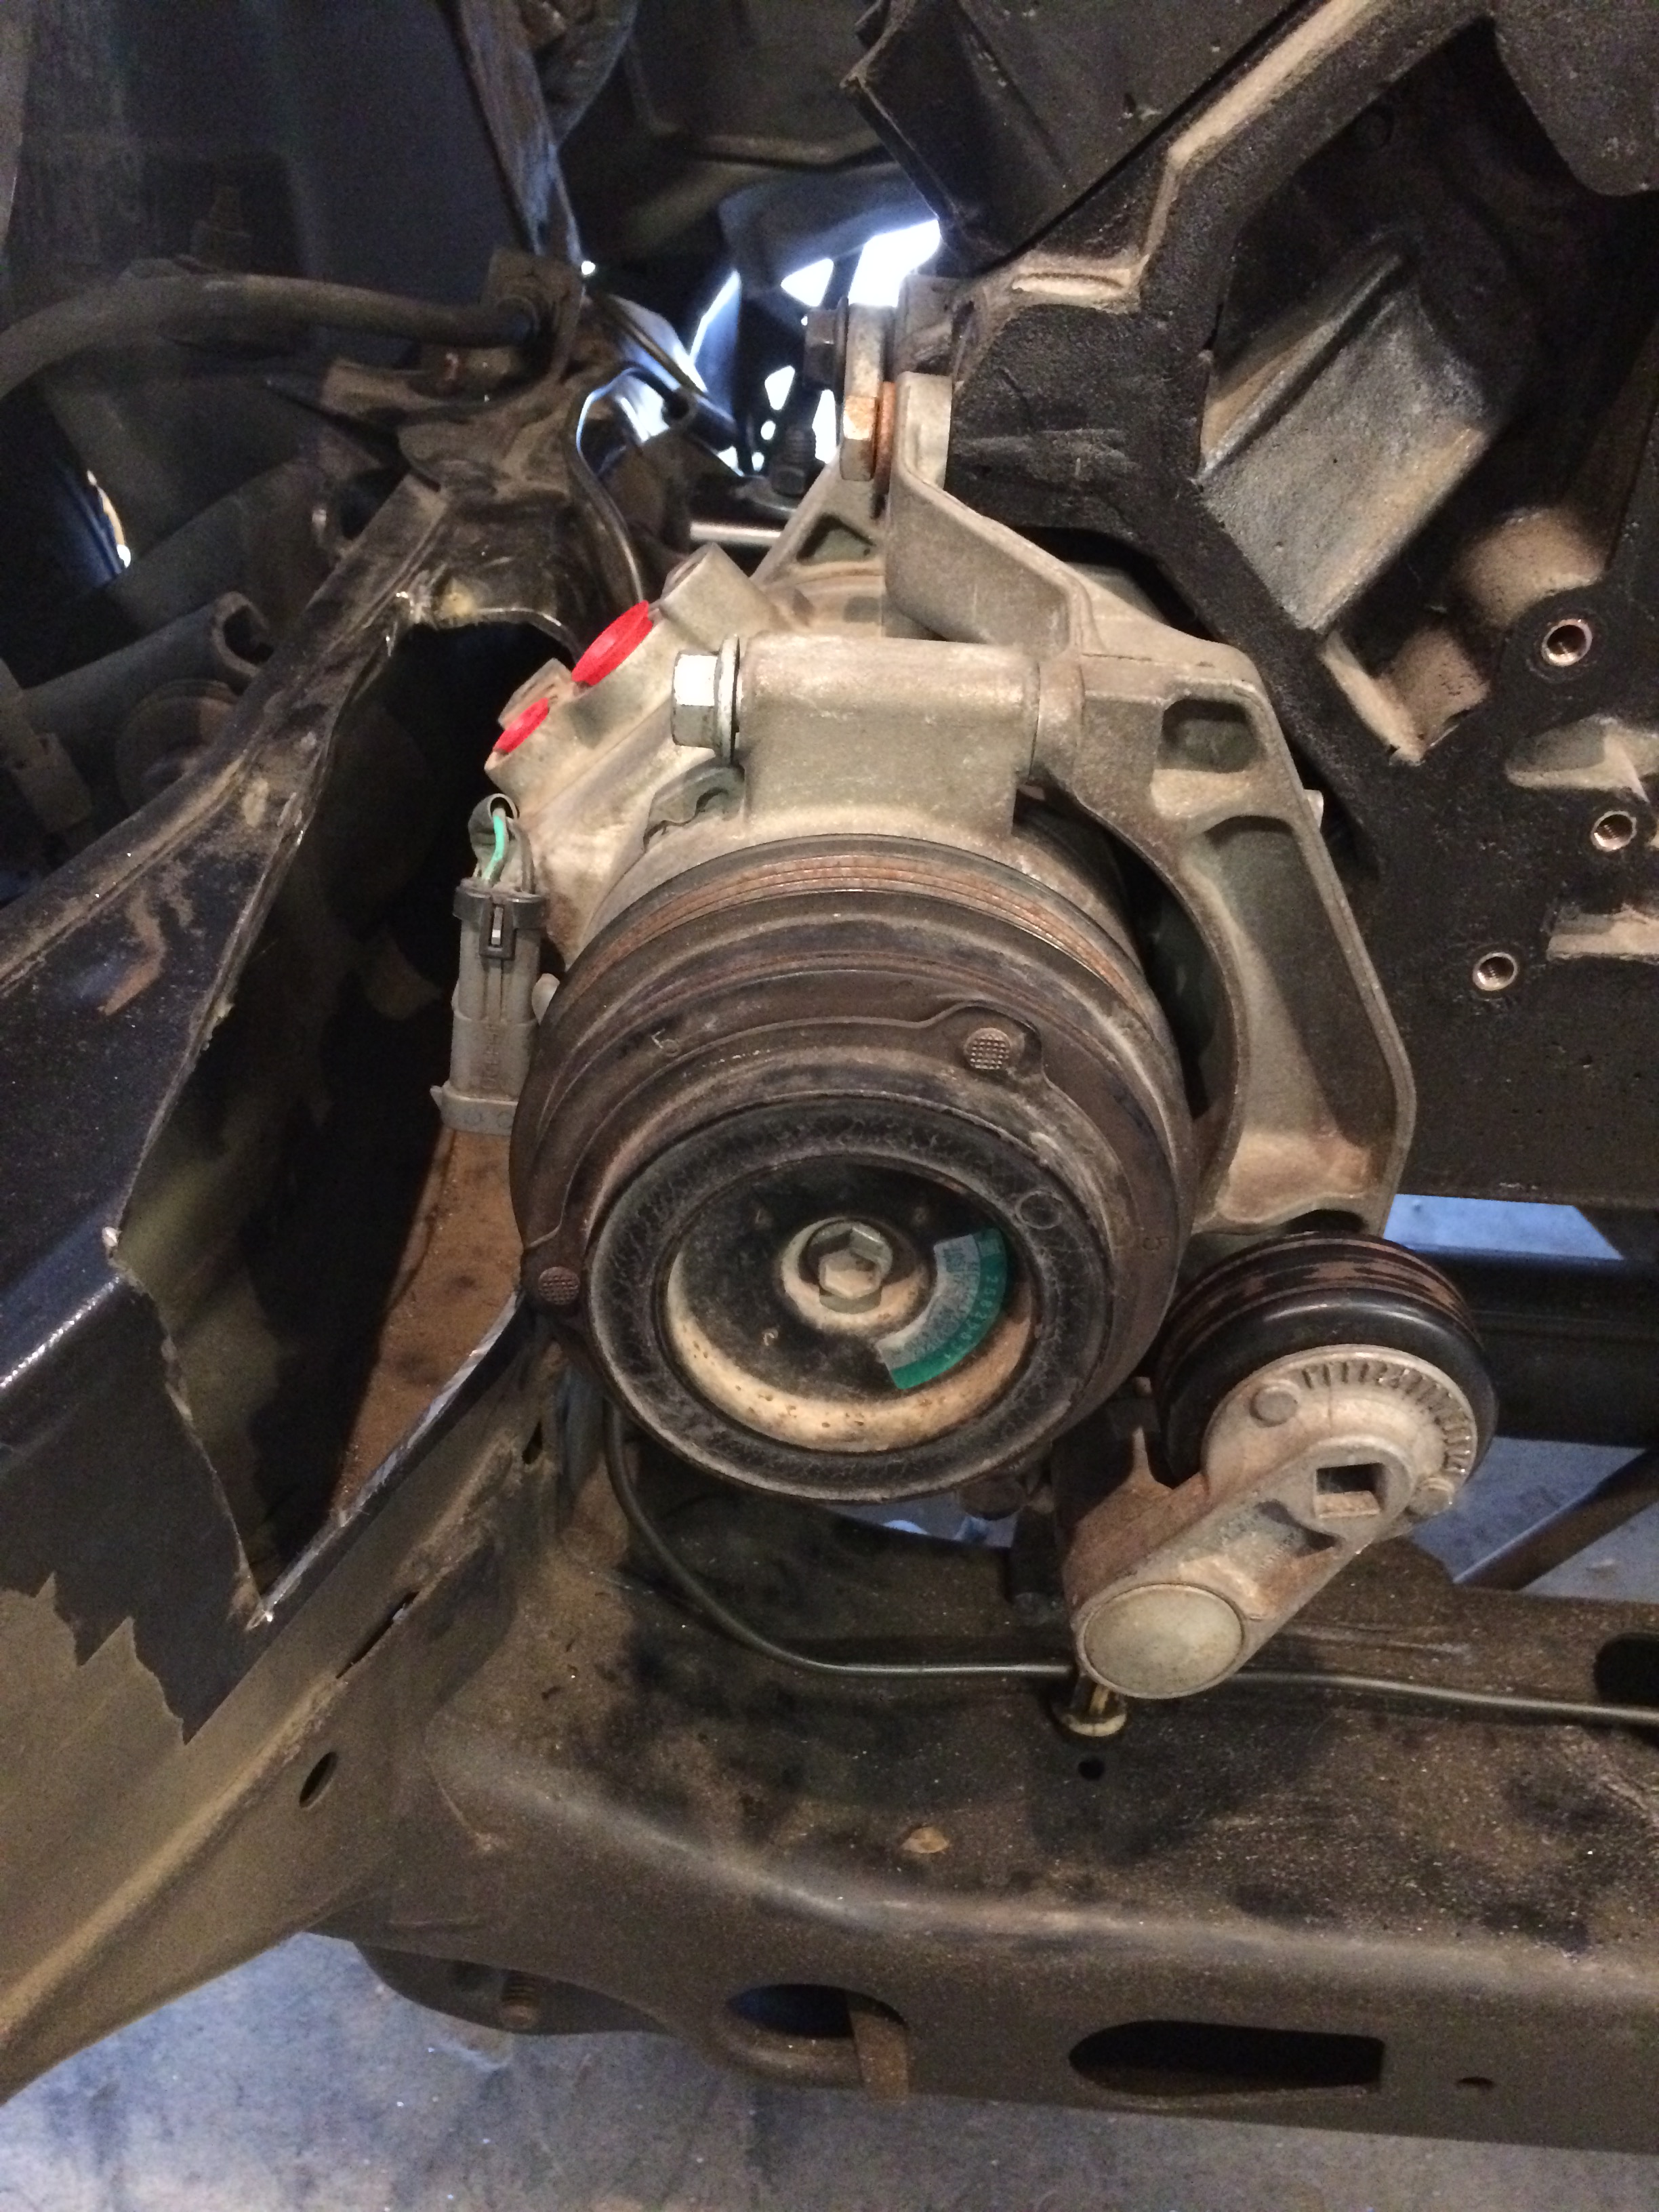
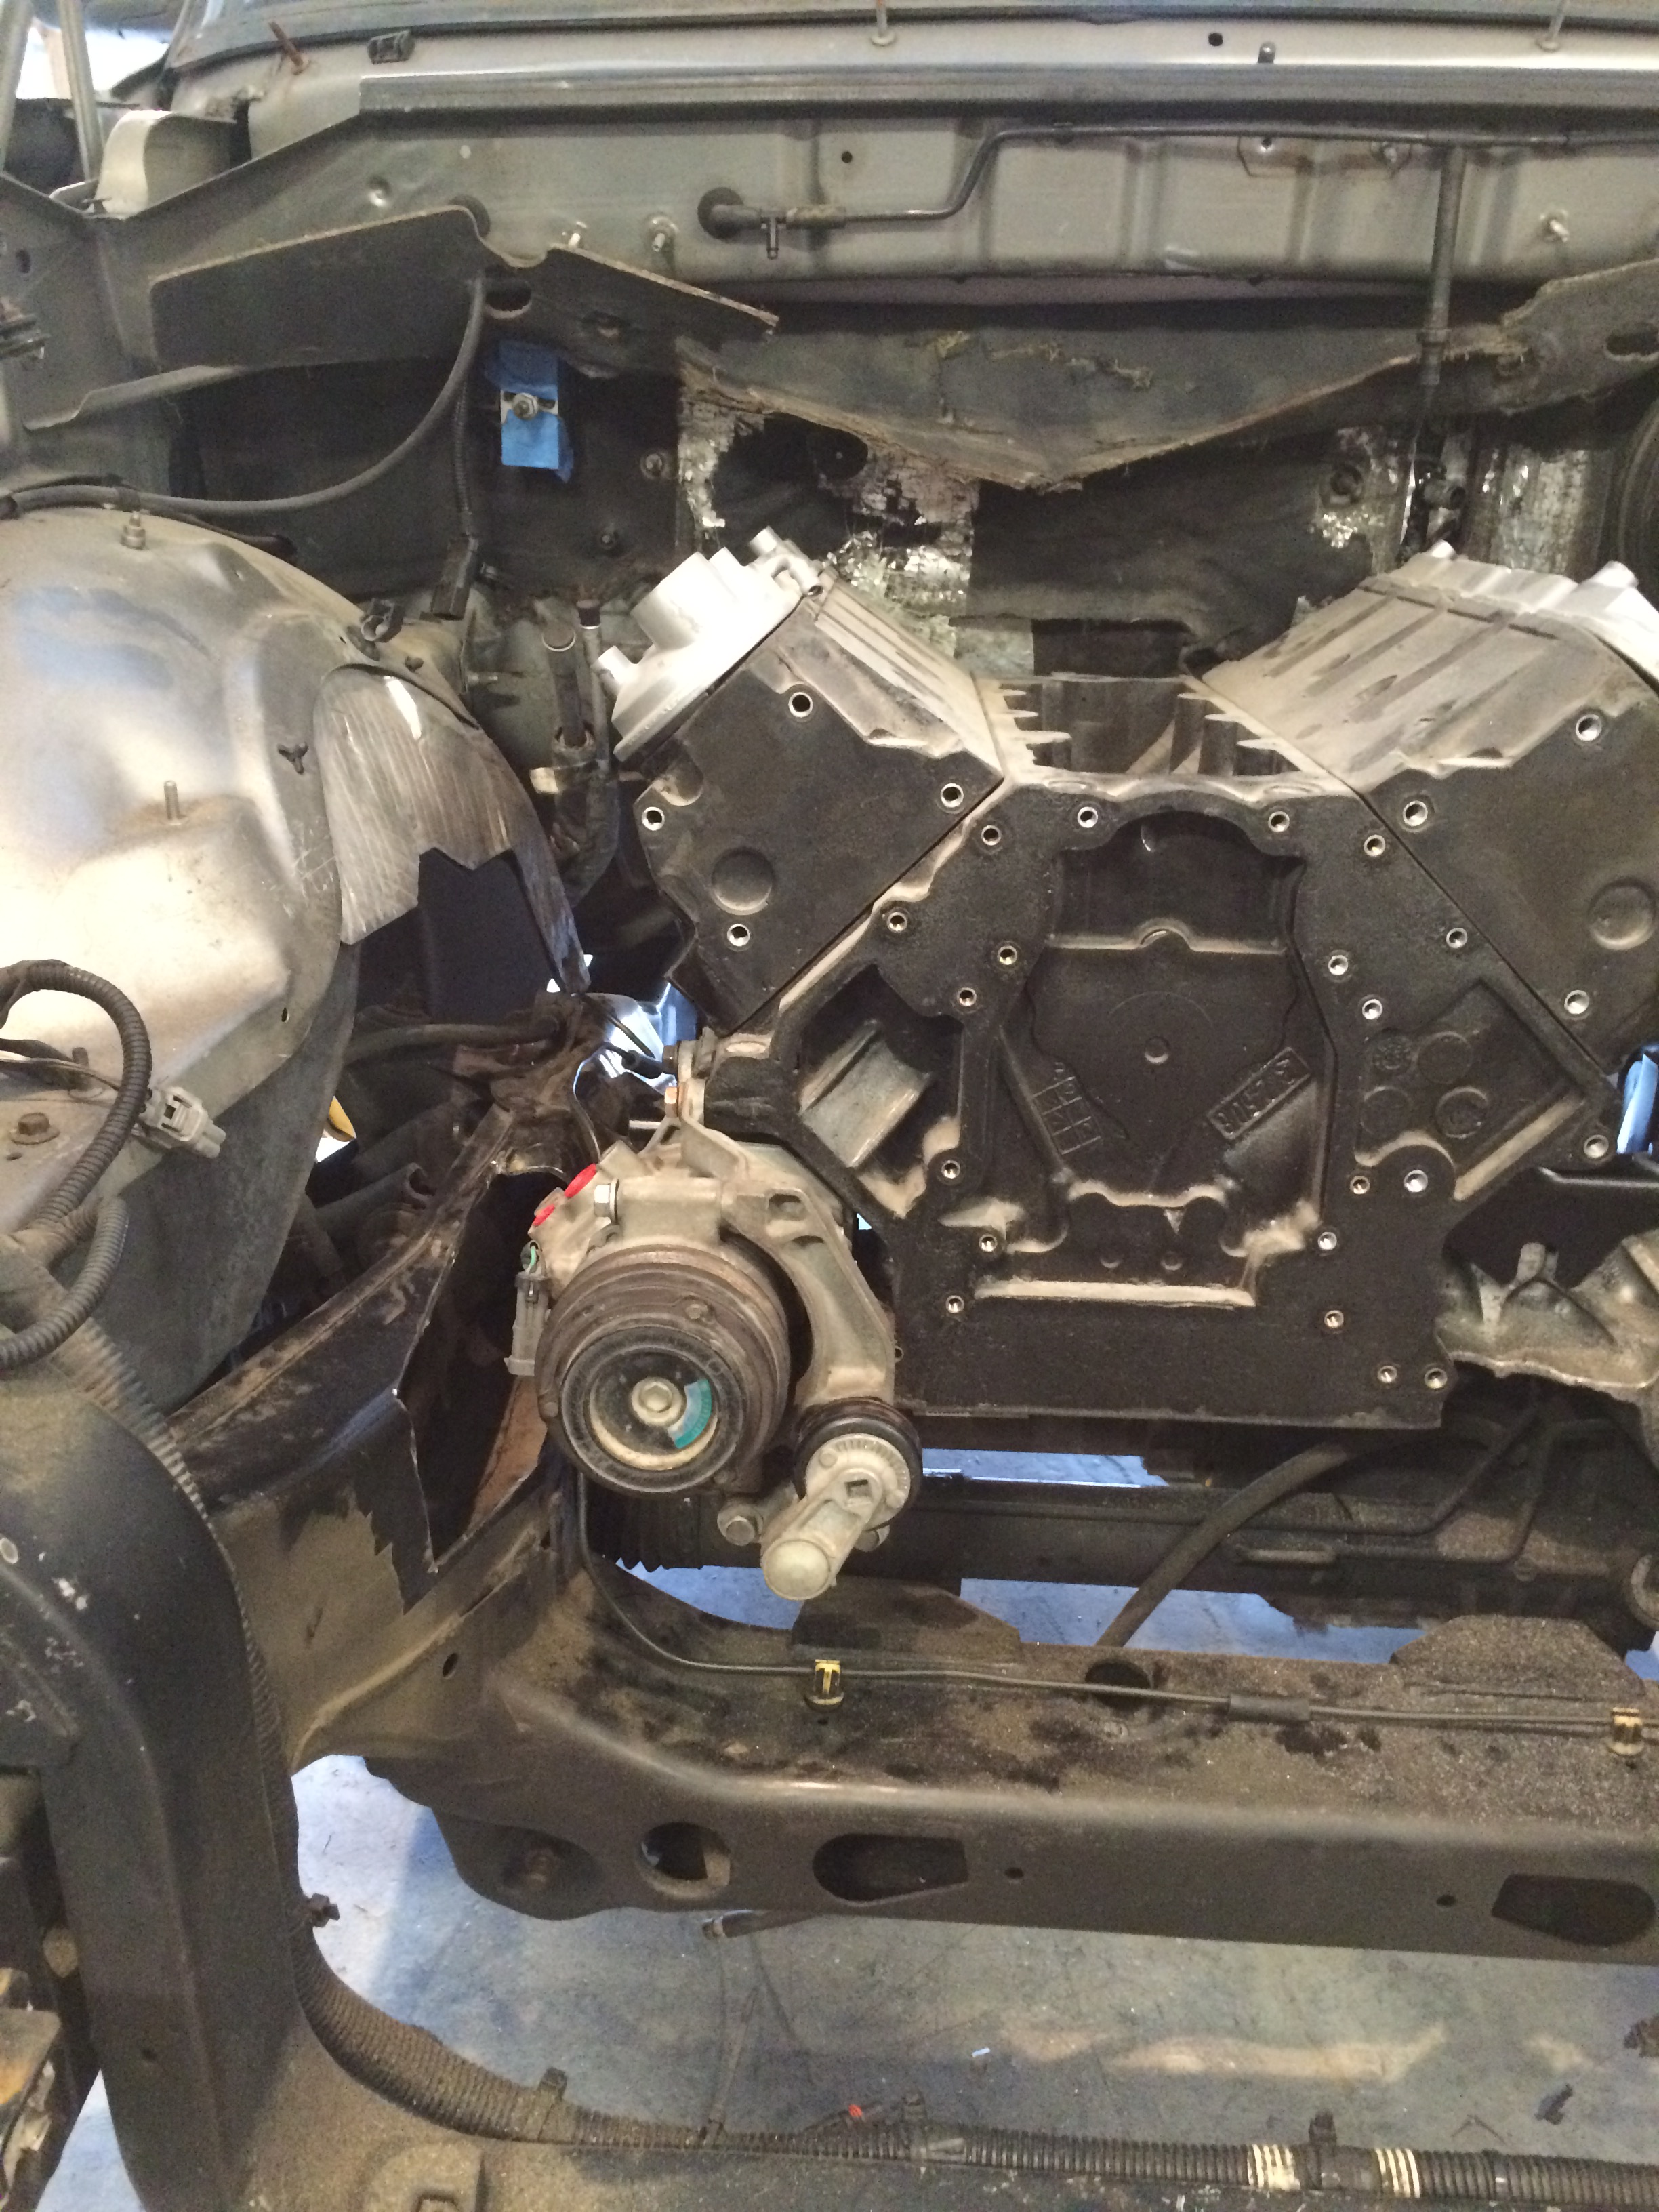
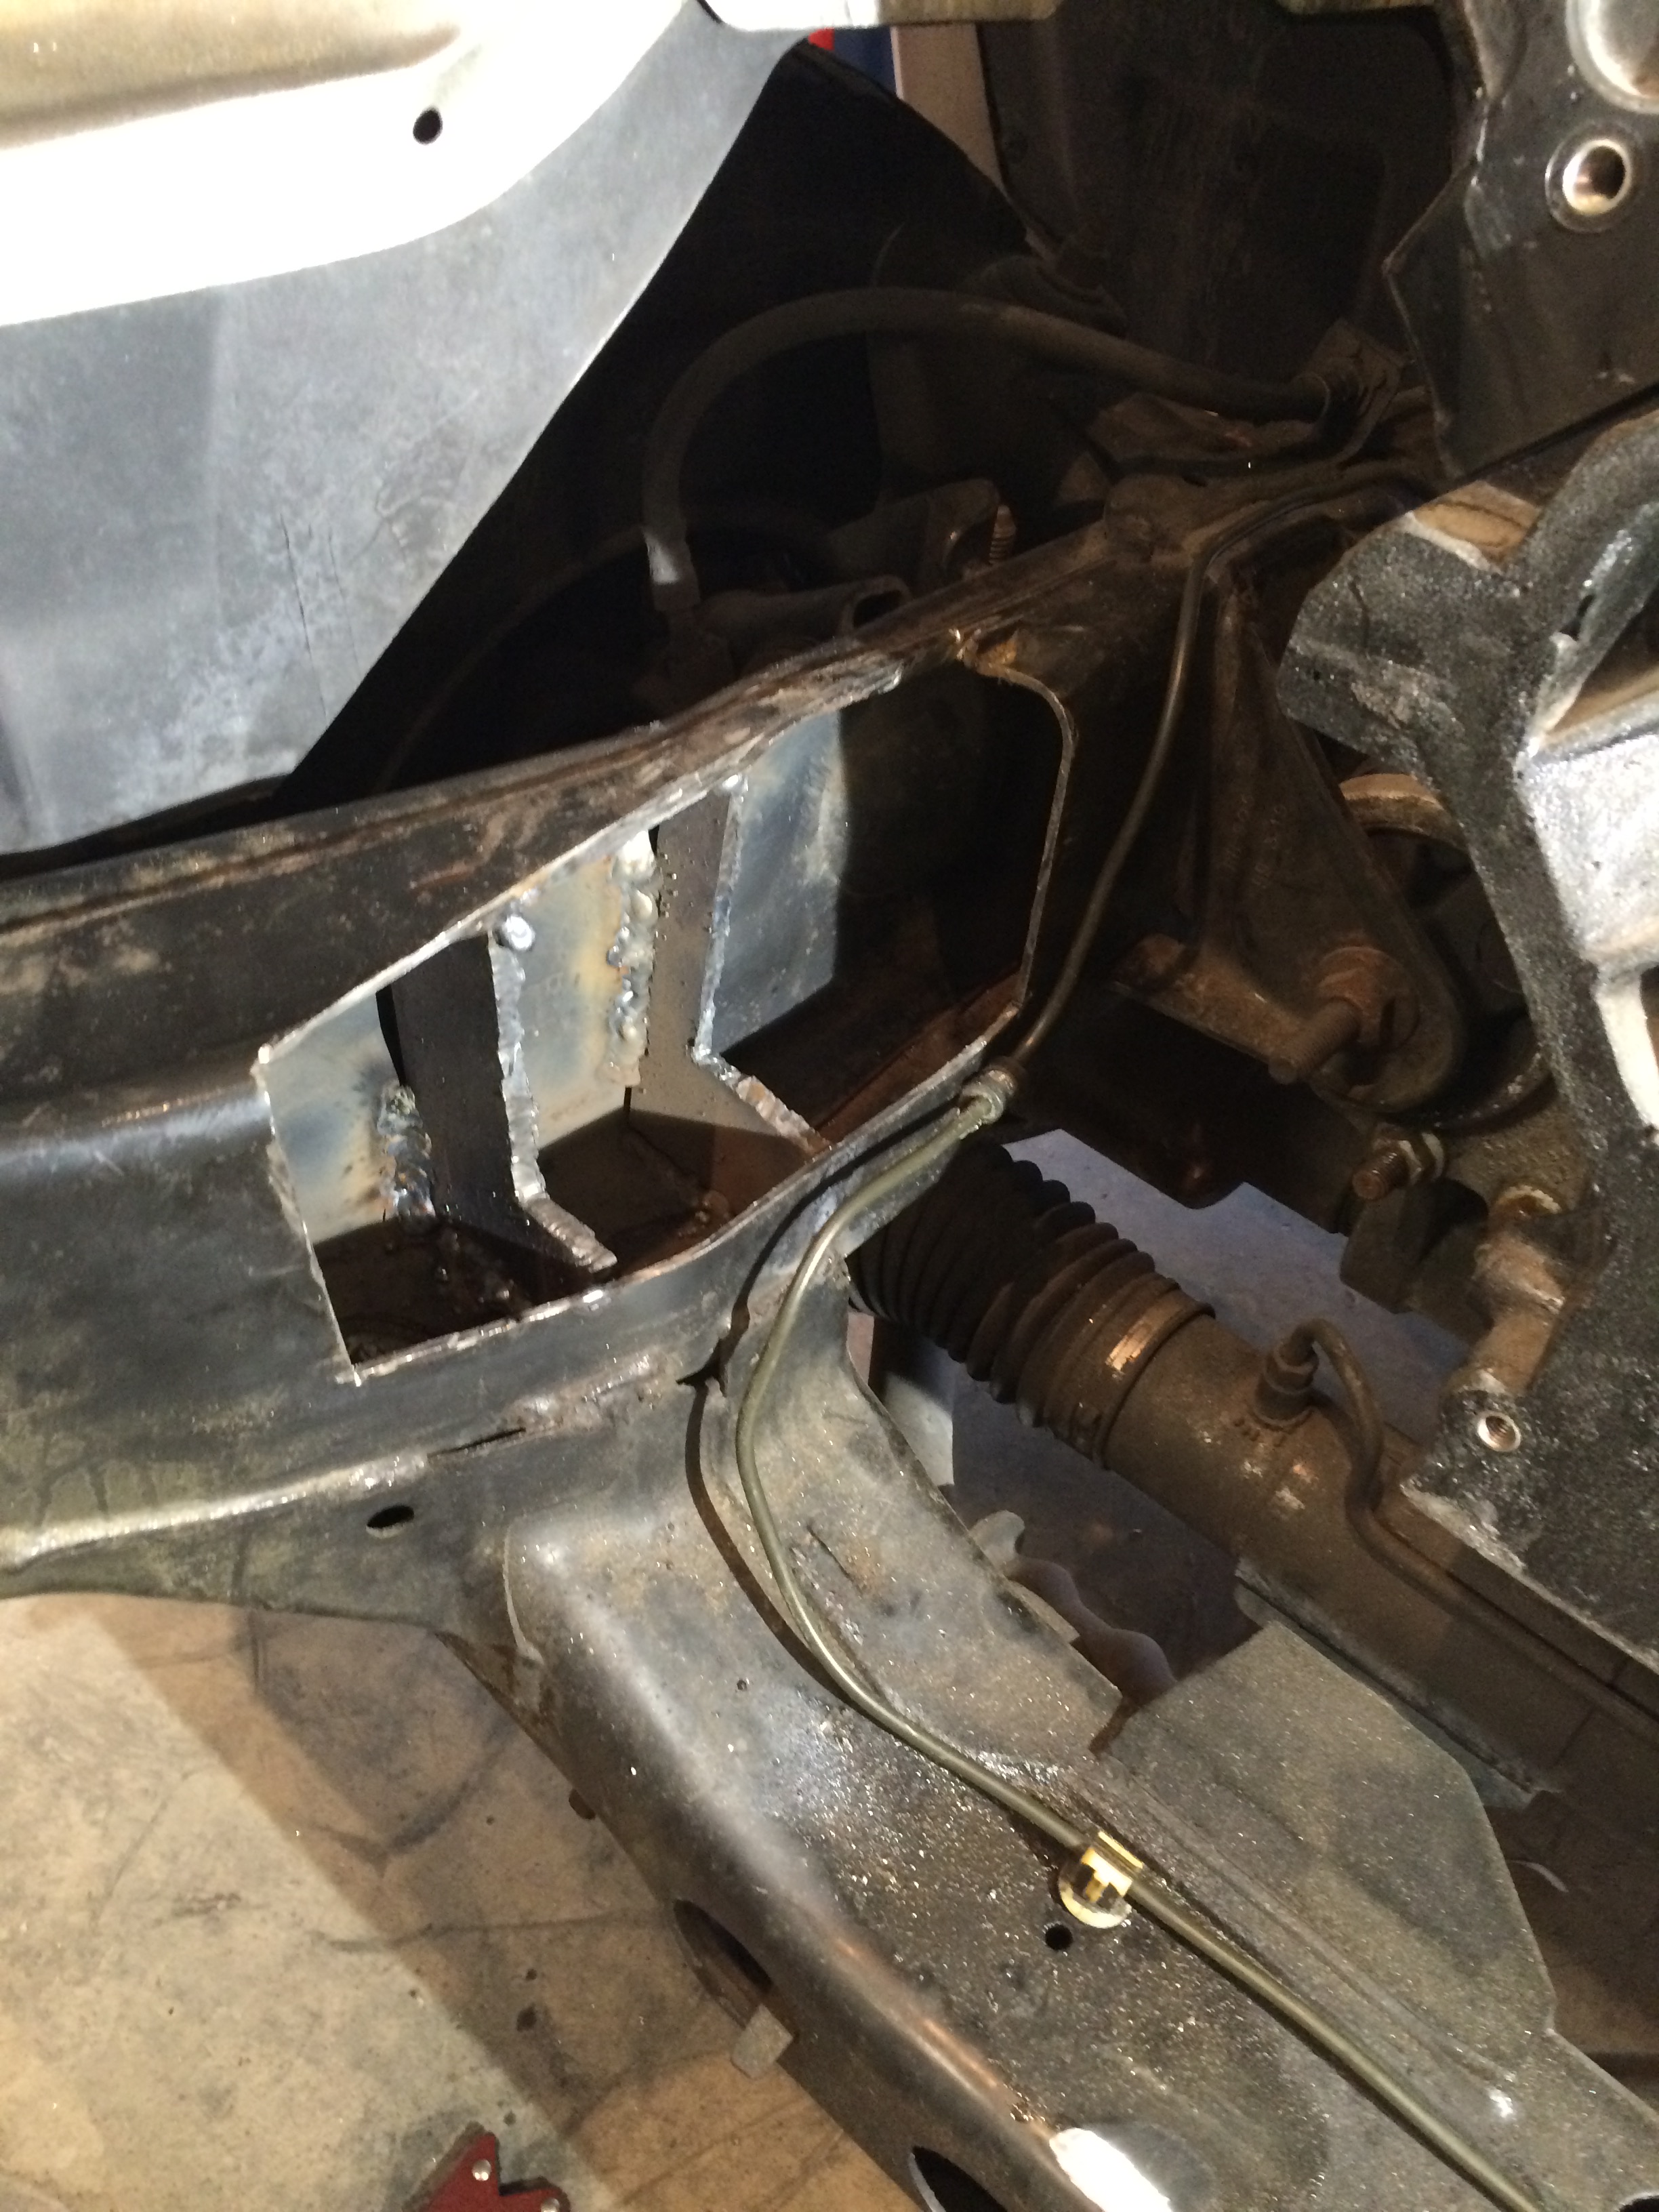
Moving on this week, I had to notch the frame for the AC compressor. In the last picture, I had outlined the cut. So I cut it, and boxed it in with 1/4 inch steel.
I don't know how other people use their plasma cutter, but I am not good with free-hand. So I use a 4 1/2 inch angle grinder and die grinder with carbide bit to score the steel, then follow the groove with the cutter. I still leaves a jagged edge that has to be cleaned up, but it sure is quick.
Also, despite being sent two input shafts by Novak for the 242 transfer case, neither is right. Turns out, in this 2000 Durango transfer case, Dodge used the thicker 24 mm input bearing (which is good), but used the newer cut gears. Looks like I am going to have to get a new planetary with older gears. I am going to step up to a 6 gear planetary for this. Something else I have to order and wait for.
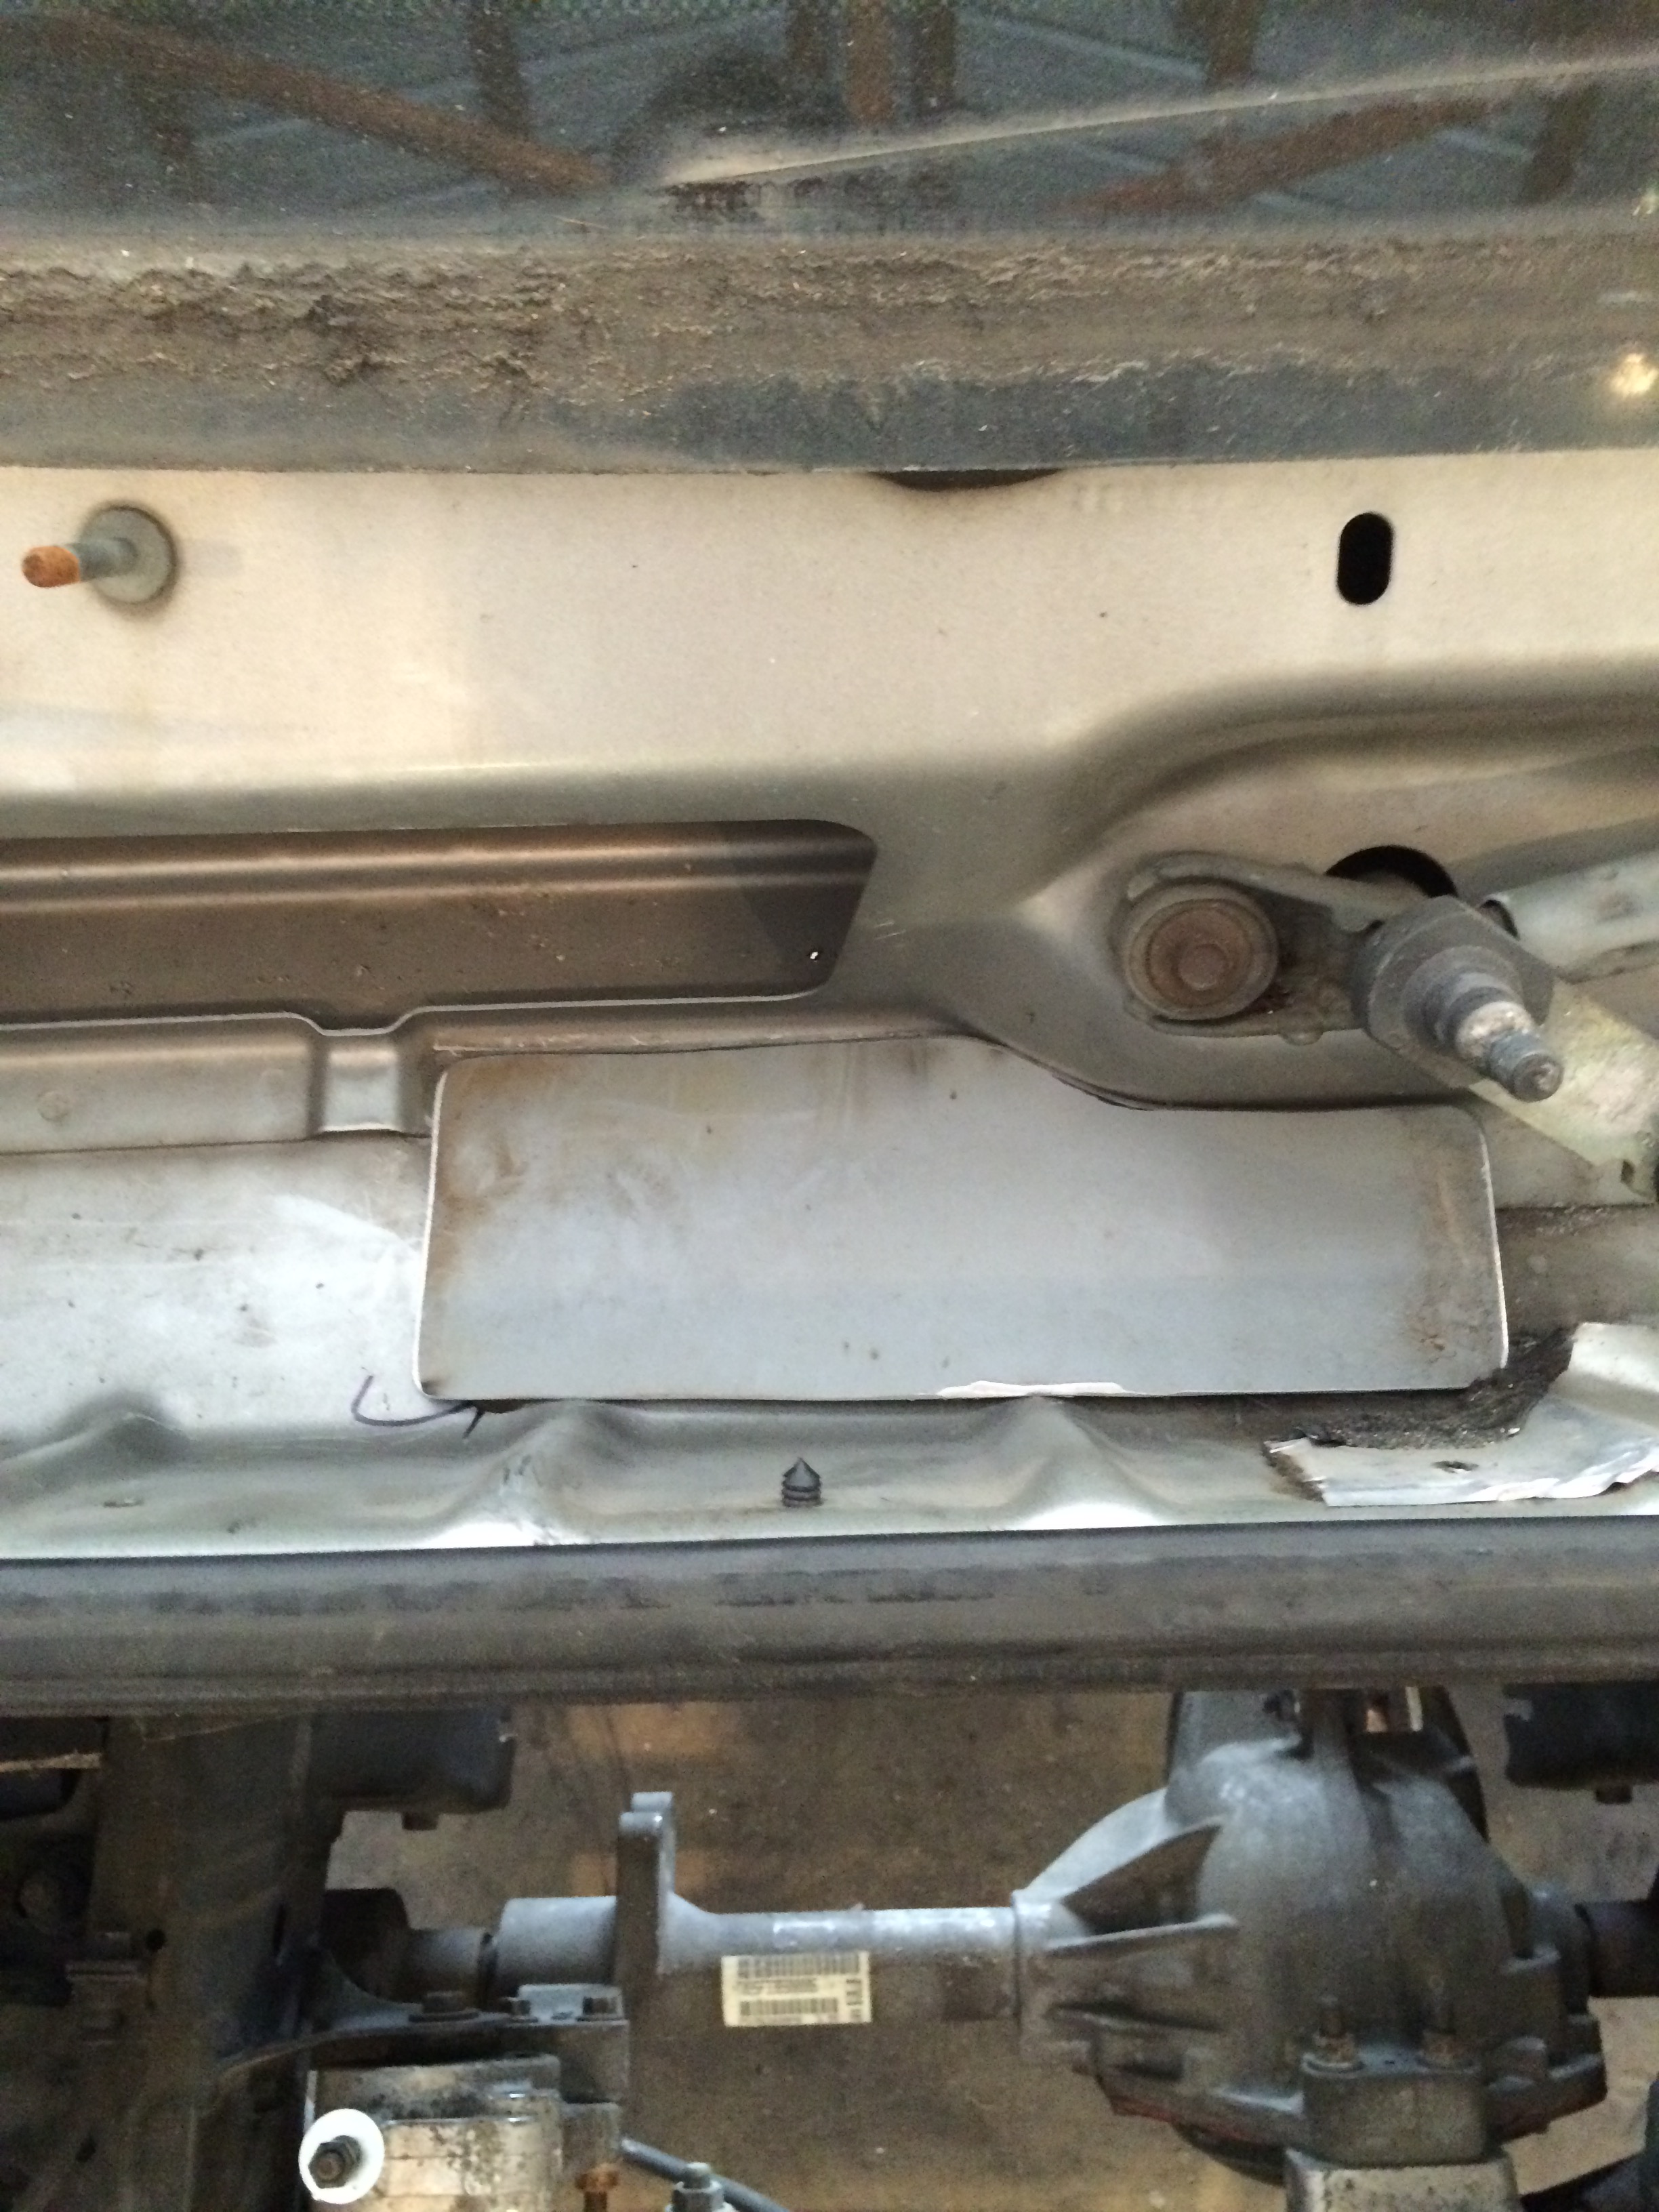
Also, I had to make an access panel in the windshield wiper cowl so I could reach the back bolts on the supercharger lid. So I made a cover for it.
Here is a really nice article about the 231 and 242 transfer cases.
http://www.jeepforum.com/forum/f13/t...-np242-685644/
Mark for ac compressor
Engine out, hole cut.
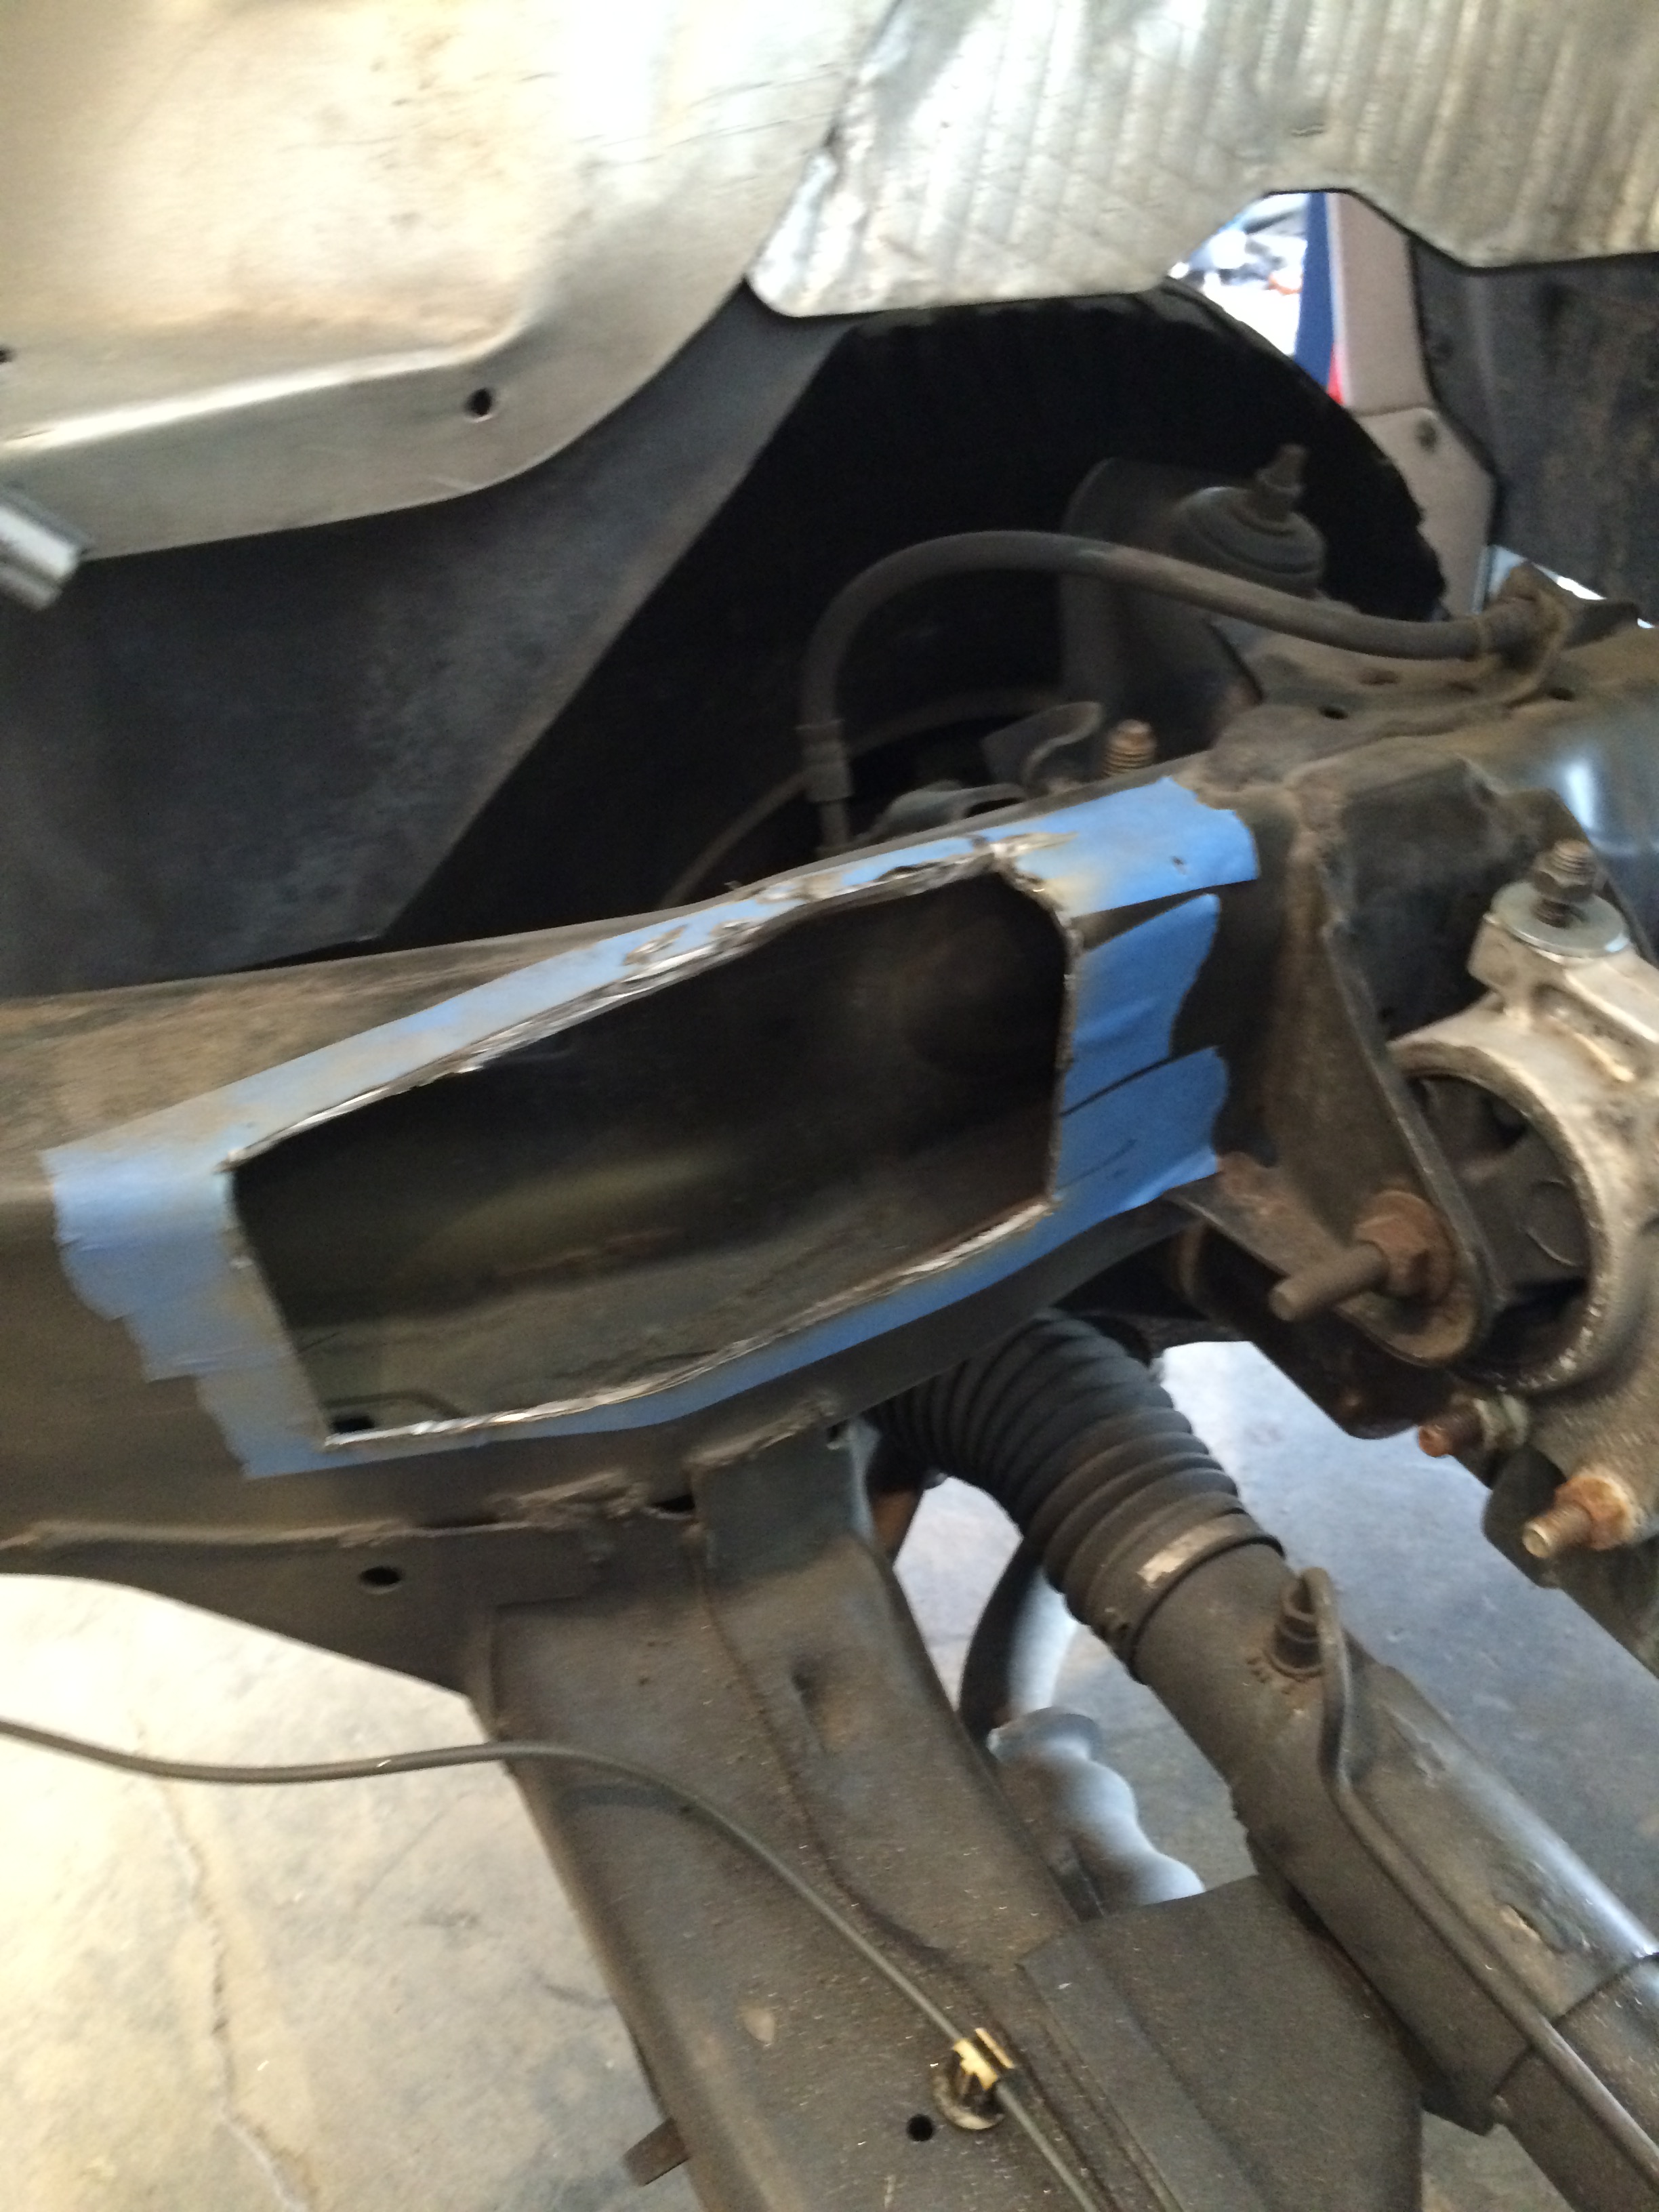
Fits nice. The lines will lie right on the frame. Nice and tidy.
I reinforced the inside of the frame where the front crossmember attaches. I didn't clean up the jagged edges from the plasma cutter because it is hidden anyway. Fully welded, this should be pretty strong.
Top plate.
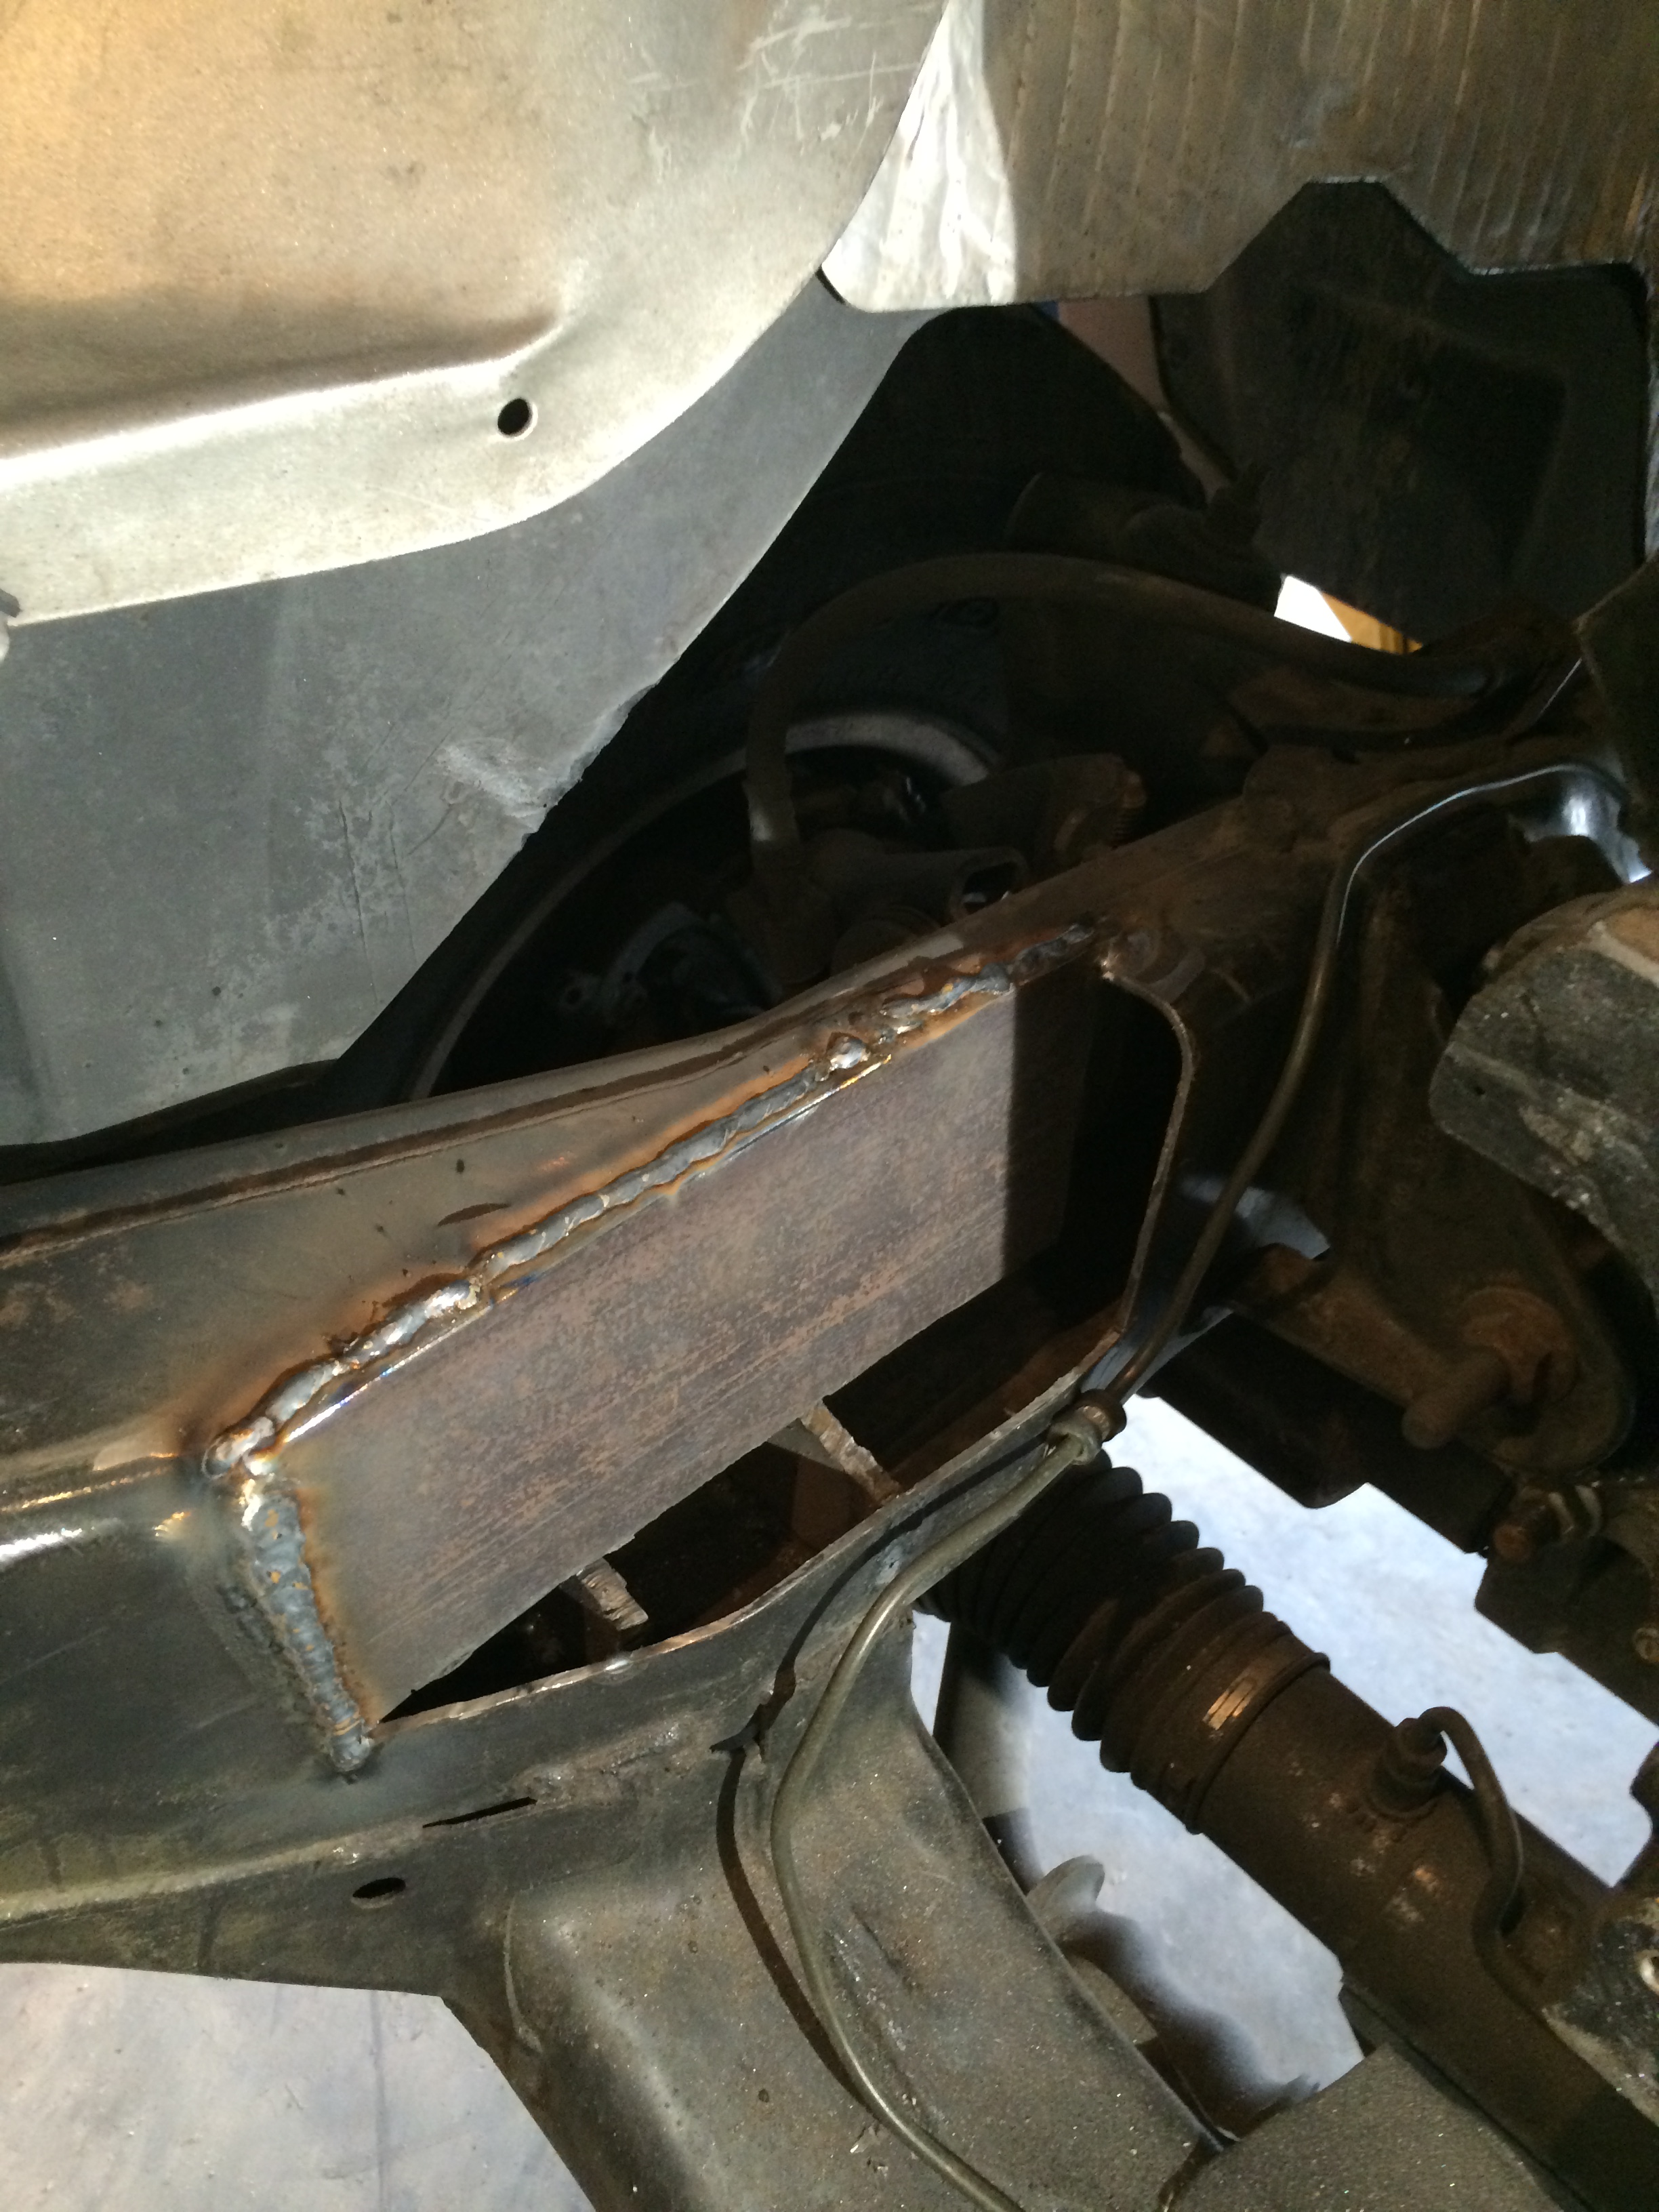
And closed in. I left the gap in the back for a reason.
Groove for plasma cutter.

Novak input shafts. The older 24 mm bearing needs the lower shoulder, but the planetary I have needs the newer gear cut.

Windshield cowl access hole and cover.
I don't know how other people use their plasma cutter, but I am not good with free-hand. So I use a 4 1/2 inch angle grinder and die grinder with carbide bit to score the steel, then follow the groove with the cutter. I still leaves a jagged edge that has to be cleaned up, but it sure is quick.
Also, despite being sent two input shafts by Novak for the 242 transfer case, neither is right. Turns out, in this 2000 Durango transfer case, Dodge used the thicker 24 mm input bearing (which is good), but used the newer cut gears. Looks like I am going to have to get a new planetary with older gears. I am going to step up to a 6 gear planetary for this. Something else I have to order and wait for.
Also, I had to make an access panel in the windshield wiper cowl so I could reach the back bolts on the supercharger lid. So I made a cover for it.
Here is a really nice article about the 231 and 242 transfer cases.
http://www.jeepforum.com/forum/f13/t...-np242-685644/
Mark for ac compressor

Engine out, hole cut.

Fits nice. The lines will lie right on the frame. Nice and tidy.


I reinforced the inside of the frame where the front crossmember attaches. I didn't clean up the jagged edges from the plasma cutter because it is hidden anyway. Fully welded, this should be pretty strong.

Top plate.

And closed in. I left the gap in the back for a reason.

Groove for plasma cutter.


Novak input shafts. The older 24 mm bearing needs the lower shoulder, but the planetary I have needs the newer gear cut.

Windshield cowl access hole and cover.

 01-24-2016, 10:58 PM
#48
This week I took care of some little things. I am still waiting for the outer input shaft bearing that matches my hybrid planetary gear for the 242. I bought a 6 gear planetary, but I need a 16 mm bearing. NAPA had it for $104, and a 1 hour round-trip drive. Quadratec had it for $35 shipped. So, I can wait.
Time to move on to the little things. I built one of my signature battery boxes out of 2 home depot heavy-duty shelf brackets, and some sheetmetal from an old AC unit. A piece of bed frame welded into the space under the right rear wheel, and a Group 34 battery will fit right in.
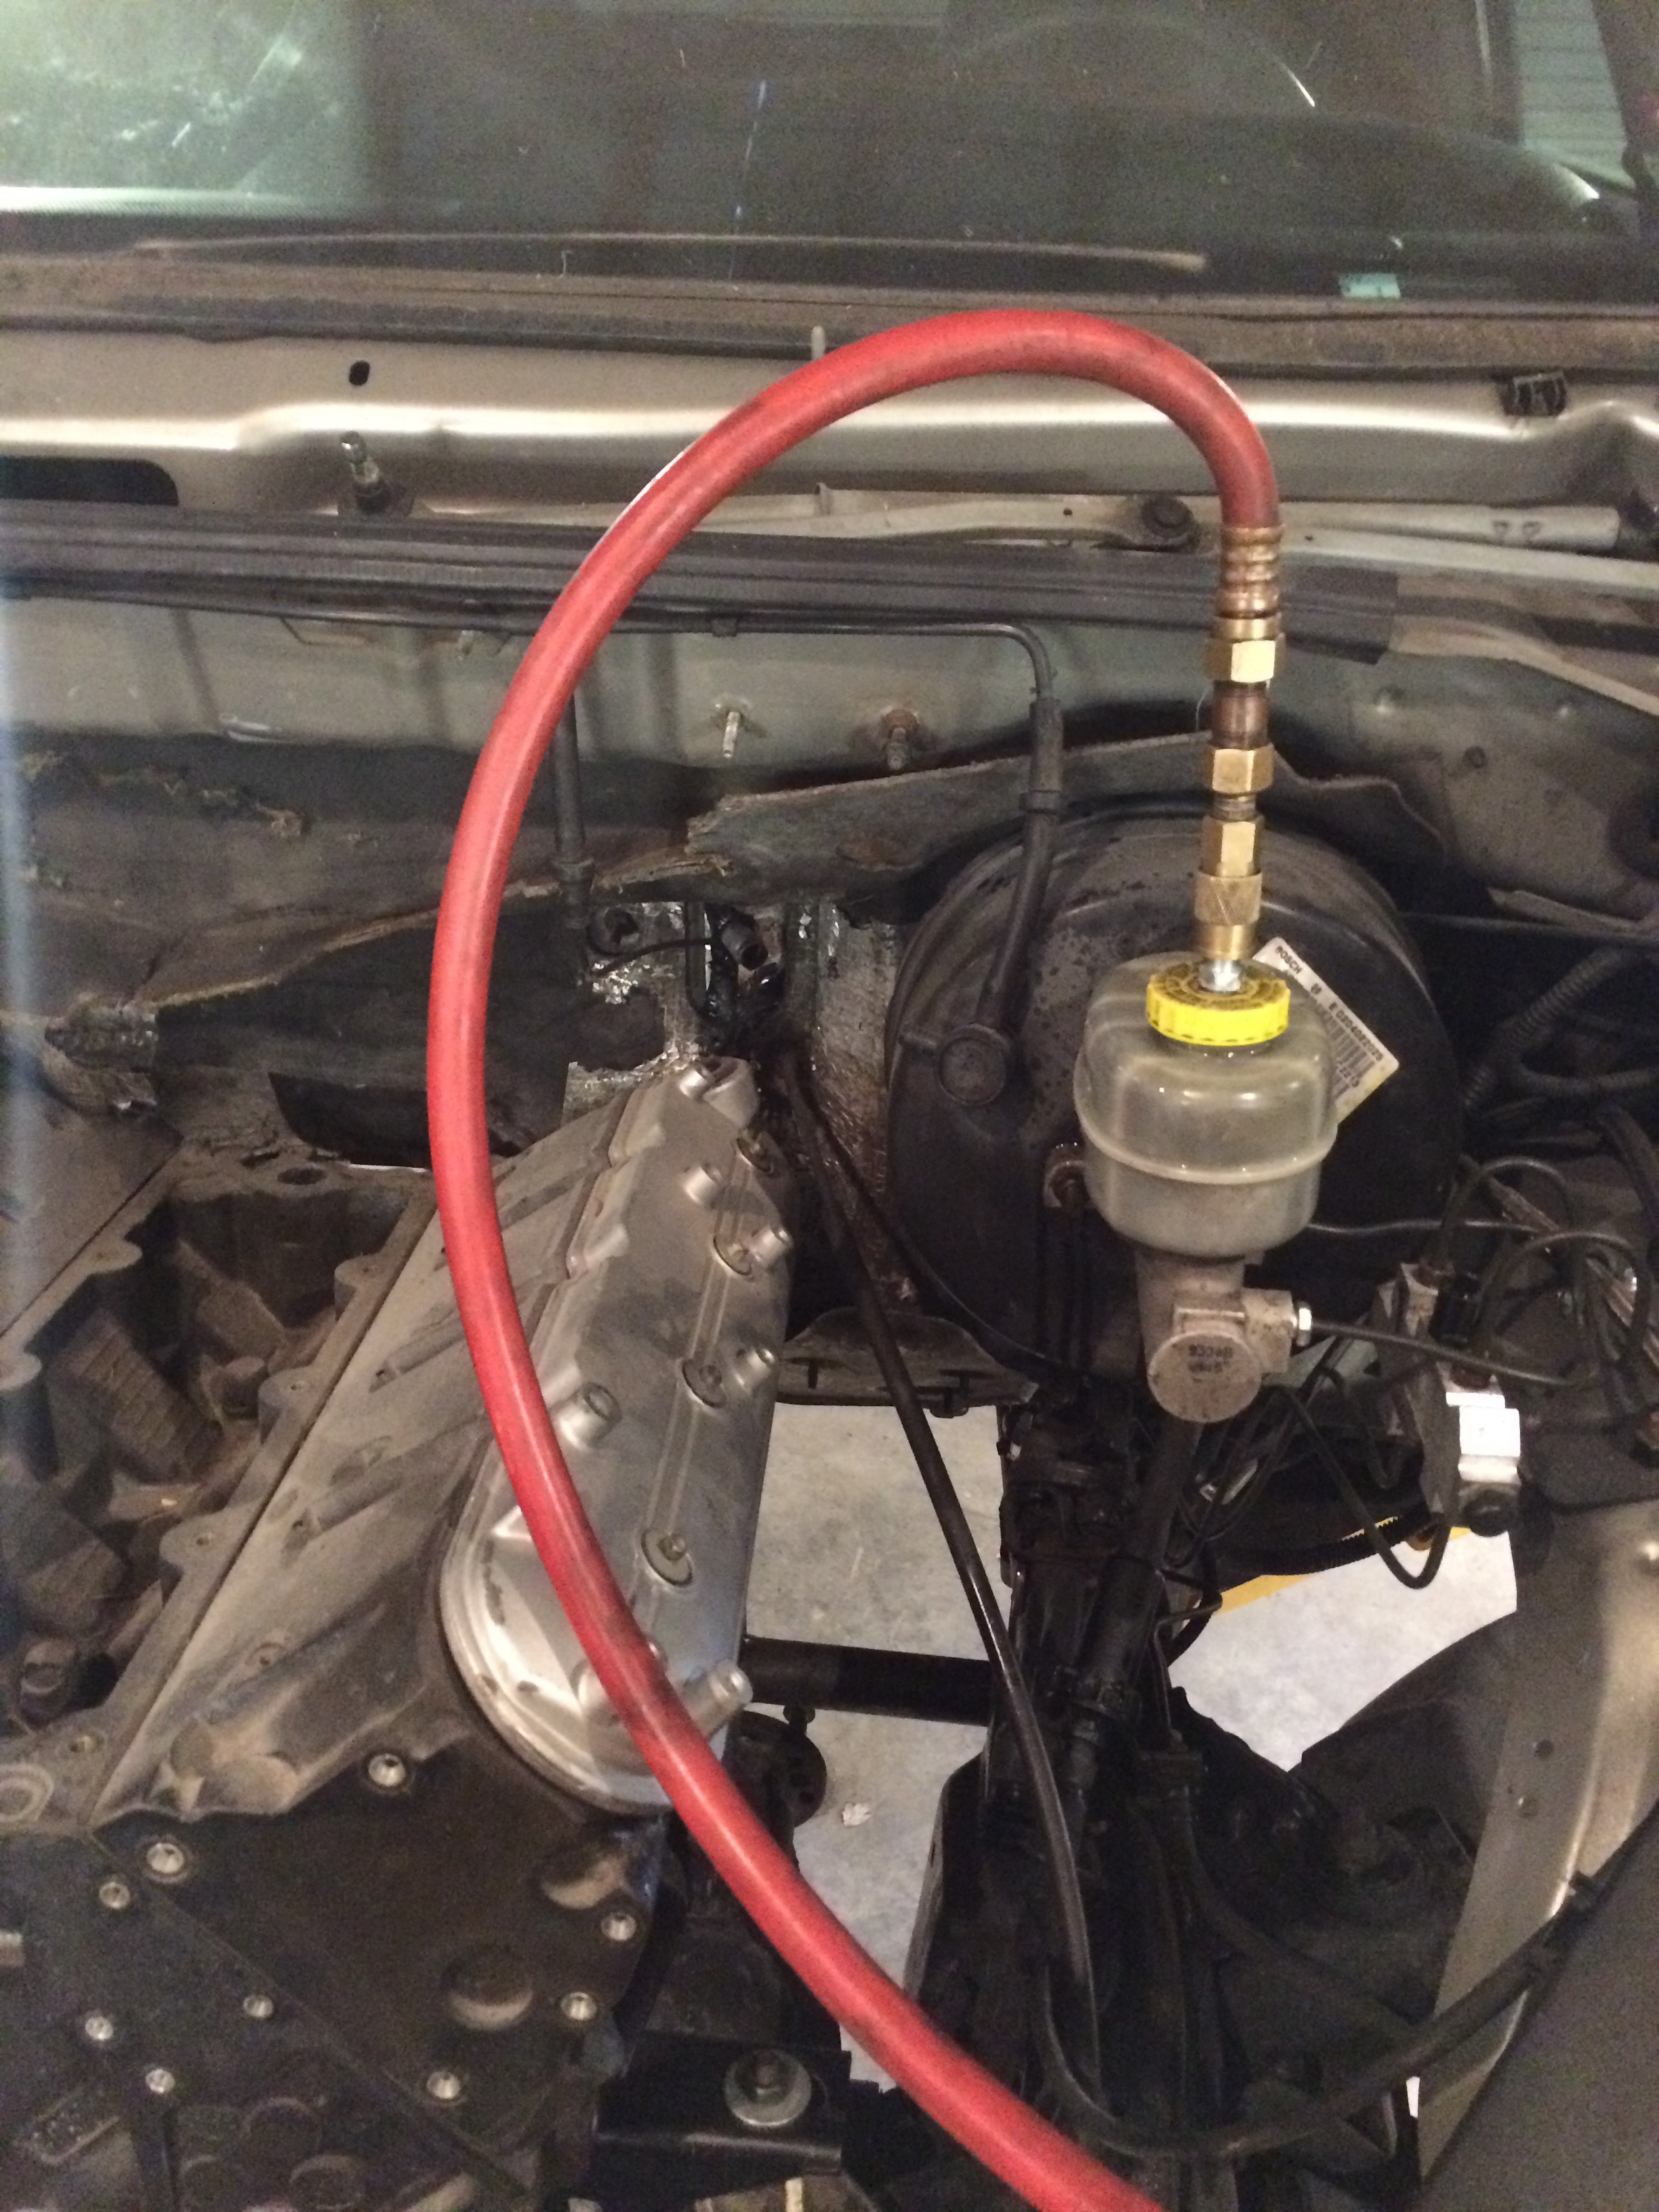
Also, I flushed the brake lines. I have shown this before, but I will show it again. I have an old master cylinder cap, fitted with an air compressor quick-connect fitting. I blow all of the old fluid out of each line, using about 20 psi from the compressor. Then I fill the reservoir right to the lip. Keeping the pressure applied, I can bleed all four calipers, and usually it is right at the fill line on the reservoir. Top it off, and done. Forget those Mighty-vac, Motive, or Eastwood things. This is cheap and works well.
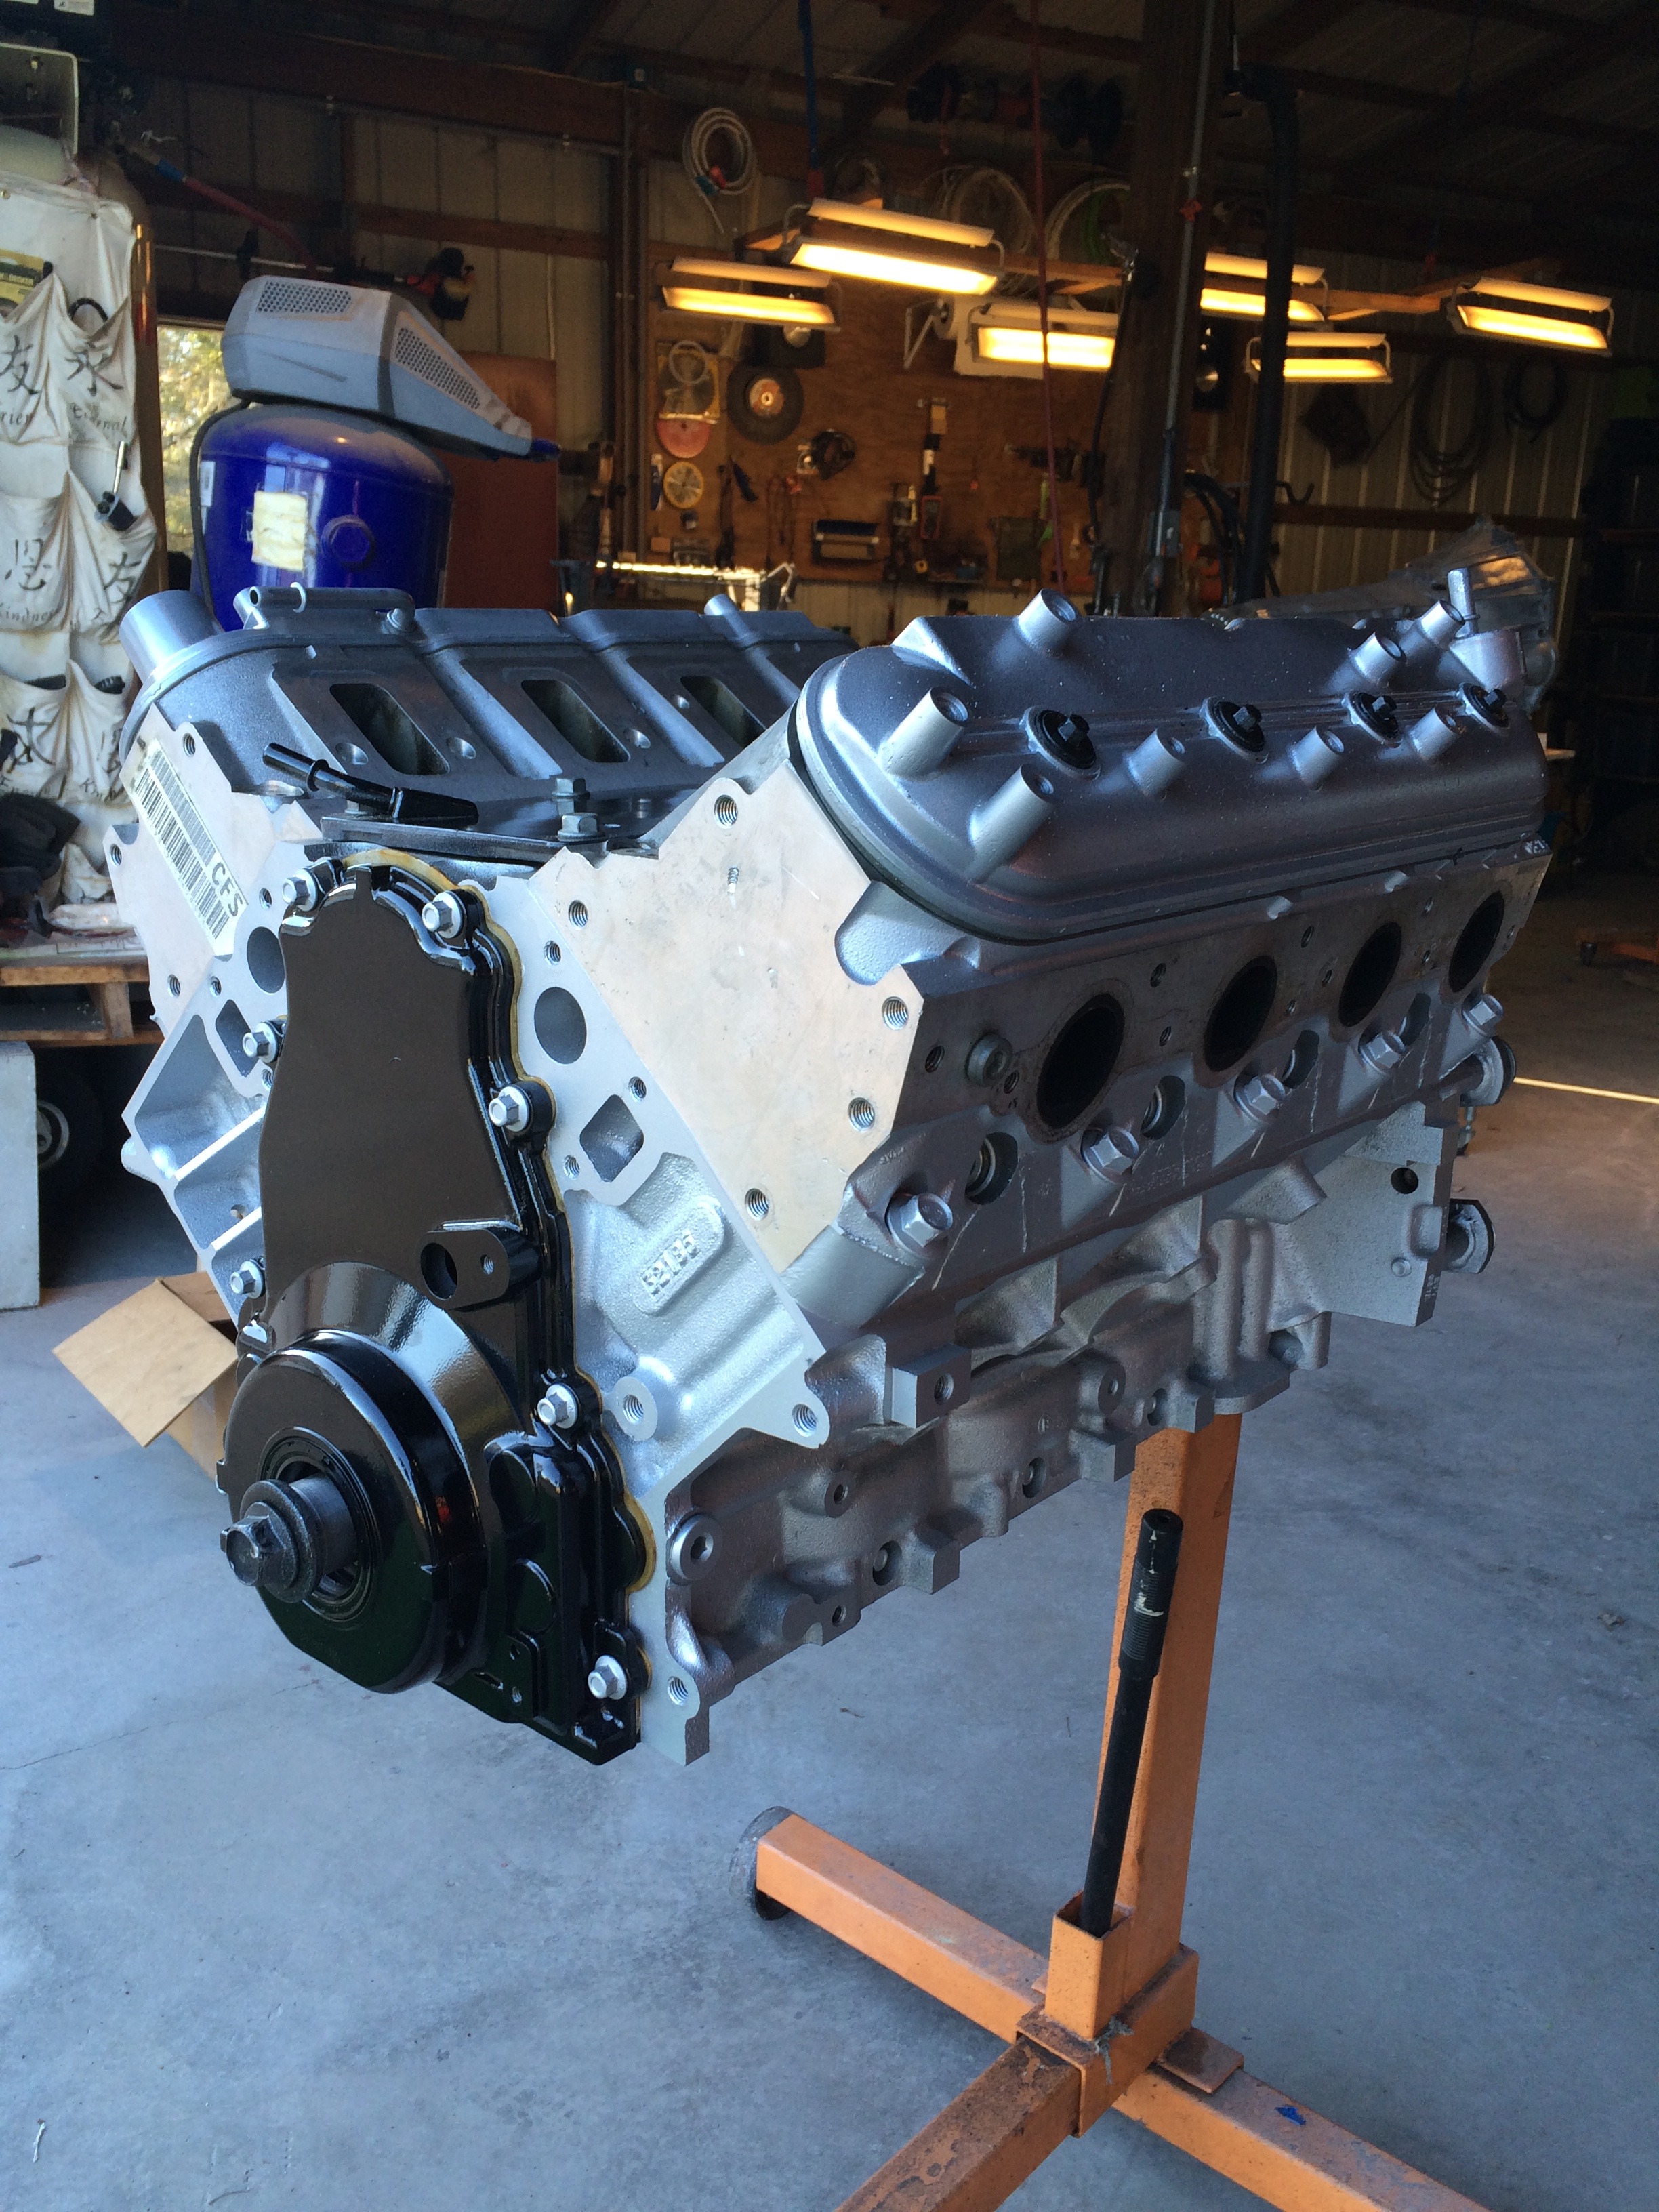
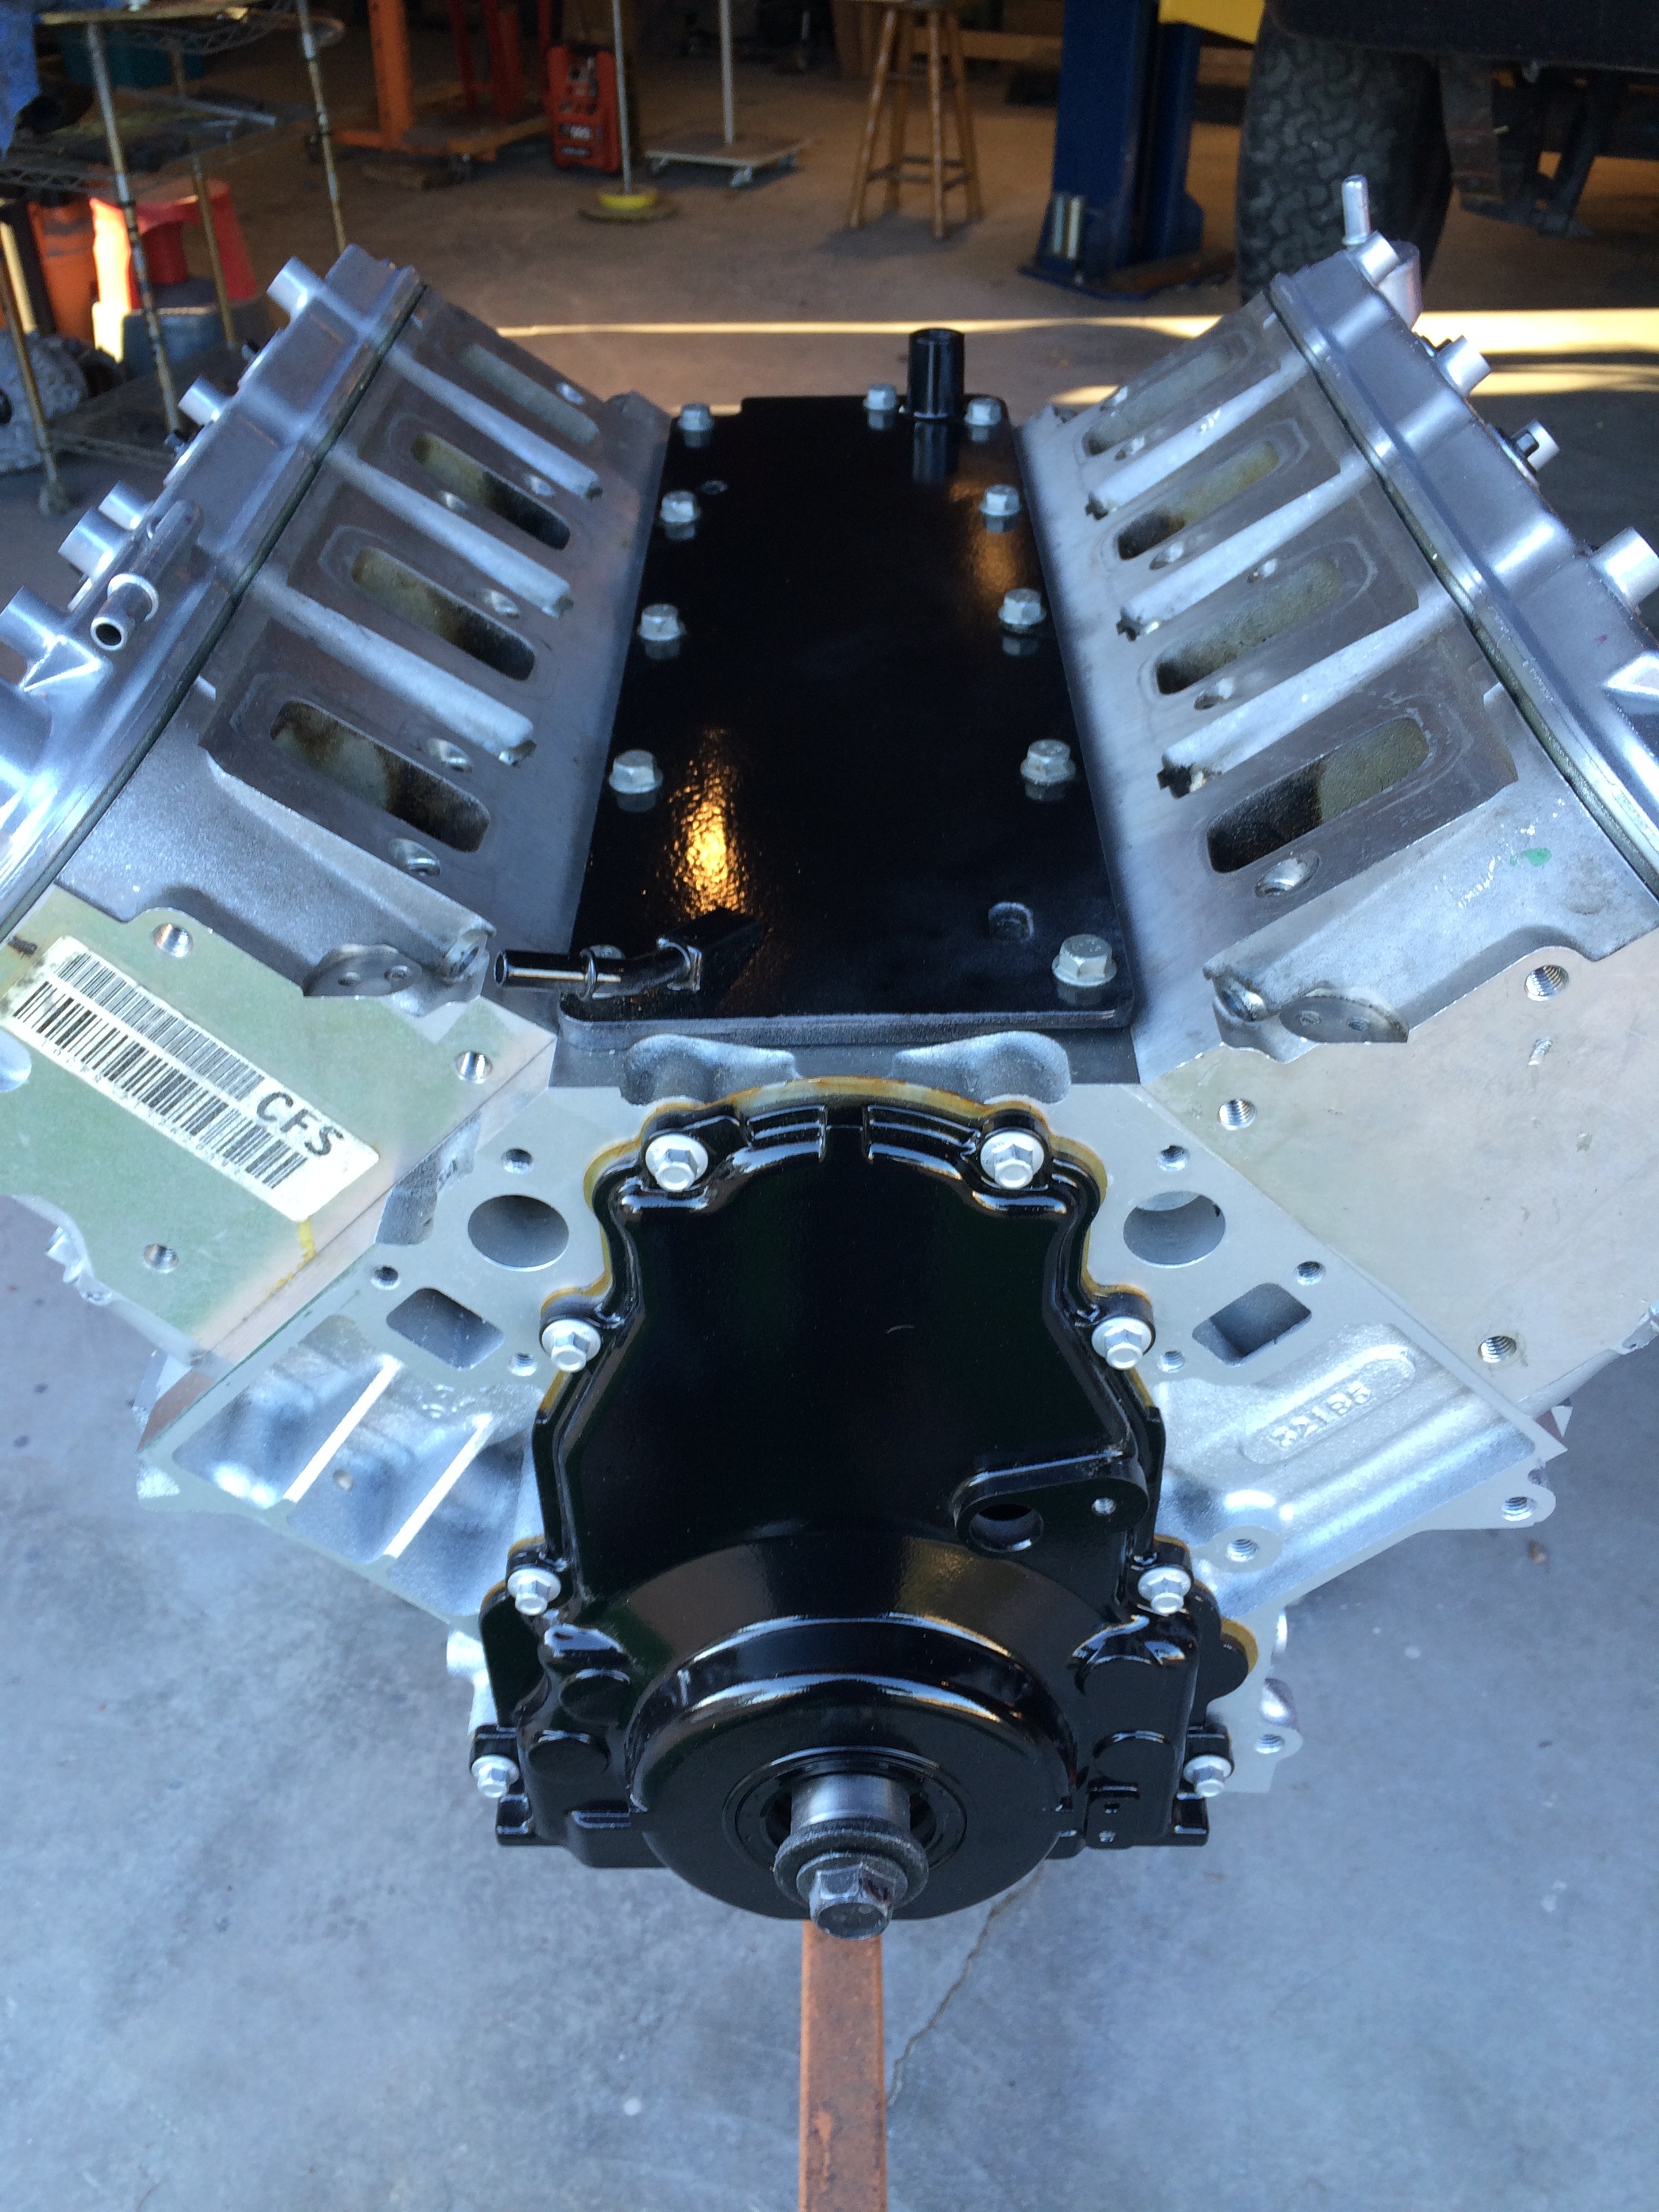
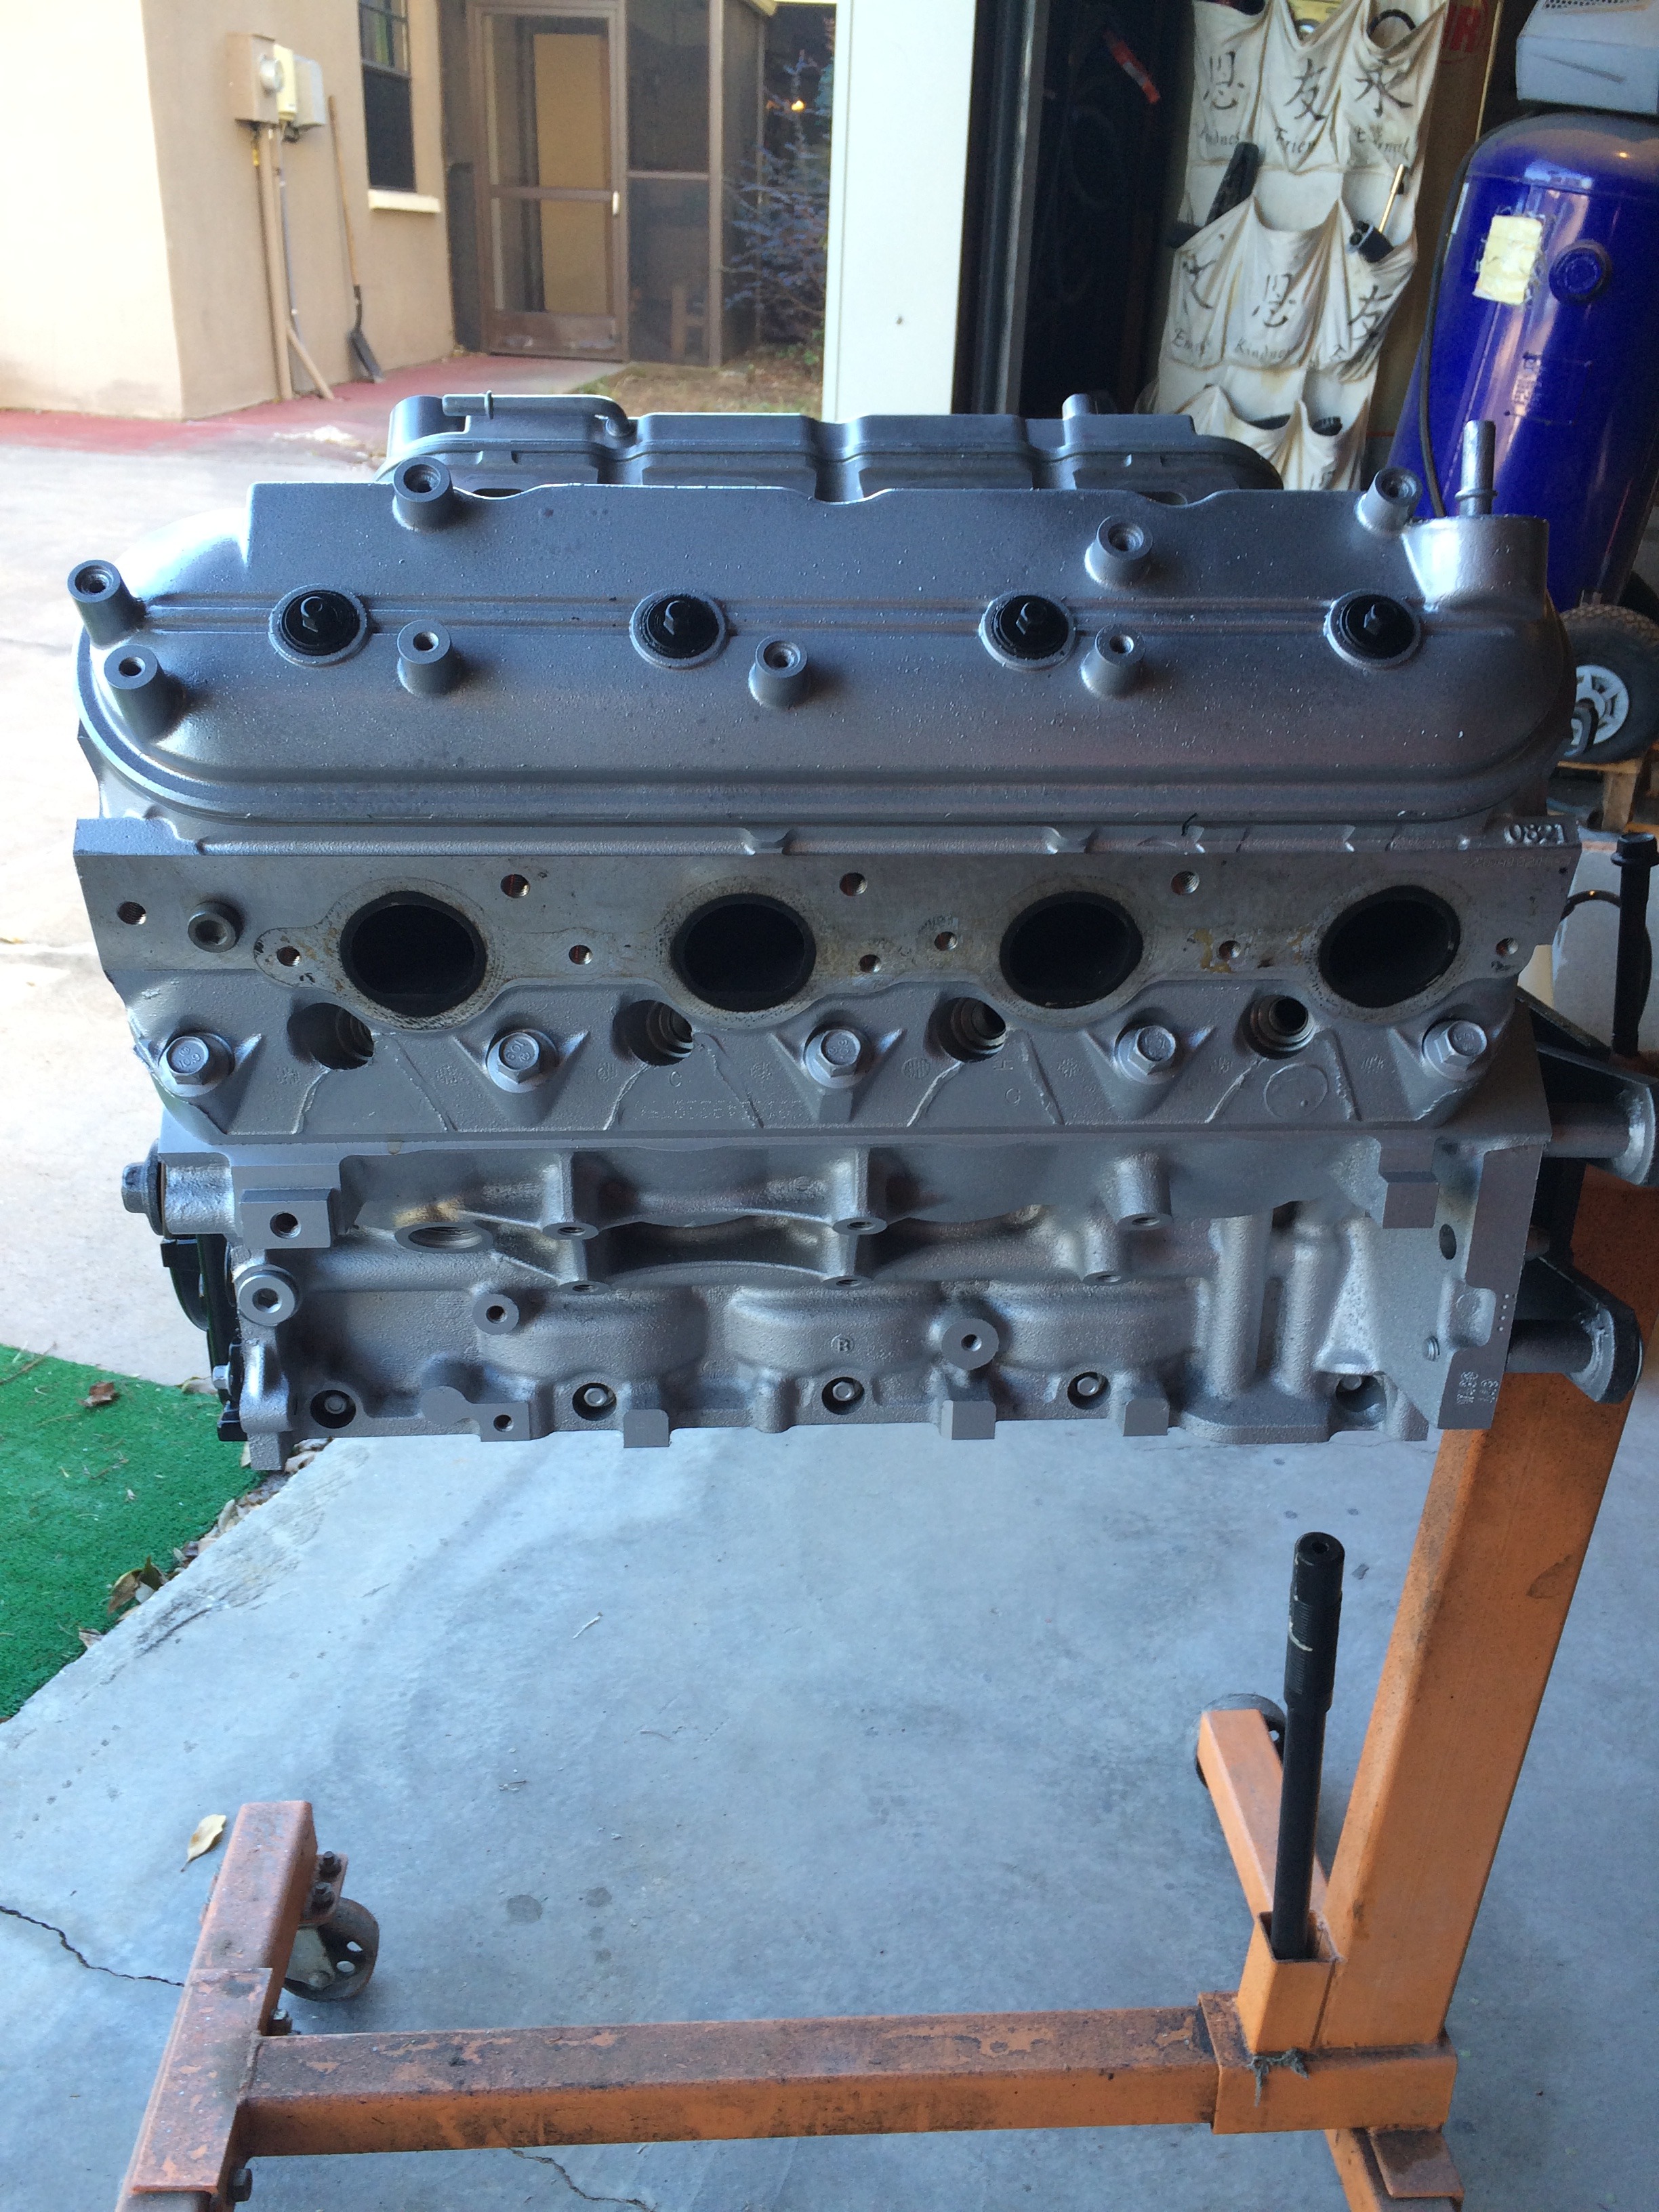
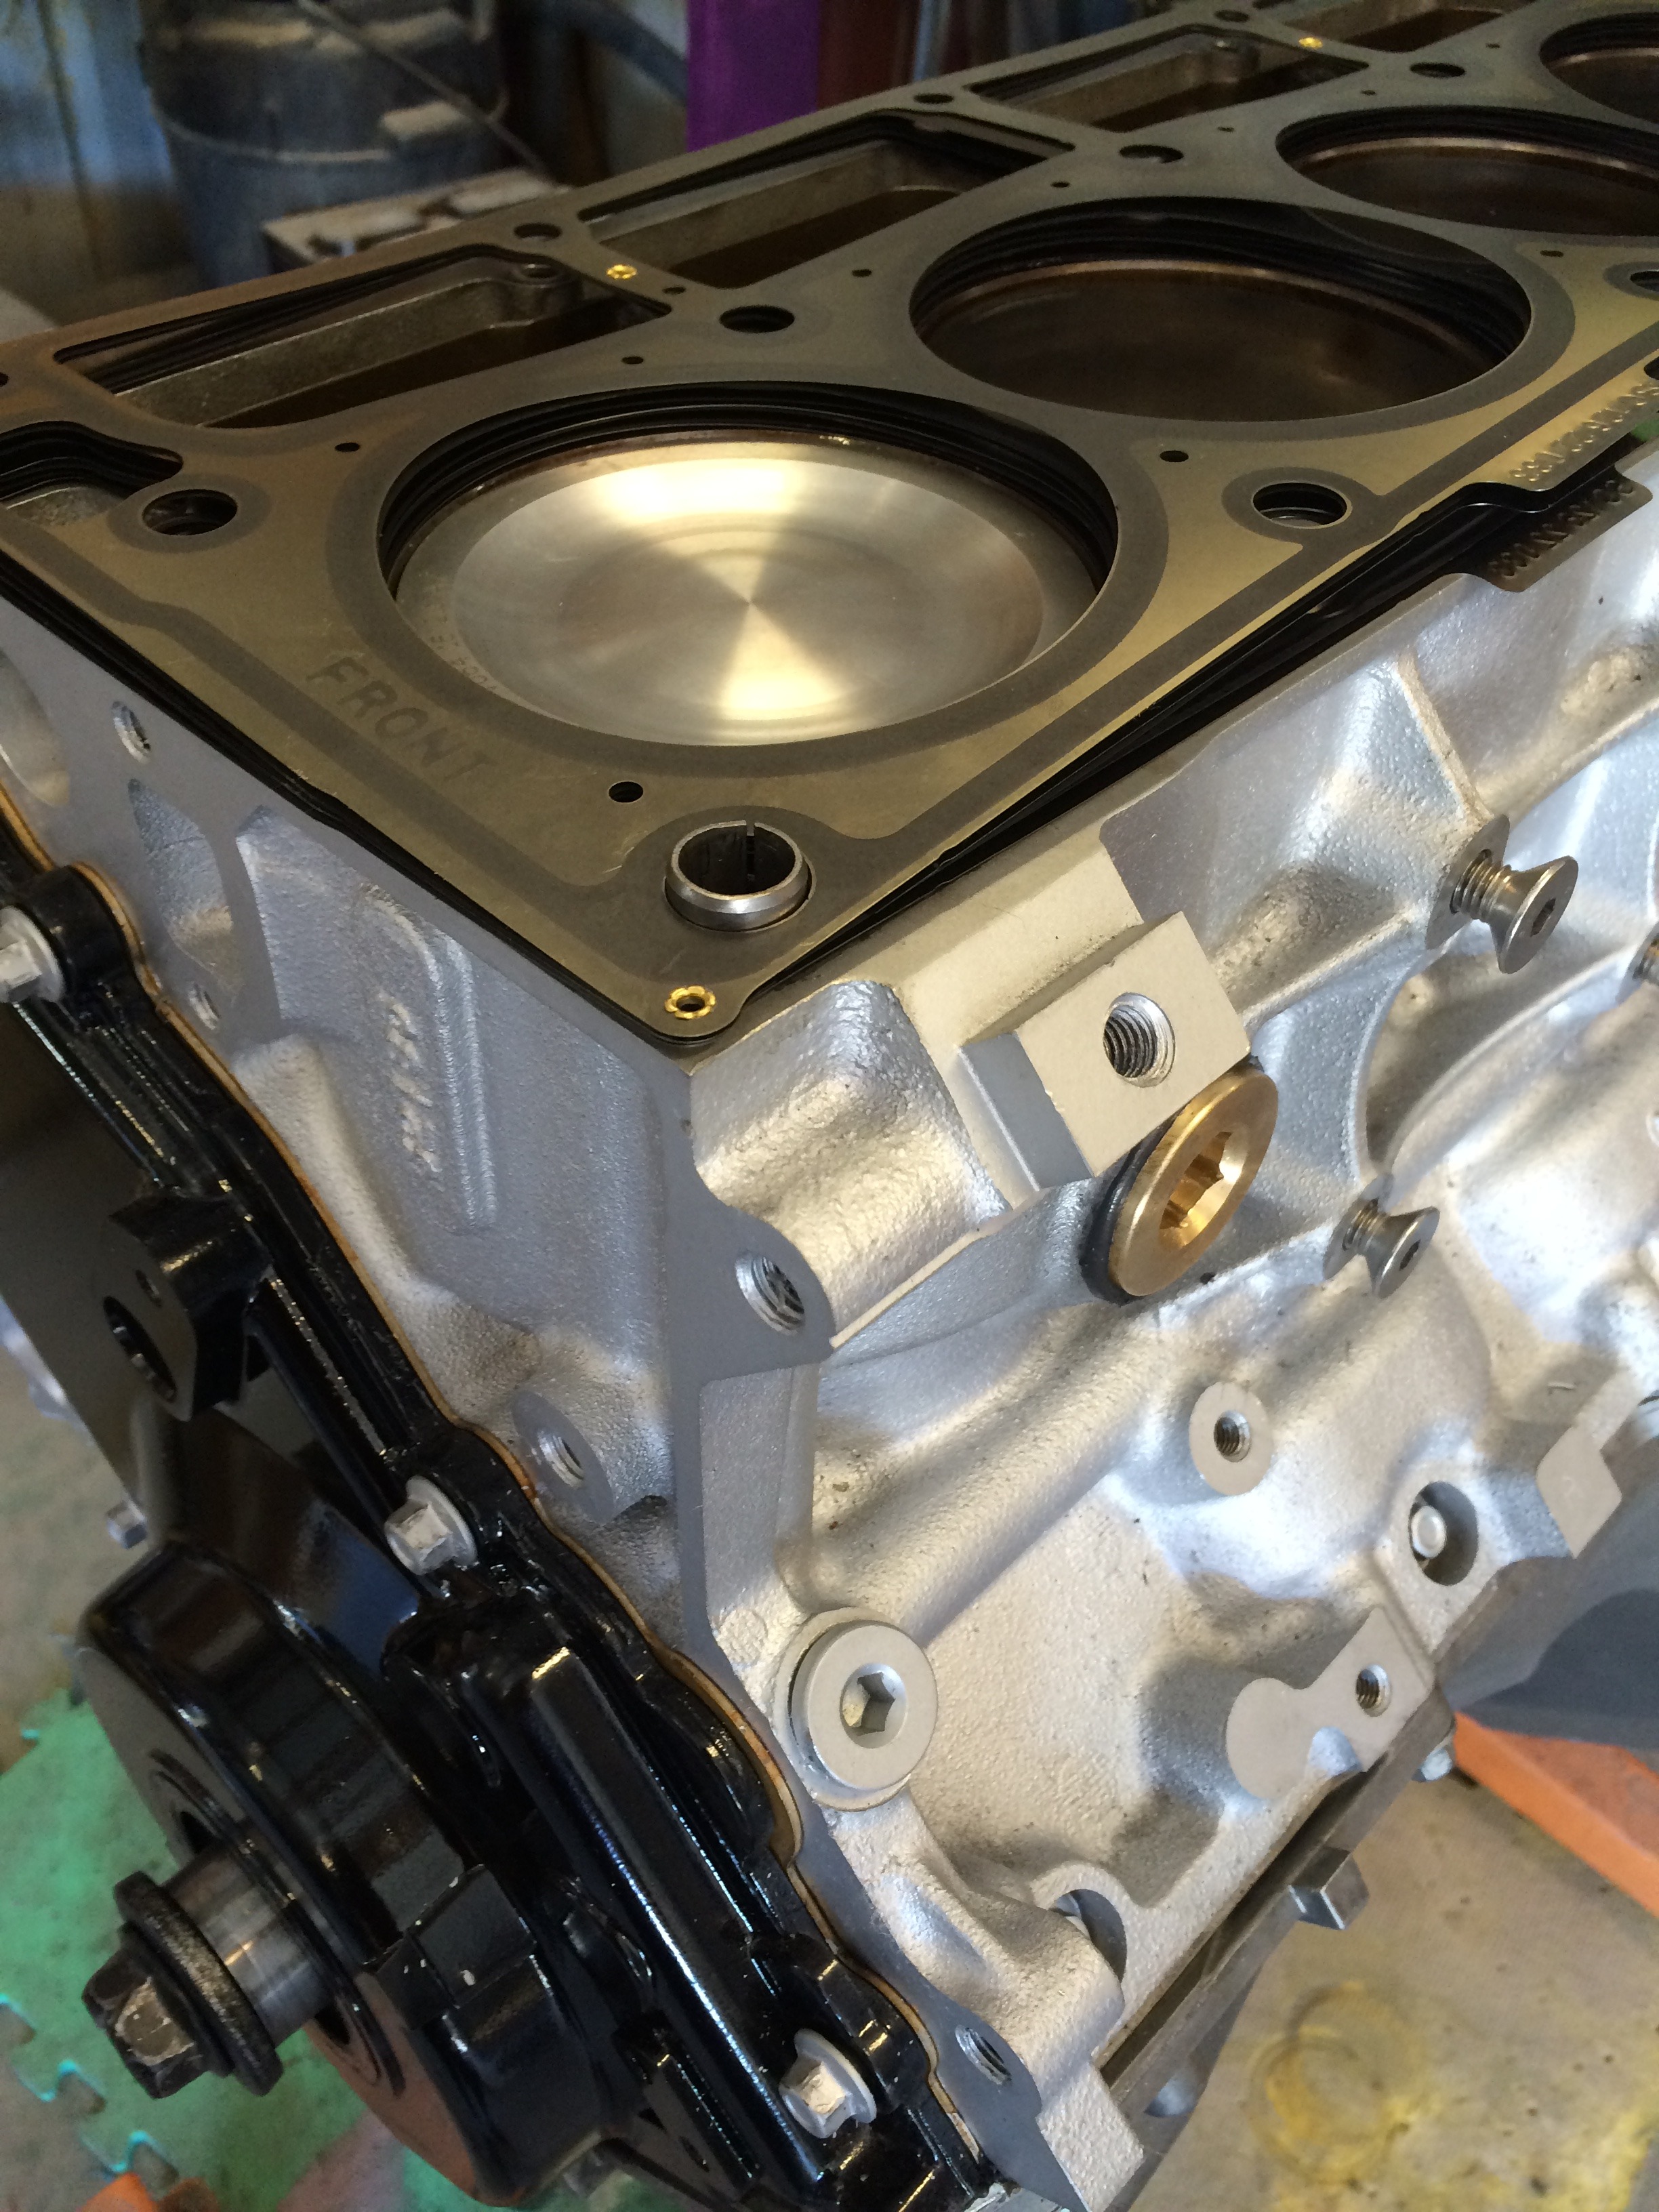
And finally, time for some engine cleanup. After putting in the rotating assembly, I powder-coated the valley cover, front cover and valve covers. The block was painted with VHT silver, and the motor mounts and adapters were painted with Rustoleum gloss black.
Old cut gear (thin shoulder) New cut gear (Thick shoulder)
6 gear planetary.
One-man brake bleeder (No engine or pumping brakes required)
Battery box, before painting

Donor cover from AC unit

Upper rail for battery box, under right rear wheel
Installed and painted

Powder coating the valley cover. This is the primer.
Before

After. Black and Silver to match the Durango.

Time to move on to the little things. I built one of my signature battery boxes out of 2 home depot heavy-duty shelf brackets, and some sheetmetal from an old AC unit. A piece of bed frame welded into the space under the right rear wheel, and a Group 34 battery will fit right in.
Also, I flushed the brake lines. I have shown this before, but I will show it again. I have an old master cylinder cap, fitted with an air compressor quick-connect fitting. I blow all of the old fluid out of each line, using about 20 psi from the compressor. Then I fill the reservoir right to the lip. Keeping the pressure applied, I can bleed all four calipers, and usually it is right at the fill line on the reservoir. Top it off, and done. Forget those Mighty-vac, Motive, or Eastwood things. This is cheap and works well.
And finally, time for some engine cleanup. After putting in the rotating assembly, I powder-coated the valley cover, front cover and valve covers. The block was painted with VHT silver, and the motor mounts and adapters were painted with Rustoleum gloss black.
Old cut gear (thin shoulder) New cut gear (Thick shoulder)

6 gear planetary.

One-man brake bleeder (No engine or pumping brakes required)

Battery box, before painting

Donor cover from AC unit

Upper rail for battery box, under right rear wheel

Installed and painted

Powder coating the valley cover. This is the primer.

Before

After. Black and Silver to match the Durango.


 01-28-2016, 06:44 AM
#49
The transfer case has been a real time-killer. I started with a Borg-Warner out of a Cadillac Escalade, but it wouldn't fit between the torsion bars. So I moved on to a NP242 out of a 2000 Durango R/T. When I ordered the Novak conversion kit, I had the choice of "early cut" or "late cut" gear for the input shaft. Since this took place around 1994, I figured I was safe with the "late cut gear". But Dodge did things differently. There is a full write-up about the inside of these transfer cases on Novak's website.
Anyway..... The Dodge uses a "late cut" gear, but an early, 24 mm wide input shaft bearing. This meant the input shaft they sent me wouldn't allow the case to close. No one makes a "late cut" gear with a low shoulder. So I cruised the internet forums looking for an answer. At one point, I considered replacing the front half of the case with a later case that had a narrow, 16 mm bearing. I also considered buying an "early cut" planetary, but I had already spent $70 on a 6 gear planetary that had "late cut" gears.
Then I ran across someone's thread. "Putting the thin bearing in place of the thick one. The case doesn't care". So I bought a 16mm bearing from Quadratec, and pushed it right in. No clearance issues, no problem.
Input shafts. Late cut (back, thick shoulder), early cut (front, thin shoulder)

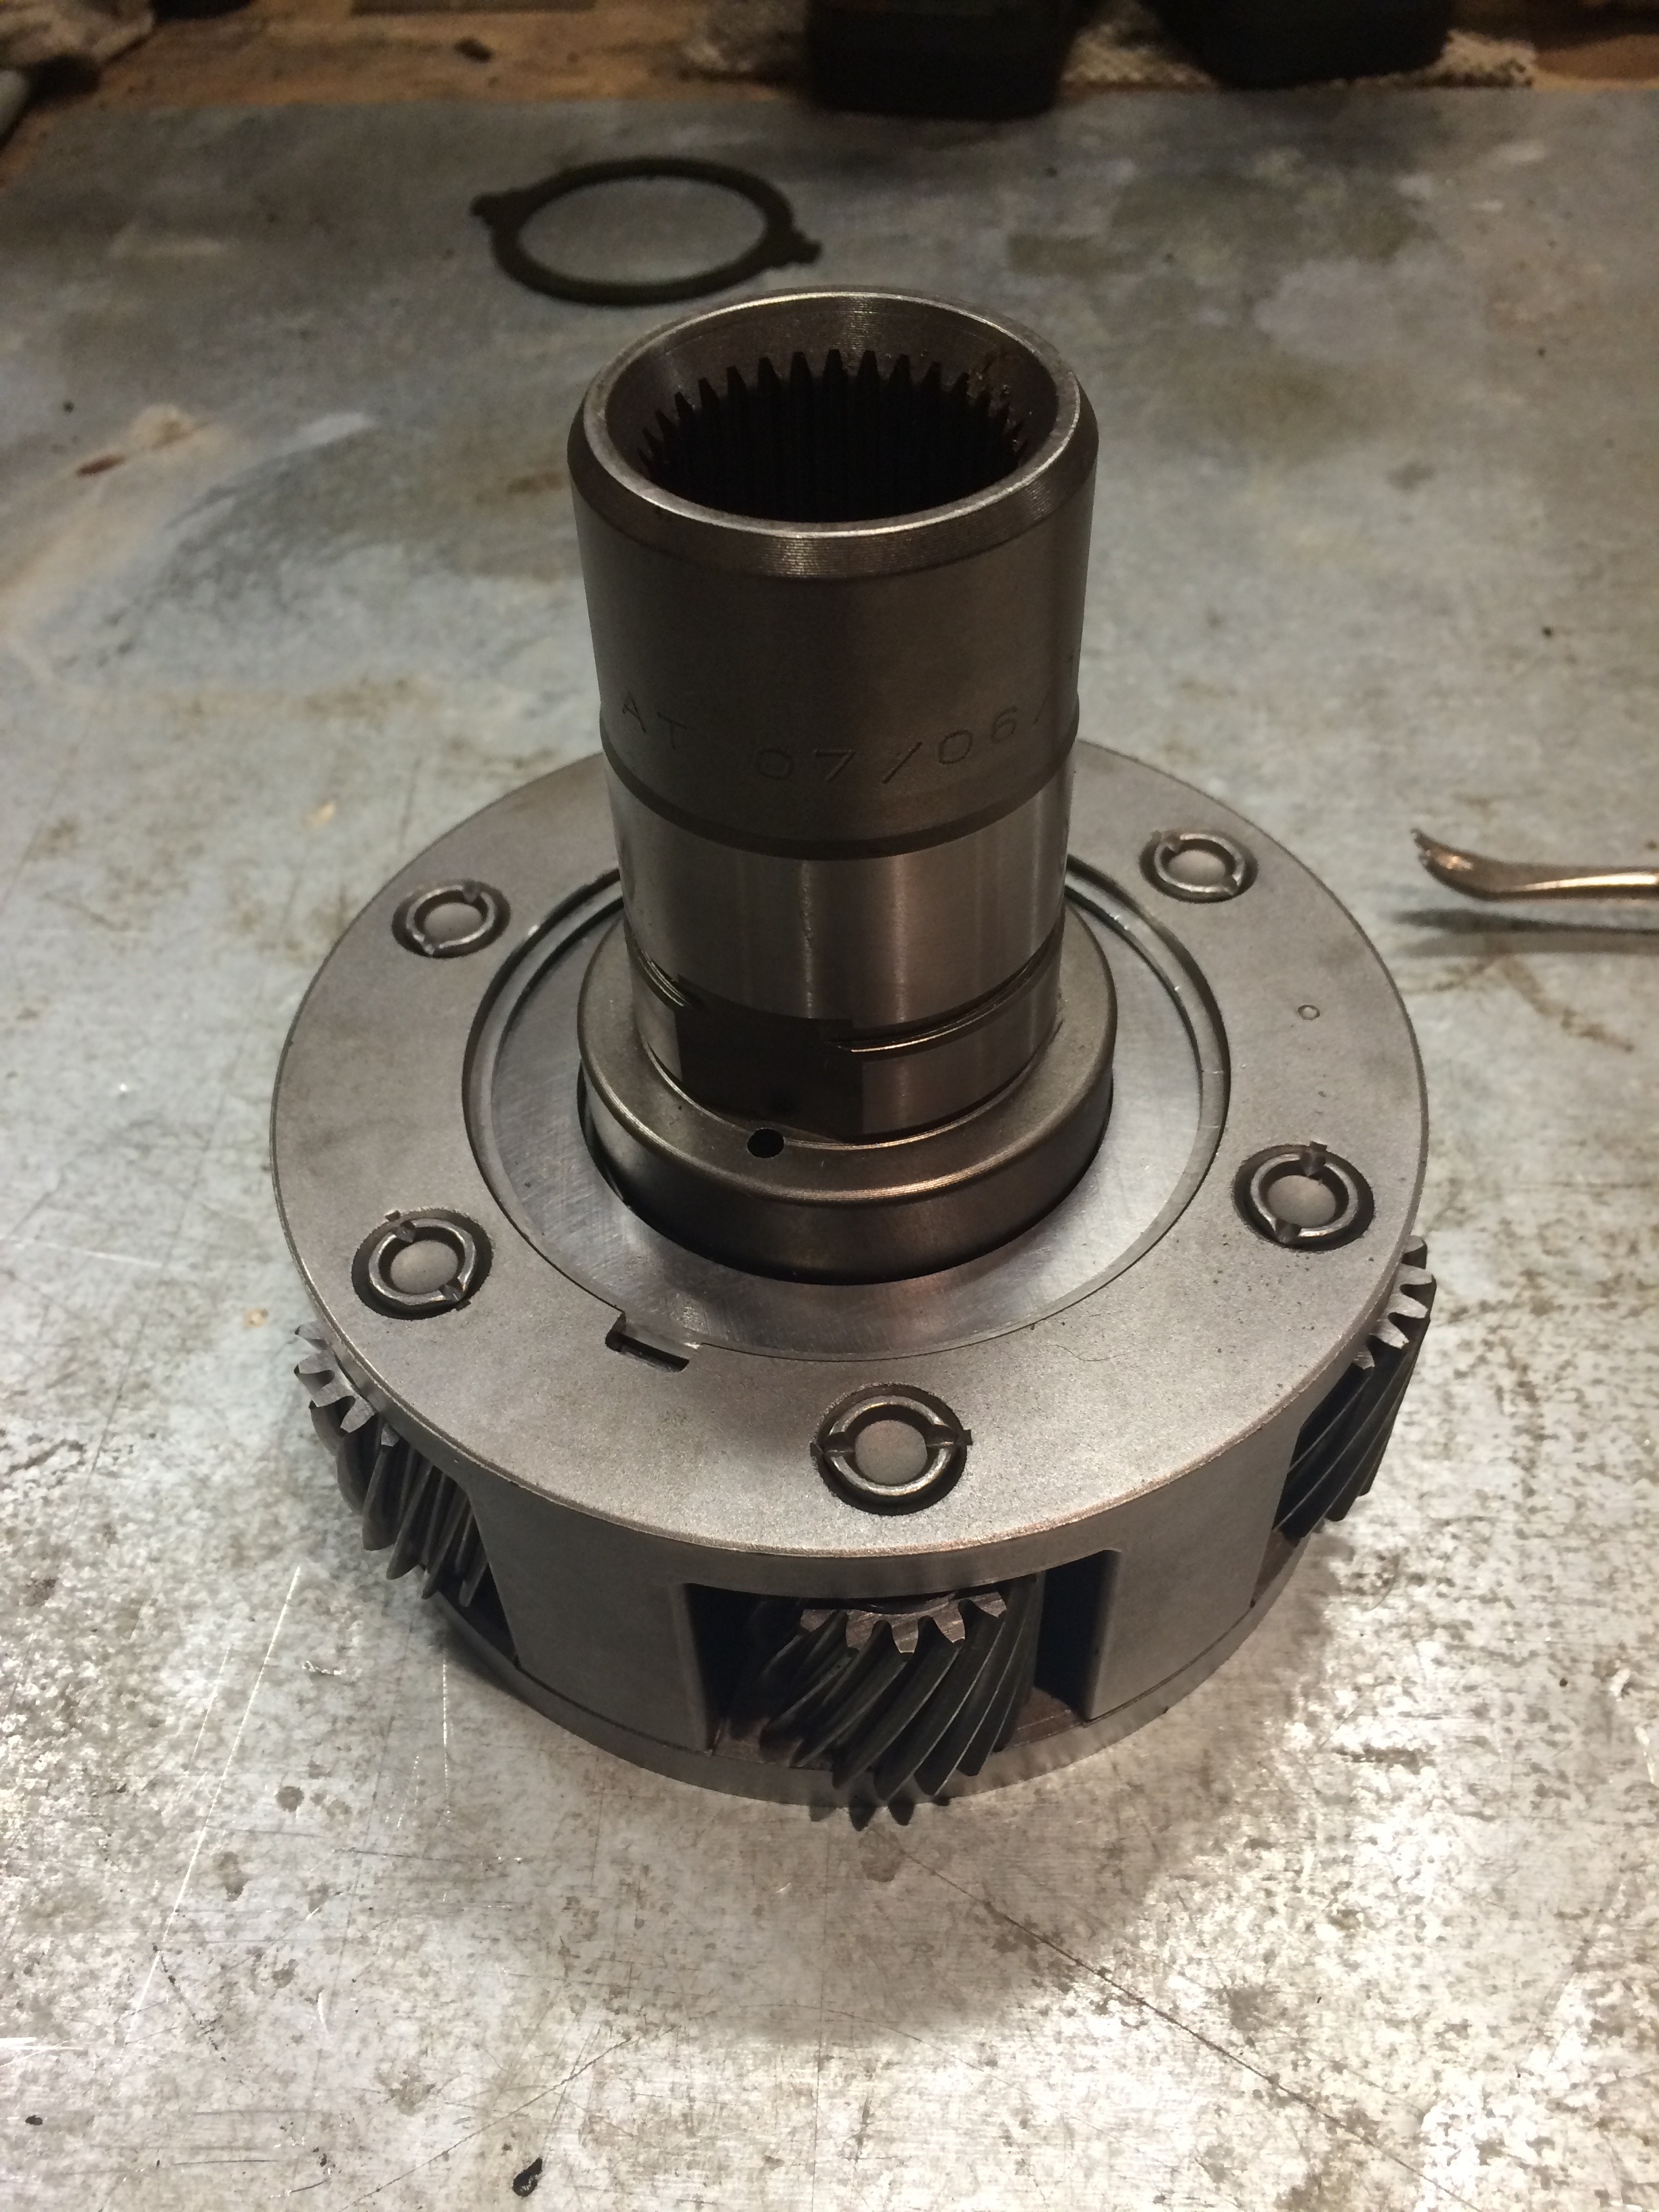
6 gear planetary

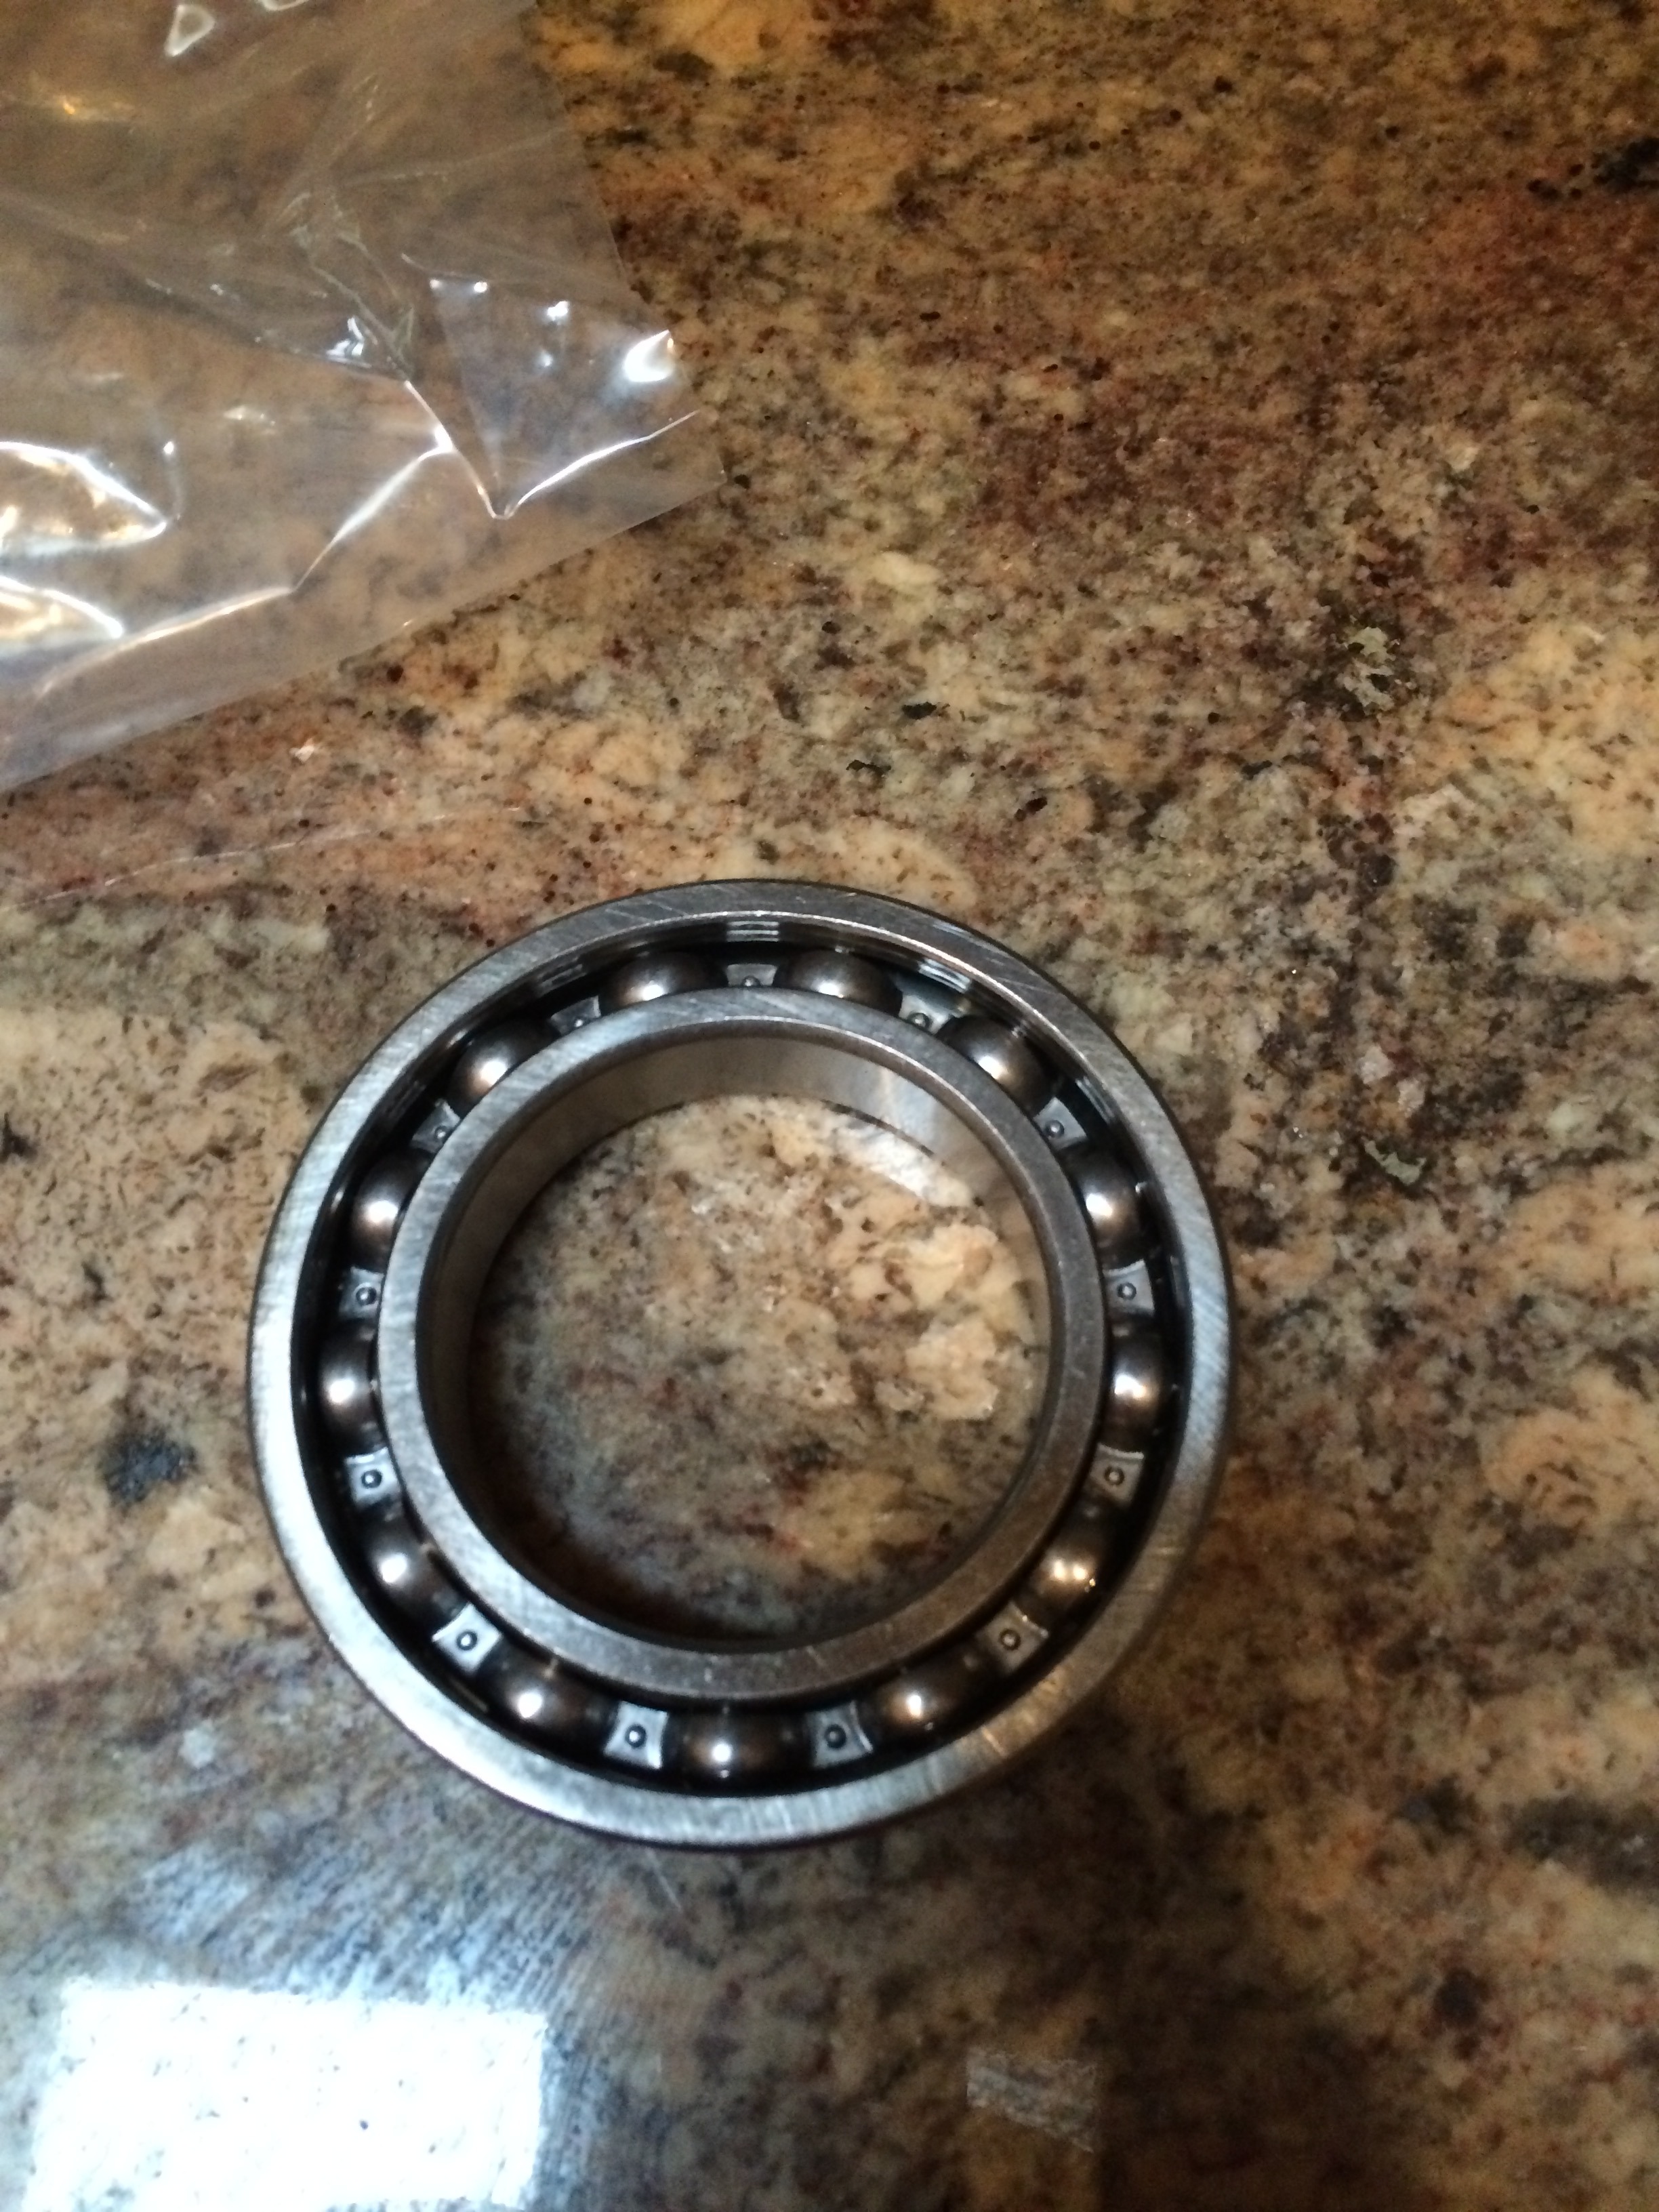
Thin 16mm bearing
Getting ready to put the shift forks back in. The 242 has this stupid roll pin at the bottom, with a little access hole to get to it. Following the advice online, I used a pry bar to pull the forks out. Getting them back in is not the reverse order, unfortunately. I couldn't "pry" the shift fork back in. So I used a matching size drill bit and hammer to drive the roll pin out now.
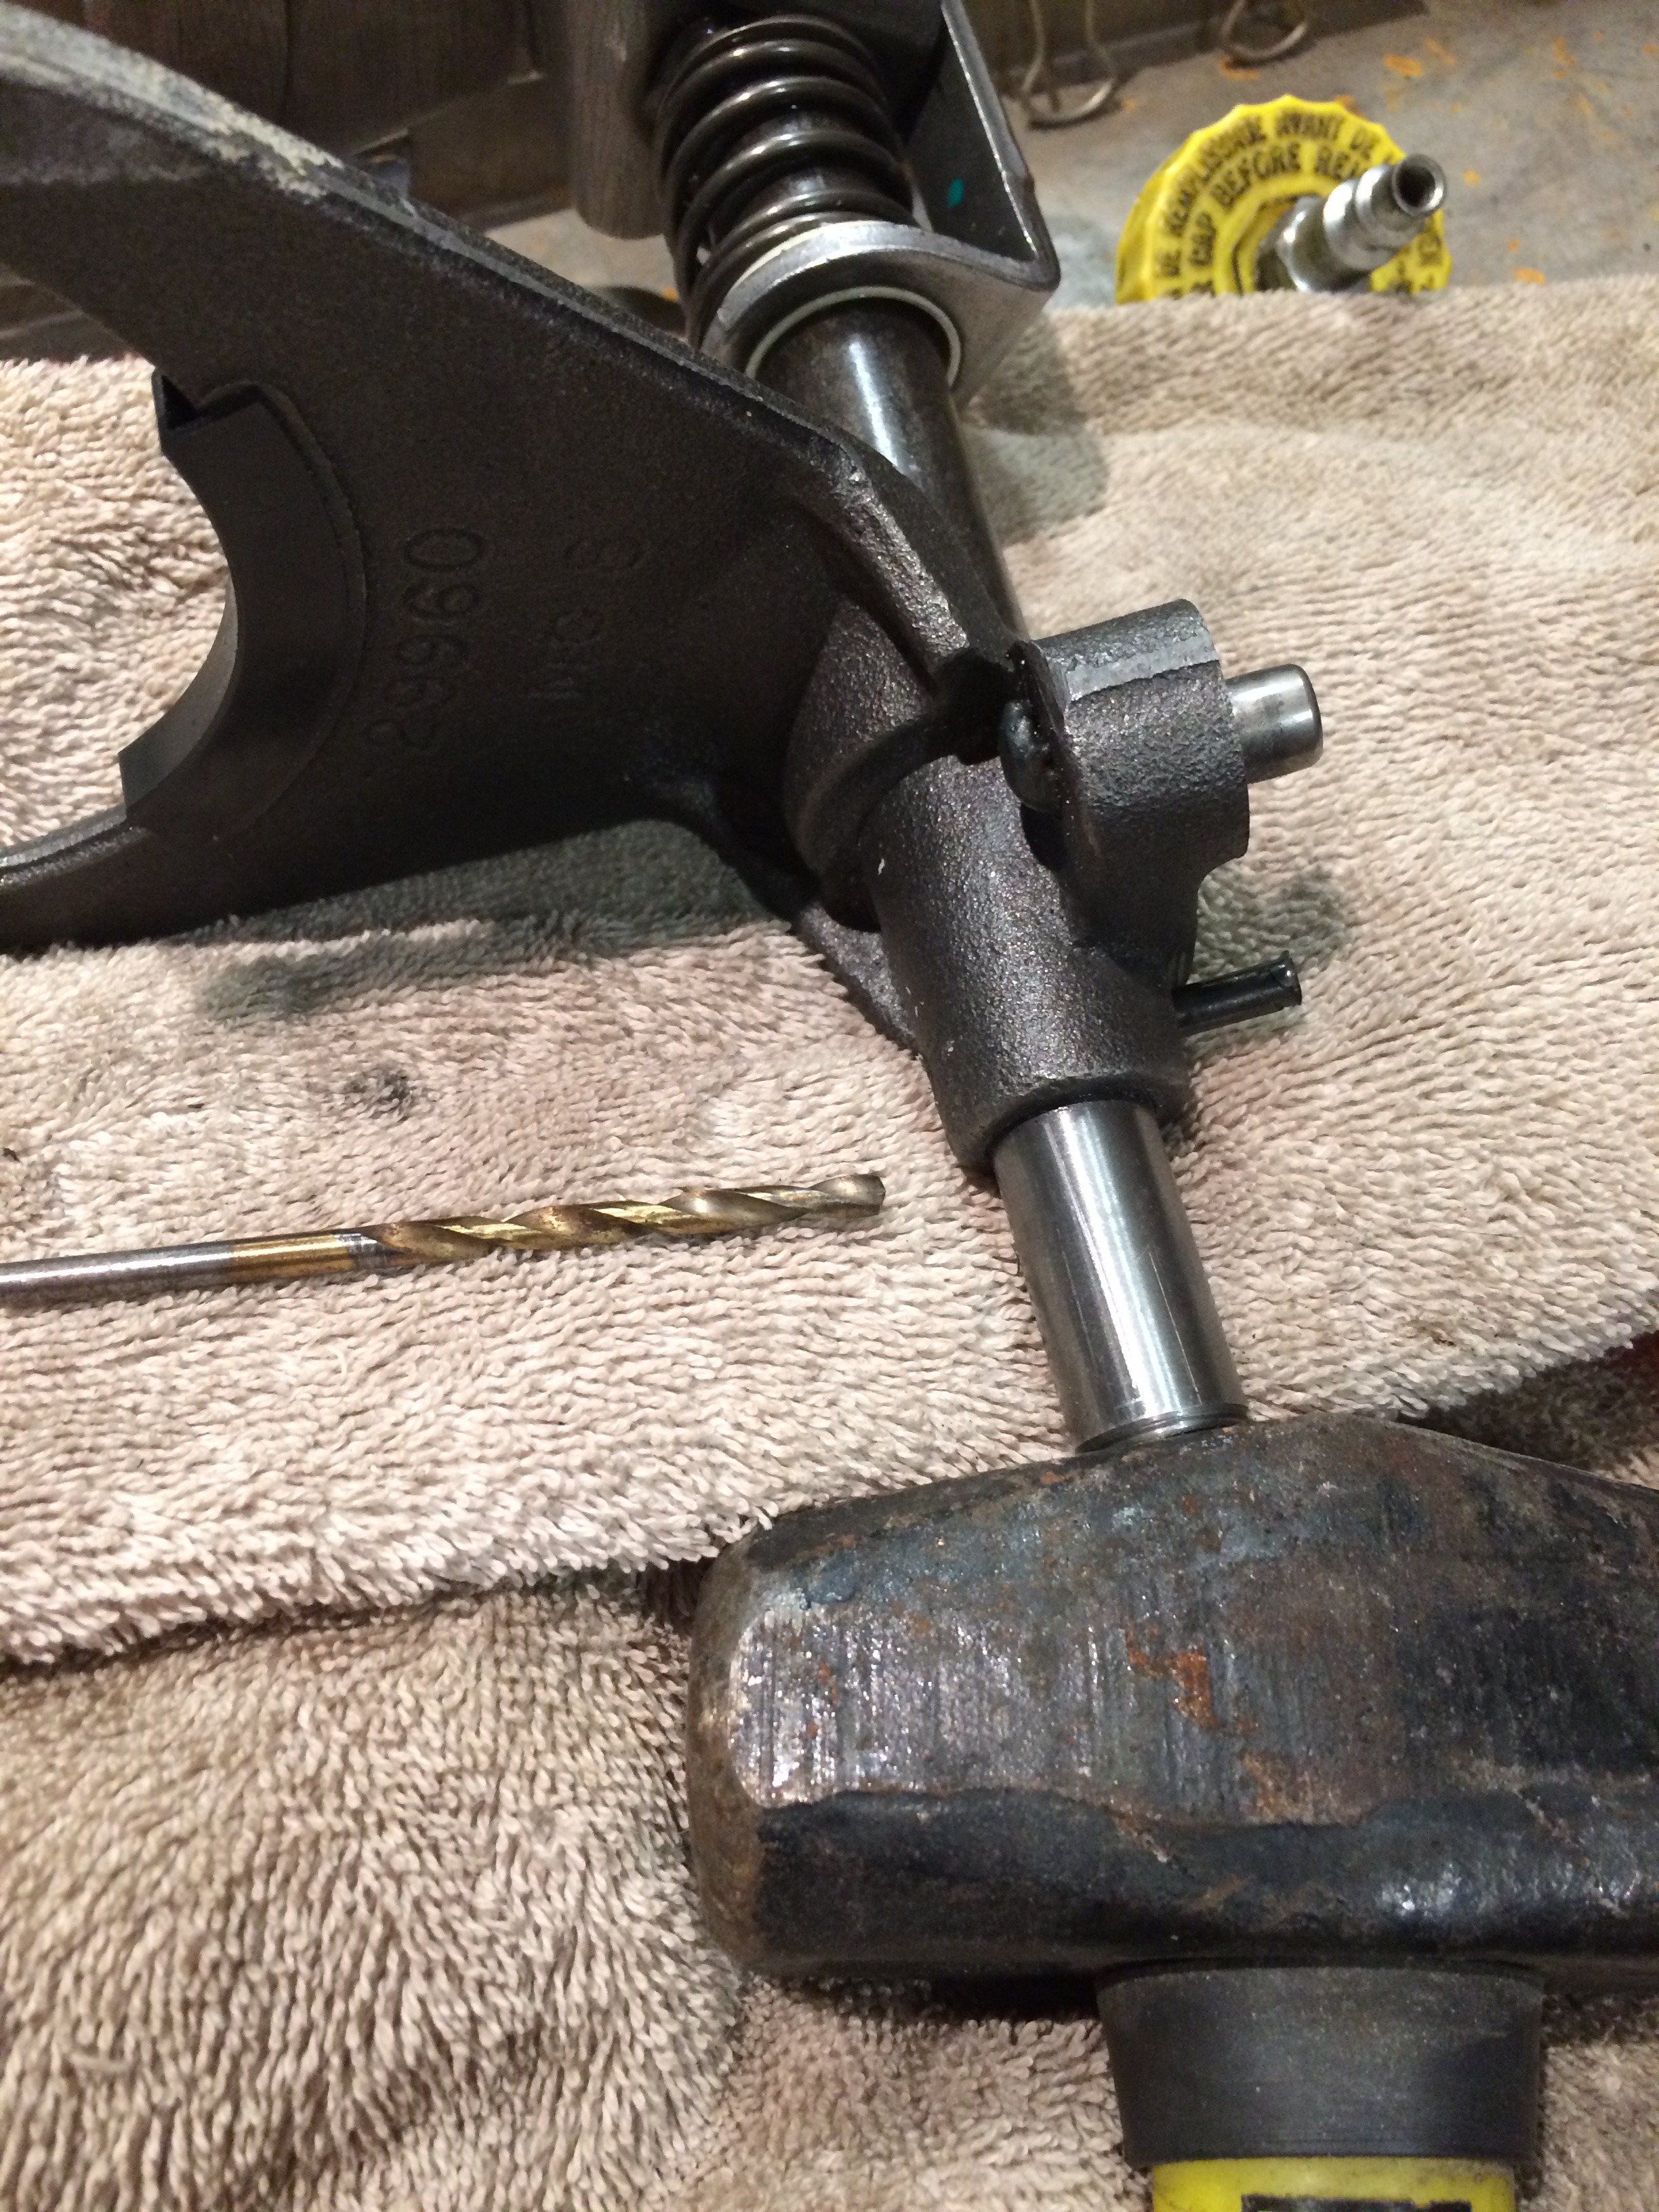
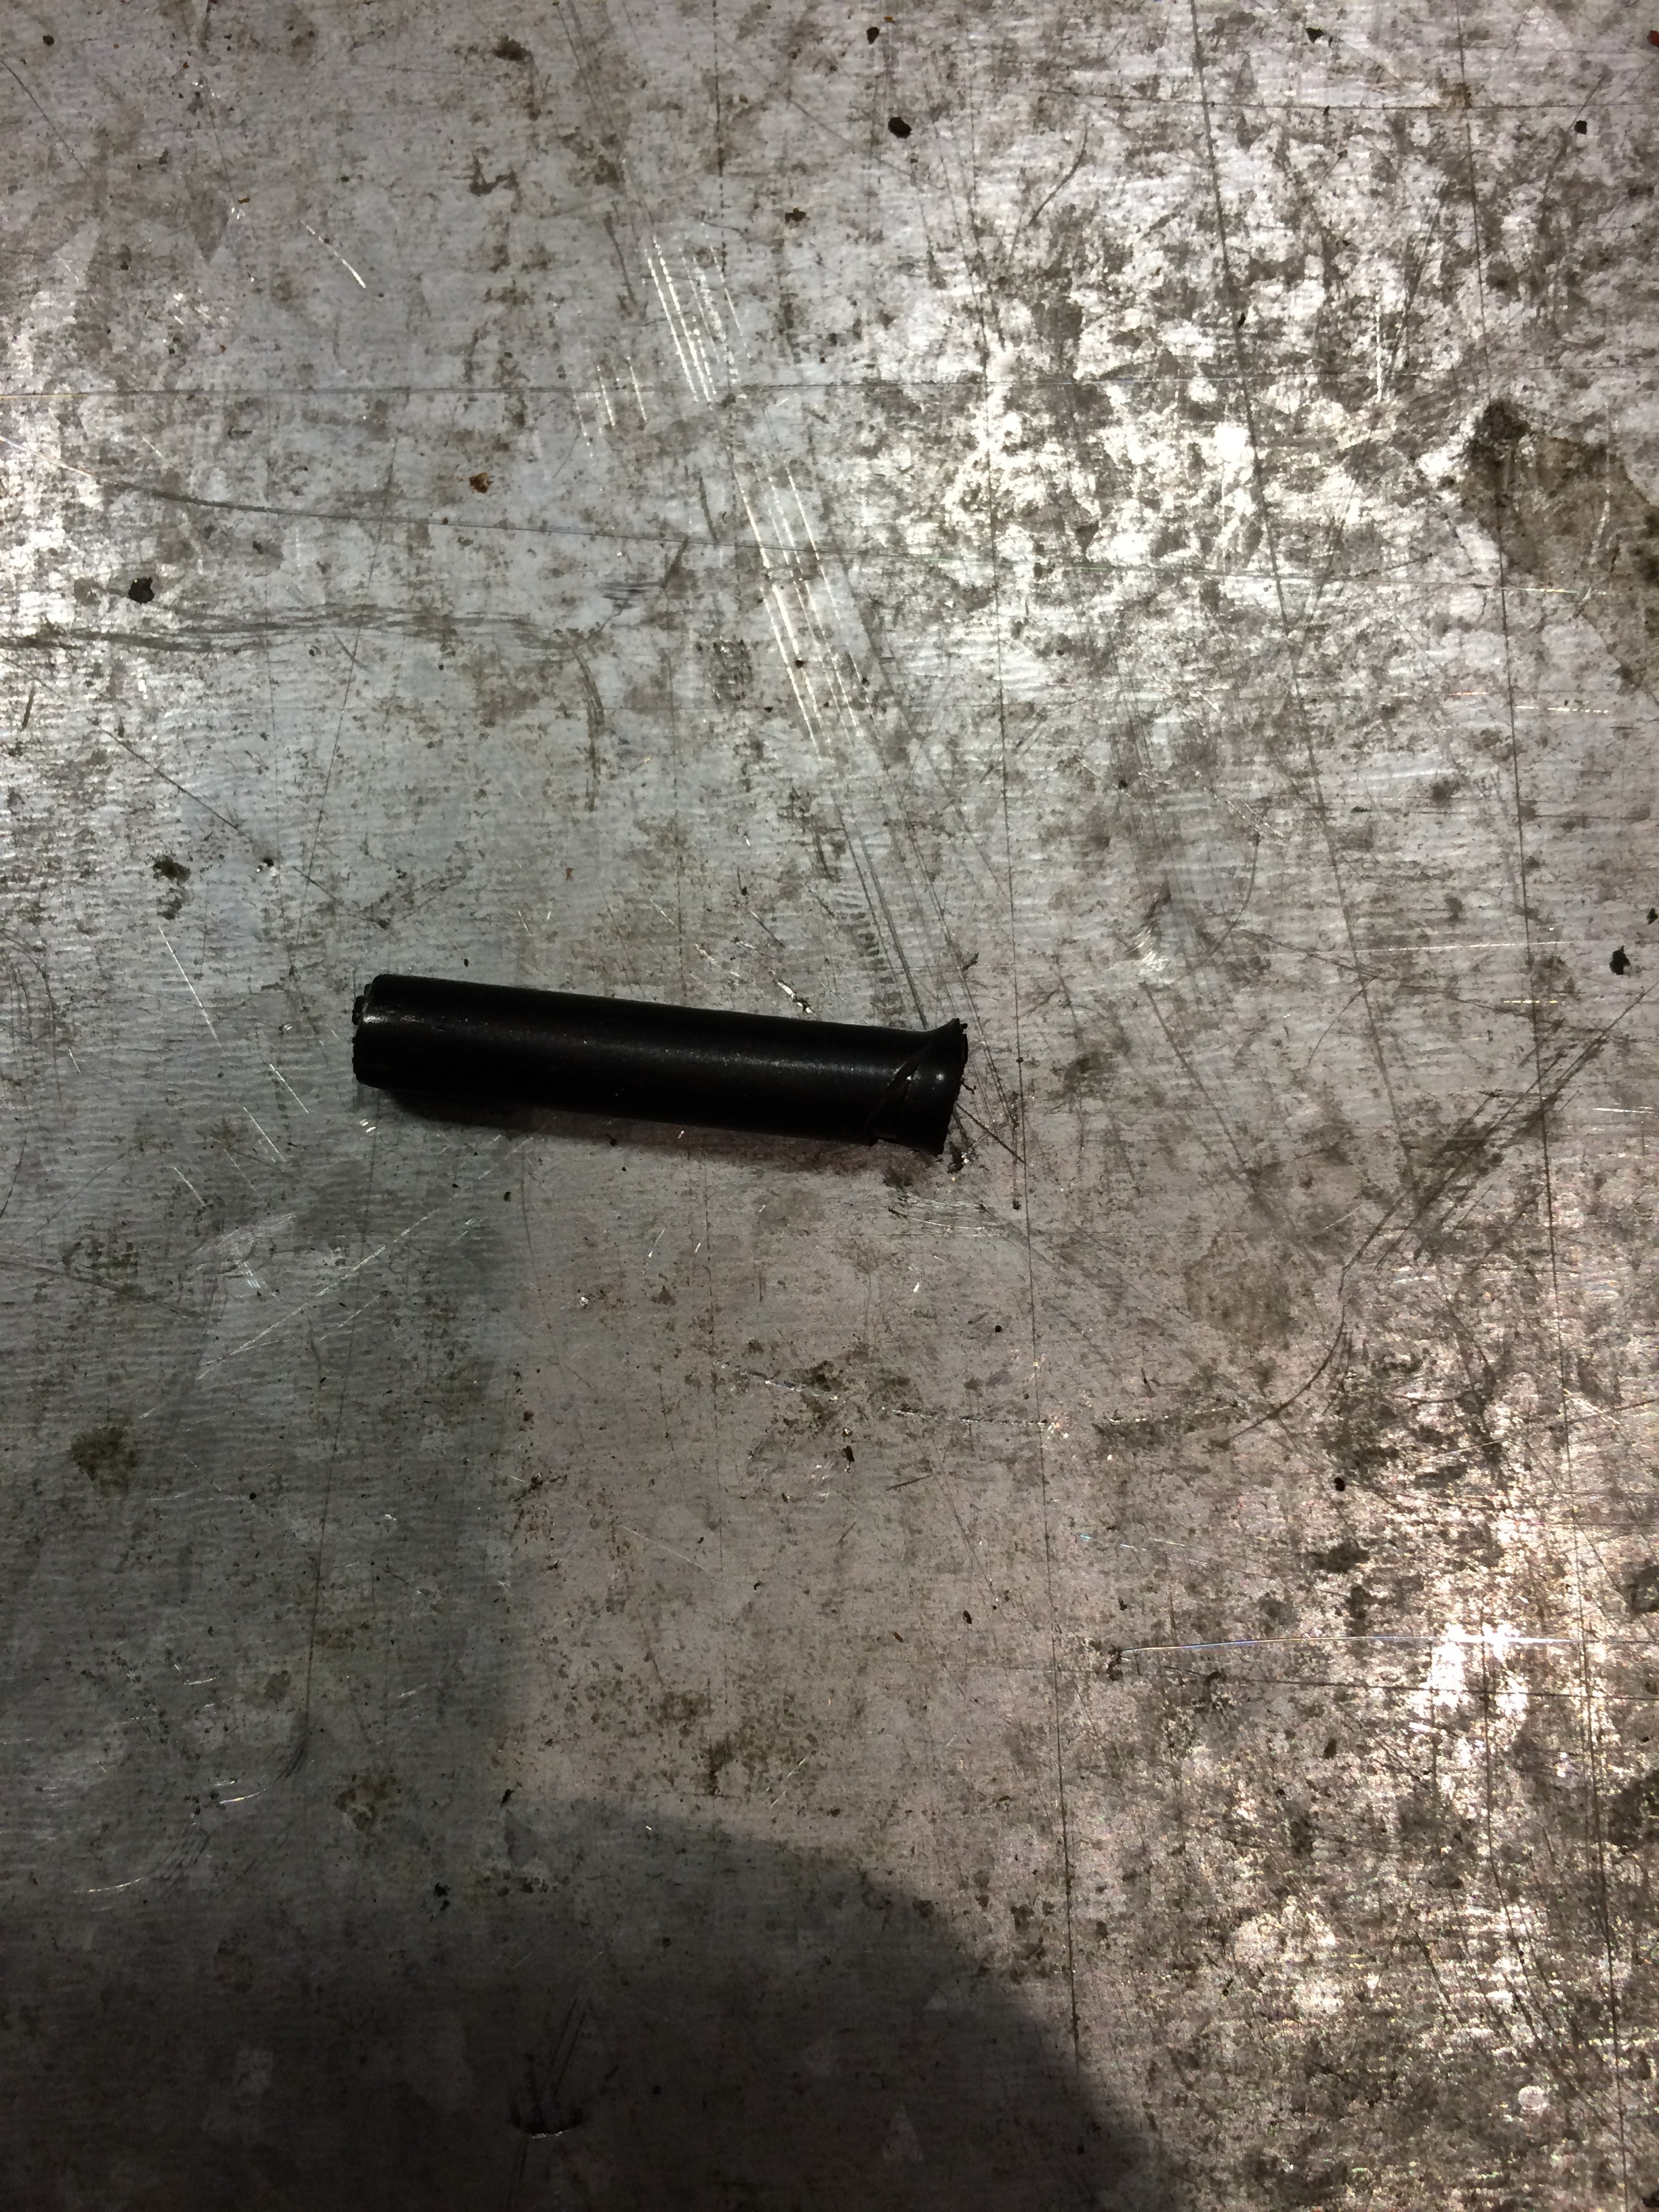
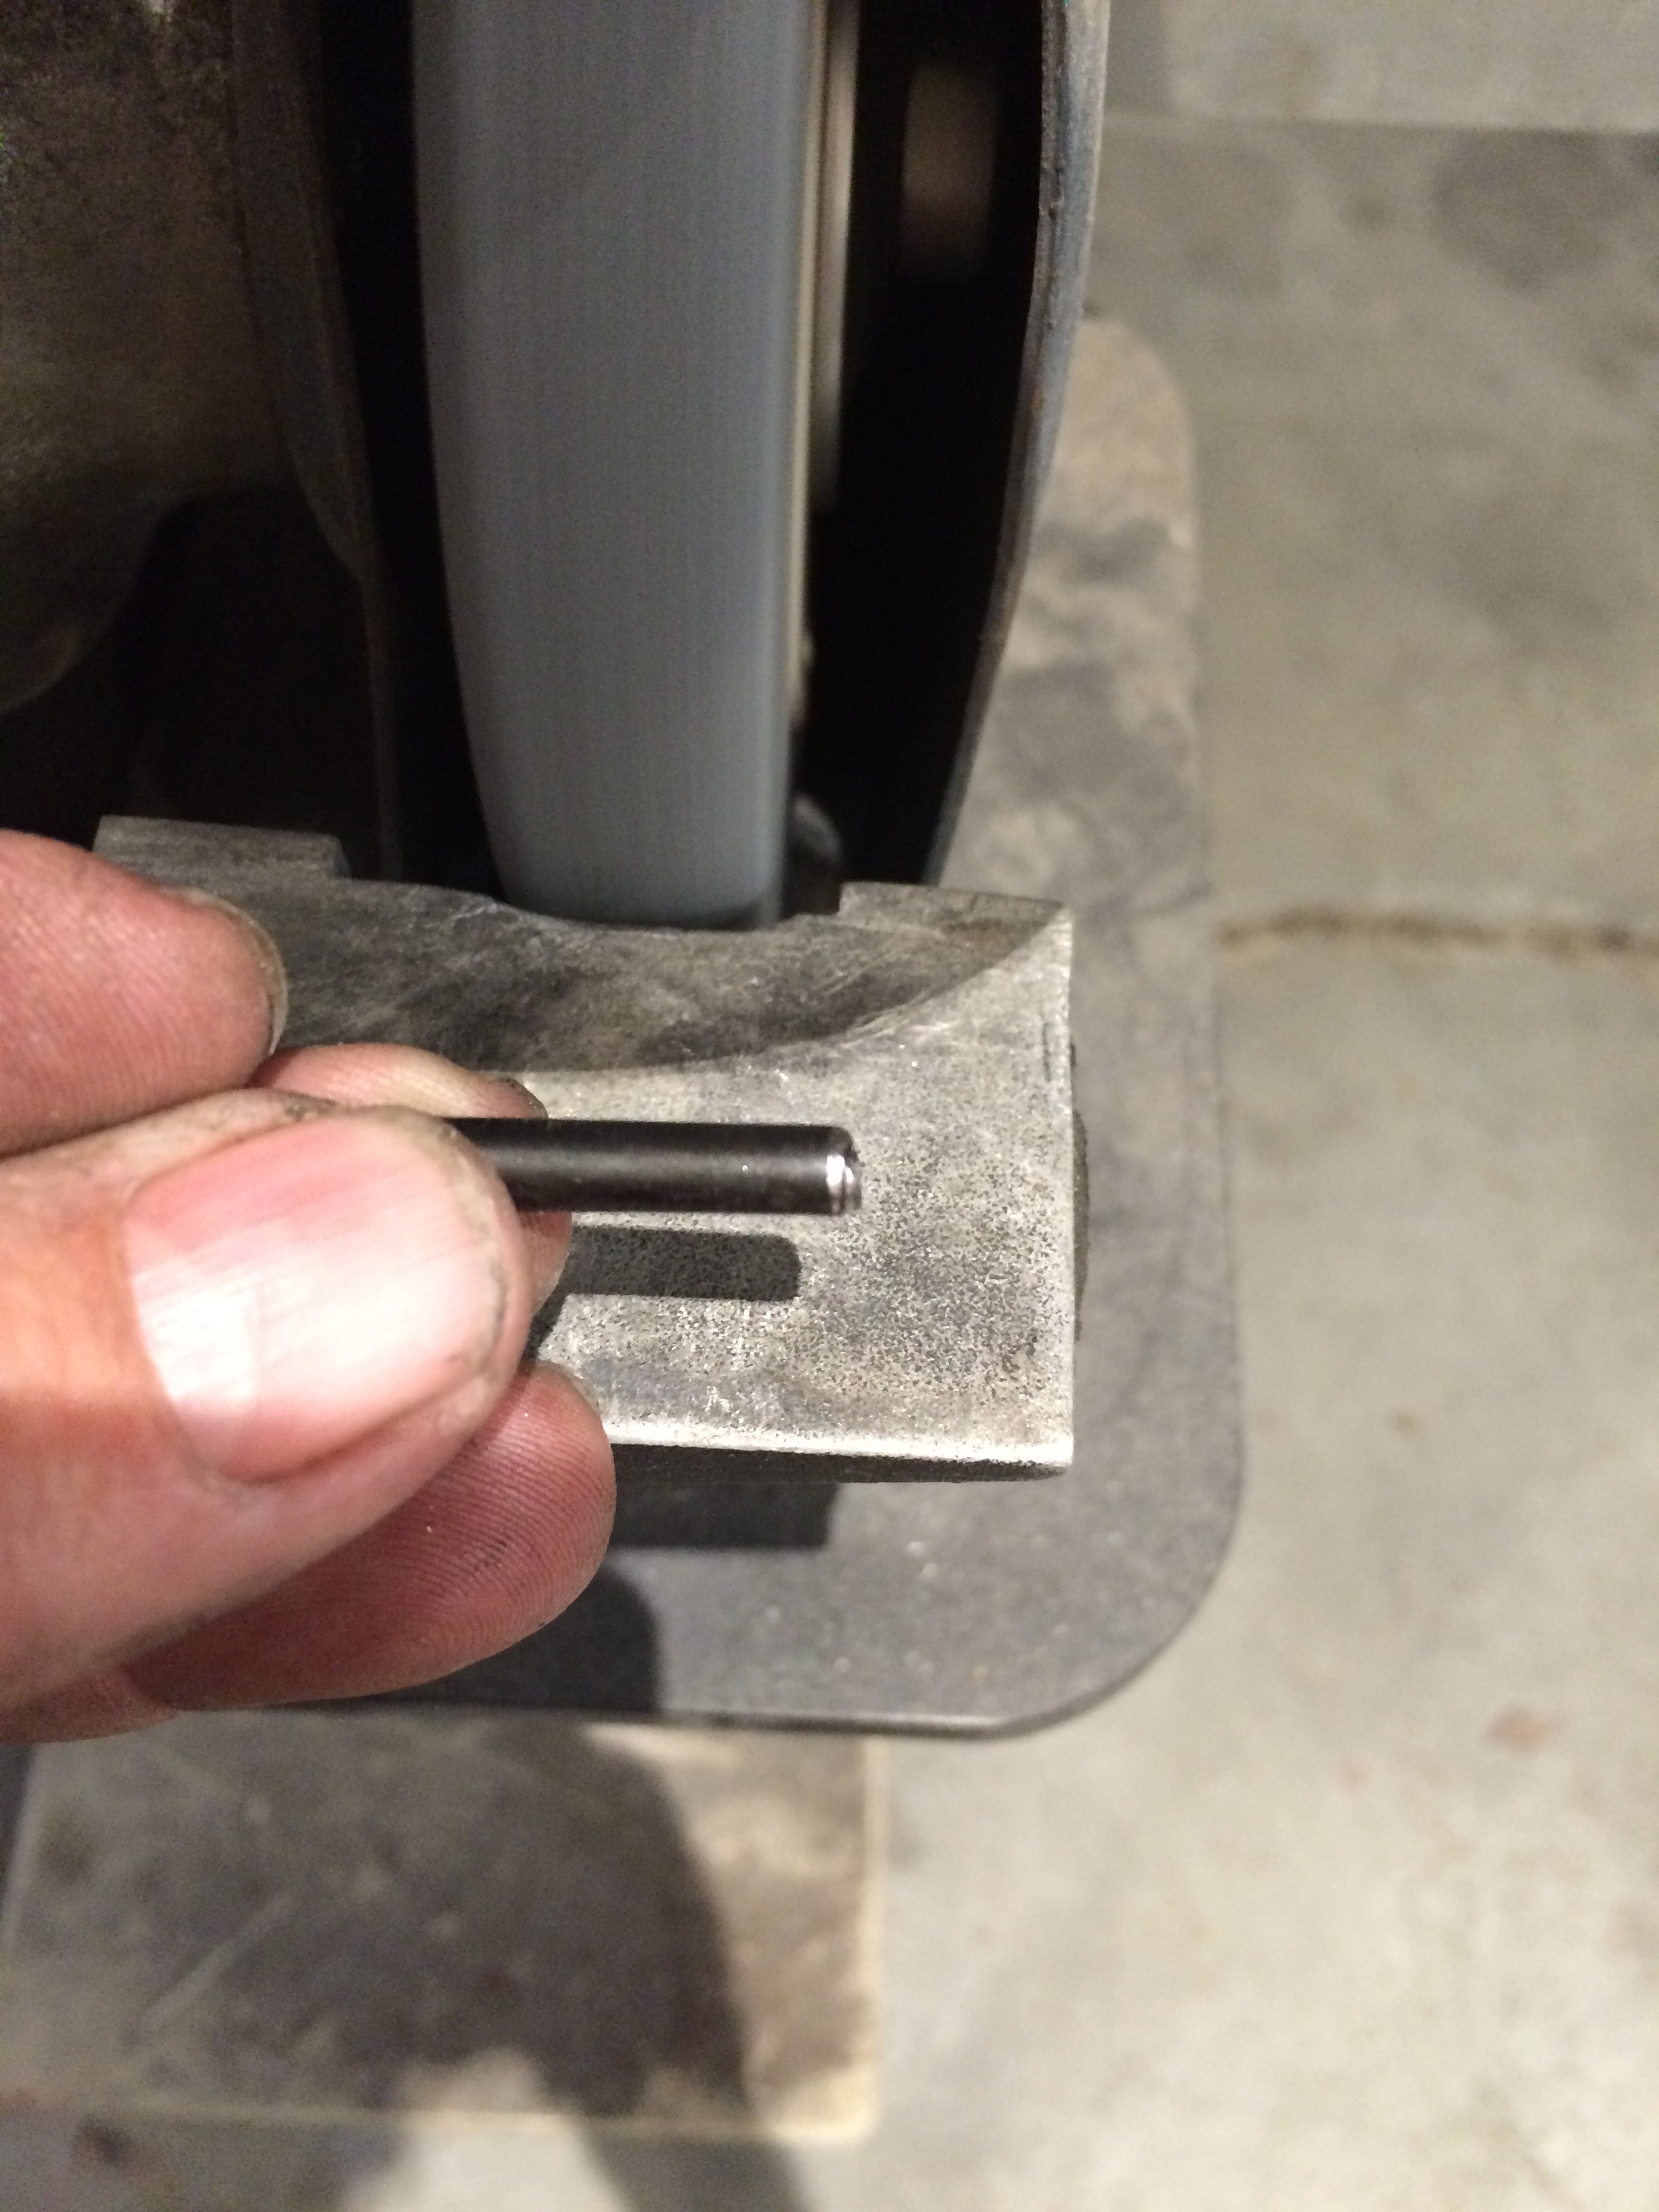
There is no reason to try to find a new roll pin. They come in rebuild kits, but are otherwise not worth looking for, in my opinion. Clean it up on the bench grinder, give it a tapered end, and drive it back in. I used a drill bit that would fit through it to line it up in the holes, and a small screwdriver to reach beside it and get it started. Then a big drill bit to drive it all the way in.
Shift fork lined up
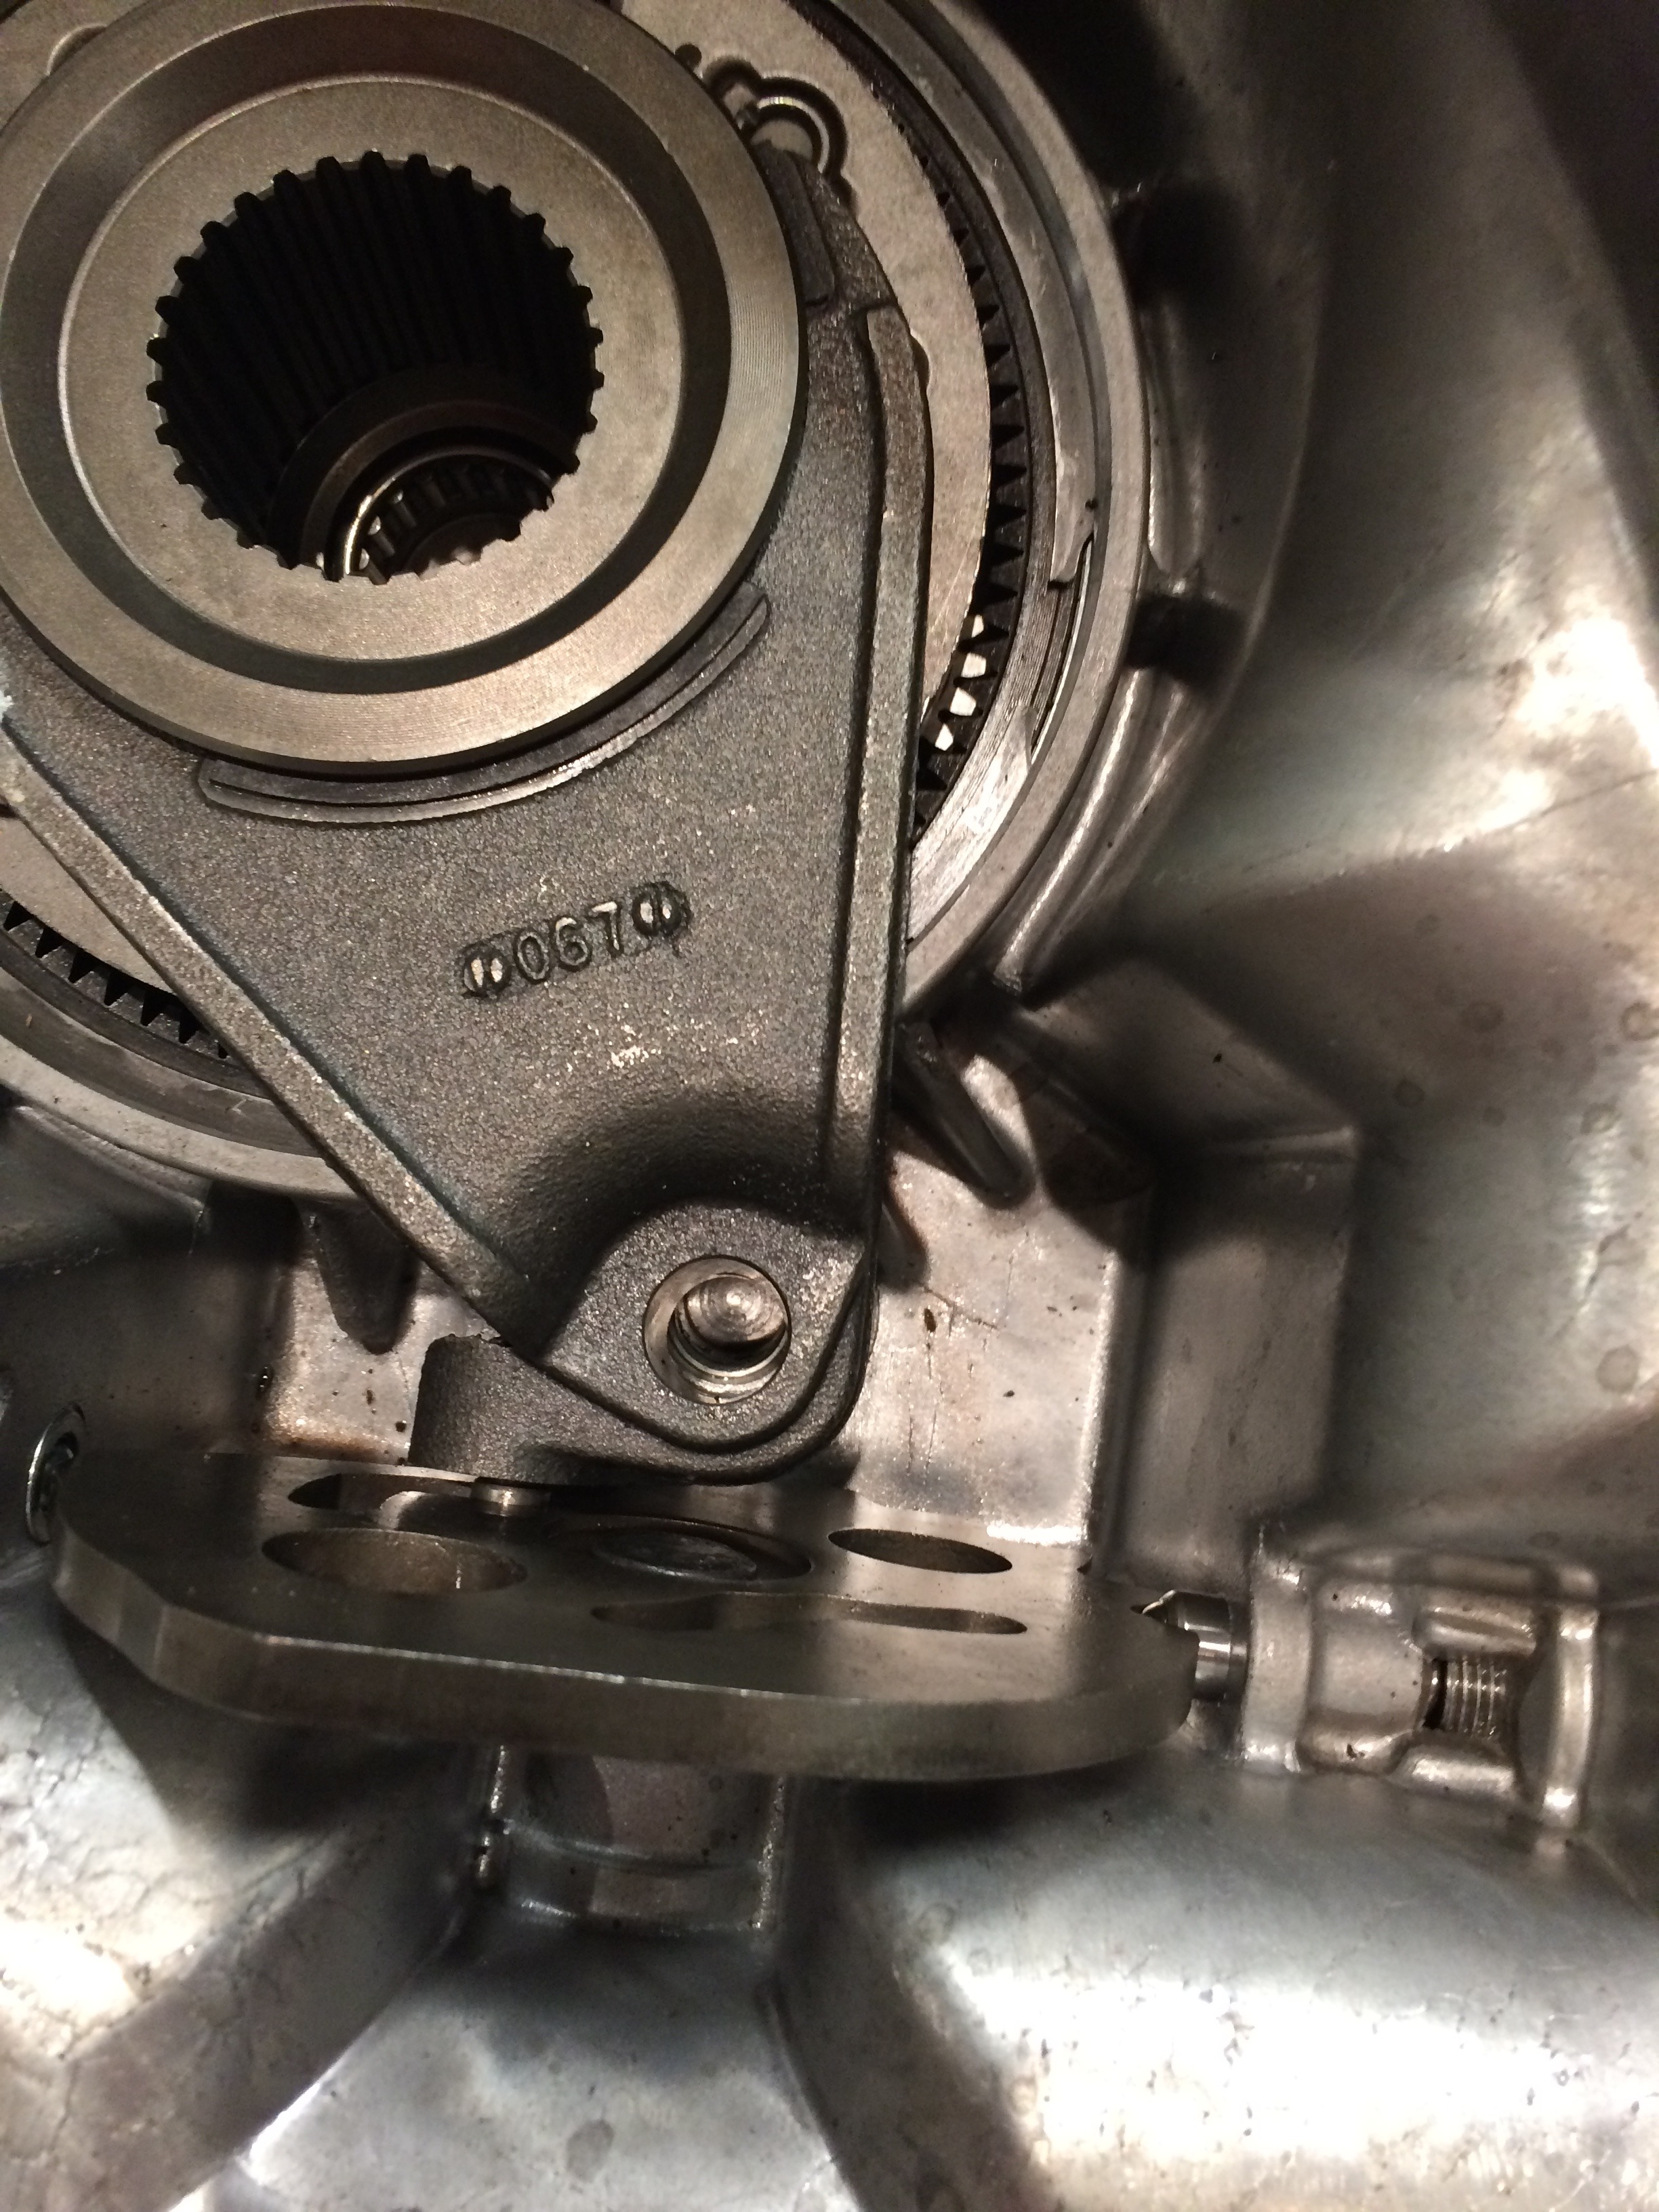
Shaft in position in the shift fork, hole lined up (as seen though the access hole).
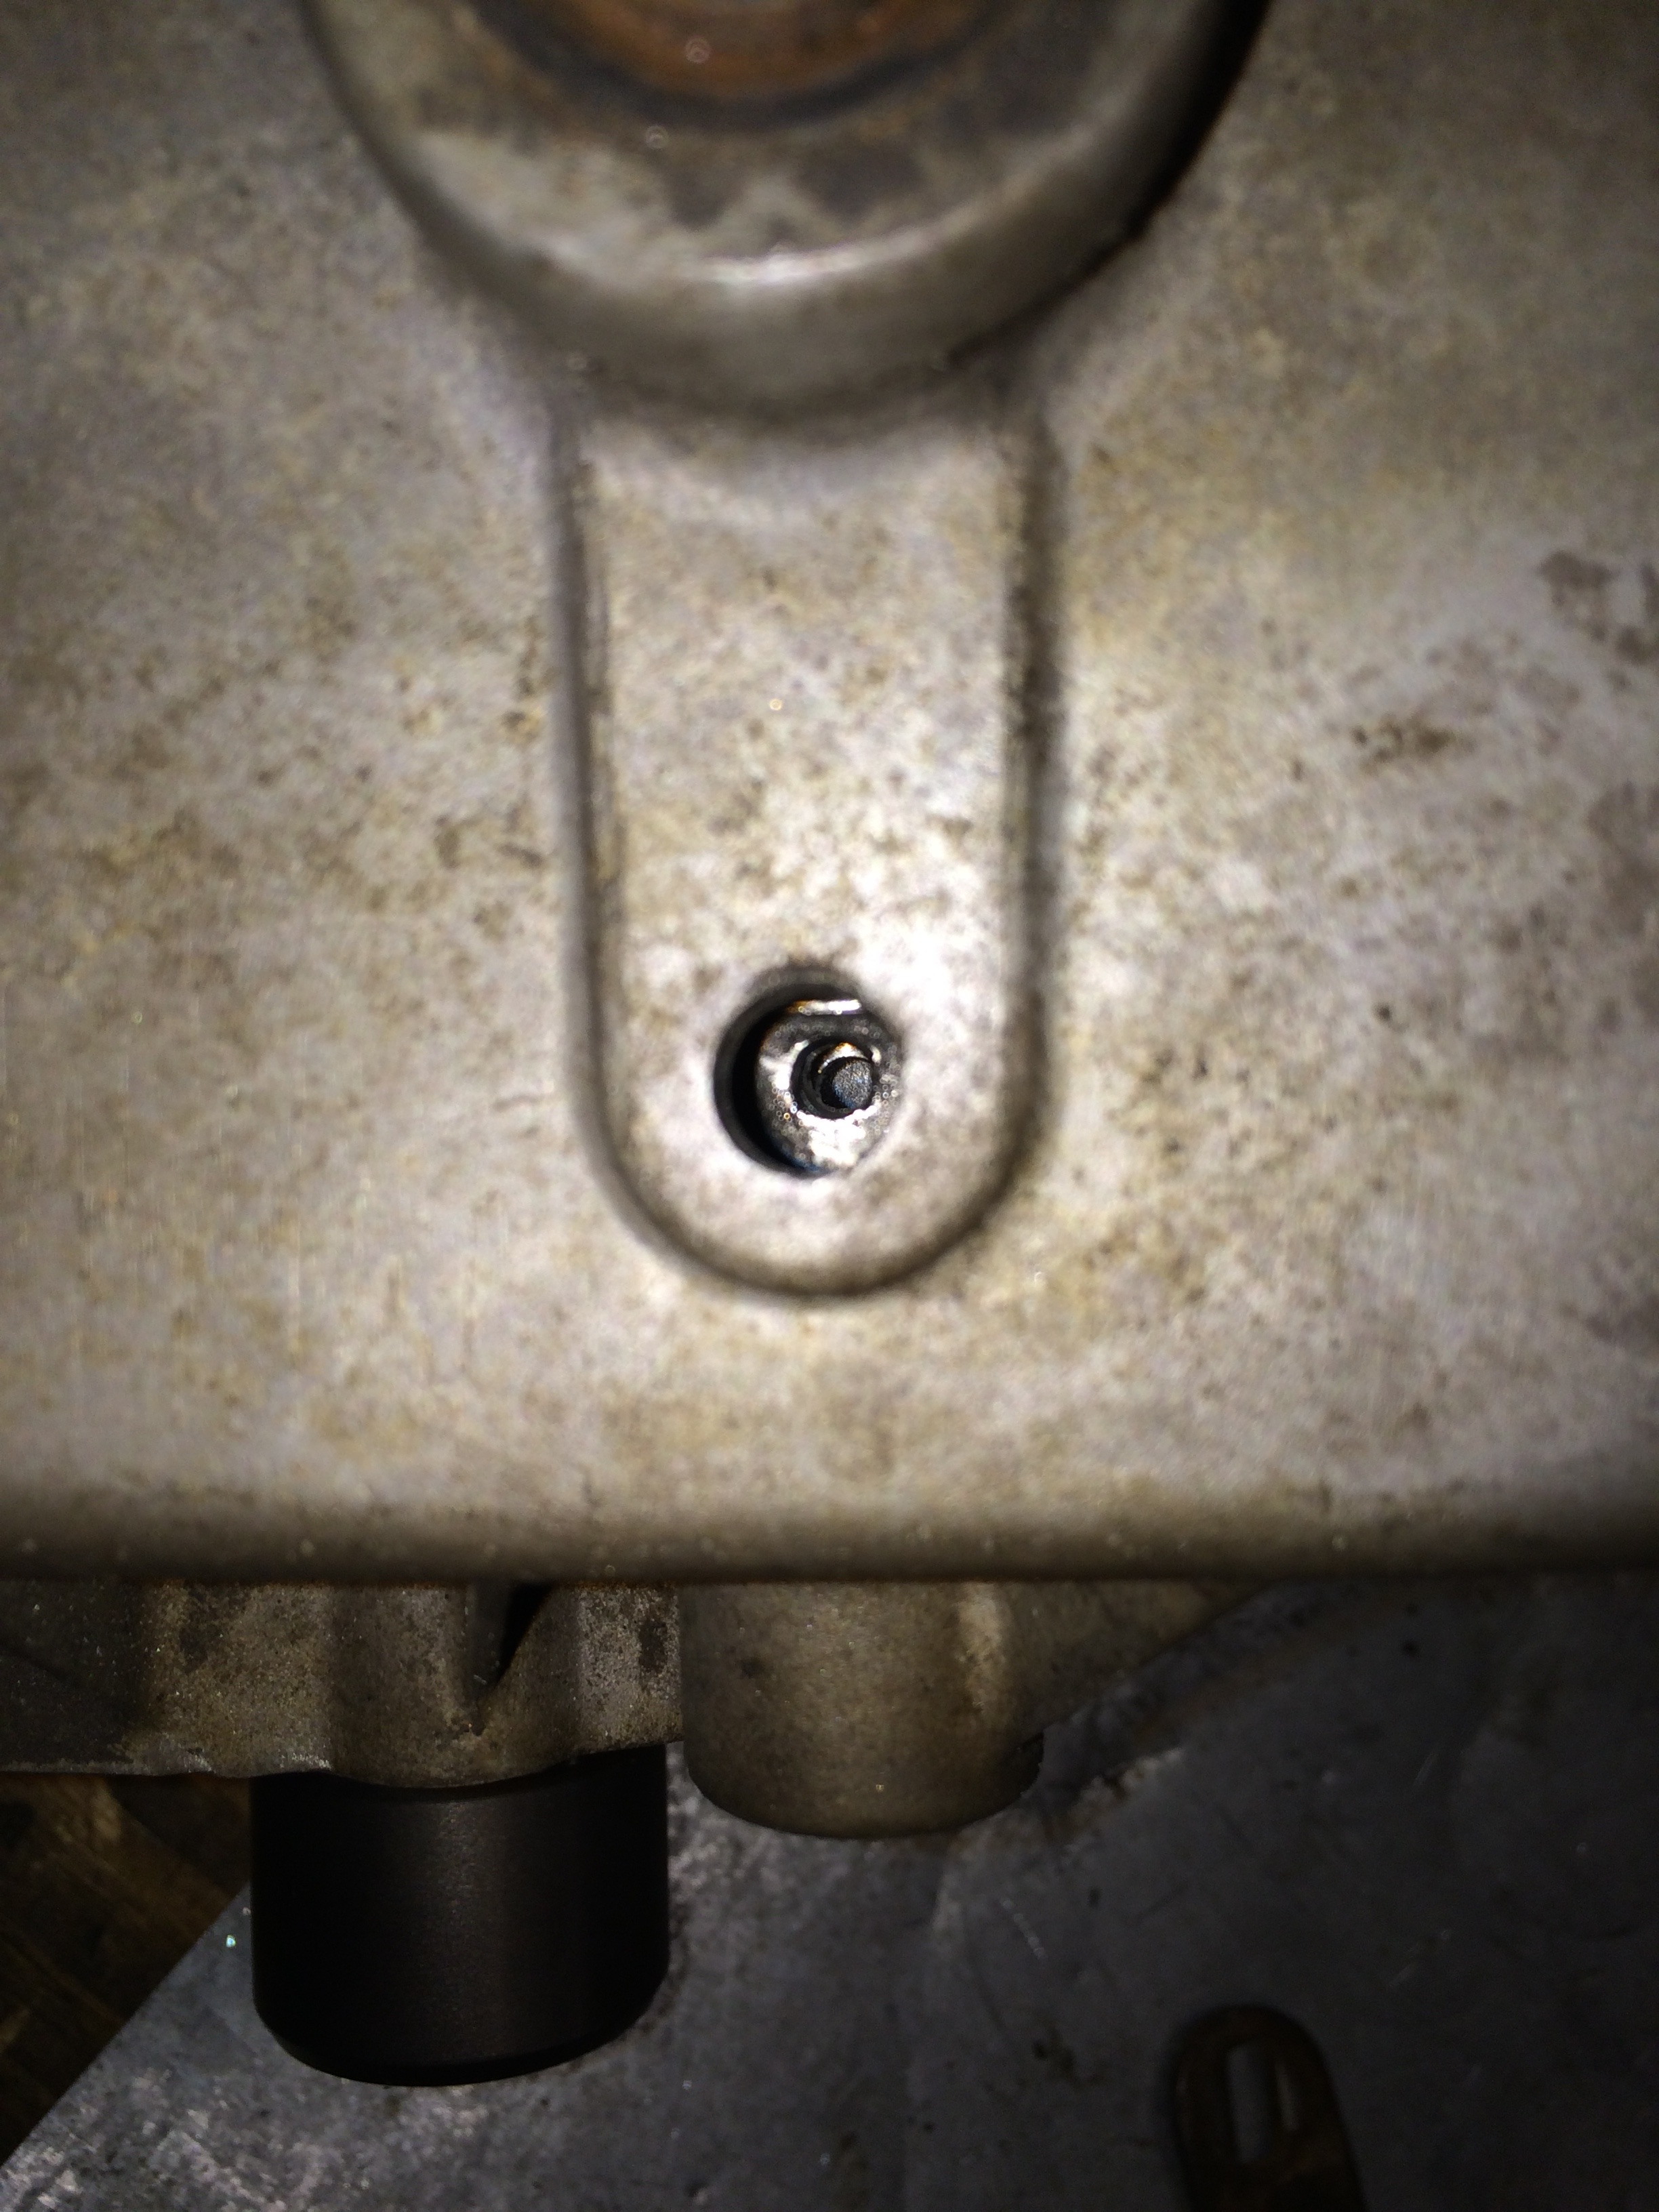
Tool set to install roll pin

After assembling the case completely, I pull it apart and insert small wood blocks on 3 sides, and squeeze in the RTV, with input shaft stuck through the hole in my table.

Anyway..... The Dodge uses a "late cut" gear, but an early, 24 mm wide input shaft bearing. This meant the input shaft they sent me wouldn't allow the case to close. No one makes a "late cut" gear with a low shoulder. So I cruised the internet forums looking for an answer. At one point, I considered replacing the front half of the case with a later case that had a narrow, 16 mm bearing. I also considered buying an "early cut" planetary, but I had already spent $70 on a 6 gear planetary that had "late cut" gears.
Then I ran across someone's thread. "Putting the thin bearing in place of the thick one. The case doesn't care". So I bought a 16mm bearing from Quadratec, and pushed it right in. No clearance issues, no problem.
Input shafts. Late cut (back, thick shoulder), early cut (front, thin shoulder)
6 gear planetary
Thin 16mm bearing

Getting ready to put the shift forks back in. The 242 has this stupid roll pin at the bottom, with a little access hole to get to it. Following the advice online, I used a pry bar to pull the forks out. Getting them back in is not the reverse order, unfortunately. I couldn't "pry" the shift fork back in. So I used a matching size drill bit and hammer to drive the roll pin out now.


There is no reason to try to find a new roll pin. They come in rebuild kits, but are otherwise not worth looking for, in my opinion. Clean it up on the bench grinder, give it a tapered end, and drive it back in. I used a drill bit that would fit through it to line it up in the holes, and a small screwdriver to reach beside it and get it started. Then a big drill bit to drive it all the way in.

Shift fork lined up

Shaft in position in the shift fork, hole lined up (as seen though the access hole).

Tool set to install roll pin

After assembling the case completely, I pull it apart and insert small wood blocks on 3 sides, and squeeze in the RTV, with input shaft stuck through the hole in my table.

 01-30-2016, 05:20 PM
#50
Things are moving right along now. Parts are mostly all here. Longblock is togeather and in the truck, and the transmission and transfer case are painted and ready to go in tomorrow.
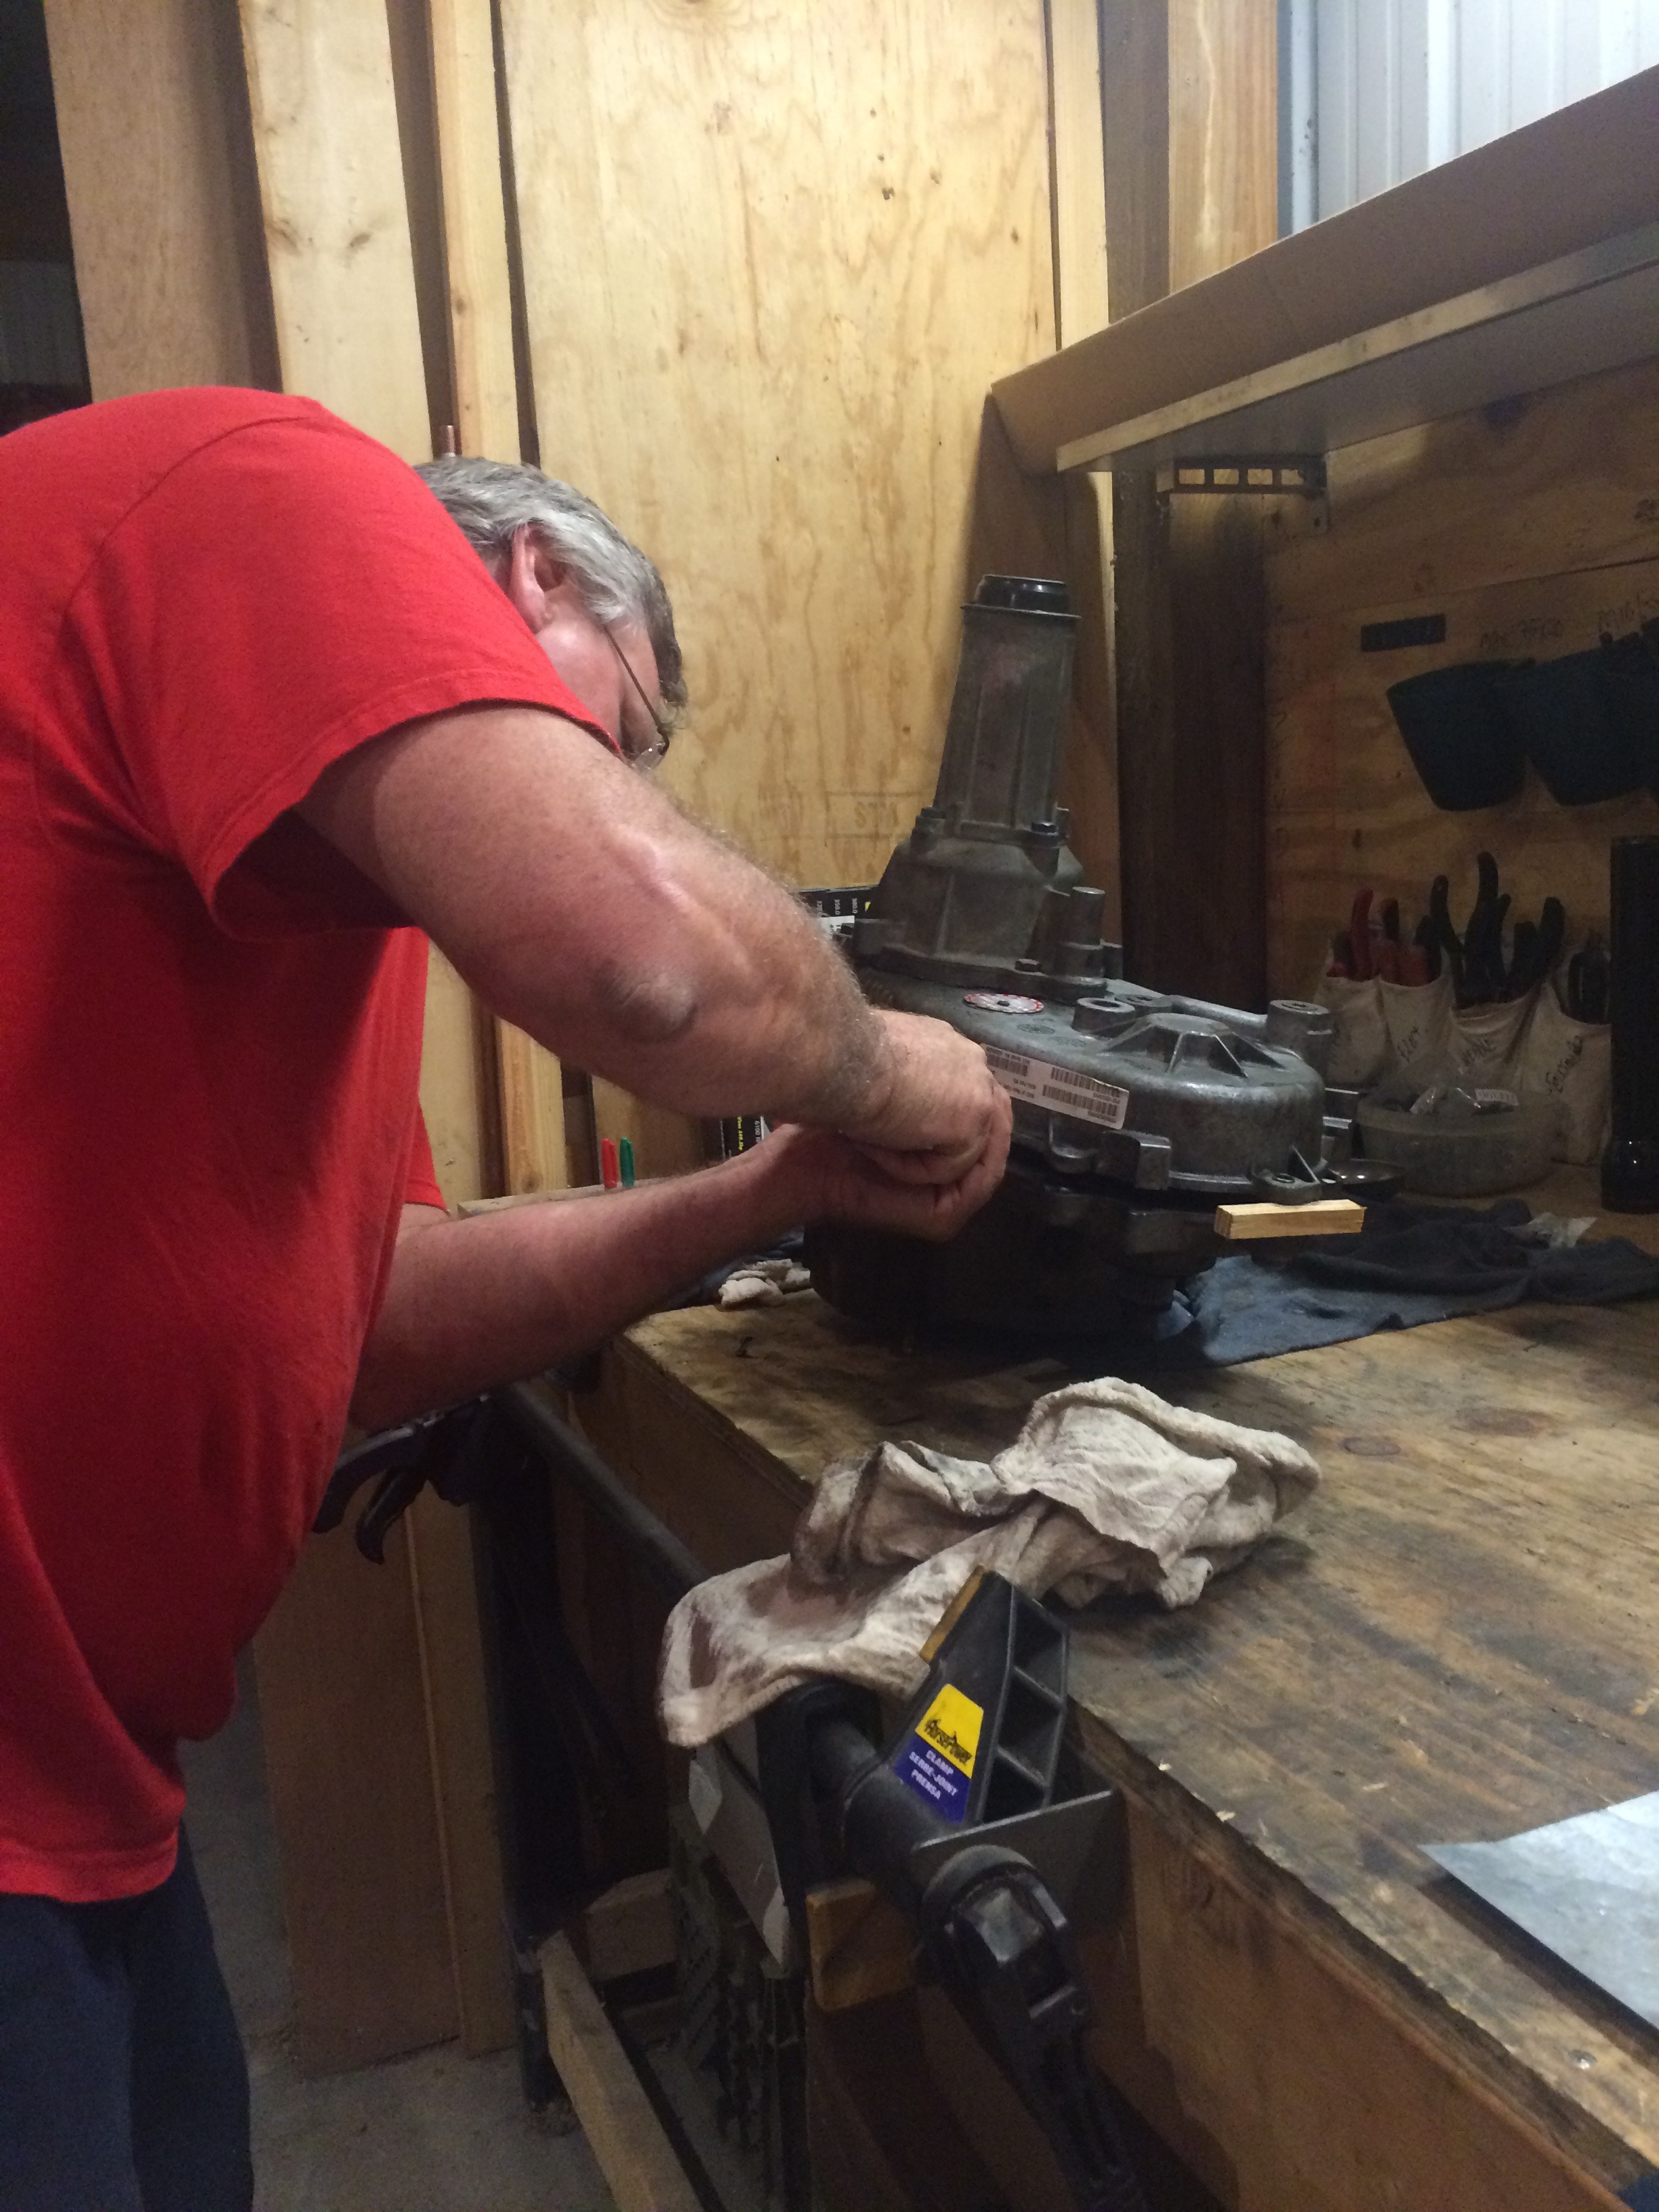
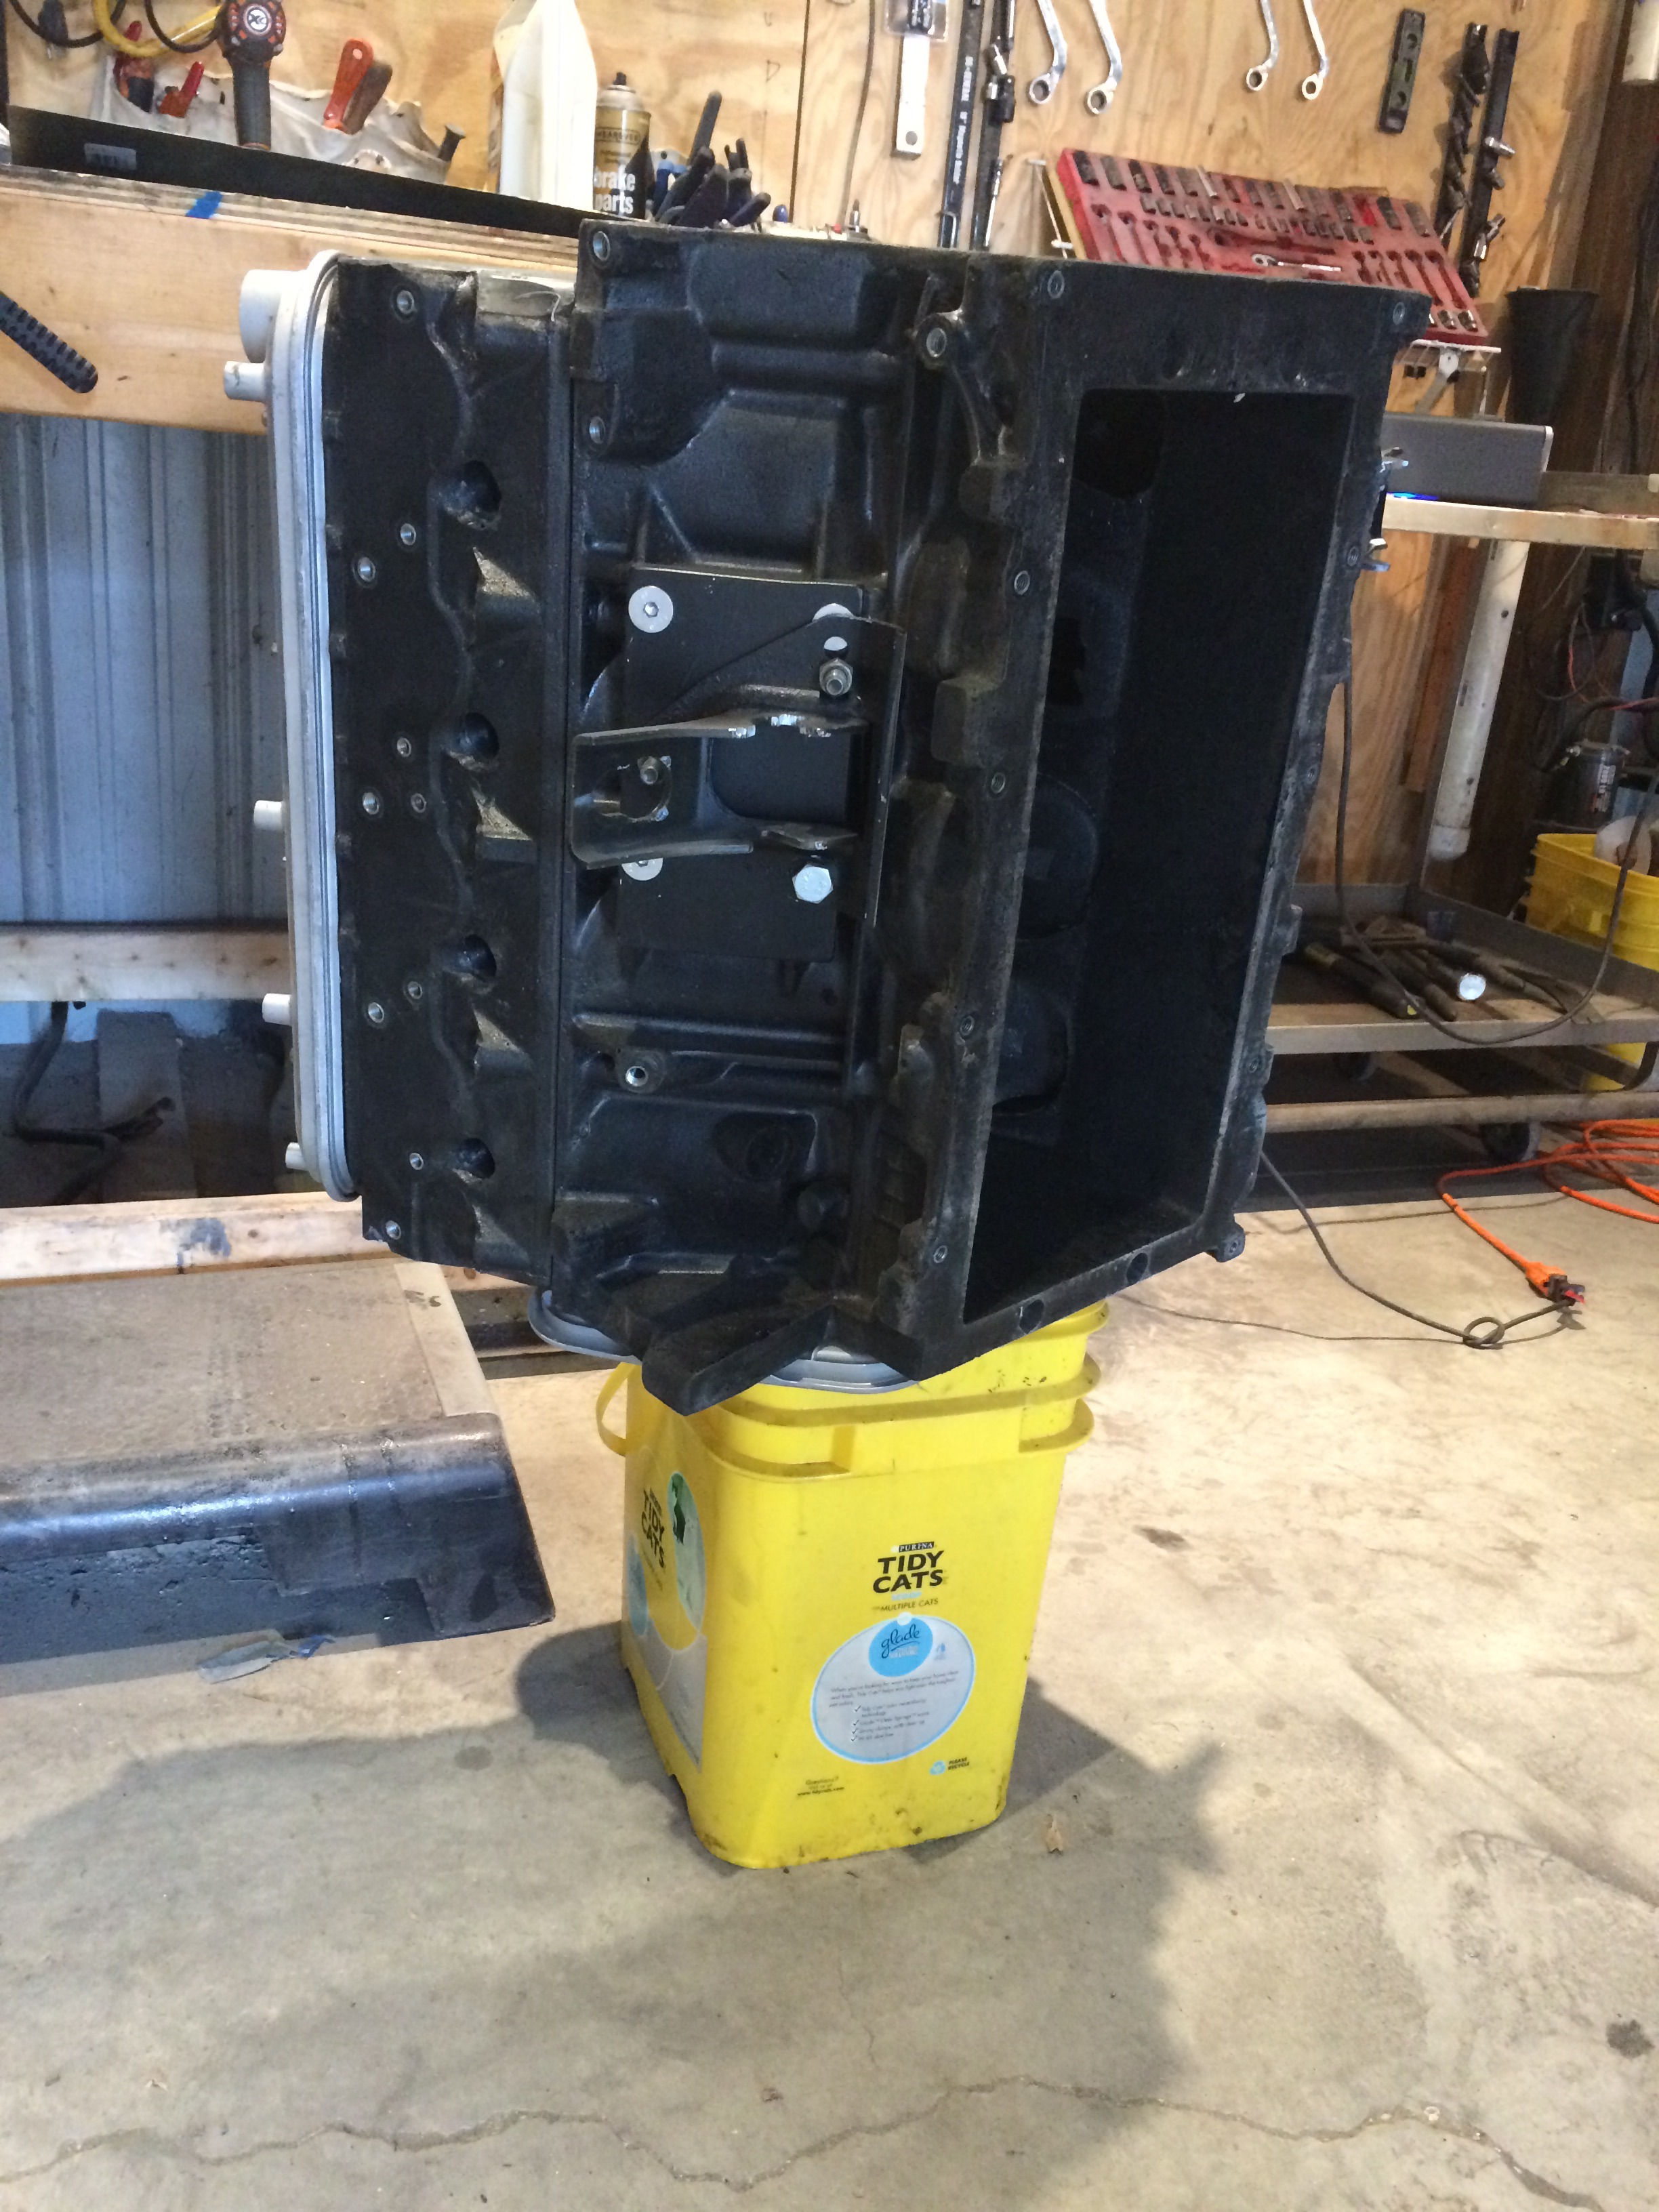
Anytime anyone asks me about doing an LS swap, one of the first recommendations I have is to get a plastic mock-up block. Here, I am making a couple of last-minute tweaks to the motor mounts and adapter plates, just to make sure everything will drop right in. It is nice to take it in and out, and set it on a cat litter bucket to work on it.

Final appearance of motor mount and adapter plate. Painted.
Pulling locating dowels (acutally, roll pins) out of cylinder heads. I use this upholstery tool that I have had for many years. Grabs them, and pulls them right out.

Locating pin with LS9 head gasket. Last look at LSA piston.
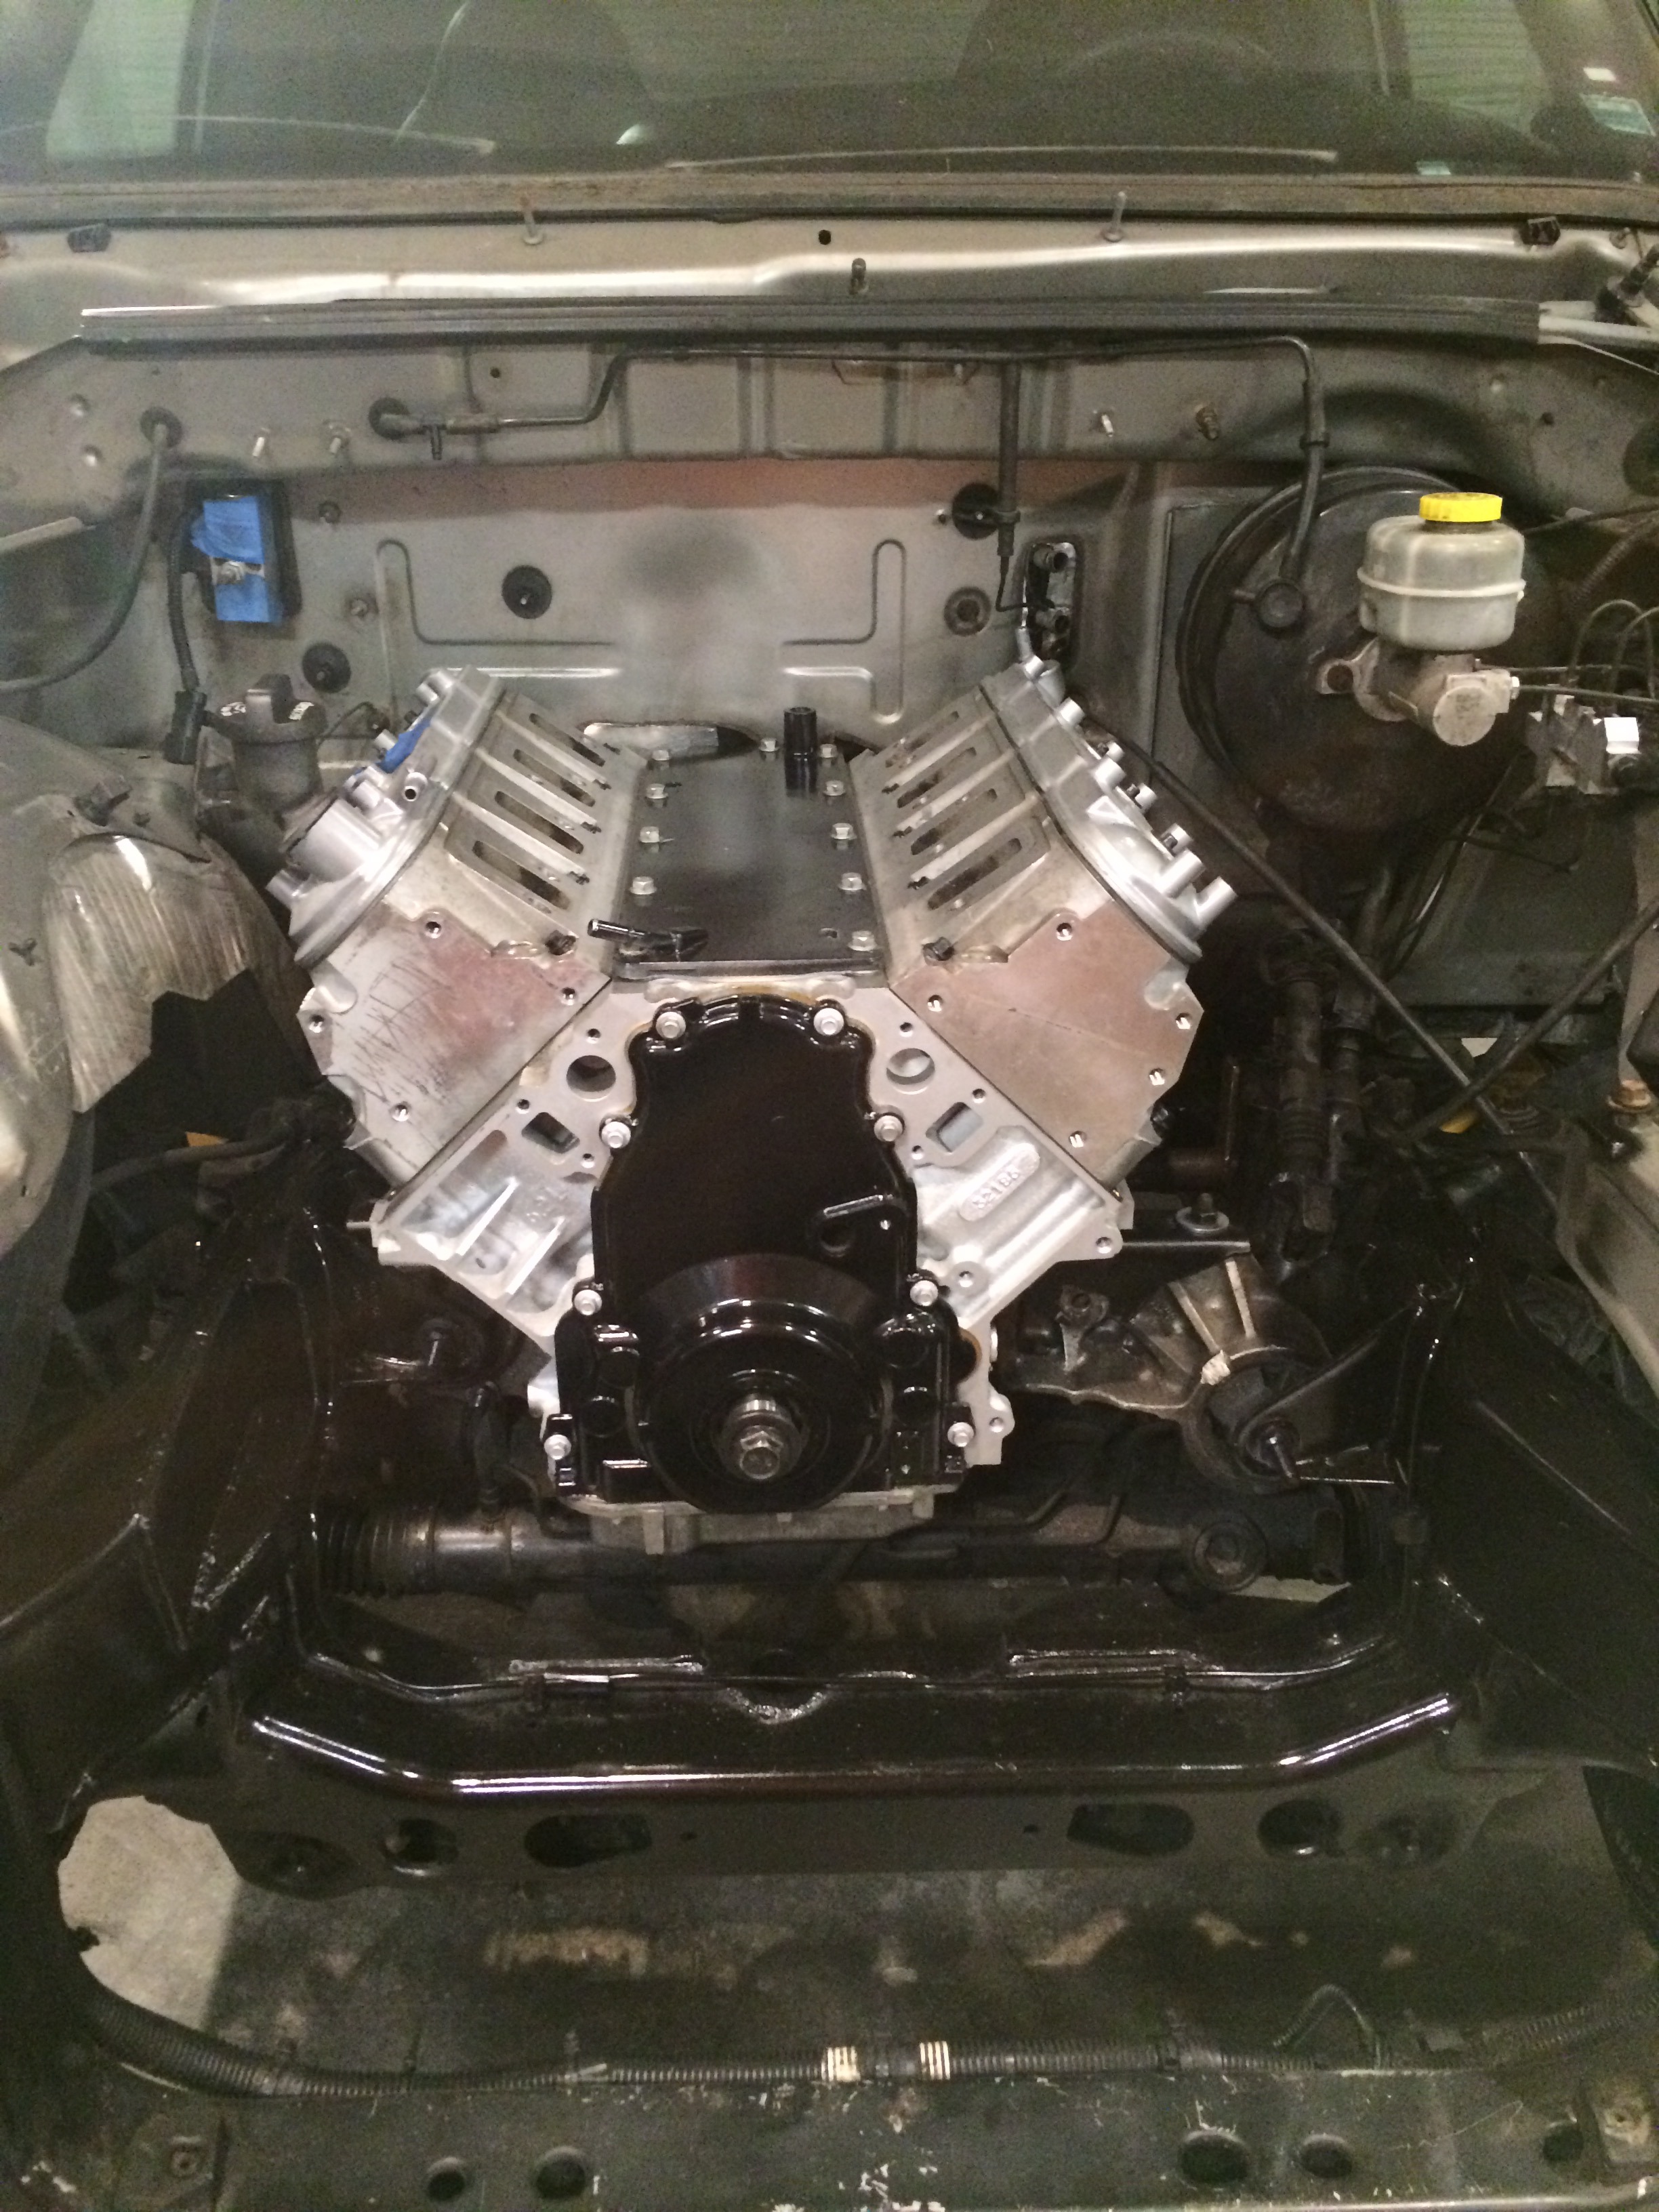
Motor in. Keeping with the silver and black theme.
Transmission painted. This will go in tomorrow, just need to buy some trans fluid. Check out the gleam from that Novak adapter. Too bad no one will see it.

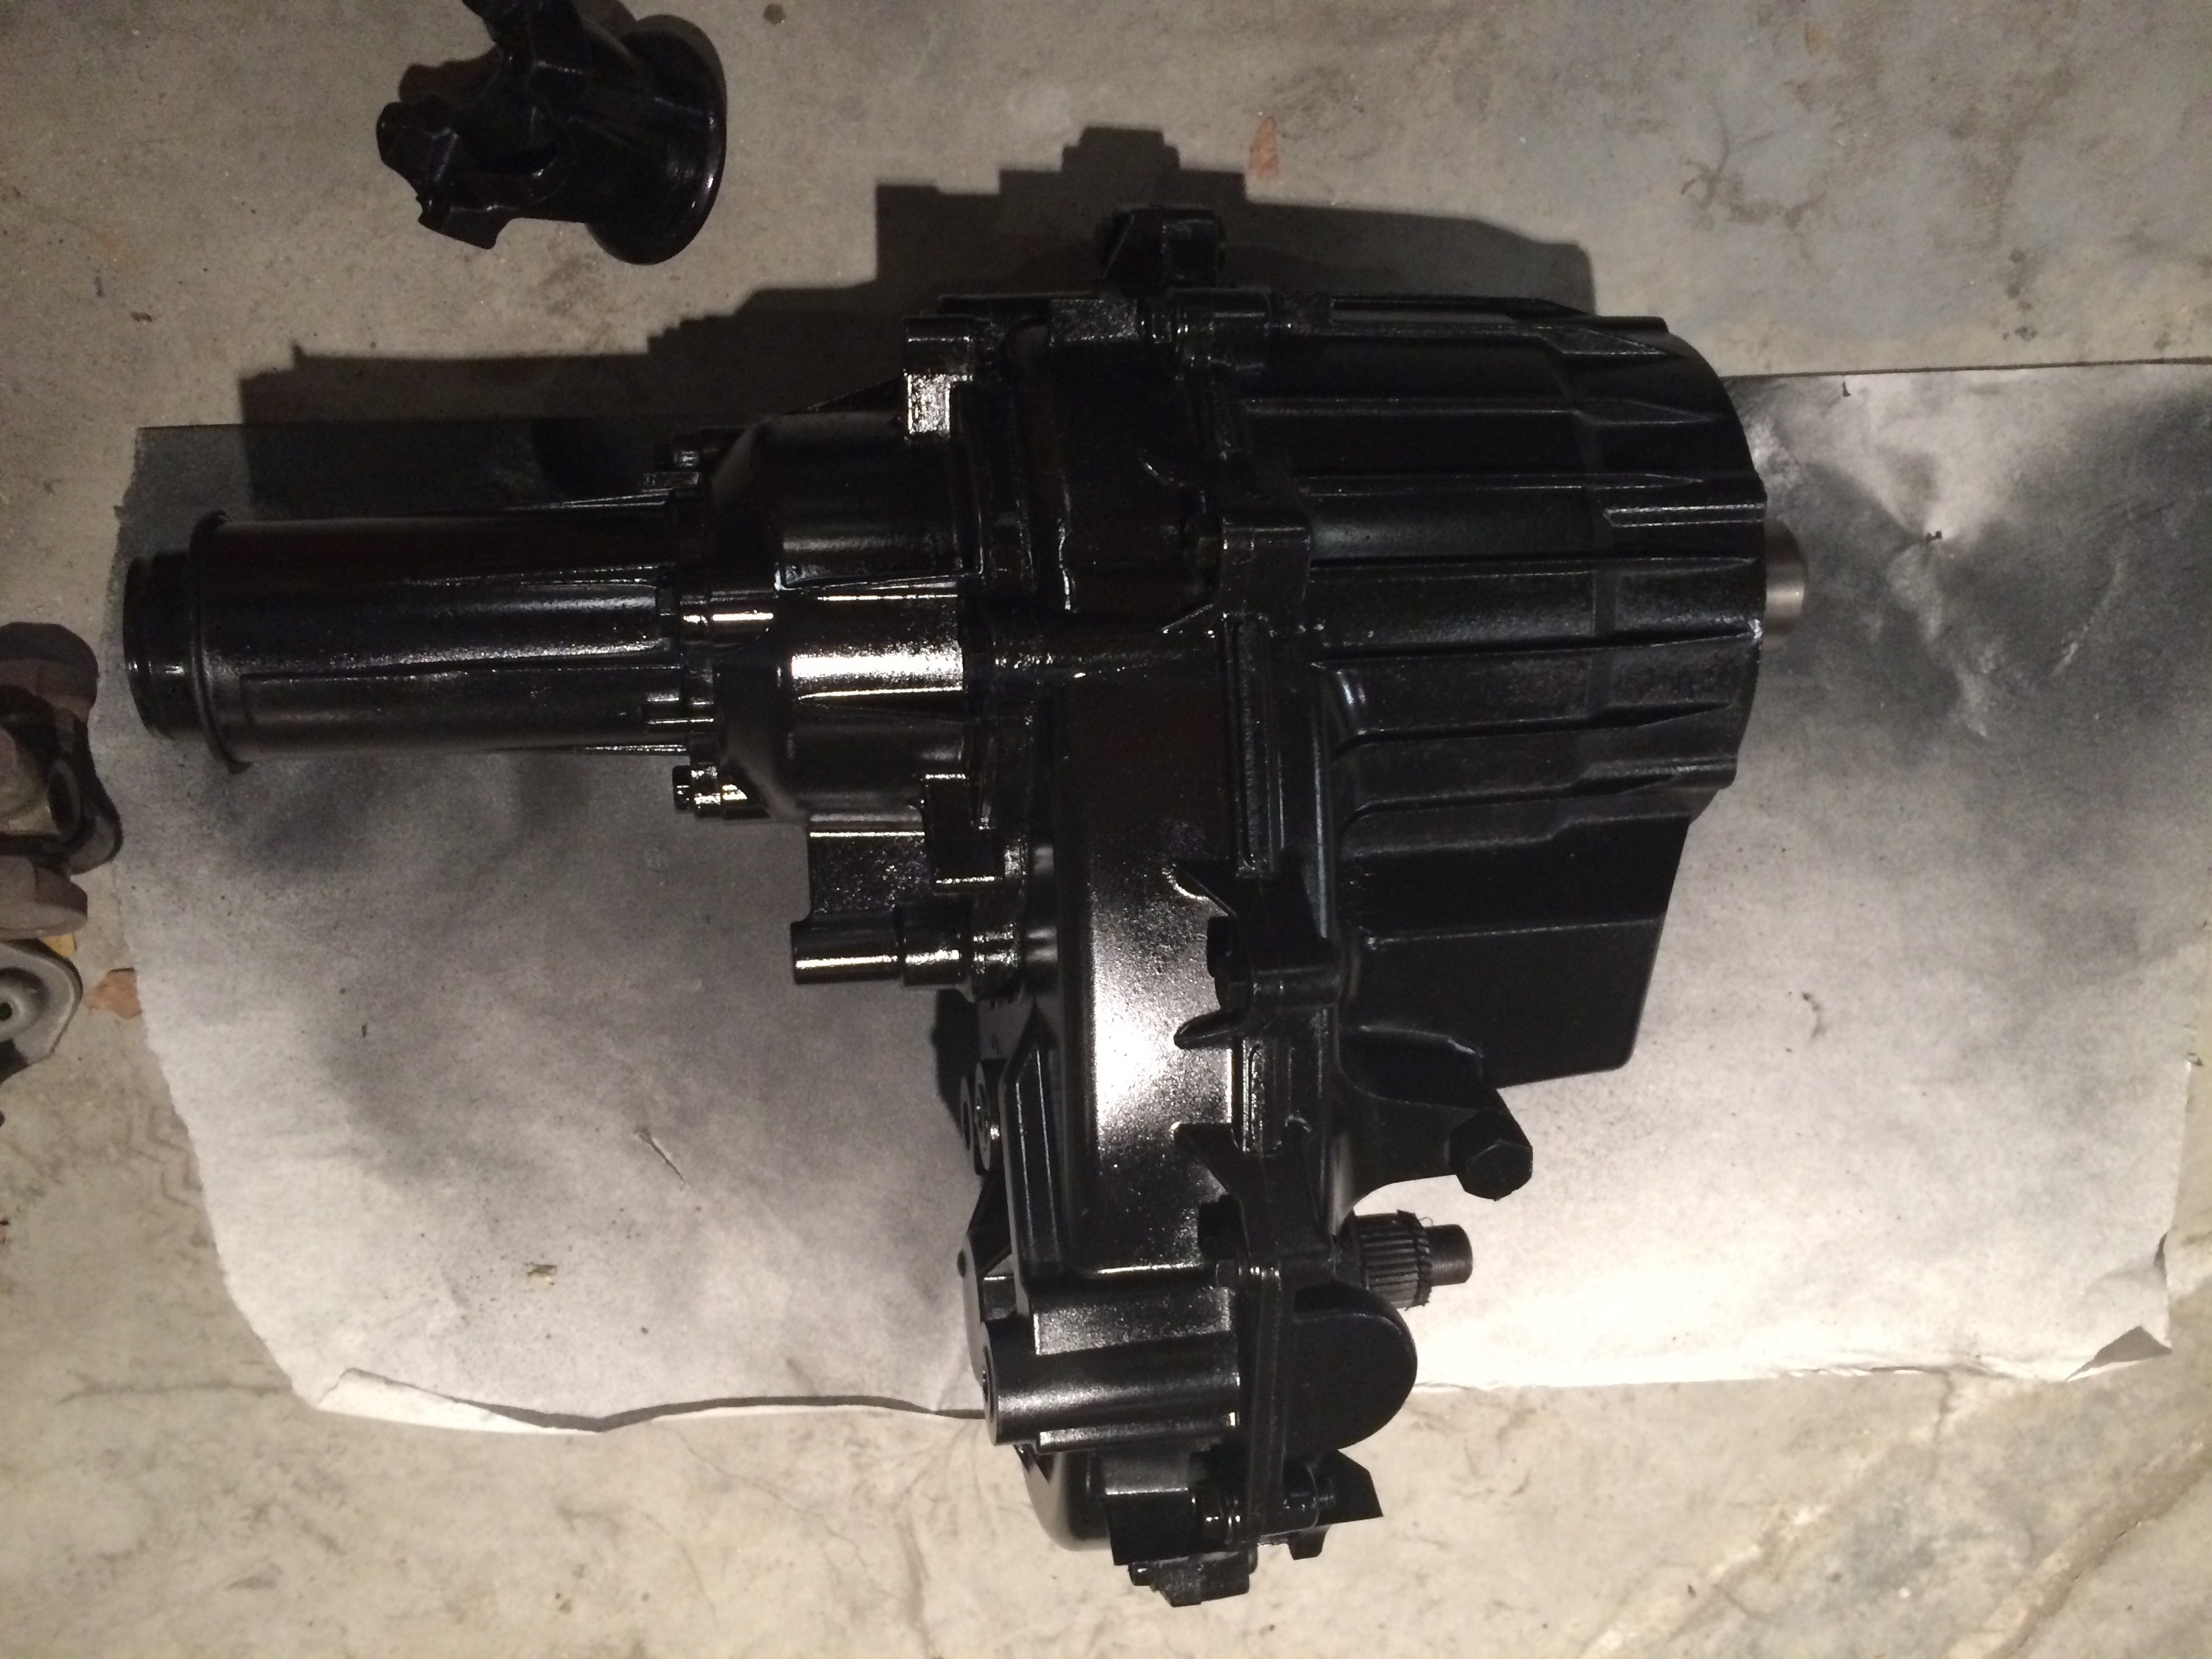
And painted transfer case. Also going in tomorrow.
Anytime anyone asks me about doing an LS swap, one of the first recommendations I have is to get a plastic mock-up block. Here, I am making a couple of last-minute tweaks to the motor mounts and adapter plates, just to make sure everything will drop right in. It is nice to take it in and out, and set it on a cat litter bucket to work on it.


Final appearance of motor mount and adapter plate. Painted.

Pulling locating dowels (acutally, roll pins) out of cylinder heads. I use this upholstery tool that I have had for many years. Grabs them, and pulls them right out.

Locating pin with LS9 head gasket. Last look at LSA piston.

Motor in. Keeping with the silver and black theme.

Transmission painted. This will go in tomorrow, just need to buy some trans fluid. Check out the gleam from that Novak adapter. Too bad no one will see it.

And painted transfer case. Also going in tomorrow.
 01-31-2016, 03:26 PM
#51
Transmission is in. Dropped back in without any issue at all. Starting with my kitchen cart/transmission cart, I have my son lower the Durango down while I sit on the floor. Not too bad. I don't want a transmission jack in my garage taking up space. This is a multi-tasker. I did have to modify the corner with a sawzall to clear the front differential housing.
I was able to reach all of the bell housing bolts with a long extension from the back. Nice that I didn't have to crawl on top of the motor for the top one. Once they are tightened, I jack the trans up and put in the crossmember and spacer. All the holes lined up again!
Trans ready to go on my cart
Quick mod to make it work.
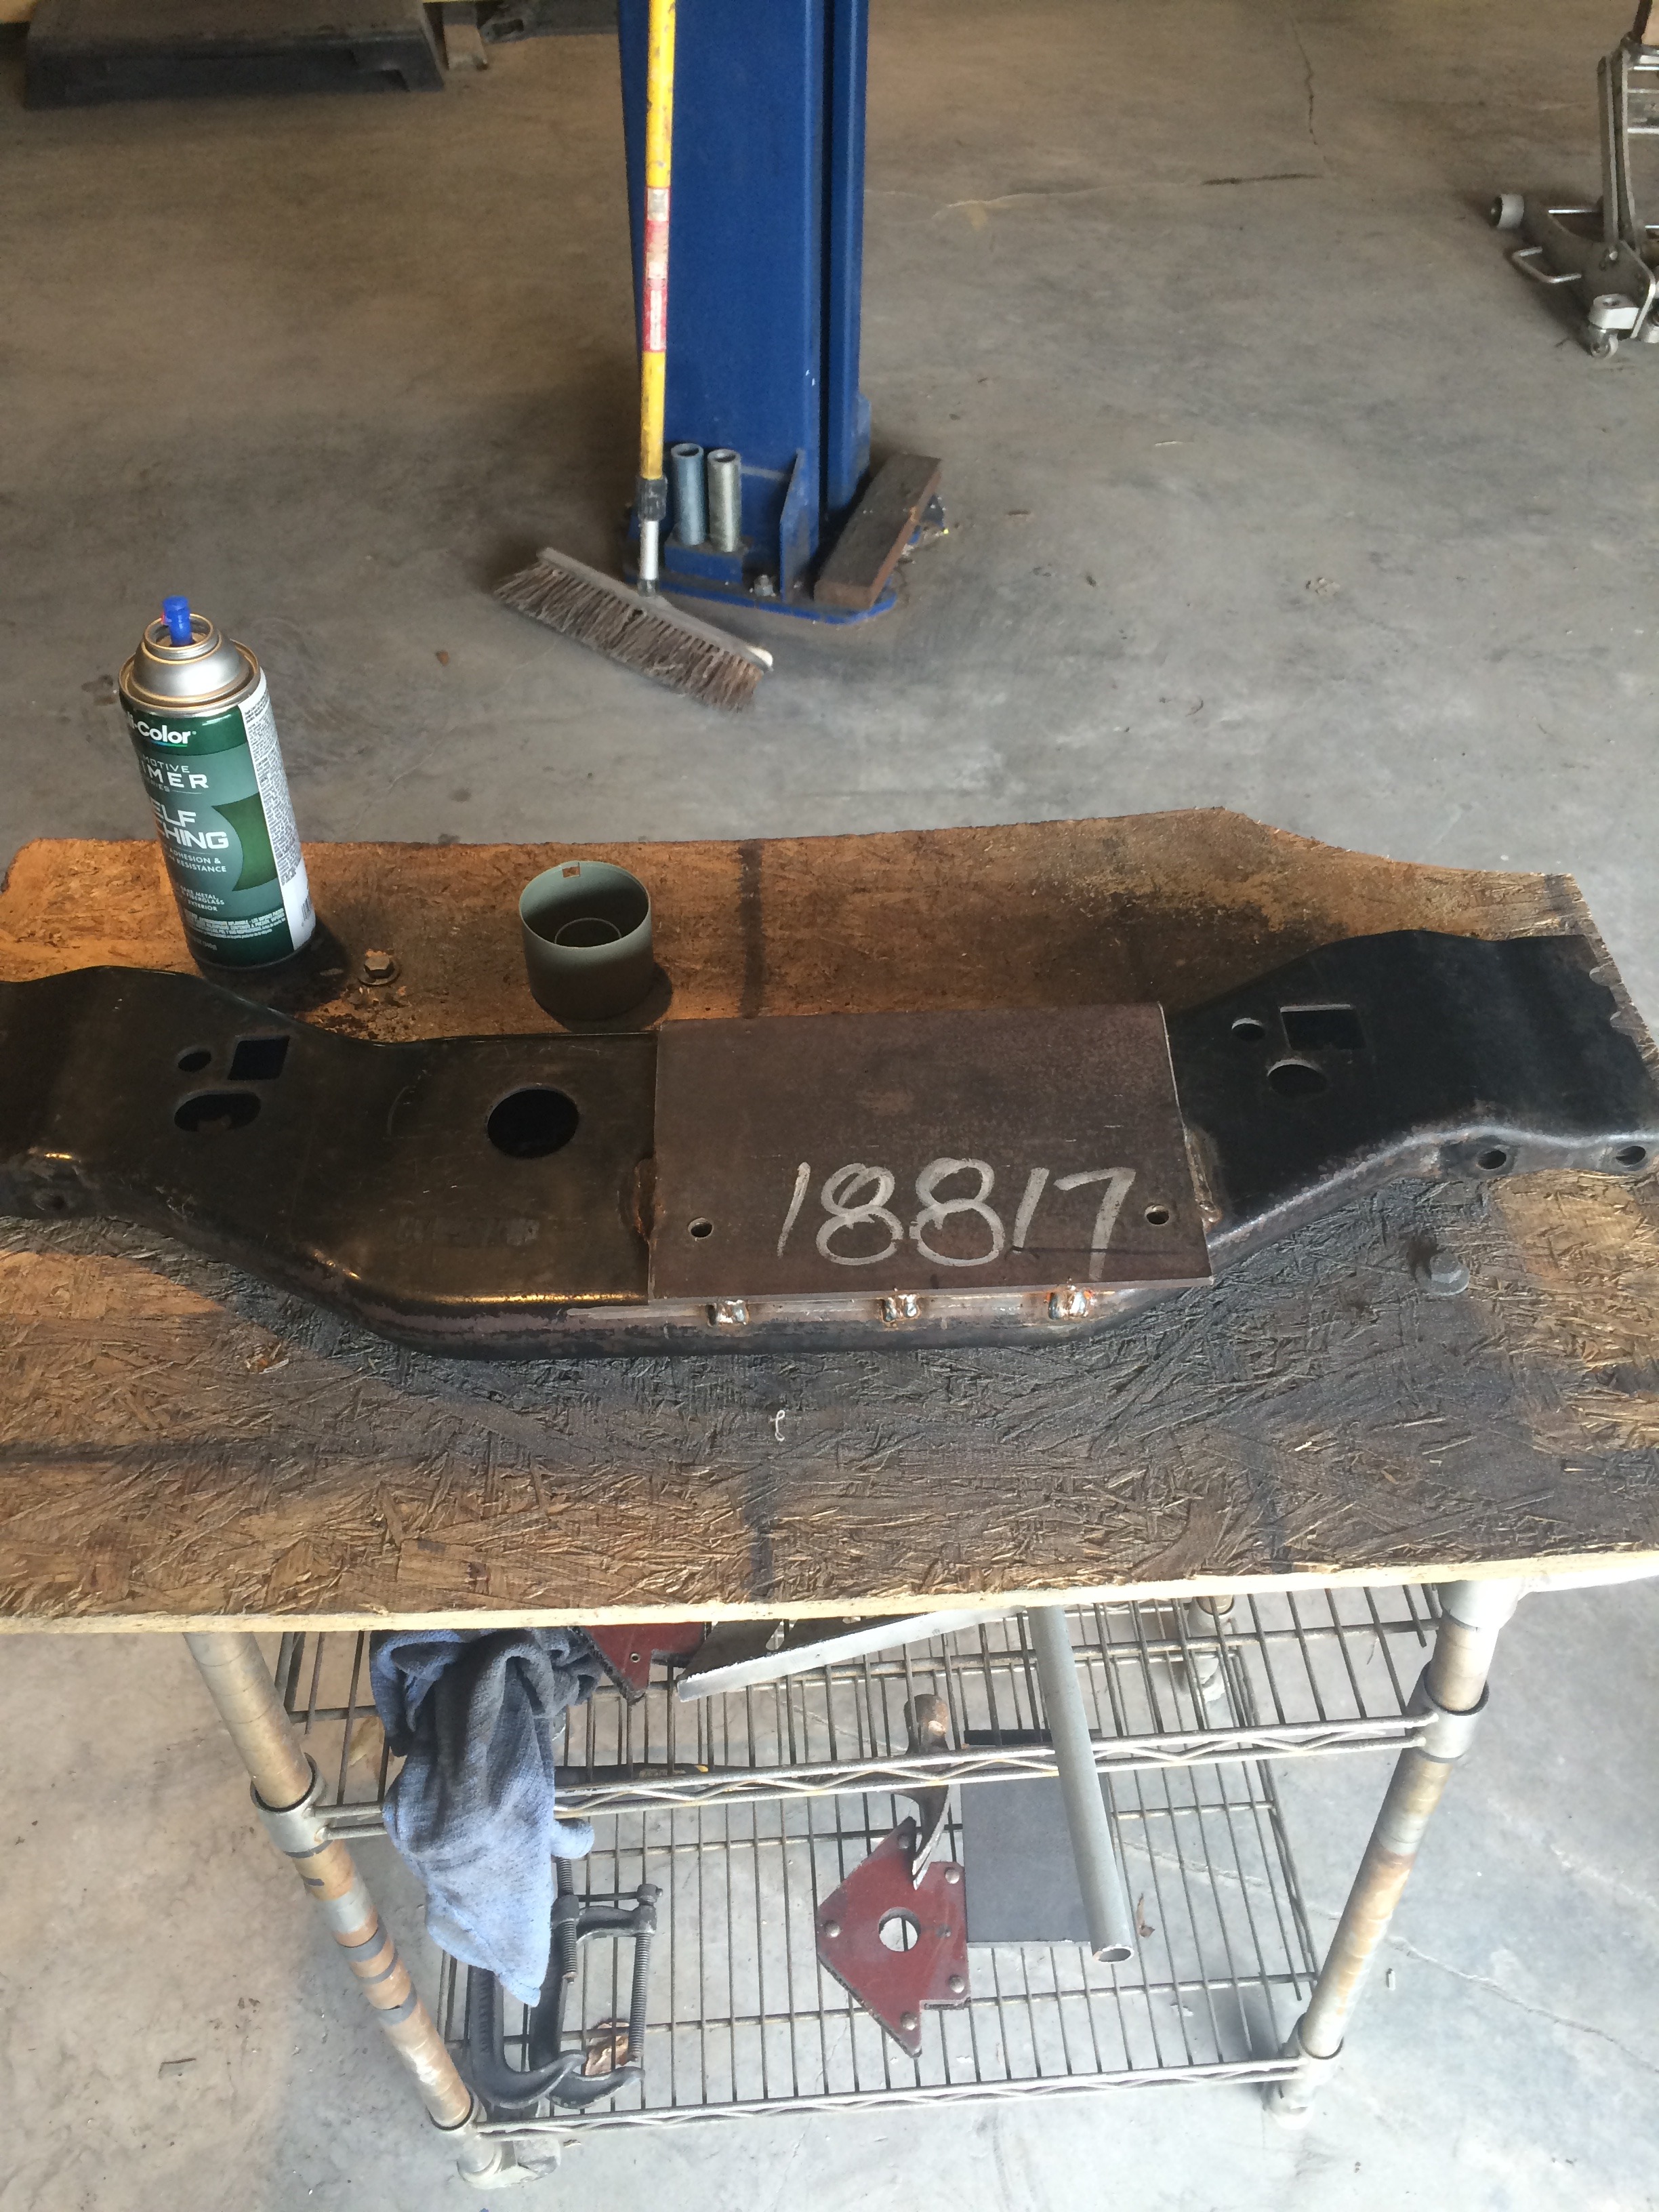
Crossmember before painting. I flipped the original crossmember over, and welded a steel plate on it. Then I tapped for 3/8 x 16 bolts.
Looking up. The pan is black fleck with silver bolts. Too bad no one will see it.

Not sure why the lighting looks weird in these. I need to check my phone settings.
I was able to reach all of the bell housing bolts with a long extension from the back. Nice that I didn't have to crawl on top of the motor for the top one. Once they are tightened, I jack the trans up and put in the crossmember and spacer. All the holes lined up again!
Trans ready to go on my cart

Quick mod to make it work.

Crossmember before painting. I flipped the original crossmember over, and welded a steel plate on it. Then I tapped for 3/8 x 16 bolts.

Looking up. The pan is black fleck with silver bolts. Too bad no one will see it.

Not sure why the lighting looks weird in these. I need to check my phone settings.


 02-15-2016, 05:59 PM
#53
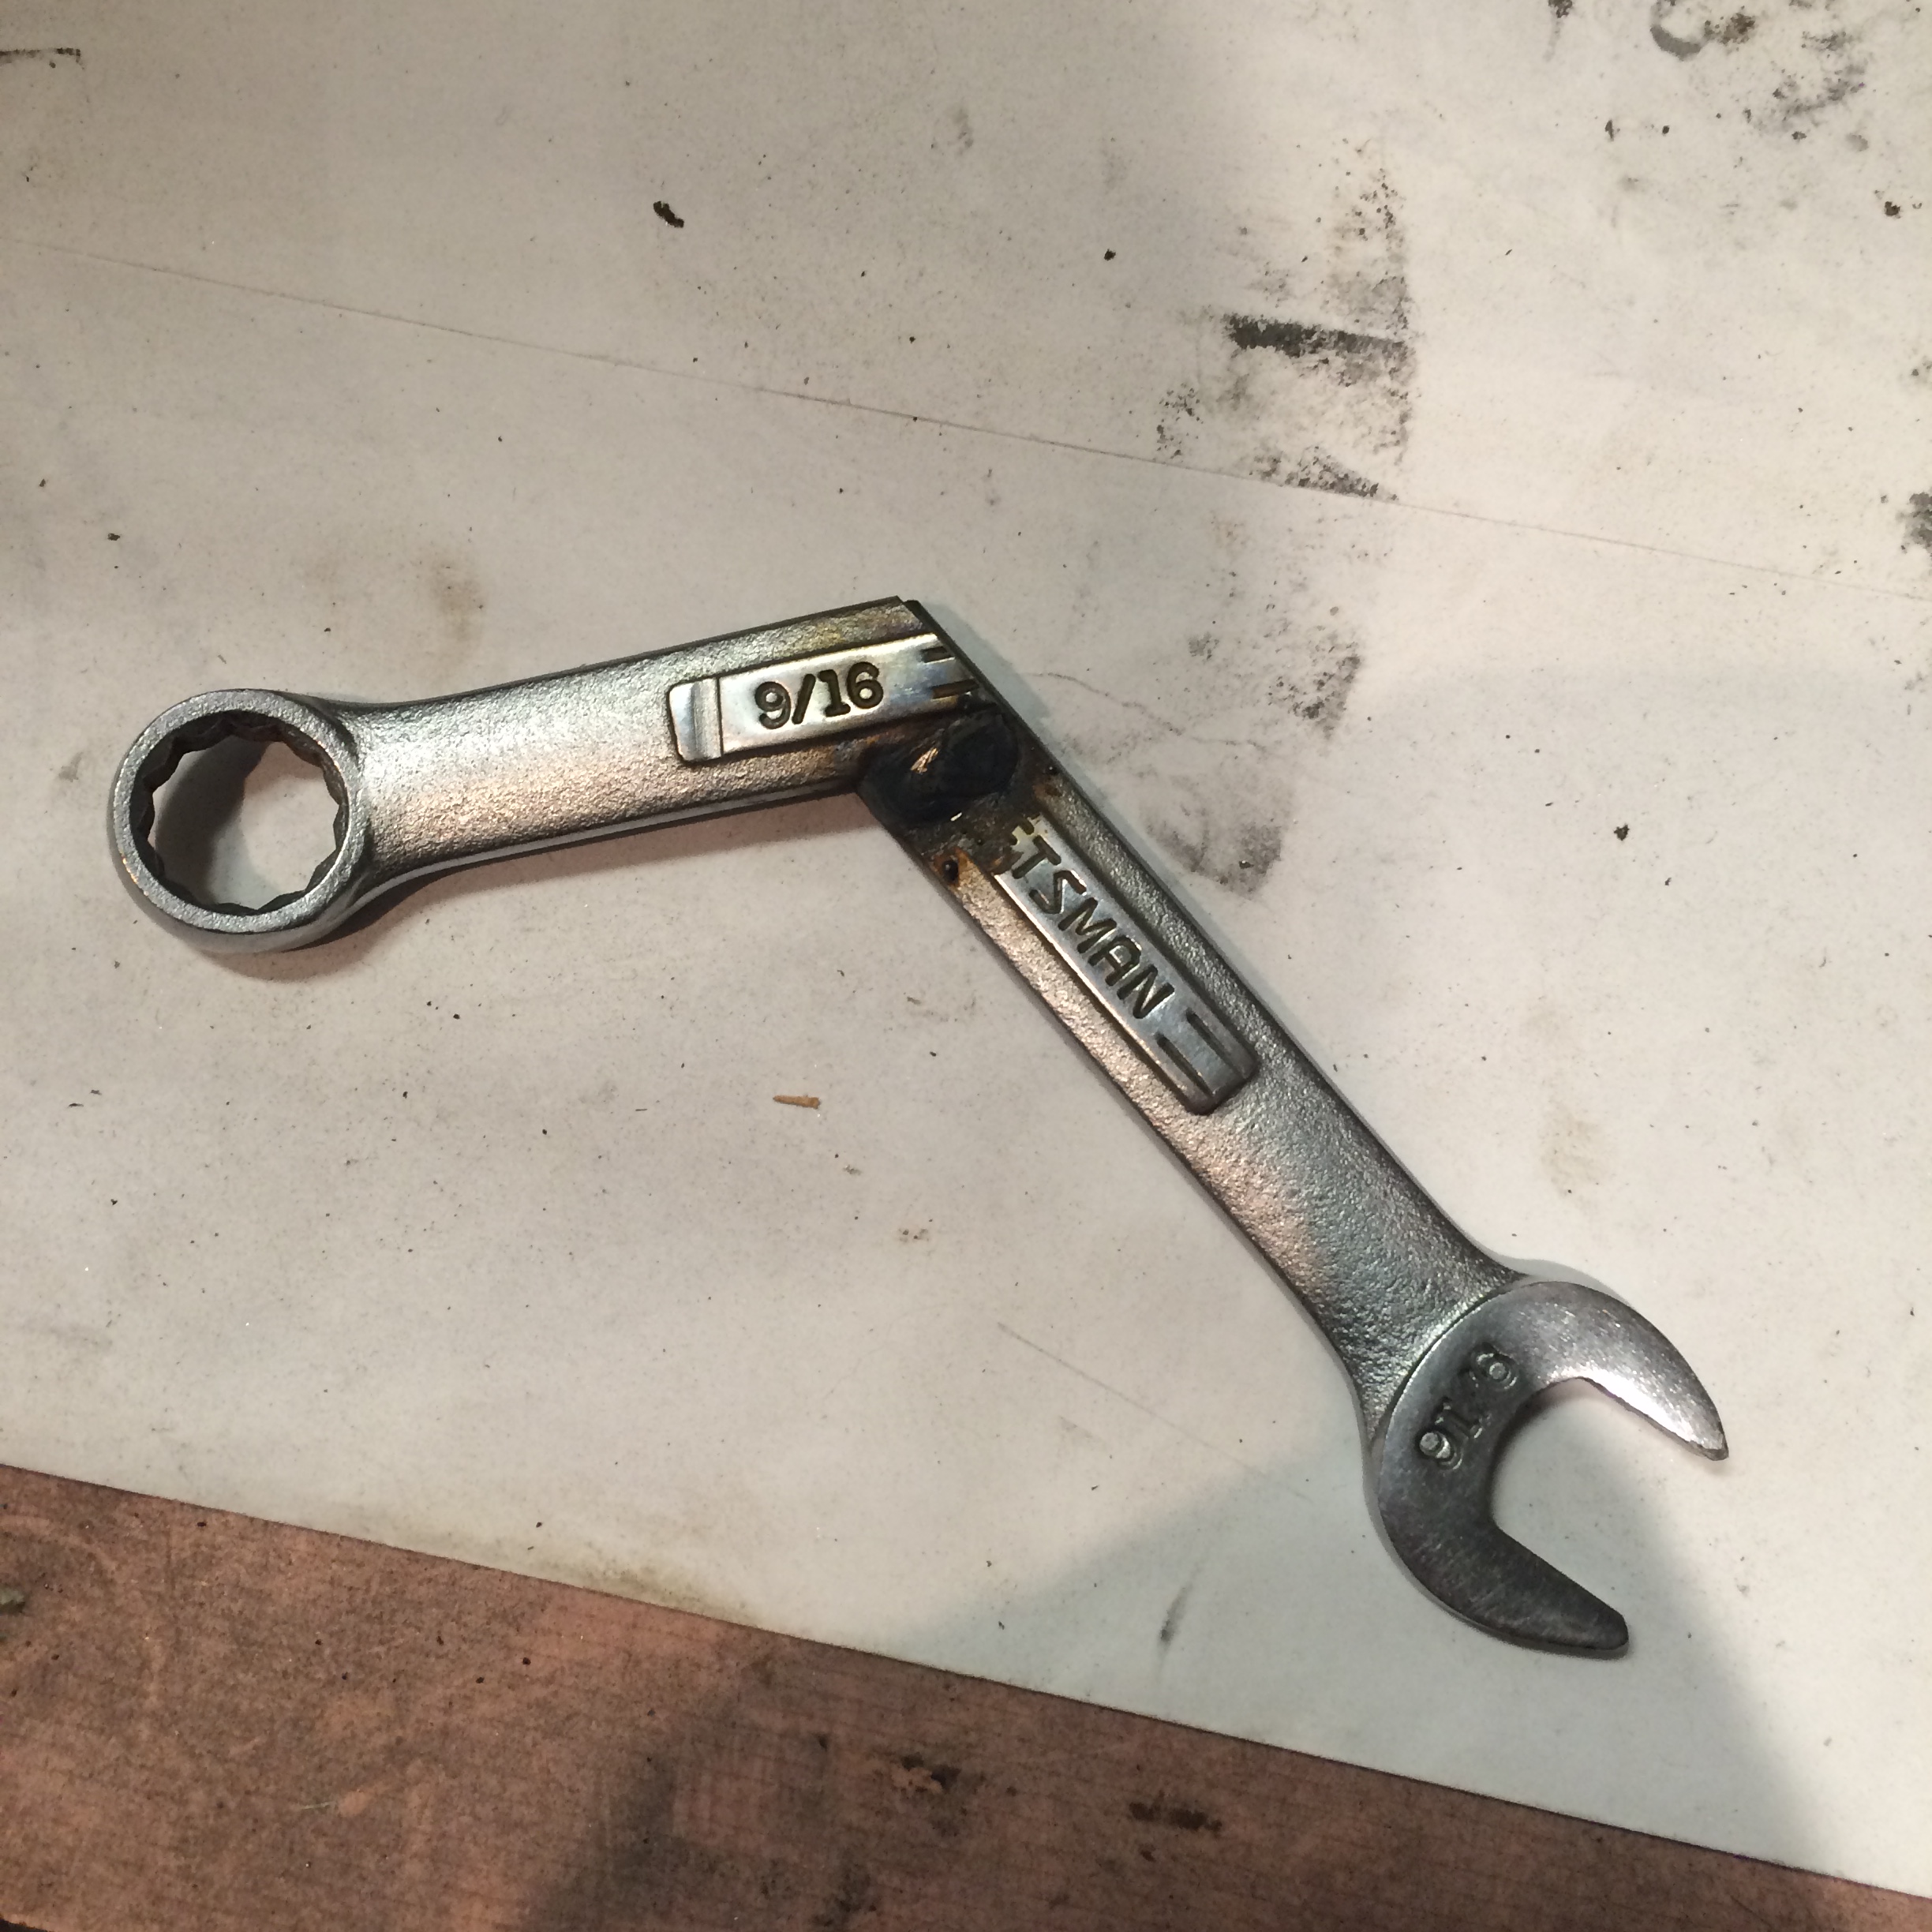
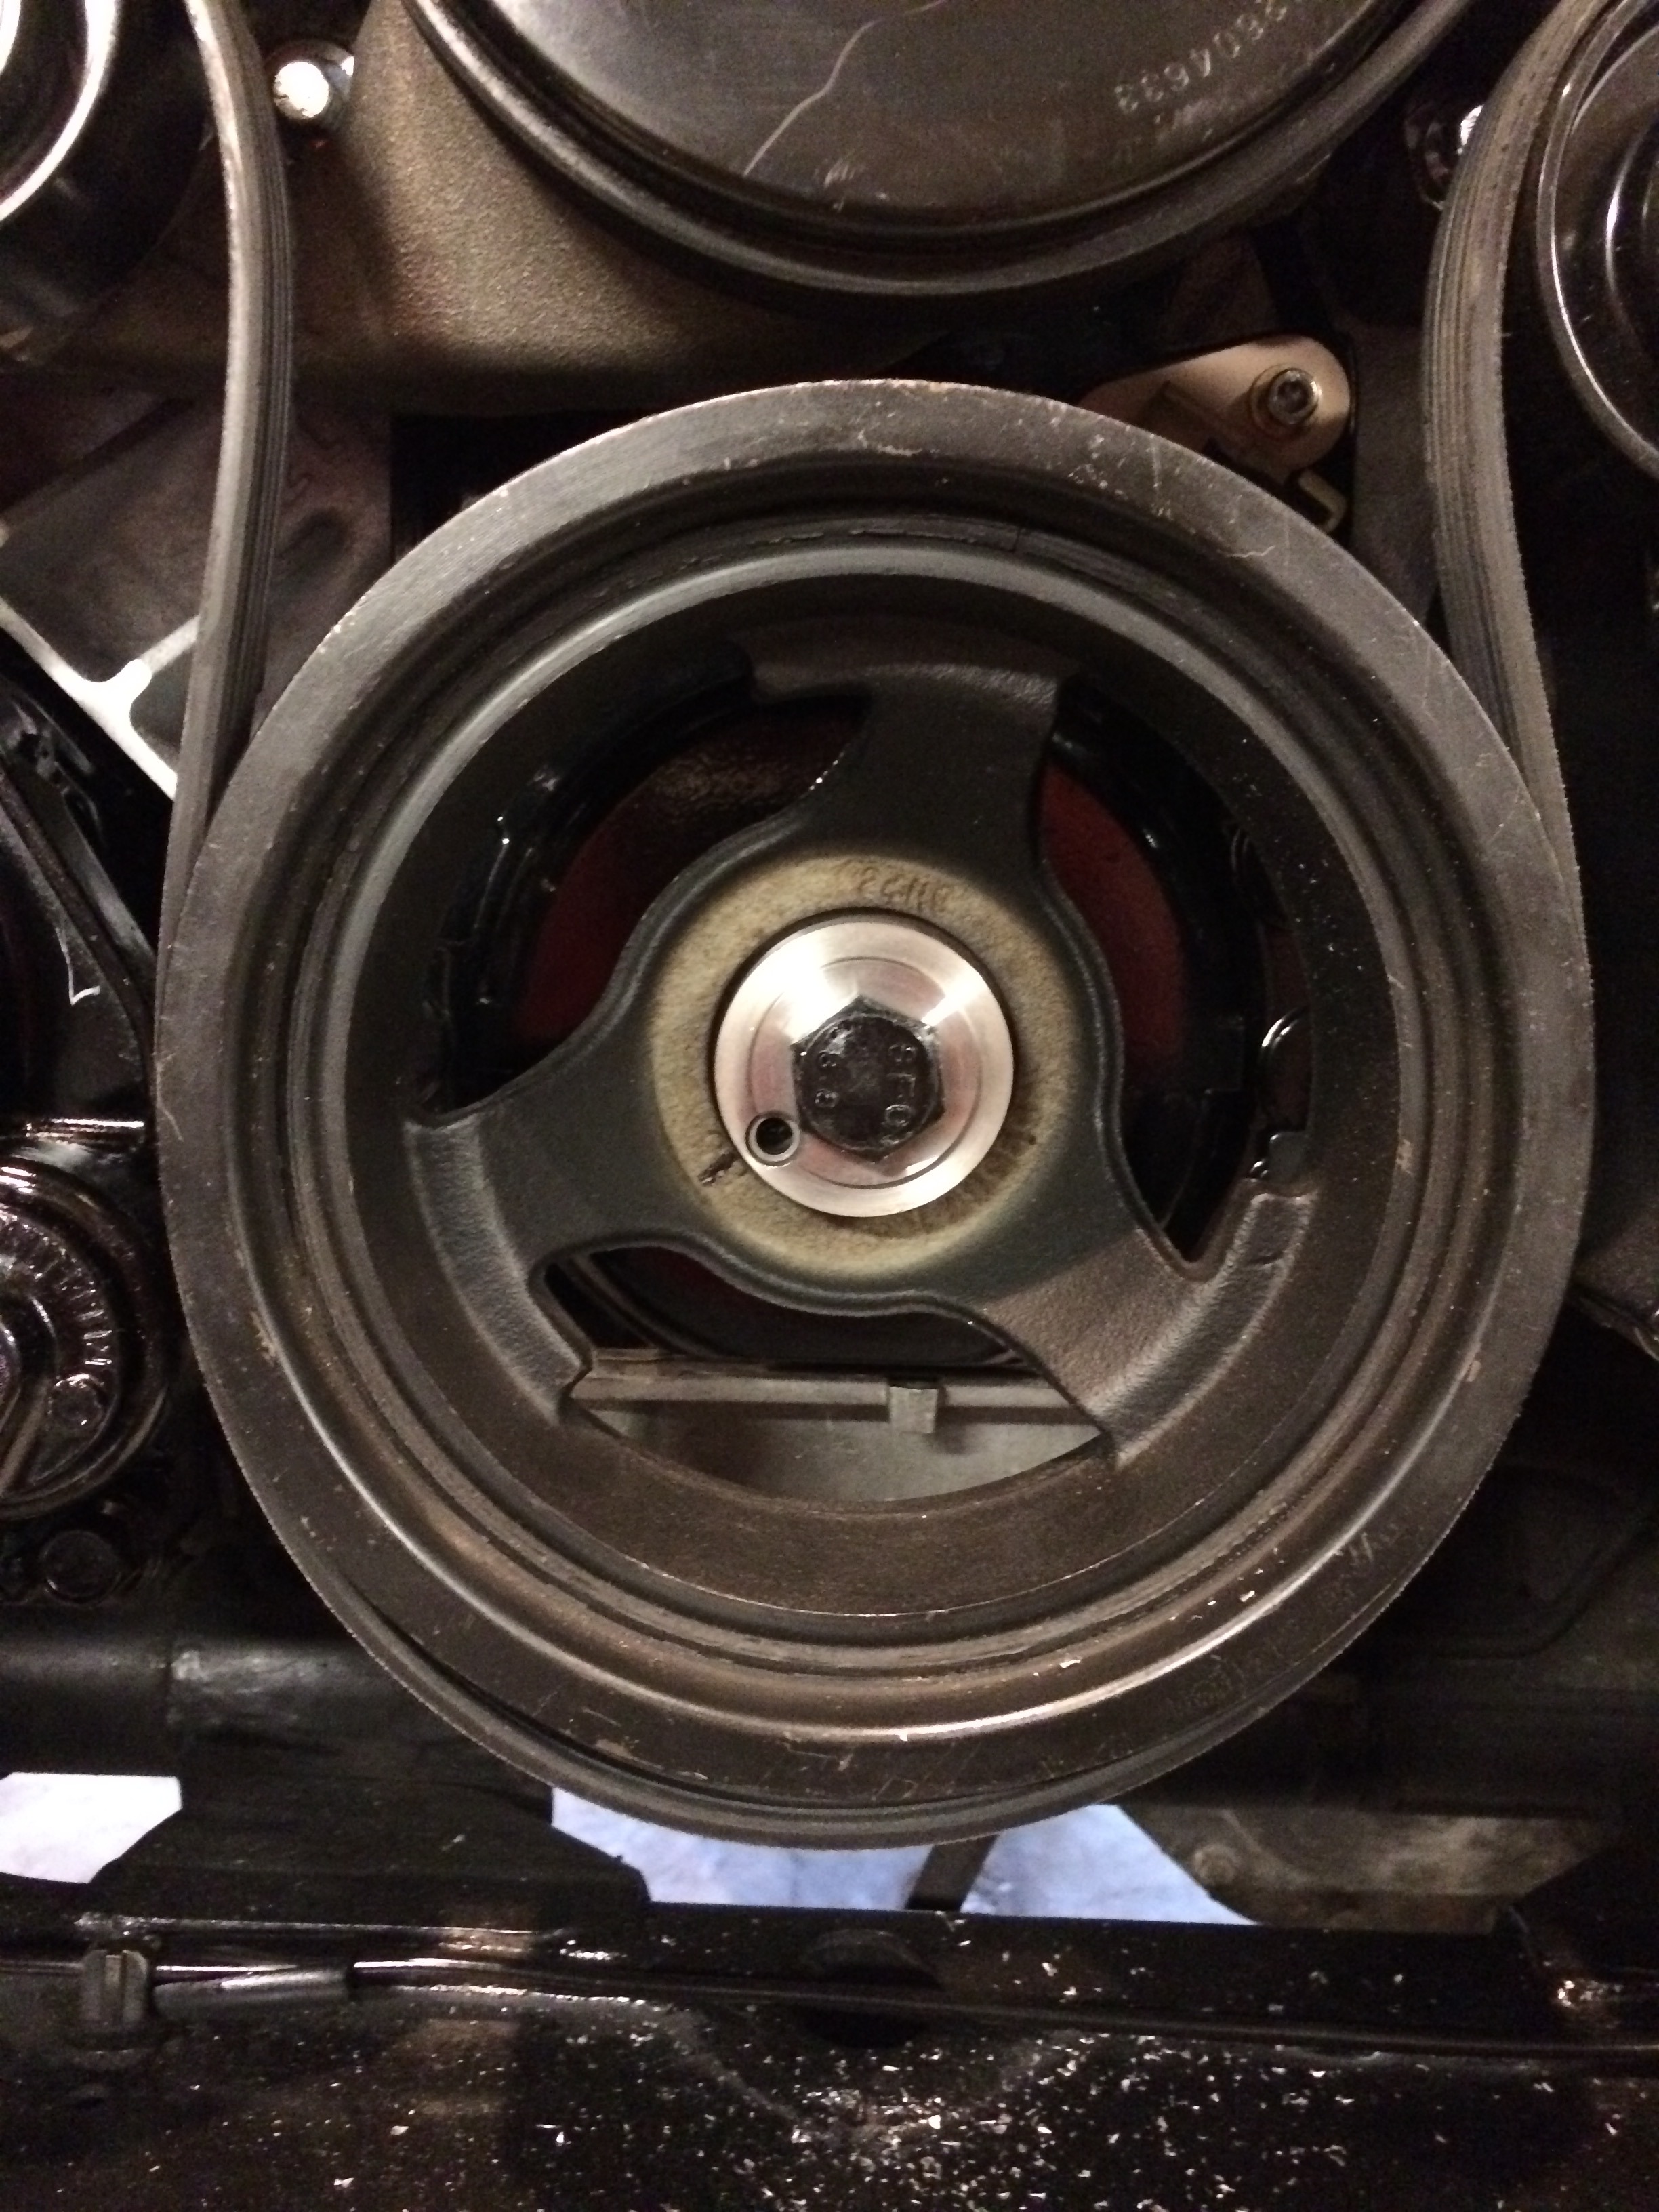
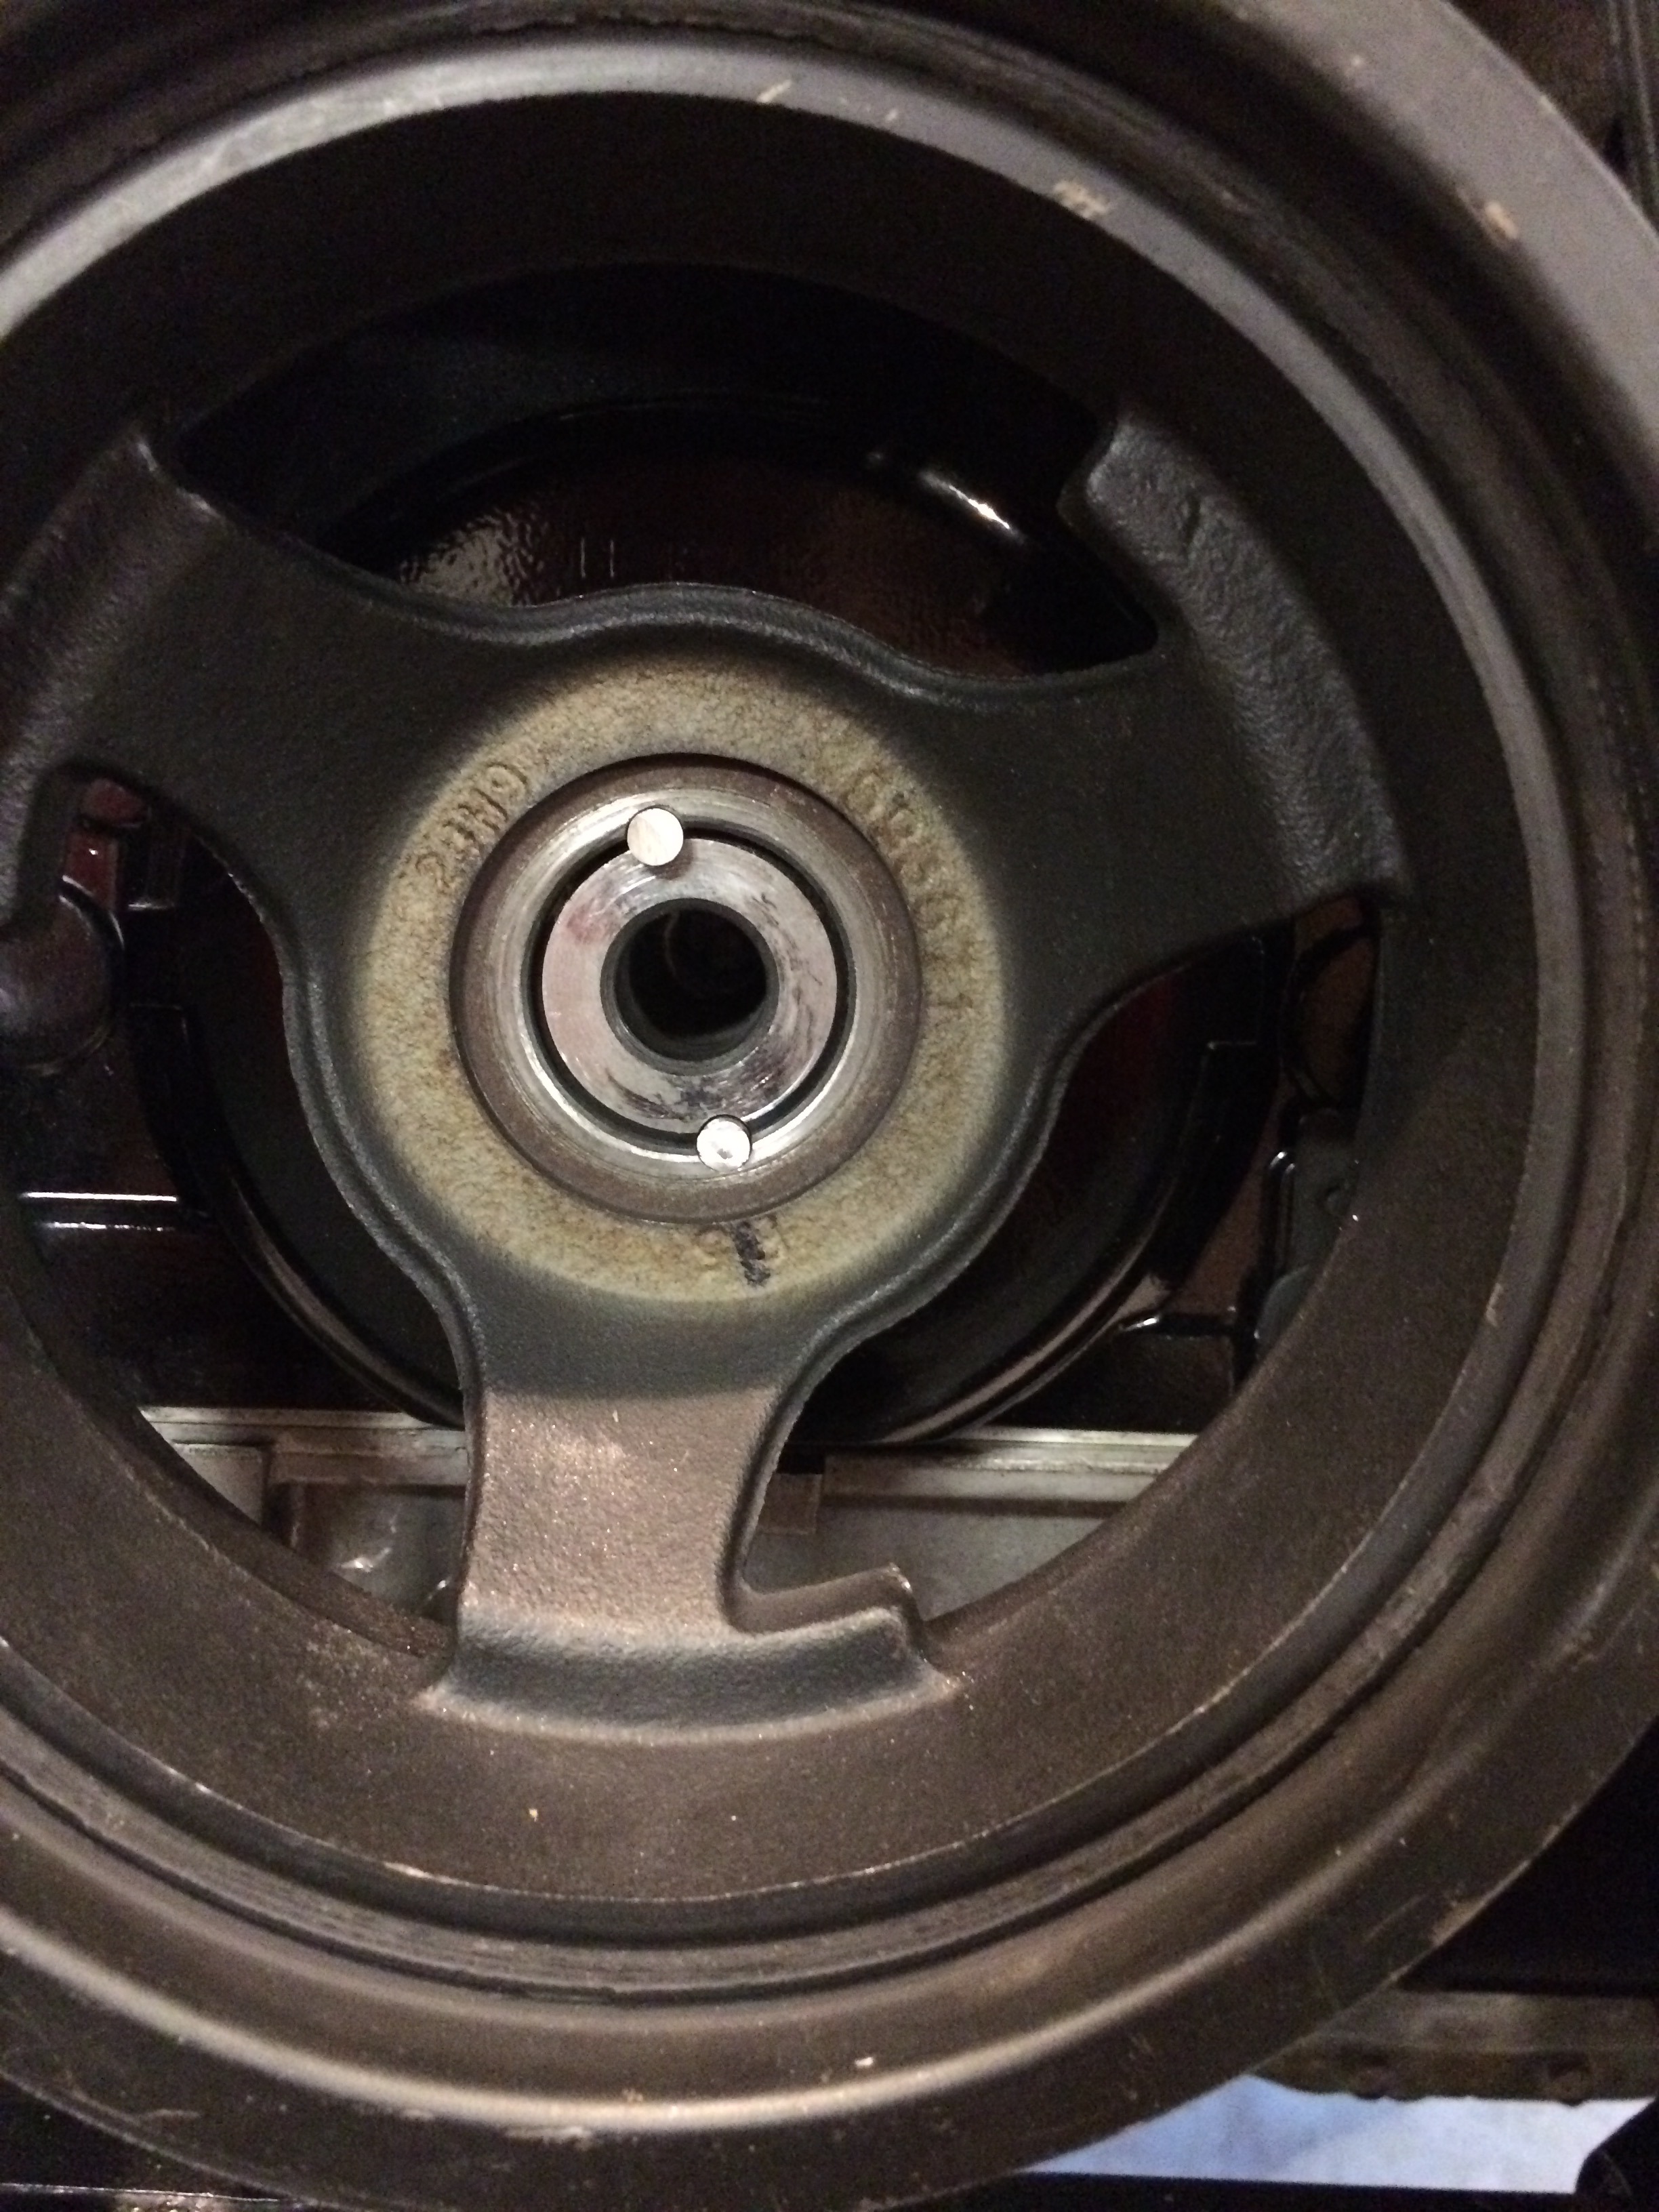
I came back from my trip late, but did get a few things done. I used a threaded rod and cut it down to make a crank pulley installer. Fished the battery cable from the rear battery box to the front through the frame, with the help of my son, installed the transfer case (had to make a wrench to get to the top bolt), and pinned the crank (x2).
Long threaded rod cut down to use as installer. I have these for sale now, if anyone wants one.
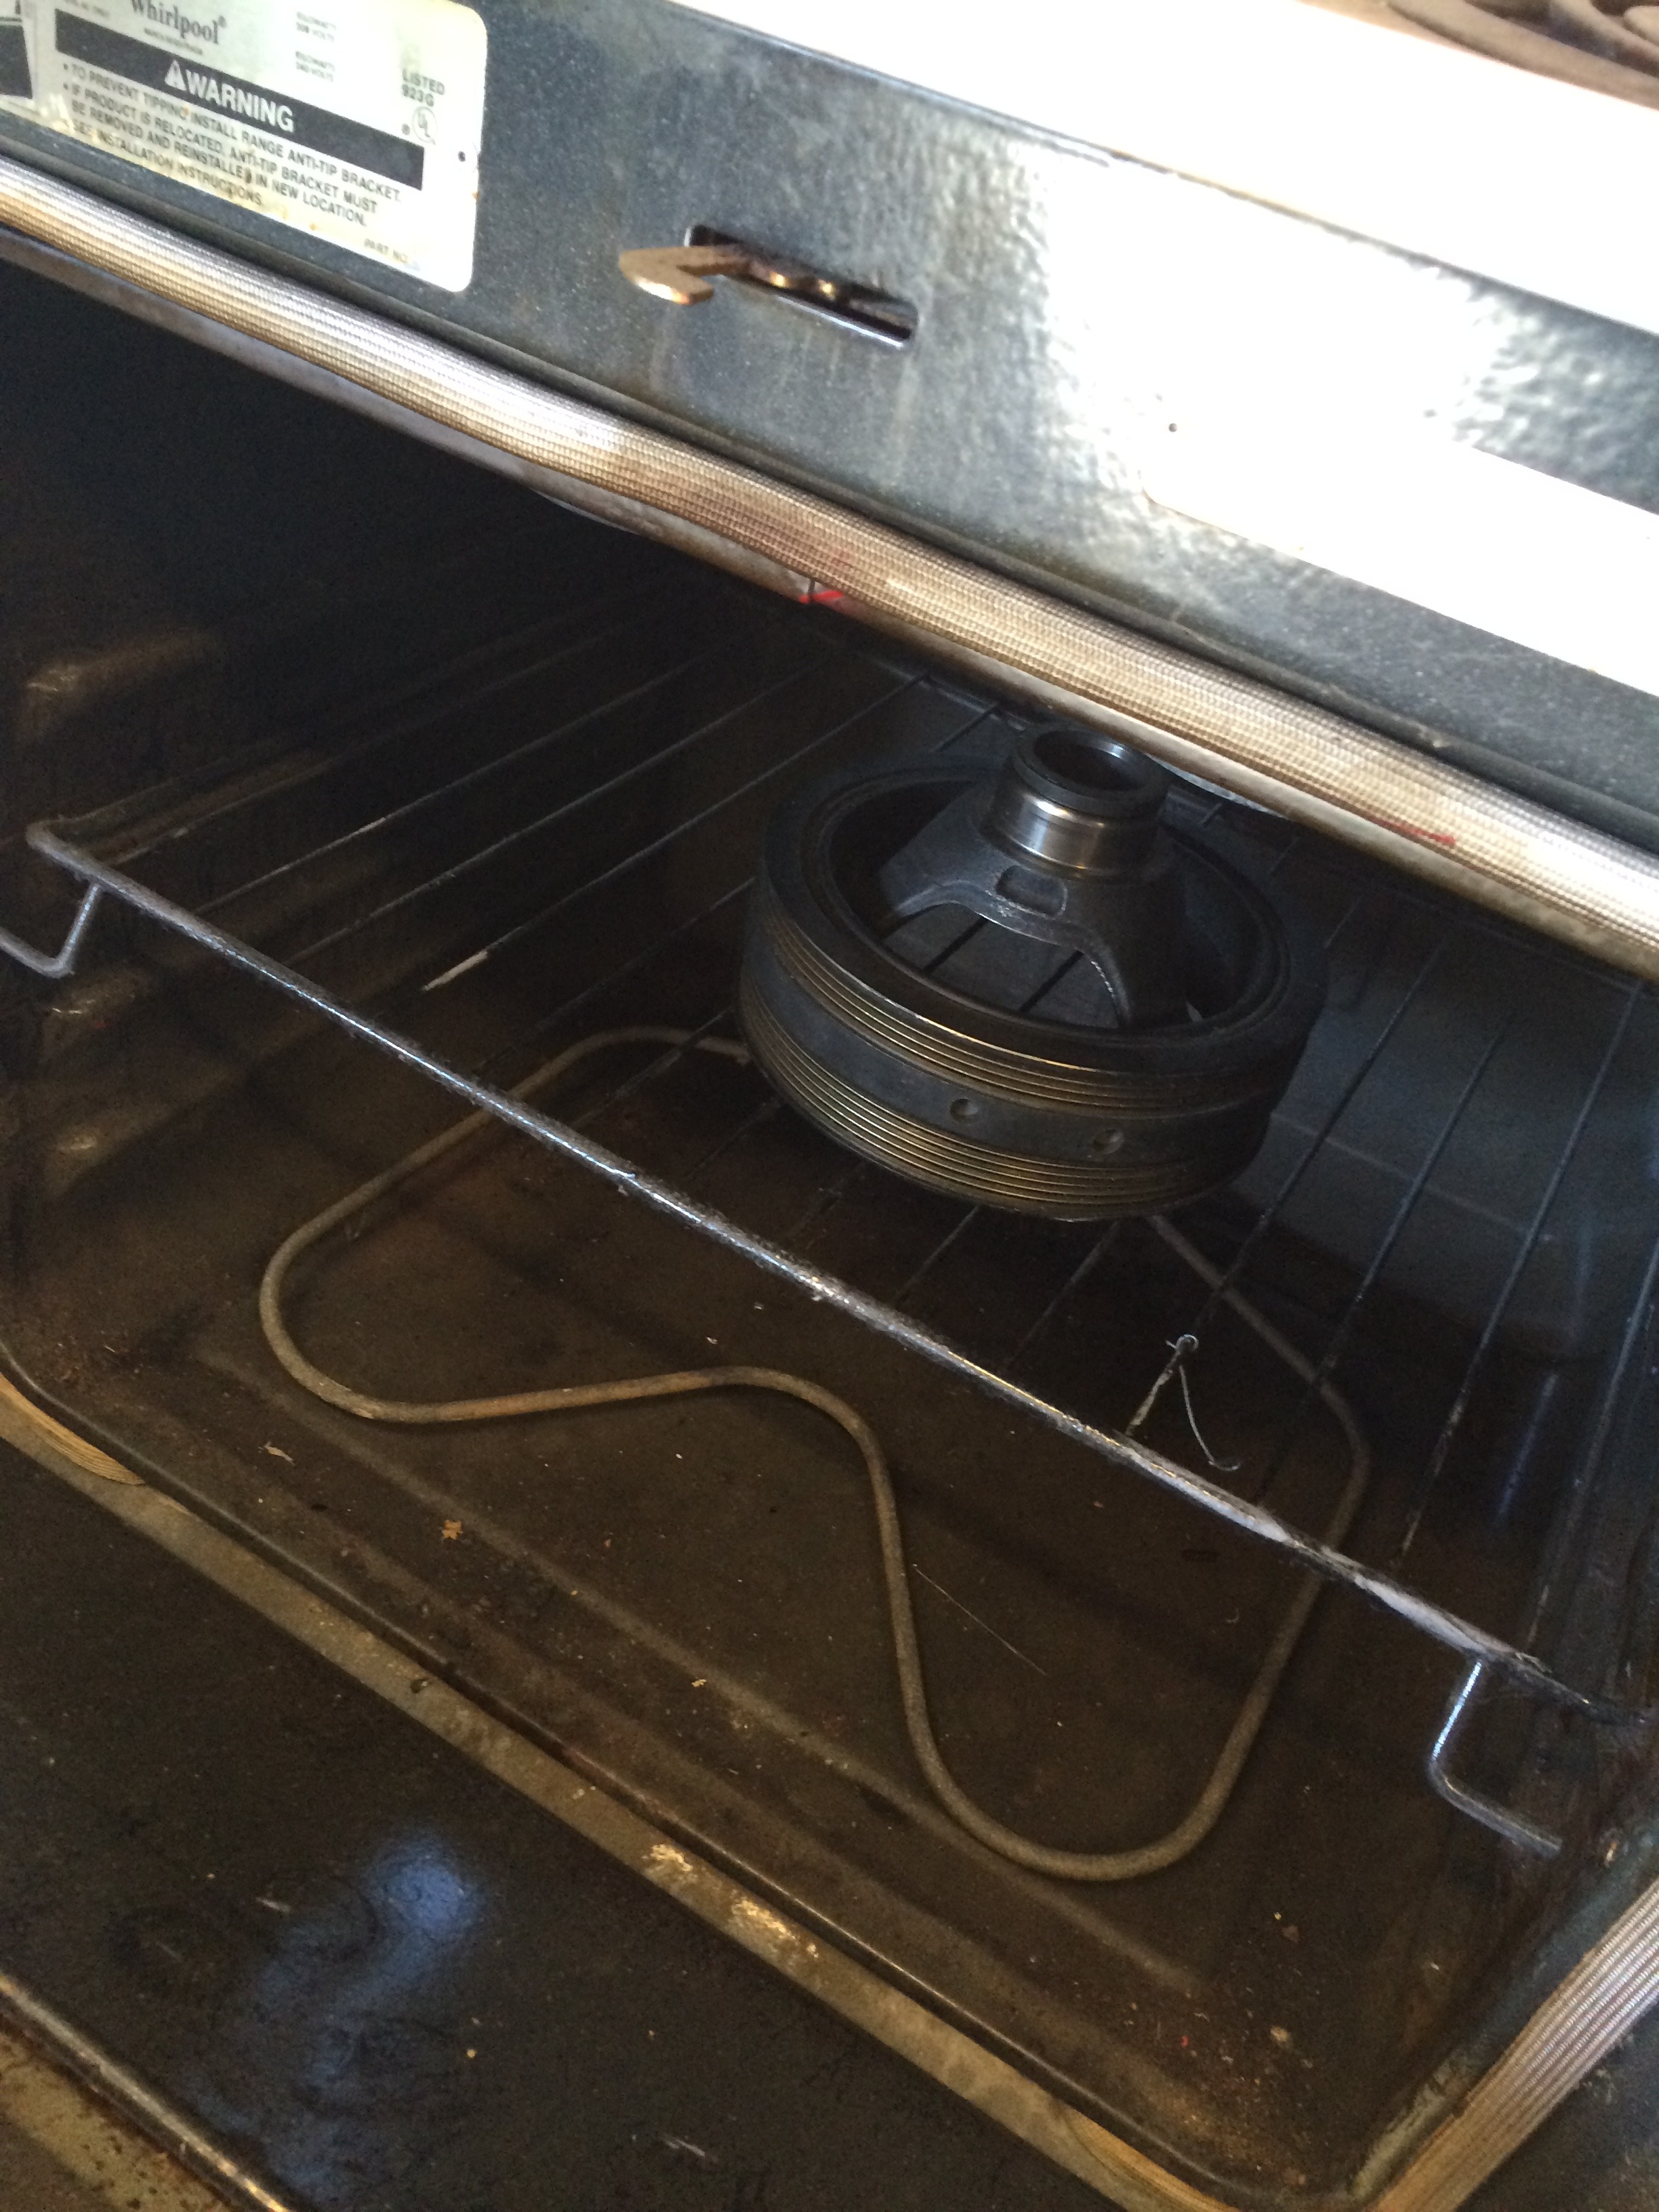
Warm the crank pulley
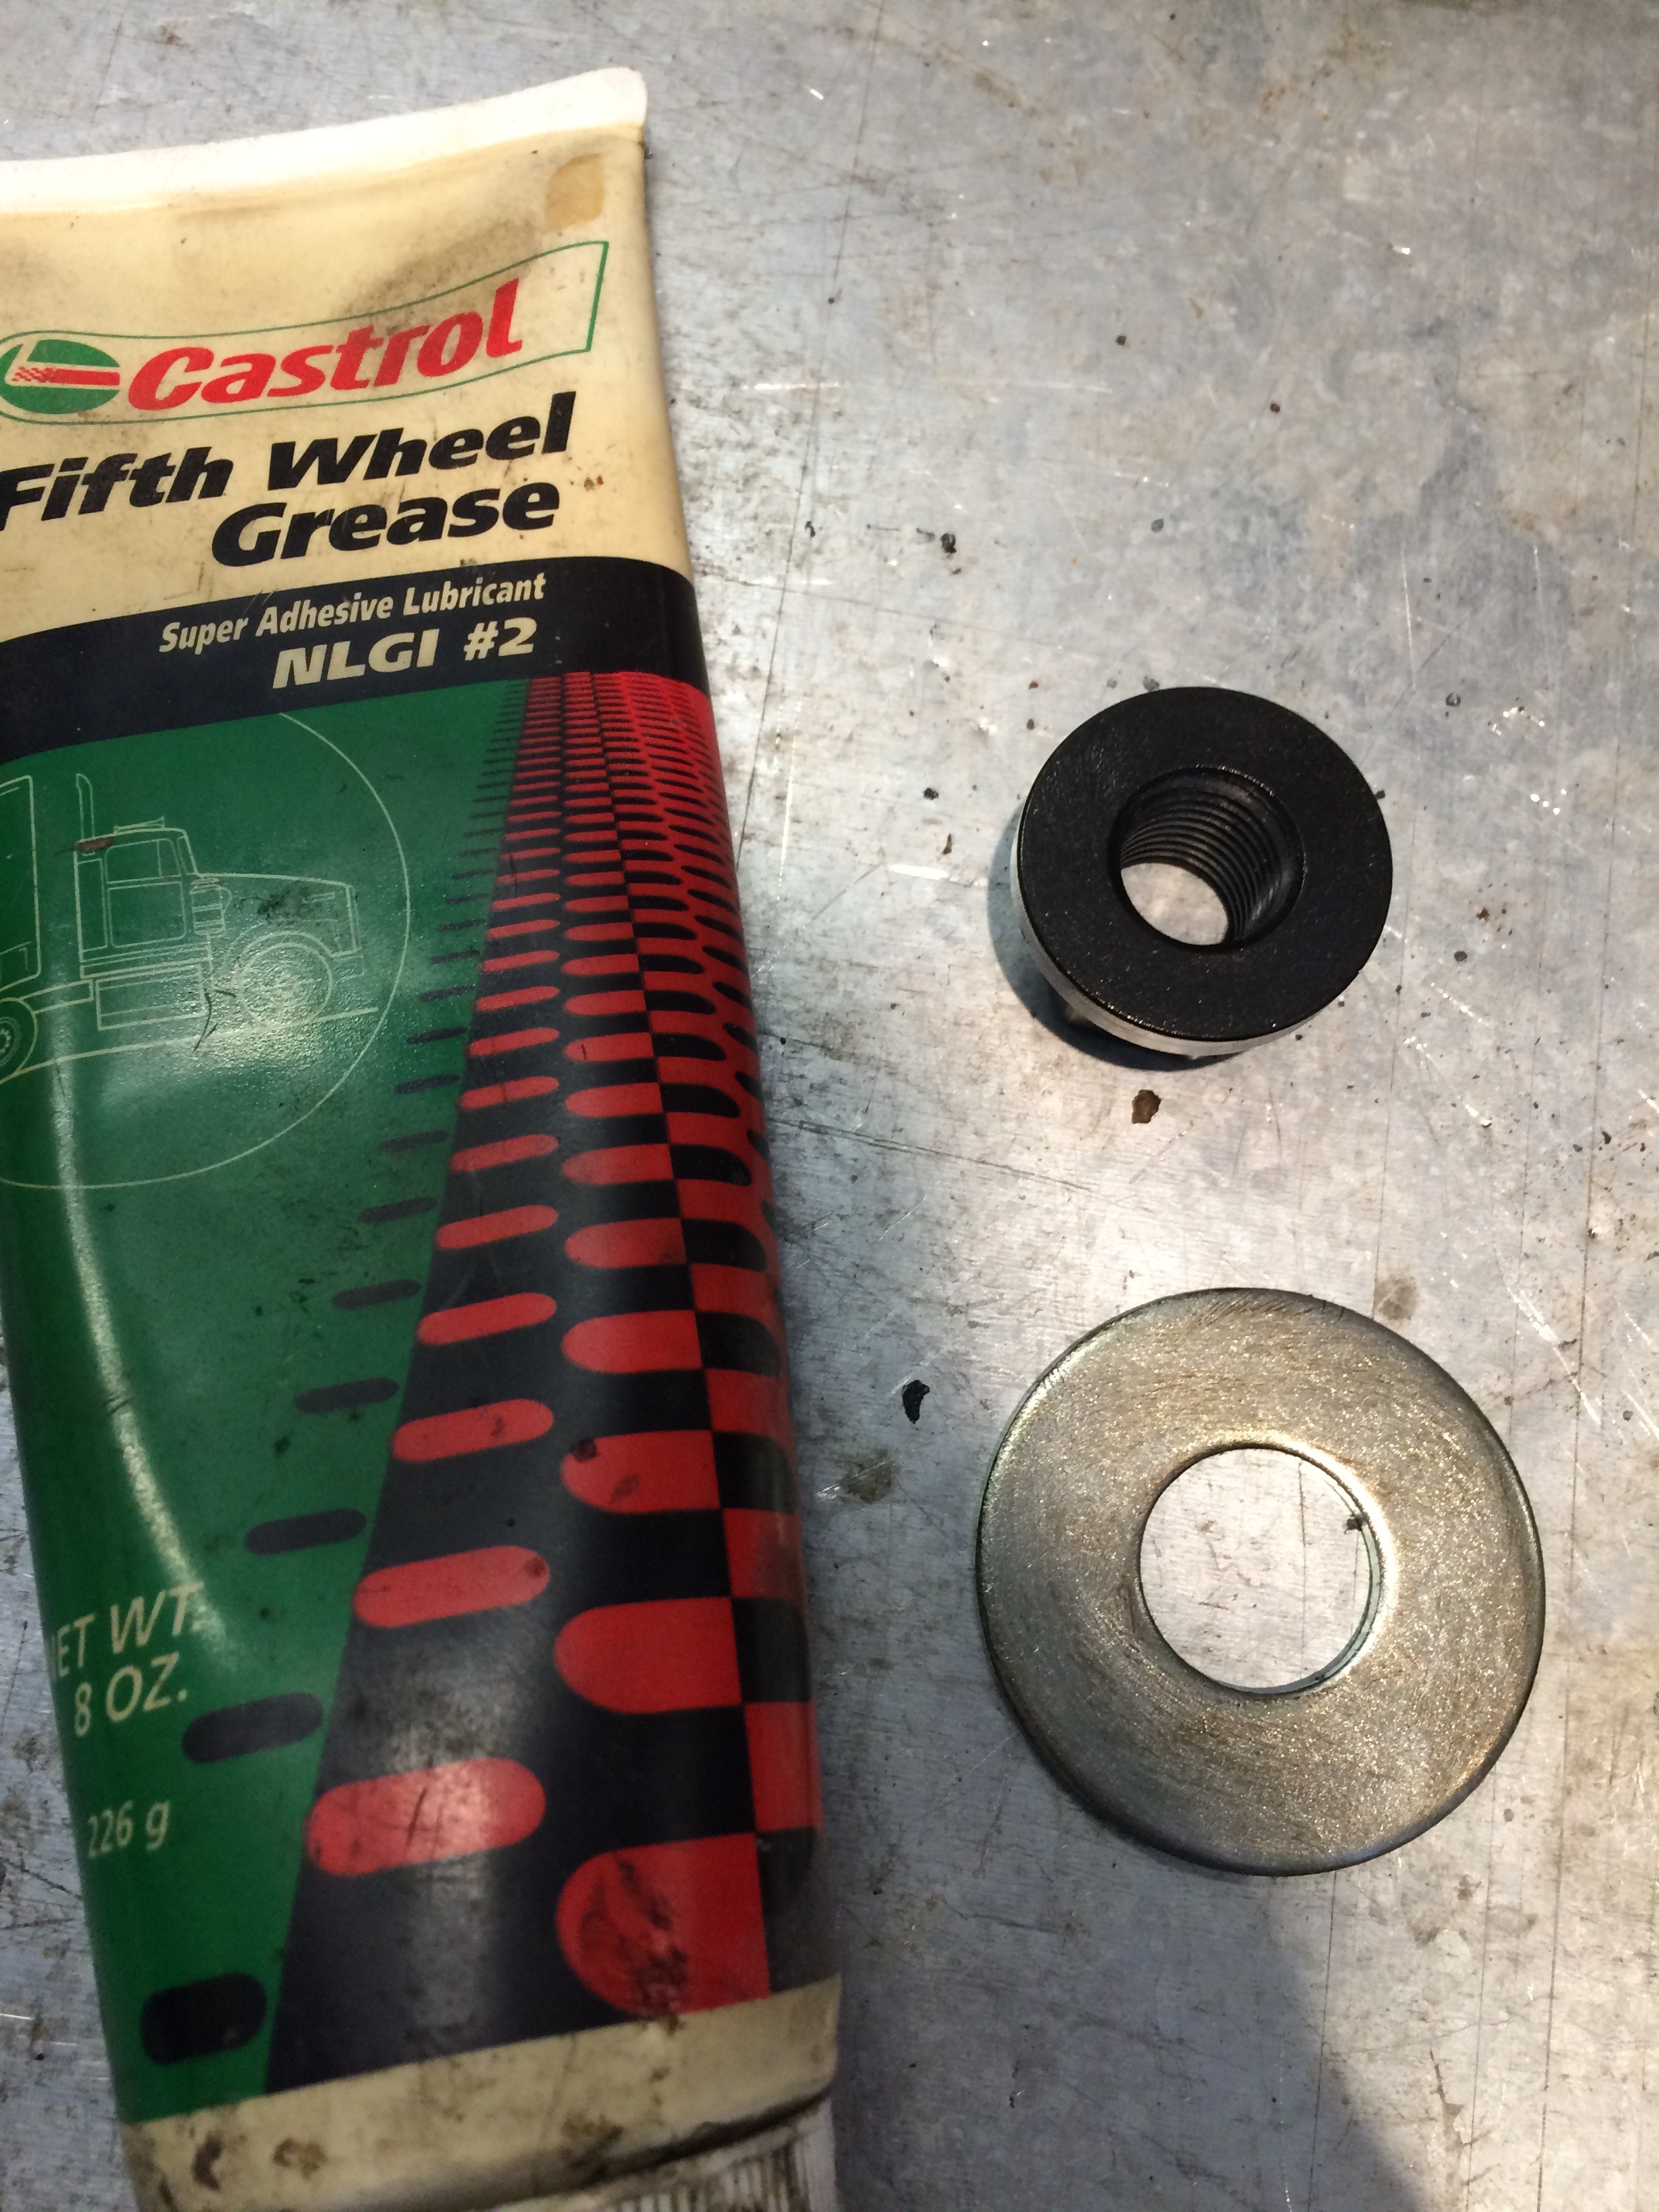
Add a nut and washer, and a little grease
Pulley is on, time to fish the wire through the frame
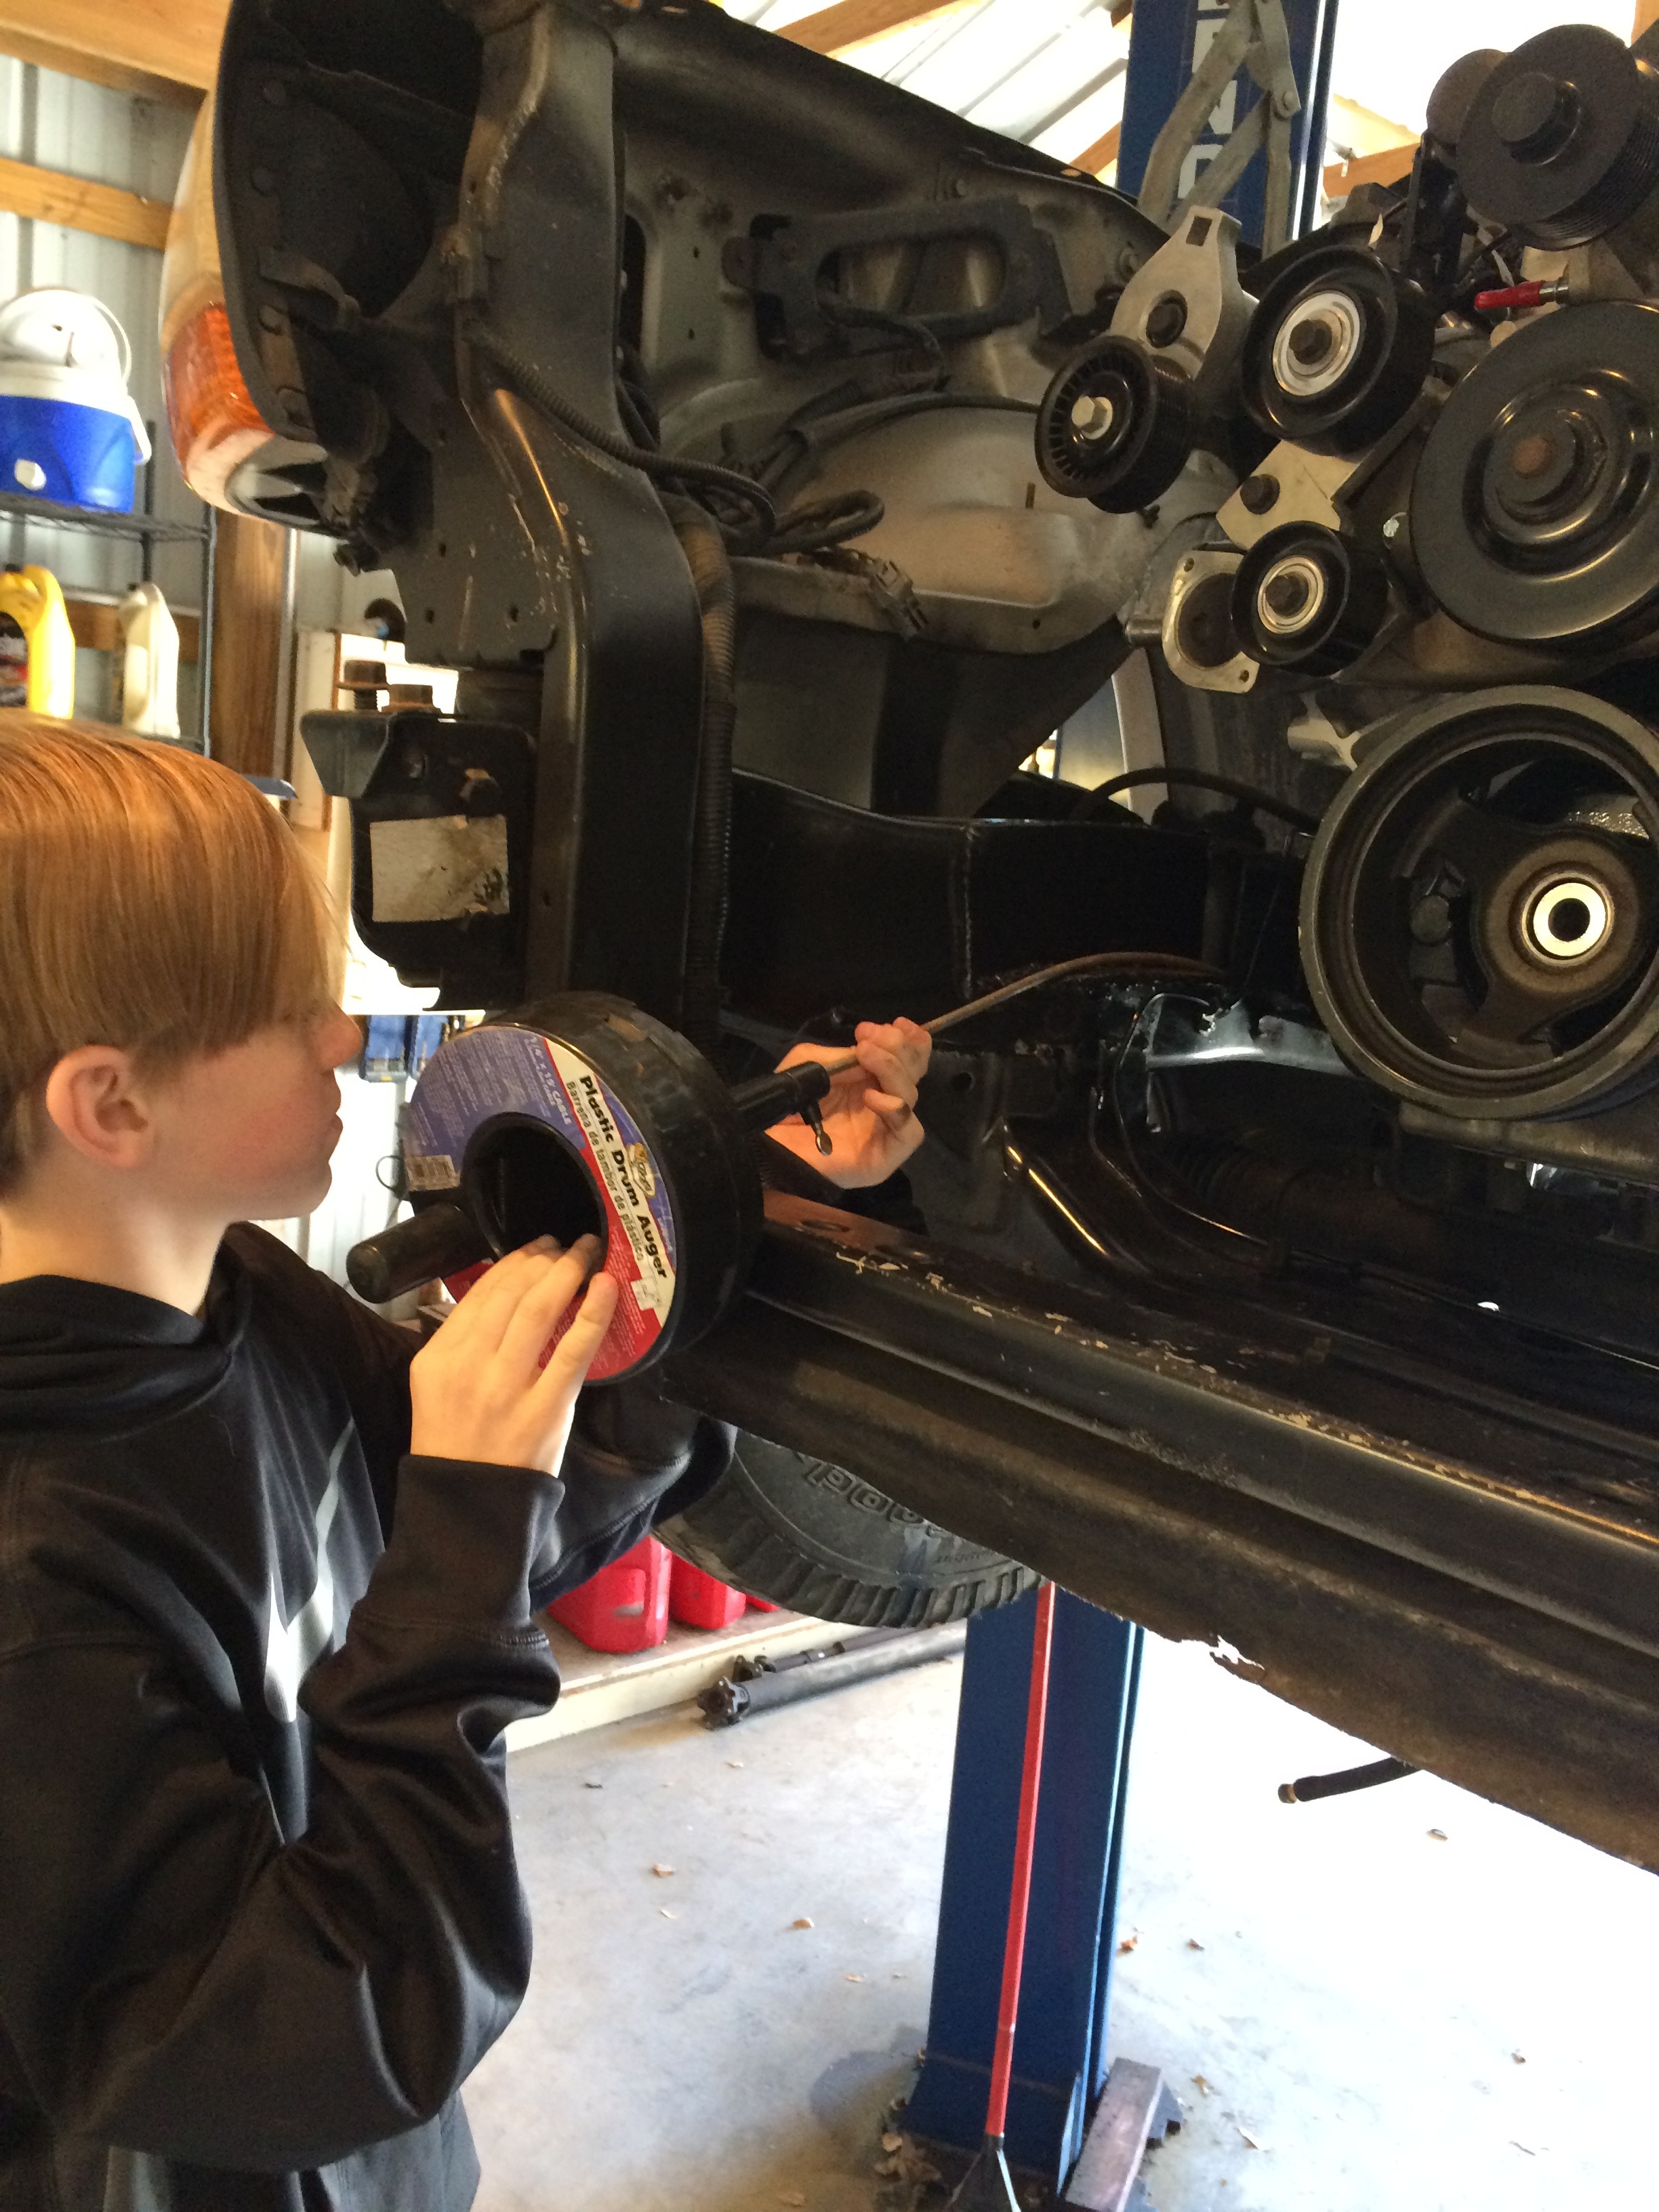
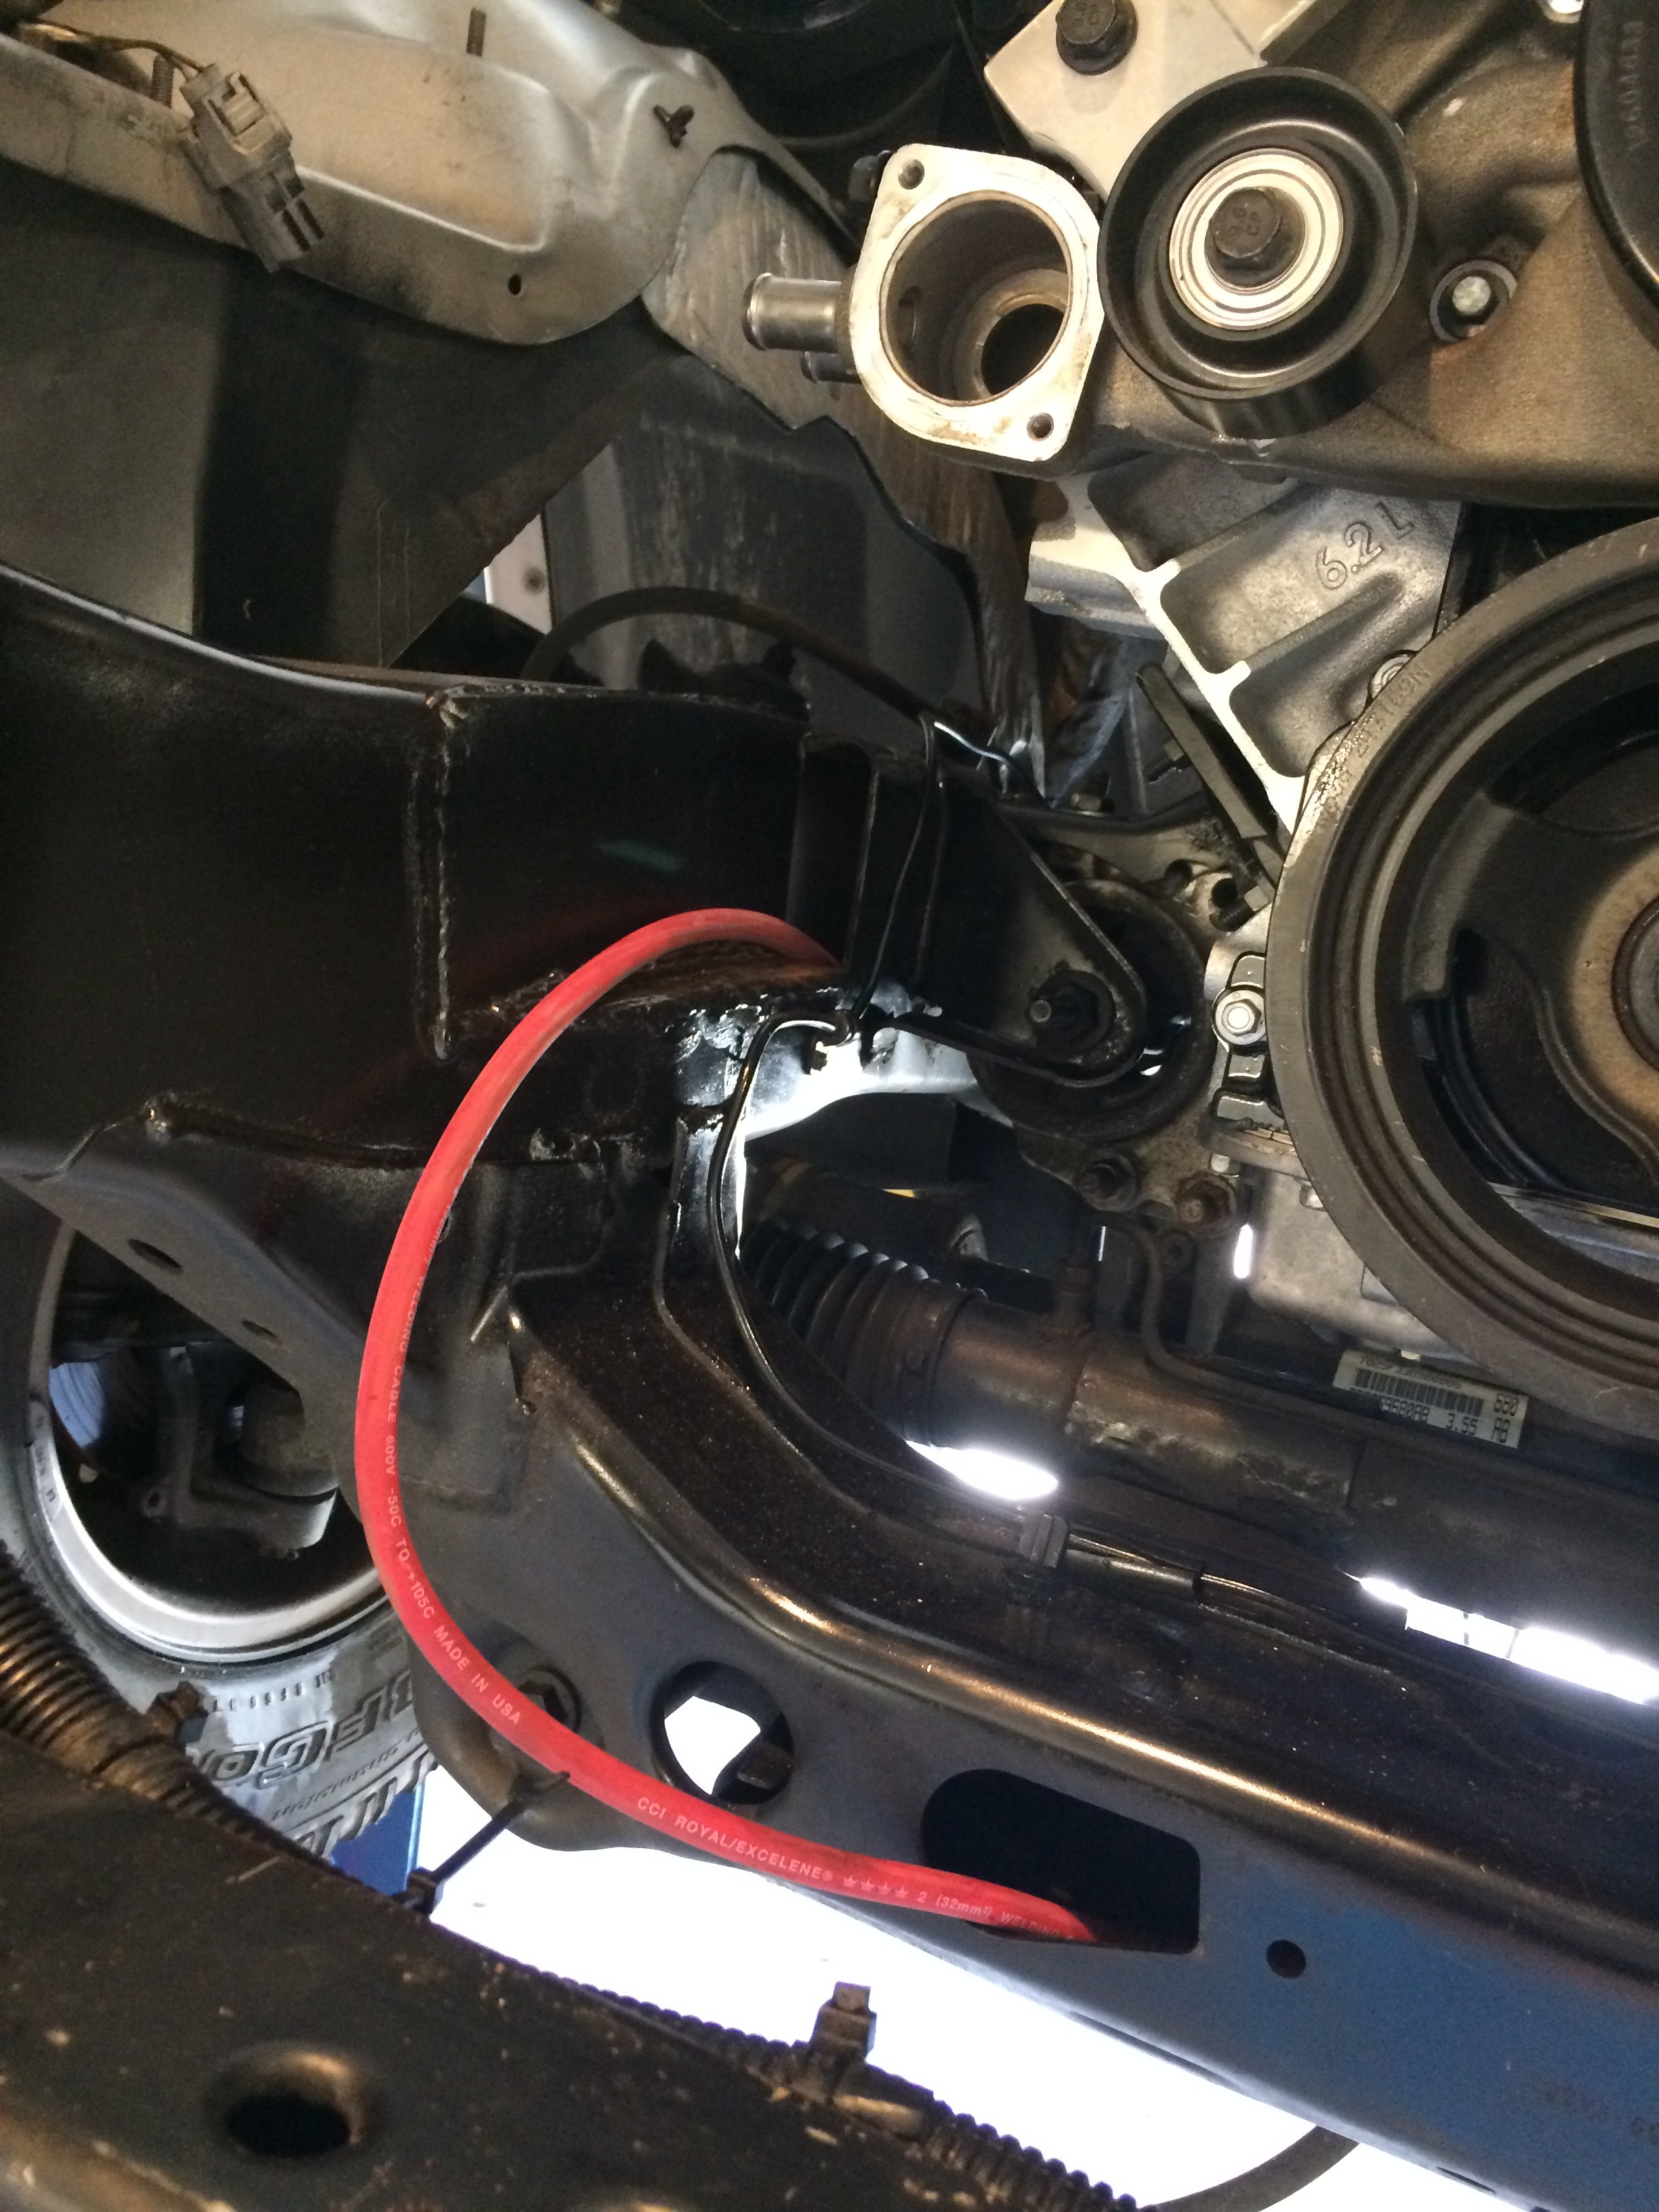
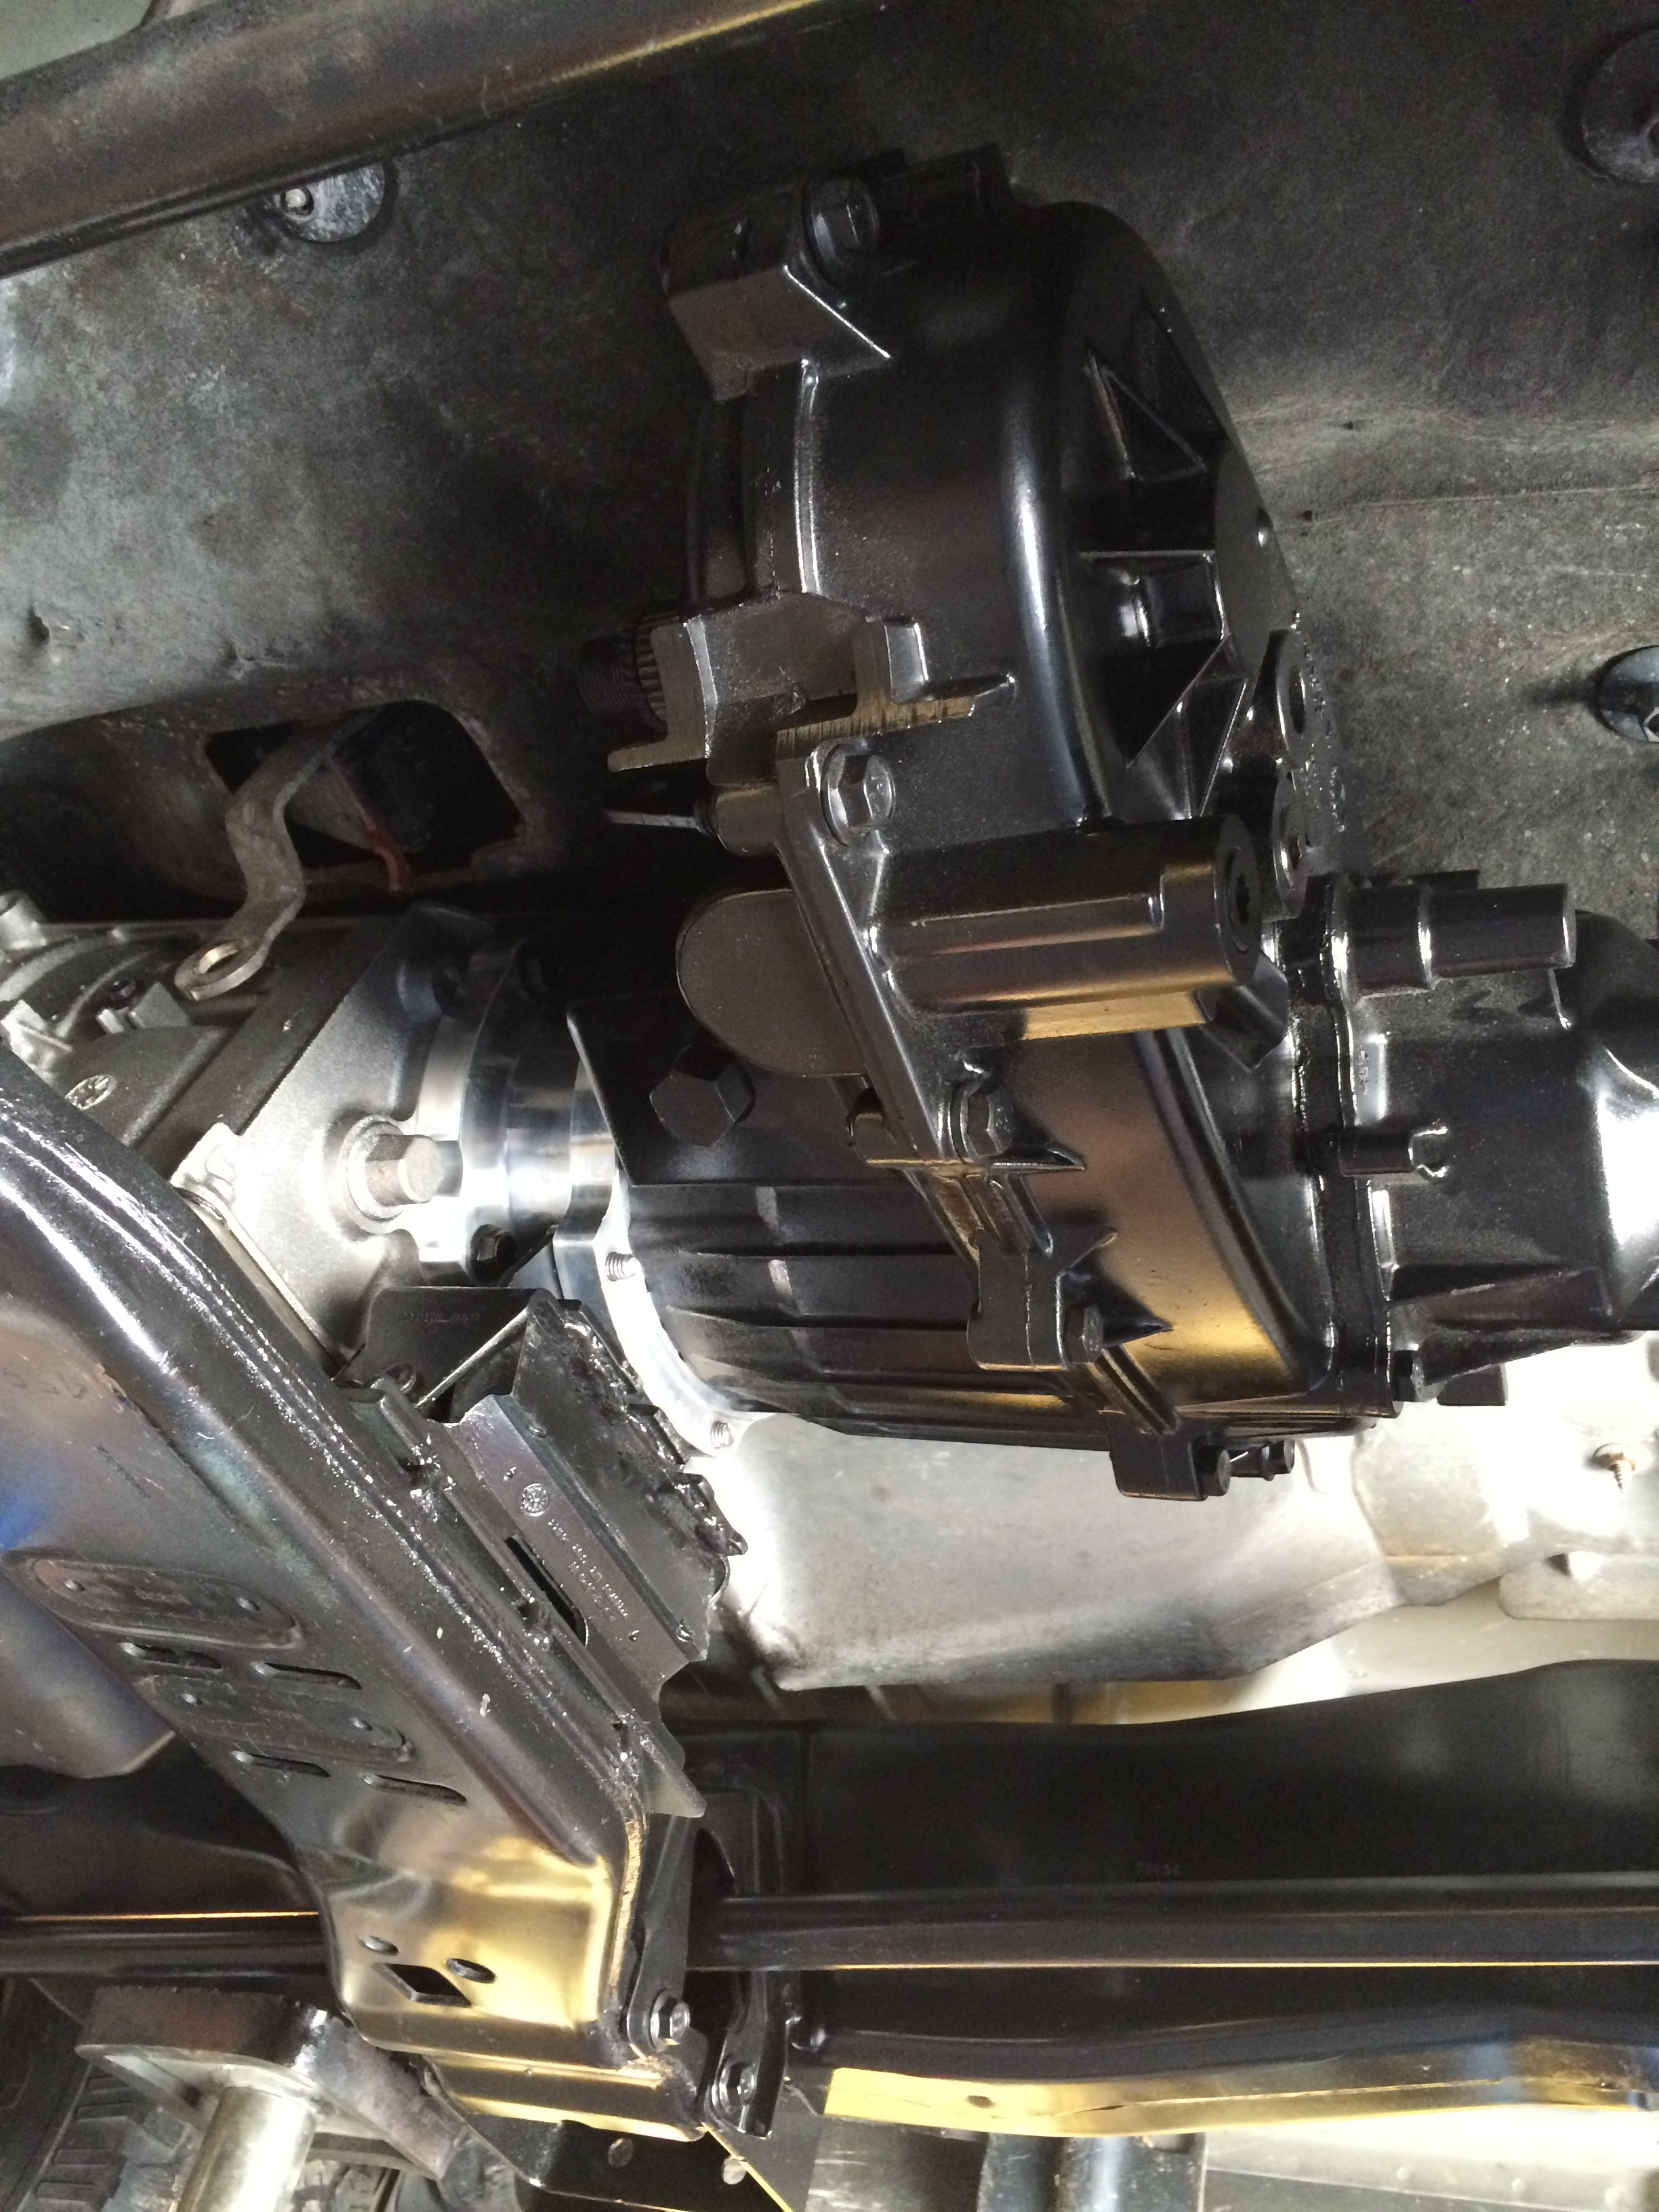
Transfer case is in
Stop and make a tool to reach the top bolt on the transfer case. Wonder is Sears will warranty this.
Crank pin tool. Thanks chenrymotorsports.com
Two.
Getting there.

Long threaded rod cut down to use as installer. I have these for sale now, if anyone wants one.

Warm the crank pulley

Add a nut and washer, and a little grease

Pulley is on, time to fish the wire through the frame


Transfer case is in

Stop and make a tool to reach the top bolt on the transfer case. Wonder is Sears will warranty this.

Crank pin tool. Thanks chenrymotorsports.com

Two.

Getting there.


 02-21-2016, 12:12 PM
#54
So it's time to start buttoning up this project. Wiring harness and all supporting stuff (ECU, throttle body, pedal, and transmission controller) is being put together by Bill at BP Automotive. He is planning on setting this up as a ZL1/CTS-V, rather than an ls3 with boost. Not sure what that means, but it sure sounds good.
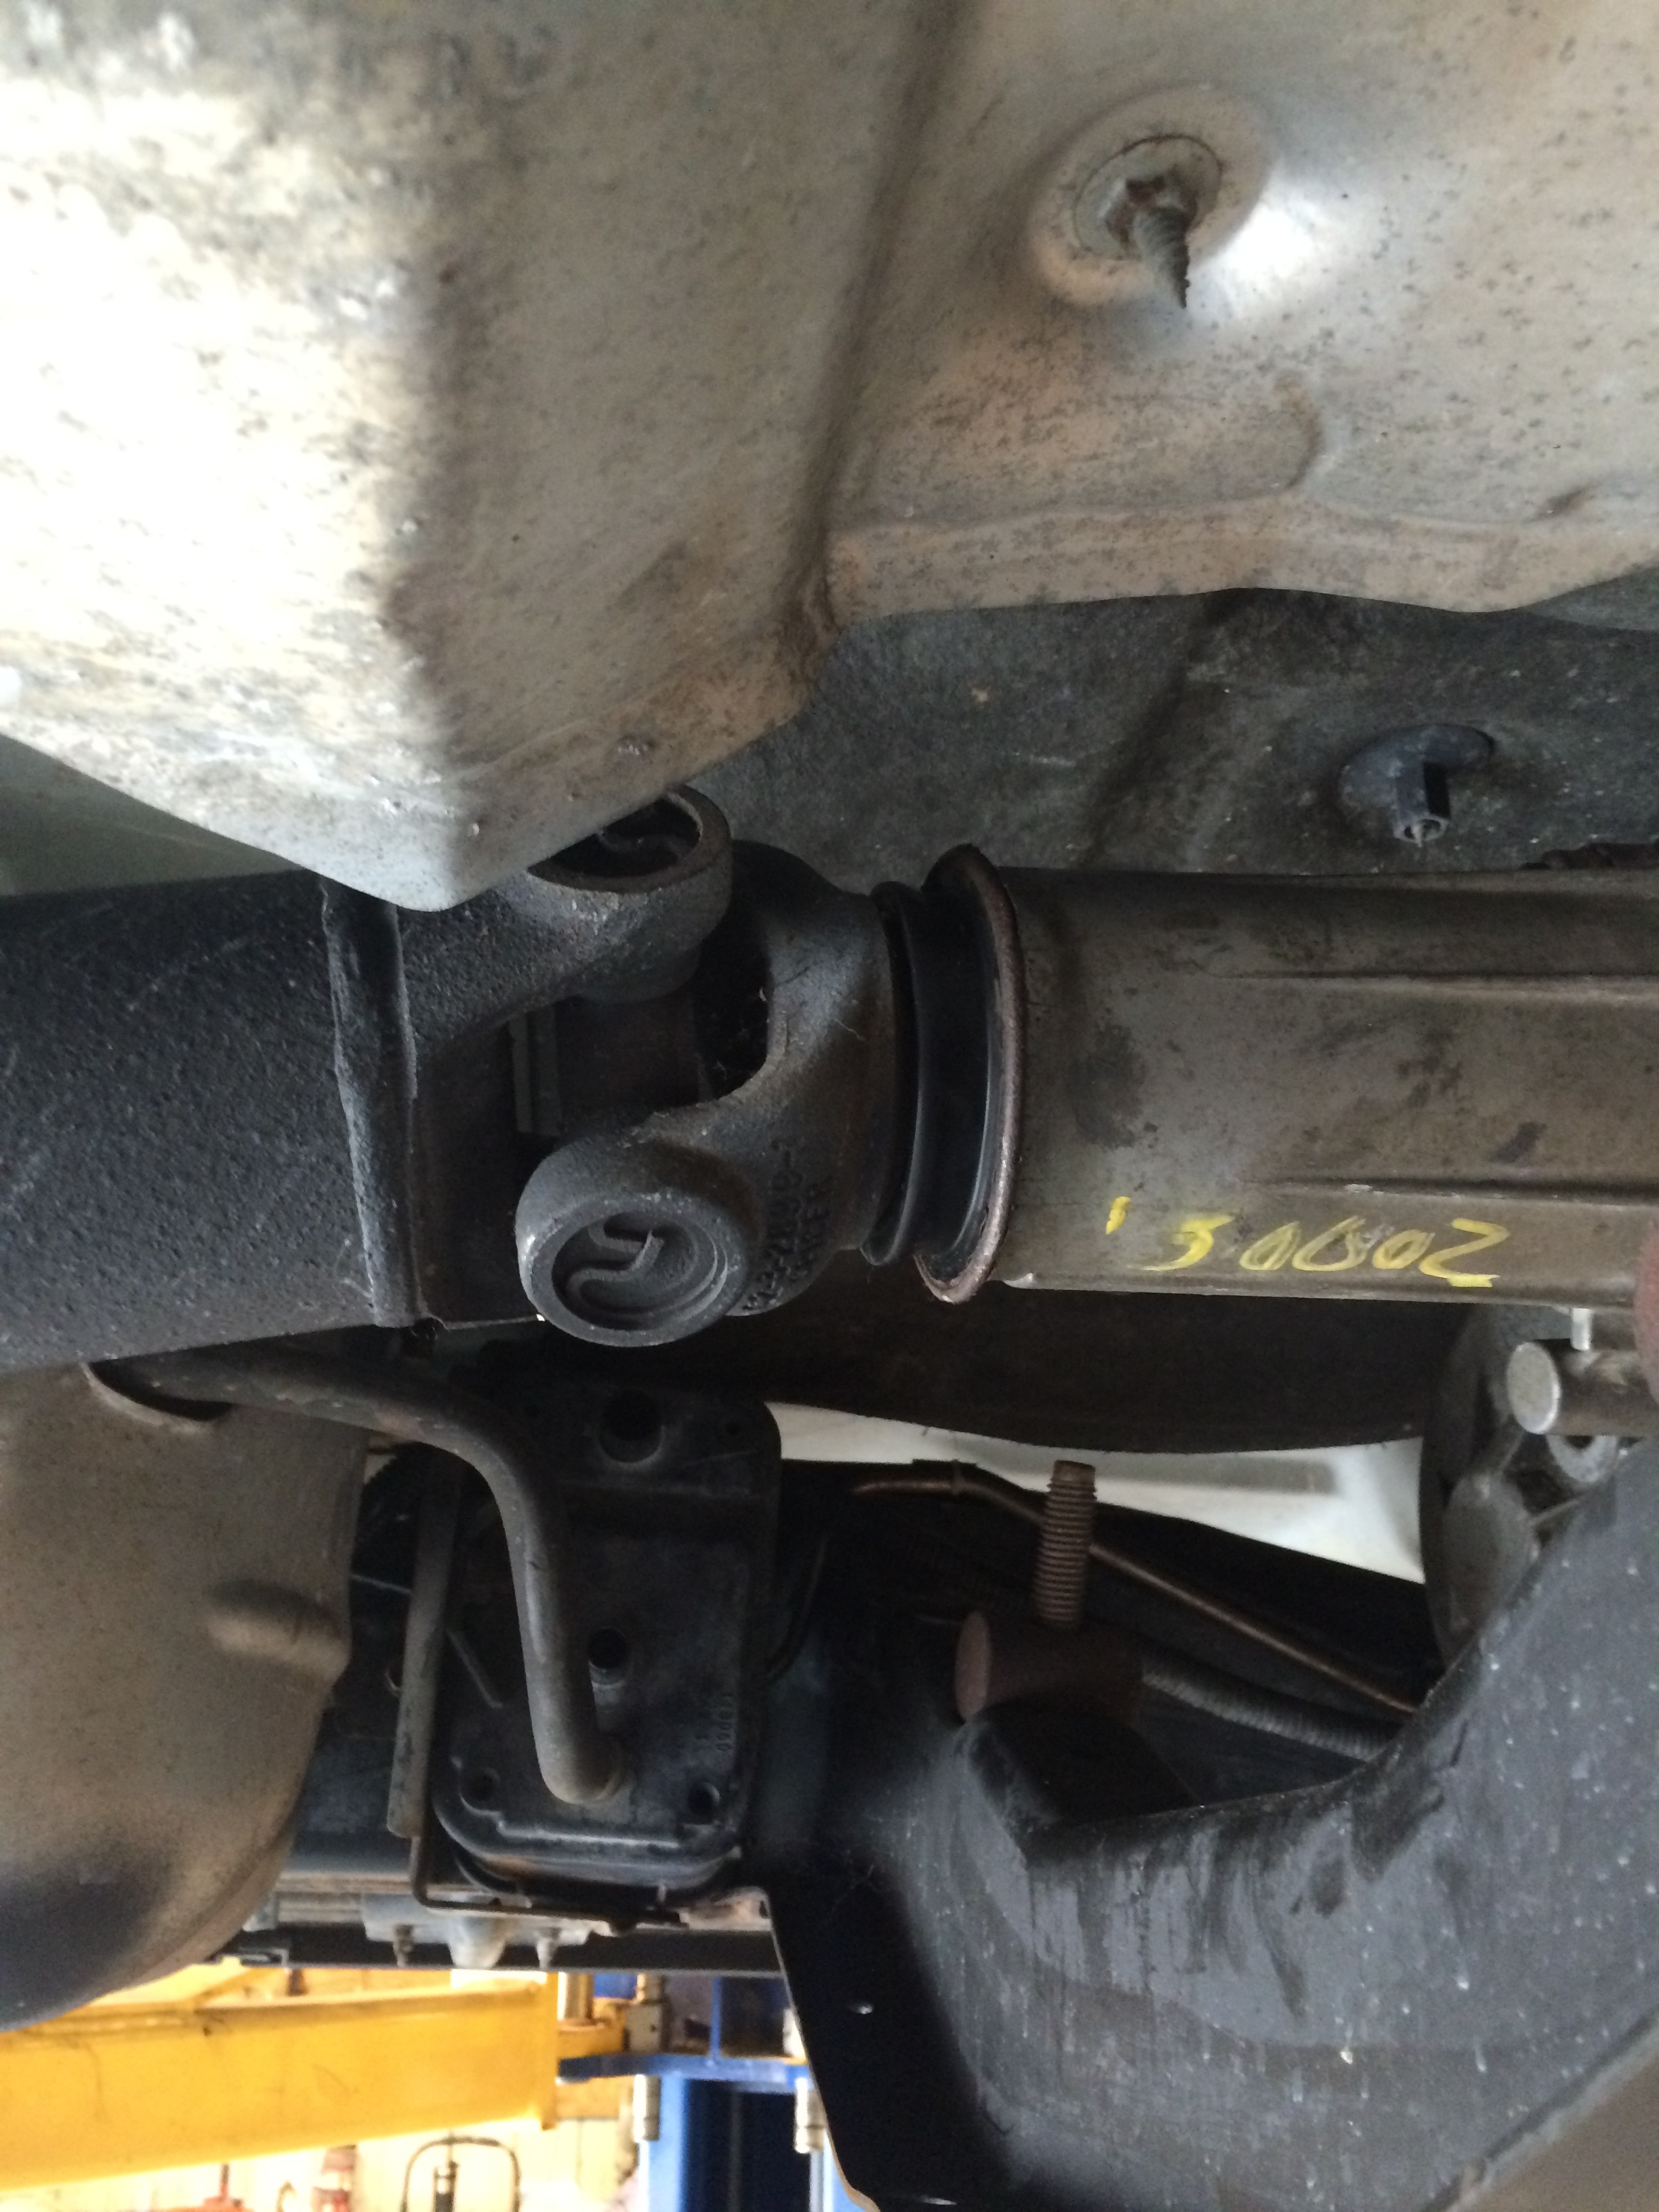
Driveshafts were also ordered. Since the transfer case moved back 1.5 inches, the rear shaft will be shortened and rebuilt. The front shaft will be re-tubed and rebuilt.
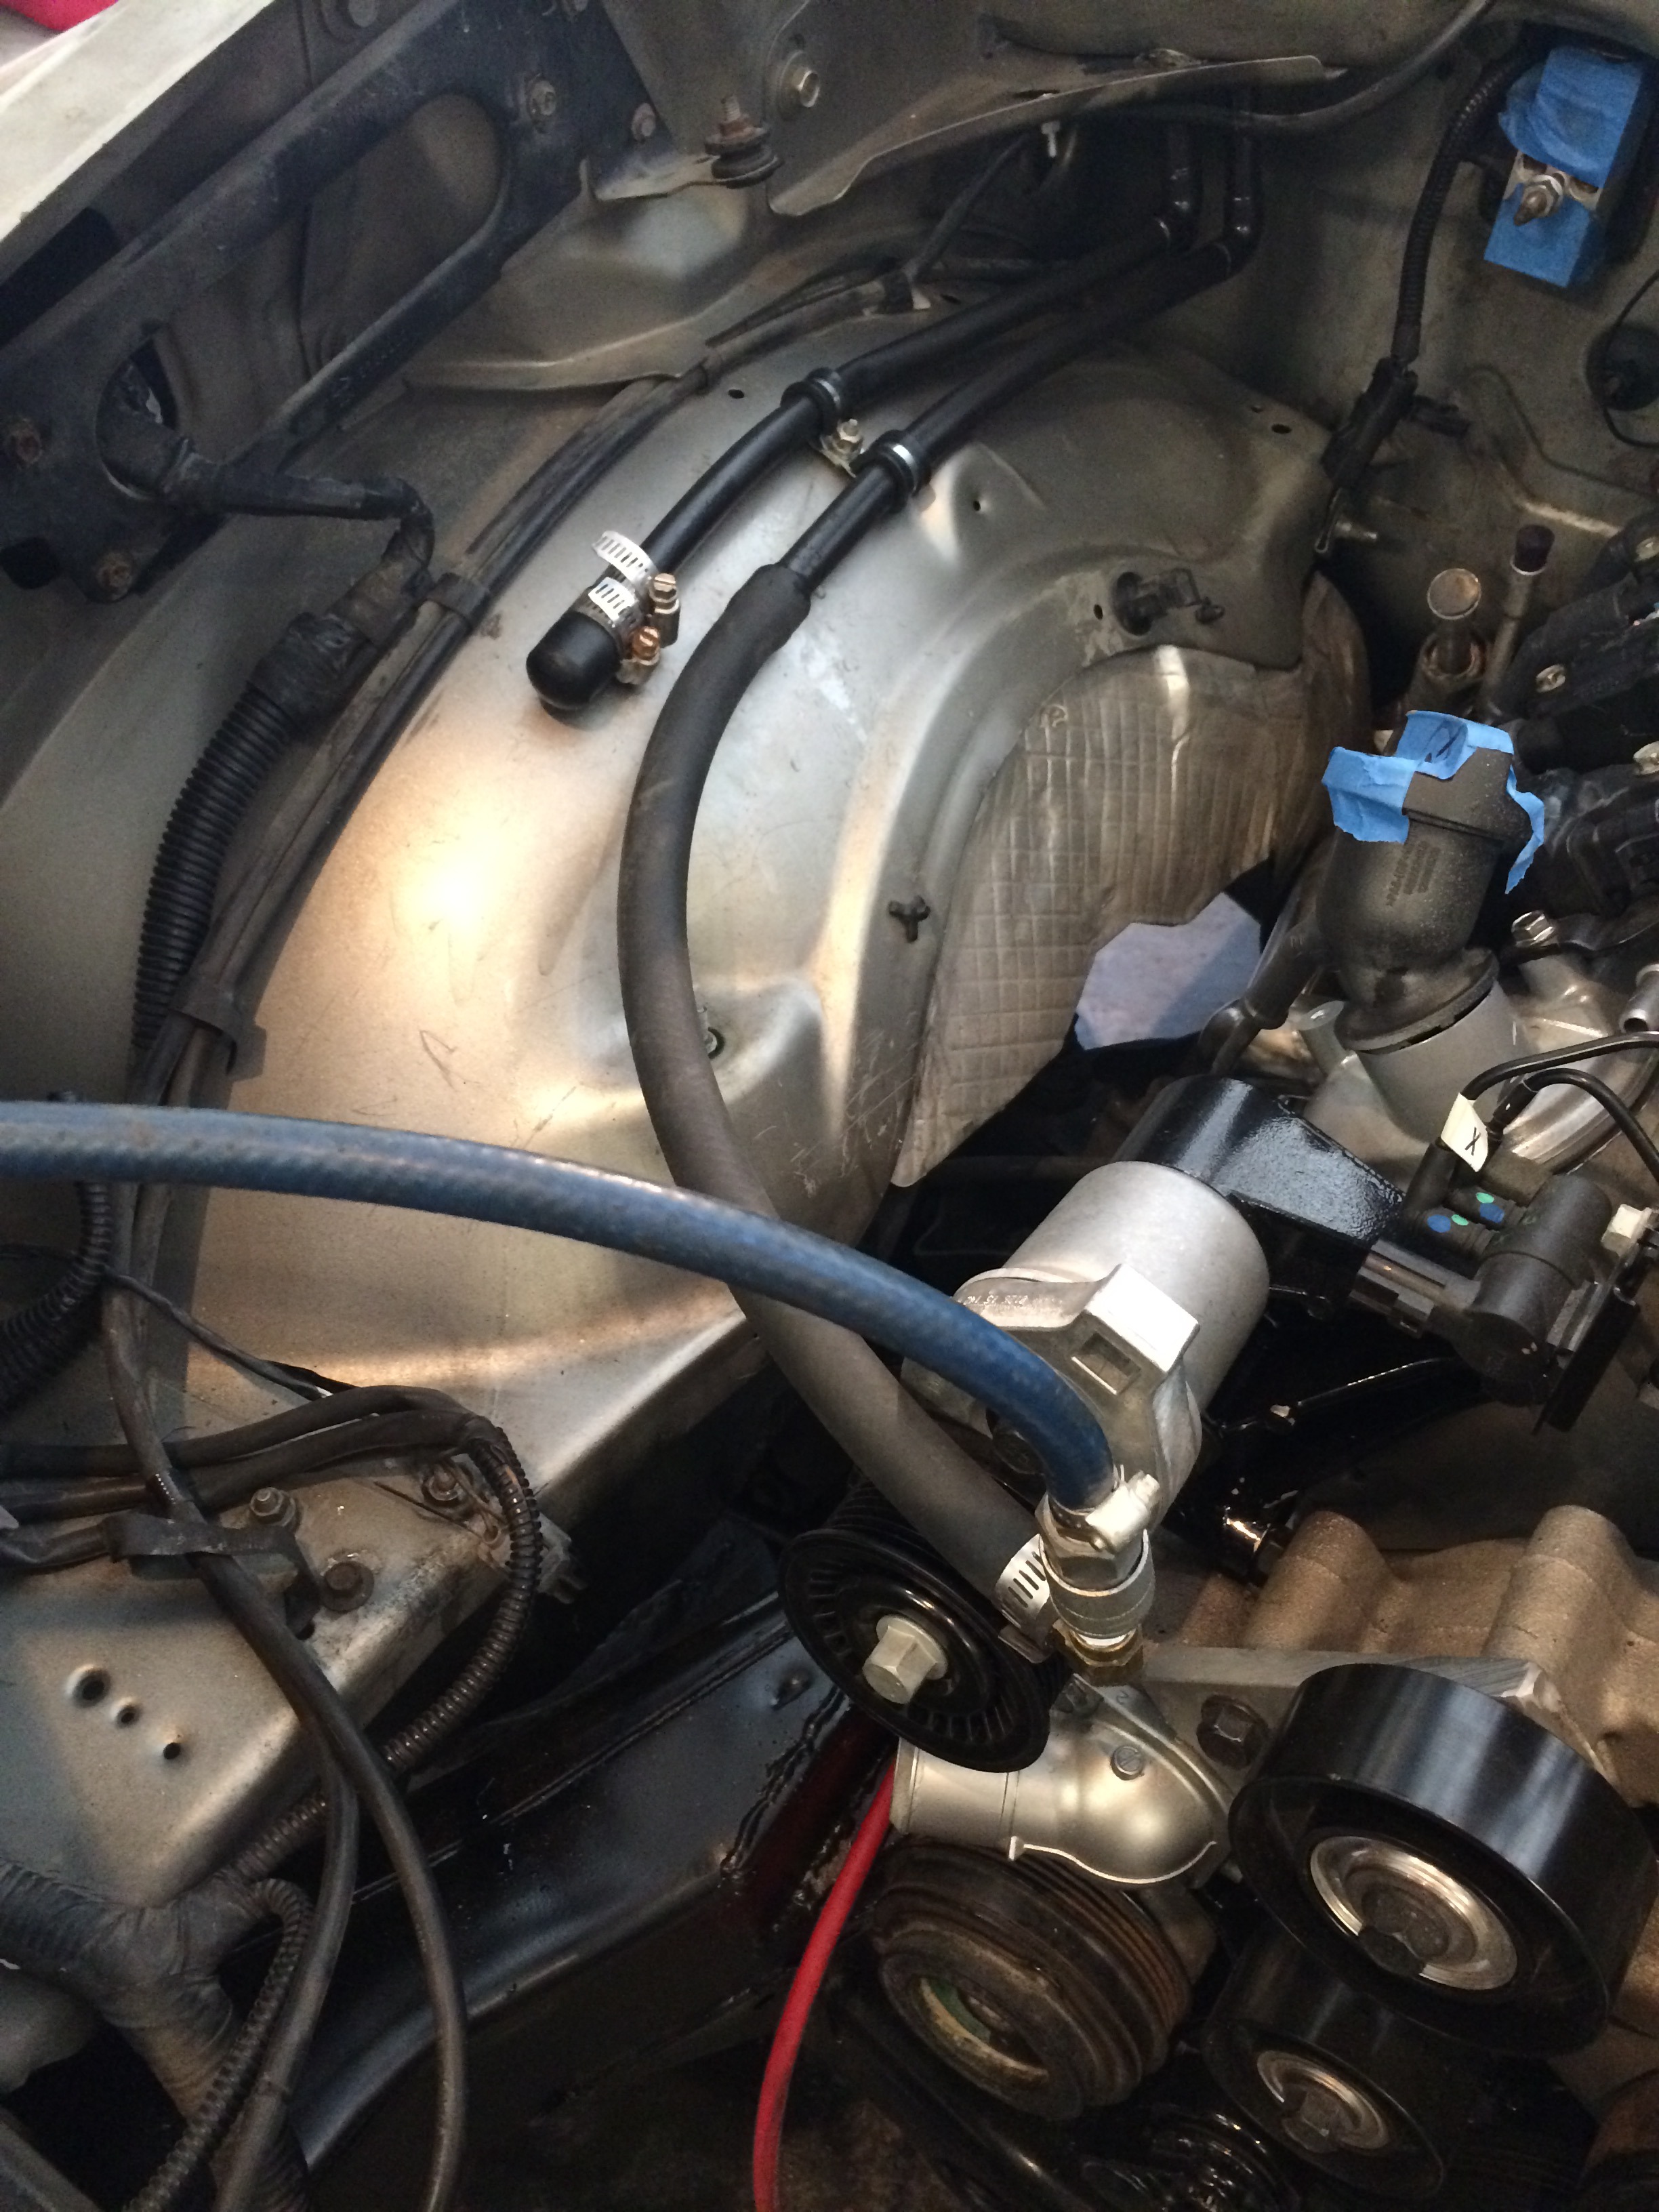
So this week, I routed the heater plumbing through the windshield wiper cowl, and pressure tested this system. It seemed like a good idea to pressure test this now, since using soft copper sometimes causes joint failure due to out-of-round ends. The last thing I want when I am trying to focus on the engine at start-up is having a stupid leak somewhere. A few minutes on this saves trouble down the road.
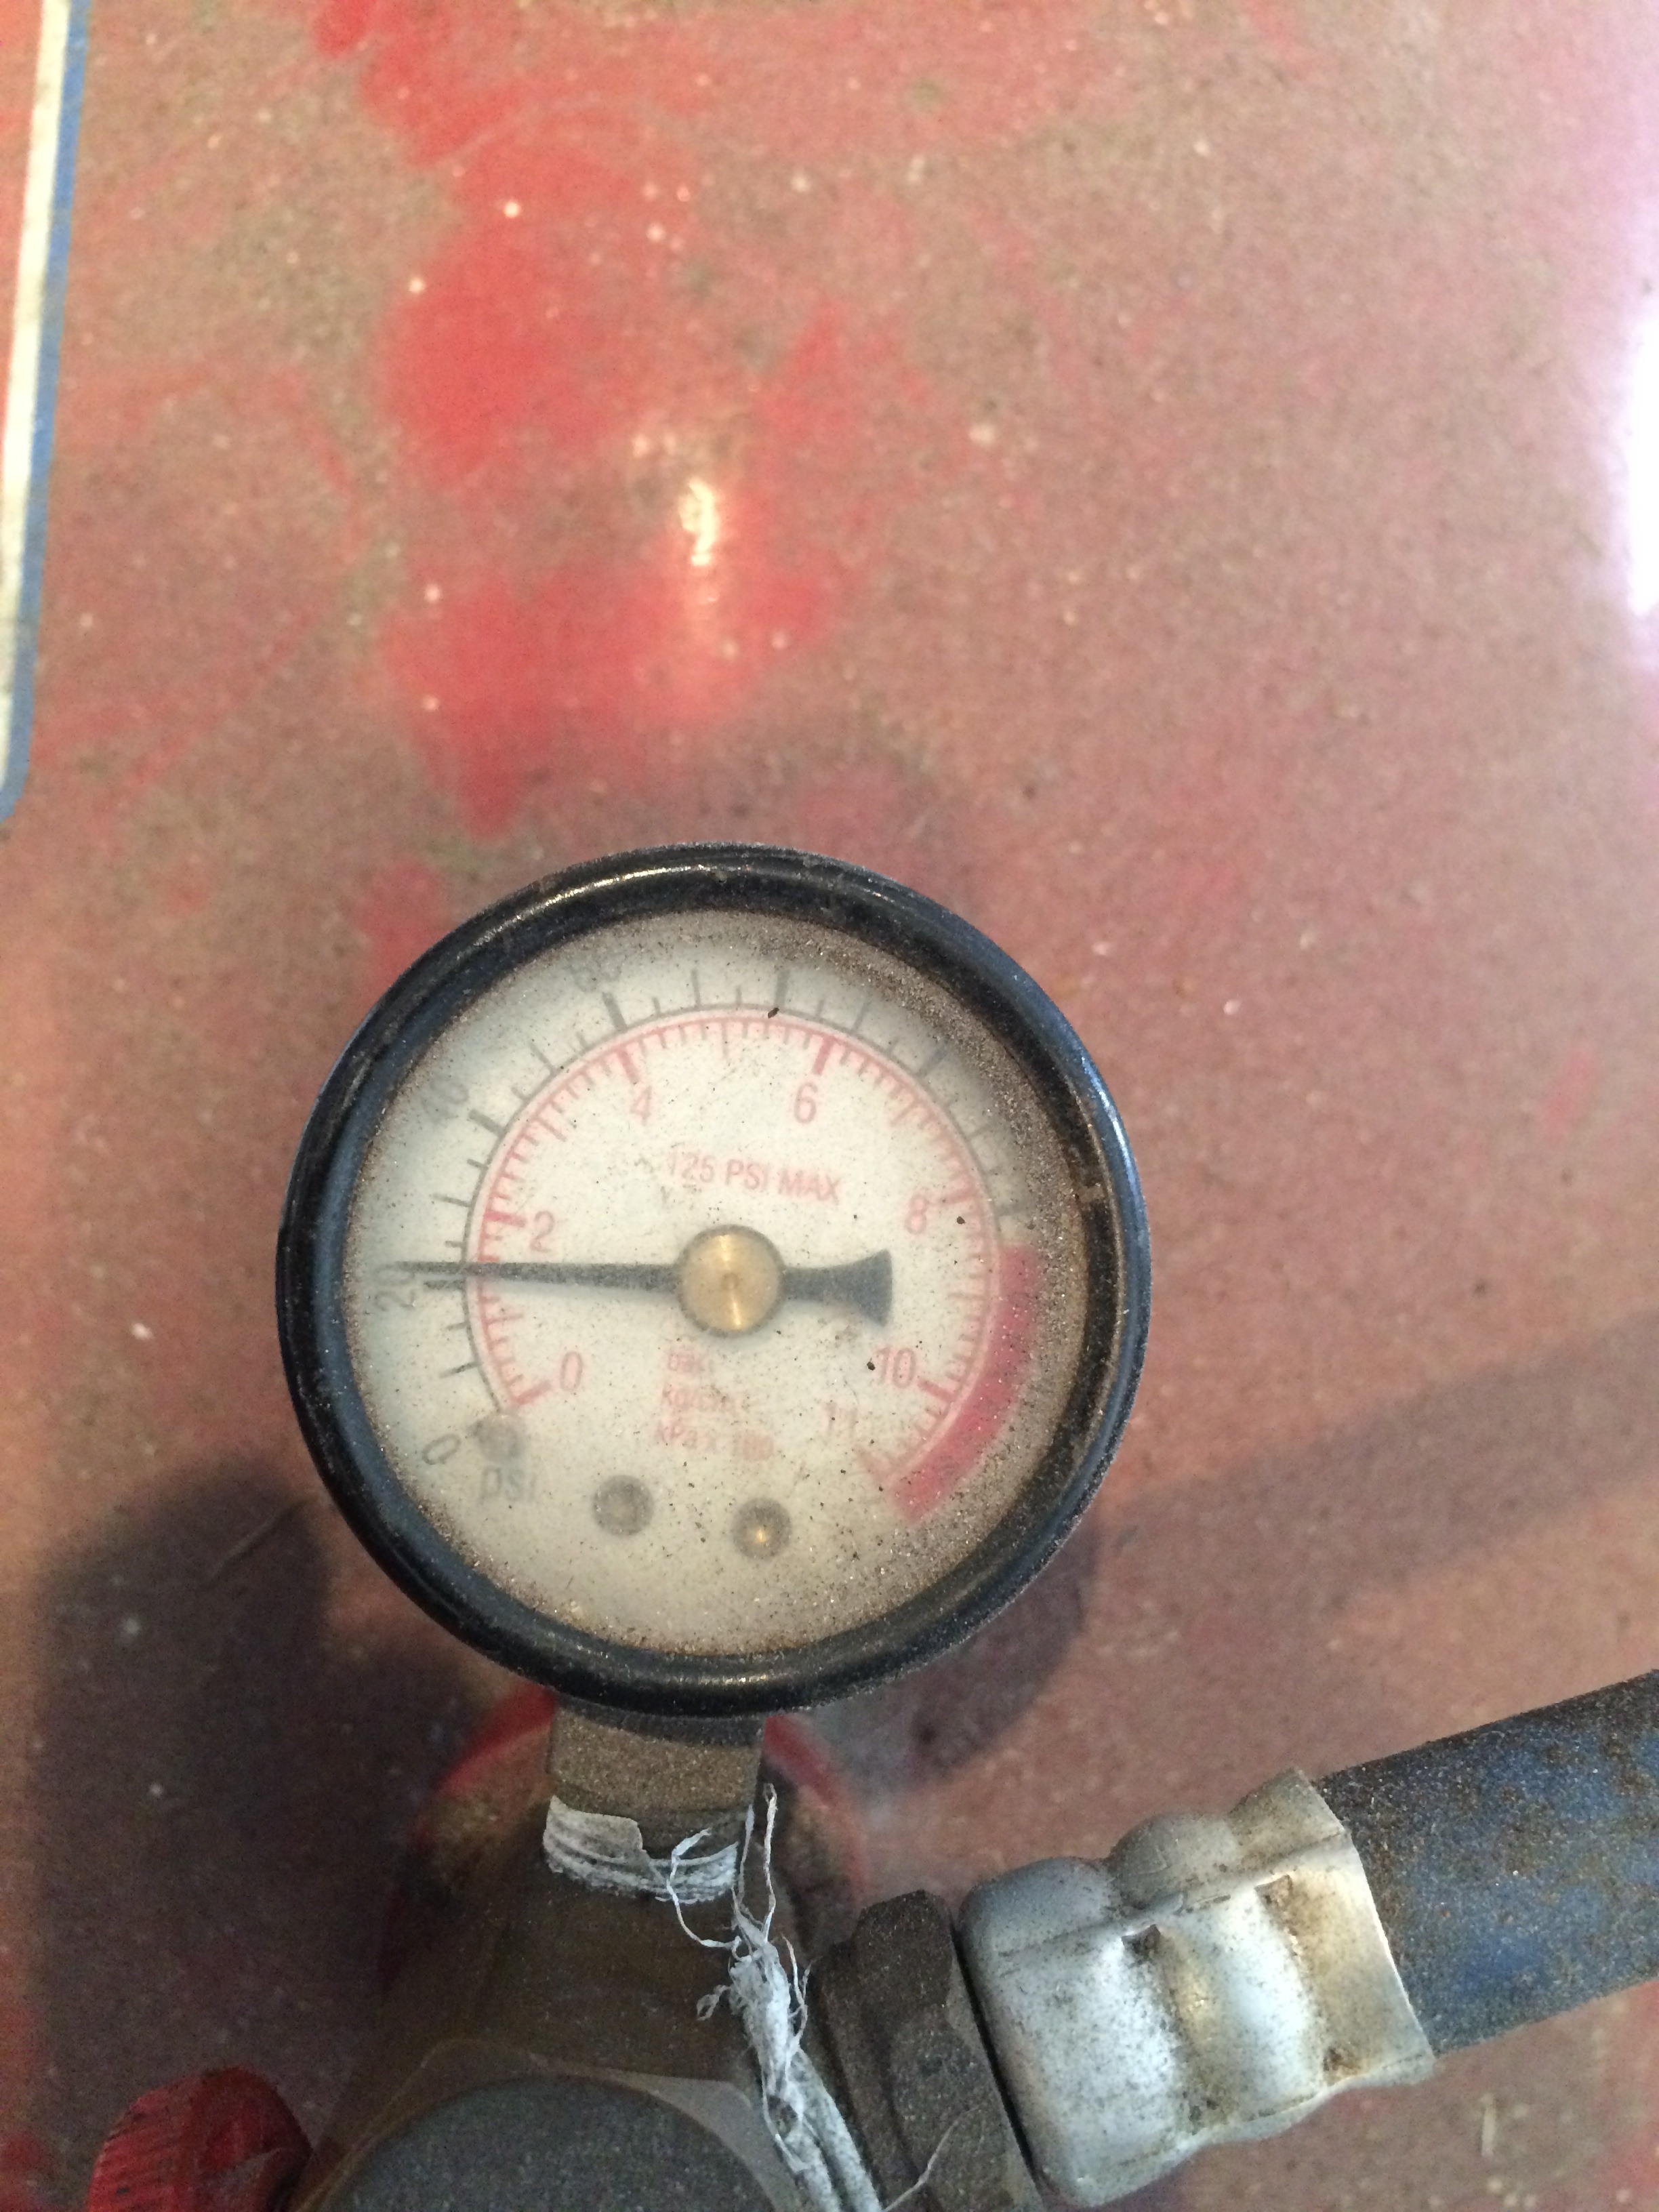
It tested fine at 20 psi.
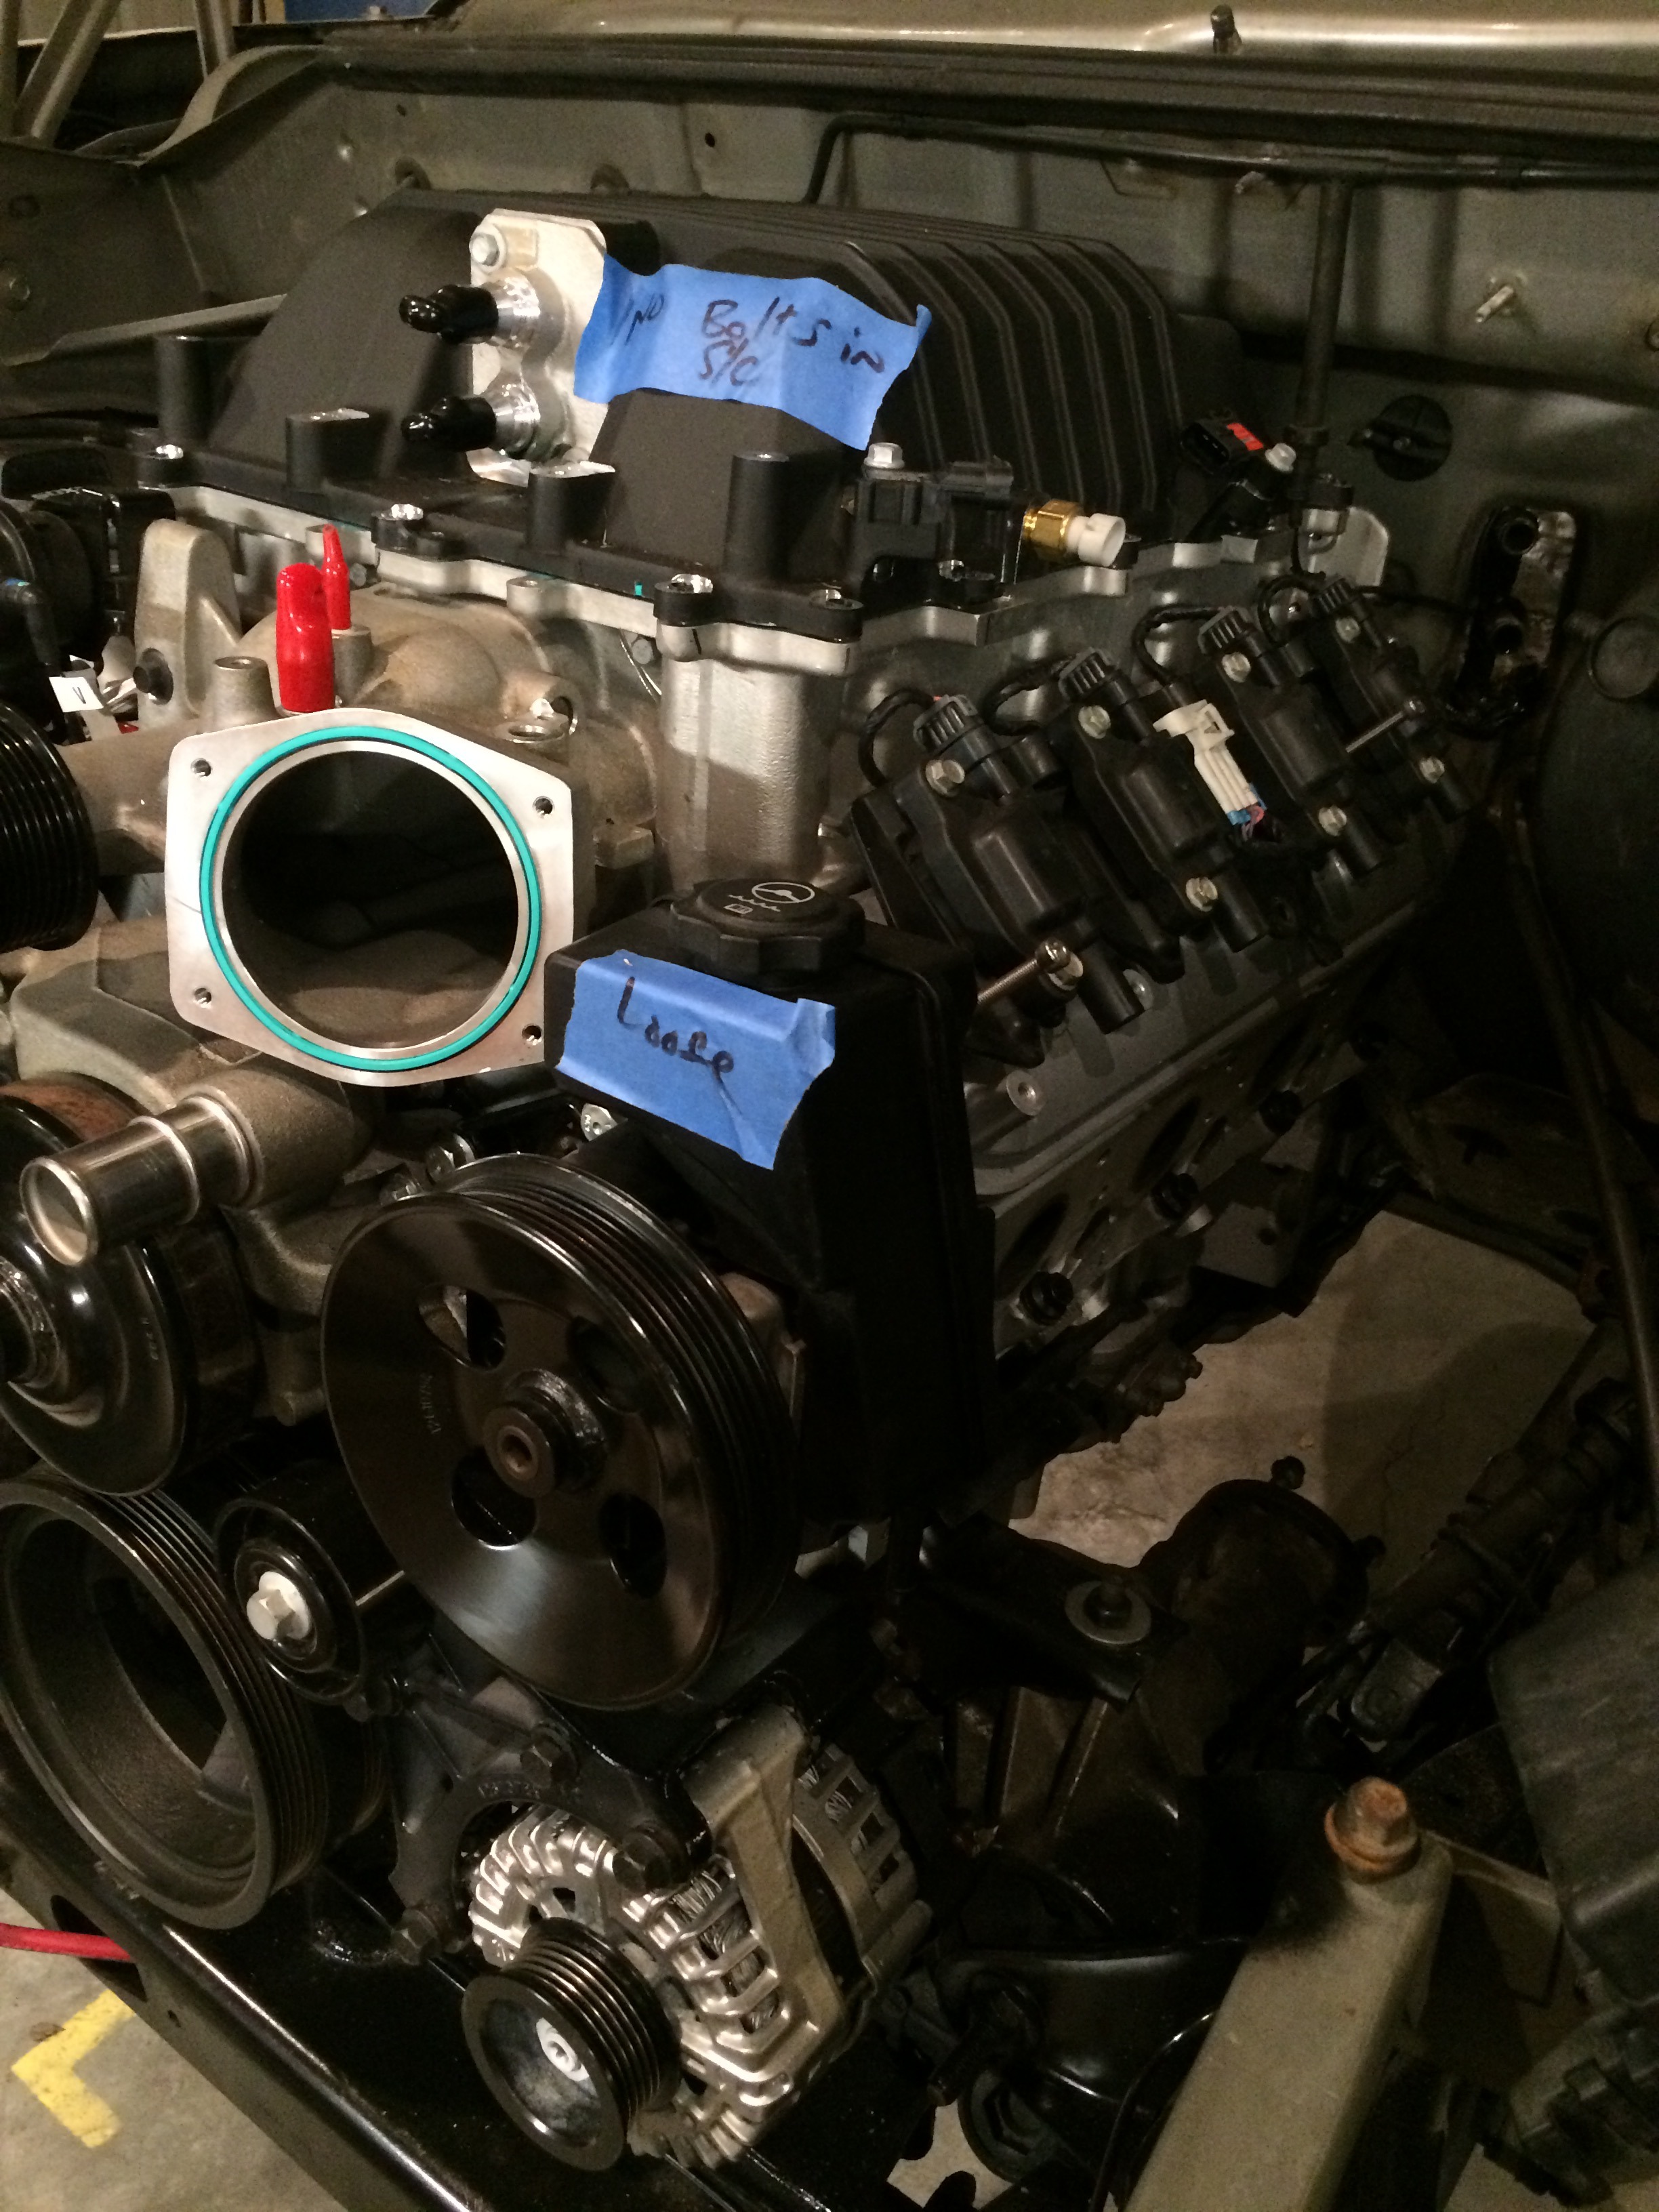
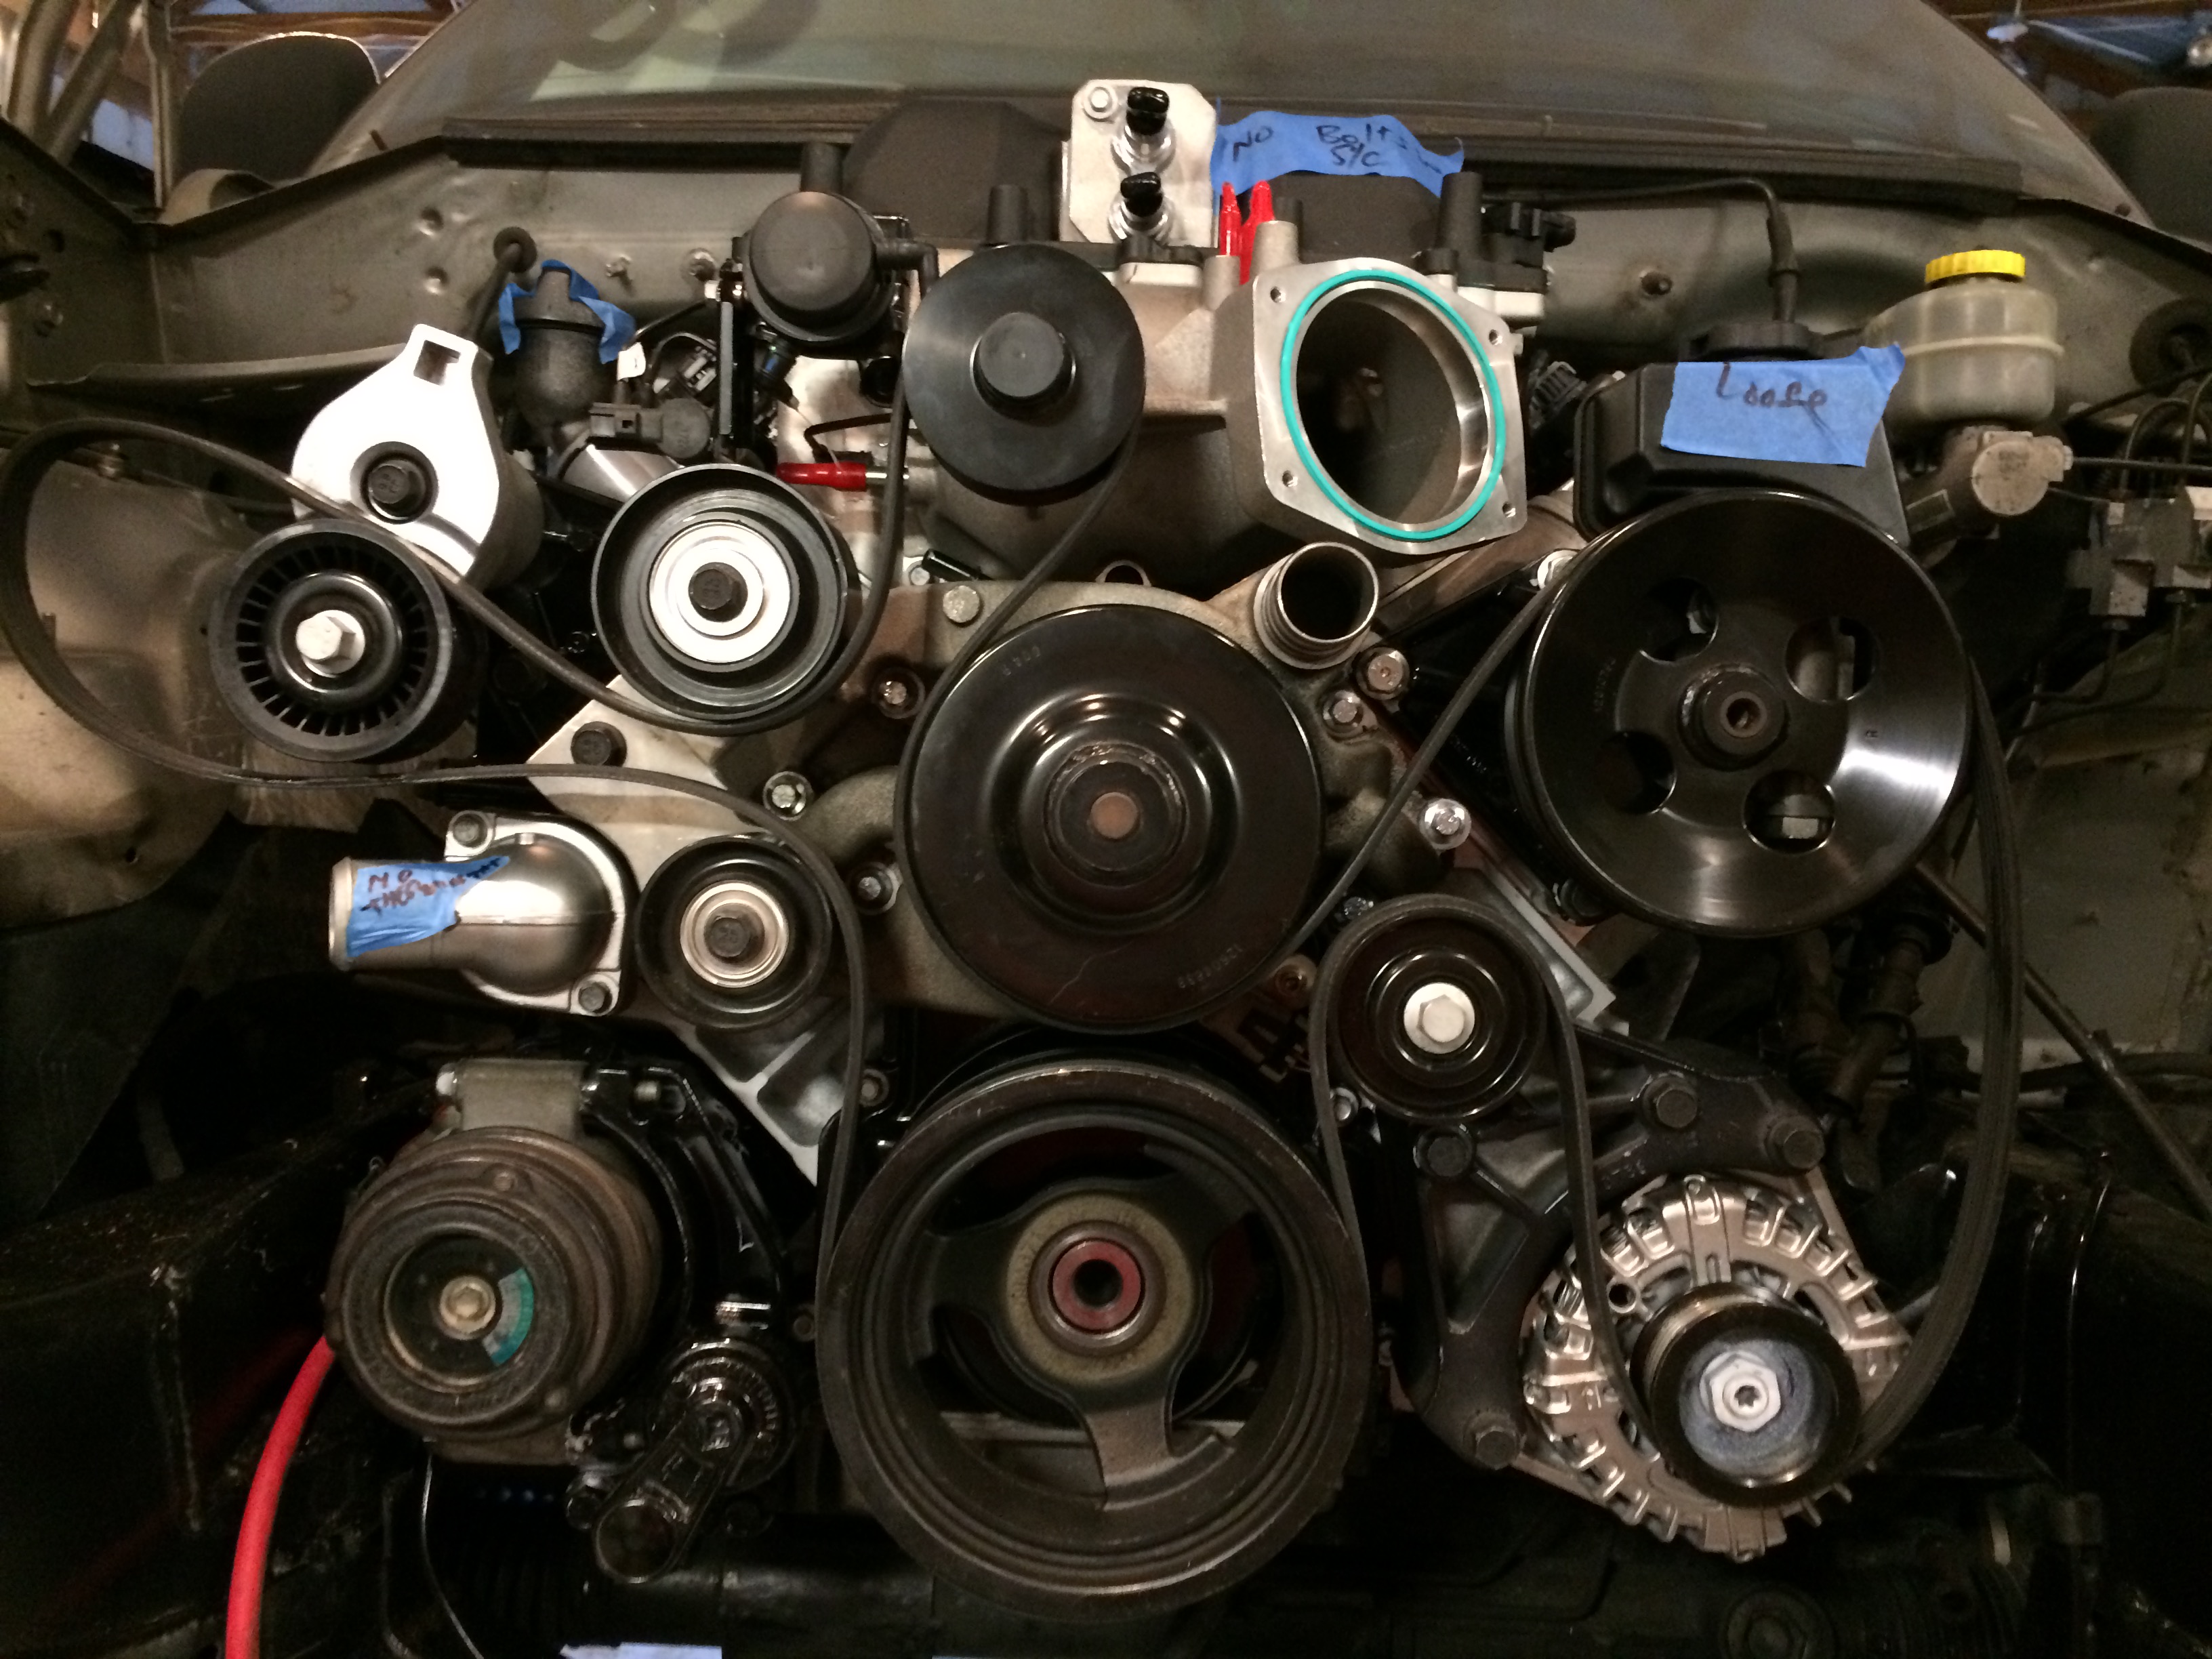
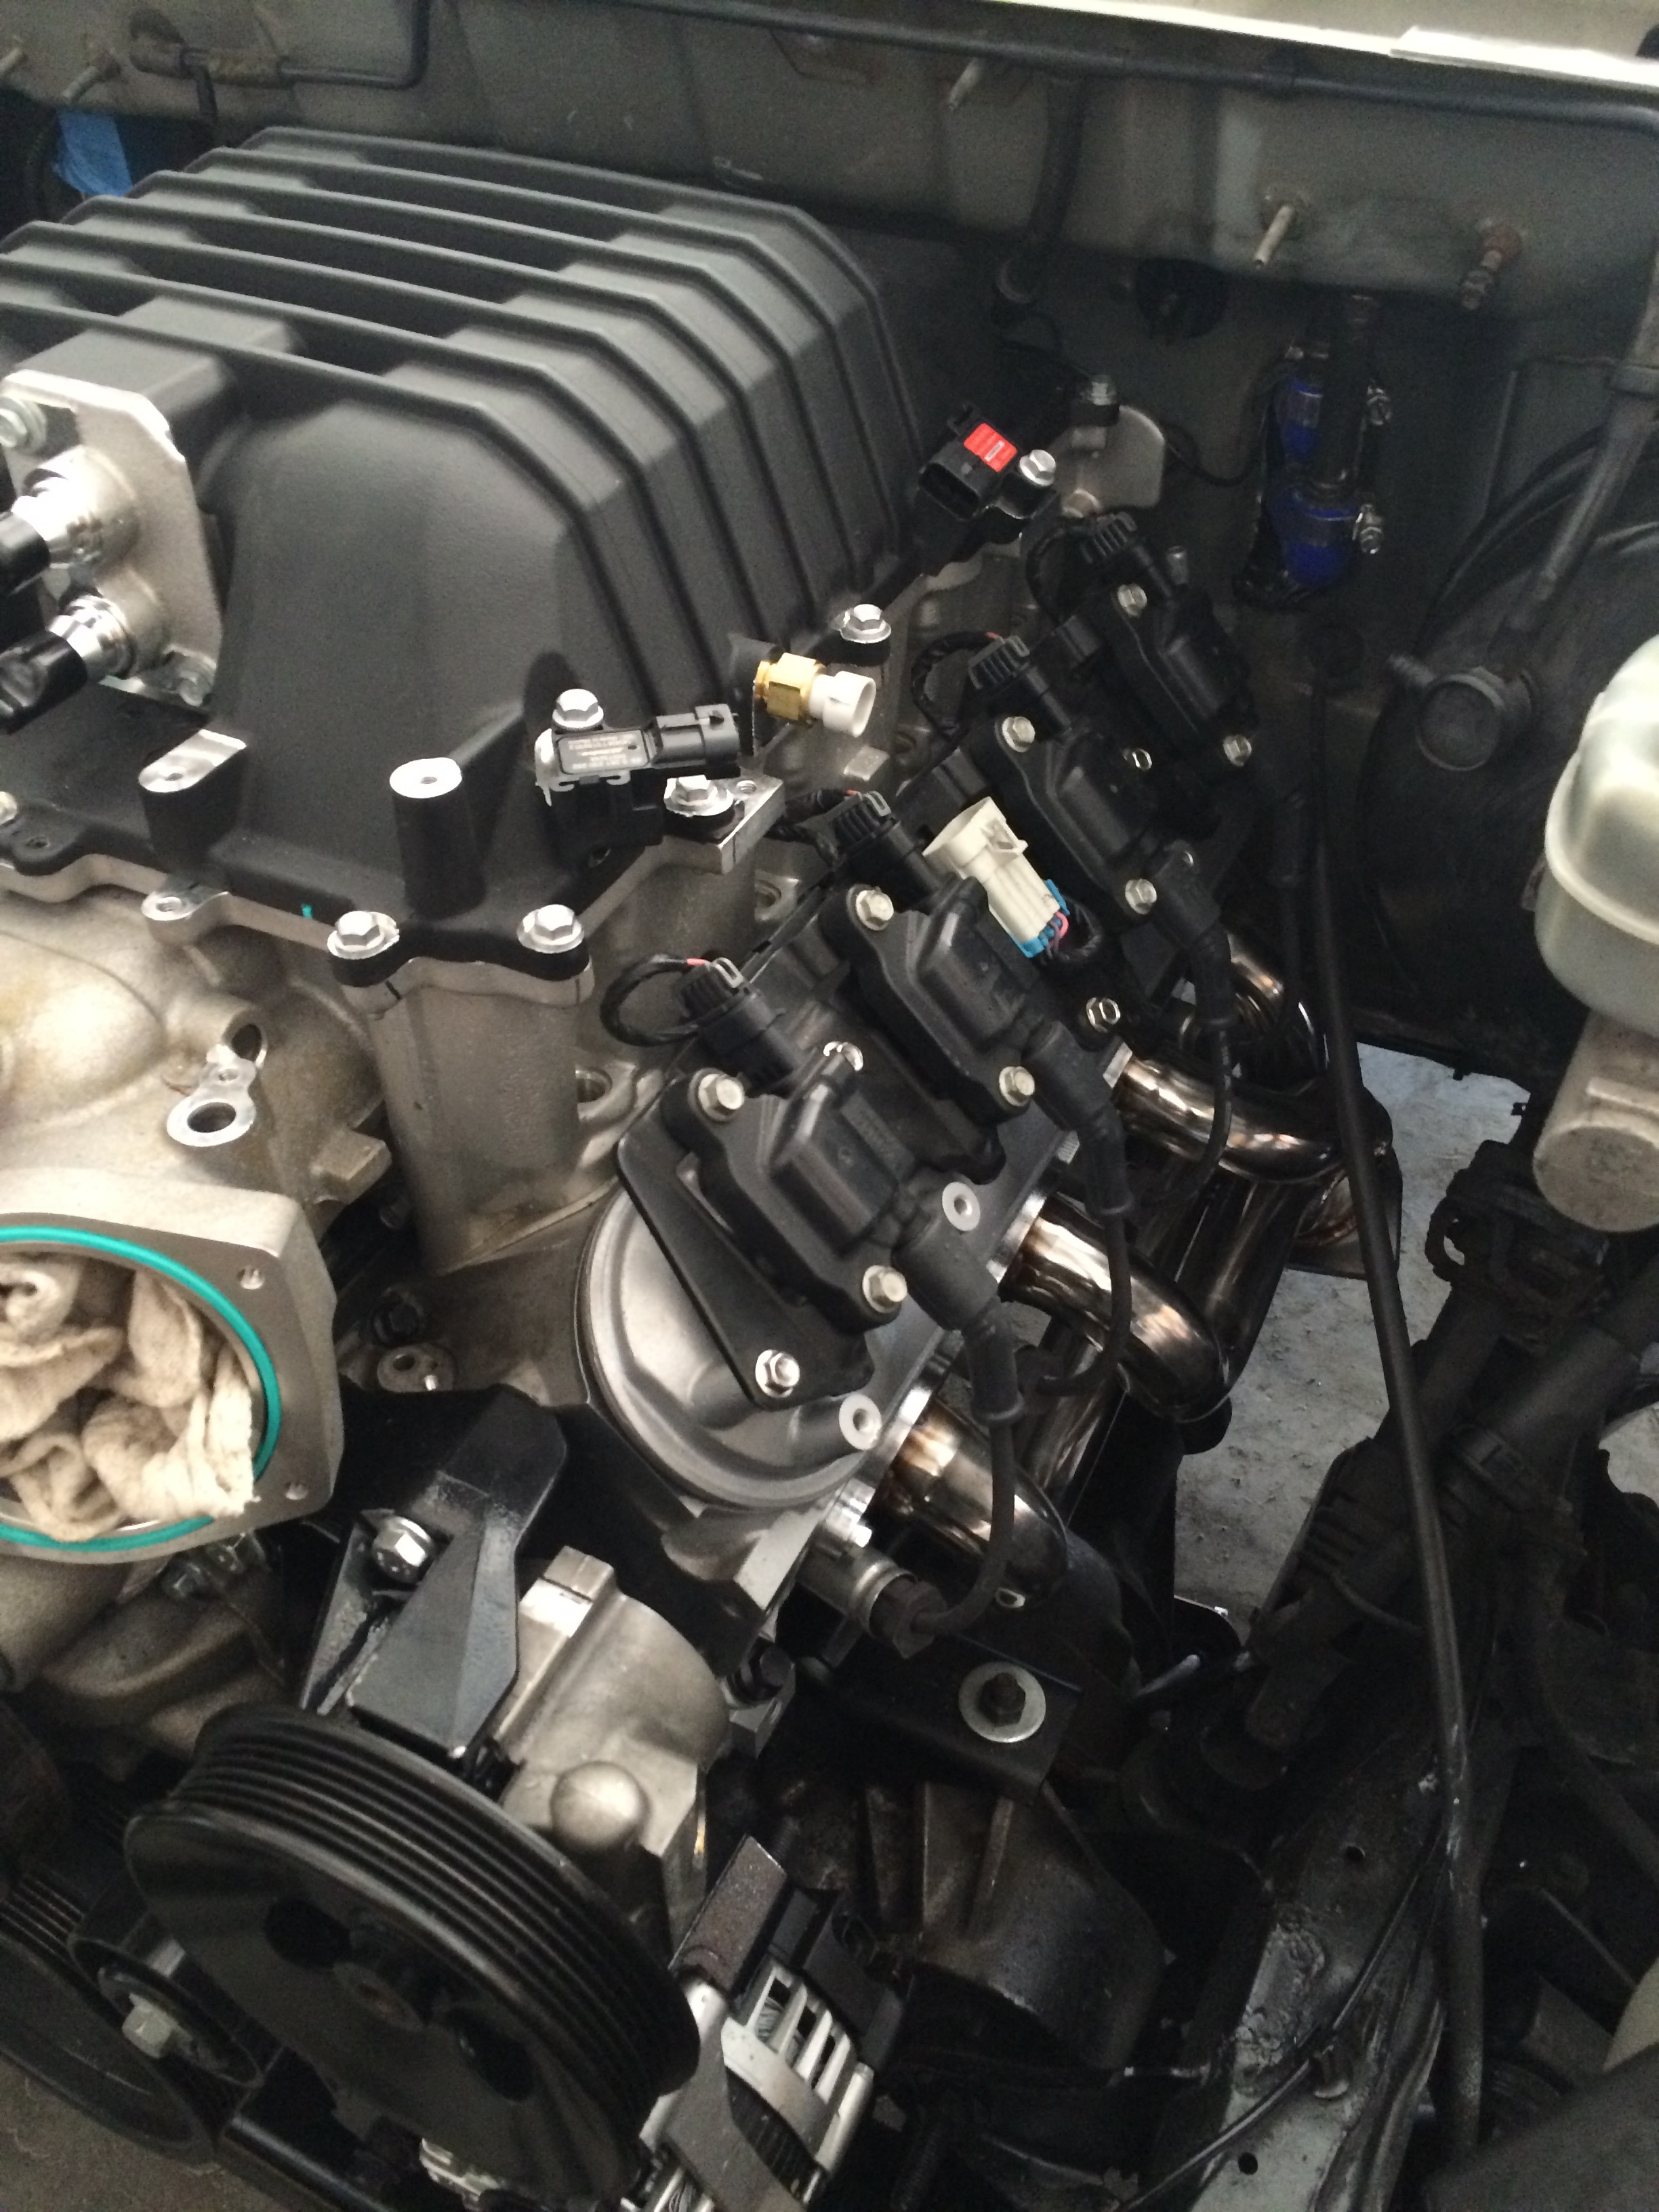
And...the big news......Headers. I went with shortie Silverado headers. I know I am giving up a little power, but I knew they would drop right in. At this point, I am not ready to waste another week or two and a bunch of money guessing at long-tube headers and having them bump into something. Maybe later. And they did drop right in. Maybe 5 minutes per side. I am ok with that.
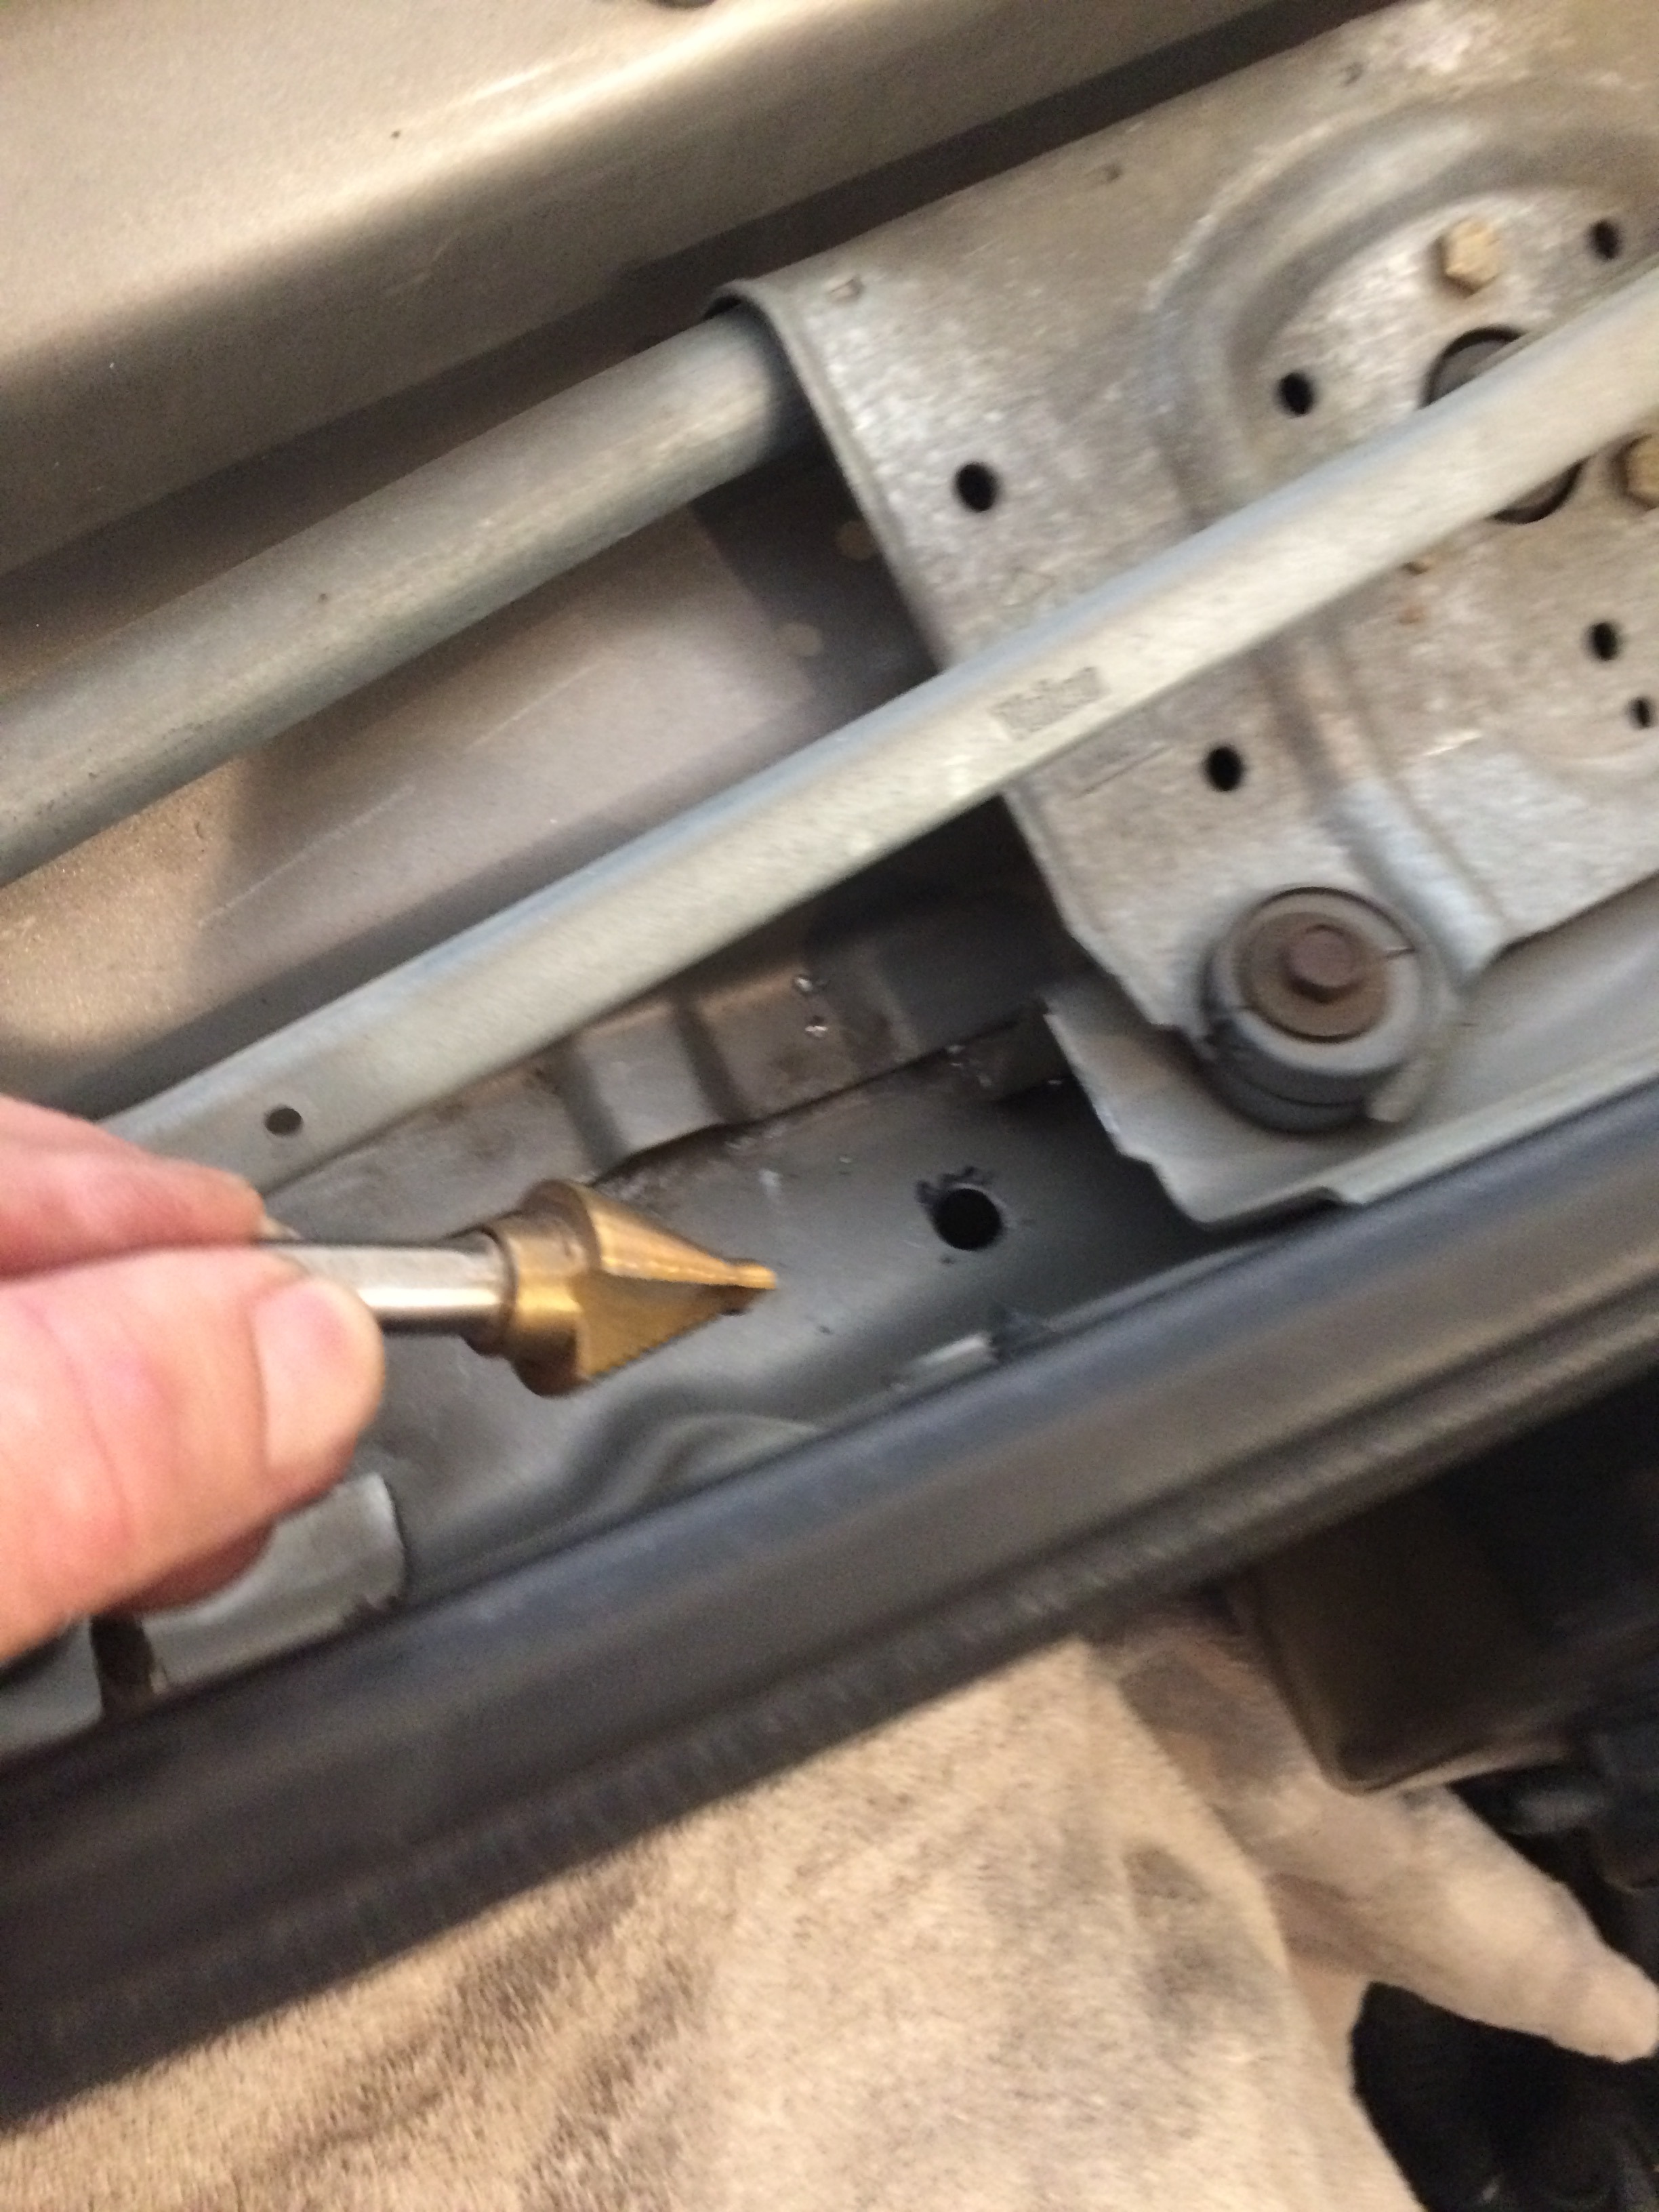
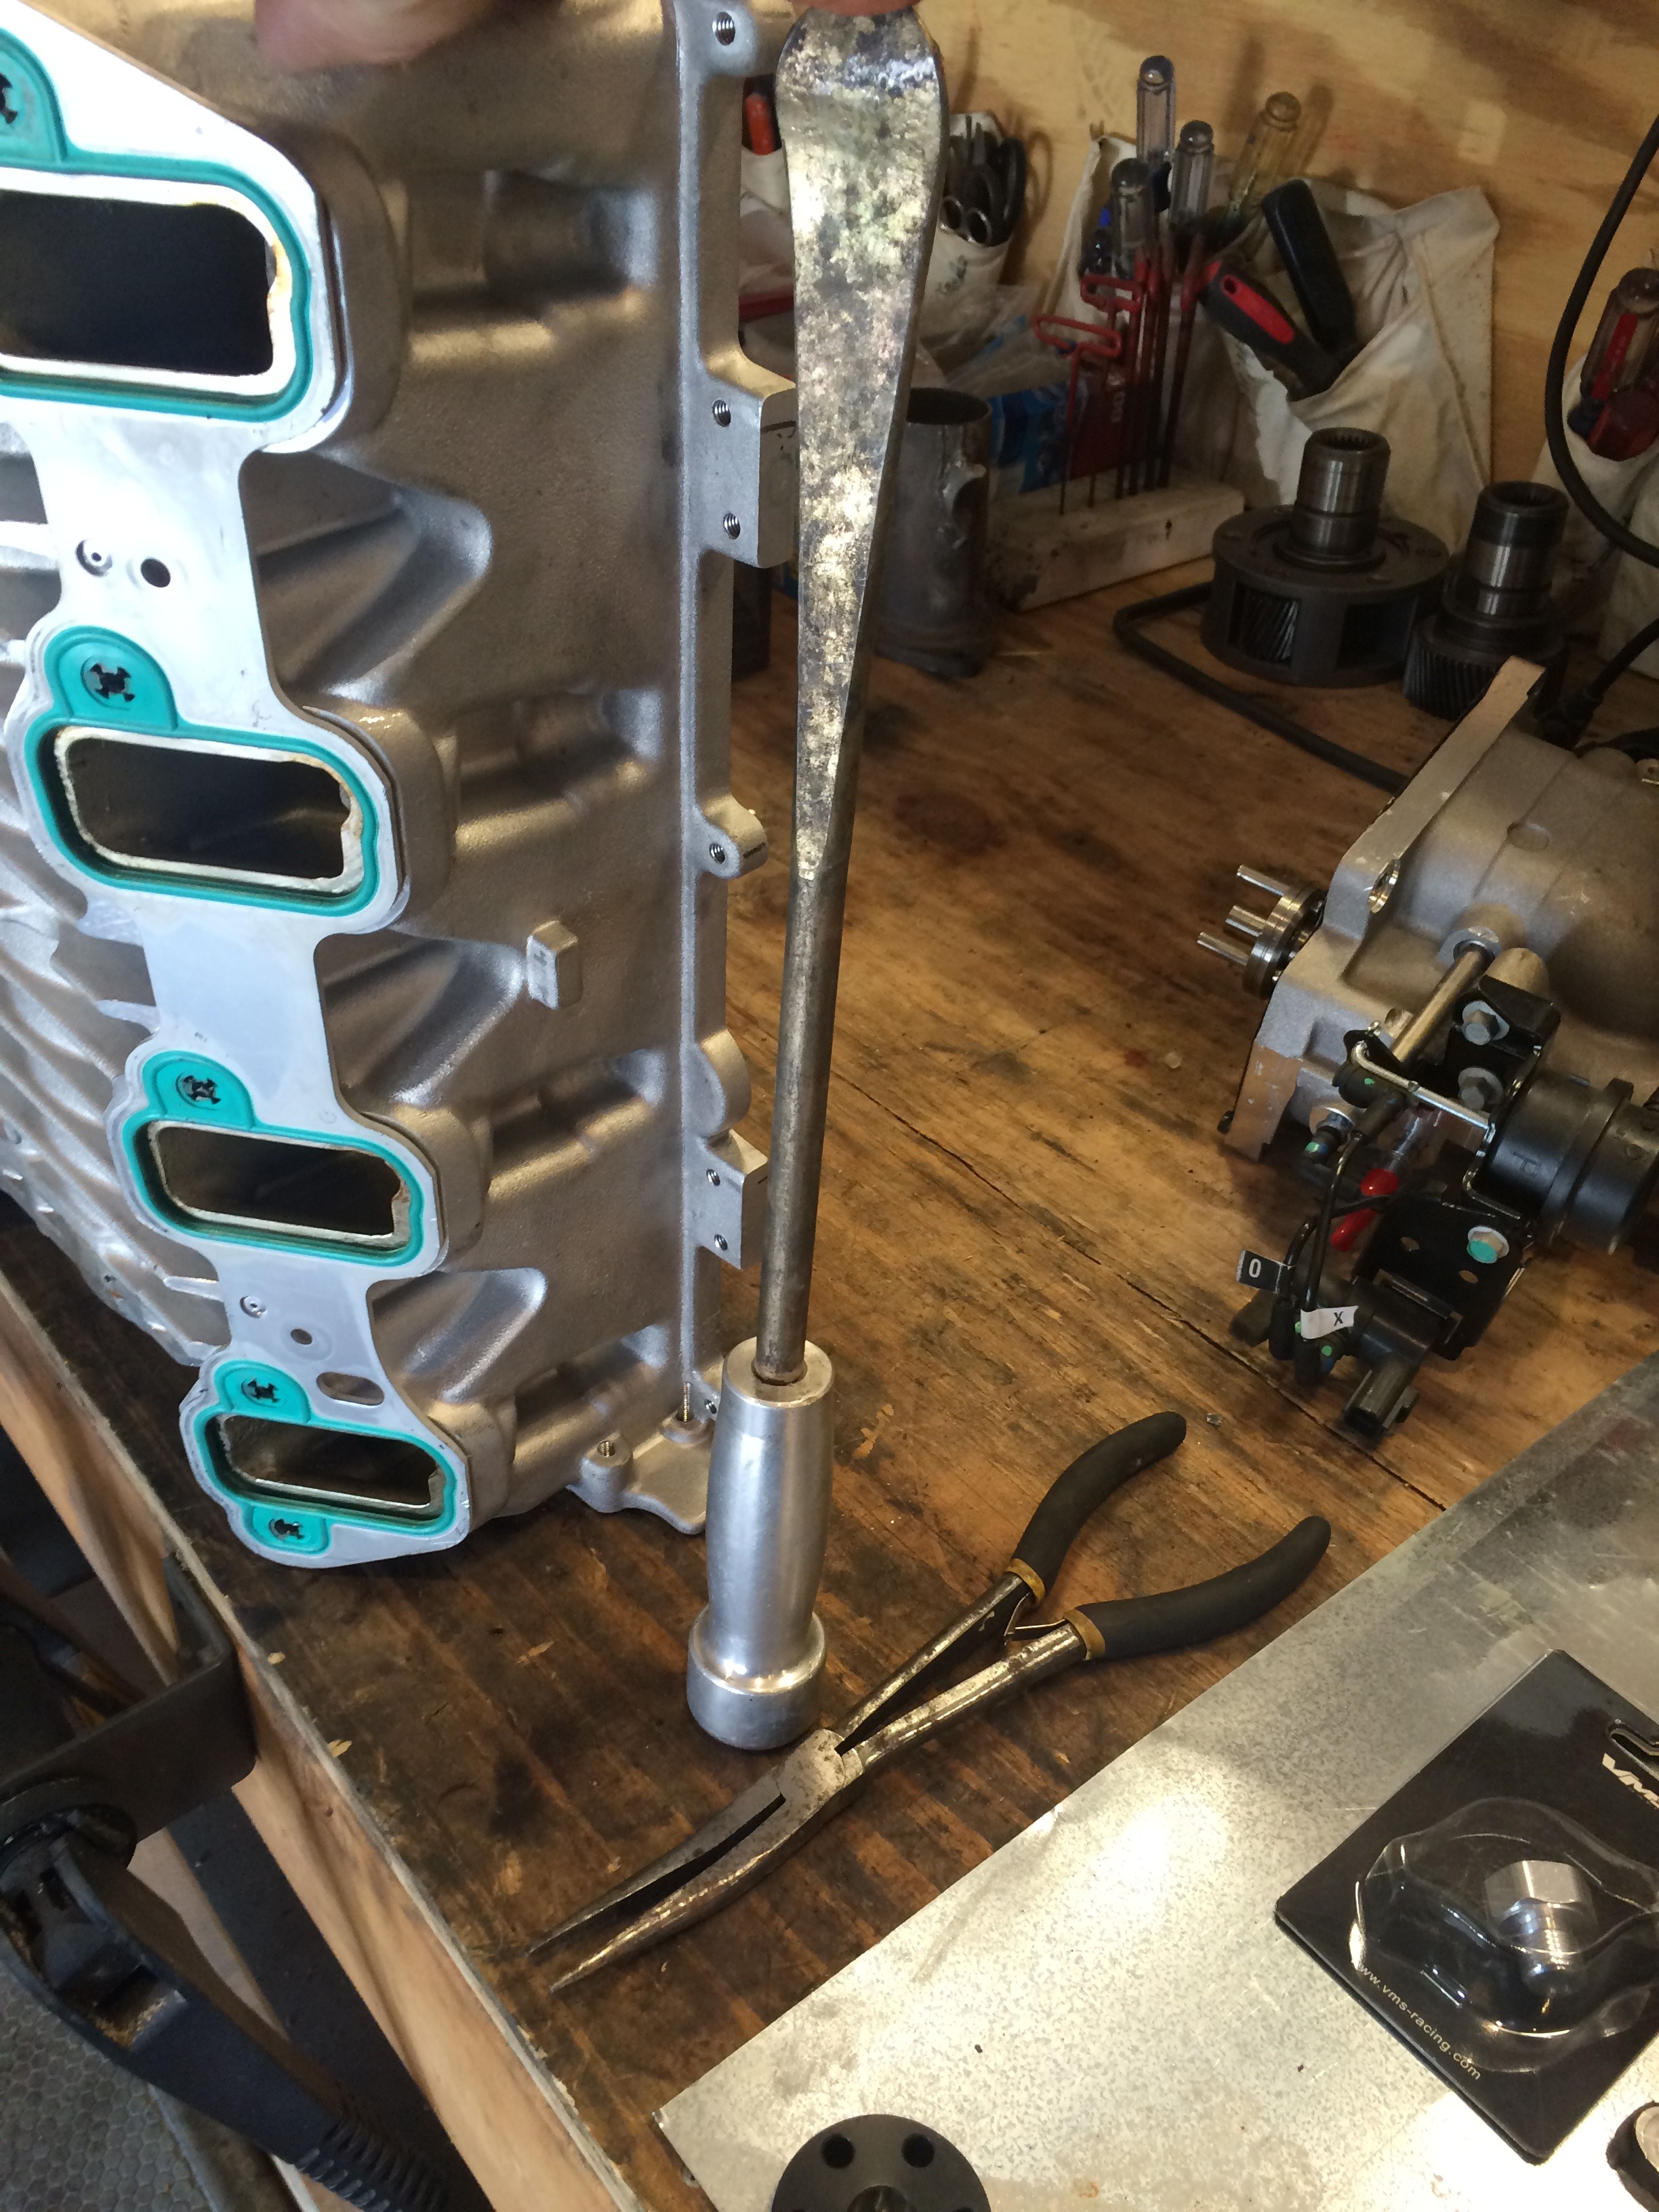
So, after cutting a hole in the windshield wiper cowl (or whatever you call this area) so I could have access to the rear bolts on the supercharger cover, I wanted to drill holes for the 1/2 inch copper. The step bit was too short, so I welded an old drill bit on it to lengthen it.


Then I ended up pulling the wiper assembly anyway. and ran the soft copper through the cowl, bending it to fit.

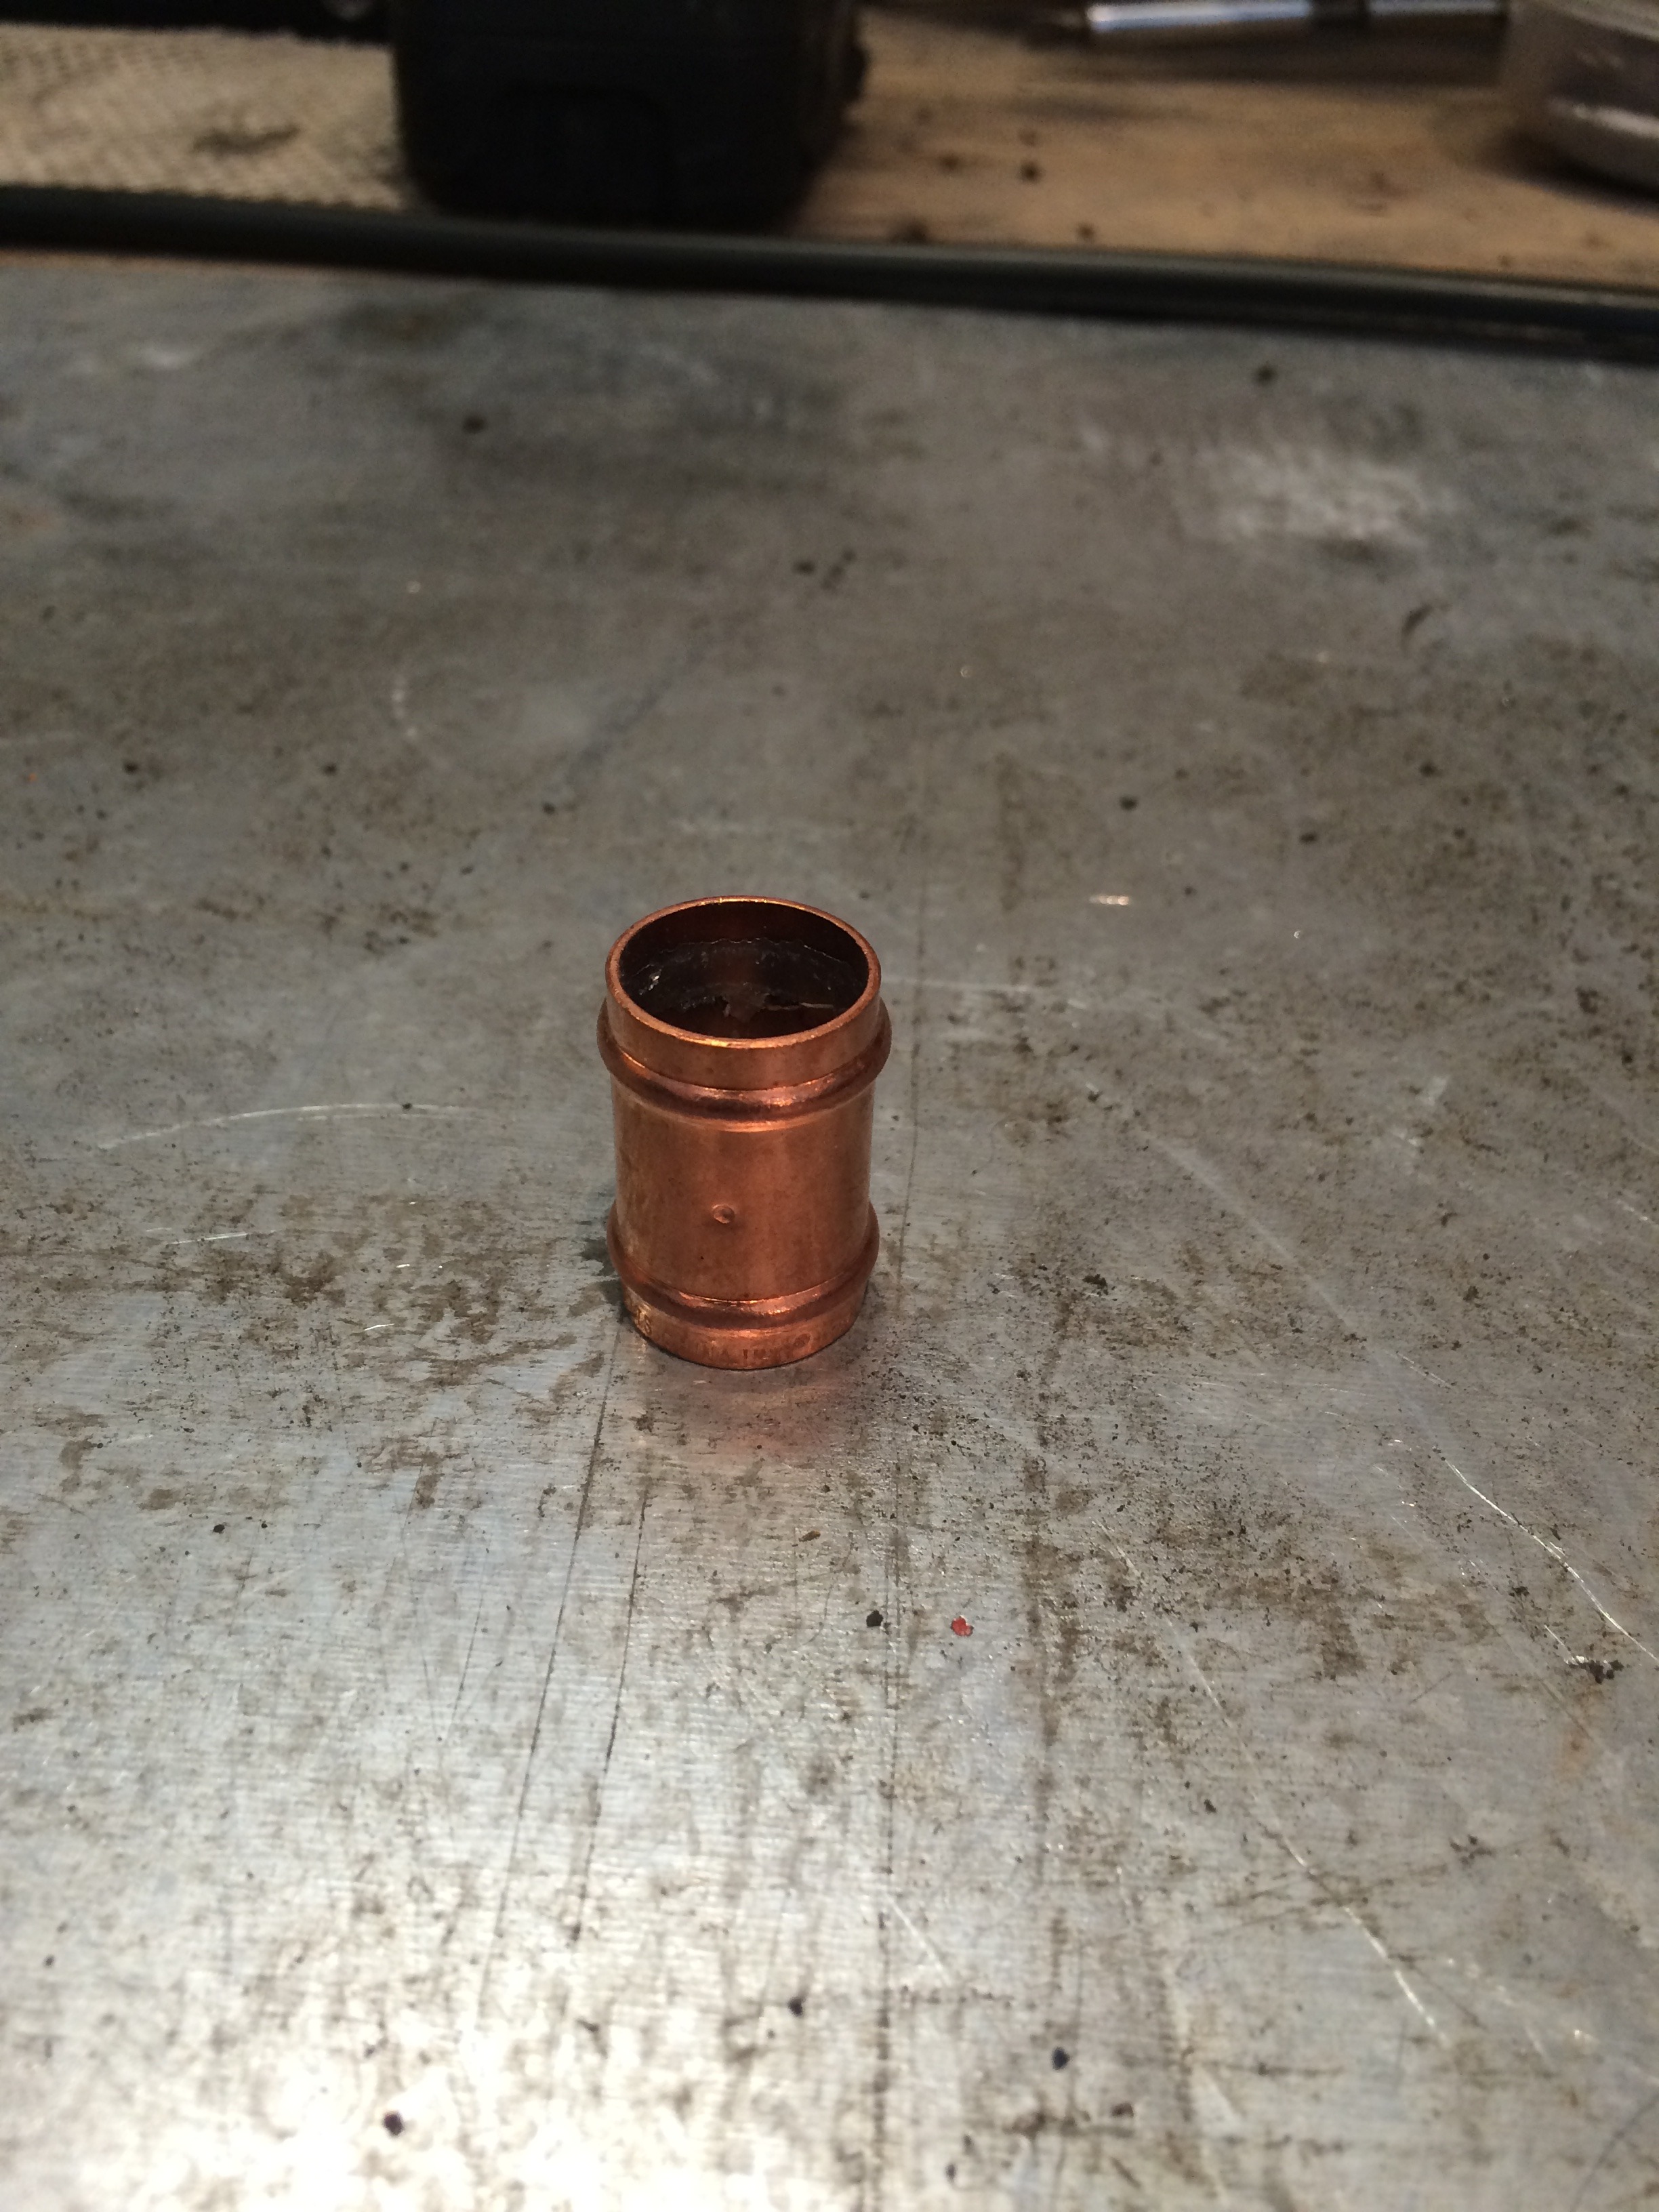
I use these fittings by Watts on the end of the tubing, and 5/8 or 3/4 heater hose fits right over. The hose clamp fits nicely and doesn't slip.


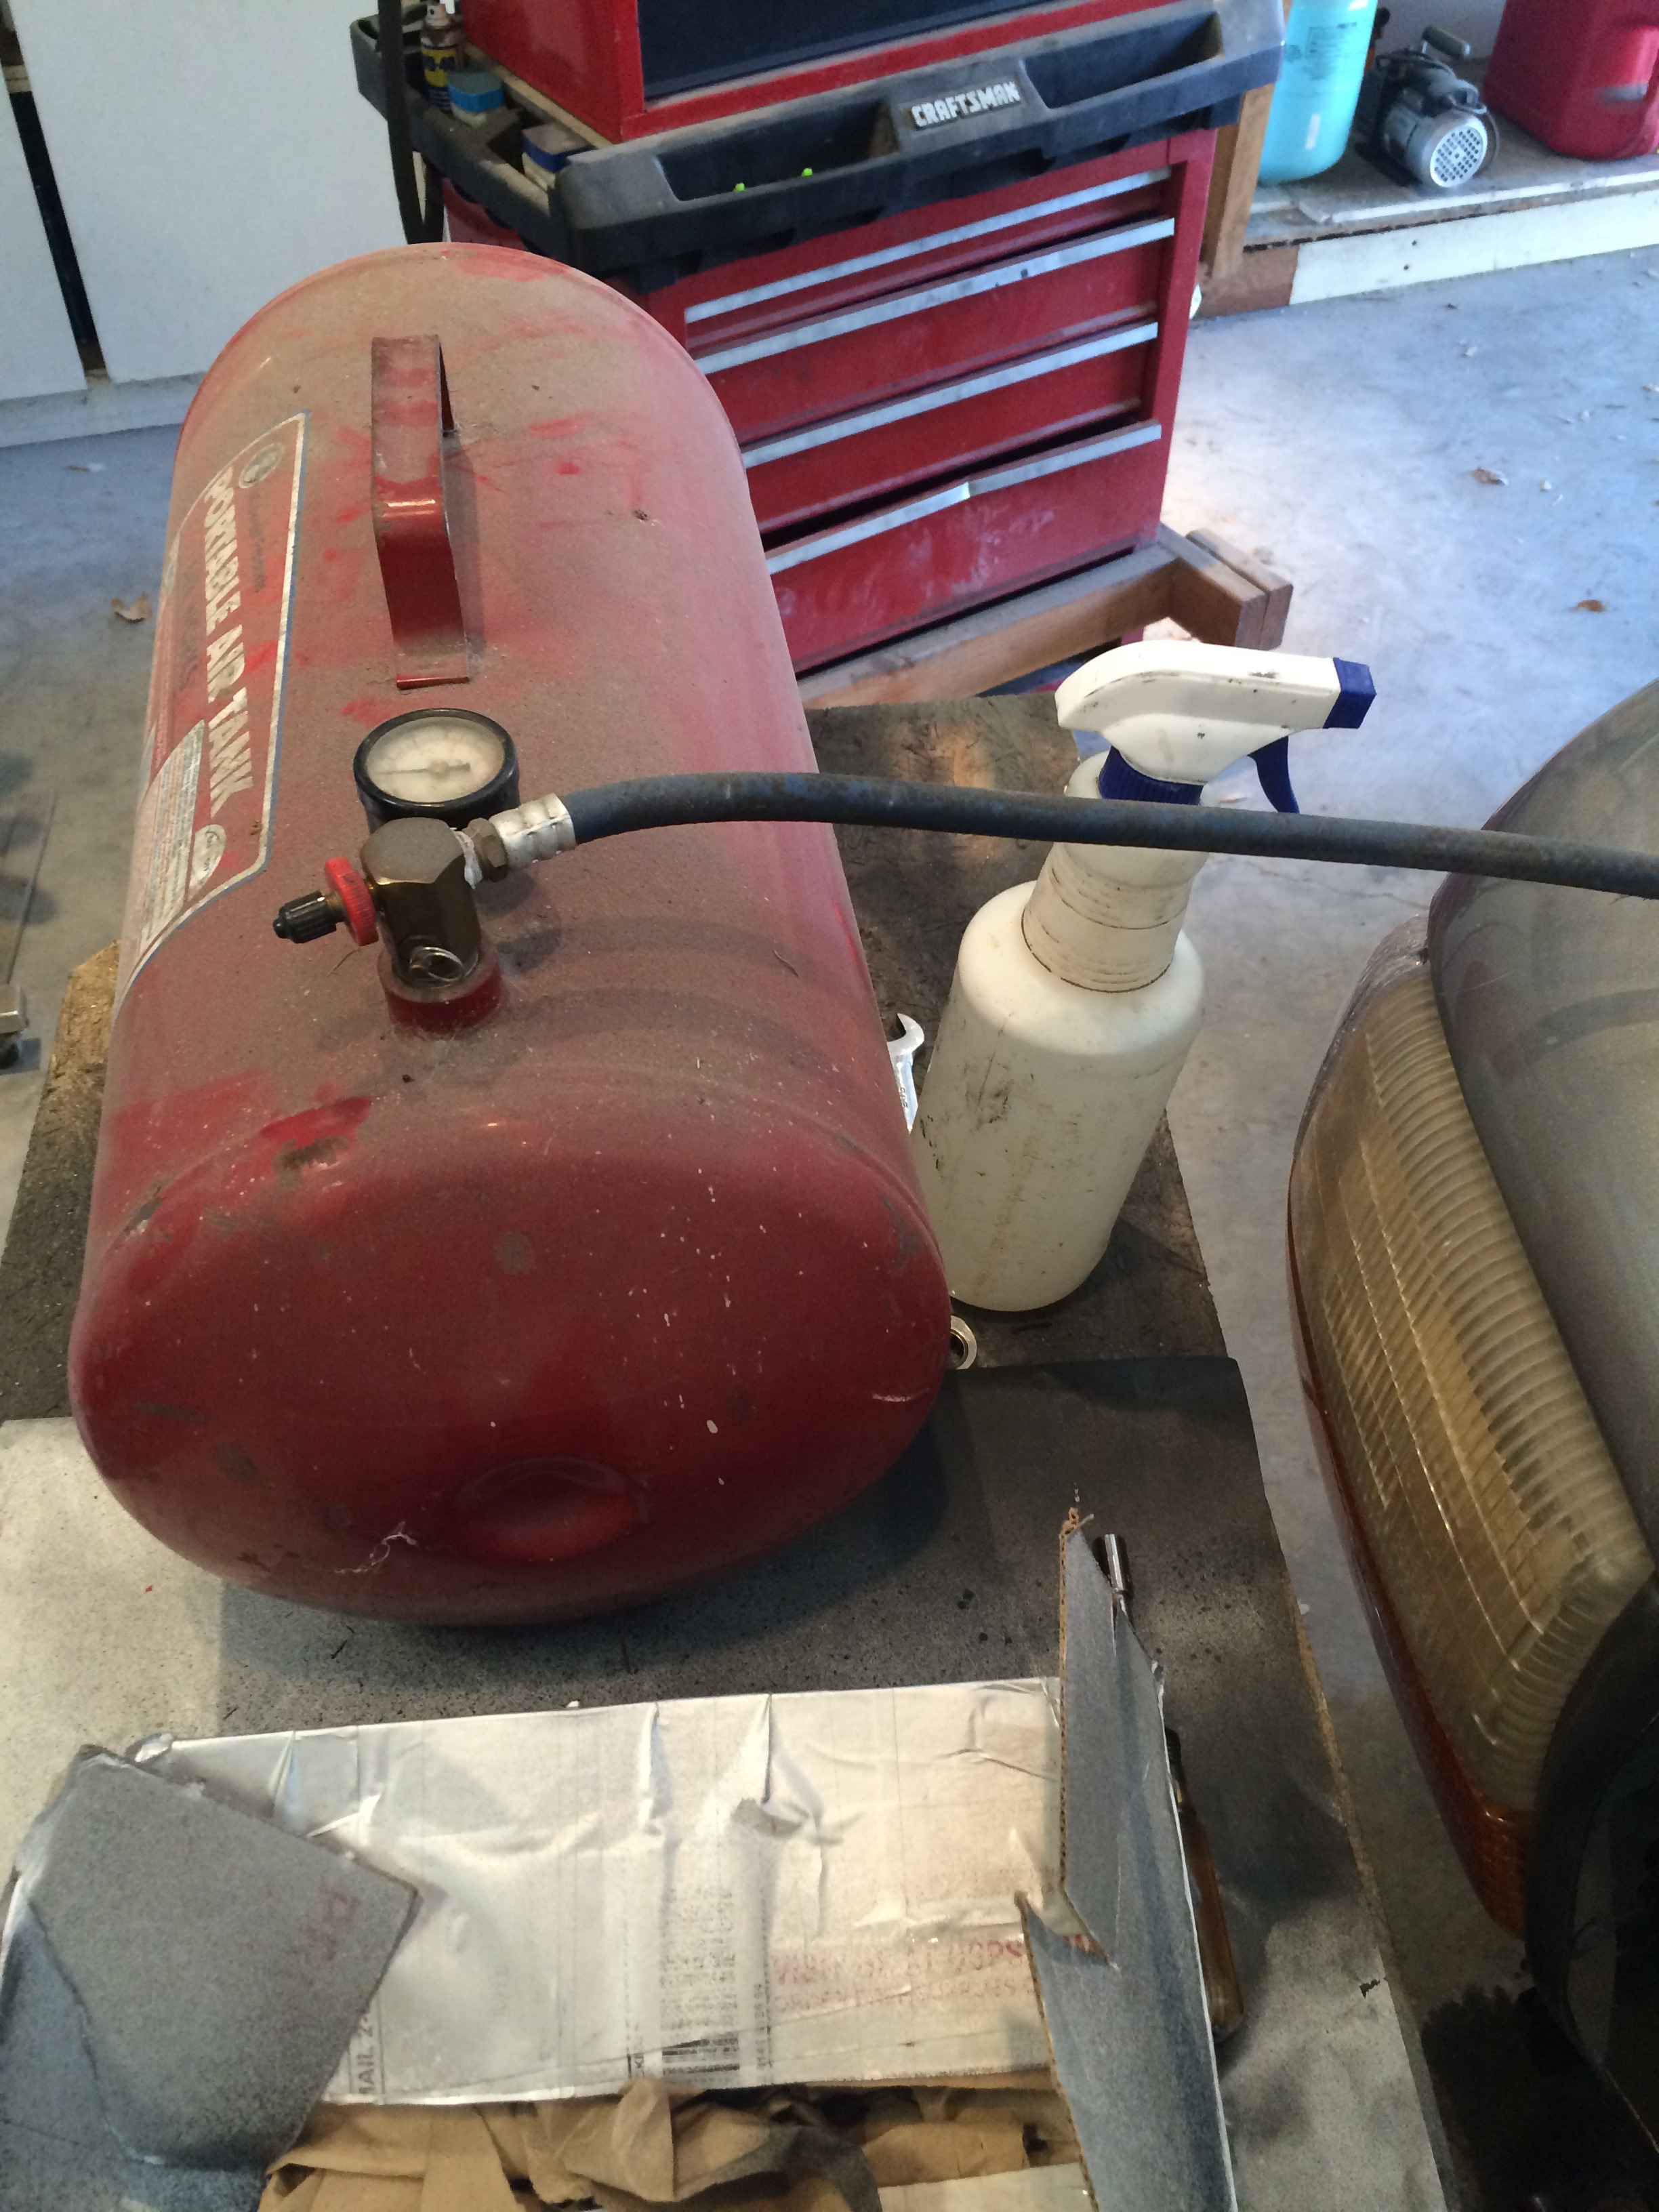
Pressure testing at 20 psi for about an hour, while I put the windshield wiper cowl cover back on.
Tank and soapy water in a spray bottle.
Capped one end, pressurized the other.
Checked out, so I put the hoses on to complete this. I need to find more attractive hose clamps. There is the passenger side header.
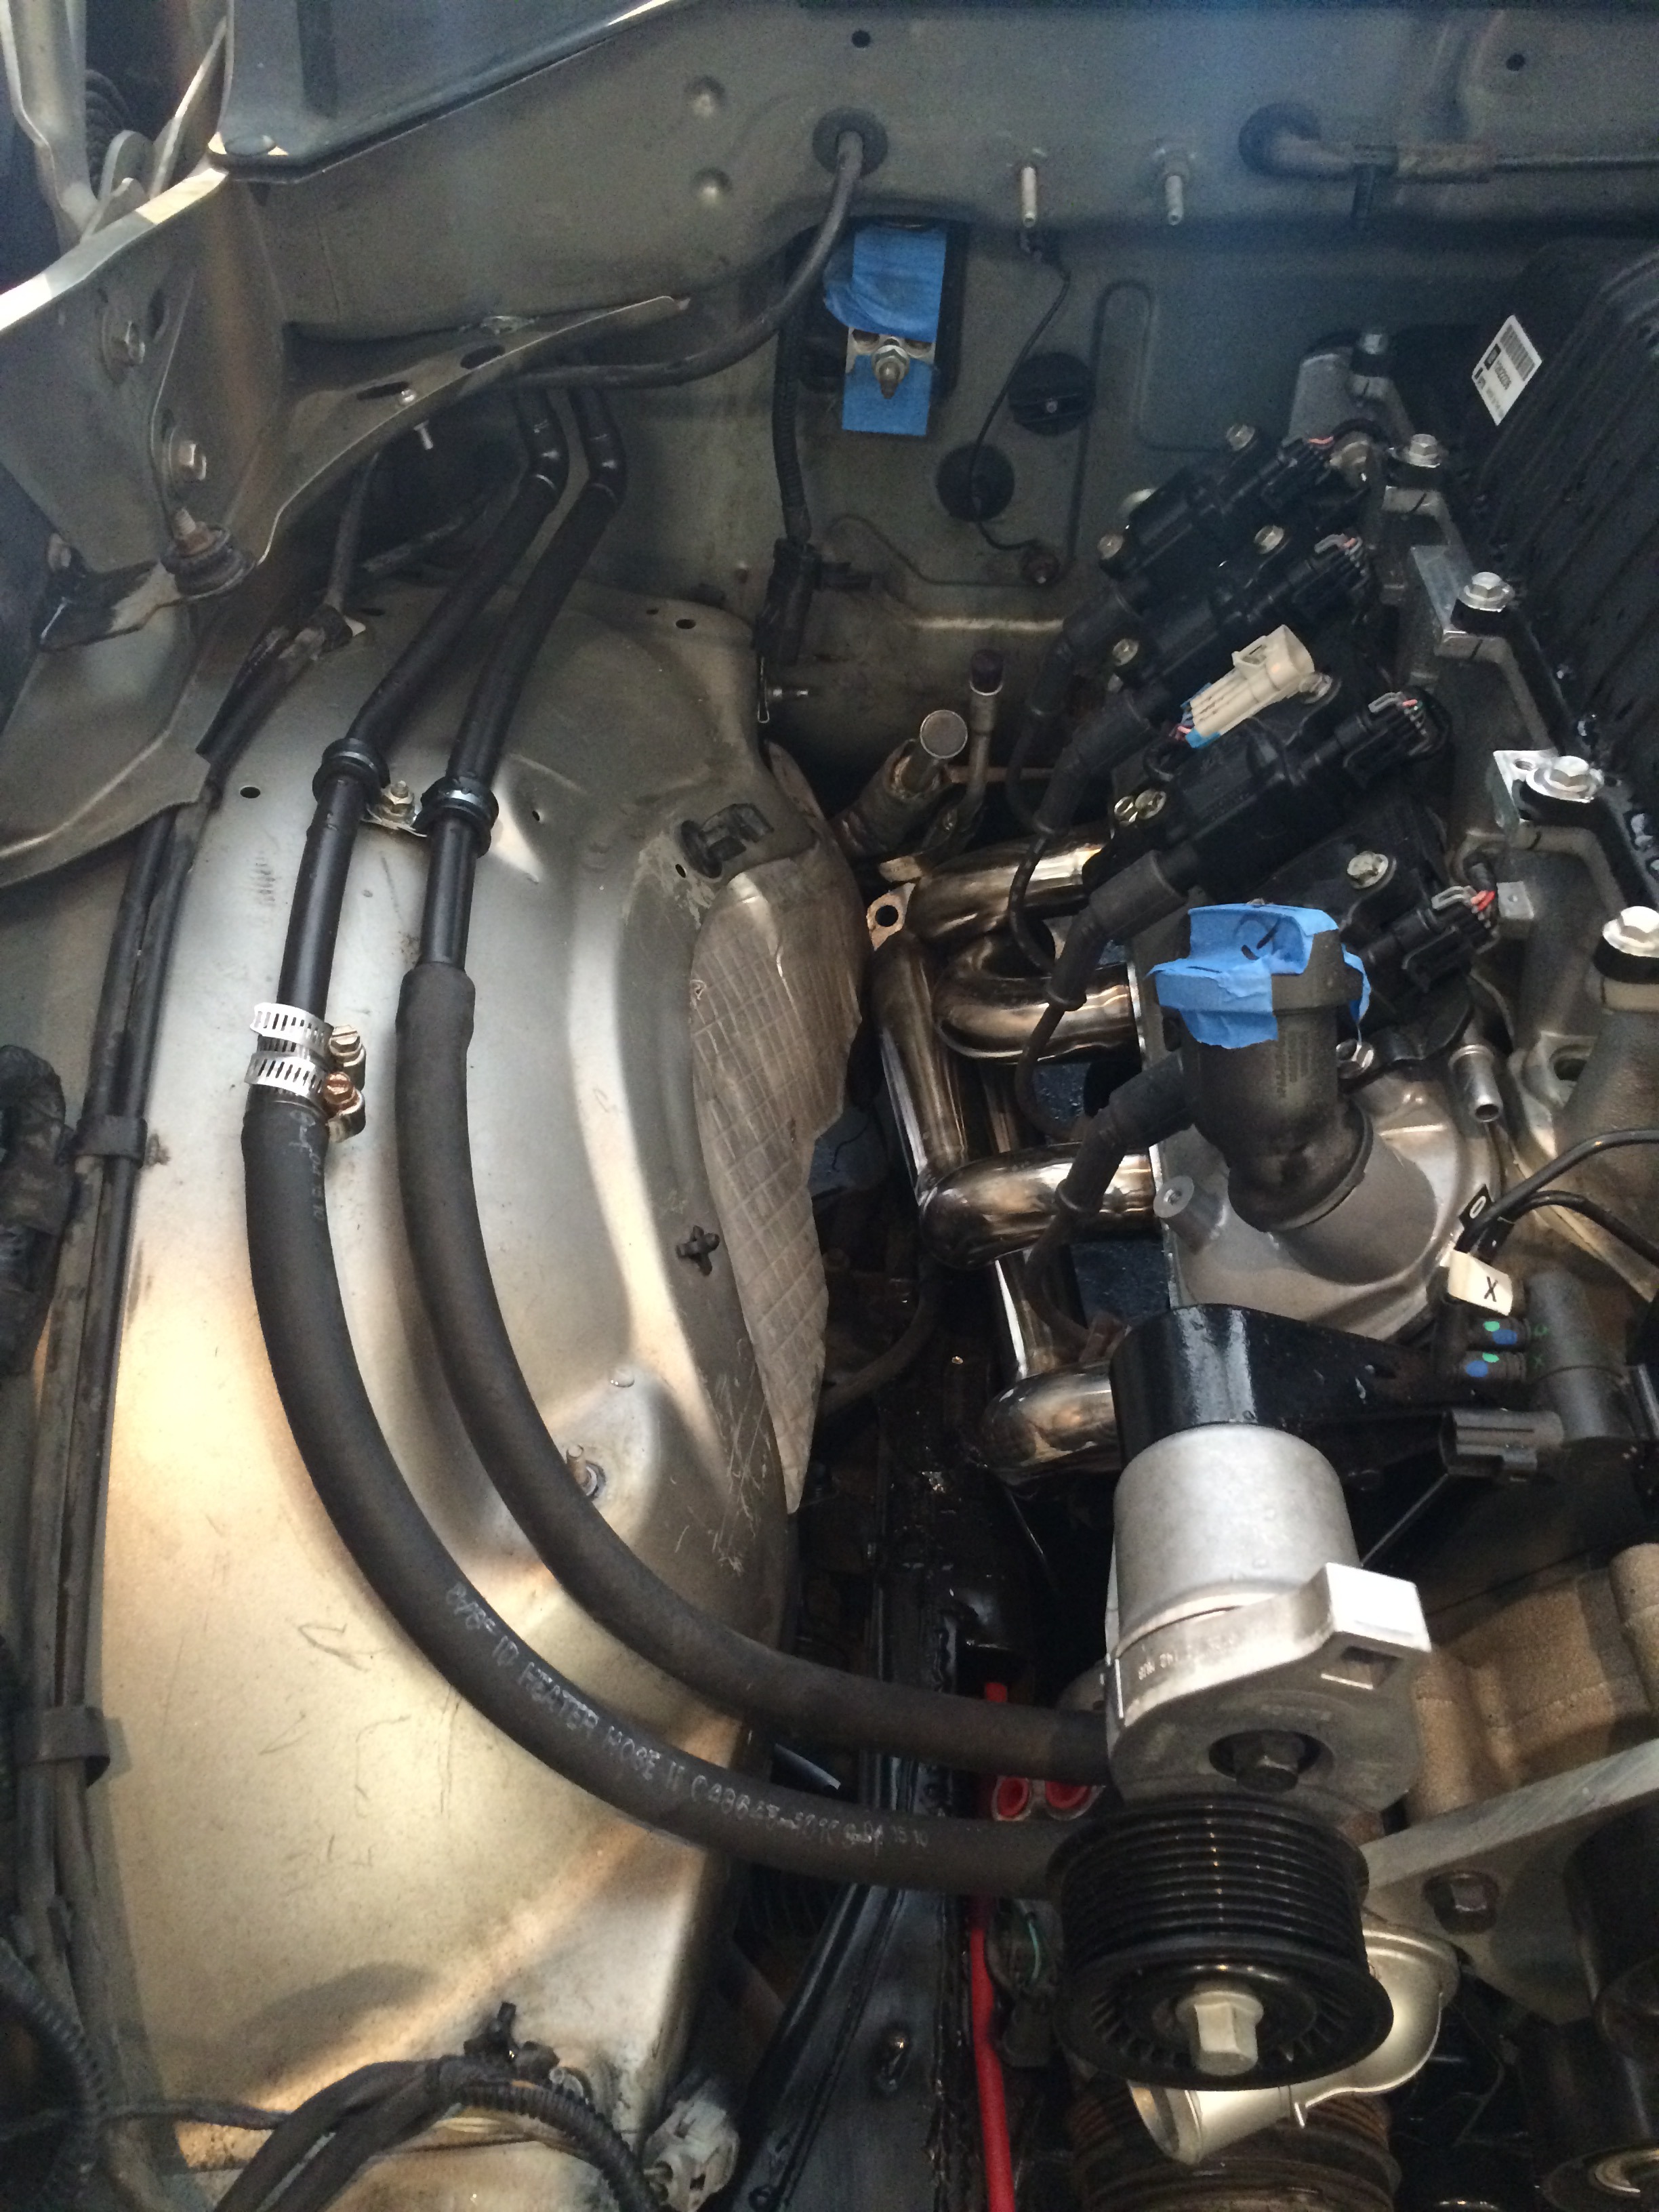
And the driver side header.
Driveshafts were also ordered. Since the transfer case moved back 1.5 inches, the rear shaft will be shortened and rebuilt. The front shaft will be re-tubed and rebuilt.
So this week, I routed the heater plumbing through the windshield wiper cowl, and pressure tested this system. It seemed like a good idea to pressure test this now, since using soft copper sometimes causes joint failure due to out-of-round ends. The last thing I want when I am trying to focus on the engine at start-up is having a stupid leak somewhere. A few minutes on this saves trouble down the road.
It tested fine at 20 psi.
And...the big news......Headers. I went with shortie Silverado headers. I know I am giving up a little power, but I knew they would drop right in. At this point, I am not ready to waste another week or two and a bunch of money guessing at long-tube headers and having them bump into something. Maybe later. And they did drop right in. Maybe 5 minutes per side. I am ok with that.
So, after cutting a hole in the windshield wiper cowl (or whatever you call this area) so I could have access to the rear bolts on the supercharger cover, I wanted to drill holes for the 1/2 inch copper. The step bit was too short, so I welded an old drill bit on it to lengthen it.


Then I ended up pulling the wiper assembly anyway. and ran the soft copper through the cowl, bending it to fit.

I use these fittings by Watts on the end of the tubing, and 5/8 or 3/4 heater hose fits right over. The hose clamp fits nicely and doesn't slip.


Pressure testing at 20 psi for about an hour, while I put the windshield wiper cowl cover back on.

Tank and soapy water in a spray bottle.

Capped one end, pressurized the other.

Checked out, so I put the hoses on to complete this. I need to find more attractive hose clamps. There is the passenger side header.

And the driver side header.
 03-05-2016, 06:19 PM
#55
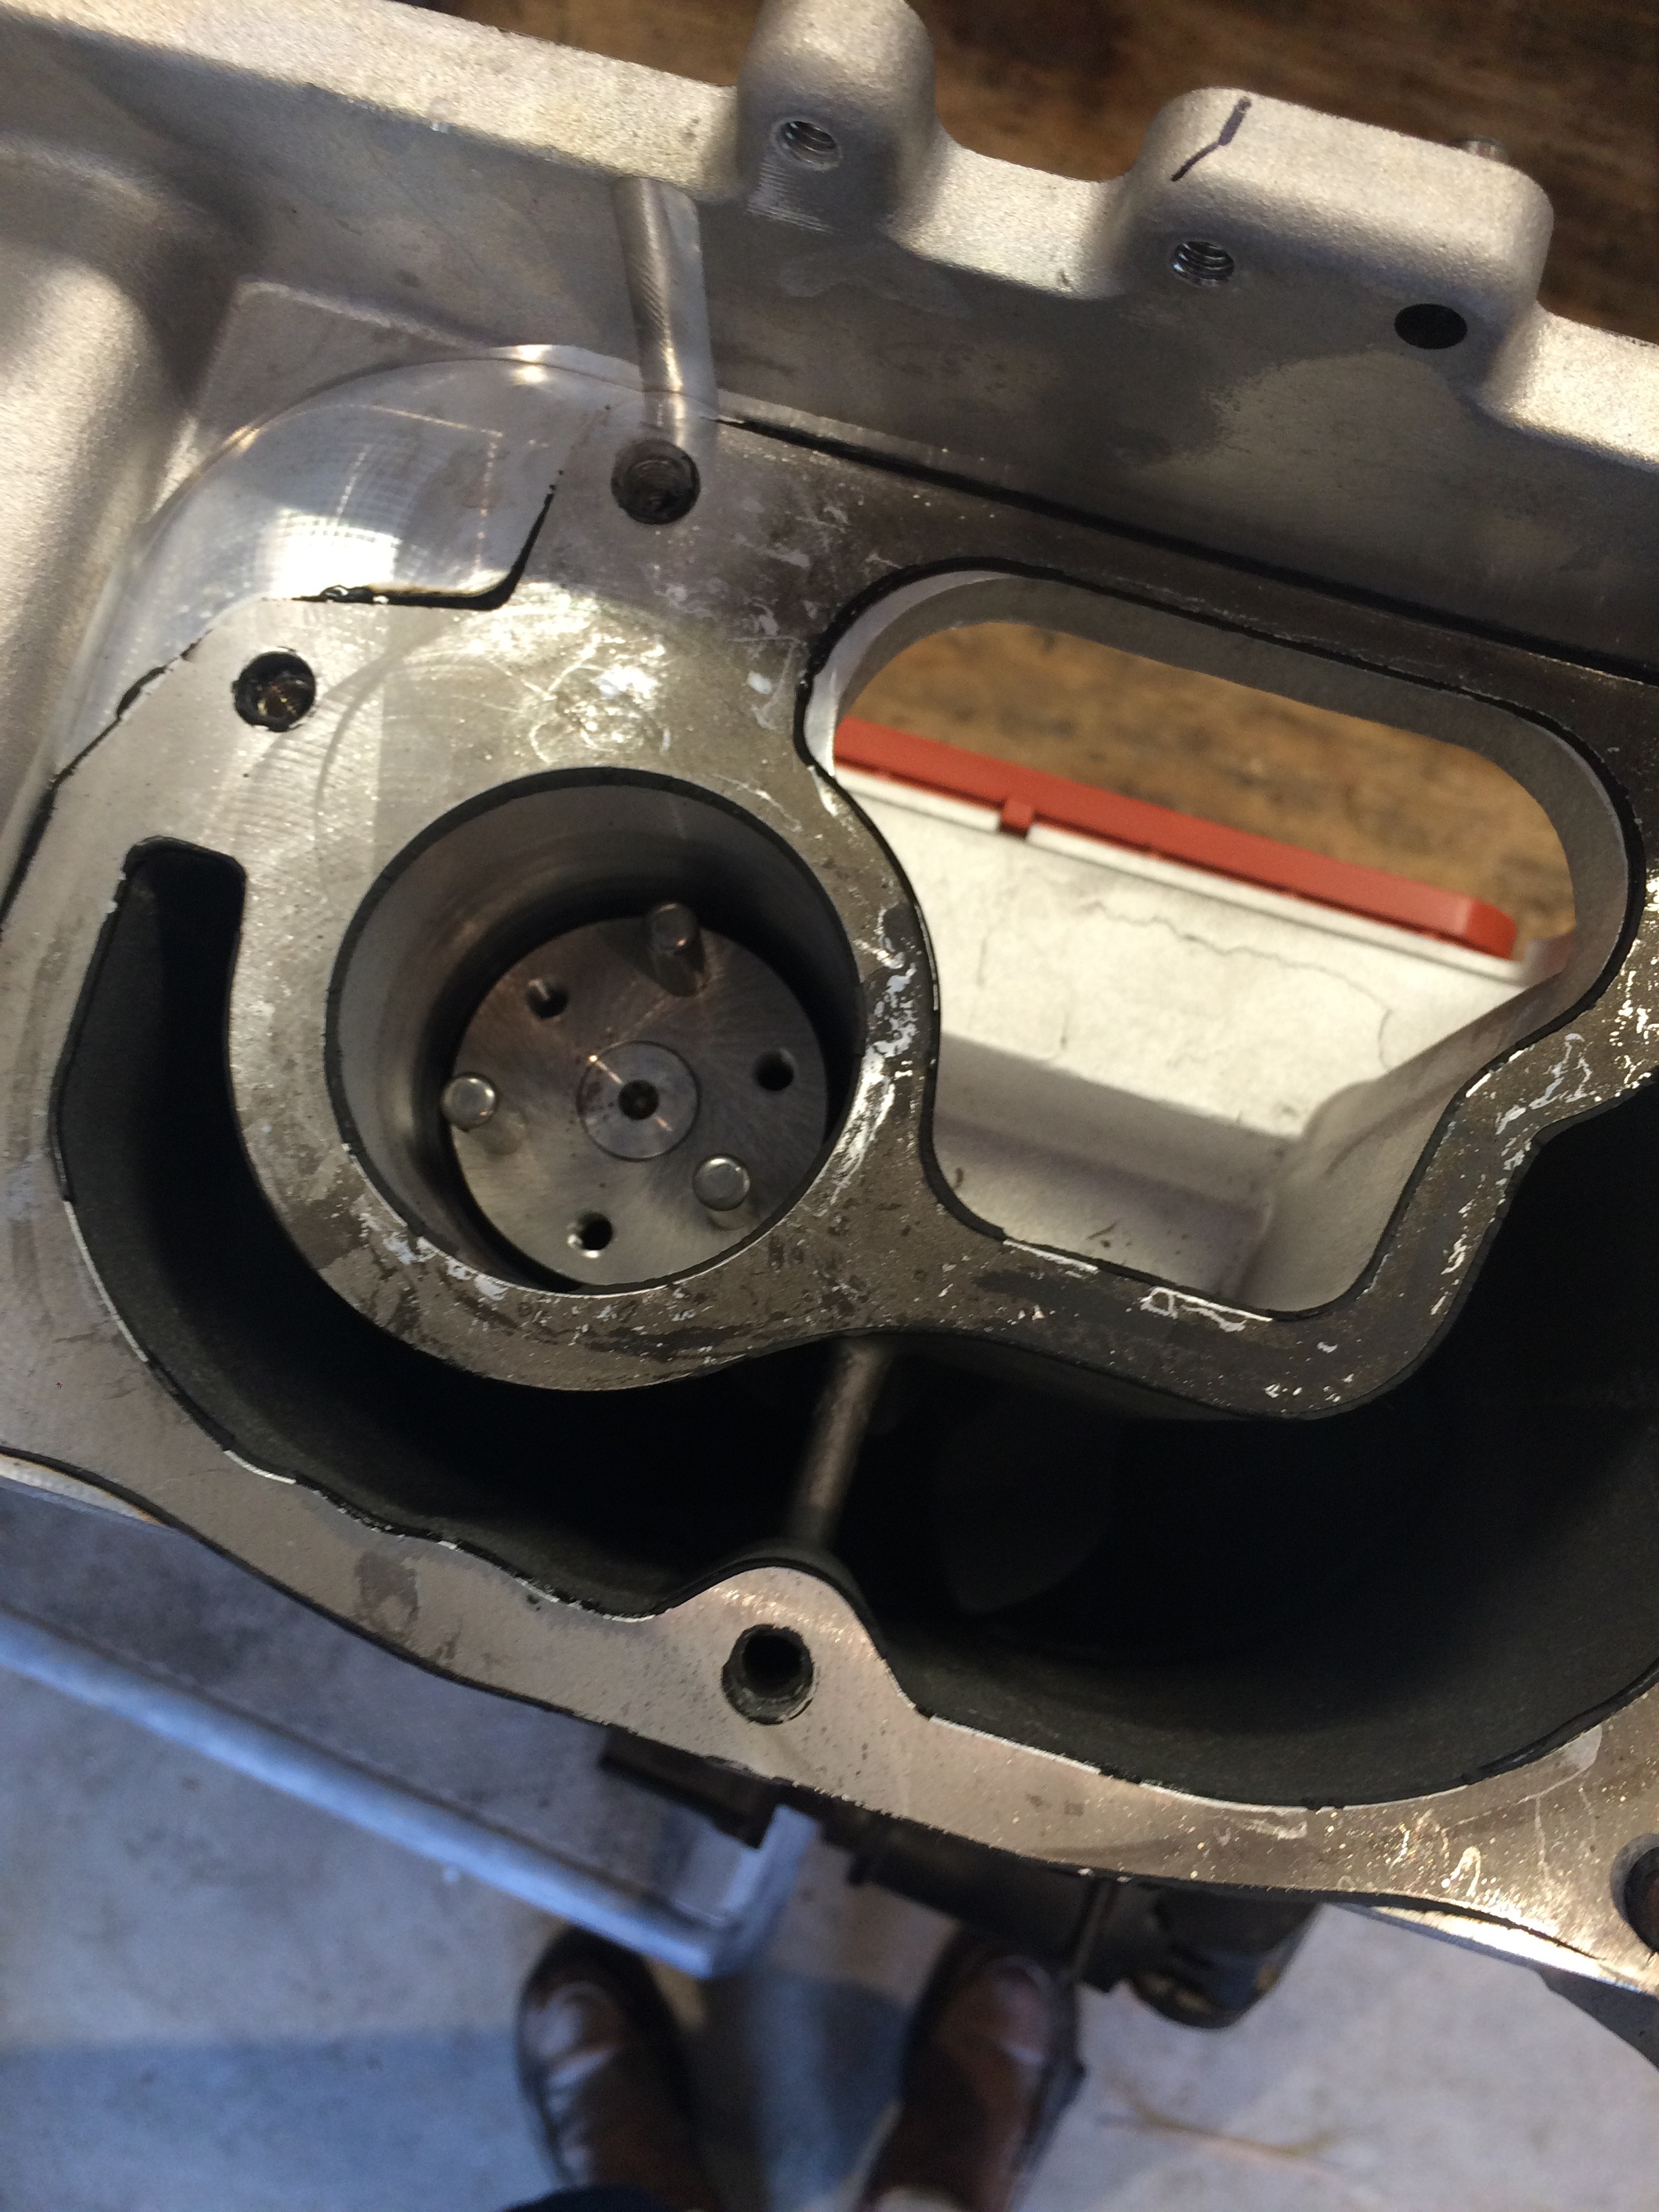
Time for an update. The driveshafts are done, and installed. No trouble at all. I can't get a picture, because I took the Durango off of the lift to fix the LSDAK driveshaft. I did take time to replace the isolator on the lsa supercharger. This has been discussed on many different threads. The GM engineers put a spring-loaded isolator to decrease damage to the input shaft on the supercharger during rapid RPM changes. However, it rattles, and eats into the input shaft. So I replaced it using a solid isolator from ebay.
Problem #1,getting the snout off. There are two pry points on the snout, but it is held on by a large amount of grey RTV. After prying with 3 different pry bars, we managed to break it lose.
Short pry bar used for home-wrecking. Didn't work.

Longer pry bar used for motorcyle tires. Didn't work.
And finally, 2 ft pry bar from motorcyle tire changer.
Out with the old, in with the new. For sale. Stock LSA isolator with 0 miles. You pay shipping (HA!).

Clean up that gasket maker. The factory uses grey RTV.
I clean it off with xylene. Best thing I have found for this.
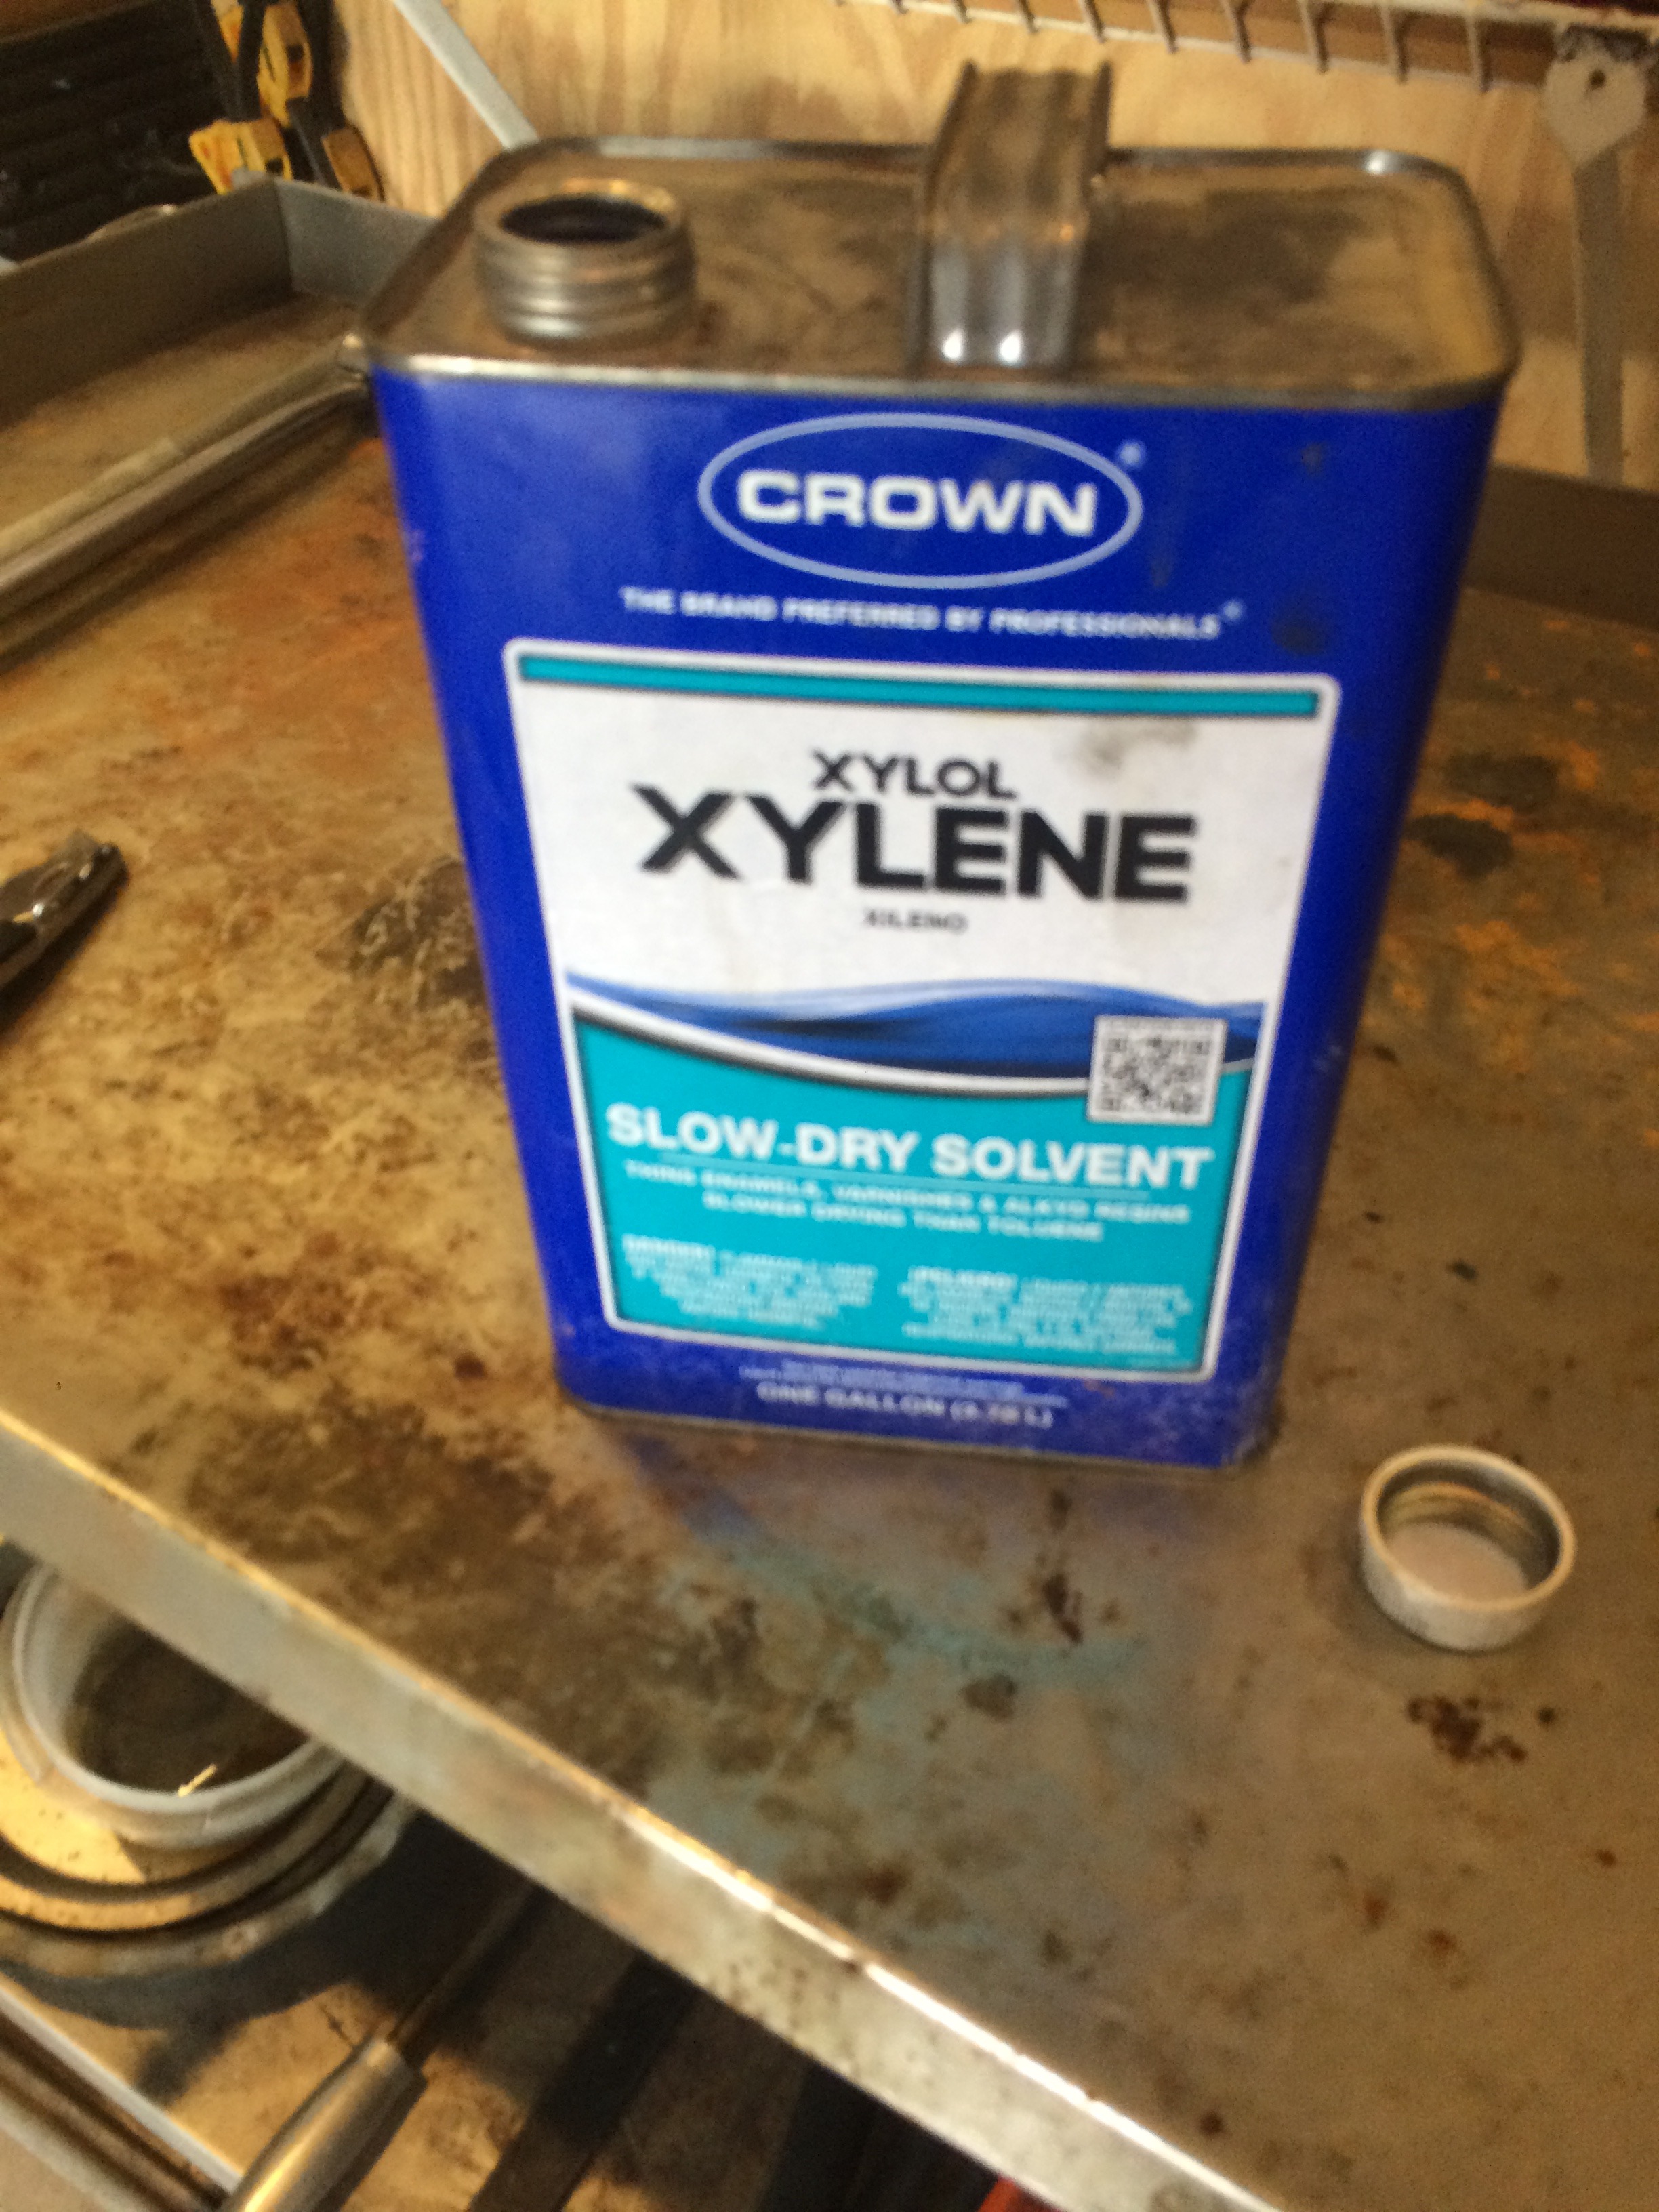
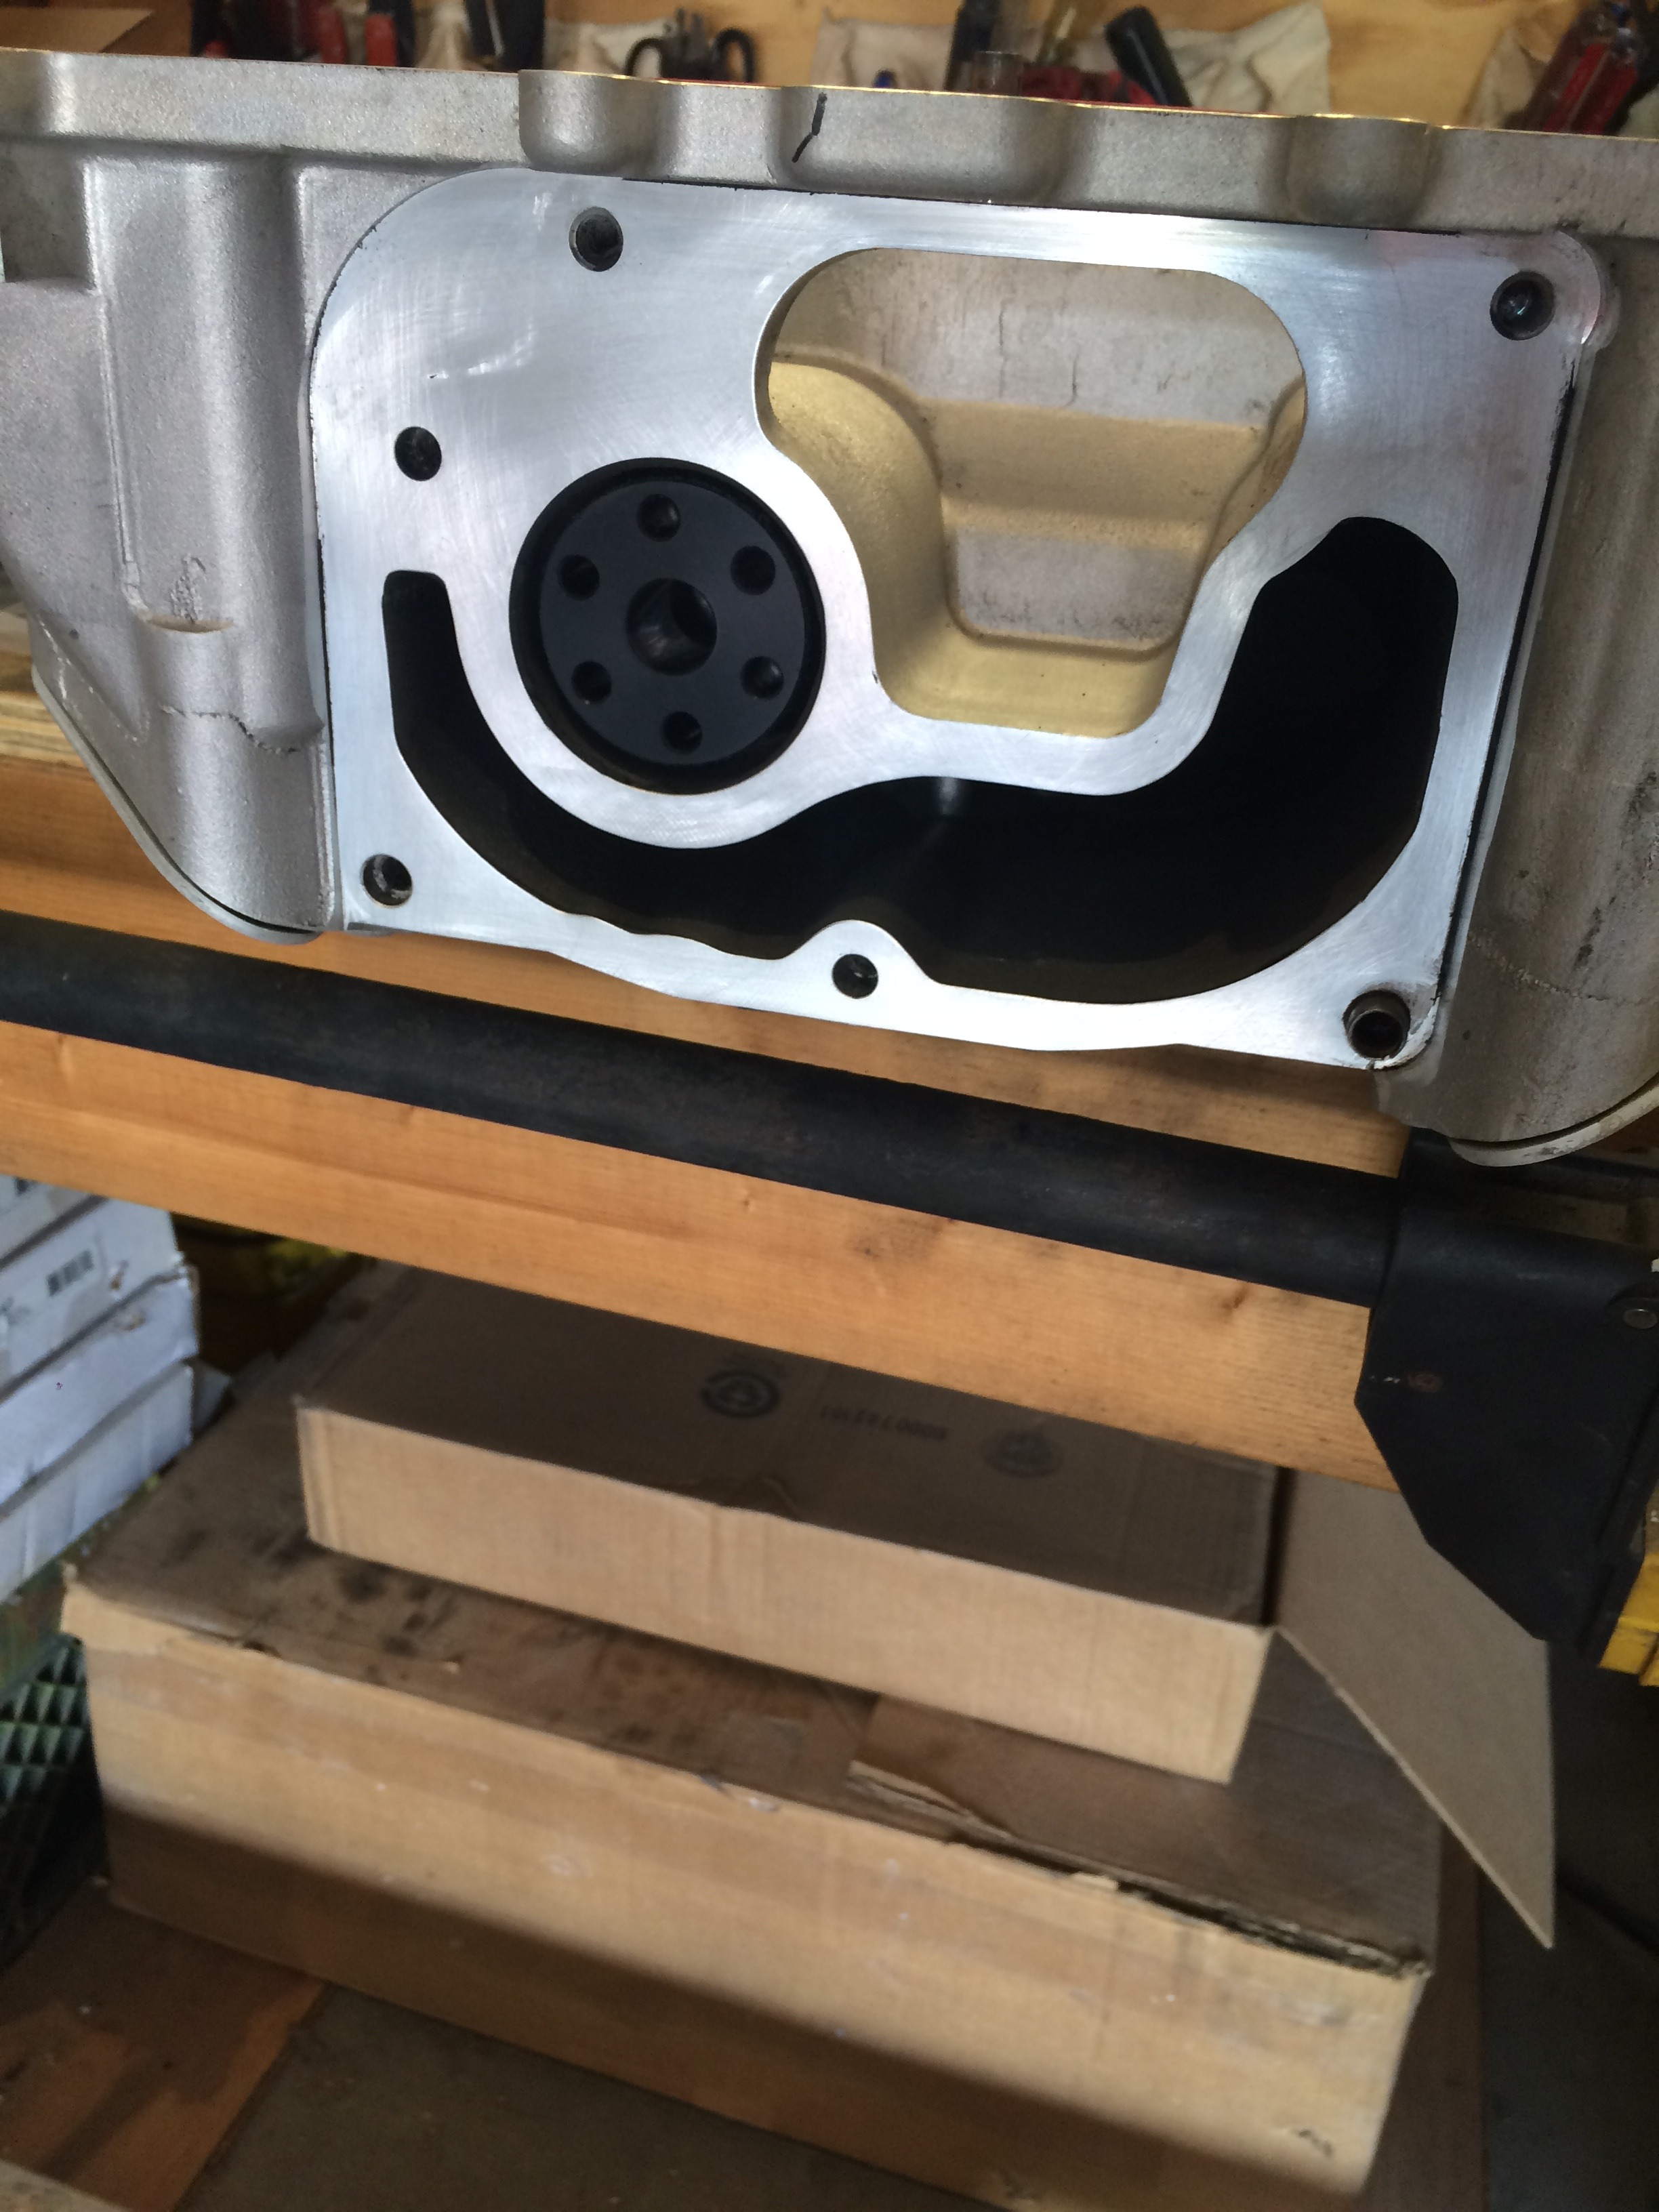
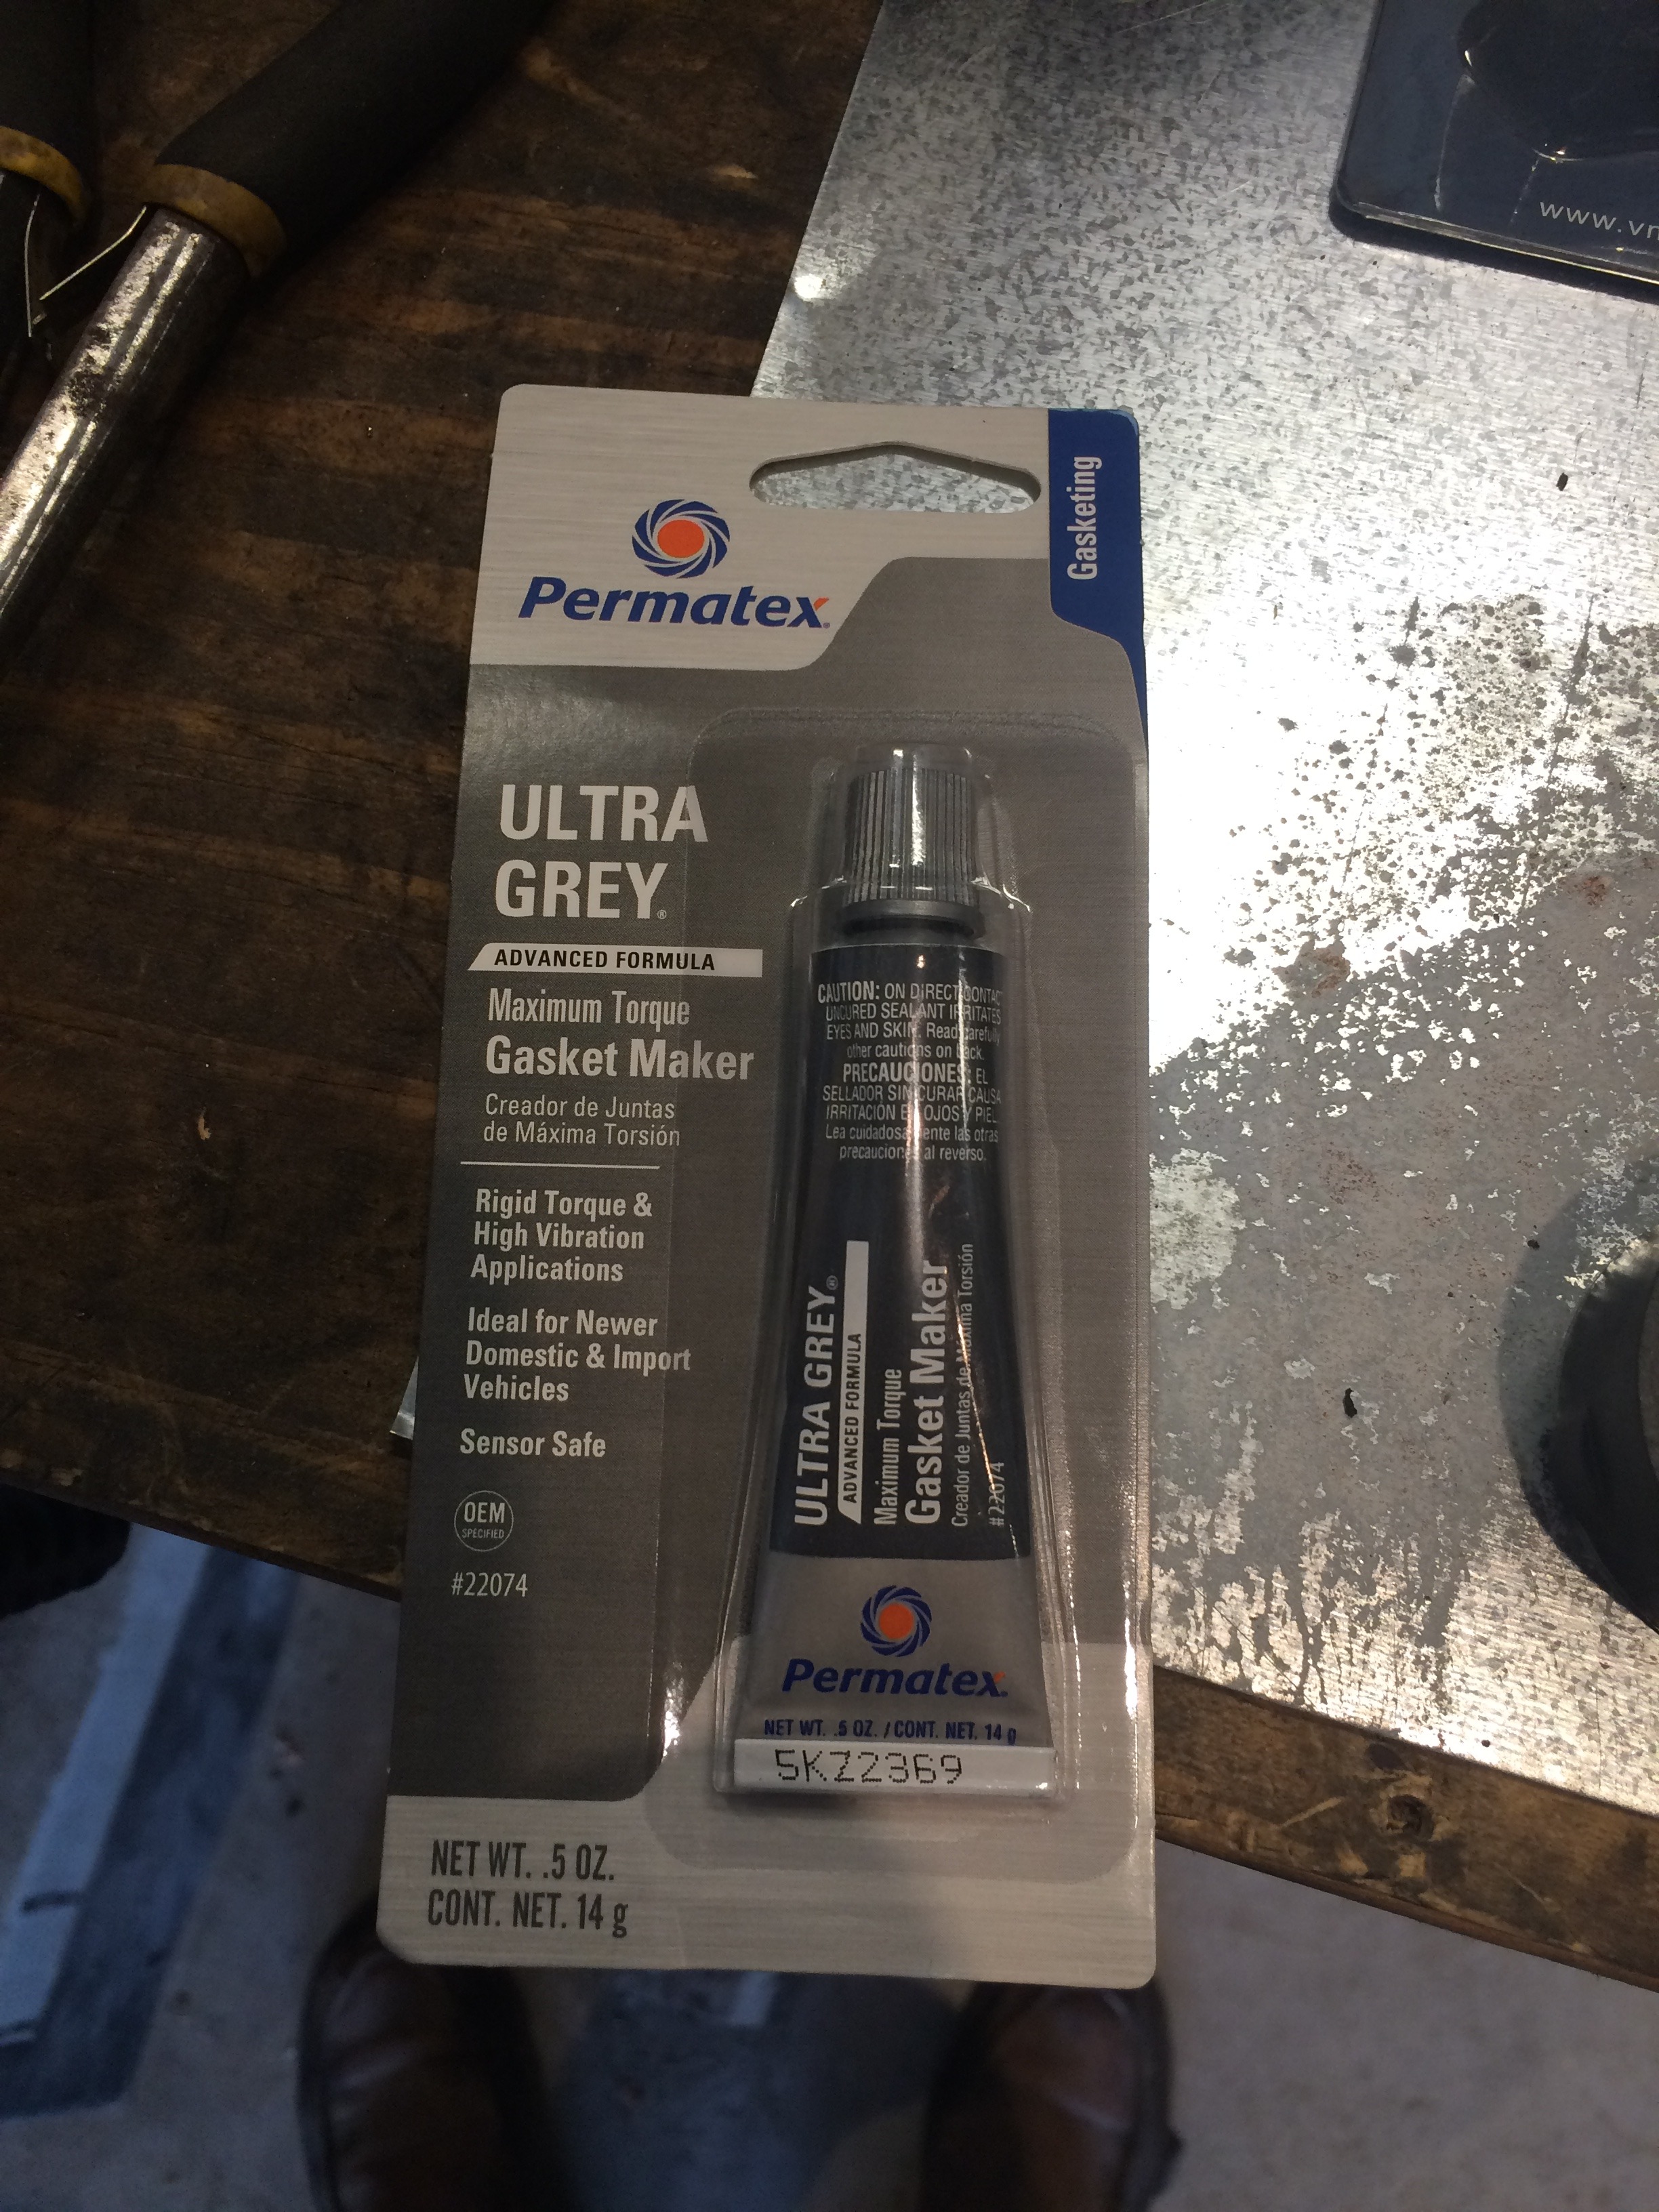
And seat the snout back on with Ultra Grey.
Done.

PreviewBBCode
Edit Reason (optional):
Save ChangesThe thread in which you are posting has no effects applied to it.
Thread Summary
Problem #1,getting the snout off. There are two pry points on the snout, but it is held on by a large amount of grey RTV. After prying with 3 different pry bars, we managed to break it lose.
Short pry bar used for home-wrecking. Didn't work.

Longer pry bar used for motorcyle tires. Didn't work.

And finally, 2 ft pry bar from motorcyle tire changer.

Out with the old, in with the new. For sale. Stock LSA isolator with 0 miles. You pay shipping (HA!).

Clean up that gasket maker. The factory uses grey RTV.

I clean it off with xylene. Best thing I have found for this.


And seat the snout back on with Ultra Grey.

Done.

PreviewBBCode
Edit Reason (optional):
Save ChangesThe thread in which you are posting has no effects applied to it.
Thread Summary
 04-21-2016, 03:31 AM
#58
It has been over a month since an update. I ordered the wiring harness on February 1, but hadn't heard anything. Not sure what the normal turn-around time is, and I was getting ready to find someone else when I was told it would be done this week.
So, I had the call that it will ship tomorrow. Then I can finish this up.
So, I had the call that it will ship tomorrow. Then I can finish this up.
04-28-2016, 09:54 AM
#60
Me too. I am just sitting here figuring out whether I should flame this guy who is building the wiring harness. Spoke with him last week, and he told me "it will be done and in the mail Saturday". Yeah, that came and went.
He is a respected vendor, just not sure what the deal is. He has excellent customer service skills, and is always very polite in the phone, even when obviously lying.
He is a respected vendor, just not sure what the deal is. He has excellent customer service skills, and is always very polite in the phone, even when obviously lying.