


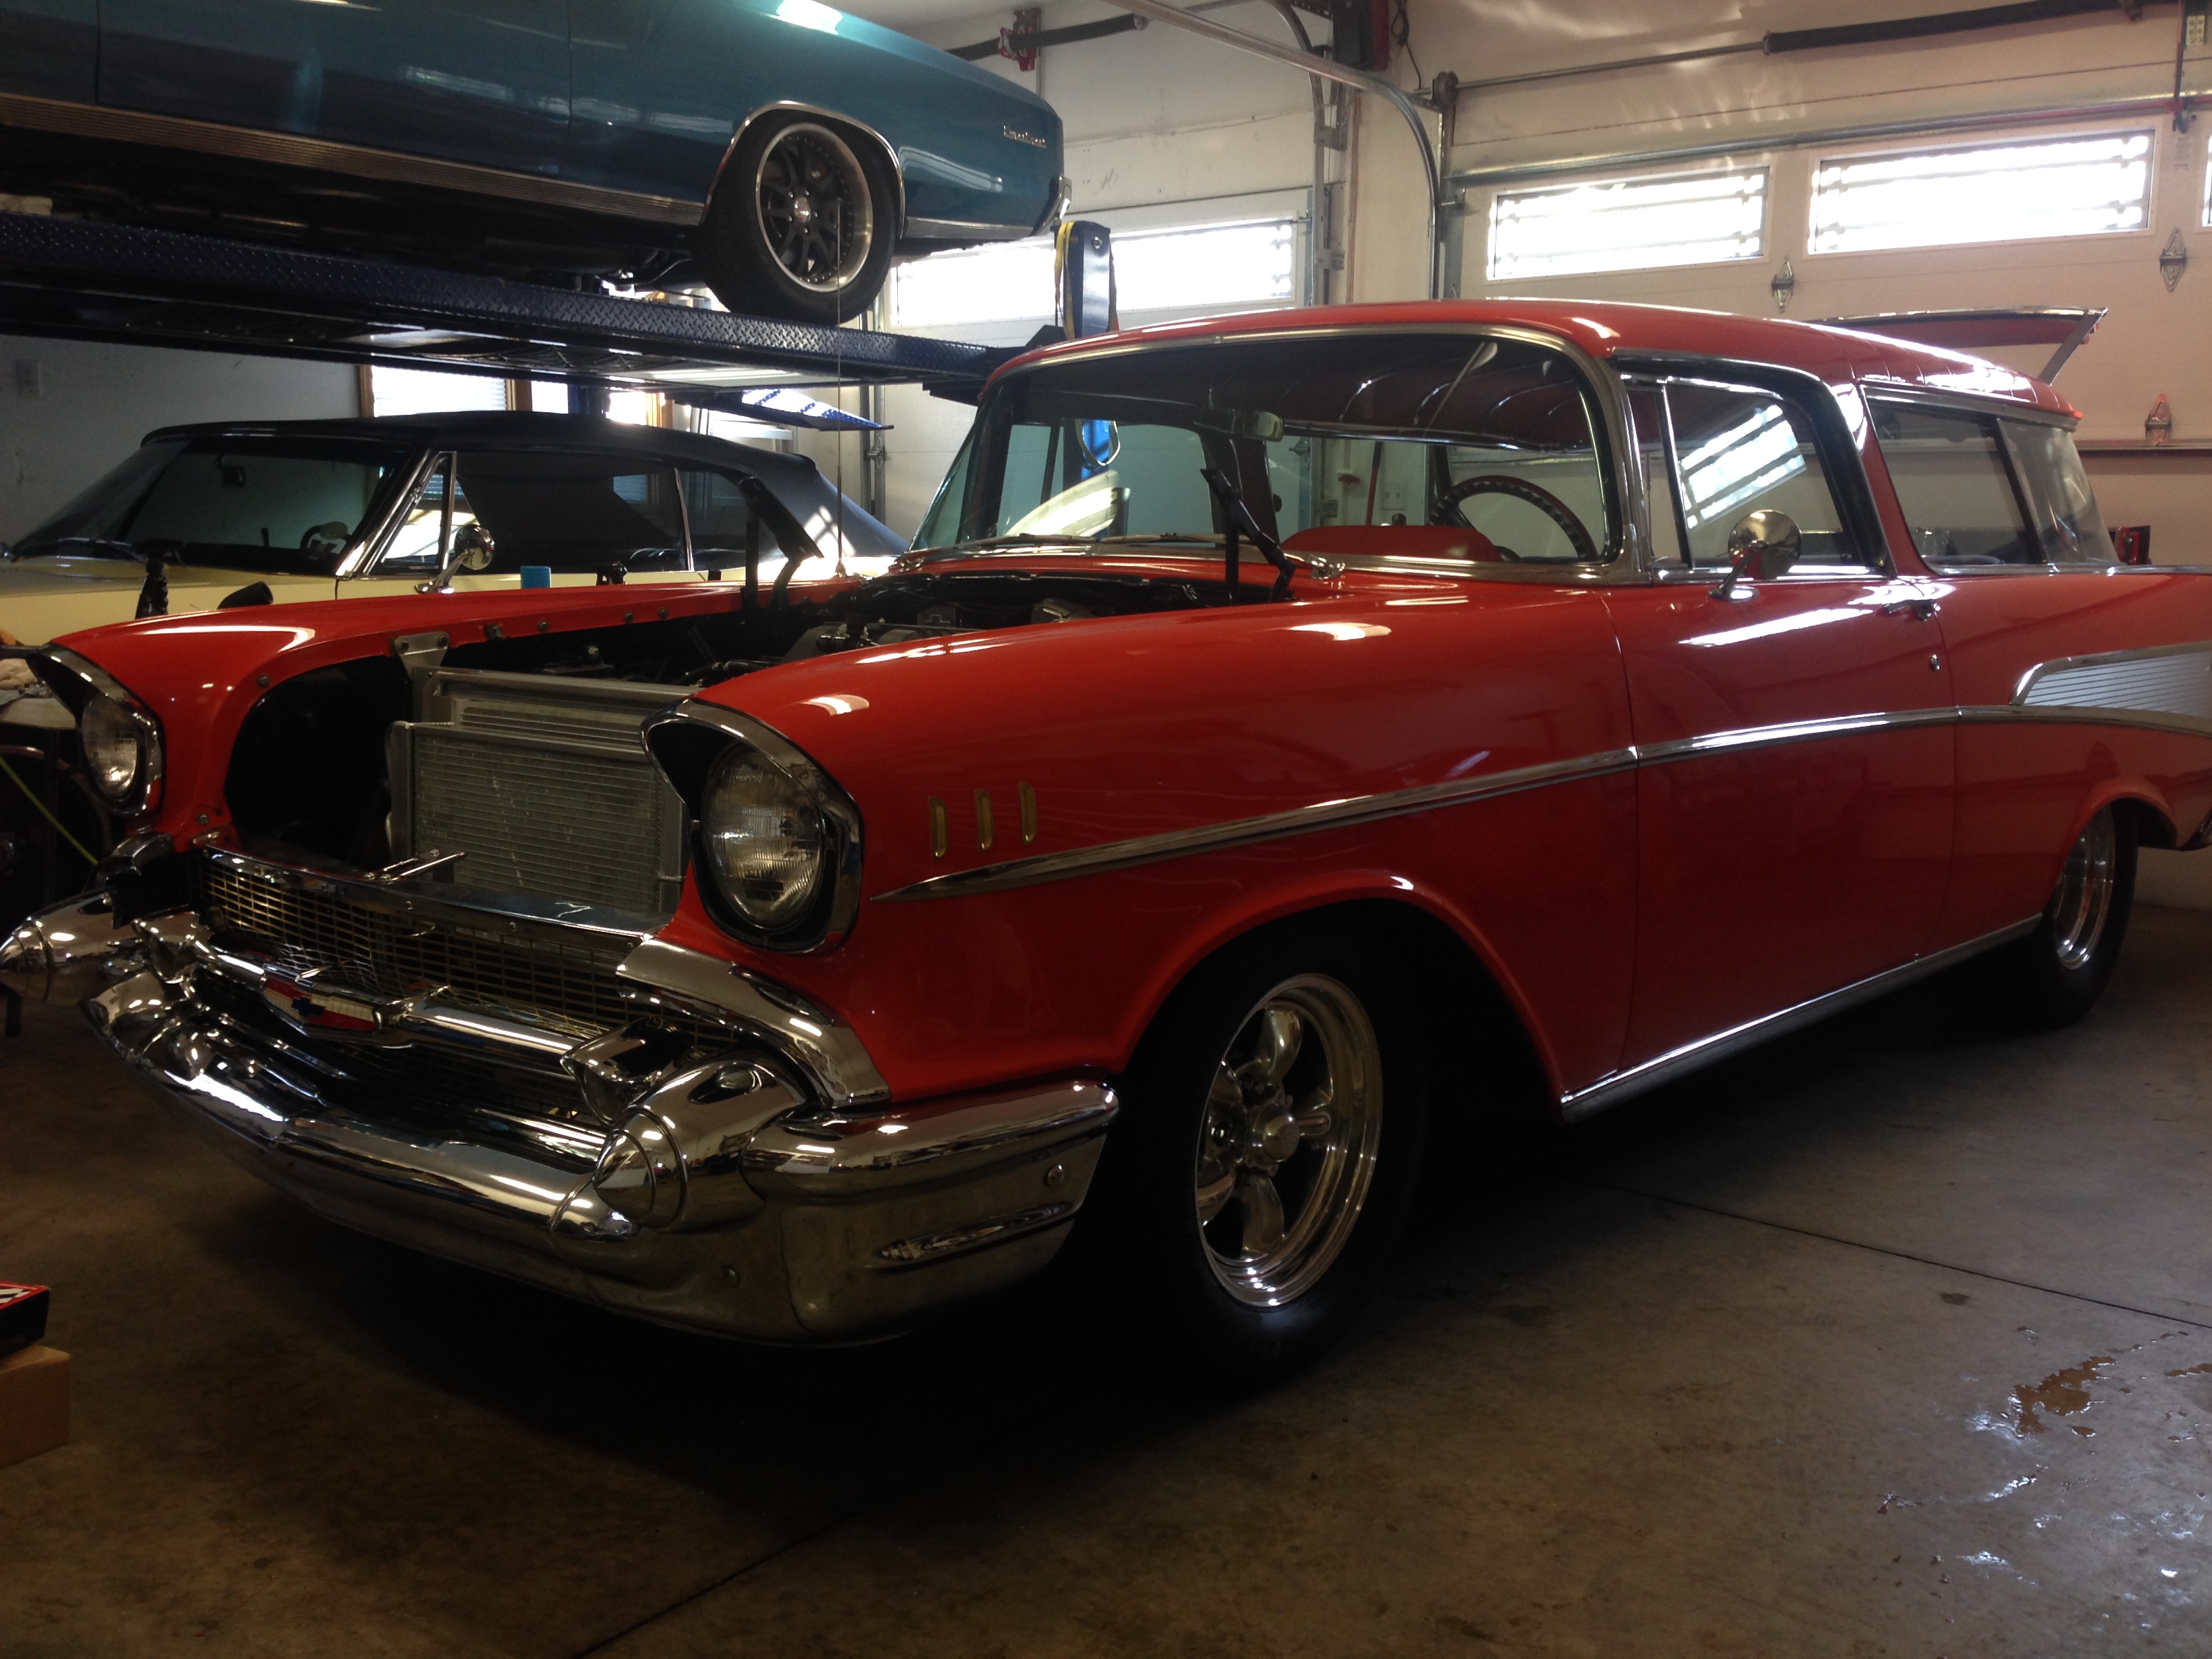
57 Nomad Project
TECH Fanatic


Joined: Jul 2007
Posts: 1,803
Likes: 334
From: Wilmington, De
That's because the Concept One set-up put everything on a single belt, whereas the factory has one belt for the accessories, and one for the AC.
I'd look at swapping the alternator and power steering so an additional idler pulley could be added to get the belt to wrap around the crank pulley more.
I'd look at swapping the alternator and power steering so an additional idler pulley could be added to get the belt to wrap around the crank pulley more.
Andrew

Thread Starter
TECH Fanatic


Joined: Jul 2008
Posts: 1,570
Likes: 173
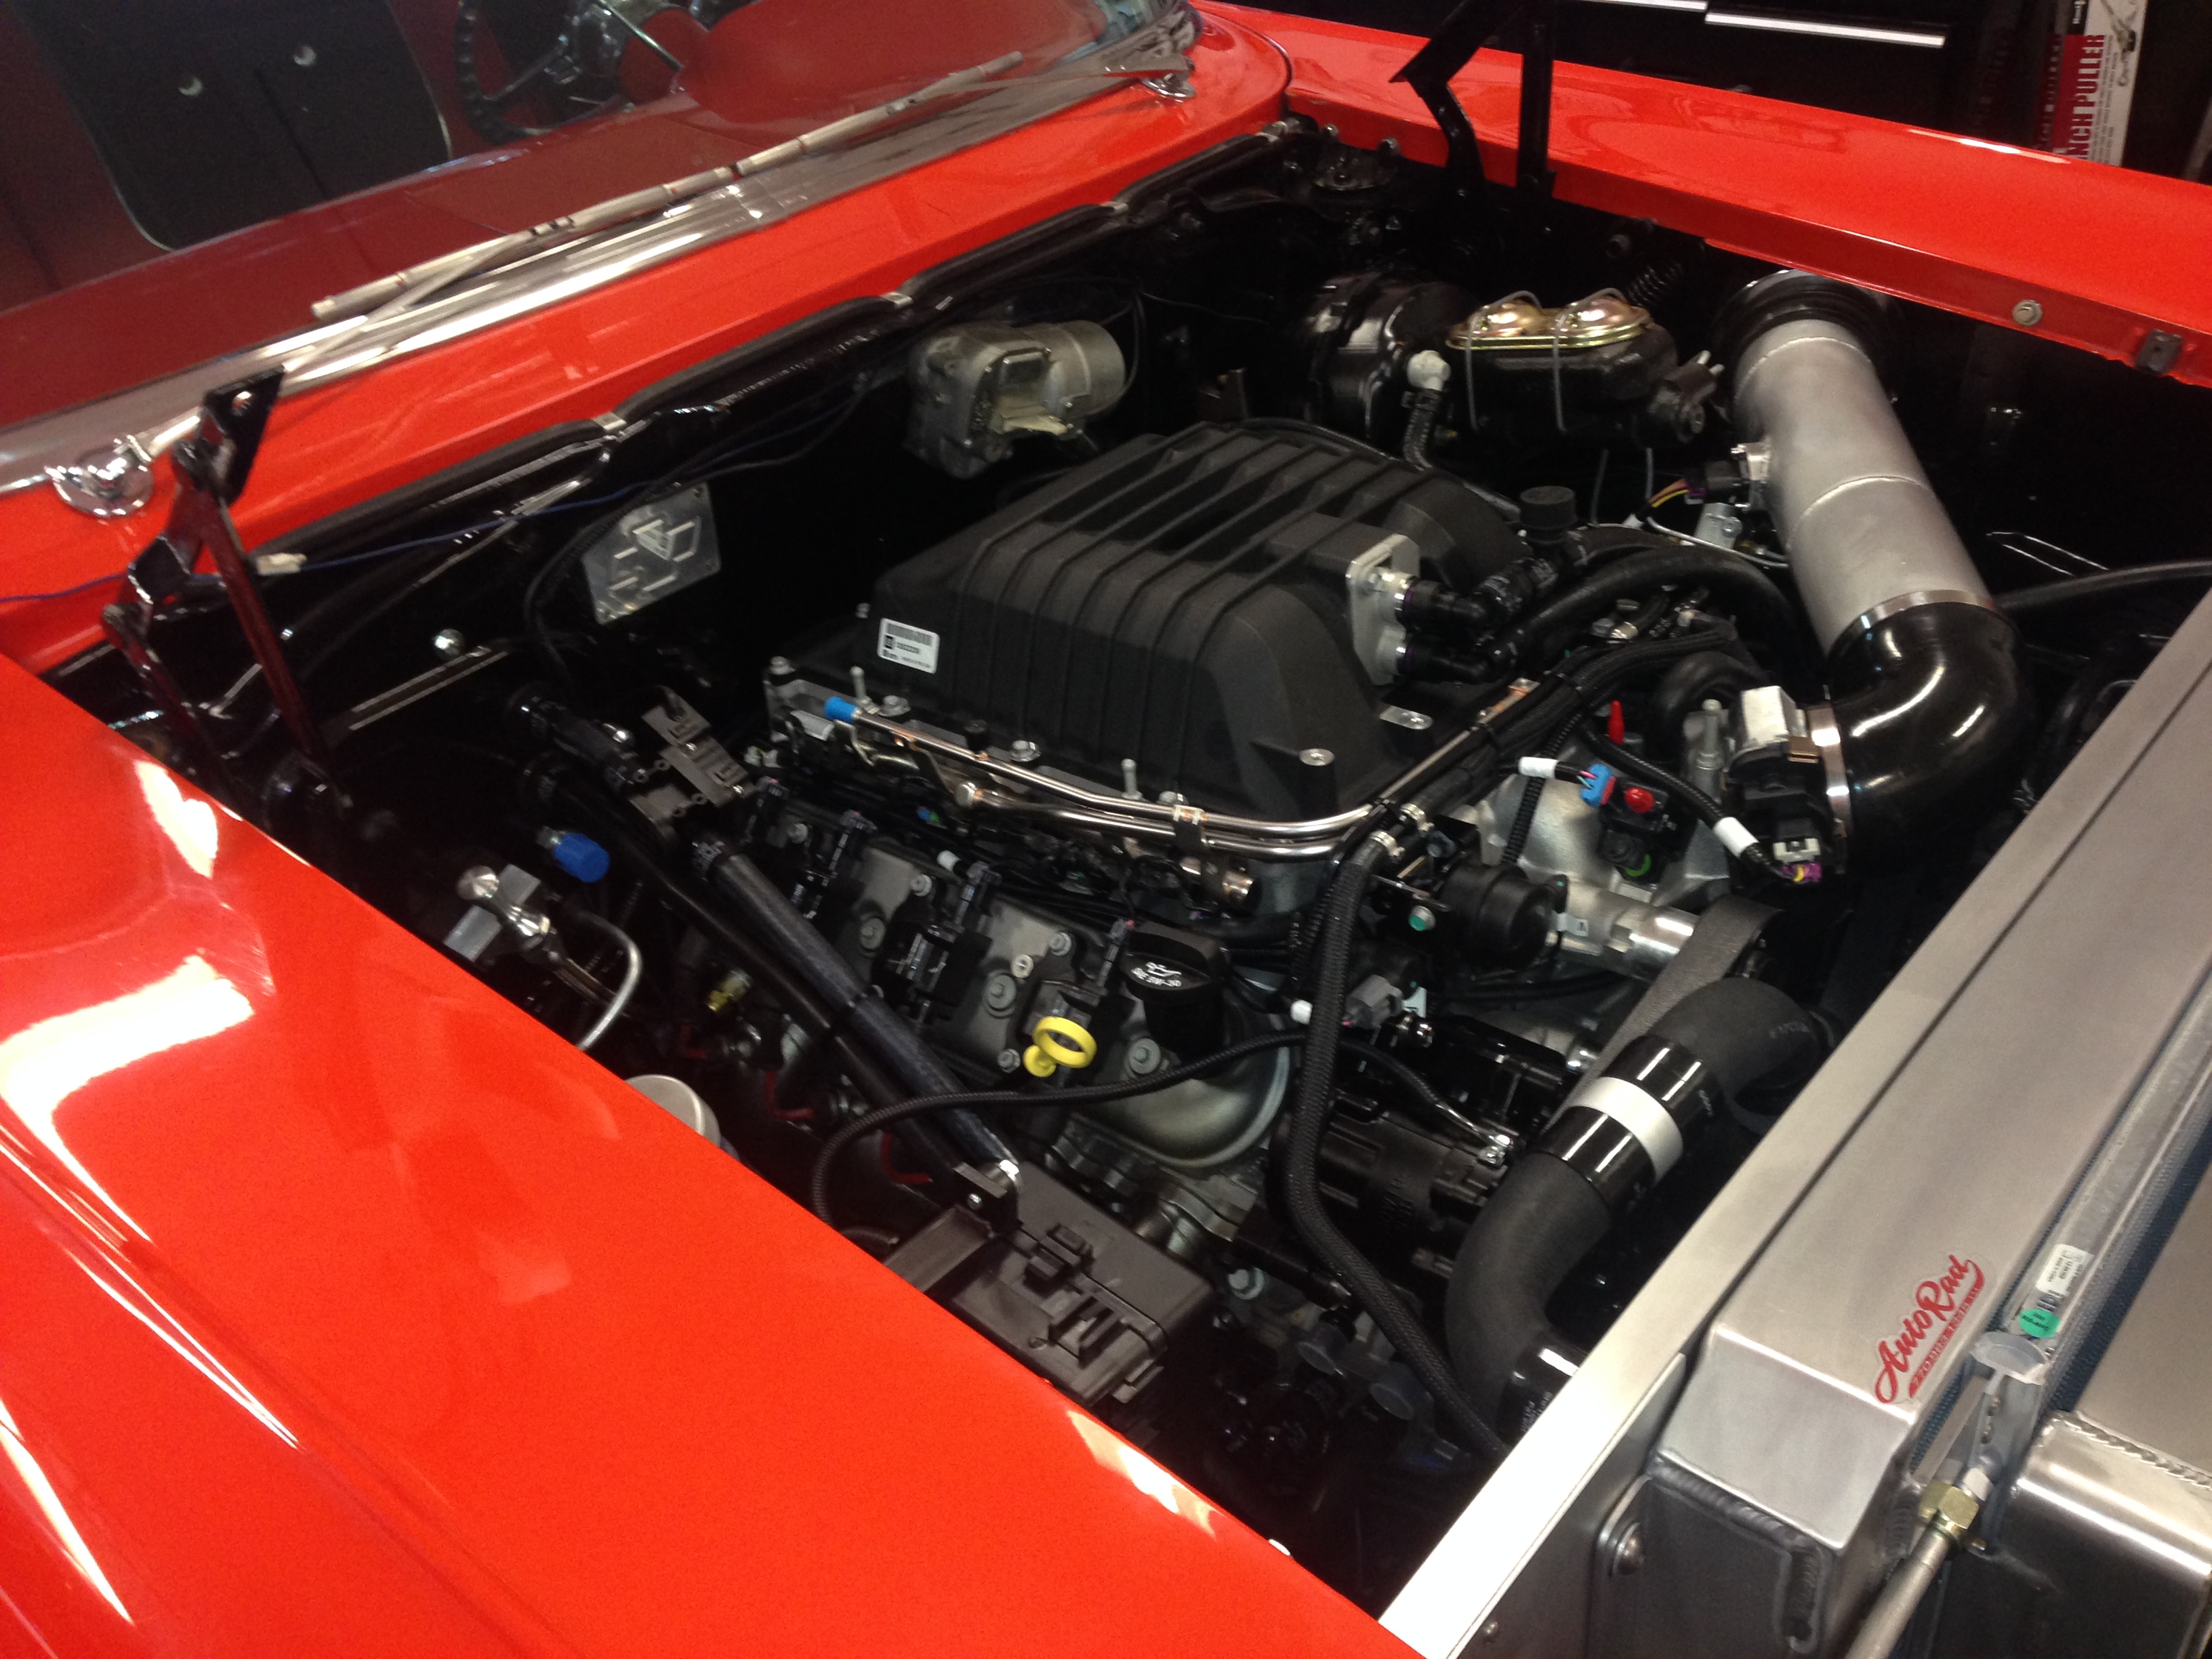
Yes.........8 rib pulleys and belt.........I know what you mean but I didn't have too many options with the Compressor needing to be mounted up top....No room down below without cutting half the cross member out.........They limit the boost to 10 lbs with this set-up......I'll probably never use it to it's limit.......I just like the LSA torque......
Thread Starter
TECH Fanatic
Joined: Jul 2008
Posts: 1,570
Likes: 173
That's because the Concept One set-up put everything on a single belt, whereas the factory has one belt for the accessories, and one for the AC.
I'd look at swapping the alternator and power steering so an additional idler pulley could be added to get the belt to wrap around the crank pulley more.
I'd look at swapping the alternator and power steering so an additional idler pulley could be added to get the belt to wrap around the crank pulley more.
My thoughts exactly !!!!!!
Thread Starter
TECH Fanatic
Joined: Jul 2008
Posts: 1,570
Likes: 173
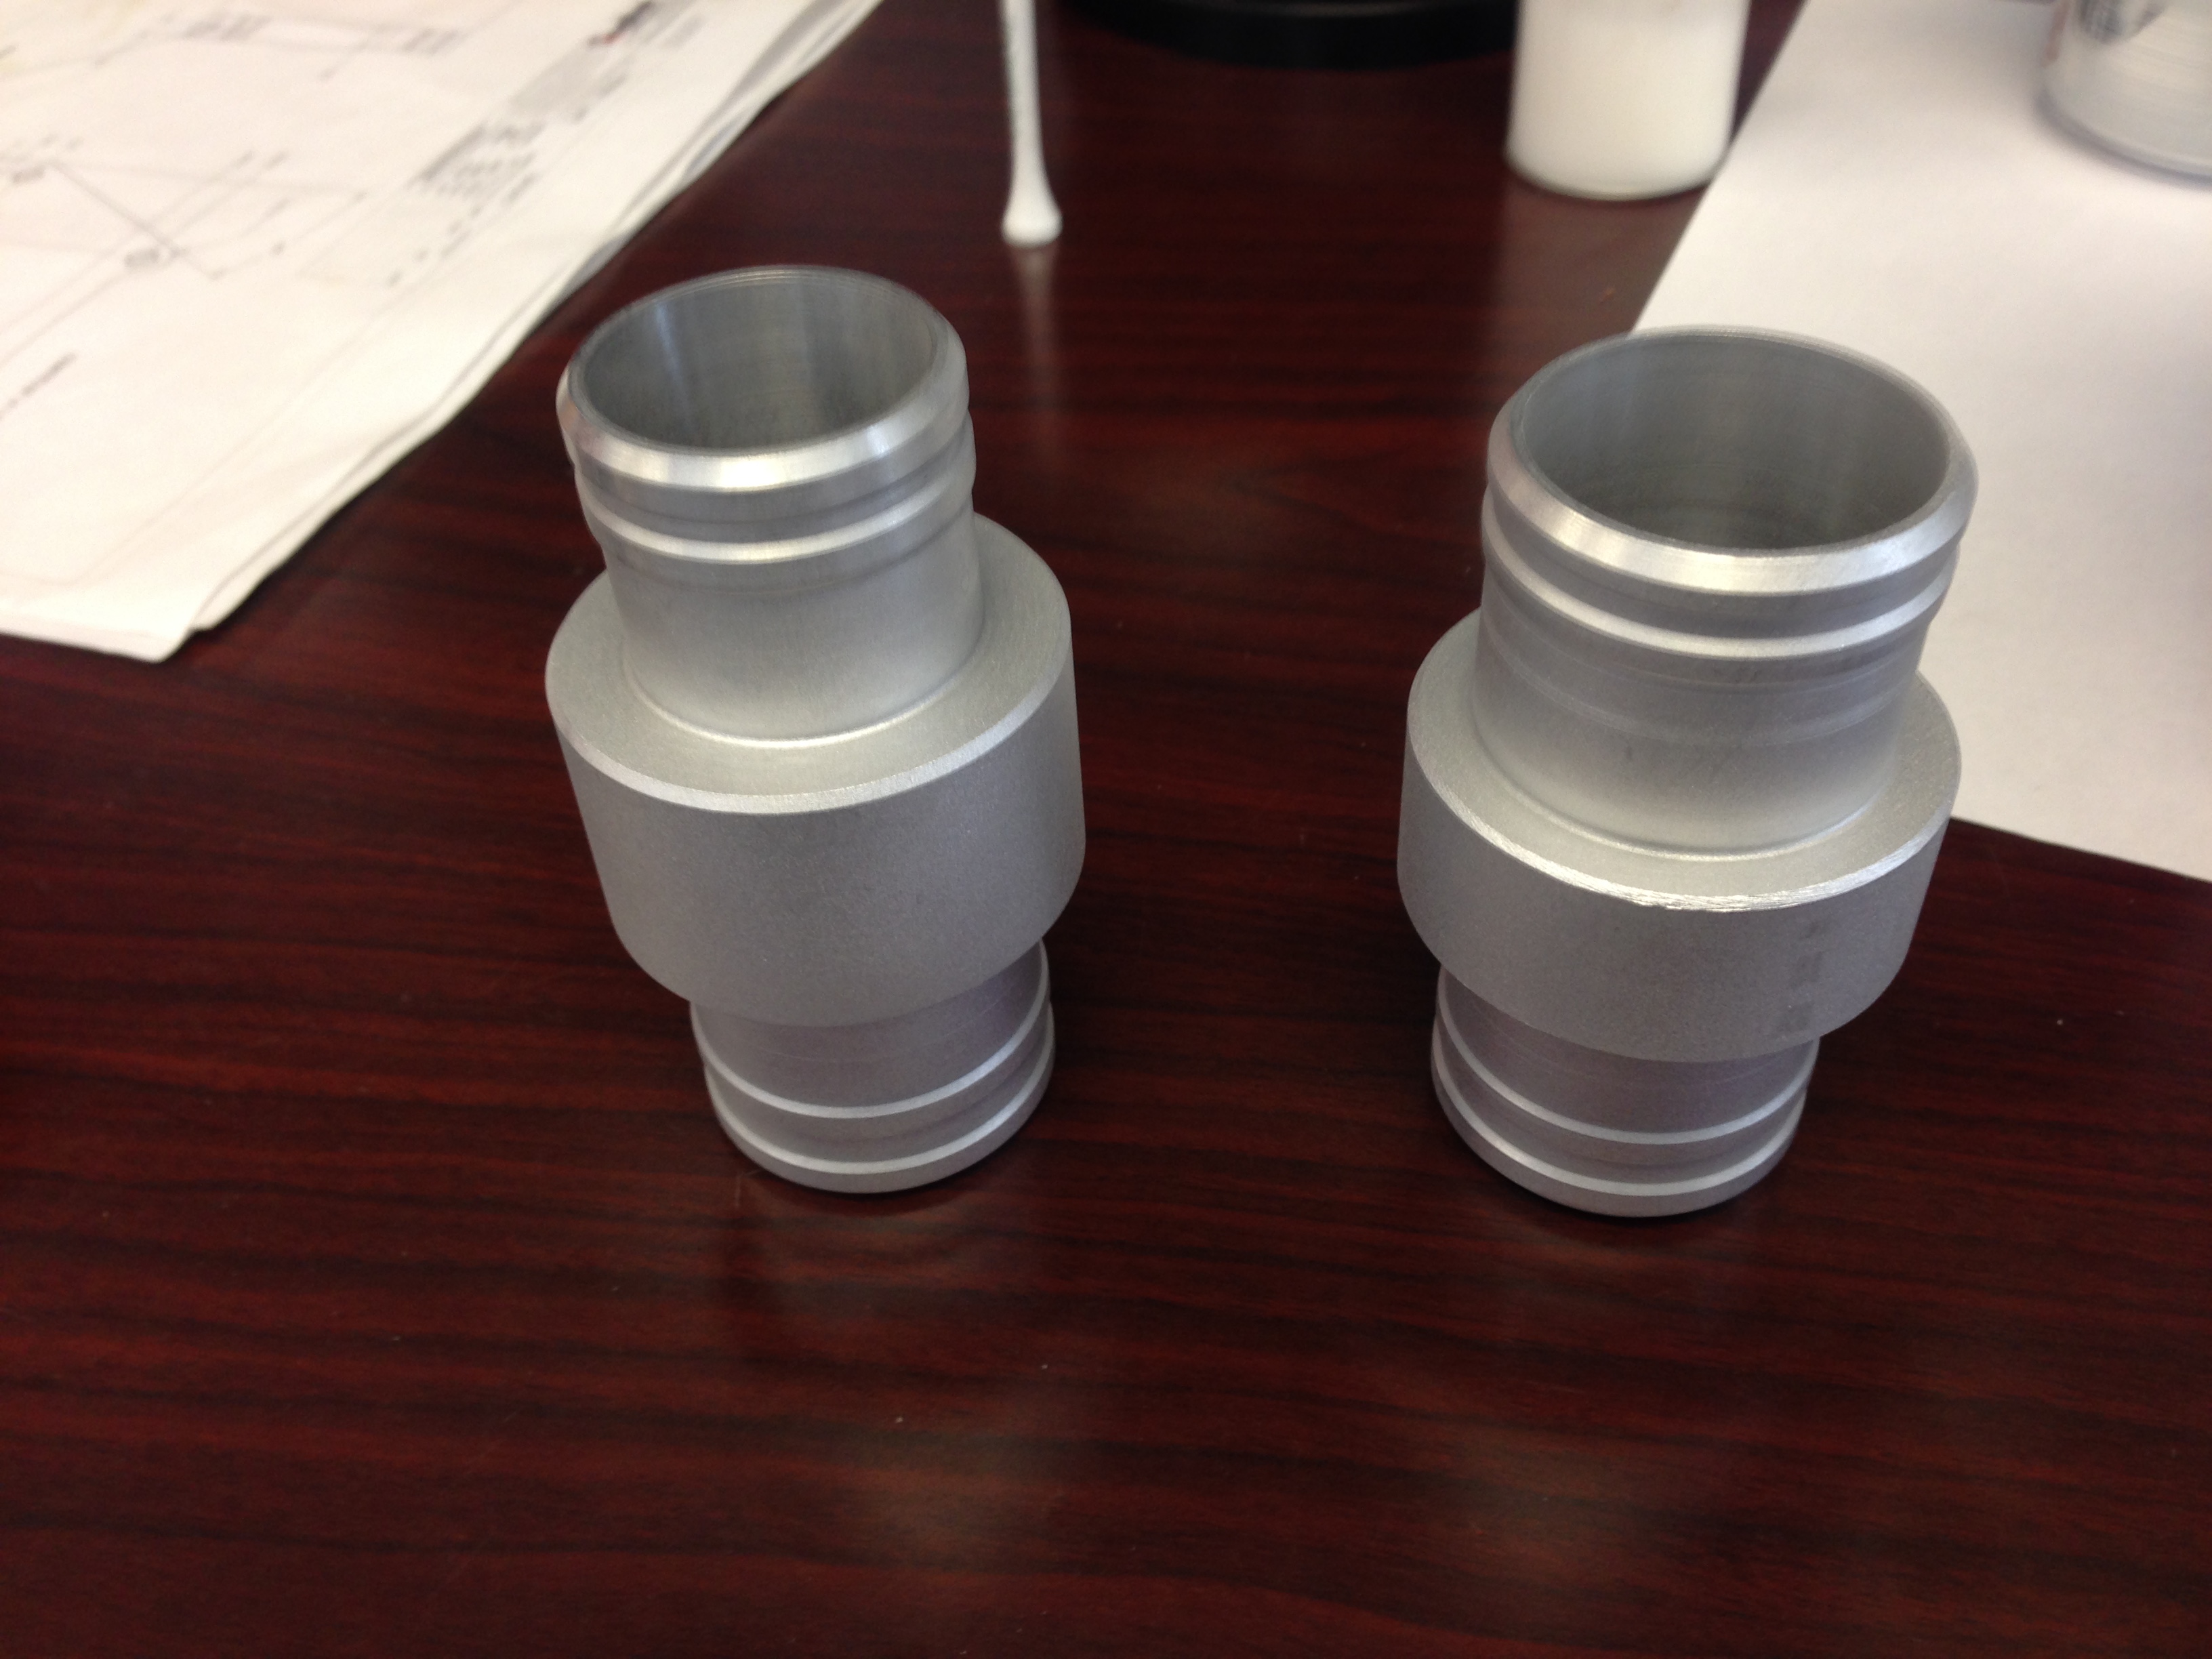
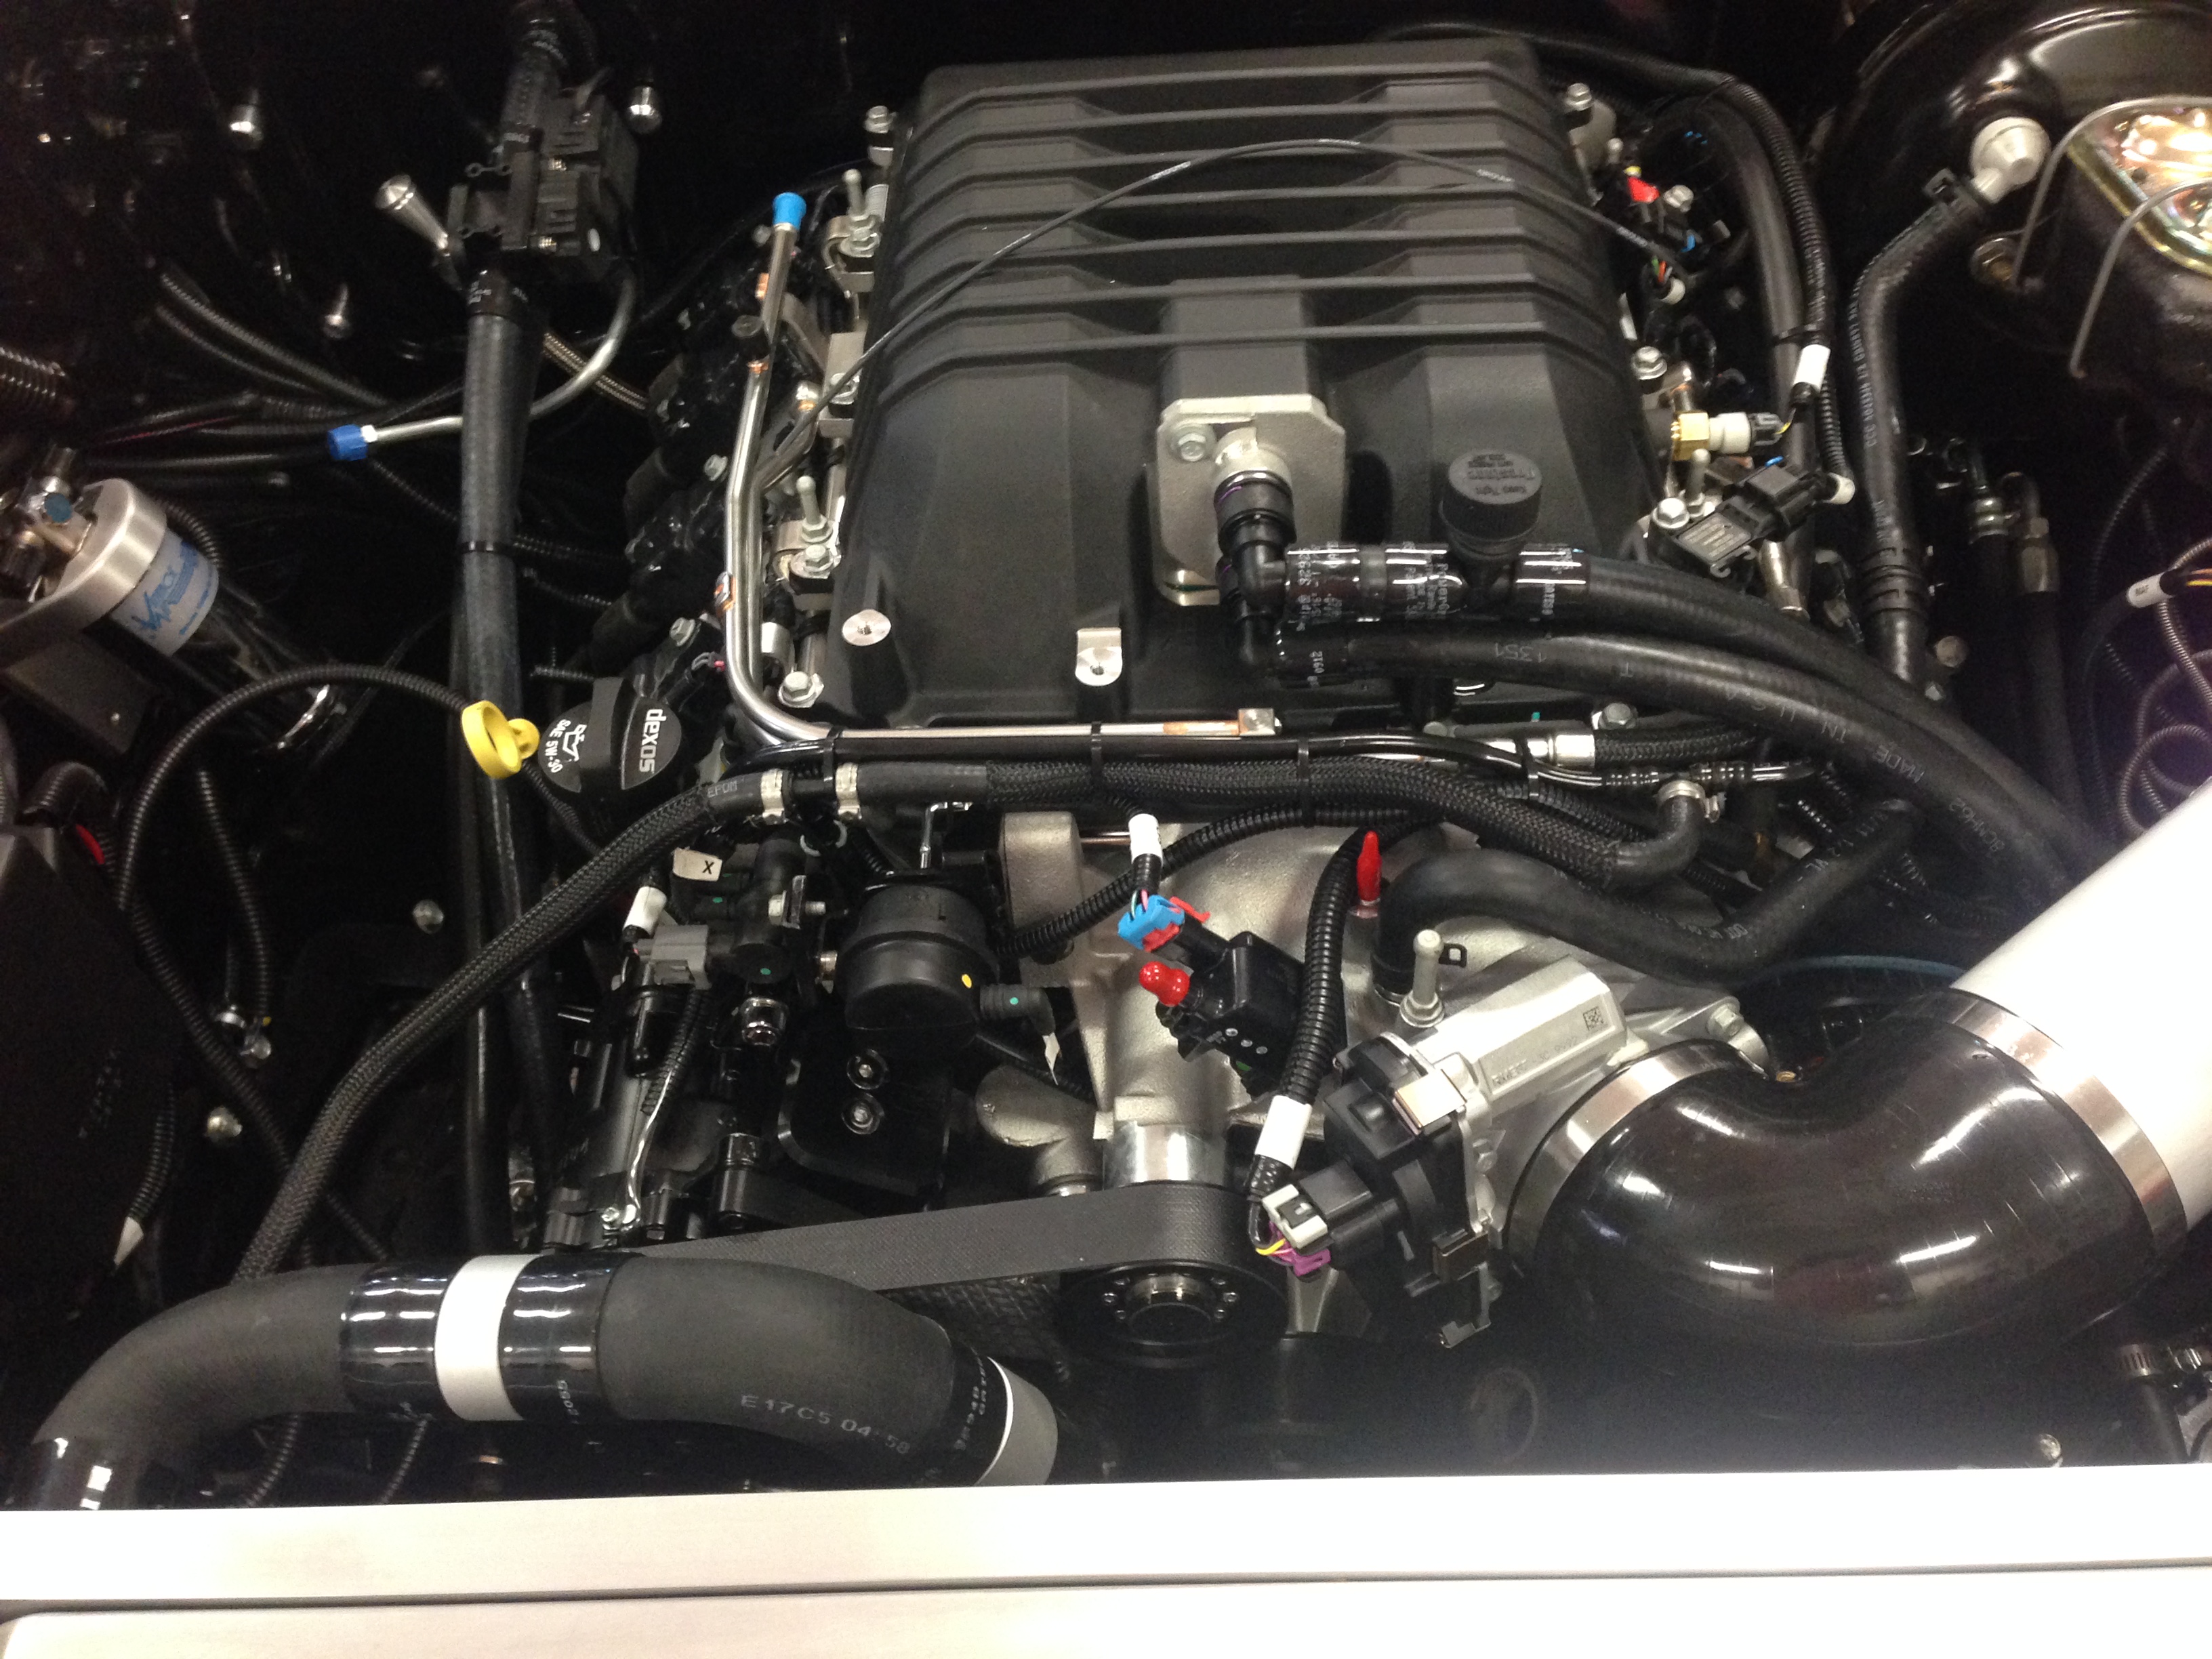
Moving along.........Got the heater hoses installed and on to the part that is a real pain in the rear.....piecing together radiator hoses.........So.....I made some adaptors today matching the different upper hose sizes and then went to the auto parts store trying to visualize cutting sections out of hoses to get then to suit my application.......ended up being simpler than I expected.....I ordered a bunch of heat shrink hose clamps that will be here Monday so I can get them finished....Supercharger intercooler hoses are next........Getting closer......the adaptors are Aluminum Glass Beaded
Thread Starter
TECH Fanatic
Joined: Jul 2008
Posts: 1,570
Likes: 173
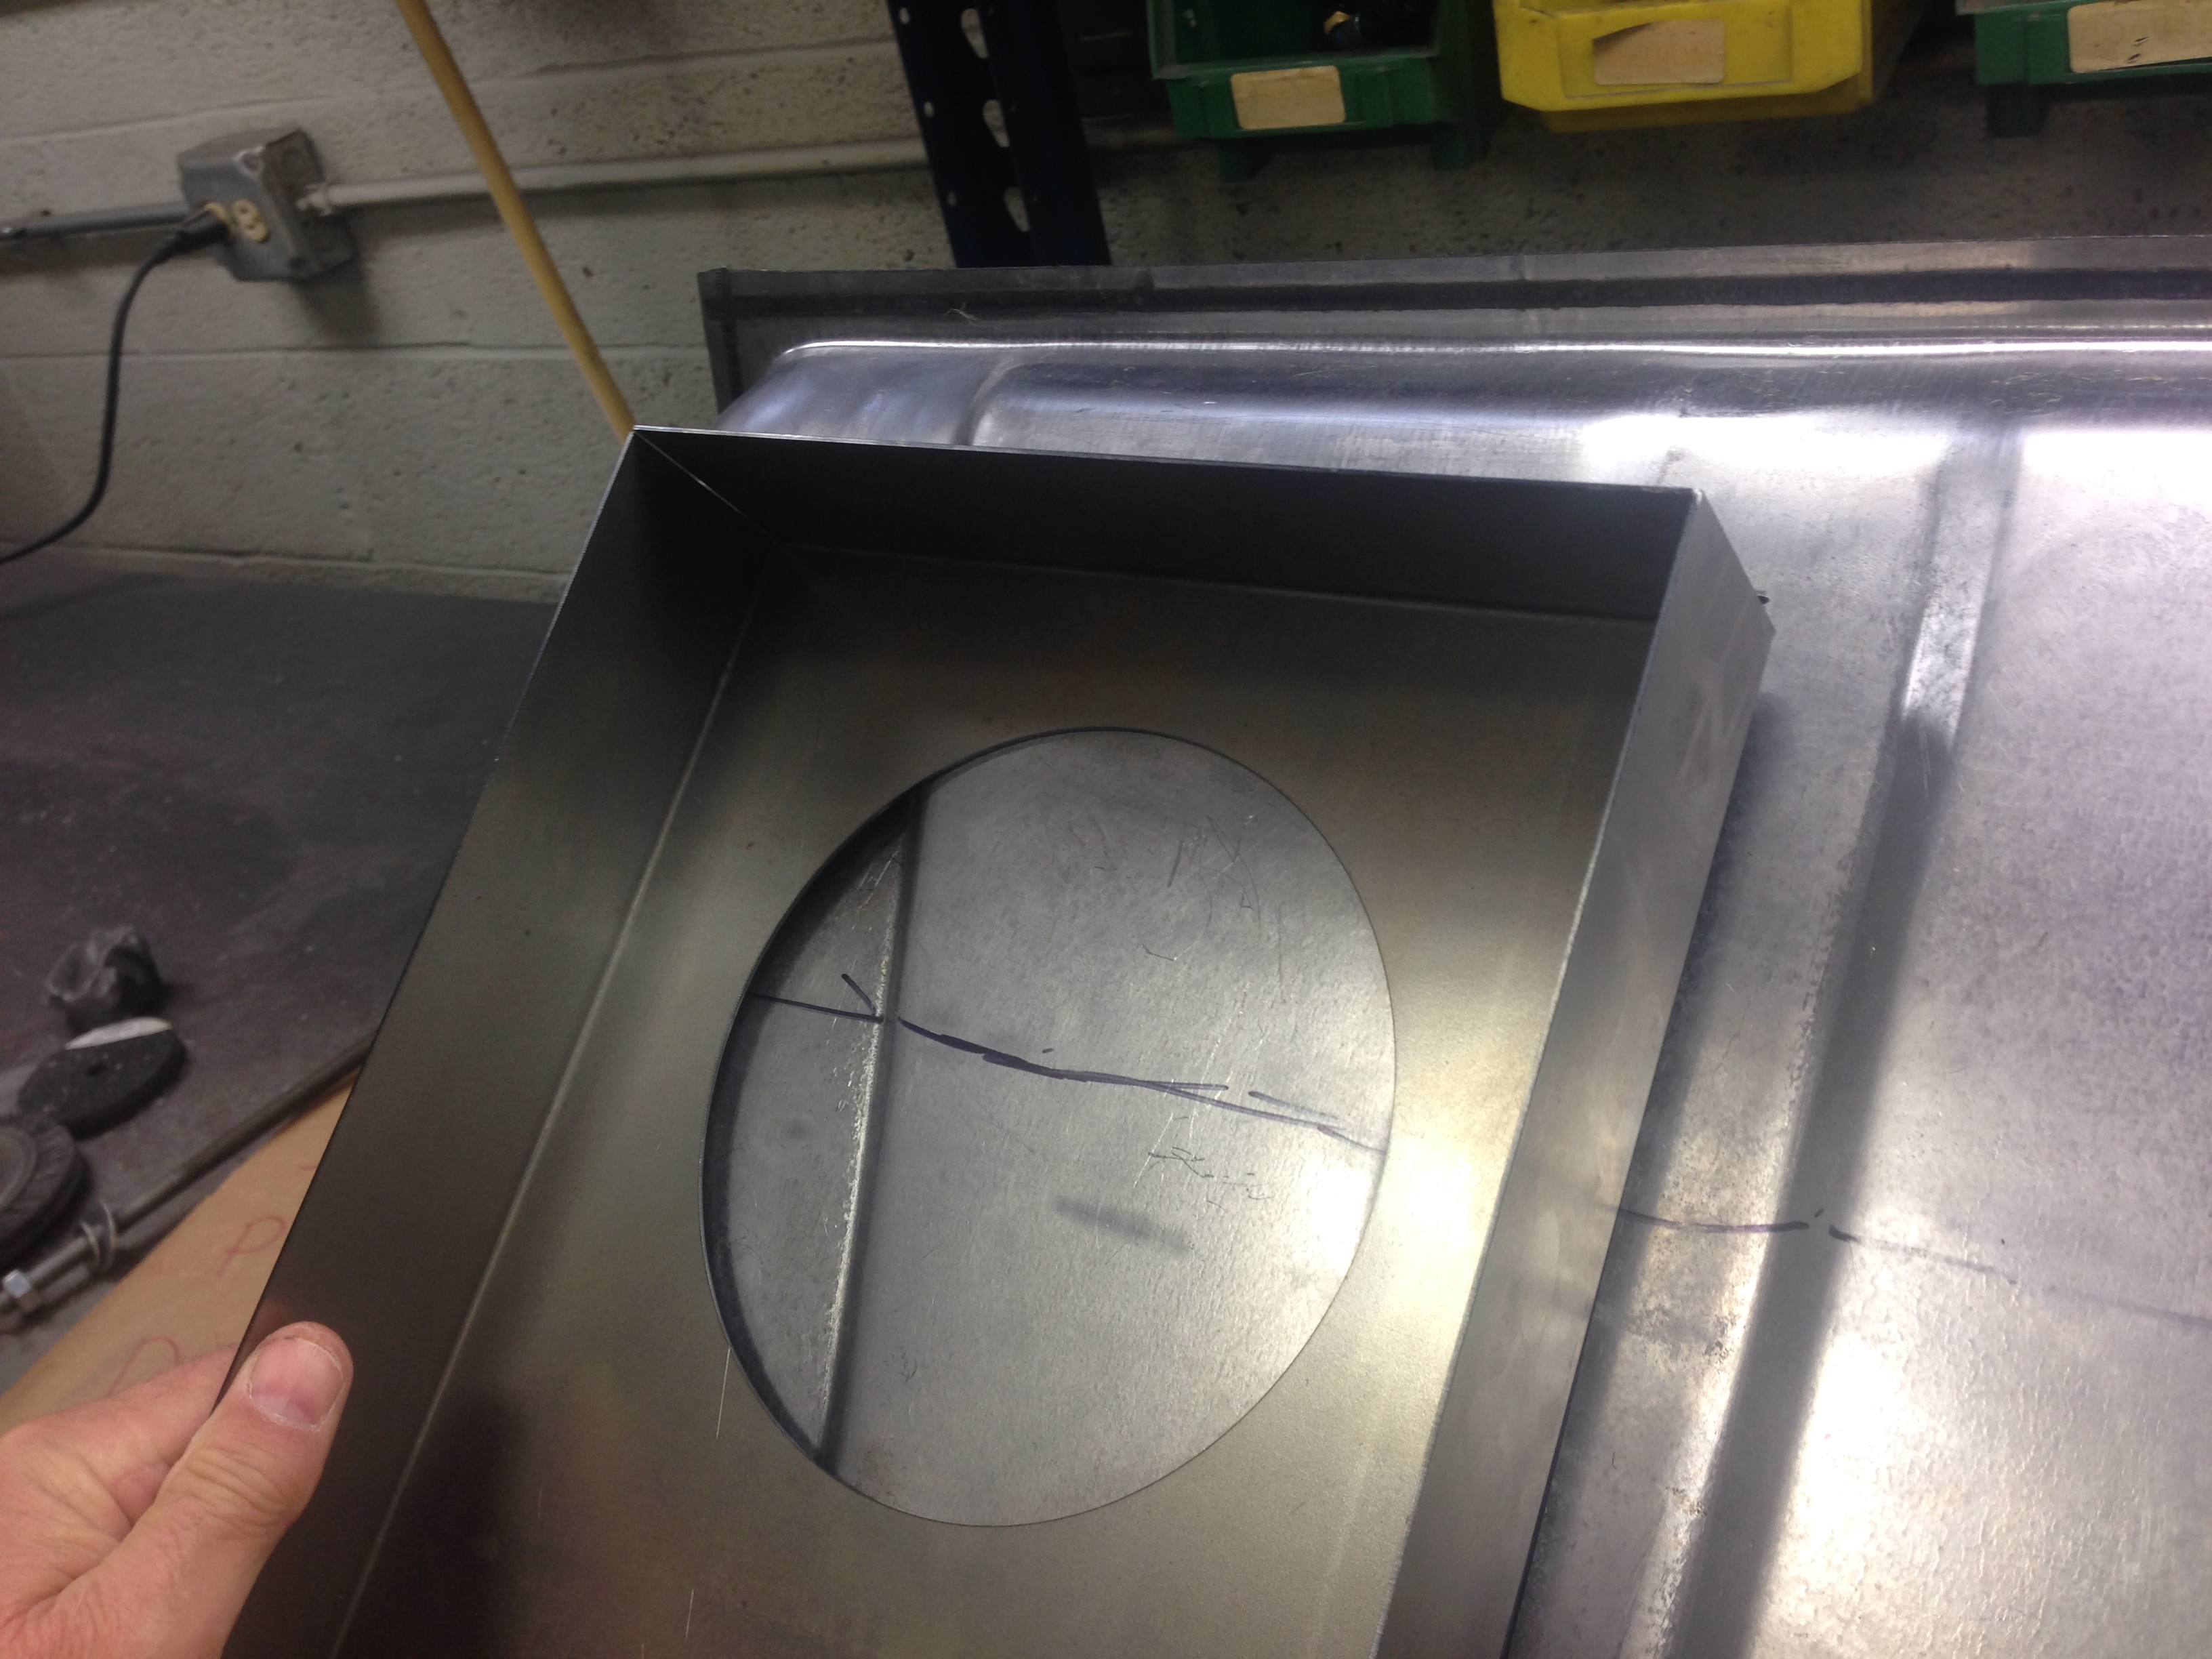
On to the last major piece of the puzzle......Fuel System.......The Nomad has a major difference from the standard 55-57 Chevrolets........The Gas Tank........Because of the spare tire well in the Nomad.....the standard Gas Tank couldn't be used......so...GM used the space available and pretty much form fit a tank to fit........the easy option would have been to cut out the well and use a stock tank........I couldn't take the easy way out....LOL.......So......With the Nomad tank being much deeper than a stock tank, and using a stock GM LSA Fuel Pump.........some major issues popped up.......In my other conversions I had to shorten the overall length of the pumps to fit.......on this application I have to go the other way and lengthen the Pump and modify the tank to accept the new pump.........Stay Tuned......LOL

LS1 Tech Stories
The Best V8 Stories One Small Block at Time

Topdon ONE vs. Artidiag 800 BT2: Which is the Diagnostic Tablet For You?
Pouria Savadkouei
Gas Monkey Built a 6-Wheel Ferrari Testarossa With a Corvette LT4 Engine
Verdad Gallardo
7 Most Reliable High-Performance Engines GM Has Ever Built
Verdad Gallardo
Amazing '71 Camaro Restomod Is Modern Muscle Car Under the Skin
Verdad Gallardo
6 Common C5 Corvette Failures and What's Involved In Repairing Them
Pouria Savadkouei
Retro Modern Bandit Pontiac Trans AM Comes With Burt Reynolds' Autograph
Verdad Gallardo
Top 10 Greatest Cadillac V Series Performance Models Ever, Ranked
Pouria Savadkouei
Top 10 Most Powerful Chevy Trucks Ever Made!

Hennessey's New Supercharged Silverado ZR2 Has 700 HP
Verdad Gallardo Thread Starter
TECH Fanatic
Joined: Jul 2008
Posts: 1,570
Likes: 173
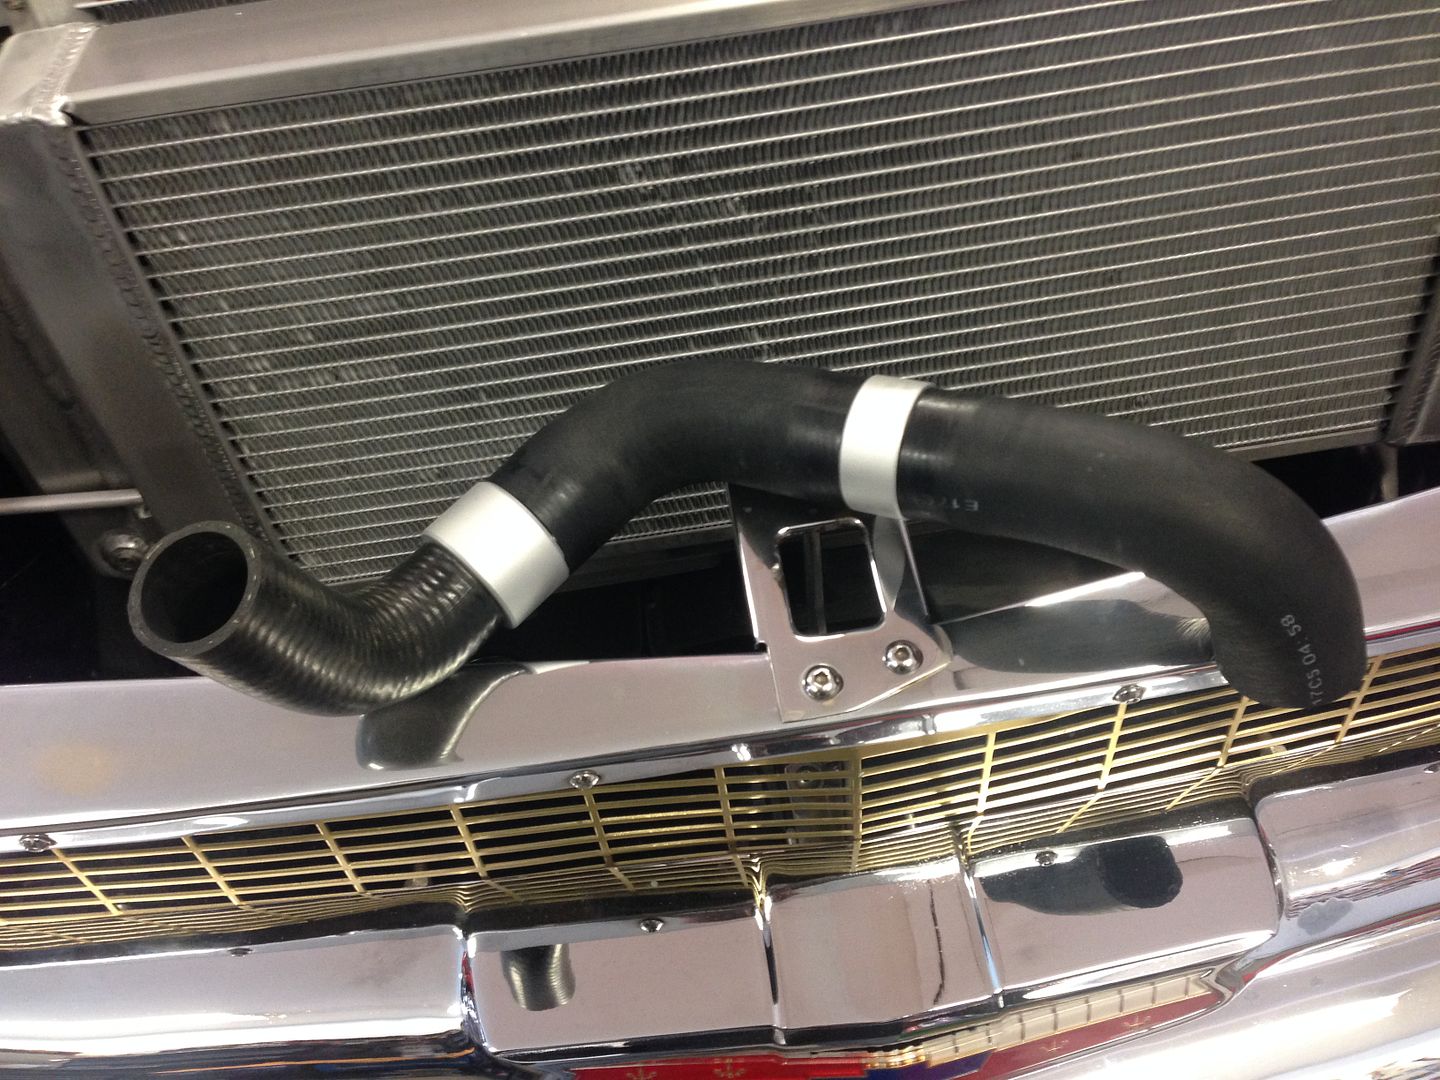
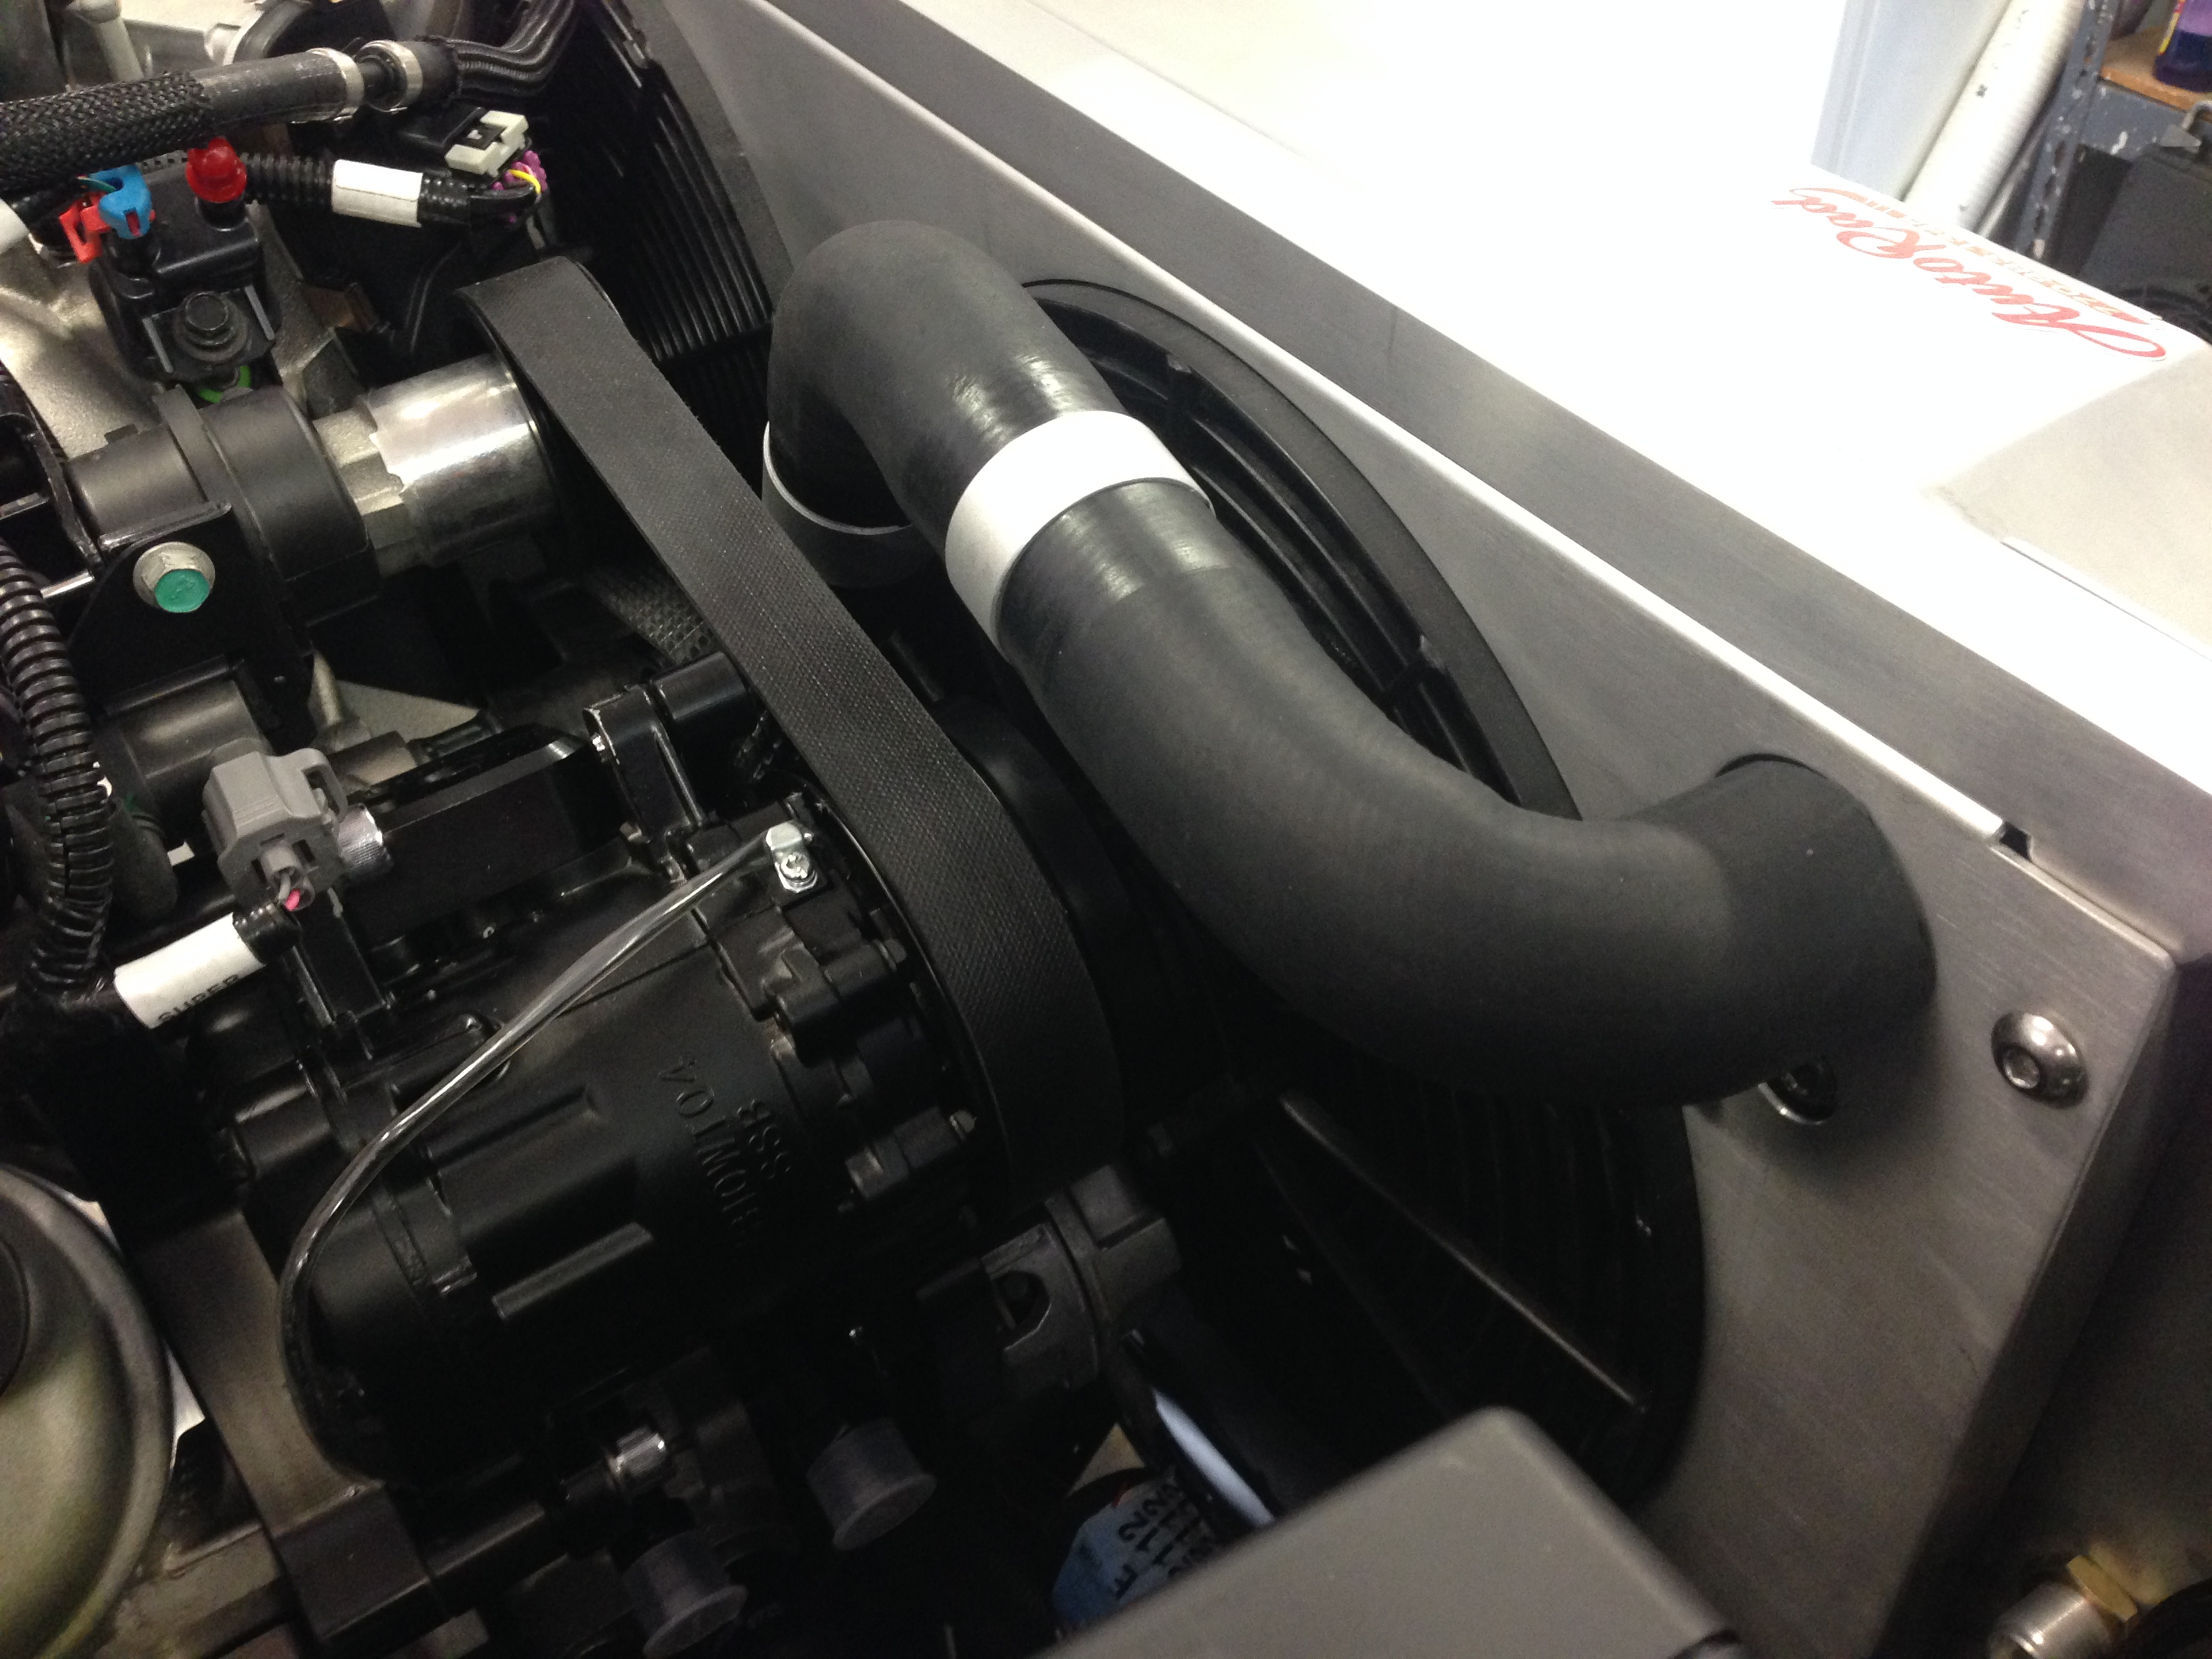
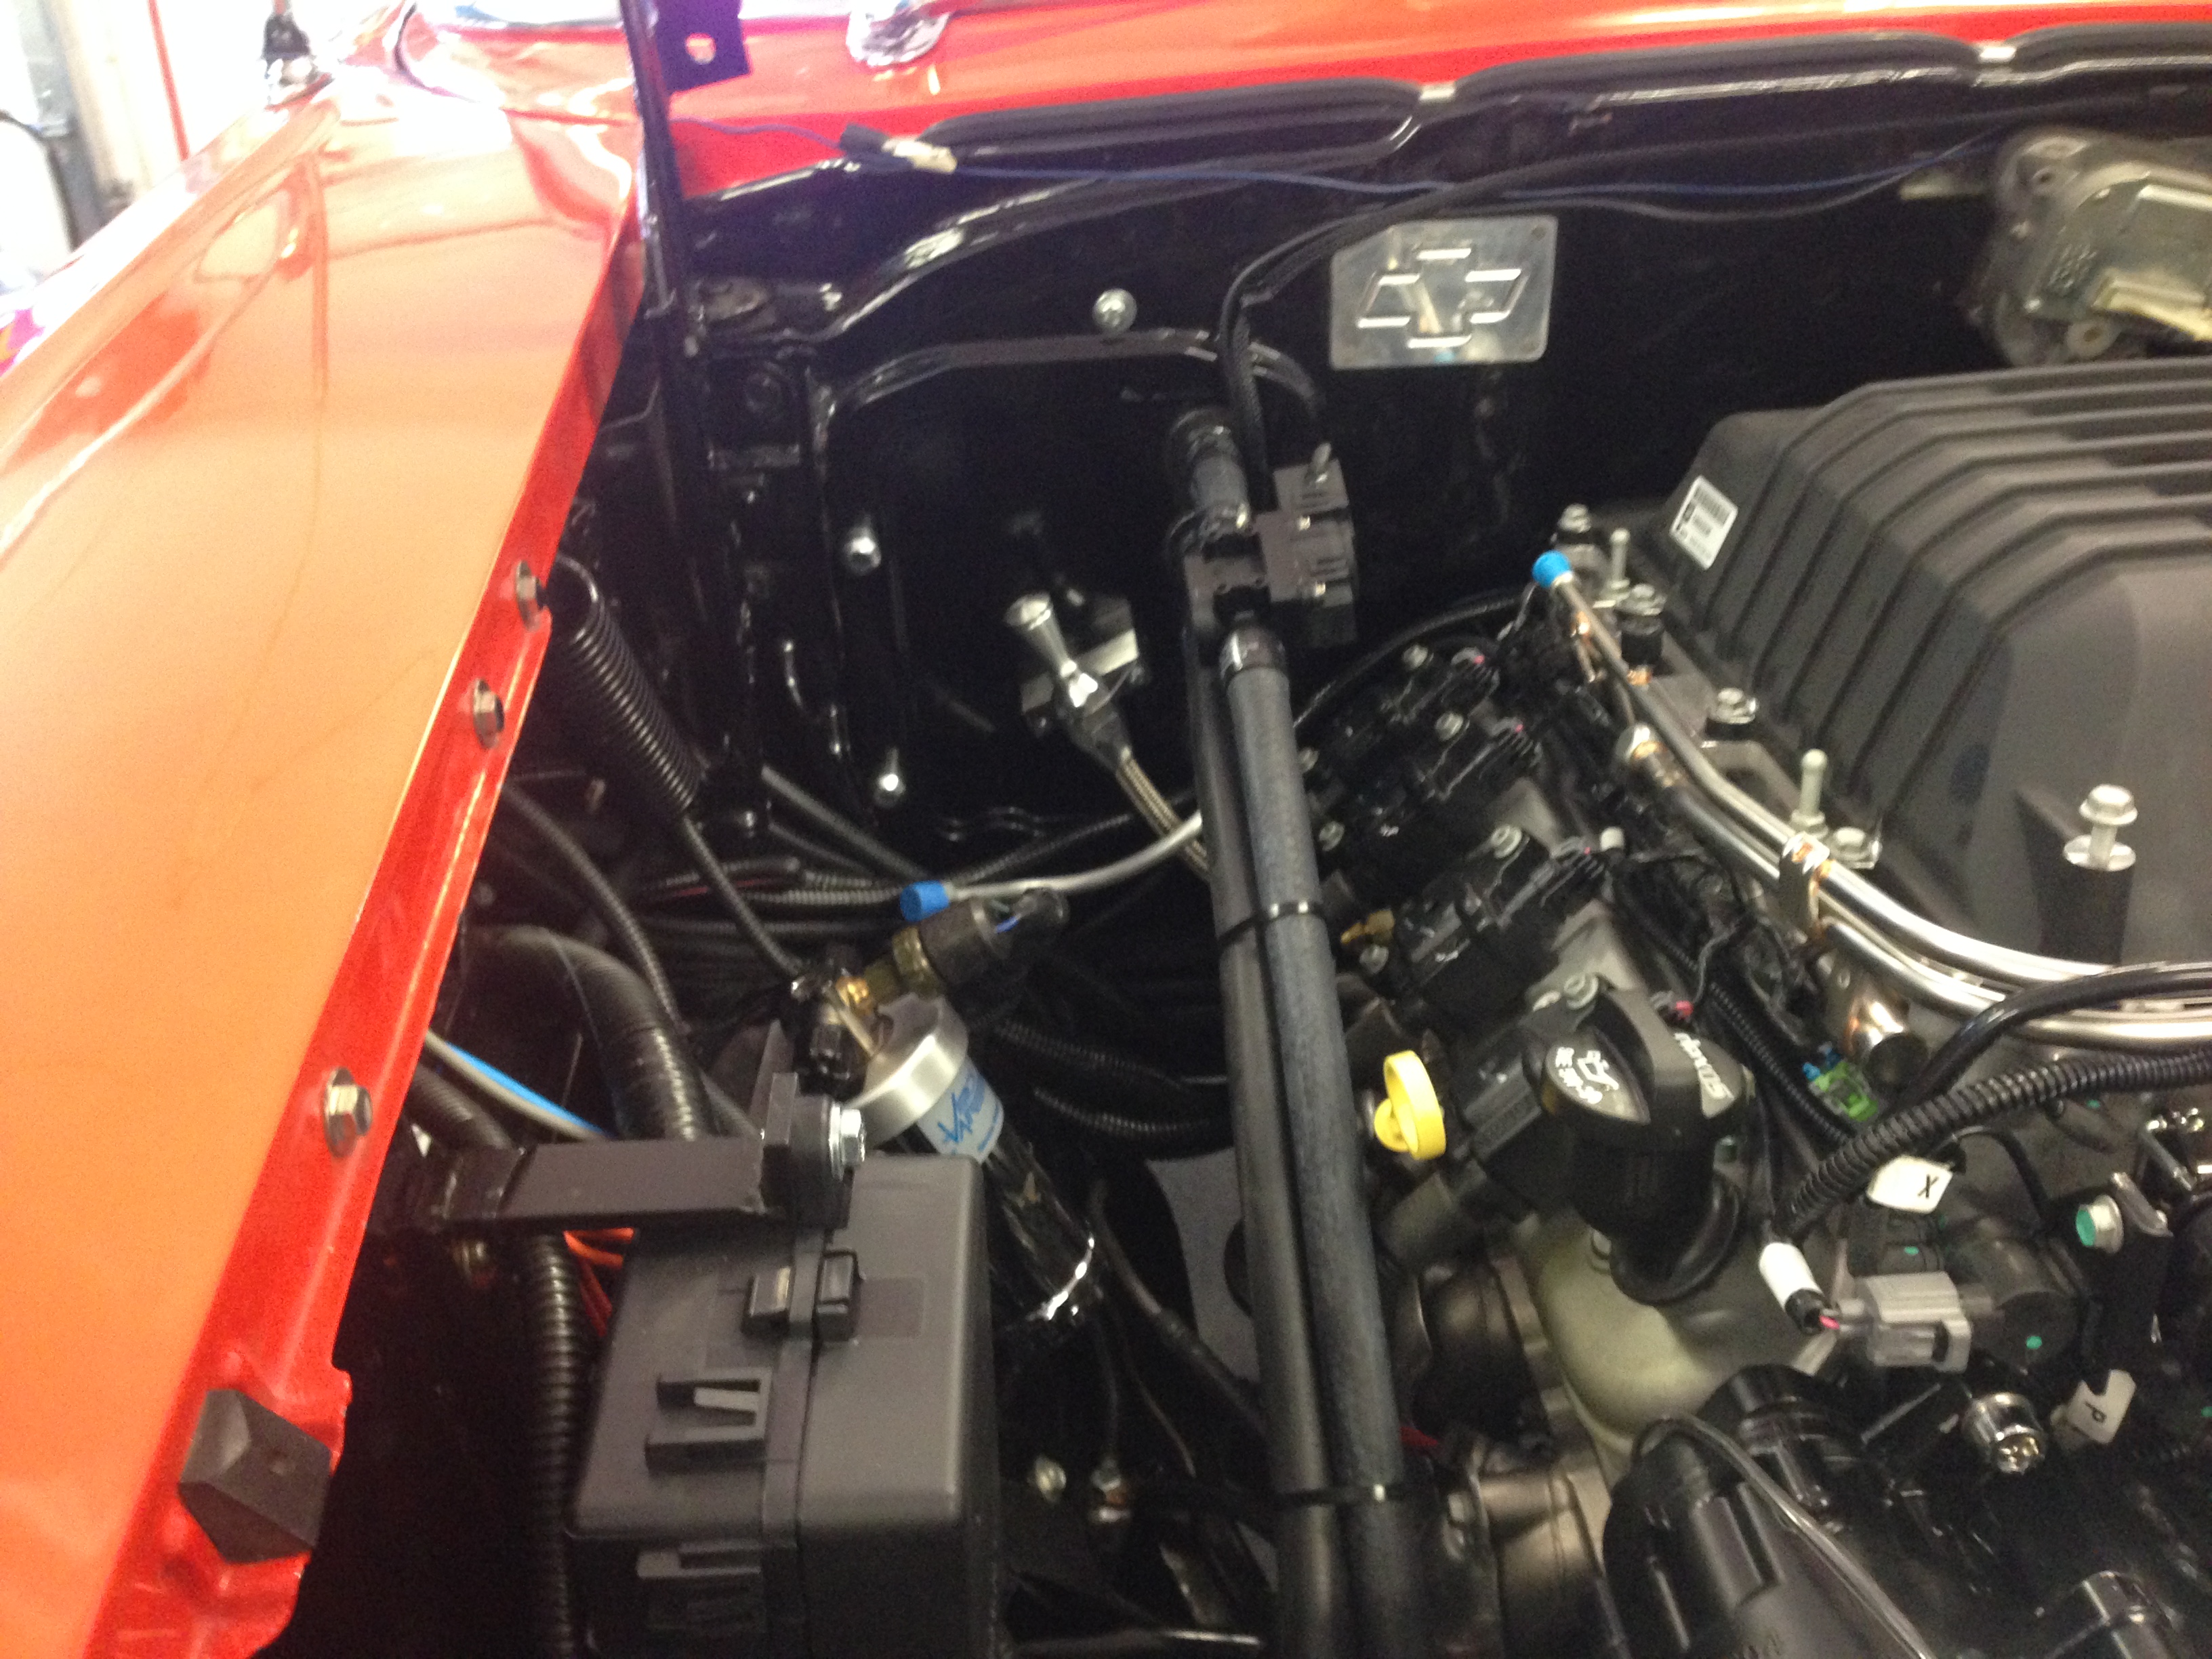
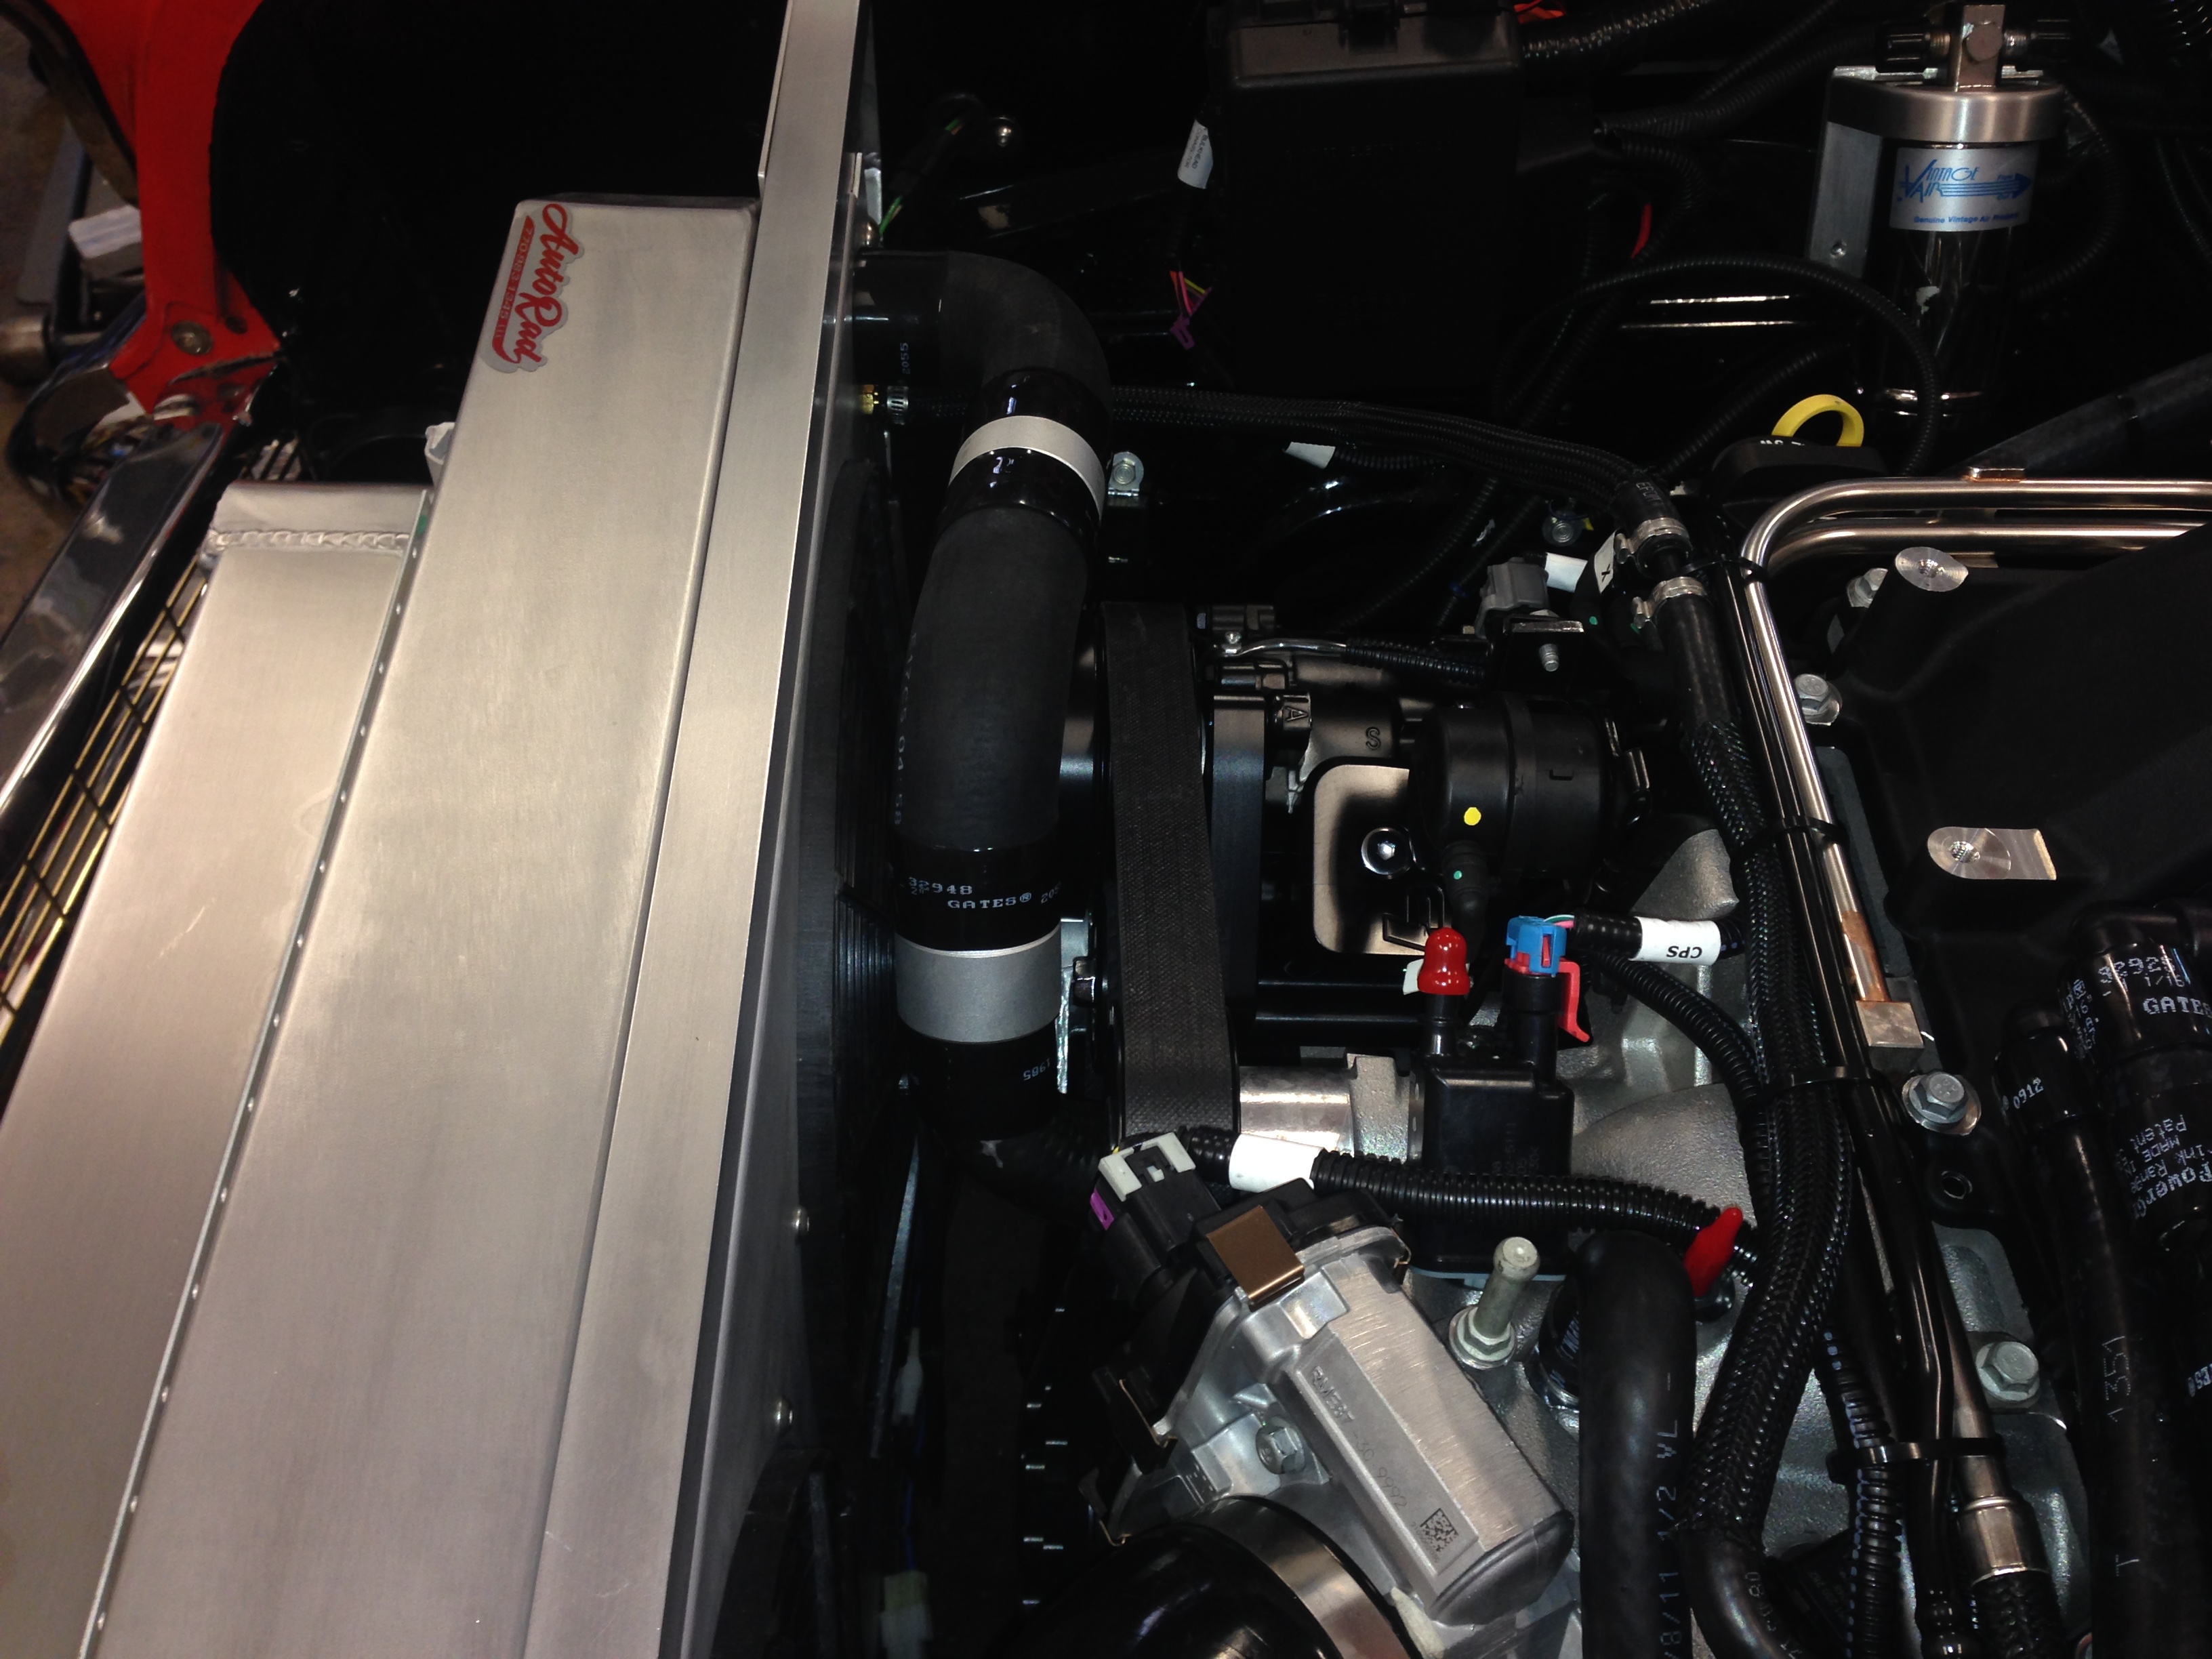
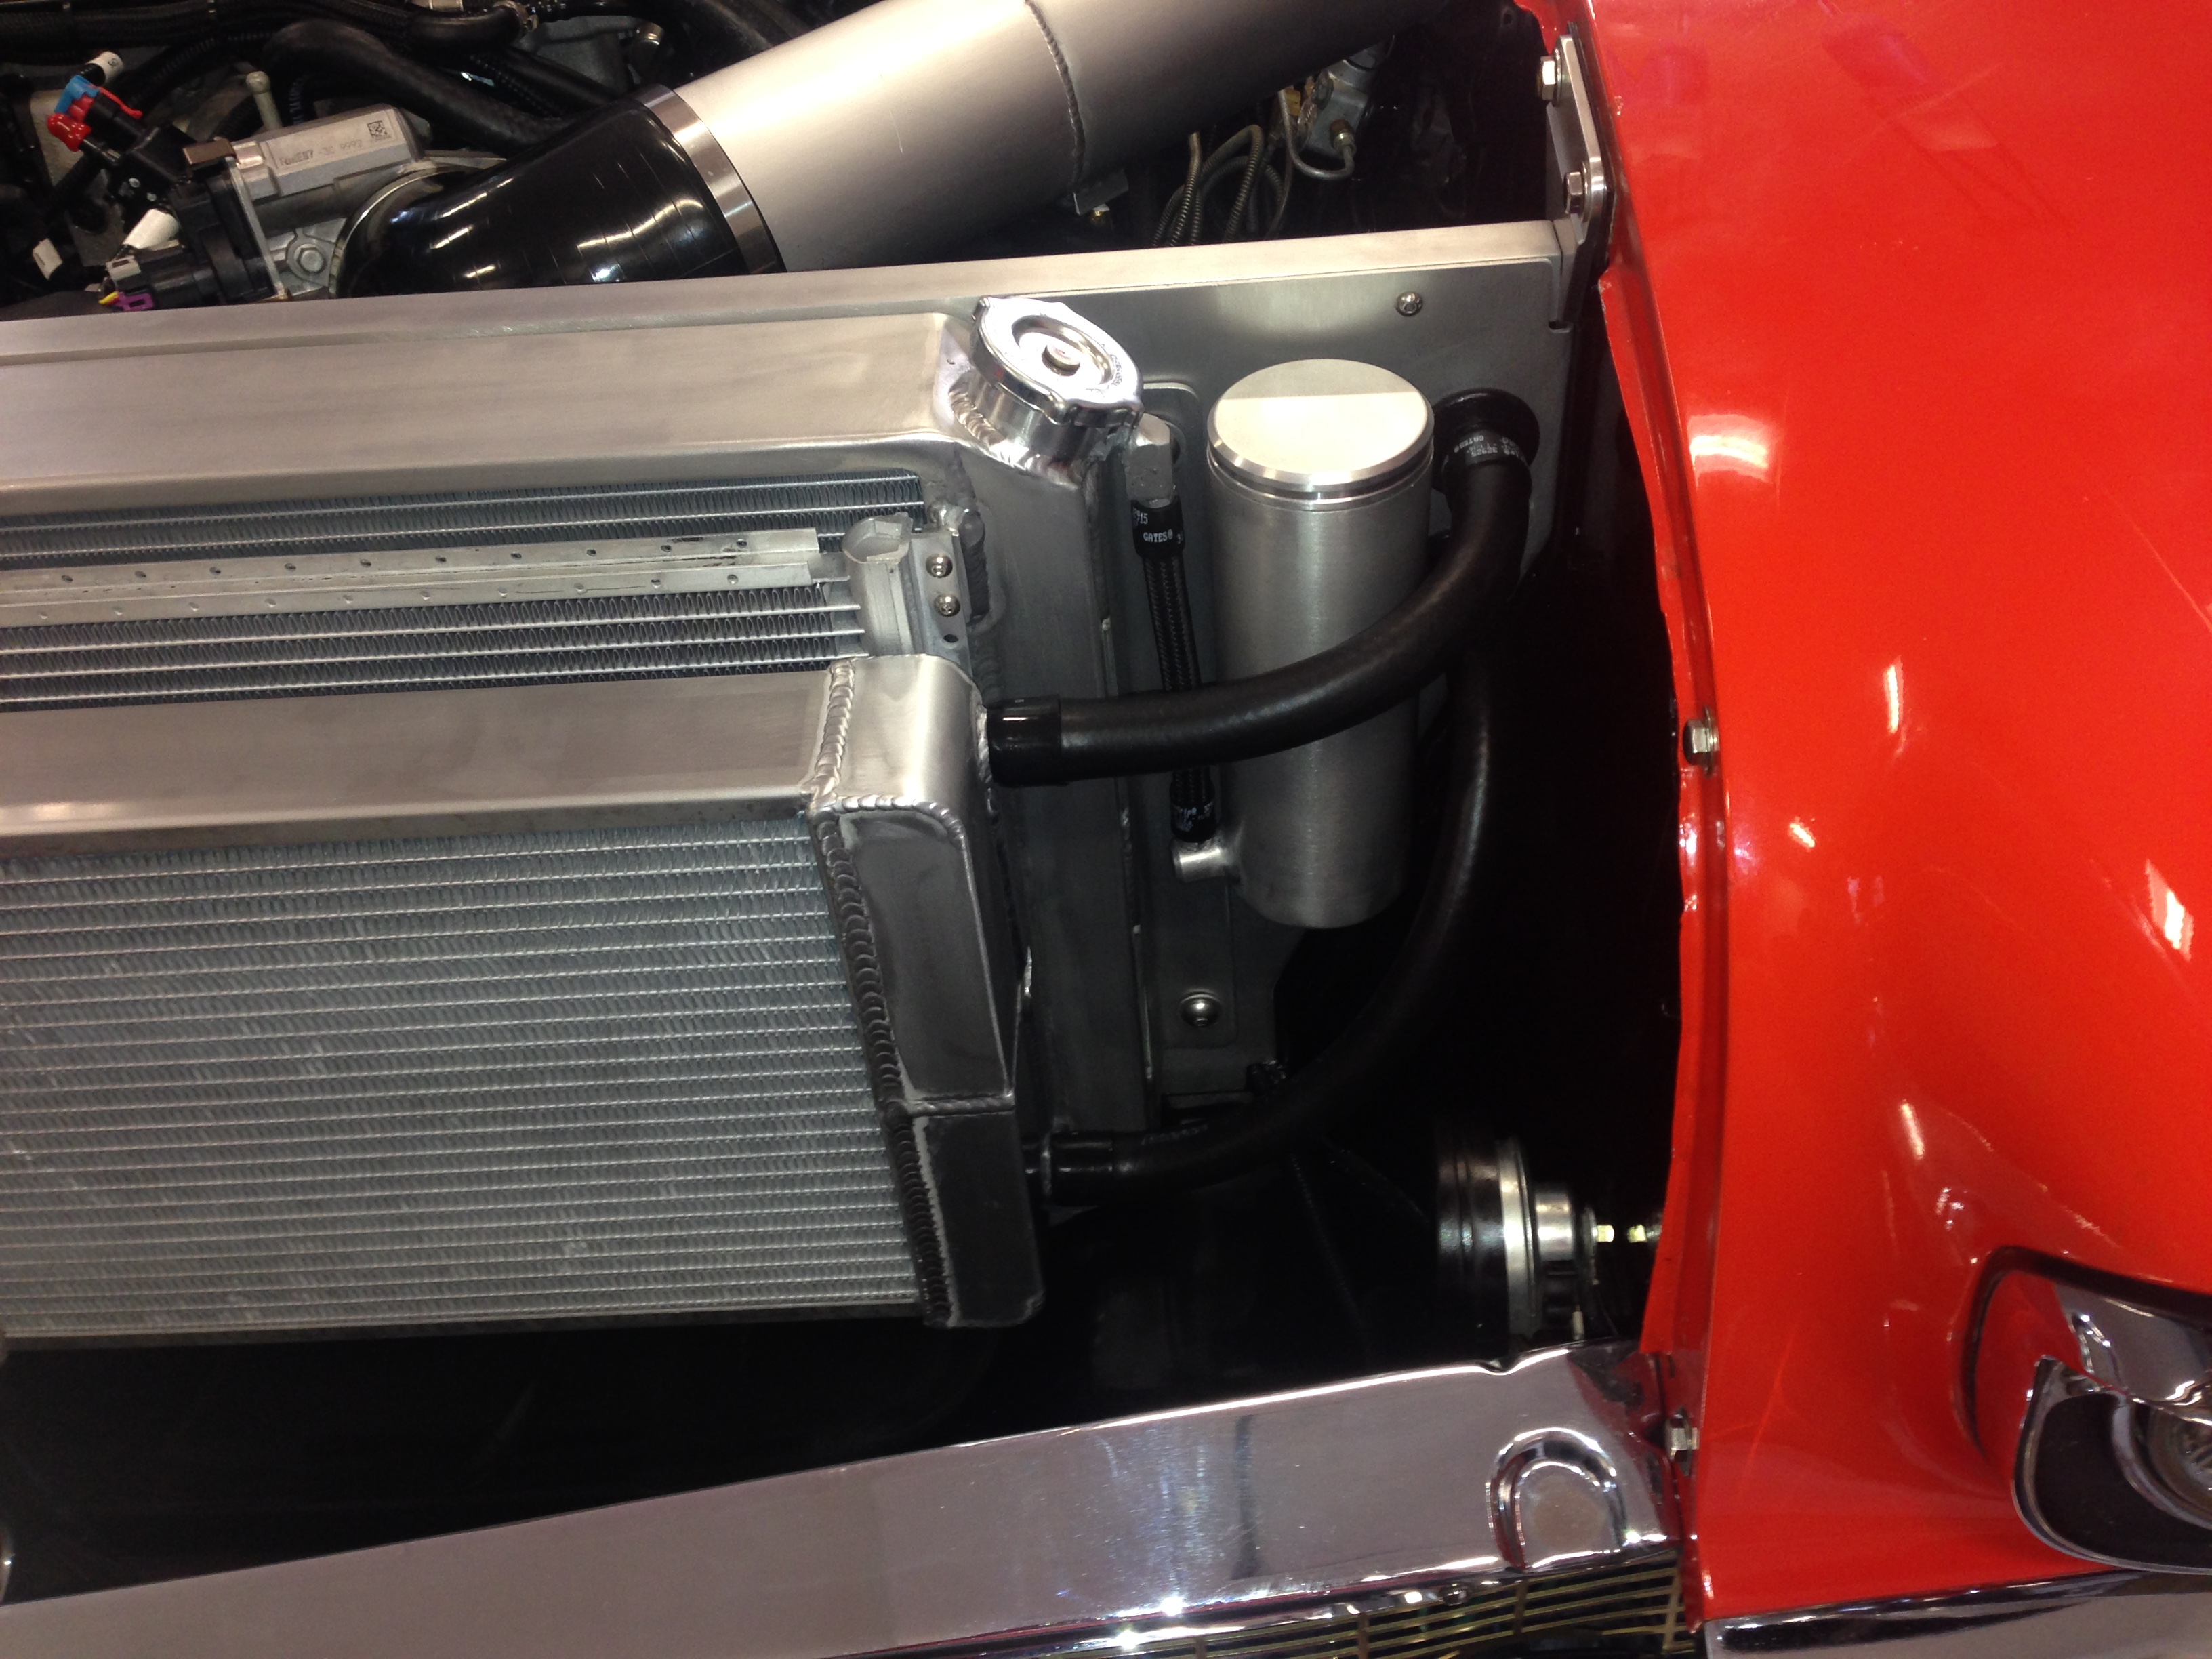
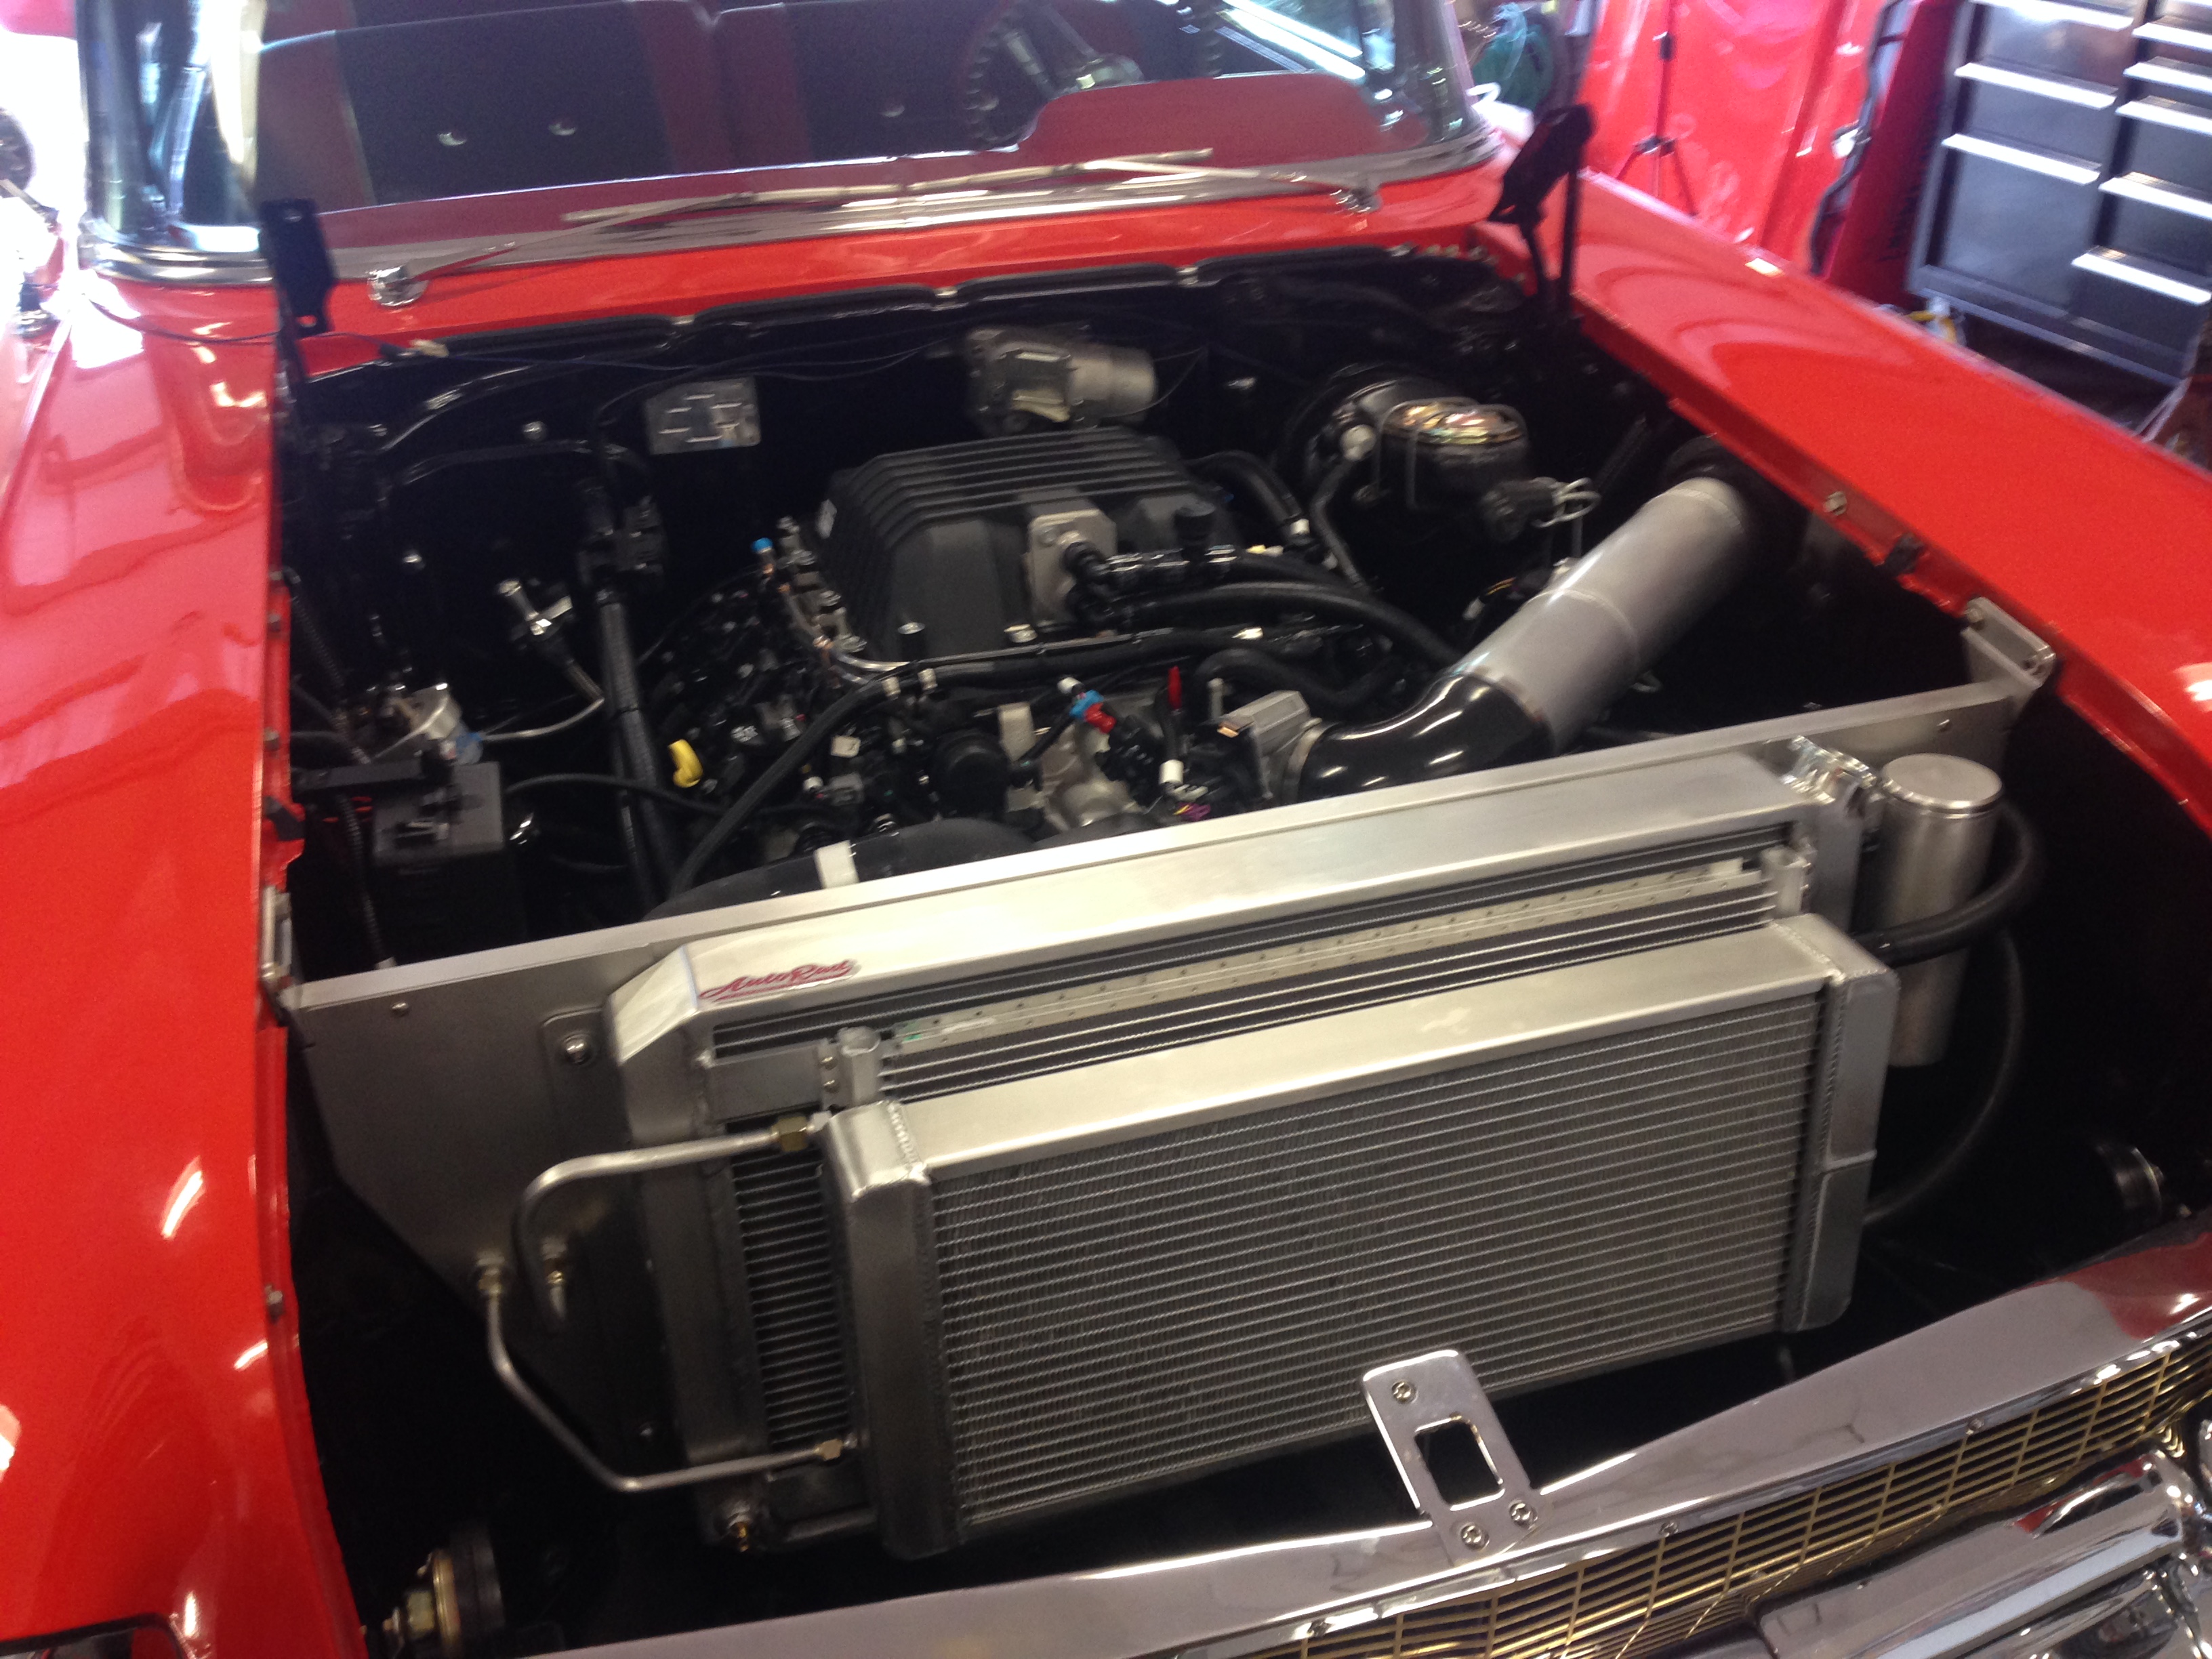
Got all the radiator hoses installed and sealed........also got all the intercooler lines run and sealed up then filled both the Radiator and Intercooler........Almost time to put the Hood back on........so.....I have to make a mount for the throttle pedal and get the fuel system mod's completed and the exhaust system made.......But...other than that.....Engine compartment sure filled up....LOL
Thread Starter
TECH Fanatic
Joined: Jul 2008
Posts: 1,570
Likes: 173
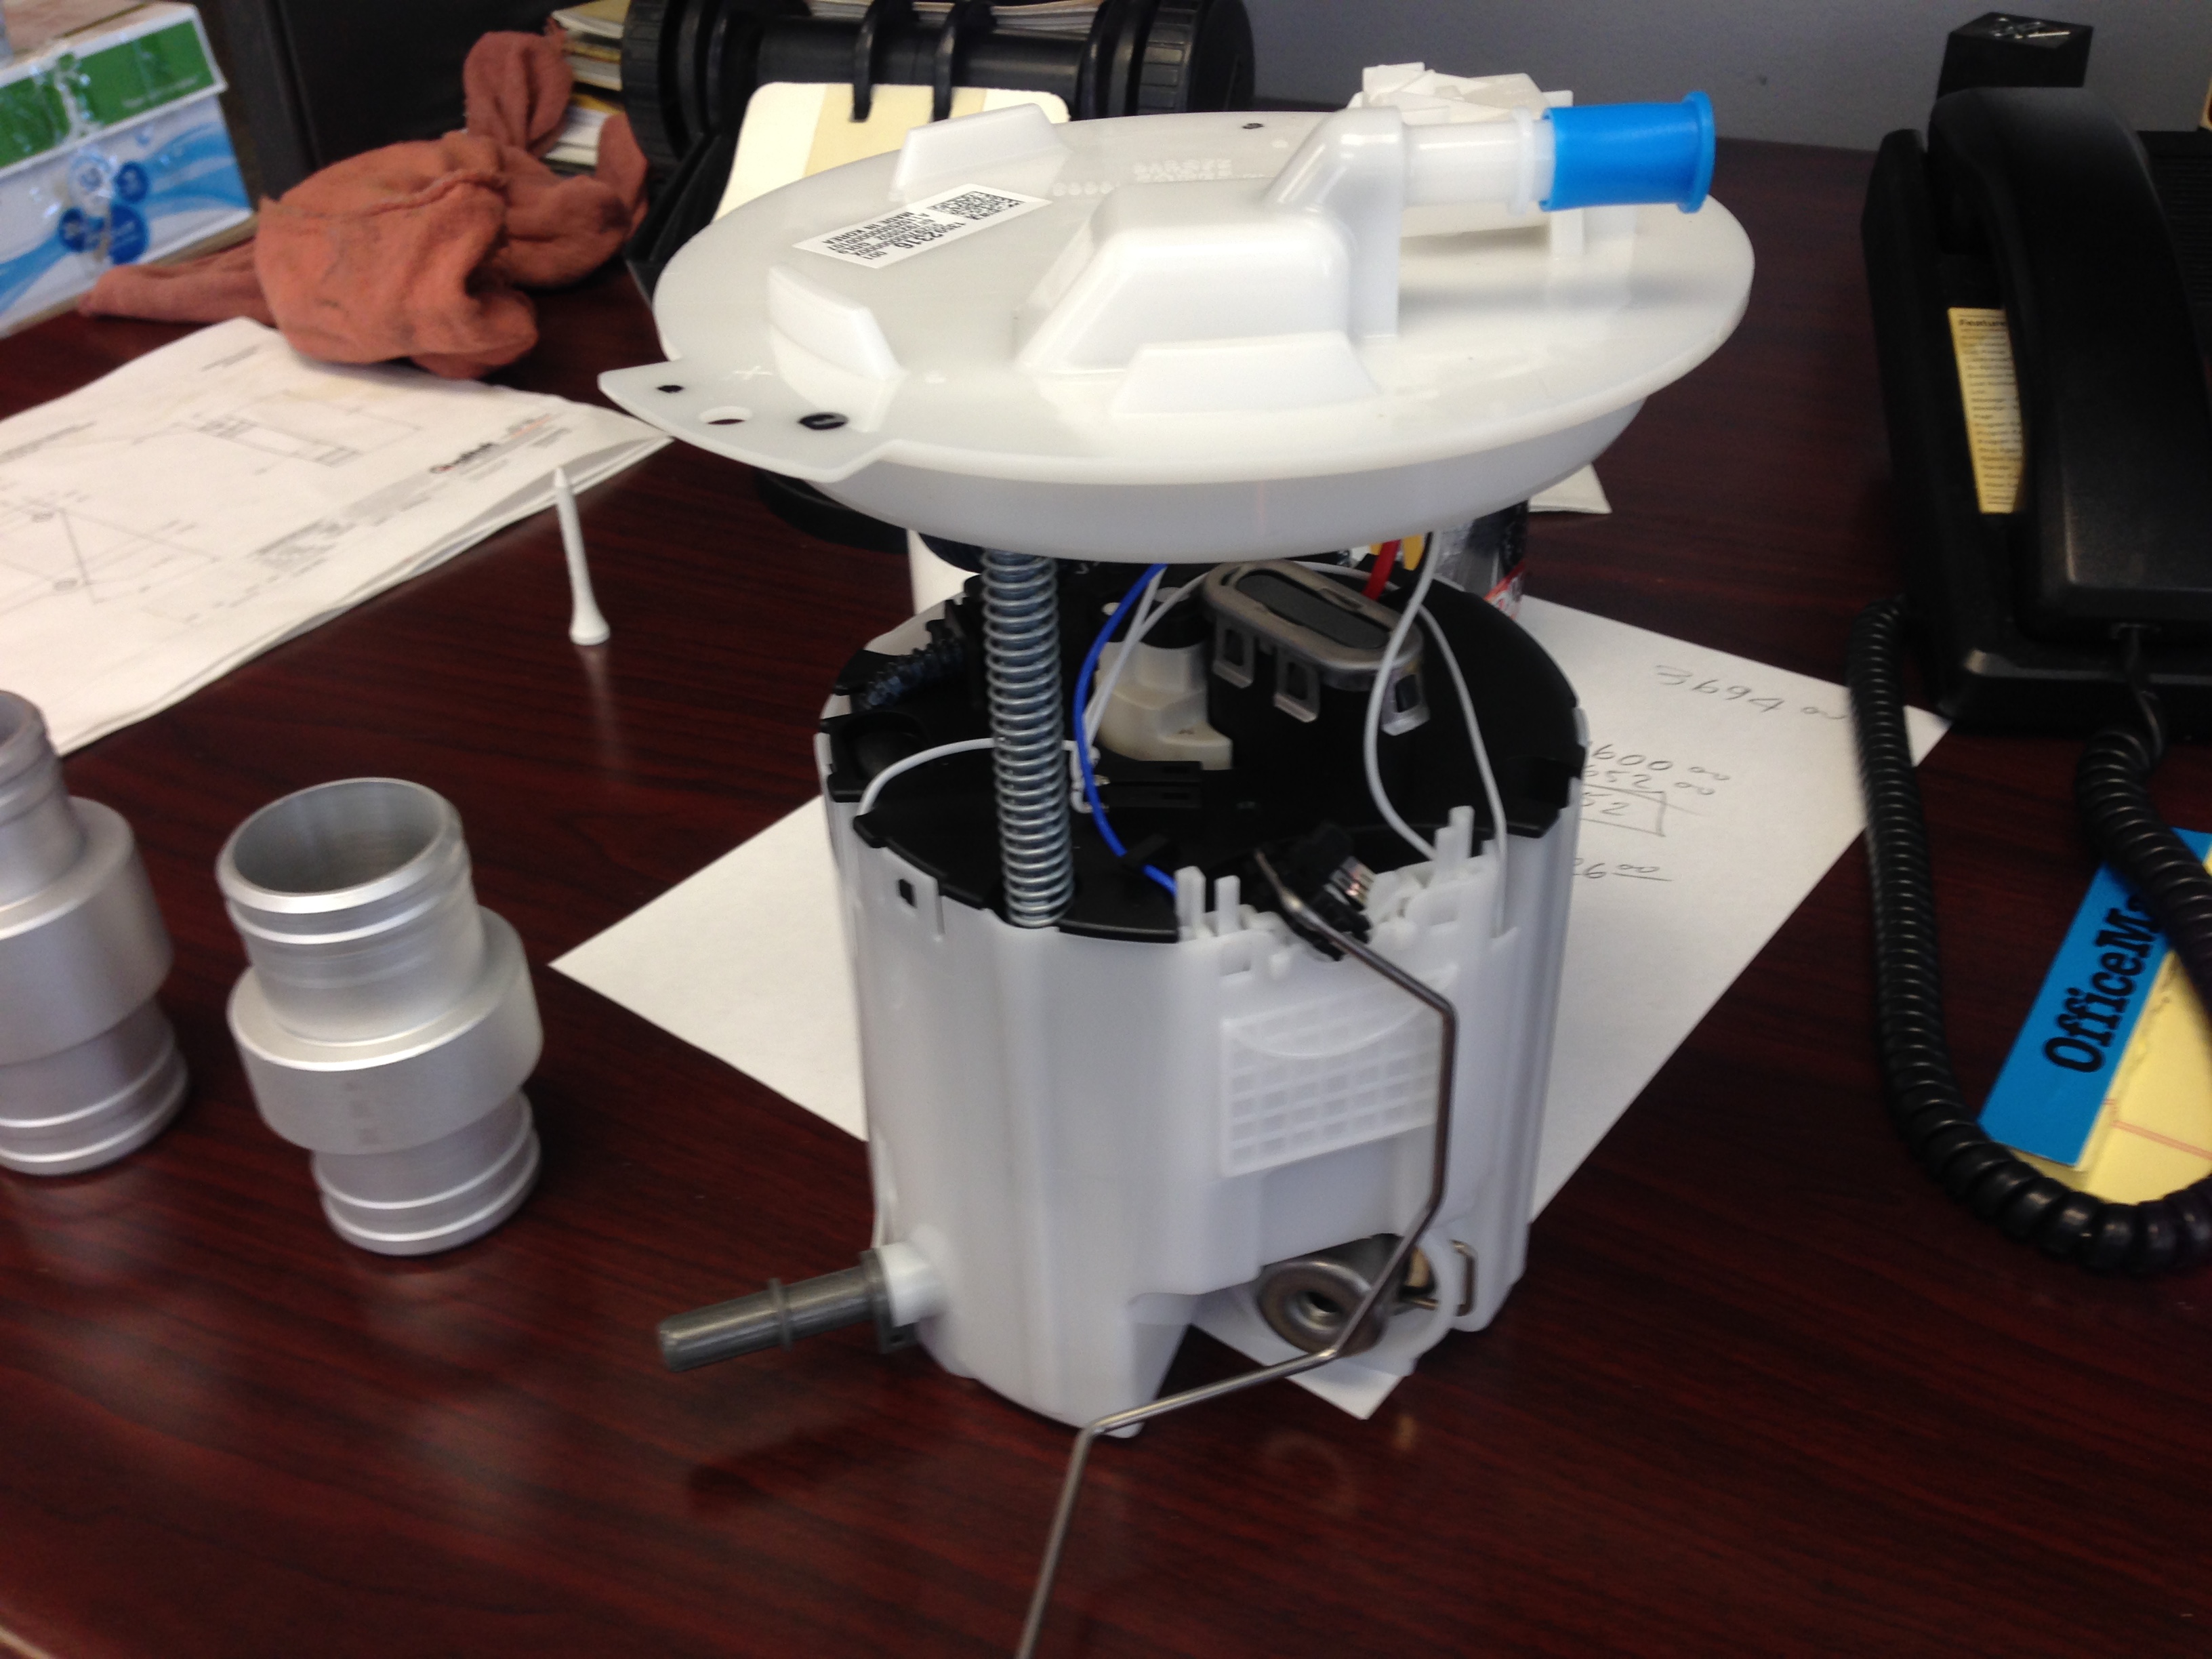
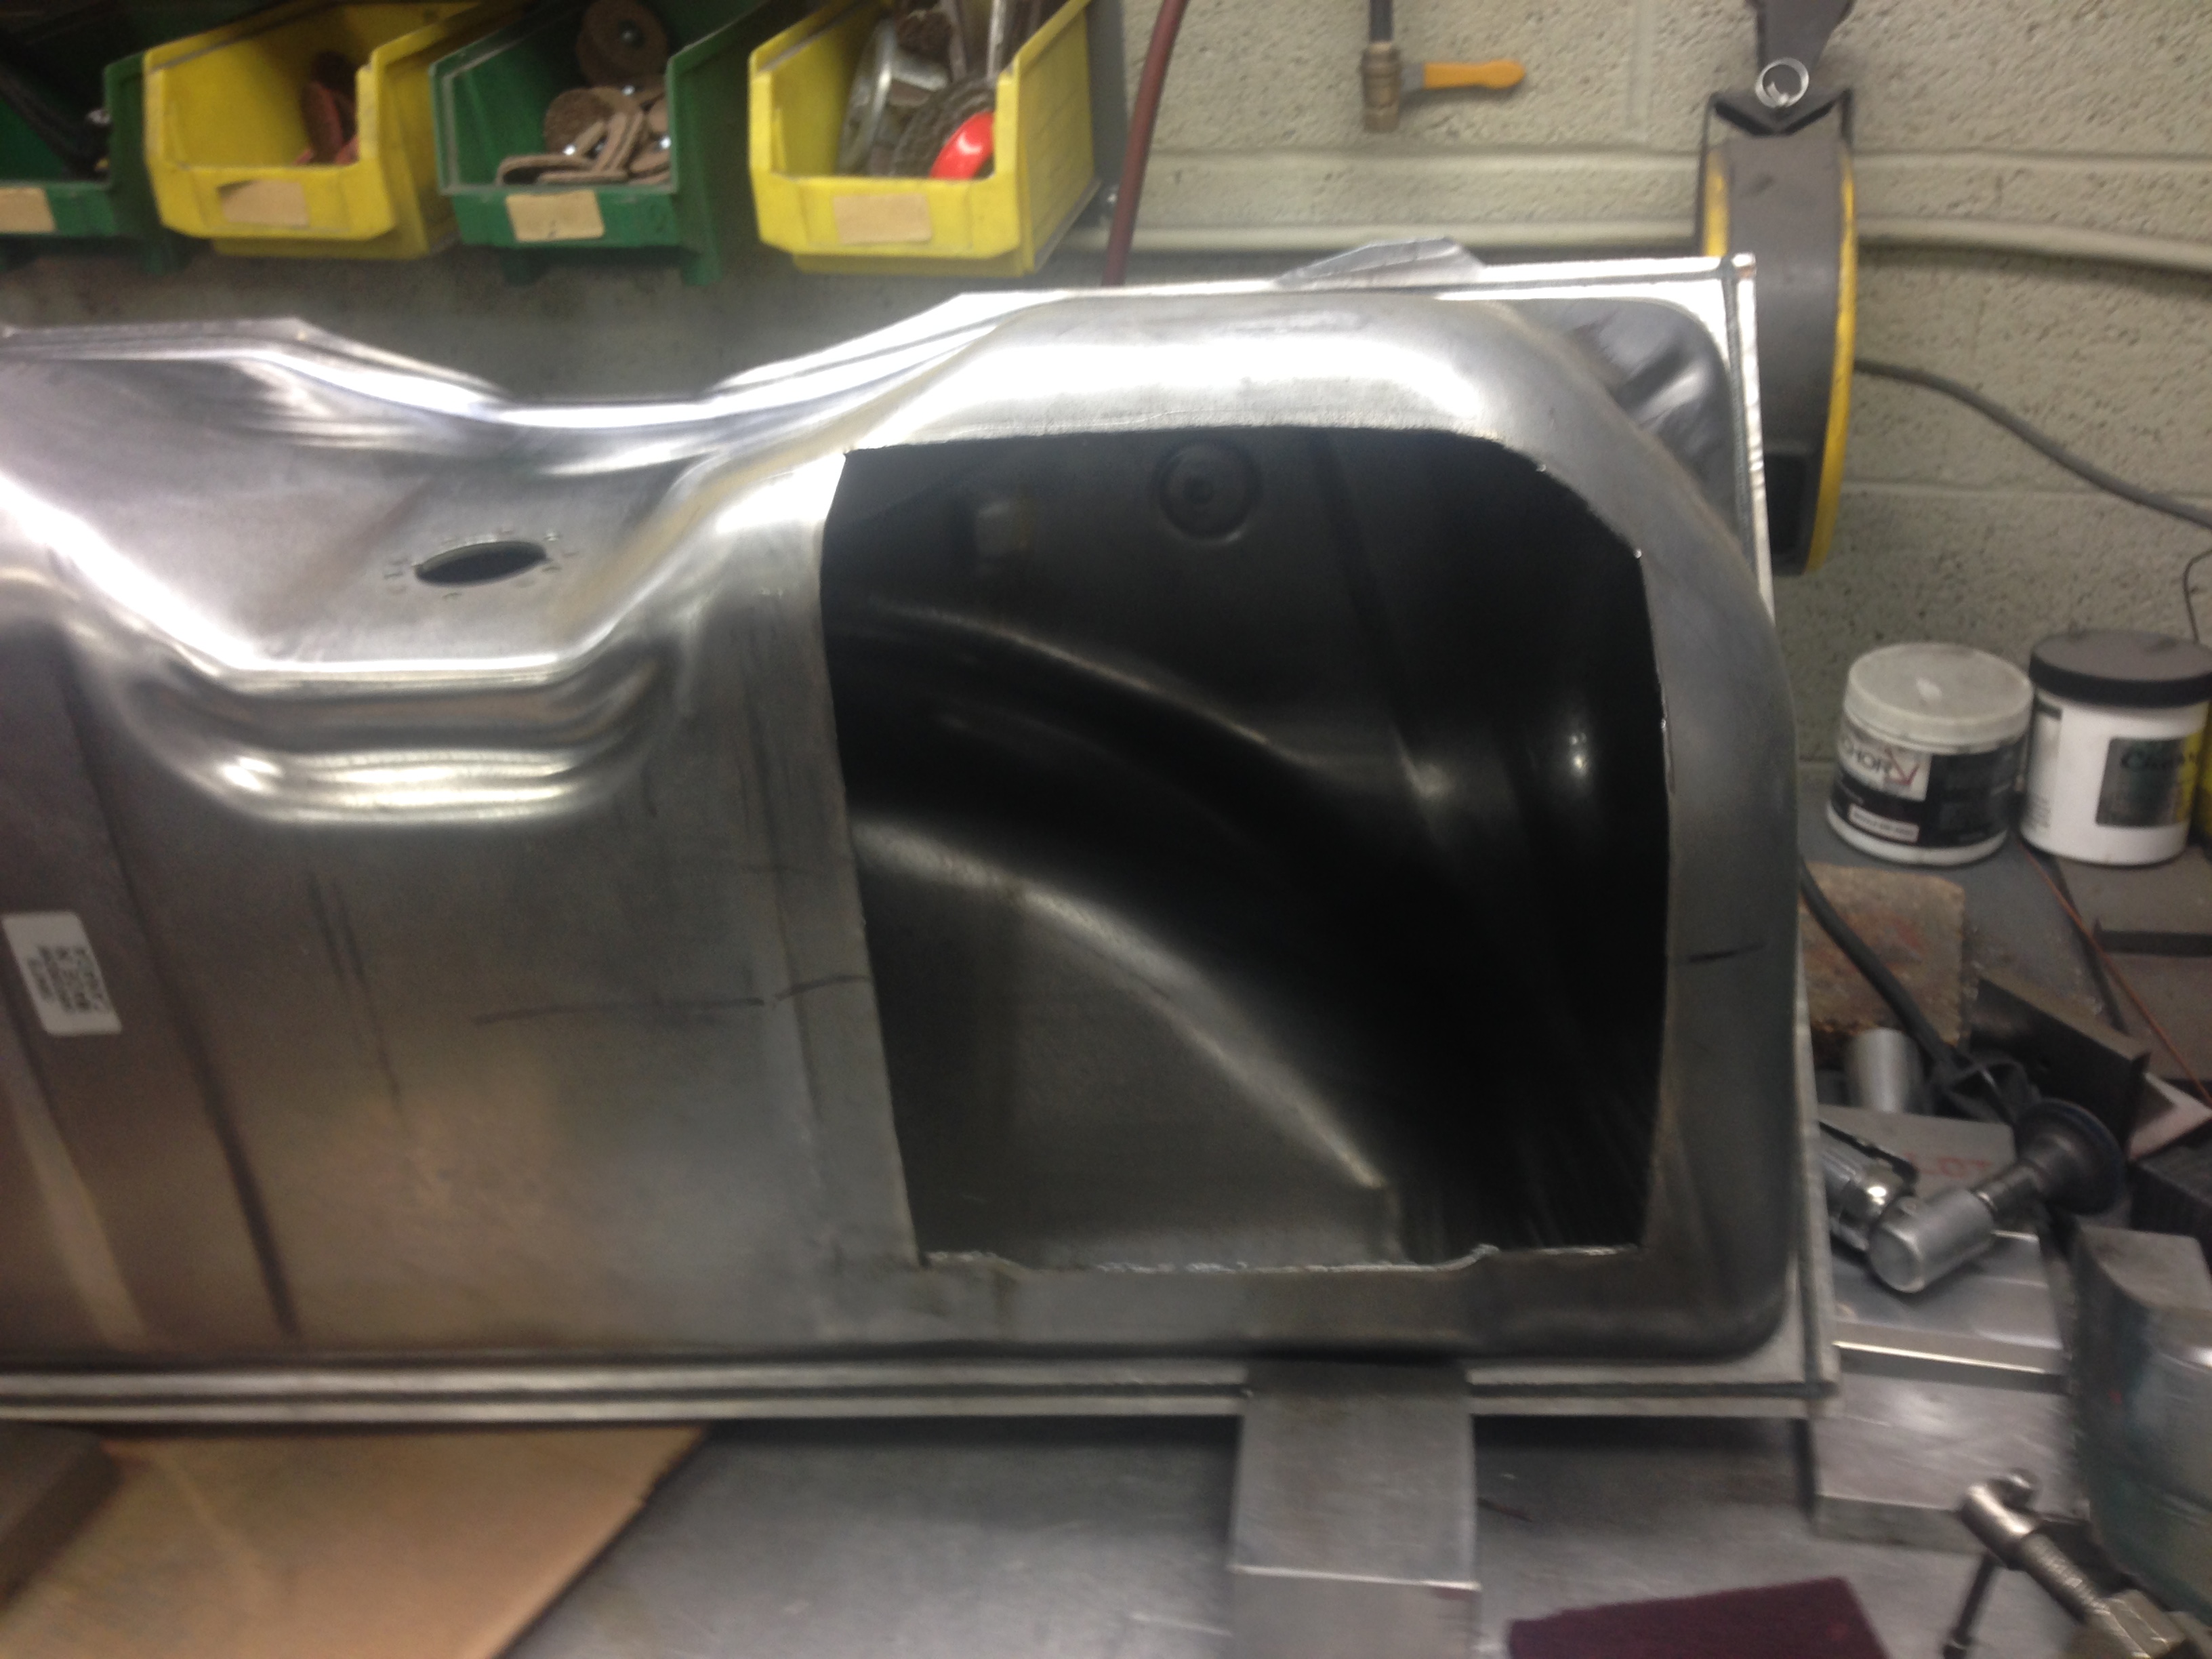
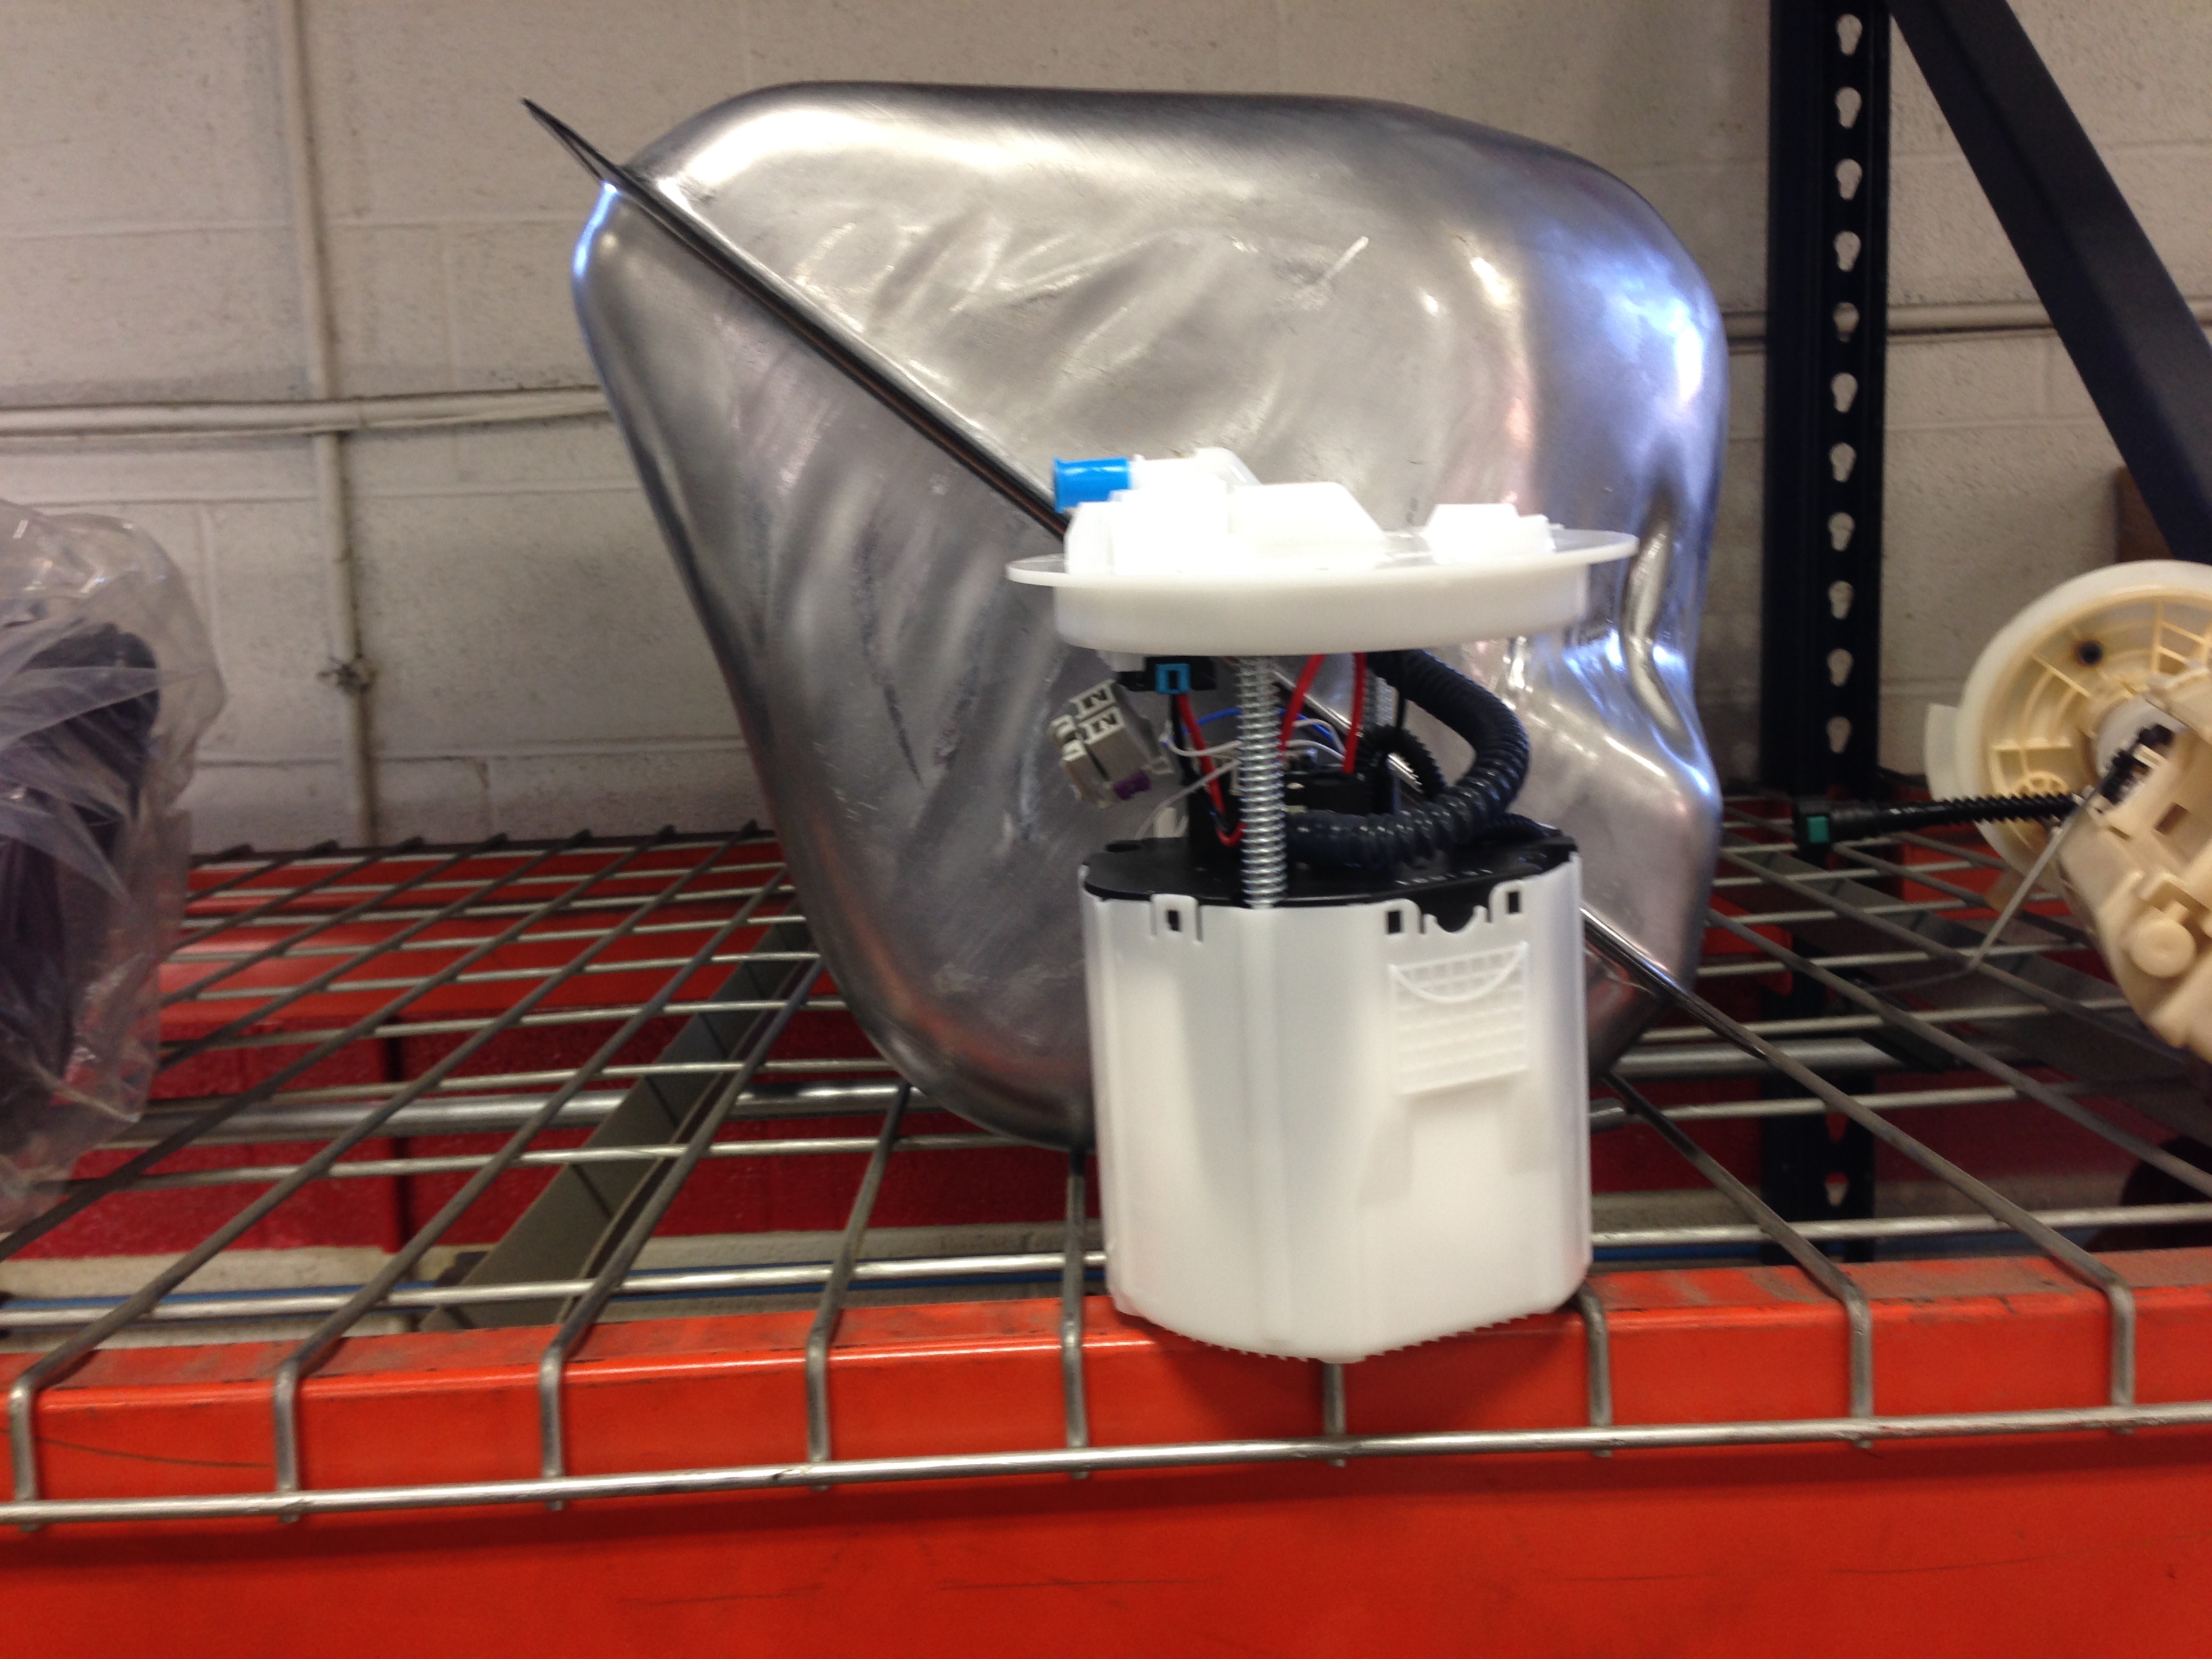
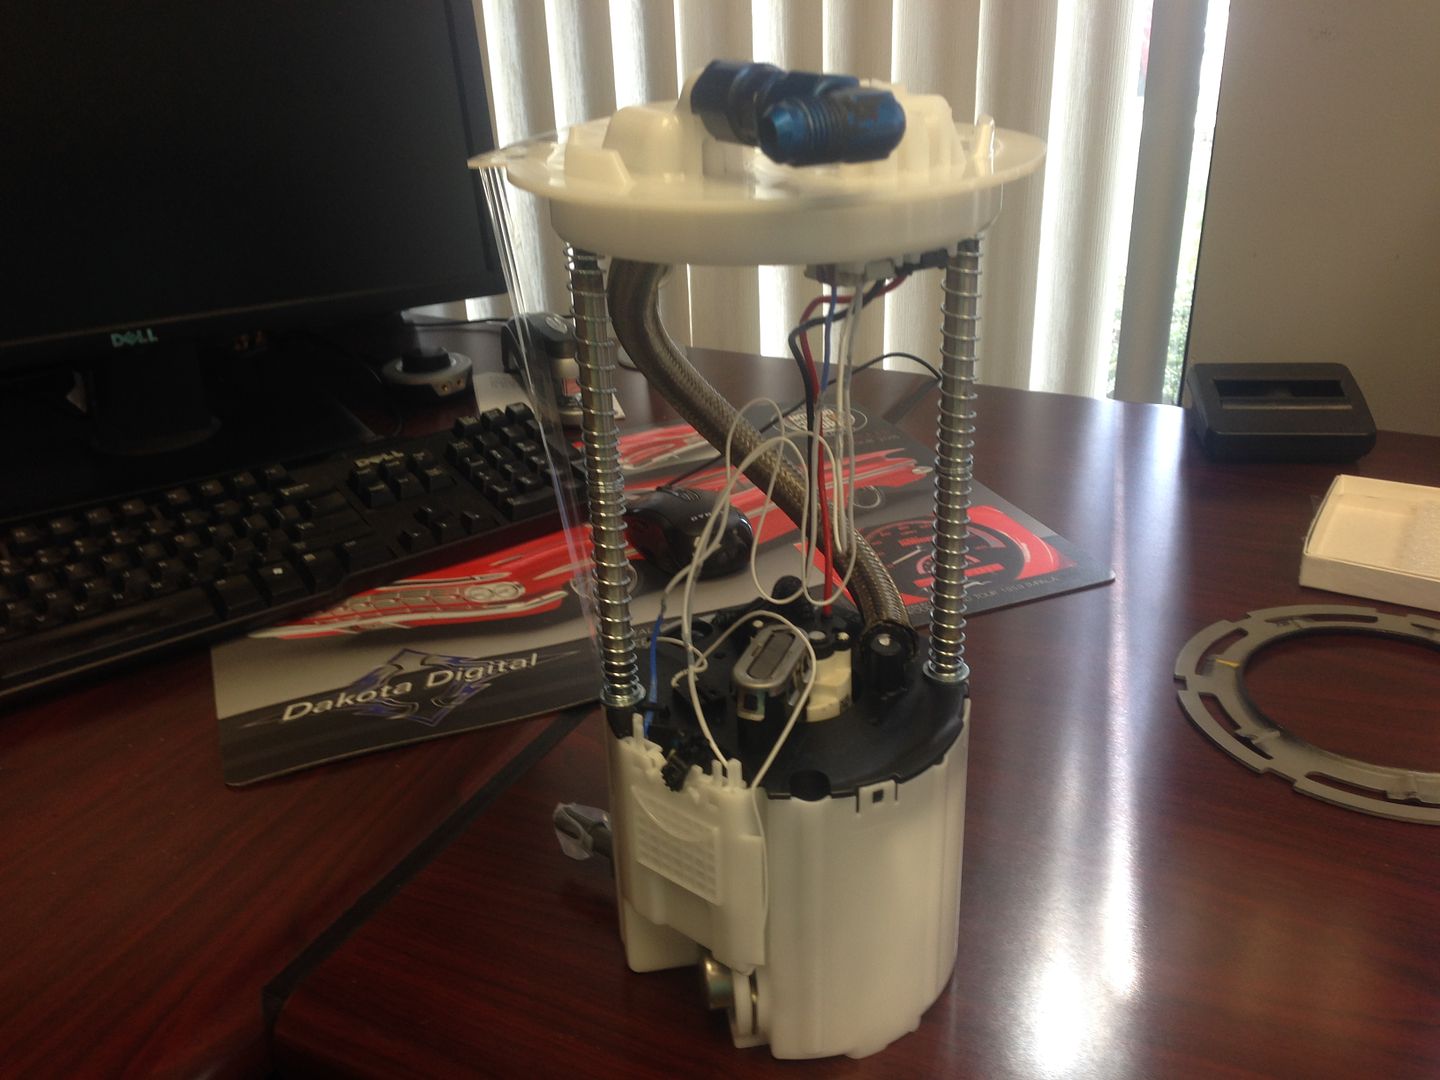
Well........The last big hurdle is the Fuel system......Two issues here.......#1....The Nomad gas tank is nothing like a stock 57 tank......with the spare tire well in the rear floor....there wasn't too much room left for a gas tank.....so GM pretty much form fit a tank in the space that was available......as you can see........
And a new tank I bought for Modifications.............
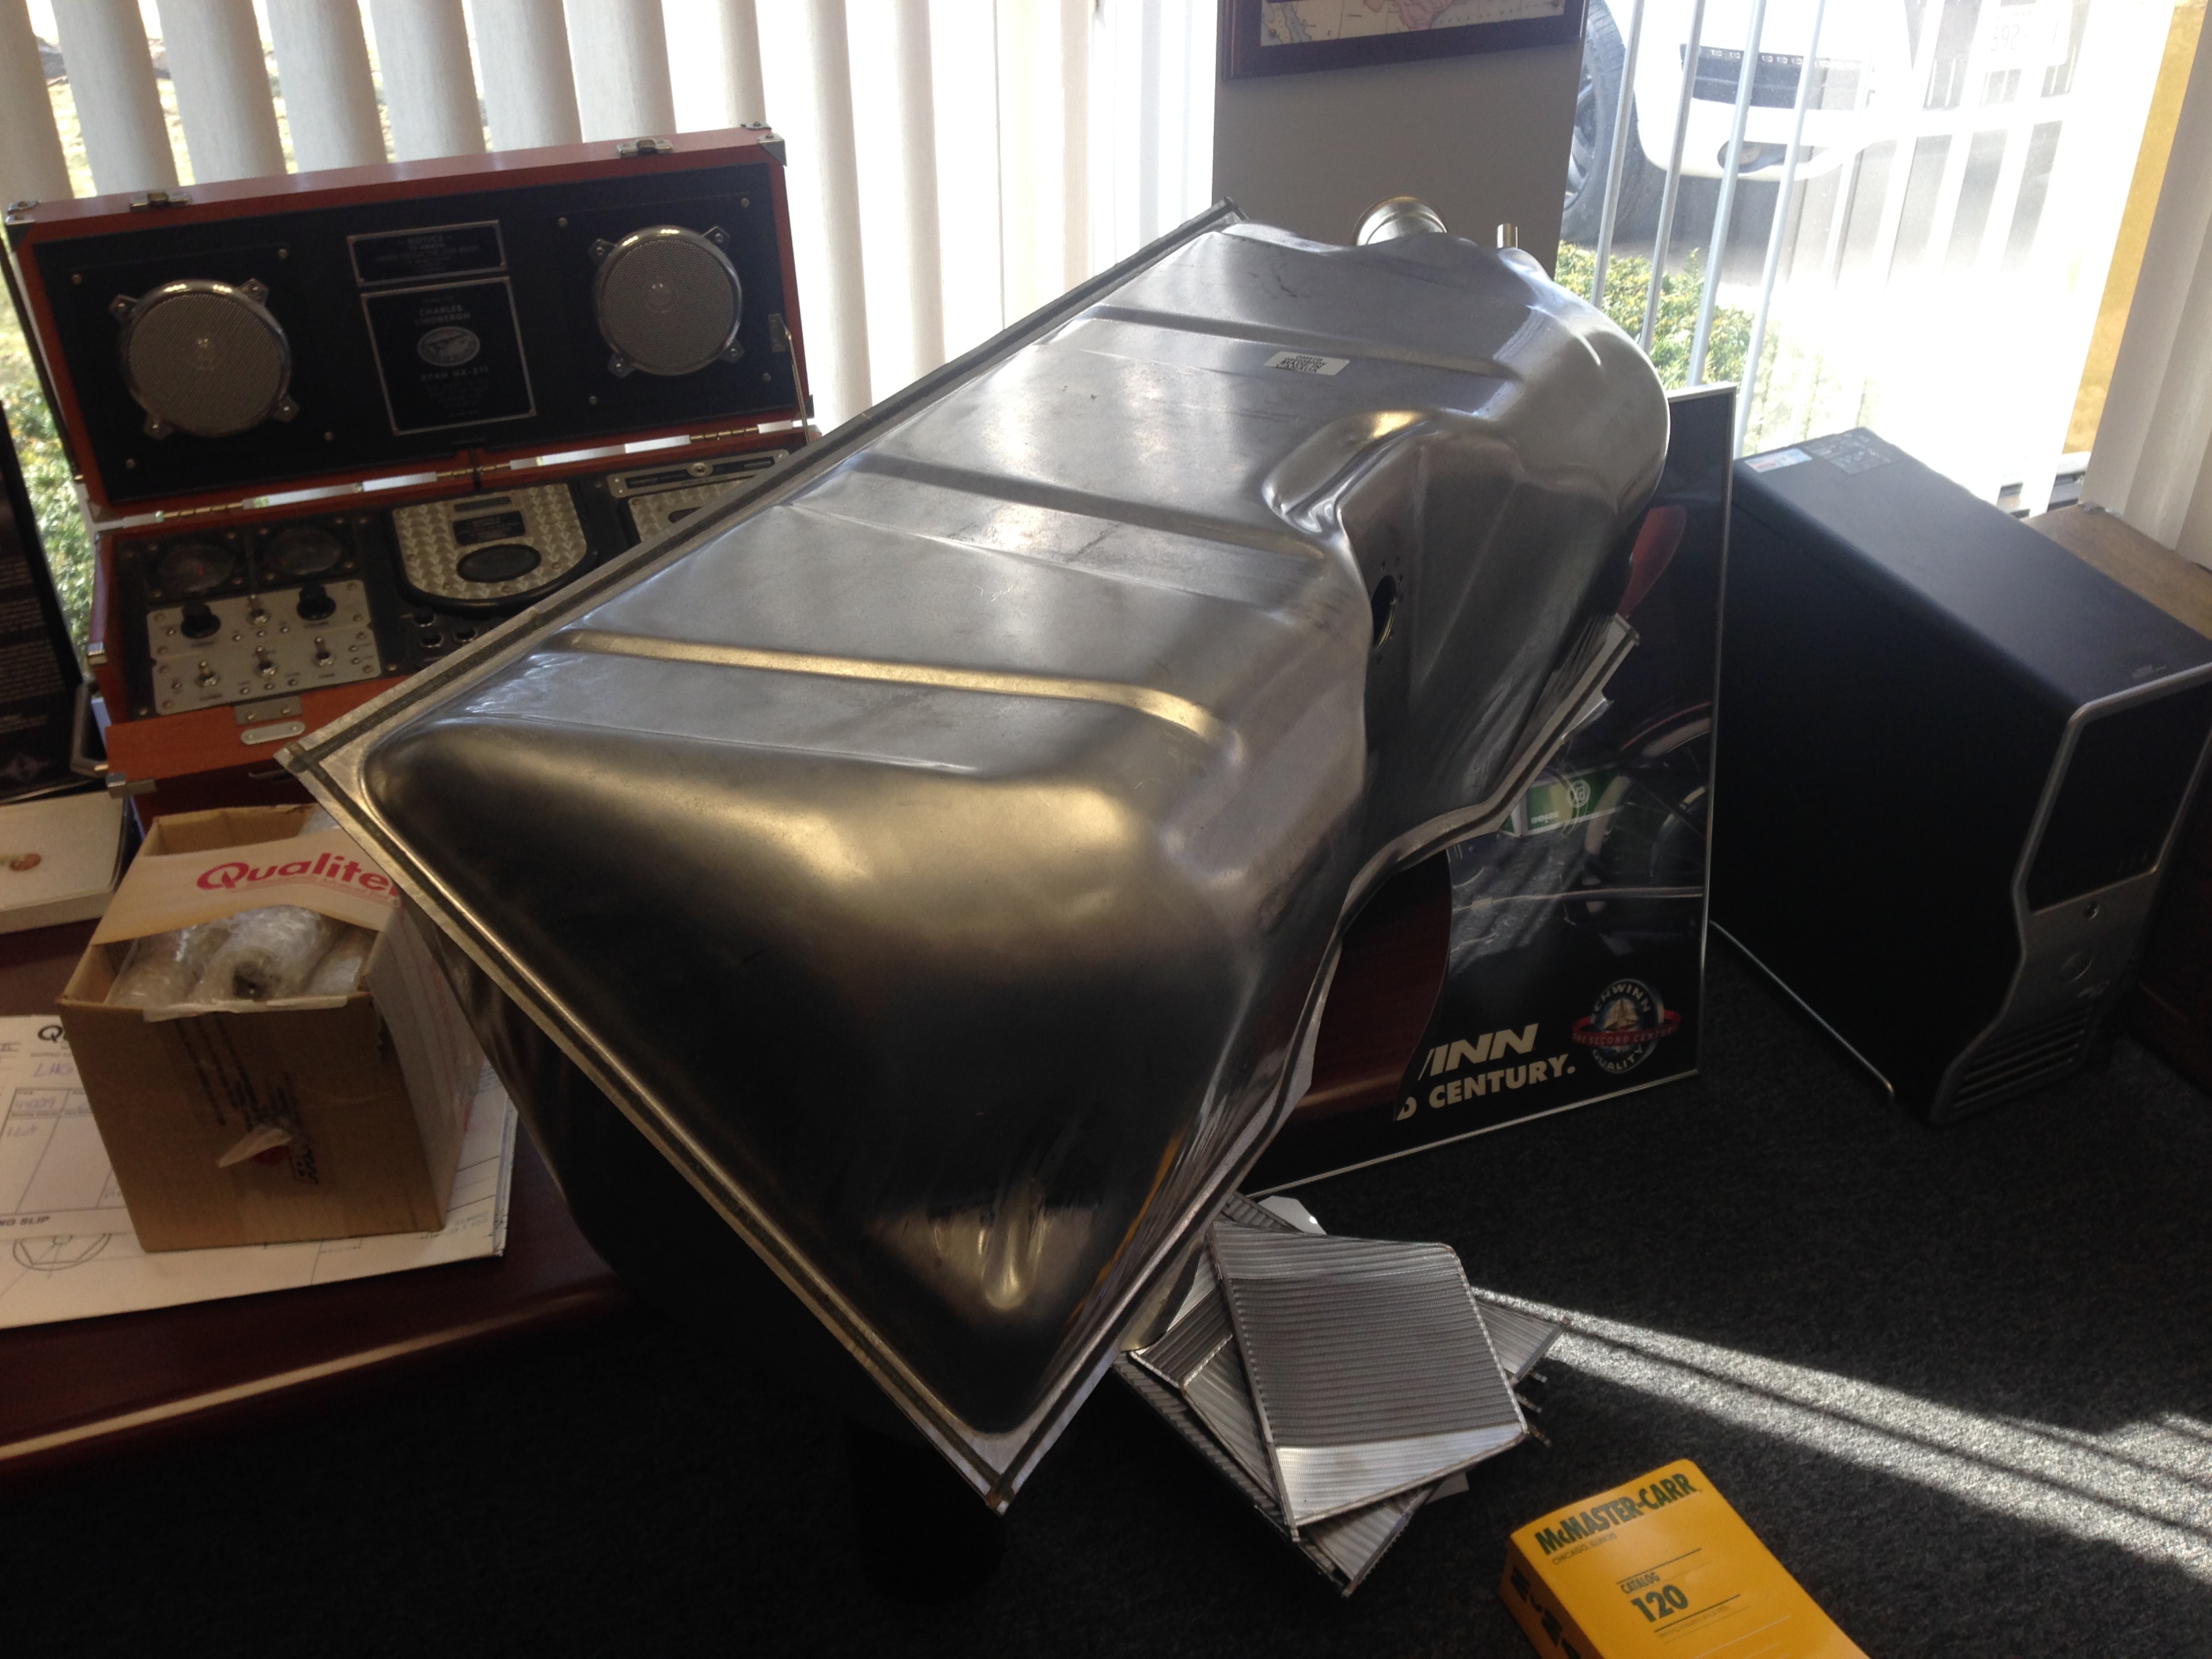
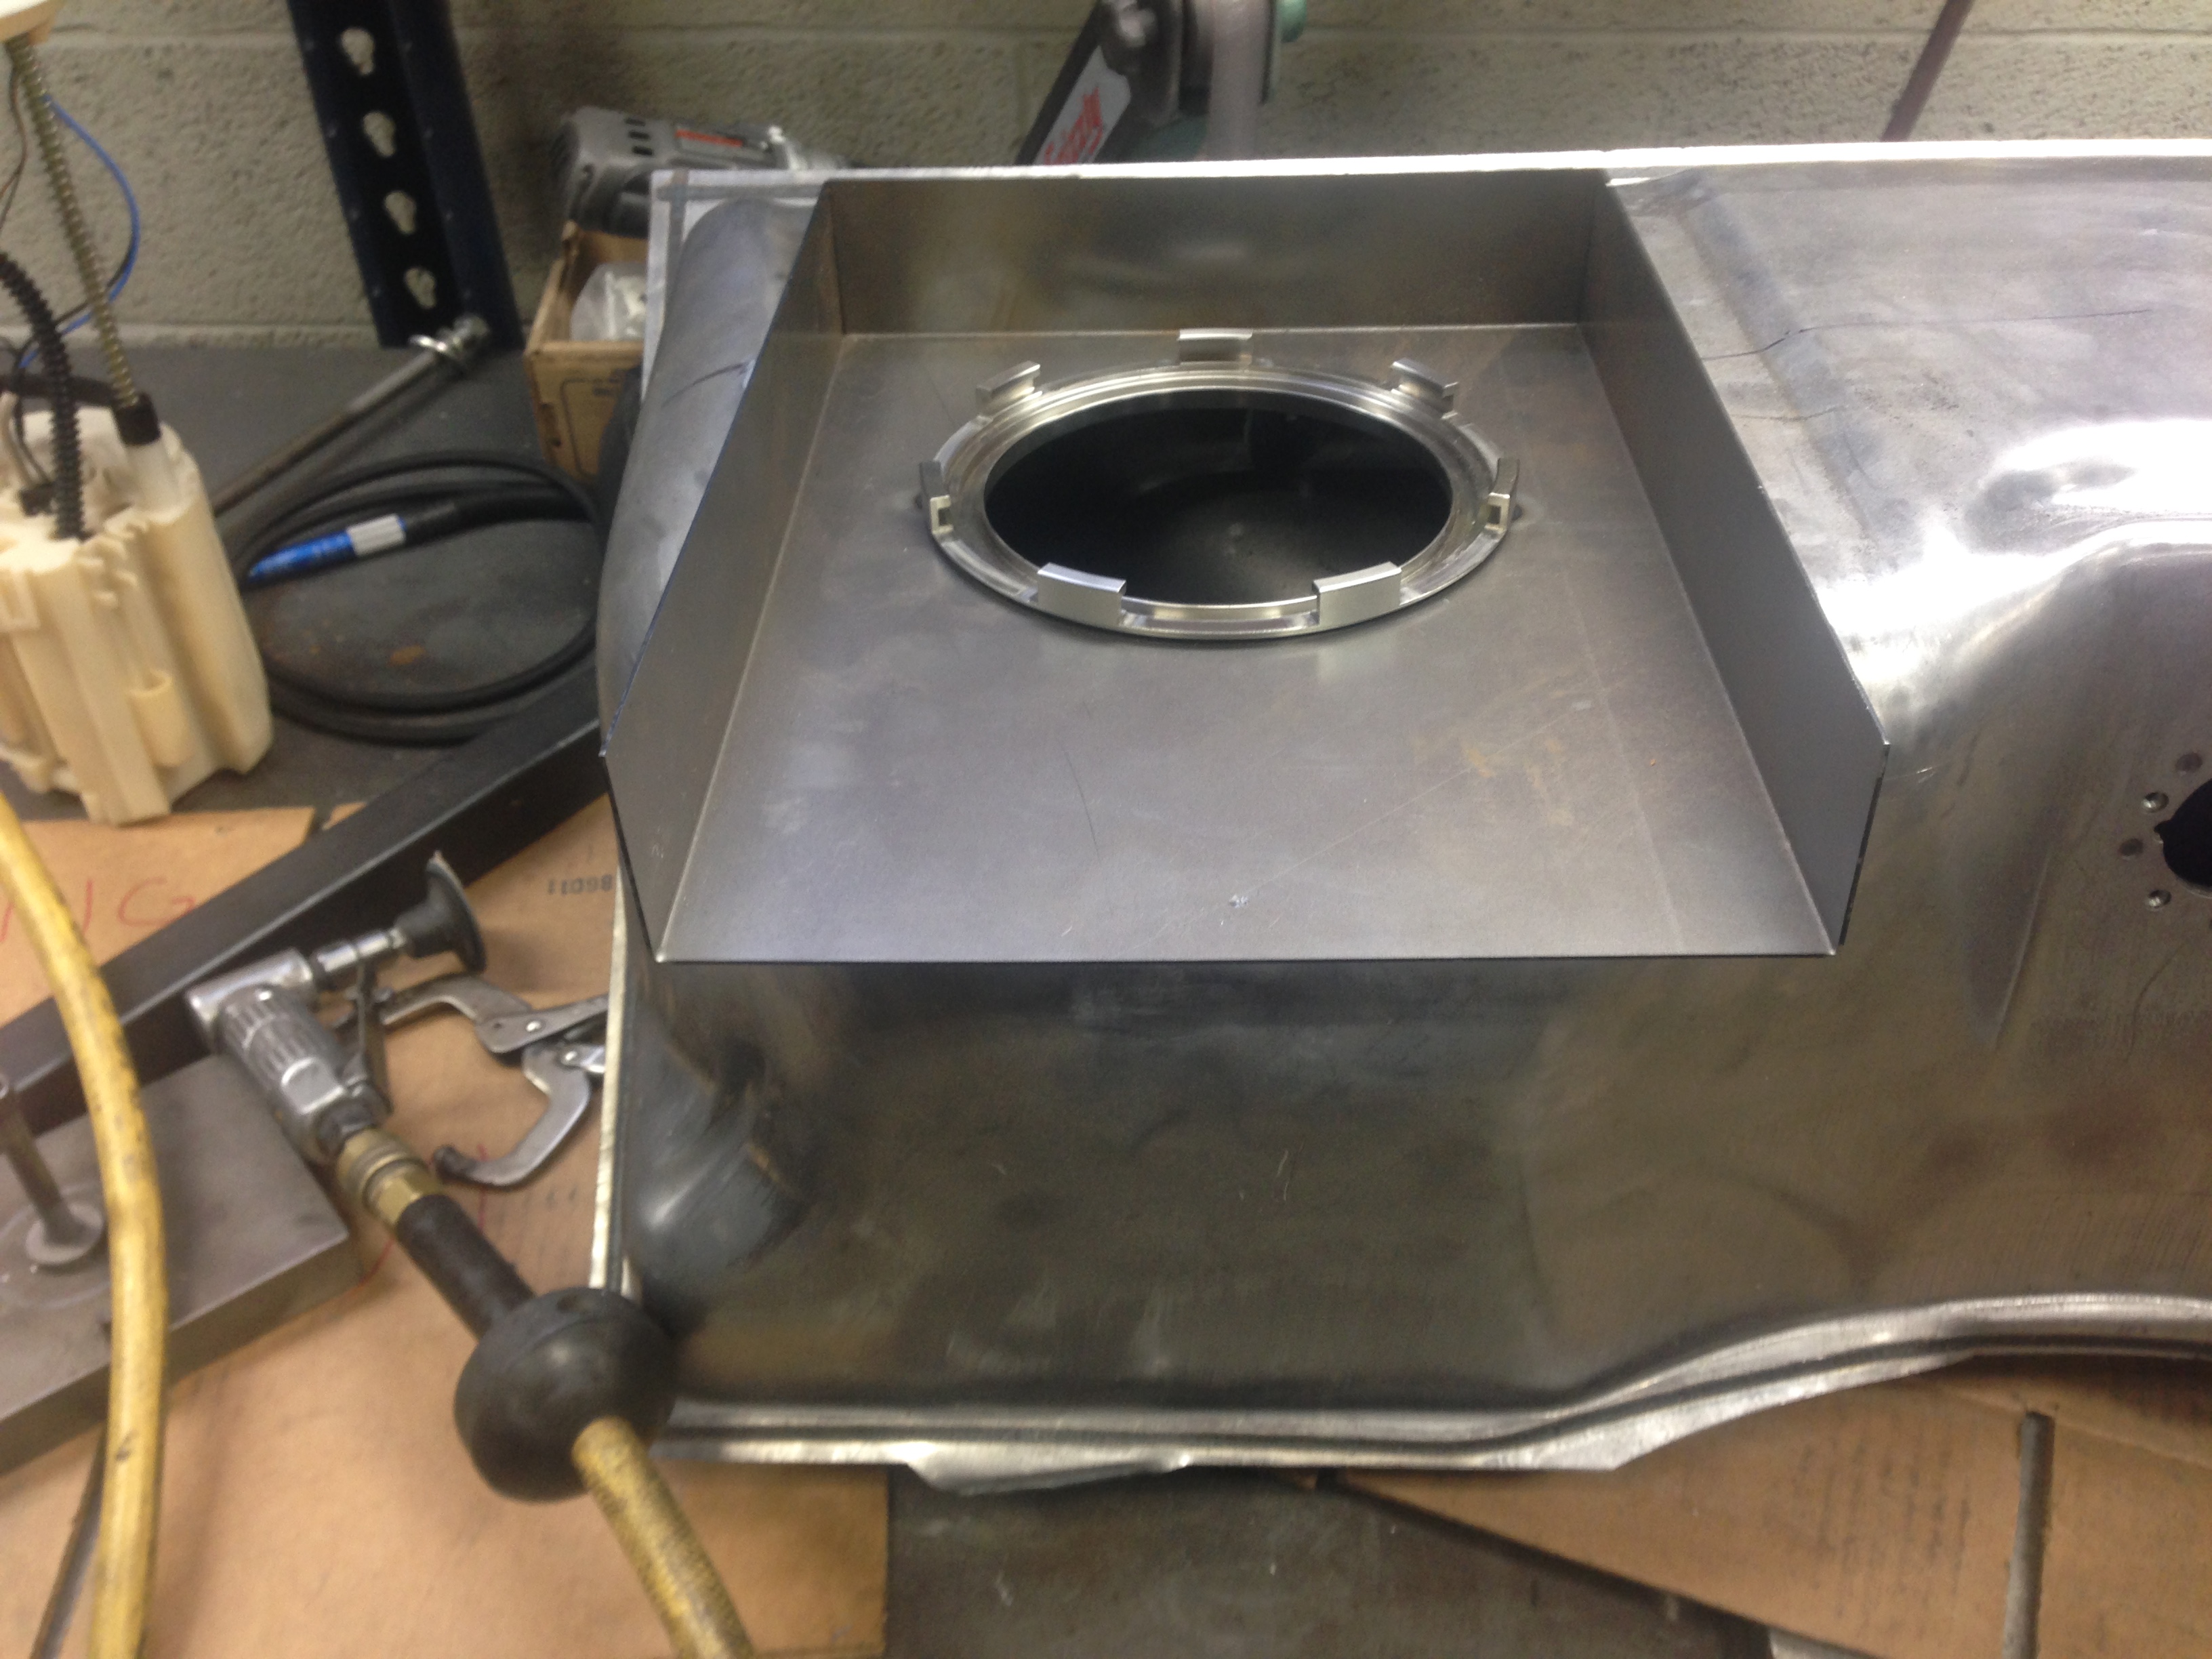
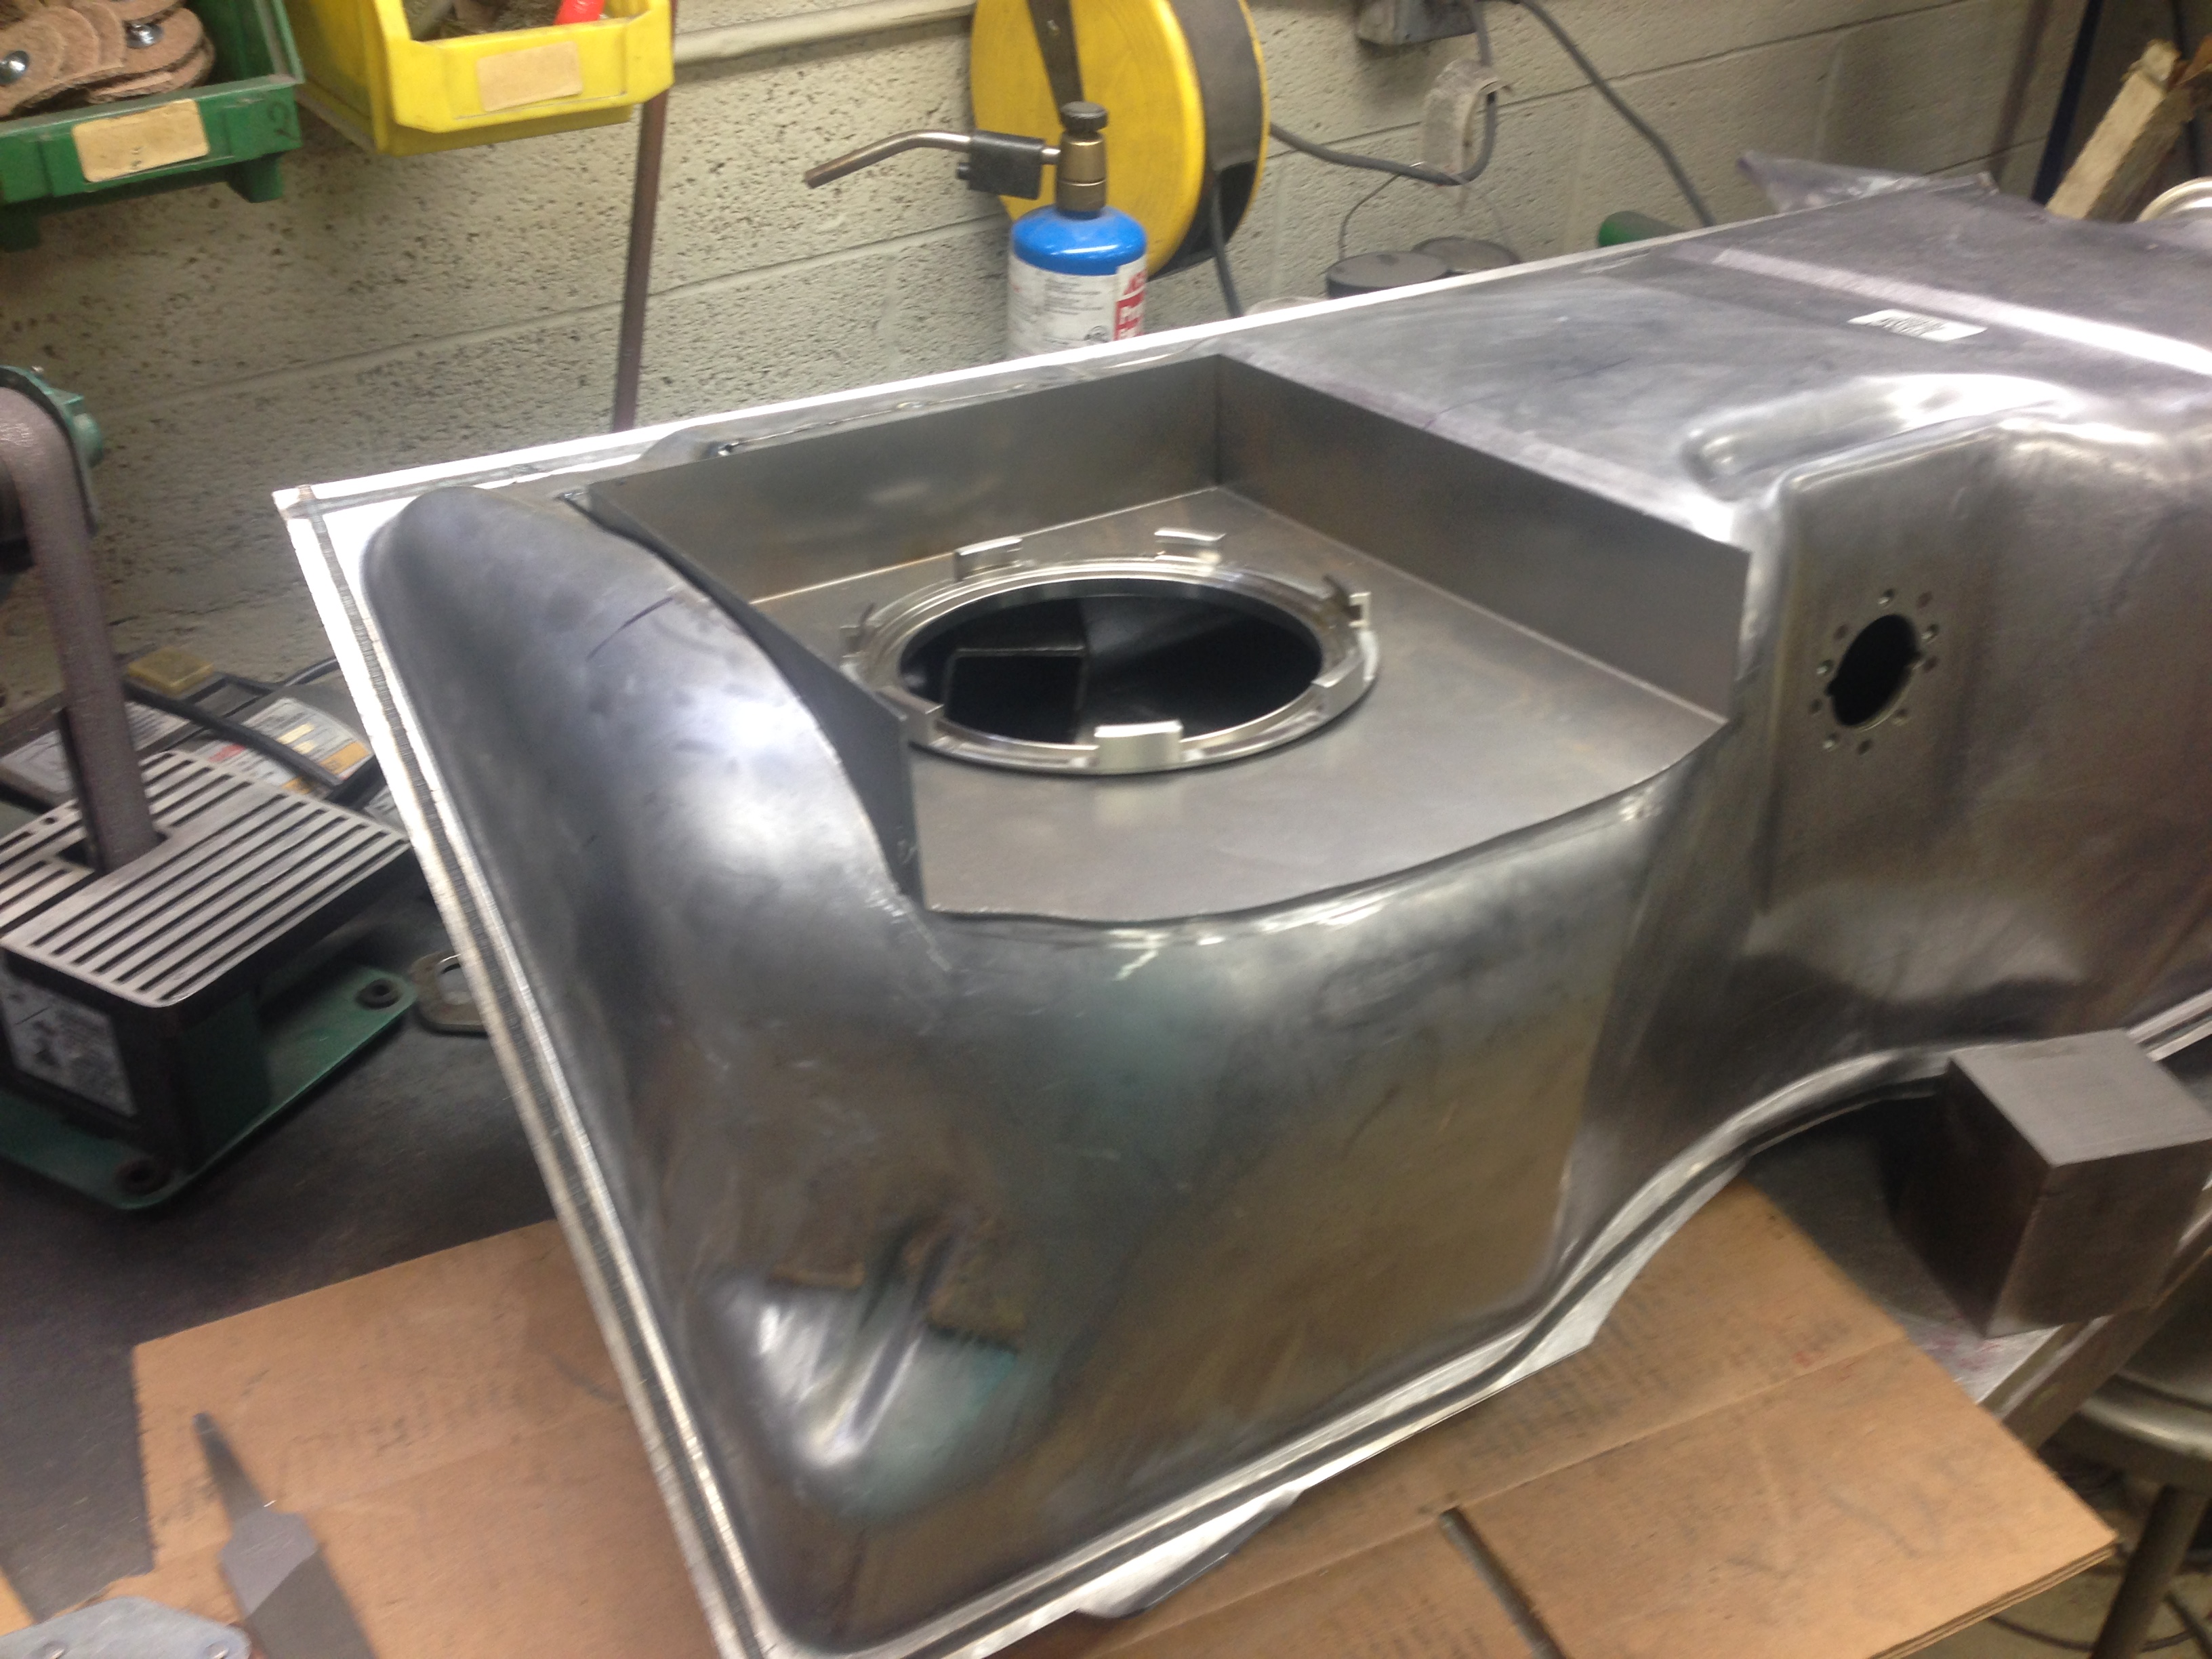
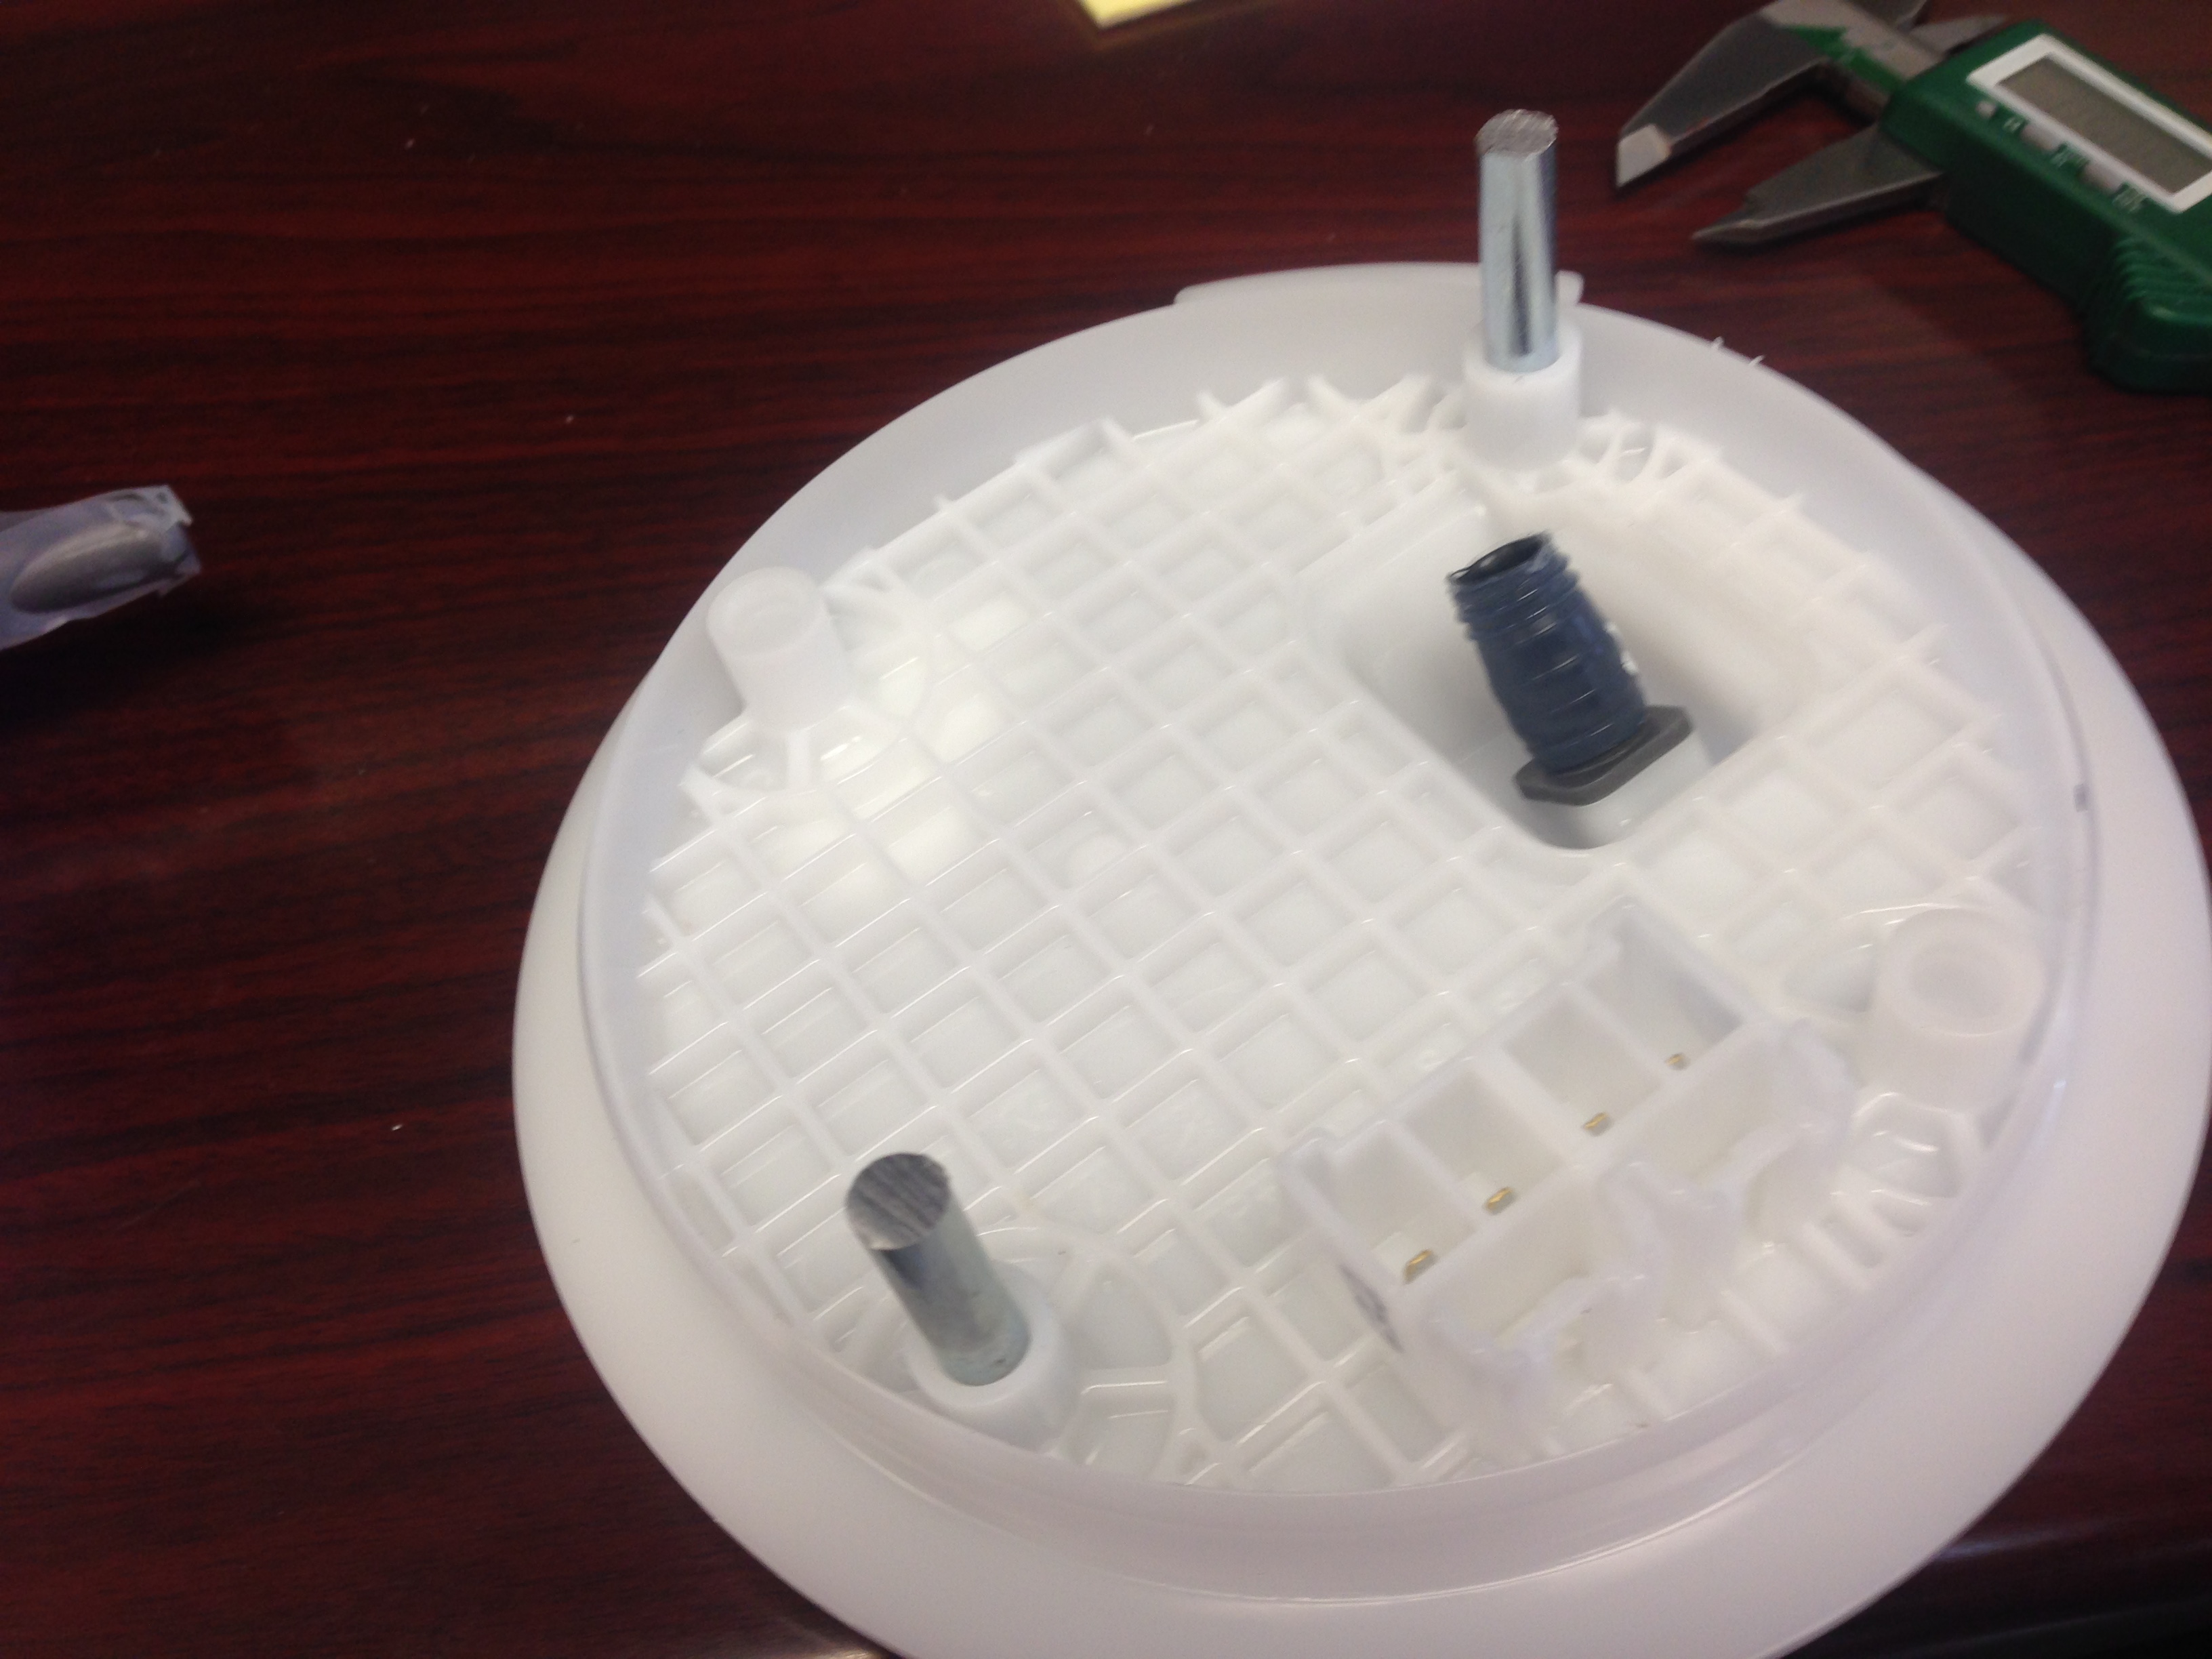
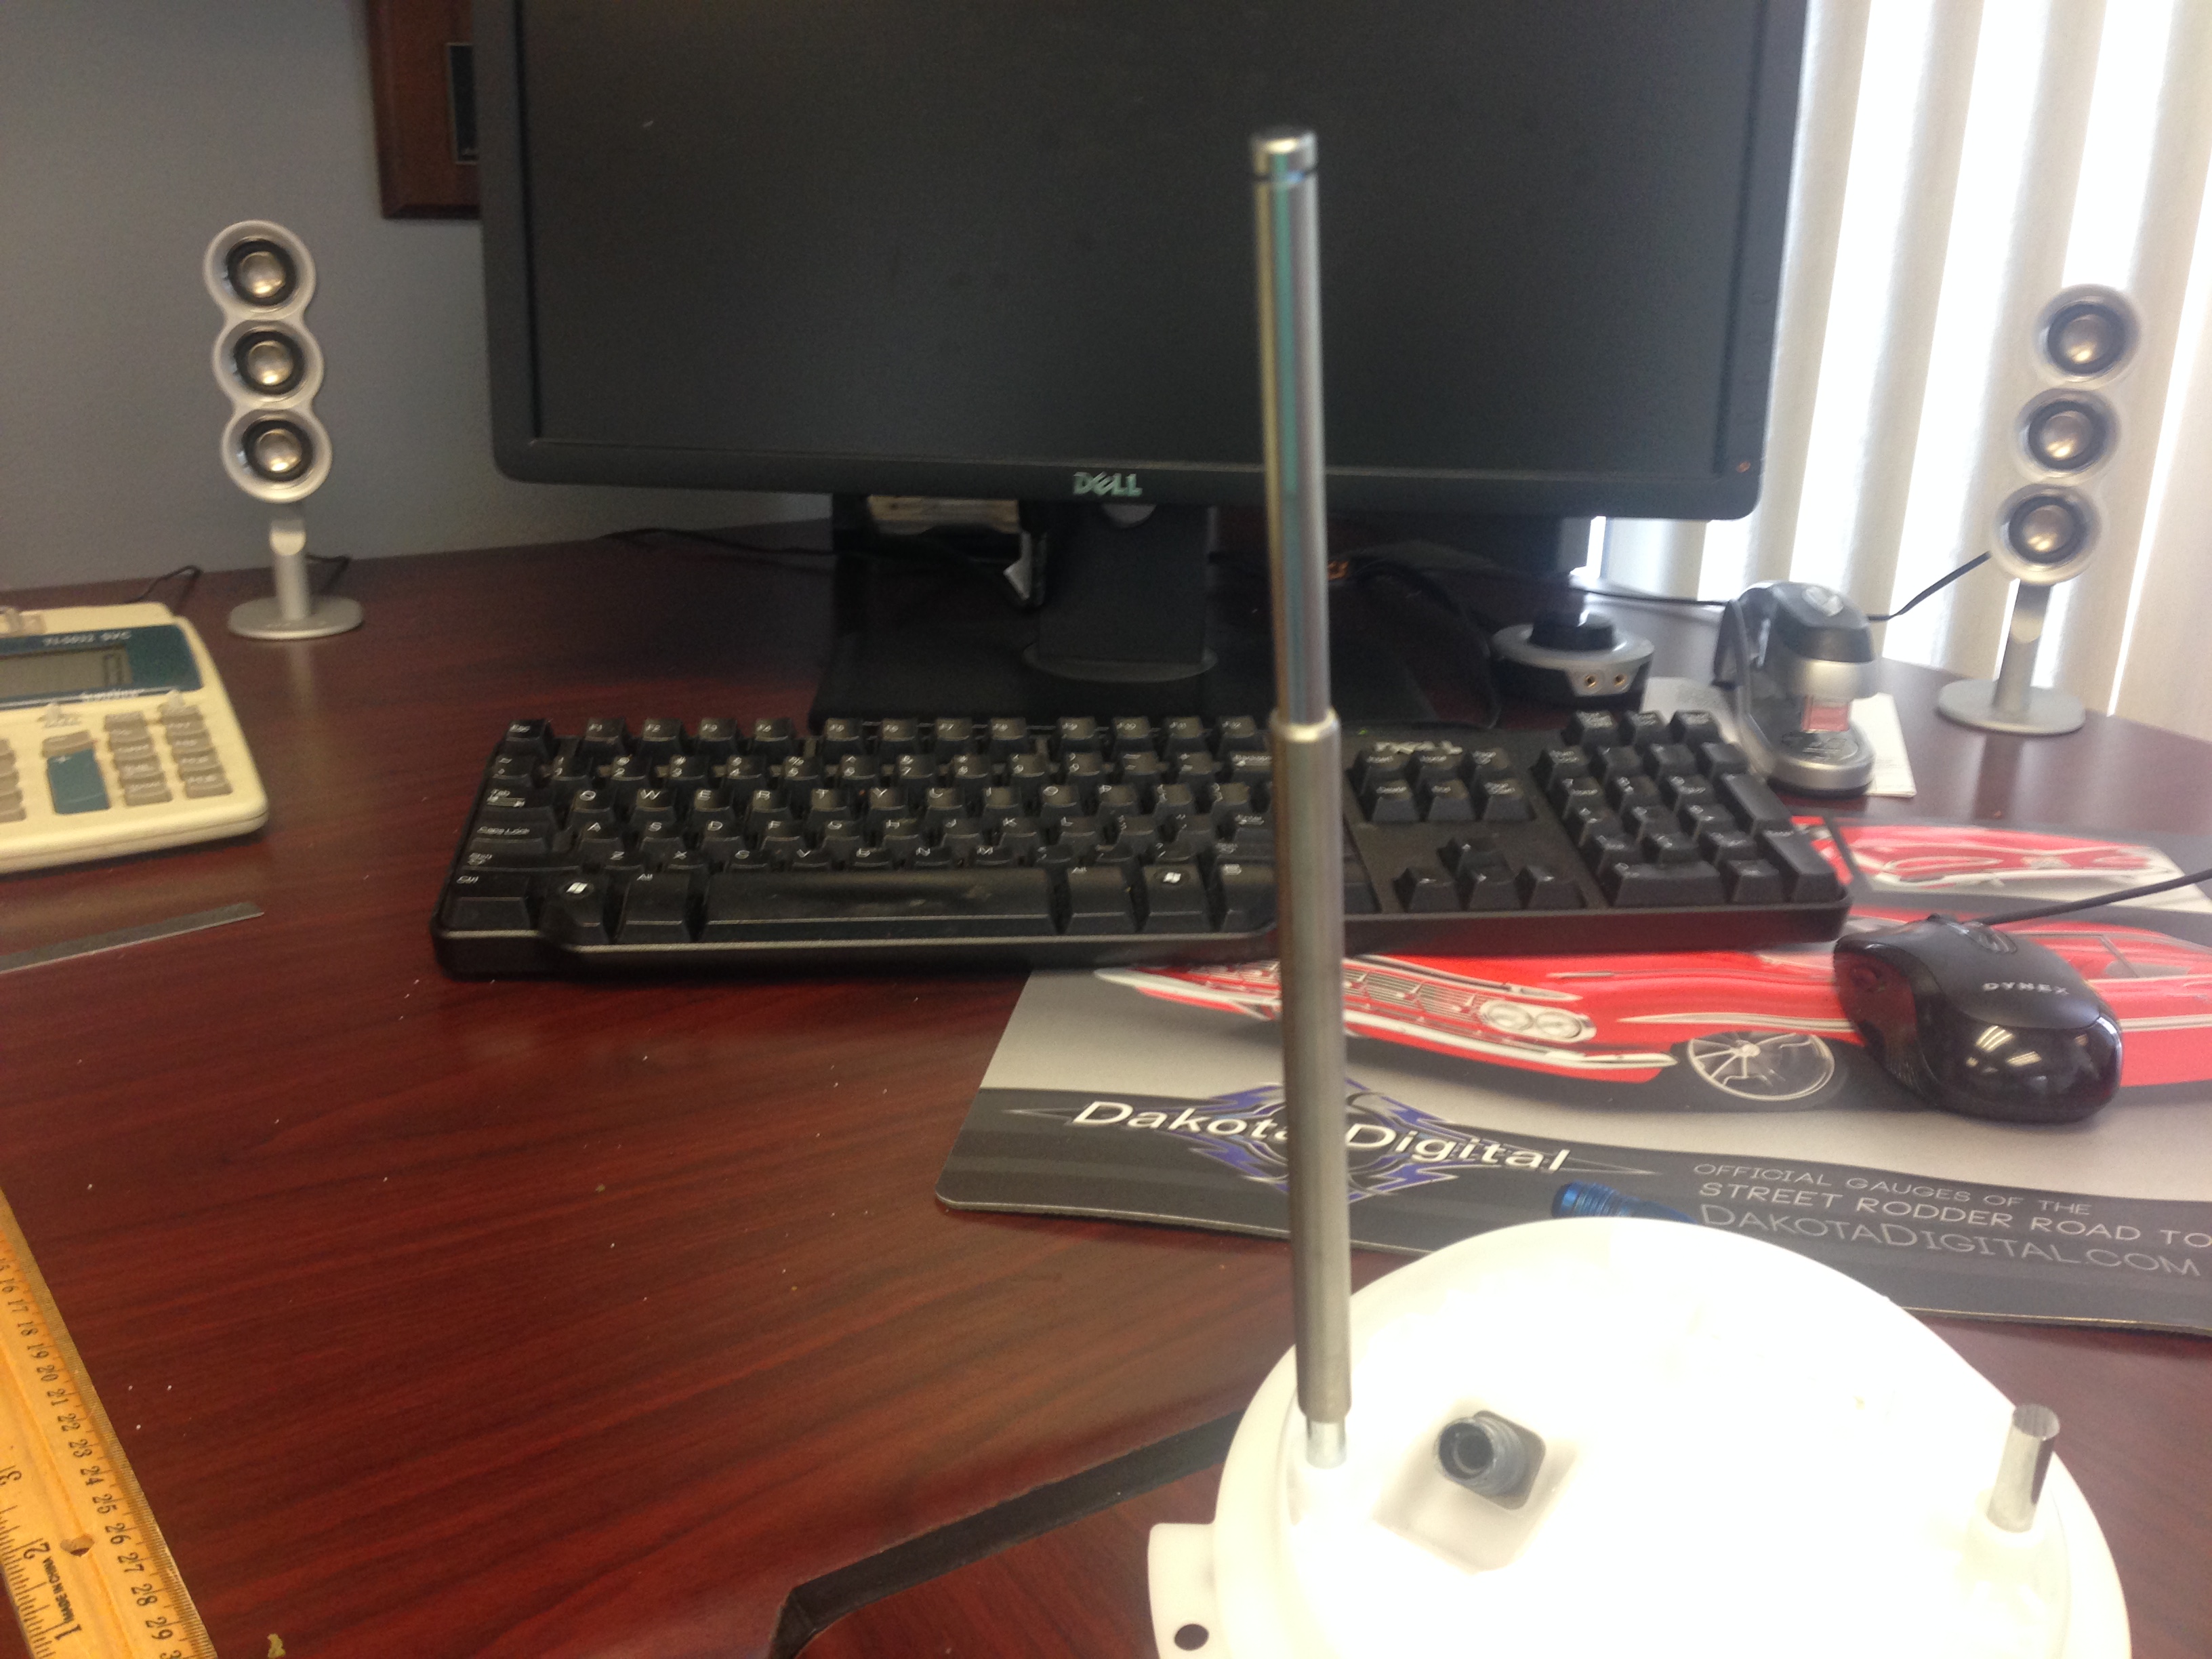
I'm using a GM LSA Fuel pump which is 7 1/2" high and the Nomad tank is 12" deep.....So......two problems....the GM pump needs to be spring loaded against the bottom of the tank......so...I need to build a recessed mounting system for the GM pump......and I need to lengthen the stock LSA pump to replicate the stock compressed GM specs......Here are some pic's of the Tank Modifications.......Should be finished later this week........
More to come
And a new tank I bought for Modifications.............
I'm using a GM LSA Fuel pump which is 7 1/2" high and the Nomad tank is 12" deep.....So......two problems....the GM pump needs to be spring loaded against the bottom of the tank......so...I need to build a recessed mounting system for the GM pump......and I need to lengthen the stock LSA pump to replicate the stock compressed GM specs......Here are some pic's of the Tank Modifications.......Should be finished later this week........
More to come
Thread Starter
TECH Fanatic
Joined: Jul 2008
Posts: 1,570
Likes: 173
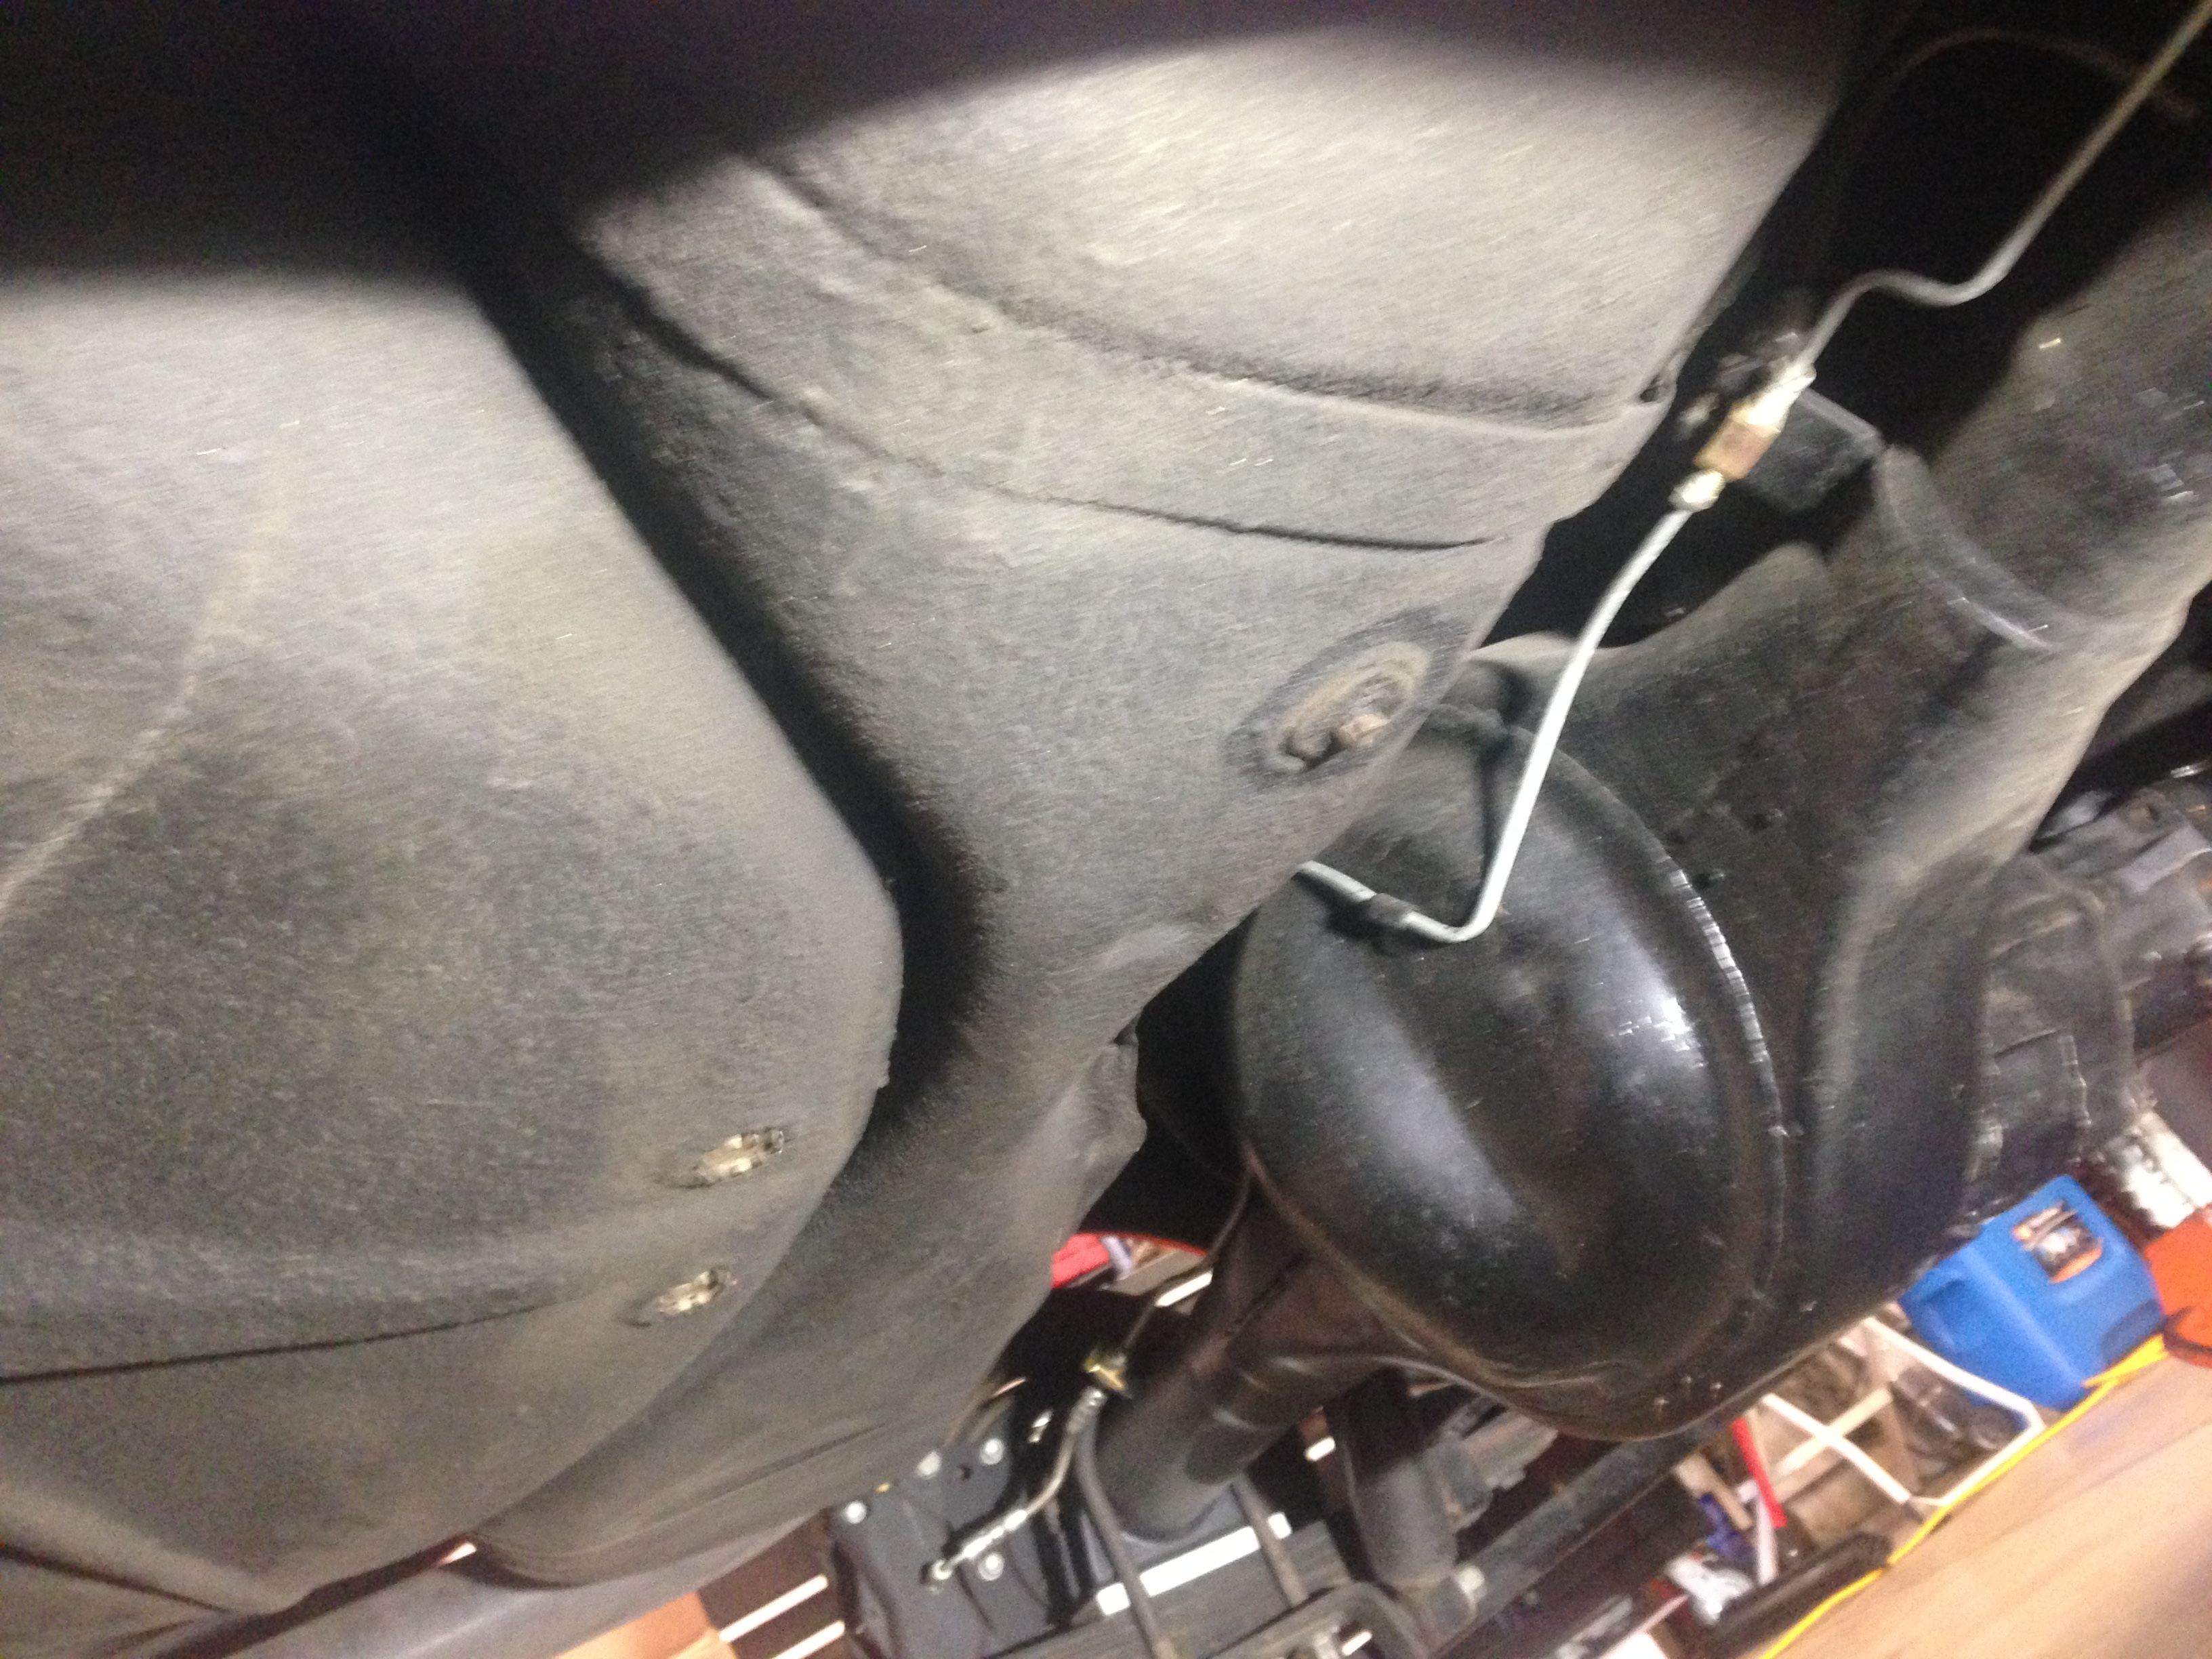
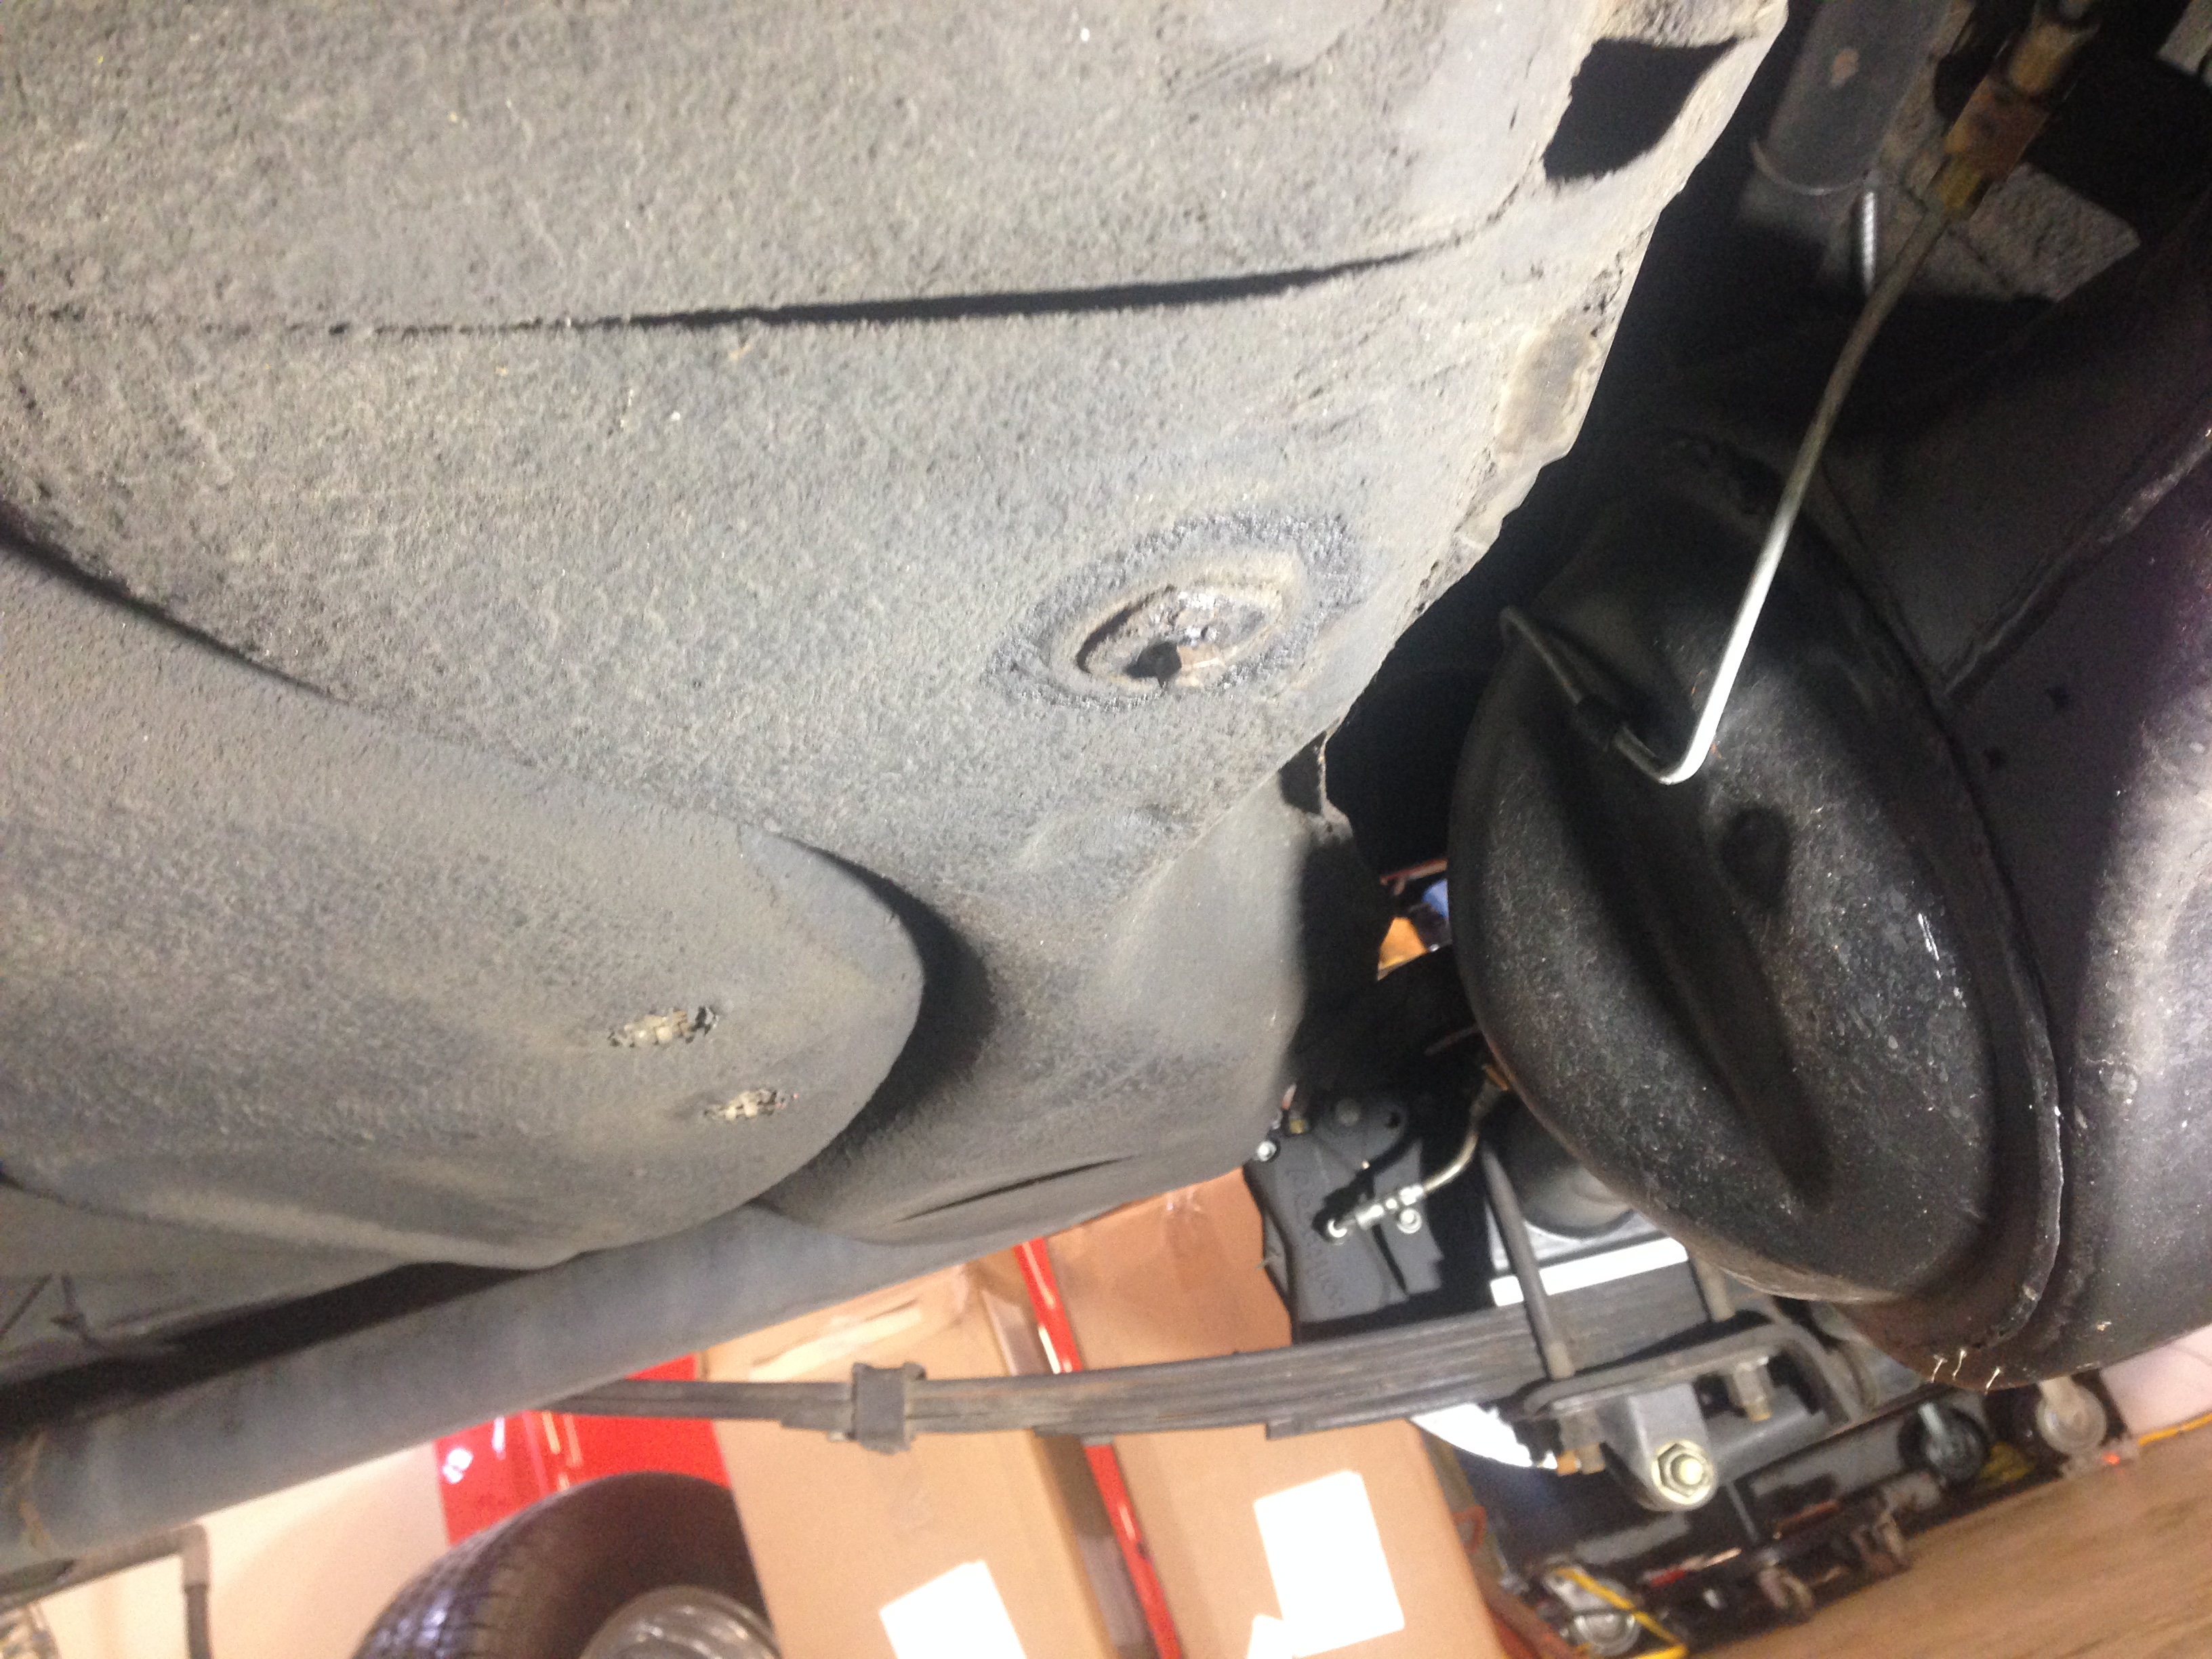
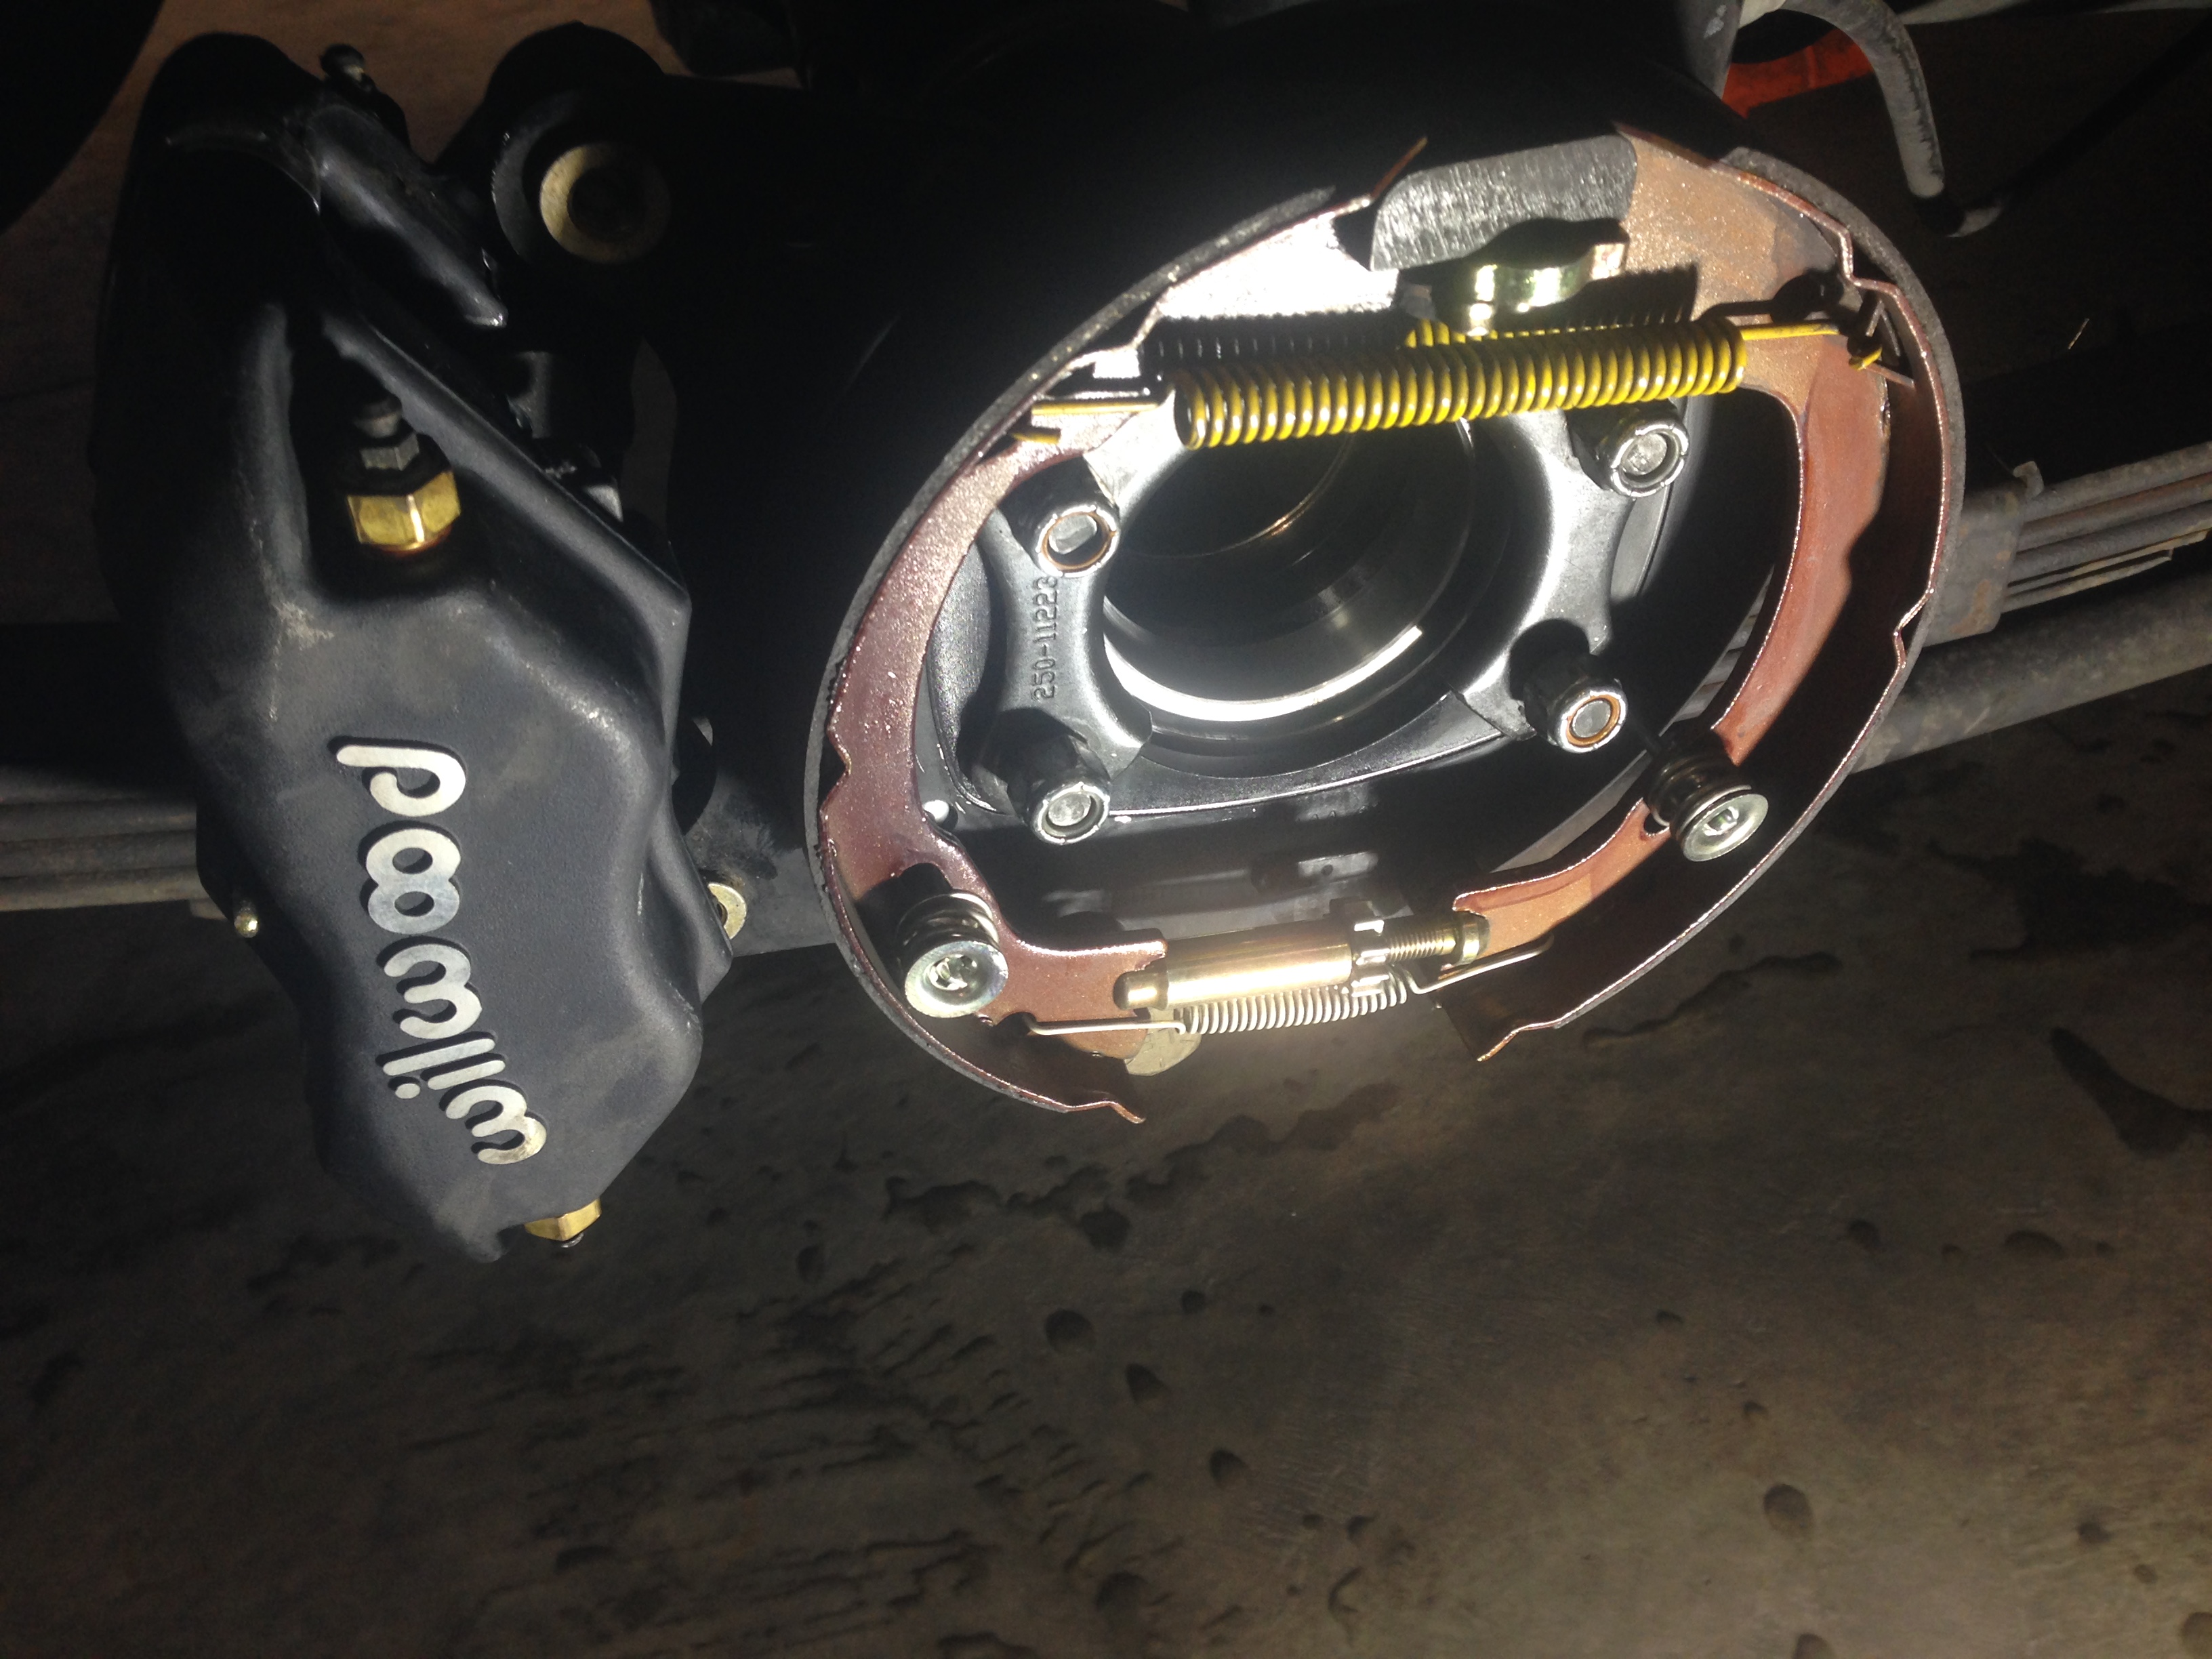
Also..........To get the old Nomad tank out of the car I basically had to just about take the rear axle assy out........I disassembled everything and slid the housing forward on the springs to get enough room for the tank to come out.......And....as long as I am ripping the rear of the car apart, I had an Axle oil seal leak on the passenger side, so....pulled the axle out to get that fixed.......then I checked and found out the rear was an open rear......so....pull it all apart and took the third member to get a Posi unit installed.........used a couple cans of Brake clean to get the oil out of the parking brake assy and to get the pads and rotors cleaned up......should have the rear ready for reassembly when the tank is finished.....
Thread Starter
TECH Fanatic
Joined: Jul 2008
Posts: 1,570
Likes: 173
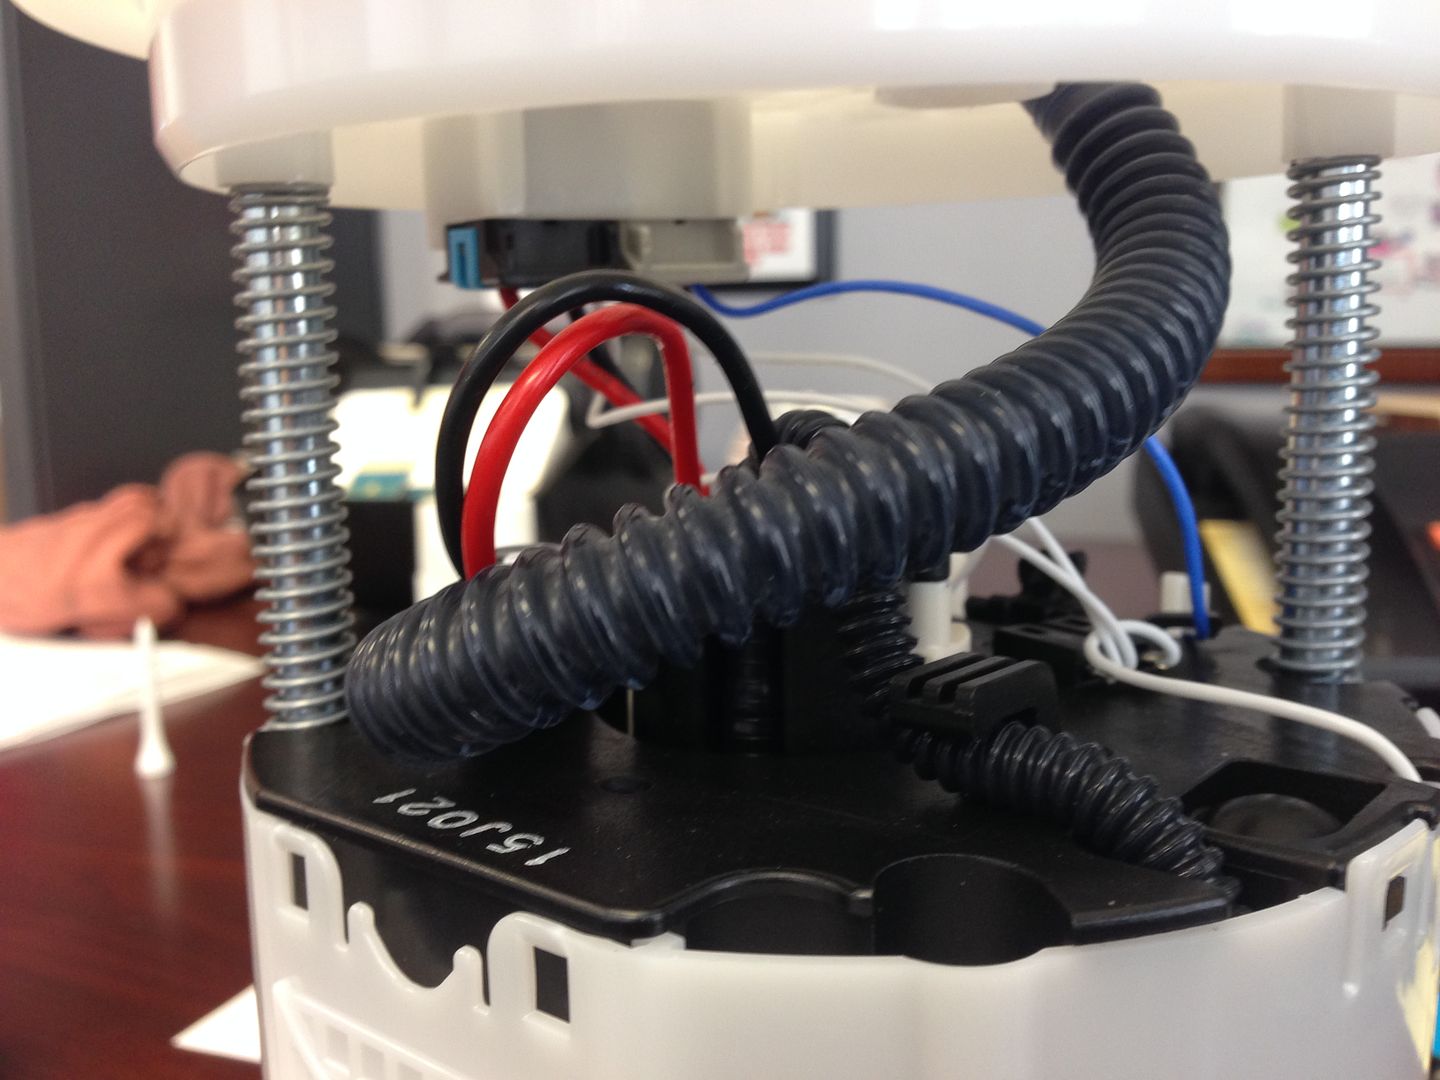
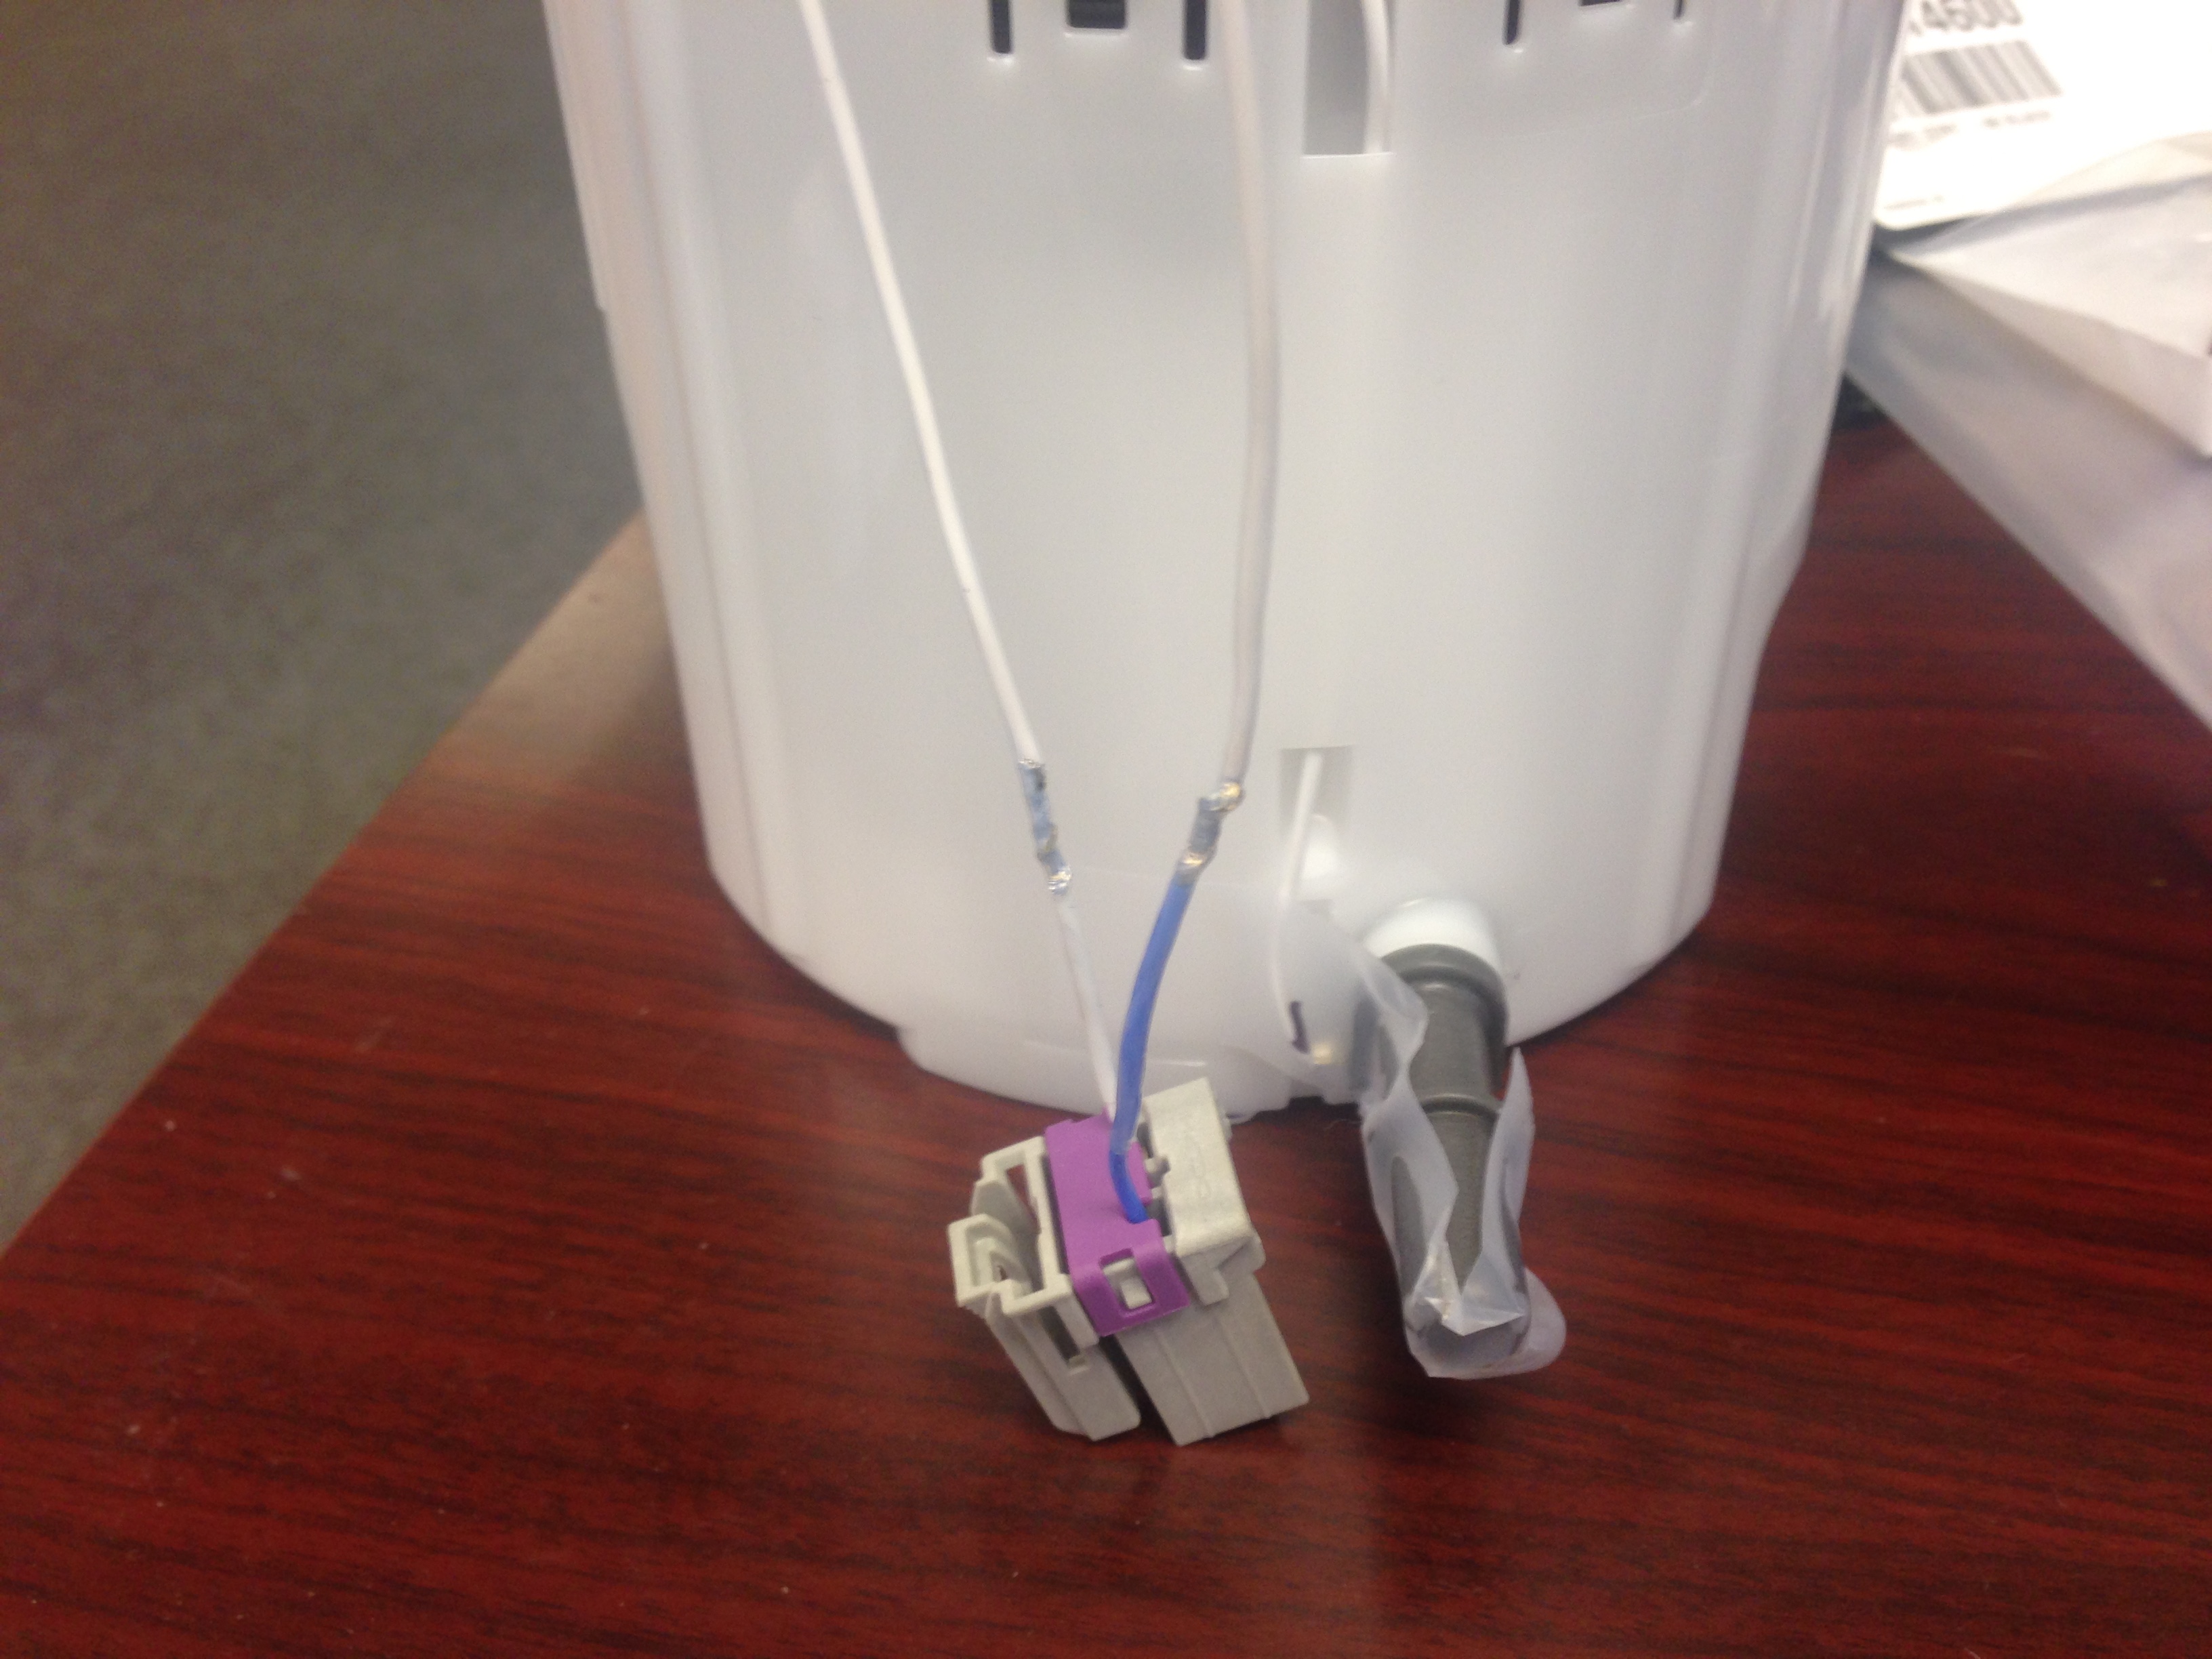
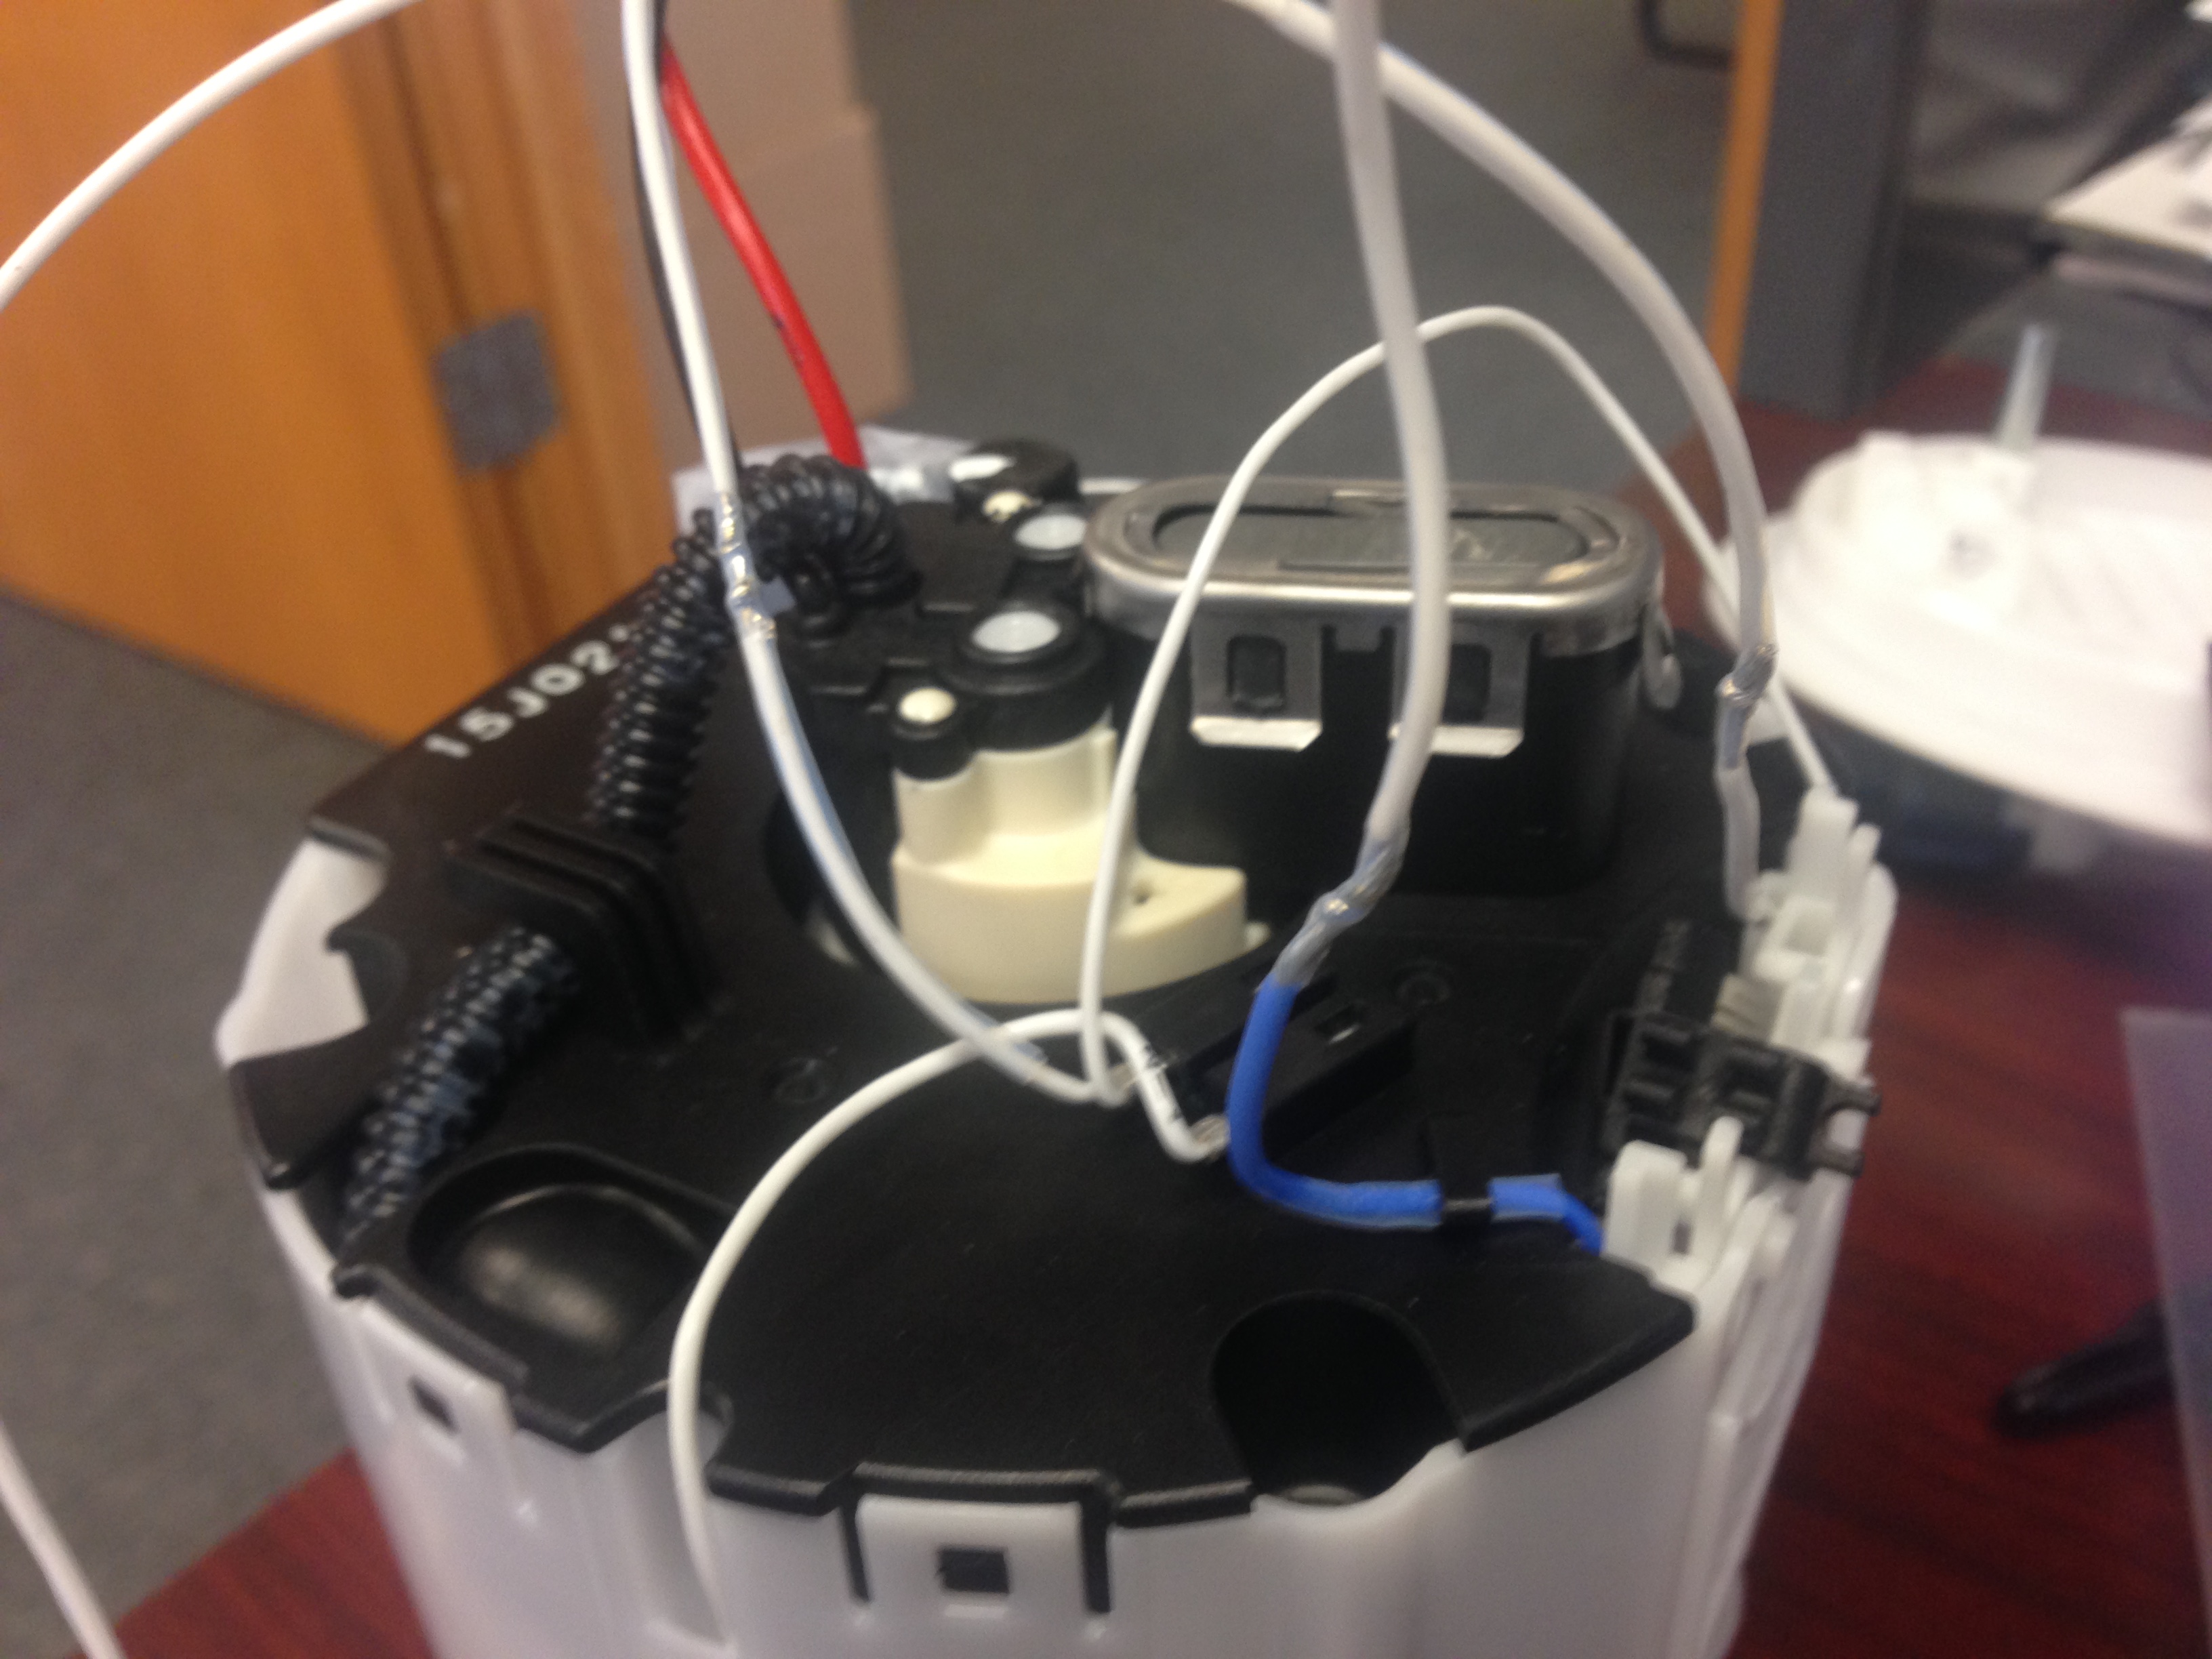
And........The Fuel pump.........A couple of concerns here.......The GM pump has exposed wires that are submersed in the gasoline........So....I found out by asking the experts on LS1tech how to extend the wires while lengthening the pump......I was told to use PTFE wire and shrink tubing only.......took a while to locate the Teflon insulated wire and shrink tubing......finally got everything and got the wires fixed.........next was the flexible "Soda Straw" feed line from the pump to the outlet port on top of the assy........couldn't figure out a good way to lengthen the corrugated plastic tube without crushing or restricting the line........so.....I ended up getting some -8 braided stainless fuel hose and it worked out perfectly......I cut off the plastic tube and left the stock GM RF sealed tube ends on the fittings.....the -8 hose fit over these tube ends perfectly and will be held on with stainless hose clamps.....then I made some stainless rod extenders and longer springs to make the pump to the new length.........all finished, just need to wire tie the wires to neaten then up.......


Thread Starter
TECH Fanatic
Joined: Jul 2008
Posts: 1,570
Likes: 173
Did a Google search and found a source in California....I was worried about the hose immersion also and was guaranteed this hose would hold up......?????...........any suggestions ???????
Ken


I didn't keep up with your fuel sender thread, so not sure if you asked there, but Racetronix sells that "soda straw" flexible hose in several different lengths. Not that it matters now, but for future reference. LOL!
Thread Starter
TECH Fanatic
Joined: Jul 2008
Posts: 1,570
Likes: 173
Thanks for the info..........I can still change the feed tube........I went on their website to check what's available and it seems the site is not active ?????
Ken


Thread Starter
TECH Fanatic
Joined: Jul 2008
Posts: 1,570
Likes: 173
