

L83 Gen V Swap into 1956 Buick Special
 08-11-2017 | 01:44 AM
#41

Thread Starter
Staging Lane
Joined: Jan 2017
Posts: 97
Likes: 2
Moving along on the Special. I had a custom 90 degree bulkhead fitting made to allow for more clearance for the fuel pump. I had to remove the differential from the rear cage anyways, so I put just the empty cage in to work on the exhaust. pretty small clearance on the back of the differential cage to the exhaust, but nothing I haven't seen on a solid axled car. I will be building the exhaust with v band clamps so that if it needs to be removed, or if the gas tank needs to come down, it will be quick and easy. For mufflers I went with flow master 50 series. they should sound good, but not too loud.
I also began on the transmission cross member (believe it or not still haven't finished this, hanging in place by a chain!) I am using 1/8 angle iron and 3/8 bolts to hold it. I broke my only drill bit so I want able to get this finished today.

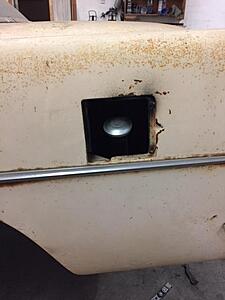
Here's a view of the filler neck, its sitting even high than I expected. I plan on cutting it down 2 or 3 inches and using rubber filler beck hose with hose clamps to bring it down.
 08-11-2017 | 07:53 PM
#42
Thread Starter
Staging Lane
Joined: Jan 2017
Posts: 97
Likes: 2
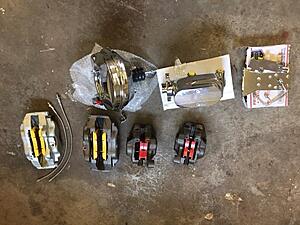
Most of my brake parts came in this week, I'll be going with ebc brake pads all around, a chrome 9" booster, a chrome 1 1/8" master cylinder, and a bottom mount proportioning valve. Oddly enough the brake calipers came in different colors.
 08-17-2017 | 12:43 AM
#44
Thread Starter
Staging Lane
Joined: Jan 2017
Posts: 97
Likes: 2
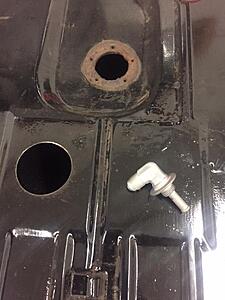
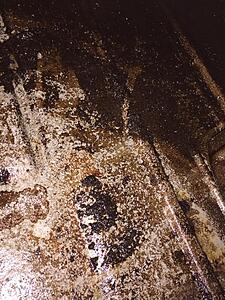
I pulled the gas tank, differential cage, and exhaust today for final cleaning and assembly. I pressure washed the suspension parts and realized while I was at it, I should pressure wash inside the gas tank too! Endless dirt and rust came out. I'll be using a gas tank sealer after the water is all dried out. Here are some pics of the gas tank, the second is inside the gas tank:


 08-17-2017 | 12:48 AM
#45
Thread Starter
Staging Lane
Joined: Jan 2017
Posts: 97
Likes: 2
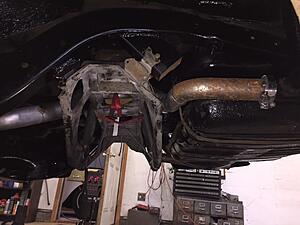
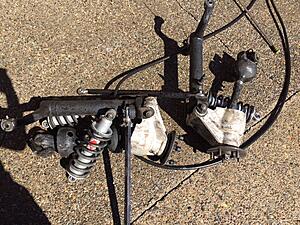
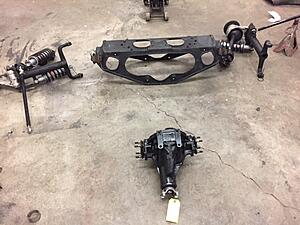
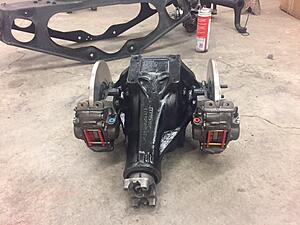
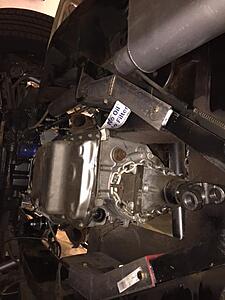
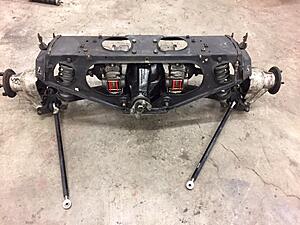
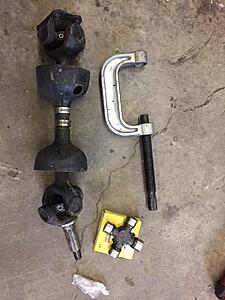
Here are some pics of the suspension cleaned up and going together. the Differential was rebuilt using an Auburn limited slip, 3.73 gears and all new timken bearings. Also the u joint yoke was replaced with a standard strap style yoke. I'll be using standard 1310 u joints. Getting the parking brake to work will be a challenge.


 08-17-2017 | 12:53 AM
#46
Thread Starter
Staging Lane
Joined: Jan 2017
Posts: 97
Likes: 2
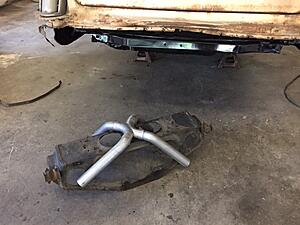
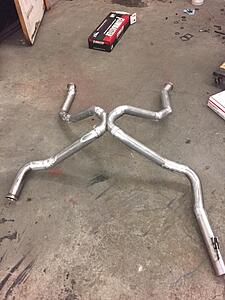
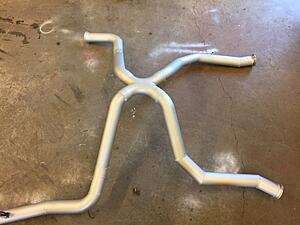
But wait theres more.... here are some pics of the exhaust removed from the car. the exhaust will be going above the diff cage, through the factory holes in the frame and will all around be impossible to remove if it can't be disassembled, so I'm using a total of 5 v band clamps so that each part can be removed easily enough, and the gas tank can be removed as well. I will be painting the pipes an aluminum color, and wrapping exhaust wrap around them where they are near the gas tank and the rear brake rotors.
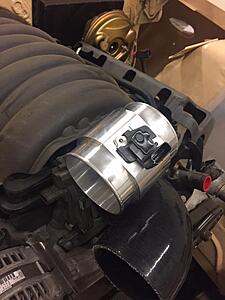
Heres a pic of the new griffin radiator and some of the intake piping. I bought a universal 3" maf housing that accepts the factory style maf. more pictures of that to come. In the past I have had others do the tuning for me, but I am debating buying HP Tuners and tackling this myself. After all this motor has original internals so how hard can it be?
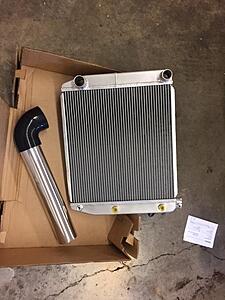

Heres a pic of the new griffin radiator and some of the intake piping. I bought a universal 3" maf housing that accepts the factory style maf. more pictures of that to come. In the past I have had others do the tuning for me, but I am debating buying HP Tuners and tackling this myself. After all this motor has original internals so how hard can it be?
 08-18-2017 | 02:45 AM
#48
Thread Starter
Staging Lane
Joined: Jan 2017
Posts: 97
Likes: 2
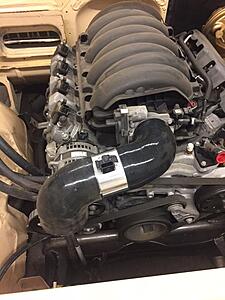
The MAF housing arrived today. I found it online, it's aftermarket as you can see and comes in either 76 or 86mm inside diameter versions. I purchased the 86mm. can anyone confirm what the ID of the original maf housing is? Will this be a good part for me?

 08-23-2017 | 12:28 AM
#49
Thread Starter
Staging Lane
Joined: Jan 2017
Posts: 97
Likes: 2
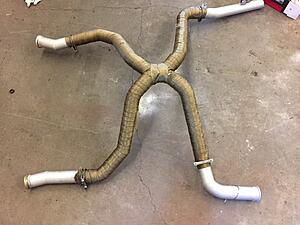
I painted the rear section of the exhaust in an aluminum colored exhaust paint and put a heat wrap on it in the areas it goes over the axle because of the proximity to the inboard rear brakes, the gas tank, and the fuel lines.
For the gas tank, after it dried out from pressure washing, I used a shop vac to get the rest of the dirt and debris out of the tank and then used a tank sealer to coat the walls and prevent any future rusting. It seems to hold water just fine, but was surprisingly dirty. I will be putting two fuel filters in the car, one on the high pressure side before the fuel pressure regulator, and another between the regulator and the engine. My last fuel pump was able to handle a lot of debris so I'm hoping this one does the same. The bolts will be welded to that flat piece of sheet metal. A tiny cheesy looking but very effective and very inexpensive, while maintaining a low profile for these shallow tanks.
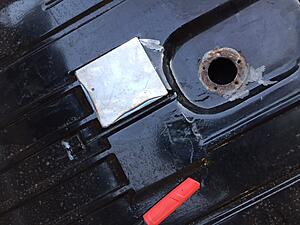
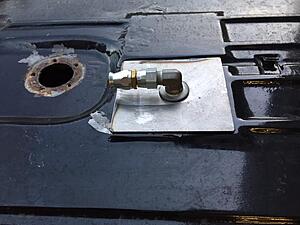
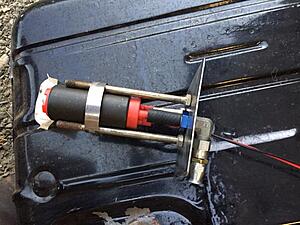


For the gas tank, after it dried out from pressure washing, I used a shop vac to get the rest of the dirt and debris out of the tank and then used a tank sealer to coat the walls and prevent any future rusting. It seems to hold water just fine, but was surprisingly dirty. I will be putting two fuel filters in the car, one on the high pressure side before the fuel pressure regulator, and another between the regulator and the engine. My last fuel pump was able to handle a lot of debris so I'm hoping this one does the same. The bolts will be welded to that flat piece of sheet metal. A tiny cheesy looking but very effective and very inexpensive, while maintaining a low profile for these shallow tanks.


 09-18-2017 | 09:12 AM
#50
Thread Starter
Staging Lane
Joined: Jan 2017
Posts: 97
Likes: 2
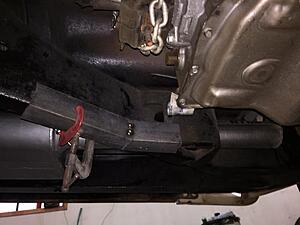
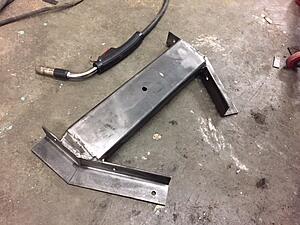
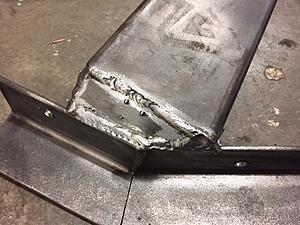
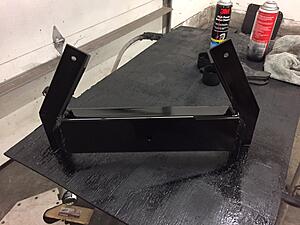
I finally finished up the transmission crossmember this weekend! this is made from simple angle iron and 2x4" steel. The angle iron works really well, I first make the side rails that bolt to the frame and then weld in the cross piece after those are made.


 09-20-2017 | 12:14 AM
#52
Thread Starter
Staging Lane
Joined: Jan 2017
Posts: 97
Likes: 2
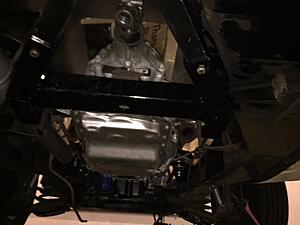
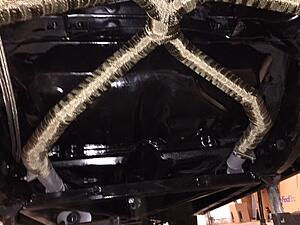
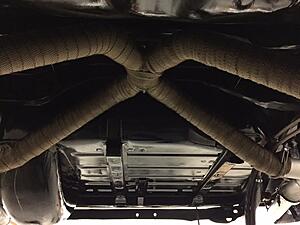
Got the rear suspension re-assembled! exhaust and suspension went back in for good.
all new U joints in the driveshafts (4 U joints back here!)
exhaust before the suspension
and finally:
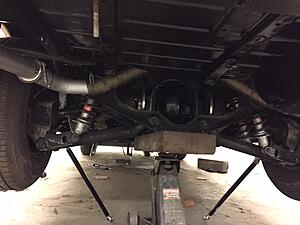
The gas tank will go in next, driveline will get made, then on to plumbing the engine!

all new U joints in the driveshafts (4 U joints back here!)

exhaust before the suspension


and finally:

The gas tank will go in next, driveline will get made, then on to plumbing the engine!


 10-16-2017 | 11:07 PM
#58
Thread Starter
Staging Lane
Joined: Jan 2017
Posts: 97
Likes: 2
I bought HP Tuners Pro today. looking forward to playing around with that. I've seen the program operated and finally decided I'm done paying people to tune my cars. I'm sure I will have questions in the weeks to come
10-17-2017 | 12:05 AM
#59
Thread Starter
Staging Lane
Joined: Jan 2017
Posts: 97
Likes: 2
Also, I've got some differing opinions on 6l80e TCMs. specifically, do I need to remove it and do any tuning to it? does it have to be changed to standalone? if I just run it as is, will it keep the factory shift pattern? or???? any help is appreciated
10-17-2017 | 01:03 PM
#60

TECH Junkie

Joined: Dec 2005
Posts: 3,092
Likes: 8
Now a dealer can reprogram the transmission control module without taking it out of the transmission .
Bottom line is if your components match there is no problem. You can program the shift patterns using an outside program on a laptop.