
99 Mustang 5.3/80e swap
 01-12-2018, 02:06 PM
#81
TECH Apprentice
Thread Starter


yea im going to hopefully fit the brake booster in my car today. it was a v6 originally so its already there just removed from the car currently. when i got it was sort of a basket case with a bunch of stuff taken apart and out.
 01-22-2018, 07:39 AM
#82
TECH Apprentice
Thread Starter
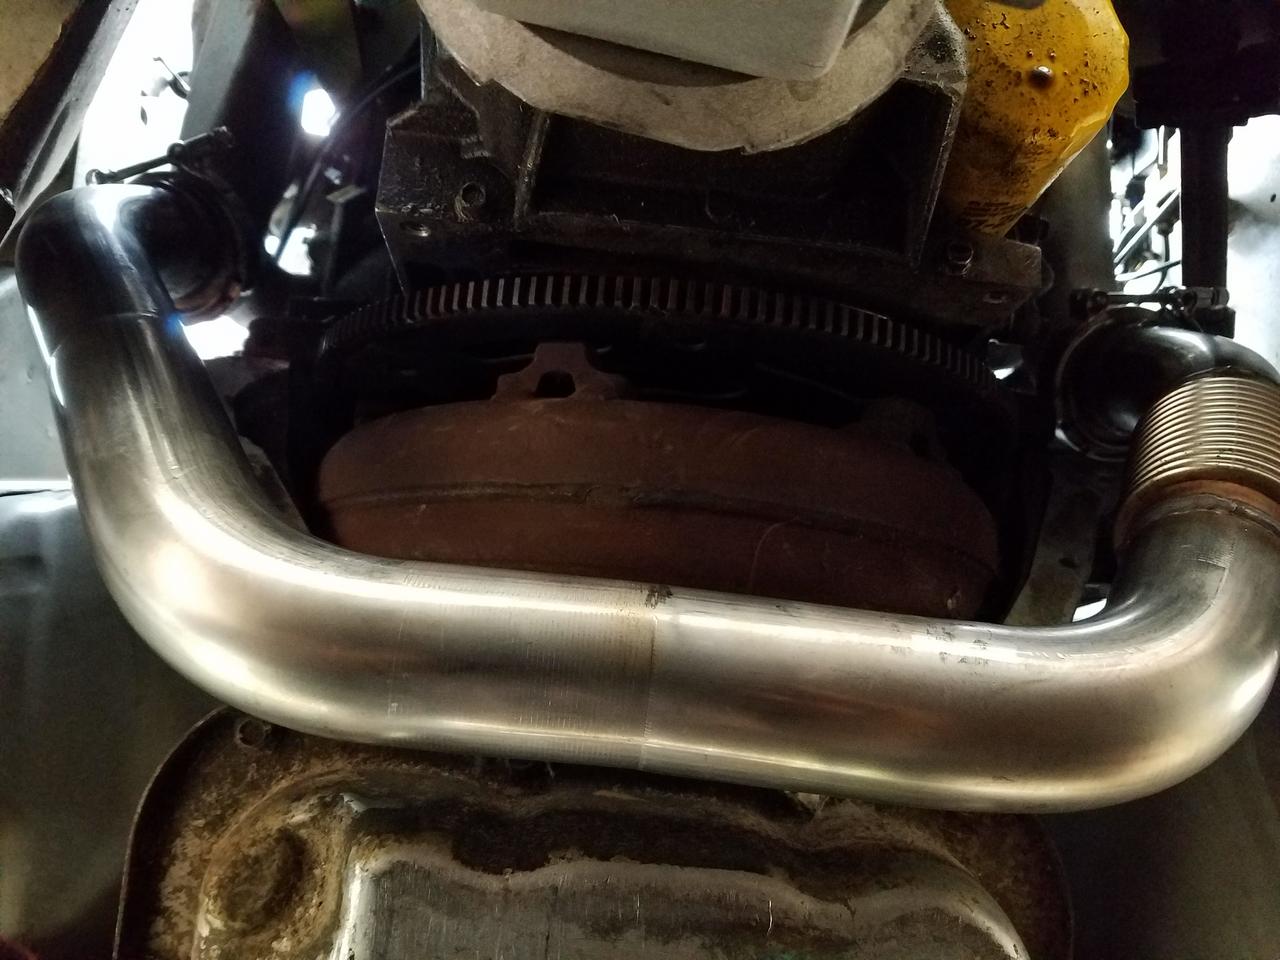
with the freeze last week and the rain this weekend i havent had a ton of time to work on it. but i had a chance to test fit the hooker manifolds and the brake booster.
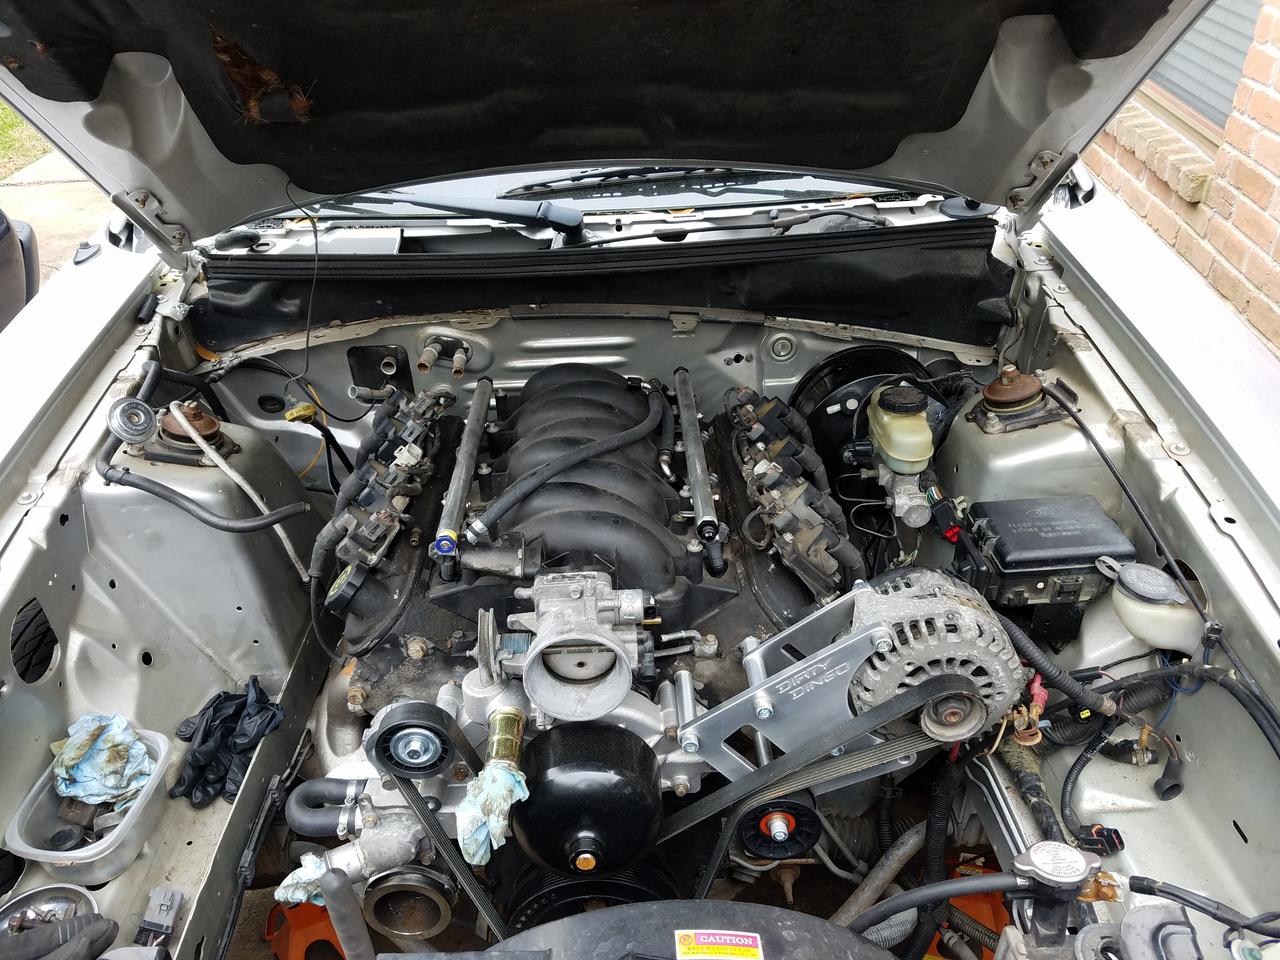
Test fitting the hooker turbo manifolds and brake booster
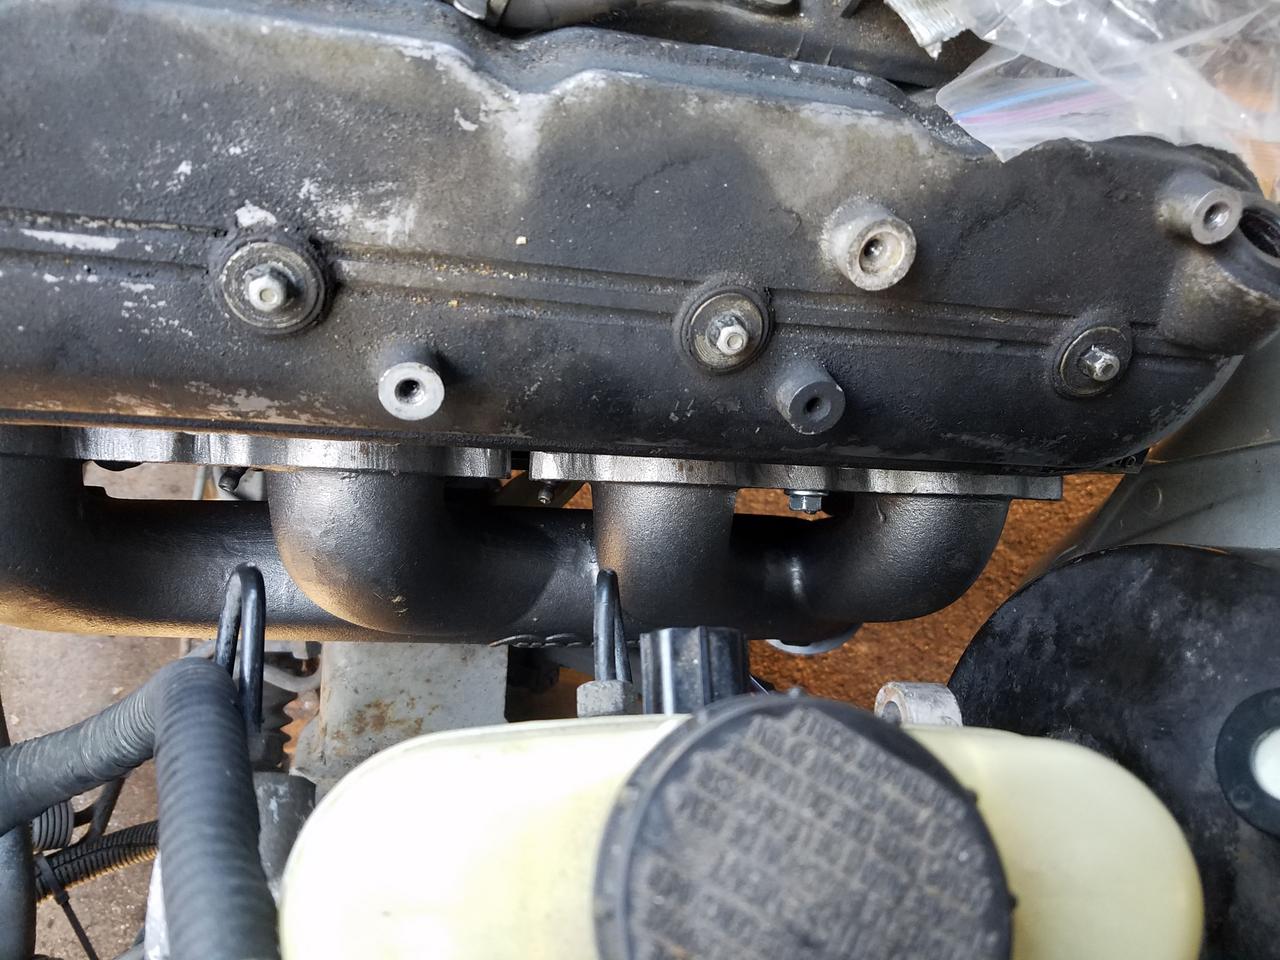

brake booster has tons of room, the vband clears the steering shaft without any issues. these manifolds fit so well.


my buddy had these fuel rails laying around and sent them to me since i needed some.
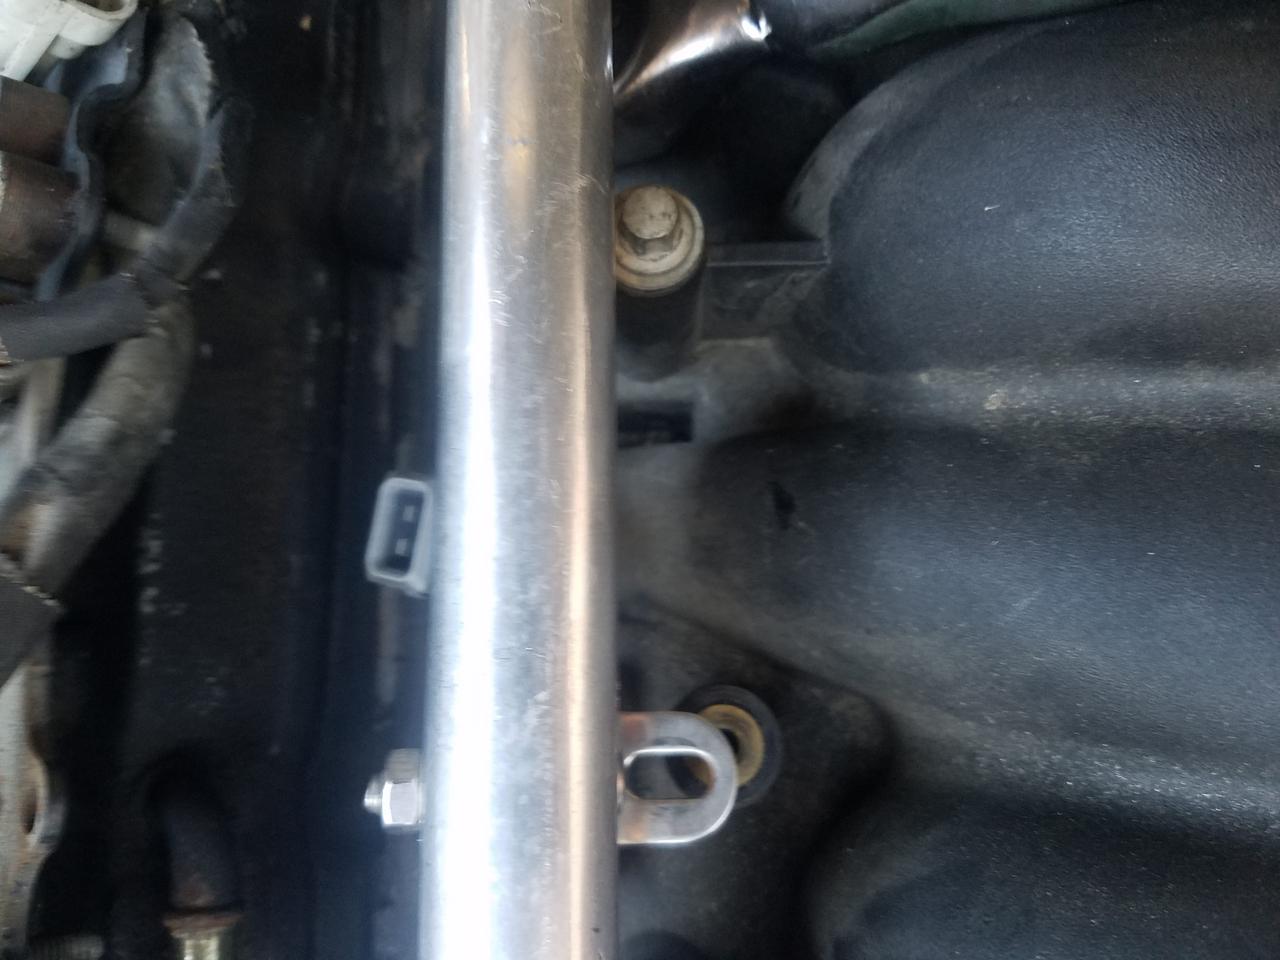
they need a bit of fiddling to get fit but nothing that cant be handled.
Subframe connectors are here, i just need to burn them in and then i can start working on building a trans crossmember and get the 80e home finally.
Test fitting the hooker turbo manifolds and brake booster
brake booster has tons of room, the vband clears the steering shaft without any issues. these manifolds fit so well.
my buddy had these fuel rails laying around and sent them to me since i needed some.
they need a bit of fiddling to get fit but nothing that cant be handled.
Subframe connectors are here, i just need to burn them in and then i can start working on building a trans crossmember and get the 80e home finally.
01-22-2018, 07:42 AM
#83
TECH Apprentice
Thread Starter

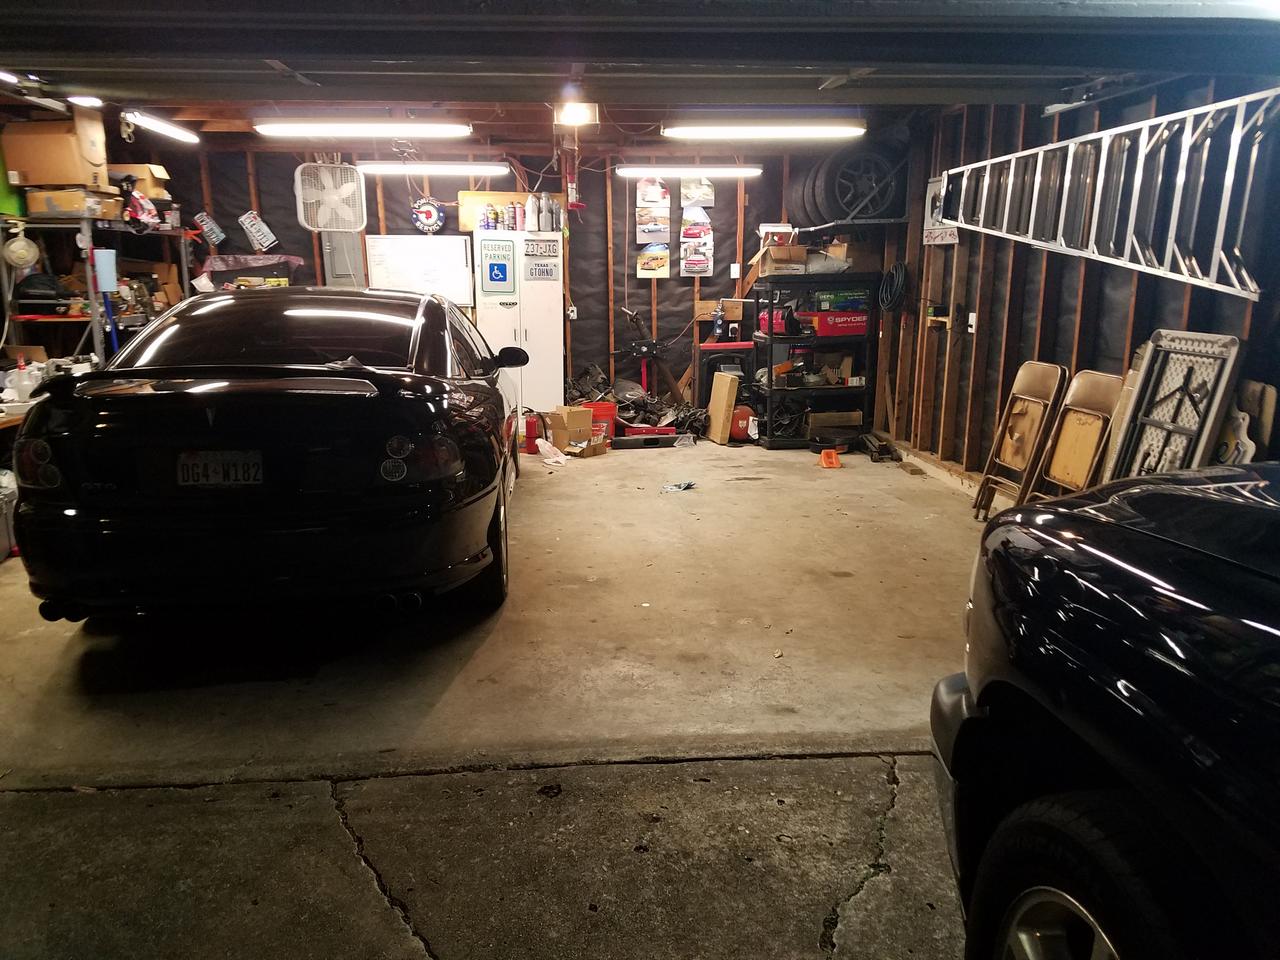
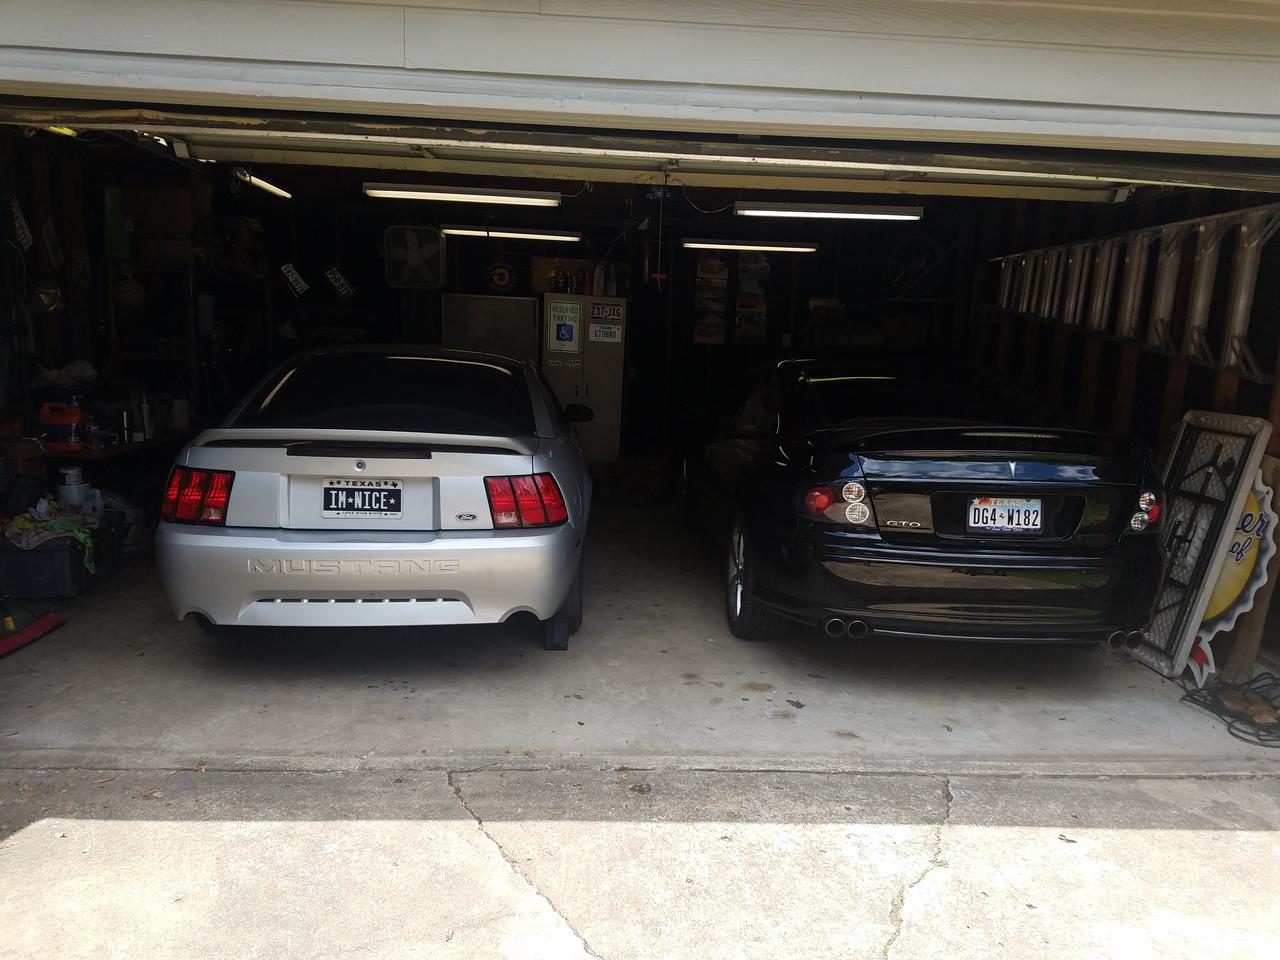
and a nice little family portrait, missing my GTO as its currently disabled infront of the mustang. i hit something on the freeway the other day and knocked the exhaust loose. just havent had time to look at it yet.
i was up trimming a tree when i got this photo from the roof.
01-22-2018, 02:57 PM
#87
TECH Apprentice
Thread Starter
will do. im trying to document as much of this as i can because that was one of my struggles with the beginning of this project was finding pics of how stuff fit. im a visual person i need to see what i am getting myself into lol.
01-22-2018, 05:49 PM
#88
Originally Posted by dan95gst
will do. im trying to document as much of this as i can because that was one of my struggles with the beginning of this project was finding pics of how stuff fit. im a visual person i need to see what i am getting myself into lol.
01-27-2018, 06:37 AM
#89
TECH Regular
tired2valve did a t56 swap in his when he first did it. I rememeber seeing his build thread but I can't remember what he had for pics. I'm sure he'd answer any questions you can throw at him.
02-26-2018, 10:41 AM
#90
TECH Apprentice
Thread Starter
sadly weather has not cooperated for weeks! either raining or super cold.
got in a J bend to build the NA exhaust and some injector harness adapters and a speed sensor so i can break out the wires for the 80e.
going to start working on the wiring pieces tonight. i can do that on the bench in the garage but i have to clean the bench off first lol.
got in a J bend to build the NA exhaust and some injector harness adapters and a speed sensor so i can break out the wires for the 80e.
going to start working on the wiring pieces tonight. i can do that on the bench in the garage but i have to clean the bench off first lol.
02-26-2018, 10:44 AM
#91
TECH Apprentice
Thread Starter
i also hit something in my GTO that knocked my exhaust all wonky at the beginning of feb and it pissed me off and i needed some time away from the cars to sort my brain out.
never fails, i take the car out and something happens to it. drives me crazy.
never fails, i take the car out and something happens to it. drives me crazy.
03-04-2018, 11:02 AM
#92
TECH Apprentice
Thread Starter
With the nice weather for the first time on a weekend in what feels like forever, i got some stuff done on the car!

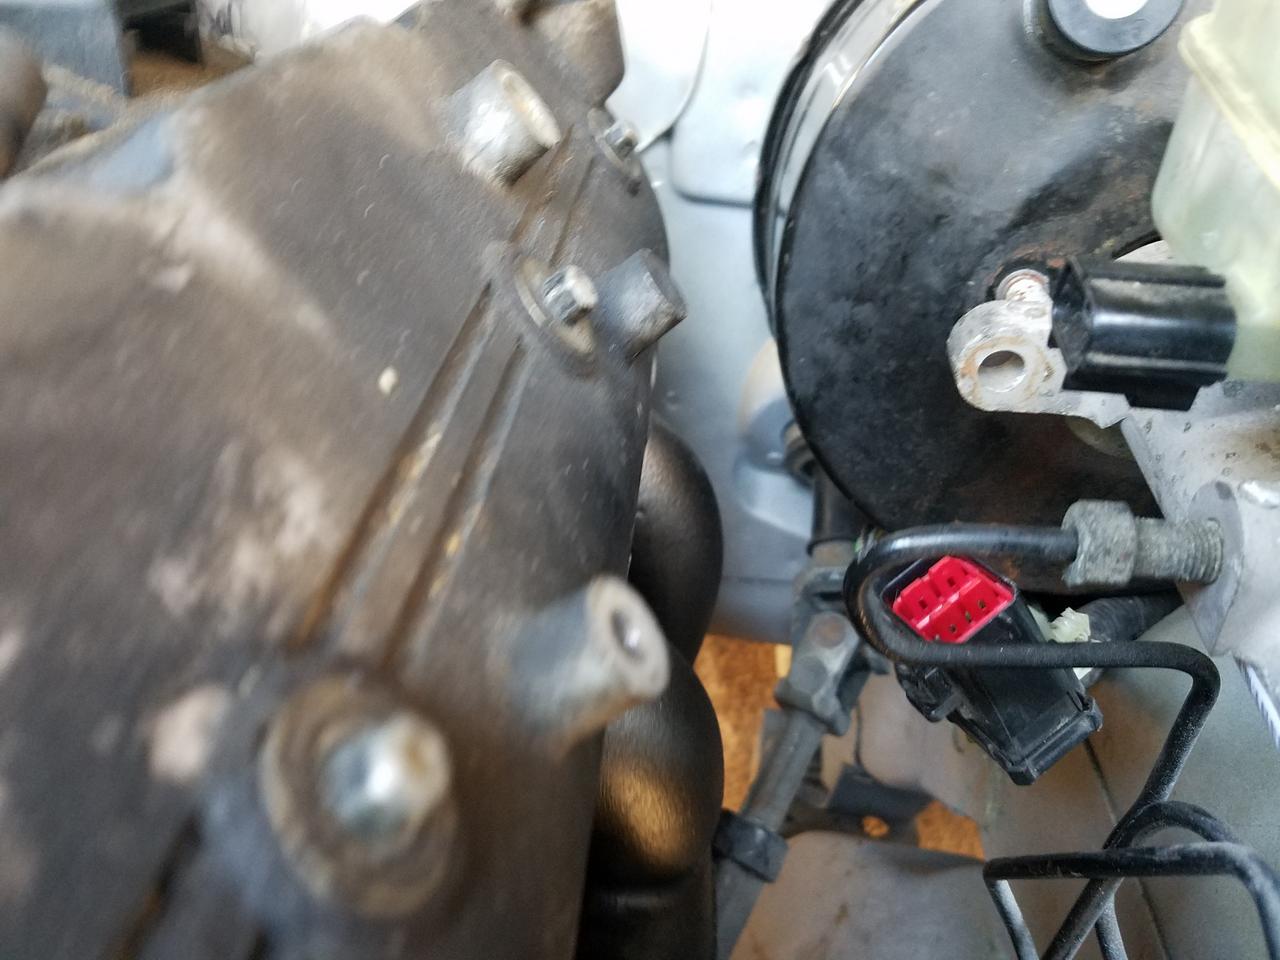
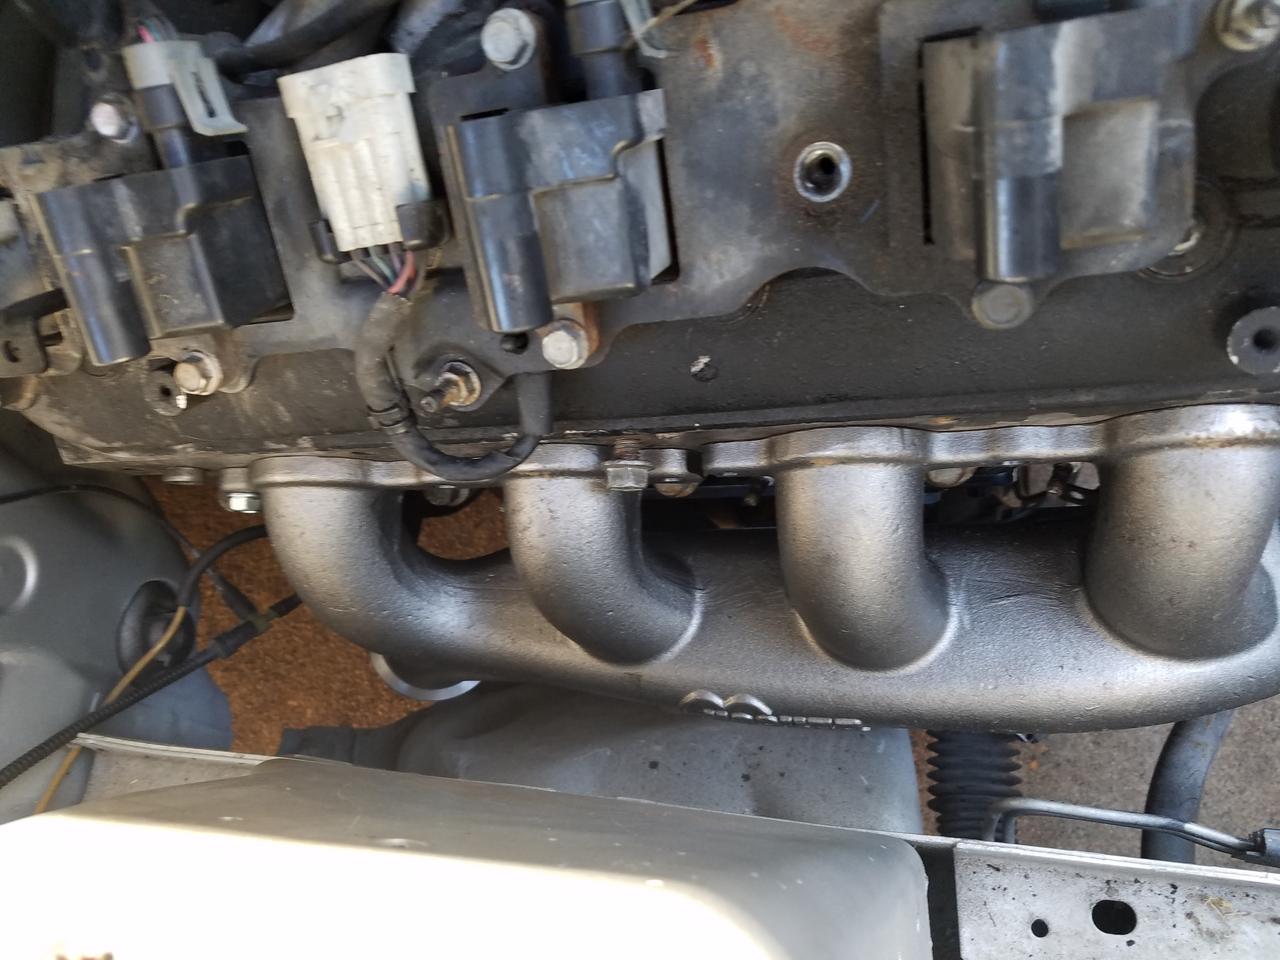
Under the hood i got the exhaust manifolds bolted up with gaskets and the works, plugs and wires on, and crawled under the dash to finish tightening up the brake master and attaching the rod to the pedal.
Started efforting the subframe connectors which was troublesome. firstly the bbk ones were really short front to rear compared to pics ive seen of others. problem two, these were the "bolt in/weld in" ones that SHOULD have bolt hole alignment on the seat/front but they were WAY off like over a half inch for the seat bolts. Normally i wouldnt bitch too much and just make it work but if im gunna have to re-engineer these, i might as well get some of the weld together ones that you build yourself. so thankfully i got a return started on amazon and going to order the other ones i was looking at and just weld the whole thing.

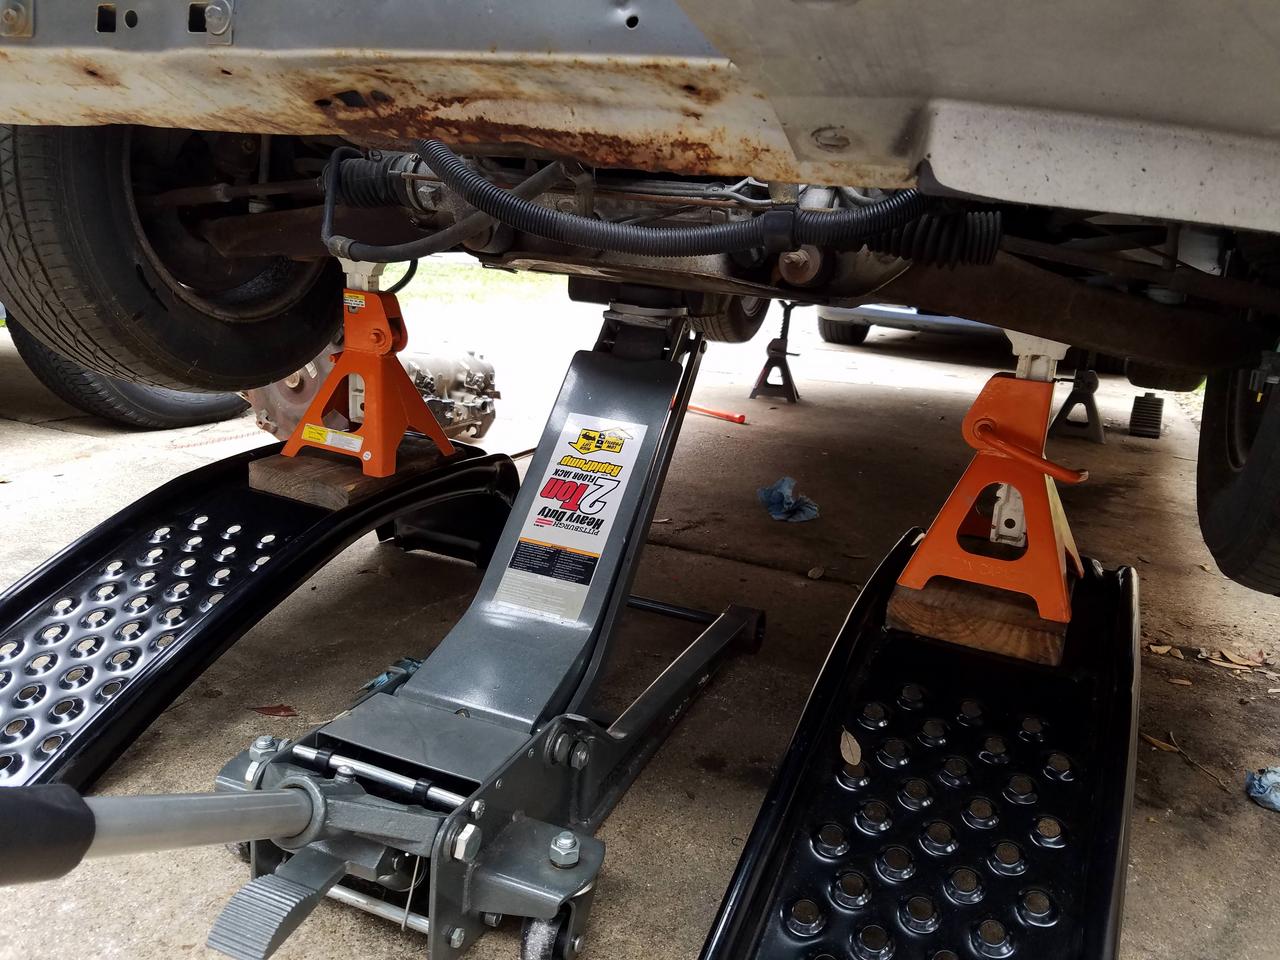
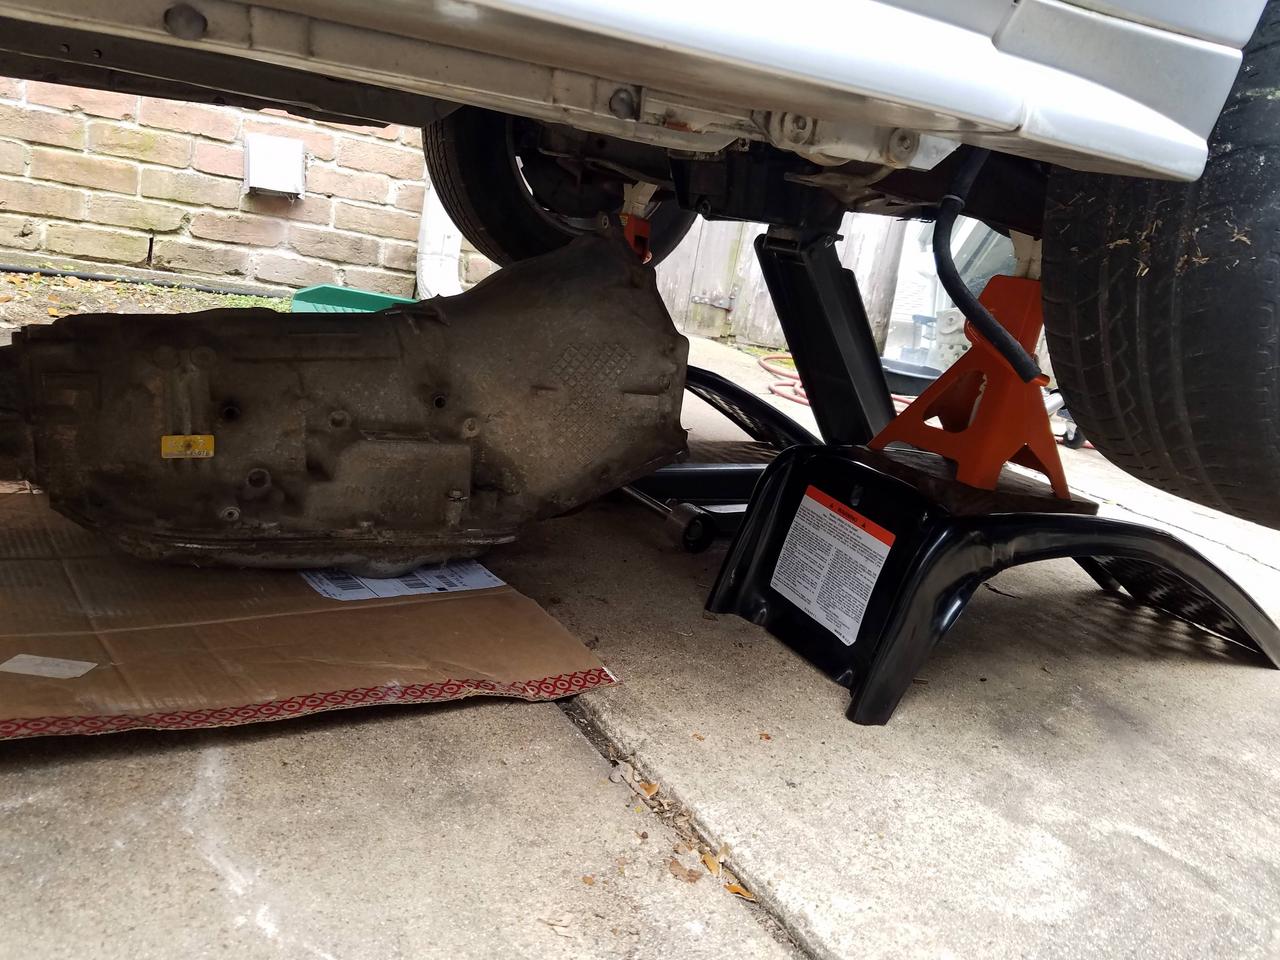
had to get a BIT sketchy to get the trans under the car. we only had it setup this way for a couple minutes while we shoved the 80e under the car. once it was under we lowered it back down to the safe jackstand configuration
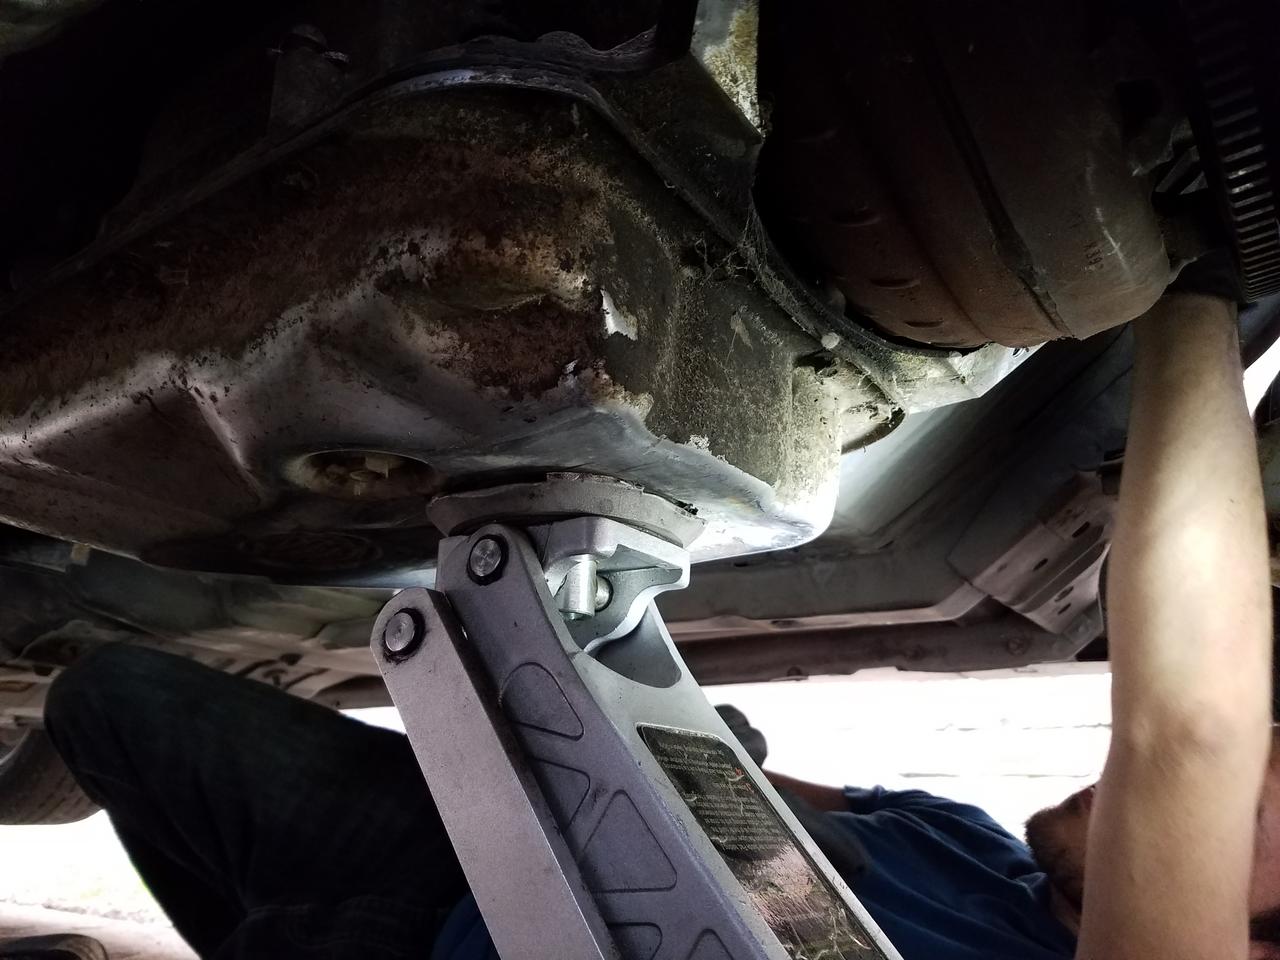
spent a lot of time trying to figure out the SFC issues before i decided to just ditch them and get the better ones and burned a lot of time.
but still made good progress.
Under the hood i got the exhaust manifolds bolted up with gaskets and the works, plugs and wires on, and crawled under the dash to finish tightening up the brake master and attaching the rod to the pedal.
Started efforting the subframe connectors which was troublesome. firstly the bbk ones were really short front to rear compared to pics ive seen of others. problem two, these were the "bolt in/weld in" ones that SHOULD have bolt hole alignment on the seat/front but they were WAY off like over a half inch for the seat bolts. Normally i wouldnt bitch too much and just make it work but if im gunna have to re-engineer these, i might as well get some of the weld together ones that you build yourself. so thankfully i got a return started on amazon and going to order the other ones i was looking at and just weld the whole thing.
had to get a BIT sketchy to get the trans under the car. we only had it setup this way for a couple minutes while we shoved the 80e under the car. once it was under we lowered it back down to the safe jackstand configuration
spent a lot of time trying to figure out the SFC issues before i decided to just ditch them and get the better ones and burned a lot of time.
but still made good progress.
03-04-2018, 11:06 AM
#93
TECH Apprentice
Thread Starter


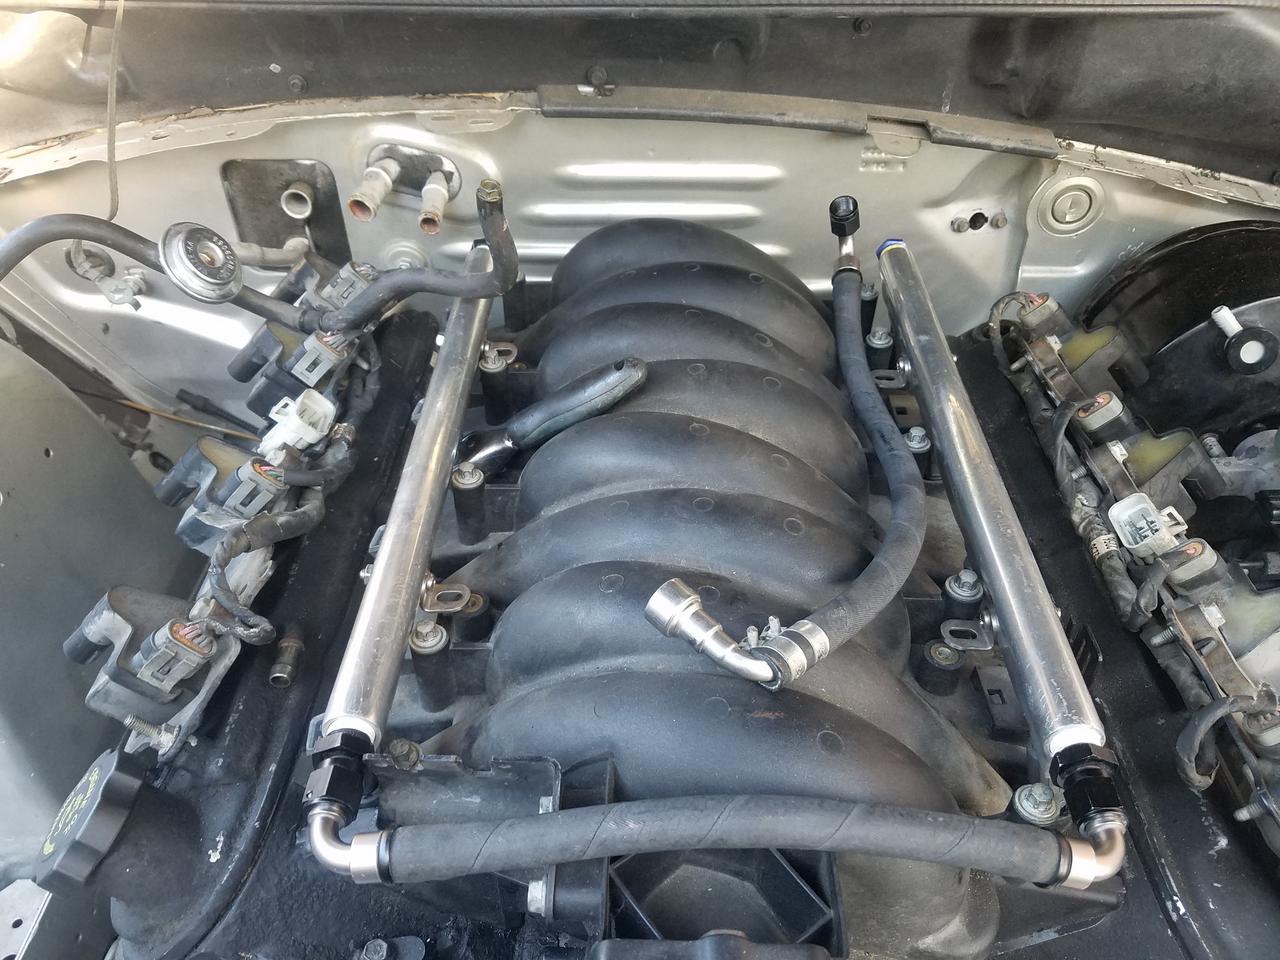
The more i use these hooker/holley swap parts the more i wish i could just buy everything from them to build something. Holley/Hooker did a damn fine job engineering this stuff!
03-04-2018, 11:06 AM
#94
Originally Posted by dan95gst
With the nice weather for the first time on a weekend in what feels like forever, i got some stuff done on the car!

Under the hood i got the exhaust manifolds bolted up with gaskets and the works, plugs and wires on, and crawled under the dash to finish tightening up the brake master and attaching the rod to the pedal.

Started efforting the subframe connectors which was troublesome. firstly the bbk ones were really short front to rear compared to pics ive seen of others. problem two, these were the "bolt in/weld in" ones that SHOULD have bolt hole alignment on the seat/front but they were WAY off like over a half inch for the seat bolts. Normally i wouldnt bitch too much and just make it work but if im gunna have to re-engineer these, i might as well get some of the weld together ones that you build yourself. so thankfully i got a return started on amazon and going to order the other ones i was looking at and just weld the whole thing.

had to get a BIT sketchy to get the trans under the car. we only had it setup this way for a couple minutes while we shoved the 80e under the car. once it was under we lowered it back down to the safe jackstand configuration


spent a lot of time trying to figure out the SFC issues before i decided to just ditch them and get the better ones and burned a lot of time.
but still made good progress.
Under the hood i got the exhaust manifolds bolted up with gaskets and the works, plugs and wires on, and crawled under the dash to finish tightening up the brake master and attaching the rod to the pedal.
Started efforting the subframe connectors which was troublesome. firstly the bbk ones were really short front to rear compared to pics ive seen of others. problem two, these were the "bolt in/weld in" ones that SHOULD have bolt hole alignment on the seat/front but they were WAY off like over a half inch for the seat bolts. Normally i wouldnt bitch too much and just make it work but if im gunna have to re-engineer these, i might as well get some of the weld together ones that you build yourself. so thankfully i got a return started on amazon and going to order the other ones i was looking at and just weld the whole thing.
had to get a BIT sketchy to get the trans under the car. we only had it setup this way for a couple minutes while we shoved the 80e under the car. once it was under we lowered it back down to the safe jackstand configuration
spent a lot of time trying to figure out the SFC issues before i decided to just ditch them and get the better ones and burned a lot of time.
but still made good progress.
Looks good, nice progress.
03-04-2018, 11:10 AM
#95
TECH Apprentice
Thread Starter
03-13-2018, 07:58 AM
#97
TECH Apprentice
Thread Starter
the maximum motorsports subframe connectors showed up as well as the flexible trans dipstick and some odds and ends. if the weather is good this weekend ill do the SFCs. taking advantage of these now longer days and nice weather to get some progress done.
ordered a PSI harness for it because of that ebay coupon last week that had up to 100 off. that should be shipping soon and i have a fuel pressure regulator enroute as well.
ive officially blown the 3k get it running budget but ive been doing a bunch of things i was planning on doing during phase 2 like the turbo headers and the wiring harness. i think im around 3900 in right now. maybe slightly over and i still need some fuel system fittings/lines, a battery and what not, etc. repurposing what i can where i can.
05-24-2018, 10:26 AM
#98
TECH Apprentice
Thread Starter
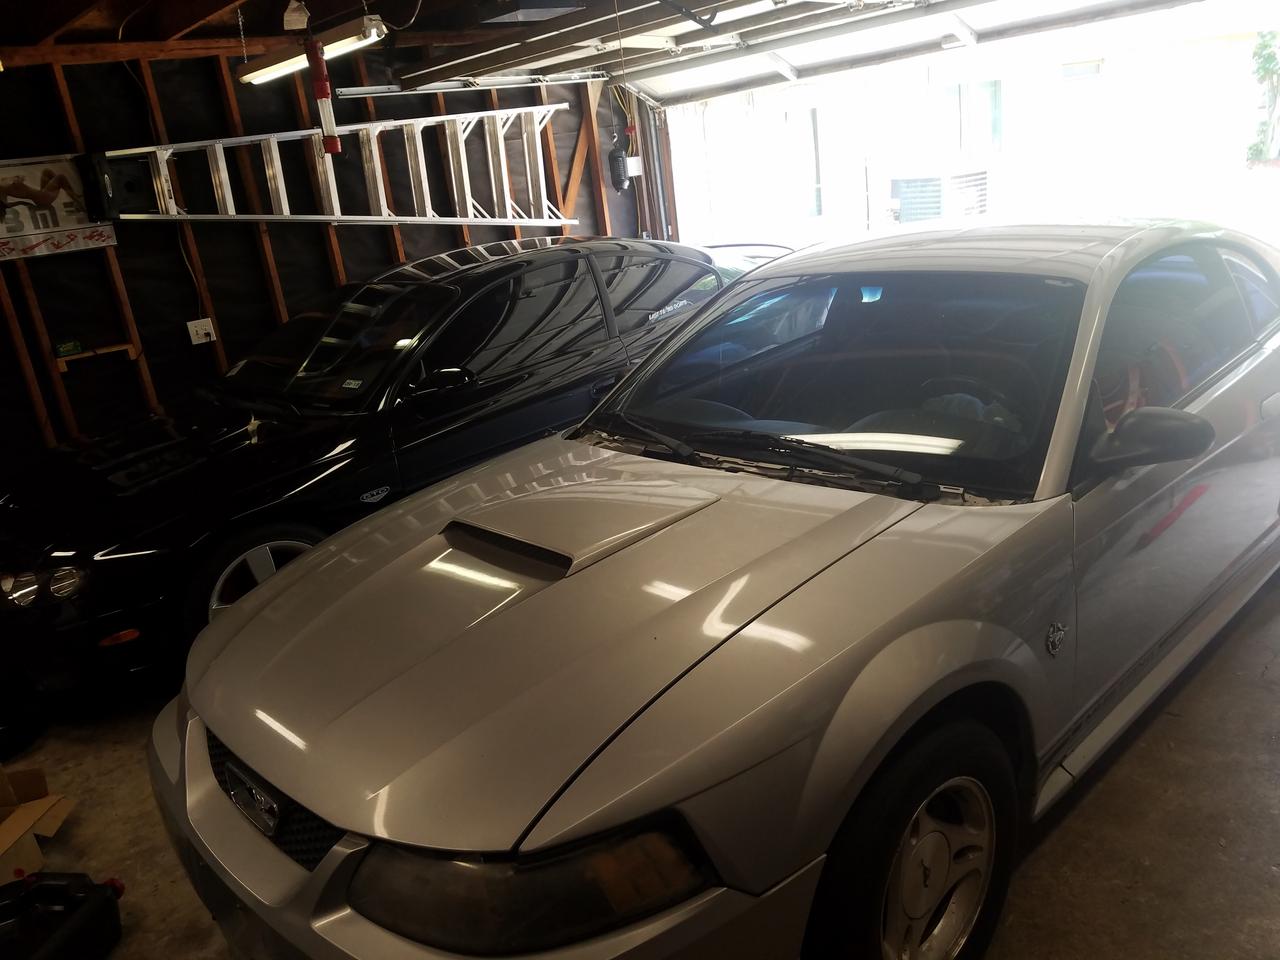
So after getting a few notices from the HOA, had to make some adjustments to how i am working on this car.
relocated my GTO to a friends house for storage so i can push the mustang into the garage and get it up on stands and start really working on it again. had to fix a variety of other car issues over the last few weekends but mostly everything is lined out now and in a good spot. going to fix an airleak on my compressor and replace the starter on my wife's GTO then it moves over, mustang moves in, and we can start wrenching on the mustang again at a reasonable pace.
relocated my GTO to a friends house for storage so i can push the mustang into the garage and get it up on stands and start really working on it again. had to fix a variety of other car issues over the last few weekends but mostly everything is lined out now and in a good spot. going to fix an airleak on my compressor and replace the starter on my wife's GTO then it moves over, mustang moves in, and we can start wrenching on the mustang again at a reasonable pace.
05-29-2018, 08:42 AM
#99
TECH Apprentice
Thread Starter
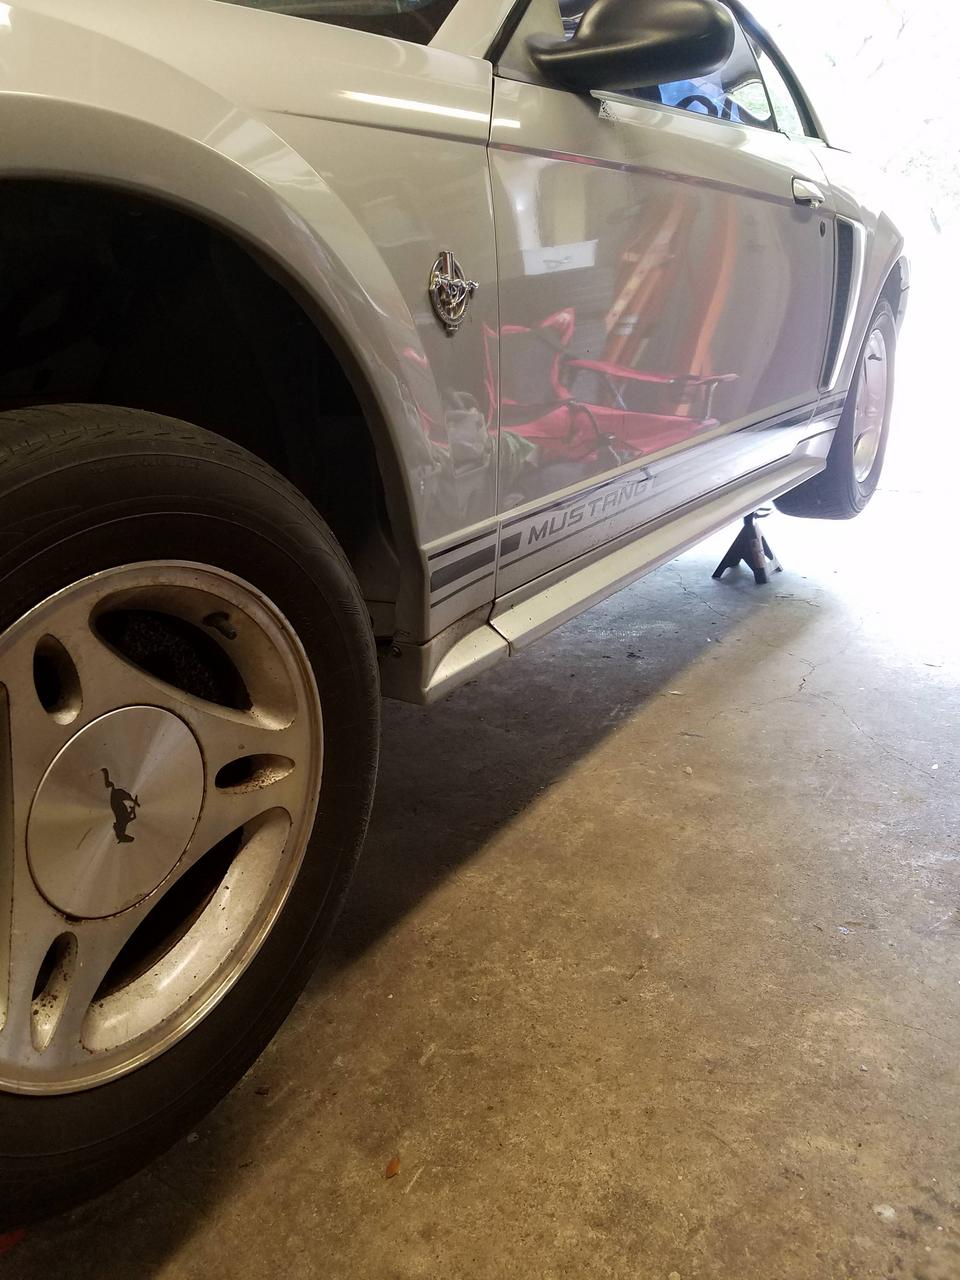
FINALLY SOME PROGRESS!!!
so after getting my GTO moved to a friends place for storage, i was able to do the starter on my wifes GTO and an oil change and it got shuffled over and i pushed the mustang in the garage.
such a strange sight
anyway got it up on stands and started underneath it.
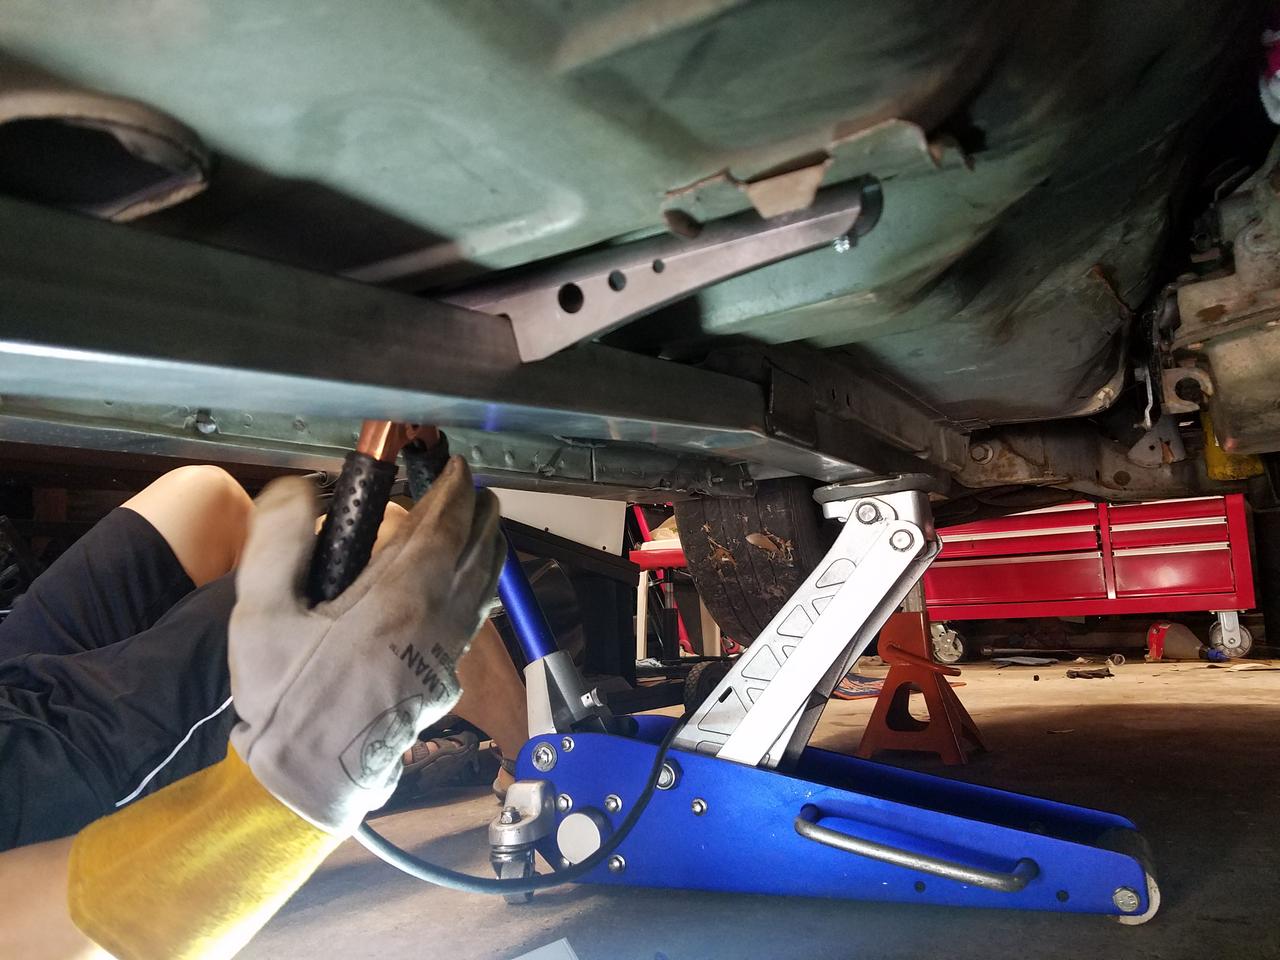
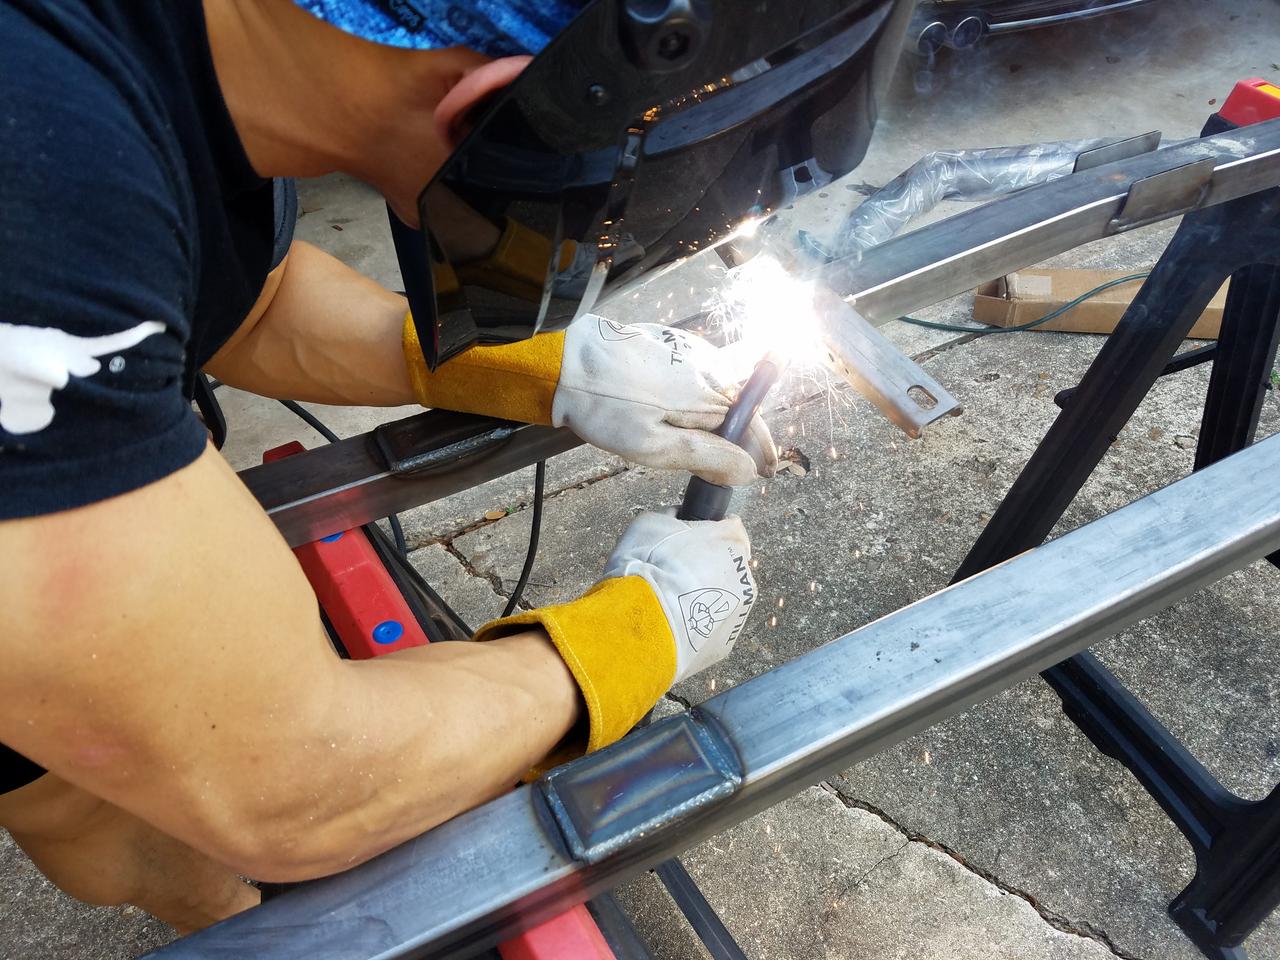
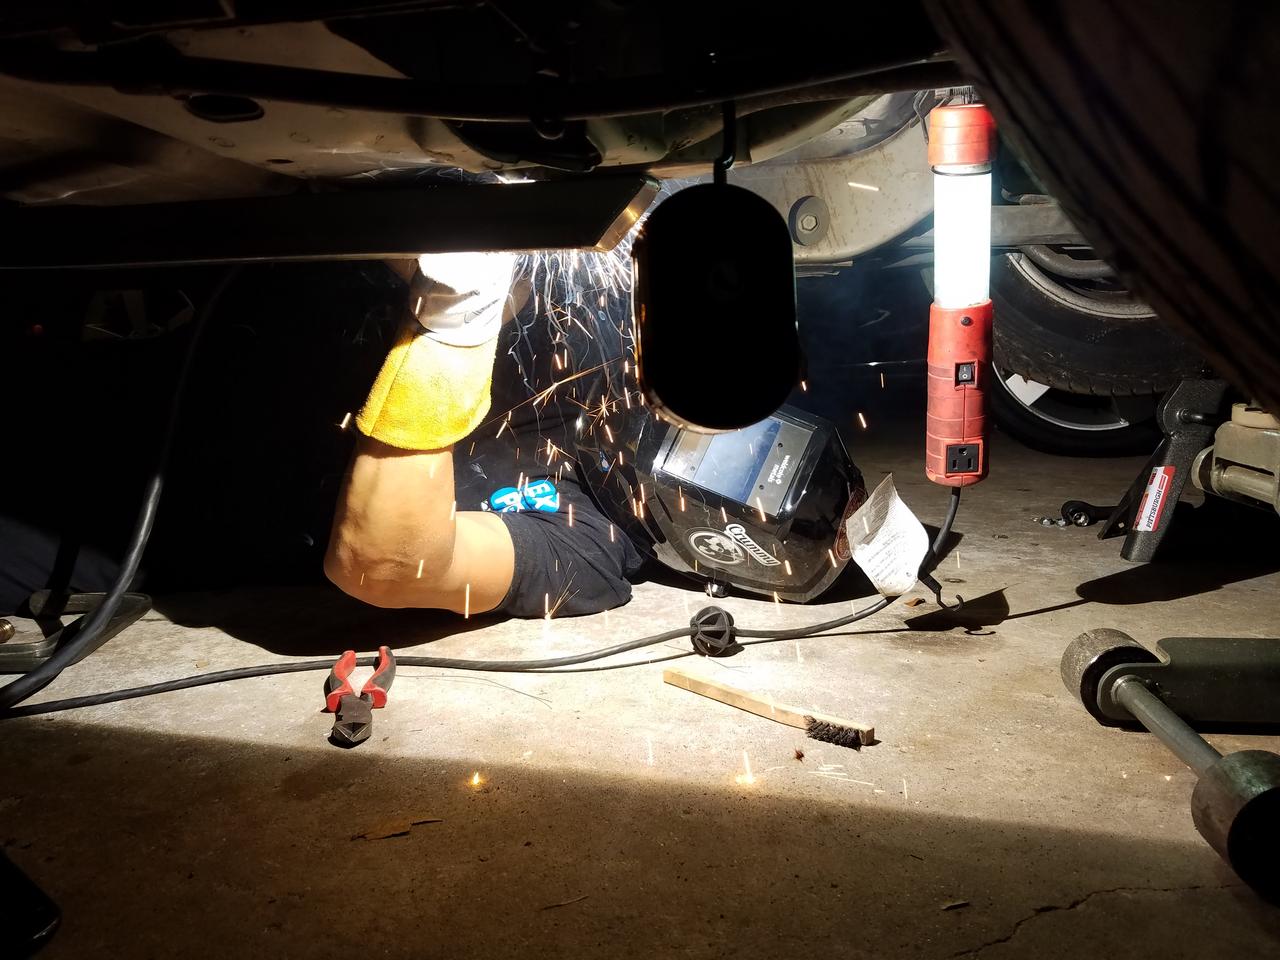
first task, the maximum motorsport full length subframe connectors. im going to put end up putting some brackets onto these to build my trans crossmember off of. My friend Mikey came by to help me burn them in since i suck at welding and his work has been paying for him to learn so it works out he gets some practice. We ended up spending about 14 hours saturday and sunday getting these burnt in. includes a few food runs as well as runs to harbor freight to get new grinders since the arbor lock on the one i had broke and it wont pin as well as a run for more wire and tips for the welder. using a hobart handler 140 a friend let me borrow with flux core wire. its ugly but it worked. about 1/4 into the second one we were on another spool of wire and it was lincoln vs hobart wire and holy crap it laid so much better.

realized i only snapped one once we had it suspended on its own and not once fully burned in. we did a few stitch welds front and rear.

i needed a day NOT laying on concrete cause my body was screaming at me monday so im gunna get under there tonight or tomorrow night and scuff it up, clean it up and spray some etching primer on it to keep it from rusting then im gunna spray some undercoating on it.
so after getting my GTO moved to a friends place for storage, i was able to do the starter on my wifes GTO and an oil change and it got shuffled over and i pushed the mustang in the garage.
such a strange sight
anyway got it up on stands and started underneath it.
first task, the maximum motorsport full length subframe connectors. im going to put end up putting some brackets onto these to build my trans crossmember off of. My friend Mikey came by to help me burn them in since i suck at welding and his work has been paying for him to learn so it works out he gets some practice. We ended up spending about 14 hours saturday and sunday getting these burnt in. includes a few food runs as well as runs to harbor freight to get new grinders since the arbor lock on the one i had broke and it wont pin as well as a run for more wire and tips for the welder. using a hobart handler 140 a friend let me borrow with flux core wire. its ugly but it worked. about 1/4 into the second one we were on another spool of wire and it was lincoln vs hobart wire and holy crap it laid so much better.
realized i only snapped one once we had it suspended on its own and not once fully burned in. we did a few stitch welds front and rear.

i needed a day NOT laying on concrete cause my body was screaming at me monday so im gunna get under there tonight or tomorrow night and scuff it up, clean it up and spray some etching primer on it to keep it from rusting then im gunna spray some undercoating on it.
07-23-2018, 08:02 AM
#100
TECH Apprentice
Thread Starter
realized i updated on the other forums but not here.
from 2 weeks ago.
after burning 3 hours trying to modify the truck cross member and making very little progress, i decided since im on a time crunch (gto has to come home soon) im going to hit the easy button and order a universal mount and modify that. way less to do that way. so i spent some time doing some measurements and i need to double check those today before i order one. i laid the fuel lines out following the stock routing and marking them for length. also mounted the FPR under the hood so i could get those lengths.
only have a little time a day taking care of the wife after surgery so im getting done what i can where i can.
From this weekend.
ALMOST finished the fuel system this weekend.
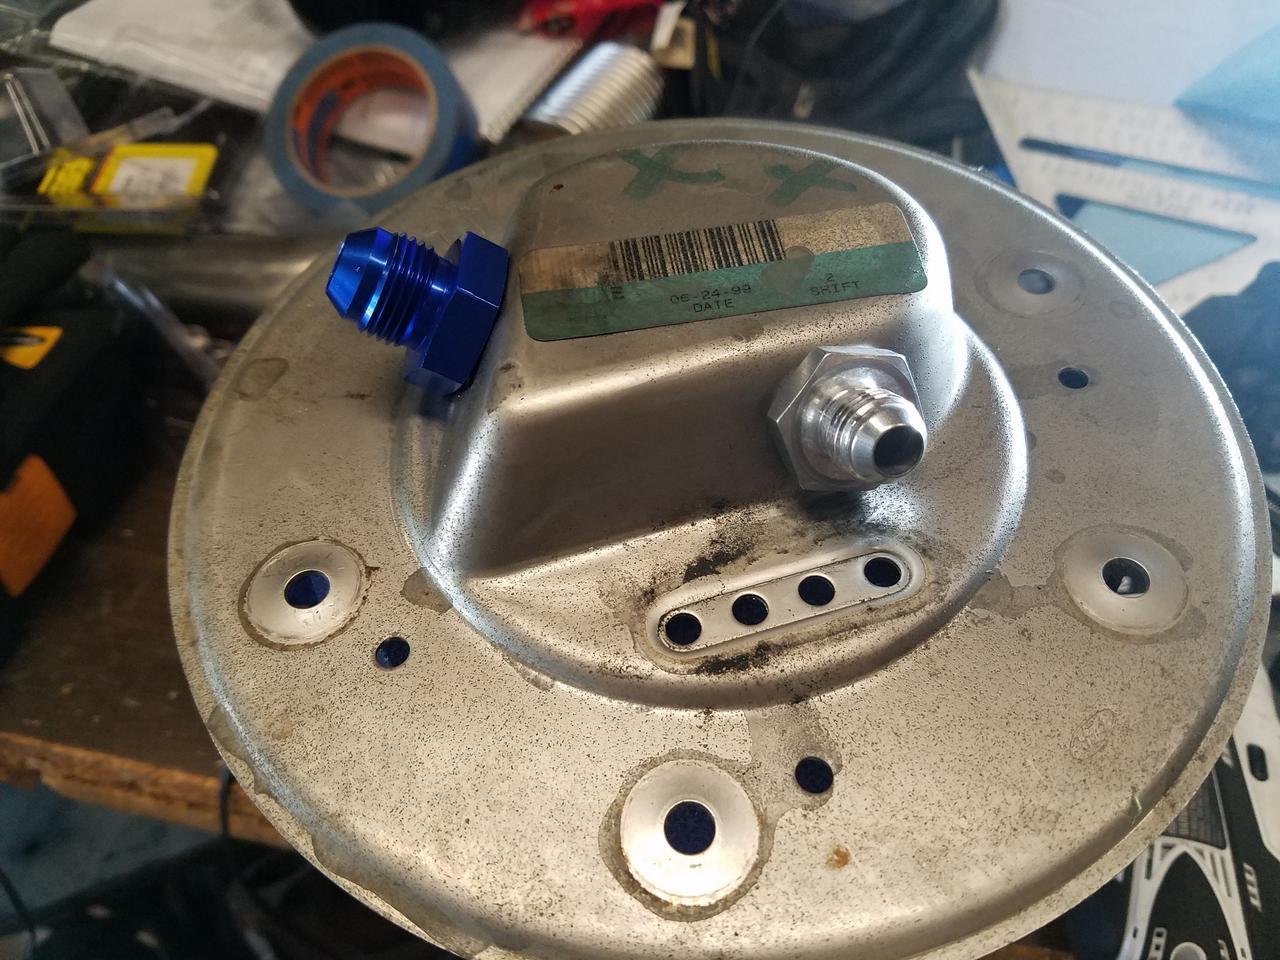
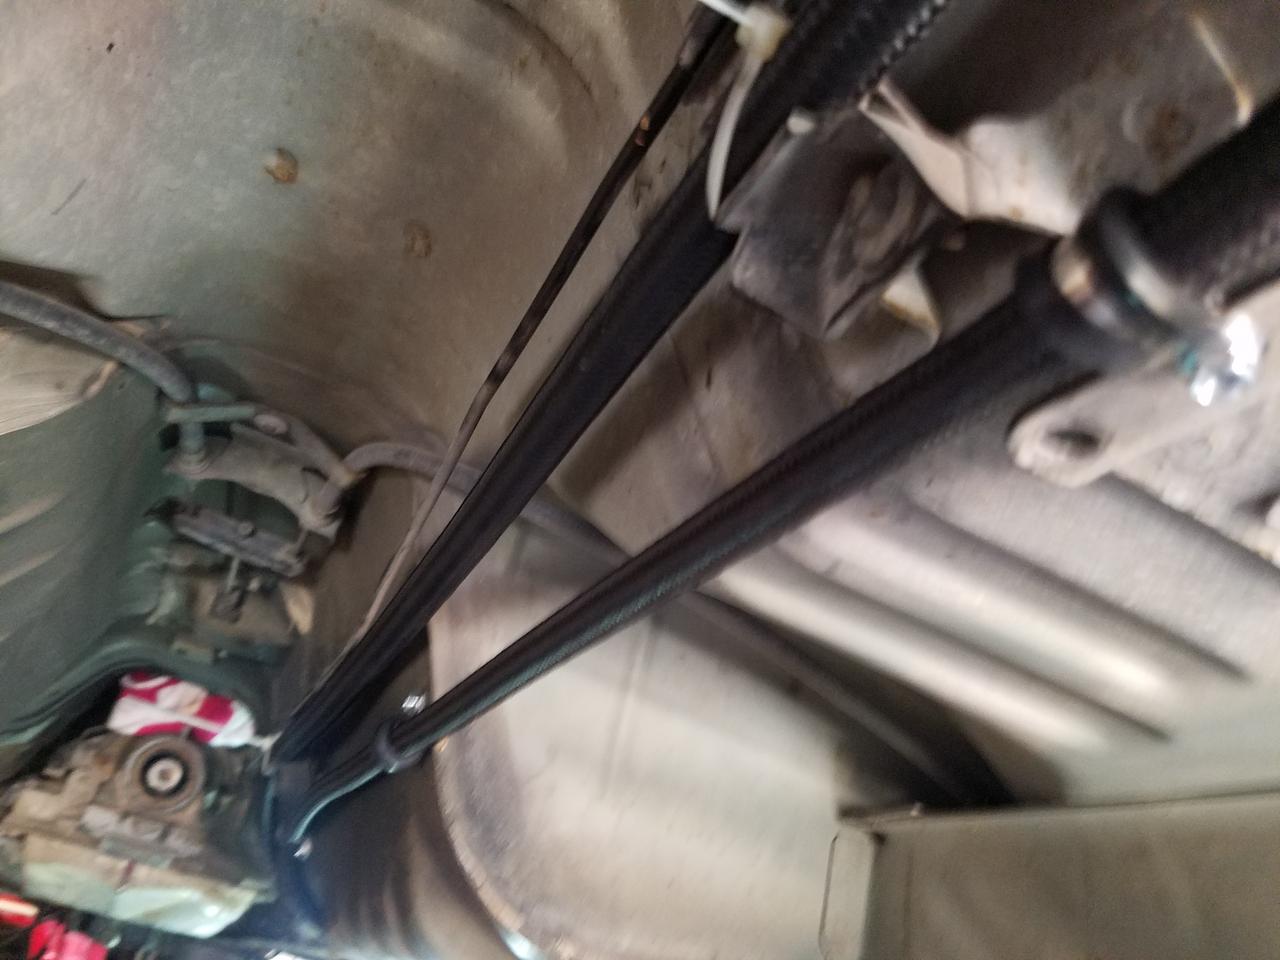
modified the stock fuel hat to have AN lines in/out. build the an feed and return lines from engine bay to the rear of the car. built a second set of lines to come from the fuel hat to the body lines so i can easily drop the tank with one person instead of lowering it down and then having to loose the lines i can just disconnect them from the chassis, disconnect the filler neck and electrical for fuel pump and drop the tank down.
couldnt finish due to not having any submersible fuel line to go from the hat to the pump and putting a line on the return to prevent cavitation. went to 4 parts stores looking and ended up going to amazon prime racing to order it lol. once that gets here ill get it setup and in the tank and then mount the tank back up.
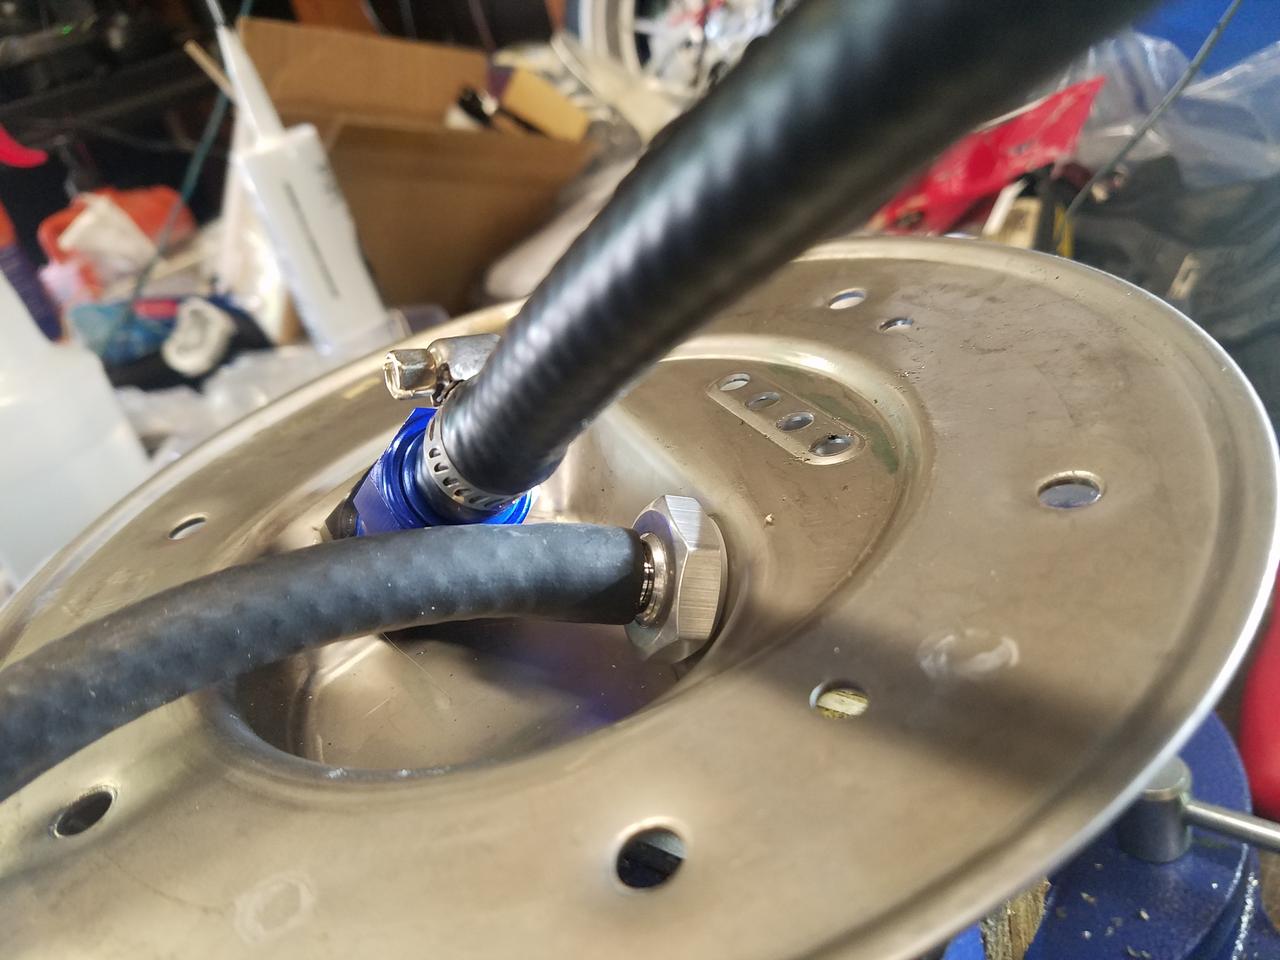
been a while since i made AN lines


routed along the factory path.

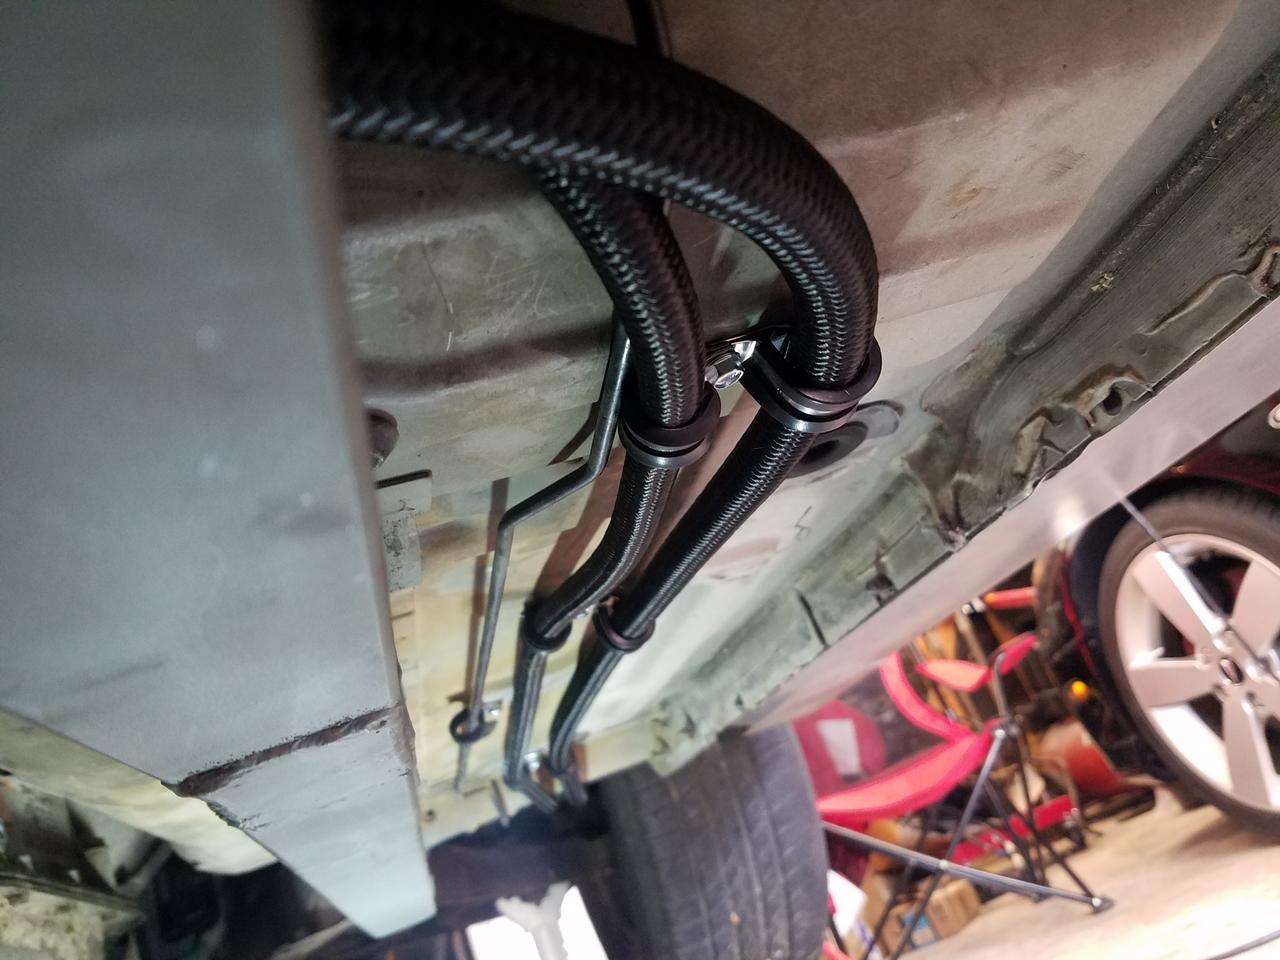
the -8 actually clicked into the holders for the factory evap line but i wanted to ensure it didnt go anywhere (thus the zip ties)
Didnt get any pics of the short lines on the back of the tank but its coming along.
from 2 weeks ago.
after burning 3 hours trying to modify the truck cross member and making very little progress, i decided since im on a time crunch (gto has to come home soon) im going to hit the easy button and order a universal mount and modify that. way less to do that way. so i spent some time doing some measurements and i need to double check those today before i order one. i laid the fuel lines out following the stock routing and marking them for length. also mounted the FPR under the hood so i could get those lengths.
only have a little time a day taking care of the wife after surgery so im getting done what i can where i can.
From this weekend.
ALMOST finished the fuel system this weekend.
modified the stock fuel hat to have AN lines in/out. build the an feed and return lines from engine bay to the rear of the car. built a second set of lines to come from the fuel hat to the body lines so i can easily drop the tank with one person instead of lowering it down and then having to loose the lines i can just disconnect them from the chassis, disconnect the filler neck and electrical for fuel pump and drop the tank down.
couldnt finish due to not having any submersible fuel line to go from the hat to the pump and putting a line on the return to prevent cavitation. went to 4 parts stores looking and ended up going to amazon prime racing to order it lol. once that gets here ill get it setup and in the tank and then mount the tank back up.
been a while since i made AN lines
routed along the factory path.
the -8 actually clicked into the holders for the factory evap line but i wanted to ensure it didnt go anywhere (thus the zip ties)
Didnt get any pics of the short lines on the back of the tank but its coming along.