

2003 Mustang Cobra Build (Turbo/Powerglide, PIC HEAVY)


 07-28-2022 | 10:45 AM
#42
Slowly but surely. Not much time these days, little bit here and there. Wiring this thing has been so time consuming, took me 3 hours last night just to make a makeshift trunk wiring section.
Took the factory wiring, stripped out all of the garbage that is no longer needed probed and wired to a Deutsch 12 pin connector. Taillights, Brake Lights, Turn Signals, 3rd Brake, interior light, pop lock function all there. Still room for 4 more wires so ill probably end up putting the fuel level/fuel temp sensors through it as well. Trying to make it as easy as possible to diagnose, modify later down the road.
Took the factory wiring, stripped out all of the garbage that is no longer needed probed and wired to a Deutsch 12 pin connector. Taillights, Brake Lights, Turn Signals, 3rd Brake, interior light, pop lock function all there. Still room for 4 more wires so ill probably end up putting the fuel level/fuel temp sensors through it as well. Trying to make it as easy as possible to diagnose, modify later down the road.
07-28-2022 | 02:10 PM
#43

TECH Senior Member

Joined: Jul 2009
Posts: 7,927
Likes: 608
Great progress. What brand bulkhead connectors are in the carbon fiber panel?
You�re doing all of the wiring yourself? what tools are you using? I�ve been eyeballing a kit at home. I�m hoping they�re as good as I read about for the hobbyist.
I never knew Circle D did the bolt together �veter. Will this allow you to change stall? If so, how? LOL
thanks,
jimbo
You�re doing all of the wiring yourself? what tools are you using? I�ve been eyeballing a kit at home. I�m hoping they�re as good as I read about for the hobbyist.
I never knew Circle D did the bolt together �veter. Will this allow you to change stall? If so, how? LOL
thanks,
jimbo
07-28-2022 | 03:08 PM
#44
They are genuine Deutch Connectors, i have a 23 Pin Deutsch Connector for the switch panel, 14 Pin Deutsch Connector for Holley Integration Wiring, 31 Pin Deutsch Connector for Main Outputs 1, 23 Pin Deutsch Connector for Main Outputs 2.
I am, i have some basic knowledge and have watched hundreds of hours of wiring from some of the best car wiring guys out there on YouTube. I am using a combination of tools, ill post a picture tonight of the ones most commonly used for my build and what they work for.
Yeah Pete Nichols (one of the best converter guys out there) moved over to Circle D from Hughes so that's the only reason i went with Circle D. This will allow you to do it all at home without having to keep sending it out to get cut and re-welded based on new combinations or if the converter is too loose or tight. You unbolt it and swap in a new stator and bolt it all back together.
07-29-2022 | 09:07 AM
#45
TECH Senior Member
Joined: Jul 2009
Posts: 7,927
Likes: 608
Thanks for the reply. The Deausch (sp) connectors are the round ones? If so, are they from their Auto Sport line?
Converter, Ok that sounds great. How expensive are the parts you would have to bolt in there? Hopefully not too bad. Have a bunch for dialing the setup in. Pretty cool
Converter, Ok that sounds great. How expensive are the parts you would have to bolt in there? Hopefully not too bad. Have a bunch for dialing the setup in. Pretty cool
 08-01-2022 | 09:09 AM
#47
Thanks for the reply. The Deausch (sp) connectors are the round ones? If so, are they from their Auto Sport line?
Converter, Ok that sounds great. How expensive are the parts you would have to bolt in there? Hopefully not too bad. Have a bunch for dialing the setup in. Pretty cool
Converter, Ok that sounds great. How expensive are the parts you would have to bolt in there? Hopefully not too bad. Have a bunch for dialing the setup in. Pretty cool
Heres the tools i use the most. Crimp style pins, i use the green handle pliers to crimp them. Solid pins i use the TE pliers, they are expensive but really worth it. The pink tool is just to release pins/remove the caps.

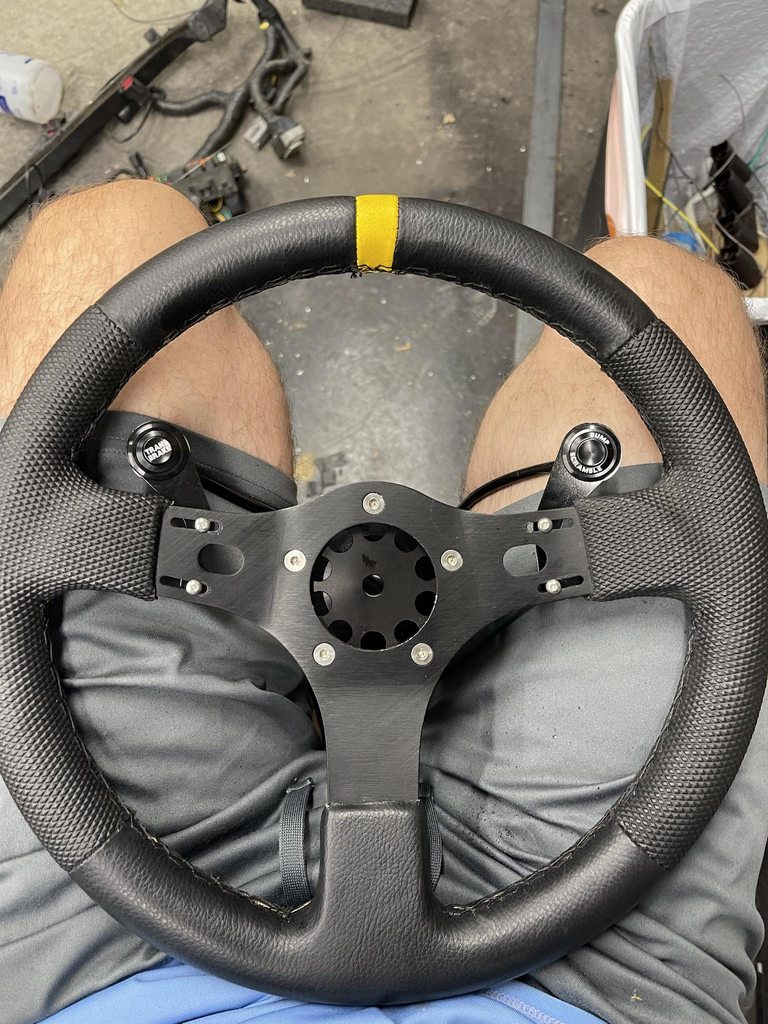
Made some small progress last night. Got the steering wheel buttons all on, along with half of the monocord (quick disconnect),

Started fitting the dash with the screen in place, have to do some minor trimming to level it out and drop it down a bit but this will be close to where it will end up.
 08-04-2022 | 10:02 AM
#48
Finally got my cam, springs, shims and spring height micrometer in.
Ended up with a custom specd cam from FPP (John Bewley) Cam specs are 239/245 .632/.632 114+5.
Ditched the BTR .660 springs for some SK03s since im going to be spinning this car to 7500 rpm on the shift.

Spring Height Mic so i can shim the springs appropriately.

Picked up my exhaust trim ring, need to sand it down to remove the color and then drill for rivets.

Then tackled mounting the Holley 12.3 dash. I knew i was going to need to do some serious trimming of the dash pad where the stock cluster is mounted. Then i started fitting it and had to trim some metal off the dash support bars. This area was not that structural so i saw no issue with cutting it out.

Money shot! Couldn't have ended up anymore perfect. I did have to make a slotted extension to the column mount where it attaches to the Motion Raceworks Dash bracket.

Was going to wrap up the dash wiring and buttons last night, but i did not have the correct sized pins. So i need to order some DTM plugs and pins tonight.
08-05-2022 | 07:06 AM
#50
08-15-2022 | 12:03 PM
#53
Finally got myself a to-do list figured out. This isnt everything but it is a start to get this thing fired up.

Got that tubes all painted, looks so much better and almost like we are headed in the right direction!

Figured ill do some carbon for the holes in the firewall, so i got myself a sheet to cut and fit to the existing holes.

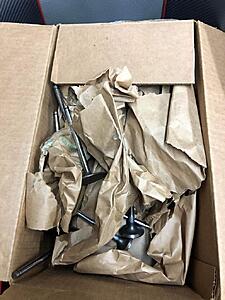
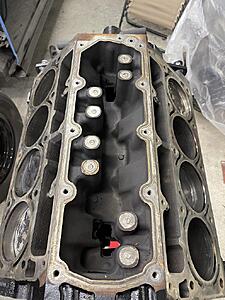
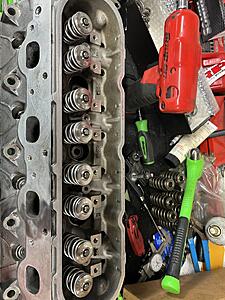
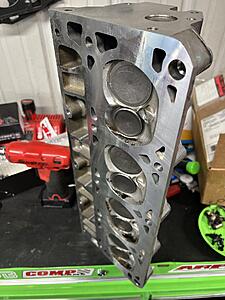
Got the heads all disassembled, cleaned and then found these valves all rusted. So i grabbed another set locally to throw in to get my by until next year.


Sloppy tip, A37 tapered bearing is a great alternative to drilling and tapping the oil ports on the DOD motors lol.
brought my trailer home to get the car to the fab shop to do some rework on the rear bars so i can fit the Ice Tank and Fuel Cell.

Should have some parts rolling in this week to scratch off a lot of the to-do list!

Got that tubes all painted, looks so much better and almost like we are headed in the right direction!

Figured ill do some carbon for the holes in the firewall, so i got myself a sheet to cut and fit to the existing holes.

Got the heads all disassembled, cleaned and then found these valves all rusted. So i grabbed another set locally to throw in to get my by until next year.


Sloppy tip, A37 tapered bearing is a great alternative to drilling and tapping the oil ports on the DOD motors lol.

brought my trailer home to get the car to the fab shop to do some rework on the rear bars so i can fit the Ice Tank and Fuel Cell.

Should have some parts rolling in this week to scratch off a lot of the to-do list!
08-19-2022 | 08:41 AM
#56
Did a little work on the car last night as well as some parts rolling in. First up, finally got my ATI balancer back from ATI, they had to rebuild it and replace the hub as it was corroded.


Got my fittings in for the radiator now that i am running a 417 Water manifold.

Inlet works great, outlet not so much lol, will have to plate the radiator and drill a new hole.


Got the sensors in to finish the Intake, minus the dummy injectors for the dual injector rail. Running a After cooler IAT and pre cooler IAT sensor for more data on the runs. Low Dollar 5 Bar, and then a boost reference fitting to a common block for the BOV, Regulator and other items in the car.


Assembled the Aeromotive 5GPM pump now that the fitting came in!

Dropped the transmission pan, oil pan and charge pipe/downpipe off to get some fittings welded on. Needed to add the pre-cooler IAT to the charge pipe, 02 Bung onto the downpipe, Transcooler sensor into the Trans pan, and turbo drain onto the oil pan. Should have my heads back today so i can start assembling the engine and start measuring push rods.
08-30-2022 | 10:15 AM
#57
Couple small things ive done, been fighting covid and a stomach bug!
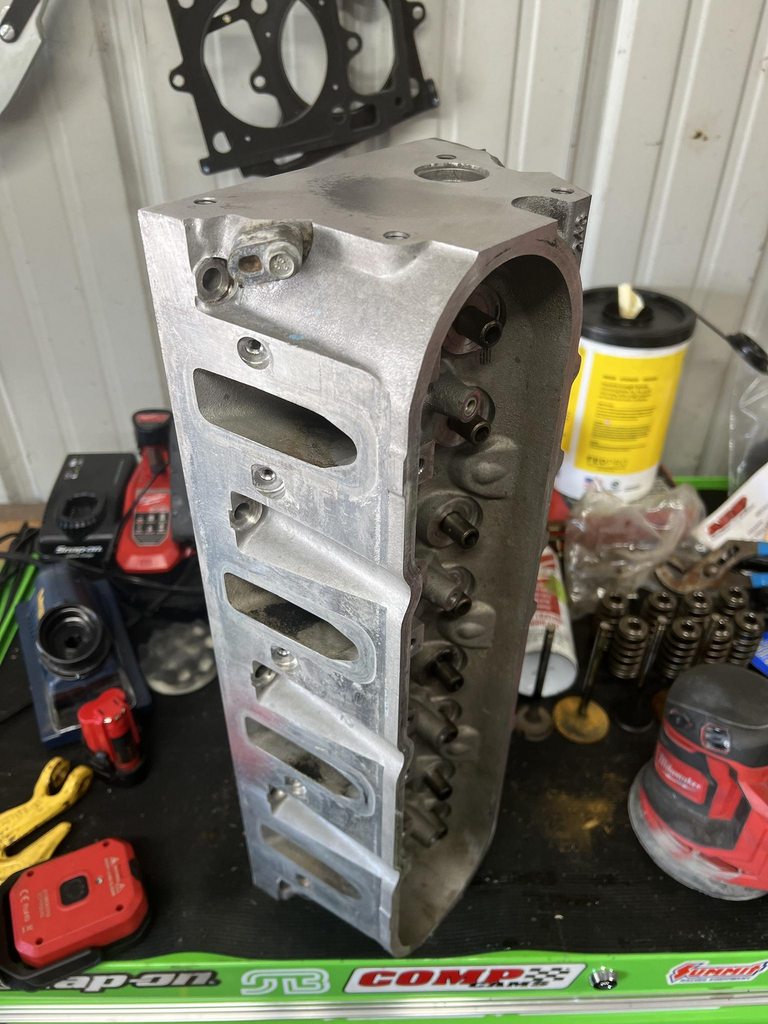
Got the heads back and ready to bolt on, only had to shim a couple of the springs to get all to the same height.
Degree'd the cam in, surprisingly enough i didn't have to advance the cam or retard it to match the cam card.

Got the billet blank injectors in.


Installed the shaft rockers so that i can measure pushrod lengths. Ended up both being 7.553 +/- .002 which falls in line with the +/- .005 that the lifters allow. Ordered 3/8" diameter push rods as i will be seeing some high RPM and there is quite a bit of pushrod flex ive seen on other cars using 5/16" diameter rods. You can also see i have used studs instead of bolts for some additional clamping force. These are from a company called Point One, they are pretty nice pretty comparable to ARP.

Had to throw the BTR valve covers on just for show, ill pull these back off and get them powder coated eventually.

Also finally dragged my Monte Carlo out from storage, put it away after i had just painted it about 18 months ago so the paint should be nice and hard now lol!

Got the heads back and ready to bolt on, only had to shim a couple of the springs to get all to the same height.


Degree'd the cam in, surprisingly enough i didn't have to advance the cam or retard it to match the cam card.

Got the billet blank injectors in.


Installed the shaft rockers so that i can measure pushrod lengths. Ended up both being 7.553 +/- .002 which falls in line with the +/- .005 that the lifters allow. Ordered 3/8" diameter push rods as i will be seeing some high RPM and there is quite a bit of pushrod flex ive seen on other cars using 5/16" diameter rods. You can also see i have used studs instead of bolts for some additional clamping force. These are from a company called Point One, they are pretty nice pretty comparable to ARP.

Had to throw the BTR valve covers on just for show, ill pull these back off and get them powder coated eventually.

Also finally dragged my Monte Carlo out from storage, put it away after i had just painted it about 18 months ago so the paint should be nice and hard now lol!

The following users liked this post:
Burning (08-30-2022)