When you click on links to various merchants on this site and make a purchase, this can result in this site earning a commission. Affiliate programs and affiliations include, but are not limited to, the eBay Partner Network.
52 Chevy Truck LS Swap - It's gonna be a loooong build!
Hey everyone. This is my first foray into such a complete project, I'll need a ton of advice from this forum. I've been collecting info for years and now I'm diving into the project. I don't have a ton of time right now to devote to the build so I pick at it little by little for now, that's why the title says it'll take a long time. I'll post pics and info along the way and i'll need advice from most of you as I go so please feel free to comment on things, I can take criticism just fine so if I'm heading down the wrong path don't be shy to tell me so. I thank any of you that can offer advice along the way.
The project consists of a 52 Chevy truck that I got from my dad. It came from Colorado and I traded him a bunch of beautiful Texas truck parts - bed, fenders, doors, etc. for this pile that you see here:
The donor drivetrain is from a 2002 Silverado 1500 HD 2wd that was T-boned. It's a 6.0L with flat tops and camshaft, with a stock 4L80E with stock converter. Before - all stock 285k mile 6.0L
I'll have to get pics of the chassis. It's on a stock 52 truck frame, rear end is a 4-link kit with coilovers using a 97 Explorer junk yard 8.8 rear end with disc brakes and 31-spline axles. Front end is a Mustang II kit with coilovers. An amazingly talented fabricator setup the whole chassis for me because that's something I will happily pay for quality work. The frame was sandblasted and then sprayed with an SEM chassis paint. Got the bed and front end piled in the backyard and now it's time to get to work on this thing:
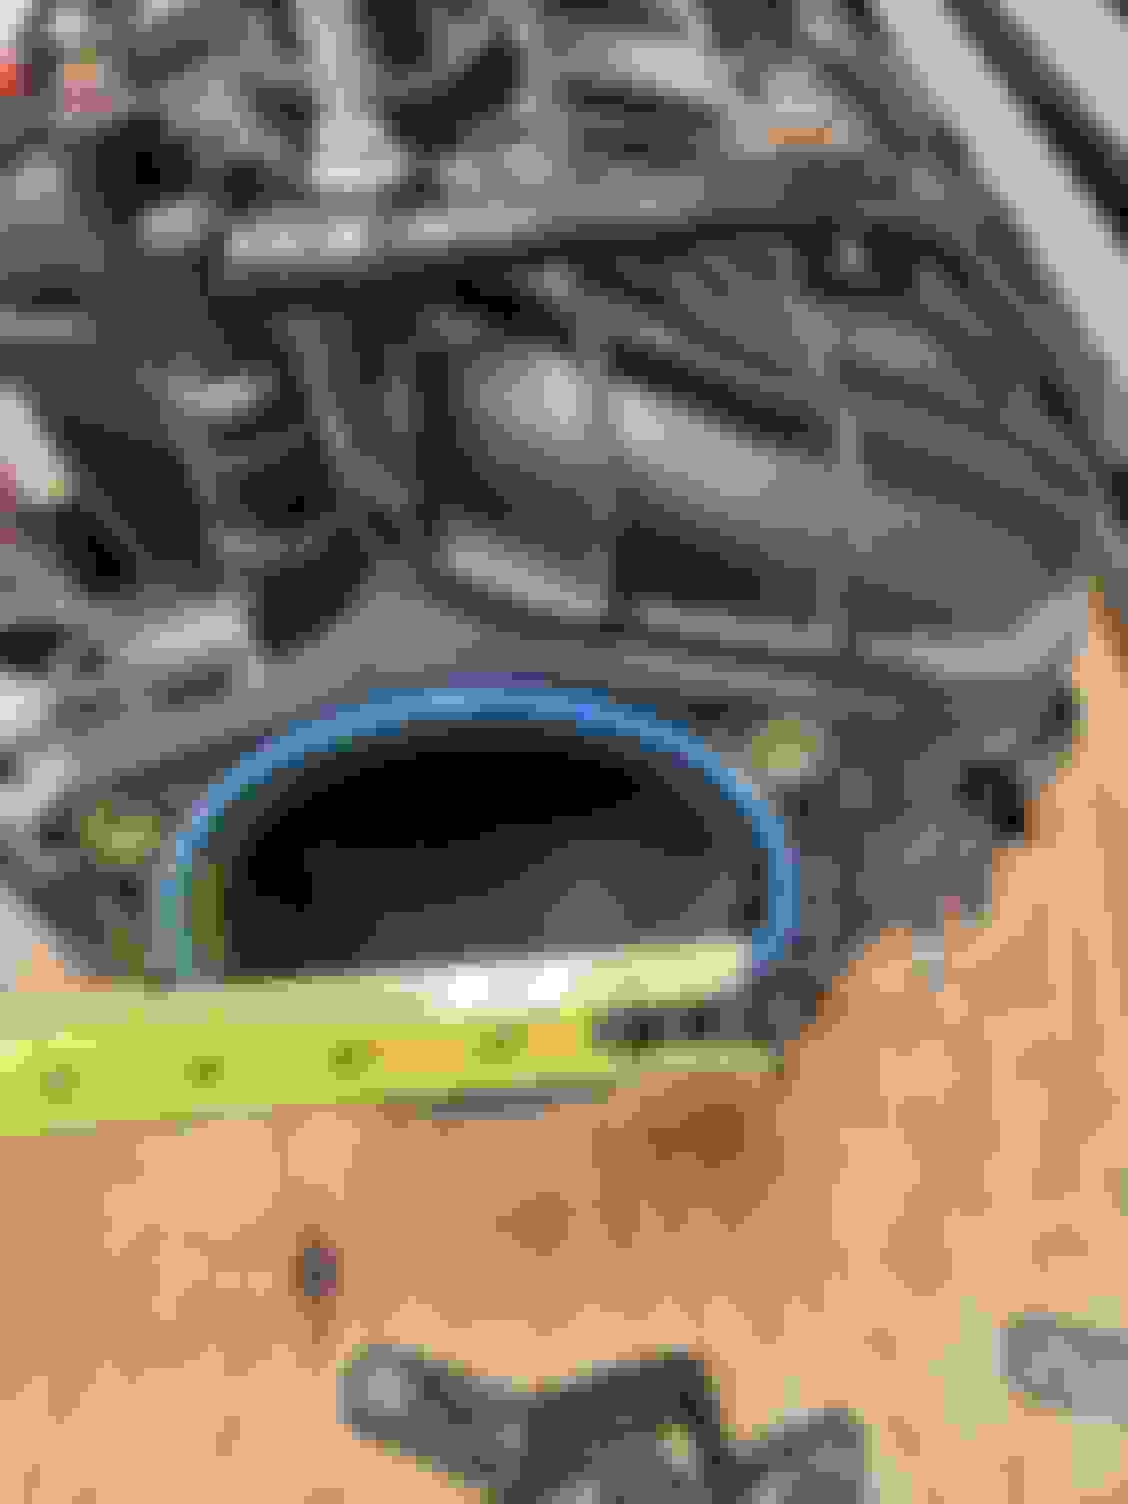
I picked up a bread box intake with rails and what I believe to be flex fuel injectors:
Will these injectors be good enough for an N/A build? I'll send them off for a real cleaning too:
Are these Flex Fuel injectors?
The 4L80 looked like it had been plowed through 285k miles of sand and dirt and crud for 20 years.....probably because it had! I got busy with about a dozen of those Harbor Freight tooth brush sized wire brushes and a few hours of scrubbing and scraping to get it to look like this: ~4 hours of scraping, brushing, sanding, washing and cussing
Time to apply these products:
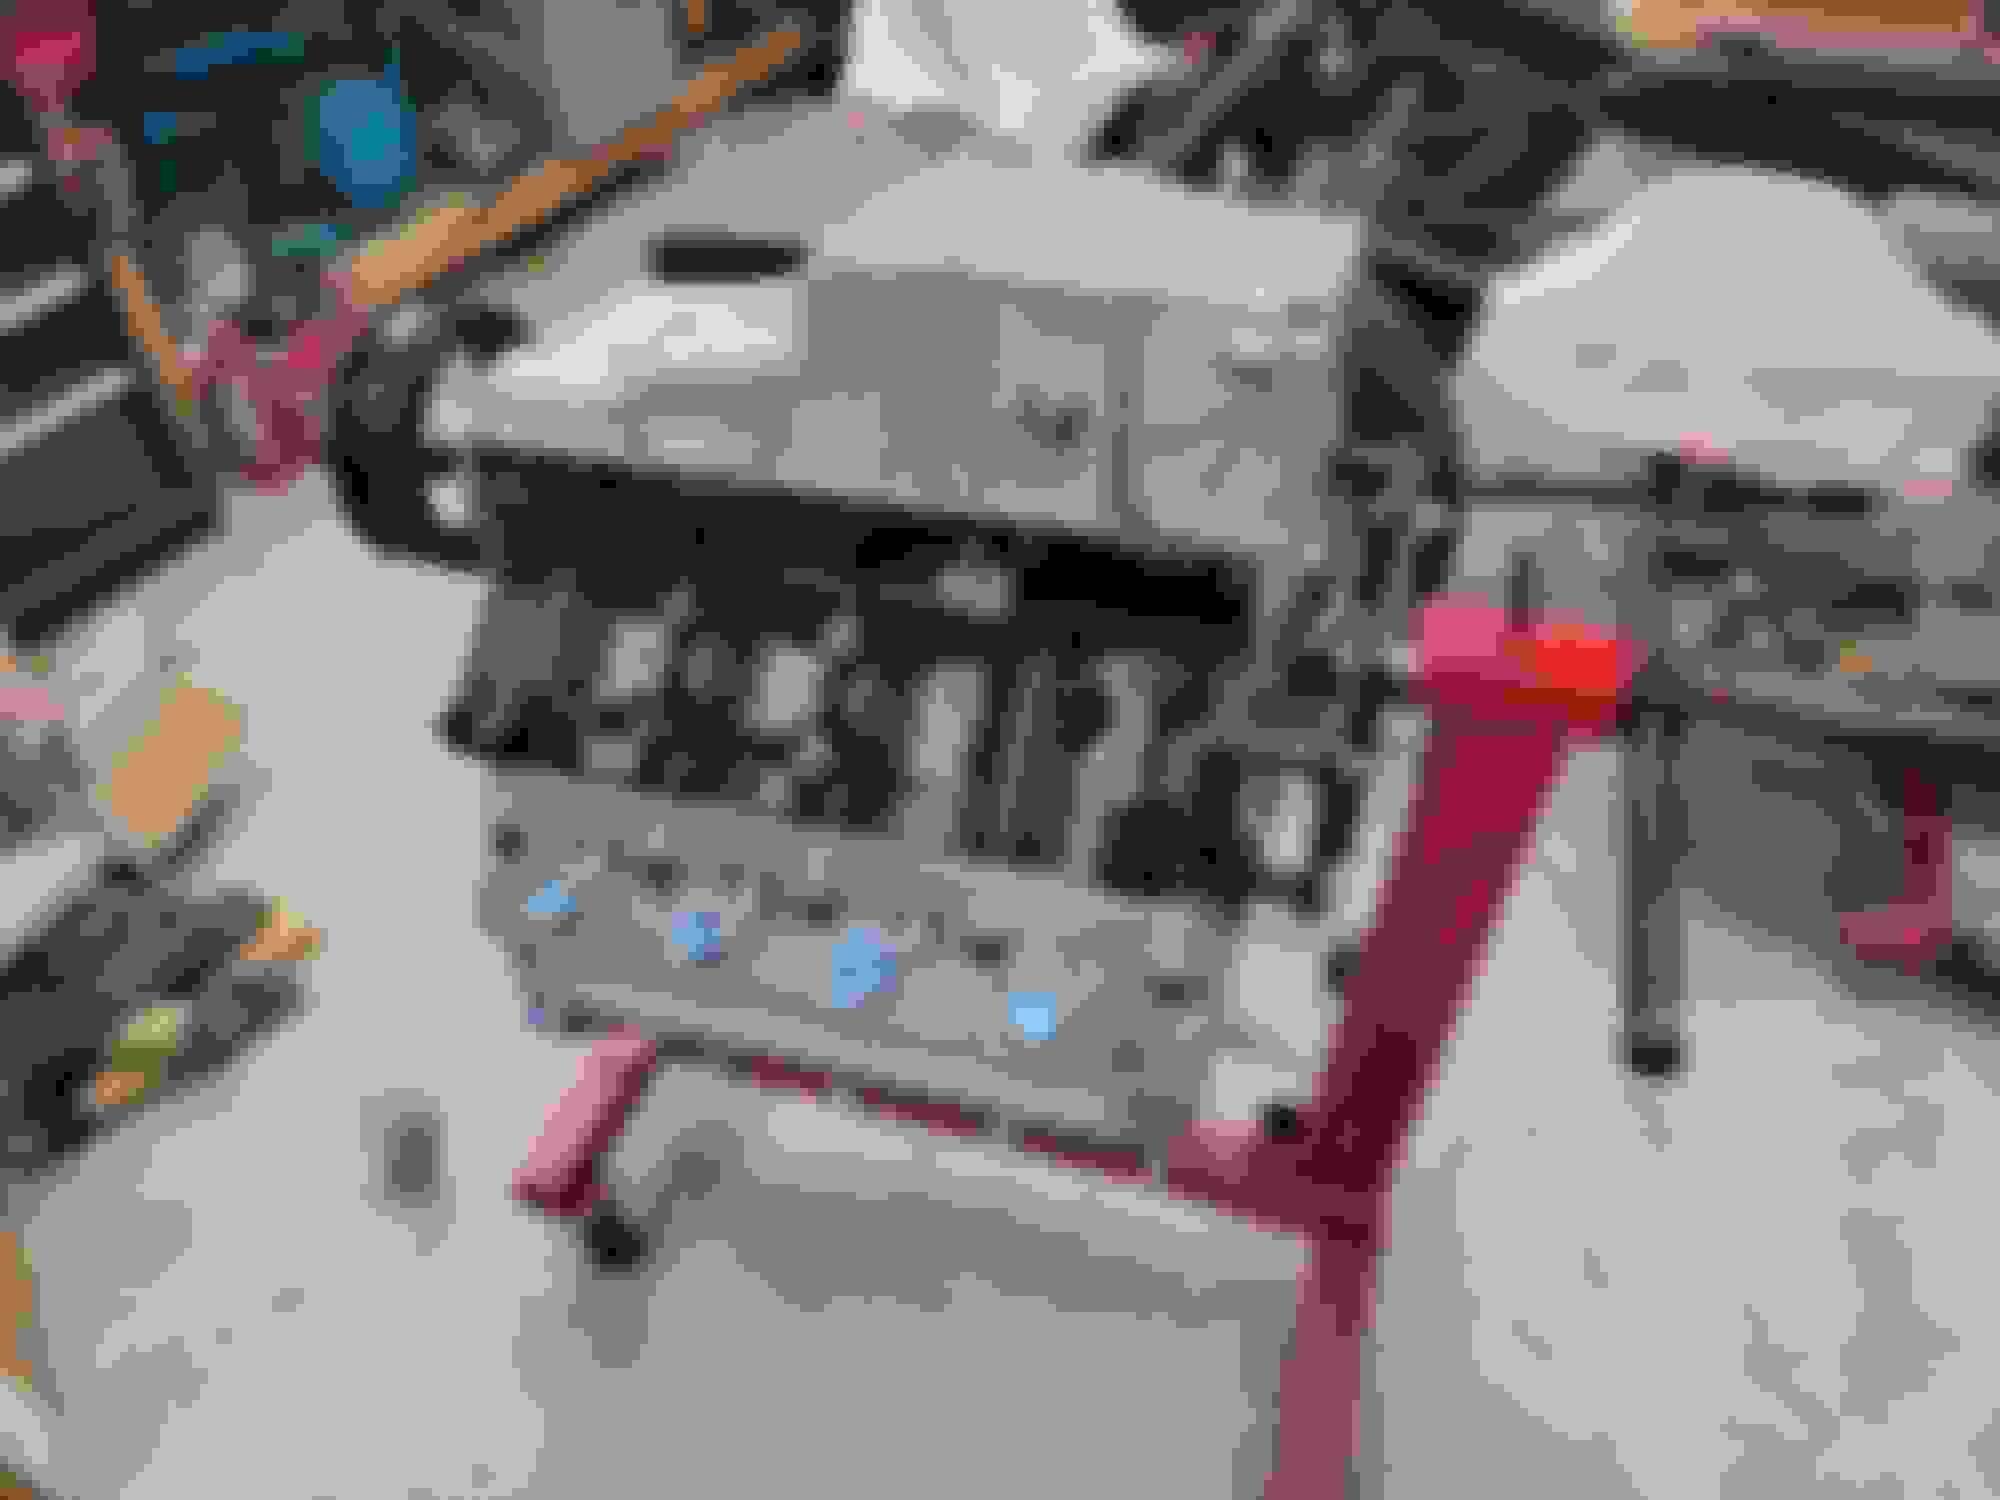
Primered trans case:
And now for the finished product, sure hope it shifts half as nice as it looks. Notice the broken tab at the top bellhousing bolt. Turns out that if you pry hard enough separating the trans from the engine you can break this tab! I've since learned that earlier 4L80's didn't use this bolt hole since the pre-LS blocks were not tapped for a bolt here. The machine shop that did my engine tapped another hole for me so I have a bolt now where GM didn't, at the next hole toward the passenger side. I'm gonna run it like this and never think about it again:
Mocked engine/trans into the frame. Had to clearance the cab a bit so a small trans tunnel has been added to the list of things needed. You'll notice the recessed firewall in this pic. The guy that setup the suspension for me also installed this firewall. It should add almost 4" of extra space to allow me to shift the engine further back and have more room for accessories, radiator fans, etc.
Hmmmmm.....will long tubes fit in this narrow frame?
Hey, looks like these barely fit and I'll have to barely trim the frame on the passenger side. I splurged the budget to buy some Sanderson long tubes. These are the CPLS134 model and I was lucky enough to find an open box buy on ebay: It looks tighter in the photo than it really is. I will have to clearance the top flange of the frame maybe 1/4"
Now to figure out the engine mounts. I bought a beautiful set of SBC engine mounts from Welder Series out of Canada. I can't recommend them enough. He spent time on me with several emails and dimensions, etc. before I made the purchase and now I know his parts are awesome quality. I had to use his SBC mounts along with his LS adapter plates in order for the mount to be shifted to the front of the engine.....without that my long tube headers would not have fit because the front tube conflicted with the mount. Even the sliding mount wouldn't work, I had to learn that the hard way: This is the Welder Series SBC mount along with their LS adapter plate. This allowed me to offset the mount further forward so the front tube of the headers would clear. Success! plenty of clearance between the mount and the front header tube
The Welder Series kit comes with the tabs or ears to mount to the frame. This is my first time doing this so everything takes me 5 times as long as it should. I cut some cardboard templates until the fit was just right and then cut the steel tabs. I had to test fit and cut about 20 times until all 4 tabs were at the correct angle and length but it turned out good. I tacked it all in place with the engine supported on wood blocks in its final resting spot with approx. 2.8 degrees rear tilt:
Similar story for the trans crossmember. I bought the 4" drop crossmember from Speedway, then cut it to the correct length and angle to fit my frame rails. I tacked the mounting plates to the crossmember and then this and the engine mounts will go to the welder dude to get burned in with real welding equipment. I only have a 110v welder and zero welding experience so I don't mind taking my stuff to the shop for the final welding:
Wow those headers sure look good, but that LS truck oil pan sure hangs low:
Off to ebay to get an F-body pan. I luckily found some guy that sells these by the dozens and scored a nice lightly used OEM camaro oil pan kit for a great price. I trimmed my truck windage tray and reused it. Thanks to this forum I learned how to do that! I yanked the engine back out (it won't be the last time!) and tore into it:
LS truck pan is super deep
Trimmed the truck windage tray, and clearanced the area where the F-body pickup tube will bolt to the main cap
The F-body pan product gains a full 2" of clearance and is now flush with the bottom of the front crossmember when installed into the chassis.
I'm working on brake pedal, booster, and steering column now. I'm going to try something slick for the booster. I'm going slow so next update in a few weeks I hope. Please offer advice if you see me heading toward a mistake.
Things I need to figure out:
I need to decide if I want to have someone tune my stock PCM or if I want to go with the Holley Terminator. To reuse my stock wiring harness and PCM will involve some cost for either a tuner or a HP Tuner credit and maybe new wiring harness since the stock stuff is so old.......maybe that's halfway towards buying the Holley kit? My setup for tuning will be: DBC T-body, typical open filter air intake, long tube headers with full exhaust, stage 3 BTR cam, flat top pistons, and the auto trans. This is a Gen 3 engine so there is no DoD or variable timing to deal with.
Good move on the pan. You'd hate for the pan to be "first on the scene"!
Always love the "Advance Design" 47-54 trucks, but I'm biased as my grandfather had one from new (forget the year) until about 1970.

 06-02-2023, 10:14 AM