


New pics of '67 Camaro Conversion
Thread Starter
Joined: Aug 2005
Posts: 1,959
Likes: 4
From: The trailer park
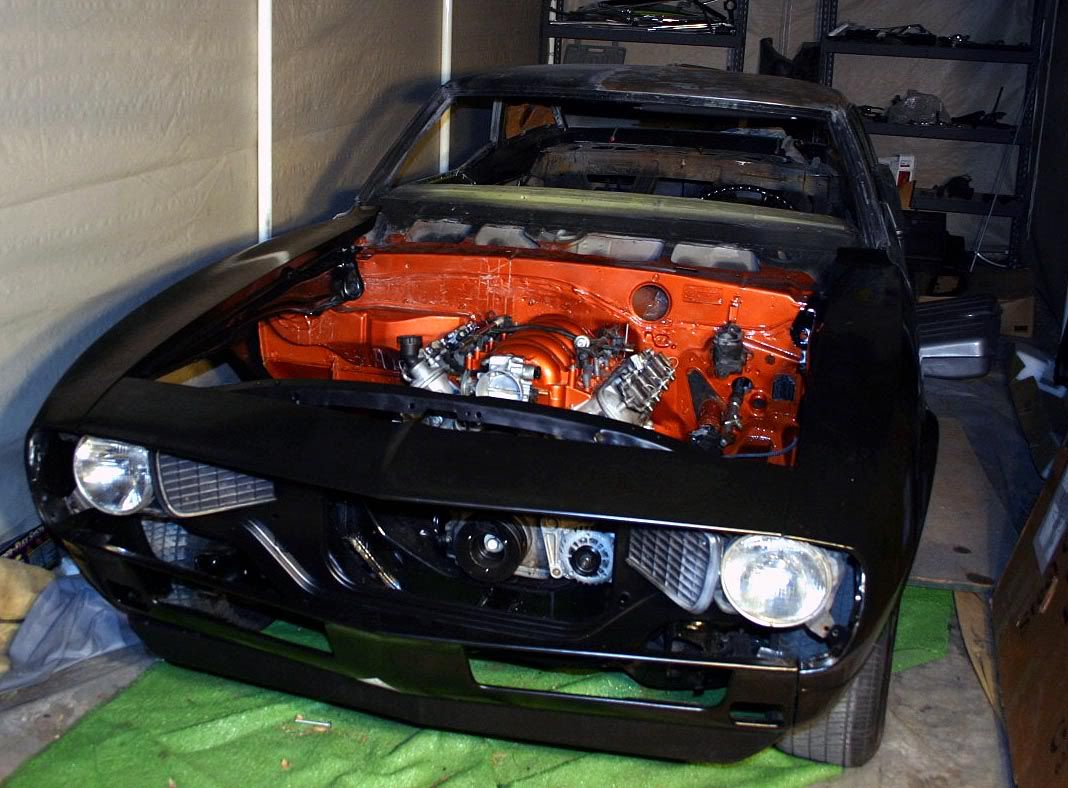
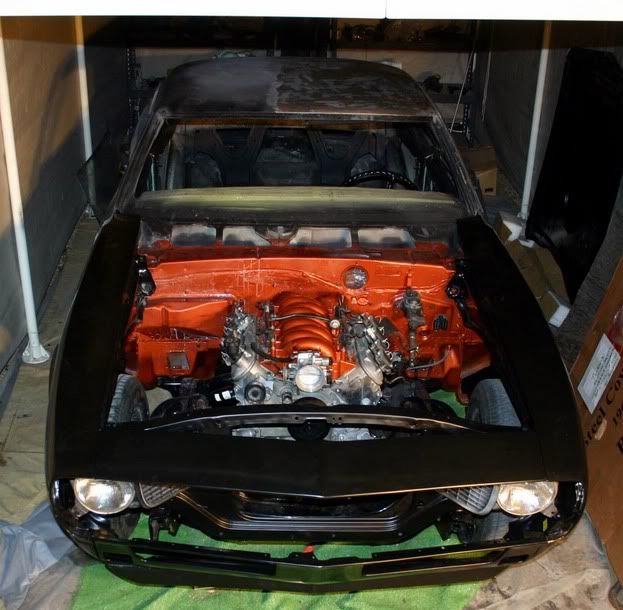
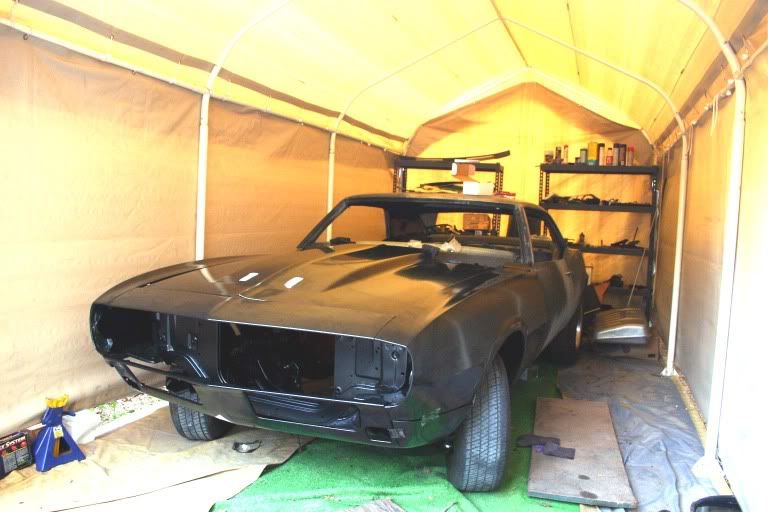
Thought i'd post a few pics. Got my whole front clip sheet metal, and spent an hour putting it on. Ignore the lower valance and hood alignment (no hinges on ATM, and tell me what you think. I love the cowl hood =)
olly
olly
Last edited by 67RSCamaroVette; Oct 27, 2005 at 10:10 PM. Reason: picture wrong
Looks good, what engine mounts are you using??? did you cut up the subframe for the alternator? if so post a pic of that please, I going to run the alt and A/C compressor, so I'll be cutting mine, Thank Steve
Thread Starter
Joined: Aug 2005
Posts: 1,959
Likes: 4
From: The trailer park
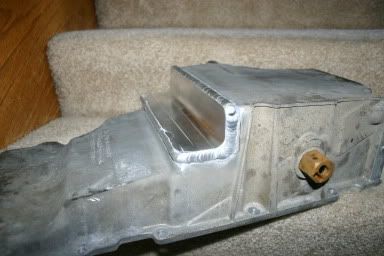
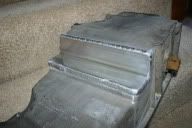
No, buddy. I'm running mine with just alternator and power steering. I just got my pan finished today. I machined out an "L" shape out of 6061, and milled out my pan 2" back, 2 1/4 inch deep (looking down on the bottom of tank from the front), then i had the guy who works next door bake it and weld it for me. Good luck with your frame. I would never notch mine, even if i did run AC. I welded all the seams, replaced the front frame extensions (crash damage) then had it blasted and p-coated. I am running the s&p style mounts from ebay ($39 ones), fabbed my own crossmember from the competition engineering kit (do a search, it's still floating around.)
good luck
olly
good luck
olly
Trending Topics
LS1 Tech Stories
The Best V8 Stories One Small Block at Time

Gas Monkey Built a 6-Wheel Ferrari Testarossa With a Corvette LT4 Engine
Verdad Gallardo
7 Most Reliable High-Performance Engines GM Has Ever Built
Verdad Gallardo
Amazing '71 Camaro Restomod Is Modern Muscle Car Under the Skin
Verdad Gallardo
6 Common C5 Corvette Failures and What's Involved In Repairing Them
Pouria Savadkouei
Retro Modern Bandit Pontiac Trans AM Comes With Burt Reynolds' Autograph
Verdad Gallardo
Top 10 Greatest Cadillac V Series Performance Models Ever, Ranked
Pouria Savadkouei
Top 10 Most Powerful Chevy Trucks Ever Made!

Hennessey's New Supercharged Silverado ZR2 Has 700 HP
Verdad Gallardo
Coachbuilt N2A Anteros Is an LS2-Powered C6 Corvette In Italian Clothes
Verdad Gallardo Thread Starter
Joined: Aug 2005
Posts: 1,959
Likes: 4
From: The trailer park
Steve- i'd recommend BRP mounts for you if you want the A/C. They let you run longtubes easier, and allow you to use stock brackets and not notch anything.
the pick-up is a problem. I cut off half of it, and stainless-steel wired the screen so there were no openings, but it didn't fit still. I ended up removing the whole pickup assembly except for the tube. I don't know what i'm gonna do. ive currently got the engine in the car with the oil pan installed. I've got the tube with the wire mesh over it, with a hose clamp holding it tightly on. I was going to post to see if it was o.k.
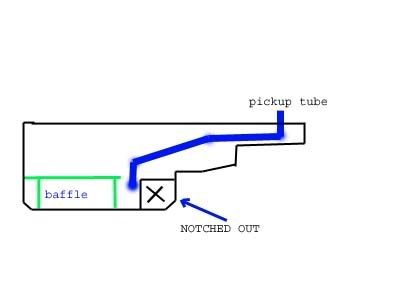
i drew that.... i don't know what to do. I'm not sure if i want to leave it like that.
olly
the pick-up is a problem. I cut off half of it, and stainless-steel wired the screen so there were no openings, but it didn't fit still. I ended up removing the whole pickup assembly except for the tube. I don't know what i'm gonna do. ive currently got the engine in the car with the oil pan installed. I've got the tube with the wire mesh over it, with a hose clamp holding it tightly on. I was going to post to see if it was o.k.
i drew that.... i don't know what to do.
I'm not sure if i want to leave it like that.olly

On The Tree
Joined: Nov 2004
Posts: 127
Likes: 0
From: childress tx
Originally Posted by 67RSCamaroVette
House of Kolors Cinnamon Pearl with white pearl bumblebee stripe. 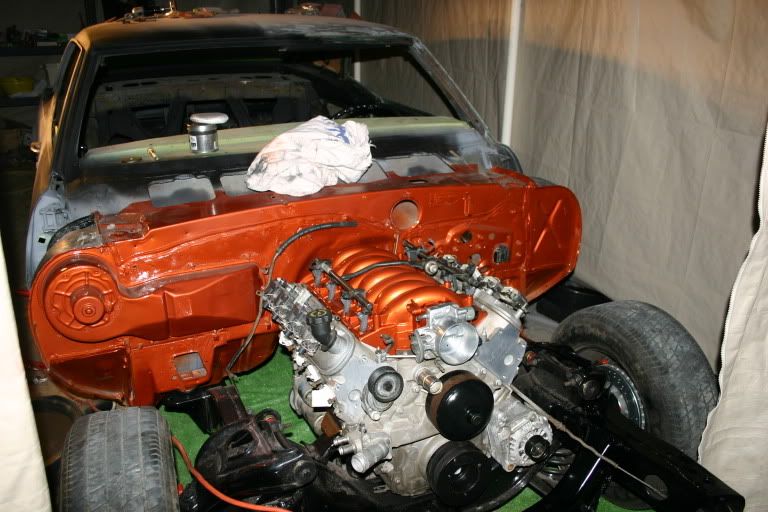 .. That's the color. It looks fabulous in the sun.
.. That's the color. It looks fabulous in the sun.Take a look at this. Are you copying me or am I copying you
 Small world huh!!
I want to keep up with your progress so keep it posted and i will do the same

Staging Lane
Joined: Oct 2005
Posts: 75
Likes: 0
Nice I am getting ready to do one before too much longer. Have you got your headers and everything else. The one one we did here at Year One we had to run rack and pinion for the Stainless Headers to fit. Just a thought hopefully you have it figured out. Good luck. Love that.
LS67;
Looking at your picture it appears that you're using the LS1 mounts, were you using it just to check the placement of the motor and trans?
It also appears that you have about 4 to 5 inches of space from the back of the motor to the firewall if so would it be better to move it back to have a better balance?
Please post some close up pictures of the motor with the motor mounts, I want to see how much clearance you have.
Thread Starter
Joined: Aug 2005
Posts: 1,959
Likes: 4
From: The trailer park
"Take a look at this. Are you copying me or am I copying you "
LOL. Yours is redder. I like that color better than mine. I was experimenting with mixing raspberry pearl with the cinnamon, but i decided to stick with cinnamon. Best of luck- you painted your frame with POR-15, huh?
"I'll check those out, can you reweld the screen back on to the tube?"
actually, i used a hose clamp, put it over the pickup tube, and clamped it really good. There are no gaps, so its fully screened, and the little nubs of metal hold the hose clamp on. I'm only concerned about oil starvation. Maybe i'll run extra oil like the LT1 people do, or maybe take it back out and bust out the brazing rods. any suggestions would be appreciated.
olly
On The Tree
Joined: Nov 2004
Posts: 127
Likes: 0
From: childress tx
Originally Posted by Tri5Nerd
LS67;
Looking at your picture it appears that you're using the LS1 mounts, were you using it just to check the placement of the motor and trans?
It also appears that you have about 4 to 5 inches of space from the back of the motor to the firewall if so would it be better to move it back to have a better balance?
Please post some close up pictures of the motor with the motor mounts, I want to see how much clearance you have.
Looking at your picture it appears that you're using the LS1 mounts, were you using it just to check the placement of the motor and trans?
It also appears that you have about 4 to 5 inches of space from the back of the motor to the firewall if so would it be better to move it back to have a better balance?
Please post some close up pictures of the motor with the motor mounts, I want to see how much clearance you have.
ls67 restoversion you will need this password to look at the album ( hammerhead )skinner@srcaccess.net
On The Tree
Joined: Nov 2004
Posts: 127
Likes: 0
From: childress tx
Originally Posted by SatisTraction
you really would have been better off using the S&P style mounts. better balance, easier to fit headers, easier to fit the pan, but harder to fit AC. its a toss up really.
Originally Posted by ls67
not really, I've done both I like this one better you can set the motor forward or back and it doesnt get any easier. I set the motor in with out notching the oil pan and 3 inches back from an original point and low as it would go for a better look and ttranny fit, and got the shifter to come up where I wanted, no tranny tunnel clearance issues built the crossmember to fit the t56 where I wanted it and I didnt have to order any parts to do it. I got what I wanted and did it cheep.
How about notching the K-member for the A/C compressor?
What is the pinion angle of the motor and rearend if you don't mind me asking.
On The Tree
Joined: Nov 2004
Posts: 127
Likes: 0
From: childress tx
Originally Posted by SatisTraction
so you used a BRP mount and did not have to notch the pan? never mind i see you spent $800 or so on a rack. kinda kills the cheap part of it. it does look damn good though 